Search the Community
Showing results for tags 'safety'.
Found 179 results
-
untilThe European Skydiving Symposium is a one-of-a-kind event in Europe. It's a 3-day conference that aims to increase safety, share knowledge, and integrate the skydiving community. The agenda will include: - safety seminars, - keynotes, - workshops, - discussion panels. We are also hosting all of the big brands in our sport and tens of smaller brands that look at the growth opportunities. The Expo Hall is packed with well known brands and rising stars so there will be a lot of great opportunities to meet your favorite brand reps in person, try on some products and maybe treat yourself with a pre-season gift! In the agenda, you will find 5 tracks: - Fun Jumpers, - Tandem/Camera, - AFF Instructors, - Riggers, - DZ Management (new!) Already confirmed Speakers are: Brian Germain / Albert Berchtold / Maxine Tate / Beau Riebe / Lesley Gale / James La Barrie / Ralph Wilhelm / Damien Sorlin / Meredith Ottery / Mario Fattoruso / Jasper van der Meer / Timothy Parrant known as koala_in_the_sky / Noah Watts / Sebastian Dratwa The agenda is here: https://skydivingsymposium.eu/agenda-2024/ + in attachment. The registration is OPEN httpa://register.skydivingsymposium.eu Strategic Sponsor: UPT Platinum Sponsors: Cypres, Vigil, MaxFly Agenda ESS 2024.pdf
-
 On Saturday October 26, 2013 there was a near canopy collision by experienced jumpers. There were several factors which may have contributed to this event. I feel that a lack of understanding of exit separation was a major contributor. The winds of the day were posted: 24 knots at 12,000 feet, 22 knots at 9,000 feet and so on. I was on the first load, first out with a three way formation. I turned to the group behind me and asked for 10 seconds of separation. The response was “Why? That’s a lot of time.” Both of these jumpers have around 500 jumps. One has been jumping for over 10 years, the other for 9 years. One of these jumpers was part of the group that was involved in the near collision later that day. The incident: a near miss at opening time between two skydivers we will call jumper 1 and jumper 2. Jumper 1 left the plane first as part of an 8 way relative work group. Jumper 2, as part of a less experienced 2 way relative work group, left next with 5-6 seconds of separation. The second group left the plane flipping and having fun then got stable and continued a normal relative work dive. Jumper 1 was oriented to track up the line of flight decreasing his separation from the 2nd group. Jumper 1 further decreased his separation from the 2nd group by continuing to fly his canopy up the line of flight for 12 seconds. At which time he noticed one of the jumpers from the two way open pretty close. He then started looking for the other jumper from the two way group (jumper 2) and started a right rear riser turn. At this point, jumper 2 under a still deploying main fell past and within 20 feet of Jumper 1. Here is a link to the video of the opening sequence. This video was taken with a gopro camera and the jumpers in it are closer than they appear. Conclusions: 1. The initial flipping on exit of the second group may have had the two way in an orientation to slide down the line of flight and therefore contributed to the second group moving towards the first group. If so this would have been only momentary and not a large contribution. 2. Jumper 1 decreased separation by tracking up the line of flight. Although a contributing factor to the lack of separation, this was an appropriate action as on groups of 2 or larger all jumpers should track away from the radial center of the formation regardless of whether that puts them tracking up or down the line of flight as this will give them the greatest amount of separation from the members of their own group which would pose the greatest danger of collision at opening time. Jumpers tracking up the line of flight away from larger groups should always be aware of their direction and not “over track”. 3. Jumper 1 was flying a small fast canopy, continuing to fly up the jump run, holding into the wind with his brakes still set. This decreased separation with the following group. Every skydiver should know where jump run is planned to be before boarding the aircraft. All jumpers should upon opening orient themselves as quickly as possible to fly perpendicular to jump run at least long enough to ensure the groups before and after them have opened. 4. There is no question that mistakes were made on both sides, but there should also be no question that there would have been greater separation with 8 seconds at the door as called for in the chart below. In this case an extra 2 seconds separation would have equated to between 224-252 more feet of separation. We are also reminded of another incident we had a while back. Jumper 1 on a hop-n-pop leaves opens and flies up the line of flight. Jumper 2 leaves with about 5 seconds of separation and tracks down the line of flight. Jumper 2 tracks through Jumper 1’s canopy ripping it in half. Luckily neither one was injured. Another example is the video posted Iloveskydyving.org. This video clearly shows the following group giving 8 seconds of separation. Judging from their flying style it is obvious they are very skilled and not likely sliding through the air unintentionally. However, they still end up opening dangerously close to the group before them. We don’t know about what mistakes the group ahead may have made if any, but consider the problem may have been enough wind to dictate more time for adequate separation. Close Skydive Canopy CollisionAs Jumpers, we must have a basic understanding of the effects the ground speed of the aircraft has on the amount of time that we need to allow for the same amount of separation. I have heard swoopers say that the only good wind is no wind. They are saying this because in a no wind situation all things remain constant and consistent. Likewise at altitude if the aircrafts speed relative to the ground was always the same we would always give the same amount of time for the same amount of separation. What is adequate separation? In distance, the number I was taught is 1000 feet from center of formation to the center of the next formation for small groups. This number increases up to 2000 feet or more for groups of 8 or larger. Consider two 4 way groups lined up perfectly with jump run which will result in a jumper from each group tracking directly at one another. This allows each jumper to track 250 feet with 500 feet still left between them. The Skydivers Information Manual goes farther and recommends 1500 feet of separation for small groups and solos. What is adequate separation? In time, that will depend on the speed of the aircraft and the wind the aircraft is encountering. In other words, it will depend on the ground speed of the aircraft on jump run. See the chart put together by Phil Litke. These numbers should be considered minimums for 1000 feet of separation to be doubled for following groups of 8 or larger. Here are some examples of experienced jumpers and Tandem instructors giving between 13 and 31 seconds exit separation when the winds were very high. Also consider that these instructors are, for the most part, giving such separation on solos and 2 ways. As stated earlier, larger groups should be allowed more distance and therefore more time. We are all concerned about hosing the guys in the back of the plane by taking too long. I am not advocating that we give more time unnecessarily. If the speed of the aircraft dictates a certain amount of separation between groups this should include your set up, climb out, and count. I am not suggesting anyone taking longer than the conditions call for as this would create different problems such as people landing off, unnecessary go arounds, and wasted fuel. Most of us have had experienced people in the back of the plane yelling for people to hurry up and get out. This is because they feel you are taking too long to exit and will end up with them getting too far from the airport to make it back. If the winds are strong enough to necessitate a certain amount of separation then likewise the plane is moving slower relative to the ground, Freefall drift will be greater, and the acceptable opening spot may be farther from the landing zone. Every skydiver should know the acceptable exit and opening points for the conditions of the day. Many people land out without trying to make it back because it looks father than they are used to seeing. Without looking at the winds and calculating the opening spot before you go up you have very little chance of knowing for certain whether you will make it back, especially as the winds get higher and the spots get longer. One thing that you cannot control when you leave the aircraft is what the group behind you will do. We all should look after each other. By knowing how much separation to give you are looking out for yourself and the group ahead of you. Don’t be afraid to confirm with the group behind you that they will also wait an appropriate amount of time before exiting. Recommendation to reduce the likelihood of these type incidents: 1. Phil Litke’s exit separation chart should be posted near the jumper closest to the pilot for easy reference on jump run. 2. Upon turning onto jump run after the cut, the pilot will inform the close jumper of the aircrafts ground speed. This close jumper will look at the chart and determine how many seconds are needed. The number of seconds separation to give will be passed down to all jumpers on the load. 3. If this turns out to be too great a burden for the pilot we should install a GPS unit near the door so that the jumpers can determine ground speed themselves and make all jumpers on the load aware of how many seconds separation to give. We all have to get on board for this to work. Our landing direction at our dropzone is mandatory. This has been the best proactive step towards promoting a safe landing area and smooth landing pattern I have seen since I have been with my dropzone. The chaos of 22 jumpers landing in every direction in light and variable winds seems to be behind us. Each of us knows no one landing against the assigned pattern will escape a talk with a staff member. Exit separation is as important a safety issue and should be treated with the same respect. It needs to be a matter of policy for consistency. There is not an original idea on this subject here. This is the best knowledge which my mentors passed on to me. Here are a couple of related articles which go into greater depth about these concepts and solutions to these problems. I hope it is clear we must go about things in a more thoughtful and consistent way to avoid similar incidents in the future. http://www.dropzone.com/safety/Exit/Exit_Separation_Revisited_628.html http://indra.net/~bdaniels/ftw/sg_skr_dealing_1_uppers.html
 -
 This glossary of skydiving terms accompanies the Student Skydiver's Handbook, by Bryan Burke. Click on the letter corresponding to the first letter of the word you are looking for: A B C D E F G H I J K L M N O P Q R S T UV W XYZ Return to the top of the Glossary to search for more words or just browse them alphabetically. The Letter A AAD. Automatic Activation Device. A device that senses rate of descent and altitude and which will attempts to mechanically activate the reserve parachute if the skydiver passes below a set altitude at a high rate of descent. A/C. Aircraft. Accuracy. Also known as Precision Landing, this is a competition discipline in which the skydiver attempts to land on an established target. At the National level the target is 3 cm in diameter, about the size of a quarter. Accuracy landings of various difficulty, from 20 meters to 2 meters, are required for USPA licenses. See the SIM for details. AFF. Accelerated Free Fall. An AFF student receives training on freefall jumps of 40 seconds or longer, accompanied by a qualified jumpmaster, as opposed to Static Line training which does not involve long freefall in the initial training phase. AGL. Above Ground Level. Altitudes are in reference either to Ground Level of Sea Level (see MSL). Skydivers always use AGL when referring to altitude. Airspeed. The speed of a flying object through the air, commonly used in reference to aircraft or canopies. Altimeter. A device indicating altitude. Angle of attack. The angle at which the wing is presented to the apparent wind. With square parachutes this changes when the brakes are applied. Angle of incidence. The angle at which a canopy is trimmed to glide through the air. Apparent wind. The wind perceived by an observer. See relative wind. ASP. Skydive Arizona's version of AFF, the Accelerated Skydiving Program includes two tandem jumps and an enhanced version of the AFF syllabus. ASTRA. An AAD made by FXC Corporation. Aspect ratio. The ratio of a canopys width (side to side) to breadth (front to back). Seven cell canopies typically have an aspect ratio of about 2.2 to one, while nine cell canopies are usually between 2.8 and 3.0 to one. The Letter B Backslide. To move backward in freefall relative to a neutral reference. Usually unintentional and undesirable, caused by poor body position. Bag. The deployment bag in which the canopy is packed. Base. The core around which a formation skydive is built. Can be a single person or a group of people, depending on the number of skydivers involved. BASE jump. A jump made from a fixed object rather than an aircraft. BASE is an acronym for building, antennae, spans (bridges) and earth (cliff). Beech. Short for Beechcraft, an aircraft manufacturer. Usually used in reference to a Beech D-18, a.k.a. Twin Beech. At one time these were common skydiving planes, but they are becoming obsolete. BOC. Bottom of Container. Refers to the location of the pilot chute. An increasingly common position for main deployment devices, as opposed to belly or leg mounted. Body position. Ones freefall body posture. Variations in body position are what make a wide range of freefall maneuvers possible. Boogie. A gathering of skydivers, usually focused on fun rather than competition. Big drop zones host several boogies a year, often on long holiday weekends. Bounce. To land at unsurvivable speed. Also to frap, or go in. Box man. A neutral, face to earth body position in which the arms form right angles at shoulder and elbow, and the legs are spread at about 45 degrees from the long axis and bent 45 degrees at the knees. Generally considered the ideal position for Formation Skydiving. Brakes. The brake lines of the canopy are synonymous with steering lines. Used together, they slow the parachute. Used independently they result in a turn. Break off. To cease formation skydiving by tracking away from the formation prior to deployment. Bridle. The thin webbing strap from the pilot chute to the top of the canopy. Part of the deployment system which consists of pilot chute, bag and bridle. BSR. Basic Safety Requirements. BSRs are USPA guidelines. They do not have force of law but are generally regarded as excellent minimum safety standards. Burble. The area of turbulence behind an object going through the air, whether a person in freefall or a canopy in flight. The Letter C Call. The time remaining until you are to board the aircraft. For example, a fifteen minute call means you will board in fifteen minutes. Canopy. The construction of fabric and lines used to land safely after a freefall. Usually used in conjunction with a type reference (round, square, zero-p, main or reserve). Cascade. The point where two lines join together so they run smoothly into one. Cascading the suspension lines results in reduced bulk and drag. Cell. Square canopies are made up of pressurized cells, usually seven or nine. Each cell consists of a load bearing rib at each side to which the suspension lines are attached. A third, non load bearing rib runs down the middle of the cell. The cell is pressurized through the open mouth at the front and also through cross ports in the ribs. Adjacent cells share load bearing ribs. Center point. The point around which movement takes place. In an individual the center point is considered to be in the middle of the torso. In a group, it is the point that the formation centers around. Cessna. An aircraft manufacturer. Single engined Cessnas such as 180s, 182s and 206s are the workhorse of smaller drop zones, carrying four to six jumpers. Chute assis. French for sit flying, or freefalling with one's seat presented to the relative wind. Closing loop. The small loop that holds the flaps of the container closed once the pin has been guided through the loop. Coach. A skydiver with some formal training in the art of instructing freefall technique. Container. The element of the parachute that houses the canopies. Technically, the Harness/Container but usually just referred to as the container. Crabbing. A canopy is crabbing when it is flown at an angle sideways to the ambient wind, resulting in a path across the ground that is sideways as well as forwards. Creep. To creep is to practice formation skydiving sequences while laying prone on a creeper. Creeper. A board equipped with wheels on which a skydiver lays to simulate freefall maneuvers. Cross ports. Holes in the ribs of a cell that allow air to flow from one cell to another. Current. To "be current" is to have jumped recently enough to retain proficiency in the sport. Uncurrent skydivers, depending on their experience, must be supervised to some degree when they resume jumping. See the SIM. Cut away. To release the main parachute, cutting away is a standard emergency procedure prior to deploying the reserve. More properly known as a breakaway, the technique did involve using a simple release system activated by pulling a handle. CRW. Canopy Relative Work, now officially known as Canopy Formations. CRW involves flying open canopies in close formation, where the pilots actually take grips on each other's parachutes. CYPRES. A type of AAD. Made by AirTech of Germany, this is the most common type of AAD and the first modern design to be widely adopted by expert skydivers. The Letter D DC-3. A type of aircraft, the Douglas DC-3 is a large, twin engined airplane capable of carrying over 40 jumpers. Like the Twin Beech, DC-3s are being rapidly replaced by more modern turbine engined aircraft. De-arch. To flatten out or reverse one's body position from the normal arched box man. A de-arch results in a slower fall rate than an arch. Dacron. A common construction material for canopy suspension lines. Dacron lines are thicker and softer than so called "microlines". Data card. Every parachute carries a data card with information on the reserve parachute, including type, last date packed, owner, serial number, etc. Dead spider. Slang for de-arch. Decision altitude. The altitude at which a skydiver is trained to begin execution of emergency procedures. Usually 2,500 feet AGL for students, and 1,800 feet for expert skydivers. Deployment system. The components of the parachute that control deployment of the canopy. Includes pilot chute, bridle and bag. Dirt dive. To rehearse a skydive on the ground. Dive floater. A dive floater is a skydiver who is inside the airplane in the exit line up, but leaving prior to the base. This configuration only occurs on large formations. Dive loops. Many advanced skydivers have loops or "blocks" on their front risers to make it easy to grip the front risers for steering purposes. Also called front riser loops. Diver. Anyone diving out of the plane during a formation skydiving exit. Door jam. To practice an exit in the aircraft door of a mock up of it prior to the skydive. DOS - Double or Dual Action System Down plane. A CRW formation with two canopies, both pointed toward the ground. This can also occur to a single skydiver with both main and reserve deployed. Drop zone. Common slang for a skydiving center, also DZ. Dytter. A brand of audible altimeter. The Letter E Elliptical. A wing shape characterized by a tapering leading and trailing edge so that the middle of the canopy is wider, front to back, than the ends. This configuration is typical of many high performance canopies. End cell. The cell furthers out on a canopy. Exit weight. The total weight of the jumper and all equipment and clothing. The Letter F F-111. A fabric common in mid range canopies, F-111 is slightly permeable to air and wears faster than zero-p fabric. Pronounced "F one eleven". FAA. The Federal Aviation Administration is the agency of the US government that regulates aviation activity, including skydiving. FAI. Federation Aeronautique International. The international organization governing air sports. FARs. Federal Aviation Regulations, the laws governing aviation. Fall rate. The speed at which a skydiver falls. Matching fall rate is essential to successful formation skydiving. This is done with jumpsuits, weights and body position. Finger trap. A method of installing a loop in a brake line without producing rough spots on the lines, the finger trap is accomplished by sliding one line into the other. The loop serves as a method of setting brakes in the desired position for the parachutes deployment. Flare. The act of pulling down the brakes of the canopy in order to slow it down, resulting in an increased angle of attack and reduced descent rate. Floater. Skydivers who leave the airplane before the base are called floaters since they must use a slow fall rate to get up to the base. Floating also refers to an exit position outside the airplane. Freestyle. A type of skydiving characterized by acrobatic individual flying, reminiscent of gymnastics. FS. Formation Skydiving, formerly known as relative work. In FS, skydivers attempt to go through a predetermined sequence of freefall formations. Formation. 1) A freefall skydiving formation of more than one jumper. 2) A flight of more than one jump plane. Funnel. A funnel occurs when one or more skydivers find themselves in an unstable body position and end up in a skydivers burble. The resulting loss of stability for the other skydivers usually causes the formation to break up. FXC. A company manufacturing AADs. One FXC design is common on students but considered by many to be unsuitable for expert skydivers. A new FXC design, the ASTRA, went on the market in the spring of 1996 and is relatively unknown. The Letter G Glide ratio. The distance a canopy flies forward compared to down. A canopy with a 3:1 glide ratio flies three feet forward for every foot of vertical descent. GPS. Global Positioning System. By picking up signals from satellites, a GPS receiver can tell the user position over the ground. Used in skydiving aircraft to spot the exit. Grips. Using the hands to hold onto another skydiver in freefall or during the aircraft exits. In formation skydiving, the formations are scored as complete when every skydiver has taken the correct grips. Grippers. Hand holds built onto formation skydiving jumpsuits to make it easier to take grips. Ground speed. The speed of an airplane or skydiver over the ground, as opposed to through the air. The Letter H Hand deploy. To activate the parachute by manually deploying the pilot chute as opposed to pulling a ripcord. Harness/container. The webbing and fabric holding the main and reserve canopies to the skydiver. Heading. The direction an aircraft, skydiver, or parachute is facing. The ability to recognize and maintain heading is crucial to jumping with others successfully. "On" or "off" heading are terms commonly used to describe exits and deployments. Holding. When a parachute is flying directly into the ambient wind, it is said holding. See running and crabbing. Hook knife. A small knife carried in the jumpsuit or on the parachute harness, the hook knife is designed to cut lines or webbing. A small razor blade is recessed in a hook shaped handle to prevent unintentional cuts. Hook turn. A turn of 90 degrees or more executed close to the ground. Because of the high risk associated with this maneuver, hook turns have an unfavorable connotation. Hot fuel. When the airplane does not shut down during fueling. Do not board the aircraft while fueling is in progress. The Letter I In date. A reserve packed within the previous 120 days is said to be "in date". If more than 120 days have elapsed since the reserve was packed it is"out of date" and illegal to use. Instructor. Someone who has held a USPA jumpmaster rating for at least one year and passed an Instructor Certification Course. IPC. The International Parachuting Commission oversees sport parachuting. It is a committee of the FAI. The Letter J Jump run. The flight path taken by the jump plane to put the skydivers in position over the airport. Jumpsuit. A cover all type garment designed for specific skydiving applications such as FS, freestyle or accuracy. Jumpmaster. Someone who has successfully attended a USPA Jumpmaster Certification Course. A jumpmaster has all of the privileges of an Instructor except that they cannot supervise a first jump course, sign off licenses, or manage a student program without an instructor's supervision. The Letter K Key. A signal to move on to the next step in a skydive. King Air. A turbine aircraft made by Beechcraft and common in medium sized drop zones. The Letter L Line of flight. An imaginary line corresponding to the jump plane's path over the ground, the line of flight is a useful reference line on larger formation skydives. Also, during the jump run the skydivers will be distributed along this line of flight. Log book. Like pilots or sailors, skydivers log their activity and achievements in order to document their experience. LORAN. A navigational system similar to GPS except based on ground transmitters, LORAN is relatively obsolete. The Letter M MSL. Mean sea level. Used by pilots when defining altitude, MSL refers to feet above sea level as opposed to above the ground. Pilots always use MSL when referring to altitude. Main. The primary parachute. Manifest. 1) The list of skydivers on the jump plane. 2) The act of going to the office where this list is maintained to put yourself on a plane. 3) The location where manifesting takes place. MARDS - Main Activated Reserve Deployment System Microline. A modern type of suspension line considerably smaller than dacron line. The Letter N The Letter O Organizer. Someone with leadership skills and skydiving expertise who plans formation skydives. Otter. The DeHavilland Twin Otter, a very popular turbine jump ship carrying up to 23 jumpers. Out landing. Landing off target. Out of date. See in date. The Letter P Packing data card. See data card. Peas. Pea gravel, used in the landing area as a target reference and because it is forgiving of hard landings. Pin. 1) The skydiver who first gets to the base. Base/pin are the two people around which many formations are built. 2) The act of docking on the base. 3) The closing pin of the main or reserve container, which should both be checked prior to jumping. Pit. The pea gravel area. Pilot chute. A small, round parachute that acts as a drogue to extract the main parachute from the container and deploy it. PLF. Parachute landing fall. A technique used to minimize injury during rough landings, a PLF distributes the landing shock along feet, calves, thighs, hip and shoulder. Porter. A single engined turbine aircraft carrying up to ten jumpers. Post dive. Review of a skydive after everyone has landed. PRO rating. A USPA rating indicating competence to perform difficult demonstration jumps. Pull out. A type of hand deploy pilot chute where the pilot chute is packed inside the container and pulled out using a handle with a lanyard to the pilot chute. Pull up cord. A piece of cord or line used to pull the closing loop through the grommets of the container. Pud. Slang for the handle on a pull out pilot chute system. The Letter Q The Letter R RSL. Reserve static line. This is a line from the main risers to the reserve cable. In the event the main is cut away, it may pull the reserve pin. Note: this system is only effective in malfunctions where the main is at least partially deployed. RW. Relative work, the term used to describe formation skydiving until a change in nomenclature made by the International Parachuting Commission in the early 90s. Relative wind. The apparent wind felt by a jumper in freefall, relative wind is the result of the skydiver's speed through the air. Reserve. The auxiliary parachute carried on every intentional parachute jump. Rip cord. The deployment system on all reserves and most student parachutes. The ripcord is a piece of cable with a handle at one end and a pin at the other. When pulled, the pin comes out of the closing loop holding the container shut, and the pilot chute is released. Rig. Skydiver slang for the entire parachute, including main and reserve canopies and the harness/container. Rigger. Someone with a certificate from the FAA stating they have successfully met the requirements to be a parachute rigger. Rigger's certificate. The certificate possessed by a rigger as proof of competence. Senior riggers may make minor repairs and pack reserve and main parachutes. Master riggers may make major repairs and alterations as well as packing parachutes. Risers. The webbing that connects the harness to the suspension lines. At the bottom of the risers will be a mechanism for attaching and releasing the risers and harness, usually in the form of a three ring release. On the rear risers are the brakes/steering lines. The suspension lines attach to the top of the risers with connector links, also known as rapid links. Round. 1) A formation where each skydiver has grips on the arms of those next to him, also known as a star. 2) A round parachute, as opposed to a modern ram-air "square" parachute. Running. When a canopy is flying with the ambient wind it is said to be running. This produces the greatest possible ground speed. The Letter S S&TA. Safety and Training Advisor. The S&TA is a volunteer representative of USPA who attempts to disseminate information about safety and act as a liaison between the DZ and USPA. Most S&TAs hold instructor ratings. SCR. The oldest award for formation skydiving achievement, for those who have been in a star of at least eight people in which each person left the aircraft separately and flew to the formation. SIM. Skydiver's Information Manual. Published by the USPA, the SIM is a comprehensive manual on USPA policies and training methods. It also includes FARs pertinent to skydiving. SOS. Single Operation System. This system simplifies emergency procedures by combining the functions of the cut away and reserve handles in a single handle. Seal. Reserve parachutes have a small lead seal on a piece of red thread around the closing pin. This seal indicates the reserve has not been opened since it left the riggers hands. Sentinel. A type of AAD. Single operation system. See SOS. Skygod. Although on the surface this term refers to a superior skydiver, in drop zone use skygod is a derogatory term for a skydiver whose ego has grown faster than his skydiving ability. Slider. A rectangular piece of nylon fabric with a grommet at each corner through which the canopy's suspension lines are routed. Packed at the top of the lines, the slider controls the opening of the canopy by preventing the parachute from expanding too rapidly. Slot. A position in the skydive or on the plane. Uses: "dock in your slot", or "two slots left on the next Otter". Spectra. A material from which microline is made. Spot. The position of the aircraft when the jumpers exit. Spotting duties (selecting the spot) can be done by a skydiver or the pilot. Square. A ram air parachute as opposed to a round parachute. Stabilizer. The vertical strips of cloth depending from the end cells of the canopy. Stabilizers improve the canopy's ability to fly straight ahead and enhance efficiency by reducing tip vortices. Stall. When the angle of attack of a wing becomes too high to sustain lift, the wing is said to be stalled. Static line. In static line deployments the parachute deployment system is attached to the airplane, with a cord ten to fifteen feet long, resulting in deployment immediately after exit. Steering lines. The lines that run from the steering toggles on the rear risers to the trailing edge of the parachute. Steering toggles. Handles attached to the end of the steering lines to facilitate their use. Toggles and lines are configured so they can be stowed in a partially down position to enhance the opening of the parachute. Stow. To neatly arrange suspension lines on the deployment bag or steering toggles in their keepers. Style. A type of freefall competition where an individual skydiver attempts to execute a predetermined sequence of maneuvers in the shortest possible time. Suspension lines. The lines from the risers to the canopy. They are normally in four groups, labeled from front to back as A, B, C and D. They can be further divided into right and left or front and back riser groups, and by type of material. Swoop. 1) To dive down to a formation or individual in freefall. 2) To aggressively approach the landing area in order to produce a long, flat flare and an exciting landing. The Letter T TAF - Tandem Accelerated Freefall where the 1st 3 or 4 stages are done on tandem and then the AFF one on one jumps are done as per the standard AFF program. Tandem. Parachute jumps in which two skydivers, usually an instructor and student, share one parachute system. The student is in a separate harness that attaches to the front of the instructor's harness. Terminal velocity. The speed at which drag matches the pull of gravity, resulting in a constant fall rate. Typical terminal velocity for formation skydiving is in the 120 to 135 mile per hour range, but speeds as high as 300 miles per hour have been reached. Three ring. A parachute release mechanism that utilizes three rings of separate size in a mechanical advantage system. Invented by Bill Booth in the late 70s, the three ring release is almost universally considered the best cut away system available. Throw out. A deployment method in which the pilot chute is stowed in a pouch on the belly, leg of bottom of container. Toggles. Handles on the steering lines. Track. To assume a body position that creates a high forward speed. Used to approach or depart from other skydivers in freefall. TSO. Technical Standard Order. A technical standard that all American parachutes must meet before they can be marketed. Unless specifically exempted by the FAA, a parachute must have a TSO placard to be legal. Turn around load. When the aircraft does not shut down between loads, but lands and picks up skydivers for immediate departure. The Letters UV Uppers. The upper winds, or winds at exit altitude. The "uppers" are often much stronger and occasionally from a different direction than ground winds. USPA The United States Parachute Association is a non profit skydiver's organization. USPA offers guidance and assistance to skydivers in training, government relations, competition, and many other fields. Most drop zones require USPA membership of individual skydivers because such membership includes third party liability insurance. The Letter W Wave off. Prior to deployment a skydiver should make a clearly defined arm motion to indicate to others nearby that he is about to open his parachute. A good wave off is essential to the avoidance of deployment collisions. WDI. Wind drift indicator. A paper streamer thrown from the jump plane to estimate winds under canopy and determine the spot. Weights. Many lighter skydivers wear a weight vest to allow them to maintain a fast fall rate. Wuffo. Skydiver slang for people who don't jump, from "Wuffo you jump out of them planes?" Wind line. An imaginary line from the desired landing area, extending directly along the direction the wind is blowing. Winds aloft. See uppers. Wing loading. The ratio of weight born by a wing to its surface area. In the US, divide your exit weight in pounds by the square footage of the canopy. The Letter XYZ Zero-p. Common slang for a type of fabric relatively impermeable to air. The less air that flows through the fabric wing of a ram air parachute, the more efficiently it flies.
 -
Although there are many ways to improve one’s accuracy in parachuting, I have found no better way than flying a consistent pattern. By connecting a series of invisible points in the sky, “Altitude-Location-Checkpoints” as I call them, we can create a consistent flight path that makes us more predictable in the air, as well as significantly increasing our chances of landing on target. The typical pattern, made up of three distinct turn points, I will now argue is not quite enough to get to the target with the consistency we are looking for. The standard flight pattern for a ram air parachute involves a downwind leg, a cross wind leg, and an into-the wind leg, also know as the final approach. This pattern is defined by three distinct turn points, “A” (Base to Final), “B” (Downwind to Base), and “C” (pattern entry point). It is true that if we are prepared to modify our approach in light of new information along the way, we can hit the target. But wouldn’t it be nice to get there without needing to modify our flight path, to just sail along and turn when the altitude is right? That is exactly what the inclusion of a fourth turn point does. The trouble with the standard pattern is that there is a good deal of guesswork when it comes to the length of the Base leg. Depending on the glide ratio of the parachute, the location of the turn to Base leg will vary widely. The better the relative glide ratio, the farther the turn to Base needs to be from the target. Our ability to adapt to this changing environment is spotty at best, and often requires substantial correction along the way. This creates traffic conflicts, as well as varying airspeed and decent rate, making life far more difficult for us, and for the canopies behind us. In most cases, the length of the Base Leg needs to be longer than we think. This becomes an even more important issue for swoopers setting themselves up for a high speed approach. If the length of the Base Leg is incorrect, the pilot is forced to either float in the brakes or “S-Turn” prior to the initiation of the dive. This has consequences to the approach, even if they manage to reach the Initiation Point at the correct altitude. If they are flying significantly faster than usual when they arrive at the initiation point, they may lose much less altitude in the turn due to the increased front riser pressure upon initiation. If they are flying significantly slower than usual, they may lose a much greater amount of altitude in the turn, and find themselves hooking into the ground. It is my experience that, aside from the altitude of the Initiation, the selection of the “B” point is the most important aspect of a high speed approach. If we simply add another checkpoint prior to the entry into the Downwind Leg, we can take the guessing out of the process. Assuming that the turn points are equidistant in altitude (300, 600 and 900 feet), we can simply add another unit above the original pattern entry to create a fourth, or “D” point, precisely on the wind-line, upwind of the target. What this does is, it creates a Pre-Base Leg, which shows us exactly how long the Base Leg needs to be. In other words, if the altitude between the points is 300 feet, the “D” point is at 1200 feet. The beauty of the data that this “D” point brings us is, we discover the exact length of the base leg without choosing the precise location of the “B” point prior to exit. This means that we can fly this pattern at a new drop zone, or when we are landing off, and learn where the altitude-location-checkpoints are for that specific landing area. It doesn’t help us with the “depth” of the pattern points, but it puts us in the ballpark, assuming that we have a rough idea of our canopy’s glide ratio. When the winds pick up, this method still works perfectly well. The crab angle on the Pre-Base Leg is equivalent to the angle of crab on the Base Leg. Note that the horizontal distance of the offset from the target on the downwind leg on a windy day is exactly the same as it would be on a no wind day (A to B = Anw to Bnw). This is only true if we do not compensate for the side-slip of our ground track due to the crosswind legs. However, even when we do choose to compensate for diagonal crabbing on the base leg and create a “Holding Crab”, if we create the same crab angle on the Pre-Base Leg, we end up on the perfect final approach despite the complex situation. This is easily accomplished by simply making our goal to fly a box pattern on the ground, flying our Pre-Base and Base Legs perpendicular to the wind-line. Also note that the length of the base leg is longer on the No Wind condition than it is on a windy day on which we perform a Holding Crab on the crosswind legs. This is due to the reduced groundspeed when in a Holding Crab, and the diminished glide ratio that comes as a result of it. If you aren’t pointed where you are going, you will not move there quite as quickly. This method assumes something that many canopy pilots do not have: a trustworthy altimeter. A standard dial-type, analog altimeter is not sufficient to give us the kind of accuracy we are looking for. Even the digital dial-type is not usually graded in such a way that we can distinguish units of one hundred feet or less. These are freefall altimeters. For the precise data required by today’s canopy pilots, we need digital altimeters with digital read-outs. Even better, many of us have found, is the heads-up advantage of an audible altimeter designed for canopy flight such as the Optima and Neptune. If you have an audible alert telling you where you are, it is far easier to keep your eyes looking outside the cockpit and on the action that may require your instantaneous reactions. All that being said, your eyes have ultimate veto power. If things do not look right, your instruments must be ignored. Too many skydivers have hit the ground due to complete faith in their instruments that let them down due to mechanical problems, battery issues or some unconsidered technical malfunction. Assuming that you use this accuracy technique the way it was intended, and you notice what is happening as it is happening, you can take a huge step forward in consistently hitting your target runway. It will take a while to dial-in your approach so that you actually hit the target, but the target is always a secondary goal to hitting the centerline of the runway and turning to final at a reasonable altitude. If you plan your pattern well, using four distinct points along the way, you can change what you are capable of handling as a canopy pilot. Not only will you feel better about yourself, you will increase the likelihood that you will live a long, healthy life. That, of course, is the mark of a great skydiver. In addition to being a highly experienced skydiver with over 14,000 jumps, Brian Germain is the author of several books including The Parachute and Its Pilot, Transcending Fear, Vertical Journey, and Green Light. He is currently designing canopies for Aerodyne Research, and offers canopy flight courses worldwide. For more about Brian’s Books, Seminars and Parachutes, visit his websites: www.BigAirSportz.com and www.TranscendingFear.com
-
Here is an in-depth review of Brian Germain's online coaching service for skydivers (both beginners and advanced), which I've been a member of for a year. I'm not getting any commission for this, and no one asked me to write it. The Network is nothing like I thought it would be, and I wish a review like this was available when I first heard of it. I would have joined much earlier! Hopefully this helps others make a more informed decision. Questions, feedback, and grammar police welcome! Happy to add and clarify things. Warning: it's *very* in depth :-). Maybe read the first two sections and then skim all the headings to see what details you're interested in. https://docs.google.com/document/d/e/2PACX-1vSf8548z4FrC7PJ5dKoXbRpdYz9CwWq8WywXRvBHRT4T2sUN3appsa7FSQJMNSfnXjxqOLZAsOk6kzj/pub
-
untilThe European Skydiving Symposium is the only skydiving-oriented event in Europe that gathers experts, members of the skydiving community, instructors and gear specialists from our industry. It's not a trade-fair, it is a conference with a variety of presentations about safety, incident-analysis, gear specification, innovations… and so much more.The skydiving community gathered in one place, before the season 2022 starts, is the best way to learn new things, revise safety procedures, meet new people or plan some skydiving adventures and boogies together.There is going to be simultaneous translation provided for all presentations (Polish < > English). We are happy to confirm the following speakers: Bill Booth (UPT), Tom Noonan (UPT), Melissa Lowe (USPA), Tom Parker (SunPath), Lesley Gale (Skydive Mag), Rich Medalay (PD), Bartek Ryś, Tomasz Witkowski, Sebastian Dratwa.We are currently working on details of our agenda, you can also submit your topic here.We plan to publish the agenda late November 2021. There are going to be 4 tracks - similar to 2020 edition.The beginning of each day will start with "All-audience" presentations, including keynotes. After lunch we plan to split the audience into "General" end "Pro":Day 1: All Audience track + Tandem Pilots trackDay 2: All Audience track + Instructors trackDay 3: All Audience track + Riggers trackOn Friday evening all 2-days and 3-days ticket owners are invited to the After Party in Aviator Club. For Symposium attendees Airport Hotel Okęcie has a special offer - call the hotel and get your special deal. We kindly inform, that the underground hotel parking is 30 PLN/day.
-
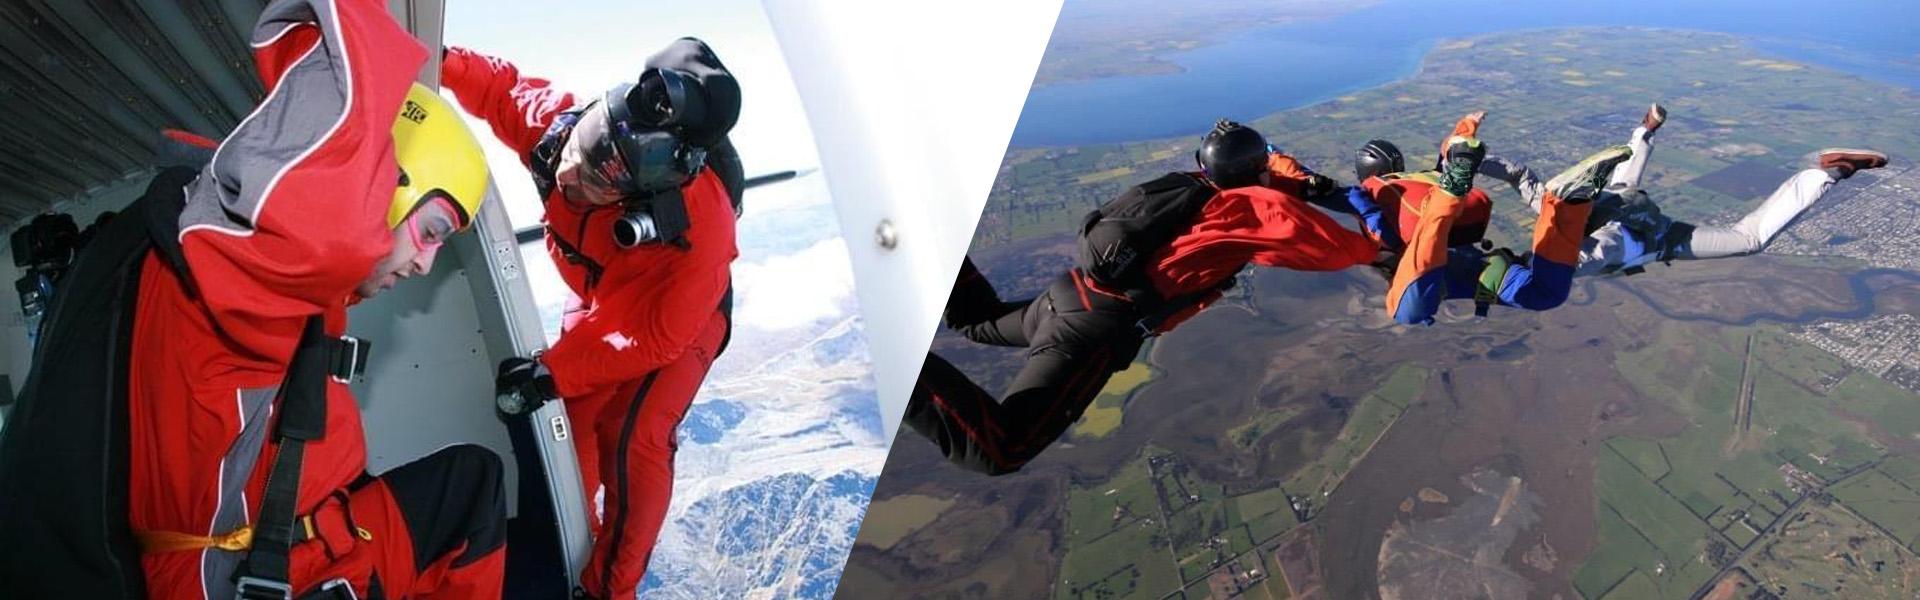 Have you ever realised that you feel something is not right in the system and something must be done about it? The question is how many times you did something to improve things…..? Avoidable Fatalities The purpose of Education in Skydiving and Rigging is to facilitate learning. Nothing else! All things learned are important and often vital to the skydiver- our sequence emergency procedures, wrong decisions under pressure and improperly done maintenance and repairs can end in disaster and they have. If there is any other interests involved in the education system- the process is ineffective. Also there is a difference between education in skydiving and public schools. If students in public education are to experience the result from what they learned in school or college years after graduation, skydiving students will need what they learned literally the same or the next day. A study was carried out by Hart, Christian L. and Griffith, James D. (2003) "Human Error: The Principal Cause of Skydiving Fatalities". Here are a couple of points: “Of the 308 fatalities that were reported between 1993-2001, 264 (86%) were categorized as Human Error, indicating that human error was deemed to be the principal causal factor in the mishaps. The remaining 44 (14%) fatalities were categorized as Other Factors, indicating that human error did not play a principal role in those mishaps. Therefore, human error appears to be the principal causal factors in the great majority of skydiving fatalities. Within skydiving training and education programs, specific attention should be given to human error, and training should be deliberately aimed at reducing human error mishaps. In the design of parachuting equipment, attention should be given to designing systems that increase skydiver situation awareness and increase the probability of correctly carrying out deployment and emergency procedure while under stress and time pressure.” I find it unacceptable that in the 21st Century with the level of science and experience in the sport we have 86 percent fatalities that have resulted from avoidable mistakes. In skydiving, critical situations require making correct decisions and executing proper action. This causes increases in pressure and cognitive load, beyond the state of flow that impairs our ability. When the cognitive load increases, our limited cognitive capacity is exceeded and we become overloaded. Our brains cannot process the large volumes of information being generated by the situation and we can fail to make accurate decisions. Example is tandem bag lock malfunction- requires very fast thinking, change of standard emergency procedures, reaction and execution when RSL is connected. However, if RSL is not connected- things are way easier- action is as usual- cutaway and reserve deployment. This is just an example where correct training can significantly reduce the pressure or lead to positive outcome. Knowing that there is direct connection between the previous training taken and how the skydiver would react under pressure is vital. Namely our gut feeling is what determines our reactions under pressure and lack of time. It all happens simultaneously before we put everything in words. So someone that has never used RSL as a backup system would go first for the reserve handle after cutaway and will almost never check for main risers clearance. In the late 80’s and 90’s of the last century, there were significant discoveries in phycology that explain a lot how and why humans make certain decisions under pressure. Unfortunately skydive training still has not caught up with psychology. Mirror neurons is one of these discoveries. For example, neurons in our brain fire symmetrically to match our instructor’s emotions. So, if the instructor is very positive, enthusiastic and smiling, about 20-30% of the neurons in the same area in the student’s brain, responsible for these emotions fire as well. The result is that students assume that if the instructor is that positively charged- everything must be in order. It is the same when the instructor looks negative, unhelpful, concerned- the student is experiencing a grade of freeze, flight response and the performance goes down. This is just a generalisation but it explains why students love enthusiastic instructors, regardless how competent they are. However, students also can identify incompetence hidden in positive attitude. There is also an explanation for that recently discovered. In this article, I will try to scratch the surface on training. Combining psychology and training in skydiving is going to be part of a different publication. In skydiving we have two types of Education- Safety education and skills improvement training. They overlap and mix all the time but they stay different things. Example is the training during the new skills courses- initial AFF, Tandem and AFF Instructor certifications. They all have two parts- the Safety part, which teaches the student/candidate/ how to survive the skydive with the new equipment and procedures and the Skills improvement part- how to do it well. This is very important since decision making is heavily influenced by the level of competence and skills in these separate areas. Both, the student and the teacher/instructor/ should know where they stand in that- at what stage of the training and learning process they are. Even more, the training for a particular skill must match the psychological reasons influencing how the student will react in this situation. It’s important to know why people make fatal mistakes and how to avoid them- you never know when a simple flight back to the landing area can turn into a situation that requires emergency procedures. Approaching Education Differently Looks like education in skydiving suffers from a bit of amnesia! It is based on the industrialised system of education. This system came out during the industrial revolution and it was designed to serve the needs of the manufacturing process- to produce a workforce that follows algorithms. Basically, it’s a system that tells you how to do things, without much explaining. The student is instructed not thought. This all works well when in the manufacturing! And we have all seen the big emergency procedures charts that look like wiring diagrams like they are designed for a computer processors to follow. However, people are not machines but organic creatures and in addition they have to make their own decisions under pressure. Industrialised system is based on standardisation and conformity! It is true that these principles are a must in skydiving and they define the skills necessary for surviving the skydive with- must know, must do and must not do. But there must be a clear line where they begin and finish because any irrelevant and wrong information or negative emotions significantly affect the decision making process. The fact that a student does not understand what causes our bodies to turn in freefall creates negative emotions and can cause them to fail the stage. Conformity and standardisation also contradict the principles on which skydiving and life for that matter have flourished over the years- diversity and creativity. Every single person is different. Not a single person’s life is the same as anybody else’s. There’s no two persons on this planet that are the same. So why skydiving training is standardised to that extent? One of the results is that year after year there’s a great amount of people that give up skydiving after they get their A licence. And the reason is that they don’t want to spend a long time and a lot of money doing relative work with B rels. Most of the students started skydiving because they wanted to do something else- usually freeflying or swooping. There is a great amount of students that never complete the AFF course as well. If a private company was losing such an enormous amount of their clients every year, they would say- “Maybe it’s not the customers, maybe it’s something we do”. If equipment and training courses were put under the compatibility lid some time ago, they would never advance more than the static line course and round military parachute stage! People are also curious and creative. They want to learn. Everyone knows that students and instructors start their career with a great amount of curiosity and want to learn and keep this going forever. Curiosity is the engine of achievement. One of the effects of the current culture, has been to de-professionalise instructors. There is no system in the world that is better than it’s instructors. Instructors are the lifeblood of the success of drop zones, but teaching is a creative profession. Teaching, properly conceived, is not a delivery system. Instructors should not be there just to pass on received information. Great instructors do that, but what great teachers also do is mentor, stimulate, provoke, and engage. Another big problem with the industrial based system is that it never covers everything that we need to know because it is based on what has happened so far. Especially in recent years, it presents you with a list or diagrams with possible situations. What happens if you get into situations that are not on the list?! Then you need creativity! A good example is the tandem fatality resulted from a turn initiated at about 200ft and the control line and toggle got hooked on the disconnected side passenger connector. The tandem pair entered into a continuous diving turn. The tandem instructor ran through the given emergency procedures diagram but there was nothing for this particular situation. The most he could think of was- cutaway and deploy reserve. Unfortunately it was too low. However, there were at least two solutions in this case that were not on the diagram- cut the break line and try landing with risers or counter the turn with the other toggle and land on deep brakes. Compliance in this situation didn’t equal safety but provided a false sense of safety. Situations like this require some creativity or divergent thinking. And we use divergent thinking all the time in skydiving- when we exit and fly different tandem clients, when different aircraft changes the inflight procedures, when tailoring the stage for a particular AFF Student, when packing reserves or repairing equipment etc. “Divergent thinking is a thought process or method used to generate creative ideas by exploring many possible solutions. It typically occurs in a spontaneous, free-flowing, "non-linear" manner, such that many ideas are generated in an emergent cognitive fashion. Many possible solutions are explored in a short amount of time, and unexpected connections are drawn.” There is another system of education, which is based on reasoning, where cause and effect are the significant element. This is the system to which we owe the development in skydiving and skydiving equipment- people trying different things and improving the ones that work. With this system, understanding how and why things happen is the driving force. That’s how basic military parachutes were improved for sport parachuting to get to the current state of the art canopies and harness containers. This is how we all got where we are now. With this system, the student’s safety and progression are the important thing, not the standard of “pass or fail” and the learning process can be tailored so the students can learn effectively. In this system both- student and instructor are aware of the level of competence /unconscious incompetent, conscious incompetent, conscious competent, unconscious competent/ the student is in. Right now there are thousands of consciously incompetent skydivers and instructors about their own equipment but they are expected to deal with extraordinary situations with competence. They simply do not know how their reserve system or components exactly work and what potential problems they can cause them. As a result, these licenced skydivers are not ready to deal with a number of issues. If you knew that if the Cypres fires in head position and the reserve might hesitate, how materials and body position affect the reserve openings, what the reserve pilot chute is, etc. you would consider your actions. The level of competence/competence- confidence loop/ directly affects the performance and decision making in every situation- challenging or threatening. The more competent you are with equipment and situations, the more pressure is reduced and it is easier to make decisions. All this is not that new and there is wonderful work done by instructors and dropzones. However, it is happening not because of the current standardisation and command and control culture but despite it. Yes, sometimes habit is stronger than reason, but reason always prevails eventually. Maybe it’s time the available knowledge in the 21-st century about learning, training, psychology and the connection between them to be implemented accordingly. While doing that, some accidents could be prevented. After all, skydivers are organic creatures and parachutes are just mechanical systems operated by skydivers. Nothing magical happens up there! The magic we feel is only in our heads! --------------------------------------- K.B Jumps - 25 000+ AFF, Tandem Instructor, Freefall Photographer Rigger- FAA all types, APF Rigger Examiner Master of teaching, Biology and Chemistry
 -
 When first learning to skydive, at least in the US, you attend a first jump course (FJC) that usually lasts between four and five hours on the ground, then you go up in a plane and jump. There are several methods of instruction including Accelerated Free Fall (AFF), Instructor Assisted Deployment (IAD), Static Line (SL), or a combination of the three called the Integrated Student Program (ISP). While all of these methods of instructions are different, they all have one thing in common: gravity. You have to land your parachute. This is where the PLF comes into play. It is also where numerous accidents happen, sometimes due to sliding in, rather than doing a PLF. This is understandable, since tandem pairs land this way for safety reasons. Besides standing up the landings (the preferred method), this is the landings students see most often. When skydiving first began, all of the equipment was military surplus. This included round canopies, so naturally the PLF was brought along as the safest way to land. Over time, and thanks to the innovation of early pioneers of the sport, the equipment evolved into the square (and now elliptical) canopy, which brought its own problems, like needing a slider to control the opening, and also alleviated the issue with hard landings, mostly. Now, rather than falling more or less wherever the wind blew you, you could steer and fly the canopy much the same as a glider, since the canopy is now a pressurized wing. When you want to land, you fly a landing pattern and pull both steering toggles down and flare, much the same as an airplane would by using flaps. This allows you to bleed off forward speed and land softly standing up (theoretically). Like all things skydiving, when it works, it works really well, but when it doesn't work, it can kill you. I was a skydiver before going airborne, so when it came time to learn how to PLF, I thought I had an advantage since I had been taught how. Boy was I wrong. They had a platform you climbed on and rode a zip line to gain forward speed and then you let go to learn how to PLF in a simulated landing. I could not keep my feet together, so the Blackhat (instructor) tied my boots together. I had to hop around all day, but I have not had a problem keeping my feet together since. In airborne school, they take two weeks to train you how to jump out of planes compared to five hours in skydiving. Most of that time is preparing you to land. As there is no way to steer the round canopy other than slipping on landing (pulling the risers to go sideways a little) or facing into the wind, and no way to flare or slow down the speed, the PLF is needed to prevent injury. I have seen a jumper fall about 50 feet and do a PLF and walk away with a few bruises. While I understand that time is limited and it is hard to prepare a student for all possibilities, I feel that more time should be spent on PLFs during the FJC, at least an hour, and that students should do at least five correct PLFs before every jump. This is standard procedure before doing an airborne jump, and includes all jumpers being led through the entire jump by a jumpmaster, including their emergency procedures. If we put every student through this before every day of jumping, it would help prevent injuries. The reason students choose to slide in rather than PLF is observation. Since this is the way a tandem pair lands in order to prevent injury, it is assumed to be safe. It is, when properly taught. It is easier to injure yourself sliding in or trying to run out a landing than doing a PLF. I know of at least two serious injuries sustained sliding in that a proper PLF would have prevented. One case ended with a cage around the lower vertebrae. I made a jump at an unfamiliar DZ on rental gear and the winds were a little high, about 15 mph, so I ended up landing long. When I turned on final, there were some power lines in front of me and I was headed straight for them. I turned around and did a downwind landing, and a PLF into the hard-as-a-rock, newly plowed field, ending up with some scratches when I landed. I was going about 20 mph forward speed. Had I slid in or tried to run it out, I would most likely have broken something. Another time I jumped at an unfamiliar DZ, I chose to PLF instead of running it out, and while walking back stepped in a gopher hole. Had I hit that while running out the landing, I would have broken my ankle. A proper PLF has five points of contact: the balls of the feet, calf, thigh, buttock, and pull-up muscle (deltoid). When you prepare to hit the ground, keep your feet and knees together, slightly bent, in preparation to absorb the impact. When you fall, hit all the points of contact in order, while rolling on the ground. A proper PLF will allow you to absorb all of the energy and dissipate it by rolling, rather than staying stiff and breaking bones or tearing ligaments and tendons. I kick my feet together when approaching my landing to ensure my feet are together and knees bent, ready to hit the ground and roll. That way, if I don't bleed off enough speed to land standing up, I am already prepared to roll and do it without thinking. If I am going slowly enough, I have a nice stand up landing. Although the goal is standing it up, it is best to be prepared for a PLF, especially if you are fond of your ankles and spine. Blue skies. Article written by @sfzombie13
 -
I've been thinking about this for a while, and have talked about it a bit with some people deeply involved with developing current training methods in the US, but thought I'd feel out here, if people think I'm off with this: Clearly, learning to fall properly, when a landing does not go quite right, is an essential safety skill, and it has been my saving grace many times, especially on my first 100 jumps or so, but I feel like the current teachings around this topic may not quite be up to date with the reality of our sport. Like everyone else, I learned the good old PLF. And--I think also like everyone else--I tried to apply it in the real world, but if I am honest, in reality have practiced something that really wasn't quite what we learned. Don't get me wrong: There are some crucial aspects of the PLF (such as rolling over the side and distributing the impact over as wide of an area of the body as possible, at the same time protecting the most vulnerable parts of the body) that absolutely apply now just as much as in the past, but: If you look at any depiction of the exact technique of the PLF, it becomes clear that the technique was designed for absorbing high vertical speed with almost negligible horizontal speed, and minimizing the impact on crucial body systems in such a scenario. This is of course exactly what one would have experienced during a landing with a round parachute at the time when this method was developed (and still now, as a paratrooper jumping similar systems) However: This is generally NOT the situation during a (potentially) hard landing, using modern sports parachutes. In these situations, you are generally encountering fast horizontal speeds and varying vertical speeds, with a tremendous variety of exact scenarios. While again, something LIKE a PLF, or some principles of the PLF, still apply, I have noticed that many jumpers intuitively (or through experience) know that this does not work completely, and then design their own system (consciously or not) to deal with the reality of the situation. This can vary from from something like a rolling judo fall to "just slide it in"--and there is really no consistent system that gets trained that is fully applicable, since instructors and coaches simply have to train the "PLF", even though they would have to admit that they do not quite use it in the way it is described--if they were honest. (And clearly some solutions are better here than others.) On the other hand, there are so many techniques from martial arts and especially parkour that may actually apply more here and could be trained if someone dared to update our current methods. What do people with more experience think? Am I off about this? Can this "sacred cow" actually be updated? Does your own method of avoiding injury during (semi-) hard landings actually resemble the original PLF? Do you think it's good enough to continue teaching the PLF as a general system and trust that everyone will modify it to the actual situation they are in? If you think a PLF does not apply exactly as taught, what changes would you suggest? Should this go under the safety forum? (I feel the forums, other than "Speakers Corner" are so underused these days that I am hoping to post this somewhere, where it's at least got a semi-decent chance of attracting some eyeballs and responses--but feel free to move it, moderators, if you think that's more appropriate)
-
I'm going to be operating from a heli soon and I'm looking for advice or resources on procedures and technique. I believe it will be an A350 Anyone got anything?
-
Apparently tandem skydives are too dangerous for Enzo Ferrari's team's taste. https://www.livetradingnews.com/ferrari-nyserace-displeased-with-driver-leclerc-secret-skydiving-163966.html#.Xk0kKmhKh7g
-
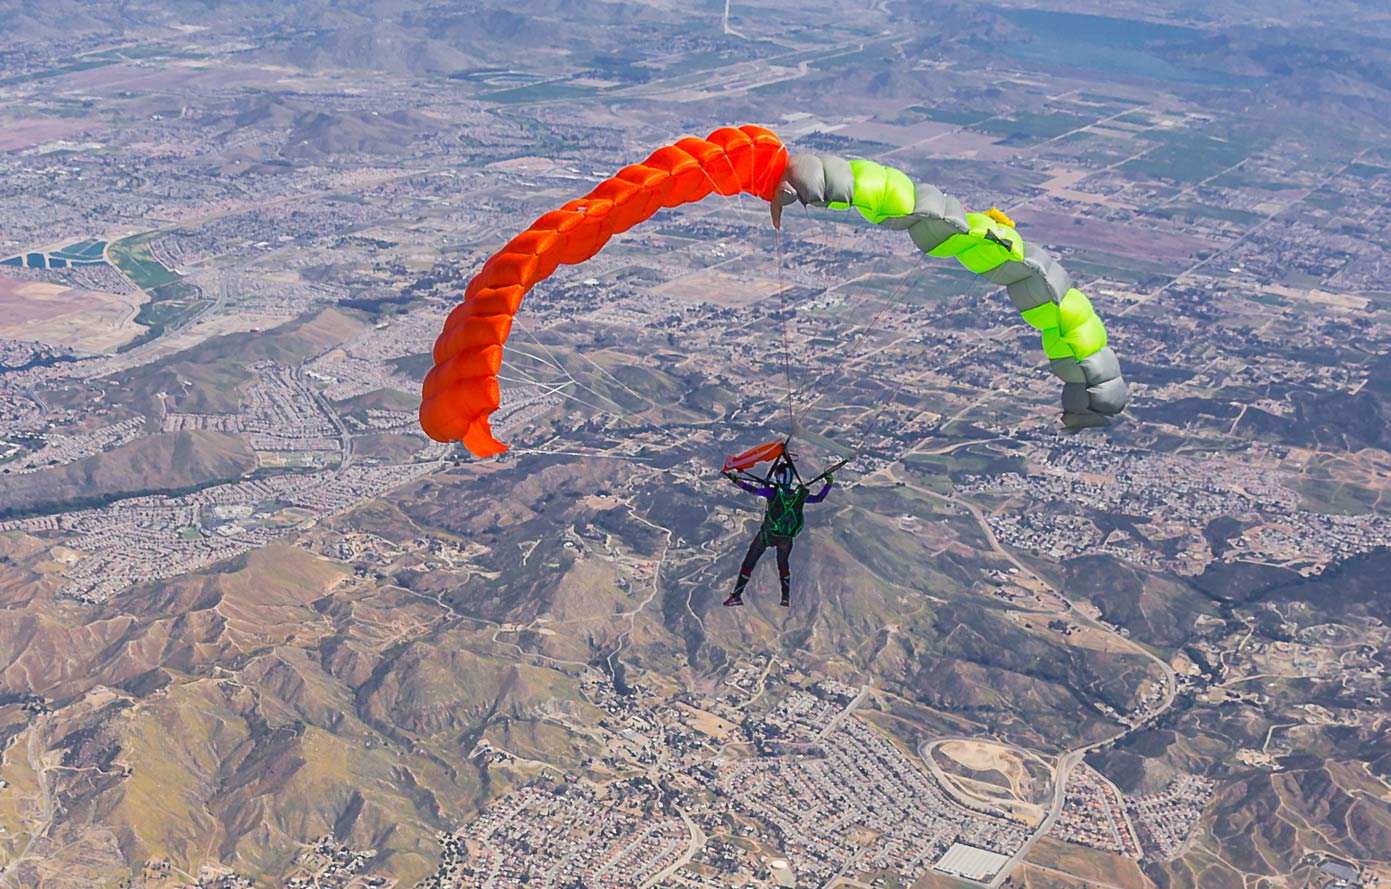 April 1st is typically a day for trickery, but the only fool this year was me, and the only trickster was my main canopy! I decided to make a last-minute trip to Skydive Perris with friends to make a balloon jump, but when it was winded out, the generous CReW Dawgs at Elsinore came up with all the gear my friend and I would need to make some beginner CReW jumps. The first jump on borrowed gear went great, but as we packed up my coach informed me the gear I was borrowing was a pull-out, and briefed me on how to use it. We planned a four-stack and lucked out with a camera jumper. As we get out of the plane, I pulled weak and ended up with no canopy. I knew from previous coaching that it’s a bad idea to take a Lightning terminal, so I went straight to reserve. As the reserve came out, I was kicking myself that I wasn’t going to be able to participate in the CReW jump, and would have plenty of time to think about how I got into this mess as my teammates got to play. I decided to fly over and watch, and that’s when I noticed the pilot chute bouncing around on my back. “I should get rid of that,” I thought, and reached for my cutaway handle. I didn’t even have a grip on it before my main came out and settled gently next to my reserve. Next thing I know, the camera flyer is in front of me, pointing and laughing. “What do I do?” I screamed, and he just laughed harder. “Well,” I thought, “if he’s not freaking out, why should I?” So I didn’t freak out. Instead, I worked to get back to the dropzone. No easy task, as I’d soon find out. A west-blowing wind was sending me back over the Ortegas, and with twice the fabric over my head, I was struggling to get any forward movement at all. Unbeknownst to me, my coach flew under me, shouting at me to chop. I tried to force some separation between the two canopies to do just that, but I couldn’t trust myself to hold the reserve away from the main long enough to go for my cutaway handle. Because the two canopies were trimmed so similarly, they really wanted to fly together, although the particular configuration I was flying really wanted to fly south. Considering the town of Elsinore was south, I spent a whole lot of time and energy just keeping the pair flying straight. Image by David Sands (D29444)Imagine pulling straight out of the plane under a large canopy, unable to do much besides try to keep your canopies flying straight and think about the sequence of events that got you here. Imagine looking down and going through your tree-landing procedure, and then multiplying that by two. Imagine trying to figure out how you’re going to steer the two canopies onto one of the small access roads on the mountains. With 1,000 feet to spare, I made it to the field I was aiming for, just at the foot of the Ortegas. I tried the usual landing-out procedure, transposing my pattern onto the field, but my canopies kept wanting to steer to the right, into the small neighborhood next to the field. So instead I just aimed my canopies at a small patch of grass in the field, and hit it gently without flaring. My legs were shaking and I couldn’t stop laughing nervously. It took me three tries to daisy chain my lines, and one of the Elsinore staff members had come to pick me up before I even made it out of the field. My coach, feeling responsible for me, landed in the mountains and called Elsinore to let them know what had happened. It took some time, but they found him, having landed without incident. Once I got back to the dropzone, I cracked a beer and waited for the shaking in my legs to go away. Lessons LearnedThe main takeaway from this is to know your gear. I was briefed very thoroughly by my coach on how to use a pull-out system, and practiced multiple times on the plane. Yet when it came time to pull, I didn’t fully extend my arm, and ended up with a pilot chute in tow. To me that was always one of the scariest malfunctions there are, because there are two schools of thought on how to handle it. One is to go straight to reserve, as I did, and one is to cutaway and go to reserve. In hindsight, I stand by my choice, because cutting away could have fired my main directly into my reserve. The other scary thing about this particular malfunction was that it was a two-out that was flying stable. One school of thought is that you should cut away to avoid a downplane, and the other is that if you’re flying stable, you can pilot it to an open area, which is what I did. If I had downplaned, I could have cut away my main and flown my reserve down, but I wasn’t convinced I could keep the canopies apart long enough to get to my cutaway handle. The problem with this scenario is that, under different circumstances, a dust devil could have blown my canopies into a downplane close to the ground, and I might not have been able to chop my main at all. One last thing I would change is that I would have taken my cell phone. If I had gotten hurt in the mountains without any way to access emergency care, things could have been a lot worse. I’ve since invested in a small prepaid phone to keep in my jumpsuit pocket. In the end, I stand by my choices, and acknowledge that there was a lot of luck that kept me from disaster that day. I regret that my coach got stuck in the mountains, but I’m grateful that he was willing to look out for me. I faced the two malfunctions I feared the most on one jump and managed to walk away with a swollen ankle and a wounded sense of pride. Will I still do CReW? Every chance I get! And I’d trust the riggers, CReW Dawgs, staff, and other jumpers at Elsinore any day.
 -
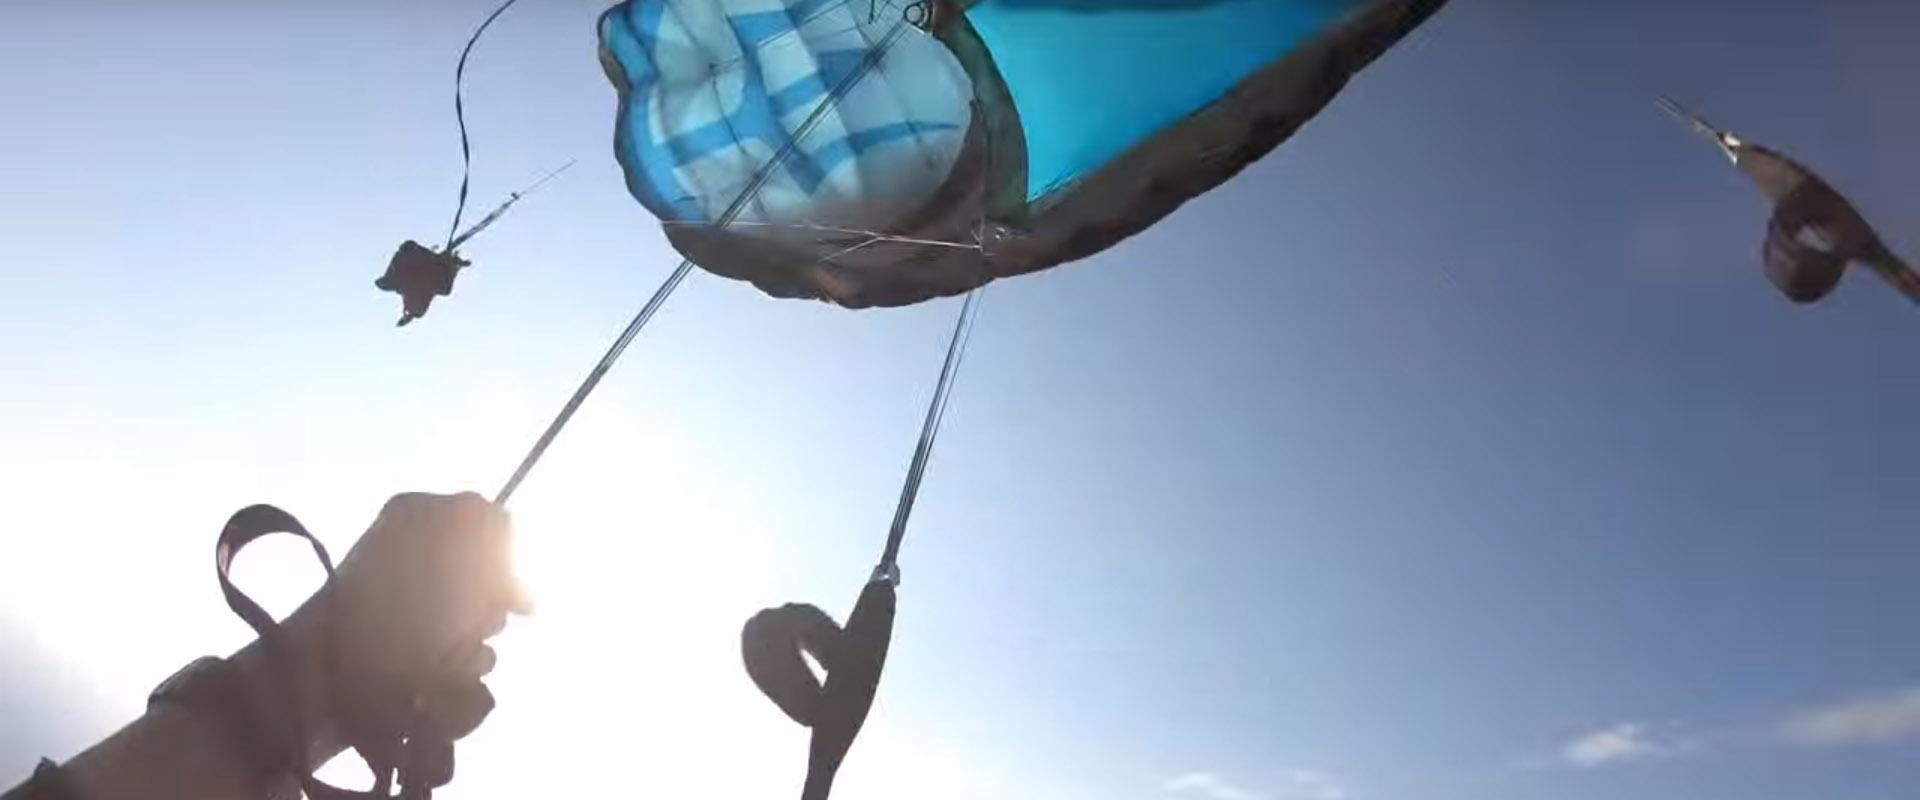 We recently posted an article showcasing some really sweet videos to get you amped to hit the sky. The reality however, is that not every jump goes as planned. Sometimes you find yourself victim to a bad pack job, bad technique or failed equipment. The collection of videos below are some of the malfunctions that made their way onto Youtube in the past year. Use these videos to learn from other's mistakes, look at how others reacted to their incidents and how it affected their outcome. While some malfunctions one can laugh about later, others should serve solely as a lesson to other jumpers. From the uploader: "On my first jump with my Strix i had a toggle fire and needed to cutaway! Not the best body position and pitched with some speed. This is the only way that my great SABRE 1 wingsuit canopy can get into a diving spin." From the uploader: "After an uneventful jump, on deployment one of the riser covers of the Wings rig did not release, leading the PD 90 to deploy unevenly and start violent spinning behind the neck of the jumper. He was about to cut away the wing and pull his reserve when the riser cover released. The jumper checked his altitude, reasoned he had altitude to keep working on it a bit longer and then untwisted. He landed back at the dropzone exhausted and shocked, then switched container manufacturer as soon as he could." From the uploader: "Bag lock is a b*tch, especially on a tandem skydive. This TI and passenger were in the saddle by 1650 feet." From the uploader: "A skydiver has some heavy line twists on opening, which he fights all the way down to his hard deck before cutting away and deploying his reserve parachute -- which also opens with heavy line twists. Yikes!" From the uploader: "Skydiver rides his reserve parachute safely to the ground after a canopy malfunction!" From the uploader: "A pilot chute in tow malfunction is never fun, especially when you try to manually deploy your main parachute and end up flipping onto your back with a mess of lines wrapping around your leg. That’s exactly what happened to this skydiver. He pulled his cutaway, deployed his reserve and crossed his fingers that the reserve would clear the ball of $#!t above his head." From the uploader: "This jumper deployed their main, saw a malfunction they could not recover from, and cutaway. Their three-rings separated but a line got caught and the main parachute remained connected to the container. While attempting to clear the line entanglement, it appears the jumper pulled on their RSL and extracted their reserve pin; giving them a two-out. The jumper flew the reserve and, twenty seconds before safely landing their reserve, the main finally released." From the uploader: "As they exited the plane this jumper’s deployment bag came out of their container and gave them a horseshoe malfunction. They realized their pilot chute was still in the BOC and deployed it in an attempt to remedy the situation. Unfortunately, the pilot chute failed to extract the main, resulting in a SECOND malfunction! This time the jumper was faced with a bag lock. They cutaway their main, regained stability and deployed their reserve." From the uploader: "After an uneventful wingsuit flight this jumper deployed his main and found himself with a line over that sent him spinning. Unable to fly the canopy, he cutaway and – after dealing with some line twists – landed without further incident." From the uploader: "This skydiver pulled at 4k feet to get comfortable under canopy again -- it was their first jump after a 4 month break from skydiving. Once they deployed, they checked their canopy and thought it was an end cell closure, but quickly realized that it was actually a line-over. They began pumping the risers to clear it and continued to do so until they reached their decision altitude. The jumper claims they were preparing to cut away when they did one last pump of the risers and cleared the line-over."
 -
How To Land Where No One Has Landed Before (The Star Trek Trick)
nettenette posted an article in Safety
 ...Or Where Everyone Else Is Landing, But That’s Beside the Point Image by Wolfgang LienbacherYou’ve seen Star Trek, you big nerd -- so you know the answer to this question: When everybody’s staring out the front of a spaceship as it slams into warp speed, what are they looking at? Don’t make that face. This absolutely applies to skydiving. The answer, of course, is that they’re staring dramatically out into a starfield. Within that starfield, the outside stars are streaked into blurs and the center stars are distinct, clear and individual. At any given moment, the spaceship is headed towards the clear stars in the center of the frame. Gene Roddenberry and his glitter-stirring co-wizards didn’t come up with that out of nowhere. they used a classic model, called the Radial Optic Flow Pattern (or ROFP), to base their screensaver-worthy visuals upon. Originally defined by scientist James J. Gibson, Radial Optic Flow has greatly driven the development of an “ecological” approach to visual perception. This approach investigates human vision in the context of the natural environment (as opposed to a laboratory). It may sound obscure, but that same model is the one you, as a skydiver, should consciously use if you’d rather land in the peas than the trees. Here’s how. Velocity Fields and FOEsAs a human in motion, your field of view – your very own spaceship windshield – is called your “velocity field.” Within that velocity field, when you’re traveling along a straight path (with no eye, head or body rotation), your heading is nailed quite precisely by the unmoving focus of expansion (FOE) in the center of your vision. How precisely? Well, a 2008 Oxford University study found that humans can use the FOE in optic flow to estimate their heading within one degree of the visual angle, and that’s good – because the FOE is exactly where you’re going. As opposed to a paraglider – which can go up just as handily as down, in the right conditions* – a skydiving canopy has one essential mode: forward/down. A ROFP for forward movement describes expansion – like the stars in the front windshield of the spaceship as it rushes towards the FOE described by the still stars in the middle. (As our skydiving canopies can’t really go backwards, we won’t worry about the “reverse thrusters” mode.) Image by Wolfgang Lienbacher Where’s My FOE?If you’re flying your skydiving canopy straight, your FOE is easy to pick off: it’s the place in your vision that isn’t dropping, rising, or side-sliding. As you approach the landing area, the FOE remains central while the rest of the field expands proportionally more quickly. If you’re throwing a bunch of canopy inputs into the mix, however, it’s much more difficult to determine FOE. That’s because you’re introducing a “rotational component of lamellar flow,” which forces the retinal flow pattern not to be radial anymore, thereby making it difficult to recover the original heading. How to “Energize” Your Accuracy:When you set up your landing, choose objects on the ground and notice whether they’re moving up or down in your velocity field. Notice the still spot that indicates your FOE. Notice how accurate you can make your landings by fixing your FOE on your intended spot landing. As you learn to determine your FOE close-up, start to work on spotting your FOE from higher and higher altitudes. By doing this, you’ll train yourself to know instantly if the spot is off and you’ll need to choose an alternate landing area. Keep your FOE on the target, not an obstacle. When I was racing motorcycles, I used to refer to this trick as my “eye magnets.” That sounds just as silly as spending four hours in a makeup chair getting a rubber Klingon face glued on, but it’s not: your gaze truly is functionally magnetic. You'll head inexorably towards the one tree in the landing area you’re terrified of hitting (and thus staring at). Conversely, you'll kinda-magically turn away from that tree without any other conscious inputs if you “unstick” your gaze and attach it firmly to open turf. Improperly applied eye magnets are referred to less-cutely as “target fixation.” Many skydivers refer to this phenomenon as “the accuracy trick,” which seems unfair – there are a lot of helpful tools for accuracy, of which this is only one. That said, consistently landing where you want to is a great way for a skydiver to live long and prosper. (Shh. You know you giggled.) ** For this reason, “the accuracy trick” is a little trickier to use for paraglider pilots, because visual cues have a tendency to bounce around as the wing is affected by thermic “bubbles” near ground level.
 -
Does anyone have any pointers (this is great don't buy this) on electronic wind speed indicators? I searched and there is a wide variety. A friend suggested I focus on those used by boat owners. Thoughts?
-
Hi, I have gotten mixed answers to this question so I wanted to ask here. Hopefully someone who owns one of these can chime in or a rigger who has experience with them I was told that the TSO may be written in a way that some riggers will pack it and others will not. Another source told me it has a TSO and there is no problem. The one I'm looking at was manufactured on 1999 if that makes a difference Anybody have any experience with this?
-
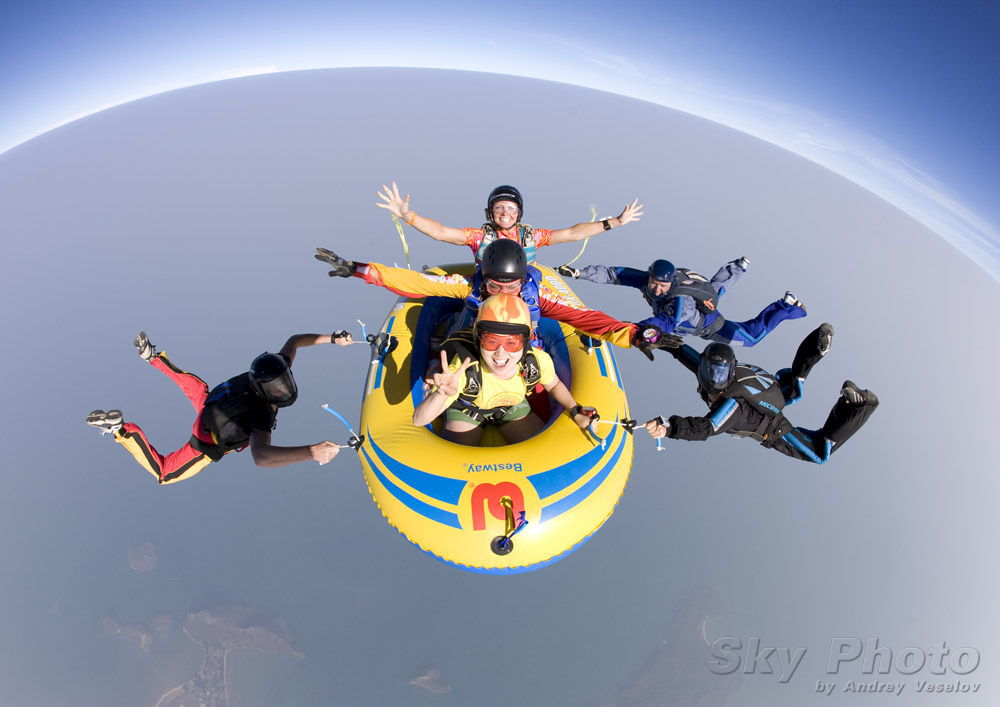 The History of a Silly Name Image by Andrey Veselov It’s hard to imagine that, not too long ago, a skydiving get-together was a rare thing indeed. Today, as you’ve no doubt noticed, there are hundreds of ‘em. In fact, almost every drop zone, no matter how small, has at least one official yearly boogie to celebrate its local jumpers. Namibia! Fiji! A tiny little beach town in Kenya*! A big field in Montana! Where two or three are gathered in its name, behold: you’ve got a boogie on your hands. Some of these events are immense, filling the skies with dozens of wildly various aircraft, hundreds of skydivers and a whirling (terrifying?) smorgasbord of disciplines. Others are comparably tiny. Despite their differences, most boogies are a reliably good time. It stands to reason that a group of skydivers would find any excuse to come together in a frenzied combination of daytime skydiving and nighttime frivolity–but when did the first one take place, and how did it come by such a goofy name? Read on. The Birth of a BoogieThe modern skydiving boogie may owe its existence to a film: specifically, the first major skydiving film released to the public, called Gypsy Moths. Shortly after the film’s much-lauded debut, one of the skydivers featured in the film – a prominent skydiving athlete named Garth “Tag” Taggart – was asked to put together a “just-for-fun” skydiving event in his hometown of Richmond, Indiana. Until then, skydivers only really, officially gathered for USPA-officiated competitions at regional and national meets. In September of 1972, Garth arranged that seminal event, which is recorded in Pat Work's fascinating record of early skydiving (entitled "United We Fall"). Where Did the Term “Boogie” Come From?The term “boogie” derived from a comic motif developed by fringe cartoonist R. Crumb.** The motif features a “boogie man” striding confidently across an abstract landscape with the phrase “Keep On Truckin’” emblazoned above. The word “boogie” doesn’t appear anywhere within the motif, but the story goes that Garth Taggart was inspired by the image. He was also probably influenced by use of the word in New Zealand skydiving circles, as well as by its use as a then-trendy name for an, ahem, wild party. In any case, Taggart picked that moniker to describe the Richmond RW Festival on its event t-shirts, and the term stuck. Firmly. These get-togethers have sometimes been referred to as “jumpmeets”--in the olden days, when the organizers didn’t want to saddle the event with the term’s then-obvious, hard-partying implications--but “boogie” is how we’ve really come to know the phenomenon. Hilariously enough, those historic shirts didn’t actually use the word “boogie.” Due to an unfortunate misspelling on the hastily-printed giveaways, they described the event as a “boggie.” Snicker snicker. The First Boogie Kicks OffHowever confused the naming, that original event brought together more than a hundred skydivers from all over the US to practice the then-relatively-new RW discipline. The Richmond City Boys’ Club hosted the event, making significant revenue by charging non-skydivers an admission fee. That first boogie (or “boggie,” if we’re being historically accurate) saw some formations that were, for the time, pretty damn groundbreaking. In "United We Fall," Pat Work notes that the athletes “made several big stars out of a Twin Beech and a DC-3.” Work goes on to remember that “[a]ll the self-styled, super-hero RW types made three tries at a 30-man, and succeeded in FUBAR-ing all three in front of the lens of Carl Boenish.” The botched jump didn’t cripple the event, however. “Everyone else just giggled and went up and made 18-mans […] with no problems[.]” That night, the skydivers and some lucky spectators enjoyed a raucous bonfire, dancing and screenings of some of the most seminal skydiving videos on record. The Boogie EvolvesIn the years immediately following that first boogie, the quickly growing sport of skydiving started to earn a bad-boy reputation amongst the general public (who didn’t much care about it previously, when the sport was tiny and firmly on the fringes). For several years, the city of Richmond out-and-out banned skydiving for fear of its freakshow excesses.*** By the time the 1970s were drawing to a close, however, that original boogie had become very official. It turned into the USPA Nationals--whaddaya know. Boogies TodayThe phenomenon of the boogie holds to the much same spirit as Garth “Tag” Taggart’s founding principle: fun. These days, however, they’re also used as a venue for major skydiving competitions, world records, vendor demonstrations, charity efforts and loci for training. Across the board, these events retain one important historical value: the nominal “boogie” itself. We come for the party, right? *Which I just finished attending. **If you aren’t aware of R Crumb, treat yourself to a Google image search. You’re welcome. ***Apparently, it was proving too logistically difficult to lock up their daughters--and sons, for that matter.
 -
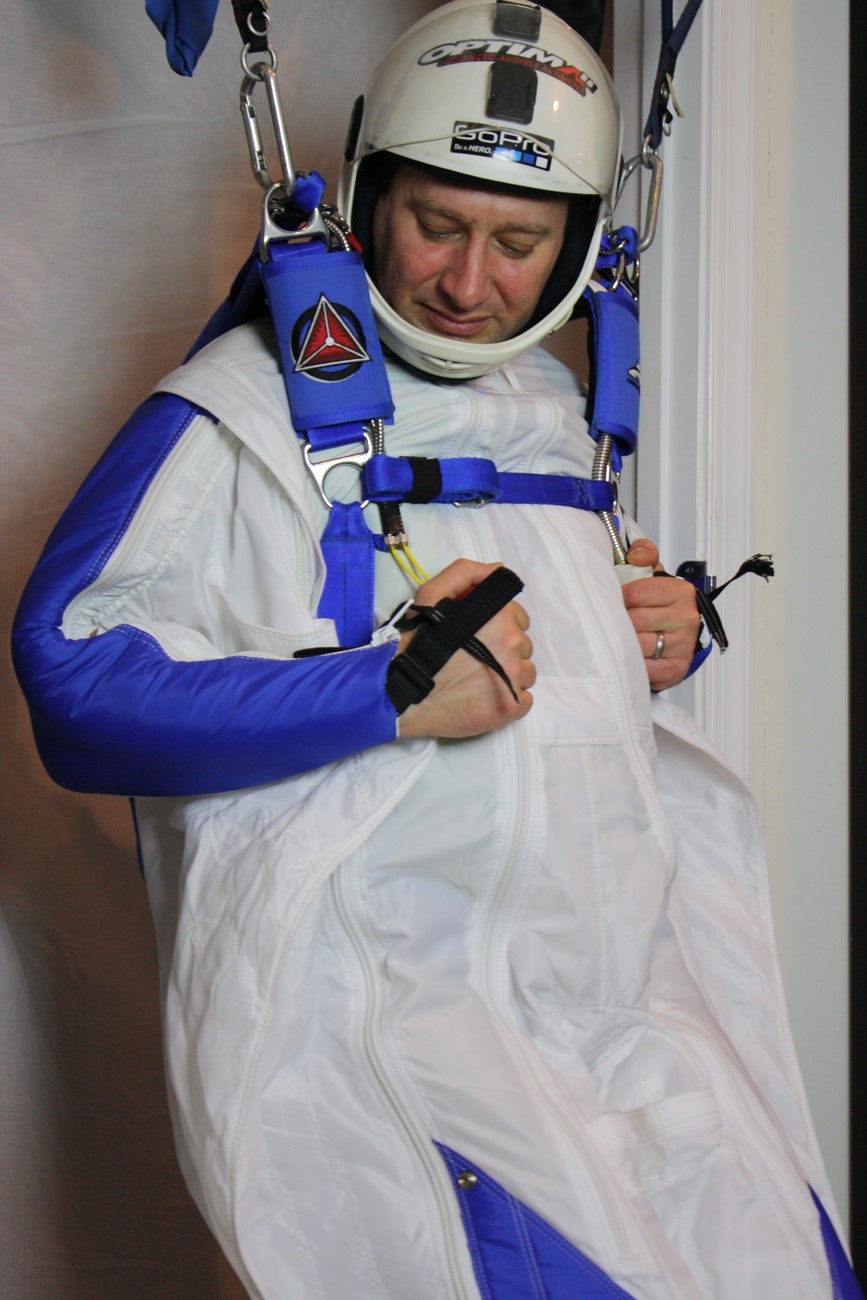 A reserve ride is an exciting adventure no matter how many jumps you have under your belt. Preparatory training is obviously the best way to ensure that you walk away unscathed, but it is my experience that the simulations we create are not as realistic as they could be. In many cases, many of us will argue, they are not as good as they need to be. The purpose of this article is to suggest possible improvements to the state of the art in emergency procedure training. If we envision beyond what we have done in the past, improvement is assured, and the safe conclusion of parachute malfunctions will increase in frequency. If we can simulate cutaway jumps more realistically, skydivers will be calmer in emergency situations, and more skillful. Elaborate simulation, in my experience, will also result in greater awareness and recall, more efficient actions, and less emotional trauma once the event is over. The first issue to be addressed by our sport as a whole is our simulation equipment. Although a vest with handles may be very helpful for establishing the general flow of handle-pulling, it is a far cry from what the event will actually feel like. Many jumpers have reported, upon landing from their first cutaway, that things did not feel or look remotely the way they expected. Handles were not where the jumper expected them to be, pull forces were not what they anticipated, nor was the feeling of the experience similar to the training process that was supposed to prepare them for this event. It is my experience, however, that when we take thoughtful steps to improve our training methods and equipment, the gap between expectation and reality can be closed significantly. The most important piece of equipment in any simulation is the mind. Creating a clear visualization of the scenario is essential, no matter how silly it may look to bystanders. The job of the Instructor in these situations is to provide insightful clarification, ideally based on their own experience. Set the emotional stage for the student in every possible way, describing the details as clearly as possible, leaving nothing out. Allow yourself to get wrapped up in the excitement that is inevitable in such experiences. This will not only make the simulation feel more real, it will help illuminate the natural mental reaction of the student to intense stress. If over-reaction or under-reaction is apparent, further training is necessary. If the student failed to perform, the instructor simply has more work to do. It continues to be my strong opinion that a suspended harness is absolutely essential for the best possible training. Given the vast amount of money we now spend on aircraft and student gear, skimping on this key element of teaching equipment is shortsighted, and most often a product of laziness and compromise. If building a hanging harness cost thousands of dollars, the financial argument might hold more merit, but this is most decidedly not the case. There are many possible methods that cost very little, and can be created in just an hour or two. I know, I build a new hanging harness at almost every dropzone I travel to in the process of running my canopy skills and safety courses. I do this because I want to offer my course participants the best possible training, and because an alarming percentage of skydiving schools have done away with this vital piece of training equipment. This needs to change if we are to improve the safety of our sport. Let's start with the actual harness. When I find suspended harnesses in use, most often the actual rig is an uncomfortable, dilapidated old rig from the early 1980's, hung from the ceiling by attachment points that are way too close together to simulate a realistic experience. In the best cases, there is a three-ring setup that allows the jumper to cut away and drop a few inches. This is a great training aid, but what if the rig was a more modern adjustable harness that could accurately reflect the fit and handle placement of the rig they will actually be jumping? For that matter, what if we hung them in the rig they were actually going to jump? What if the suspension apparatus was long enough to practice kicking out of line-twists? What if the toggles simulated the resistance of an actual parachute using bungees or weights? What if you pulled on straps attached to the bottom of the harness each time they flared, to simulate the pitch change? What if, as crazy as it sounds, you went to the local hardware store and picked up a high-powered carpet blower, a.k.a. “snail fan”, and angled it up at the harness to reflect the feeling of the relative wind? This is the kind of outside-the-box thinking that creates better simulations, and better training. Further, this is how we prepare our students for an actual malfunction and reduce the risk of pilot error. For experienced jumpers, I highly recommend hanging up in your own rig. This will clarify handle placement under load, allow you to explore strap tightness possibilities, and give you the opportunity to experience actual pull forces when your repack cycle is up. If you do not have stainless steel hardware on your rings, please use fabric connection points rather than the carabiner attachment displayed in these photos. Another key element of malfunction simulation is to follow through with the complete jump, rather than stopping after the handles are pulled. In reality, the adequate performance of emergency procedures is just the first in a long list of steps that lead to a safe landing. For instance, what if the cutaway harness had Velcro reserve toggles that needed to be first peeled upward and then pulled downward? Many people, myself included, have tried simply pulling the reserve toggles downward to find that they would not release. Missing details like this can lead to a student feeling more angst than is necessary, and can result in further stress-induced mistakes with major consequences. Additionally, proper exploration of the reserve canopy is important for a good flight pattern, accuracy and landing flare following a malfunction. How much slack is in the brake lines? Where is the stall point? What is the flare response on this brand new canopy? A good cutaway followed by a broken ankle on landing is still a bad day. Simulate the whole jump, and there will be fewer surprises. The final issue I want to cover on the topic of better emergency procedures training is the inclusion of deliberate adrenaline management efforts following the deployment of the reserve canopy. Carrying the emotional momentum of a malfunction all the way to the ground definitely increases the chances of a lousy landing. High levels of stress takes time to sluff-off, but a skilled operator also knows how and when to slow down. Once you have pulled all the handles you need to pull, taking three long, slow, deep breaths while gazing at the horizon with a smile of relief on your face can change your mood, and your fate. Get your composure back, and your optimism will follow. From there, skill is just a short step away. This process can and should be included in every emergency procedure simulation to create a habit that is likely to be carried out in the sky. Following such quiescent procedures allows the mind to more easily let go of the recent past and focus on the present moment and the near future: 1) Check altitude and location 2) Find a safe landing area 3) Explore the reserve 4) Fly a good pattern 5) Flare beautifully 6) Walk away with a smile on your face 7) Thank your rigger A malfunction does not need to be viewed as an emergency, especially if you are truly prepared; it is just a change of plans. A complete simulation can be the difference between a horrifying emergency and a well-executed contingency plan. If we handle it well, a main parachute malfunction can actually be fun. I have found few experiences more rewarding than a complicated situation that I figured out on the fly, and despite my fear, I kept my head and did the right thing. In short, a parachute malfunction is an opportunity to prove to yourself and the world that you can handle yourself in a crisis, and with realistic training, your success can be an inevitable conclusion. About the Author: Brian Germain is a parachute designer, author, teacher, radio personality, keynote speaker with over 15,000 jumps, and has been an active skydiver for 30 years. He is the creator of the famed instructional video "No Sweat: Parachute Packing Made Easy", as well as the critically acclaimed book The Parachute and its Pilot. You can get more of Brian’s teaching at Adventure Wisdom, Big Air Sportz, Transcending Fear, and on his vast YouTube Channel
 -
 Image by Joel StricklandDoes exit order seem like some kind of obscure semi-religious ritual? Do you go through the motions without really understanding the moving parts? If so, yikes--but you’re certainly not alone. Luckily, understanding the logic behind the order is a pretty straightforward affair, and the entire sky will be better off if you wrap your head around it. Ready? Okay. Commit this to memory. 1. In the name of science, get the $#&$ out.It may seem like hollow tradition to hustle out the door on exit, but it’s not. As a matter of fact, there are serious calculations behind the art of exiting the plane efficiently. On a calm day, an aircraft on jump run covers around 175 feet per second of flight (that equates to a mile every 30 seconds or so). Translated into stopwatch terms, that means that--on that same calm day--no more than 60 seconds can pass from the moment the first jumpers leave the airplane to the moment the last jumper exits. For practical purposes, taking into consideration how much ground the average square canopy can cover, every jumper in the plane has to be out during a two-mile jump run. If they don’t, some are bound to land out (or a chilly second pass is going to be served up to the sulky remainder). 2. Don’t mess up the pilot’s math.If your group is about to be the first big handful of meatballs out of the plane but you suddenly split up into smaller groups, you’re messing with the pilot’s chi. After all, the jump pilot has more to calculate when he/she turns on that little green light than you might realize. He/she has to calculate about how much time each group will take to exit, and make sure the green light goes on at the correct distance from the DZ to accommodate the aforementioned 60-second countdown. As a rule, the group that will have the slowest climb-out should leave first. Big group? Light goes on farther out from the DZ to allow for a slower climb-out. Little group? The light goes on closer to the DZ. How can you help? Jump the plan you give manifest, and the pilot can give everybody a good spot. 3. Jealously guard your real estate.If you’re a Big Sky Theory kinda jumper who assumes vertical separation is going to save you from a meat-traffic collision, you are not working from scientific facts. Horizontal separation is the only separation that really counts up there, so make sure your group has a chunky slot of sky all to yourselves. Never place big bets (like: your continued existence) on your fellow skydivers pulling at the altitude they swear by. A tiny brainfart (or a big malfunction) will eat up that vertical separation before you can say “what happened to pulling at 3,500, toolbox?!.” 4. Horizon-pointing belly buttons go behind downward-pointing belly buttons.When freefly folks get out first, they tend to become part of an undelicious freefall sandwich. Here’s why: On a typical skydive, a pair of freefliers will clock a 45-second freefall and open at around 3,000 AGL. Let’s say that pair is followed by a belly group with a 10-second climb-out. This is going to sound like a math word problem, but bear with me: If one of those freefliers has a canopy with a 30MPH forward speed (which will move forward at around 45 feet per second, assuming little-to-no wind), opens 30 seconds before the belly group and turns right back toward the DZ, the variables are stacking up for a collision. Those 30 seconds of flight will drive the freeflier forward by about 1,300 horizontal feet--a measly 400 feet from the middle of the belly folks, which a solid six-second track can cover. If you add wind to the equation and the RW group gets blown even further into the path of the freefly pair, the likelihood of a meetup gets even uglier. When freefly groups get out after belly groups, the picture gets a lot healthier. The fast fallers get their horizontal separation, predicated on their shorter climb-out and faster descent rate. Wind becomes a positive safety factor instead of a negative one; slower fallers simply blow farther away. 5. With longer flights comes greater responsibility.Tracking groups, high pulls and wingsuits get to snuggle with the pilot (and/or the tandem pairs) in the way back of the plane. Why? First off, they’re mobile: if they’re doing it right, they’ll use all that horizontal power to get the hell away from jump run--and get back from a longer spot. If they’re not doing it right, however, they’re fully within their capability to truck through everybody’s personal piece of sky on the way down. The moral of the story: longer freefall (or, in the high-pull case, general airtime) requires greater awareness and responsibility on the part of the nylon pilot. 6. Don’t be the heat-seeking meat missile.That’s the bottom line, really. Everybody in the sky is counting on you. (Me, for instance.)
 -
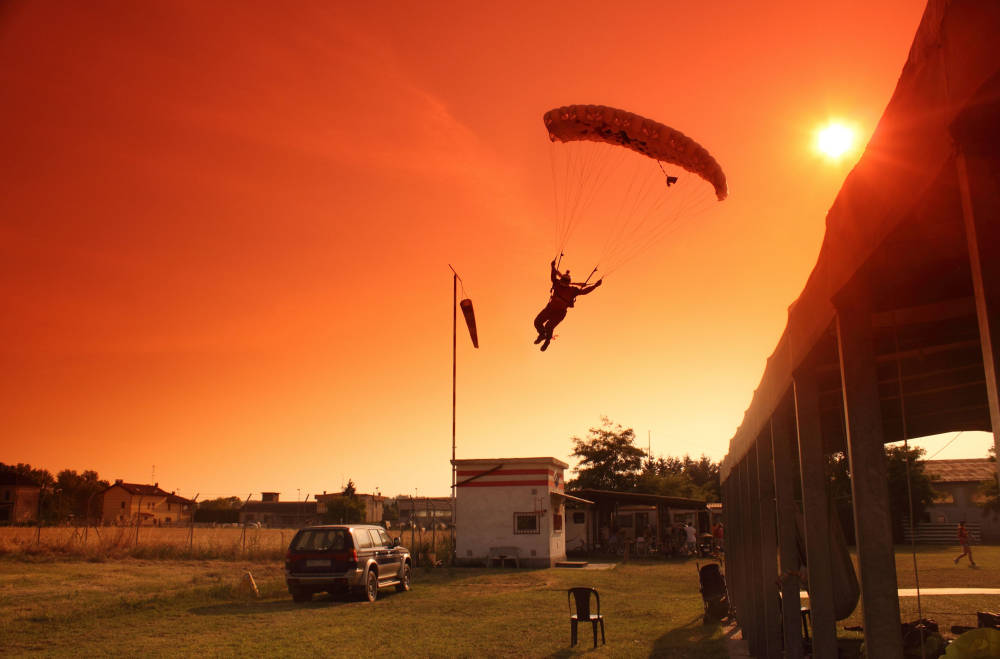 Damage Control for Unwilling Christmas Ornaments Image by Corrado MarianiChristmas ornaments are lovely, aren’t they? Glossy, colorful baubles, swinging gaily from the bushy branches of a fragrant fir, make our little hearts sing along with the season they decorate. They are not, however, excellent role models for air sports athletes. If you ever end up gracing some branches with your majesty, the United States Parachute Association would first like you to take your enforced treetop time to think very carefully about how you got there. According to the SIM, “properly preparing for the canopy flight by observing the winds,” “planning an appropriate landing pattern” and “choosing the correct exit and opening points” will generally keep you out of the foliage. In short: you messed up, kid. ...But let’s move on. If you discover that you’re on an imminent collision course with a tree, you need to know your 8-step damage control plan. Here’s what to do. 1. Make sure you’re flying into the wind.Do not downwind a tree landing. You may not have a sock to steer by, but – hey, lucky you! – you have at least one tree for reference. Watch the movement of its branches to determine the wind direction. 2. Fly in half-brakes.Your aim is to slow down your canopy as much as possible for the impact. Fly your final approach in half brakes, taking care not to stall your canopy in the process. 3. Go for the middle.Your aim is to impact at the central trunk of the tree. If you miss the middle of the tree, you run the risk of clipping the tree with a line or a cell, collapsing your canopy and dumping you on the ground in a yowling pile. 4. Keep your $#!* together.As you do in a properly executed parachute landing fall (“PLF”), hug your body towards the midline, as though you were inside a mummy-style sleeping bag. Keep your legs springy at the knee, but hug them snugly towards the midline. Continue to fly your canopy until you contact the tree. Just before impact, draw your forearms together so that your elbows sit at the stomach and your hands over the face. This position protects your belly, ribs and chest from being lanced by branches. 5. Keep your hands to yourself.Resist the urge to grab limbs to stop your fall, as this will only leave vast areas of your body unprotected from veritable armies of sharp branches that are about to mobilize for the attack. 6. Assume a hard landing.More often than not, a parachutist who lands in a tree does not stay in the tree. Usually, the jumper falls right through, snapping branches and leaving shredded bits of canopy all the way down. Keep that PLF position as best you can, in order to make the landing as soft as possible when the tree finally sees fit to deposit you at its feet. 7. Get comfortable.Have you actually managed to stay in the tree? Oh, great. Stay there. A great many injuries occur not during a jumper’s actual tree landing, but from the jumper’s failed attempt to detach themselves from their mangled equipment and climb down. In general, if you’re more than a meter or so over the ground and you have any hope of rescue, wait for that rescue to arrive. If you’re phoneless, radioless, jumping-buddyless, out of public earshot and generally hooped for help, you’d better hope you have a hook knife handy. You'll use the hook knife to -- gulp -- disentangle yourself from the spiderweb of lines you're likely encased in. This is necessary to prevent you from accidentally throttling yourself, and from sustaining a serious rope-burn injury if a branch cracks and sends those knifelike lines through your tender outer layers. You'll probably cry a little bit with every line you cut. Ain't no shame in it. 8. Be grateful.Even if you shred your pricey gear, rejoice if you walk away from a tree landing uninjured. Gear can be replaced -- and you lucked out, you lucky duck. See the bright side.
 -
 March is safety month, and what better time than just before the Northern Hemisphere's summer season to refresh yourself on information you may be rusty on, or just become more educated in the various safety aspects. Last year we published an article with what we felt were some of the most important safety related articles published on Dropzone.com at that time. Since then we have had several new pieces of information published, that may help you in staying safe out there, from canopy control to exit separation. We've also included several safety day events that are happening around the world later this month. Here's a list of what we feel are 5 of the most important articles submitted over the past year: Teaching Students To Navigate The Landing Pattern In our most recently published safety article, coach and IAD instructor rated Corey Miller discusses some of the core aspects of landing patterns and how students are taught to navigate them. The article focuses specifically only the way instructors relay landing information to students over radio, while perhaps not allowing the students to truly learn for themselves what is important to look for and more closely address the subject of learning to land as opposed to being told how to land. Staying Current During Winter While this article may be a bit late for the northern hemisphere, winter is approaching down south and many useful tips can be learned. In the article, Brian Germain discusses the benefits to staying current during the off season and provides readers with a number of useful exercises that can be done to ensure optimum efficiency when you return to the sky. There's numerous images included to help you understand the setups and how they work, as well as exercises that addresses specific individual disciplines. Exit Order Safety Another article by Brian Germain, on the topic of exit order safety. The main focus of the article revolves around establishing and discussion the different types of jumpers and how their time under the plane may vary, and in turn to establish who should jump when and why. Not only is the direct exit from the aircraft addressed, but the article further discusses exit order importance with regards to exit timing and landing area. In the comments section, Brian goes on to acknowledge the possible ambiguity in the term "prop-blast penetration", used in the opening paragraph and says that the term can be replaced by such terms as "forward throw", "relative wind penetration" or the more self-explanatory "horizontal distance traveled". When Should You Upsize Your Canopy The first of two very useful articles on the topic of canopy size, this article was a combined effort by Melissa Lowe, Barry Williams and Jason Moledzki. It uses numbered points to address 10 factors that one should look at when considering canopy size. Most of the time the thought is on downsizing, as one feels more comfortable with their current setup, but for some people - the solution to many of their problems may actually be to head in the other direction and consider upsizing their canopy. There are numerous variables involved that could prompt one to require an upsizing, from gaining weight to even jumping at a higher elevation. At the end of the discussion, there is a Canopy Risk calculator (created by the USPA), which is intended to act as a guideline for you to see how much of a safety risk you are with your current setup and skill level. It's Not Only Size That Matters - Thoughts on Canopy Upsizing The other canopy upsizing article we featured was submitted by Dave Kottwitz and focuses more on retelling lessons learned when he upsized from a Triathlon 210, to a Spectre 230. On his third jump on the new, larger canopy Dave ended up breaking his leg in six places as well as dislocating his shoulder. In the article, he looks at what caused the problems and why one has to realize that upsizing your canopy is not an immediate guarantee for an increase in safety.
 -
 IntroductionBoogies, skills camps and destination events are now available in the farthest reaches of the globe - taking place in countries that range from reassuringly orderly to exhilaratingly shambolic. Wherever you are heading, be sure to bone up on all the information you might need before you go - and prepare accordingly. Background research both specific to skydiving and for travel in general will aid your journey under any circumstances, favourable or otherwise, but the more you know in advance the better off you will be when things get complicated. Somewhere that is putting on a skydiving event might simply operate very differently to what you are used to, and the more you can do in advance to set yourself up for success the better. If any appropriate information has been overlooked by the event organisers and you are left in the dark without adequate briefings and knowledge, then ask around - skydivers love to quack on about stuff and those that have previously attended a particular location will tell you the things you really need to know. Skydiving events of any size contain a lot of moving parts that must all work harmoniously to keep people jumping safely. Myriad financial and logistical puzzle pieces require being carefully pulled together over the course of many months to successfully stage a gathering above and beyond the scope of a dropzone’s usual activity. These numerous variables mean there is a lot that can potentially go wrong - the weather might totally crap out and leave everyone fighting for whatever slots that might become available, a broken thingumy may ground an aircraft and significantly reduce lift capacity (or even scratch it completely) or someone can easily enough pick up the kind of injury that demands all jumping operations be shut down for a bit. The list of things that can cause problems and inefficiencies is long and unpredictable - and while the likelihood of the event organisers doing anything other than their very best is slim, they simply might not have the available mental power to stay on top of a snowballing situation. So, what should you do when you are at an event where the wheels are coming off? Buddy Up:If you are used to jumping in a country with lots of rules that must be adhered to while parachuting you can quickly land well outside of your comfort zone in the sketchier corners of the map. Teaming up with another human who can watch your back, both during jump procedures and on the ground in more general ways can provide a measure of reassurance not formally provided. Someone more experienced is good, but anyone who can objectively and reliably keep an eye on you is a solid plan. Check in with each other before and after every jump and at various points throughout each day. Also let one another know how to access vital documents and important personal items should anyone end up taking a trip to the hospital or the police station or the loony bin. Use Your Skills Wisely:Always keep both eyes on your own safety. At any boogie it is very easy to get swept up onto jumps where you are really less than comfortable. If a boogie is running away from itself it is more important than ever to correctly asses and manage the jumps you are doing. Nobody is going to do that for you. Remember that the real rewards are in the endless journey. A nicely formalised and arranged skills camp is the time and place to stretch your legs. Understanding you current limits and working sensibly with them is the path to a great time and safe jumps. Wisdom is calling things to heel when everyone around you is getting looser by the minute. Take Responsibility For Your Data:You can pretty much guarantee that by the time the boogie kicks off any dropzone internet will be down for the duration. Whatever reliable bandwidth the facility has available will likely be reserved for the running of crucial operations, and not for you to WhatsApp photos of each other of someone with a bottle of Jaegermeister duct-taped to their face. A local pre-paid mobile bundle is often the most reliable and affordable choice, but whichever way you want to sort it out some personal phone data is well worth the money. The more overwhelmed an event becomes, the higher the chances are of someone going missing or taking a trip to hospital - you can use the navigation and location tracking services of modern smartphones to find your way back to the airfield or to help look for a lost person. A active messaging group for all of your party can enhance a group experience but can also provide a valuable safety net for communication when everybody is getting shitfaced and things are getting weird. Be Ready:Impending chaos will likely first show itself as wildly inaccurate call times. A twenty-minute warning might mean you will be jumping either right away or hours from now - so the best plan is to always be ready. If your group can rock and roll at a moment’s notice not only will it aid the quality of your jumps, such exhibitions of professionalism will possibly ooze out of you and influence those close by who are less coherent. Help Out:If things are frantic, offer to help. If you have some local knowledge and are surrounded by disgruntled people who have travelled far to attend, then perhaps round them up and show them a good time. Chipping in even with seemingly insignificant things such as making the tea might free up other people better positioned to get stuck in with that broken aeroplane problem or downed computer network. Patience:A spoonful of patience goes a long way. If things are devolving into chaos aim to ease through it rather than throw wood on the fire. Try to remember that planning and executing a boogie takes a lot of work from all the people involved with the DZ and they rarely (if ever) make any money - and certainly not more than the usual daily business of the place. Not getting all up in people’s faces might help things to run smoothly again and shouting at the staff will help no-one. Speak Out: However! Don’t be afraid to speak up if you can see that something is dubious or outright dangerous. Stick your chin up and your chest out and say “What the fuck is this, you clueless morons?” Those responsible for an event that is going to shit may well be under fire from all angles, but if something is wrong they are required to honour everybody’s safety and fix it. Conclusion:All told, if your life allows you to own a parachute and use it recreationally then things are pretty good. Any kind of skydiving jamboree you attend will most likely be filled with treasured experiences you will talk about for years to come. If the odd one does not pan out exactly as you were hoping, then attempt to handle it in the most positive way possible - try not to make things worse, help others be safe wherever you can, and wring every bit of knowledge and experience you can from it to apply going forwards. If you do find yourself at an event that devolves into the kind of chaos where you are genuinely worried about making though with your personage and sanity intact - you can always simply walk away.
 -
Exit separation has become a point of contention at many DZ's lately. Years ago, when belly flying was the rule and the Cessna 182 was the aircraft at most DZ's, exit separation wasn't too much of a big deal - you gave the other group (if there was another group) some time and then you went. With the aircraft in popular use 15-20 years ago, it was hard to exit very quickly to begin with, and so the issue never came up very often. Bill von Novak started skydiving in 1991 at a small DZ in New York. Since then he has become an S+TA, an AFF, tandem and static line instructor, and has set two world records in large formation skydiving. He lives with his wife Amy in San Diego. Since then, several factors have conspired to make exit separation more of an issue. First off, there are more people freeflying. Freeflyers, especially head down groups, drift differently than belly flyers, and thus need different considerations when planning for exit separation. Faster canopies mean that people who open facing each other need more distance to deal with a potential collision. Large aircraft with big doors can hold several larger groups, and those groups can get out those big doors more quickly. Finally, GPS spotting has removed some of the delay between groups. It's rare to see people even check the spot before beginning their jam-up. I first became aware of this issue in 1994, when I started jumping at Brown Field in San Diego. We went through a series of aircraft as we grew, from Cessna 206's to King Airs to Beech-99's, none of which had GPS. In addition, we were less than a mile from the US-Mexico border, which meant our jump runs had to be east-west and our spots had to be dead on. Several instructors were "designated spotters" and we would argue over 100 yard differences in jump run offset and exit location. After a while we got pretty good at spotting. As our aircraft became larger, exit separation became more of an issue. We had a few close calls, and so we agreed to start allowing more space between groups. At first it was essentially trial and error - we would leave some amount of time (10 seconds or so) between groups and increase that time whenever someone felt they were too close to someone else. After a while, we began to get a feel for how much time was required. We knew that if the upper winds were strong and the plane was just creeping along the ground, we had to leave more time. We also knew that if we let the freeflyers get out first, we had a problem almost every time. We ended up with a system that worked for us, and had essentially no problems with collisions or close calls after that. During this time I was also traveling in the summers to different boogies and I noticed a wide variety of exit separation techniques. By far the most common technique was some amount of fixed time - the next group would pause, then climb out and go, without knowing what the upper winds were doing or what the spot was. The next most common technique was similar but they added a "leave more time if it's windy" clause to their delay. There was also a class of jumpers who looked out the door to tell how much separation to leave; these jumpers either looked at angle of the departing group or the ground to tell how much space to leave. This got me thinking. What really works and what doesn't? I tried a few methods on my own, from the "45 degree" method to a purely ground-based method. After some experiments, a group of skydivers collaborated via email and internet and came up with the actual math behind separation, the physics that determines how far the center of group A will be from the center of group B after they open. But before diving into the math, there are a few basic concepts to cover. What we care about. When we're talking about separation at opening time, we don't really care about where we are in relationship to the plane or even the ground - what we care about is how far we will be in the air horizontally from the next group that opens. So for our purposes, the airplane and the ground don't really matter, and someone watching from either of those places may not get the same "picture" of things that we get. (Of course, we do care about our relationship to the ground when it comes to spotting and landing on the DZ, but that's a separate issue.) How we fall. In most freefall (tracking dives and wingsuits excepted) we fall essentially straight down with respect to the air. If there's wind, the wind blows us at whatever speed it's blowing. If the wind is doing 30kts at altitude, a group of skydivers will be doing 30kts as they drift with the wind. It's also important to realize how your trajectory changes after you open. At a freefall speed of 100kts, a 30kt wind will slightly deflect your trajectory, because it's a small fraction of your total speed. Once under canopy and descending at 10kts, it will deflect your trajectory a tremendous amount, since it is now a very large part of your speed. Of course, under canopy you have much more control over your own horizontal speed, and the winds may add or subtract from your canopy's groundspeed depending on the direction you are facing. Speeds. When discussing speeds, it's important to define units. There is feet per second, which is very useful for people who are trying to figure out how far they want to be from another group. At 100 feet per second, 10 seconds gives you 1000 feet, which is about as easy as it gets. You may also hear the terms indicated airspeed, true airspeed, and groundspeed, in both knots and miles an hour. These can all be converted back and forth as needed .Now that all that's out of the way, the math is pretty simple. The distance you will get between group centers is the speed of the aircraft plus the speed of the winds at opening altitude, multiplied by the time you leave between groups. That's it. So if the aircraft is flying into the wind doing 80 knots per its GPS, and the winds at opening altitude are 10 knots from the same direction, and you are waiting 10 seconds between groups, you are going to get (80+10 = 90 kts, which is 153 feet per second) 1530 feet between groups. It gets a little more complicated when the winds are not from the same directions. If the winds at opening altitude are opposite jump run, you have to subtract them rather than add them. If the winds at opening altitude are from the side, it's the same as zero winds at opening altitude when it comes to separation. If you put these equations into a spreadsheet and play with the numbers, some basic patterns emerge. If the headwinds at altitude are strong you have to leave more time. If the plane is slow (i.e. it's indicated airspeed on jump run is low) you have to leave more time. If the winds at opening altitude are strong as well, and from the same direction, you can safely leave less time. (Or, preferably, just leave the same amount of time and you'll end up with even more separation.) If the winds at opening altitude are opposite from jump run, that's the worst case, and you have to leave even more time. Some people have a problem visualizing how winds at opening altitude can possibly cause them trouble if they leave enough distance on exit. The question is usually phrased as "don't all jumpers follow the same path out of the plane?" And they definitely do. To visualize why this can still cause you problems, take a look at the separation diagram shown below. Drawing showing exit separations In the first drawing, there is no wind after exit, and the first group breaks off, tracks, opens, and flies their canopies away from the center for the first few seconds, which is what they should be doing on most formation skydives. (After that, it's a good idea to turn away from line of flight once you're sure you are clear of others in your group.) The second group arrives 10-15 seconds later, shortly after the first group has opened their parachutes, with some room to spare. The second drawing shows what happens when there are winds are the same all the way down. Notice that the "cone" caused by the breakoff and the canopy flight has shifted strongly to the right. This is because (as mentioned before) once their parachutes are open, the wind affects their trajectory more strongly. As with the first example, it is assumed that everyone flies away from the center for the first few moments. That means the jumper flying into the wind makes no progress and comes straight down, while the jumper flying downwind gets a boost in groundspeed.. The third drawing shows where you can run in to problems. In this drawing, the winds after exit are from the opposite direction. You get the same skewing of the cone, but now the edge of the cone is getting dangerously close to the trajectory of the next group. This is a case where the same separation at exit led to trouble because of opposite winds at opening altitude. This leads naturally to the question "how much separation do you really need?" That depends on the group. 1000 feet should probably be an absolute minimum for any belly formation skydiving. That means that two four-ways can exit, fall straight down the pipe, track 300 feet from center on breakoff, and then still have 300 feet to deal with avoiding a potential collision after opening. With the speeds of today's canopies, that's a bare minimum. If the group size grows to two 10-ways, 2000 feet might be a wiser separation. If a low-time RW group backslides a bit, again, 1500 feet might be needed to be clear of them at opening time. So how does a jumper who doesn't want to carry around a calculator figure out how much time to leave between groups? One very simple way is to just look out of the plane and wait until it has covered 1000 feet, then go. This method, originally suggested by Skratch Garrison, takes much of the figuring out of exit separation. It can be hard to determine how far 1000 feet is on the ground, but fortunately most DZ's come with a handy ruler - a runway. A 3000 foot runway allows you to put 3 groups out along its length with a bit of margin thrown in. This method also has the tremendous advantage that it requires people to look out the door, and that means they are more likely to see traffic, high canopies or clouds that could pose a hazard to their skydive. Another simple way is time-based. There are several tricks you can use to determine how long to wait. One common one is to always leave at least 7 seconds, then if the upper winds are strong divide them by 2 and wait that number of seconds. (Faster aircraft sometimes use divide by 3.) So if the winds are 30kts you wait 15 seconds between groups. This technique uses some math but isn't too bad. A third technique that seems to be popular for some reason is the 45 degree method. In this method, jumpers wait until the previous group passes through an imaginary 45 degree line before they exit. The problem with this method is that the jumpers never pass through that 45 degree angle, or pass through it so quickly (under 1 second) that it's not useful for determining separation. The numbers confirm this. What you see out the door depends purely on speed of the aircraft, fallrate of the jumpers and type of exit. If the plane is going slower than freefall speed, the group may start out above the 45 degree line, but will drop below the line in less than a second and never rise above it again. If the plane is going faster than freefall speed (which is rare) the jumpers stay above the line and never cross it at all. A good head-down exit will tend to move jumpers lower in the picture. Winds will not affect the picture; an exit in 5kt uppers looks the same as an exit in 50kt uppers. There has been some friction over this issue. The 45 degree method has a lot of supporters because it's so simple and makes a sort of intuitive sense. Beyond that, it actually seems to work for some people - although it's likely that the extra time it takes to locate and stare at the previous group has something to do with the reason the next group usually leaves enough time. To show that this doesn't work, two cameras were fixed at a 45 degree angle and mounted on a boom outside an Otter's door (see pictures below.) Pictures and video of several jump runs both into the wind and downwind were taken and magnified to determine how close each group was to the imaginary 45 degree line, which was essentially the center of the images. The pictures confirmed the basic problems of the 45 degree rule. RW groups, falling a little faster than the aircraft, never quite passed behind the 45 degree line. Freeflyers, going much faster than the aircraft, stayed well below the 45 degree line for as long as they were visible in the stills (about 30 seconds.) Some version of the 45 degree method may work for some people. It may be that the simple act of looking out the door delays them enough, or their subconscious may see the group moving slowly along the ground (because the aircraft's groundspeed is low) and send a warning message to the rest of their brain - "hey, hold up a minute." But waiting for a true 45 degree angle simply does not work. Another issue that has become more important lately is exit order. Some places still put freeflyers out first, and that doesn't make much sense. In 30kt uppers, a belly flyer who leaves 10 seconds and gets out after freeflyer will open 100 feet from him, but if the belly flyer goes first and the freeflyer leaves the same time he will open 2200 feet from the freeflyer. RW groups, since they are in freefall longer, drift farther downwind before opening. It seems like a no-brainer to choose an exit order that used this to your advantage and increased, rather than decreased, separation distances. You can certainly wait 20 seconds after the freefly groups before the belly groups exit if there is some other reason why the freeflyers have to exit first, but at most DZ's it's hard to ensure that 20 seconds, especially since waiting so long almost guarantees long spots or a goaround. Below are two diagrams that show how exit order can affect separation. Belly out first diagram Freefly out first diagram One reason given at DZ's to explain a backwards exit order is that freeflyers open sooner and therefore are beginning to descend before the next group gets there. Bryan Burke of Skydive Arizona has pointed out that you simply cannot trust vertical separation - one premature deployment or malfunction and all that vertical separation is gone. Even during a normal skydive, when you add up altimeter error, pull timing and snivel distance, you can easily get a jumper opening 1000 feet from where he expected to be open. In fact, Bryan points out that at Skydive Arizona, the primary reason high pullers get out last is not for separation but rather because they are the ones that can make it back from a bad spot. Every drop zone is going to have a different set of rules and a different approach to exit order. Some work well, some don't work as well. Jumpers have to understand the factors that can reduce group separation so they can make informed decisions about when they want to exit and what kind of exit orders they are comfortable with.
-
 A jump ship at Perris airport was involved in a collision with a fuel truck on Wednesday 24 May 2017. According to official reports, the plane was in the process of landing when it hit the fuel truck, causing damage to the front and the wing of the plane. The aircraft then spun out of control, stopping just short of one of the building structures. Despite a hard collision with the truck, and extensive damage to the plane, there was no fuel leakage from the truck after the incident. Only minor injuries were reported by one of the two individuals on board, both of whom declined any medical treatment at the scene. The situation could have been different had the fuel tanker leaked, or had the plane been going any faster. The 1976 de Havilland “Twin Otter” DHC-6 suffered severe damage to both the right wing and the nose of the aircraft. It wasn't immediately clear whether the aircraft was being rented by the dropzone or whether it is owned by Perris. After the series of plane crashes in the past 2 years, this incident will go down as a best case scenario, with no fatalities or severe injuries. The information as to exactly what happened to cause the plane to collide with the tanker wasn't immediately published, and would likely warrant an investigation prior to any public information being released.
 -
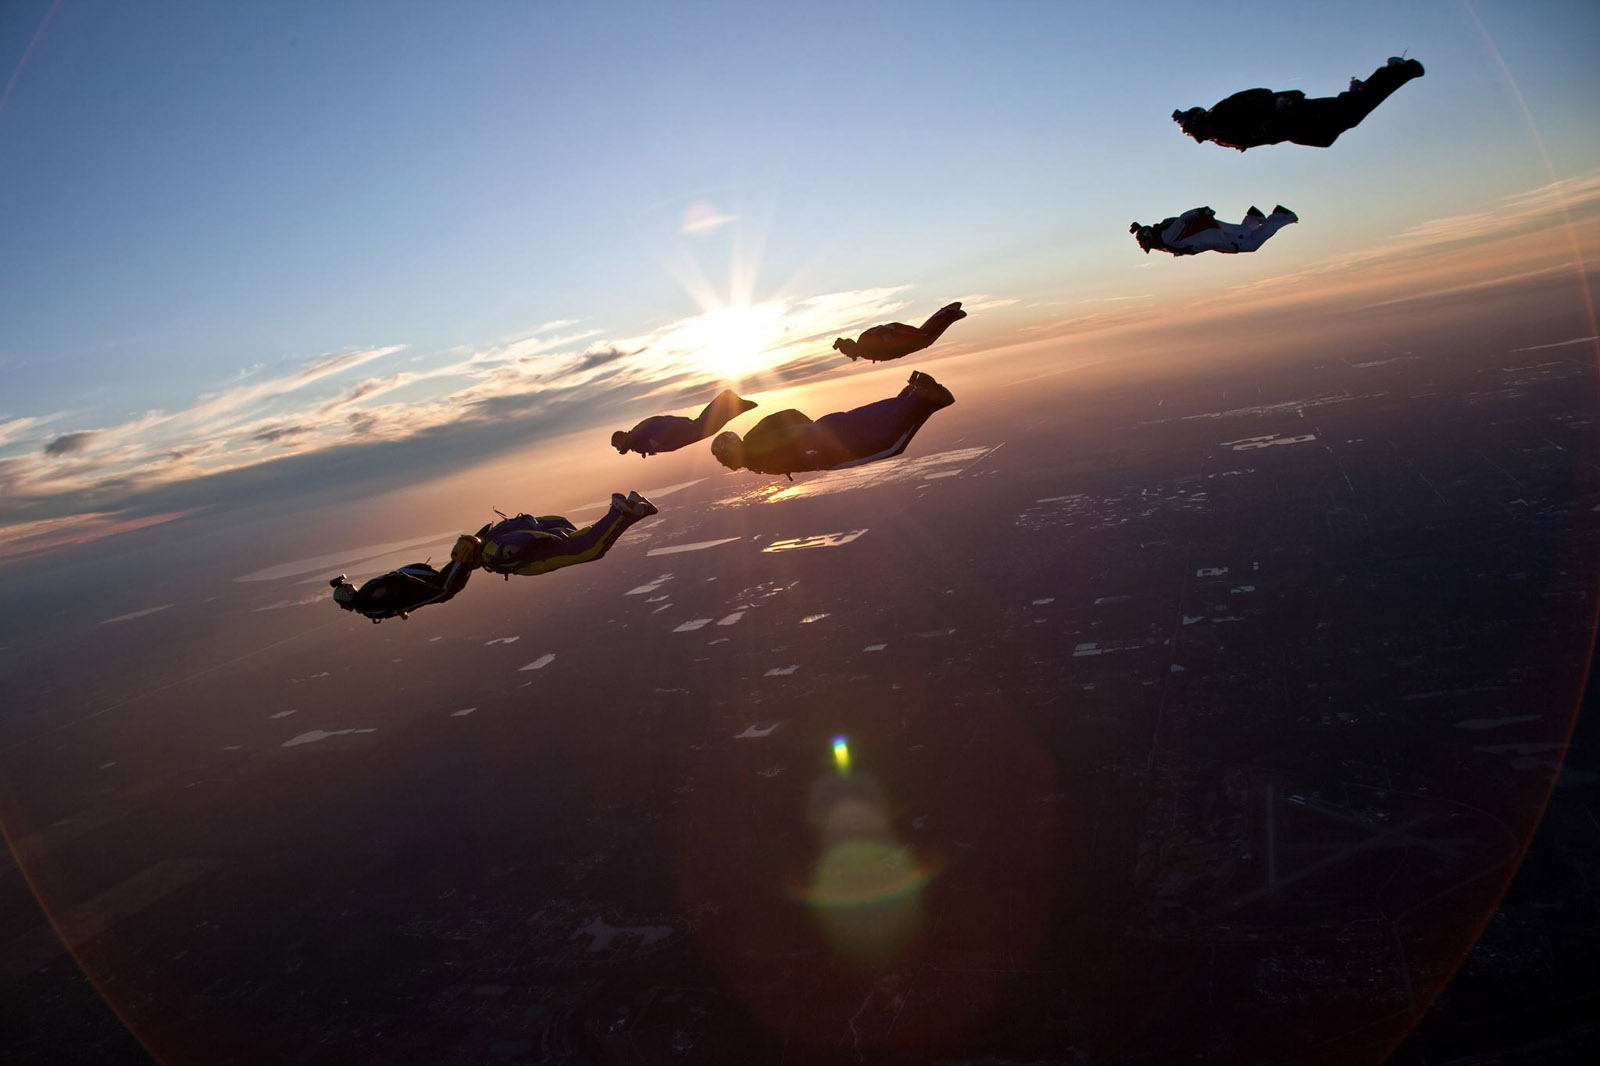 All Images by Scotty Burns Scotty Burns Breaks Down Your Pre-FJC Checklist Scotty Burns is a skydiver with fixed-wing pilot blood in his veins. He started skydiving on his 18th birthday, because his first commercial aviation gig--towing banners--included an obligatory parachute. He decided that he wanted to learn how it worked, just in case he had to use it. The rest, of course, is history. While today Scotty owns and operates the Flyteskool wingsuit academy in DeLand, Florida, his airborne specialties go far beyond inflatable nylon. For almost two decades, he’s held Commercial Multi-Engine Instrument Airplane (and helicopter) ratings, with a couple thousand hours of PIC (pilot-in-command) time. It’s his Wingsuit Instructor Examiner role that most folks in skydiving recognize Scott in most readily, however, as he’s spent the last ten years training over a thousand baby-bird wingsuit students at dropzones all over the world (and as the Wingsuit I/E for Skydive University). Scotty’s pilot-first-skydiver-also training techniques have helped to make wingsuit flying safer for everyone over the years--and, in the process, he has seen the good, the bad and the ugly when it comes to wingsuit wannabes. If you’re interested in the good and interested in avoiding the bad and the ugly, listen up. Scotty has a few things to say to you before you show up for that wingsuit FJC. Here it is--in his own words... Slow Your Roll A lot of the issues that we’re starting to see over and over these days point right back to the same root cause: rushing. People are really wanting to start flying wingsuits as quickly as possible, almost in spite of the rest of the sport. To save money, they’ll get in and do 150 hop-and-pops. They just jump their ass off for the numbers and don’t focus on building actual skills in freefall or under canopy. Their canopy skills are especially crappy, because hardly any of these guys have done any canopy coaching. They just want to get to jump number 200 and they assume they’ll figure it out. Round out your skills. One of the first things that I would recommend people do that want to get into wingsuiting is to laser focus on building a well-rounded set of skills, and to do so early. On your way to that first hundred jumps, learn all the other disciplines that you can. Go out and do a bunch of RW jumps. Learn how to turn points and do different exits, and get comfortable doing that. Learn how to do some head-down. Get into some angle flying and tracking jumps, because it is really going to help you learn how to control the air as you get further into your skydiving career. Flying a wingsuit is not an unrelated accessory to this progression. It requires all the work that comes before. That said: As you learn to fly a wingsuit, you are becoming a lot more of a pilot or an airman than you are a skydiver. There are a lot of differences between jumping with a wingsuit and jumping without a wingsuit. There are a lot of skills and experience that you need to have that you really don’t learn in any other form of skydiving. That is not an oversight on the part of your teachers; these skills are simply not necessary in other disciplines. Learn to fly your canopy, then your wingsuit. Your wingsuit is not how you land. Your canopy is. And in our discipline, it is much more common to have to land out, in a place you don’t want to--like someone’s backyard, or a parking lot--under a reserve, not so uncommonly. Statistically speaking, you are much more likely to get injured close to the ground in that wingsuit. Your ability to put yourself down safely in a place you wouldn’t normally want to go because you didn’t have any other choice is an extremely important skill. Get canopy coaching, and plan on the worst possible case scenario. Ease off the YouTube. Don’t spend your time watching every wingsuit video on Vimeo. It is cool and all, but it becomes a liability at a point. For instance: I had a student come out just the other day who has been working in the industry for a couple of years and has been waiting to start flying wingsuits. At my ground school, he was talking over me half the time and telling me what he had learned through all of these BASE videos that he had seen. He was acting unteachable. He is a really nice guy, but if he wasn’t in the industry, I would have had to tell him to go home. Take it easy. Then take it easier. Because one of the most important things about flying a wingsuit is your ability to relax, there is a huge difference between what most people see in videos before they learn how to fly and what they should actually be doing when they first put on that suit. There is a huge difference between what people do that are BASE jumping with a wingsuit--the decisions they’re making, and the gear they are flying--versus what somebody at 200 jumps is going to do. And it’s also important to remember that a lot of the guys in those videos are no longer with us. Some of the most talented human beings you would ever know or ever dream up. So what does that tell you? That means that it doesn’t take much to screw up, so you’d better take the long, thorough road. On that first jump, remember: You’re not trying to go out and break any records. You’re trying to make sure that you can get out safely and fly a pattern and pull with stability. You should aim to fly at 60 or 70%. You wouldn’t jump into a brand new race car and mash the pedal to the floor to get it out of the dealership. he amount of drag that you produce in that wingsuit versus the drag you produce on a normal jumpsuit is 6 or 8 times as much--easily--so it only takes about an eighth of the amount of input to get the same kind of response. The more you can relax, the better off you will be. Planning for Plan B is not optional. Planning for that worst possible case scenario has always got to be in the back of your head because it is going to happen. It might not happen today or tomorrow, but it is going to happen and it is probably going to happen at the worst possible time. Making sure that you have got that out is very important. Modern wingsuits are tiny little F16s without engines. It is really easy to find yourself miles away from where you were supposed to be. I have had to land in more people’s backyards than I care to admit to. Most of the time it wasn’t that I personally made a mistake; it was because shit just happens in this sport, and you have to be ready. You can make great decisions and still shit can go down. Then you end up having to rely on emergency skills that you had better hope are there. Keep it simple. Most people that are getting into it just want it so bad and they try too hard. If you can just relax and smile, listen to your coach and do as you were taught (and not what you learned from videos), you can keep yourself doing this for the next 15 or 20 years--versus being broken, giving up on it, or worse. It is incredible to see how far the wingsuiting discipline has come. It’s really sad that so many of our friends aren’t still around to see the changes. That’s why it is even more important for people to seek out the best information--and the best instruction--they can.