Search the Community
Showing results for tags 'canopy control'.
Found 29 results
-
untilThis live in person parachute flight safety course with Brian Germain, is one of the very best ways to gain both confidence and skill under canopy. This in person canopy flight skills and safety course allows for the added benefit of filmed and debriefed landings, specific questions and a customized approach. Topics vary depending on the group but may include, parachute aerodynamics, canopy control, dynamic maneuvers, flight safety, collision avoidance, flying in turbulence, navigation, patterns and accuracy, landings, advanced approaches, adrenaline management and other relevant topics. The focus of the camp is canopy skills, but it goes deeper than other courses because individual hanging harness training is performed to dial in your techniques, and discover if your harness requires adjustments. Brian does formation flights with as many participants as time allows, using an amazing two way communication system which also records the conversation to a camera used for filming the flight together. To find examples of these flights, offering an incredible opportunity to learn your individual parachute, Google or search YouTube for "Talking Skydives" videos. Brian gives everyone skill drills for each jump, films the landings and debriefs performance. Then he gives drills for the next jump that will help dial in the areas that need focus. Course participants typically do three jumps per day, weather permitting, usually from 7000 feet. The course is open to all levels, and Brian will field any question on any topic, so you can individualize the course. Brian adapts the course based on the need and experience of the group. The range of experience typically spans 25 jumps up to several thousand. This course meets the USPA B license requirement and is one of the best investments you can make to become a safer and more skilled canopy pilot. Reserve your spot and place your deposit here. https://www.adventurewisdom.com/store/Canopy-Course-Deposit-p170928506
-
Although there are many ways to improve one’s accuracy in parachuting, I have found no better way than flying a consistent pattern. By connecting a series of invisible points in the sky, “Altitude-Location-Checkpoints” as I call them, we can create a consistent flight path that makes us more predictable in the air, as well as significantly increasing our chances of landing on target. The typical pattern, made up of three distinct turn points, I will now argue is not quite enough to get to the target with the consistency we are looking for. The standard flight pattern for a ram air parachute involves a downwind leg, a cross wind leg, and an into-the wind leg, also know as the final approach. This pattern is defined by three distinct turn points, “A” (Base to Final), “B” (Downwind to Base), and “C” (pattern entry point). It is true that if we are prepared to modify our approach in light of new information along the way, we can hit the target. But wouldn’t it be nice to get there without needing to modify our flight path, to just sail along and turn when the altitude is right? That is exactly what the inclusion of a fourth turn point does. The trouble with the standard pattern is that there is a good deal of guesswork when it comes to the length of the Base leg. Depending on the glide ratio of the parachute, the location of the turn to Base leg will vary widely. The better the relative glide ratio, the farther the turn to Base needs to be from the target. Our ability to adapt to this changing environment is spotty at best, and often requires substantial correction along the way. This creates traffic conflicts, as well as varying airspeed and decent rate, making life far more difficult for us, and for the canopies behind us. In most cases, the length of the Base Leg needs to be longer than we think. This becomes an even more important issue for swoopers setting themselves up for a high speed approach. If the length of the Base Leg is incorrect, the pilot is forced to either float in the brakes or “S-Turn” prior to the initiation of the dive. This has consequences to the approach, even if they manage to reach the Initiation Point at the correct altitude. If they are flying significantly faster than usual when they arrive at the initiation point, they may lose much less altitude in the turn due to the increased front riser pressure upon initiation. If they are flying significantly slower than usual, they may lose a much greater amount of altitude in the turn, and find themselves hooking into the ground. It is my experience that, aside from the altitude of the Initiation, the selection of the “B” point is the most important aspect of a high speed approach. If we simply add another checkpoint prior to the entry into the Downwind Leg, we can take the guessing out of the process. Assuming that the turn points are equidistant in altitude (300, 600 and 900 feet), we can simply add another unit above the original pattern entry to create a fourth, or “D” point, precisely on the wind-line, upwind of the target. What this does is, it creates a Pre-Base Leg, which shows us exactly how long the Base Leg needs to be. In other words, if the altitude between the points is 300 feet, the “D” point is at 1200 feet. The beauty of the data that this “D” point brings us is, we discover the exact length of the base leg without choosing the precise location of the “B” point prior to exit. This means that we can fly this pattern at a new drop zone, or when we are landing off, and learn where the altitude-location-checkpoints are for that specific landing area. It doesn’t help us with the “depth” of the pattern points, but it puts us in the ballpark, assuming that we have a rough idea of our canopy’s glide ratio. When the winds pick up, this method still works perfectly well. The crab angle on the Pre-Base Leg is equivalent to the angle of crab on the Base Leg. Note that the horizontal distance of the offset from the target on the downwind leg on a windy day is exactly the same as it would be on a no wind day (A to B = Anw to Bnw). This is only true if we do not compensate for the side-slip of our ground track due to the crosswind legs. However, even when we do choose to compensate for diagonal crabbing on the base leg and create a “Holding Crab”, if we create the same crab angle on the Pre-Base Leg, we end up on the perfect final approach despite the complex situation. This is easily accomplished by simply making our goal to fly a box pattern on the ground, flying our Pre-Base and Base Legs perpendicular to the wind-line. Also note that the length of the base leg is longer on the No Wind condition than it is on a windy day on which we perform a Holding Crab on the crosswind legs. This is due to the reduced groundspeed when in a Holding Crab, and the diminished glide ratio that comes as a result of it. If you aren’t pointed where you are going, you will not move there quite as quickly. This method assumes something that many canopy pilots do not have: a trustworthy altimeter. A standard dial-type, analog altimeter is not sufficient to give us the kind of accuracy we are looking for. Even the digital dial-type is not usually graded in such a way that we can distinguish units of one hundred feet or less. These are freefall altimeters. For the precise data required by today’s canopy pilots, we need digital altimeters with digital read-outs. Even better, many of us have found, is the heads-up advantage of an audible altimeter designed for canopy flight such as the Optima and Neptune. If you have an audible alert telling you where you are, it is far easier to keep your eyes looking outside the cockpit and on the action that may require your instantaneous reactions. All that being said, your eyes have ultimate veto power. If things do not look right, your instruments must be ignored. Too many skydivers have hit the ground due to complete faith in their instruments that let them down due to mechanical problems, battery issues or some unconsidered technical malfunction. Assuming that you use this accuracy technique the way it was intended, and you notice what is happening as it is happening, you can take a huge step forward in consistently hitting your target runway. It will take a while to dial-in your approach so that you actually hit the target, but the target is always a secondary goal to hitting the centerline of the runway and turning to final at a reasonable altitude. If you plan your pattern well, using four distinct points along the way, you can change what you are capable of handling as a canopy pilot. Not only will you feel better about yourself, you will increase the likelihood that you will live a long, healthy life. That, of course, is the mark of a great skydiver. In addition to being a highly experienced skydiver with over 14,000 jumps, Brian Germain is the author of several books including The Parachute and Its Pilot, Transcending Fear, Vertical Journey, and Green Light. He is currently designing canopies for Aerodyne Research, and offers canopy flight courses worldwide. For more about Brian’s Books, Seminars and Parachutes, visit his websites: www.BigAirSportz.com and www.TranscendingFear.com
-
 While I was an S+TA, I spent a considerable amount of time telling people they shouldn't be loading their canopies so heavily. 90% of the time it didn't work. Skydivers can have a bit of an ego, and when I told them they probably shouldn't downsize yet they heard "I think you're a crappy canopy pilot who can't handle a smaller wing." So they downsized and broke their legs, backs and pelvises with some regularity. A few years back I met up with Brett, one of the people I'd been lecturing to whle I was an S+TA. He told me that he wished he'd listened to me back then. He had broken his femur during a botched landing, been out of the sport for a while, and then came back and really learned to fly his canopy. He took a canopy control course and actually upsized to get more performance out of his canopy. He ended up coming in first in one of the events at the PST that year. That started me thinking. Maybe the approach I was taking was wrong. Since jumpers tend not to listen to other people who tell them they're not as good as they think they are, perhaps if you could give them better tools to evaluate themselves they could make better decisions about canopy choices. It's one thing to have some boring S+TA guy give you a lecture about not having any fun under canopy, quite another to try to perform a needed manuever under canopy - and fail. In that case there's no one telling you you can't fly the canopy, it's just blatantly obvious. So I came up with a list of canopy control skills everyone should have before downsizing. Some are survival skills - being able to flat turn would have saved half a dozen people this year alone. Some are canopy familiarization skills - being able to do a gentle front riser approach teaches you how to judge altitude and speed at low altitudes, and how to fly a parachute flying faster than its trim airspeed, a critical skill for swooping. It's important to do these BEFORE you downsize, because some manuevers are a little scary (turning at 50 feet? Yikes!) and you want to be on a larger canopy you're completely comfortable with before trying such a thing. The short version of the list is below. Before people downsize, they should be able to: flat turn 90 degrees at 50 feet flare turn at least 45 degrees land crosswind and in no wind land reliably within a 10 meter circle initiate a high performance landing with double front risers and front riser turn to landing land on slight uphills and downhills land with rear risers Details: 1. Flat turn 90 degrees at 50 feet.This is the most important of all the skills. The objective of this manuever is to change your direction 90 degrees losing as little altitude as possible, and come out of the manuever at normal flying speed. Coming out at normal flying speed means you can instantly flare and get a normal landing. If you can do this at 50 feet, and come out of the manuever with normal flying speed at 5 feet, you can flare and land normally. Every year people die because they decide they simply have to turn at 100 feet and know only one way to do it - pull down a toggle. The parachute dives and they hit the ground at 40mph. To prevent this, not only do you have to know how to flat turn, but you have to practice it enough that it becomes second nature. Then when you do need it, you won't have to think about it. To pull off this manuever, start by toggle turning the parachute gently. IMMEDIATELY follow that with some opposite toggle. The idea is that you want to flare just a little to counteract the canopy's desire to dive. Continue adding opposite toggle until you've stopped the turn. At this point let both toggles all the way up. If you feel the parachute accelerate after you let go of the toggles (i.e. it feels like you just flared) use less opposite toggle next time. If you feel like the parachute is diving, like you just did a toggle turn, use more opposite toggle next time. Basically you want to start the turn with one toggle, stop it with the other one, and use just enough toggle to keep the wing from diving but not so much that it does a flare. It should go without saying that this manuever should be practiced up high before you ever try it down low. If and when you do try it out low, start at lesser angles (i.e. try a 15 degree turn first) make sure the pattern is clear and make sure conditions are good (soft ground, good winds.) Work up gradually to a full 90 degree turn. I do think it's important to try at least a gentle flat turn very low; we are horrible judges of exact altitudes when we're at 1000 feet, and it's hard to tell if you've lost 50 feet or 200 in a turn. By trying it out down low, you'll get a better sense of what it can do for you, and you'll have the "sight picture" better set in case you have to use it for real one day. A variation on this is to go to half brakes and then let one brake up. This gives you a flat turn, but by flaring first you "use up" some of the canopy's energy so you can't turn as effectively. On the plus side the turn happens more slowly. If you are about to hit a tree and want to make a last minute turn, this variation might be the way to go, as it combines a turn and a flare, thus reducing your speed before impact. A version of this is currently taught in the ISP, so it might be a good way to make your first flat turns before transitioning to the less-braked variety. 2. Flare turn at least 45 degrees.This does two things - it gives you another tool in your arsenal to dodge last minute obstacles, and teaches you to fly your canopy all the way through to the landing. The #1 mistake jumpers with new HP canopies make is to "reach out to break their fall" while they're flaring; this of course turns the canopy in the direction they are reaching. Most people decide that this is due to a side gust just as they're landing. I remember one jumper at Brown who, amazingly enough, experienced a side gust seconds before he landed (and always from the right) 40-50 times in a row! Learning to flare turn will help eliminate this problem. To flare turn, start with a normal flare, then flare slightly more with one toggle. The canopy will turn. Bring the other toggle down to match it, and the canopy will straighten out. It's a dynamic process; rather than put the toggles at a certain position, you have to speed up one toggle for a second, then speed up the other to match it, before you level them and finish the flare. If you balloon upwards, then don't flare as quickly. If you drop to the ground, bring both toggles down more aggressively when they are 'split.' One thing that helps people is to think about where your canopy is rather than what it's doing. Use the toggles to put it off to one side for a moment, then use them to put it back over your head. This can be hard to practice with a large canopy. I can pull off a 45 degree turn on a Manta, but the flare is over so fast that it's hard to explain what I just did. It's much easier on a canopy loaded around 1:1, so you may want to wait on this one until you get to that loading. Note that if you combine a flare turn with a flat turn, you can pull off nearly a 180 degree turn at just above 50 feet. Also note that knowing how to do flat and flare turns doesn't mean you can always turn at 50 feet and get away with it - sometimes it's better to accept a downwind landing than make a turn at a dangerously low altitude. But if you do have to turn low (say, you're on course for the electrified fence around the pit bull farm) a flat/flare turn will let you either turn and land normally or turn and minimize the damage caused by landing in a turn. 3. Land crosswind and in no wind.These are straightforward. No wind landings are pretty easy; the only issue is that your perception of speed and altitude will be off. Since you seem to be moving faster over the ground when there's no wind (which you actually are) it can seem like a good idea to add just a little brake to 'slow you down' before you land. Resist that urge! Keep that speed in your canopy; you can turn the speed into a good flare only if you start the flare with decent (i.e. full flight) speed. Crosswind landings can be a little more tricky because of that strong tendency to want to "reach out to break your fall." Counter this by flaring with your hands in towards the center of your body. You may have to PLF on these landings, since you'll have some decent forward speed and have some sideways motion from the wind. If you want to get fancy, try a flare turn after you start your flare on the crosswind landing - you can easily pull off a standup landing if you get turned enough before you put your feet down. If these work well you may want to try a downwind landing. The benefit to doing that is it will prepare you to accept a downwind landing in the future; you won't be tempted to turn too low to avoid it. Choose an ideal day for this one, with a slippery landing area (wet grass is perfect) low winds and a clear landing area. Prepare to PLF, and think about "laying it down" on your thigh as you land to start sliding. You can slide across grass at 30mph without getting hurt, but planting your feet and cartwheeling at those speeds can be very dangerous. 4. Land reliably within a 10 meter circle.This is essentially the PRO requirement. This is critical because your accuracy skills are what will keep you from having to turn low. It's very comforting to know that you can land in any 50ish foot clearing if you find yourself having to land out; it's especially important as you get to smaller canopies that need longer and longer runways to land well. Your only option may be a section of road, and you may have to hit the beginning of the road dead-on to have enough room to slow down. The subject of canopy accuracy is too long to do justice to here, but the top 3 hints I've heard are: - If you're not sure if you're going to make it over a wire or tree, look at what it's doing with respect to the background. If more background is appearing from beneath the wire or tree, you're probably going to make it. - As you look at the ground, most points will seem to move away from a central point. Some will rise, some will fall, some will go out to the side. If you look long enough you'll find one point that's not moving - that's where you're going to land if the winds don't change all the way in (which is rare.) - Going into brakes usually makes you land short in high winds, but can extend your glide in no wind. Front risers almost always make you land shorter. 5. Initiate a high performance landing with double fronts, and a front riser turn to landing.I am pretty convinced that front riser high performance landings are a lot safer than toggle turn high performance landings, and double fronts are the safest of all. If you do it too low, or become worried about the landing - just drop the risers and you're back to normal flight. For double front riser landings, set up a normal landing, aiming for a point a little farther away than you normally do. At 100 feet or so, pull down both front risers. Your canopy will drop and accelerate. At some point above the ground (30-10 feet depending on your canopy) drop the front risers. Your canopy will begin to recover. Before it completes the recovery to normal flight, you should be at flare altitude. Start the flare normally. You may need to use less toggle than normal, since the canopy is now going faster than you're used to, and the same amount of toggle gives you more lift. You will also plane out farther, since you have more speed you have to bleed off before you come to a stop. For front riser turns to landing, first try front riser turns out above 1000 feet and get used to how your canopy recovers. Then start by coming in 10 degrees off the windline, and making a gentle front riser turn to line up with the wind at ~100 feet. The canopy will dive and accelerate, so be prepared to drop the front riser instantly and flare if you have to. Also be prepared to steer in the flare, since the canopy may not have stopped turning completely before the flare begins. Done correctly, you'll start the flare with more forward speed, giving you a longer planeout. Make sure your flares are smooth for this! A smooth flare generates more lift for a longer period of time than "stabbing" the brakes. However, don't start the flare at 30 feet - starting the flare that high will slow the canopy down, negating the effects of the front riser approach. If you do find yourself stabbing the brakes to prevent hitting the ground, move the altitude at which you start front risering up. Probably the most critical skill you will get from this exercise is the development of the "sight picture." Below 200 feet your altimeter is pretty useless, and you should be looking at traffic and the landing area anyway. Eventually you'll develop a sense of what "picture" you should see just before you start that riser turn. The picture will vary with wind, landing area etc. If you arrive at the point where you would normally start the front riser turn, and the picture's not right - abort it and land normally. Once you have the picture down, and are doing front riser turns that transition to gradual flares, then start increasing the angle. Once you get to 90 degrees you're going to be gaining a lot of speed, so be sure to adjust your sight picture up to compensate. As always, bail by dropping the risers if you feel like there's anything wrong. Once you drop the risers, level the wing with your toggles and prepare to flare. At worst you'll have to land crosswind - but that's a skill you should have by this point anyway. 6. Land on slight uphills and downhills.Often, land away from the DZ isn't perfectly flat; sometimes you can't tell this until you're at 20 feet. To prepare for this, find a place in your LZ that's not perfectly flat, scope it out, and plan on landing there. There's not too much magic concerning landing on a slope. You flare more aggressively to land going uphill, less aggressively to land going downhill. Obviously not all DZ's have slopes. If you don't have a good slope on your DZ somewhere, you may have to put this one off until you're at a DZ that does have one. Beaches are a good place to practice this, since they have pretty predictable slopes down to the water, and overrunning the landing just means you get wet. 7. Land with rear risers. Knowing how to land with rear risers can help you deal with a canopy problem like a broken or stuck brake line, and can help you make a better land/cutaway decision when you do have such a problem. Again, this is best practiced up high. See how far you can pull the rear risers before the canopy stalls. It will stall much earlier with rear risers; memorize where that happens so you don't do it near the ground. When you try it for real, choose an ideal day - steady moderate winds, soft ground, clear pattern. Be sure to try this for the first time on a largish canopy (one of the reasons you should do these things before downsizing.) Leave your hands in the toggles and wrap your whole hand around the rear riser. That way if things go awry you can drop the risers and flare normally. Start the flare at a normal flare altitude, and prepare to PLF. You may get the sort of lift you're used to, but you probably won't slow down as much before you're near that stall point. Make sure your feet are on the ground (sliding preferably) before you get there. On smaller canopies, you may want to start the flare with rear risers. Then, once the canopy is leveled out, drop the risers and finish the flare with the toggles (which are still around your hands.) That way you get your vertical speed to zero, which is the critical part of a safe slide-in landing, and can still stop the canopy without hitting the ground going too fast. (This is also a technique used by swoopers to extend their swoops BTW.) The above list is not meant to include all the skills you need to safely fly a canopy; it’s just a checklist for a cross-section of skills you should have before downsizing. Some of these will be easier on a larger canopy, and can be practiced right away. Landing downwind, for example, is easier on a larger canopy simply because it can slow you down more before stalling. Some skills are more difficult on a larger canopy. It can be difficult to get a planeout at all on a larger F-111 canopy, so practicing things like a flare turn may best wait until you approach a 1:1 loading on a ZP canopy. At that loading, the canopy begins to perform more along the lines of how we expect a HP canopy to fly. More importantly, skills like the flare turn become both possible and necessary to practice, so you can hone your skills while you are under a canopy that tolerates minor mistakes. As I mentioned in the beginning, these are skills you should learn before you downsize, although some (like the flare turn) can be difficult to practice at very light loadings. If you can't do some of them yet? Get some coaching; it makes a lot more sense to learn them on your larger canopy, before you start jumping a smaller canopy that scares you. Once you can do them all, then try the smaller canopy. And if someday someone cuts you off under the smaller canopy, you'll have the reactions you learned under the larger canopy. Even if you haven't completely adapted those manuevers to the smaller canopy yet, those reactions will more likely than not save your life.
- 2 comments
- 9
-
- 1
-

-
- canopy control
- safety
- See more
-
 At the end of the day, skydiving is a dangerous sport. I’ve lost many friends and even family members– under properly functioning parachutes. We can’t regulate stupid behavior, but we can at least spread good information so more people can make wise decision. So why would someone consider upsizing? 10. Cannot land consistently standing up. If you’re having troubles standing up consistently or even in the same area in all weather conditions, then you need to upsize and take a canopy course to understand the concepts basic flight characteristics. 9. Not current. You can be uncurrent after a winter vacation without skydiving, coming off an injury or just life getting in the way. According to USPA, you are uncurrent if: A-license holders who have not jumped within 60 days B-license holders who have not made a freefall skydive within the preceding 90 days C- and D-license holders who have not made a freefall skydive within the preceding six months DZ policy: Every DZ has their own policy for uncurrent skydivers. Be sure to check in with them before coming out to the DZ to see what you may have to do. Also check the USPA Skydiver’s Information Manual for more info. 8. Jumping at a Higher Elevation. At higher elevations the canopy is going to perform faster and act more responsive because of the air being less dense. So landings will feel faster and turns will feel more aggressive. If you’re traveling to places like Colorado or Utah, you may want to pack a larger canopy. 7. Gained Weight/Wearing Weight. Well, what can I say? Sometimes during the winter, it’s easy to pack on some pounds and that invariably negotiates your wingloading. Also, if you haven’t jumped all winter and you’ve accumulated a new wingloading, you may want to consider getting current on a bigger canopy. Next, if you’re a small girl, or decide to get on a 4-way team, you may be wearing weights. This added weight will definitely make your canopy fly differently than expected. So before making a decision on what canopy to buy or whether or not to downsize, consider the use of weights to make the best wingloading decision for your experience. 6. Reserve Size. Generally, your main and reserve should be about the same size. If you were quick to downsize or couldn’t find the right sized container, but have a larger reserve, with little experience under a bigger canopy, may be a good reason to upsize your main. (Having the same sized canopies also reduces other problems should 2 canopies out occur.) 5. Types of Jumps. Doing big ways? Wingsuiting? Demos? Some jumps may warrant a bigger parachute. When I do world record jumps, I usually opt for my bigger canopy so I’m not fighting my way through traffic and have a larger range of floating. Wingsuiting can cause line twists or other malfunctions and jumping a more docile canopy can help you negotiate them better. On demos, having a lower wingloading will give you more range to negotiate smaller landing areas or areas surrounded by obstacles – as long as you understand the flight dyamics of your wing. 4. Age/Health/Agility. Take an inventory of your overall health. How are your knees? Wrists? Ankles? Eyesight? Depth perception? Reaction Time? These may be considerations to upsize. 3. Attitude/Experience. Someone’s overall experience and attitude about the safety of themselves and others is a vital component in skydiving safety. Disregard for your own experience and/or safety is an obvious sign to upsize. 2. Because You Downsized and You Shouldn’t Have. Having inconsistent landings? Not standing up your landings? Stabbing out your flare? Landing by touching down on your knees first then popping up to your feet thinking it was an awesome swoop? Spiraling in traffic cause it’s freakin’ fun on a small canopy when not necessary? Scared of line twists? Having a hard time kicking out of line twists? Not paying attention to others in the sky? Land downwind for fun? Don’t follow a landing pattern? What the hell is a landing pattern? Don’t understand the flight characteristics of your wing? Pretty much don’t follow the rules? 1. Finally, if you cannot answer yes to all of these questions, you need to upsize: Can you land your main crosswind? Are you comfortable landing crosswind? Can you land your main downwind? Are you comfortable landing downwind? If you had to land out and the only option was a tight area surrounded by obstacles, do you know you could land your canopy accurately? Do you feel that you completely understand the flight characteristics of your wing? Do you understand what happens to the flare, landing pattern, stall characteristics and overall flight characteristics when you downsize? Have you used your rear risers & do you know why and when you’d need to use them? Have you used your front risers & do you know why and when you’d need to use them? Have you performed braked turns? Braked turns for landing? Can you land within 10 meters of a target center at least 5 times in a row? Did you take a canopy course beyond the B-license requirements? When I first started skydiving, I was young and pretty much invincible. I was on the fast track to get on a small canopy and go fast! And it’s all fun, until you get hurt or you watch someone die. I’d seen a lot of crazy things (especially people “getting away” with bad decisions) in my 20-year career, but in 2003, I witnessed my father’s fatal canopy collision. Then without your permission, things change. It’s amazing how death will completely transform your perspective on safety, especially when the sport is your livelihood. We spend more time under canopy than we do in freefall, so this is a moment to check in and evaluate how much canopy education have you gotten? My dad used to tell me, “take stock into your destiny.” So, take that Flight 1 course you’ve always wanted to, finish your B-license canopy training, ask questions, and just know, there ain’t no shame to upsize that thang! How at risk are you? Below is a canopy risk calculator that was created by the USPA, which can give you an idea of just how big of a safety risk you're at with your current canopy and experience level Calculate My Canopy Risk Useful Resources Barry Williams on Canopy Safety (Skydive Elsinore 2013 Safety Day) [Video] Barry Williams on Canopy & DZ Safety (Skydive Elsinore 2012 Safety Day) [Video] Performance Design's "Survival Skills for Canopy Control" Contributors: Melissa Lowe, Barry Williams and Jason Moledzki
 -
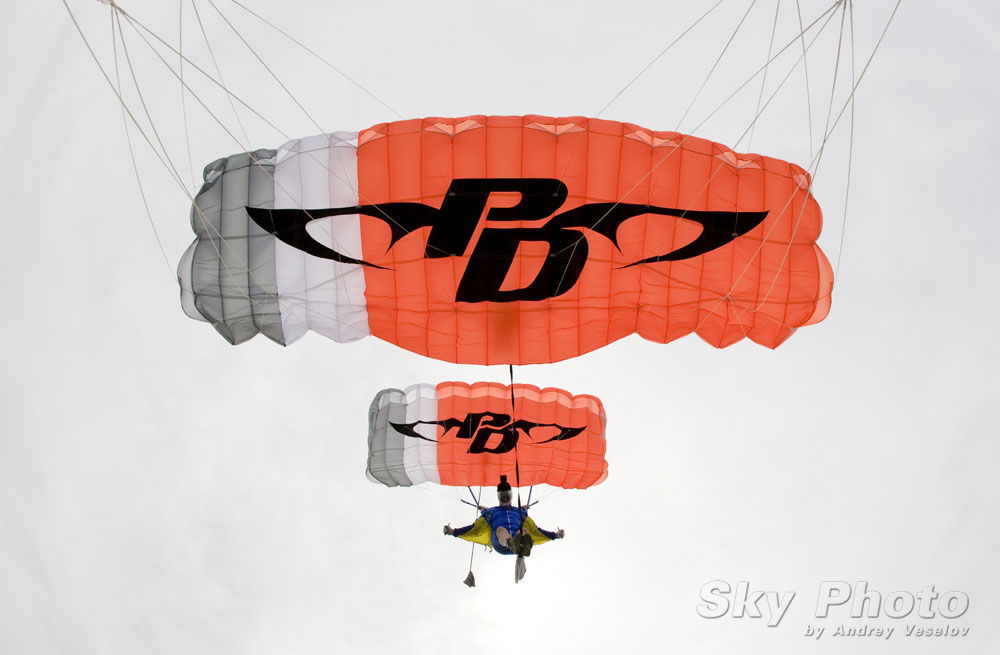 Image by Andrey VeselovStalling For Success: What You Don’t Know About Stalling Your Canopy Could Smack You. Hard. This, suffice it to say, could end badly. There was a balloon jump. (Whee!) The winds picked up at around 3,000’ and shoved your jolly crew rather far off-DZ. (Um…) You jumped anyway. (Whee!) You over-rotated your super-magnificent aerial and pulled a titch lower than you wanted to. (Um…) Your landing options are now -- well -- limited. And a little heavy on the obstacles. And kinda tiny. And now you’re on final. (Uh-oh.) Do you know where your stall point is? Probably not. Right about now, I bet you wish you did. In this regard, skydiving is unusual. After all, stall training is a foundational part of the training process in other air sports (paragliding, specifically), and there’s no question it’s vital. Considering how important it is to know the exact point at which your equipment stops flying, it’s surprising how few skydivers – even advanced ones – have seriously investigated the stall point of their canopies. Perhaps this is because the transition between the very-slow-flight and no-flight modes produces a stomach full of butterflies. It could also have something to do with the fact that skydiving canopy rides are much shorter than paragliding flights -- and, because the skydiving canopy is trimmed to fly down instead of up, comparatively easy to fast-forward. No matter what the root cause, the fact remains: knowing your stall point is an essential component of safe and skilled canopy flight. And there’s probably a lot that you probably don’t know -- yet. Here’s the skinny. 1. You aren’t really in control up there.Sorry, buddy. Without understanding your system’s stall point, you are not in full control of your wing. Most notably, you’re at a significant disadvantage during the landing process, as the execution of a flare is the approach to a stall in very close proximity to the ground. 2. It’s not about slow flight. It’s about no-flight.The lion’s share of ram-air canopy pilots believe that the definition of a stall is directly related to slow airspeed – that the “stall point” is when the canopy is flying too slowly to produce lift. Sound familiar? Yep. Unfortunately, while it often ends up being the case in practice, this isn’t actually true. The true “stall point” is defined as the moment when the parachute is no longer producing lift, no matter what the airspeed when you enter the maneuver. Bear with me here, because this has bearing on your jumping career. When a ram-air airfoil reaches an excessive “angle of attack,”* a stall results. As relative wind moves over an airfoil, it “curls” over and downward to create lift. However, when the pilot adjusts the airfoil to a higher angle with respect to the relative wind – often, but not always, by pulling hard on the brakes – he or she is effectively building a nylon wall against that relative wind, making it harder for the relative wind to follow its usual path and create lift. Finally, it reaches a point where it can’t. At any point that the angle of attack reaches that point, no matter what the airspeed, the pilot has a stall on his or her hands. When you understand the stall as a function of AoA, you can easily see how a ram-air airfoil can stall at high speed as well as low speed. This leads to an important fact: a higher-loaded wing will stall at a higher airspeed than its more lightly loaded counterpart. This is just another of the galaxy of reasons why it’s important to downsize your canopy thoughtfully and knowledgeably. 3. You can choose your own adventure.Initiating a stall for the first time is not unscary. Don’t just stab the brakes and cross your fingers, though: manage the process. The rodeo quality of the stall depends on the type and sharpness of the inputs you use to get into it, and on your technique for stall recovery. Stalls entered using slow inputs tend to initiate a stall from slow speed and slight sink, making the stall more docile than those entered using quick, brutal inputs. The more aggressive and uneven you are in your entry, the more likely you are to introduce a bank angle at the entrance of the stall. This will stall the lower wing first, which can often result in a spin (and, maybe, line twists) during recovery. Another bit of advice: Don’t just reach for your brakes. Jumpers tend to initially experiment with stalls by monkeying around with their toggles – mostly, because they’re more familiar with those controls. That’s not really the best idea. Though rear-riser stalls “kick in” more suddenly than stalls initiated with the brakes (as they profoundly and quickly change the shape of the canopy using the C and D lines), recovering from them is smoother and easier.** ...and, of course, pull high. The “lab” is up at a nice, cushy altitude. Make sure to stop your experiments with a lot of margin between you and the dirt. 4. You don’t have to go it alone.Look at your canopy’s manual to familiarize yourself with the stall dynamics you can expect from it. If there’s no information regarding stall behavior in the manual, contact the manufacturer and ask about it. They’re happy to help. So are canopy coaches. Ask, ask, ask. Then you might not have to ask the farmer to disentangle you from the fence, collect your scattered dignity and help you hobble to the road. That’s worth it, no? Here’s a great little video by AXIS Flight School that demonstrates a rear-riser stall. In this video, you can closely inspect the canopy’s reaction to the stall input. *The angle of attack, or AoA, is the angle between the cord line – visualized as a straight line between the leading edge and the trailing edge – and the relative wind that the airfoil is moving through.
 -
 How to Avoid Spinning Malfunctions Image by Oliver NöthenAh, to be swung madly around the ballroom of the sky. If you like that sort of thing, of course. Most of us, y’know, don’t. Even though they’re eminently preventable, spinners remain a very statistically significant cause of cutaways. There’s good news, however: A little attention will go a long way towards making sure you aren’t dancing downward under a misbehaving main. Here’s how to get your body, brain and gear set up right. 1. Are you bungling the basics? If spinning mals come up more than occasionally for you, consider whether you need to send yourself back to packing (or body-position) school. Might be the case. 2. Are you just being loopy? Back when side ponytails were sexy and just about everything smelled like Teen Spirit, the skydiving industry used Velcro to secure toggles to risers. When manufacturers made the switch to the velcro-free designs we see now, they forgot about something vitally important: the long, floppy bights in the steering line that were now suddenly exposed to the rodeo ride of the deployment process. Those mile-long bights took the opportunity to lasso anything they could. A particular favorite: hands. One misplaced toggle grab, and a skydiver could easily find him/herself in a compromising bondage situation with their control lines. The bights happily welcomed guide rings into the act. It was a ready-made recipe for a super-solid spinner, and it was ugly. Soon, every single manufacturer’s rig designs had integrated line stowing features (“keepers”). There’s a reason the changes were made: as a jumper, you need that line tucked safely away until you’re good and ready to release the brakes. That said: Many of those old risers are still around, unmodified. Even more bafflingly, some skydivers don’t bother stowing the lines during the packing process (presumably, to save 20 seconds or so). If that’s you, you know what to do. And if you have Velcro on your risers, for the love of god check it for airworthiness. 3. Are your cat’s eyes conspiring against you? Toggles love the cat’s eyes of brake lines. They dive at the chance to snuggle and lock in a spinny embrace. It’s no wonder that’s the case: after all, their relationship is really hot. The heat that’s generated by the slider’s travel over the lines has a shrinking effect on the system, creating a kind of Chinese fingertrap for your toggle seating. With one toggle in and one toggle out, you’re going to be going for a ride. A rigger can quickly suss out if your cat’s eyes are in good shape: big enough for the toggle to pull out smoothly, but not so capacious that the toggle’s fat bits can pass through. If they need replacing, do it. 4. Do you know when to let go? Spinning malfunctions are sneaky bastards. For all their preventability, they have killed people. Make no mistake: Once you’re looking at one, you need to take it seriously. The most important thing you need to remember is this: a spinning malfunction is not a line twist. When you’re under a docile, level main that’s flying cheerfully along as you swear at it, you’re looking at a line twist. When you’re not directly below a canopy that’s flying level -- when it’s flinging you outwards as it heads for the ground -- you are on the business end of a spinner. The first is an inconvenience. The latter is a mal, and you’d better get on it. As wing loading increases, so does the violence of the spin, and the likelihood that you’re going to kick out of it quickly dissolves. So: Don’t fight it. Just get rid of it. Take some quality time with your reserve. You’ll be glad you did.
 -
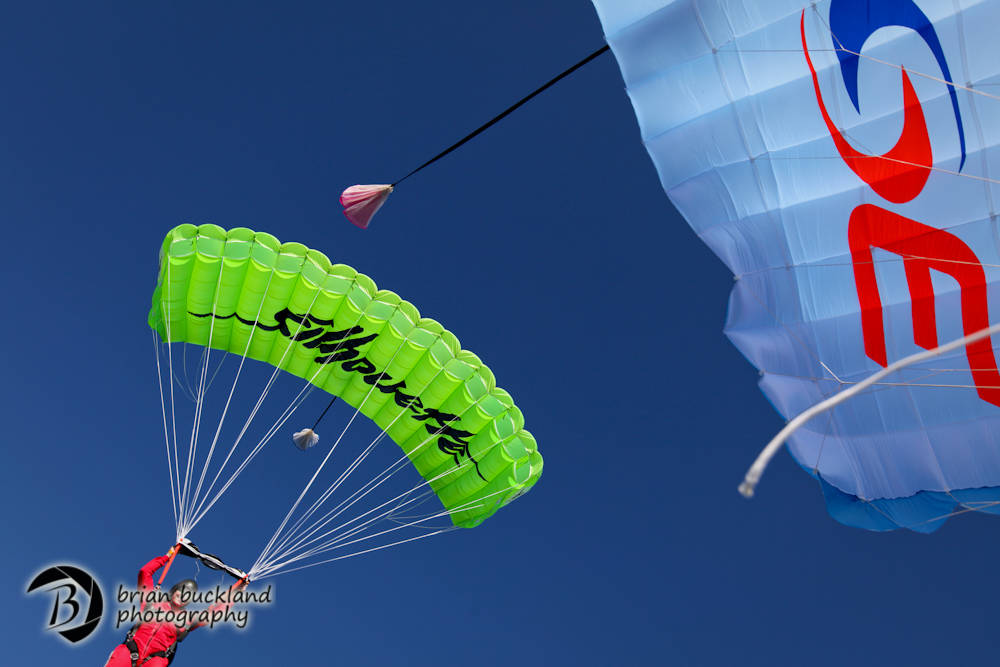 Image by Brian Buckland It is common knowledge that wing-loading has profound effects on the way parachutes perform. Furthermore, it appears that even if the wing-loading is exactly the same between two otherwise identical parachutes, different size canopies fly quite differently. In other words, if you fly a 210 square foot parachute of a given design with lots of additional weight to achieve a loading of say, one pound per square foot, a 150 at the exact same wing-loading will usually have a steeper glide ratio, faster turns, and demonstrate a longer recovery arc following a high airspeed maneuver. This means that, regardless of the wing-loading, all small canopies are high performance, and should be treated accordingly. There are many explanations for this non-linear relationship, and in this article I will discuss some of the most significant governing variables. Test flight data shows us that small wings, regardless of wing-loading, will be more radical than their larger counterparts, all other design aspects being equal, however the degree to which they are different depends of the model of the canopy. Nevertheless, the trend is consistent and predictable. The most common explanation for these differences is that it is due to differences in line length. Smaller canopies do have shorter lines on the whole. Although it is true that some aspects of a parachute’s performance increases as line length reduces, this only applies to mobility about the roll, pitch and yaw axis. The effects on recovery arc tend to have the opposite response to line length. In other words, a parachute with longer lines tends to exhibit a longer recovery arc. To explain these counter-intuitive effects, we must look elsewhere for an explanation. The other aspect, previously unconsidered, is the relationship of the canopy's internal volume to its surface area. Essentially, the volume displaced by the airfoil can be thought of as a key aspect of the overall DRAG. Of course the shape of the wing itself is vitally relevant to the drag coefficient, but for the purposes of this discussion, let’s focus on the effects of drag from the perspective of simple air displacement, like a footprint in the sky. The fatter the airfoil, the more drag it will exhibit. This means that a “fat” parachute will sit at a higher angle of attack in full flight, based on the balance of power between the airfoil's drag (D1) and that of the suspended load, the jumper (D2). Further, the drag value of a “fat” airfoil will increase markedly with airspeed, and therefore large objects will suffer more drag than “skinny” airfoils at high speed. The wing, therefore, will “want” to return to the overhead position more aggressively on fatter airfoils, as a general rule. Let's take those aerodynamic principles to the realm of parachute sizing. When a parachute design is scaled, for the most part, the entire wing is scaled simultaneously. This is the same geometric progression as a matchbox car: same three dimensional proportions, but a different size. When we want to make a parachute larger, we simply multiply each dimension by a “scale factor”, a single number that will result in the size change we desire. When we apply this mathematical model to parachute designs, we create an unwanted effect: disproportionate scale factors relating to area and volume. Simply put, the number we use to scale the parachute is based on the "square footage" of the wing, and this is of course, a square function (X²). The volume on the other hand, is governed by a cube function, (X³). This means that when we increase the height of the rib at the same rate as the span and the chord, we inadvertently make the wing too fat as we scale upwards, and too thin when we scale down. This is one of the reasons why a 120 flies very differently than a 170, even at the exact same wing-loading and body drag component. The wings only appear to be the same, but they are most decidedly not the same from a volumetric perspective. So, one might say, why don't we make the height of the airfoil on smaller wings greater, and that of larger wings smaller, proportionately? This is sometimes done and it works to a certain degree. However, if we were to search for a formula that would allow us to scale the volume at the same rate as the area, we would have to keep the rib height the same on all sizes of a design. I worked this out with a brilliant Tasmanian mathematician on flight back from Sydney many years ago. A 120 with the same rib as a 190? That doesn't quite pass the gut check, does it? Only the middle sizes would fly right, and beyond a few degrees of freedom, the system would collapse into chaos, because the fat little wings would have too much drag to be efficient and the big wings would have too little lift to land well, and would be prone to collapse in turbulence due to their flimsy nature by virtue of their low volume. A simple answer does not appear to exist, at least not yet. The heart of the problem is the fact that our industry has grown accustomed to the use of "pounds per square foot" as our way of quantifying parachute size. This leads to the erroneous belief that a given "wing-loading" will result in similar performance for all parachutes regardless of size. This is most certainly not the case, and is dangerously misleading for light weight jumpers striving for that magical one pound per square foot wing-loading. A 120 is inappropriate for someone with less than 100 jumps no matter how much they weigh. So, what do we do? Firstly, we honor the differences in parachute sizes, and downsize very carefully. We make our steps downward based on actual ability and frequency of jumping, and we look for any excuse we can to upsize. In addition to remaining conservative with regards to canopy size, we must go to greater lengths to understand the nature of performance and size. If it is true that performance trends do not appear linear with regards to parachute size, then perhaps the solution is a curved ruler. To that end, I have offered a complex sizing chart to the world that reflects the non-linear nature of parachute sizing and performance for the purpose of downsizing guidance. This easy-to-operate chart has been adopted by many national organizations and local dropzones as the official guidelines for parachute size relative to experience. Born from a brilliant but arguably conservative Swedish chart created by my good friend and colleague, Ola Jameson, who was the Head of Safety (Riksinstructor) for the SFF at the time. My somewhat less conservative version of the “sizing chart” offers suggestions for parachute size relative to weight, rather than simple wing-loading alone as the defining factor. This allows the recommended parachute size for a heavy person to be a higher wing-loading than that which is suggested for a lighter person. It is available HERE. The sizing chart does not suggest when the jumper should downsize, but rather limits the degree to which they should decrease their parachute size based on the complex aerodynamic principles effected by wing geometry. The "chart trap" is always a risk with such things, when jumpers automatically step down in size because the chart suggests that a change is reasonable. Decisions based on parachute size and design should always be made based on the actual ability of the jumper, and the other governing factors described in the 22 pages of modifying text that follow the chart. Another consideration I will now put forth to the skydiving community is a fundamental change to the way we define parachute size. Based on the discussion above, a two-dimensional analysis is insufficient to describe what a parachute will do in the sky, and "pounds per square foot" is a very limited 2-D relationship. I suggest that a better model for parachute size definition is Pounds (or kilos) per Cubic foot (or cubic meter). The metric numbers would be far easier to work, if we can get the Yanks and Brits to let go of the Imperial system; but we have to pick our battles, don't we. By using lbs/ft³, we will effectively remove the 2-D bias from the "ruler" as it were, and make the relevant differences more numerically obvious. It may sound like a radical idea at first, but so was the ram air canopy when that showed up, but look how well that worked out. Just because a change is difficult does not make it less necessary. In the interest of moving this new paradigm forward, and in the spirit of the immortal words of Mahatma Gandhi, I will be the change I wish to see in the world. Here are the volumes of my parachutes. It is my hope that other manufacturers will follow suit, in the interest of transparency of our parachutes’ designs, for the good of the skydiving public. The topic of parachute performance prediction is vast, and must continue to be discussed in scientific terms. We must do this because, as one of the few (mostly) self-governing branches of aviation, we are the only true experts in our field. We are the ones who must think outside the old box of established paradigms, and change when change is necessary. We will continue to improve our sport in every way, simply because we love our sport so much that we want to know more, and grow more. The universal passion for knowledge exhibited throughout the skydiving community leads us to a very high level of mutual respect for our fellow jumpers. This precious commodity of solidarity is rare in this world, and we must allow that connection to lead us to always reach for safer procedures built on our ever-increasing understanding of that which saves our lives. Improvement in matters relating to safety is just love of life in motion, and love must be adaptable and smart if it is to last in a complex world. Again and again, skydivers prove to me that they are highly intelligent adventurers committed to safety, and very much worthy of my respect. We will adapt, and we will thrive. About the Author: Brian Germain is a parachute designer, author, teacher, radio personality, keynote speaker with over 15,000 jumps, and has been an active skydiver for 30 years. He is the creator of the famed instructional video "No Sweat: Parachute Packing Made Easy", as well as the critically acclaimed book The Parachute and its Pilot. You can get more of Brian’s teaching at Adventure Wisdom, Big Air Sportz, Transcending Fear, and on his vast YouTube Channel
 -
 There are many variables to consider when looking into a canopy collapse: What was the pilot doing? How fast was the canopy flying when it collapsed? Where was the pilot flying? What is the canopy design? What is the wing-loading? Was there any re-active solution employed?These are the principle considerations, but not the only ones. I will take each one separately. 1) The way in which a parachute is flown can increase or decrease the "G" loading on the lines. A rapid release of one or both brakes significantly increases the chances that the canopy will collapse. This allows the parachute to surge forward to a lower angle of attack, decreasing the lift of the parachute. This reduces the amount of energy exerted by the parachute away from the suspended load, allowing the "negative" portion of the lift to take over and allow the wing to fly towards the jumper. 2) Airspeed is what creates lift. Lift is what causes the wing to strive to fly up and away from the jumper. This is the formula for line tension and therefore stability. The slower you are flying, the more likely your parachute will collapse due to low internal pressure and low line tension. 3) Was the wing flying in clean air when the collapse occurred? This is an important part of the question. All parachutes can collapse in "bad" air. We must always fly considering the invisible dangers that the sky presents us. If you wouldn't fly a kite there, don't fly or land your parachute there. 4) Certain parachute designs do better in turbulence than others. I must avoid pointing fingers here, as this is a volatile industry that can be taken down by non-skydiving lawyers. Nevertheless, certain wings have an increased propensity to go "negative" when presented with adverse condition, while others bump around a bit and keep on flying. This is a complex issue, and the best way to decide which parachute to buy and fly is to listen to the actual statistics, and to your own experience when flying a particular design. I have not experienced any kind of collapse on the parachutes I fly, ever.* If you have on yours, you may want to reconsider what is over your head. *(This does not include nasty, ill-conceived prototypes that seemed like a good idea at the time. I am talking about production-model canopies here) 5) Parachutes perform differently at different wing loadings. The lighter the wing loading, the slower it will fly. This means that the internal pressurization of the wing will be less on larger canopies. In general, lightly loaded parachutes experience more small collapses than heavily loaded ones. Not only is there less internal pressure in the wing, but the dynamic forces area also less with decreased airspeed. This means that the average line tension tends to be less on a lightly loaded wing, and the wing tends to have a increased propensity to surge forward in the window when flying at low air speeds. This is why very small, highly loaded parachutes tend to experience fewer distortions, especially when flown at high speed. Flying at high speed increases the drag of the canopy itself, relative to the jumper, so the relative wind holds the parachute back in the window and at a higher angle of attack. This is why I make carving, high "G", high speed turns to final approach heading, especially in turbulence. The speed actually reduced the chances of a collapse by increasing the forces that keep the parachute at the end of the lines. I am literally increasing my wing loading by flying fast and at high "G's", and the increases velocity reduces the amount of time that I fly in bad air. I am not saying that you should downsize just to increase your stability. I am saying that until your skills and knowledge are ready to fly smaller, faster parachutes, you should stay out of the sky until the winds come down. I still haven't been hurt by a jump I didn't do. 6) This is all about "Pitch Control". If you are flying a good design with lots of airspeed and significant line tension, and in a reasonable location that has no obvious precursors for collapse, you can only deal with a collapse in a re-active manner, as you have addressed all of the relevant variables up to this point. If your wing tries to aggressively surge forward in the window, you must notice it and quickly stab the brakes to bring it to the back of the window. A collapse always begins by a surge to a low angle of attack, but there is very little time to deal with the problem before I folds under. Here are the signs: The first sign is a change in Pitch. The wing moves forward in the window. This is the limited flying space over your head. Too far forward and it collapses. Too far back and it stalls. The "G" loading drops dramatically and almost instantly. In other words, your apparent weight in the harness drops because the wing is producing less lift. This is the time to jerk on your brakes: quickly, sharply, but not more than about 50% of the total control stroke. This action is to pull the wing back in the window, not to stall the parachute. By putting the wing further back in the window, we are increasing the angle of attack. This increases the lift, and forces the wing to fly away from the suspended load and thereby increase the line tension. This can prevent a collapse entirely, or cause the wing to recover to stable flight before things get really out of control. If the wing is allowed to collapse, it may recover quickly on its own. This is why the more modern airfoils have the fat point (Center of Lift) so far forward. It causes the wing to pitch nose-up when it begins to fly again, bringing it back to the end of the lines. Nevertheless, parachutes can still collapse fully, which often involves significant loss of altitude and possibly a loss of heading. If your wing goes into a spin because of a collapse, your job is to stop the turn first, as you increase the angle of attack. If it is spinning, there is less chance of recovery until the flight path is coordinated and the heading stable. Conclusions: Don't fly an unstable parachute. If it is prone to collapse, ground the parachute. Do not sell it to an unsuspecting jumper at another drop zone. These people are your brothers and sisters. Don't fly in crappy air. Land in wide open spaces, in light winds, and never directly behind another canopy. Practice stabbing your brakes in response to forward surges on the pitch axis. This must become a "learned instinct" that requires no thought at all. Like pulling emergency handles, pulling the wing to the back of the window when the lines get slack is essential for safe skydiving. Keep flying the parachute. If your parachute does something funny near the ground, don't give up. If you keep your eyes on YOUR ORIGINAL HEADING, you will unconsciously do things that will aid your stability and keep you from getting hurt. Looking toward what you don't want is how you make it occur. I hope this little article helps you understand the phenomenon of collapses a bit better. I know as well as anyone how painful a collapse can be. I do not want to go back to that wheelchair, and I don't want anyone else to have to experience that either. You morons are my family, and if information can help protect you, I will give it until my lungs are out of air. Blue Skies, Sky People. Bri Article Discussion BIGAIR SPORTZ
- 3 comments
- 4
-
- 1
-
-
- canopy control
- safety
- See more
-
Landing your canopy in a specific place is a skill that we all must master. If you cannot land where you want to, eventually you will land someplace you don’t want to. Honing this skill is something that we all must pursue, and how we approach this will determine whether or not we survive the learning process. We must first learn how to land on a runway before striving to land on a specific point. When pilots try to skip this step, they often run into significant stumbling blocks, some of them requiring surgery. Once you are proficient at hitting the centerline of a runway with consistency, then you can move on to more specific targets such as entry gates and landing points. One of the most important aspects of any approach is the “entry angle”. Although we can often repair a flawed approach, there are limits to our course corrections. The parachute can only do so much. If you set up too close to the target or entry gate of the swoop course, you may be in for a painful lesson. Too tight is a very dangerous place to be. Even if you are flying a conservative approach, making gentle turns to final, this can still bite you. When a pilot strives to land on a target that is mostly underneath them, they are on what I call “the path of crazy shit”. You can almost hear the banjo music starting like in a chase scene in an old western. There is no graceful way to land on a target that is directly below you. The parachute wants to glide, and turning or diving to get there will always put your life at risk. If you are a swooper, the consequences of being too close to your entry gate are dire. You may have the potential to extend the dive of your canopy to make the entry gate, but all you will do is make a divot between the flags that mark the location of your final act of egoistic stupidity. Let it go, and live to swoop another day. If we are too far away from our entry gate, real or imaginary, our solutions are simple, and generally quite safe. “Shallowing” of the approach can easily be accomplished by letting off the dive early and/or holding a bit of brakes or rear risers. We do not often read incident reports about canopy pilots who died a horrible death as a result of holding two inches of rears to stretch their glide back to the target. Set up deep, and tighten up over several jumps. The hard part comes when you have set yourself up, started your dive, and are not sure if you can make the gate or not. You are tight and steep, and you think that if you make it you are going to be a hero. Hero or zero that is; only time will tell. If you hold your swoop in your hand like a butterfly, hoping it will not fly off, you will live far longer than if you squeeze it tightly and try to force a square peg into a round hole. Either it is there or it is not. You need to train yourself to know when you are too tight by knowing what it looks like when it is just right. Visualize the perfect entry, not too shallow, not too tight, with the target or entry gate out in front of you. Walk through the sequence, setting up tiny gates on the ground, and practice making aborts by lifting your eyes from the entry gate and landing long. If you are looking down at it, just let her fly, land safely, and go up and do it again. There is always the next jump. They key to a good abort procedure is training. Without physical rehearsal for physical activities, our cognitive understanding is useless. We have to practice arresting the dive over and over, and find new ways of putting our parachutes into level flight quickly. The first concept is: “Pitch Before Roll”. This means that the turn itself is less important than the pitch attitude of the canopy. When you are striving to pull up from a diving turn, increase the canopy’s pitch angle before striving to recover the roll. Bank angle does not kill people, descent rate does that. If you nose your parachute up, you will increase the angle of attack of the wing, which will give you the added lift that will reduce the decent rate. This will afford you the time to reduce your roll angle prior to touchdown. You literally create time. The second concept that supports healthy recovery technique is: “Sharp Inputs Create Sharp Results”. Slowly applying the brakes, regardless of the depth of the input, will never create the high rate of pitch change that shorter, sharp inputs can. This is the same reason why slow flares, when started at a very high altitude, will not cause an adequate change of direction of flight so as to create a level-off for a soft landing. Practice giving sharp stabs on the brakes while in a turn, and see what it does for you. If your weight increases dramatically, you know you are creating a change of direction, since inertia is resisting your change of motion. Another relevant concept with regards to saving yourself from a low turn is: “Give Up Some Heading”. If you strive to arrest your dive and stop the yaw too quickly, you are likely to wobble on the roll axis. This is because the increased lift on the low wing is bringing that wing up, beginning an oscillation about the roll axis. This can easily be prevented by allowing the turn to continue a bit following the increase in the angle of attack. Look into the turn, and let the wing follow through with its natural over-steer tendency, perhaps as much as 90 degrees when recovering from a fast turn. This overshoot can be as little as 20 degrees in a slower, carving turn. When you strike the toggles, do it with a short, strong burst-and-hold of 12-18 inches, but do it in an asymmetric manner that continues the current momentum of the turn. This will allow you to smoothly and slowly exit the turn and enter your final landing procedures gracefully. The last idea that seems to make a difference in how quickly you are able to pull up from a low turn is where you are looking: “Look Where You Want To Go”. If you are like most people, you will stare at your impending impact point on the ground, right until landing. By focusing your attention on what you don’t want, you inevitably make it happen. Somehow we are drawn toward whatever is in the center of our focus, so it is a far better plan to look toward where you intend to go, rather than where you are currently going. If you have turned too low, your current destination point is somewhere below you, while your intended flight path is in the general direction of the horizon. Lift your eyes, and make your parachute fly toward where you want to go. Focus is more than the object of attention, it is the shape of things to come. Aborting is a part of life. Humans are not perfect, and sometimes we are incapable of fixing our errors. Targets and entry gates are fun to shoot for, but not at the expense of our bodies. Aim to fly a clean approach every time, and let your gut tell you what to do. If it feels bad, it usually is. Do not let your desire to make the swoop course or the peas keep you from seeing what is right in front of you. Ego distorts our vision, as does passionate desire. The only way to see clearly is to remain calm, breathing slowly and completely throughout the approach, and maintain a positive mood as you set yourself up. If you start to feel scared, it is your cue to breathe more and try less. The perfect approach always feels easy. It flows like water. It is the result of good planning combined with good execution, made possible by positive emotion. Joy is thrust, fear is drag, ego is weight, and knowledge is lift. Maximize lift and thrust, and you will go far. Go Big Live Long BSG Brian Germain is the author or several popular skydiving books including: The Parachute and its Pilot, Transcending Fear, Vertical Journey and Greenlight Your Life. He also has a spot on Skydive Radio called “Safety First with Brian Germain. Brian runs canopy flight courses throughout the world, and does motivational keynote speaking on the topic of transcending fear. His website is: www.BrianGermain.com
-
"Turn coordination" is a topic that, until recently, has been mostly unapplied to ram-air parachute aerodynamics. In simplest terms, this refers to the degree to which a flight vehicle is aligned to the relative wind during a turn. Another way to look at this is the degree to which a turning aircraft is pointed at the relative wind with regards to the yaw axis. A "clean turn", from an aerodynamic perspective, is one that keeps the nose of the aircraft pointed at the relative wind throughout the turn. When flying airplanes, this prevents the passengers from spilling their drinks, as well as saving fuel and preserving airspeed. In parachutes however, this aspect of turning has mostly been ignored. As parachutes become faster and faster, the time has come to begin thinking about this aspect of our canopy flight for several very important reasons. The first has to do with the ability of the pilot to level off at any point during the turn. Lets face it, sometimes the ground creeps up on us. Flying an aerodynamically sound turn increases the likelihood that you will be able to convert your airspeed into lift in a timely manner. If you are sliding sideways through the sky because you are simply jamming a toggle down, you are not prepared to interface with the planet. The relative wind is jumping across the bumps on your parachute, creating turbulent flow, while the suspension line load is getting shifted to one side of your canopy. When you attempt to stab out of an uncoordinated turn, there is a hesitation before the parachute begins to change direction and level off. If the ground gets to you before this happens you may find yourself watching Oprah in your hospital bed for a while (not that I have anything against Oprah). The second reason for flying a coordinated turn has to do with overall parachute stability. In an uncoordinated turn, the nose of your parachute is not pointed at the oncoming relative wind. It is sliding sideways. This means that the pressure in your wing is being compromised, in addition to the wingtip on the outside of the turn being presented to the relative wind. If you hit turbulence during this kind of "sloppy" turn, you are much more likely to experience a collapse of this side of the parachute. In other words, if you are turning right, your left wing more likely to fold under. Interestingly, when an aggressive, uncoordinated toggle turn is released, the opposite tends to happen. When the right toggle is released, the right wing surges forward as the drag is released and it is presented to the relative wind, opening the door for a collapse on right side of the parachute. Either way, this can result in way too much daytime TV. A fundamental problem...There is a fundamental problem with the way in which most of us were taught how to turn our parachutes. They said: "if you want to turn right, pull down the right toggle." Simply pulling on a toggle increases the drag on the right side of the parachute, retreating that wing tip. At the beginning of the turn, it is purely "yaw" energy. It is like the pilot of an airplane stepping on the rudder pedal. As a discrete action, steering toggles are an incomplete input. We need some "roll" energy. The harness is more than a way to attach the jumper to the parachute. It is also a way to manipulate the canopy itself. If the right leg reaches for the earth as the left hip reaches for the sky, the parachute will turn to the right. It is true that smaller parachutes will respond quicker to such inputs than larger ones, with elliptical canopies responding the quickest, but harness input will have an affect all parachutes. Most importantly, when used at the initiation of a turn, harness steering converts a toggle turn into a coordinated maneuver. This is true if you are under a Lotus 190 or a Samurai 95. When flying an airplane, all turns begin by initiating roll energy with the ailerons, (rotating the yolk), followed by an application of the rudder to coordinate the turn. The old airplanes had a string on the cowling (hood) to show the direction of the wind-flow, while newer ones have slip indicators on the instrument panel. If only we had such information while we were flying our canopies. Ah, but we do… Trailing behind your wing is all the yaw axis coordination data you will ever need. It is called your pilot-chute. If you are flying a coordinated turn, your bridle will remain parallel to the ribs of your canopy throughout the turn. If at any point it goes slack, whips around like a snake or drifts off to one side, you are not flying a clean turn. You are not carving your wing through the sky; you are skidding out of control. The relative wind is not following the valleys of your ribs; it is hopping over the bumps, tumbling into chaos. Try this on your next jump. Look up at your canopy while you are flying straight and simply yank a steering toggle down to the ½ brake position. You will immediately see what I am talking about as your pilot-chute swings off to one side. Next, lean in your harness, lifting one leg-strap to yield direct roll axis input. It may turn and it may not, depending on the wing. This is not important. Then, while holding the harness input, pull the steering toggle to turn toward the direction of your harness input. You will notice that the pilot-chute is trailing straight back, even in a sharp turn. Once you have experienced your first real coordinated parachute turn, it is time to develop new habits. This takes time. I find that when learning a new skill like this, it is best to have a simple way to remember the process. In this case, try using the following sequence for every turn you make: 1) LOOK, 2) LEAN and 3) TURN. This is mnemonic was taught to me by a great paragliding instructor and skydiver, J.C. Brown. Rather than thoughtlessly jamming a toggle down, look where you are about to go, lean in the harness to establish the roll, and finally, pull the toggle down to flow deeper into the maneuver. When you play with this kind of turn, you will find that the parachute simply feels better; that you feel more in control over the wing. You will also find that you can better bump both brakes down during the turn in order to reduce your decent rate, or even level off completely. While practice is necessary to perfect the technique, all parachute have the ability to transition from a descending turn into a level flight turn, into a soft beautiful landing. If you know how to carve your way out of a low turn, there will never be a reason to hook into the ground, ever. Although many skydivers still think of their parachute simply as a means to get back down to the ground after a skydive, learning how to use the system the way it was meant to be used will increase the chances that you will get back down to the ground safely. Gravity pulls equally on those who love canopy flight as those who abhor it. From twenty years of teaching parachute flight I have learned this: you can only become great at something that you love. The more you understand, the more you will explore. The more you explore, the more you will feel control. The more in control you feel, the more you will love it. And that, ladies and gentlemen, is what it is all about. BSG Brian Germain is a parachute designer, test pilot, advanced canopy flight instructor and author. Brian's book The Parachute and its Pilot has become the worldwide source for canopy flight information and is available at a gear store near you, or through Brian's website: www.BigAirSportZ.com
-
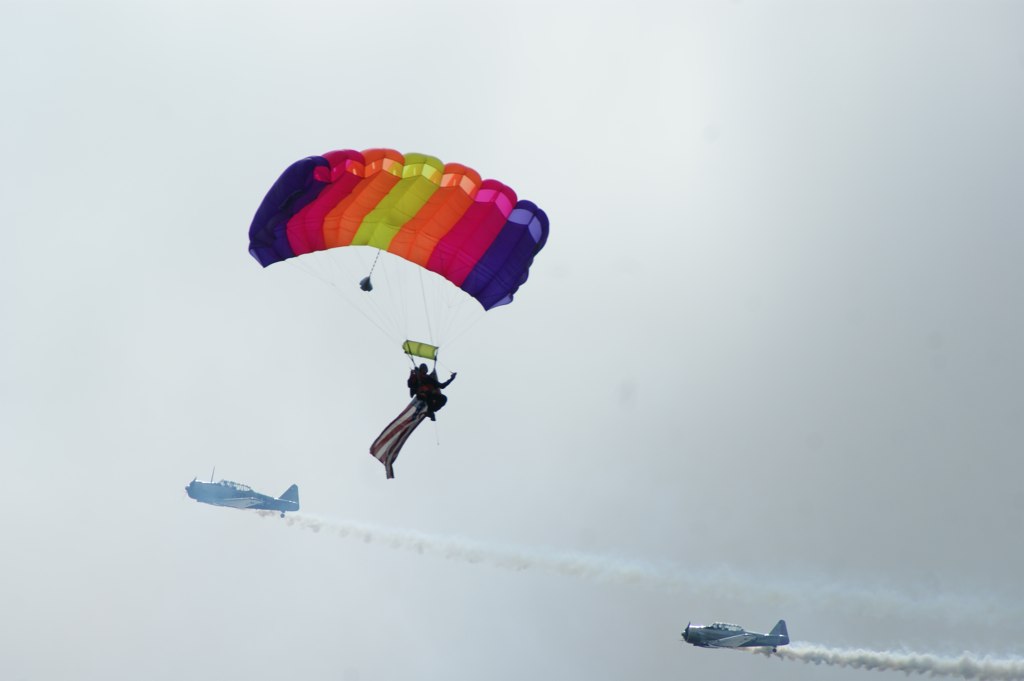 At 66 years of age and with a one year old hip replacement, it decided that it was time to upsize my main canopy. I currently jump an Aerodyne Triathlon 210, so I purchased a Performance Designs Spectre 230. I had heard good things about the Spectre, although I had not yet jumped a demo Spectre. Of course, I did not need any advice on how to use this canopy. I have almost 2300 jumps, a USPA Pro Exhibition rating, and have owned dozens of canopies. I thought I could land anything, especially my nice new big 230 square foot canopy. Little did I know that a "slightly elliptical" canopy would be so drastically different when making turns and in recovery than the more traditional Triathlons I have always jumped. So, my first mistake was that I never read the flight characteristics information in the sales literature, in particular, about the dive characteristics of this canopy. Many of the reviews said that the Spectre is described as “ground hungry”, and needs a deeper and faster flare to land well. My jumps on my new canopy: Jump #1: I tested my turns and my old style two-stage flares. Oh well. Not much of a stall. Maybe I just have to "learn" this new canopy. I used a straight-in approach on grass, but hit rather hard in very fast, sliding landing. Good thing the grass was damp. Jump #2: I decided to land into the pea gravel pit. A 10 mph crosswind at 45 degrees caused me to make a small correction on landing, then the wind side started to dive, a I pushed my flare, nothing, I hit hard, drove my right shoulder into the pea gravel pit, plowed a deep furrow through it, and went into a belly slide as I exited the peas. But this still counts for accuracy, right? Jump #3: After breakoff from a 15-way formation, and after too long of a track, I opened, and saw that I was rather far from the landing area. I decided to land in a small green field. I fortunately noticed the chain-link fence on all four sides of the field. Now I needed to burn off some altitude to get into this spot. I used one carving S-turn at quarter brakes, and then a last second turn to come straight in. However my canopy started to dive into the ground so fast that I never had a chance to get the “fast deep flare” that this canopy requires. I hit so hard that I caused six breaks in my leg and a partial shoulder dislocation. Rotor cuff surgery is now in my future too. It seems that in an stressful situation, I reverted to my old landing and flaring habits from my other canopies. So here are my comments and recommendation when jumping a new canopy (even when upsizing.) If most of your experience is on some of the more docile rectangular canopies, be careful if you change to even a slightly elliptical canopy, even if it is bigger. It will surprise you how differently it responds in turns, dives, and recovery. Bigger is not always enough to be better. (Sorry guys.) Read all of the reviews written about the canopy, and all about the flight characteristics. Talk to others who have owned one. Ask your Safety and Training Advisor and Rigger about the canopy and how it fits your style and experience. Open high and test everything you can up high. Practice steep as well as shallow turns. Test your flare and note the toggle pressure and location needed to find your stall point and "sweet spot". (Your brake settings may be different than on other canopies you have jumped.) Observe the dive speed and recovery traits at all brake locations, plan a straight in landing until you get experience, and that means more than one jump. Even if you have 2300 jumps like I do, read all of the articles you can find on canopy skills. At the very least, you will wind up with a checklist of things to look for to prepare for your first landings. In summary: I was careless but lucky. I have gone through many "could have - should have" thoughts, and offer my personal experience and observations as food for thought, and hope it may help others when changing canopy style or size.
 -
 Many factors determine the way your canopy opens. The design of the canopy and the way it is packed are two important factors, but body position also plays a major role. We learn to deploy our canopies in a basic, stable position as students, and many of us don't give this skill much more thought after that. Unfortunately, we sometimes develop a few bad habits that have a negative effect on our openings. Even after making thousands of jumps, people have been surprised to find that a few small adjustments to their body position during deployment can significantly improve their openings. This article is about deploying a parachute, one of the most important things you do on every skydive. It might be a good idea to practice these techniques on the ground before trying them in the air. You might even want to make a solo jump and try some practice pulls using these techniques before it's actually time to deploy. If you are not a licensed skydiver yet, or have just recently earned your license, you should discuss this article with your instructor before trying anything you read here. He or she may want you to focus on more important skills, like altitude awareness and basic stability, rather than adding anything new to your pull sequence. No Need for SpeedThe speed at which you are falling when you deploy your canopy can have a large effect on the forces generated during the opening. As your airspeed increases, these forces also increase. Many of today's canopies are designed for relatively slow openings, and some will not be affected greatly by a little extra speed at deployment time. Some jumpers even find that their canopies open better when they are falling a bit faster. This is not something you should take for granted, though. Higher airspeeds might not cause a canopy to open hard as long as everything else is just right, but small variables tend to have greater effects at higher airspeeds. If you rush your pack job one time and let things get a little sloppy, or if your canopy is starting to go out of trim, extra airspeed could make the difference between an opening that is slightly abrupt and one that really hurts. Slowing down before you deploy can provide a greater "margin of error" and reduce the effects that other variables have on your openings. Slowing down can be especially helpful if your openings are frequently or even just occasionally faster than you like them to be. Vertical or "freefly" body positions like head-down or sit-flying allow you to reach much higher airspeeds than "flat" body positions. This extra speed makes flattening out and slowing down before you pull particularly important. Both beginners and experienced freeflyers should keep this in mind when planning their dives. Even if you don't freefly, simply tracking at the end of a belly-to-earth jump can significantly increase your airspeed, and you may still find it helpful to "flare out" of the track and slow down before you deploy. To flare out of a track, spread your arms and legs and de-arch slightly for a second as shown in. This will help bleed off any excess speed. Keep your arms and legs spread out and maintain a slight de-arch while you wave off, remembering to look around for other jumpers. As you finish your wave-off and start to pull, relax back into a normal arch. If done correctly this doesn't take a significant amount of time and becomes a natural part of your wave off. What Are You Looking At?Take a moment to notice where you are looking while you reach for your pilot chute. If you jump with a video camera, look at some of your openings on tape. What do you see in the video as you pull? Are you looking up at the horizon, or down at the ground below you? Do you look back toward your pilot chute handle as you reach for it? Do you look over your shoulder after you pull? Older skydiving rigs used spring-loaded main pilot chutes activated by a ripcord. Even in the late 1990's this type of system was still used on most student rigs. Those of us who were trained using this type of system were taught to look for the ripcord handle before grabbing it. We were also taught to look over one shoulder and "check" after pulling the ripcord. Looking over your shoulder changes the airflow over your back and helps clear pilot chute hesitations, which are common when using a spring-loaded main pilot chute. Most licensed jumpers use hand-deployed main pilot chutes, and these are becoming the standard for student training as well. Even if years have passed since they transitioned to a hand-deployed pilot chute, many experienced jumpers still have the habit of looking for their pilot chutes as they reach for them and checking over one shoulder after they throw them. Unfortunately, it's almost impossible to look over your shoulder and keep your shoulders level at the same time. Looking over your shoulder also tilts your container to one side. Although large, docile student canopies may not get offended if your shoulders and container are uneven, more responsive sport canopies will be much happier if you keep your shoulders level. Having your shoulders and container tilted as the canopy deploys can cause off-heading openings, line twists, and can even cause a hard opening. Most of us have our pilot chutes mounted on the bottom of the container, so trying to look for the handle is really useless. Even if you still use a legstrap-mounted pilot chute, you probably can't see the handle very easily in freefall. Since hand-deployed pilot chutes are thrown into the clean air next to your body, pilot chute hesitations rarely occur and checking over your shoulder every time isn't necessary. Some people have a habit of looking straight down as they deploy. This tends to put you in a slightly head-low attitude, which can increase your airspeed slightly. It can also amplify the opening force your body feels, since this force will mainly be transmitted to your shoulders when the canopy reaches the end of the lines. Also, your legs may swing through a wider arc as the canopy sits you up in the harness, making the opening feel more abrupt. Instead of looking for your handle or looking down at the ground, try lifting your head up and looking out at the horizon as you reach for your main deployment handle. This puts you in a more head-high attitude. The opening forces will be transmitted farther down through the harness instead of being concentrated at your shoulders.Looking at the horizon also helps keep your shoulders and container level as you pull. After throwing the pilot chute, bring your arms back into a neutral freefall position and think about keeping your shoulders level as the deployment bag lifts off of your back. You can also push your hips down slightly and bend your knees just a bit, as if you were in a very slow backslide. This keeps your head and upper body high. In the past, some jumpers have recommended "sitting up" during the deployment. This can actually work well as long as it is done correctly, but if you sit up too much or too soon there is a risk of increasing your airspeed or even becoming unstable. Simply lifting your chin, looking at the horizon, arching a bit more, and relaxing your legs slightly has a similar effect to consciously sitting up, and you're less likely to overdo it. Some people who jump with side-mounted cameras believe it's necessary to keep their heads down when they deploy, to prevent a riser from hitting the camera. This might be an issue if you have narrow shoulders or wear your chest strap very tight, leaving less room between your risers. It also might be a problem if your camera sticks out from the side of your helmet quite a bit. It's best to minimize this problem by keeping side-mounted cameras as small, streamlined, and snag-free as possible. If you're convinced it's necessary to keep your chin down, at least keep a good arch and relax your lower legs to keep your shoulders higher than your hips, and also focus on keeping your arms and shoulders level in the relative wind. Back in the Saddle As soon as the canopy sits you upright in the harness, try putting your feet and knees together for the rest of the opening . Putting your legs together helps keep your weight even in the harness and reduces the chances of an off-heading opening. This is especially effective if you are jumping an elliptical-type canopy. Just the weight of your legs swinging around or a small weight shift in the harness can cause some of these canopies to start turning. If you grab your risers as the canopy is opening it's best to hold the lower part of the risers, just above the 3-Ring system. If you grab the risers up near the toggles you might make the canopy turn by unintentionally pulling one riser or releasing one brake. If you hold on to the bottom of the risers, you can still slide your hands up quickly to steer with the risers or release the brakes if necessary. Some jumpers try to keep their openings on heading by actively steering with their rear risers while the slider is still up against the canopy. This works with some canopies, but other canopies don't like it at all. You may get better results if you just relax, sit still, focus on keeping your weight even, and wait until the slider starts to come down before making any corrections with the risers. Watch Where You're GoingIn a first jump course we are taught to check our canopies to make sure they open correctly. Although this is important, it can also create a very bad habit. Many jumpers look up at their canopies as soon as they start to open, and continue watching the canopy through the entire opening sequence. Some people continue looking up for several more seconds while they collapse their sliders and release their brakes. If another person opens close to you, you may only have a second or two to react in order to avoid a collision. Staring up at your canopy for five or ten seconds after you deploy is like driving down the highway while staring up at the roof of your car. Fortunately, a few techniques can help you avoid this problem. Many students are taught to count out loud while their canopy deploys, saying "arch, reach, pull, one thousand, two thousand, three thousand…" If you don't do this already it's a good habit to create, and can help you keep track of time during the deployment sequence. You will hear and feel different things during each stage of the deployment. A second or less after you throw your pilot chute, you should feel the snatch force pull you upright in the harness. This is the force of the canopy fabric hitting the relative wind as it comes out of the deployment bag. The canopy will then snivel. The snivel is the portion of the opening where the slider stays against the bottom of the canopy, reducing your airspeed before the canopy starts to inflate. There will still be a lot of wind noise during the snivel, and you will still have a sensation of falling. This may last for a second or two, or even for several seconds. The inflation occurs as the slider moves down the lines and the cells fill with air. Things become quieter once the canopy inflates. Even under a canopy that inflates very slowly and smoothly, you will still feel the transition from falling to gliding. You may also hear the slider flapping above your head once it comes down. Once you become more aware of these sensations you will find that your other senses can tell you as much about your opening, if not more, than your eyes do. Soon you will feel comfortable looking out in front of you during the entire opening, rather than watching the canopy itself. This allows you to watch for other jumpers, and many people find this reduces off-heading openings as well. "But," you may ask, "if I don't watch my canopy open, how will I know if I'm having a malfunction?" Take the advice of someone who has cut away a number of misbehaving canopies: you will probably know right away if you are having a malfunction. They tend to feel very different from a normal opening, and you will probably know something is wrong before you ever look up. If you start to count after throwing your pilot chute, and reach "two thousand" or "three thousand" without feeling the snatch force, there is obviously a problem. This would be an acceptable time to look back over your shoulder and check for a pilot chute hesitation or pilot chute in tow. Once you know how many seconds the snivel usually lasts on your canopy, you will also know if that part of the opening is taking longer than normal. You can usually feel line twists right away, and if you start spinning wildly you'll surely want to look up at your canopy and see what's bothering it. What if the opening feels perfectly normal? Unless you need to avoid another jumper right away, you should still look up and check your canopy right after it inflates. You might not notice a tear, broken line, or similar problem until you look up. Even in these situations, if the opening felt normal then the canopy is probably flying well enough to give you a low rate of descent. Assuming you deployed at a reasonable altitude, you should have enough time to do a control check and execute emergency procedures if necessary. If you've been watching your canopy open every time then you might not feel ready to stop doing this during your very next jump, but you should start developing better habits as soon as possible. Start counting when you throw your pilot chute, and notice how long each stage of the deployment sequence takes. Pay attention to what you are hearing and feeling during the opening. Soon you won't need to watch the whole deployment, and will be able to pay more attention to your body and your surroundings. Improving your body position and increasing your awareness when you deploy your canopy can produce great results. You might not remember everything in this article during your next jump, but at least think about trying these suggestions one at a time, at your own pace. You might be amazed by the difference a few small changes can make. About the author: Scott Miller runs the Freedom of Flight Canopy School at Skydive DeLand in Florida (www.freedomofflight.tv) and holds canopy skills camps at other DZ's throughout the year. He has worked at several drop zones as an AFF instructor, tandem instructor, and freefall photographer, and also worked as a test jumper for Performance Designs. This article first appeared in Skydiving Magazine, Volume 25, Number 7, Issue #295, February 2006. Printed here by permission of the author.
 -
The stall is one of the least explored and most feared aspects of flying. Avoidance of this flight mode causes many canopy pilots to be uncomfortable with flying slowly, and unpracticed in this important art. This article will discuss the governing variables relating to the stall, in hopes that this knowledge will help parachute pilots to become less afraid of this essential aspect of the flying experience. First we must explore what a stall is. The assumption made by most canopy pilots is that the stall is caused by slow speed flight. This is not true. It is correlated with low speed flight, but a wing can stall at high speed too. A stall is caused by an excessive angle of attack. When the relative wind flows over an airfoil, it is bent in the general direction of down. This causes an opposite force called "Lift". When the orientation of the airfoil is changed to a higher angle with respect to the relative wind, it is said to have an increased angle of attack. Air is quite cooperative. It is willing to be redirected and still flow in a fairly organized manner…up to a point. At a specific angle, all airfoils fail to bend the air into submission. This discrete angle of attack is referred to as a stall. It is coupled with a sudden drop in lift, and thus a significant increase in decent rate. Whether you are flying an F-16 or a Lotus 190, recovery from a stall is always the same: the pilot must reduce the angle of attack. On an airplane this requires forward pressure on the yolk or stick. On a parachute, we are simply required to let off the downward pressure on the toggles or rear risers that has increased the angle of attack in the first place. Each parachute stalls and recovers differently. Depending on several governing variables, some parachutes will recovery nicely from a stalled configuration no matter what the recovery technique, while others will require very careful execution. Let's take a look at these issues one by one. The characteristics of a stall on any ram air canopy are based on two main variables, and several lower order variables. The most significant governing variable is the flight mode when the stall is reached. If the canopy is in a sink, rather than level flight (zero decent surf), it will tend to stall in a more forgiving and docile manner. The second primary variable is the attitude about the roll axis when the stall is reached. In other words, if there is any bank angle when the stall precipitates, it will cause the lower wing to stall first, resulting in significant yaw energy, which can result in line twists. There are several other things to consider when testing the stall of a canopy, including: canopy design, density altitude, wing-loading, aggressiveness of the control input, and most importantly, recovery technique. This will be discussed next. If the wing is allowed back into forward flight quickly, it will dive aggressively toward the ground, causing a drop in the angle of attack, as well as the lift and therefore the overall line tension. This may allow the wing to surge below the suspended weight (you), and possibly cause a jumper/canopy entanglement. Further, if the release of the brakes is asymmetrical, the lack of line tension can allow the wing to surge unevenly about the yaw axis, causing line-twists. The key to stalling any wing is to enter the stalled configuration in a sink, with the wing level and static about the roll axis. As soon as the stall is reached, the toggles (or rear risers) should be released only a few inches to allow for only a slight drop in the angle of attack. As soon as the brakes are released, the jumper should be prepared for a sudden increase in toggle pressure, as the tail of the parachute is about to get hit with a pulse of relative wind. If the pilot is unprepared for this, the toggles will usually be pulled upward and possibly in an uneven manner, often resulting in an aggressive stall recovery that may result in line twists. When the brakes are released quickly to the full flight position, the wing doesn't have much drag. This means that there is very little to prevent it from surging forward in the window. When the brakes are released slowly, and then held down just above the stall point, the wing has a great deal of drag. You have two big barn doors at the back of the wing helping to prevent and aggressive surge. Further, as you become more familiar with the stall and recovery characteristics of your wing, you may begin to fly "actively" with respect to the recovery process. In other words, as soon as the wing begins to fly forward in the window, the pilot jerks on the brakes to dampen the forward surge. It is important to do this minimally enough to prevent re-stalling the wing. A well-timed reapplication of the brakes during the recovery process will significantly reduce the amount of altitude lost in the stall. This can be very useful in the event of a low altitude stall. This maneuver can be practiced in relative proximity to another canopy in deep brakes. Be sure to keep your distance when you do this. By definition, a stall is a loss of control of the wing. Rear riser stalls tend to be sharper at the onset, but quicker on the recovery. Therefore it is advisable to stall the parachute on the rear risers first before attempting to stall it on the brakes. Further, such maneuvers should always be performed at an altitude that will allow for a safe cutaway. Given all of these concerns, one must ask "Why should I stall my parachute in the first place". There are several valid reasons why each jumper should rehearse stalls at altitude. In high angle of attack approaches, such as may be necessary in a tight landing area, stalls can happen inadvertently while maneuvering. This is why it is also important to practice slow flight maneuvering by lifting the toggle on the outside of the turn, rather than depressing the one on the inside of the turn. In order to reach a (near) zero ground-speed on a no-wind day, the pilot must have full "Toggle Authority". In other words, if the toggles are set too long, the pilot will be unable to access the slowest possible airspeed, and therefore will be forced to land with more ground-speed without the advantage of a headwind. Being able to finish the flare completely and then let up after landing to prevent the stall from pulling you onto your heels in an essential part of any no wind landing. When you decide to practice stalls, I suggest taking the process step by step. Simply honking your brakes down with your eyes squinting in negative expectation usually results in a wild ride, and sometimes a cutaway. Try hanging out in slow flight for a while. Bring your toggles down to a bit more than half brakes and leave them there. If you are above the stall point, it isn't going to just stall all by itself. Watching people fly in deep brakes is usually similar to watching them light a firecracker. Your parachute isn't going to explode…promise. When you get your canopy into the deep brake mode, take a deep breath in and let it out slowly. Relax your muscles. Let your legs hang limp. I find that nervous pilots can't connect with their parachute because it isn't touching their bones. If you soften your muscles, your will allow the leg straps to sink into you so that you can feel what is happening with the newest addition to your body: your wing. By truly relaxing under canopy, we begin to sober up from the adrenalin that is blurring our vision and skewing our perspective toward the negative. Stalls are an essential part of flight. If you are to be fully in control over the wing, you must explore all aspects of your parachute's performance envelope. Ultimately, flying slowly is the most important aspect of flight because we land in slow flight. The more comfortable you are with your slow flight skills, the better your touchdown will be. Remember, the definition of a good flight is one that ends well. BSG www.BrianGermain.com BIGAIR SPORTZ
-
 A large sector of the skydiving population is currently in danger of extinction. This is because of the widespread proliferation of new DZ rules that prohibit 270 turns for landing or ban high speed approaches entirely. Consequently, many jumpers now find themselves homeless and considering alternate sports - not a good thing for skydiving. These new restrictions come in the name of safety. We have lost many friends this year due to canopy collisions, and the management at several dropzones has responded by adding new rules in an effort to prevent such accidents from happening in the future. There are several aspects within this direction of policy that concern me. Remember 9-11? We felt unsafe after the tragedy, and so we willingly gave up many of our rights as free citizens. Now they are taking nail-clippers away from little old ladies. It is getting ridiculous, as is the policy banning advanced approaches. It is a knee-jerk reaction to fear, and I think we all know where that slippery slope leads. "My rights end where your rights begin."This is the fundamental idea that forms civilization. In other words, if I fly my parachute into you in the pattern, I am in the wrong. I think everyone agrees with this and it therefore can and should be asserted that if my behavior does not have an effect on anyone else, I should be allowed to continue to do what I am doing, provided I am doing it in a safe manner. We all need to challenge ourselves. This is what keeps us showing up at the dropzone every weekend. Thousands of people enjoy the challenge of high speed approaches and define the swoop landing as an essential part of their experience. They wait all week to get a few jumps in over the weekend, and now many of them are unable to get what they came for. To take that away is to cut many people off from the very reason why they skydive in the first place. Is that really where we want to go with this? We cannot afford to alienate anyone. There are precious few experienced skydivers in the world and I would argue that we are the reason for the dropzone in the first place. I understand that there are a few DZOs that are doing very well running purely tandem operations, but this is the exception, rather than the rule. Most dropzones are a business of passion, rather than a pragmatic financial pursuit. If we wanted to make a million dollars, we would have done something else with our time. We do this because we love it. The atmosphere created by having fun jumpers around is essential to the success of a dropzone, even if the profit is significantly less. Sport jumpers give the tandem students a reason to come back and learn how to skydive. They come back for the jumping, true, but they also come back for the connection to other people. They want to be part of a community, as do we all. We must therefore allow all aspects of the sport to continue to proliferate so that our numbers may grow. It is that simple. We can create sustainable solutions.It is possible. We simply need to think things through and adapt to the changing needs of a growing sport. I remember the debate on my dropzone as to whether or not we wanted to let the students jump ram air canopies. Many were concerned that the "squares" were too much responsibility and that students could not be trusted. Are we saying the same thing about ourselves now? We need to trust each other. True, we need to create a structured environment in which we can create a degree of predictability in the air over our DZs. Otherwise none of us would be able to manage all the variables in our heads. But as soon as we start back-peddling away from danger, we are becoming more similar to the groundlings we pass on the road on the way to the dropzone. We must have specific runways where the high speed pilots can land safely, out of the way of everyone else. We must communicate our intentions in the loading area. We must create sustainable vertical separation before reaching pattern altitude. Most importantly, we must increase our level of awareness under canopy so that no matter what the circumstances, we can fly in traffic without risk of running into each other. We do this by remaining calm and keeping our eyes open. We need to stop pointing fingers and making over-protective rules, and simply do what we need to do in order to be safe and still have fun. Let's work together and unite as a whole to make the dropzone a welcoming place for everyone. Brian Germain www.TranscendingFear.com
 -
 So you whipped through your student program, graduated AFF, moving towards or already got your A license, eyeing a rig to buy and well on your way to your first 100 jumps. Canopy or parachuting skills are an integral part of every training program, but are also the most important skills these days. There are five quality canopy skills every student should know: awareness of your rig and canopy, awareness of your self and others in the pattern, awareness of target and setup, good depth perception, and a proper two stage flare. A Few Parachuting Tips That Are Very Important 1. Awareness Of Your Rig And CanopyDeveloping awareness of your rig comes with time. Unfortunately, when you're a student, time is not a comfort you always have. You need to be comfortable and confident with your rig on every jump. If it is a new rig you're jumping, wear it around the house, while your cooking dinner, sitting on the couch or doing chores so that you can get used to it. If you rent rigs, get suited up extra early like on the twenty minute call, so you can go through all your emergency procedures. This comfort and confidence is paramount when you are up in the air. If you are not confident in your parachuting equipment, you will have "gear fear" and this can affect your judgment. If you have a new rig and there are things you don't like about the rig, change them. You would be surprized the little things a rigger can do to make a rig fit better. I recommend buying a custom rig when you have reached a size you will be on for a while 190-170 sq feet on average. Even with a new rig, small alterations can be made. The easiest fixes that I see students can do is a bungee cord to connect your leg straps, padded reserve handle, shortening the closing loop, and modifying the laterals to make the rig fit tighter. All these modifications are freefly specific but a tighter rig is a safer rig. Know your canopy when parachuting. Know each stage of deployment and the equipment on your canopy which is responsible for each stage. Learn how to pack! Packing your parachute is an intimate way to get to know your equipment. If you can pack your rig well, you will more likely have a greater understanding of your equipment and confidence with it. Packing comes with experience. Pack at home over and over again, watch people pack, and ask lots of questions. If a packing course is offered, take it. I know when I was starting out, I wasn't that interested in my canopy. It was a docile vehicle to get me from 3,000 feet to the ground, which I had to pack every time to go up. I definitely feel different about my canopy now. When you are under canopy and not in the pattern above 1000 feet, play with your canopy, practice your landings over and over again. Experiment with front risers, rear risers and toggles. Two intricate tips with your equipment can improve the performance of your canopy immensely. The first is simple, stow your slider and bring it down behind your head. Keep weary of where you are located relative to the drop zone, and other jumpers. Don't mess with the slider as you might end up in another county. Stowing your slider helps reduce drag and can increase your glide. It also gets rid of that annoying flapping noise. The second tip is for a student who can land on his target consistently. After your slider is stowed elongate your chest strap all the way out, without undoing it. Practice on the ground. You want your chest strap to be as wide as possible for three reasons: the canopy is designed to fly like this as it increases the glide of your canopy, second it gives you another control surface to fly, that being your hips, and lastly it allows you to lean forward in your harness which gives you more control. All three of these points can be seen on a good canopy pilot and a moderate student can start practicing these skills early on in his career, even though it will play a bigger part later. When your chest strap is elongated your hips are now hooked directly to your canopy instead of your shoulders through the harness. It will be hard to turn the canopy with your hips at first especially with large canopies, but it can be done. Simply scissor your legs and throw the leading leg over the trailing leg and lean in to it. Then try it the other way. This will become more important when you get to sizes like 150 sq feet and below. A word of caution, don't spend too much time elongating your chest strap under the canopy while you are parachuting, you definitely will end up in a different county. Opening shock makes it more difficult to elongate the chest strap then on the ground. The buckles cinch up with opening shock to make sure you don't fall out. Do not undo your chest strap! If you elongate the chest strap properly you will not fall out of the harness. The canopy will feel slightly wilier but nothing dangerous. Stow your slider and elongate your chest strap before you unstow the brakes. This will make it infinitely easier. If you unstowed your brakes already, let the alterations go and remember to do these things on the next jump. You must have a certified instructor watch over you when you practice on the ground and in the air. Make sure these alterations are done before 1000-1500 ft. Be careful, use common sense. 2. Awareness Of Your Self And Others While ParachutingI have briefly touched on this subject already, but since canopy collisions and landing off are a reality, awareness of yourself and others is a Quality Skill unto it self. Always know where you are relative to the drop zone. Are you up wind or downwind? Can't tell, figure it out! Watch the wind on the trees, or a nearby lake. Watch other skydivers, are they landing in the same direction your facing, or the opposite. I tell my students to watch the drop zone in the plane and where you are relative to it and the wind. This serves multiple purposes: you gain an awareness of where the pilot is in his jump run and his tendencies, you have a better understanding of the area you are jumping and potential outs and hazards, and on jump run you will be able to anticipate where you will be if you look out the window while other people are getting out. Look out for other people under canopy, especially during and right after opening. Check your canopy then look for others immediately. Look up and down the jump run for the people who got out before you and right after you. Get a visual then go through your checklists of things to do. If you are playing with your canopy up high always look before you turn or yank on a control surface. Find the pattern; be mindful of people out side the pattern. Do not spiral in the pattern. The best way to have clear space around you is to go last and deploy high. One easy thing that you can do especially when you are traveling to a different drop zone is find how they operate their pattern. You would be surprised how many experienced jumpers do not ask about or forget the pattern. I think this is the biggest problem at destination DZs where people are visiting. Follow the rules laid out; the rules are there for you as skydiver's safety and the safety of others. 3. Awareness Of Your Target And SetupYou should be aware of where your landing target is in freefall. I have left countless jumps early because the spot was off, people took to long in the door and spread the spot to thin, or the wind was stronger when we exited then when we took off. The point is, develop an awareness of where your target is in freefall by doing solos. Don't be afraid to deploy a little early if you see you are entirely too long to get back. After you are open and you have made sure the canopy is safe, you have made your control checks and alterations, size up the distance and altitude you have from your target. Execute the pattern your instructor and you have gone over. Try to stay up wind of your target before you start to execute your pattern. Go over in your head, how you are going to execute, see the legs of your pattern, check for others, and then go! Hitting your target is not done in the last 150 feet, that is how people get hurt. Hitting your target comes from proper briefing of the landing area before the jump, your spot, and how you set up for your pattern at 1000 feet. Good target acquisition comes from practice but also preparation. 4. Good Depth PerceptionDepth perception is a key element of being a good canopy pilot. It is a learned skill but can be greatly improved through various techniques. If you wear glasses please tell your instructor. Do not be ashamed of your sight. Your sight will put you at a great disadvantage if you do not use your glasses or contacts while parachuting. With proper use of glasses and contacts you can enjoy the sport with no problems. If your goggles don't fit your glasses buy ones that do. If you do not like glasses and your contacts dry up, change your goggles to a snugger fit, or possibly look into laser surgery. I know many people in the sport who swear by laser surgery. The bottom line is that when you skydive, use what you use to drive your car. Skydiving is as critical as getting behind the wheel with your eye sight. If your sight isn't a problem or you use one of the corrective measures above, you can dramatically increase your depth perception of the drop zone and the ground. Look at the drop zone while you are in the plane and gage it with your altimeter so you get an idea of how high you are. Get a highly visible altimeter and don't forget it on the ground! When you get within the last 150 feet do a quick check for people around you, then lock in on your target. When you get 50 feet from your target, shift your eye sight from looking down to looking in front of you. Open your vision so you still include the ground but try to look forward. Begin your two stage flare at about 10-15 feet depending on the winds. Keep your vision open and wide; do not fixate on the target. Consult your instructor. 5. A Proper Two Stage FlareI know some drop zones do not condone a two stage flare. Do not buck the trend on this one. If your drop zone doesn't allow it, come to me I will teach you. Ask your instructor about the two stage flare. I know from my experience some students have a tough enough time doing a symmetrical flare at the proper altitude. So maybe the two stage flare is not right for you, right now. I do believe it is an important part of being a good canopy pilot, and mixed with all the alterations mentioned above can give you your first swoops coming straight in with no riser input. In fact I have seen students who collapse and stow their slider, elongate their chest strap, and use a proper two stage flare swoop 50-60 feet with no wind. The two stage flare is quite simple.10-15 feet above the ground quarter flare your canopy. This action planes out your canopy and translates your vertical motion forward. Make sure that the flare is quartered not a half flare. There is a dramatic difference. A quarter flare will plane the canopy out and accelerate you forward; a half flare will distort your canopy and make you sink. When you are five feet above the ground, full flare to come to a complete stop. I see many people just leave the canopy in a quarter or half flare. This action makes you hit the ground moving forward and a little hard, you might have to run it out. Make sure you have a consistent symmetrical flare on target before you practice a two stage flare. The two stage flare is difficult without video to show you what you are doing. So, get coaching with video, people just telling you what to do will not get it done. You must have feedback and video is the best for this. Also if your instructor uses radio this is a plus, but not essential. I have commented on many things in this article. Do not try to do them all at once. Concentrate on one thing per jump. Focus on one thing for 20 jumps if you get flustered easily, till you get it right and it becomes habit. If you incorporate all these things with the over site of a quality coach, you can swoop coming straight in with no riser input on target safely negotiating others and the physical hazards around you. Be very careful under canopy while you are parachuting. Nothing replaces common sense, good judgment and asking lots of questions. You too can be an excellent canopy pilot with these five quality skills. Steven Blincoe has 4,000 jumps and 300 Skyventure hours in the wind tunnel. He is the founder of the New School Flight University in Orlando, Florida. He also has 10 years of experience in the sport coaching, competing, and filming. Steven Blincoe can be reached by phone 530-412-2078 USA, or by email [email protected]. You can also go to www.blincoe.org.
 -
When I started skydiving round parachutes were the only parachutes available. The landing under a round canopy had a high straight down component. Although Para Commanders had a noticeable forward speed under no wind conditions, landing in winds over 10 mph were again straight down. Due to straight down landings most injuries were to the ankles because one tended to sit down on the ankles during a less than perfect timing of the landing techniques required by round parachutes. Use of the Parachute Landing Fall (PLF) greatly reduced the extent and severity of landing injuries. Virtually all successful skydivers were experts at PLFs because not every landing was executed perfectly, no matter how many jumps one had, and sooner or later one had to land a round reserve. In the classroom it required a block of at least two hours to teach landing the parachute because so much of the time was devoted to teaching an actual PLF. The complete PLF technique is not a natural, readily apparent procedure. During the actual jump about half of the students would perform a PLF and the other half wouldn’t no matter how much time and practice was spent on PLFs. The injury rate was quite high. About 1 in 20 first jump students would suffer some type of ankle injury. With the advent of square parachutes, and particularly with the advent of placing students under square parachutes, the landing injuries changed. Each experienced person reading this article will realize that the injuries from landings that we see today are not limited to ankles. This is because the parachute is moving the jumper across the ground in almost all circumstances. However, there are cases were a person would be descending straight down even today. A high or rapid or deep flare by a student would be one example. In this case the PLF position for landing would definitely influence the ability of the student to walk away from their mistake. In my opinion there are instances when use of a PLF for a botched landing is NOT beneficial to the jumper. A downwind landing is such an instance. The PLF introduces a roll and a square parachute introduces a large amount of speed. For the sake of this example, assume the wind is blowing at ten mph. The jumper has made a mistake and is landing downwind. He/she has the presence of mind to have the toggles at his/her ribs (half flight) for an air speed of ten mph and a ground speed of 20 mph. Please bear with me for the easy math. 20 mph = 20 mph X 5280 ft/hr = 105,600 ft/hr 105,600 ft/hr = 105,600 ft/hr divided by 60 minutes/hour = 1,760 ft/min 1,760 ft/min = 1,760 ft/min divided by 60 sec/min = 29.33 ft/second At 20 mph ground speed a person is moving 29.33 ft per second across the ground. At half flight the downward speed (3 to 5 mph) would be somewhere between 4.4 ft/sec and 7.33 ft/sec. I believe that in this example the best outcome for the jumper would be to try to absorb as much of the initial downward velocity as possible with their legs (knees bent and pressed tightly together) and then NOT ATTEMPT A PLF. The danger inherent to a high speed roll/tumble is a direct result of the laws of physics. An example using a cylinder will illustrate the principle. I am 52 inches around the shoulders so let’s talk about a perfectly round cylinder, 52 inches in circumference, moving in the air just above the ground and oriented perpendicular to the line of flight. At touchdown the cylinder is going to pick up a rotational (angular) velocity based upon the speed across the ground (linear velocity) divided by the circumference of the cylinder. Excluding friction, which will slow the cylinder by scraping, the cylinder will initially roll across the ground at 29.33 ft/sec divided by 52” (circumference) per rotation. 52 inches divided by 12 inches per foot = 4.33 feet (circumference) 29.33 ft/sec divided by 4.33 ft / rotation = 6.77 ROTATIONS PER SECOND!!! If this seems quite a lot, it is. However, this is why occupants of a rolling vehicle are thrown so far from the vehicle in a rollover car accident (buckle up?). In the rollover case the rotational speed (angular velocity) of the vehicle rolling is translated to the linear velocity of the thrown body. The thrown objects, including unbuckled occupants, are thrown hundreds of feet. Returning to the skydiver, I am not a perfect cylinder. I am more of an imperfect ellipse (oval) seen from above. This is not to my benefit in a rolling landing as the ground (not perfectly smooth) will have a tendency to turn me into a round object by attempting to break off my protrusions (shoulders, arms, knees, etc.) This is complicated by the fact that the PLF was developed using round parachutes which did not have flare capability. As such the arms in a round canopy PLF were above the head, elbows bent and cushioning the head from the sides. This positioning essentially extends the arms along the long axis of the cylinder. With a square parachute our hands are down at our sides (hopefully) controlling the flare. During the rotation of a PLF, and particularly a rotation of 6.77 rpm, the hands and arms are thus exposed to quite a bit of trauma due to impact with the ground, more than once, as the roll proceeds. What one hopes for is the best case scenario where the jumper is rolling from shoulder to shoulder across the ground. The worst case scenario would be tumbling head to toe across the ground. Unless one is a trained gymnast this would expose the head and neck to several impacts with the ground. A real life roll/tumble would probably fall somewhere between these two extremes. At a rotational speed of 6.77 rpm a PLF would risk head and neck injury. At a rotational speed of 6.77 rpm, even a perfect PLF has great risk to shoulders, arms, hips and legs. There is a solution to this downwind landing possibility. It is easy to train and easily understood by newcomers and experienced skydivers alike. The simplest way to prepare for as many landing scenarios as possible is to assume the PLF position, fly the parachute and slide on one hip in the event of a forward motion, high speed landing. I teach our students to envision holding a dollar bill between their knees and squeezing a quarter between their glutes (“feet and knees, dollar and a quarter”). Actually doing so puts one into the PLF position. When the person discovers a downwind mistake has been made, he/she should assume this PLF position. At touch down the jumper should try to absorb as much as possible of the downward impact with their feet but lean back in the harness. Under no circumstances should the person allow themselves to be thrown head first. The jumper wants to stay on their feet as long as possible, tending to sitting down. As the person sits down he/she wants to transition (during the squat) onto a hip. One does not want to impact directly onto the butt. The spine will tolerate torsion (bending) but very little compression. Sitting down directly onto the butt could cause spinal problems on its own (disks and vertebrae). Absorbing the actual butt touchdown with the hip will allow the spine to flex. Hitting a rock with the tailbone while sliding across the ground could be quite painful as a likely result is a cracked tailbone. Hitting a rock with the hip while sliding across the ground might possibly bruise the hip, an easier recovery than any spinal injury. The jumper should perform a baseball slide into second base ensuring that they remain sliding feet first. The person will get dirty. Done properly, one may see damage to the leg strap cover on the hip, but a dirty/torn jumpsuit and/or a dirty/scraped hip cover will be all that one sees. During a proper landing (into the wind) and under reasonable conditions, if a person is in a PLF position (feet and knees, dollar and a quarter) accompanied by a flare anywhere near half–flight, the parachute will lay the student down in the first half of a PLF. This is all that is necessary with a properly sized square canopy. The “lay down” is a result of the fact that most students are not true into the wind at touchdown and thus the square parachute almost always imparts some degree of forward AND sideward motion to the student. The occurrence of downwind landings is relatively rare. However, bear in mind that most of these are done by a jumper off student status (off radio assistance). This person has received very little if any formal instruction since the first solo landing class. So the technique must be simple to learn, retain and execute months after the initial training. Since I began teaching this concept, decades ago, I have not had a single jumper injury related to downwind landings when my advice was put into practice. My motivation for writing this article comes from the words that I hear when traveling to other drop zones and the words that I read in articles such as “Incident Reports”, “…you should have done a PLF”. This is not always the case, particularly with today’s parachutes. A PLF is no longer a panacea for all conditions. I also want to point out that, in my opinion, the instructor showing a first jump student a PLF accomplishes nothing at all. Having each student perform a PLF on the ground is no better. For a person to learn a PLF requires repetitions by the student, MANY repetitions, from an elevated platform. A person or publication telling anyone that he/she should have done a PLF, which the person has never actually learned, is not accomplishing what the student needed and the knowledge that the publication is trying to disseminate.
-
I have spent much of my life studying parachute stability. It has become an obsession of sorts, spurred by a fairly sizable stint in a wheel chair- funny how that works. I have designed and built many, many canopies with the goal of creating collapse-proof canopy. I have failed. It is impossible. This is the case because, despite the best efforts of the designer to increase internal pressurization and dynamic stability, the canopy can still be flown badly and become unstable. This will always be so. The job then, falls on the educators, and on the pilots themselves to learn and rehearse the essential survival skills that increase the chances that the correct action will be taken in the spur of the moment. I stated in my original article on turbulence, entitled “Collapses and Turbulence”, that the key is to maintain lots and lots of airspeed and line tension. I still hold that this is generally the truth. However, upon re-examining the situation, I have realized that my perspective on the situation is based on my frame of reference. I fly sub-100 square foot cross-braced speed machine that falls out of the sky like a homesick bowling ball. I do not really represent the whole. The average-size parachute is 150-170 square feet in the civilian world, and much larger for students and military jumpers. In further exploring the issue from the perspective of lighter wing loading and larger parachutes, I have discovered that this is not necessarily best way to fly a larger canopy in chaotic air. Here is why this is so: If the parachute has a great deal of drag, i.e. a light wing-loading, thick airfoil or is a large parachute in general, the rules change. Such canopies are less capable of maintaining high speeds unless flown very aggressively. Due to the high drag variable at the canopy end of the drag equation (“Rag Drag”, as I call it) the excess airspeed makes the canopy itself want to retreat behind the jumper far enough to reduce the airspeed far below the unadulterated full flight speed. This momentarily increases the likelihood of a collapse. The parachute levels off in mid air, slows down, and for a brief moment, becomes vulnerable to collapse. Therefore, when flying a canopy with a short, powerful recover arc, aiming to increase the speed beyond full flight becomes a double-edged sword. If the timing is wrong, such as when leveling out high (prematurely), the situation can become very dangerous. The truth is, leveling off well above the ground is dangerous for any wing-loading, and can happen with any parachute due to an incomplete plan or an imperfect execution. Parachutes flown below one G, at speeds less than full flight speed tend to be more susceptible to collapse. So, if the pilot is quick with their "Surge-Prevention Input", (what paraglider pilots call "flying actively", the risk of collapse is significantly reduced as the negative pitch oscillations will be minimized, thereby diminishing the likelihood that the wing will reach a low enough angle of attack to actually achieve negative lift and dive toward the jumper (i.e. collapse and scare the daylights out of you). Given the fact that the only preventative or corrective response to a collapse is to stab the brakes as quickly as possible, the sooner the pilot responds to the forward surge, the less the input necessary to avoid or correct a collapse. Therefore, a canopy with a great deal of slack in the brake lines will require more motion on the part of the pilot to create any appreciable effect. This means that a canopy that is in full glide, with the toggles all the way up in the keepers and three inches of excess brake line trailing behind will take longer to see an increase in the angle of attack due to the control input than one with no slack in the brakes at all. So then the question is posed: “Do we shorten the brake lines on larger canopies to help the pilot prevent collapses?” The answer to this is no, we cannot. This will result in serious bucking during front riser input. It will also mean that following a few hundred jumps, the canopy will be in significant brakes when they think they are in full flight, due to their “lazy arms” pulling the tail down when they should be flying arms up. This will result in lower average airspeeds that will reduce the parachute’s flare power, as well as it’s penetration into the wind. This will also result in more oscillation and distortion in turbulence. The answer comes to us from our sisters and brothers in the paragliding world. They teach their students to hold a touch of tension on the brakes when flying through turbulence. The goal here is not to put on the brakes and deform the tail, but to simply take up the slack on the brake lines, in preparation for a 12-24 inch strike on the toggles to prevent a collapse. Some teach their students to hold about 5 lbs of pressure on the brakes, while others teach that we should hold no more than two inches below the “Feel Point”. Either way, taking the slack out of the brakes is like standing ready in the door, even when you can't see the count. So, on larger canopies, it appears that a light touch on the brakes may help prevent collapses. However, it is not because the canopy is more stable in this configuration, but simply that the pilot is more prepared to prevent the wing from surging forward in the pitch window. Once the wing has passed through that parcel of turbulent air, however, the job remains to regain the full flight airspeed, while maintaining positive G's. Letting the wing surge back into full flight too quickly can send the wing out of the frying pan and into the fire. Get it back to speed gently, but get back there as quickly as possible. These are opposing goals, so the actions of the pilot once again become pivotal, calling upon trained skills and acute attention to sensation. Ultimately, the best way to handle turbulence is to deny it battle. Despite what your ego is telling you, you already have enough jumps. I know you want more, but sometimes the best way to go is to sit on the ground and watch the inexperienced jumpers get experienced. Live to fly another day. Brian Germain Big Air Sportz www.bigairsportz.com
-
Most of us agree that canopy control is the most important, and most difficult aspect of skydiving instruction. Within this broad objective is the ability to fly a safe and consistent landing pattern. This is crucial for everyone, from the highest level of experience down to the beginner. The clear necessity for improvement in this area has been demonstrated time and again with the unacceptable frequency of canopy collisions and low turn accidents that have plagued our sport for far too long. General aviation has implemented many new technologies to assist pilots in navigation. These tools have enhanced aviation safety, and such devices are not considered crutches, but a necessary part of safe flying. Similar advances are now commercially available for skydivers as well, but many do not include these instruments in their safety toolkit; least of all for primary instruction methodologies. It is time for this to change. Altitude awareness is not something that ends once the canopy opens. Knowing precisely how high we are throughout the approach and landing is vital for consistency, and many of the traditional analogue devices are unable to provide truly trustworthy data. The digital altimeters that are now widely available are accurate within ten feet or so, but they have one tragic flaw: the pilot must look away from the ground, and away from the traffic, in order to access the information. Having water available does not guarantee that the thirsty will drink, and as altitude diminishes and stress level increases, visual altimeters are used less and less. As many high performance pilots have come to realize, audible altimeters are an incredibly powerful aid for heads-up access to the information that saves their lives. The time has come to utilize these tools for students and intermediate skydivers as well. A pattern is a simply a series of invisible points in space, what some have come to refer to as "altitude-location check-points". With three or four ALC's, a canopy pilot can follow a preplanned path through space to a predictable landing point. When these ALC's are programmed into an audible device such as the Optima, with its impressive tolerance of + or - only ten feet, the distracting glances at a visual altimeter become mostly unnecessary. More importantly, I have found that my canopy piloting students who use such audible cues are more aware of their surroundings, and are far less likely to run into other canopies on the way to the target. Even more importantly, by having their eyes focused "outside the cockpit" so to speak, the canopy pilot learns exactly what the ground looks like at the various altitudes. Therefore, I have discovered, if there is an instrument failure in the future, they have "calibrated their eyeballs", and are aware when they are too low to execute a hard, descending turn. Many instructors have grown accustomed to preaching the party line that relying on instruments for canopy flight is inadvisable. Although there is some merit to training our eyes to recognize key altitudes, simply trusting our inborn instincts is not an effective way to accomplish this goal. When a “flat-line” beep goes off in your helmet that marks 300 feet AGL, and you happen to be looking at the ground at the time, you immediately become a better canopy pilot. Furthermore, when you are focused on your surroundings, rather than a dial on your wrist, you are more likely to make the necessary course corrections that lead to the target. The primary reason for missing the target is, and always will be, failure to maneuver when a course correction is necessary. When you always know how high you are, and are observing your location in relation the target, you are far more likely to make the change that puts you in the peas. The safety concerns regarding the use of audible devices for flying a pattern can be addressed with a few simple rules. The first rule is, if you don’t get the first beep, assume that the instrument has run out of battery life, or is improperly programmed. When the initial pattern beep comes, verify that this is in fact the altitude that you expected it to be by looking at your visual altimeter. If it is not, or you hear nothing at all, use your visual altimeter for the remainder of the jump, and sort it out on the ground. Above all else, your eyes are your default, and you can veto what the audible is telling you, or not telling you. If it doesn’t look right, put your parachute over your head and prepare to flare for landing. There have been many technological leaps that have changed the sport forever, and audible information for canopy flight is proving to be one of the most profound. By knowing exactly how high we are at all times, we can act appropriately. We can relax more as we fly our approach, and enjoy the simplicity and joy of landing our parachutes without worry. Above all else, the reduction of the stress within each canopy pilot, both student and expert, has proven itself to allow for the full expression of skill that training has made possible. When we embrace such advances, we can more easily expand into the pilots we were meant to become. BSG Brian Germain is a parachute designer and test pilot, and runs canopy flight skills and safety courses all over the world. Brian has made over 14,000 jumps in his 25 years in the sport. He is also the host of the “Safety First” segment on SkydiveRadio.com, and the creator of many educational You Tube videos. Brian is the author of the widely popular canopy flight text The Parachute and its Pilot, as well as Transcending Fear, Greenlight Your Life, and Vertical Journey. His upcoming book entitled “Vibe Matters, emotion is everything” will be coming out later this year, along with the long awaited educational packing video “No Sweat”. His websites are www.BIGAIRSportZ.com and www.Transcendingfear.com and his YouTube channel is: www.youtube.com/bsgermain
-
 Learning to fly our parachutes is absolutely necessary for long-term survival in this sport. The philosophy that the canopy is simply a means to get down from a skydive is gradually becoming a thing of the past. This may be as a result of individuals with such an attitude dropping out of the sport due to canopy-related injuries, or from the insurmountable fear that comes as a result of a lack of control over their experience. Regardless, many jumpers have been taking an increased interest in flying their parachutes better. Reading and talking about canopies is the beginning of this process. We must understand the principles that allow our canopies to fly. To make a real difference in our capabilities, however, we need to physically experiment with our parachutes in flight. We must practice in the real world. Here are a few exercises that will increase your abilities to save your own life, and enhance your feeling of control while under canopy: Pitch Control Exercises Manipulate the canopy on the pitch axis using the brakes. Look at canopy to notice the amount of pitch axis change. Notice the difference between "soft" and "sharp" inputs: slow application vs. quick. Why? Controlling the pitch angle is how we manipulate the angle of attack of the wing. Without a dynamic change to the angle of attack, we will be unable to increase the lift of the parachute enough to change the direction of flight from its normal full flight glide to level flight. This maneuver is essential for safe landings. Pitch Control With Bank Angle Begin a turn using a single steering toggle. Apply the opposite toggle while still in the turn. Experiment with soft versus sharp inputs to negate decent. Look at canopy to notice pitch changes.Why? Having the ability to control the pitch axis while in a bank is what gives the pilot the ability to control the decent rate while in a turn. The natural tendency is to loose altitude in a turn, but this is not necessarily the result of turning with bank angle. By increasing the angle of attack while in a bank, we can increase the amount of lift that the parachute is producing, and even alter the flight path to level flight despite significant bank angle. Dive Arrest: Toggle Turns Place the canopy in a spiral dive using a single steering toggle. Arrest the dive as quickly as possible by sharply applying the opposite toggle as well as the inside toggle; the inside toggle is not applied until the two are matched in the degree of input. When the toggles are matched, a short stab of collective brake pressure is usually all that is needed to achieve level flight. Exercise both banked recovery and wings level recovery. Why? Turning too low is the preliminary cause of many injuries in our sport. Unfortunately, most canopy pilots assume that bank angle must be eradicated before arresting the dive. This leads many to waste valuable altitude in the process of leveling the wing. In situations with very little altitude remaining, this may delay the collective brake application until it is too late. By rehearsing a transition to zero decent while still in a bank, the pilot becomes accustomed to applying the toggle on the outside of the turn as a learned instinct, reducing the chances of a turn leading to serious injury. Dive Arrest: Front Riser Dive Place the canopy in a dive using the front risers. Rehearse dropping the front risers and quickly stabbing the brakes. Rehearse both straight front riser dive recovery as well as turning dives. Why? While acceleration on final approach can be great fun and usually leads to longer swoops, the acquisition of speed is not really the hard part. What keeps us alive is the judgment and skills necessary to save us when we dive the canopy too close to the ground. If we rehearse the solutions to the dangers, the likelihood of a dive resulting in serious injury is reduced. Letting the front risers up slowly may be the best way to get a long swoop when the dive is rounded up slowly and with ample altitude. Unfortunately, this muscle memory may not serve us when we are really low. In the time it takes to smoothly let up on the front risers we may find ourselves planted in the ground like a shrubbery. Dropping the front risers allows the pilot to keep their hands down, ready to stab the brakes aggressively to arrest a mortal dive. A short, sharp, shock on the brakes may be all that is necessary to place the jumper back under the wing, and to the higher angle of attack that saves their life. Slow-Flight Practice Place the canopy in 90% brakes and hold for 60-90 seconds. Make controlled heading changes of 45-90 degrees. Notice the difference in responsiveness as compared to full flight turns. Notice that lifting a toggle on the outside of the turn reduces the risk of stalling the wing on the inside of the turn.Why? Most pilots spend the majority of their canopy ride in full flight. This means that the feeling of the canopy in this mode is most comfortable to most people. It also means that flying in deep brakes places many out of their comfort zone. This means that most people are feeling somewhat uncomfortable just prior to putting their feet on the ground every single jump. In fact, this anxiety often causes people to hold their breath, and then offset their steering toggles toward the end of the landing in order to get to the ground sooner. They simply want this part to be over. In order to land with great consistency, we must become intimately aware of the flight performance of our parachutes in very deep brakes. The more time we spend in this flight mode, the more comfortable we will be. If we are to land well, we must be as comfortable with deep brakes as we are with full flight. Brian Germain is the author of The Parachute and its Pilot, a canopy flight educational text. Brian is also the President of Big Air Sportz parachute manufacturing company, and teaches canopy flight courses all over the world. To learn more about parachutes, or to order the book, go to: www.BrianGermain.com .
 -
When I started skydiving more than 25 years ago, the leading cause of skydiving deaths was the failure to pull on time, or at all. Skydivers just failed to do the one thing every one of us knew we _must_ do: pull. Education, regulation specifically addressing this issue, and not least the development by Helmut Cloth of the first AAD widely accepted by experienced skydivers in the 90's helped to control this problem… only to show the emergence of another, more insidious: skydivers were dying in increasing numbers under perfectly good parachutes, hitting the ground at unsurvivable speeds sometimes after colliding at low altitude with other perfectly good parachutes. And this happened not only to hot shots under handkerchief-sized canopies, it also affected jumpers flying conservatively under big canopies. Once more, the response adopted by the skydiving community has been to put an increased emphasis on the education of skydivers, their instructors, safety officers and DZ operators. It is here where “Canopy Control: Core Essentials” fits right in. Produced by VASST.com and authored by Chris Gay and Chris Warnock, it is aimed primarily to new skydivers. To them, it will be an invaluable tool to complement and clarify what they are learning in the first jump course. But while reviewing it I found it is also extremely useful for experienced skydivers as a refresher of basic concepts that may or may not have been adequately acquired, and sometimes forgotten, years ago. The DVD is divided in several sections totaling 55 minutes, with another 12 minutes of bonus material plus a couple of printable charts. In the beginning the host Chris Gay introduces a key concept: “the person most responsible for your safety, is you”, and it is with this in mind that one should view this DVD, regardless of experience level. Throughout the DVD the importance of different aspect of flying our canopies in relation to others is constantly reminded and related to, as a way to increase our awareness of other canopies in the air and to reduce the chances of a collision. It is also constantly reminded to seek advice from an instructor or canopy pilot coach. In the “Terminology” section, Chris Gay introduces and proceeds to explain basic terminology and concepts related to canopy flying. As through DVD, well conceived and executed graphics, both static and animated, are used to clarify the point being made. This, in addition to the even more prevalent footage of canopy pilots executing the maneuvers being discussed or explained. In “Planning and Landing Pattern”, this process is thoroughly explained. While more experienced skydivers jumping at their local DZ may not be conscious of doing it, it is a skill that must be acquired and developed. And when we are on a new DZ… well, then we all are “new” skydivers. In this regard, great importance is given to acquiring local knowledge on the peculiarities of any given DZ we may be visiting regarding local regulation, obstacles, landing areas, not to land zones (a.k.a. Farmer McNasty’s fields), wind indicators, etc. Also, it is explained how to explore the landing area and what to watch out for. The section “Flying the Pattern” follows, in which great emphasis is given to adapting the landing pattern to changing conditions. There is an extensive treatment on how to modify the landing pattern according to different wind conditions, and what to do if they change after take off. Similar treatment is given to the effect canopy traffic on the landing pattern and how to adjust accordingly, or what to do is you find yourself in the landing pattern at altitudes different than planned. And what to do if, in spite of all our planning and best efforts, we find we are not going to land where intended? That is also explained in this section. “Canopy Controls” is the most technical of the sections, in which a in-depth explanation of the diverse methods of controlling the parachute is given, as well as in what situation every kind of input is appropriate, always relating it to the aerodynamic forces involved. “Getting Back From Long Spots” deals with how to recognize the probably landing site and how to adjust the flight of our canopy to correct it in order to land in the intended site in different wind situations. It also explains the ever important how to plan and what to watch out for if we end up having to land out. “Flaring” advices on how to improve our landings. Explains how the canopy reacts while flaring for landing, different flaring techniques, and how to learn more efficiently this aspect of canopy control. The main section of the DVD finalizes with a “How to Learn More” section, in which different training aids and techniques are advised. In the Bonus section a variety of complementary topics are discussed: wing loading, technical aspects of canopies (7 vs. 9 cells, elliptical vs. “square”, cross braced vs. standard, flight characteristics of small vs. large canopies), on heading openings, packing for better openings, when to learn swooping, and finally a safety review Q & A. As a bonus of the bonus, if I may call it that, there is footage of the Canopy Formation 4-way world champion team Clean Air demonstrating what it is meant for “canopy control”. In summary, as stated by Chris Gay, “Our goal to make this DVD is to help to make you a safer skydiver”. I believe that reviewing and following the advice in this DVD, both by beginners and experienced skydivers, will certainly be a big step in that direction.
-
CANOPY FORMATION PARACHUTING - CF (Part 2)Part 1 may be read here Packing the Canopy You will want to pack your canopy for a CF jump in a way which will ensure that: it opens fast and reliably it opens on heading all canopies involved open with identical timingA good way to achieve this is to pack the main similar to a reserve canopy, as the requirements for a reserve opening are about the same. Indeed, many CF teams do so. Since there are different methods of reserve packing, it is recommended that all jumpers involved in a team or group should use the same packing method for safety reasons. Doing so reduces the probability of collisions and unintended different opening levels to make sure that each team member has an optimal set up for his way to the formation. Type of Exit and Exit OrderA good exit speed is 70 to 80 knots with little prop blast. Newcomers to CF will enjoy greater success if the jumpers exit one after another in the same way students perform “hop and pops” and remain stable. It is essential to remain in a symmetrical body position until the canopy is completely inflated to assure that the canopy opens on heading and continues flying straight until you want to fly your pattern towards the docking position. With experience comes a tighter exit timing, and this practice becomes even more important. If your canopy does not open on heading you can easily end up in a dangerous collision or at least in a bad position during the approach to the formation. Also, other jumpers can be disturbed as they try to avoid the errant canopy. In general you will exit in the order of your position in the formation. Competition teams might use different techniques to speed up the build of their first formation. TimingTeams with more experience will eventually develop an exit with two or three jumpers standing in the door, jumping with only very little delay, and pulling in sequence to create a perfect set up for the build of their first point. In this type of exit, the last jumper leaving the plane (front person in the door) deploys first. The next jumper deploys when he can see the beginning deployment of the jumper above. This leads to a set up with the lower canopy slightly in front, which creates a perfect set up for a final approach. Set-Up for Building the FormationIn most cases it makes sense if the person flying the Base sets up on heading, flying with a little brakes and slightly lower than the jumpers that will dock next. That gives the next jumpers the potential to fly to their docking position because altitude is our fuel. A good position for the final approach of a single canopy is slightly higher and to the side (perhaps slightly behind) of the canopy to dock, onflying parallel with it. The optimum setup of course depends on the flight characteristics of the formation to dock on. For docking on a fast sinking formation, it’s probable that the setup will be lower than for docking on a floaty formation. The necessary experience to estimate the perfect set up will only come with the jumper and quality of your jumps Body Position Fig2.1 To keep your canopy flying straight with even controls, body position must be symmetrical. Shoulders should be square and arms in a “box position” with legs slightly spread and bent as shown in the sketch of a stack. If you lift one leg from that position while stretching the other one your canopy will start to turn towards the stretched leg. If done with intention, this can be a useful tool. For example, a stair step formation might benefit from stretched-leg control. Bent legs also provide the potential to compensate for tension in a formation and to dampen oscillations. Reducing AltitudeWhen getting into the setup position for your final approach to the formation you may find yourself higher than desired (if your are too low or far behind you won’t be able to get into the formation). There are different ways to lose extra altitude without using much space. It always makes sense to stay in a small area because long distance movements take much more time. Additionally you may interfere with the waiting position of another jumper. Furthermore, you might have difficulties estimating your exact position. Below, you’ll find methods of losing altitude. Cross ControlsIf it is important to use very little space, you can easily lose altitude by using cross controls. That means you’ll pull down one front riser, then compensate the move your canopy would now make by applying the toggle on the opposite side. Because the canopy is being distorted it sinks and will pick up speed to the distorted side. The toggle action evens out this momentum so that the canopy ends up sinking in place, assuming that the right balance is applied. Doing so you can get into the desired set up position for your final approach without disturbing another jumper in his set up position close to the formation. Rear Riser StallA similar result can be achieved by performing a rear riser stall. To do so, you grab the connector links on your rear risers and pull them down carefully. This is not very hard to do. Because the main part of the lift is being created in the first third of the profile where the A- and B-lines are attached to the front risers, this is a fairly light pull.. At first, the canopy will begin glide flatter without losing much speed. This range can be useful if you find yourself far away from the drop zone on a down wind flight pattern and want to get as close to the DZ as possible. If l the risers are pulled down a little further, the canopy will smoothly begin to stall and sink very fast. This technique can help to lose a lot of altitude. However, it should be practiced with only two jumpers involved before being used in a big way jump. It is not recommended in a tight echelon as the canopy may come out of the stall bailing out to the side, and interfering with others in the lineup. Rear RiserIf you are too low and need to gain altitude on the way to your waiting position, or if you’ve gotten behind the formation, you can use very light pressure on both rear risers to fly a fatter path without losing much forward speed. This has to be done very carefully because it you pull them down too much you will lose speed and only millimeters further, end up in the rear riser stall previously mentioned. About the oldest technique to lose altitude is the “sashay.” The sashay begins with a radical toggle turn away from the formation and then a reverse movement as soon as the canopy has tilted to the side; this movement is stopped out with both toggles. It is not very efficient, utilizing a lot of area and you may lose track of your position relative to the formation. It takes a lot of practice to get good results with this radical maneuver. Over the TopAlso from rotations comes the “rotation over the top“. The move begins with going to deep brakes quickly. As soon as the canopy rocks back grab both front risers and quickly pull them down without letting go of your toggles. It takes less force than you might expect because if done at the right moment, the front riser pull will coincide with the canopy having almost no lift and no tension on the lines. Next, you riser down little further than your final destination, release the risers, and swoop into your docking position by using the toggles. Today some successful teams are using a combination of the two techniques mentioned above. However, these should be considered advanced skills, to be discussed in another article. Techniques for ApproachesThe most challenging part of a CF jump is the build of the initial two-way formation or the dock on a single canopy. Remember, a formation will usually not perform as well as a single parachute. Docking on a larger formation always gives you a little extra performance relative to the formation since you have a single canopy with all of its lift potential. Good technique(s) is/are required to dock with a single parachute of similar performance. That means you’ll need to gain some momentum when attempting to dock on a canopy flying by itself. The only way to do so is by setting up higher and not too far behind the canopy you’ll be docking with. The canopy to be docked upon should slightly hold brakes to make things easier. The docking jumper begins his approach setting from a position with his feet approximately at the level of the canopy he’s docking on; slightly behind or a little to the side. The approach is initiated by using front risers to pick up speed and controlling the direction of flight. Now pilot the canopy to a position slightly lower and slightly behind the final docking point. The final move is performed via toggles (reducing speed), swooping up to the desired level, and aiming the docking cell to the desired position (center cell for a stack or end cell for a stair step). It is essential not to have too much energy left when docking and also not to end up too low. If you end up too low the dock will fail. If you find yourself having too much left-over energy, you should abort the dock for safety reasons and use the potential energy to fly to a good position for a new setup and another attempt. Building the FormationsIn principle, there are only two or three ways of making approaches. Building a StackTo build a stack, the jumper who is docking sets up slightly behind and above the canopy he’s docking on while the jumper to be docked upon flies straight holding a little brakes. The lower canopy stays in brakes until the docking center cell has touched his back. If the dock is perfect and he has some experience, he can take foot grips hooking his feet behind the center lines. If not, he can release his toggles and grab the docking canopies nose get it into the right position and then take the foot grips. Having done so, the lower canopy pilot gets back on the toggles to control the formation. Never release the toggles before the docking canopy has actually touched you because if you do, your own canopy picks up speed and flies away from the canopy trying to dock. In any case it is important that he releases both toggles evenly to prevent the formation from spiraling. It is also very important that the docking pilot can see at least the lower legs of the jumper he’s docking on. Should the legs become shorter and shorter you need to add more brakes. It an absolute NO to pass under a jumper you intended to dock on. If you have the impression that this is about to happen you must abort the attempted approach by either stalling radically or turn away with one front riser pulled down. It can be extremely dangerous to fly underneath and in front of a formation because your burbles can cause canopies in the formation to collapse. Also you could lift up with the middle of your canopy under the jumper you wanted to dock on ending up in a wrap. That means if you perform any kind of dock on a formation you have to be in full control of your canopy at all times and able to abort if not. Otherwise you are not qualified to do CF jumps. Fig 2.2 If the docking canopy ends up higher than wanted, it’s not necessarily a problem. The docking jumper can park his canopy with his nose in the center against the lines of the top canopy and slide it down by moderately using his front risers until the top jumper is able to reach for his grips. Approaches to lower positions in a stack or plane will need a lower set up than for high positions because the formation begins to sink more with its size - especially the “plane” formation. Speed teams may still want to dock positions three and four from a higher position and perform a riser dock by aiming their slider to the jumpers feet instead of the center cell. Building a PlaneA plane formation begins with a stack. Next, the top jumper climbs down the center A-lines and once the slider has been reached, he now hooks his feet behind the front risers of the lower jumper. The lower jumper helps by putting on some brakes to increase the lift of his canopy. If the top jumper needs to pull himself down on the A-lines, it must be done with uniformity to prevent the formation from oscillating sideways. Building a StairstepThe Stairstep is the second basic type of formation. The technique for building a stairstep dock is similar to the techniques explained previously but because the Stairstep is far less solid than a stack or plane, everything has to be done with lighter input and greater precision. The set up for the final approach is slightly to the side of the formation. To make a clean straight and precise dock you’ll want to keep it relatively short with not too much potential. You may start with one canopy width to the side of your target canopy and your canopy slightly lower than the canopy to dock. The approach should be from the side rather than from behind so that the jumper to be docked upon has a good view of the line he wants to catch as well as remaining in the clean air to the side of the docking canopy. Also in this type of dock you should never get too low or lose sight of the target. The docking end cell should end up at the hip to the shoulder of the docked body. The docked jumper can now hook his outside foot behind the outside A-line of the docking canopy with his body staying outside the docking cell. If the grip taker should need to use a hand grip to guide the docking canopy to a good position for taking ther foot grip he has to be well aware to maintain his body position in the harness to prevent unwanted influence on the flight of his own canopy. The docking pilot puts on some outside front riser trim as soon as the top jumper has taken his grip to prevent his canopy from coming up on the opposite side. After having set his canopy by doing so he may release some of that trim or maybe even all of it. Sometimes it gives you enough trim to stretch the outside leg to keep the bottom canopy flying nicely. Sometimes no further trim is needed any more but still you should keep your hand on the outside front riser ready to apply trim again if needed. The set up for stairstep docks in lower positions may be somewhat lower. None-the-less be aware that a stairstep formation flies fast and flat compared to other formation types. If your setup is too low your docking time may become very long. The build of the stairstep, stack, or plane can of course also be done in reverse order with the lower canopy flying in little brakes and being the target and the top canopy flying the approach. The technique is referred to as the Top-Dock and will be explained with techniques of sequential CF later on. Flying in the FormationAs in free fall skydiving you have to keep on flying after you docked. In a stack for instance, especially in the bottom position, you need to make sure that your canopy does not get too light and floats up. All canopies should have slight tension on the center A-line to make the formation healthy. In a plane it is important that all cells of all canopies are inflated. If not the jumper in question can reinflate his closed cells by putting on some brakes. Perhaps he will also have to maintain some toggle trim to keep his canopy’s nose open. Also a jumper next to a closed cell can help by pulling the nose open. Good awareness is needed in formations with stairstep grips like stairsteps, diamonds or boxes. Especially jumpers in lower positions need to always keep their canopies from coming up or around. Possible techniques are: outside front riser trim asymmetrical leg position and inside toggle. Signals within the FormationTo signal information to other jumpers in the formation there are two ways. You can either shout a command by addressing the jumper with his name or use certain signs. In bigger formations it is more convenient in most cases to use signals instead of vocal communication to avoid noise and confusion. The signs and commands to use must be known well to everybody. In case of vocal information you must never use negative commands. If for instance you shout “don’t cut away!” and the other jumper misunderstands he will cut away. In this case you should have said “hold on!” for example. In large formations there are two very useful signals to the jumper below you: Twisting your foot sideways means the jumper whose canopy is on that foot needs to get lighter for example by putting on some brakes or easing the front riser pressure if possible. Shaking the foot vertically means get heavy which means put on some front riser pressure or signal further down if the jumper(s) below is (are) light on you as well. Piloting a FormationStack and plane formations always follow the top canopy and are controlled by the top jumper also called the pilot. The stair step needs more caution than the stack because it is connected less stable. Diamond formations act similar but in bigger formations the pilot might need some assistance by all the out side wing people to help keep the formation flying straight or to help turn the formation. Bigger diamonds are fairly inert. It takes some time to make a big diamond turn. The most attention is needed in stair steps. In a turning stair step the bottom jumper always needs to compensate the change in the flight characteristic of the turning stair step versus the straight flying one. If the formation is turning away from him he needs to release some of his outside front riser trim and if the formation turns towards him he needs to increase the trim on his outside riser. Because the links in a stairstep formation are similar to pivot points these formations need to be turned very carefully. Separating a FormationSeparating a formation needs at least as much attention as building one, especially for safety reasons. Also should it be done high enough. Bigger formations should be separated at 1.500m (5.000ft) and smaller ones at 900m (3.000ft). Small formations can be split in reverse order of building letting go one jumper after another. The jumper whose turn it is to go shouts the names of the ones holding him and they drop him. Then he clears the proximity of the formation immediately to give room for the next jumper to leave it. Larger formations in the shape of a diamond of up to 36 jumpers can be split by using a technique called STARBURST. The starburst is being started by the designated person calling “starburst! - starburst!” which is to be echoed through the formation. Then one person starts a count down calling “ok – ten, nine…..two, one, break!“ Everybody else joins the count loudly to make sure that everybody is able to hear it. On “one” everybody get his hands on the controls and on break lets go of the grips to fly out of the formation radially away from the center. Peter A. Pfalzgraf Rheingaustr. 24 12161 Berlin [email protected]
-
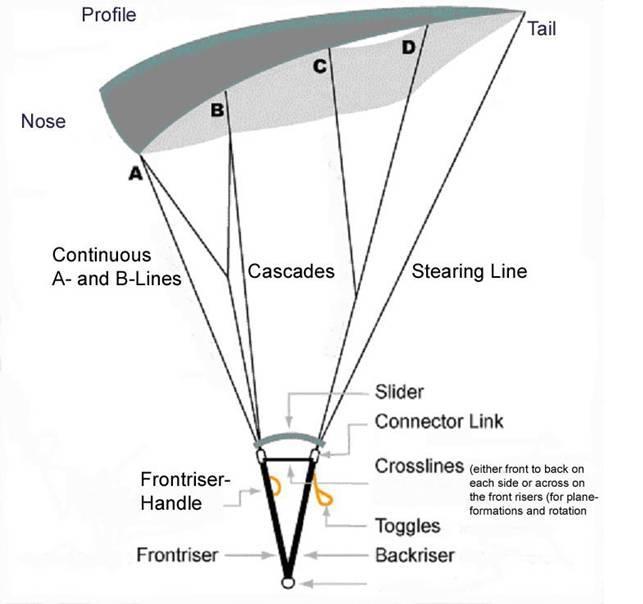 By Peter Pfalzgraf In the early days of CReW (as canopy formation skydiving used to be called) I wrote and published a little booklet for those who were interested in learning the new sport. Things have changed a lot since then. So, I found it necessary to publish something new to make general information on our sport available to everybody interested. This essay combines techniques and hints from Europe and America. The latest input came from the training camps for the new canopy formation world record attempts aiming for a 100-way formation. Canopy and Harness (Figure 1) The times are gone where they had all-around canopies that could be used fairly well for any kind of skydive. Such canopies as the Cruisair, ¬U¬nit, Pegasus, Cruislite and Fury were once very common. Today, the best parachutes for canopy formation parachuting (briefly known as “CF”, in the old days) are 7-cell canopies. These parachutes are the safest concerning deployment and stability in flight, especially in turbulent conditions. It is no coincidence that reserve parachutes and canopies for BASE jumping are mostly 7-cell canopies. Triathlons and Spectres with Dacron lines can be used for casual CF jumps, although Lightnings are the CF canopies of choice. If you intend to do a CF jump today you are well advised to use a canopy that has been designed for this kind of activity. As a compromise for your first attempts, you may use a 7-cell canopy with a thick profile (for instance a student or accuracy canopy). Never attempt CF jumps with elliptical canopies, canopies with wide wing spans (in comparison with the depth of the profile/length in direction of flight) and/or a low profile. Today’s CF canopies are available in different sizes for different weight classes. It is important that people intending to join a CF jump use the same type of canopy with the same line length and trim. Furthermore, the wing loading (weight under canopy per square foot) should be reasonably identical to guarantee similar flight characteristics. The container of your harness should be big enough for the packing volume of the canopy to make sure it can be closed properly (safety!). There should be no handles, container flaps, pop-top pilot chutes or anything else sticking out that could get caught in another jumper’s lines. Those things could result in unintentional reserve openings or problems on separation. The bridle should be short or even better, self retracting to prevent your pilot chute from being caught in the other jumper’s lines while you are in a formation. You can imagine that separating a plane formation with one jumper’s pilot chute entangled in the other jumper’s lines will most certainly result in serious problems. Additional Equipment The altimeter should be worn in a way that makes sure it does not get snagged and can always be seen while you have your hands in the toggles. The helmet should provide not only head protection but also allow good hearing. It should not cause wind noise that might affect your hearing. Every CF jumper should carry a hook knife that can be used in case of an entanglement or wrap. Sometimes it only takes one line to be cut to get free and save a reserve ride. The hook knife of course should also be worn in a way that prevents it from being caught or ripped away. Your shoes must not have any hooks. They should fit loose enough that you can get rid of them if need be in order to get free. It is very useful to wear long socks to protect your legs against bruises and line burns. Aerodynamics of the Airfoil Lift is the force that keeps a canopy in the air. Opposite to a round canopy that only creates a big air resistance to slow down your descent using a large area of fabric, the square parachute, or airfoil, really produces lift like the wing of a glider for instance. The square footage of an airfoil is approximately one-sixth to one-quarter of a round canopy, and yet has a far lower rate of descent. The lift of the airfoil consists of 1/3 high pressure under the profile (similar to the round canopy) and 2/3 low pressure on the top surface created by the undisturbed airflow. This effect is the important matter for us. The physical reasons for this effect aren’t pertinent to this particular discussion. What is most important is to know that the main part of the lift depends on the undisturbed airflow on the top surface of the square canopy, forward speed and the shape of the profile. The lift increases with forward speed and grows with the thickness of the profile. The air resistance of the canopy slows the forward speed down. Due to the different pressure at the upper and lower surface of the profile air will flow around the sides of the canopy from the bottom to the top following the pressure difference. This effect reduces the lift and is called induced resistance. As a consequence of this, the maximum lift is in the centre of the airfoil. The stabilizers on either side of the profile are designed to reduce the loss of lift by hindering the airflow from the bottom to the top surface. Another way to reduce the loss of lift is to make the airfoil very wide so that the percentage of wing area being affected becomes comparably small. A good sample for this solution is the paraglider. This shape of airfoil is, of course, not good for CF activities. Because of the airflow around the sides and also around the tail, a parachute gliding through the air leaves a track of turbulence. The side turbulence creates a zone of turbulent air on either side beginning at the trailing corners of the airfoil. The turbulence of the tail creates a turbulent zone rising from the trailing edge of the canopy. It is clear that a parachute or canopy formation flying into such a turbulent zone will be affected by losing lift. Even aircraft flying through the turbulence of a canopy formation will lose considerable altitude. Figures 2 and 3 show the shape and position of the zones of turbulence. In a formation these phenomenon cause effects that can be noticed clearly. Just the top canopy in a formation gets only undisturbed airflow and has the maximum possible lift. All canopies having a body in front or on a front corner will lose lift due to the turbulence caused by the body out in front. Aerodynamics of the basic Formation Types Knowing the things mentioned above, we can predict that any type of formation cannot perform as well as a single canopy. That is useful for building formations as it gives the single canopy the potential to approach and dock on a formation due to its extra lift and forward speed. In principle all formations consist of a few basic types. Let’s look at the conditions in these. The Stack The stack (Figure 4) is the most basic formation. To build a stack one jumper sits on top the other jumper’s center cell and hooks his feet behind the center A-lines of the lower canopy similar to sitting on a chair. There will be some tension on the lines because the lower canopy in this type of formation will have a little less lift. In a stack the body of the top jumper is in front of the center cell of the lower canopy. The turbulence of that body meets the airflow of the lower canopy exactly at the point where the main lift is created and leads to a considerable loss of lift. This means that a stack will sink far more than a single canopy. The Plane The plane (Figure 5) is created out of the stack. The top jumper climbs down the center A-lines and hooks his feet behind the front risers of the lower jumper underneath the slider. The lower jumper supports him by putting on some brakes to increase the lift of his canopy. For this formation type one or two cross connectors are required, which either connect the front connector links (one line) or two lines that connect the front and rear connector link on either side. Otherwise the top jumper might slide back up due to his plus of lift and pull up the slider, which would result in a collapsed lower canopy. In a plane formation, the turbulence/loss of lift effect is not as strong. As the top jumper’s body is beneath the two canopies, one might think there is no loss of lift at all, yet the line contact causes deformation in the lower canopy and additionally forces both canopies into a new aspect ratio. This leads to a loss of performance. A single canopy will perform better than a biplane. If a plane becomes bigger there will of course, be canopies with bodies in front of them. Planes with more than four canopies will sink faster as the plane formation grows larger. The Stairstep In a stairstep formation (Figure 6) the top jumper is positioned outside of the lower canopies end cell. He takes a foot grip on the outside A-line. Flying the stair step requires much more experience than flying a stack or plane formation because the link is not as stable. It is more of a pivot point than a stable connection. The lower jumper has to compensate for the influence of the upper jumper’s body to the flight of his canopy. To prevent the lower canopy from coming up and around you can put some tension on the outside front riser of the lower canopy or the lower jumper can stretch the outside leg while lifting the inside leg. The stair-step is far less turbulent than the stack and plane. The body of the top jumper only causes turbulence on the outside corner of the lower canopy and that is a part of the airfoil that contributes only a minor amount of lift. That means that a stair step formation is only slightly less efficient than a single canopy. Because only one side of the lower canopy is affected, the other side will perform better and cause the canopy to rise and drive forward. If the lower jumper does not compensate for this, his canopy might come up and around, leading to a wrap. To prevent that the lower jumper will start to compensate for the difference as soon as the top jumper has taken his grip. Possible ways to compensate include putting tension on the outside front riser and stretching the outside leg while lifting the inside leg. One might also apply some slight inside brake. You can determine how much trim is needed by easing up on the risers or brakes after the canopy is set. Sometimes the formation will fly well with only slight trim or none at all. Nevertheless, the lower jumper should keep a watchful eye on his canopy to immediately compensate, if necessary. That wraps up part one. Join Peter in a week or so for Part 2, when we'll dive deep into building and controlling these formations.
 -
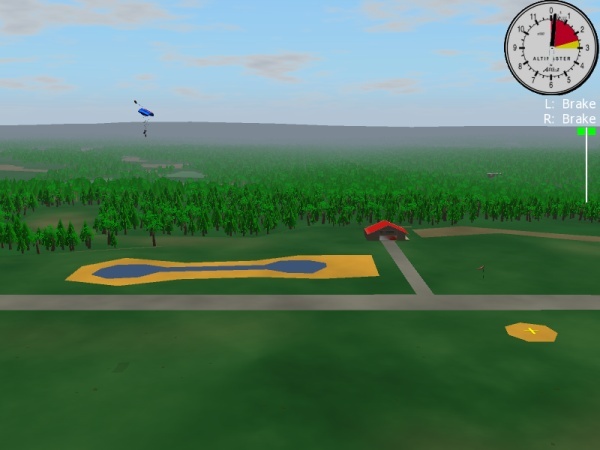 Skydiving requires an action to survive. Freeze, fight or flight are natural reactions to stress but they do not work for skydivers. There is very little time to think about what to do next when the ground is approaching fast. Hence, our response must be quick. We can separate a human reaction into three process: perception, assessment, and execution. These processes happen consecutively. The faster we complete them, the quicker our response is to the changing environment. Let's examine how education and training affects these processes. Perception is the process during which we become aware of information: we look at the altimeter to know the altitude, we look around to see if no other canopies are moving to collide with us, etc. Education and past experiences play a major role in a person's perception. We are not necessarily aware of what we look at. Education trains us to look for the right information in the right places. For example, if we do not look around after our canopy opens to see where the drop zone is, we will not turn to fly toward it. On the other hand, even if we see where the landing area is, we may not know how to detect if we can reach it. As a result, we may not make a turn to fly toward the landing area in time. Books and instructors tell students where to look and what to see, while videos show us examples. However, once students are in the air, they must make a conscious effort to look in the correct direction and focus on the right information: "It's landing time. The ground is moving very quickly. It should not move so quickly. Ohh... I must look at the horizon, I must not look directly underneath." The goal is to make proper perception a habit, because conscious effort is slow. Habits develop with practice, and practice takes time. A student has not yet developed habits and may forget to think about what to pay attention to, but help comes from the instructor over the radio: "Prepare for landing flare. Eyes on the horizon..." One does not develop a habit by taking a class, reading a book or watching a video. Instead, these sources supply knowledge that can be used during practice, which eventually leads to habit. Simulation of a situation, on the other hand, does help to develop a habit, in a safe environment. The emergency procedures that every jumper practices before every jump (you do, right?) is the example of a "simulation". In such "simulation" we create situations and responses ourselves. Another example of a "simulation" is hanging in a harness during a safety day. In this circumstance, an instructor creates an emergency situation for us. Dirt-dive is an example of a non-emergency "simulation". Airplane pilots take the concept of "simulation" further by using flight simulators (http://en.wikipedia.org/wiki/Flight_simulation). The military have used skydiving computer simulators (these are similar to flight simulators) for some time. Nowadays, computer parachute simulation software is available for everyone. The second process in our reaction sequence is assessment - making a decision about what the acquired facts mean. We look at the altimeter and it's 2000 feet. Nothing to be done just yet, or maybe we still have a problem with the canopy, or maybe we see that we are not making it to the landing area, etc. Education has the largest impact on the process of assessment. We are taught what actions are required in different situations. At the very beginning, all we need to do is to pick the right action from the proffered set of actions. Speed of the recall is important. Repetition is key for a quick recall. Taking a class, reading a book, or watching a video are good ways to refresh our memory (safety days help us do exactly that). The disadvantage of these methods is that they cover very limited number of situations and conditions. For example, we are told that to get back from a long spot we can use rear riser input, but that's only true for a certain ratio of your canopy forward speed and the speed of the wind. In some situations, we may have to use front risers or brakes. Now instead of a simple memory retrieval task, we have to do some reasoning. We may have all the knowledge to do the reasoning properly, but it's slow and error prone (time pressure and adrenalin rush do not help rational reasoning). Simulations offer an efficient way to condition memory by repetition. A computer simulation also allows for an infinite amount of situations with different conditions. It's easier to make a decision when we have already seen such a situation before. Execution is the process of acting on the chosen response. Muscle memory allows us to speed up this process. Instructors, books, or videos can not help this process. Muscle memory is developed by repeating an action... but we already know that simulation is good for that! Pulling the cut away and reserve handles while hanging in a training harness or before your reserve is due for a repack are good examples of muscle memory training: we feel how hard we need to pull the handles, what the proper motion of the hands are, etc. Computer simulation can help as well, but it is most effective with a special hardware, which is not yet available at a reasonable price. We have covered three processes that contribute to our reaction: perception, assessment, and execution. We repeat them over and over again. Every time we do something, a new set of conditions manifests itself. There is a dynamic and complex relationship between the situation and our responses to it. Instructors, books, and videos can only mention a very small set of examples. Traditional simulation methods (use of the imaginations or/and an instructor) are also quite limited. A computer simulation, however, provides real time feedback for all possible actions that we can exercise in the simulation. We can judge the correctness of our actions based on what happens next. Simulation has always been an essential part of skydiving education and training. Computer simulation takes this concept further and allows for even better results. We have seen how it can help us when other means of education and training are less efficient or can not help at all. One may ask: "How good must a "computer simulation" be to be used for training?". A similar question would be "How good must a picture be in a text book?" The answer is "As long as it (simulation or picture) reasonably illustrates the required concepts." No educational tool can or should be used by itself. The purpose of the tools is to make a student think, ask the right questions, and develop the correct responses. Given our limited attention span, it's always a compromise between focus on safety and focus on other things, especially for novice jumpers. The faster we get our habits and muscle memory developed, the safer our jumps become. This is why it's important to understand what tools are available to us, and what their limitations, advantages, and disadvantages are. In his book "The Parachute and its Pilot" Brian Germain phrased it this way "When we can acquire the right information, and access this data at the right time, we have a pretty good chance of walking away from sketchy situations." Our goal is "to acquire the right information." We can do this most efficiently when we understand what educational and training tools we have in our disposal: classes, book, videos, simulations, etc. The newest tool in the skydiver's toolbox is computer simulation software. This software greatly complements the other means of education and training. Which, in turn, will result in a safer and more enjoyable sport. Author Information: Alexander Shyrokov is the founder of Static Line Interactive, Inc.

.thumb.jpg.4bb795e2eaf21b8b300039a5e1ec7f92.jpg)