Search the Community
Showing results for tags 'emergencies'.
Found 19 results
-
 April 1st is typically a day for trickery, but the only fool this year was me, and the only trickster was my main canopy! I decided to make a last-minute trip to Skydive Perris with friends to make a balloon jump, but when it was winded out, the generous CReW Dawgs at Elsinore came up with all the gear my friend and I would need to make some beginner CReW jumps. The first jump on borrowed gear went great, but as we packed up my coach informed me the gear I was borrowing was a pull-out, and briefed me on how to use it. We planned a four-stack and lucked out with a camera jumper. As we get out of the plane, I pulled weak and ended up with no canopy. I knew from previous coaching that it’s a bad idea to take a Lightning terminal, so I went straight to reserve. As the reserve came out, I was kicking myself that I wasn’t going to be able to participate in the CReW jump, and would have plenty of time to think about how I got into this mess as my teammates got to play. I decided to fly over and watch, and that’s when I noticed the pilot chute bouncing around on my back. “I should get rid of that,” I thought, and reached for my cutaway handle. I didn’t even have a grip on it before my main came out and settled gently next to my reserve. Next thing I know, the camera flyer is in front of me, pointing and laughing. “What do I do?” I screamed, and he just laughed harder. “Well,” I thought, “if he’s not freaking out, why should I?” So I didn’t freak out. Instead, I worked to get back to the dropzone. No easy task, as I’d soon find out. A west-blowing wind was sending me back over the Ortegas, and with twice the fabric over my head, I was struggling to get any forward movement at all. Unbeknownst to me, my coach flew under me, shouting at me to chop. I tried to force some separation between the two canopies to do just that, but I couldn’t trust myself to hold the reserve away from the main long enough to go for my cutaway handle. Because the two canopies were trimmed so similarly, they really wanted to fly together, although the particular configuration I was flying really wanted to fly south. Considering the town of Elsinore was south, I spent a whole lot of time and energy just keeping the pair flying straight. Image by David Sands (D29444)Imagine pulling straight out of the plane under a large canopy, unable to do much besides try to keep your canopies flying straight and think about the sequence of events that got you here. Imagine looking down and going through your tree-landing procedure, and then multiplying that by two. Imagine trying to figure out how you’re going to steer the two canopies onto one of the small access roads on the mountains. With 1,000 feet to spare, I made it to the field I was aiming for, just at the foot of the Ortegas. I tried the usual landing-out procedure, transposing my pattern onto the field, but my canopies kept wanting to steer to the right, into the small neighborhood next to the field. So instead I just aimed my canopies at a small patch of grass in the field, and hit it gently without flaring. My legs were shaking and I couldn’t stop laughing nervously. It took me three tries to daisy chain my lines, and one of the Elsinore staff members had come to pick me up before I even made it out of the field. My coach, feeling responsible for me, landed in the mountains and called Elsinore to let them know what had happened. It took some time, but they found him, having landed without incident. Once I got back to the dropzone, I cracked a beer and waited for the shaking in my legs to go away. Lessons LearnedThe main takeaway from this is to know your gear. I was briefed very thoroughly by my coach on how to use a pull-out system, and practiced multiple times on the plane. Yet when it came time to pull, I didn’t fully extend my arm, and ended up with a pilot chute in tow. To me that was always one of the scariest malfunctions there are, because there are two schools of thought on how to handle it. One is to go straight to reserve, as I did, and one is to cutaway and go to reserve. In hindsight, I stand by my choice, because cutting away could have fired my main directly into my reserve. The other scary thing about this particular malfunction was that it was a two-out that was flying stable. One school of thought is that you should cut away to avoid a downplane, and the other is that if you’re flying stable, you can pilot it to an open area, which is what I did. If I had downplaned, I could have cut away my main and flown my reserve down, but I wasn’t convinced I could keep the canopies apart long enough to get to my cutaway handle. The problem with this scenario is that, under different circumstances, a dust devil could have blown my canopies into a downplane close to the ground, and I might not have been able to chop my main at all. One last thing I would change is that I would have taken my cell phone. If I had gotten hurt in the mountains without any way to access emergency care, things could have been a lot worse. I’ve since invested in a small prepaid phone to keep in my jumpsuit pocket. In the end, I stand by my choices, and acknowledge that there was a lot of luck that kept me from disaster that day. I regret that my coach got stuck in the mountains, but I’m grateful that he was willing to look out for me. I faced the two malfunctions I feared the most on one jump and managed to walk away with a swollen ankle and a wounded sense of pride. Will I still do CReW? Every chance I get! And I’d trust the riggers, CReW Dawgs, staff, and other jumpers at Elsinore any day.
 -
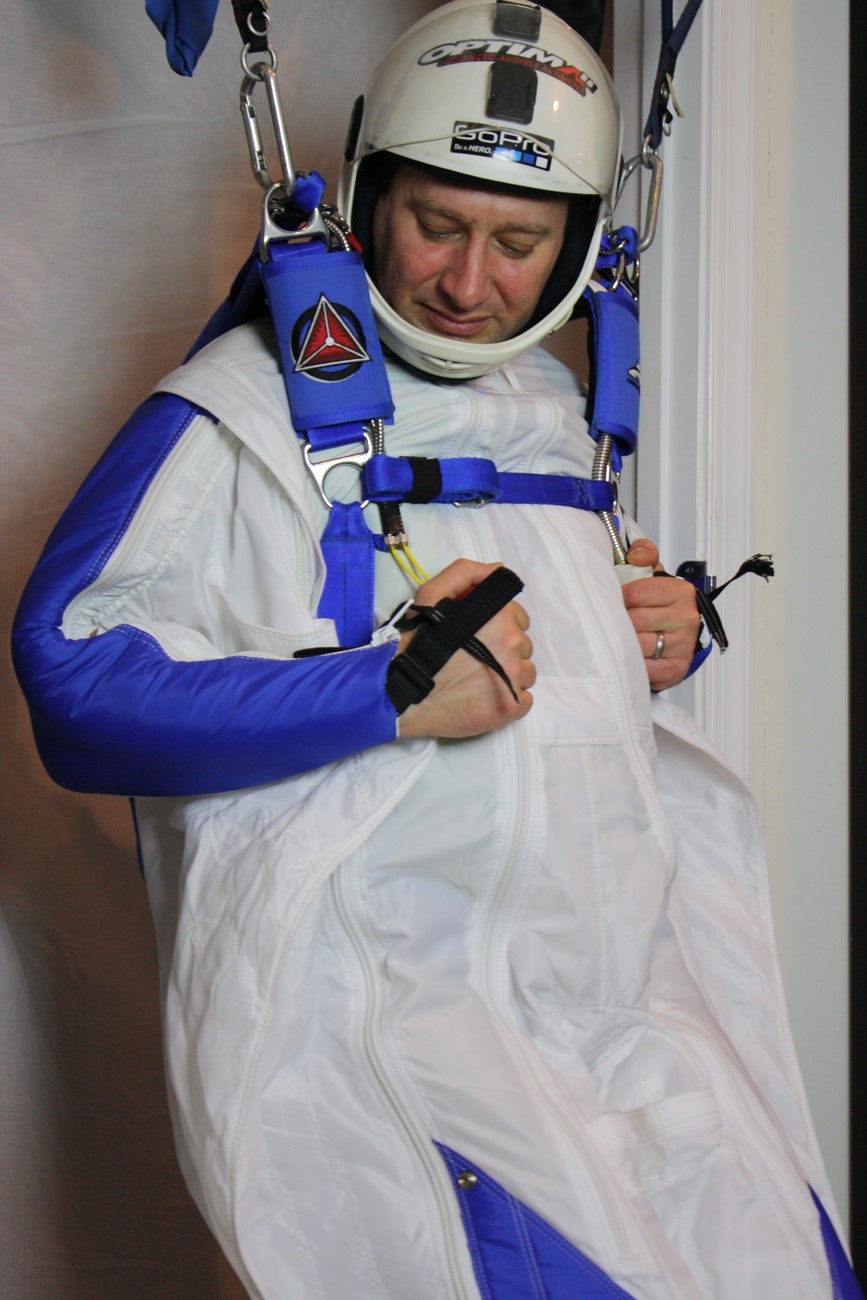 A reserve ride is an exciting adventure no matter how many jumps you have under your belt. Preparatory training is obviously the best way to ensure that you walk away unscathed, but it is my experience that the simulations we create are not as realistic as they could be. In many cases, many of us will argue, they are not as good as they need to be. The purpose of this article is to suggest possible improvements to the state of the art in emergency procedure training. If we envision beyond what we have done in the past, improvement is assured, and the safe conclusion of parachute malfunctions will increase in frequency. If we can simulate cutaway jumps more realistically, skydivers will be calmer in emergency situations, and more skillful. Elaborate simulation, in my experience, will also result in greater awareness and recall, more efficient actions, and less emotional trauma once the event is over. The first issue to be addressed by our sport as a whole is our simulation equipment. Although a vest with handles may be very helpful for establishing the general flow of handle-pulling, it is a far cry from what the event will actually feel like. Many jumpers have reported, upon landing from their first cutaway, that things did not feel or look remotely the way they expected. Handles were not where the jumper expected them to be, pull forces were not what they anticipated, nor was the feeling of the experience similar to the training process that was supposed to prepare them for this event. It is my experience, however, that when we take thoughtful steps to improve our training methods and equipment, the gap between expectation and reality can be closed significantly. The most important piece of equipment in any simulation is the mind. Creating a clear visualization of the scenario is essential, no matter how silly it may look to bystanders. The job of the Instructor in these situations is to provide insightful clarification, ideally based on their own experience. Set the emotional stage for the student in every possible way, describing the details as clearly as possible, leaving nothing out. Allow yourself to get wrapped up in the excitement that is inevitable in such experiences. This will not only make the simulation feel more real, it will help illuminate the natural mental reaction of the student to intense stress. If over-reaction or under-reaction is apparent, further training is necessary. If the student failed to perform, the instructor simply has more work to do. It continues to be my strong opinion that a suspended harness is absolutely essential for the best possible training. Given the vast amount of money we now spend on aircraft and student gear, skimping on this key element of teaching equipment is shortsighted, and most often a product of laziness and compromise. If building a hanging harness cost thousands of dollars, the financial argument might hold more merit, but this is most decidedly not the case. There are many possible methods that cost very little, and can be created in just an hour or two. I know, I build a new hanging harness at almost every dropzone I travel to in the process of running my canopy skills and safety courses. I do this because I want to offer my course participants the best possible training, and because an alarming percentage of skydiving schools have done away with this vital piece of training equipment. This needs to change if we are to improve the safety of our sport. Let's start with the actual harness. When I find suspended harnesses in use, most often the actual rig is an uncomfortable, dilapidated old rig from the early 1980's, hung from the ceiling by attachment points that are way too close together to simulate a realistic experience. In the best cases, there is a three-ring setup that allows the jumper to cut away and drop a few inches. This is a great training aid, but what if the rig was a more modern adjustable harness that could accurately reflect the fit and handle placement of the rig they will actually be jumping? For that matter, what if we hung them in the rig they were actually going to jump? What if the suspension apparatus was long enough to practice kicking out of line-twists? What if the toggles simulated the resistance of an actual parachute using bungees or weights? What if you pulled on straps attached to the bottom of the harness each time they flared, to simulate the pitch change? What if, as crazy as it sounds, you went to the local hardware store and picked up a high-powered carpet blower, a.k.a. “snail fan”, and angled it up at the harness to reflect the feeling of the relative wind? This is the kind of outside-the-box thinking that creates better simulations, and better training. Further, this is how we prepare our students for an actual malfunction and reduce the risk of pilot error. For experienced jumpers, I highly recommend hanging up in your own rig. This will clarify handle placement under load, allow you to explore strap tightness possibilities, and give you the opportunity to experience actual pull forces when your repack cycle is up. If you do not have stainless steel hardware on your rings, please use fabric connection points rather than the carabiner attachment displayed in these photos. Another key element of malfunction simulation is to follow through with the complete jump, rather than stopping after the handles are pulled. In reality, the adequate performance of emergency procedures is just the first in a long list of steps that lead to a safe landing. For instance, what if the cutaway harness had Velcro reserve toggles that needed to be first peeled upward and then pulled downward? Many people, myself included, have tried simply pulling the reserve toggles downward to find that they would not release. Missing details like this can lead to a student feeling more angst than is necessary, and can result in further stress-induced mistakes with major consequences. Additionally, proper exploration of the reserve canopy is important for a good flight pattern, accuracy and landing flare following a malfunction. How much slack is in the brake lines? Where is the stall point? What is the flare response on this brand new canopy? A good cutaway followed by a broken ankle on landing is still a bad day. Simulate the whole jump, and there will be fewer surprises. The final issue I want to cover on the topic of better emergency procedures training is the inclusion of deliberate adrenaline management efforts following the deployment of the reserve canopy. Carrying the emotional momentum of a malfunction all the way to the ground definitely increases the chances of a lousy landing. High levels of stress takes time to sluff-off, but a skilled operator also knows how and when to slow down. Once you have pulled all the handles you need to pull, taking three long, slow, deep breaths while gazing at the horizon with a smile of relief on your face can change your mood, and your fate. Get your composure back, and your optimism will follow. From there, skill is just a short step away. This process can and should be included in every emergency procedure simulation to create a habit that is likely to be carried out in the sky. Following such quiescent procedures allows the mind to more easily let go of the recent past and focus on the present moment and the near future: 1) Check altitude and location 2) Find a safe landing area 3) Explore the reserve 4) Fly a good pattern 5) Flare beautifully 6) Walk away with a smile on your face 7) Thank your rigger A malfunction does not need to be viewed as an emergency, especially if you are truly prepared; it is just a change of plans. A complete simulation can be the difference between a horrifying emergency and a well-executed contingency plan. If we handle it well, a main parachute malfunction can actually be fun. I have found few experiences more rewarding than a complicated situation that I figured out on the fly, and despite my fear, I kept my head and did the right thing. In short, a parachute malfunction is an opportunity to prove to yourself and the world that you can handle yourself in a crisis, and with realistic training, your success can be an inevitable conclusion. About the Author: Brian Germain is a parachute designer, author, teacher, radio personality, keynote speaker with over 15,000 jumps, and has been an active skydiver for 30 years. He is the creator of the famed instructional video "No Sweat: Parachute Packing Made Easy", as well as the critically acclaimed book The Parachute and its Pilot. You can get more of Brian’s teaching at Adventure Wisdom, Big Air Sportz, Transcending Fear, and on his vast YouTube Channel
 -
 Dave Rhea gives his Skyhook a workout over northern Arizona Photo Credit: Dave Rhea You’re as ready as you’ll ever be. Right? You know what a malfunctioning main looks like. You know the sequence*. You’ve done your homework (like we reviewed last time). Before you pull that handle, though, make sure you know the rest of the story: how to make that reserve ride as un-traumatic an experience as possible. 1. Do not overthink itIf you believe that your main is unlandable, you are going to have a reserve ride. Lots of skydivers have landed under reserves, realizing later that the problem was solvable. Lots of skydivers have also gone in while striving to sort out malfunctions that did not get solved. Pick your poison. 2. Do not worry about stabilityThis is the very least of your problems, as you are on the world’s most intractable timer. Worry ONLY about altitude. 3. Pull the cutaway handle until no lower than 1,000 feetIf your pull is sufficiently low (shame on you for that, by the way--gotta say it) and you have an unlandable main, you’ll be testing your reserve’s opening characteristics in the most potentially lethal way. Take note: the USPA not-so-recently raised the minimum deployment altitude even for eminently experienced D-licensed jumpers. Initiating a reserve ride below 1,000 feet isn’t always deadly, but it has an unnerving tendency to be. Don’t take the chance. 4. Hold on to your handles...or, y’know, do your best. If you manage it, you’ll save a bit of money, and you’ll save face when you land. 5. Make sure it’s outArch and look over your shoulder for the reserve pilot chute. Reserves deploy fast, so this head position may rattle your neck – but if the pilot chute is somehow caught in your burble, this should either shake it loose or make it clear to you that you need to do some burble intervention, stat. 6. Keep an eye on your free-floating mainHowever: do not try to chase it and grab it in the air. (People have died doing that, bigshot.) Don’t “chase the bag” if it means you’ll land in a dangerous LZ. Use landmarks to get a bead on where the gear is headed, then take a deep breath, leave it to the fates, and prioritize your mortal coil. 7. Remember: Your Cutaway, Your BusinessWhen you land a reserve, you’re going to be the talk of the DZ (for about five minutes, usually). During that five minutes – longer, if the loads are turning slowly – you’ll probably be approached by a gamut of big talkers and would-be mentors, questioning your malfunction and eager to discuss your decision to cut away. My advice: speak to your trusted mentors and co-jumpers about it in private, and tell the rest to go suck an egg. When you suddenly need to get proactive about saving your life in the sky, make no mistake: you are absolutely alone. In the entire world, there exists only you and two handles. Your cutaway is your business. You were there. They were not. Review your own footage to determine the nature of the malfunction and review alternative methods of correction, if applicable. 8. Buy a bottle of posh booze for the rigger who packed the reserve you rode, and keep the reserve pin for posterity. It’s tradition. * Arch, look down at your handles, grasp the handles, pull cutaway, pull reserve.
 -
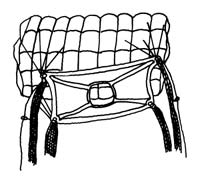 A malfunction is any failure of the system to provide a normal rate of descent and this includes loss of canopy control. Malfunctions are normally caused by one or a combination of the following: bad packing, poor body position during canopy deployment and/or faulty equipment. There are some malfunctions, however, that just happen (Acts of God); parachutes are good but not perfect. Failures of the main parachute can be divided into two areas. Either nothing comes out and you have a total malfunction or the canopy starts to open but something is wrong with it and you have a partial malfunction. Each of these two areas will be broken down still further in this chapter. It is because of the possibility of an equipment malfunction that the USPA’s Basic Safety Requirements list the opening altitude for students at 3,000 feet AGL. (For tandem jumps, it is set at 4,000 feet AGL. For A and B licensed skydivers, it is set at 2500 feet.) The BSRs and the FARs require that a second (reserve) parachute be worn for all sport jumping. It is important that you are drilled in its use. But even with the stated opening altitude safety margin or cushion, you must be aware of the time, speed and distances involved. If you exit the aircraft at 3,000 feet AGL, for example, you will begin to accelerate; you start off at zero vertical speed and then fall faster and faster until you reach terminal velocity (more about that later). If you didn’t have a parachute, it would take you about 22 seconds to reach the ground. In the case of a partial malfunction, you will have a little braking from your canopy and this means even more time. But even if you have a total, allowing for reaction time, you should be open under your reserve at well above 1,500 feet. In fact, while it seemed like an eternity to you, your friends on the ground will tell you that you performed your procedures quickly and efficiently; you will be surprised at how fast you react to a malfunction. Your main parachute takes 3-4 seconds to open and the reserve may be just slightly faster. Even at terminal velocity, which in a face-to-earth,stable position is about 110 mph, (the fastest you can fall in that position), four seconds translates into about 700 feet. If you haven’t been jerked upright by the sixth segment (second) of your exit or pull count, you should already be into the emergency procedure for a total malfunction. Static lines not hooked up, in-tow situations, lost or hard ripcord pull or pilot chute problems have already been discussed and won’t be repeated here. Total Malfunctions Of all the possible equipment malfunctions, the total (pack closure) is the safest to deal with because there is no other garbage over your head to interfere with the deploying reserve. While the total is the easiest malfunction to rectify, remember it also presents you with the least amount of time in which to act. Do not spend time trying to locate a lost handle; you do not have time. Do not waste time breaking away; a loose riser could tangle with a deploying reserve. When in doubt, whip it out. (Pull the reserve ripcord.) Partial Malfunctions A partial malfunction is one in which the canopy comes out of the container but does not properly deploy. The canopy may not inflate (e.g. a streamer that hardly slows your descent at all) or it may take on some air and be spinning violently (e.g. a line over or slider hang-up). You could have an end cell closure that will probably slow you enough for a safe landing. So, partial malfunctions may be major and minor. An additionally important consideration is that they may be stable or spinning. Most partials can usually be attributed to an error in packing or poor body position on opening. Some partials, however, just happen. Some partials are so minor, most instructors do not even classify them as malfunctions; they call them "nuisances." Some of these things that just happen are line twists, end cell closures and a slider that has not fully descended. These are correctable problems which you will be trained to handle. A good canopy is rectangular (square) and flies straight once the slider is down and the brakes are released. It is stable through the flare and turns properly with the correct toggle inputs. (Remember the controllability check?) Major partial malfunctions. Ones that you don’t waste time to correct. Bag lock presents you with trailing lines, bag and pilot chute but the canopy will not come out of the bag. This problem is not likely to clear itself. Breakaway and pull your reserve. Horseshoe. This malfunction can result from bad maintenance, failure to check equipment and incompatible canopy/container systems. It can happen when the locking pin or ripcord is dislodged from the closing loop, allowing the bagged canopy to escape before you have removed the pilot chute from its stowage pocket. The horseshoe can occur if you tumble during the deployment sequence, allowing the pilot chute to catch on your foot, your arm, or some other part of your body, but these are rare occurrences today. Another possibility is a poor launch of a pilot chute from your container, allowing it to fall back into your “burble” (the partial vacuum behind you) where it can dance around and snag on something, preventing it from properly deploying. Improper hand deploy procedures can lead to the pilot chute being caught on your arm. The danger of a horseshoe malfunction is that a pulled reserve may tangle with the horse-shoed main as it tries to deploy. If you experience a horseshoe, and you are using a hand deployment technique, pull the main’s hand deploy pilot chute immediately. Then, and even if you can’t pull the main hand deploy pilot chute, execute a breakaway and deploy the reserve. Chances are that there will be enough drag on the lines and canopy to separate the risers from their attachment points and present only a single line of “garbage” for the reserve to clear (rather than a horseshoed main). Violent spin. Unless you can tell immediately that you have an unstowed brake, breakaway and pull your reserve. If you have plenty of altitude and the problem is not compounded by line twists, push the toggles down to the crotch for two seconds, then let up slowly. If the spin continues, break away and pull your reserve. Line overs can occur when a brake lock releases during the opening sequence allowing one side of the canopy to surge forward over itself, or due to a packing error or an Act of God. If you are on a very high clear and pull, you may try to pull down on the end lines (by the risers) to make the other lines slip off. However, if you deployed at the normal pull altitude, you do not have time for this maneuver on the main. Break away and pull your reserve ripcord. If this happens on a square reserve, pulling down on the side the lines are over is your best hope, along with a great PLF. Partial Malfunctions That May Be Majors Or Minors Partial malfunctions that may be majors or minors. You may have time to make a decision as to how to handle them. Rips and tears are not common on ram-air canopies and may usually be ridden in. Even a rip from leading edge to trailing edge on one surface can probably be controlled. Internal rips may not be visible. See whether the canopy is controllable with toggle pressure no lower than your shoulder. If your controlability check indicates a serious problem, break away and pull your reserve ripcord. If the check does not indicate a serious problem, make slow, shallow turns and flare slowly for landing. The snivel is a slow, mushy opening. The canopy’s fabric weave opens up slightly after a few hundred jumps and becomes more porous. Higher permeability leads to sniveling. Look up after pulling to watch your canopy open. Learn to distinguish a slow-opening snivel from a never-opening streamer. Sometimes replacing the pilot chute will lead to quicker openings. Try packing the nose of the canopy in different positions but check with a rigger before you experiment. Contact the manufacturer about resetting the brakes two inches higher. Then the canopy will take to the air with the tail somewhat higher giving the leading edge a better bite of air. Slider hang-up, at the canopy. The slider may hang up at the top of the lines because it is caught in the lines or caught on the slider stops. Grommets become battered and rough as they slide down and hit the connector links at the risers. The links should be fitted with plastic sleeve buffers. Make sure the grommets are smooth. A slider hang-up at the canopy is a high-speed malfunction and will be hard to clear. You may be upright but you are descending quickly. There is little time to deal with a slider hang-up at the canopy, so jettison your main and pull your reserve ripcord. Slider hang-up, halfway. A slider hang-up halfway down the lines will slow you down but possibly not enough for landing. Check your altitude and if there is time (you are still above the decision altitude for emergency procedures), release the brakes and pull the toggles down to your crotch for two seconds in an effort to stall the canopy and relieve some of the spanwise spreading of the canopy. Repeat if necessary, pump the steering lines up and down. If the slider descends to within 10 or 12 inches of the connector links, that is close enough. Sometimes, the slider is caught higher in a suspension line or steering line. Let both toggles up to determine whether the canopy will fly straight. If you have to pull down the opposite toggle to more than shoulder level to maintain straight flight, the canopy will probably be unstable. If you don’t gain total control of the canopy by the decision altitude (sometimes called the hard deck), break away and pull your reserve ripcord. If the slider comes down the lines halfway and stops, the canopy has probably changed in some way. After you are safely on the ground, measure the line lengths and compare opposite lines. Check the slider grommets for damage. Bring the canopy to the equipment manager (if it is student gear), your rigger, or send it to the manufacturer for inspection. Broken suspension line(s). Most line breaks only put the canopy into a slight turn. Correct the turn with opposite toggle pressure. Occasionally the broken line causes the slider to hang up. Do a controllability check. If there is any internal damage to the canopy, it will not perform as expected. Failing a controllability check will dictate a breakaway and a reserve deployment. Minor Malfunctions Minor malfunctions are more like nuisances that can be dealt with and don’t threaten you unless they get worse or are complicated by other problems. Line twists. Sometimes, the bag rotates a few turns as it lifts off. Now you may find it difficult to get your head back to look up at the canopy. The problem is that the risers are closer together and twisted instead of spread. These twists can happen with or without your help. If you are kicking, rocking or twisting just as the bagged canopy lifts off, you can impart a twist to it. The principle is the same as when you give a Frisbee disc a flip of the wrist on launch. Line twists are more common on static line than freefall jumps. Determine quickly whether the canopy is flying straight, your altitude and which way the lines are twisted. Reach above your head, grab the risers and spread them to accelerate the untwisting. If necessary, throw your legs in the twist direction. Line twists are worse on a ram-air canopy than a round because you cannot pull down on the steering lines to control the canopy until the twists are cleared and this may take up to 30 seconds. If the canopy is spinning in the same direction, you may not be able to untwist faster than it is twisting. Do not release the brakes until untwisted. While you have the risers spread, check your canopy to make sure nothing else is wrong with it. A spinning canopy descends quickly. If you haven’t untwisted the lines by 1,800 feet AGL, break away and pull your reserve. Premature brake release. Ram-air canopies are packed with their brakes set to prevent the canopy from surging on opening. If one brake releases on opening, the canopy is likely to turn rapidly which can escalate into a spin and/or an end cell closure if not corrected immediately. If the canopy doesn't have line twists, grab both toggles and pull them down to your waist. (Grabbing both eliminates having to choose which one to pull.) This maneuver will release the other brake, reduce your forward speed, stop the turn and let you see if any lines are broken. If the premature brake release is compounded with line twists, releasing the other brake may have some or no effect. Be aware of your decision altitude and try to unspin from the line twists. If you are sure that just one steering line is still set in its deployment setting, you might try to release it. Broken steering line. When you find one of your steering lines has snapped or floated out of reach, release the other brake and steer the canopy by pulling down on the rear risers. Do not try to steer with one control line and the opposite riser. The turns will be inconsistent and you may find yourself in a dangerously low turn when you flare for landing. Pulling down on the risers may be hard but it will steer the canopy. The canopy will probably want to turn in the direction of the good control line. If you cannot make the canopy fly straight with the opposite riser, break away and pull your reserve. If the broken line wraps around the slider, do not try to pump the slider down any further. It will only make the turning worse. Reserve some energy to pull down on both risers at about ten feet from the ground to flare the landing. You want to start this flare lower because pulling down on the risers results in a more pronounced flare. Steering line(s) won’t release is similar to dealing with a broken steering line, except that one may release while the other won’t. If neither steering line releases, simply fly the canopy to a safe landing using the rear risers. If only one releases, then you can pull that steering line down to the point at which the canopy will fly straight, then control the direction the canopy flies by either using the rear risers or using the one working steering line. Quite often, you will have time to grab the riser of the steering line that won’t release and work towards getting it released. Be mindful of your altitude as you work on the problem. You don’t want to steer yourself to a hazardous landing while you are distracted with this release challenge. Pilot chute "under/over" problems. The pilot chute may fall over the leading edge of the canopy and re-inflate underneath, usually causing a turn in the distorted canopy. Attempt to stall the canopy slightly so that it backs up, possibly allowing the pilot chute to come back up and over the front of the parachute. If the canopy cannot be controlled with toggles, break away and pull your reserve ripcord. End cell closures occur when the pressure outside the canopy is greater than the pressure inside. They usually happen during canopy surge on opening but they can also be caused by radical turns or turbulent air. Turbulence can occur on hot, no-wind days, on windy days downwind of trees and buildings, and during stormy conditions. Lightweight jumpers under large canopies (called low wing loading) will experience end cell closure more frequently. To avoid end cell closure, fly with one-quarter to one-half brakes. To counteract end cell closure, push the toggles down to your crotch for a few seconds, until the cells inflate, then let the toggles up slowly. Repeat if necessary. End cell closures are not a major concern. Keep the canopy and land it if it is not spinning. If the end cells collapse below 200 feet, do not try to re-inflate them.Pull to half brakes to stabilize the canopy. When you flare for landing, the cells will probably pop open. Combination Malfunctions When confronted with more than one malfunction, correct for line twists first. The canopy will be uncontrollable until the twists are removed. When in doubt, whip it out, especially if you are at or below decision height (1800 feet AGL). Two Canopies Open You may find yourself confronted with two fully open canopies. This can happen in several ways: The automatic activation device on your reserve could fire when you are happily flying your canopy through 1,000 feet; you may have reacted very quickly to a pilot chute hesitation without effecting a breakaway; or the main release system may have failed to separate during an emergency procedure. If the two canopies take off at different times, they may not deploy into each other, but you need to be prepared to handle that possibility. At the Parachute Industry Association Symposium in Houston in 1997, a detailed report was presented on the performance of two ram-air canopies out — a very dangerous situation. First, quickly check the condition and position of the main and reserve canopies, then make your decision based upon the following: If the two canopies are flying side by side, steer yourself to a safe landing area by using gentle control inputs on the larger canopy. Due to the nearly doubled surface area supporting your weight, the effective lift of the parachute system will make flaring the canopies unnecessary. Flaring one could create a hazardous situation, especially close to the ground. If the two canopies are both flying downward towards the ground (called a downplane), jettison the main. Note:Certain reserve static line lanyards may have to be disconnected so as not to foul the reserve parachute when the main is disconnected. Ask your instructor about the specifics concerning your system. If the canopies are flying one behind the other and in the same direction (called a biplane), make gentle steering inputs with the lead canopy (which is usually the main). Do not release the rear canopy’s deployment brakes. Do not flare the landing. If the reserve container has opened but the reserve canopy has not yet, or not completely deployed, make gentle steering inputs with the main and try to haul in the reserve and stick it between your legs. Tandem Jumping Malfunctions Tandem jumping malfunctions may be aggravated because the weight is doubled while the effective drag area of the two falling bodies is not. As long as the drogue pilot chute has been deployed properly, freefall speeds are about the same as a single skydiver. If the drogue is not deployed or fails to work properly, the terminal velocity will be much faster than that of a single skydiver (110 mph); perhaps as much as 160-170 mph. The greater speed places a much greater strain on the parachute system and on the jumpers. Large Ring And Ripcord Handle Older harnesses used a plain round ring for the largest of the rings in the 3-Ring canopy releases. When the main canopy is jettisoned, the largest of the riser-release rings remains on the harness. If the rings flop down on the lift web, the one near the reserve handle may be mistaken for that handle. Both are large silver rings and the reserve handle may have shifted from its normal position. Some jumpers have broken away only to tug on the wrong ring. Some never lived to tell about it. Newer equipment may have a shaped large ring or a smaller (mini) ring that is more difficult to confuse with the reserve handle. If you have older equipment, you should be aware of this potential problem. Change Of Emergency Procedures Anytime you change your equipment or emergency procedures, make sure you are thoroughly trained. Practice in a suspended harness until proficient on the new equipment. Each corrective procedure is different and you must not waste precious seconds in an emergency thinking about what you should do. You must act automatically and quickly. Review your emergency procedures prior to each jump and touch all your handles before you proceed to the door. Breakaway Training Breakaway training is essential to assure that it will be accomplished completely, quickly and well. Training must take place in a suspended harness that is easy to rig up. Simply tie an old set of risers to an overhead beam and attach them to your harness. The drill must be repeated again and again until it becomes mechanical and automatic so that you will perform correctly and without hesitation should the time come. When you take your reserve in to be repacked, ask your rigger if you may practice the breakaway to include the reserve pull. It is a valuable experience and in this controlled environment, it is safe for your gear. Emergency Priorities Think about and review the seven priorities of skydiving: Pull - Open the parachute. Pull by the assigned altitude or higher - whether stable or not. Pull with stability - to improve canopy-opening reliability. Check the canopy - promptly determine if the canopy has properly opened and is controllable. If necessary, activate the reserve - perform the appropriate emergency procedures if there is any doubt that the main canopy is open properly and is controllable. Land in a clear area - a long walk back is better than landing in a hazardous area. Land safely - be prepared to perform a PLF with the feet and knees together to avoid injury. Canopy Collisions Let’s assume that your canopy has just opened properly and you are reaching up for the toggles when suddenly, you look ahead and see another canopy coming directly towards you. What should you do? If the collision is avoidable by steering to the right or left, choose the right. The turn to the right is virtually universal in all forms of navigation. If the collision is unavoidable, spread your arms and legs out to absorb the impact over the most surface area possible. Chances are that spreading out will allow you to bounce up and over the lines and canopy you will be colliding with. You may get a bit hurt, but you will be alive so long as you don’t make full body contact with the other jumper. If you find yourself entangled with another parachute, the general rule of thumb is that the lower person has the right to perform emergency procedures first. Communicate with each other as to what you want to do, what you’re going to do, then do it while you still have enough altitude to do it safely. Most canopy collisions occur during the landing phase of the skydive, when too many people are trying to get into one tiny area all at the same time. Vigilance in canopy control and choosing a less congested area can help avoid this emergency. If you do end up tangled at an altitude too low to break away (less than 500 feet AGL), ride about half brakes and get set to do a fantastic PLF.
 -
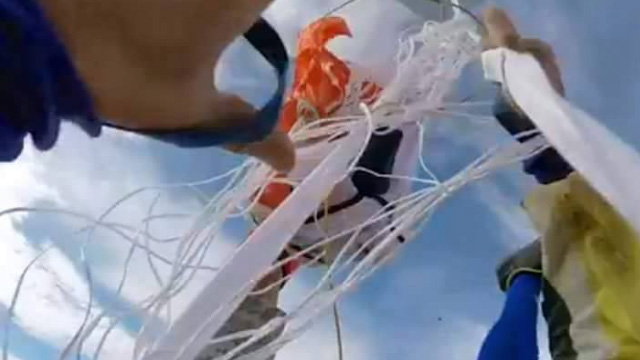 Michael Huff has a hard time saying goodbye. Photo credit: Michael HuffAre you ready to be alone in the sky with a malfunctioning parachute and two little handles? Though there are skydivers with thousands of jumps who have never experienced the fun of a cutaway, don’t be fooled: it’s not a question of “if,” it’s a question of “when.” Don’t feel ready? You’re not alone – but there are a number of proven ways to boost your confidence (and, therefore, safety). 1. Stay CurrentI know. It’s not your fault. Your home DZ is seasonal – or it’s far away – or it’s a tandem factory that keeps sullen fun jumpers on the ground. Whether it is or isn’t your motivation that’s the problem, the fact remains: long lapses between jumps are dangerous. They dull skills, heighten apprehensions, create a sense of unfamiliarity with aircraft and degrade the muscle memory you have carefully built around your gear, which is of vital importance in the event of a reserve ride. It’s vital to your career as a skydiver – especially, at the beginning – to make the effort to jump every couple of weeks. Make the effort and get up there. 2. PrepareThe USPA Skydiver Information Manual puts it rather dryly: “Regular, periodic review, analysis, and practice of emergency procedures prepares you to act correctly in response to problems that arise while skydiving.” Rephrased in a slightly more compelling manner: practicing might save your life, especially if you’re a newer skydiver who isn’t quite as accustomed to the stresses of freefall as an old-timer. Here’s a two-item to-do list to tip you in the right direction: Deploy your reserve for every repack. Have you ever deployed the reserve for your current skydiving rig? If not, the result may surprise you. You’ll learn the direction of pull for your gear, as well as the force you’ll need to exert. If your rigger watches the process, he/she can watch the deployment and identify potential problems. Even if you have deployed your own reserve, a repack is an unwasteable drill opportunity. Practice emergency procedures in your DZ’s training harness. (You may feel like a dork, especially if you’ve already been skydiving for a little while. Go on a quiet weekday and do it anyway.) 3. Do The Little DanceBefore each and every jump, the USPA advises skydivers to “review the procedures to avoid emergency situations and the procedures to respond to emergencies if they occur.” This doesn’t have to mean poring over your SIM like you’re cramming for a test. It does, however, require a little bit of work before every jump--just to make sure that your muscle memory is fresh and your brain is prepared for puckersome eventualities. Touch your handles in sequence before you enter the plane. It is not beneath you. Being blasé about basic safety doesn’t make you more awesome. If you ever happen to share a plane with an energy-drink teammate or a world-class coach, watch ‘em closely and you’ll see what I mean. Check that your reserve handle is seated, while you’re at it. A loose reserve handle can deliver a reserve ride without the fun of a malfunctioning main – and you don’t want that, do you?Right! So: now you’ve done what you can to be ready for a potential reserve ride on any given skydive. Next time, we’ll talk about what to do when your main decides to give you the pop quiz.
 -
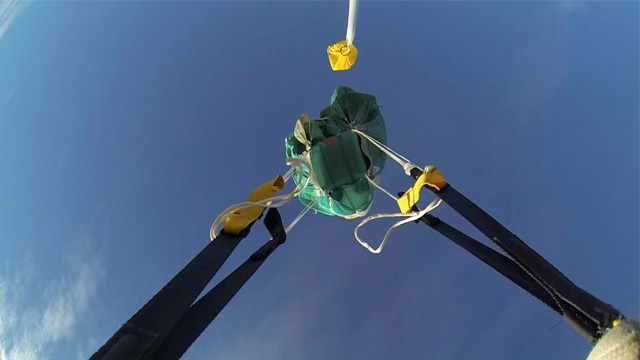 Image by Joe NesbittLast week, we talked about the mighty kerfuffle that is the pilot-chute-in-tow malfunction. So...who wants to have one? Nobody! Right. So now that we’ve established that, we can get down to the business of avoiding the hell out of those. There are four big steps you can take to lessen your risk of a PCiT, and there’s a good chance you’re currently messing up at least one of them. 1.Cock it up (so it doesn’t cock your jump up).Your collapsible pilot chute is a demanding partner. Her deal is this: no foreplay, no canopy. Most of the time, you’re good about it. You guys have a really established routine at this point, right? From the time you’ve got your nylon laid out on the floor to the time you wrap your legs around it to finish it off, you follow a very predictable routine. Somewhere in there, you give that collapsible pilot chute a tug and get her indicator window nice and blue. Everybody’s happy. But what happens when you get distracted? If you end up ignoring your PC for a surprise debrief or a dance break or an awkward conversation with the meaty contents of the best-fitting freefly suit you’ve seen all week, make no mistake: she’s going to get her revenge. Failure to cock the collapsible pilot chute, after all, is the leading statistical cause of PCiTs. The solution here is simple: focus. Give your pack job the attention it deserves, in the same order every time. (It’s never a bad idea to include that little indicator window on a quick gear check, either.) 2. Do what you’re told.I know. You’re the boss of you, and I’m not your real mom, and manufacturers are basically like corporate drones, and the USPA is a bunch of guys throwing canes and slippers at kids who merrily chase balls onto their collective lawn. You do what you want. That said: maybe you should do what you’re told every once in awhile. This is revolutionary stuff, I know. But the manufacturers’ instructions for bridle routing and main-flap-closing aren’t just there to give you something else to toss giddily out of the box when your new container arrives. As any pro packer will tell you, those yawn-inducing closing procedures differ dramatically between brands. If you’re using the wrong one for your particular equipment, you’re setting yourself up for a container lock. 3. Watch the news.Along those lines: be on the lookout for updates. Remember a few years back, when all those photos came out of closing pins stabbing neatly through the middle of their bridles? It kinda looked like a fabric samurai drama, but it was pretty serious -- several jumpers, jumping different equipment, experienced pilot-chutes-in-tow in this same manner. In response, manufacturers posted updates to their manuals, changing the closing procedures for their containers to lessen the risk. The moral of the story is this: Maybe you’re still doin’ it the old way and have managed to be lucky so far. (Emphasis on: so far.) You can also investigate pull-out -- as opposed to throw-out -- pilot chute systems, if you like to be on the oddball end of technology. 4. Embrace the transient nature of our linear existence.Nothing is forever, dear reader. All seasons pass. All kittens turn into old cats. Your pilot chute and bridle will eventually wear out. Thus is the way of the world. We know you love your pilot chute and bridle. They love you back. They yank that nylon out of the bag for you over and over and over without complaint. They get dragged across the grass and the filthy packing mat and the Arizona desert for you. They get stepped on and sat on and waved around willy-nilly when you need to get someone’s attention on the other side of the hangar. But they can’t do it forever. Collapsible pilot chutes lose effectiveness when their little kill lines shrink. If that line shortens to the point that the PC can’t inflate fully, you will probably end up with a dead pilot chute flapping around above you in freefall while you count to yourself in your helmet. Insufficient drag to pull the closing pin = PCiT. Like many existential tragedies, this doesn’t happen overnight. Have you noticed little hesitations after you throw? Are they getting longer? Have you noticed the aging process creeping up on your little bitty sub-parachute in the form of obvious wear? Cuddle up on the couch with her, read The Velveteen Rabbit together, cry a little bit and give your old, loyal PC a Viking funeral. She deserves it.
 -
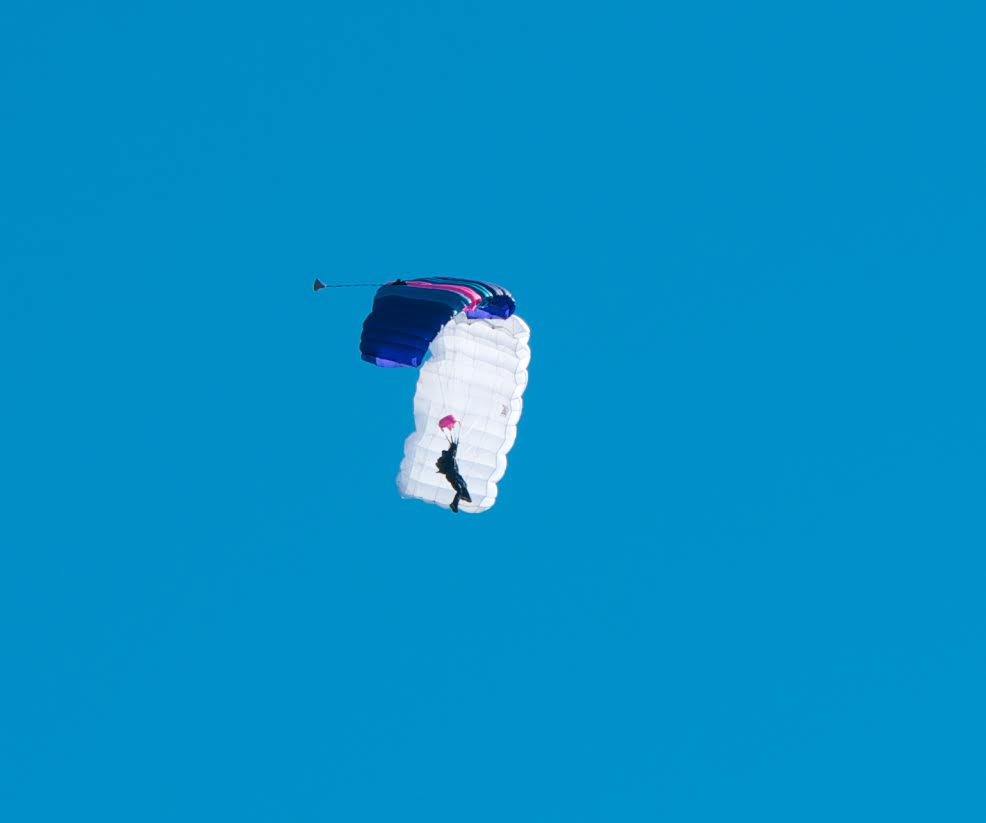 Curt Vogelsang captures some hot canopy-on-canopy action. Y’know when you don't feel like getting out of bed in the morning? Your main parachute is likely a lot brighter-eyed and bushier-tailed than you are, but every once in a good long while it just doesn't feel like getting out and doing its job. Y’know? Relatable. Kidding aside: When you throw your hand-deployed pilot chute but the container stays closed -- trapping the main deployment bag inside, helpless to deliver you a parachute -- you’ve gotchaself a pilot-chute-in-tow. In other words: you’ve got nothing out, which makes you the clenchy, concerned (and hopefully very temporary) owner of a high-speed mal. You’d better get on that, buddy. Stat. But how? Deploy the reserve immediately or cut away first and then deploy the reserve? One Handle or Two Handles: The Cagematch If you’re not sure which you’d choose,* you’re certainly not the first. This particular point has been the subject of roaring contention since the invention of the BOC, my friends. (Guaranteed: the comments section below will corroborate my statement. I can sense people sharpening their claymores and dunking their arrows in poison even now.) There’s a school that says -- well, duh -- get your damn reserve out, like right now what are you waiting for. There’s another school that calls that school a bunch of mouth-breathing pasteeaters. The latter group insists that you'd better go through the procedures you know lest you mess it up when it counts. They usually follow up by spitting on a photograph of the first group’s mother and wondering aloud why the first group is even allowed to skydive. Then they start punching each other. Images by Joe Nesbitt The USPA Skydiver’s Information Manual doesn’t make a move to break up the fight. It stands clear of the flying arms and legs and says, “Y’know -- they both kinda have a point.” Section 5-1 of the manual says this, verbatim: “Procedure 1: Pull the reserve immediately. A pilot-chute-in-tow malfunction is associated with a high descent rate and requires immediate action. The chance of a main-reserve entanglement is slim, and valuable time and altitude could be lost by initiating a cutaway prior to deploying the reserve. Be prepared to cut away. “Procedure 2: Cut away, then immediately deploy the reserve. Because there is a chance the main could deploy during or as a result of reserve activation, a cutaway might be the best response in some situations.” Let’s look a little closer at the options, then, shall we? Option One: Not Even Gonna Bother With That Cutaway Handle. Pro: Immediately yanking out that reserve saves a step. When AGL counts (and golly, doesn’t it?), saving a step can save a life. Many skydivers are quick to point out specific incidents in which jumpers with PCiTs have gone in with sealed magical backpacks, having failed to pull both handles (or pull any handle at all) while the clock was ticking. Gulp. Con: It takes the pressure off (in a potentially bad way). As the reserve leaves the container, there’s a chance that it can take the sealing pressure off the flaps that are keeping the main container closed. The main can then leap to freedom and deploy at the same time as the reserve. At this point, you might wind up with an entanglement, a side-by-side, biplane or downplane to figure out.** Option Two: Get Off The Field, Main Parachute. Reserve, You’re In! Pro: It’s the same stuff you’ve been taught to do for every other reserve-requisite malfunction. ...If you initiate the reserve deployment clearly, confidently, and as early as possible, of course. After all: making a one-off exception for a single kind of malfunction can be tricky. A jumper might well spend a little too much time thinking it over (‘Am I going for my reserve handle first right now? ‘Cause that’s weird. Is that okay?’) when they should just be yanking the stuffing out of their emergency handles. Going through the real-life motions of the little dance you do before you get on every load makes more sense to your body, for sure. Con: You’re adding more complexity to the situation than you may realize. Especially if you don’t have secure riser covers, the (jealous?) cut-away main risers might sneak out of the container and grab for the reserve as it deploys. Another thing: the main is very likely to wiggle free, detach from the harness as soon as it catches air and do its best to entangle with your Option B. The latter kerfuffle is made much more likely when you add a single-sided reserve static line to the mix, turning the already-dismaying situation into something of a tug-of-war. Neither of these choices sounds like the cherry on top of a lovely afternoon; I know. At some point, however, you may be forced to make one. If you do, you’d better have a plan in mind. Not in the mood to make that choice? Me neither. Luckily, there are some steps you can take to better your chances of never seeing a PCiT -- and in next week’s article, I’ll tell you what they are. --------- *If you have a Racer (or any container with a cross-connected RSL), you do not have a choice. You must pull the reserve without cutting away. Do not pass ‘go,’ do not collect $200. In that particular configuration, the main will choke off the reserve if the cutaway has been pulled. If this unnerves you, get thee to a rigger to discuss it. **Head over the PIA.com to check out a handy study they did in 1997 regarding the management of two-out situations. It’s called the “Dual Square Report.”
 -
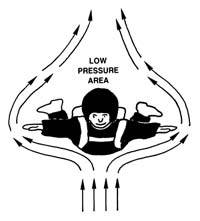 Common ripcord and hand-deployed pilot chute malfunctions are the lost handle and the hard pull. Submitted by plante Lost Handle Lost handle or out-of-sight hand-deployed pilot chute. Some ripcords are held in place by elastic webbing or Velcro® cloures. If the ripcords come out of these places, they may be blown out of your sight. Some puds (knobs or handles for hand-deployed pilot chutes) attach with Velcro closures, and some are stowed in elastic pockets. There are pros and cons to where these pilot chutes and deployment handles should be mounted. Either one may separate from the container and blow up behind you. Search for the ripcord (one time only) by following the harness to the ripcord housing with your hand. Search for a hand deployment device (one time only) with your hand by following the container to the area where it is supposed to be mounted — perhaps even as far as the closing grommet. If you can’t locate the handle immediately, pull your reserve ripcord. Practice this on the ground periodically. Lost handles and hand-deployed pilot chutes can also occur after the pull if you fail to pull far enough. Make sure you pull the ripcord all the way out of the housing, or if using a hand-deployed pilot chute, pull the pud to arm’s length before you release it. Hard Pull The hard pull may be caused by a bent or rough pin, a hand-deployed pilot chute bound up in its pouch, or you may have packed more canopy in the center of the container instead of filling the corners. If you feel resistance to your pull, give it two more quick tries (perhaps even with both hands while maintaining the arched body position) and then if that doesn’t deploy the main parachute, pull your reserve ripcord immediately. After a number of jumps, it is normal to become somewhat complacent about the pull; you may give it a relaxed, half-hearted jerk. The pull may take as much as 10 kg (22 lbs.) of force, so pull again. If continual hard pulls are bothering you, you might choose to spray a non-petroleum-based silicone or Teflon® fluid on your ripcord cable or your closing pin and your closing loop. This will make quite a difference and it will last for many jumps. You may occasionally have to do it again as dirt and grime builds up on your pin or ripcord cable system. Inspect your system for any signs of roughness. If they exist, get a rigger to replace the rough component with a smooth one. Pilot Chute Hesitation A problem you could have with your reserve deployment, or a main with a spring-loaded pilot chute, is the common pilot chute hesitation. Hesitations can happen to hand-deployed mains but they are not as common. Hesitations occur when the pilot chute momentarily flutters in the low-pressure area behind you rather than catching air. The hesitation may be caused by a bent or weak pilot chute spring, but usually the pilot chute is just sitting in the dead air space created behind you when you are in the stable position. Sometimes the pilot chute jumps upon release but fails to travel far enough to get a grip on the air rushing past you. It may drop back down on your back and just bounce around or just lay there. If it was hand-deployed, you may not have given it a good throw. To correct the problem, you may turn on your side during the post exit or pull count, allowing the airflow to inflate the pilot chute and pull it free, you may peek over your shoulder after pulling the ripcord, or you may sit up to dump (deploy your canopy). This last method of pulling, then sitting up (almost the start of a backloop) also reduces the opening forces on your shoulders, but it can lead to other problems such as trapping a tight-fitting deployment bag in its container. Consult with an instructor who is familiar with your system prior to attempting this type of maneuver. Pull-out v. Throw-out The pull-out and throw-out pilot chutes are preferred by experienced jumpers, but students (except IAD students) use the ripcord and coil spring pilot chute combination. For a detailed explanation of these three systems, see the chapter on equipment. Trapped Pilot Chute If the pilot chute is not properly stowed in its pocket, it may bunch up and jam when you try to extract it. The trapped pilot chute results in a hard pull that may or may not be cleared. If you find you have a hard pull, try one more vigorous pull before you go for your reserve. Pilot Chute In Tow Pilot chute in tow may be short or long. It is short when the pilot chute bridle is looped around something such as a harness strap. (A proper gear check could have avoided this problem.) If you have one of the rare bellyband mounted throw out models, make sure that the bellyband is not twisted. If the pilot chute bridle is wrapped around the harness (such as on a twisted bellyband or leg strap), tugging on it will only result in a (short) trailing pilot chute. Check the bridle routing during packing, have it checked in the equipment check prior to boarding the aircraft and check the routing again prior to exit. Twisted bellybands and twisted leg straps are a significant cause of pilot chutes in tow. The pilot chute in tow is long when the pilot chute pulls the bridle to its full extent but does not pull the pin securing the main container. The failure may be due to a damaged pilot chute (producing insufficient drag), a rough pin, a tight main container (canopy stacked too high), or a closing loop which is too short. The long pilot chute in tow is more likely on sub-terminal velocity jumps. Make sure the bridle-pin connection is not worn, that the pin is smooth and curved, not straight (unless it is supposed to be such as in pull-out pilot chute systems), and that the locking loop is not too short. If you are faced with a long pilot chute in tow, never try to clear it. A recent USPA article (Parachutist, June 1997) stated that if you have a pilot chute in tow, deploy the reserve immediately. Therefore, it is treated as a total malfunction. Other experts in the field take the position that if there is anything out behind the container, including a spring-launched or hand-deployed pilot chute, execute a cutaway and reserve deployment immediately. Note: Most student equipment is Single Operation System (SOS) oriented. This means that pulling the reserve handle will execute the cutaway (disconnect the main risers) then deploy the reserve all in one smooth action. A two-handle system requires a separate cutaway handle to be pulled to disconnect the risers, followed by a pull of the reserve ripcord. How to handle a pilot chute in tow has been the subject of great debate and much beer has been consumed discussing it. While there are exceptions and strong feelings about what has been stated above, time is usually too short to consider them. After the reserve starts to deploy, the main container may go slack enough that whatever kept it closed is no longer doing so, therefore the main may start to deploy. If the main was disconnected from the harness by the action of a cutaway, it will probably not be anything more than a temporary nuisance. However, one must always be prepared for possible entanglement of the two canopies whether a “cutaway” has or has not been performed.
 -
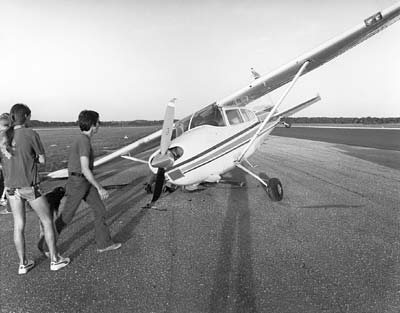 Airplane Problems Engine and structural failures. If the engine is going to fail, it will probably do so when the pilot reduces power after your full throttle takeoff. If the engine quits, he will attempt the best landing he can, straight ahead off the end of the runway. Since you are helmeted, padded with gear and strapped in, you need only assume the proper position to be prepared. Draw your knees up, tuck your head down, fold your hands across the back of your neck and hold your head down to resist whiplash. As soon as the plane comes to a stop, get out FAST. If you are nearest the door, get moving. There are people behind you who want to get out. There is always the danger of fire, particularly if the aircraft has suffered structural damage on impact. Watch where you step, the plane may have clipped through some power lines. They can zap you and they start grass fires. Remember that the wings of the airplane usually contain flammable fuel. Occasionally, the jump ship suffers a structural or other mechanical failure. Twisted-on parts sometimes twist off or a canopy may get draped over the tail jamming the controls. Depending upon the situation and the altitude, your jumpmaster will select one of two commands: PREPARE TO CRASH or GET OUT (jump). The dividing line is usually set at 1,000 feet above the ground since at this altitude there may be enough time for an orderly exit and the pilot will probably be able to land his glider on the runway. The jumpmaster might tell you to jump and pull your reserve on the theory that it is somewhat more reliable and may deploy faster than the main and/or he may be concerned about the setting of your AAD. His instructions will depend on the circumstances of the situation. So, if you are below 1,000 feet when the challenge occurs, you will land with the aircraft. If you are over 1,000 feet when the rubber band breaks, your jumpmaster may direct you to make a normal static line jump, but you will do it all a lot faster; swing out onto the step and go. Student freefallers may be directed to make a jump and pull; this is where they will open their mains as soon as they clear the aircraft, or the jumpmaster may sit them in the door, pull their reserve and simultaneously push them out. It all depends on the altitude at the time of the emergency. Licensed jumpers are next, then the jumpmaster and, in the case of severe structural failure, the pilot. The purpose of getting out of the plane is not only to remove you from the area of danger but to lighten the load making the aircraft easier to control. The jumpmaster goes next to last because he must take care of those in his charge. The pilot goes last (he wears a parachute too) so that he may wrestle the jump ship to keep it flying until you are gone. The above rules are general and are for students. Experienced jumpers may elect to exit lower. For example, if the aircraft is at 500 to 1,000 feet, an expert skydiver may elect to jump and pull the reserve (which presumably opens faster). Of course you will follow the instructions of your jumpmaster, but sometimes you have to make the decision yourself. In the excitement of solving the engine failure or other problem, the pilot may allow the airspeed to drop, stalling the plane and allowing it to spin. In this condition the aircraft drops fast and the centrifugal force may pin you against the side or ceiling. Now is the time make the decision to scramble and get out. Depending on the size of your jump ship and the procedure at your drop zone, your static line may be hooked up on the ground, at 1,000 feet, or on jump run. Whether or not your main is hooked up may determine what type of escape you can make in case of an aircraft emergency. For example, if you hook up prior to boarding, and the plane crashes on takeoff, when you unbuckle and get out, you can expect to unpack your main about eight to 15 feet from the door (the length of your static line). The final point to remember is to watch and listen to your jumpmaster for instructions. When you receive them, carry them out quickly and without panic. Open Parachute In The AirplaneSeveral times in the past, jumpers have been pulled through the side of the jump plane when a container opened and a canopy escaped out the door. Rarely does this result in a fatality but usually there is severe damage to both the jumper and the aircraft. If either the main or the reserve open prematurely in the aircraft, one of two things will happen; the pilot chute and/or canopy will either start out the door or remain in the plane. You have only one course of action for each situation. The jumper whose reserve escaped out the door of this aircraft was lucky; he survived. If the main container opens in the aircraft, it is usually the result of excessive movement by a person in the aircraft. This could happen when you constantly shift positions, rubbing the static line and/or closing flap on an interior surface or snagging the static line on something during movement in the aircraft (from one position to another). With the Instructor Assisted Deployment (IAD) method, these hazards are real because hand-deployed pilot chutes use small closing pins. With long plastic coated cables for a main ripcord, the hazard is much less likely, especially when the ends are tucked into housings on a closing flap. If the main container opens, it is a simple matter to move backward pinning the errant canopy against a wall or flat surface. Show the problem to your jumpmaster immediately. Once satisfied that you have it well secured, disconnect the main canopy from your harness by operating the canopy releases (the method depends on the type of system you are using — your jumpmaster will probably do this for you as well as disconnect your reserve static line device). This is so that if it should somehow get out the door later, you won’t be connected to it. Now sit on the canopy and pilot chute so they won’t get away and ride the plane down. Sometimes the reserve container will burst open while you are in the back of the plane. The pin works its way out, or perhaps since you are in the back of the plane, you are not vigilantly guarding your reserve ripcord handle and it is snagged out as you move around trying to find a comfortable position. Grab the reserve pilot chute and canopy, cover them and hold them tight. Call the jumpmaster’s attention to the problem immediately. The reserve creates a greater potential danger than the main because it cannot be quickly disconnected from the harness. The deploying reserved canopy pulled the static - line student off the step. If, however, either of your canopies start out the door while you’re attached to it, you will follow it out. You have, at most, two seconds, and if you hurry you will experience a near-normal canopy ride to somewhere in the vicinity of the airport. But if you are slow, the developing canopy will act as a giant anchor, extracting you not just through the door but, more than likely, through the side of the aircraft too, causing great injury to you, damage to the aircraft, and exposing others still in the aircraft to great danger. The best solution is prevention. Always guard and protect your static line and/or your ripcord(s), canopy release handle and pins.
 -
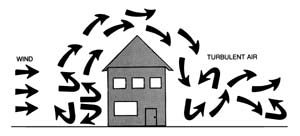 Most of your landings will be normal and in the center of the drop zone, but unusual things do happen like landing in water, in sudden high winds, descending through power lines or trees. TurbulenceAs mentioned earlier, bumpy air may be encountered at any altitude and it has been known to close end cells and upset canopies. Jumpers have been robbed of their wings to be left back in freefall at 75 feet. Bumpy air may occur on windy days and on hot, no-wind days. Keep your canopy inflated during turbulence by flying at one-quarter to one-half brakes and make gentle turns. If turbulence causes a partial canopy collapse of your canopy, bring the steering lines down to half to three-quarters brakes to help the canopy to reinflate. Turbulence near the ground may be caused when wind flows over obstacles such as buildings and tree lines. Avoid landing on the downwind side of any obstacle. The air may be bumpy or descending. The stronger the wind, the farther downwind the turbulence will exist and the taller the object, the higher the turbulence will be. Turbulence can be significant downwind as far as twenty times the object’s height. For a fifty-foot tree line, that could mean 1,000 feet downwind turbulence. Turbulence also occurs behind other ram-air canopies. Stay away from the area directly behind another canopy about 45 degrees up from the trailing edge. Dust DevilsDust devils are very dangerous. They can rob you of your canopy when you need it most — near the ground. Look for the spinning dust clouds. Unfortunately they can’t be seen over grass. One jumper landed, his canopy deflated and then it was reinflated by a dust devil. The swirling wind picked him up and then threw him back on the ground. He died from the impact. In windy conditions, pick up your deflated canopy immediately. In bad conditions, stand on it. High winds. If you find yourself in high winds, look behind you as you back up. Many jumpers back into power lines and fences. When landing in high winds, let go of one toggle as soon as your toes touch the ground. Keep the other toggle at the flare position and quickly pivot 180 degrees in the direction of the depressed toggle. Steer the canopy into the ground. Run toward and around it to collapse it. If necessary, continue pulling on that toggle and reel in its line to pull the canopy out from under itself. Once you are on your feet, stand on the canopy and remove your harness. Don’t let it reinflate and start dragging you all over again. ThunderstormsThunderstorms are violent vertical lifting of air masses, a phenomenon which can build cumulonimbus clouds from near the ground to anywhere from 50,000 to 75,000 feet. Thunderstorms possess violent updrafts and downdrafts along with lightning. While the West Coast of the U.S. has only around five thunderstorms each year, the northeast has 20, and Florida 80 to 90. Jumpers have been caught in cumulonimbus clouds for some pretty scary and wet rides. When the storm clouds appear, put the gear away. The Tree LandingThe tree landing is rarely hazardous if you “center” the tree. Your canopy will lower you gently into and through the trees as you slow further, breaking the thinner branches. You will probably go all the way through to the ground and make a normal parachute-landing fall on the other hand, if you clip a tree with a wing tip, your canopy may collasp, dropping you to the ground. If you can’t avoid the trees, face into the wind to minimize your ground speed, pull half brakes, and place your feet and knees tightly together so you won’t straddle a branch. Do not attempt to brake your descent by grasping limbs; you are better off going all the way through to the ground slowly than ending up sitting in the top of the tree. Prepare for a PLF. If you come to rest short of the ground, check your position. Students should wait for DZ personnel to come to their aid. If your feet are within three feet (1m) of the ground, unfasten your chest strap and then your (solid saddle) leg straps and drop to the ground. If you do not undo the chest strap first, you could injure your neck as you fall away. If you are up quite a way, relax and wait for help. If help does not arrive, you may have to climb down. Perhaps you are way off the DZ and dusk is approaching. It’s hard to shout continually, and it is nice to have a whistle in times like these. You may deploy the reserve canopy without activating the cut away mechanism (for S.O.S. type equipment, pull the metal cable out of its housing without disturbing the plastic-coated breakaway cables), let down the canopy and lines and then climb down hand over hand. If you let the narrow lines slip through your fingers and aren’t wearing gloves, you will receive painful friction burns, so go hand over hand. Keep your helmet on until you have both feet firmly on the ground. Its purpose is to protect your head from takeoff to touchdown, and you aren’t down yet. Power LinesYou must avoid power lines at all cost; the danger is just too great. Look for the high-tension wires. If you are at an unfamiliar DZ or land off target, look for poles; wires run between them invisibly. Keep power lines continually in mind from the time you open so you can avoid them. High-tension lines don’t look dangerous, but they strike with the speed and power of lightning. They may electrocute you in an instant or put you in the hospital with severe burns; it isn’t at all pleasant. If there is any question about clearing the lines, turn and run with the wind until you are past them and make the decision high enough. It will be better to land downwind than to land in power lines. If landing in the wires is inevitable, it is essential that you avoid touching more than one wire at a time. Any bird will tell you that it takes touching two wires to get zapped. If you are going into the wires, face your canopy into the wind to minimize horizontal drift, pull half brakes to make your final descent as close to vertical as possible. Drop your ripcord or anything else in your hands. Place your feet and knees firmly together with the toes pointed to avoid straddling a wire. Look for wires and wriggle and squirm as necessary trying to avoid touching more than one at a time. If you come to rest near the ground, check below to see what is underneath you. If there is no hazard below you and it is less than five feet to the ground — and assuming it is the main canopy that is hanging you from the wires you might decide to execute a breakaway and get away from the danger area as quickly as possible, but it would be better to wait for calmer heads to give you guidance in this matter. If there is a hazard below you or if it is your reserve parachute that is hanging you from the wires, you must wait calmly for competent, professional help. Any movement on your part may force an electrical contact. If a local resident walks up desiring to help you, ask them to call the power company and the DZ in that order. Warn would-be rescuers not to touch you or your gear until the power has been turned off. They could complete a circuit between you and the ground with fatal results. Once you get to the ground, be alert for broken power lines, they are like snakes hidden in the grass and they not only strike, they sometimes start fires. Never pull on a canopy attempting to remove it from the wires, it may be your very last good deed. Let the power company do it; it is their kind of work. Water LandingsThere are two types of water jumps — those you plan and those you don’t. An intentional water jump is an exciting, rewarding combination of aviation and water sports. But being unexpectedly blown out over a body of water is cause for great concern. In fact, while few jumpers have perished in a planned water jump, 48 perished in unexpected water landings between 1967 and 1984. These figures have dramatically decreased now that the use of ram-air canopies has become universal and floatation devices for operations within one mile of water are mandated by the BSRs. The procedures for these two very different types of landings are not the same. In an intentional water landing you will slide back in the saddle, undo the chest strap, the bellyband (if there is one), and loosen both leg straps slightly (unless you have a full saddle harness, in which case you can release one leg strap up high, then the last leg snap upon splashing down). This procedure is also recommended if you find yourself being blown unexpectedly out over the ocean or other immense body of water. When there is absolutely no question that you are going for a dunking, you should inflate your floatation device. Don’t get out of your gear until you get wet. Don’t break away when you think you are about to get wet. Depth perception over water is deceptive. You may think you’re at 20-feet, but you’re probably much higher. Without knowing how deep the water is, you almost guarantee yourself a landing injury if you don’t steer the canopy all the way to the surface. For landing purposes, assume the water is just a few inches deep. Take a deep breath and prepare to do a PLF. Line up your landing into the ground winds (you may have to use the sun’s position for a reference) and once you are wet, swim or work your way forward out of your gear. Don’t try to save the gear at first. Remember that it is replaceable, you aren’t. Worry about the gear later, when you are safely away from it. Better yet, let someone else (such as your water landing crew) worry about it. When making an intentional water jump, conditions are good, the jump is planned and the necessary flotation equipment is worn. The ingredients for tragedy, on the other hand, are born by being unprepared for the unexpected. The Basic Safety Requirements insist on carrying flotation gear when parachuting within one mile of any water deep enough to take a life, but there are times when one mile is not enough. A bad spot on a big load with high upper winds, sudden radical wind changes, or a popped round reserve as you exit at twelve grand, for examples, may carry you far from the friendly DZ. Some water requires more protection than just flotation gear, such as when a jumper punches through the ice in the wintertime. Most unintentional water landings are also unexpected. They take place in narrow rivers and small ponds; so small that you don’t know you are going into them until just a short distance from splashdown. There is no time to do much water-landing preparation, particularly if you are trying to avoid trees. As a result, you are going into the water in all your gear and your chances are poor. On the other hand, if you go through the intentional water landing procedure just in case and then miss the water only to land in the trees because you couldn’t spend enough time steering, you may subject yourself to other dangers. The greatest danger in water landings is becoming entangled in the net-like canopy and lines. In fact, we should think of: panic-canopy-entanglement-drowning. All are challenges, very much related, and either of the first two can lead to the others. If there is little wind in the small tree-protected pond, the canopy will deflate and fall straight down on you in a huge mess of tangled nylon fabric and lines. If you panic, you are sure to become caught in the trap. It seems logical, then, to try to avoid the canopy, or better yet, avoid the water landing. The procedure recommended for unintentional water landings is as follows: You are at 1,000 feet and the wind is backing you toward a water hazard. If you continue to face the wind, you may land short of it and if you turn to run, you may land on the other side of it, but one thing is for sure: you will land in the vicinity of it. So, take the action outlined below and then at double to triple the height of the trees, face into the wind to minimize your ground speed, pull your toggles to half brakes, and place your feet and knees firmly together in preparation for a PLF. Two Action System (TAS) Continue to steer, activate your flotation gear if you have it, undo your chest strap and your belly band if there is one. Loosen your leg straps so that you can slide the saddle forward a bit. Disconnect the RSL. Then, just before touchdown, reach for the canopy release handle. At the moment your feet get wet, not one moment sooner, activate the releases. The tensioned canopy will recoil upwards and even a mild wind will carry it away. Altitude is very difficult to judge, especially over flat ground or a large body of water. One is always tempted to drop out of the harness just before touching down, but what appears to be just a leg length may really be building height, so don’t break away until your feet are in the water.This procedure will leave you floating with your harness and reserve on but with the dangerous unpacked main canopy gone. Roll over on your back and take off the harness. Actually, the harness won’t hurt or restrict you and the packed reserve will even provide positive flotation. In fact, the reserve won’t become negatively buoyant for about three minutes. So, you can use it for temporary flotation. Single Operation System (S.O.S.). With the S.O.S. system, if you jettison the main canopy, the Stevens lanyard will activate the reserve. Allow yourself to get wet, bend forward and then swim or work your way forwards out of the loosened leg straps as quickly as possible. Get clear of the canopy. If the canopy does land on top of you anyway, grab it and follow/walk a seam to the edge of the canopy. There is no reason to panic as you can always lift the porous fabric to form a space to breathe. Once clear of the canopy, swim away using mostly your hands until you are clear of the lines. Keep kicking to a minimum, as pumping legs tend to draw lines and fabric toward them. If you should land in a river, even a slow moving one, you want to jettison your main as soon as possible. If it catches in the current it will drag you under and/or downstream away from your rescuers. Besides your reserve, certain other pieces of your gear may provide some flotation. Pneumatic soled jump boots, full shell helmets, knotted jumpsuits, etc.; they are all there for those who think to use them. You must undergo (dry) unintentional water-landing training for your USPA A license and (wet) live water training with full gear for the B license. These requirements have probably saved hundreds of lives so far. Buildings Landing on a building presents two distinct hazards. First, you might go through the roof of the building, which may lead to a broken or cut extremity. Second, if it is windy, you might find yourself being dragged off of the building and going for a second extremely hazardous landing. If you feel your life is in danger (such as being dragged off a high building), break away from the main as quickly as possible. Don’t worry about the reserve inflating — it won’t have enough of a chance to do so. If it is your reserve that put you on the building, try to collapse it as quickly as possible. If that doesn’t work, you’re going off the building in the wrong position for a second landing and there probably won’t be much of a chance to get into a PLF mode, but try to anyway. Other ObstaclesThere are many other landing obstacles that are potentially hazardous to parachutists such as ditches, fences, hard roads and even some unique ones like hot water geysers. These hazards at your DZ will be pointed out to you in your first jump course, probably with a marked aerial photograph. When visiting a new drop zone, be sure to check in with an instructor or the Safety & Training Advisor for a briefing on their local hazards and recommended alternate landing areas. When you are in the air, look for the danger areas. Invisible barbed wire runs between visible fence posts, power lines run between power poles, isolated buildings are served by electricity. Power lines, ditches, and fences often border roads, airplanes land on runways, etc. This should all be obvious, but sometimes it’s not. It is all new to you and the view is different: you are looking down at the terrain now, not horizontally. If an obstacle presents itself, steer your canopy to avoid it. Turn your canopy to run and land beyond it, if necessary. If you are going to strike an object, hit it feet-first. Successful landings under a parachute are like those in an airplane: the ones you walk away from are good. It is far better to land outside the target area and walk back than land on a fence and be carried back. Don’t let get home-itis get you. If you pass over the obstacle very low, you may not have sufficient altitude to turn into the wind for landing. It is then preferable to crab the canopy slightly and try to do your best forward PLF. But, obviously, the best solution is to think and plan ahead to avoid the obstacle in the first place. The most important rule about landing hazards is: Continually make efforts to avoid them. The second rule is: It is better to land flying downwind than to hit an obstacle.
 -
Accelerated FreeFall (AFF) EmergenciesAs you get ready to leave the aircraft, you are supposed to do a pre-exit check to make sure that your jumpmasters are ready to exit too. If you make an error in your exit count, you can fool your jumpmasters (JMs) into thinking that you are about to leave and they may end up pulling you off the aircraft before you are truly ready to go. If you leave at the wrong time in the count, you could be taking your jumpmasters in tow. This could lead to some awkward flying if you are not arched. You may be positioned in a reverse arch (like a cat standing on top of a toilet bowl) which will attempt to send your butt to earth. The exit timing depends upon you doing the exit count right so that your jumpmasters can exit with you, not before or after you. If you find yourself looking up at the sky or tumbling, arch hard for stability. Your jumpmasters will be doing their best to assist you in getting back to the proper belly-to-earth position. AFF:Loss Of One JumpmasterIf you sheared off one jumpmaster during the exit or one let go because he was not contributing to the stabilization of the formation, arch for stability and check with the remaining jumpmaster during your circle of awareness. If you get a headshake of “NO,” it may mean that the jumpmaster holding onto you is not quite comfortable with your stability at that time. On the other hand, it may mean that he doesn’t want you to go to the next portion of your tasks because the other jumpmaster is just about to re-dock on the formation and he wants that jumpmaster in the correct position before you continue with your tasks. You may or may not feel the other jumpmaster re-dock. Whenever you get a “NO,” simply arch a bit more, wait a few seconds, then do another circle of awareness. If you get a nod of “YES,” you may continue on with your skydiving tasks regardless of whether or not you have just one of both jumpmasters firmly holding onto you. AFF: Loss Of Both JumpmastersYou are in an extremely hazardous environment if you don’t have a jumpmaster holding onto you. The moment you realize this, arch and pull immediately. The following emergencies apply to either AFF or S/L program freefalls. Of course, in the S/L program, a jumpmaster might not be in the air with you during your freefall. Five-Second Rule For Loss Of StabilityHere’s a good rule for AFF or freefall. It is called the Five-Second Rule. If you are out of control, attempt to regain control by arching hard for five seconds. If you don’t recover stability by the end of that five-second period, pull your ripcord immediately (which one depends upon your altitude). This rule is normally taught to AFF students when they start their Level III training and it is applicable to all freefall students. Loss Of Altitude AwarenessIf you can’t determine what your altitude is because you can’t see your altimeter and you can’t see either of your jumpmasters’ altimeters, arch and pull immediately. The worst of all situations is to go into the ground at a high rate of speed simply because you didn’t know where you were. GogglesIf your goggles weren’t tight, they may come up off of your eyes and cause sight problems. You could simulate a practice pull position and try to hold them in their proper place, but it is probably better to end the freefall once the situation occurs. There is nothing worse than a distraction to disorient you and cause you to lose track of time and altitude. When in doubt, whip it out.
-
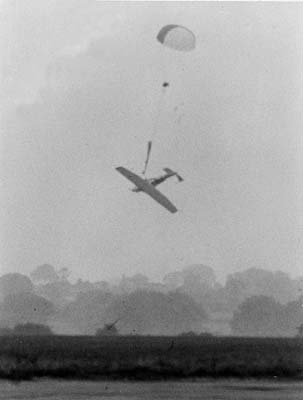 Exit Hazards-static LineWhen climbing out onto a step for a S/L exit, you need to firmly plant your feet on the step so that you don’t trip over yourself and fall off. If you do find yourself prematurely exiting the aircraft, merely arch hard for stability. Don’t grab the pilot chute or parachute as it comes by you. To do so may cost you your life. Exit Hazards-AFFWhen climbing out for an AFF exit, your jumpmasters are supposed to have good control of you. If you start to stumble, they will probably help you into position. If you do prematurely exit, at least one of them should have a hold of you and you will need to arch hard for stability. When climbing out, make sure your hands stay away from the jumpmaster’s ripcord handles. Occasionally a jumpmaster is launched off the step when a student grabs for the jumpmaster and snares a handle by mistake. Dangling Static LineAfter the jumpmaster dispatches each student, he will unhook the static line and stow it in the back of the aircraft or under the pilot’s seat. If he forgets to disconnect the static line, it is one ingredient for another horror story. During the scramble to exit, jumpers have managed to get those long pieces of webbing half-hitched around their ankle. The result is a surprising and abrupt halt just a short distance out the door. Due to the weight of the gear and the wind, it is impossible for the jumper to climb back up. There should be a knife in the plane to cut you loose and, of course, every experienced jumper in the plane should be carrying one. If there aren’t any knives handy, you will hope the pilot is sharp enough to think of breaking some glass out of one of the instruments in the panel because your alternatives are not terribly pleasant. Either you can pull your ripcord and risk jerking your leg off, or you can wait it out and suffer severe runway rash when the plane lands. One jumper caught in this situation lucked out, he was jumping a helicopter. The pilot set him down gently and red faced in front of everyone on the DZ. Student In TowOne of the more dramatic problems is the static line hang-up or student in tow. It occurs when you or some part of your equipment entangles with the static line preventing separation. You wind up suspended about ten feet below the aircraft by the long nylon web. This emergency is extremely rare and if it does occur, it will probably be because the static line is misrouted (perhaps under the harness). Maybe the error was missed in the equipment check, or you and the jumpmaster failed to keep the line high and clear as you moved into the door to jump, or you performed some wild gymnastic maneuver instead of a stable exit and became entangled in the line. Some students, despite all their training, yell arch thousand and then let go with the hands, leaving the feet firmly planted on the step, thus they perform a backloop upon exit. The in-tow/hang-up situation presents all of you with a perplexing situation. The jump ship will be more difficult to fly. In fact, the pilot may be unable to maintain altitude because of all the extra drag. Just as with the dangling static line situation, you do not want to pull the reserve or land with the plane. As with other emergencies, there is an accepted procedure. You, your jumpmaster and pilot must be familiar with it. The pilot will be diverting the aircraft to a safer, open area and will be trying to gain altitude. If you relax, you will probably assume a stable towing position either face or back to earth which is better than twisting in the wind. If you are conscious and your arms have not been injured, signal the jumpmaster by placing both hands on top of your helmet. Your hands will show you understand the situation and are ready to take corrective action. Your jumpmaster will signal he is ready too by holding up a knife. Now, your jumpmaster will cut the static line and you will fall away. Pull the reserve ripcord. Be sure you are cut loose before you pull. If you are unconscious or otherwise incapacitated, you won’t be able to give the OK signal to your jumpmaster. Your static line will still be cut but your jumpmaster (and you) will rely on your automatic activation device to deploy your reserve parachute. Back when reserves were worn in the front, jumpmasters could lower an unconscious student by unhooking their own reserve and attaching it to the static line. The static line had to have an extra ring for attachment to the reserve to make this method of rescue possible. There is also a second type of main canopy in-tow emergency to be considered. Normally, you fall away from the step so quickly that it is virtually impossible to tangle your canopy in the tail, but if one of your parachutes opens when you are on the step, entanglement may occur. If you find yourself in this situation, look up and determine which parachute is fouled on the aircraft. If it is the main parachute (which will be attached to risers that can be disconnected from the harness), look at your reserve ripcord handle, jettison your main and pull your reserve ripcord immediately, per the procedures that you were taught to use. If it is your reserve that is entangled on the aircraft, pulling the reserve/SOS ripcord would not change your situation but it will make your main canopy useless as it would be disconnected at the risers, therefore don’t pull the reserve ripcord handle. The fouled canopy may just self-destruct, putting you back into freefall, in which case you will need to deploy your main parachute to save your life. (If you deployed your main parachute while the reserve is fouled on the aircraft, you can assume that major structural damage will occur to that aircraft and anyone left inside that aircraft will have to perform their own emergency procedures.) Static Line Not Hooked UpOccasionally, despite all procedures, a student exits the jump plane without being attached to it. While hooking up the static line is the jumpmaster’s responsibility, you must verify that it is attached prior to exit. If you forget to check this and find yourself in freefall, follow the procedure for a total: pull your reserve ripcord. Pulling High Is DangerousEveryone else expects you to pull below 3,000 feet. If you pull higher, another freefalling skydiver could hit you. An open canopy descends at about 1,000 feet per minute and jumpruns are usually a minute apart. If you plan on pulling higher announce your decision to all before leaving the ground.
 -
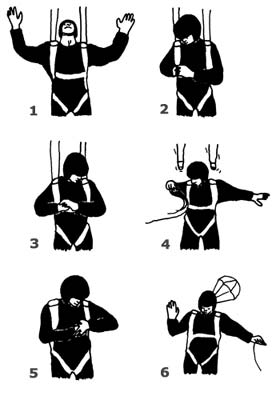 Jettisoning The Main CanopyBefore we talk about the series of problems you may encounter with your main canopy, it is important to discuss the types of cutaway (main canopy disconnection systems) that are in common use and their procedures. The breakaway or cutaway is an emergency procedure that involves jettisoning the main canopy prior to deploying the reserve. Originally, the cutaway was performed with a knife and the lines were cut to separate the canopy from the harness. Today, we use canopy releases to breakaway. The breakaway procedure should be executed immediately under rapidly spinning malfunctions because ever-increasing centrifugal forces will make arm movement difficult, and may cause you to lose consciousness (red-out) due to the blood flow to your eyes. The decision altitude for the breakaway is 1,800 feet. This is your safety margin, above this it is safe to try to clear the malfunction but at this point, all clearing work must stop. Watch your altitude. The breakaway must be commenced above 1,600 feet to assure you plenty of time to get the reserve out. Under high-speed malfunctions, you may be just seven seconds off the deck at this point, and it may be necessary to forget the breakaway and just pull the reserve. To breakaway, spread your legs (for lateral stability and push them back as far as possible while bending your knees about 45 degrees (only). Arch your back and pull your head back but keep your chin resting on your chest and your eyes on the handle(s). On release you will fall into a stable, face- to-earth position. Body position during the breakaway is very important. If you are not falling away correctly, you may become entangled in the canopy and/or lines of your deploying reserve. Even with good body position, breaking away from a violently spinning malfunction may throw you tumbling across the sky. The breakaway procedure is as follows: Two Action System(TAS)The TAS has two handles: Pull the first one (usually a Velcro-attached pillow handle located on the right-hand main lift web), to release both risers (a single point release). Then activate the reserve by pulling the other handle (usually located on the left-hand main lift web). A. Total malfunction (nothing out) Do not waste precious time breaking away; just pull the reserve. LOOK at the reserve ripcord handle and arch. REACH for the reserve ripcord handle with both hands. PULL the reserve ripcord handle with both hands. B. Partial malfunction (canopy out but not working properly) There are two schools of thought on how to perform the breakaway action using this system. The first one presented is in the USPA’s Skydivers Information Manual, “Section 8-3.16.” While it states “Look at the reserve ripcord handle...” (step 3), it says nothing about the choice of one hand or both on the breakaway handle. It is as follows: LOOK at the breakaway handle and arch. The arch should keep you from making a backloop when you jettison the main. REACH for the breakaway handle (presumably with both hands). LOOK at the reserve ripcord handle before breaking away. PULL the breakaway handle and throw it away while continuing to keep your eyes on the reserve handle. REACH for the reserve handle with both hands. PULL the reserve ripcord. CHECK over your shoulder for a pilot chute hesitation. CHECK your reserve canopy, look around and prepare to land. Note: For student equipment, and something that is becoming more popular on experienced jumper equipment, there is a device known as a reserve static line lanyard RSL (sometimes called a Stevens lanyard). This is a piece of webbing attached from the right side riser (or both risers on some systems) to the reserve ripcord cable. It is designed to pull the reserve ripcord out of its locking loop(s) as you fall away from the main parachute after that main canopy is cut away, thus allowing the reserve to deploy. When installed and operating properly, it will usually beat you to the manual deployment of the reserve. However, it should not be relied upon, for after all, along with an automatic activation device (AAD — described in Chapter 7), it is merely a back-up device to your proper execution of emergency procedures. This system can be disconnected (if necessary) by personnel who know what they are doing. It is a possibility that when you perform a breakaway using both hands on the breakaway handle, there is a fraction of a second of disorienting instability as the maneuver is executed. Although you are supposed to be looking at the reserve ripcord handle, you still need to move one or both hands to it from whatever position you are in at the conclusion of the breakaway-handle pull. The ripcord handle may move from where it was (on the harness) under the tension of the partial malfunction to a different position during this moment. It is a possibility that there may be an additional second or more of elapsed time as you reach for the reserve ripcord handle. Therefore, there is a second school of thought about performing the breakaway, which is, if you are about to execute a breakaway and you put your right hand on the breakaway handle and your left hand and thumb through the reserve ripcord handle, there will be no lost time reaching for the reserve ripcord after the breakaway is executed. Here is a typical scenario: LOOK at the breakaway handle and arch. The arch should keep you from making a backloop when you jettison the main. REACH for the breakaway handle with your right hand. REACH for the reserve ripcord handle with your left hand, placing your thumb through the handle to ensure that you have a firm grip on it. PEEL and PULL the breakaway handle to full right arm extension. Throwing it away is optional. Immediately after you’ve pulled the breakaway handle with your right hand, PULL the reserve handle out to full extension with your left hand. CHECK over your shoulder for a pilot chute hesitation. CHECK your reserve canopy, look around and prepare to land. In this scenario, there is no hesitation in looking for a reserve ripcord that may have moved, thus it may save a second or two of precious time. The Single Operation System (S.O.S)The Single Operation System is a one-handle/one-motion system. The S.O.S. has a combined handle, usually on the left main lift web, to release both risers and activate the reserve. The S.O.S. has a reserve static line lanyard (Stevens lanyard) from one riser to the reserve ripcord. The purpose of the S.O.S. is to eliminate one the motions in the breakaway sequence; that of separately pulling the cutaway handle. By pulling the reserve ripcord all the way, you accomplish both the breakaway and the reserve-ripcord pull in one complete action. With a two-action system, half a breakaway is worse than no breakaway at all unless you have an RSL. The S.O.S. usually produces full deployment of the reserve canopy in less than 100 feet. If you find an RSL on your piggyback harness/container assembly, you should leave it on. When you and your instructor develop enough confidence that you will pull the reserve after a breakaway, you can do away with the line if you wish. Total or Partial malfunction In the event of a total or partial malfunction: LOOK at the combination release/ripcord handle and arch. REACH for the combination handle with both hands. PULL the combination handle with both hands to full arm extension. REACH back with one hand, grasp the cables where they come out of the housing. PULL AGAIN to clear the cables and CHECK over shoulder for a pilot chute hesitation. CHECK the reserve canopy, look around and prepare to land. Never depend on the reserve static line device (Stevens lanyard). Always pull your reserve ripcord cable all the way out of the housing immediately after breaking away. Canopy Transfer Canopy transfer is a third type of breakaway procedure sometimes used in Canopy Relative Work by those who believe something is better than nothing. If your main canopy becomes damaged or tangled on a jump and it is still flying forward, you may pull your round reserve and drag it behind you, full of air. Once the reserve canopy is inflated, jettison the main. This maneuver is extremely risky with a square reserve canopy as two squares may fly around and into each other. This type of problem is discussed later on in detail. Harness shiftWhen you jettison the main canopy, your harness will shift downward taking the reserve ripcord location with it. Therefore, it is essential that you keep your eyes on the reserve ripcord handle, if your hand is not already grasping it, when jettisoning the main canopy. Now that we have covered cutaways (breakaways), let’s discuss when and where they are used.
 -
Hazard BriefingsEmergency procedures will vary from drop zone to drop zone to fit local conditions. There may be trees, rivers, power lines, hostile neighbors, prisons, highways or a girls’ school. In fact, those DZ’s lacking certain hazards may touch on the corrective action for every emergency but lightly. Therefore, when visiting a new DZ, it is imperative that you get a briefing on the area. Alcohol And DrugsIn order to achieve the greatest enjoyment from your skydiving experience, you will want to approach it with an unfogged mind. This means going to bed early the night before and going easy on the booze. Even the common cold will trouble you due to the changes in atmospheric pressure. If your mind and body are not operating at 100%, you will react with less efficiency in an emergency and you will enjoy the jumping less. Remember, the lower pressure at altitude amplifies the affects of alcohol and drugs. Health ConcernsJumping with a head cold can lead to ruptured sinuses and ruptured ear drums. The inner ear and the Eustachian tubes do not take kindly to large pressure changes when they are plugged. Infections in these areas can produce debilitating pain under normal jump conditions. In a few words — if you are sick or under the weather, don’t jump. Loading up on antihistamines and decongestants can cause other medical problems. There is always another day to enjoy a jump in good health. Scuba Diving AlertThere is no problem in descending into the water within 24 hours of jumping or flying, however, there is trouble waiting in doing the reverse. Scuba divers know to stay away from air travel for a period of 24 hours after their last descent below 30 feet (one atmosphere’s increase in pressure) so as to avoid the bends (nitrogen bubbles forming in the joints and blood stream). Since skydiving involves air travel, the same rule applies. Some Fear Is Good For YouIt has been said that the difference between fear and respect is knowledge. Most people fear skydiving because they don’t understand it. Fear is the result of ignorance and it is part of nature’s protective mechanism; it warns us to beware when we are on unfamiliar ground. The best way to cope with problems is to prevent them in the first place. The key is education. It is unfortunate when someone is injured while engaging in sport, but it is tragic when a second person is hurt for the same explainable and preventable reason.
-
Never smoke around aircraft, hangers or pumps. Both aviation fuel and aircraft dope present a great fire risk. When moving light aircraft, be careful where you push. They are covered with very light fabric or metal and are easy to damage. The pilot will show you where it is safe to apply pressure. Beware of the prop. It is difficult to see and will make quick mincemeat of anyone who walks into it. Always walk around the back of fixed-wing aircraft and in front of helicopters. Stand where the taxiing pilot can see you; his or her forward visibility is not good. Get into the habit. Leave the dog and the children at home, the airport is not a nursery. If a play area is made available to children at the DZ, remember that they are still your responsibility. If your airport has more than one runway, stay off the active one. It will normally be the one running the closest to the direction of the wind. Remember that planes usually takeoff and land into the wind so look for them downwind. Rules change from airport to airport and at some you will not even be allowed to cross the active. Do not walk down any runway and do not fly your canopy over one under 500 feet. Be nice to all the pilots, they have a lot of clout at the airport and you may need one to fly the jump ship. Be patient with the whuffos (spectators), they are public opinion.
-
One of the things that all most every Dropzone or Boogie waiver has is a space to list an Emergency contact. Most jumpers just fill this information in with the first relative or friends name that pops into their head as they fill out the waiver, but jumpers should fill this section out after carefully selecting a contact. Jumpers should put more thought into this decision then they do into what type of jumpsuit they are going to buy. There are criteria that make people better emergency contacts then others and jumpers should keep this in mind as they make their selection. Potential emergency contacts should meet the following criteria at a minimum: Potential emergency contacts need to be aware of any medical issues or conflicts that you might have. If someone is allergic to something and forgets to put it on their waiver the emergency contact might just be the last line of defense there is to prevent the emergency responders from giving them a potentially dangerous drug or drug combinations. Emergency contacts should have phone numbers to your immediate family members rapidly available so they may inform your loved ones about any potential incidents that might have happened. Poor choices for emergency contacts include people that have never met you or your family before you visit the DZ. At a minimum your emergency contact should have the phone number to contact the person that you would want to be notified of your injury or death first. Another trait that makes a good emergency contact is choosing someone that is not at the airport the same time you are. In the case of something like a plane crash or canopy entanglement you might be involved in the incident with potential emergency contacts. By choosing someone that is not involved in skydiving or at the airport at all you maximize the availability of contacts that DZ personal might be able to reach in the case of an emergency on the dropzone. Contacts should be someone that will be able to initially handle receiving potentially devastating news about you. Choosing someone that is known to be extremely emotional over the phone might be a poor choice as a contact if the Dropzone or medical teams need to ask questions of the emergency contact. Choose someone that will be able to calmly answer any potential questions after being informed that you are injured or worse. Having multiple methods of contacting emergency contacts makes the task of reaching the emergency contact a lot easier for the dropzone personal. Emergency contacts should have at least one phone number and if possible multiple phones. List every phone number in the order that they should be called. Listing mobile numbers, home numbers and work numbers should all be done at a minimum to insure the maximum possibility of reaching someone in a true emergency. Other things that should be used as criteria in potential emergency contacts include knowing who might be on vacation and out of reach at the time of certain boogies, knowing which contacts will be available to rapidly travel to deal with incidents if they happen, and in the case of international jumpers knowing the time difference and how that is going to affect the ability to contact your potential contact. Using these criteria to choose an emergency contact will increase the probability that the dropzone personal will be able to reach and inform people of emergencies involving you, plus it will reduce the anxiety factor on the dropzone staff side in contacting people if they know they will not have to end up calling 10 people to reach someone that has needed answers about you.
-
None of us want to think about a member of our skydiving family getting hurt or killed, much less getting hurt or killed while skydiving. Even further down the list is having to talk to a journalist about a skydiving incident. As distasteful as it is to try to explain to a whuffo reporter why a fellow skydiver was injured or killed while jumping, though, it's actually an opportunity to improve the image of the sport. As we well know, most journalists aren't skydivers and at best have a tough time explaining the circumstances of a skydiving incident. They often get it wrong with a common theme of "The parachute didn't open." But while it is certainly their responsibility to get the story right, they can't do it without help from the experts-which in this case is you, the skydivers who were present during an incident and are designated media contacts. Avoidance and condemning of the media for their often poor explanation of skydiving incidents is common among skydivers, but we can do the sport far more justice by working with journalists towards a proper article than by blowing them off. It requires more effort, to be sure, but more accurate coverage of these incidents can help dispel the image of skydiving as a ruthless sport in which some participants die despite doing everything right. Take the common statement of "The parachute failed to open," for example. This implies that the gear is at fault, when we all know that it's a very rare situation when the skydiver can do everything right and still die. Almost 100% of the time, a skydiver dies because of a primary (e.g., no pull, low pull, low turn) or secondary (incorrect response to a malfunction) mistake. The public doesn't understand this. While it might not seem important that they do, think of the number of times you are asked by non-skydiving friends and coworkers why you skydive, or hear a comment of how they can't believe you skydive, all with the overtone of why would someone want to do a sport that everyone knows will kill you. Do you get tired of that? I do. The simple fact is that a large percentage of the non-skydiving population thinks that people who die skydiving die through no fault of their own, thus they think skydivers are a bunch of adrenaline junkies who don't care if they die skydiving. We know that's far from the truth, but when news articles don't give the whole story for long periods of time, this is the result. Additionally, it's frustrating to all of us skydivers when the story isn't right. Following are some suggestions for dealing with the media in the event of a skydiving incident. Thankfully, most of you will never have to do this, but if you do perhaps this will help. Send them to the source. If you are not the S&TA or other appointed drop zone media liaison, do not discuss the incident with a journalist. We all know that rumors bloom fast and furiously on drop zones, particularly in situations such as this. What began as a simple low turn by an inexperienced jumper on a smaller canopy than he was used to can quickly become an evasion of traffic, a dropped toggle, avoidance of an obstacle, etc., via the rumor mill. Whether you saw the incident or not, don't talk about it to the media and don't offer any opinions unless you're the media liaison. Refer any reporters to the S&TA or DZO, or whomever the drop zone has designated as the media contact. This person's job is no fun, but it's their responsibility to investigate the incident based on witness accounts and gear information, to prepare a complete report, and to deal with the media (and the coroner if the accident was fatal). Again, no one but the designated media contact should be talking to the media. Don't dodge the press. We'll give chapter and verse to anyone who asks about most things related to skydiving, but when it comes to chatting with a reporter about a skydiving incident we often clam up. Why? Because we're afraid they'll get it wrong again. But if we don't give them information, we're guaranteed a minimal or misleading report of the incident. If we want these incidents to be reported accurately, the information has to come from us-the S&TA or designated media contact. Be professional and courteous. Don't say, "You shouldn't be writing about this," because they will anyway, and this will just annoy the reporter and make it more likely that he/she will write something negative about the situation, the drop zone, and/or the sport. Also, it will burn a bridge that can be used for publicizing positive events at the drop zone such as charity events or milestones. Anytime you speak as a skydiver or skydive in front of non-skydivers, you are an ambassador for the sport whether you like it or not. Use this interaction with the media as a chance to portray skydiving accurately, and in the best light possible in a bad situation, by being honest and helpful. Avoid the "us vs. them" kind of interaction; this doesn't have to be a challenge where either you or the reporter gets their objective at the other's expense. Think about your description beforehand. In all likelihood, reporters won't be there right away following an incident, unless it occurs during a demo. In either case, coverage of the incident will turn out better with better information, and you will be able to give better information after thinking about the incident a bit and getting it clear in your mind. Be specific, but simple. It's pretty clear by now that I'm asking for more accurate reporting of skydiving incidents, and this isn't a problem for skydivers. What is more of a problem, especially if we're distracted by the substantial emotional impact of the incident, is that we'll talk to a reporter in the same way we'll talk to fellow skydivers-discussing things in skydiving terms rather than lay terms--if we talk to them at all. This doesn't improve the coverage, it just makes their eyes glaze over. For example, don't say "The right toggle came unstowed from the toggle tip keeper, allowing the cat's eye to come off of the loosely stowed brake and sending the canopy into a left-hand spiral to the ground," Instead, think about your audience (the general public as well as the reporter) and say, "It appears that a minor malfunction during deployment caused the parachute to spiral down, and so and so did not correct it in time to avoid the hard landing from the spiral." Refer questions about a jump plane crash to the National Transportation Safety Board (NTSB). It is extremely counterproductive to speculate about the cause of a jump plane crash without an investigation report. If you are asked about a jump plane crash, refer reporters to the designated NTSB public affairs officer once he/she has arrived on the scene. We don't like it when uninformed reporters speculate about the causes of skydiving accidents, and the pilot (if he survived) and his family won't appreciate uninformed speculation about the plane crash either. Offer to review the article before publication. It's not often that you will get the opportunity to do this, but you might if you offer it. What better chance will you get to ensure that the coverage is accurate? Of course, the reporter will reserve the right to accept or reject your changes as they choose, but the chance to review the article before publication is something not to be turned down. The relationship between skydivers and the media has not always been a good one in general, as is often the case when laymen try to describe technical pursuits. That can't be changed overnight. But things won't get better without a responsible effort from both sides, hence the two-part coverage of this topic directed to both groups. A better working relationship between skydivers and the media, both for good and not-so-good events, will benefit both of us. If you found Part 1 of this series useful-"Skydiving Incident Reporting for Mass Media Reporters"-please feel free to copy it and give it to any media representatives (print, web, or television) whom you think would benefit from it. Sidebar: Recommendations for Working With PoliceWorking with the police in the aftermath of a skydiving incident is about as much fun as dealing with the press, but there are a couple of things they should know about the investigation that will make things easier for everyone. First of all, the gear is only to be removed from the area by the coroner, not the police or the local rigger. When the coroner gets there, the drop zone representative and hopefully a rigger should be there to help answer any gear questions. Most policemen don't know how to investigate the gear or scene, so removing evidence (gear) hampers the ability of those skilled in accident investigation-the coroner and your S&TA, rigger, or whoever is designated to investigate-to determine what happened. If the police want to rope off the area without disturbing the scene, that's fine. But if they try to remove the gear without it being investigated by the coroner, politely advise that they will get far more information if they will wait until the coroner, along with the S&TA or rigger, can inspect the scene and the gear with them. Don't get angry with them-which is easy to do when a member of our skydiving family has died and the police and/or media seem to be handling things wrong. Anger will only introduce further tension into an already awful situation, and make it less likely that things will get handled with skydiver input. When the coroner is finished with the gear, the police often will impound it, do whatever they need to do with it, then release it to the FAA. The FAA then will usually inspect the gear with a rigger of their choice as part of an investigation. Working with instead of against the police can help us get better answers to a skydiver's death than a feud. Make every effort to keep things civil and helpful, and this unpleasant situation will be minimally unpleasant for all concerned. Thanks to Randy Connell, S&TA, S/L I, AFF I, for his contributions to this article. Christy West is a journalist and gold/silver skydiving medalist with over 1,800 jumps.
-
Reporting a skydiving (or any other technical sport) accident isn't an easy job, but making the effort to do it thoroughly can give your readers a better product that tops competing publications in this area. Why is improving coverage of this relatively rare event important? The reason is because turning out boilerplate or inaccurate coverage of these incidents angers many skydivers, who might then become ex-readers, and gives the non-jumping segment of your audience nothing special to take away from the story and thus doesn't reinforce your publication's brand. Accuracy, Not Generalities Before you think I'm suggesting that you write a full investigative report of any sport accident, let me say that I don't suggest any additional words in your reports. What I am suggesting is making those words count, with more solid information. Often the sentences that appear in skydiving accident coverage are misleading as to the true nature of the accident. For example, the explanation of "The parachute failed to open" that is so often used in such reports is not a simplification for an audience uneducated about skydiving; it's just plain wrong nearly all the time. It's comparable to saying of a single-vehicle accident, "The car failed to stay on the road," implying that the car is at fault rather than the driver. Such a statement implies that the skydiver did everything in his power, correctly, and still his/her equipment failed to function. However, this is exceedingly rare-occurring far less often than once per year. What is far more common is that a skydiver makes a mistake landing a perfectly good canopy (39% of the 35 U.S. skydiving deaths in 2002, the most common cause of death), collides with another skydiver in freefall or under his parachute (21% of the 2002 deaths), or fails to respond correctly to a survivable equipment malfunction (12% of the 2002 deaths). (Note: skydivers do carry reserve, or backup, parachutes; a malfunction of the main parachute does not automatically kill the skydiver.) We all like to think that we'll make all the right decisions when the chips are down, but the unfortunate truth is that nearly all skydiving deaths are caused by "pilot error"-a mistake on the part of the skydiver. This doesn't mean that we have to crucify this person who made the mistake, but we shouldn't imply that the equipment was at fault when it wasn't necessarily the main factor in the accident. Getting the Scoop Reporting the specific cause of sport accidents gives more "meat" to your story, which both your skydiving and non-skydiving readers will appreciate. But how do you know what to write when you're not a skydiver and don't understand the topic you're supposed to report? Work with the experts-foremost of whom is that drop zone's safety and training adviser (S&TA). The S&TA is an individual appointed at almost every drop zone in the U.S., and abroad, by each Regional Director of the United States Parachute Association (USPA), regardless of whether or not the drop zone is a Group Member of USPA. This individual is tasked with many different safety and administrative-related duties at their appointed drop zone, one of which is investigating skydiving accidents and fatalities. Investigating incidents is one of the less enjoyable responsibilities of an S&TA. Other interview possibilities include the coroner (if the skydiver involved is deceased) and the rigger (person licensed by the Federal Aviation Administration to pack reserve parachutes, and usually knowledgeable about skydiving gear malfunctions) who inspected the gear--if applicable and if the S&TA directs you to talk to this person. A third possibility is the drop zone owner/manager if an S&TA is not available. The USPA is a good source of general skydiving information, but is not a good source of information on specific incidents. The local sheriff or a representative often becomes a media liaison by default, but unless this person is a skydiver working closely with the drop zone's S&TA, then working only with this person is not good. A sheriff with no skydiving experience is no better information source on a skydiving incident than a reporter with no skydiving experience, and will often garble information he or she is given simply through unfamiliarity with the topic. Ask the previously listed skydiving professionals to explain to you, in layman's terms, the cause of the accident so that you can accurately report it. They may not yet have all the answers, especially if certain equipment malfunctions are suspected, but if you are polite and interested rather than forceful about getting the story before an early deadline you will get a lot more cooperation. A good working relationship with the drop zone in question is ideal, because not only will this help you on this story, but you will also get a much better story for other drop zone events such as charity fundraisers (skydiving is interesting to your non-skydiving readers, and can sell publications when good events happen as well as accidents). Introducing more specifics to your report will be good for your readers, but more information requires more fact-checking. If possible, send a copy of the article to your source at the drop zone before publication. The source will likely jump (pardon the pun) at the chance to review the coverage for accuracy. Don't Make These Mistakes Skydivers do not skydive because of a death wish. If that were the case, they'd only make one jump apiece. They most definitely are thrill seekers, but they are dedicated to skydiving safely, even while pushing the envelope, so they can continue to skydive. Portraying skydivers and skydiving as irresponsible, imminently dangerous, or suicidal is an inaccurate disservice. It is also inaccurate to imply that drop zone management is to blame for most skydiving deaths, because it is every skydivers' choice to exit the aircraft; once they have done so, the only person who can keep one safe is himself/herself. For the most part, blaming a drop zone for an experienced skydiver's death (nearly always skydiver error, as previously stated) is similar to blaming the highway system for a motorist's death. The system simply provides the place for the motorist to drive; the drop zone merely provides an aircraft and landing area for the skydiver to jump and land. What a skydiver does with those resources is his or her responsibility alone. Also, keep in mind that stating or implying that a drop zone is to blame for an incident could lead to a libel suit if there is no evidence to back up the accusation. While the following isn't technically a mistake, it is the author's firm belief that in most cases, the practice of including a roll call of any deaths that have previously occurred at a drop zone (or any other sports facility) with an accident article serves no good purpose. If all of these deaths were attributable to the management or equipment provided by the drop zone, then there is something going on that should be exposed. Without proof of such culpability, however, listing previous deaths generally just angers skydivers and creates the mistaken assumption by non-skydiving readers that there is something going on that should be stopped. Again, keep libel laws in mind. Jump Plane Accidents Thankfully even less common than skydiving fatalities, jump plane accidents present a different reporting challenge mainly because aviation accident investigation falls under the authority of the National Transportation Safety Board (NTSB). The local skydivers might or might not have an aviation and accident investigation background, and might or might not know the cause of the accident; they are not the people you should interview about aircraft incidents. Just because the accident involved a jump plane doesn't make it a skydiving accident. The pilot would be a good source if he survived, but NTSB is the final authority on aircraft accidents, and their reports tend to take some time to come out. They do send public affairs officers to the scene of aircraft accidents; these people are the ones you should talk to in this instance. Resources for journalists regarding aviation accidents can be found on their web site at www.ntsb.gov/events/journalist/default.htm. The end goal of this article is more informative, balanced, tasteful reporting of skydiving and other sport incidents in order to better serve readers and thereby the commercial publications they purchase. Thanks to Randy Connell, S&TA, S/L Instructor, AFF Instructor; Chris Schindler, ATP, CFII; and Jim Crouch, AFF/I, USPA Director of Safety and Training, for their contributions to this article. Resources: www.uspa.org www.ntsb.gov Christy West is a journalist and gold/silver skydiving medalist with over 1,800 jumps.
-
Skydiving EmergenciesThe bulk of the content from this section is republished with permission from Chapter 4 of Parachuting: The Skydiver's Handbook by Dan Poynter and Mike Turoff. Although rare, the fact of the matter is that there are a number of possible emergencies in skydiving that could either hurt or kill you. The emphasis in this section is on education. If you are uncertain about anything speak to your jumpmasters. On The Ground Briefings and Safety Considerations Hazard Briefings Alcohol and Drugs Health Concerns Scuba Diving Alert Some Fear is Good for You Airport Safety In The Aircraft Emergencies in the Aircraft Airplane problems Open parachute in the airplane On Exit Exit Emergencies Exit hazards-static line Exit hazards-AFF Dangling static line Student in tow Static line not hooked up Pulling high is dangerous In Freefall Freefall Emergencies Accelerated FreeFall (AFF) emergencies AFF: Loss of one jumpmaster AFF: Loss of both jumpmasters Five-Second Rule for loss of stability Loss of altitude awareness Goggles At Deployment Deployment Emergencies Lost handle Hard pull Pilot chute hesitation Pull-out v. throw-out Trapped pilot chute Pilot chute in tow Under Canopy Canopy Emergencies: Breakaway Jettisoning the main canopy Two Action System (TAS) The Single Operation System (S.O.S) Canopy transfer Harness shift Parachute Mulfunctions Total malfunctions Partial malfunctions Major partial malfunctions Bag Lock Horseshoe Violent spin Line overs Partial malfunctions that may be majors or minors Rips and tears The snivel Slider hang-up, at the canopy Slider hang-up, halfway Broken suspension line(s) Minor malfunctions Line twists Premature brake release Broken steering line Steering line(s) won’t release Pilot chute "under/over" problems End cell closures Combination malfunctions Two canopies open Tandem jumping malfunctions Large ring and ripcord handle Change of emergency procedures Breakaway training Emergency priorities Canopy collisions On Landing Landing challenges Turbulence Dust devils Thunderstorms The tree landing Power lines Water landings Buildings Other obstacles