Search the Community
Showing results for tags 'general'.
Found 265 results
-
RELEASE DIVE JUMP SEQUENCE: When your jumpmaster says "GET INTO POSITION", take your position in the door. There will be no reserve side JM on this dive. When you are ready to exit, turn to your right and shout "CHECK IN!" to your main side JM. The JM will respond "OK!" and nod his head when you are ready to go. Do the exit count - "Ready! Set! Arch!" On "Arch!" step to the left, out of the plane. Count to four, maintaining a hard arch. Do one practice ripcord touch. Check your altitude. Your JM may give you hand signals, and will then move in front of you. If everything is going well, and you seem stable, your JM will release you and fly 5-10 feet in front of you. Maintain hover control. If you slide backwards away from the JM, use forward motion to correct. Maintain heading. If you seem to be turning away from the JM, turn back towards him At 6000 feet, shake your head. Your JM will move back beside you when he sees this. Do not follow! Wave off and pull at 5000 feet. Count to five and check your parachute. PERFORMANCE STANDARDS: Maintain heading control by using your turning skills Maintain forward/back control by using your forward motion skills Stay stable by holding the arch throughout the dive Pull on your own at the right altitude. Hold the arch through the pull. Fly your canopy back to the LZ and land with no radio assistance. LEVEL FOUR HINTS: To fix stability problems - ARCH! Remember - pull at 5000 feet NO MATTER WHAT! Do not attempt to get stable if you find yourself on your back at 5000 feet. PULL IMMEDIATELY! REMEMBER THE MOST IMPORTANT PARTS OF ANY SKYDIVE: PULL! PULL AT THE RIGHT ALTITUDE! PULL STABLE! LAND SAFELY UNDER AN OPEN CANOPY! Before Level 1 Level 2 Level 3 Level 4 Level 5 Level 6 Level 7
-
 Napoleon Skydiving Center: Level 4 - Turns to RedockCongrats, you are halfway through the AFF program. In the aircraft you should be paying careful attention to the spotting procedures. On the ground, you should be well along learning how to do a JMPI and packing. Under canopy try using risers (front and rear) for control up high. Though you are still a student, you should start preparing for the time when you will be off student status and jumping on your own. Safe skydiving requires good equipment. Begin talking with your instructors and other jumpers about what type of equipment you should purchase. It is recommended that you start by ordering an appropriately sized jumpsuit, helmet, goggles and altimeter. In fact, you can begin using these items before you complete the AFF program. TLOs Start and stop controlled turns. Forward motion to redock. Wave off, then pull at or above 3000 feet. Dive Flow Running DescriptionRoach Hotel Check: Check In, but no check out. Exit Count: C-182 Prop, Up, Down, Arch; Otter Center, Out, In, Arch. HAM Check: Heading, Altimeter, Main JM. JM Gripswitch: Jumpmaster switches from side to front. More Maneuvers? Check Altimeter, if above 6000 feet signal with a nod yes. If below 6000 feet signal with a head shake no. In either case, JM has the final authority. 90 degree Turns: performed using a combination of bending and tilting the upper body. Initiate by looking over the arm in the direction of the turn. Bend upper body toward the turn at the waist and tilt shoulders by raising the shoulder opposite the direction of the turn by 3--4 inches. Keep arms in the same position at the shoulders and elbows, all motion should originate at the waist. Recover to box man as new heading is attained. Forward to Redock: At the completion of the 2nd turn, the JM will back up from 5--10 feet. Move forward by extending legs at the knees and bending arms at the shoulders. Keep elbows locked at 90 degrees. Hold position until redocked on JM, then recover to boxman. More Maneuvers? Yes if above 6000, else no. Wave Off: at 4500 feet by crossing hands above head twice with a large sweeping motion of the arms. Pull: at 4000 feet. Primary Canopy Check: Shape, Spin, Speed, Twist. Release Toggles, Secondary Canopy Check, Controlability Check. Canopy Control: halfway down, halfway back. Flare at 10 feet, knees together, PLF if necessary. Collapse the Canopy, Field Pack, and Return. Level 1 Level 2 Level 3 Level 4 Level 5 Level 6 Level 7 Level 8
 -
 Napoleon Skydiving Center: Level 5 - Turns to Redock IIThis level is like the last but the turns are 360 degrees and the amount of forward motion is greater. You should be assisting with the spot in the aircraft and with packing on the ground. Under canopy practice a "collision avoidance" maneuver by turning using a front or rear riser prior to releasing your toggles. TLOs 360 degree turns (one before each redock). Forward movement and docking without assistance. Control of all 3 axes (Pitch, Yaw, and Roll). Wave off, then pull at or above 3000 feet. Dive Flow Running DescriptionRoach Hotel Check: Check In. Exit Count: C-182 Prop, Up, Down, Arch; Otter Center, Out, In, Arch. HAM Check: Heading, Altimeter, Main JM. JM Gripswitch: Jumpmaster switches from side to front. More Maneuvers? Yes if above 6000, else no. 360 degree Turns: one before each redock. Forward to Redock. More Maneuvers? Yes if above 6000, else no. Wave Off: at 4500 feet. Pull: at 4000 feet. Primary Canopy Check: Shape, Spin, Speed, Twist. Release Toggles Secondary Canopy Check: Slider, Endcells, Tears, Lines. Controllability Check: Turns and flares OK. Canopy Control: Halfway down, halfway back. Setup For Landing: Downwind at 1000', Base at 500', Final at 200'. Flare: at 10', feet and knees together, PLF if necessary. Collapse the Canopy, Field Pack, and Return. Level 1 Level 2 Level 3 Level 4 Level 5 Level 6 Level 7 Level 8
 -
SOLO TURNS AND FORWARD MOTION JUMP SEQUENCE: When your jumpmaster says "GET INTO POSITION", take your position in the door. When you are ready to exit, turn to your right and shout "CHECK IN!" to your JM. The JM will respond "OK!" and nod his head when you are ready to go. Do the exit count - "Ready! Set! Arch!" On "Arch!" step to the left, out of the plane. Count to four, maintaining a hard arch. Do one practice ripcord touch. Check your altitude. Your JM may give you hand signals, and will then move in front of you. If everything is going well, and you seem stable, your JM will release you and fly 5-10 feet in front of you. Maintain hover control. If you slide backwards away from the JM, use forward motion to correct. Maintain heading. If you seem to be turning away from the JM, turn back towards him. Your JM will give you a turn signal - a hand pointed in one direction. Turn 180 away from the JM, then turn back. Check your altimeter. Your JM will not give you turn signals unless you check your altimeter first. Your JM will give you another turn signal. This time, turn 360 degrees, and stop facing him. Check your altimeter. If altitude permits, your JM will give you another turn signal. At 6000 feet, shake your head to indicate "no more manuevers." Your JM will move back beside you when he sees this. Do not follow! Wave off and pull at 5000 feet. Count to five and check your parachute. PERFORMANCE STANDARDS: Do smooth, slow turns in each direction. Do not allow yourself to build up speed in a fast turn. Maintain altitude awareness by checking your altimeter often. If you find yourself backsliding, use your forward-motion skills to correct it. Signal no-more-manuevers at 6000 feet, then wave off and pull at 5000 feet. LEVEL FIVE HINTS: To fix stability problems - ARCH! Check your altimeter after every turn. Be aware of your legs! Unwanted leg motion is one of the most common problems on level 5 jumps. REMEMBER THE MOST IMPORTANT PARTS OF ANY SKYDIVE: PULL! PULL AT THE RIGHT ALTITUDE! PULL STABLE! LAND SAFELY UNDER AN OPEN CANOPY! Before Level 1 Level 2 Level 3 Level 4 Level 5 Level 6 Level 7
-
BACKLOOPS AND DELTA TRACKING JUMP SEQUENCE: When your jumpmaster says "GET INTO POSITION", take your position in the door. When you are ready to exit, turn to your right and shout "CHECK IN!" to your main side JM. The JM will respond "OK!" and nod his head when you are ready to go. Do the exit count - "Ready! Set! Arch!" On "Arch!" step to the left, out of the plane. Your JM will not hang on to you during exit. Count to four, maintaining a hard arch. Do one practice ripcord touch. Check your altitude. Turn to find your JM. He will not be hanging on to you, but he will be nearby. Follow your JM's hand signals. When he signals you to turn, do a 360. Check your altitude after each manuever. When he signals you to backloop, pull your knees up to your chest and stick your arms out in front of you in one fast motion. You will feel yourself backloop. When you feel yourself upside down, hard arch to recover stability. Check altitude after the backloop, then find your JM. When he signals you to delta track, put your arms back by your sides, extend your legs and point your toes. Track for six seconds. Recover to a neutral body position. Check your altimeter, then find your JM. At 6000 feet, shake your head to indicate "no more manuevers." Turn 180 degrees away from your JM. Wave off and pull at 5000 feet. Count to five and check your parachute. PERFORMANCE STANDARDS: Begin the backloop, then recover stability. Maintain altitude awareness without reminders. Turn smoothly. Track aggressively in a straight line. LEVEL SIX HINTS: Remember - to start a backloop, be agressive. To recover from a backloop, arch hard. It may take a second to get back over - hold the arch until you feel yourself flip back over. When you begin a delta track, pick a point on the horizon to track towards to avoid tracking in a circle. REMEMBER THE MOST IMPORTANT PARTS OF ANY SKYDIVE: PULL! PULL AT THE RIGHT ALTITUDE! PULL STABLE! LAND SAFELY UNDER AN OPEN CANOPY! Before Level 1 Level 2 Level 3 Level 4 Level 5 Level 6 Level 7
-
 Napoleon Skydiving Center: Level 6 - Solo ExitYou should now be able to spot and pack like a pro (if not, get on it before the next level). Under canopy try a ``maximum recovery flare'' by initiating a toggle turn and then bringing the other toggle down without letting up the first one (but try it up high). TLOs Brief pilot with assistance. Spotting direct to pilot. Perform a stable poised exit without assistance (solo, no-contact, with subterminal heading control). Two backloops. Tracking. Wave off, then pull at or above 3000 feet. Dive Flow Running DescriptionRoach Hotel Check Check In.Exit Count C-182 Prop, Up, Down, Arch; Otter Center, Out, In, Arch. Solo Exit performed without the jumpmaster assisting in stability. Remember to arch hard on leaving. If stability is lost, recover using arch. Inversion recovery can be performed by briefly folding one arm across the chest to initiate a roll in that direction. JM Demonstrates Backloop. Get eye contact with the JM. He/she will initiate a backloop by drawing legs in and swinging arms using a large circular motion. Perform Backloop. Initiate by drawing legs in extending arms out and then down past legs using a circular motion. Recover to arch as you see green (ground) again. Repeat. Track by first getting a ground reference on the horizon. Face the reference and extend legs to straight out at knees. At the same time bring arms down and back until they are straight at the elbows and even with the lower back. Continue to arch at the hips and chest. Slowly recover to box man position by 4500 feet. Wave Off at 4000 feet. Pull by 3500 feet. Primary Canopy Check Shape, Spin, Speed, Twist. Release Toggles Secondary Canopy Check Slider, Endcells, Tears, Lines. Controllability Check turns and flares OK. Canopy Control halfway down, halfway back. Setup For Landing Downwind at 1000', Base at 500', Final at 200'. Flare at 10', feet and knees together, PLF if necessary. Collapse the Canopy, Field Pack, and Return. Level 1 Level 2 Level 3 Level 4 Level 5 Level 6 Level 7 Level 8
 -
 Napoleon Skydiving Center: Level 7 - Clearance DiveBy now all of this should be easy. Good luck. Once you complete this level, you're ready to skydive on your own (after buying the DZ a case of beer for your accomplishment). TLOs Demonstrate ability to inspect, don and adjust equipment correctly. Demonstrate ability to inspect and pack main canopy. Explain and demonstrate knowledge of RW safety procedures. Brief pilot and spot correctly without assistance. Perform a diving exit (solo, no-contact --- maintain or recover control). Intentional front loop. Chain of controlled maneuvers. Tracking. Wave off, then pull at or above 3000 feet. Land within 25 meters of target without radio assistance. Dive Flow Running DescriptionRoach Hotel Check Check In. Exit Count C-182 Prop, Up, Down, Arch; Otter Center, Out, In, Arch. Solo Diving Exit Performed by diving head first from the aircraft. Immediately arch and extend arms out over head to the ``superman'' position. Recover back to the boxman position. Frontloop Performed by pulling arms to sides and bending sharply forward at waist while ``kicking'' legs straight at knees. Recover to boxman position as you see green again. Half Series. Perform two alternating 360 degree turns followed by a backloop. Track: until 4500 feet. Wave Off: by 3500 feet. Pull: by 3000 feet. Primary Canopy Check: Shape, Spin, Speed, Twist .Release Toggles Secondary Canopy Check: Slider, Endcells, Tears, Lines. Controllability Check: turns and flares OK. Canopy Control: halfway down, halfway back. Setup For Landing: Downwind at 1000', Base at 500', Final at 200'. Flare: at 10', feet and knees together, PLF if necessary. Collapse the Canopy, Field Pack, and Return. Level 1 Level 2 Level 3 Level 4 Level 5 Level 6 Level 7 Level 8
 -
GRADUATION DIVE JUMP SEQUENCE: The JM will check the spot, then tell you to exit. When you are ready to exit, just dive out of the plane like Superman. Do not check in. Get stable as soon as possible after exit. Turn to find your JM. Track towards him when you find him. Follow your JM's hand signals. Remain close to him throughout the dive. When he signals you to turn, do a 360. Check your altitude after each manuever. When he signals you to track towards him, use forward motion to get closer to him. When he gives you the delta-track signal, track for five seconds. If he drops below you, arch harder to increase your fall rate. If he floats above you, arch a little less to decrease your fall rate. At 6000 feet, shake your head to indicate "no more manuevers." Your JM will not remind you if you forget. Turn 180 away from your JM and track for five seconds, then stop. Wave off and pull at 4000 feet. Note the new altitude. Check above you as you wave. Count to five and check your parachute. PERFORMANCE STANDARDS: Remain stable 100% of the time after exit Demonstrate tracking, fall rate control, and tracking skills Demonstrate altitude awareness despite distractions. Perform breakoff procedure at 6000 feet. Stable solo waveoff and pull at a lower altitude (4000 feet, plus or minus 500 feet.) LEVEL SEVEN HINTS: Be altitude aware! Your JM will not help with altitude clues, and may try to distract you. Do not let him! Remember - the pull is lower than previous dives. You have more time between "no more manuevers" and the pull. During the track, be sure to pick a point on the ground to track towards so you don't track in a circle. Expect the unexpected. This is your final dive as a student, and your JM will be testing you to see if you can safely jump on your own. REMEMBER THE MOST IMPORTANT PARTS OF ANY SKYDIVE: PULL! PULL AT THE RIGHT ALTITUDE! PULL STABLE! LAND SAFELY UNDER AN OPEN CANOPY! Before Level 1 Level 2 Level 3 Level 4 Level 5 Level 6 Level 7
-
Napoleon Skydiving Center: Level 8 - Solo DivesCongratulations on your successful completion of the New Napoleon Skydiving Center's Accelerated FreeFall Program. You are probably wondering "Where do I go from here?". The answer is that whether you have 10 jumps or 10,000 jumps, there is always more to learn. As an AFF Level VII graduate, that journey begins with (surprise) level VIII. The Level VIII program is a series of solo dives designed to accomplish three goals: Perfect the skills learned in the AFF program. Build confidence in your ability to exit an aircraft at a lower altitude (should that need arise). Develop the ability to identify and use a rig equipped with a "hand deployed" main pilot-chute. These goals will be accomplished over the 4--8 solo dives of the Level VIII program. Once these goals have been reached, you'll be ready to start making coached dives with experienced skydivers to work on your air skills. Relax, have fun, be safe, and see you in the coaching program.... AFF Level 8 (Page 1) - AFF SkillsThe first phase of the NSC Level VIII program is a series of two to four solo dives to practice the things you learned in the AFF program. The emphasis here is on having fun and building some confidence your ability to skydive "on your own". You will also be practicing for the next phase which is a low altitude "clear and pull" dive. TLOs Perfect ability to perform poised and diving exits. Perfect ability to start and stop controlled turns. Practice backloop and frontloop maneuvers. Practice tracking to gain horizontal separation for opening. Practice for "Clear and Pull" by maintaining stability while performing a PRCT within 5 seconds of exit on at least two dives. Maintain good altitude awareness. Perform dives in a safe manner. Wave off, then pull at or above 3000 feet. Land within 20 meters of target (record distances in logbook). Dive SuggestionsThe exact format of these solo dives is up to you, but it will probably resemble the AFF Level VII dive flow somewhat. It is important to use a good ground reference when practicing turns to enable you to judge your ability to start and stop them on heading. When practicing tracking, do so in a direction perpendicular to the aircraft's line-of-flight to stay clear of groups exiting before or after you. It is suggested that solo jumpers leave the plane after the smallest RW group, but before tandems and AFF groups (which open higher). Remember that the priority on all skydives is Pull, Pull at the assigned altitude (before 3000'), Pull stable. AFF Level 8 (Page 2) - Low Altitude ExitThroughout the AFF program, dives were performed from high altitudes to give a maximum amount of freefall learning time on each dive. Unfortunately, due to circumstances beyond our control, skydivers must often exit the aircraft at lower altitudes due to mechanical or atmospheric problems. This dive is to get you acclimated to the lower altitude exit. TLOs Ability to perform a stable exit. Initiation of deployment within 5 seconds of exit. Land within 20 meters of target (record distance in logbook). Dive SuggestionsThe first low altitude exit should be performed between 4000 and 5000 feet. The exit is not dramatically different than the exit you used for Levels I--VI (poised exit). In this case though, you will be initiating the main ripcord pull before reaching terminal velocity (which would take about 10 seconds). To insure stability at subterminal speeds, a hard arch position is used. This is accomplished by putting the hips and chest into a "maximum arch" position. Additionally, the arms and legs are extended straight. When performed correctly, it should look like the letter "X" when viewed from the front or back. When performing the actual dive, exit the aircraft from the poised position and perform a hard arch. Give a two to three second count and then initiate a main ripcord pull in the usual manner, recovering immediately to the hard arch position. This dive is also good for practicing your spotting skills since you will probably be the only one exiting on this pass. Remember that you are not at terminal velocity, so a 3 second delay translates to only about 150 feet of altitude loss (versus a 500 foot altitude loss at terminal velocity). AFF Level 8 (Page 3) - Transition to Hand DeployMost experienced skydivers use rigs employing pullout or throwout main canopy deployment systems. These systems eliminate pilotchute hesitation and make packing easier. They also demand more proficiency of the jumper. TLOs Understand and identify pullout and throwout deployment systems. Be able to pack a throwout deployed pilotchute. At least ten practice pulls on a throwout deployment system. At least one jump with a throwout deployed main canopy. Land within 20 meters of target (record distance in logbook). The Pullout Deployment SystemThough it was developed after the throwout system, the pullout deployment system is actually more like a traditional ripcord deployment system. In the pullout system, the deployment handle is attached to a straight closing pin and to the base (or bottom) of a springless pilotchute. As the deployment handle is pulled, the pin is first extracted from the container closing loop. As the handle is pulled further, the pilotchute is pulled from the now open container and inflates, pulling the handle from the skydiver's hand. The handle is usually mounted on the bottom of the container. The Throwout Deployment SystemThe throwout system was the first "hand deployed" pilotchute system developed. The handle is attached to the apex (top) of the pilotchute. The pilotchute itself is externally packed (usually in a pocket on the legstrap or bottom of container. The pilotchute is extracted from its pocket and released at arm extension. It then inflates and pulls a curved pin from the closing loop, opening the container. Using a Hand Deployed SystemIn any hand-deployed system, there are several things to be aware of: Stability is important. If activated in an unstable position, the hand deployed pilot chute can easily entangle with the jumper. Note that this does not mean that the pull can be delayed until stability is achieved! The priority is still Pull, Pull by the assigned altitude, Pull stable. The pilotchute should be released at full arm extension. Releasing it sooner can allow it to be "sucked" into the jumper's burble. The handle will be in a significantly different position, possibly one that cannot be seen. To prepare for your first hand deployed jump, have a staff member demonstrate the correct technique for folding the pilotchute. Then make several (ten or more) practice pulls on the ground, concentrating on maintaining good form and a good arch. Finally, perform at least one skydive using the hand deployed system. Plan your breakoff and pull at least 1000 feet higher than usual to allow for the new deployment procedure (but make sure to alert others that you are doing so). Where do I go from here?Now that you have completed the solo dives of the level VIII program, you are ready to begin skydiving with others. Your immediate goal should be to qualify for a United States Parachute Association "A" License. The minimum requirements for that license beyond what is accomplished in the AFF program are: Twenty (20) freefall jumps including 5 minutes of total freefall time. Landed within 20 meters of target on 5 jumps. Unintentional water landing training. Participation in at least three 2--way relative work jumps. Pass a written exam. Note that application for any license requires documentation of the requirements (usually a logbook entry). When you are ready, you may contact any of the AFF Instructors for information on taking the exam and applying for the license. You should also have begun accumulating your own skydiving gear. At a minimum, you should already have ordered or received: A hard, Protec style, helmet (which NSC requires until 50 jumps). A jumpsuit appropriate for your size and weight. A visually accessible altimeter (either chest mounted or wrist mounted). Goggles. You should also be in the market for a complete rig (main parachute, reserve parachute, and harness/container system). There are many manufacturers of parachutes and containers, each of which produces several product lines and sizes. Ask staff and other jumpers for suggestions on the type of gear they recommend (but remember they are only suggestions). A new rig will cost between $2500 and $4000 depending on the choice of components. A used rig will cost less, but should be carefully inspected by an FAA rigger prior to purchase. There are many other items that are useful for skydiving, many of which can be obtained through regular sporting goods sources. Gloves are necessary for skydiving whenever the temperature on the ground or at altitude drops below 40 degrees farienheight. Equipment should be stored and transported in a protective container like a duffel, gear bag, or hard case. A USPA Skydiver Information Manual has information necessary for passing the license exams and performing special dives like night or demonstration jumps. Finally, keep in mind that you are entering a new sport quite unlike any you previously have experience with. Jumping with others will be helpful, but you must carefully determine the experience level and ability of those wanting to "coach" you. Just like "Two drowning men cannot save one another", two recent AFF graduates cannot effectively teach one another to skydive, and may actually represent a hazard to each other. NSC offers several coaching programs and many jumpers enjoy coaching novices. Staff members can introduce you to available coaches who we feel do a good job. If you have questions about the ability of someone wanting to coach you, ask. Freefall time is expensive and we want you to make the most of yours. Good luck, have fun, be safe. Dale Southard, Safety and Training Advisor, Napoleon Skydiving Center, AFF/I, VTM, Sr. Rigger, D--11216 Level 1 Level 2 Level 3 Level 4 Level 5 Level 6 Level 7 Level 8
-
 All the employees of SkyVenture Arizona are delighted to announce that the world’s largest indoor wind tunnel is now officially open for business! We believe the moment you enter the flight chamber for the first time you will agree that this fantastic facility was worth the wait! Whether you come as an individual or part of a team, we know that this new tunnel will meet and exceed all of your expectations. With the totally round 14 foot diameter flight chamber, four quiet and powerful electric engines, and new airflow design, we are confident that you will find this new tunnel to be the best training aid available anywhere! To mark our opening, for a limited time, we have special low hourly rates for you! Because we are a part of the Skydive Arizona family (www.Skydiveaz.com) we have the best coaching for every skydiving need. Our great group of newly trained tunnel instructors is always here to assist you as well as instructors from the Arizona Training Center. Members of Skydive Arizona's World Championship team, Arizona Airspeed, (www.Airspeed.org) will also be holding tunnel camps, skills camps, team and individual world class coaching as well! In addition, Airspeed will be holding weekly tunnel coaching sessions throughout the year (more on those in our next email). Whether your goal is to become a better and safer skydiver, to have some fun, to compete, or to become a world champion, the wind tunnel at Skyventure Arizona is another great reason to come to the sun. Heck, now you don't even need that! We look forward to flying with you, soon! For more information please visit our web site, www.Skyventureaz.com, or call us at 1-888-BODYFLY or 520-466-4640.
 -
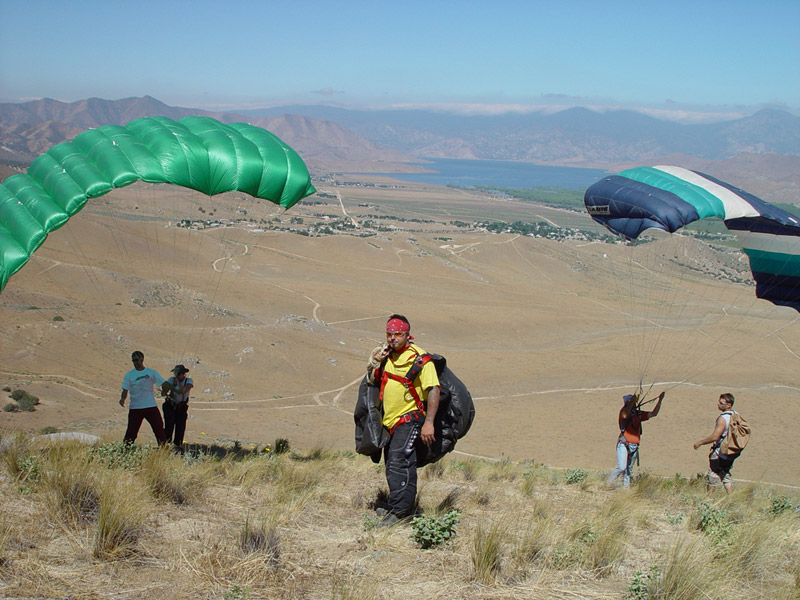 The Ground Launch CenterTM has implemented a new program designed to teach non-skydivers the art of canopy piloting. The center is a playground for experienced pilots, and provides a solid training environment for all levels of canopy pilots. The GLC offers advanced canopy control, Blade running activities and canopy piloting training to low time skydivers. Jim Slaton, who started the center, has put much of his focus into creating a solid training program that can even teach non-skydivers how to fly a parachute before they make their first solo skydive! Jim believes ground launching will play a huge role in the future development of canopy pilots and canopy piloting (a.k.a swooping) as a sport. More on that later… After a full season of development at the center Jim finally accepted his first non-skydiver into the program. Why would a non-skydiver want to learn canopy piloting you ask? The first student pilot was a 49-year-old male from the Northeast U.S. that had made a few tandem skydives over the last couple of years but was terrified of the canopy flight. He had flown in the wind tunnel in Orlando, and was comfortable with his freefall abilities, but not his actions under an open parachute. He read about the Ground Launch Center™ in Skydiving magazine and contacted the center for training. Jim had just finished the "Zero Intro" program for the center, which was designed to teach non-skydivers canopy piloting through tandem progression and a series of hovering flights. The Zero Intro training begins with an introduction to the modern ram-air parachute and it's design parameters. The ground training includes harness training, kiting and basic canopy handling. The student learns kiting and how to fly the parachute overhead using all of the controls. The student is then placed in a "saddle" area on the training hill where the student is allowed to kite the canopy overhead and hover above the ground tethered to the ground instructor. The student then conducts a series of tandem flights with the instructor to learn the basics of parachute flying. Through tandem progression the instructor demonstrates flat turns, stalls, riser turns, harness turns and more. The student is allowed to hold the controls with the instructor so they can feel the timing and speed of all inputs made during each flight and landing. The student eventually graduates to the point where the instructor gives the student full control of the toggles and talks the student through the pattern, set up and landing while flying as a tandem pair. When the student can fly all aspects of the pattern, demonstrate full control of the parachute and land the tandem on a designated target several times they are allowed to make their first solo flight. The student makes their first solo fight with the same Set 400 parachute they were flying during the tandem progression phase. They are taken back to a small training hill with a gentle slope that allows for very little altitude and flight time. The student and instructor are both equipped with a voice activated radio. The instructor assists the student through the launch and guides them through a short flight and into the landing area. The student continues with these low level flights until they demonstrate full control of the parachute and land (standing up) on a designated target several times. The student then graduates from a Set 400 to a 240 square foot parachute and conducts the same set of maneuvers as before. When the student has demonstrated proficiency with the 240 on the training hill, they are moved up to the 600ft launch site. When they prove proficiency on the 600ft hill they are moved up to the 800ft hill where they have enough flight time to perform a full set up, approach and landing, solo. In the case of our 49 year old male, he made 13 tandem launches with the instructor followed by 12 solo flights under a 240 in three days of training at the center. After the tandem progression phase of the training he was able to run a pattern and perform a stand up landing in the designated area on every solo flight! After successful completion of the GLC's "Zero Intro" program our 49-year-old male enrolled into the AFF course and is soon to become a licensed skydiver. The center is not only breeding better canopy pilots for skydiving, they are breeding a new generation of canopy pilots that are pushing the very limits of the ram-air parachute. For the first time ever, other professional athletes and aerial enthusiasts can get involved with parachuting without some of the restrictions that come along with skydiving. We are not talking about Paragliding (also conducted at the GLC) but more like "speed gliding" with the appeal of Swooping and BladerunningTM. If you want to see some of what we are talking about check out the Pro Tour's latest DVD entitled GRAVITY PILOTS "Canopy Piloting Revolution" at www.gravitypilots.com or find more info on the Ground Launch Center™ at www.canopypiloting.com
 -
So you want to make a night jump and don't know what to expect? Here is an example of how many dropzones run their night jump procedures and what you need to know before you participate in night jumps.Before you even sign up for night jumps at a DZ you need to do a few jumps at the location during the day. Open somewhat high on at least one of the jumps looking and examining the potential hazards and outs if you end up in any direction from the DZ at night. Also before the end of the day arrives you need to have at least 1 glow stick and 1 strobe light that can be easily turned on under canopy. Typically most dropzones will hold a briefing before dark to go over the procedures for the specific location or situation. You will most likely then be asked to sit in a dark room with no lights for a period of time to allow your eyes to adjust to the darkness Typical things that are covered during night jump briefings include: Prep work In plane procedures Exiting Opening separation Under canopy behavior LandingBefore you can even prepare your eyes for the night skydives you need to prepare your equipment. First take the time to actually do a proper pack job on your main. Last thing you want to add to an already complex skydive is a reserve ride. You need to securely attach a glow stick to your altimeter or use a clearly lighted altimeter. If you are going to use a glow stick it is best to activate it before you start preparing your eyes then cover it with duct tape that is pulled off right before you jump. This insures that your glow stick is not a dud and it also keeps the light from shining on people's eyes. You also need to securely fasten your strobe light to you or to your rig. Attaching it to the rear of your leg, rear of your helmet or back is preferred since as the strobe fires your body will be blocking the light from getting in your eyes, but it is still very visible to everyone else. Some DZ's also require you to attach glow sticks to an arm so you need to listen during the briefing for individual DZ procedures. The most important thing in the preparation of the equipment is for the strobe and light sticks to be securely attached. One of the most important things you can do to maintain your night vision is to avoid looking at any lights during your climb to altitude. Make sure your jump plane does not have any interior lights on, that no one is using flashlights, or anything else to light up the plane. The only color light that should be used inside the plane is a red light since that does not affect night vision. If there are any other light sources or colors (from jump lights) cover as much of them as possible to maintain your vision and still maintain their functionality. According to the USPA SIM first time night jumpers are required to do a solo before they do any group night skydives. It is a really good idea to spend your first time in freefall at night looking around to make sure you find the landing area and pulling at your correct altitude. Typically groups are sorted by both group size and wing loading of the people in the skydive. Usually people with higher wing loadings are the first out on night jumps for reasons to be detailed shortly. After the groups and solos have been sorted most good night jump organizers will dictate exit order and pull altitudes. Usually with larger planes such as Caravans, Otters, Skyvans and Casa's two passes are made to allow for a greater horizontal separation then normally is allowed. Discuss with the pilot and S&TA; what the needed delay is for proper night jump separation. Exit on time, but as during the day do not rush the count. Just prior to exiting you need to activate the lights in the altimeter or uncover the glow sticks. DO NOT activate the strobes yet. In the last rewrite of FAR 105.19 the FAA changed the wording so the strobes no longer have to be active in freefall and since the lights of others in the group could affect your vision keep the strobes off. You do need a strobe that's visible under canopy still though. At most DZ's each night jump group is separated by a solo skydiver. The first group out the door is assigned the lowest pull altitude. 3000 feet is a standard first pull altitude for the first group to allow proper separation and more time to deal with the complexities of night canopy flight but this may change with the group experience and DZ procedures. Each solo or group exiting after the first group is assigned an altitude 500 feet higher then the previous group up to usually 4500 to 5000 feet. Pull at your correct altitude. Do not pull higher then your altitude since the combination of horizontal separation, vertical separation and wing loading separation make for the safest possible night jump environment for you. Once under a good canopy you need to do a few things differently than you normally would. The first is do not collapse your slider. The flapping noise that it makes can be heard by other canopies that might be getting close to you. You also need to turn on your strobe light. Do not do any spiraling or altitude loosing maneuvers since this will eliminate the vertical separation factor that the assigned pull altitudes established. Remember that. In a lot of cases of near misses on night jumps its usually discovered one jumper spiraled down to the other jumpers' level. Fly a very conservative pattern with no hook turns, S turns or other erratic flying. As you are flying constantly be scanning for the dropzone, outs, hazards and other canopies in the air. Hazards at night are different then hazards in the day since its easier to mistake a river for a road or not see power lines. If you are going to land off, try to avoid landing extremely close to roads since there are probably power lines above them you can not see. Always assume a PLF when landing off at night since you will not be able to clearly see the landing area. Typically most DZ's will light their landing areas by having the jumper's cars facing into the wind with the headlights on. Jumpers must plan and fly a flight pattern that has them passing over the cars high enough to miss them, but low enough that they do not out fly the lighted safe landing area. Overshooting the landing area is acceptable if the jumpers know the terrain and know of any potential obstacles they need to avoid. Notice the wind direction as you are boarding the plane, in some locations near large bodies of water the winds will change 180 degrees at night as the temperatures change. Take note of the lights and wind direction before you are set up to land. Also to safely land at night the jumpers are best advised to concentrate on the horizon more then looking down. Looking down will distort your vision and cause you to assume you are at the wrong height for flaring. If you learn nothing else about night jumping learn about the shadow effect. In a lot of situations where the moon is at your back as you are landing you will see a large black canopy rising up on a direct collision course with you. This is your shadow that you are flying into. Lots of jumpers have made avoidance turns only to pound themselves into the ground breaking bones or killing themselves only to find out it was their shadow they were avoiding. As soon as you land depending on the DZ procedures and where you landed, most DZ's either have you walk towards the cars or to the side of the lighted landing area. Others have you stay where you are until your entire pass has landed. Check in with either manifest or the organizer as soon as you land. Additional safety items to be taken into consideration are to carry a cell phone and the DZ phone number with you. Carry a DZ business card or pamphlet with you to make sure you have the correct local DZ phone number and not just a 1-800 number that redirects to them. This way if you land out you can call to let people know where you are or if you need help. Give your cell phone number out to manifest so that if you do not check in right away they can try to contact you. Leave the ringer set to high so if you are injured the rescue parties can locate you that way. Also a whistle around your neck can be used under canopy to scare away any canopy coming close to you or if you are coming close to them. The whistle is also a great way of assisting responders to find your location if you are hurt at night. As with all jump activity, the use of any alcohol or drugs is not only against the law, it is dangerous to others and STUPID. If you or others are unable to refrain from said activities do not get on an airplane to jump. Also some jumpers go the extra steps of attaching a glow stick to their main risers so in the case of a cutaway it is easier to track and then retrieve from the ground. Discuss the best method of doing this with your rigger or S&TA.; If a jumper lands off field do not rush into a truck to get them, slowly drive towards them with your head lights on high with someone walking in front of the truck to make sure you do not run over an injured jumper. This article was compiled by Eric Boerger D-26333 with assistance by Keith Laub, Michael Owens and Art Shaffer.
-
Para-Gear is interested in photographic submissions that you may have for the 2005 -2006 Para-Gear Catalog #70. We have taken the time to briefly describe the format and certain criteria that we look for, in order to help you to see if you have something worth submitting. We have included examples of previous catalog covers for your reference. Over the years Para-Gear has used photos from all of skydiving's disciplines. We do not have a preference as far as what type of skydiving photo it is, rather we look for something that either is eye-catching or pleasing to the eye. In light of the digital age, we are also able to use photos that in one way or another may be less than perfect and enhance them, removing blemishes, flipping images, altering colors, etc. The following are preferences. However what we prefer and what we get, or choose, are not always the same. If however we came down to a choice between two photos of equal quality, we would opt for the one that met more of our preferences. We typically prefer that the photo be brighter. In the past we have used sunset photos and even a night jump photo, although by and large most of the photos are daytime. We like the subject of the image to have contrast with the background. Subjects that are wearing brighter more colorful clothing usually stand out more. We prefer to have the people in the photo wearing equipment since that is what we sell. Headgear, goggles, jumpsuits, altimeters, audible altimeters, and gloves are all good. We also prefer to see skydivers wearing head and foot protection. We do not print any BASE jumping nor any Tandem photographs. No submissions of these will be accepted. Our basic criteria is as follows:Vertical Format. The front and back covers of the catalog are both in a vertical format. We can use a horizontal (landscape) shot, as opposed to a vertical (portrait), and then crop it as long as the image lies within a vertical cropping. Photo Quality. The front and back cover shots will be printed as 8 ½ x 11 in 300 dpi format. Any film that can hold its quality up to this size and print dpi is fine. Slide film is preferred. In the event of a final cover choice, we prefer to be sent the original slide for getting the best quality out of the image. Back Cover Photo. The back cover photo is no different from the front except in one respect. We need to have room on the left side of the image for the thumb index. In the past we have taken images and been able to horizontally flip them thereby creating this room. Originality. Anything that is original, eye-catching, or makes someone take more notice of the catalog covers is something we look for. It could be a photo from a unique camera position or angle, a scenic skydive, shots under canopy, landings, etc. We look for photos that have not been previously published and most likely would not accept them if they have, as we want a photo that no one else has seen yet. We also do not want any photos that are chosen as the front or back covers to be used for other non Para-Gear advertising for a period of one year. Para-Gear offers $250.00 each for both the front and back covers we choose. Our current deadline for catalog cover submissions is March 18th 2005 . Sending sample pictures by e-mail or mail are both fine. We will return any mailed in photos or slides after we are done with them. Please feel free to contact me directly with any questions. Para-Gear Equipment Co. Inc. 3839 West Oakton Street Skokie, Illinois 60076 USA Ph: 847-679-5905 Fax: 847-679-8644 E-mail: [email protected] Internet: http://www.para-gear.com When replying, please advise your full name, address, e-mail, phone/fax and copy our e-mail or refer to the subject so we can reply easily back to you. Thank you.
-
 There are many areas of this sport in which we can invest ourselves, so many avenues in which to excel. By focusing heavily on a single discipline, we are able to achieve significant notoriety in a fairly short period of time. By utilizing the superior training techniques, personal coaching and wind tunnel rehearsal, modern skydivers are able to reach significant prowess in just a few months of participation in the sport. Although the speedy gratification of our desires is tempting and rewarding in the short term, there is a larger, more important goal. We must survive. I asked Lew Sandborn what he thought was the biggest problem in the sport today. With very little hesitation he stated that what concerns him the most is "new jumpers trying to make a name for themselves before their skills are ready for them to have that name". We want to get it all in one shot, and instantly achieve all of our goals. In a pursuit as complex as skydiving, it is impossible to get all the necessary information in a short period of time. We have to keep learning, and hope that our knowledge bucket fills up before our luck bucket runs out. It is difficult to see the big picture of our lives from where we are at any given moment. We forget that the medals we strive so hard to achieve will not mean much when we are older. They will just represent more stuff to box up when we retire to Florida. In the end, the things that matter most pertain to the choices that we wish we could take back. Twisting an ankle today might seem like a small issue, but in fifty years from now, it will be something that effects whether or not we can ever jump again. Picture yourself forty or fifty years from now. Are you still skydiving? Do you have pain in your joints from a bad landing? The quality of your life in the future is dependant on the choices you make today. If that wise old geezer that you will someday be could somehow communicate to you in the present-day, it might sound something like: "Stop trashing my body!" We are insecure when we are young. We are so uncertain of who we are that we feel a need to prove ourselves at every opportunity. We think that who we are is based on our most recent performance. We go to great lengths to show the world what we can do, and often pay a hefty price for our impulsiveness. Short-sighted goals neglect to take into account anything that does not achieve that goal. If looking cool and wearing the right gear is your highest priority, you may find yourself joining the dead skydivers club before too long. I hate sounding like an old fart. People assume that being safety oriented means that you have to be boring. Not true at all. We can have fun; we just need to keep the throttle below 100% thrust if we are to control where we are going. The long-term survivors in this sport all seem to have this perspective; whether or not they talk about it. We sit around in trailers at boogies, shaking our heads at the ridiculous behavior that repeats itself over and over. We watch people eat it in the same ways that they did last year, and twenty years before that. It’s like the message did not get out or something. The message is: "Pace yourself, this is a long journey". On every jump there is a way for your life to end. No matter how many jumps there are in your logbook, the Reaper is watching for the moment that you stop paying attention. He is looking for the one thing for which you are not prepared. This fact does not require your fear, it requires your attention. If you are to be there at the Skydivers Over Sixty Swoop Competition, you must let go of your grip on trying to prove yourself, and stay focused on the stuff that really matters. The real identity of a skydiver is not in how many medals they win or how stylishly they swoop. It is in how long they jump and how safely. There simply are no Skygods under the age of sixty. If you want to prove yourself, stay alive. BG Brian Germain is the author of The Parachute and its Pilot, a canopy flight educational text as well as Vertical Journey, an illustrated freefly instructional book. Brian is also the President of Big Air Sportz parachute manufacturing company, and teaches canopy flight courses all over the world. To learn more about Brian, or to order a book, go to: www.BrianGermain.com.
 -
I am much more experienced in paragliding than skydiving and in paragliding we really respect the thermals as they are what we need to fly – but at the same time can cause all sorts of havoc close to the ground. Thermals are bubbles of rising air. They might extend all the way from the ground to a cloud or they might be just a bubble. I have been told to study a 1970 hippie lava light, as the rising lava in the light is nothing more than a thermal. If a thermal bubble leaves the ground and rushes up in a column of air, there is a void that must be filled - with the same amount of air going down or sideways outside the thermal as is going up in the thermal. Again, think of the lava light – as the lava rises, the oil fills the void where the lava was. In other words, if you land near a thermal that is bursting, you can be in the middle of a gust of wind that is going down or sideways filling the area under the thermal. I have been in a thermal that went up at 1,400 feet per minute – which is faster than a lot of jump planes. Somewhere there must have been air going down 1,400 feet per minute to fill the void. If you see a wind indicator (wind sock) quickly change directions, you might have just witnessed a thermal near by. On a quiet day in a field of tall grass you can hear them leave too, just a quick rustle of the grass is all you hear. A lot of times thermals are the most aggressive close to the ground as they are narrow and get wider as they go up. They can be explosive off of a super heated asphalt driveway or black roof. There are some “surface tension” forces that keep the thermals close to the ground until they break off. If the wind changes a bit, it might be all it takes to make a thermal release. In paragliding, you know you are about to enter a thermal when you start to feel turbulence or even go down a bit. You actually judge your angle of attack into the thermal by looking at how the wing turns as you enter it. If your wing flies straight but surges back evenly, you entered it straight on. If your wing turns, part of your wing hit the thermal first causing the turn. If your wing surges forward, you probably just left the thermal. It is very easy on a large paragliding wing for half of your wing to be in a thermal and the other half not – causing all sorts of fun things – like asymmetric collapses. You could “hear” them in your wing all the time, they sounded like fabric getting loose then springing tight. Big asymmetrics could collapse more than half a canopy. On very active thermal days, only the advanced would dare to fly paragliding canopies/wings because you could experience all sort of "asymmetric collapses” or other dynamic unexpected events. Paragliders are rated by DHV ratings, 1 thru 4 where 1 is the safest to fly, which rate their handling in stalls and collapses. My DHV 1 GIN Bolero glider turns 90-180 degrees in an asymmetric collapse and must spontaneously recover to get the DHV 1 rating. Gliders rated higher might need pilot intervention to recover from a collapse. Turning = loss of altitude = hit the ground hard any way you look at it. Have you ever studied what might happen to your canopy under an asymmetric? How do you fix it? To avoid thermals close to the ground, I avoided ground treatments that absorb heat, like rock (pea gravel) or cement. In paragliding – we liked the green soccer fields, but I don’t think DZ have those. Thermals are caused by heated air on the ground being abnormally hotter than the air above. They “break” off of any pointed object, as small as a shrub. We were taught – turn the ground upside down after a rainstorm and anywhere water would drip off is where thermals rise. It is a mistake to think thermals only happen on hot days, because temperature difference, not just warm air, causes thermals. If the atmosphere is cold and the tarmac is hot – expect a greater thermal than normal even if the outside air temperature is freezing. There are all sorts of mathematical equations used to predict thermals and the strength of thermals, some available on the 1-800-WXBRIEF FAA Flight Service Center pre-flight briefing system, such as the “wave soaring forecast” and the “K index”. The K index measures stability in the atmosphere. You can also speak to a pre-flight briefer who can help interpret the data – but since I don’t speak pilot, I was always intimidated to talk to the humans and only played the recorded messages. If you are interested, you can study the “lapse rate” which is the phenomenon that as air gets thinner higher you go up in the atmosphere, the air pressure goes down and so does temperature. Physics says pressure and temperature are related due to fact higher pressure causes molecules to be closer to each other. Pure science says that the “dry adiabatic lapse rate” is 5.5 degrees per 1000 feet. This means, if you jump out of a plane 12K above the ground, expect it to be 66 degrees colder at 12K than at the DZ because the air is under less pressure. But our flying areas do not exist in scientific test tubes – there is instability in the atmosphere. If the actual temperature, lets say 2K up, is more than 11 degrees colder than the ground temperature – you are bound to experience even more aggressive thermals than normal as the atmosphere tries to find balance. Oh, thermals cause clouds – the reason why paragliders fly “cloud streets” of thermals across country. It is possible to experience “cloud suck” also, where the thermals are so strong you get trapped in a cloud and must use advanced techniques to lose altitude. Note – I am not an expert at this. Someone with more experience is invited to correct me. But my point is: aggressive thermals can cause turbulence close to the ground, which can very easily cause landings to be rough.
-
 So you've decided to spice things up a bit and jump out of a perfectly good plane! Or maybe learning how to skydive has been a dream you've had all your life and the time has come to make it happen. Whatever your motive, you're in the door (no pun intended!) of doing one of the most fun things you'll ever do and being introduced to one of the coolest communities you'll ever come across. Of course we're not biased! It’s not always easy to figure out how to go about making your first skydive. If you follow the 5 steps in these articles, you will be well on your way to skydiving and other fun things like learning to fly a wingsuit. Skydiving is a sport where we never stop learning and there is no such thing as a stupid question, so when in doubt, ask! Regardless of what your motives and reasons are, it's important that you understand the risks and requirements before you take that first leap! Start Here: 1. Be aware of the risk 2. Choose a method of training 3. Find a Drop Zone 4. Set a date and jump! 5. Get licensed
 -
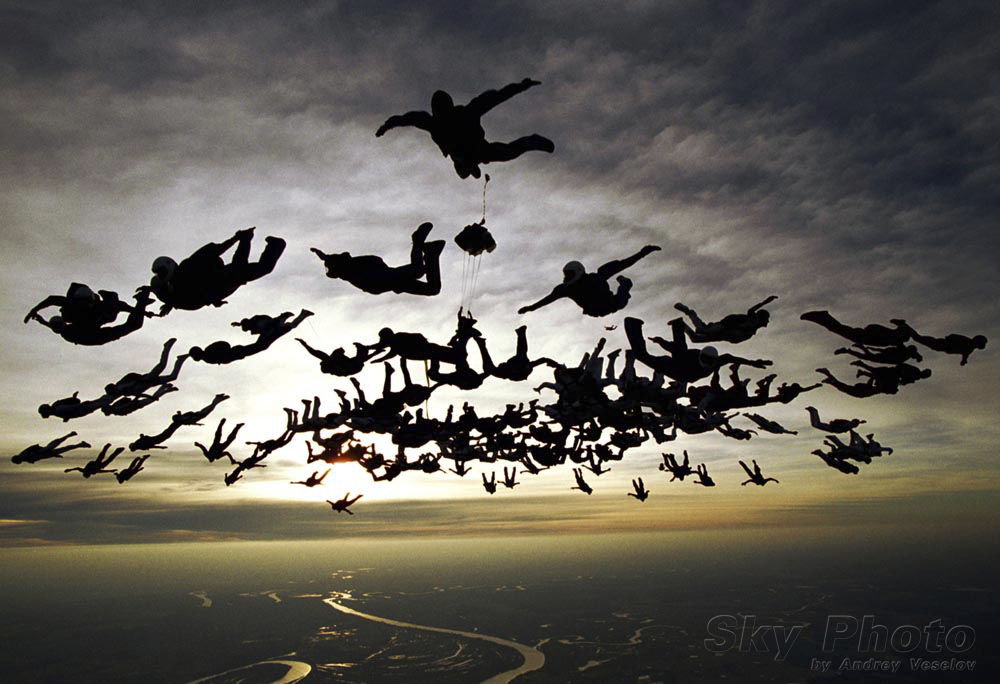 Be Aware of the Risks Choose a method of training Find a Drop Zone Set a date and jump! Get licensed So the first question in your mind is obviously: So, how safe is skydiving? And the frank answer is: Skydiving is not ten pin bowling. There are some very real risks involved when learning how to skydive but as with any other "extreme" sport there is a direct relationship between your knowledge, skill and attitude and your chances of enjoying the sport for many years to come. As you probably know statistics can be manipulated to tell you whatever you want to hear. They can be manipulated to make skydiving look very safe or very dangerous. We're not going to swamp you with numbers to tell you how skydiving is "safer than crossing the street" or try to prove to you that "it's safer to skydive than to drive to your local store". The USPA over a 10 year period reports an average of about 35 skydiving fatalities per year in the USA. Skydivers make hundreds of thousands of jumps each year. It is a sport with very real risks (otherwise you might not be interested!), but those can be easily and effectively mitigated through training and good judgment. Considering that students comprise the bulk of participants in the sport, relatively few fatal accidents involve student skydivers. This is due largely to the design of skydiving equipment used for students and the quality of instruction and care provided at most skydiving schools. All parachutes are designed for reliability, but student gear is also designed to be easy to use and forgiving. Skydiving accidents rarely result from equipment failure or bad luck. Remember: knowledge, skill and attitude. It's about you as the individual. Even though this is a dangerous sport, if you learn how to skydive and exercise your new skills, keep your cool and do everything you're taught to do, you should be fine. What Are The Requirements When Learning How To Skydive? Medical Fitness In most countries there are some requirements for medical fitness. These are seldom very prohibitive but make sure you know what they are for the country you're in. In the USA, all skydivers must meet the USPA's Basic Safety Requirements for medical fitness. This simply means you have to be in good health and physical condition to skydive and should not be on medication which could affect judgment or performance. Some medical conditions can be properly managed if the instructor knows about them. Make sure to mention any heart conditions or episodes of black-outs. If you have recently gone SCUBA diving or donated blood, you may have to wait a few days. When in doubt, ask your doctor and mention it to your instructor. Age Again this varies from one country to the next, so it behooves you to ask this question when you call your DZ learning how to skydive. In the USA minors who are at least 16 years of age and have notarized parental or guardian consent may be allowed to participate in some training programs at some schools, according to state and school policies. The person providing consent for a minor may be required to observe all pre-jump instruction. Most commonly, schools require all participants to be at least 18 years of age. Testing Once you've completed your ground training or first jump course (FJC), it is common practice and good teaching procedure for students to be required to pass written, oral, and practical tests before you'll be allowed to make your fist jump. Don't panic! The written tests are normally a quick check of your knowledge and understanding. Oral tests are used to exercise and build your decision-making ability and practical tests are structured so you can show your reactions and skills. All of these are necessary to assure the instructor that you are ready to make a safe jump. It should also give you confidence that you're ready to go out there, have fun, and be safe! Now that you learned how to skydive and understand the risk and have a good idea of some of the requirements, it's time for some more fun stuff! Next, you need to choose how you'd like to be introduced to the sport. Next: Choose a method of training More Information On Learning How To Skydive: Skydiving Emergencies Fatality Database Safey and Training Articles Safety and Training Forum Skydiving Glossary
 -
Be Aware of the Risks Choose a method of training Find a Drop Zone Set a date and jump! Get licensed Depending on how much time you have, how much cash you've got to spend, and how strong your nerves are, you have three options for what method of skydiving you'll use for your first jump: tandem, static line, and accelerated freefall (AFF). These methods vary in that some are designed to give you a quick experience and introduction to skydiving while others start with full blown first jump courses that will set you on the path to becoming a certified skydiver. Consider your options. Think about the experience you'll get out of each of these and your reasons for doing it. Then pick one. Whichever method you choose to expose yourself to the sport we know you won't regret it. You'll have fun, broaden your horizons and shift your boundaries. Tandem Jumping Tandem jumps are a very popular way to make your first jump. They allow the curious potential student to experience, first-hand, the thrills of skydiving without the stress of AFF or SL progression. Most dropzones are set up to offer tandem skydives under two different scenarios: the "one-time fun jump"", or as part of a hybrid training method sometimes called "tandem progression." The former only requires about 30 minutes of ground preparation; the latter is generally completed after a fairly standard First Jump Course (FJC) which can last up to four hours or more. Tandem jumping, by definition, consists of an experienced jumper called a "Tandem Master" or "Tandem Instructor" and the passenger. The tandem master rides on the back and wears an extra-large parachute system capable of carrying weights of up to 500 pounds; easily able to safely suspend two people. The passenger (or tandem progression student) wears a specially designed harness that attaches in four points to the front of the tandem master. A tandem freefall generally lasts between 45 and 60 seconds, followed by a four minute canopy ride to the ground. Tandem jumping provides an obvious advantage for the adventurous spirit who cannot adequately meet the physical or proficiency requirements for the S/L or AFF jumps. By relying on Tandem Master's skills, they will still be able to experience the thrill of skydiving. It should be noted that, in the United States, tandem jumping is conducted in two different modes: as a "ride" by manufacturer-rated Tandem Masters, and as bona fide skydiving instruction by USPA Tandem Instructors who also hold the manufacturers’ ratings. Only USPA-rated Tandem Instructors can teach tandem as a part of hybrid skydiving instruction. In most of these hybrid courses, a student makes three or four tandems and then finishes training starting with a level four AFF jump. The utility of this hybrid method is that there is never more than one instructor involved in any one skydive, thus freeing up staff to more quickly train the student load. Jumps made with a USPA-rated Tandem Instructor count towards student proficiency, those made with a non-USPA rated Tandem master do not. Tandem jumps range in cost from as low as $70 dollars (US) to over $300, so it’s best to shop around for the best deal. Static Line Training (S/L) This method has evolved over the last ~30 years from its military origins into a successful method for training sport parachutists. The student gets 4-5 hours of ground training and is then taken to an altitude of about 3000 feet for the jump. The jump itself consists of a simple "poised" exit from the strut of a small single engine Cessna aircraft, or the side door of a larger aircraft. As the student falls away from the plane, the main canopy is deployed by a "static line" attached to the aircraft. The student will experience about two to three seconds of falling as the parachute opens. Subsequent S/L jumps require about 15 minutes of preparation. After 2 good static line jumps, the student will be trained to pull their ripcord for themselves. The student then does 3 more static line jumps where they demonstrate this ability by pulling a dummy ripcord as they leave the plane (the static line is still initiating the deployment). The student is then cleared to do their first actual free fall. The first freefall is a "clear & pull", where the student initiates the pull sequence immediately upon leaving the aircraft. Next is a 10 second delay jump. Subsequent jumps go to progressively higher altitudes with longer delays. After 25 free falls, and meeting certain other basic requirements, the student receives their A license and is cleared off student status. Accelerated Free Fall (AFF) The AFF program was instituted in 1982 as an "accelerated" learning process as compared to the traditional static line progression. The AFF program will give you a true taste of modern sport skydiving. The ground training is a bit more extensive than S/L (~5 hours) because the student will be doing a 50 second freefall (that's right!) on his/her very first jump. The student will exit the aircraft at 10,000-12,000 feet along with two AFF instructors who will assist the student during freefall. The instructors maintain grips on the student from the moment they leave the aircraft until opening, assisting the student as necessary to fall stable, perform practice ripcord pulls, monitor altitude, etc. The student then pulls his/her own ripcord at about 4000 ft. The official USPA AFF program is a 7 level program. Levels 1, 2, & 3 require two AFF instructors to accompany the student. These dives concentrate on teaching basic safety skills such as altitude awareness, body position, stability during freefall and during the pull sequence, and most importantly- successful ripcord pull. On level 3, the instructors will release the student in freefall for the first time, to fly completely on their own. Levels 4, 5, 6, & 7 require only one freefall JM (less $$) and teach the student air skills such as turns, forward movement and docking on other people, moving forward, "superman" exits from the plane, etc. Each AFF level is designed to take one jump, and requires about 45 minutes of training. After successfully performing the objectives of each level, the student moves on to the next level. After graduating Level 7, the student enters a less structured educational program called the Integrated Student Program, where they jump on their own and with coaches to improve their skills and learn more advanced maneuvers. Once they reach 25 jumps they are ready for their A license. Once they have their A license they are free to jump however they choose, within the dictates of good judgment and the guidelines of the USPA’s Basic Safety Recommendations (BSR’s.) Prev: Be aware of the risks Next: Find a Dropzone Prev: Be aware of the risks Next: Find a Dropzone More related information: The Student Skydiver's Handbook Sample: AFF Course Material Safey and Training Articles Safety and Training Forum Skydiving Glossary
-
Be Aware of the Risks Choose a method of training Find a Drop Zone Set a date and jump! Get licensed Well, now that you've made up your mind that you want to do this you can't just rent a parachute from the costume store on the main street and take a leap out of your cousin's Cessna! Not only would it be illegal it might prove to be an unhealthy way to enter the sport! So where can you go? There are few ways you can find the nearest DZ to you: Dropzone Database The Dropzone.com Dropzone Database lists more than 700 DZs all over the world. Organized by region, country and state you can browse and search the database till you find a DZ near you. There's a lot of information on our pages and in most cases you can jump straight to the web page of the DZ for more information. You can also read reviews by other Dropzone.com members who have jumped here before. It's a great resource! USPA If you're in the USA, call the United States Parachute Association at 540.604.9740 or visit their web site to get the name of an affiliated drop zone in your area. Dropzone.com Forums Dropzone.com has more than 32,000 members and with more than 1.2 million posts to the forums you'll be certain to hear from someone. Register for a free Dropzone.com account and ask about DZs in your area in the Dropzone.com Forums. Google it! Yes, as you know you can find almost anything on Google. Use your city or region name and "skydiving" or "skydive" as keywords and see what it spits out. Yellow Pages Look in the Yellow Pages online in your local phone directory. You're bound to find some skydiving ceters under "parachuting" or "skydiving". Ask around You probably have some friends who have done it. Are they still alive? If so, then go to the same place they did; that way, you can feel assured of your safety. ;-) Skydiving clubs - If you're in college, most universities have skydiving clubs. This offers a cheaper and easier way to get into the sport. Plus, nothing brings people together better than absolute terror. You may even make some friends. How do I tell a good Drop Zone from poor one? Most dropzones that provide regular student training will be affiliated with the official skydiving organizing and regulating body in your country. The United States Parachute Association (USPA) is the representative body for sport parachuting within the US, and a member of the FAI (the international equivalent). Representative and regulating bodies like the USPA usually develop and monitor safety and training doctrine for the sport. In some cases they also provide liability insurance for students and DZs in the case of damage to property. Ask about their official affiliations and benefits when you contact a DZ. In the USA the USPA has successfully instituted rating programs for Coaches, Instructors, and Instructor-Examiners to ensure that only properly trained and qualified personnel work with students. In the USA you should insist on USPA Instructors and Coaches. If you're outside the USA, do not hesitate to ask about the rating programs for Instructors in your country and the qualifications of those people you'll be working with. Do not be afraid to ask to see your Instructor or Coach’s rating card. It should show the appropriate rating and expiration date. Also note that currently, most Tandem Instructors are certified by both the the equipment manufacturer and USPA. USPA affiliation is not required, and does not guarantee a DZ to be a "good" DZ, and non-affiliation does not mean the DZ is "bad". However, the USPA, through their diligence and caution, has compiled an excellent safety record over the years. Use the Internet to do some research of your own. Reading the DZ reviews in the Dropzone Database is a good idea. Remember to always take everything online (good and bad) with a pinch of salt. If at all possible, one of the smartest things to do is to visit the DZ before you make your jump. Ask if you can sit in on a FJC. Hang around, talk to some people and pick up on the vibe. Prev: Choose a method of training Next: Set a date and jump! Prev: Choose a method of training Next: Set a date and jump! More related information: Dropzone Database Events & Places to Jump Forum Skydiving Glossary
-
Be Aware of the Risks Choose a method of training Find a Drop Zone Set a date and jump! Get licensed You know how we are. We plan and plan and don't get to it. Set a date, get out there and make the jump! If at all possible gather some friends together to do it with you. Doing a first jump course or any skydiving in a group is always a lot more fun and you'll have other people around to motivate you! When you arrive and the dropzone, all jumpers will be required to fill out a registration form and sign a liability release before jumping. This release will verify that you understand that there is risk involved in skydiving and that you freely agree to accept that risk. The legal release will usually contain a contract or covenant by which you agree not to sue the skydiving school or anyone else if you're injured. Yes we know, this sounds all too horrid but if you want to jump you'll have to sign these forms. It's part of any adventure sport. Freefall sounds more scary than it is. In reality you barely have a sensation of "falling" while skydiving. You'll feel the stresses and excitement of the air rushing past you. However, because there's nothing up there for your brain to use as a reference point to tell you that you're falling, it will feel more like you're lying on a column of air, floating. Upon opening your parachute it'll feel like you're being pulled upwards. You're not going up. You're just decelerating pretty quickly and that causes the sensation. Your parachute can be steered by a simple steering mechanism. A "toggle” in each hand will enable you turn the parachute left and right fly it where you need to go. At most modern skydiving centers you'll be able to hear instructions from the ground passed to you via a radio receiver and speakers in your helmet. At some dropzones instructors will guide you in with batons or hand signals once you get close to the ground. All of this will be covered in your FJC. In both cases your Instructor on the ground will guide you in for a nice soft landing. Student canopies are relatively large, docile and forgiving square parachutes. This "big wing" makes landings slow and soft. Keep in mind that the skydive is not over till you've landed safely. By far the majority of skydiving injuries happen during landings so keep your wits about you, listen to your instructor and have fun! That's great, but you may ask: "But what if the parachute doesn't open?" This is always a risk when skydiving, but if you keep your training in mind and keep your cool you should be able to deal with this. By law, anyone making a skydive has to be equipped with both a main and reserve parachute. Your reserve is your second chance in case of any malfunction of your main. Reserve parachute technology has come a long way and is very reliable. All reserves must be inspected and repacked every 120 days by an FAA-rated parachute rigger, even if it hasn't been used during that time. Activating your reserve is something you have to do, though. This will be taught and practiced a lot during your training. As an additional layer of protection almost all modern training parachutes are also equipped with a Automatic Activation Device (AAD). An AAD is a computerized release system that keeps a watch over your descent rate and altitude. If you reach a certain altitude and your decent rate is still high enough that it is clear to the system that you did not deploy your main canopy, it will automatically release your reserve. Never rely on your AAD alone. Do what you've been taught during your training but take comfort in knowing you have a guardian angel. Prev: Find a Dropzone Next: Get Licensed Prev: Find a Dropzone Next: Get Licensed More related information: Dropzone Forums Skydiving Glossary
-
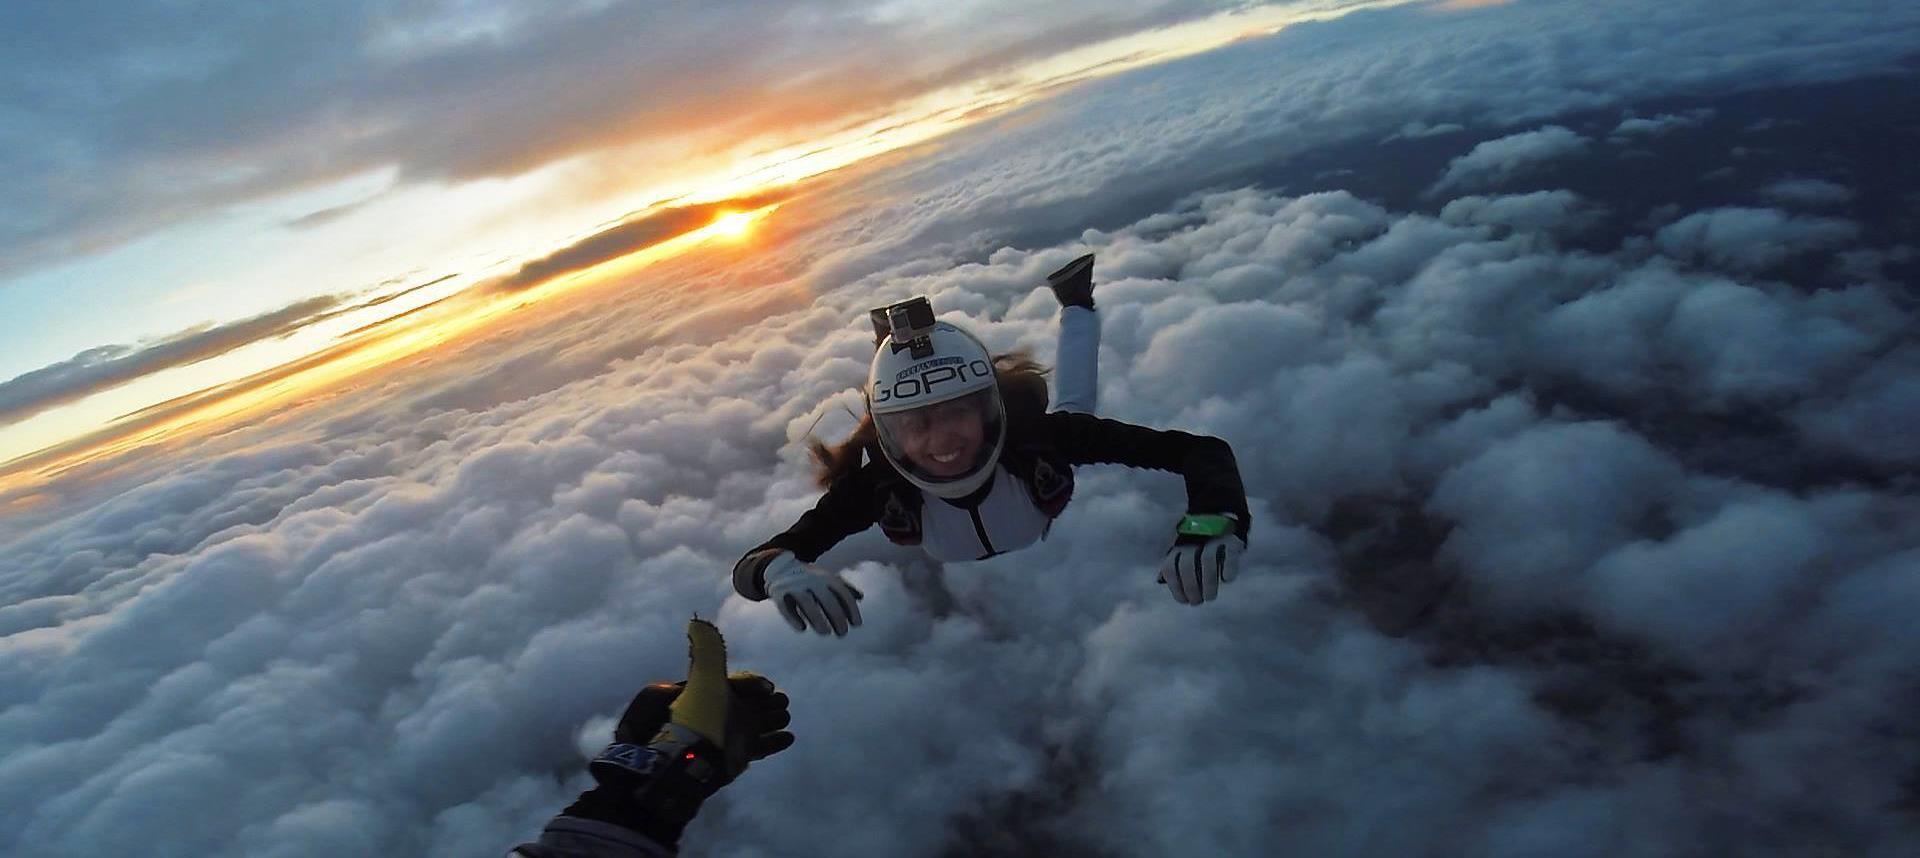 You've done it! You loved it. We know you did but don't mind you telling us anyway! We gave you a nice cheesy certificate and if you wanted them, you also got some cool photos and a video to impress the whuffos with. So what's next? Do it again! Come back next weekend, and do it again and again until you can give yourself the title of "a licensed skydiver". It takes about 15 to 20 jumps, each with more tasks, until the student is competent enough to jump without instructor supervision. However, if you learn with the AFF method, you can start jumping on your own after seven jumps. Each successive jump costs a little less. Once you're certified and have sold the shirt off your back to buy your own equipment you only pay around $25 for your slot on the plane. That's it, you can now enjoy jumps at any drop zone. Each country has its own system of skydiving licenses. The USPA has four skydiving licenses, from the basic A license (25 jumps) to the D license (which you are eligible for after 500 jumps.) You'll need to work your way up through the levels. Each level will give you access to more jump types and more difficult landing zones. Once you're a seasoned skydiver there are many disciplines that you can try. Each of these have their own experience and proficiency requirements. Talk to your Instructors before you try something new. It is always prudent to get additional formal training in your discipline by someone qualified. We also strongly suggest you find yourself a mentor. Approach some one whom you respect and trust and ask him or her to coach and guide you through your skydiving career and progress. It is important to have someone you can bounce your plans and ideas off just to test them and get some experienced input. Remember what we said up front: Knowledge, Skill and Attitude. Never stop learning and developing these. Dropzone.com is loaded with useful information at all levels but make sure to talk to your Instructors and Coaches often. Ask them about the advice you get online. They know and understand your skill levels and can help guide you safely on this journey. We'd love to hear your skydiving stories in the Dropzone.com forums, and most of all, we'd love to share the sky with you somewhere at a boogie in the near future. The forum also has a wealth of information and it's a great way to chat to other jumpers. Prev: Set a date and jump! More related information: Skydiving Disciplines Gear Classifieds Skydiving Glossary
 -
Dropzone.com today launched its voluntary Premier Membership service! The decision to move forward with voluntary user supported subscription services was made for a few reasons: I want to keep Dropzone.com on the web and without this, I can not pay the bills. We want to keep advertising content low and we want to provide you with the best possible service and the coolest features we can! That's it. Dropzone.com is a very advertising-lite site. We don't bombard you with pop-up ads. Even though we serve millions of pages every month we choose not to join large advertising syndicates and expose you to streams of irrelevant non-skydiving promotions and ads. We want to keep it that way. This also provides the highest value to our advertisers as their ads are not lost in a flood of outside noise. We continue to appreciate the support we receive from the skydiving industry in this.Rather than turning to large corporate sponsors from outside we'd chose to come to you, the community, for support. People have shown over the years that they are willing to donate and get involved. We very deliberately made a decision that nothing that has been free in the past will become part of the Premier services. You will be able to continue enjoying Dropzone.com exactly as you have without ever giving us a penny. That's the way I want it. We will create additional Premier features, and those users who find them valuable can subscribe on a voluntary basis. We think they're pretty neat! Thank you to everyone who have supported me through the years in all manner and ways. I hope you enjoy the Premier Features. As part of our Premier launch we have partnered with Aerodyne and one of our new premier members will win a complete system - container, main and reserve - from Aerodyne's line of products. Click on the link below for more information. More information and how to Subscribe for Premier Membership
-
For the first time Skydive Perris is organizing a tunnel training camp for women only at SkyVenture Perris. Nina Kuebler and Synchronicity are the organizers. In addition to what the Perris Performance Plus already offers, we now are hosting an all female 4-way tunnel and skydiving camp. DZ.com: Why organize a women’s only tunnel camp? Nina: The tunnel as a training tool has changed the way we skydive, so the learning curve for individual flying skill is much steeper. I find that a considerable number of skydivers, particularly females, think that the tunnel is something for “serious 4-way freaks” only, and therefore never consider trying it out themselves. By getting more people interested in newer training developments we certainly help the sport overall, thus giving as many people as possible the chance to feel the exhilaration of flying their body aggressively. Many females are intimidated by the somewhat competitive atmosphere of the predominantly male clientele and staff of “traditional” camps. After hosting several camps at Perris using the successful formula of tunnel flying and jumping, we have experienced how different skydivers respond to different coaching, particularly how females respond fruitfully to female coaching. DZ.com: That sounds kind of like the same concept as establishing the women’s division in 4-way in order to draw more females in the sport. Nina: Exactly. Last year we had 9 all girl teams competing at the US Nationals, which was a great turnout. It was also my first time to compete with an all girl team (4something, thanks again ladies!!!) With the nationals being in Perris, we are expecting an even more exciting female competition. DZ.com: Does the girl only camp also refer to the staff? Nina: Watching another woman fly powerfully and aggressively is certainly the strongest inspiration and motivation to do just he same. In other words: Yes, this is a stricktly female coaching staff. DZ.com: Do you in general support all girl events? Nina: I do believe in 4-way, in physical flying and strong moves – of which both genders are equally capable. I have benefited from male coaches, and being on a male team, I have learned to push myself to the greatest extent possible. However, my flying style is different from my male teammate’s style; therefore I think a female student can benefit from a female coach. I believe that there are an infinite number of individual learning behaviors. Consequently in the coach/student–relationship is paramount for the coach to communicate (in the physical demonstration and the verbal explanation) with any student in an understandable way. I am very much looking forward to share what I had the chance to learn in 6 years of training 4-way and 8-way with other females.
-
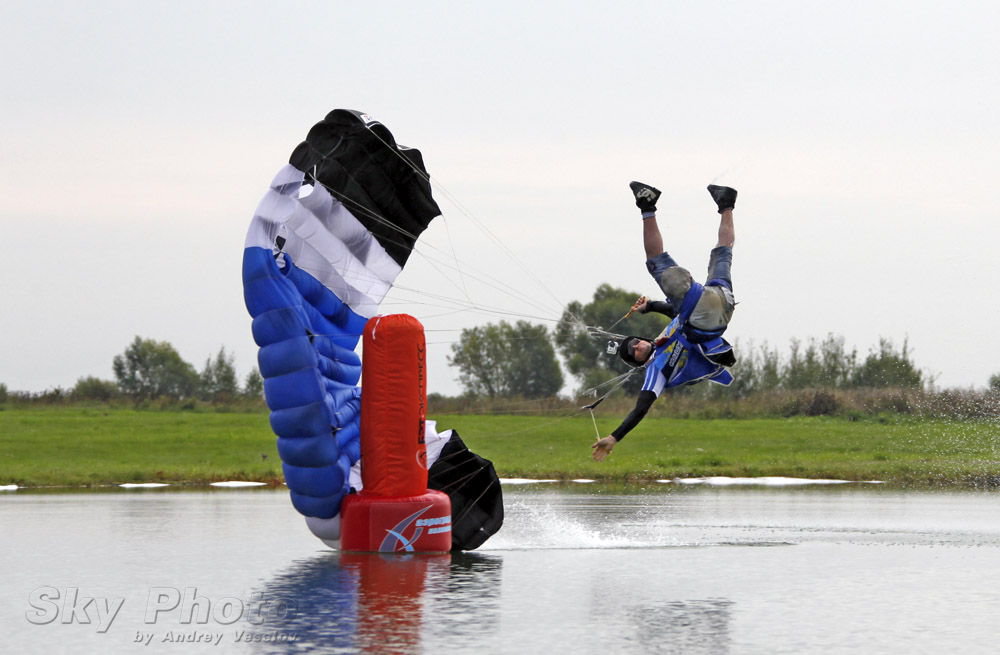 Skydiving is a sport where you never stop learning. Even if you could, somehow, come to know everything, the sport is evolving constantly, and someone who's an expert one day is a newbie the next. Often, the learning we do isn't just academic - it can make us perform better, even keep us alive when there are problems. With that in mind, here are ten things that may keep you alive when things really hit the fan: 1. Know your limits. Everyone's limits are different, and are based on their experience, background, physical and mental fitness, and natural abilities. Some people think well under pressure, some need to drill and drill so their natural tendency to freeze is overcome. Some are incredibly flexible, some need 'crutches' (like sleeves or weight) to control their fall rate. It's important to be honest with yourself when deciding your limits, even if it goes counter to the alpha mentality that most skydivers have. We're all human. 2. Respect your limits. Don't do things you're not ready for, and don't let other people talk you into doing them. This comes up very often when women jumpers enter the sport - suddenly they have a lot of male friends who want to take them on 20 ways, free fly jumps, demos etc well before they'd ask a male jumper. And while it is technically possible to safely take someone with 20 jumps on a 20-way (you could do it with 19 AFF-JM's) it's usually a bad idea. 3. Push your limits. This may seem in contradiction to 2) but it's important. Once you know your limits, and respect them, you can start overcoming them. Do you have a problem with fall rate? Find a slow (or fast) skydiver and do a 2-way, with the other jumper going slower and slower (or faster and faster.) Is your canopy control so-so? Try drills - learn to flat turn and flare turn, a little more on each jump. Follow someone else. Do no-contact CRW. Learn to sit fly. Pushing your limits isn't just a feel-good thing, it actually helps you survive in the sport. If you learn how to fly a small elliptical well, you will have much more control over your slightly larger square - and that can save your life if someone cuts you off on final. CRW can be fun, but can also be the difference between life and death if you have a cypres firing and have to land two canopies. 4. Push your limits, one at a time. This is even more important. It's possible to learn to do demos, as long as you learn the basics - canopy control, obstacle landings, spotting. Trying to learn these all on your first demo is asking for trouble. Small canopies, same thing. You can certainly learn to jump a VX 97. Doing it all on one jump - going from a Sabre 150 to a VX 97 - is a huge mistake. First transition down to a smaller Sabre, then learn to fly it. Then switch to an elliptical of about the same size, and learn to fly _it_. Once you get to that VX 97, you will have the background to fly it well - and you will be much, much better prepared to fly any canopy in between. 5. Learn flat and flare turns. You should be able to do a 180 in the air without your canopy diving at all, and you should be able to turn at least 45 degrees during your flare. Every year, several people die because they turn too low. I'm convinced that many of these aren't intentional hook turns, but accidental low turns to turn into the wind or avoid an obstacle. Knowing how to flat and flare turn might have saved their lives. 6. Learn more about your gear. What color is your reserve? Your reserve toggles? If you ever look above your head and see four sets of risers, how will you tell them apart? What color is your freebag? You can learn all this by watching your rigger pack your reserve, and even more by doing it yourself (under supervision, of course.) Read up on TSO testing of your gear, and learn about the limits it was tested to. If you know that, you can keep your own flying within its operational limits. Learn about what's in a Cypres, and how it judges altitude. Learn the difference between Dacron and Spectra, and how to pack a pullout rig. 7. Get related experience. Pilots have a distinct advantage over other jumpers when something goes wrong in the plane, because they know how to read the signs, and they know how to operate around aircraft. They have a better idea what to touch and what not to touch, and can more easily communicate with the pilot (and, in rare instances, ATC.) You don't have to get your instrument rating - even a few lessons will teach you a lot about aerodynamics, aircraft weight and balance, stabilized climbs and descents, elevator trim and its importance, etc. Or learn to climb. Serious climbers (except, possibly, sport-only climbers) are their own riggers, and understand the ideas behind an equalizing anchor, dynamic vs static rope, and nylon to nylon friction. Many of those transfer to the kind of rigging that gets done in skydiving, and if nothing else, will help you make sense of how rigs are designed. 8. Get out of your drop zone. Drop zones tend to have "flavors" to them, and are sometimes homogenous when it comes to skills or equipment. Kapowsin, for example, seems to use nothing but Infinity's, and for a while Air Adventures was nearly 100% Reflex. Some drop zones are mainly free fly, some RW, some do a lot of demos. By getting away from the familiar, you'll learn more about other disciplines, other equipment, even other ways of thinking. You'll also meet some really cool people - you can't talk to Bryan Burke, John LeBlanc, Tony Domenico or Adam Filipino, for example, and not learn something. Unfortunately, not every drop zone has them, so you have to hit the road. 9. Buy your beer. It sounds like a selfish tradition, designed to punish new jumpers. It's a whole lot more than that, though. The key is that, if you buy the beer and give it to people, they will ask you what it's for, and you will end up talking to people (up to 23) about what just happened. Since this usually happens at some significant time (say, right after your first cutaway) this is a really important time to talk about what just happened without being embarrassed about it. (Well, maybe you will be anyway, but tough.) On the flip side - if someone buys beer for the DZ, and you're an experienced jumper, don't just grab a bottle and run. Find out who bought it and why they bought it. That beer isn't quite free - the price is that you have to pass on the knowledge that _you_ first learned when it seemed like you were buying a case every other weekend. 10. Teach others what you know. There is no better way to learn than to teach, and it helps others as well. If you want to become an expert at emergency procedures, teach part of a few first jump courses and watch other people screw their procedures up. If you want to learn a lot about RW, organize. If you want to learn more about skydiving in general, teach a graduate course. Just the act of putting everything down on paper and talking about it will lead you to research to make sure you're right, and you'll get feedback when you actually do the teaching.
 -
The AFF program was instituted in 1982 as an "accelerated" learning process as compared to the traditional static line progression. The AFF program will give you a true taste of modern sport skydiving. The ground training is a bit more extensive than S/L (~5 hours) because the student will be doing a 50 second freefall (that's right!) on his/her very first jump. The student will exit the aircraft at10,000-12,000 feet along with two AFF Jumpmasters (JM) who will assist the student during freefall. The jumpmasters maintain grips on the student from the moment they leave the aircraft until opening, assisting the student as necessary to fall stable, perform practice ripcord pulls, monitor altitude, etc. The student then pulls his/her own ripcord at about 4000 ft. The AFF program is a 7 level program. Levels 1, 2, & 3 require two freefall Jumpmasters to accompany the student. These dives concentrate on teaching basic safety skills such as altitude awareness, body position, stability during freefall and during the pull sequence, and most importantly- successful ripcord pull. On level 3, the JMs will release the student in freefall for the first time, to fly completely on their own. Levels 4, 5, 6, & 7 require only one freefall JM (less $$) and teach the student air skills such as turns, forward movement and docking on other people, frontloops, backloops, "superman" exits from the plane, etc. Each AFF level is designed to take one jump, and requires about 45 minutes of training. After successfully performing the objectives of each level, the student moves on to the next level. After graduating Level 7, the student enters a more free format stage called "Level 8" where they practice and hone their skills by themselves and in small groups until they obtain 20 freefalls and qualify for their A license.