Search the Community
Showing results for tags 'general'.
Found 265 results
-
From Student to the 100th Jump Making it to my first Nine-way and then suddenly being welcome into RW jumps During early 2005, I became interested in big ways while I was still a student skydiver. As a deaf person, I discovered the deafskydivers.org website, and they were planning an upcoming Deaf World Record event. They required 100 jumps and a B license to participate in the event. A daunting goal, this gave me the incentive to jump as often as I could at my home dropzone. At jump #99, the largest formation I had ever jumped in was a three-way. For my next jump, I set forth trying to get the biggest RW formation the drop zone would let me build. This became a nine-way, made mostly of Skydive Gananoque's instructors. For my 100th jump, we created a successful 9-way jump even though I funneled the exit! Before this jump, I had a hard time finding willing RW buddies. Word went out I'd accomplished a two-point nine-way. Now I was suddenly being invited into four-ways, five-ways, and six-ways, jump after jump! As a result, my learning experience experienced a big bang after this milestone jump. photo by Dave "Fuzzy" Hatherly Deaf World Record 2005 First experience being “cut” from a bigway event November 2005 was my first skydiving vacation. I flew to Florida to participate in Deaf World Record. It was like a deaf boogie, organized by the infamous Billy Vance and John Woo. Before the event, I went to Skyventure Orlando for the first time. I was floored to learn that John Woo had 20 hours of tunnel time, and is a World Team member having completed the 357-way World Record the previous year. He told me he had about 700 jumps. His story was an inspiration, even if it was an impossible dream at this time. Over the next few days, 20 of us jumped several attempts to break the 14-way2003 record. I learned a lot, and docked on several formations that exceeded the size of my 100th jump formation. Eventually, they had to give “the speech” to four jumpers to reduce subsequent attempts to 16. I was one of the people to be “cut” from the final formation. My feelings of disappointment disappeared as I witnessed the Deaf World Record from the ground, the subsequent first night jump, and giving my glowsticks away. The photo with the goofy smile tells the whole story of Deaf World Record 2005 experience. Attending Canada Big Way 2006 Failing to get to the 59-way level, but managing to get to the 30-way level I learned about the Canada Record during late 2005, and wanted to see if I could possibly qualify for this event. It seemed far fetched that I might participate in an 80-way but I kept my mind open. During 2006, I completed my first 20-ways during boogies when the Twin Otter visited my Cessna home dropzone. The dropzone told me to go and attend the Canada Record anyway, to 'try out' and see if I was good enough. At this event I had my first taste of big way education, such as stadiums, radials, sheep dogging, red zone. Alas, I was cut before I went past a 21-way. The event proceeded to complete a 59-way while I jumped a side 20-way camp for people who were cut from the main formation. I learned many valuable lessons, including from Guy Wright: Never look up when I fall low. After that advice, despite still being a sloppy flyer, I consistently recovered from falling low during these jumps. I made many bad impressions with Guy Wright, however, TK Hayes invited me to participate in a 20-way. Later, it became apparent there was too many jumpers, and it became two separate 30-ways instead. This became the consolation prize: My first multiple-plane formation load, and my first 30-way, that I completed, docking 14th. Guy Wright's Big Way Camp 2007 Struggle trying to stay current During 2007, I had a major downturn in my jumping frequency due to job and love life situation. Nonetheless, I attended a Guy Wright big way camp at the same dropzone as the Canada Big Way 2006 event. However, I got cut very early during the first day as I was very uncurrent and my previous impression at Canada Big Way 2006. In addition to my lack of currency, I had also gained weight, so I had much more difficulty falling slow, so I kept falling low too often! Discouraged, I gave up on big ways for the remainder of 2007 except for the easy 20-ways that occurred at Gananoque's Twin Otter boogies. Perris P3 Big Way Camp May 2008: Finally Persistence Wins! Finally reaching the 50-way level In the previous two years, I kept hearing about the famous “Perris Big Way Camps” as being the best camp to learn about big ways. I was getting current again and I worked a little over an hour of tunnel time and 20-way jumps previous to the camp. Finally having the prerequisite jumps, I attended the Perris big way camp for May 2008. They require 250 jumps with 50 jumps in the preceding 6 months. It was to become the best skydiving vacation ever. As a deaf jumper, I was very challenging to the Perris P3 team, because I often required a little more maintenance than everybody. Load organizers dislike high-maintenance jumpers, and it was always a challenge to make myself as low maintenance as possible. I was struggling trying to learn as much as possible, with the help of other jumper writing notes for me! I persisted and climbed my way through ever-bigger formations, and the final jumps on the final day, I was to become part of an outer weed whacker (“weed whacker of last resort”). On the third last jump, I fell low. On the second last jump, I successfully docked but others in my whacker did not make it. I approached a discouraged-looking guy and encouraged him, good job, you can still do it. He was a guy, very much like me, who was trying so hard. I gave him a good pat on the back and gave him the encouragement. The thrill of diving fast from a trail plane, and slowing down on time for a dock. I almost fell low on this jump, but I docked – DOCKED! Then I committed the sin of looking away from the center and to other jumpers docking on me. He was struggling, going to fall 1 foot low below me – but I made a last minute decision to drop my level slightly below, while still docked, and help catch him. We docked in a mutual grunt of effort. Right in the nick of time, the final person, about to go low too, caught the very end of the weed whacker and promptly pulled our entire whacker low again, a whole 2 feet below the formation level, with the chain becoming almost diagonal! However, we quickly leveled out without funneling. We DID IT. I was sloppy, the video showed my instability as I caught the other skydiver, but I felt I played “hero” on this jump – helping other new big way jumpers like myself complete the formation. While I was not ready to truly play the role of hero, I had so badly wanted the formation to be complete – and it was my job in the weed whacker of last resort to try to make it succeed. On the other hand, skydivers are supposed to look towards the center of formation. Despite this succeess, I still had lots to learn. But it was time to celebrate – I was so happy I was part of a complete 49-way formation! photo by T.C. Weatherford Perris P3 100-Way Camp September 2008 Now reaching the 100-way level By now, I was starting to think I might make it into the next World Team if I tried hard enough. I started to hear that the next World Record might be happening in year 2010. I then made a decision to gamble and “go for broke” for the Perris P3 September camps, and try to bring myself to the 100-way level. The Perris camps were organized as a 50-way camp the weekend prior and a 100-way camp the weekend after. I had only gotten a conditional invite for the 100-way camp based on the performance of my 50-way camp, but planned my vacation as if I was going to possibly be accepted into the 100-way. As a deaf skydiver, I hunted down interpreter help to try and decrease my maintenance level even further. Jan Meyer stepped up to the plate and offered to be my debrief-room interpreter and to double as a dedicated big way coach. I surpassed the performance of my previous Perris May 2008 visit. It worked – I qualified for the 100-way camp. The next week, I finally did my first 100-way as I had dreamed of doing someday. The Future... Even though I am still very much a relative newbie to bigways still yet to be part of an invitational big way event, I now have a new goal: Be part of The World Team within my lifetime, whether in 2010 or later! Although I now have enough experience to be invited to the smaller invitationals listed at the bigways.com site, I still have a long way to go, and lots yet to learn!
-
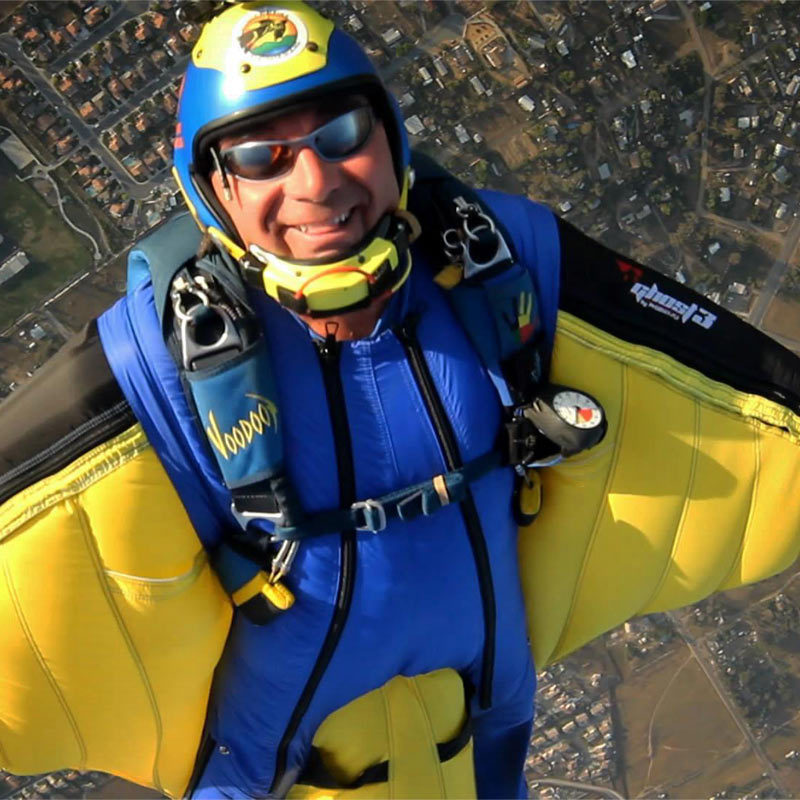
Last week GoPro sent me one of their new Hero cameras to test in a variety of environments. I’m somewhat of a snob when it comes to cheap camcorders, and the people at GoPro knew this from the start. In fairness, this is the least expensive camera/camcorder I've ever reviewed, and not expecting to be impressed.The camera arrived in a complete configuration; batteries, 2GB SD memory card, and the standard box that the GoPro comes with. Opening the GoPro package requires a degree in disassembly if the box is to be kept in more than one piece. It took three people nearly 10 minutes to figure out how to open it. If the box is any indication of how tough this camera is…it’s gonna be a great little camera. The GoPro Hero Wide Physical Characteristics: The camera includes several mounting options, including a rubber headband that resembles a jockstrap. It’s not much to look at, but it’s also not going to be the common use (I hope) for most users. The camera mount on the “jockstrap” can easily be removed and connected to more substantial webbing. The water housing is impressive. Very impressive for the price, in fact. I’ve paid more for a cheap housing than for this entire camera, and this housing is more nicely built than a housing I once paid $350.00 for. This is a good thing, because the mount for the camera is integrated into the waterproof/protective housing of the camera. The system is not designed to be used without the camera in its waterproof housing. The camera itself feels “plastic,” even though it is made of light aluminum and plastic. The plastic lens is fairly exposed; all the more reason to keep it in its waterproof case and keep the case in a soft bag when not being used, in order to protect the lens from damage/scratching. This shot was one of 92 still images captured in a single skydive. With a plastic pressure-release mount, there is some fear that a hard strike will cause the unit to be torn from whatever mounting device it may be attached to; this is a positive feature rather than negative factor, as safety is the primary concern of all active sport enthusiasts. The plastic mounts are plentiful; GoPro provided three stick-on mounts with extra double-sided adhesive material. In addition, GoPro provides a pair of extra mount clips, and a mounting arm that allows for a 90degree rotation of the camera when mounted to vertical objects such as the mast of a kiteboard, paraglider, or similar. It’s much like an Israeli-arm used for higher end cameras, excepting that it’s exceptionally lightweight, and plastic. The camera comes with several mounting devices/replacement parts. Technical Characteristics: The camera has a very small sensor size, I believe it is 256 x 192 with doubling, but I was unable to receive confirmation of this from the relations department at GoPro. The sensor is a CMOS imager, which is somewhat obvious by the lack of dynamic range (see image with large black spot in center of sun). Sporting an output frame size of 512 x 384, broadcast, output to DVD, or other full-frame display will be difficult to do with any degree of image integrity. For web or fun review on a computer in small viewer, it's perfectly appropriate and will give a lot of enjoyment to the sports enthusiast that isn't chasing professional results. GoPro encodes to an MJPEG codec in AVI container (will be .mov on Apple) and will require an MJPEG decoder in order to read/edit. Most NLE software includes an MJPEG decoder, and they are available from several providers around the web. The encoder compresses the video data to 4800 Kpbs, which is approximately the same compression ratio found on many hllywood DVDs. However, bear in mind that Hollywood DVDs are framesized at 720 x 480, and are sourced from film or HD cameras. I mention this, as some of the marketing commentary on the GoPro Hero compares technical data with that of a DVD. They’re not remotely the same. Additionally, DVDs are encoded with a PAR (Pixel Aspect Ratio) of .909 or 1.333. This means that pixels are elongated in either a horizontal or vertical configuration. The GoPro records a PAR of 1.0 (this means the pixels are square, and are not stretched, which is a benefit). The display is a Standard Aspect Ratio, otherwise known as 4:3. This is the “old” format of screen display, and is no longer available in television displays. GoPro might consider providing widescreen in an anamorphic format in their next camcorder models, as widescreen displays are now the world standard. 30Fps Progressive frames means the image will be smooth for playback, and clear on computer monitors. Audio is recorded in Mono @8Khz/64Kbps stream. The audio is useless for anything other than reference. It should be pointed out once more, that this camera is aimed at the sport enthusiast that wants to capture exciting moments for the web, not for broadcast or professional use. Still images may be captured at the rate of one still every two seconds for up to 65 minutes (over an hour) on a 2GB SD card. Larger cards may be used. The stills are 5MegaPixels, and for some, this is going to be a “wow” factor. However, there is a difference between stills captured through a low-cost plastic lens and a reasonable quality glass lens as found on most 3-5MP hand cameras. In other words, the megapixel count is only a small part of the actual picture quality. (More megapixels don’t assure better pictures in any event.) SD flash card is the format in which this camcorder stores data. SDHC cards do not improve the performance, speed, nor quality of the camcorder. The camcorder package also includes a proprietary cable connection that outputs to USB and video composite signal. Note the hot-spot in the middle of the sun. I was able to consistently reproduce this artifact with any bright light source in a high latitude shot. Even a 100 watt lamp could create this anomoly in a reasonably lit room. I believe this is a problem with the sensor; it cannot manage high latitude. Operational Characteristics: The camera is easy to operate. The multiple-press menu button that provides an icon-driven LCD panel doesn’t provide immediate feedback, and requires a review of the owners manual to decode the iconography of the display. In my first operation, I captured video from a skydive, but accidentally deleted the files as a result of not being clear on what the different icons were indicating. Additionally, it wasn’t immediately clear on how to turn off the camcorder, and when left on without operation, the camcorder eats batteries fairly quickly. With regard to batteries, only Lithium batteries should be used with the GoPro Hero. They’re a little more expensive, but this device eats alkaline batteries like they are candy. Rechargeable batteries may not be used. The GoPro Hero Wide uses SD memory cards. The black strip on the back is a rubber isolator to keep the camera tight in the waterproof housing. There are only two buttons on this camera, it’s not like it’s a challenge to operate once the owners manual has received a glance or two. One button for shutter control/record functions, and one button for menu control. The beauty of this camera is found entirely in its small size, price, and ease of use. Summary: This camcorder isn't going to light the professional's eyes up like a professional POV camera will, but it won't burn the amateur's wallet like a professional POV camera costs, either. I've tried all the various POV "sport cams" currently on the market, and for sub $200.00, this is clearly the winner. There simply is no camera in its class that can compete. GoPro should be proud of themselves for designing a camera with this quality in this price range. At $189.00 it certainly isn't a toy, but it is a very fair cost of the fun this camcorder can record for the sport enthusiast. Mounted to handlebars, helmets, struts, pedals, forks, kayaks, paddles, fenders, wrists, feet, belly, or other body part, the GoPro Hero is a hit in my book. -douglas spotted eagle
-
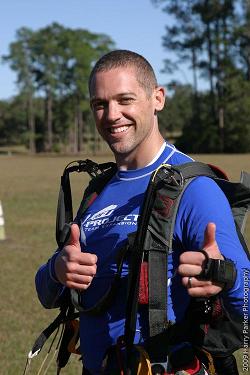 By Ian Drennan I wasn't really sure what to expect when arriving at Deepwood Ranch in Deland for the PDFT Tryouts. So much of my skydiving career had been spent preparing for this moment, yet when it finally arrived I felt very unprepared. I can't deny that going into the event I was in competition mode, not sure what to expect, but sure I was going to give 100% no matter what they threw at us. Little did I know that this would feel, and be, nothing like a competition, and nothing like anything I'd ever experienced before... After a brief welcome by the PDFT we were all taken to a house where we were given free rein to divide our living space as we saw fit. The mood was good; everyone was excited, and nervous, as to what the coming days would bring. Surprisingly when it came to picking living space, most people gravitated towards the people they'd never met or had spent limited time with. There were of course, requirements for each area - thankfully our space was dubbed the "No Snoring" zone :) I had expected the atmosphere to be tense; there was so much unknown and so much riding on this event for each and every person there. Yet the mood was upbeat and encouraging - the tone for the week had been set. We woke on Tuesday morning, way earlier than any human should have to be awake (that's 6am for me... what can I say, I'm not a morning person!) - still, the rooms were abuzz with excitement and everyone anxiously scurried out to start the day. After breakfast the introductions began, lead by the PDFT and John LeBlanc (who blew off a meeting to spend more time with the group!). As the introductions progressed, each participant revealed more and more about their background, upbringing, and motivations behind pursuing this dream. This 3+ hour experience flew by as, surprisingly, people quickly took to a "heart on the sleeve" approach, laying out their innermost insecurities, fears, thoughts, and dreams.Once the introductions were done, we were assigned groups (picked by the PDFT) of 5 people. Each of the 3 teams was then assigned a task: prepare a group presentation on a set topic (each group had the same topic) within the hour, and each team member was required to spend an equal amount time speaking. This exercise quickly allowed groups to get a feel for personality dynamics within each team and, hopefully, learn to work as a group. Well, I can't speak behalf of the other groups, but Group 3 rocked the house :) I was lucky to be paired with a fantastic group of people, all bringing different strengths to the table. The groups were not just responsible for a single presentation, but rather were together for the week and assigned different duties for each day - dish washing, cooking, or grounds maintenance that would be done in between the scheduled activities for the day, and interviews. Tuesday night was brought to a close by the group’s first rock session. Much like the Native American Talking Stick tradition, this concept allowed people to voice opinions – uninterrupted - discussing themselves, their teams, the day, or anything that sprung to mind in a positive, or negative, fashion. Once again each individual surprised me with their honesty, and their ability to take constructive criticism. Around 11pm, after a long day, we packed it in and went back to the house - exhausted.....I don't think I've ever seen so many skydivers in bed at such an early time :) Wednesday we woke to poor weather, so the group took the opportunity to do their individual presentations. We were entertained with a variety of topics, from cooking, to building water towers, to snowboarding, juggling, fresca ball, and even how to hot-wire an airplane! Each member added their own personal flair. I think it was here that it really struck me what an amazing job the PDFT had done selecting the 15 members. I remember looking around and realizing how level the playing field was. Each individual was strong in different ways, and it was clear that the team could pick any 4 and still have a spectacular outcome. After the presentations, everyone blew off some energy by playing some of the newly introduced games or learning to juggle. It was quite a sight to behold. Group 3 took to cooking that evening, and with little deliberation began the cooking assembly line. Surprisingly, Travis Mills (from group 2) joined us in our food preparation. Travis, a onetime sous-chef, took the time to help us rapidly prepare our ingredients (that man is a chopping machine!!). I began to notice how well we were working together. As usual, after dinner, everyone sat around the fireplace, chatting, trading stories, etc. It was here that JC took it upon himself to introduce Zip-Zop. Every single person participated in the game (despite enormous suspicion), including Jay, Ian, and Shannon from the PDFT! I won't ruin any surprises, but needless to say - JC is a prankster....oh, and JC if you're reading this....I'm plotting my revenge... On Thursday we woke to beautiful weather. The energy levels were almost uncontainable....we were finally going to JUMP! The team had something special in store for us today: We were going to do a mini-competition. After a few practice rounds the competition started - interestingly enough, the mood wasn't competitive; it was supportive. I can't speak for others, but I've never felt so relaxed before. Each round was just downright fun. The highlight, for me at least, was the expression round - not an event I normally do well in, so needless to say, I was elated with the final outcome. After the competition it was back to chores where our group was to help Kim, the land owner, chop wood for his house (and our fire pit). It was here that what was happening really became clear to me. Our group was unable to audibly communicate, since Tommy D was using the chainsaw to cut wood. But somehow we still needed to work together to load up the truck and get a system going. We fumbled a bit the first few minutes, each struggling to find our place....but then, something happened: We began to draw on what we knew of each over the last few days and created yet another assembly line - seamlessly operating in unison. We actually got so efficient that we chopped, and loaded, and entire truck full of wood in 20 minutes all with minimal communication! Returning from the wood chopping experience, I was summoned to my interview. This was it, this was the moment to shine in front of the team, and give them every reason why I should be on the Expansion Team. I consider myself fortunate to have competed, and become friends, with the team before this day - yet it was still intimidating. I cannot imagine how some candidates, who'd never met any of them, felt at that table. The team was warm and welcoming though, and it felt far more like a discussion than an interview. Offering up direct questions and answers, I felt I represented myself well. I walked away with a smile thinking that good things were coming... and then it hit me, and it was like getting hit by a Mack truck. All these doubts entered my mind: "What if I get offered a slot, can I live up to the public expectation of a team member?"; "What if I just blew it?", etc. You see, in all my dreams of becoming a PDFT member, I'd actually never stopped to think what would happen if I actually got it. I know I wasn't the only one. I didn't have too long to dwell on my insecurities since the night's activities were about to start after dinner. This time JC once again had an icebreaker game. This one was more a mind game, and boy did he mess with my mind :) The rules of the game were simple: You had to figure out the rules of the game, and when you did you had to guide (but not tell) players who hadn't figured it out yet. Much to my frustration I wasn't getting it and, as more and more around me figured it out, my frustration grew. Fortunately, Ryan was the most frustrated and, in a fake temper tantrum, provided comic relief. It was now time for our Rock Session. The team once again kicked it off, providing examples of how negative, but constructive, criticism to other teammates. Surprisingly, the candidates sessions remained largely positive. It was a very emotional experience for everyone involved. Drained and filled with self-doubt, I headed to bed. Friday morning was the first morning all week, that no one was on time to breakfast. Mentally exhausted, and nervous, we gathered ourselves and headed out for the final day. The mood was definitely serious - we all knew what was happening today. We kicked off the day with a grueling exercise: We had to pick who we thought the new team should be, as well as a 'heart' team made up of 3 other people we'd love to fly with and then explain to everyone in a few short words, why we made the choices we did. It was here we got a tiny taste of what the PDFT was about to go through. It was incredibly tough to pick so few people from so many qualified people. In the end, after everyone's choices were vocalized, the choices were spread evenly among the group - this was definitely not going to be easy. Deciding to jump, each group got paired with a PDFT member and did a formation jump. The exercise was in trust, and it was here I noticed that I needed to be more trusting of my teammates in the air. Time was now out though and the PDFT needed to go and deliberate, and while they deliberated gave us carte blanche to jump and do whatever we wanted to, to blow off steam...and blow off steam we did :) I took the opportunity to work on my trust issues by encouraging everyone there to swoop me while I sat in a kayak on the pond - after all, if I couldn't trust these people, who could I trust? It was one of the most enjoyable things I've ever done in my life. I had my own swoop show, with each person trying to outdo the other on the pond. It was total and utter carnage - and it was great! My favorite memory is of Travis Mills screaming by doing a ghost-rider with the biggest smile I think I've ever seen anyone have. After a quick hike through Deepwood Ranch, it was time to return to hear the final announcement. The team arrived a few minutes later than expected, with a somber, yet relieved, look on their faces. It was clear they'd made a decision. Addressing the group the team announced that they'd almost not reached a decision that night, they had dropped the list to 6 people but had been unable to narrow it further. My heart jumped. With us all hanging on every word, the team announced that they'd made a change in plans and had decided to expand another 2 slots as "next on deck" or alternates. These candidates would be given first dibs at any future opportunities, or expansions, within the PDFT but would not be considered 'the final four'. First Jens Thorgenson's name was called. I was immediately thrilled; Jens and I had started building a strong friendship and respect, and I thought he was a wonderful choice. Next they announced me and my heart raced - it was unexpected, but ultimately perfect for me. I was ecstatic! In a weird way, I felt like the pressure was off, but felt no sadness at not making the final four. I knew, no matter who was picked, it was going to be a good choice and the PDFT was going be stronger than ever. Before announcing the final four, Ian Bobo emotionally reminded everyone that the blue jerseys weren't an indication of self-worth, and that each person there was a great candidate. The words were sincere, and they rang true. Once the final four were announced, through tears of joy, and sadness, everyone took the opportunity to congratulate them. Looking around I realized this is what the week was all about - cheering your team on, and we were ALL a team. We all left the next day as better people, with a deeper respect for everyone there than any of us could have imagined. I often try to explain the experience to people, but realize that it falls short of doing the whole process justice. All I can say is that it changed me in a way I can't describe. I've had many people asking me what happens from here? What does "next on deck" mean? Honestly, I don't know where this is going, but I know it's going to be a hell of a ride.
 -
Get Hypoxic HYPEYE D PRO Remote Camcorder Indication and Control System Settle back with a cup of good coffee as this is going to be lengthy; the product does a lot more than meets the eye! I received my HYPEYE D PRO controller and expansion in the mail today; I was overjoyed. I knew it would be a good product, as I already owned two HYPEYE MINI camera indicators. Just in case you ve been in the air too long, don't fly a camera, or simply haven't paid attention to technology, the camera control protocol known as LANC or (Local Area Network Control) is not a part of the crop of new camcorders being issued by Sony (or Canon). LANC is a tape-based protocol, and none of the new camcorders are tape-based, but rather are Hard Disk Drive (HDD), DVD, or Flash memory-based in design. Tape is very much on its way out, and will not exist as a common format in the foreseeable future. Absent a LANC controller, camera flyers struggle to start/stop the camcorder, not to mention the lack of an indicator usually mounted on a ring sight to indicate the status of the camcorder. True, a small mirror might be mounted on an altimeter to view camera status, and of course, camera flyers can cut large holes in their camera boxes for access to on/off switches and record switches, so it s not as if all is lost with the disappearance of LANC. But it is terribly inconvenient for most of us. Sporting a rubberized/weather proofed recessed button, this unit is solidly built. Early camera switches were fairly unreliable and affected by riser slap, high humidity, water, or the camera helmet being laid upon the ground and accidentally triggering the camera button. None of the above has any impact on the operation of the Get Hypoxic HYPEYE D PRO (damn, that s a long name) camera controller, due to the way it s built. Designed to be mounted either inside or outside the helmet, the switch housing offers a threaded hole in the back of the unit allowing for an included nylon screw to mount it to the outside of a helmet or other mounting surface. Even though this may expose the switch to a riser slap, the nylon screw should break/release in an entanglement. The switch housing is identical in size to the pre-formed port found in many camera helmets, allowing for a .65 to be drilled, allowing for a flush switch on the outside of the helmet with the bulk of the switch housing inside the helmet. Double stick tape or gaffers tape (not included) can be used to secure the switch to the helmet or mounting chassis. That s not all, nor is it the only way to be mounted - more on that later. I used the Expansion kit to set up my own switch access that is smaller than that of the HypEye, but it is not weather resistant like the HypEye switch. The switch housing has two rubber inserts for accessories available for the HYPEYE D PRO. The first is a female 3.5mm jack that allows for a debrief cable to be plugged into the helmet/switch directly, thus eliminating the need to remove the camera from a camera box/housing, or from a mounting plate in order to view the video. The debrief cable will likely be essential for any team camera flyer or AFF instructor wanting to debrief a jump. Not only is removing the camera from the helmet a pain, but also wears hard on the camera and box, this allows additional wear on the camera and helmet to be avoided. Techno-geeks will probably install a female 3.5mm jack in their helmet so the debrief cable doesn't need to be plugged into the HYPEYE D PRO switch housing too. I've already seen one team using the debrief port on an LCD monitor in the aircraft as they climbed to altitude for another jump, again saving the hassle, time, and potential error involved with removing the camera from the housing or helmet. If your last camcorder came with a four-contact 3.5mm cable (has yellow, red, and white connectors on the end) you won't need to purchase the HYPEYE D PRO DEBRIEF CABLE. The other rubber plug is an access port for the HYPEYE D PRO EXPANSION CABLE KIT. This is the kit that got me really excited about the unit because it adds so many features to the HYPEYE D PRO. In my opinion, this is what makes the HYPEYE so spectacular. The Expansion Cable Kit is optional at a cost of $29.00 USD. So what does the Expansion kit add? A plug that connects to an L&B; Optima audible altimeter. This allows a separate set of LED s on the HYPEYE indicator to flash when the Optima is triggered. The indicator will flash slow flashes at the first altitude set in the Optima, faster flashes as the second altitude is reached, and very fast flashes when the final altitude is reached by the Optima. This feature isn't only for the camera-flyer; deaf skydivers will find this feature very useful. Unlike the L&B indicator which is fragile and stiff, the HYPEYE indicator is on a flexible cable and can be mounted any number of ways to suit the users desire and need. Bite Switch input. Yup, the Expansion Kit allows owners to plug their existing 2.5mm bite switch cable into the system, triggering stills from a video camera. Some cameras can only shoot 3 stills during a jump, but camcorders like the Sony CX7 or HC5 may be turned into a still-only camera, allowing for reasonable quality stills to be taken with these small HD camcorders. External Switch/Remote Switch connection. This allows the rubberized nipple switch found in the HYPEYE housing to be bypassed and the system controlled by a third party switch. This is what I've done with my system. All electronics are mounted inside the recesses of my BoneHead Flat Top Pro helmet, and I've mounted my own softswitch on the side of the helmet. This is useful for custom buttons, but also would allow a pilot to trigger an exit camera or similar. Zoom Memorization. Ever gone on a jump only to find that the zoom button had been moved, and everything was blurry, deeply zoomed, or both? This feature tells the camera to be zoomed in at a user-defined point. This will hopefully reduce the number of absolutely ugly vignettes found in so many skydiving videos, allowing users to slightly zoom in past the point of the lens adapter rings. Remote on/off of camera functions. Imagine this; you re in the door of the aircraft ready to jump, and notice that you've forgotten to turn on the camcorder. The count begins as you yell WAIT! With the HYPEYE D PRO, pressing the switch will turn on the camera even if the on/off switch of the camera is in the off mode! (this is camera model dependent, and won't work with all cameras, but it s great with the CX and SR series cameras) A audio/microphone input rounds out this system very nicely. If the camera is in a typical housing, the internal microphone is buried, often under Neoprene or other material designed to securely hold the camcorder. An external microphone isn't only helpful, but essentially necessary for tandem interviews in this situation. Or you can just connect your ipod and burn to DVD for your 4way team with no post production work at all.Here is where users will find a weak point in the HYPEYE system; the installation instructions for the Expansion Kit recommend placing a dab of glue on top of the connector. After a quick call to Get Hypoxic I learned this was to prevent years of vibrations from inadvertently dislodging the cable. I needed to either use a hot glue gun or fingernail polish to create a bead on the cable once installed in the switch. It wasn t difficult, but I wondered why a swage or something similar wasn t molded to the otherwise well-designed cable. It would save users the headache of finding a glue gun or borrowing fingernail polish from someone. I used the hotglue, it was easier. See the GetHypoxic website for very detailed photos and instruction on how to achieve this. What's to love Weatherproof, recessed nipple button Audio/ Line-Level Microphone input Audible altimeter connection Super-bright LEDs Debrief port Zoom memory Bite Switch ready/input Remote control of all camera modes The camera connection side of the system is an AVRemote S cable system exclusive to Sony camcorders. What makes this unique is that these right angle cables will fit inside of most camera boxes where a straight connector absolutely will not. It s obvious that Get Hypoxic designed this connector and its slim profile, as the Get Hypoxic name is molded into the cable connector, as it is in the Expansion Kit fantail. The indicator side of this unit has several micro LED s in it. These indicate a number of different functions depending on the mode in which the camera is operating. Ready/Standby is indicated by a blue LED, Record indicated by a red LED, and warnings for batteries, sleep, error, or tape end indicated with a yellow LED. However, double-clicking the switch will put the camera automatically into different modes. Want to switch from video mode to stills only mode? No problem, just double-tap the HYPEYE switch. Wanna go from stills to playback? Same action. What's Not So Lovable: Big round cables are space-killers in tight helmets Zoom reset is slow Requires tools and additional adhesives for certain setups like the Expansion Kit Debrief port is part of switch, making it inconvenient for in-helmet setups PriceyWARNING: THESE LEDS ARE BRIGHT! Users may find them too bright if they're mounted close to the eye such as in a ring sight configuration. Using a Morse code-like tap sequence, the LED s may be dimmed in five different levels. (Out of the package settings are at the most dim preset) Military users will appreciate the exceptionally dim light in those covert training ops, and night jumpers will appreciate not being blinded by the camera flyer s indicators as well. These same LED s will also indicate altitudes triggered by the Optima, if the Expansion Kit is part of the setup. Be aware that the batteries in the Optima will affect the brightness of the altitude indicators. Camera status indicators are not affected by the Optima battery level. Speaking of military users, Get Hypoxic has said that they ll soon have an armored, aluminum billet version of the HYPEYE available at a higher cost. (comes stock set at a low brightness level, for your protection) There are some things I wish were different. The HYPEYE uses a very high quality silicone-covered rounded cable. A flat cable would have been more appropriate given the very tight confines of most helmets, yet it should be mentioned that flat ribbon cable is very expensive and not terribly durable. The molded fantail/distribution point of the Expansion Cable kit is also somewhat larger than I would have liked. In my Tonfly CC1, it took significant effort to keep the cables from impacting how the helmet fits, but it is possible. As my TonFly helmet does not have a ring sight (used for wingsuit camera) I appreciated the very stiff plastic in the indicator side of the HYPEYE D PRO. The user-programmable zoom depth is slower to get to zoom point than it should be, yet this is camera-dependent, so not really GetHypoxic's fault. Cable size aside, I feel this is one of the best-designed tools available to camera operators in any sport application where space and control are considerations whether they re using tape-based HDV camcorders, newer DV cams, or AVCHD camcorders. Congrats to Get Hypoxic for presenting a very well thought out, fully-featured product that skydivers can actually use, that seems to be very tough (I have only 22 jumps on my system). This tool is 110% real as far as I m concerned. It s hot, not hype. Get the Hypoxic HYPEYE D PRO Remote Camcorder Indication and Control System at Get Hypoxic or most skydiving gear outlets. HYPEYE D PRO-$99.00 MSRP PRO Expansion Kit-$29.00 HYPEYE D PRO Debrief cable kit-$10.00 The Hypoxic Hypeye D Pro is also available on Amazon: Hypoxic HYPEYE D Pro Remote Camcorder Indication and Control System.
-
 ByNadene Beyerbach Want to improve your skydiving skills, but don’t have thousands of dollars to blow in the wind tunnel? Try yoga! Yoga has been around for thousands of years. What is commonly considered yoga in Western society is actually Hatha Yoga, focusing mainly on physical yoga postures. However, yoga is not just a series of postures or poses. Yoga is meant to integrate the mind, body and spirit, and to achieve a state of enlightenment. For skydiving, this means developing your insight, awareness and focus, as well as balance, flexibility and stability. Not just an effective exercise for improving skydiving skills, yoga is also extremely convenient to practice at the dropzone. The simplicity of yoga means that you can do it virtually anywhere and need very little to get started. The most important thing you can do is wear comfortable, loose fitting clothing that you’re able to move easily in. A yoga mat is ideal, since it will allow you to grip with your feet and go deeper into the poses. However, poses can be done on grass, a towel or a blanket, if necessary. You can experiment with different yoga postures, breathing, meditation and relaxation exercises to see how they affect your skydiving. Try the following to get started: Complete Breath: A complete, “three part” breath consists of deep, continuous breathing through the nose. It is referred to as “three part” breath because you breathe first into the throat, expanding through the ribs, then deep into the belly. Slowly exhale, drawing the belly back in. Slow, deep breathing both energizes the body and calms the mind. Try using complete breathing when you’re concentrating on flying a body position that requires a lot of effort. For a relaxed and stable exit, you can also try exhaling completely as you leave the aircraft. Meditation/Relaxation: Simply close your eyes and focus on your breathing. Let your mind go blank. As thoughts enter your mind, just return your attention to your breath and let the thoughts float away. Meditation reduces stress and tension and improves concentration. Try meditating for a few moments on the ride to altitude before you begin any mental rehearsal. This will allow you to visualize your intention for the jump from a calm and centered place. Physical Postures: There are many different types of yoga postures to explore. Standing poses, seated poses, forward bends, back bends, twists, inversions (upside down poses), balance poses and relaxation poses are just some of the different types of postures. Let’s take a more in-depth look at sun salutations, twists, inversions and balance poses. Sun Salutations are an ideal warm-up for skydiving. Sun salutations are made up of a series of poses, flowing continuously from one move to the next. As you move through the poses be sure to hold each one for a few deep breathes. Begin by standing with your shoulders back and body properly aligned (Mountain Pose). Taking a deep breath, stretch your arms overhead, then fold forward at the hips and let your head hang toward the ground (Forward Fold). Step back with your left foot into a lunge. Follow with your right foot, pushing into your hands and feet to create an inverted V shape (Downward Dog). Lower your body toward the ground (Plank), then straighten your arms, looking up and lifting your chest toward the sky (Upward Dog). Now return to your starting position: Push back into Downward Dog, lunge on the right leg, fold forward, and finish by inhaling deeply in Mountain Pose. Try this sun salutation before gearing up for your next jump. You’ll instantly increase circulation, mobility, and flexibility. Twists offer back relief for skydivers who do a lot of bellyflying. If you spend a great deal of time arching, try a Half Spinal Twist to release tension in your back. Sitting down, bend your right leg to bring your foot toward you. Lift your left foot and place it on the outside of your right knee. Looking over your left shoulder, place your left arm behind you and your right arm around your knee. Breathe deeply and twist through your spine. Along with relieving tension, spinal twists will increase flexibility in your back and neck to help you further improve your RW skills. Inversions are poses performed upside down (with your feet above your head). They improve circulation and increase the flow of oxygen throughout the body. Inversions allow you to become comfortable in an upside down position and to work on balance with your center of gravity above your head. To try the Half Shoulder Stand, lie on your back and pull your knees to your chest. Support your back with your hands and straighten your legs above your body. Your weight should be on your shoulders, not your neck. Breathe deeply and remain strong through your core to help you balance. The Half Shoulder Stand is an excellent inversion to work on if you’re learning to fly head down. Balance Poses deserve special attention when it comes to skydiving. There is no better way to develop balance, strengthen stabilizer muscles, and increase mind-body awareness. Warrior 3 (also known as Airplane) is a good pose to begin working on your balance. Start by standing tall and lifting your arms to shoulder-height. Place your weight on one leg, lifting the opposite leg and leaning forward until you form a straight line. Hold for a few deep breathes, then repeat on the opposite side. Holding a balance pose will quickly make you aware of your alignment and body position. If you do any freeflying, adding balance work to your routine could give you the edge you’re looking for. Enjoy your adventures in yoga! Test out the suggestions in this article and continue to experiment with different postures to find what works best for you. Always work at your own pace and stop if you experience any pain or discomfort. Remember, it’s about the journey, not the destination, so don’t worry if you’re not an expert right away. To learn more, consider attending a yoga class or inviting an instructor to teach at your dropzone. With practice you’ll start to notice improvement in your skydiving skills through increased mind-body awareness, balance, focus and control. Keeping your body strong and flexible will also help to protect you from hard openings and not-so-perfect landings. Blue skies, or as we say in yoga, Namaste. Nadene Beyerbach is a skydiver and yoga instructor. She is certified by Body Training Systems as a Group Centergy instructor and is a member of the Canadian Yoga Association. Learn more about skydiving specific yoga at Flex Fly.
 -
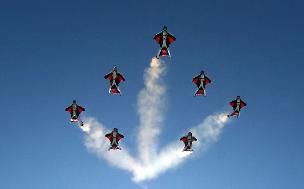 Skydive Airkix is proud to announce that the UK members of the BIRDMAN Factory Team – Top Gun (www.BirdManTopGun.com), will be permanently based at Skydive Airkix in Peterborough, with immediate affect. In line with Skydive Airkix’s commitment to bringing world renowned coaching and instruction to the UK, Top Gun members, Macca, Duncan, Steve and Dave will be available for first flight courses, coaching and load organising – for beginners, right up to already advanced wingsuit pilots. The team have a fleet of demo suits for instructional use or rental and whether you’re a solo flyer looking to join a flock, or a team looking for some coaching, you’ll find everything you need at our dedicated wingsuit facilities based at Skydive Airkix.Macca from the team comments, “As the team is spread across Europe, we have spent a long time floating around. It’s great to finally have a place to call home, especially one that offers £15 lift tickets and up to 15K of altitude! The team are really looking forward to making Skydive Airkix the number one choice for wingsuiters in the UK and offering skydivers quality wingsuit coaching and instruction” In addition to regular wingsuit activity, Skydive Airkix will also be holding dedicated wingsuit weekends this year, along with instructional evening seminars. The current requirements for wingsuit jumping in the UK are 500 jumps, or 250 in the last 18 months - at CCI’s discretion. There are also certain gear requirements, but if you’re interested in getting your flock on, get in touch to organise your flight: [email protected]
 -
Fredericksburg, Va., Jan. 11 -- Things are looking up for the skydiving industry. According to the U.S. Parachute Association (USPA), America's premier skydiving association, 2007 made history as the year skydiving took a dramatic turn upward as one of the most popular adrenaline sports in the nation. USPA reports that 2007 was one of the safest on record with 18 skydiver fatalities -- out of over 2.5 million jumps. That number surpasses a 1962 record for skydiving's fewest accidents. Considering that in the early 1960s, USPA was only about 10% of its current size with 3,353 members and the aggregate number of jumps was considerably less than today's 2 million+ jumps, this record stands out even more as a testament to years of strict safety standards, training policies and programs. "This has been a group effort," said Ed Scott, Executive Director of USPA. "USPA policies have been applied by every skydiver in the nation, as well as coaches, instructors, safety/training advisors, drop zone owners, riggers, pilots, manufacturers and gear distributors. We should all take pride in the strides we have made in skydiving safety the past half century." And the good news doesn't end there. Significantly more people are taking up the sport. USPA membership soared in 2007, with a significant number of new skydivers joining its ranks. USPA ended 2007 with more members (31,264) than the previous year for the first time since 2002. The total number of new members in 2007 was 4,900, reversing a five-year downward trend; it's also the highest number of new members since 2003. The skydiving industry also saw an unprecedented upturn in the number of skydiving licenses issued by USPA; more than at any point in the last four years. USPA's 2007 Skydiving Review with additional stats/demographics will be released in early spring. USPA is dedicated to the promotion of safe skydiving nationwide, establishing strict safety standards, training policies and programs at 200+ affiliated skydiving schools/centers. The Federal Aviation Administration recognizes and supports USPA's successful leadership role in the self- regulation of skydiving. USPA hosts the National Skydiving Championships, the sport''s largest and most exciting annual competition, October 18-25, 2008 (Skydive Arizona). Information: 1-800-371-USPA, http://www.USPA.org. Source: U.S. Parachute Association Discuss it here!
-
 Back in 1936, snow skiing was a sport that only a few dedicated individuals pursued. The primitive conditions practically guaranteed that anyone foolish enough to ski would eventually be injured. On the snowy slopes of a Vermont mountain, just that happened to Charles Minot "Minnie" Dole when his ankle snapped in a fall. His friends went for help, but eventually had to toboggan him off the slope themselves, using a piece of sheet metal roofing material as an improvised rescue sled. The ankle fracture was so bad that Dole was told he would probably never ski again. A few months later, one of Dole's friends who had helped him down the mountain was killed in a ski racing accident. Dole was not only determined to recover and ski again; he was also determined to do something about making skiing safer. He co-founded the National Ski Patrol in 1938, modeling it after some of the informal ski patrols at local ski areas and grafting on some of techniques used by Swiss ski instructors and mountain guides. After World War II, skiing boomed in popularity, equipment and services improved, and the National Ski Patrol is now the largest winter safety organization in the world. To this day the NSP serves an invaluable function in preventing or responding to skiing accidents with special training and equipment. Skiing and skydiving have many parallels. They evolved over roughly the same time frame, and advanced rapidly after World War II. During the sixties and seventies national organizations formed, services improved, training became professionalized, and equipment evolved rapidly. Similar sports enjoyed similar progress. Swimmers and surfers have trained, well equipped lifeguards. Climbers have mountain rescue specialists and spelunkers have cave rescue organizations. But for some reason skydiving has never evolved an organization dedicated to preventing accidents, responding to them where and when they happen, and evaluating them to learn how to make the sport safer. Considering the frequency of skydiving injuries, there is an obvious need for trained response. All outdoor sports share some commonalities. Each takes place in an unusual environment, with specific environmental hazards. Each has specialized equipment and skill sets. Each has an undeniable element of risk, yet those risks are not mysterious and can be mitigated through proper preparation. Skydiving can learn from other forms of outdoor recreation and develop a national training program to prepare drop zone staff and volunteers in accident prevention, preparation, and response. Such an organization, modeled after the National Ski Patrol, may be just around the corner. This December Skydive Arizona will host a training course that will also serve as an opportunity to examine what is needed to bring this sort of organization to your drop zone. At the core of the program will be a Wilderness First Responder course from a nationally accredited organization. The WFR was chosen over standard EMT training because of a heavier emphasis on trauma, and on managing it without access to immediate ambulance response, since many DZs are a long ways from the nearest ambulance. In addition to the WFR, the course will include modules on skydiving specific problems such as aircraft and fuel safety, removing skydiving equipment from injured jumpers, recovering cut-away equipment, problems involving tree, water, and power line landings, and incident investigation. Relationships with the local emergency medical system and with the FAA will be reviewed. Recognizing and mitigating hazards will also be discussed, as will incident reporting and the possibilities offered by building up a national database of accidents. The course, scheduled for December 1 - 10, 2007 is open to any interested skydivers, regardless of their experience in the sport. Slots are limited and must be reserved well in advance. The course cost is $600, which includes instruction, materials, and training aids. Graduates will receive WFR certification from the Wilderness Medicine Institute of the National Outdoor Leadership School. For registration details, go to www.airdropassist.org/wfr.htm The course cost does not include lodging or food. Participants will be engaged in classroom activities all ten days, and actual skydiving is not on the agenda. If you bring your rig, plan on jumping before or after the course. Camping is free. Inexpensive team rooms or bunks are available on the drop zone. There are several hotels nearby. For lodging and travel information, go to www.skydiveaz.com. For other questions, contact Bryan Burke at: [email protected].
 -
Wikipedia describes the phenomenon as follows: 'Risk homeostasis is a psychological theory developed by Gerald J.S. Wilde, a professor emeritus of psychology at Queen's University, Kingston, Ontario, Canada...the theory of risk homeostasis states that an individual has an inbuilt target level of acceptable risk which does not change. This level varies between individuals. When the level of acceptable risk in one part of the individual's life changes; there will be a corresponding rise/drop in acceptable risk elsewhere. The same, argues Wilde, is true of larger human systems (e.g. a population of drivers).' Through the comparison of relevant Sky Diving statistics, recent studies in the field of risk homeostasis show that the introduction of a safety feature does not necessarily improve the generalredistribution This phenomenon, due to a type of 'risk redistribution', was researched by Sky-Diving academics who spotted strange fatality rate fluctuations migrating back and fourth between open canopy fatalities, 'no pull' and 'low pull' cases and others, depending on the adoption of certain safety feature at that time. The study employed the Cypres (Cybernetic Parachute Release System) Automatic Activation Device (AAD) as an example, which is specifically designed to deploy the reserve parachute at the required altitude, in the event of timing neglect by the jumper. Risk homeostasis shows that varying individual trends toward risk adjustment become displaced by the introduction of a safety feature. The concept results an inadvertent psychological neglect of natural automated adjustments to these barriers. This leads to a generalised lowered level of risk, instead of unique to the area in which the safety feature is applicable. The risk then becomes distributed across parameters and is referred to as 'accident migration'. When this in turn was applied in relation to levels of perceived risk, it was noted that; 'Skydivers adjust their behaviors to maintain arousal at optimal levels'- a behavioral modification linked to inadvertent risk displacement. Levels of risk vary from one person to another and are adjusted in accordance so as to maintain a level of comfort most acceptable to the individual. On the other end of the spectrum, however, more risk can be introduced if the threshold is too low in comparison to what the individual is used to. In other words, the tendency to take less precaution in presence of a safety measure does not necessarily result in a balanced distribution of risk and as a direct result, risk is inadvertently lowered in other areas. Where there may have been a decrease in 'low pull' or 'no pull' fatalities due to this mechanism, the open canopy fatalities increased, and the introduction of open canopy safety features appeared to coincide with an increase in landing fatalities. A correlation can be seen concerning traffic accidents, where most of the evidence for risk homeostasis originates. Studies have shown that 'pedestrians are twice as likely to be killed in a painted crosswalk as in an unmarked one' and that driver side airbags in actual fact contributed to driver behaviors that increased accidents and fatalities. Needless to say, the field of skydiving is a popular target for academic study on the topic of researching risk whether perceived or real. Sensation seeking provides the blueprint for studying risk-taking in social, legal, physical and financial for the sake of such experience. It has been found that personality types within this sphere can be genetically characterized by an elongated version of the DRD4 gene which regulates the production of dopamine and effects pleasure and emotion. It should therefore come as no surprise that when comparing skydivers to non-skydivers it was found that the former have lower levels of death anxiety, which in turn lends itself to higher levels of target risk. It was also found that Skydivers accept significantly higher levels of risk and that 'More experienced skydivers monitor the risk perceptions of the beginning skydivers in their subcultures.' Further research will be conducted into how to enforce precautionary measures within the parameters of these findings. To read the original case study visit www.vicnapier.com Original Authors:Napier, Vic Pima Community College Findley, Carolyn Sara (Casey) Auburn University Montgomery Self, Donald Raymond Auburn University Montgomery
-
 About 2500' feet above the floor of the Grand Canyon. Tied in with 5/8 rope, bits of aluminum and steel cable holding five cameramen in place on sheets of ice/soggy snow, we're shooting the Performance Design Factory Team (PDFT) as they become the first terrain swoopers in the world flying inside the Grand Canyon. The Factory Team are the most experienced and talented athletes in the skydiving world, having won world event competitions as a team and as individual athletes. Our task was to shoot in places no camera has ever accessed, and this project was a techno-marvel at every twist and turn in the several miles of dirt road (and sometimes virtually no road) it took to arrive at shooting locations. Unable to physically scout the area, Global Positioning Satellite (GPS) systems were used in conjunction with specific areas that were discovered, chosen, and mapped out using Google Earth Plus by the Factory Team members. None of the five jumpers had ever been in this remote area far from the beaten path of tourists. Satellite phones were used for general and emergency communications, as there is no cellular coverage (or power of any kind) on the site. Base camp was established at the Cameron Trading Post on the Navajo (Dine) reservation in north central Arizona with a 2.5 hour drive to each shoot location. The nearest airport is Tuba City, AZ to the north, and further to the south in Flagstaff, AZ. The video aircraft based themselves out of the Tuba City airport. The shoot is in a remote area, miles from the nearest power outlet or electronics store, temperatures are hovering just below freezing at noon, and zero/single digits in the early morning and late afternoon. We needed cameras that would be capable of moving 120mph and manage fast exposure changes from bright sunlit sky and clouds to the dark recesses of the Grand Canyon, that could manage the cold and wind. No stunt nor camera setup could be rehearsed, as helicopter time is exceedingly expensive for this no/low-budget project. The stunts the skydivers performed were dangerous enough on level and familiar ground. Flying wings of nylon and string at speeds approaching 100 mph while skimming the rocky soil for distances of up to 150 feet, then at ground level, executing a nearly upside down barrel roll only a couple of feet from the edge of the Grand Canyon would be considered an extreme act of athleticism. Place cameramen with shoulder cams directly beneath them that need to avoid the canopy pilots, and the canopy pilots need to avoid the cameramen; even the slightest strike could easily kill the canopy pilot and toss the tethered camera operator over the edge. Due to the budget, location, availability of crew, and the speed that setups had to happen, we chose to use HDV camcorders on this shoot. The Factory Team was already prepped up for the HDV format, as they currently all fly Sony HVR-A1U camcorders on their camera helmets. Each member of the team flies a camcorder to shoot POV, while team photographer JC Colclasure flies over, under, and around the team to capture an overall perspective from the air. All aerial camcorders are fitted with Raynox HD wide angle lenses, while the helmets are fitted with CamEye and Brent's Sights camera indicators and sight rings. Four Sony HVR Z1U, three HVR V1U, and eight HVR A1U camcorders were used on the shoot, plus two Canon XLH1 camcorders used for long shots using a variety of lens lengths. The lighter camcorders were critical, as they needed to be quickly rappelled into the canyon strapped to our backs, quickly set up on canyon ledges when positioned by helicopter, and able to be flown on lightweight jibs over the canyon. Dave Major aka "Clem", a Hollywood stunt coordinator and stuntman managed the harnessing and safety tie-downs; Jack Guthrie, a DZO (Drop Zone Operator) and safety officer oversaw all safety aspects of the shoot, managing the cameramen on the rim of the canyon and the cameramen flying in the Cessna 185 aircraft and helicopter. Each on the shoot was required to wear a harness at all times, and be secured from at least one point for each shoot position. Cameramen Matt Wimmer, Joey Allred, Dave Major, Jack Guthrie, and boom operator Benjamin Bressler are all accomplished skydivers, some with great BASE (Building, Antenna, Span, Earth) jumping skill, which was of great benefit when consistently 2000 feet from the ground. The Performance Designs Factory Team all wear Skysystems or Wes Rich camera helmets, Bonehead ShuVue (foot camera mount), and belly cams to capture a variety of air-to-air angles. Shannon Pilcher, Ian Bobo, Jonathan Tagle, Jay Moledzki, and JC Colclasure are all not only world record canopy pilots; they're all very accomplished aerial camera operators, and have flown for a wide variety of television broadcasts as aerial camera persons. We used lightweight tripods with Bogen 516 and 526 heads were used on a variety of sticks, but at all times, the kit was kept exceptionally light. The tripods were used for the long ground-to-air shots, as the lenses were fully extended, and needed to be kept tight on high speed objects, virtually invisible to the naked eye. Upon reaching a preset altitude of approximately 3000' AGL (Above Ground Level) the pilots would pop skydiver smoke, allowing them to be more easily seen and tracked. We also used the Gorillapod camera grippers/mounts, wrapped around rocks, scrub, and lighting poles to capture unique angles without being seen on in the frame of other camcorders. Audio Technica wireless and microphones were used mounted to KTek Graphite boom poles. We chose the wireless system as both receiver and transmitter were battery operated, and the KTek Graphite pole was chosen for past performance in exceptionally cold environments such as the Sundance Film Festival and various snowboarding competitions. Aluminum boom poles become loose, and are exceptionally cold to hang on to for any length of time. Gear planning easily became the greatest apparent hurdle. Being as remote as we were, batteries were critical for lighting, sound equipment, camcorders, wireless systems, radios, and satellite phones. For this reason, we choose to carrry four LitePanels and lightweight stands, we planned on weighting the stands with stones slung in canvas bags. Water could not be carried to the cliff ledges for reasons of weight and safety. Stones were also chosen to weight down the jib assembly used over the edge of the cliff. RedRock Micro MicroFocus' with 18" whips were used for tripod mounts on both dolly and tripod setups, adding in speed of focus during pans. We also needed to be assured of on-site monitoring, and Adobe/Serious Magic DV Rack HD served the purpose quite well. Cameras above or on the rim in sunlit areas were fitted with 4X4 polarizing filters for shooting against the sky, into the sun, and for intensifying colors against the sunlit canyon walls, causing the parachutes to brightly stand out. Other challenges were picking up great field audio. Everything in the canyon echoes and rolls, and distances ranging from over a mile to mere feet made levels a challenge to control without using automatic level controlling. We didn't want to allow auto control, as the noise of the helicopter constantly triggered auto-level controls boosting noise as the heli flew farther and closer to our microphones. We used Audio Technica 4073 mics for rim-edge placement, hanging microphones off the rim into the middle of the canyon to capture the crack of opening parachutes and the sound of rushing cloth during wingsuit jumps and canopy deployments. We also wanted to capture the very distinctive sound of swooping canopies at high speed, both at near and far distances. For the near distances (less than five feet), we used Audio Technica 4053 hyper cardiods to block as much helicopter noise as possible. Camera operators are staged at three points in the canyon. Covering the landing area, in-canyon flight and terrain stunts required helicopter placement, as the bottom of the canyon and mid-points in the canyon could not be rappelled or fast roped, and while we could have BASE jumped into the bottom of the canyon, extraction still required heli time. At many points, the cameraman had to free-step from the helicopter to small rock areas, due to the helicopter not being able to set down in small spaces. This added to the importance of highly portable camera kits. The overall scale of the canyon is not to be underestimated. For this project, we all underestimated the scope of distance, and even though we had our longest lenses in place, shooting 2000 feet even on a rock-mounted and weighted tripod could become an exercise in hunt and peck to locate the skydivers when they were 5000 feet in the air moving at exceptionally high speed. There were occasions where we were separated by as much as 8,000 feet between the exit point and landing areas. We set each camera to capture a specific range of action, given the speed at which we had to capture the moving canopy pilots. The canopy pilots gave very accurate space limits within which they'd be flying, but no aerial stunt or precision flight could be predicted to specific marks due to winds. However, once near the ground, the canopy pilots flew their wings within millimeters of mark points. Cameras set to capture at full extension, super wide, tracking, and fixed closeups were designated prior to the jump/stunt. This makes for a wide selection of camera angles for the multicam edit, offering anywhere between 6 and 14 camera angles per stunt. VASST infinitiCAM in Sony Vegas 7 software was used for cutting dailies to get a glimpse of what we had in the can each night. Ultimately, we brought home more than 100 hours of footage between all of the camcorders on the shoot, in four locations over 6 days. Logging was managed with the Sony Media Manager for Vegas, allowing us to mark all dailies, access similar scenes, search by logged keywords, and create stunt folders. On site storage for dailies was captured to Western Digital "MyBook" 500GB external drives, connected to a laptop via 1394 connection. Only key scenes were captured for immediate review at various angles, to save time on the ground. Mornings started before sunlight, and the shoots ran straight into night, squeezing the last moments out of the golden hour, to create as many romance shots as possible. During one late afternoon stunt, the winds at 4000' AGL were significantly different than winds measured at ground level, and winds generated by the cooler air in the canyon. The canopy pilots were significantly blown off course by rogue winds, causing them to not only miss their pre-assigned marks, but put them at risk of not being able to generate enough drive to fly over and subsequently into, the Grand Canyon area. This added risk cost us a few camera angles since only two of the canopy pilots entered into the sight picture and frame boundaries. These sorts of challenges are common when working with unpredictable high speed sports, and camera operators need to be prepared to improvise if anything is to be captured at all. At the end of this segment of a much larger project, everyone was exhausted from the long hikes carrying gear, shooting in very cold conditions, and the long hours. As skydivers often say, "we had fun and no one died." That sums up the project quite nicely; we had a great time under adverse conditions, captured some incredible footage (have *you* ever seen a parachute fly upside down at ground level?), and put to bed the second segment of one of the most exciting chapters in this forthcoming feature-length project. For me personally, the greatest part of the entire experience is hanging out with my heroes in the skydiving world, learning new canopy techniques, and the opportunity to join my videocraft with my passion for skydiving. From my viewpoint as a videographer that skydives, , these two weeks have been similar to hanging out with Spielberg, Cameron, Coppola, or other great director. Except these guys fly. The great achievement wasn't just that we succeeded in capturing a once-in-a-lifetime experience, but that we pulled it off using small format gear, easily carried and packed from point to point in short periods of time, trying to pace the flights and lighting .Thanks to the light weight and maneuverability of the small-format camcorders, livin' on the edge may be dangerous, but missing the shot was never a worry. All photos in this article shot by Justin Carmody, Performance Designs photographer using Canon 5D and a bag of lenses. Screen captures from Sony Vegas 7. Additional video camera assistance and aircraft piloting from David Major, Michelle Knutsen, Jack Guthrie, Debbie Zimmerman, Mannie Frances, and Ryan Crissman.
 -
Para-Gear is interested in photographic submissions that you may have for the 2007 - 2008 Para-Gear Catalog #72. We have taken the time to briefly describe the format and certain criteria that we look for, in order to help you to see if you have something worth submitting. We have included examples of previous catalog covers for your reference. http://www.dropzone.com/cgi-bin/gallery/imageFolio.cgi?direct=Article_Photos/Para_Gear_Covers Over the years Para-Gear has used photos from all of skydiving's disciplines. We do not have a preference as far as what type of skydiving photo it is, rather we look for something that either is eye-catching or pleasing to the eye. In light of the digital age, we are also able to use photos that in one way or another may be less than perfect and enhance them, removing blemishes, flipping images, altering colors, etc. The following are preferences. However what we prefer and what we get, or choose, are not always the same. If however we came down to a choice between two photos of equal quality, we would opt for the one that met more of our preferences. We typically prefer that the photo be brighter. In the past we have used sunset photos and even a night jump photo, although by and large most of the photos are daytime. We like the subject of the image to have contrast with the background. Subjects that are wearing brighter more colorful clothing usually stand out more. We prefer to have the people in the photo wearing equipment since that is what we sell. Headgear, goggles, jumpsuits, altimeters, audible altimeters, and gloves are all good. We also prefer to see skydivers wearing head and foot protection. We do not print any BASE jumping nor any Tandem photographs. No submissions of these will be accepted. We are not interested an any photos of individual or groups of skydivers standing on the ground Our basic criteria is as follows:Vertical Format. The front and back covers of the catalog are both in a vertical format. We can use a horizontal (landscape) shot, as opposed to a vertical (portrait), and then crop it as long as the image lies within a vertical cropping. Photo Quality. The front and back cover shots will be printed as 8 ½ x 11 in 300 dpi format. Any film that can hold its quality up to this size and print dpi is fine. Digital format or slide film is preferred. In the event of a final cover choice, we prefer to be sent the original digital image or slide for getting the best quality out of the image. Back Cover Photo. The back cover photo is no different from the front except in one respect. We need to have room on the left side of the image for the thumb index. In the past we have taken images and been able to horizontally flip them thereby creating this room. Originality. Anything that is original, eye-catching, or makes someone take more notice of the catalog covers is something we look for. It could be a photo from a unique camera position or angle, a scenic skydive, shots under canopy, landings, etc. We look for photos that have not been previously published and most likely would not accept them if they have, as we want a photo that no one else has seen yet. We also do not want any photos that are chosen as the front or back covers to be used for other non Para-Gear advertising for a period of one year. Para-Gear offers $500.00 each for both the front and back covers we choose. Our current deadline for catalog cover submissions is March 31st 2007 . Sending sample pictures by e-mail to [email protected], or by mail to the address below are both fine. If you are sending sample digital pictures please note that they do not need to be in a very large format. If we like the sample picture we will then ask you to send the higher quality original. We will return any mailed in photos or slides after we are done with them. Please feel free to contact me directly with any questions.
-
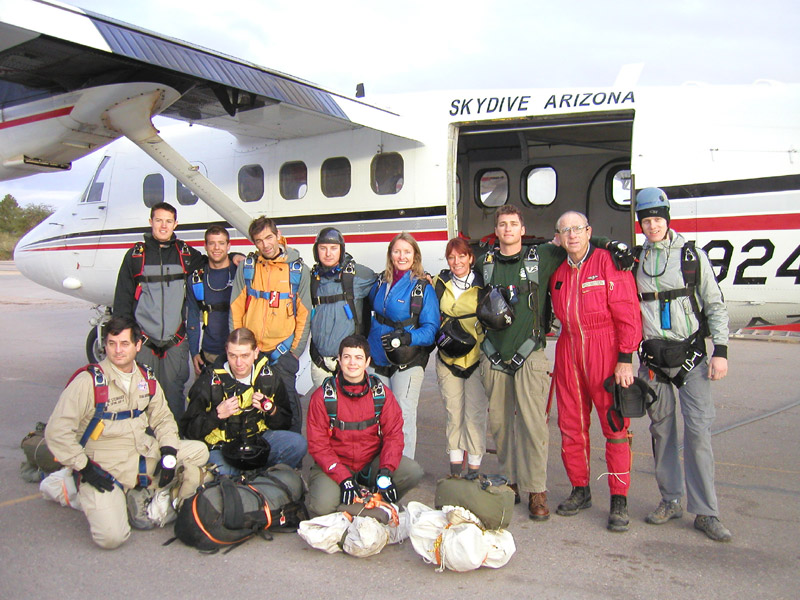 Imagine throwing a weekend supply of backpacking gear out of an airplane, then jumping out after it and hiking around the desert for a couple of days. That's what the nine students in Airdrop Assist's Basic Boot Camp did in December, at Skydive Arizona. Why did they do this? It was to train for future remote-area humanitarian expeditions with volunteer organizations like Remote Area Medical and its "RAM Airborne" team. The Volunteer Training CourseOf course, this is not all they did. The desert airdrop and hike was preceded by two and a half days of training activities, in the classroom and in airplanes. There were prerequisites too, in order to ensure a basic incoming skill level, including: a USPA-B or equivalent license, a 150 jump minimum, basic first aid certification, navigation skills, outdoor living, and more. Instructors covered old, sometimes forgotten, skills plus new ones; including: spotting, landing accurately and softly under a low-loaded wing, packing round parachutes, and preparing cargo bales for airdrops. In the short 4 ½ day period, students covered a lot of ground, during 12-hour days, and wanting more. The first course of this type was held in March 2006, where another nine students got to experience the thrill of pushing out cargo, jumping into remote sites, and testing their hop and pop skills. The revised syllabus maintained the core content of cargo bale handling but included a more physically challenging aspect, including a 12-mile hike with full backpacks, a 1,300 foot climb against the clock, and outdoor living for the duration of the course. Courses are planned to be held at least twice per year, roughly in March and December. The dates may vary, with the next one scheduled from March 9-13, 2007, and all events are posted at www.airdropassist.org/schedule.htm Humanitarian Aid - At HomeAirdrop Assist is a newly-formed nonprofit school, aimed at meeting the gap between volunteers and the rigors of remote-area volunteerism, among other things. Given the fact that the majority of Americans are overweight, a person's ambitions may not meet the standards imposed by a harsh environment; some people have it, others need to work toward it. This school is here to bridge that gap. The potential volunteer is someone who savors the outdoors, accessible only by airdrop in some places, and who is willing to endure hardship while providing humanitarian aid to those in need. It is a privilege to be in the position to provide care for another person, and an adventure when you add skydiving. Airdrop Assist seeks to train volunteers who can provide a wide variety of humanitarian aid; this aid begins at home, with local volunteerism. In addition to remote-area aid, local drop zone care is another area of concern. Work is being done to create a higher standard of safety on the home front. As part of this, the well-established "Wilderness First Responder" training program is being proposed for this fall, at Skydive Arizona, geared towards skydiving-related injuries. In coordination with members of drop zone operations, such as Skydive Carolina and Skydive Arizona, we are seeking ways in which to establish training and certification programs, along with practical protocols and procedures, which proactively deal with emergency care during skydiving activities, through a network of volunteers. In addition to the Wilderness First Responder training at Skydive Arizona, Skydive Carolina has been actively developing procedures and protocols, for medically and non-medically trained members of their drop zone, to use in the event of an emergency. The goal is to develop a globally acceptable program, which can be adapted to the distinct needs of differing drop zone operations and skydiving events. Both of these programs are under development and are seeking ways to increase support and to research ways in which to make the training, protocols and procedures effective at drop zones worldwide. More Information and More Ways to JoinVolunteerism with Airdrop Assist and Remote Area Medical, a.k.a. RAM, are not limited to airdrop activities in foreign countries. RAM holds medical clinics year round, focused around Knoxville, TN. For more information on this and other clinics held by RAM, go to www.ramusa.org Airdrop Assist also offers many other opportunities to get involved. Being a new nonprofit organization, all skills are needed, in order to make the school a success. This is an exciting time in skydiving and enthusiastic, creative volunteers are in high demand - in the air, on the ground, and over the internet. Also, for anyone who has an old skydiving rig, or other gear, an easy way to get value out of it is to donate it! Let Airdrop Assist find a way to put your gear to use, towards a humanitarian purpose. For more information, contact Airdrop Assist at [email protected] or visit our website at www.airdropassist.org. Students: Marc Bucaro Kyle Ewing Anne Helliwell Raistlin Majere Paul Maresca Matt Oakleaf Victoria Smith Jaap Suter Alex Volk Instructors: Bryan Burke Karen Hawes Larry Richardson Rene Steinhauer Volunteers: Stuart Pearson Gabe Restine
 -
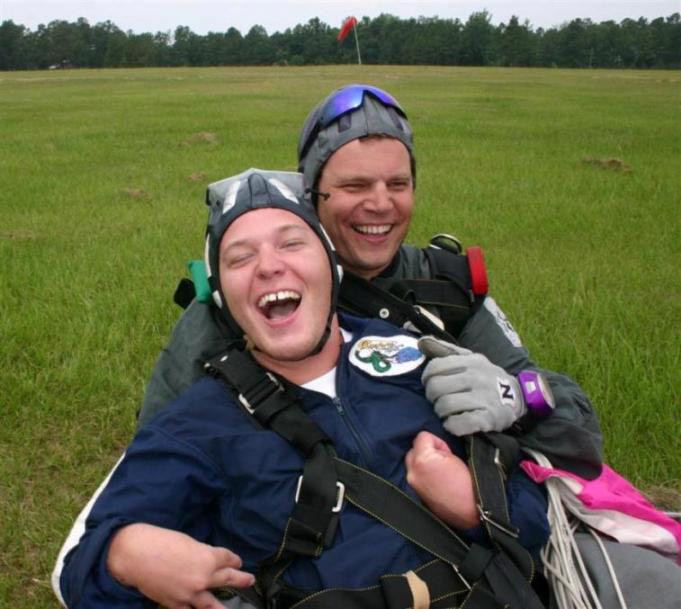 Most of us have no idea what amazing feats we are capable of. However, when we face life's challenges we are able to achieve personal breakthroughs that can result in permanent change. Leaving the perceived security of an aircraft in flight and leaping into the clear blue, arriving safely back on mother earth, creates a perfect opportunity for such an experience. A first jump tandem student can shatter self-doubt, conquer long-held personal fears, and can sometimes be launched into a journey of self-discovery. I have had the honor of being the trusted host of many such experiences as a tandem instructor: a mother who nearly died during childbirth living her life to the fullest while her baby girl looks on; a close family member conquering a fear of heights she had allowed to control her since childhood; a young man with a crippling disease busting through the limits imposed on him by social stereotypes; and many who are completing yet another item on their "list of 100 things to do" in their lives. Each one of them are real people who not only achieved a significant personal transformation, but taught me a little about myself as well. Some of you may be smiling and nodding your head in agreement; for those of you who aren't familiar with this experience, I hope this article will result in significant personal rewards for you as well. The journey toward what I call "the transfer of ownership" starts at the introduction. I ask my students why they want to make a skydive - nearly every student will eventually tell me something that I can use to make their experience more personal, and sometimes one of the most significant experiences of their life. At that time, from the student's viewpoint, the lion's share of "ownership" of this skydiving experience belongs to me. After all, I am the one teaching them how to be my partner in the air for those few short minutes, emphasizing the simple things they can do to help make our skydive as safe as possible, and calmly addressing the inevitable flurry of questions that come from the doubt surrounding any first-time experience. Eventually, my students trust me with their life - although it may go unsaid, they all know that is ultimately true. Sometimes a student can be "high maintenance." Kay (not her real name) is my best example. The wife of a local doctor and mother of a young daughter, Kay was introduced to me by her husband. As our conversation progressed, she found out that I am a part-time skydiving instructor, and I asked her to join me for a tandem jump. Her body language was unlike any I had ever seen; she began to withdraw from the outside in - something serious was going on in her heart and mind that I thought would surely keep her on the ground. Shortly afterwards the torrent of questions began . . . she researched the risks of skydiving on her own by reading internet content including dropzone.com incident forum posts, USPA fatality reports, and soaking in every over-hyped reality TV segment involving a skydiving incident. Between personal conversations, phone calls, and emails she must have asked me over a hundred questions - some of them very difficult to answer. I could have easily become frustrated, but the reality of the situation was that I really wanted Kay to make a skydive; I would answer every single question if it meant there was still a chance she would jump. To keep me sane, I repeatedly imagined seeing the joy on her face after landing. After all, that was the place both of us were working so hard to reach, and it motivated me to keep answering all of Kay's questions. The day came for our jump, and our pre-jump training and ride to altitude was filled with increasing fear on her part, eventually manifesting itself in physical shaking after I hooked her harness to mine. Despite her obviously being incredibly scared, she never once stopped moving forward toward the door. I asked her if she was ready, and she nodded her head. Exit and free fall were uneventful, and after the canopy opened cooperatively at 4500 feet, her demeanor was surprisingly calm. I could tell she did not like heights by the way she kept leaning her head back, but she continued to respond to all of my gentle instructions. After a smooth seated landing I unhooked her harness and she began to sob loudly, which I realized was an emotional release of years of pent up fear of flying and high places. After she calmed down a bit and I pulled her to her feet, there in front of me was the real life expression of joy that I had imagined to keep me focused through months of questions. At that point came the transfer of ownership - I directed her attention to the blue sky above, and explained to her that this entire experience happened because she chose to rise to the challenge of an opportunity to conquer her fear. She had indeed trusted me with her life, but more importantly she had trusted herself to do something she knew would be one of her most fearful yet critically important experiences. This was not about me at all - it was all about her. Now that I had painted that clear picture for her, full ownership of the experience was hers alone. I found out later in a letter from Kay that her first husband had been killed in an aviation accident nearly fifteen years before, and since then she had been deathly afraid of flying. Somehow she recognized skydiving as an opportunity to confront and conquer that fear, and knew that she could trust me to be means to that end. The letter, too personal to include verbatim here, is one of the greatest personal rewards I have received in 22 years of skydiving. You see, even though you the instructor are the one with the ratings, the high degree of skill, the confidence in the process, and literally in charge of every student skydive, in the end it is all about the student. Through their trust in you they briefly place their lives in your hands because most of them know that although skydiving is a calculated risk, on the other side of that risk lies some sort of unseen benefit that can empower them in ways they never imagined. Now before you lies the choice of arriving for work at the drop zone to haul human cargo for hire, or to arrive in expectation of whose life you might be able to change, along with the possibility that yours might change a bit in the process. There are many more souls out there like Kay, for whom the breakthrough of a lifetime is just one leap of faith away from becoming reality. John Hawke is an active duty U.S. Army Sergeant Major and part-time Tandem and AFF Instructor at Raeford Parachute Center in North Carolina.
 -
 Most skydivers exercise some form of mental preparation on the way to altitude. What most do not realize is how incredibly important this is. The mental state that we are in prior to exiting the airplane determines how we respond to any given situation, and this response is the most important contributing factor in how the situation ultimately evolves. In other words, mental preparation is every bit as important as a pin check. What is Meditation?It must first be clarified that the specific method of meditation is not important for the purposes of this discussion. There are many ways to attain a calm internal dynamic, and there are no wrong ways to meditate. The goal of meditation is simple. We are striving to calm the mind, and develop a state that is devoid of thinking so we may calm back down to our state of basic sanity and health. This can be achieved through sitting practice, or through deliberate focus of attention toward a simple task such as walking or yoga. All of these pursuits result in the same kind of brain activity, which happens to be the direct opposite of the fear state. In the emotional experience of fear, the brain becomes unbalanced. Certain parts of the cortex become deactivated, while others, most notably the older structures such as the Amygdala, become awakened. These ancient brain areas cause an unconscious escalation toward a preparatory "sympathetic" response, rather than the healing, balancing forces of our "parasympathetic" systems. Interestingly, the first part of the brain to show significant diminished functionality during a fear response is the pre-frontal cortex. This is the newest part of the brain, responsible for higher cognitive functioning and is the source of willed action. This means that when we are afraid, we are no longer in control of our actions. Our choices gradually become dominated by our old brain that only knows three things: Fight, Flight and Freeze. In walks the "parietal lobe" of the brain. Located on the crown of the head, this is the spatial orientation area. When the parietal lobe is working to help us orient ourselves in the world, we are not in a state of rest. When this part of the brain is under-stimulated or deprived of input, however, the quiescent (calming) systems of the mind and body take over to cool us down. When the visual information coming into the visual cortex is interpreted by the parietal lobe, there are aspects of our visual experience that have not changed in the recent past. These aspects of our reality become "base frame", which is to say that we stop paying attention to them. When this occurs to a majority of the visual data, the parietal lobe is said to be in a state of "Deafferentation". (Newberg, 2001) Deafferentation may be the cause of the altered states reported by mystics and spiritual seekers of all cultures. The common denominator across all the spiritual practices is the lack of changes in the data set coming into the visual cortex. This is accomplished simply by gazing in one particular direction for a long period of time. When the parietal lobe is deprived of neural input, our parasympathetic processes begin to transform our state of consciousness, as demonstrated in brain scans such as SPECT and functional MRI. The resulting brain activity is most notably different from our normal waking consciousness, called "beta" activity. In fact, experienced meditators exhibit extremely balanced activity throughout the brain, referred to as "gamma synchrony" (Davidson, 2004). Further studies have shown that the balance of activity in the parietal lobe is significantly different from that experienced in "normal" consciousness (Newberg, 2002). The interesting thing about the results of the many studies on meditation is the fact that repeated exposure to the meditative state seems to increase the effect. Buddhist monks with considerable meditation practice showed a much higher level of gamma synchrony than subjects with no previous experience (Davidson, 2005). It seems that practice really does make perfect. What does this mean for you and me? These studies show that we are actually able to alter our brain's activity, and prevent stress from diminishing our cortical activity to the capacity of a caveman. All we need to do is take the time to practice a new way of operating our minds. Although there are many different methods of meditation, there are common aspects across the techniques that seem to create the most powerful effect. Following are some of the common elements. Minimal change to the visual field, eyes open Focusing on the breathing, particularly the out-breath Balancing the posture to prevent physical discomfort Letting go of thoughts as they come Returning to the present momentWhen you exit an aircraft in flight, you are going into battle. You must prepare in every way that you can to defend yourself against planetary impact. The most important tool of all is your awareness. When your mental speed increases due to fear or anything else, you are a danger to yourself and everyone near you. How you find your way to the meditative state is your business. Your rituals are your personal avenue to the calm state, and it will look different for everyone. All that matters is that you take the time before each jump to cool out and let go of your thinking. That way, when some unconsidered possibility comes your way, you are relaxed and in balance, ready for anything. BSG Portions of this article are excerpts from Brian Germain's new book, Transcending Fear, 2nd edition. For more information regarding meditation as a tool for fear abatement and performance optimization, go to: www.TranscendingFEAR.com
 -
The uninsured Relative Workshop will commence trading under the new name of the Uninsured United Parachute Technologies, LLC from 1 October 2006. This change will allow Bill Booth to gather his many existing companies under one name, and will allow the company to implement a new business model more inline with modern day business practices, which in turn will fulfill our future needs for growth and diversity. This change will not affect our day to day business with our customers, apart from a change in website address and email addresses which will be advised at a later date.
-
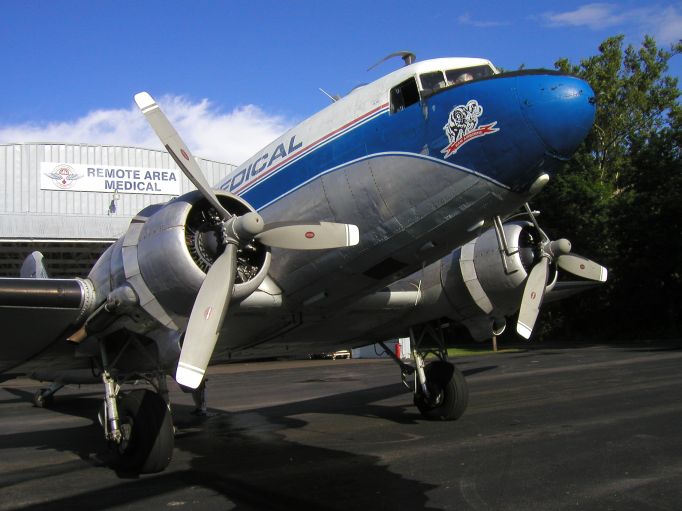 With all of the worldwide disasters happening, have you thought about joining in and helping out somehow? Skydiving skills, to reach people in isolated areas, are being used by Remote Area Medical, to bring in help where it is needed yet where it is inaccessible by conventional ground transportation. Remote Area Medical - RAM AirborneRemote Area Medical, RAM, has been providing humanitarian aid to people worldwide since 1985, with the airborne division currently on the rise and seeking skydivers. Founded by Stan Brock, from the show Wild Kingdom, RAM and its volunteers are “Pioneers of No-Cost Health Care” with well over 400 missions in the US and abroad. The first RAM Airborne mission was to Tennessee in 2005, proving that skydivers and cargo can be dropped into an unknown area, on top of a hill in the Appalachian Mountains. The next RAM Airborne mission is to Guyana in South America, to clear trees from existing grass runways; making them accessible once more by airplanes. From March 26 to April 9, RAM’s mission to Guyana will provide air-ambulance access to the people living in the nearby villages. This is a non-medical mission, but medical support is needed, in the event of an injury or medical emergency during the mission. An additional trail team is being recruited, not requiring skydiving skills, to re-clear a trail in the Amazon forest, connecting two villages to another airstrip which was repaired by a RAM team in 2004. This will be a physically demanding mission, to clear large trees and thick undergrowth, while living in a tent or hammock. Hiking through the Amazon forest is no walk through the park either, with machetes in hand and packs on your back; these are a few things to keep in mind, and a few things to savor, for those who want to come for the adventure. Skills Being Sought:Skydivers must have a B-license or better, with an average of 100 jumps as a minimum; good canopy control and a canopy wing loading of 1.3 or less are expected, because there’s no room for error, and no hospitals to go to if you biff your landing. As you may have guessed, no hook turns allowed. You bring in your own gear for camping, and you pay for your own airfare to and from Georgetown, Guyana – but it is tax-deductible, since it is for a humanitarian effort. It is the most direct way to give, by providing your skills directly where it is needed! RAM is also seeking people with medical skills, to handle any potential injuries that may happen, one per team at a minimum – more if possible – plus some basic medical supplies. The rest of the team is not required to be medically trained but everyone must be physically prepared – this is not your typical working-holiday trip overseas – it is hard work and it is worth it. Videographers are also being sought, to help document this first-time-ever event. Proof of skills will be necessary, to ensure one’s safety, and others’ as well; video cameras may also be provided, as details are confirmed. Videographers would be the first to land, then film the others as they land; the case-of-beer policy will be waived, mainly because there are no stores to go get any and no refrigeration either. If you or someone you know is interested – here are some things to begin doing: Work on hop and pop exits and accurate landings Gear up your camping supplies – for a two-week camping trip Get in shape – it’s a load of work and physically exhausting Join RAM as a volunteer – send an e-mail to karen @ karenhawes.com for further details, or go to http://www.karenhawes.com/ram/RAM-Mission-FAQ.htm RAM CampIf you want to work on the skills necessary for this type of skydiving mission, there will be a “RAM Camp” training program offered in mid-March at Skydive Arizona, prior to the Guyana mission from March 16 - 19, to hone or develop your skills in: Spotting, exiting and landing in unfamiliar areas Cargo-bail preparations and air drops Basic field-medical skills, stitching open-wounds, making traction splints Basic camping and navigation skills Other survival tips and tricks to know, plus pitfalls to avoid Prospective volunteers, who complete this course and display the necessary skill level required, will be selected over volunteers who do not. For more information about the RAM Camp, go to http://www.karenhawes.com/ram/RAM-Camp.htm This course will be taught by three RAM volunteers, with years of experience in the areas of skills being taught: Rene Steinhauer – Medical Aid in Remote Areas Bryan Burke – Cargo/Spotting/Airdrops and Navigation Karen Hawes – Travel Tips (for men and women) and Gadgets in the Wild RAM Camp InstructorsAll three trainers will cover their own areas of expertise, and survival skills training, based on actual in-field experience; with personal experiences ranging from domestic and international relief efforts, everyone has something to learn in this course. Here’s a brief background of each instructor: Rene Steinhauer RN, CFRN, EMT-P – Rene is a currently working as a flight nurse in Antarctica till February 2006. He has worked on humanitarian projects around the world and has also worked as a combat medic on the front lines in Iraq. He has trained civilian and military personnel in remote and combat medicine for years. He is also one of the founding members of RAM Airborne. Bryan Burke – Safety and Training Advisor at Skydive Arizona, with two decades in the sport and 3,200 jumps. Although he is known in the sport as the organizer of numerous boogies and competitions, he also has considerable experience with parachute testing, skydiving for the entertainment industry, and other applications that require precise airborne delivery. Most of his off-DZ time is spent kayaking, backpacking, or rafting in remote wilderness areas. Karen Hawes – A Systems Engineer at Lockheed Martin, with 500 jumps on 6 continents in 12 countries and at over 100 dropzones, she has been a RAM volunteer since 2004. She is the current RAM Airborne recruiter, with three missions to: Guyana (airstrip repair), Sumatra (tsunami relief), and Tennessee (first RAM airdrop mission). A fourth RAM mission to New Orleans is scheduled, for the second week in February 2006. She is also working on configuring solar power sources for hand-held electronic devices, to be used on remote-area missions. For More Information and to Sign-UpFor more information on the mission in March and the RAM Camp, go to: http://www.karenhawes.com/ram/RAM-Mission-FAQ.htm http://www.karenhawes.com/ram/RAM-Camp.htm Come One, Come All!If someone you know is interested, but not a skydiver, then now is the time to begin training and cap it off with one of the RAM Camps, to be ready for future missions. If you already have the skydiving skills, you can take advantage of this unique opportunity to add “Humanitarian” to your list of skills and world experiences.Find out more about RAM at www.ramusa.org and join the adventure!
 -
 When first learning to freefly the members of the Avalore Freefly School received a lot of 'coaching' from small freefly schools that offered little more than a good video of flailing attempts of headup flying. This gave them the idea of running a freefly school that provides a high level of customer service and support. They aim to help students with every aspect of their coaching trips from booking hotels to getting a reserve repack as well as supporting them after their coaching as much as possible. The school has spent a considerable amount of time improving their flying and coaching technique from the likes of Max Cohn, Chris Fiala and the UK Sports Council. They have developed numerous resources to help their students from written articles to training videos. As well as the normal coaching jump options the Avalore Freefly School (http://www.avalorefreefly.com) offers freefly courses aimed at beginner freeflyers as well as the more advanced freeflyer. The courses are for the individual wanting to learn to fly in a headup orientation or wanting to gain their BPA (British Parachute Association) FF1 qualification. Much like an AFF course, they are split up into levels to learn different skills. Courses usually last 4 days and consist of an average of 20 coached jumps, which can take you from having done no freeflying to having your FF1 qualification. The advantage of running courses is that as well as covering all the skills needed to fly in a headup orientation you also learn every other aspect of freeflying over the duration of the course. Everything is covered from exit orders, group separation and gear issues to planning successful safe freefly jumps with your friends. The courses include thorough briefs/debriefs, a copy of your coaching jumps on DVD and a comprehensive course manual covering everything you need to know. Your coach is always on hand after the course for continuous advice and support. The school has received excellent testimonials from their students all of which have returned or have booked to return in the near future. Some comments from their students are quoted below: Billy Gibbons, January 2006: "Contact was established quickly and maintained right through up until my visit, even with Louis taking time to offer hints and tips via e-mail for me to try at home and in the air which I found invaluable and which in my mind displayed excellent customer commitment." Kevin Dawes, November 2005: "During these jumps my coach quickly helped me overcome some of the bad habits I had obtained over the years. The detailed briefs he gave me before and after each jump helped improve my understanding a great deal. He also ensured that before we exited the plane I was in a relaxed state and was not rushing. This made all the difference and helped focus my mind." The Avalore Freefly School has locations in Ocana, Spain and also at the Black Knights Parachute Centre in UK. The head coach is Louis Harwood who is based in Spain and Rob McVey is the UK coach. All of the coaches have been trained as coaches by the UKCC. Coaches from the school Louis Harwood and Rob McVey train along with David Downham to form the Avalore Freefly team. They don't claim to be champions but enjoy competing and use it to improve their own skills and also their coaching. They believe you don't have to be a world champion to run a successful freefly school. They have worked hard to become good coaches and run the school the way they wanted to be coached when they first started. It goes to show that commitment and hard work does pay off! Feel free to contact the school to book your course or ask any questions you might have. You can also have a look at the website for more information. Louis Harwood Avalore Freefly http://www.avalorefreefly.com [email protected] (UK) 01212880618 (ES) +34662021951
 -
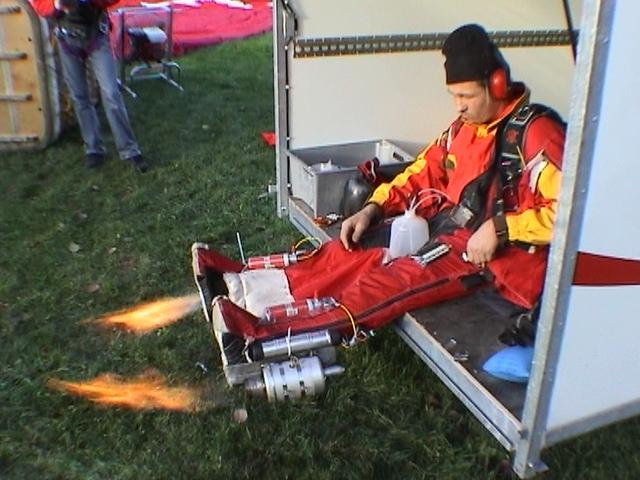 Tuesday 25th October 2005 - It was an untypical crisp October morning in Lahti, Finland when Visa Parviainen and the BirdMan Rocket Team attempted to make the first ever jet powered, birdman flight. The team set up camp in a small park in downtown Lahti, to prepare for the jump. The locals appeared to be not-at-all phased by the fact that some person was igniting a jet engine in their tranquil little park while they were walking their house pets. The launch platform selected for the day was provided by the famous Finnish Balloon Bros, who graciously offered their services for this historic event. Visa had designed a unique launch platform to hang outside the balloon to avoid 'cooking' the balloon occupants during the ascent to altitude from the exhaust gases of the jet engines. Once Visa had adorned his birdman suit and rig on the ground, it was time to test the rocket boots. Each jet engine provides around 16kgs of thrust, and is primed with a mix of butane and propane. Once ignited, the engines rely on a steady supply of kerosene (JetA1) fuel. This fuel burns at around the rate of 0.5 litres per minute, on full power, for each jet engine. The combined thrust of both power plants was calculated to be enough to sustain level human flight in a wing suit for an average weight skydiver. Once all the gear checks were made and rigorous safety procedures executed on the ground, it was time to inflate the hot air balloon for the ascent. The Balloon Bros provided a smooth and relaxing ride up to altitude over the beautiful vista of the humble town of Lahti in middle Finland. The Balloon ascended over the unpopulated areas around the lakes and forests of rural Lahti, visa primed and started the rockets prior to exit. After warming up the engines in the cold surrounding atmosphere, it was time to make the attempt. The high pitch whine of the jet engines sounded surreal in the calm stillness of the hot air balloon. Tensions were high that this attempt would be a successful one. It was time to go, as the fuel was rapidly running out, Visa gave the all clear sign (a quick grin) at around 2300m (7000ft) before 'edging' off the platform into the first rocket-powered-human-flight attempt. The exit was stable and on-heading, after attaining normal bird-man flight, Visa requested full power from the engines, which responded smoothly in horizontal acceleration. After checking the altimeter several times, it was apparent that there was no appreciable loss in altitude for this period of time. Visa next changed his angle of attack by redirected the thrust and changing his body position to attain vertical climb. This caused a loss in horizontal speed, and stalled (the body?). Recovering from the stall was made easy because of the agility of the human body to change flight profile easily. A few more attempts at this exercise yielded the same result. Pretty soon it became apparent that fuel consumption would soon terminate the level flight portion of the jump. Visa simply rode out the rest of the jump in level flight following the highway until the fuel ran out. Visa then continued in normal bird-man flight until deployment altitude. The deployment sequence was normal, and the landing was uneventful. The jump has proven empirically that level human flight is possible and sustainable using the combination of jet engines and a bird-man suit. The strength required to control level flight was relatively easy, and controlling the direction of flight feels surprisingly natural. The duration of flight is simply a factor of the consumption of fuel of the engine(s) powering the flight. Visa Parviainen has proven that with a little innovation, determination and courage it has been possible to realise the dream of uninhibited human flying.
 -
How do you perform a canopy controllability check? What happens if you flare too high? How do you prevent that? What is your decision altitude? What does that term mean? How do you recognize a good canopy? How do you get the slider down if it's stuck partway up? How do you deal with closed end cells? How do you fix line twist? How do you use your reserve if you need it? How do you handle a horseshoe malfunction? How can you avoid losing sight of your reserve handle during a cutaway? What do you do if you’re in the plane and your jumpmaster tells you "BAIL OUT ON YOUR MAIN?" What do you do if your parachute deploys prematurely in the plane? How can you prevent this from happening? If you find yourself still in freefall and the altimeter needle is in the red, what do you do? If you're in freefall, and you're unstable but you're still above 5000 feet, how do you get stable again? If you find yourself in freefall at 5000 feet and you're unstable, what do you do? What do you do if two canopies are out? How do you control them? When would you cut one away? What would you do if the pilot chute goes over the front edge of the canopy? How do you handle a hard-to-pull main ripcord? If you start having some kind of serious problem during the freefall, how do you stop the skydive? If you see your jumpmaster pull, what does that indicate? What do you do if you can't find the main ripcord? How do you steer your canopy? How do you flare it? How is your reserve canopy different from your main? How do you collapse your canopy after landing to avoid being dragged? How do you prepare for a landing in trees? Rough terrain? Water? How do you determine wind direction? What direction should you land in with relation to the wind? How do you find the landing area? What do you do if you realize you will not be able to make it back to the landing area? What is the hand signal for pull? Check-altitude? Legs-out? Hips-down? Relax? What is your pull altitude on this dive? What are the manuevers you'll be expected to perform on this dive? IF YOU DON'T KNOW THE ANSWERS TO THESE QUESTIONS, ASK A JUMPMASTER BEFORE YOU JUMP! REMEMBER, YOUR SAFETY IS IN YOUR HANDS.
-
INTRODUCTION TO SKYDIVING JUMP SEQUENCE: When jumpmaster says "GET INTO POSITION", take your position in the door. You should be facing forward, with your left foot on the edge of the door. Keep your back low to avoid snagging your rig on the top of the door. When you are ready to exit, turn to your right and shout "CHECK IN!" to your main side JM. The JM will respond "OK!" and nod his head when you are ready to go. Do the exit count - "Ready! Set! Arch!" On "Arch!" step to the left, out of the plane. Try to remain facing forward, and try to hit the wing with your pelvis as you leave the plane. Remember to ARCH! Count to four, maintaining a hard arch - "One thousand! Two thousand! Three thousand! Four thousand!" Do three practice ripcord touches - "Arch! Reach! Feel! Back to arch!" Check your altitude by turning your head to look at the altimeter on your left hand. Look at your main side jump master and shout your altitude at him - "Ten thousand feet!" Respond to any hand signals your main side JM gives you. Check your altimeter once every five to ten seconds, and shout your altitude to the main side JM each time. At 5000 feet, wave off once, then arch-reach-feel-pull. Hang on to the ripcord after the pull! Start counting - "One thousand! Two thousand! . . . . . . Five thousand!" to give your parachute time to open. Check your canopy to make sure you have a good parachute, unstow your brakes, and head back to the landing area. PERFORMANCE STANDARDS: Freefall awareness - Open your eyes and look around! Pay attention to hand signals. Altitude awareness - Check your altimeter once every 5-10 seconds, and tell your JM your altitude. Stability - Maintain the arch during the entire dive, especially on exit. Canopy control - Check your canopy upon opening, and listen to the radio during the descent. LEVEL ONE HINTS: To fix stability problems - ARCH! Check your altimeter at least once every five seconds. Time goes fast up there. Remember to keep your legs out. Don't let them collapse on your butt. REMEMBER THE MOST IMPORTANT PARTS OF ANY SKYDIVE: PULL! PULL AT THE RIGHT ALTITUDE! PULL STABLE! LAND SAFELY UNDER AN OPEN CANOPY! Before Level 1 Level 2 Level 3 Level 4 Level 5 Level 6 Level 7
-
FORWARD MOTION JUMP SEQUENCE: When jumpmaster says "GET INTO POSITION", take your position in the door. You should be facing forward, with your left foot on the edge of the door. Keep your back low to avoid snagging your rig on the top of the door. When you are ready to exit, turn to your right and shout "CHECK IN!" to your main side JM. The JM will respond "OK!" and nod his head when you are ready to go. Do the exit count - "Ready! Set! Arch!" On "Arch!" step to the left, out of the plane. Try to remain facing forward, and try to hit the wing with your pelvis as you leave the plane. Remember to ARCH! Count to four, maintaining a hard arch - "One thousand! Two thousand! Three thousand! Four thousand!" Do three practice ripcord touches - "Arch! Reach! Feel! Back to arch!" heck your altitude by turning your head to look at the altimeter on your left hand. Look at your main side jump master and shout your altitude at him - "Ten thousand feet!" Respond to any hand signals your MS JM gives you. When you see the "forward motion" signal (legs-out signal, moving away from you) do forward motion for six seconds - hands back by your waist, legs straight, toes pointed. After six seconds, return to a neutral arch. Don't bring your feet up too much! Check your altimeter. If below 6000 feet, shake your head - no more manuevers. At 5000 feet, wave off once, then arch-reach-feel-pull. Hang on to the ripcord after the pull! Start counting - "One thousand! Two thousand!" to give your parachute time to open. PERFORMANCE STANDARDS: Move forward through the sky by straightening your legs and bringing your arms back. Do three good PRCP’s to help you find the ripcord later. Pull at the right altitude. Maintain stability by keeping the arch. LEVEL TWO HINTS: To fix stability problems - ARCH! Make sure your legs are still out a little after each forward motion. Check your altimeter at least once every five seconds. Time goes fast up there. Your legs are 80% of your drive during forward motion. Make sure you get them out there. REMEMBER THE MOST IMPORTANT PARTS OF ANY SKYDIVE: PULL! PULL AT THE RIGHT ALTITUDE! PULL STABLE! LAND SAFELY UNDER AN OPEN CANOPY! Before Level 1 Level 2 Level 3 Level 4 Level 5 Level 6 Level 7
-
 Napoleon Skydiving Center: Level 1 - Free ArmThis dive is intended to be an introduction to skydiving. As such we will leave plenty of time to just arch and enjoy the experience. Concentrate on a good, relaxed arch, but don't forget to have fun. Remember to hang on to that ripcord at pull time. TLOs Perform a controlled exit. Exposure to continuous freefall. Heading awareness. Focused awareness and attention. Coordinated body movements with 3 practice pulls from free arm. Altitude awareness. Actual ripcord pull by 4000 feet. Dive Flow Running DescriptionHotel Check: Check In, look to left and wait for a nod. Check Out, look to the right and wait for a nod. Exit Count : On the C-128, the count is Prop, Up, Down, Arch. On the Twin Otter, it is Center, Out, In, Arch. In both cases the count should include both the verbal commands and the physical motions. Exit: Step off of the aircraft and push hips forward, chest forward, head back, and arms and legs to "boxman" position. HARM Check: Also called a Circle of Awareness or Circle of Observation. Heading, look forward and down at a 45 degree angle to ascertain heading. Altimeter, read the altitude on the chest-mounted altimeter. Reserve, look at reserve side jumpmaster and wait for a nod. Main, look at main side jumpmaster and wait for a nod. PRCT: A practice ripcord touch. Arch, insure a good arch at hips and chest. Look, tilt head to the right and look down the side of the body at ripcord. Reach, in with the right hand to place it over the ripcord handle while extending the left hand one foot over your head. Touch, recover to an arched position. Check, over right shoulder. Short Circles: Heading, Altitude, Reserve, Main. Performed throughout the dive to maintain awareness (indicated by the dotted lines on the dive flow). No nods from JMs. 5-5 Signal: An altitude awareness signal performed by the student at 5500'. The signal is given by closing the hands twice in quick succession. Pull: Arch, Look at ripcord, Reach for ripcord with right hand while extending left hand over head, Pull ripcord, Arch, Check over right shoulder for pilot chute launch. Primary Canopy Check: Performed five seconds after the Pull. The main canopy is checked overhead for Shape (rectangular), Spin (not spinning), Speed (floating, not falling), and Twists (spread risers and kick out). Release Toggles: by grasping them and pulling them quickly to the waist. Secondary Canopy Check: Slider Down, Endcells Open, Rips/Tears, Broken Lines. Controllability Check: Execute a turn in each direction and then a flare. Canopy Control: Locate the Airport and then the landing area. Fly back using the halfway down, halfway back rule. Watch your jumpmasters canopies. Setup For Landing: The landing setup consists of three legs: Downwind: Starting at 1000' fly to the downwind side of the target. Base: By 500', begin crabbing across the wind downwind of the target. Final: By 200', turn into the wind and fly towards the target. Once on final, no turns in excess of 45 degrees should be attempted. Prepare to Land: At 50', feet and knees together, toggles at ``full flight''. Flare:: At approximately 10', bring both toggles smoothly to your crotch, keeping your feet and knees together. If the flare occurs prematurely, slowly raise the toggles to your stomach, then re-flare at 10'. PLF: Parachute Landing Fall. Keeping feet together and hands in, roll with the landing taking the force on the fleshy parts of the body (feet, calves, thigh, butt, back/shoulder). Collapse the Canopy: by reeling in a toggle and running to the downwind side. Field Pack: the canopy, turn off the radio and AAD, return to the student packing area with the jumpmasters. Return: the helmet, goggles, altimeter, jumpsuit and radio. Congratulations You've just made your first skydive! Hand Signals Level 1 Level 2 Level 3 Level 4 Level 5 Level 6 Level 7 Level 8
 -
 Napoleon Skydiving Center: Level 2 - Body AwarenessNow that you have your feet wet, we will start working on trim maneuvers. There are a lot of things to accomplish on this level, so don't waste time geeking the camera. Once you are under canopy, try a few spiral turns (above 1500' please). TLOs Maximum free arm time. 3 PRCTs. Heading awareness during freefall. Trim control or body awareness exercises. Relaxed, arched body position through entire freefall. Pull by 3500 feet, look over right shoulder to observe pilot chute launch. Dive Flow Running DescriptionHotel Check: Check In, Check Out. Exit Count: C-182 Prop, Up, Down, Arch; Otter Center, Out, In, Arch. HARM Check: Heading, Altimeter, Reserve JM, Main JM. PRCT: Arch, Look, Reach, Touch, Check 3 times. Short Circles: to maintain altitude awareness between maneuvers. Team Turn: initiated by looking over the arm in the direction of the desired turn to pick a heading refrence. Then bend his/her upper body 20 degrees at the waist in the direction of the turn. At the same time, drop the shoulder the turn is moving toward by 2-3 inches. Keep hands and arms still -- all motions are preformed from the waist. As the desired heading is aquired, return to a neutral boxman position. Forward Motion: initiated by extending legs (straightening them at the knees) while simaltanously bending arms at the shoulders to form a 'lazy W'. Hold for 3 seconds and return to a neutral boxman position. 5-5 Signal: at 5500 feet. Pull: Arch, Look, Reach, Pull, Check at 5000 feet. Primary Canopy Check: Shape, Spin, Speed, Twist. Release Toggles Secondary Canopy Check: Slider, Endcells, Tears, Lines. Controllability Check: turns and flares OK. Canopy Control: halfway down, halfway back. Setup For Landing: Downwind at 1000', Base at 500', Final at 200'. Prepare to Land: at 50'. Flare: at 10', feet and knees together, PLF if necessary. Collapse the Canopy, Field Pack, and Return. Level 1 Level 2 Level 3 Level 4 Level 5 Level 6 Level 7 Level 8
 -
TURNS JUMP SEQUENCE: When jumpmaster says "GET INTO POSITION", take your position in the door When you are ready to exit, turn to your right and shout "CHECK IN!" to your main side JM. The JM will respond "OK!" Do the exit count - "Ready! Set! Arch!" On "Arch!" step to the left, out of the plane. Count to four, maintaining a hard arch. Do one practice ripcord touch - "Arch! Reach! Feel! Back to arch!" Check your altitude. Look at your main side jump master and shout your altitude at him - "Ten thousand feet!" Your main-side jumpmaster will give you the left turn signal. When he does, look left, then turn left and face the reserve side jumpmaster. Check your altimeter. Your reserve side jumpmaster will give you a turn signal, either left or right. Look in the direction you want to turn , pick a landmark, and then turn 90 degrees towards it. Check your altimeter again. If below 6000 feet, shake your head - no more manuevers! At 5000 feet, wave off once, then arch-reach-feel-pull. Hang on to the ripcord after the pull! Count to five then check your canopy. PERFORMANCE STANDARDS: Do slow, controlled turns in each direction. Make sure you stop where you want to stop. Maintain good stability throughout the dive. Maintain altitude awareness by looking at your altimeter after every manuever. Respond correctly to all signals. Solo stable ripcord pull at the right altitude. Fly your canopy back to the LZ and land with minimal radio assistance. LEVEL THREE HINTS: To fix stability problems - ARCH! Remember - your body follows your eyes. Look, then turn. Keep your legs out and steady! Unwanted leg movement can keep you from turning. REMEMBER THE MOST IMPORTANT PARTS OF ANY SKYDIVE: PULL! PULL AT THE RIGHT ALTITUDE! PULL STABLE! LAND SAFELY UNDER AN OPEN CANOPY! Before Level 1 Level 2 Level 3 Level 4 Level 5 Level 6 Level 7
-
 Napoleon Skydiving Center: Level 3 - Release DiveThis is the last of the two jumpmaster levels. If things go well, your jumpmasters will let go of you and you'll be skydiving unassisted for the 5-5 and pull. Stay relaxed and maintain a good arch. Pay careful attention during the pre-jump gear checks since you will soon have to know how to do one on your own. Likewise begin observing the packing procedure. Under canopy you should try a stall above 2000'. After you successfully complete this level, you should become a USPA member by filling out the application provided at manifest. TLOs Leg awareness and control modes. Heading maintenance. Hover control. Unassisted solo pull at or above 3000 feet. Dive Flow Running DescriptionHotel Check: Check In, Check Out. Exit Count: C-182 Prop, Up, Down, Arch; Otter Center, Out, In, Arch. HARM Check: Heading, Altimeter, Reserve JM, Main JM. PRCT: Arch, Look, Reach, Touch, Check. Toe Taps: Tap toes together twice to insure leg awareness. Short Circles: to maintain altitude awareness. Hover Control and Heading Maintaince: using principles of turning and forward motion. 5-5 Signal: at 5500 feet. Pull: Arch, Look, Reach, Pull, Check at 5000 feet. Primary Canopy Check: Shape, Spin, Speed, Twist. Release Toggles Secondary Canopy Check: Slider, Endcells, Tears, Lines. Controllability Check: turns and flares OK. Canopy Control: halfway down, halfway back. Setup For Landing: Downwind at 1000', Base at 500', Final at 200'. Flare: at 10', feet and knees together, PLF if necessary. Collapse the Canopy, Field Pack, and Return. Level 1 Level 2 Level 3 Level 4 Level 5 Level 6 Level 7 Level 8