Search the Community
Showing results for tags 'freefall photography'.
Found 11 results
-
 IntroductionTaking photos while skydiving is easier today than it has ever been, yet doing the job properly remains serious business. Camera technology marches ceaselessly forwards, and while the gap between the products aimed at the casual consumer and the lofty professional is narrowing - any freefall photographer that considers themselves proper job will very likely rock a stand-alone stills camera as part of their setup. Try as you might - you will never be this cool.Action cameras are great. Their small size, plus both the features they present and the quality of media they capture make them highly useful for everything from skydiving to attaching to your cat to find out where it goes at night. However - any occasion you have to directly compare the images recorded by these teeny wonders with those of a more traditional camera will highlight the superior quality a dedicated stills unit has to offer. The exponentially multiplying capacity of digital memory means that with a GoPro or whatever, you can just set it going at some point before the start of your jump, forget all about it until at least ten minutes after you finish packing then sift through an ungodly amount of chaff later in search of the choicest shots to share about the place. Everybody knows this is cheating though, and that photos created serendipitously by a piece of gadgetry that happens to be attached to your forehead is not your work - but is in fact the subtotal of all human endeavour leading up to this exact point, where you got lucky. A stills camera is the tool of the craftsperson and must be activated manually when something awesome happens. There are a few choices available for this, all of which involve using your mouth to activate the camera and get the job done. As with a lot of things in skydiving, people sometimes feel very passionately about what they believe to be correct tool for the job and will offer to fight you to the death for besmirching their good word by thinking differently - and camera switches are no exception. While all pretty straightforward to operate, they each have some subtle strengths and weaknesses so a little forethought might help you arrive at what is best for you. This man is called Trunk. Trunk runs a company called GetHypoxic. If you are building a camera platform or simply wish to geek out about skydiving technology - this is your guy. Bite SwitchThe bite switch is either straight or L-shaped with a section somewhere in the middle that you hold between (specifically) your front teeth and bite softly to operate. The Good: Good Feedback: Of the choices available a bite switch provides the most satisfying little clicks to reassure you that you are getting shit done. The Bad: - Head Movement: Operating a bite switch involves moving your jaw a little bit to bite down, which can put a visible wiggle in your framing - particularly if you are capturing video. - Moisture. If you eventually chew through the plastic casing, condensation or saliva can get inside and short out the connections. Blow SwitchThe blow switch is a small unit about the size of your thumb that you mount to the outside of your helmet. The part that goes into your mouth is a straw-like tube that you blow into to activate the camera. The Good: - Durability. With no wires and such directly in your mouth there are fewer parts that are subject to moisture or wear, and you cannot damage it by biting too much. The Bad: - Low Feedback. With nothing that clicks actually pressing against any part of your mouth you do not receive any direct indication of operation from the device itself. - Breathing. The action of blowing into a tube to depress the button can potentially disrupt your breathing, and vice-versa - having to breathe at some point can interrupt your photo taking. - Gunk. Clean it, you filthy animal. Tongue SwitchThe tongue switch is usually L-shaped. You grip it between your teeth wherever it feels most comfortable and depress a little button with the tippy end of your tongue. The Good: - Separate Actions. By holding the switch with one part of your mouth and operating the button with another, this option has a sensible tactile nature. - Flexibility. You can hold this switch anywhere amongst your teeth that feels right for you. The Bad: - Due to the available mobility, the internal wiring can wiggle loose and the switch possibly wear out over time. - Moisture. As with the bite switch - if you eventually chew through the plastic casing, condensation or saliva can get inside and short out the connections. - Hilarity. If you use a tongue switch you will quickly grow very, very tired of jokes about your increased sexual powers - from pretty much everybody. A tongue switch and a bite switch respectively. Photographed on a moist houseplant. This is me. The truth is that all these devices work perfectly well. I have a tongue switch now because I have always had a tongue switch. I don’t remember why that was my choice and yet I see no reason to change it. Every now and then someone will tell me it is a worthless piece of shit good only for the bin, yet I rarely miss a photo. There is immense satisfaction to be found in ‘getting the shot’ and if you are serious about the role of aerial photographer a good stills camera is essential. High pressure situations like freefall turn small issues into bigger ones, and although just a small element your mouth switch is an important piece of your camera helmet. One that works well for your needs over something not-quite-right can be the crucial difference between kicking ass or not kicking ass much more often than you think.
 -
 A beginners guide to filming competitive 4-wayThis article is for jumpers that already have some experience flying camera and are trying to expand on their knowledge of how to film formation-teams in a competition setting. I will focus mainly on 4-way, because I believe it to be the most difficult FS discipline to film (aside from VFS), due to the many different exits and faster key speeds. However, once you have a firm grasp of shooting 4-way, the same principles can be applied to 8-way and larger formations. During a competition, whether it be a local meet or the nationals, it is vital that you give yourself all the advantages you can to do the job right. It is advisable that you jump with two cameras with differing wide-angle lenses. Film the team with the tighter view in mind, so if a grip goes out of frame, you can always revert back to the other camera with the wider view. The difference between first and second place can come down to only one point. So our goal is to have an “NJ free” (Non Judgeable) competition for all 10 rounds. If at any time during a jump a grip goes out of frame, the videographer can cost the team a point or more. Jumping with two cameras is not necessary for training, however you want to do a few training jumps before a meet with the exact set up that you are planning on using. This may expose any flaws or issues with your equipment. Training should be more difficult for you than competition. Push yourself to fly close to the formation. Train with your back up wide-angle lens, this will force you to be closer and more aggressive in getting the shots you need. This will make every competition feel much easier. Do not be afraid to try new things. Sometimes we have to leave our comfort zones to learn something that may benefit us in the long run. Climb OutIn most cases the camera flyer is in charge of the spot. Not having to worry about this little detail allows the team to focus on their jump. As you climb out on the camera step, think of flying your body as soon as you expose yourself to the airflow. Even though you are on the airplane, miss-presenting yourself to the wind can make your job a lot more difficult. You can practice climbing around on the airplane while it is parked. Get a feel for where everything is. Continue to practice until you can climb out of the plane in a smooth and controlled manner. Speed will come with time. Do not forget to practice climbing back into the plane. Sometimes you will find yourself climbing out right as the red light turns back on. If possible, one of your teammates can block some of the wind and help you get back inside. Remember to become familiar with different aircrafts when you travel to another drop-zone to train or compete. Freak OutNever trust an exit count! It is easy to get impatient on the camera step, waiting for the team to get ready. Teams can sometimes take a while in the door to get ready, especially if they are trying something new. Do not interpret a “wiggle” as a count. Be patient and watch for other signs like a helmet releasing a head jam. Every team’s exit count is different. Before every jump, most teams will take the time to dirt dive and practice their exit from a mock-up. You can learn a lot about the team by just simply watching them on the ground, so take as many opportunities as you can to learn the exit count and timing. Leading or Peeling?The exits covered here are from an otter, a left-handed door. Keep in mind that your relative position to the team is much closer on the aircraft than what it will be in freefall. You will need to create this gap quickly during the exit by falling slow. This is where camera wings and strong legs can be very helpful. Teams and coaches prefer the leading exit over the peel exit, because it gives them a great view of their timing, presentation, and heading. This method is much more conducive for the video debrief. For this exit I have my left foot on the camera step and my right hand on the handle. (When you have your right foot on the step, you expose more of your body to the exiting team.) After the team has given the count and is in the process of leaving the airplane, I find it helpful to try and run my right hand across the fuselage. I try to feel the rivets of the plane as I kick off the step. This helps ensure that I am in the correct position relative to the formation. As for your timing on this exit, you will know you have left too early when you can see the bottom of the airplane, and you will have left too late if you make contact with the team. For all exits, this is where your timing becomes crucial. Peeling is usually considered the safer choice of the two exits, because you leave right after the team. This way, you will not leave too early because of a misinterpreted count and you do not have to worry about the teams burble. For this exit, I have my right foot on the step with my right hand on the handle. I swing my body back so that my left foot is touching the fuselage. Now all I have to do is wait for them to come out the door. Leave with the last person and follow the team down the hill. Remember to present your hips correctly into the relative wind and keep the team in those cross hairs. Chill OutAfter the exit, all you have to do is keep the team’s grips in frame for the next 35 seconds. Remember that the different formations rarely stay in one place. As the team transitions from one formation to the next, you may have to adjust your own relative position to the team to keep them all in frame. Improving your individual flight skills will allow you to make these necessary corrections quickly and without thought. Although the “hard part” is over, you still have to be in the right position to get a judgeable video. Being close enough is the first part, but probably more importantly is being “steep” enough. Your angle in relationship to the formation is crucial. The steeper you can get, the better. It is very difficult to see all the grips when you are shallow. This is especially true on exit. If at any point, other than the exit, you can see sky, you are not steep enough. You should also only be able to see the top/back of the team’s helmets (no faces). The distance from the team will vary on the size lens you are using. An additional detail to pay attention to is the background. As the videographer, you can make the judge’s job easier by turning to a heading with a solid background, such as a forest, lake, desert floor, etc. Multicolored backgrounds, such as buildings can make the image very distracting and the formations harder to judge. Doh!Making contact with the formation can occur either on exit or in free fall. We want to avoid this scenario at all costs; however, accidents can and do happen. If you find yourself falling towards a formation, get as big and flat as you can! The last thing you should do is ball-up. Your natural reaction is to protect yourself, but by doing this you will only make things worse. Not only have you sacrificed all your lift and will now impact the team with greater speed, you have also given up on the chance that your airflow may be returned to you as the formation continues to move to the next point. I think that it is a good idea for camera flyers to understand what the team is exiting and how the formation will fly. I believe that a deeper understanding is necessary than just to know whether a formation is long or round. Being able to anticipate a formation’s movements, direction, and timing will greatly improve your video quality. Be pro active! Ask your team what formations they are going to perform. It will take some time, but being able to “speak” a little 4-way will not hurt. You can educate yourself on these formations by reviewing the IPC dive pool online. Memorize how each formation flies as it comes out the door; more importantly, think about how they might block your airflow. As the team debriefs their jumps, you should do the same. Take a look at your own timing, framing, and distance. Strive to make each video jump better than your last. Competition vs. TrainingWhen it comes to competition camera flying, there is a big difference between a “Gun for Hire” and a Teammate. In order to make this transition, you need to change your approach and mind-state from just being there for the ride, to being part of the action. As a teammate, you are taking on much more responsibility than a “gun for hire”, such as: archiving and cataloging all media footage, taking pictures, submitting photos to magazines and sponsors (if applicable), checking in with manifest for calls, spotting, chasing down cutaways, etc. Your team needs to be able to depend on you to do all of these things. Creating a great training environment becomes key. The more the team can focus on their training, the better. Helping a team to perform at their best can also aid you in achieving your best. Being able to perform at your peak during a high-stress competition can be very satisfying and rewarding. A positive attitude and an eagerness to learn is the start of becoming a good competitor. Hard work and embracing the training process is what will turn you into a great competitor.
 -
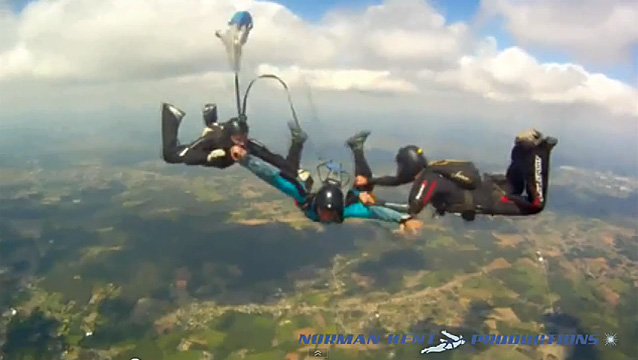 Norman Kent is not only one of the leading skydive photographers, but he is also an advocate for safety relating to freefall photography and the use of mounted cameras within skydiving. Norman has been jumping with a camera since the mid-70s when at only 25 jumps, he strapped on a Kodak Instamatic. Over the past 40 since, Norman has established himself as a leader in the skydiving photography world and is a well respected member of the community. In the past, we've run several articles relating to the safety of camera usage. In 2013, Melissa Lowe published a piece titled "Hey Bro, Check Out My GoPro" which tackled the topic and included conversation with Norman Kent over the potential safety issues of the camera. Since that time, the popularity of action camera use in extreme sports has skyrocketed, with more and more individuals focus being shifted towards the media capture side of the jump. Norman Kent has released a new video on his Youtube channel titled "Dangers of Being a Hero", in which he addresses and revisits some of the topics relating to action cam safety. In the video Norman runs through several series of video which illustrate just how easy it is for snagging to occur on the camera, and continues to express how despite the fact that many people feel as though the risks are exaggerated, that the incidents are occurring, even if only rarely has it thus far resulted in death or injury. "It's not the equipment itself, it's the attitude of 'it's only a GoPro'" Norman Kent continues on in the video to look at alternate mounts that can be used to minimize snag potential and further ways in which one may be able to increase their safety when flying under a camera.
 -
 The sleek, low-profile design, an easy-to-use system, so small it’s hardly there, and it’s oh-so-glorious high quality images – the Go Pro, Hero. In this social media society, the Go Pro is seductive, yet it’s oh-so-risky. For all you rebels at heart, those willing to learn, and especially those with less than 200 jumps - let’s lay down some tracks about being courted to don the camera. As an AFF Instructor and having been in the sport for nearly two decades, I have developed a hearty outlook about jumping a camera. But let’s slip on a bit of perspective mixed in with a bit of old school and new school thinking. So to round out this discussion, I interviewed two well-respected and well-known camera flyers about the topic – Norman Kent and Brian Buckland. Norman Kent, a life-long photographer and artist has been jumping a camera since 1975. Norman only wanted to try skydiving once. However, he experienced something so captivating, he saw an opportunity to capture the moments of beauty that was so different and so freeing in the sky. He admitted to be a fast learner, however he first strapped on a camera only having 24 jumps – it was a Kodak Instamatic with 126 cartridges. Norman didn’t have a skydiving photographer mentor. In fact, there weren’t many people strapping cameras on their heads in those days. It was an arduous and expensive venture for those willing to try. And for Norman, he made his own contraption by using a motorcycle helmet with no chin cup, wired a mechanical plunger, and confessed he didn’t know anything. So as he jumped his equipment, the air pushed the helmet up and the buckled strap choked him as the helmet moved all over his head and he fumbled in the sky. While these set backs were disappointing, it did not detour him. Instead, he was motivated to invent something that worked better - this approach lead to many camera helmet and jumpsuit innovations over his career, leaving a legacy of pioneering in camera flying. I asked Norman what he thought of today’s USPA’s current regulations for jumpers to wait until they had 200 jumps to fly a camera. “Regulation is a good idea, a good guideline,” he says. “It sounds hypocritical to say because I started with the ‘yahoo’ approach, but it’s wise to wait.” I’ve known Norman for a long time. I’ve seen him jump enormous contraptions carefully constructed upon his head. He’s a proficient and a well-respected camera flyer and we talked how different it is today with the Go Pro being so small. I ask him if he sees any dangers. “It all comes down to the attitude of the jumper,” he begins. “Because the Go Pro is small, it’s inviting people to use it who aren’t even in photography. It’s [jumping a camera] not so simple and there are dangers involved.” Norman and I both agreed that there is a shift in thinking in skydiving from the renegade days of the past. The development of tandem jumping and social media have greatly changed the image our sport, attracting more types of people to experience skydiving that the thinking of the past has to change. Norman elaborates, “People learn so differently that I’m not pro-regulating, I’m pro-educating. We need to develop a training or an awareness program [about jumping a camera.]” Although he recognizes the dangers happening, he also sees this as an opportunity for the sport. “This is an opportunity for coaches and instructors, for inventors, for schools…” Norman is currently working on a project for a You Tube production geared towards camera flying educational purposes coming out later this year. Let’s bring it back in the day where these young lads photographed below are sporting some serious state-of-the-art camera gear in 1988. Brian Buckland comes from an entirely different background. Brian made his first jump in 1994 and didn’t jump a camera until 5 years later and racked up about 500 jumps. Brian’s philosophy was to become a proficient flyer first; so he logged about 200 belly jumps, then learned how to freefly. During this time he notes that he was becoming more aware of his routine with gear checks, canopy skills, and landings. Finally the time came and he strapped on his first camera – a Canon Rebel 2000, with film. Brian went to Radio Shack after buying an off-the-shelf flat top camera helmet to wire up a shutter release. He admits to being nervous since his routine greatly changed with having to be concerned with battery life, clean lenses, and correct camera settings, in addition to checking his gear and high fiving everyone. When he landed from his first jump, he looked over his wares and was surprised how well they turned out. He submitted them and they were published. “I learned about photography after the fact [of getting the first photo published]. So I went to a continuing education course for photography and started translating that to the sky.” Over the years Brian has developed a systematic routine and is busy the entire flight making sure everything is in order prior to jumping. “It’s important to be comfortable with gear, build good habits, and safely skydive with others.” Brian also didn’t have any skydiving photography mentors. However, he looked up to the likes of Norman Kent, Joe Jennings, Mike McGowan, Tom Sanders, Craig O’Brien and later, Jason Peters. Now with established photographers in the sport, I asked Brian what he thought of USPA’s camera regulations. “The numbers are decent because the time in sport and time in the air are important in building a comfort level. Adding something new when you’re new and not comfortable with the everything else, something like a camera becomes a distraction.” Both Norman and Brian elaborated how the common attitude is, “it’s [Go Pro] not a camera, it’s so small, you-don’t-even-notice-it” attitude. Brian conveyed a story how, against his advice, a tunnel instructor with about 100+ jumps had lost two Go Pros! And we’ve all seen the photo on Facebook with an AFF student’s pilot chute wrapped around an instructor’s Go Pro. The Go Pro is a snag hazard and most people who wear them use non-cutaway helmets and screwed on mounts. This is an excerpt from USPA on September 1st, 2011: Adhering to Camera RecommendationsUSPA has been receiving an increasing number of calls and e-mails from Safety & Training Advisors and instructors regarding what to do about inexperienced skydivers who want to jump with small-format video cameras, such as the GoPro. Many new jumpers seem to feel that the small camera does not pose a risk, and they simply want to wear the camera while jumping. For that reason, the new jumpers do not consider this to be a video jump that falls under the 200-jump recommendation in the Skydiver’s Information Manual [SIM]. The truth is that even though the camera itself may be small, it still represents a significant snag hazard to any jumper. This is especially true considering the various camera mounts jumpers use. In addition to the snag hazard, no matter how much a jumper thinks the camera will not become a distraction during the jump, it will. There are plenty of cases of newer jumpers forgetting to fasten chest straps or creating dangerous situations in freefall, etc., that were directly attributed to the distraction of the camera. USPA’s camera recommendations appear in Section 6-8 of the Skydiver’s Information Manual. Be sure jumpers at your drop zone are following these guidelines. They exist for very important reasons. The SIM is an excellent outline about camera safety and requirements, but it doesn’t educate. I agree that too many people have a careless attitude about the jumping camera equipment too soon and that we need more education. We’re fortunate to have an organization that mediates our government relations, memberships, insurance, etc. However, they do not govern, they suggest and that gives us the freedom to self-police safety amongst ourselves. If we want to see change for the better, we need to take it into our hands and pass on good information. Allowing newbie’s to jump camera equipment just because they’re “heads up” isn’t a qualifier to allow them the privilege to wear one. I visited a DZ and asked the S&TA; about their policy of jumpers with sub 200 jumps wearing a Go Pro. The answer I received was, “If their heads up, it’s ok.” I quizzically looked at him and said, “How do you know he’s heads up? Have you jumped with him?” Two hundred jumps is, although not the best, a measure of experience. At least I can assume they’ve earned their B-license (including the canopy progression) and have a bit of time and experience. I don’t have a chance to jump with everyone to qualify someone with sub 200 jumps “heads up,” and who’s to judge whose heads up anyways?! There’s so much more to just jumping a small-little-thing like the Go Pro. Because of social media, there are ethics that ought to be tied into this conversation. Excited newbie’s may use their footage unjustly and this effects more than the person jumping it. For example, Gerardo Flores – an uncurrent, 30-jump wonder sneaks a camera on his jump and has a “near death experience” that goes viral on the web. This situation affected the skydiving community negatively and gave a sneak peak to the public how “reckless” skydivers can be. Not to mention other videos that go live streaming on the web. I asked Brian what advice he’d give to those thinking about jumping any kind of camera and he said, “Be comfortable with yourself well before strapping on a camera. Be proficient under the parachute, build your awareness, know your emergency procedures, know your gear and wear the proper gear. Then, learn about the camera prior to jumping it.” Although Norman and Brian didn’t have mentors, both have been a huge help and inspiration to aspiring camera flyers over the years. Both have made themselves available to help give direction and may be reached through their websites, www.BrianBuckland.com and wwww.NormanKent.com. And stay tuned for Norman’s upcoming video on You Tube, "The Dangers of Being a HERO". Now, for all you rebels at heart and those willing to learn, I cannot tell you what to do but share my experience. However, when you meet the camera flying requirements, it’s like earning the rite of passage to don a camera on your head. Throw in a bit of education in there and believe me, it’s totally cool and absolutely worth the wait.
 -
Flying with a camera can be a lot of fun, and is a reasonably easy goal for new skydivers to achieve. The USPA SIM Section 6.8E recommends that a skydiver have 200 skydives before putting on a camera. The first question often asked is “Why 200 jumps?” I believe the answer to that question is that in times past, the D license (which at one time required only 200 jumps) meant that a skydiver had experienced enough of the basics of skydiving that he/she could begin exploring additional responsibilities during a skydive. By no means is anyone with only 200 jumps generally prepared to be a good nor safe camera flyer, but everyone needs a benchmark from which to begin. This article isn’t about debating the merits of jump numbers; I’d recommend potential camera flyers stick with the SIM and the findings of the USPA. Before beginning, you’ll need to make a couple of gear decisions straight off, and this article is to help you prepare for those decisions. HEADGEARChoosing a helmet is the first and potentially most important decision in flying a camera. There are a lot of good helmets out there; each manufacturer has their own ideas about why their helmets may be better than another helmet. What your first decision will be isn’t as much about a brand, but rather a type. P>There are two types of helmets; those that are primarily side mount, and those that are primarily top mount. Most side mount helmets do offer at least a small top area to which a second camera or other fixture may be mounted. Most of the top-mount helmets are designed to place everything on the top of the helmet. Each type of helmet has its own advantages and disadvantages. Freeflyers and inside RW/FS skydivers tend to prefer side mount camera helmets not only because of the profile of the helmet, but due to the way the air moves around the helmet. Those that are shooting four/eight-way FS might prefer a top mount not only due to the greater stability of a flat-top profile, but that the larger top area allows for two cameras to be mounted (one acts as a backup in case a camera fails in competition). Commercial photographers tend to prefer flat top systems so that they can mount larger cameras, or have enough space to mount a DSLR and video camera from the same perspective point. One point to consider aside from the primary flying format; top mount helmets with properly centered weight are less injurious to the neck over repetitive openings. VIDEO CAMERAVideo camera models change pretty quickly, so it’s pointless to recommend models vs features. While recommending a brand is tempting to avoid, Sony camcorders have a strong position in the skydiving market for several reasons. -External control. This is very important, as you’ll want to know whether the camera is on, recording, battery failing, or nearly out of media. There are a couple brands of control devices that provide this information. -Electronic Image Stabilization (EIS). This is fairly important for freeflying, and much less of an issue for tandem shooters. Avoid Optical Image Stabilization in most cases. The floating lenses of an OIS system makes it difficult to shoot a stable image under any but the most optimal shooting situations (very difficult to achieve). Small is in; cameras don’t need to be large to produce large results. Keep weight on your head to a minimum and your neck will thank you over hundreds or thousands of openings. If your intent is to wear a camera merely to document skydives with friends, low-cost camcorders such as the GoPro Hero and similar small cameras are wonderful. If your eventual goal is to work towards shooting tandems or teams, you’ll want to consider a higher quality camera. A current favorite is the Sony CX series of camcorders. LENSESMost camcorders do not offer lens widths sufficient for most inside or tandem-oriented skydiving. Wide angle lens adapters are commonly found on camcorders used for skydiving. For most skydiving use, a .5 or double field of view lens is sufficient. If you’re flying inside video for FS or Freeflying, a .3 or more than double wide field of view is generally desired. Anything more wide than a .3 is typically going to be relegated to handcam or specialized use. Depending on the size of the camera’s lens thread, a step-up or step-down ring might be necessary. Step-down rings almost always assure a vignetted shot (black circle around your video frame), whereas step-up rings rarely cause a vignette. Step-up and step-down rings are very inexpensive. Some are plastic, others are aluminum. Some professionals prefer plastic rings so that if a riser strike or line catches on a lens and tears it off, the plastic ring will give way before damaging the camera. While this is likely true, plastic rings also deteriorate in strength when exposed to sunlight. If you use a plastic step ring, be sure to periodically inspect it to be sure it’s not become brittle or cracked due to sun exposure. RINGSIGHTSAlthough it’s tempting to want to outfit a helmet with everything right from the start, it’s a good idea to add parts one step at a time. A ringsight is a good tool for some disciplines; it helps the videographer know where the camera lens is looking, and some types of ringsights help with framing and distance. Ringsights aren’t necessary for inside shooting of FS or Freeflying. No matter what, a ringsight is a snag hazard regardless of how much care is taken to prevent it from being so. The risk can be lessened, but not entirely removed. The ringsite should be one of the last accessories added to a camera helmet. In lieu of a ringsight, consider a “paper asshole” or a punch hole reinforcement sticker, mounted on your goggles. This can serve the same purpose and yet completely remove the snag hazard of a ringsight. A circle or dot can be drawn on goggles as well. To sight in a dot on a goggle; face a plain wall on which, you’ve taped a target. A paper plate works well for this exercise. Stand back from the wall at a distance of about ten feet. Put on the camera helmet, turn on the camera, and have a friend hold your head/helmet so the paper plate is dead center in the camera’s display. Keep your eye looking forward; don’t be tempted to roll the eyeball up/down/sideways. Keep it straightforward. It might take a moment to get comfortable holding your eye straightforward while a friend guides your head/helmet to the centerpoint/target. Once you’ve relaxed, focused on the target, and the target is in the center of the camera, mark your goggles (one side only, usually the right side) with a DRY ERASE marker. Remove the helmet, remove the goggles/glasses, and then put them back on and check to see that a reasonably accurate target acquisition occurs. Otherwise, repeat the aiming/targeting process. It’s worth mentioning once again however, a ringsite should be one of the last accessories added to a camera helmet when you’re a newcomer to camera flying. A ringsight adds an unnecessary snag hazard. STILL CAMERAAgain, it’s very tempting to buy a camera helmet with everything in one shot, and as mentioned previously, is a poor decision for newcomers to camera flying. Learning to fly with a video camera will help develop the skills necessary for flying a still camera. DSLR cameras are popular, as they record stills to a memory card, making for fast previewing of photos taken during a skydive, and for tandems, DSLR’s are necessary for fast delivery of photos to tandem students. Though Canon and Nikon are both popular brands of cameras for skydiving, most any kind of camera can be modified to accept a bite, tongue, blow, or hand switch for taking skydiving photographs. MOUNTING DEVICESThe device used for mounting a still or video camera to the camera helmet is critical, particularly for video cameras. If the mounting device isn’t rock-solid, the camera will shake or shudder in freefall, resulting in an unstable image. Sometimes this shudder/shake will be blamed on the video camera when the blame lies squarely on the camera mount. Check whatever mounting device you’re considering to be sure it will not move either at the time of purchase, or after it’s been in use for a period of time. Personally, I’m a big fan of the Cookie Composites Padlock systems and the Really Right Stuff mounting systems. Neither are inexpensive, but if you want solid video and clean stills, a solid mounting system is critical. CONTROLLING SYSTEMSCamcorders and still cameras need hands-free operation. Video cameras can be manually started/stopped in the aircraft, but for convenience and comfort, most camera flyers use a control system of some sort. Sony tapeless systems offer essentially one controller choice; the HyPeye products from GetHypoxic. All of the camera control systems also offer an indicator that indicates the status of the camcorder such as Power On/Off, Standby, and Record modes. In lieu of these indicator devices, you can always wear a small mirror on the wrist next to the altimeter, and view the Record light on the camcorder. I’d recommend a plastic mirror vs a glass mirror in case your wrist strikes the side of the aircraft. Still cameras/DSLRs require some sort of trigger device to cause the camera to snap a shot. Conceptus manufactures tongue and bite switches for Canon cameras. Custom Nikon switches are available from The Ranch Pro Shop and other resellers. Some Pentax cameras use the Canon connection (2.5mm plug). It’s difficult to recommend a bite switch, hand switch, tongue switch, or blow switch; everyone has a preference. I personally prefer a tongue switch, but many friends like bite switches. Some like hand switches. You can also “roll your own” from inexpensive parts available at Radio Shack. JUMP SUIT/CLOTHINGSome camera flyers opt for jumping with or without a camera suit, or a suit with “wings.” Although it’s a personal preference, camera wings provide the camera flyer a more stable flying platform (when used correctly) provide the for a great deal of range and control that isn’t quite so easy to achieve when wearing a standard jumpsuit or freefly suit. If you’re looking at flying with tandems, wings are often an important part of the jump. If you’re shooting freefly work, you probably won’t want to wear wings. There is a lot to learn about flying a camera. Getting good at RW is perhaps the best thing you can do to prep for flying a camera with tandems and four/eight way teams. Understanding burbles, trapdoors, safe zones, and having good belly skills that include side sliding, the ability to orbit, and a very broad fallrate are all important aspects of camera flying. This article does not discuss the challenges of camera flying and make no mistake; there are many dangers. One such danger, is that the camera flyer is always focused on the action in front, and never able to turn to see what’s happening behind him/her. Another danger is that in order to “get the shot” some camera flyers lose altitude awareness and may find themselves well below appropriate deployment altitudes. Spend time talking to the camera flyers on your dropzone, reading the forums, and pay attention to some of the videos you’ll find on Skydivingmovies.com, YouTube, and Vimeo. All have examples of good and bad camera flying. You can learn a lot just from watching the techniques of others.
-
AVCHD has exploded on the consumer and pro-sumer scene like a new star at the Oscars, and the CX100 is the newest “actor” in the AVCHD lineup from Sony. Packed into a small body measuring 2” W x 2.25” H x 4” L (including factory battery) and 2” W x 2.25”H x 5” L with the more practical NP90 battery, this small “brick” weighs in between 11 and 14 ounces, depending on the battery chosen. Short description; this camcorder is a mini-brick. The CX100 is a very small package. The lens is a 30mm thread, if you’ll be adding wide or telephoto lenses. The CX100 records a 1920 x 1080i image on a Memory Stick Pro Duo card, with record times up to 340 minutes on the included 8GB stick, but it’s more practical to record to the highest quality video in most situations, reducing recording time to approximately 40 minutes on an 8GB card, or 115 minutes on a 16GB card. There are other modes, and these are useful for recording surveillance, low motion, or even simple scenes, but for best quality, most users will likely find the 16Mbps FH mode to be the preference. Most exciting is that this camcorder brings the award-winning Exmor™ imager to the consumer world. Exmor is the heart of the professional EX-series camcorders, which have become standards in the broadcast world. What this means to consumers is a more clean image, less noise in low-light, and a smoother image overall. It’s a single .20 CMOS imager, but don’t be fooled by single and small. Technology has brought CMOS to a new level of quality that previous generations of CCD-dependent camcorders. CMOS has shown itself to be the new future of virtually all imaging devices from the very low cost cell cams to high end professional production cameras. Exmor is currently the king of small imagers. Small is the key with this camcorder. Tiny and light weight, this camcorder fits snugly into the palm. It’s very ergonomic, being curved on the right side and square on the left side. This camcorder has a manual open/close for the lens cover. The LCD panel will notify users if the Record button is engaged while the lens cover is closed. The lens housing is very simple; it’s a 30mm threaded lens with a manual lens cover. It’s a Zeiss lens, identical to lenses found on previous HDR series camcorders. Optical width (35mm equivalent) is 42mm wide zoomed in to 497mm, so the camcorder isn’t quite wide enough for action sports or close-in work, but is plenty wide for the average user. While the camcorder does offer digital zoom, like most digital zooms, it’s not terribly useful due to the small sensor sizes. It’ll work well in a pinch, on a tripod/non-moving, or in a situation where the image acquisition is more important than image quality. Exposure is controlled via menu touchscreen, as is shutter speed, although the camera does not offer full manual control. There are nine exposure modes plus an Auto mode, giving users ten options for exposure control. Two microphone ports are found beneath the lens housing. The 2.5” LCD panel flips open and rotates; there is no clasp or latch holding it in place. The panel may be closed with the screen facing out, as with all previous models in this series. This is a big preview screen and it looks terrific. The controls are very simple. There is no normal on/off switch on the camcorder; opening and closing the LCD panel turns on/off the power to the camcorder. Power can be turned off with the LCD Panel open by pressing the on/off switch found beneath the LCD panel. The buttons, levers, and ports are few on the CX100; most of the options are found in the menu options. Also found beneath the LCD panel is a one-touch Disc Burn button to burn card contents straight to a DVD via the USB connector. Next to this is found a Play button for playback modes. Even when the camcorder is in Camera mode, pressing the Play button will put the camcorder in to Playback mode. Beneath the Disc Burn button is a Display button. Pressing this button once turns off most of the displayed information, thus allowing more of the preview screen to be seen. Pressing again turns off all display items, leaving the preview screen blank. Pressing/holding the button turns the preview off completely, thus allowing this camcorder to be used in a dark room without the LCD providing a source of light. In this mode, there is no recording indicator at all. The LCD screen is the only indication of recording; the camcorder does not have a Tally light. Next to the Display button is an “Easy button” that allows the camcorder to set all parameters of operation. Manual focus, exposure, and other modes are disabled when the Easy mode is engaged. Finally, there is a Reset button to reset all parameters of the camcorder back to factory setting. With the LCD Panel closed, the camcorder has three buttons; Record start/stop, Photo, and Zoom lever. With Record Mode enabled, the CX100 is able to take continual still photographs at a resolution up to 4Mp. However, there is a time lag between shots; expect about one still every 3 seconds, hardly fast enough for many sport photography modes. The Photo button and the Zoom lever are found on the top of the camcorder. The Photo button is a bit inconvenient if the camcorder is being held in a standard palm configuration. It fits under the index finger, but it’s hard to press the button without moving the camera during video recording. The stripped-down nature of this camcorder belies its intelligence. The camcorder is extremely smart, able to sense up to eight faces on the screen and calculate exposure based on these faces. Additionally, if the still modes are being used, the camcorder can sense smiles, and shoot automatically when it sees a smile. Now if it only had an “ugly” sensor that would prevent it from taking ugly photos, or a ‘composition’ setting that could prevent badly composed photos from being taken. Maybe in the next generation. Spot focus, spot metering, slow-shutter are all available on this camcorder, along with the previously mentioned nine exposure modes. Menus are relatively simple in this camcorder, but there are some menus the average user will want to pay attention to. There is no LANC on this (or any other file-based camcorder system. Remote control is achieved through the AV/R port. Pictured here is a HypEye D Pro control/indicator system. In the “General” menu mode (preview screen/menu button, page two under the Toolbox), there are five menu options. In this menu, Auto Shutoff, Calibration, and Power On By LCD are the important options. First, disable Auto Shutoff unless you’re okay with the camera powering down after five minutes of disuse. In the action-sports world, this is a non-starter, so disable this mode. Next, calibrate the screen for your personal finger touches. Different size fingers will touch the menu differently. Next, disable the Power On By LCD option if a remote is part of the planned operation of the camcorder. For example, when using the HypEye D Pro remote/camera indicator, the LCD panel must be opened first, then the HypEye may be enabled and will control the camcorder. If the Power On By LCD option is disabled, the HypEye D Pro will be able to turn on/off the camcorder, start/stop recording, and control functions of the camcorder while the camcorder is in a box or cage. It becomes a hands-free operation when the Power On By LCD option is disabled. If a remote on/off system is part of the operation of the CX100, be sure to go into this menu and disable the Power On by LCD option. In this same Toolbox menu, you’ll want to scroll to Page One of the menu options, and select the Face Function Set menu. Disable Face Detection, and disable Smile Shutter features. This will significantly speed the auto-focus functions of the camcorder. This same menu is where you’ll set the movie or photo modes of the camcorder. In the next menu, you’ll want to set the camcorder to record to external media, unless you’ll plan on downloading everything from the internal memory to an external hard drive. There is a huge benefit to this process; if you’ve filled or forgotten a memory stick, now you’ve got a way to record. Imagine being on a cliff wall or aircraft and realize you have no memory stick, or the stick is full. Simply switch to “Internal Memory” mode and you’ve just gained nearly 60 minutes of high-quality recording in FH mode! Be certain to enable X.V. Color in the menu for the most rich and natural colors during playback to any X.V. enabled HD display. X.V. is standard in Sony displays, but XVYcc is an up and coming standard in home video/theatre. The color information is embedded in the video stream, and having it will not harm the image of non-XV (HDMI 1.3) systems, but will be immediately apparent in XV displays. Disabling Automatic Off will be important to action sport photographers. If you need to share media, no worries. You can easily dub media from a mem stick to the internal Flash memory, or dub from the internal Flash memory out to a media stick. If Firewire has been your primary means of sharing video files, MSPD is now your transport medium for sharing video. From skateboarders to skydivers, this feature will be much loved, much appreciated, and much late in file-based recording systems. "The Sony CX100 with incredible HD quality in such a small form factor complemented by electrical stabilization and solid state media; is the best camera on the market for daily capturing skydiving and other action sports." Mark Kirschenbaum – Get Hypoxic/Skydiving Videographer Another ‘feature’ of this camcorder is the image stabilization system. For the past two years, almost all Sony models have been Optically Stabilized, or OIS. This is terrific for those that stand around with camcorders in their hands, but for those that are mounting camcorders to skateboards, helmets, aircraft struts, motorcycles, or anything else that has heavy, inconsistent vibration, OIS is a bane, not a benefit. Soft, juddery images are sometimes the result of OIS systems. The CX100 offers EIS, or Electronic Image Stabilization. Granted, for those that stand around with camcorders in their hands, EIS may not be quite as preferable, but for everyone else, EIS is golden. Action sports photographers have been begging for EIS to return to small-format camcorders. Sony has finally obliged. The bottom of the CX100 offers a metal-threaded/encased tripod mount with a removable bezel. All in all, the Sony CX100 is a dream camera for the low-budget videographer, the action sport photographer, or the independent production looking for a crash cam. At a retail of 599.00, its street price is somewhat lower, and available everywhere. In Black, Red, and Silver, there are even multiple color choices for the color-coordinated videographer/photographer. There is little to want for, given the size, weight, and cost of the CX100. The CX100 is very small, and will fit on any helmet camera mount system. Consider using gaffers tape to hold the battery if the mounting system does not support the battery bottom. Cookie Composites has announced they'll offer a box for the CX100 around the same time the camcorder ships. (pictured helmet is a Cookie Composites ROK) Weaknesses are found in the potential “oops” factor of leaving a lens cover on while using a remote, and in the opportunity to miss menu options in a hurry. Lack of audio input means extra care should be taken to capture decent sound; if a housing is used, be sure to leave an opening for audio. These are small pitfalls for the large scope of what this mini-monster brings to the table. Congratulations to Sony’s design team; in my estimation, this is the best small-format camcorder for the buck. Ever. ~dse
-
Last week GoPro sent me one of their new Hero cameras to test in a variety of environments. I’m somewhat of a snob when it comes to cheap camcorders, and the people at GoPro knew this from the start. In fairness, this is the least expensive camera/camcorder I've ever reviewed, and not expecting to be impressed.The camera arrived in a complete configuration; batteries, 2GB SD memory card, and the standard box that the GoPro comes with. Opening the GoPro package requires a degree in disassembly if the box is to be kept in more than one piece. It took three people nearly 10 minutes to figure out how to open it. If the box is any indication of how tough this camera is…it’s gonna be a great little camera. The GoPro Hero Wide Physical Characteristics: The camera includes several mounting options, including a rubber headband that resembles a jockstrap. It’s not much to look at, but it’s also not going to be the common use (I hope) for most users. The camera mount on the “jockstrap” can easily be removed and connected to more substantial webbing. The water housing is impressive. Very impressive for the price, in fact. I’ve paid more for a cheap housing than for this entire camera, and this housing is more nicely built than a housing I once paid $350.00 for. This is a good thing, because the mount for the camera is integrated into the waterproof/protective housing of the camera. The system is not designed to be used without the camera in its waterproof housing. The camera itself feels “plastic,” even though it is made of light aluminum and plastic. The plastic lens is fairly exposed; all the more reason to keep it in its waterproof case and keep the case in a soft bag when not being used, in order to protect the lens from damage/scratching. This shot was one of 92 still images captured in a single skydive. With a plastic pressure-release mount, there is some fear that a hard strike will cause the unit to be torn from whatever mounting device it may be attached to; this is a positive feature rather than negative factor, as safety is the primary concern of all active sport enthusiasts. The plastic mounts are plentiful; GoPro provided three stick-on mounts with extra double-sided adhesive material. In addition, GoPro provides a pair of extra mount clips, and a mounting arm that allows for a 90degree rotation of the camera when mounted to vertical objects such as the mast of a kiteboard, paraglider, or similar. It’s much like an Israeli-arm used for higher end cameras, excepting that it’s exceptionally lightweight, and plastic. The camera comes with several mounting devices/replacement parts. Technical Characteristics: The camera has a very small sensor size, I believe it is 256 x 192 with doubling, but I was unable to receive confirmation of this from the relations department at GoPro. The sensor is a CMOS imager, which is somewhat obvious by the lack of dynamic range (see image with large black spot in center of sun). Sporting an output frame size of 512 x 384, broadcast, output to DVD, or other full-frame display will be difficult to do with any degree of image integrity. For web or fun review on a computer in small viewer, it's perfectly appropriate and will give a lot of enjoyment to the sports enthusiast that isn't chasing professional results. GoPro encodes to an MJPEG codec in AVI container (will be .mov on Apple) and will require an MJPEG decoder in order to read/edit. Most NLE software includes an MJPEG decoder, and they are available from several providers around the web. The encoder compresses the video data to 4800 Kpbs, which is approximately the same compression ratio found on many hllywood DVDs. However, bear in mind that Hollywood DVDs are framesized at 720 x 480, and are sourced from film or HD cameras. I mention this, as some of the marketing commentary on the GoPro Hero compares technical data with that of a DVD. They’re not remotely the same. Additionally, DVDs are encoded with a PAR (Pixel Aspect Ratio) of .909 or 1.333. This means that pixels are elongated in either a horizontal or vertical configuration. The GoPro records a PAR of 1.0 (this means the pixels are square, and are not stretched, which is a benefit). The display is a Standard Aspect Ratio, otherwise known as 4:3. This is the “old” format of screen display, and is no longer available in television displays. GoPro might consider providing widescreen in an anamorphic format in their next camcorder models, as widescreen displays are now the world standard. 30Fps Progressive frames means the image will be smooth for playback, and clear on computer monitors. Audio is recorded in Mono @8Khz/64Kbps stream. The audio is useless for anything other than reference. It should be pointed out once more, that this camera is aimed at the sport enthusiast that wants to capture exciting moments for the web, not for broadcast or professional use. Still images may be captured at the rate of one still every two seconds for up to 65 minutes (over an hour) on a 2GB SD card. Larger cards may be used. The stills are 5MegaPixels, and for some, this is going to be a “wow” factor. However, there is a difference between stills captured through a low-cost plastic lens and a reasonable quality glass lens as found on most 3-5MP hand cameras. In other words, the megapixel count is only a small part of the actual picture quality. (More megapixels don’t assure better pictures in any event.) SD flash card is the format in which this camcorder stores data. SDHC cards do not improve the performance, speed, nor quality of the camcorder. The camcorder package also includes a proprietary cable connection that outputs to USB and video composite signal. Note the hot-spot in the middle of the sun. I was able to consistently reproduce this artifact with any bright light source in a high latitude shot. Even a 100 watt lamp could create this anomoly in a reasonably lit room. I believe this is a problem with the sensor; it cannot manage high latitude. Operational Characteristics: The camera is easy to operate. The multiple-press menu button that provides an icon-driven LCD panel doesn’t provide immediate feedback, and requires a review of the owners manual to decode the iconography of the display. In my first operation, I captured video from a skydive, but accidentally deleted the files as a result of not being clear on what the different icons were indicating. Additionally, it wasn’t immediately clear on how to turn off the camcorder, and when left on without operation, the camcorder eats batteries fairly quickly. With regard to batteries, only Lithium batteries should be used with the GoPro Hero. They’re a little more expensive, but this device eats alkaline batteries like they are candy. Rechargeable batteries may not be used. The GoPro Hero Wide uses SD memory cards. The black strip on the back is a rubber isolator to keep the camera tight in the waterproof housing. There are only two buttons on this camera, it’s not like it’s a challenge to operate once the owners manual has received a glance or two. One button for shutter control/record functions, and one button for menu control. The beauty of this camera is found entirely in its small size, price, and ease of use. Summary: This camcorder isn't going to light the professional's eyes up like a professional POV camera will, but it won't burn the amateur's wallet like a professional POV camera costs, either. I've tried all the various POV "sport cams" currently on the market, and for sub $200.00, this is clearly the winner. There simply is no camera in its class that can compete. GoPro should be proud of themselves for designing a camera with this quality in this price range. At $189.00 it certainly isn't a toy, but it is a very fair cost of the fun this camcorder can record for the sport enthusiast. Mounted to handlebars, helmets, struts, pedals, forks, kayaks, paddles, fenders, wrists, feet, belly, or other body part, the GoPro Hero is a hit in my book. -douglas spotted eagle
-
Get Hypoxic HYPEYE D PRO Remote Camcorder Indication and Control System Settle back with a cup of good coffee as this is going to be lengthy; the product does a lot more than meets the eye! I received my HYPEYE D PRO controller and expansion in the mail today; I was overjoyed. I knew it would be a good product, as I already owned two HYPEYE MINI camera indicators. Just in case you ve been in the air too long, don't fly a camera, or simply haven't paid attention to technology, the camera control protocol known as LANC or (Local Area Network Control) is not a part of the crop of new camcorders being issued by Sony (or Canon). LANC is a tape-based protocol, and none of the new camcorders are tape-based, but rather are Hard Disk Drive (HDD), DVD, or Flash memory-based in design. Tape is very much on its way out, and will not exist as a common format in the foreseeable future. Absent a LANC controller, camera flyers struggle to start/stop the camcorder, not to mention the lack of an indicator usually mounted on a ring sight to indicate the status of the camcorder. True, a small mirror might be mounted on an altimeter to view camera status, and of course, camera flyers can cut large holes in their camera boxes for access to on/off switches and record switches, so it s not as if all is lost with the disappearance of LANC. But it is terribly inconvenient for most of us. Sporting a rubberized/weather proofed recessed button, this unit is solidly built. Early camera switches were fairly unreliable and affected by riser slap, high humidity, water, or the camera helmet being laid upon the ground and accidentally triggering the camera button. None of the above has any impact on the operation of the Get Hypoxic HYPEYE D PRO (damn, that s a long name) camera controller, due to the way it s built. Designed to be mounted either inside or outside the helmet, the switch housing offers a threaded hole in the back of the unit allowing for an included nylon screw to mount it to the outside of a helmet or other mounting surface. Even though this may expose the switch to a riser slap, the nylon screw should break/release in an entanglement. The switch housing is identical in size to the pre-formed port found in many camera helmets, allowing for a .65 to be drilled, allowing for a flush switch on the outside of the helmet with the bulk of the switch housing inside the helmet. Double stick tape or gaffers tape (not included) can be used to secure the switch to the helmet or mounting chassis. That s not all, nor is it the only way to be mounted - more on that later. I used the Expansion kit to set up my own switch access that is smaller than that of the HypEye, but it is not weather resistant like the HypEye switch. The switch housing has two rubber inserts for accessories available for the HYPEYE D PRO. The first is a female 3.5mm jack that allows for a debrief cable to be plugged into the helmet/switch directly, thus eliminating the need to remove the camera from a camera box/housing, or from a mounting plate in order to view the video. The debrief cable will likely be essential for any team camera flyer or AFF instructor wanting to debrief a jump. Not only is removing the camera from the helmet a pain, but also wears hard on the camera and box, this allows additional wear on the camera and helmet to be avoided. Techno-geeks will probably install a female 3.5mm jack in their helmet so the debrief cable doesn't need to be plugged into the HYPEYE D PRO switch housing too. I've already seen one team using the debrief port on an LCD monitor in the aircraft as they climbed to altitude for another jump, again saving the hassle, time, and potential error involved with removing the camera from the housing or helmet. If your last camcorder came with a four-contact 3.5mm cable (has yellow, red, and white connectors on the end) you won't need to purchase the HYPEYE D PRO DEBRIEF CABLE. The other rubber plug is an access port for the HYPEYE D PRO EXPANSION CABLE KIT. This is the kit that got me really excited about the unit because it adds so many features to the HYPEYE D PRO. In my opinion, this is what makes the HYPEYE so spectacular. The Expansion Cable Kit is optional at a cost of $29.00 USD. So what does the Expansion kit add? A plug that connects to an L&B; Optima audible altimeter. This allows a separate set of LED s on the HYPEYE indicator to flash when the Optima is triggered. The indicator will flash slow flashes at the first altitude set in the Optima, faster flashes as the second altitude is reached, and very fast flashes when the final altitude is reached by the Optima. This feature isn't only for the camera-flyer; deaf skydivers will find this feature very useful. Unlike the L&B indicator which is fragile and stiff, the HYPEYE indicator is on a flexible cable and can be mounted any number of ways to suit the users desire and need. Bite Switch input. Yup, the Expansion Kit allows owners to plug their existing 2.5mm bite switch cable into the system, triggering stills from a video camera. Some cameras can only shoot 3 stills during a jump, but camcorders like the Sony CX7 or HC5 may be turned into a still-only camera, allowing for reasonable quality stills to be taken with these small HD camcorders. External Switch/Remote Switch connection. This allows the rubberized nipple switch found in the HYPEYE housing to be bypassed and the system controlled by a third party switch. This is what I've done with my system. All electronics are mounted inside the recesses of my BoneHead Flat Top Pro helmet, and I've mounted my own softswitch on the side of the helmet. This is useful for custom buttons, but also would allow a pilot to trigger an exit camera or similar. Zoom Memorization. Ever gone on a jump only to find that the zoom button had been moved, and everything was blurry, deeply zoomed, or both? This feature tells the camera to be zoomed in at a user-defined point. This will hopefully reduce the number of absolutely ugly vignettes found in so many skydiving videos, allowing users to slightly zoom in past the point of the lens adapter rings. Remote on/off of camera functions. Imagine this; you re in the door of the aircraft ready to jump, and notice that you've forgotten to turn on the camcorder. The count begins as you yell WAIT! With the HYPEYE D PRO, pressing the switch will turn on the camera even if the on/off switch of the camera is in the off mode! (this is camera model dependent, and won't work with all cameras, but it s great with the CX and SR series cameras) A audio/microphone input rounds out this system very nicely. If the camera is in a typical housing, the internal microphone is buried, often under Neoprene or other material designed to securely hold the camcorder. An external microphone isn't only helpful, but essentially necessary for tandem interviews in this situation. Or you can just connect your ipod and burn to DVD for your 4way team with no post production work at all.Here is where users will find a weak point in the HYPEYE system; the installation instructions for the Expansion Kit recommend placing a dab of glue on top of the connector. After a quick call to Get Hypoxic I learned this was to prevent years of vibrations from inadvertently dislodging the cable. I needed to either use a hot glue gun or fingernail polish to create a bead on the cable once installed in the switch. It wasn t difficult, but I wondered why a swage or something similar wasn t molded to the otherwise well-designed cable. It would save users the headache of finding a glue gun or borrowing fingernail polish from someone. I used the hotglue, it was easier. See the GetHypoxic website for very detailed photos and instruction on how to achieve this. What's to love Weatherproof, recessed nipple button Audio/ Line-Level Microphone input Audible altimeter connection Super-bright LEDs Debrief port Zoom memory Bite Switch ready/input Remote control of all camera modes The camera connection side of the system is an AVRemote S cable system exclusive to Sony camcorders. What makes this unique is that these right angle cables will fit inside of most camera boxes where a straight connector absolutely will not. It s obvious that Get Hypoxic designed this connector and its slim profile, as the Get Hypoxic name is molded into the cable connector, as it is in the Expansion Kit fantail. The indicator side of this unit has several micro LED s in it. These indicate a number of different functions depending on the mode in which the camera is operating. Ready/Standby is indicated by a blue LED, Record indicated by a red LED, and warnings for batteries, sleep, error, or tape end indicated with a yellow LED. However, double-clicking the switch will put the camera automatically into different modes. Want to switch from video mode to stills only mode? No problem, just double-tap the HYPEYE switch. Wanna go from stills to playback? Same action. What's Not So Lovable: Big round cables are space-killers in tight helmets Zoom reset is slow Requires tools and additional adhesives for certain setups like the Expansion Kit Debrief port is part of switch, making it inconvenient for in-helmet setups PriceyWARNING: THESE LEDS ARE BRIGHT! Users may find them too bright if they're mounted close to the eye such as in a ring sight configuration. Using a Morse code-like tap sequence, the LED s may be dimmed in five different levels. (Out of the package settings are at the most dim preset) Military users will appreciate the exceptionally dim light in those covert training ops, and night jumpers will appreciate not being blinded by the camera flyer s indicators as well. These same LED s will also indicate altitudes triggered by the Optima, if the Expansion Kit is part of the setup. Be aware that the batteries in the Optima will affect the brightness of the altitude indicators. Camera status indicators are not affected by the Optima battery level. Speaking of military users, Get Hypoxic has said that they ll soon have an armored, aluminum billet version of the HYPEYE available at a higher cost. (comes stock set at a low brightness level, for your protection) There are some things I wish were different. The HYPEYE uses a very high quality silicone-covered rounded cable. A flat cable would have been more appropriate given the very tight confines of most helmets, yet it should be mentioned that flat ribbon cable is very expensive and not terribly durable. The molded fantail/distribution point of the Expansion Cable kit is also somewhat larger than I would have liked. In my Tonfly CC1, it took significant effort to keep the cables from impacting how the helmet fits, but it is possible. As my TonFly helmet does not have a ring sight (used for wingsuit camera) I appreciated the very stiff plastic in the indicator side of the HYPEYE D PRO. The user-programmable zoom depth is slower to get to zoom point than it should be, yet this is camera-dependent, so not really GetHypoxic's fault. Cable size aside, I feel this is one of the best-designed tools available to camera operators in any sport application where space and control are considerations whether they re using tape-based HDV camcorders, newer DV cams, or AVCHD camcorders. Congrats to Get Hypoxic for presenting a very well thought out, fully-featured product that skydivers can actually use, that seems to be very tough (I have only 22 jumps on my system). This tool is 110% real as far as I m concerned. It s hot, not hype. Get the Hypoxic HYPEYE D PRO Remote Camcorder Indication and Control System at Get Hypoxic or most skydiving gear outlets. HYPEYE D PRO-$99.00 MSRP PRO Expansion Kit-$29.00 HYPEYE D PRO Debrief cable kit-$10.00 The Hypoxic Hypeye D Pro is also available on Amazon: Hypoxic HYPEYE D Pro Remote Camcorder Indication and Control System.
-
First things first. I assume they're giving you some sort of compensation in the form of a free slot (since you're just starting out) or maybe slot plus a small amount of cash (maybe to cover pack jobs). Understand that since they hired you, they probably expect you to do certain things, only some of which you're actually going to be able to deliver because ... you're just starting out. I can absolutely freekin' guarantee that your footage isn't going to look anything like the camera flyers at Arizona Airspeed can produce. You're just not going to do 1,000 jumps with your team this season, so nobody should expect the same results. Make certain at least the team captain understands this. If your team captain or the coach of the team expects otherwise, you may want to consider walking away right now. I'm not kidding. I saw a perfectly acceptable camera flyer get psychologically and verbally burned by his team last season because they just didn't have a freekin' clue as to how difficult "Airspeed-quality" camera flying is. If, on the other hand, they understand where you're at in your camera-flying career and are willing to work with you, then it can be a beautiful learning experience for everyone. Flying 4-way camera, you're not just flying the camera anymore. The team may decide you have other duties as well. Do they want you to handle the manifest duties? Do they want you to watch the clock so they can focus more on creeping? Are you going to be responsible for the spot? Will you have to dub tapes for everyone at the end of the day? This can be time-consuming. They're off in the bar having a cold one and you're in a debrief room makin' dubs for 40 minutes! Talk to them about it. Get that stuff understood so there are no surprises. Surprises cause arguments. Arguments are not conducive to good flying! One camera flyer I know has been at it so long and has been burned so many times that he has what he calls his "List of Demands" and when he talks to a team he gives them a printed copy of it and says "That's the deal, take it or leave it." Now, since you're just starting out, you probably can't do this just yet, but keep it in the back of your mind. At least with him, there are no surprises. Just a thought. The first day So it's the first day of training and time to get on the airplane. Make absolutely freekin' sure that everyone knows the break-off plan. Typical might be that at 4,000 AGL the team turns and tracks while you pull in the center. (Maybe 4,500 for a newbie group.) Make certain they all understand the consequences of not tracking -- you'll eventually come down to meet them and you'll both die. I shoot my team's break-off and freeze-frame it when I dub the debrief tape just to make a point of showing which person is leaving last. I've never mentioned it in those terms, but I think it does get the point across when you see the same person not getting away as fast as the rest of the team. Communicate to the team that's it's not only important that they turn and track, but it's also important that they do not pull high. Pulling high is where you are, not them. They shouldn't be pulling any higher than 3,000. This ensures they have separation from each other AND you. What's really nice about 4-way is that certain things can be somewhat consistent and therefore I feel a bit more safe. You shouldn't have to worry about what the break-off altitude is for this jump, if the team break-off plan is always 4,000. Pretty simple, we're doing 4-way, break-off is 4,000 -- period, end of discussion. We can now focus on other things and not have to worry about break-off. Simple. Same deal with most of the rest of the flow. Ten minutes to boarding the plane, check your gear, put it on and walk down to the mock-up. Five minutes to boarding the plane the team arrives at the mock-up and goes through the exit and does pin-checks. Board the plane in the same order, sit by the same person, check your camera at 6,000, do another pin-check at 9,000, handshakes at 10,000, put your helmet on by 11,500. CamEye II blue light on the red light, red light on the green light. OK, that's my routine, but you get the idea. Consistency will keep you on schedule, give you several opportunities to catch small errors and correct them. Not all camera flyers' offices on Twin Otters are created equal! Handles come in at least three distinct flavors and steps in at least two. Placement of handles and steps varies from plane to plane even on the same dropzone and even if the A&P; mechanic was really trying to be consistent! Door frames are also inconsistent in how much they have little bits poking out that can whack into your left knee or attempt to grab your reserve handle on climbout. It may piss you off, but them's the facts. Look the planes over carefully and learn which ones to watch out for. The exit For a camera flyer, there are basically two parts to the skydive: Exit and everything else. Blowing the exit can make everything else irrelevant, so I'll start with that. As I mentioned before, there are several version of handles and steps you'll have to deal with. Depending on the exact type of exit you're planning on doing, your hand and foot placement as well as your posture on the step will vary. There are three basic exits. Leading - leaving perhaps slightly before the 4-way team. This is the "classic" 4-way exit you'll see from Arizona Airspeed. There are a lot of timing issues involved with this exit and I'll go into some of them a bit later. When done well, it's a beautiful thing. When done poorly, it's a disaster! Try to learn this exit as quickly as you can, but I can guarantee you some spectacular disasters in the process. I do a lot of 4-way camera flying and even after three years of really trying to nail it, I still blow it from time to time. Trailing - leaving perhaps just slightly after the team; it's also known as the peel. Almost bullet proof because you leave the airplane in your own clean air, but teams and coaches don't like it because it's difficult for them to see exactly how well they were presented on exit. Semi-peel - also known as the 3 O'clock or 90. The team really has to launch away from the airplane for this to work and it has the same team/coaching issues as the trailing exit, but the camera flyer is a heck of a lot closer and it's very easy to see the grips so I think there are actually advantages to using this for competition, but like I said, teams and coaches might think differently. This is the exit you'll most likely see from The Golden Knights. For each exit, it's fairly important to know exactly what to expect from the team in terms of timing and their presentation. You're a fifth member of that exit and you want to place your body in an exact location just the same as the rest of the team -- you're just not taking grips. I think it's important that you go to the mock-up with the team, find out what formation they're taking out the door and do a couple of practice exits with them every time you go up. For a leading exit in particular, find out where the tail and inside center are going to be and plan on not being in their burble right off the plane. Depending on the team and their skill level, you could use any of the three basic exits. For coaching purposes, almost all teams will want you to give them a perfect leading exit. In reality, this may or may not be possible due to your experience level or theirs. It's definitely something to discuss with them. The team, the coach and you should understand that a leading exit is not always the best choice for competition purposes and may not always show what they wanted to see for coaching purposes either. Leading exits Get out on the camera step as best you can. Ideally, you'll have your left foot on the camera step and your left hand on the camera handle with your body hugging the airplane, right foot trailing and right hand maybe on top of the fuselage. At least, that's the way the boys over at Airspeed do it. Me? I can't do it that way and my guess is that depending on your body type, the handles, how much you can twist your neck and a bunch of other factors, you might need to do something slightly different too. Ultimately, your goal should be to be comfortable, stretched pretty far back with maybe just a little flex remaining in your left leg with which you can spring back off the camera step. You may find it a good idea to have your camera sight centered on either the left wheel of the Twin Otter or maybe the butt of the tail flyer. This gives the team somewhere to go in the video. If you can see the exit count, cool, but don't trust it. I usually watch for other subtle signs like a helmet popping under a head jam or maybe the tail flyer's butt leaving the plane. What is GREAT is if you can get the outside center to swing his left leg in time with the exit count -- of course, that's not going to work for all the exits, but it helps. Try to explain to the team that consistency on their part with the exit count means you'll be able to get them much better footage. Some teams do wacky things for a count -- I hate wacky. A nice rhythm of ready, set, go works wonders. For the leading exit, I go on go. That is to say, right with the team. Me -- I'm a fat boy. If I leave too early, it's a pain in the ass to try to get up in a position where I can still see all the grips. You'll know you've left too early if you can see a lot of the bottom of the airplane and they're still in it! You'll know you've left too late in a leading exit when you whack into the team. I try to leave on go, pop my wings to get another slight bit of separation and then track up and over them as they fall down the hill. For me, what I want to see is the center of the formation falling below the horizon as quickly as possible after exit. As the team falls down the hill, drive up and over them. When I exit, I shift my focus from the before exit picture to place my ring-sight on an exact spot in the formation -- maybe the center grip on a Meeker for instance. Each formation is slightly different and will all call for a slightly different spot. For the leading exits, look at the dive pool and think about how they might fly on exit. More importantly, think about how they might block your air on exit. Nice roundy thingies like Meekers aren't too much of a problem. Evil longy thingies like Monopods can be a huge problem depending on what the tail does. Some nice semi-roundy thingies like Satellites might look easy, but might have a tendency to "cut in" so that you can't see all the grips. It won't always be your fault, but you might always get blamed for it if people don't understand. Trailing exits In almost the exact opposition of the leading exit, don't lean back but try to stand up on the camera step and get your body high. Go ahead and put your focus on the center of the formation and don't worry too much about the count. Just keep the focus on the center of the formation and follow it down the hill. I try to think about placing my body in the 12 o'clock position just over the point flyer. Bingo, works like a charm. You don't really need to drive your body anywhere during this exit, the team will flatten out as they come down the hill and you should already be in pretty much good position. You will, however, be facing down jumprun as opposed to up jumprun for the leading exit. Semi-peel exits If you know the team will launch away from the plane, you can try a semi-peel exit. Almost the same as the trailing exit, but you don't really wait for the team to go by you. You leave just after the center has cleared the plane. Your body comes off at a 90 degree angle to jumprun and you may want to think about back sliding a bit under the plane. Everything else Once you've exited the airplane, there's pretty much nothing more you can do about the moment, so let it go. If you left too early on a leading exit, don't think about it -- do something about it! If you've left too late on a leading exit, you need to do something about it NOW! Keep working the issue until you've gotten things in hand. Keep focusing on where the sight should be, but keep working the problem. If you're going to whack into the team, keep trying to get big and maybe you'll be able to slide out of it. If you give up and put your hands in front of you to cushion the blow, you'll only speed up and hit them harder. Your goal should be to get close enough and steep enough to the team so that all the grips are visible. If the team flies apart during a transition, you must get higher and try to keep them all in the frame. As they rejoin, come back down so they don't look like ants! A nice secondary goal would be to keep on heading. Pick a road in the background and keep the teams original jumprun heading relative to it. This let's the team and coach look for things like unintentional rotations of the formation. As you get used to flying with the team, try to get closer and steeper. As you get steeper, you'll find that it becomes a bit more difficult to stay on heading. Teams have a tendency to move quite a bit horizontally as they turn pieces and make transitions. Obviously, if you're right over the top, you'll have to side-slide, back-slide and do all sorts of chasing. Breakoff and opening OK, you've exited, shot freefall and it's about time to breakoff. On breakoff (let's call it 4,000), I might give the wings a little pop and deploy as I continue to watch the team. As I said before, I usually watch to see who has left the formation last and will show that on the debrief tape just to subtly drive the point home. As the d-bag comes out of the container, I begin to sit up and shift my ring-sight to the horizon in an attempt to have my head, neck and back in a straight line as the canopy opens. I feel that this gives the best protection against neck strains, but obviously, this might not work for you. It does work well for me. No matter what your body position, you want to get your hands on your risers as quickly as possible between the time you deploy and full inflation. An additional benefit of looking toward the horizon during inflation is that in this head level position, you can watch out for team members doing short tracks and high openings. Individual team members probably have more than enough separation from each other, but if one dumps a little high and you maybe have a little bit longer snivel and they have a 180 opening, well, it can get interesting and you need to react pretty damn fast. Looking out toward the horizon lets you see what might be coming up to meet you, and you may even be able to shift your weight during inflation to avoid it. After opening, look around to see who in your team is where. Give 'em a quick head count and see if there were any cutaways. If there was a cutaway, first look to see if you can spot the reserve. If the jumper looks OK under the reserve, then check to see if anyone is chasing the main and freebag. Especially watch for the freebag -- they can be a lot harder to find than the main. Make sure that at least one team member is following each piece down; main, reserve freebag and jumper. Fill in where required. If everyone seems OK under canopy, then unclip your wings, release your thumb loops, stow your slider, turn off your camera, release your brakes and start flying back to the landing area. Since you're probably the high opener, you should have plenty of time and altitude to scan for traffic and fit in with the landing pattern. Usually, there's no need to rush and spiral down between canopies -- try to be predictable. With the ring-sight in front of one eye, you don't have the best vision so be a little more careful. Once you've landed, if you can, go over and do high-fives with the team, but generally keep your comments to yourself. Generally speaking, you're not a judge and you're not their coach. They usually already know if they brain-locked or went low so additional negative comments from you aren't helpful. However, positive comments about really cool jumps are almost always welcome. Wrapping up As soon as you get back to the packing area, put your rig down, head over to the debrief room and dub the tape. You don't need to stop to talk with anyone at this point -- just dub the dang tape. Teams seem to vary on exactly what they want dubbed on their tapes, but usually I slate the first jump of the day with a date and just give them a few seconds before exit until the last guy breaks off. During competition, usually you'll slate EVERY jump. Some teams seem to like to see a slo-mo of their jump from exit to the second point, but some do not, so you might want to ask about it for team training purposes. You'd never do this for competition. After you dub, pack and be ready to get on the next load before doing any socializing. The key point here is that the team should never have to wait for you -- not to pack, not to get to the plane, not EVER. I have to admit that when I'm doing team training I usually don't pack -- I hire a packer. This cuts into my profit margin, but I find that I have a heck of a lot more energy at the end of a +20 jump weekend! I also have two rigs so that if the team wants or needs to do back-to-back loads it's really no issue. Having two rigs also means that if I have a cutaway, then I can continue to jump with minimal impact to the training. At the end of the training day, typically the team members want dubs of the entire day. Ugh! Well, you can cut down on this particular chore by using one of the team members' tapes as the debrief tape during the day. I also cut this chore way down by having several VHS decks in my team room. I was able to pick up VHS decks pretty cheap ($75 each) and this also means that I never have to worry about having a back-up! Photos: © Paul Quade
-
It would be difficult, at best, to write a complete and comprehensive guide to freefall photography. Patrick Weldon's "Flying the Camera" is the first attempt I have seen to do so, and is well worth the $34.95 purchase price for an aspiring freefall photographer. It covers a lot in a short book, and may fall just short of being 'complete,' but it sure is a great way to learn the basics. It may even save you some money by helping you avoid common 'beginner' mistakes. By covering a complex subject in a short book, Weldon leaves a lot out - but he does so effectively, by making the information easy to read and follow. The information he leaves out is the sort that is usually more easily learned through personal experience anyhow. Most of the missing information is of the advanced or expert variety. If I noticed one thing that detracted from the overall impression I got from the book, it would be the quality of the illustrations and photos. The hand drawn illustrations were crude, but effective, and several of the photos seemed ill thought-out. Specifically, in the section where Weldon chides the neophyte photographer to always keep the subjects face in the sun, the example photos show the subjects face half-shaded. Nevertheless, even with cheesy drawings, the book does an excellent job of making a difficult subject into a set of tasks that are easily broken down and understood. Each area is thoroughly explained, from the equipment required to safely photograph each jump, to the proper editing technique for a tandem video. Weldon tries to cover it all and does a good job of doing so. No book on freefall photography can avoid personal technique - and there is an endless set of variations on this. Each individual has their own style, and this comes with experience. "Flying the camera" is a great introduction, but no book can teach technique. What a book can teach, however, is method - and at this "Flying the camera" is a huge success. It is in the specific methods and 'tricks' that Patrick Weldon shined the brightest - the book is full of useful hints that even seasoned photographers can benefit from - I sure did. But the book also had some controversial advice, and went directly against a personal philosophy - that of what to do when you open you parachute while wearing a camera helmet. The book specifically recommends that you put your head on your chest and look down - I was taught, and personal experience reinforced - that you always look at the horizon during opening and keep your head level to your shoulders. The difference is in the details and I am certain there are many sides to the argument. My opinion is just that - opinion. In freefall photography, whatever the technique - the method remains the same - and it really does come down to personal experience. That is what skydiving is all about, and photography just expands this - it captures an intensely personal experience and allows us to share that vision with the world. With rapid advances in camera technology, more and more skydivers are now flying a camera. This book will not cover all of the subject areas of interest, but for a novice freefall photographer this book can provide invaluable advice and guidance - and potentially save you a lot of wasted time and money. Even where the book is less-than-perfect, it is certainly better than nothing, and Patrick Weldon should be proud of his work. "Flying the camera" fills a huge gap of knowledge and will be a great benefit to anyone interested in freefall photography.
-
They're out there every weekend - you see them with the students, following the teams, part of the Freefly revolution. And now you've decided to join them. So you want to be a camera flyer, huh? Here's a few tips to consider before you rush out and buy that first video camera. This article is intended to be a brief introduction to some of the things you need to consider if you want to fly a camera, and is in no way comprehensive. The intent is to get you to consider the choices and options available, and to try to match that with the intended use of the camera. Still cameras, camera helmets, and technique are not covered in this article. Flying a camera is as fun as it gets skydiving - but it can turn your fun into an expensive and frustrating affair in a big hurry, and eat away at your precious jump money even faster. What's that? You don't expect to pay for your jumps if you fly a camera? Well, you will - for at least the first 50 to 100 jumps, until your proficiency (NOT your flying skills) with the equipment and techniques has improved to make it worth while for someone else to pay your slot. This is an additional reason to ensure that the precious money you spend on camera equipment is not wasted due to inexperience. First, as with any major purchase, you have to know what you are going to do with it. The same camcorder may be useful for tandems, AFF, 4-way, and Freeflying, but if you don't know which brand and model that is, you'll likely end up with something that does not do what you expect. Next, start a list - are you intending to make money or just expand your fun? There's a huge difference in between those two answers, and while one does not preclude the other, you may not end up with the right tool for the job. If at all possible, find a mentor! Go out of your way to find an experienced camera flyer and ask for their input. Find out how they got started and why, and what equipment they bought. Ask what hard and expensive lessons they learned - any camera flyer with experience will have a few eye-opening stories for you. They may cause you to reconsider the whole idea - and that's the point. Don't expect that they can drop everything on a Saturday afternoon to help - be reasonable and try to work within their hectic schedule. Obviously, once you've done your homework, it's time to go shopping. In today's consumer environment, there are so many choices and options available it may seem overwhelming to know who to trust and where to go. Do you buy mail order or locally? Do you get the extended warranty they try to sell you? Do you need an extra battery? What about a wide-angle lens? How wide? This is one time it really pays to have a mentor. Personally, I tell every new or want-to-be camera flyer to be careful and ensure that their purchases are what they intend. If you're intending to shoot the Freefly revolution and make awesome head-down videos, a large 3-chip camcorder is probably not what you want to buy. Of course, if you plan on challenging one of the well-known freefall photographers for title of "Top Dog" you may wish to find the most powerful and feature-heavy camera on the market. By contrast, if you are just intending to shoot video for fun and as a point-of-view when you fun jump, then a basic camcorder with an ultra wide-angle lens(0.42x to 0.45x)may be just what you need. Most of Sony's PC series have become very popular as point-of-view cameras, with even the seasoned pros. For freeflying, they're a dream come true, offering great features, top quality images, and a fair price all in a tiny package that is easy to use. In between is a vast assortment of choices, manufacturers, models, and formats. With both Sony and JVC making fine models that are as small as a paperback book, Mini-DV is now the single most popular format to shoot skydiving in. If you intend to shoot videos for hire, such as tandems, check with the local video concession to see what they require. They can also give you an idea of what sort of experience they expect, and how to get it. If you buy an analog camera, even Digital-8, it may be hard to sell later, and it surely will not produce the clear and crisp image you're used to seeing from Mini-DV. Analog camcorders are also not nearly as small and light as Mini-DV. Once you've decided on Mini-DV, the usual manufacturers are JVC and Sony. There are other options, but their equipment is not as robust or well-built as Sony and JVC. They are also not as popular, and while being popular does not mean much - it does mean others have similar equipment, have experience using it, and know what works well and what fails miserably using the camera. Both manufacturers seem to be widely discussed on some of the Internet chat rooms related to video cameras, so there is a ready source of information for those with access. I have a personal preference for Sony - but that is solely based on MY opinion. Sony is without question the most popular brand of camcorder that is found in the sport today. Sony builds top-quality equipment that is small and light, yet packed with features - some of which are useful and some of which are useless. Overall, the Sony line has a reputation for quality and is widely used - therefore it will probably be the easiest for you to learn and understand. The models available seem to change almost daily. In 1996, when I first purchased the Sony PC-7 I own, it was a new and radical departure from camcorder design and sparked an entire line of miniature cameras from both Sony and JVC. Most of these models have very slight differences in features and functions, and are too numerous to discuss at length here. JVC is also popular, but many models do not offer Firewire ports (for perfect digital copies) and do not offer the same image quality as Sony. Prices for Mini-DV camcorders have dropped dramatically. My first Sony VX-700 cost over $2000, and the PC-7 was about the same. Today, many of the PC models from Sony sell on the street for $1000 or less. I have seen JVC models advertised as low as $750. Once you have narrowed your search to a specific brand and model (or models) it's time to decide where to buy. I always try to go to a local business and make a point to get to know one of the sales people. I make them show me the model(s) I am interested in, tell them I'm serious about buying it, and inquire about price. I also tell them I am considering buying mail order, and why. In many cases, the local retailer will not be able to match a mail order price. However, any mail order purchase has its own risks - which often outweigh the potential cost savings. Most on-line or magazine-ad merchants have large restock fees if the equipment is returned - even if it's their fault or broken when you get it. They may also try to charge you extra for items the manufacturer intended to be included with the basic package - including batteries! I know of at least one merchant in New Jersey who shipped me an empty box - and charged me for it. When I called to complain, I was told I'd be charged a restock fee even though the box was empty. Buyer beware, indeed. At any rate - wherever you buy your camera, ensure it is packaged with all of the accessories that are supposed to be included. It may require a visit to the manufacturer's web site, but the effort may save you heartache later on if something important is missing. Most camcorders do NOT include a Step-up ring that may be required to mount one. Again, do your homework and know what to expect and what you will have to purchase separately. Personally, I always buy one extra with the required adapters. Once you actually do purchase the unit, I recommend one more step prior to purchasing your camera helmet - read the owner's manual thoroughly! Aside from being the best way to find out what buttons do what, it is also the only place you can learn what the different indicators and icons really mean. Knowing that may help you later, when you're on jump run at sunset for the coolest dive of the year. There you are, fat, dumb, and happy, when your camera begins to display funny codes and weird symbols, while making grinding noises and spitting out digital tape. Next up is buying a camera helmet - but that will have to wait for another installment. Remember - this was your idea! You wanted to fly a camera, even after I warned you… About Robbie Culver Robbie Culver is a freefall photographer with 2800 jumps, about 1800 with cameras. Robbie's still photography has been featured in Skydiving and Parachutist magazines, the USPA Calendar, and in various industry ads. His video credits include the staff of Roger Ponce's Color Concepts at the World Freefall Convention, the 1999 Lost Prairie Boogie video, and annual dropzone highlight videos. He and his wife Brenda skydive in the Chicago area, where Brenda is an aspiring 4-way competitor and CReW dog. They can be found most weekends at Chicagoland Skydiving in Hinckley. Examples of Robbie's work and tips on freefall photography can be found on his web site, www.skydreams.net.