A beginners guide to filming competitive 4-way
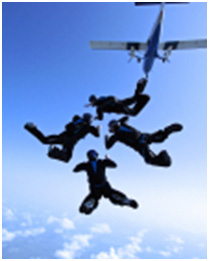
This article is for jumpers that already have some experience flying camera and are trying to expand on their knowledge of how to film formation-teams in a competition setting. I will focus mainly on 4-way, because I believe it to be the most difficult FS discipline to film (aside from VFS), due to the many different exits and faster key speeds. However, once you have a firm grasp of shooting 4-way, the same principles can be applied to 8-way and larger formations.
During a competition, whether it be a local meet or the nationals, it is vital that you give yourself all the advantages you can to do the job right. It is advisable that you jump with two cameras with differing wide-angle lenses. Film the team with the tighter view in mind, so if a grip goes out of frame, you can always revert back to the other camera with the wider view. The difference between first and second place can come down to only one point. So our goal is to have an “NJ free” (Non Judgeable) competition for all 10 rounds. If at any time during a jump a grip goes out of frame, the videographer can cost the team a point or more. Jumping with two cameras is not necessary for training, however you want to do a few training jumps before a meet with the exact set up that you are planning on using. This may expose any flaws or issues with your equipment.
Training should be more difficult for you than competition. Push yourself to fly close to the formation. Train with your back up wide-angle lens, this will force you to be closer and more aggressive in getting the shots you need. This will make every competition feel much easier. Do not be afraid to try new things. Sometimes we have to leave our comfort zones to learn something that may benefit us in the long run.
Climb OutIn most cases the camera flyer is in charge of the spot. Not having to worry about this little detail allows the team to focus on their jump. As you climb out on the camera step, think of flying your body as soon as you expose yourself to the airflow. Even though you are on the airplane, miss-presenting yourself to the wind can make your job a lot more difficult.
You can practice climbing around on the airplane while it is parked. Get a feel for where everything is. Continue to practice until you can climb out of the plane in a smooth and controlled manner. Speed will come with time. Do not forget to practice climbing back into the plane. Sometimes you will find yourself climbing out right as the red light turns back on. If possible, one of your teammates can block some of the wind and help you get back inside. Remember to become familiar with different aircrafts when you travel to another drop-zone to train or compete.
Freak OutNever trust an exit count! It is easy to get impatient on the camera step, waiting for the team to get ready. Teams can sometimes take a while in the door to get ready, especially if they are trying something new. Do not interpret a “wiggle” as a count. Be patient and watch for other signs like a helmet releasing a head jam.
Every team’s exit count is different. Before every jump, most teams will take the time to dirt dive and practice their exit from a mock-up. You can learn a lot about the team by just simply watching them on the ground, so take as many opportunities as you can to learn the exit count and timing.
Leading or Peeling?The exits covered here are from an otter, a left-handed door.
Keep in mind that your relative position to the team is much closer on the aircraft than what it will be in freefall. You will need to create this gap quickly during the exit by falling slow. This is where camera wings and strong legs can be very helpful.
Teams and coaches prefer the leading exit over the peel exit, because it gives them a great view of their timing, presentation, and heading. This method is much more conducive for the video debrief.
For this exit I have my left foot on the camera step and my right hand on the handle. (When you have your right foot on the step, you expose more of your body to the exiting team.) After the team has given the count and is in the process of leaving the airplane, I find it helpful to try and run my right hand across the fuselage. I try to feel the rivets of the plane as I kick off the step. This helps ensure that I am in the correct position relative to the formation. As for your timing on this exit, you will know you have left too early when you can see the bottom of the airplane, and you will have left too late if you make contact with the team. For all exits, this is where your timing becomes crucial.
Peeling is usually considered the safer choice of the two exits, because you leave right after the team. This way, you will not leave too early because of a misinterpreted count and you do not have to worry about the teams burble.
For this exit, I have my right foot on the step with my right hand on the handle. I swing my body back so that my left foot is touching the fuselage. Now all I have to do is wait for them to come out the door. Leave with the last person and follow the team down the hill. Remember to present your hips correctly into the relative wind and keep the team in those cross hairs.
After the exit, all you have to do is keep the team’s grips in frame for the next 35 seconds. Remember that the different formations rarely stay in one place. As the team transitions from one formation to the next, you may have to adjust your own relative position to the team to keep them all in frame. Improving your individual flight skills will allow you to make these necessary corrections quickly and without thought.
Although the “hard part” is over, you still have to be in the right position to get a judgeable video. Being close enough is the first part, but probably more importantly is being “steep” enough. Your angle in relationship to the formation is crucial. The steeper you can get, the better. It is very difficult to see all the grips when you are shallow. This is especially true on exit. If at any point, other than the exit, you can see sky, you are not steep enough. You should also only be able to see the top/back of the team’s helmets (no faces). The distance from the team will vary on the size lens you are using.
An additional detail to pay attention to is the background. As the videographer, you can make the judge’s job easier by turning to a heading with a solid background, such as a forest, lake, desert floor, etc. Multicolored backgrounds, such as buildings can make the image very distracting and the formations harder to judge.
Doh!Making contact with the formation can occur either on exit or in free fall. We want to avoid this scenario at all costs; however, accidents can and do happen. If you find yourself falling towards a formation, get as big and flat as you can! The last thing you should do is ball-up. Your natural reaction is to protect yourself, but by doing this you will only make things worse. Not only have you sacrificed all your lift and will now impact the team with greater speed, you have also given up on the chance that your airflow may be returned to you as the formation continues to move to the next point.
I think that it is a good idea for camera flyers to understand what the team is exiting and how the formation will fly. I believe that a deeper understanding is necessary than just to know whether a formation is long or round. Being able to anticipate a formation’s movements, direction, and timing will greatly improve your video quality. Be pro active! Ask your team what formations they are going to perform. It will take some time, but being able to “speak” a little 4-way will not hurt.
You can educate yourself on these formations by reviewing the IPC dive pool online. Memorize how each formation flies as it comes out the door; more importantly, think about how they might block your airflow. As the team debriefs their jumps, you should do the same. Take a look at your own timing, framing, and distance. Strive to make each video jump better than your last.
Competition vs. TrainingWhen it comes to competition camera flying, there is a big difference between a “Gun for Hire” and a Teammate. In order to make this transition, you need to change your approach and mind-state from just being there for the ride, to being part of the action. As a teammate, you are taking on much more responsibility than a “gun for hire”, such as: archiving and cataloging all media footage, taking pictures, submitting photos to magazines and sponsors (if applicable), checking in with manifest for calls, spotting, chasing down cutaways, etc. Your team needs to be able to depend on you to do all of these things. Creating a great training environment becomes key. The more the team can focus on their training, the better.
Helping a team to perform at their best can also aid you in achieving your best. Being able to perform at your peak during a high-stress competition can be very satisfying and rewarding. A positive attitude and an eagerness to learn is the start of becoming a good competitor. Hard work and embracing the training process is what will turn you into a great competitor.

There are no comments to display.
Join the conversation
You can post now and register later. If you have an account, sign in now to post with your account.
Note: Your post will require moderator approval before it will be visible.