Search the Community
Showing results for tags 'news'.
Found 523 results
-
 Performance Designs, Inc., located in Deland, Florida, is having a contest to celebrate the making of its 6000th Sabre2 main canopy which has been one of their most successful lines of main canopies. The Sabre2 emerged from over 15 years of ongoing research and development. Named after its predecessor – the original Sabre – its purpose was to fulfill the evolving need for an all-purpose all-around canopy. Starting as a replacement of the original PD 9 cell, the original Sabre was designed to appeal to the needs of an emerging skydiving market in the late 80’s. The President of Performance Designs, Bill Coe, and Vice President, John Leblanc, said they needed a canopy that would appeal to a general market that wanted better openings, landings and performance characteristics than the current models available at the time. The canopy was designed with such vision that continues to endure. The original Sabre established precedence as the benchmark for rectangular zero porosity canopies with over 20,000 of them produced and jumped all over the world since 1989. As the needs of our customers evolved, so did our research and development and it was clear that the time had come for the original to spawn the next generation of Sabre. The Sabre2 was introduced to the skies in 2001 - A totally new design from the original, Sabre2 incorporated advances in design accumulated throughout the decade or more that had passed since its predecessor – and it promised to be exciting! The Sabre2 provides a broad range of features to the general skydiving population from weekend jumpers to professional skydivers, such as Max Cohn from Generation Freefly and Arianna de Benedetti from the Italian National Team. Additionally, various drop zones use Sabre2 canopies in their student programs, as well as in transition and rental applications. The Sabre2 boasts the slogan ”Quite possibly the world’s most perfect all around canopy” and since its release has sold nearly 6,000 of them in just 4 years. To celebrate this, Performance Designs is giving one lucky winner the prize of a lifetime! FREE canopy—your Sabre2 canopy at no charge FREE flight to Deland, Florida to visit Performance Designs’ facilities. FREE first jump on your new canopy with John Leblanc, vice-president of Performance Designs and head designer of our products! FREE case of beer FREE canopy control class with Scott Miller And of course, tons of pictures and memories as we feature you on magazines and websites worldwide! About the Sabre2The Sabre2 is a slightly tapered, zero-porosity nine cell canopy, suitable for intermediate jumpers at light wing loadings and a wide range that makes it attractive to more experienced jumper at higher wing loadings. The Sabre2 is designed to be fun to fly, easy to land, and to be a great all-purpose skydiving canopy. Slow openings, crisp positive response to toggle input, along with its light toggle and riser pressure are some of the characteristics that set this canopy apart. The Sabre2 has an incredible amount of lift available on landing that will give you tremendous ability to slow down when you wish to. Sabre2’s performance envelope is huge – it will feel aggressive at higher wing loadings while maintaining its incredible ease of landing and forgiveness at lower wing loadings. If you are looking for a canopy that represents the evolution of modern, carefree performance, the Sabre2 is it! How to participateAll you need to do to participate is place an order for your Sabre2 canopy through your favorite dealer. And when lucky 6,000 comes up – John Leblanc will contact the winner personally. So what are you waiting for?
 -
ISSUE DATE: 11 th MARCH 2005 STATUS: MANDATORY - To be actioned before next jump by a qualified Rigger. IDENTIFICATION: ALL ICON HARNESS / CONTAINERS PART NUMBERS: C125 BACKGROUND: Ground testing of a ICON Harness Container revealed a Hard Cutaway. The Hard Cutaway was attributed to Dirty Cutaway Housings and Dirty Cutaway Cables. The incident is localized to and individual Drop Zone. The individual Drop Zone is in an excessively sandy (fine beach sand) and windy environment. SERVICE BULLETIN: CLEANING THE CUTAWAY CABLE AND CUTAWAY CABLE HOUSING. Fit the Container as per normal and completely remove the Cutaway Cable checking for any abnormality. With the Cutaway Cable removed pass a thin line up thru each Cutaway Housing. Now once the piece of line has passed thru the Cutaway Housing attach a suitably size (± 1” x 7” / 25mm x 175mm), piece of clean cotton cloth soaked in paraffin to the end of the piece of string and pull thru the Cutaway Housing. Perform this to both the left and right hand side Cutaway Housings. Clean the Cutaway Cable (Yellow Cable) with Paraffin. Ensure that the Cutaway Cable is completely clean and all the dark marks on the Cutaway Cable are removed. Refit the cutaway cable. Fit the container as per normal and perform 3 Cutaways completely removing the Cutaway Cable each time. Clean the Cutaway Cable with Paraffin between each test. Ensure Cutaway Cable is routed and fitted correctly. If any queries or questions please contact manufacturer AUTHORITY: AERODYNE SYSTEMS AEROSPACE (Pty) Ltd 29 Duiker Road Canelands 4340 South Africa Tel +27 32 533 0333 Fax +27 32 533 0262 e-mail [email protected] web www.aerodyne-int.com Service Bulletin SB 110305 Download Service Bulletin SB 110305 (PDF)
-
Para-Gear is interested in photographic submissions that you may have for the 2005 -2006 Para-Gear Catalog #70. We have taken the time to briefly describe the format and certain criteria that we look for, in order to help you to see if you have something worth submitting. We have included examples of previous catalog covers for your reference. Over the years Para-Gear has used photos from all of skydiving's disciplines. We do not have a preference as far as what type of skydiving photo it is, rather we look for something that either is eye-catching or pleasing to the eye. In light of the digital age, we are also able to use photos that in one way or another may be less than perfect and enhance them, removing blemishes, flipping images, altering colors, etc. The following are preferences. However what we prefer and what we get, or choose, are not always the same. If however we came down to a choice between two photos of equal quality, we would opt for the one that met more of our preferences. We typically prefer that the photo be brighter. In the past we have used sunset photos and even a night jump photo, although by and large most of the photos are daytime. We like the subject of the image to have contrast with the background. Subjects that are wearing brighter more colorful clothing usually stand out more. We prefer to have the people in the photo wearing equipment since that is what we sell. Headgear, goggles, jumpsuits, altimeters, audible altimeters, and gloves are all good. We also prefer to see skydivers wearing head and foot protection. We do not print any BASE jumping nor any Tandem photographs. No submissions of these will be accepted. Our basic criteria is as follows:Vertical Format. The front and back covers of the catalog are both in a vertical format. We can use a horizontal (landscape) shot, as opposed to a vertical (portrait), and then crop it as long as the image lies within a vertical cropping. Photo Quality. The front and back cover shots will be printed as 8 ½ x 11 in 300 dpi format. Any film that can hold its quality up to this size and print dpi is fine. Slide film is preferred. In the event of a final cover choice, we prefer to be sent the original slide for getting the best quality out of the image. Back Cover Photo. The back cover photo is no different from the front except in one respect. We need to have room on the left side of the image for the thumb index. In the past we have taken images and been able to horizontally flip them thereby creating this room. Originality. Anything that is original, eye-catching, or makes someone take more notice of the catalog covers is something we look for. It could be a photo from a unique camera position or angle, a scenic skydive, shots under canopy, landings, etc. We look for photos that have not been previously published and most likely would not accept them if they have, as we want a photo that no one else has seen yet. We also do not want any photos that are chosen as the front or back covers to be used for other non Para-Gear advertising for a period of one year. Para-Gear offers $250.00 each for both the front and back covers we choose. Our current deadline for catalog cover submissions is March 18th 2005 . Sending sample pictures by e-mail or mail are both fine. We will return any mailed in photos or slides after we are done with them. Please feel free to contact me directly with any questions. Para-Gear Equipment Co. Inc. 3839 West Oakton Street Skokie, Illinois 60076 USA Ph: 847-679-5905 Fax: 847-679-8644 E-mail: [email protected] Internet: http://www.para-gear.com When replying, please advise your full name, address, e-mail, phone/fax and copy our e-mail or refer to the subject so we can reply easily back to you. Thank you.
-
The next revolution in high performance technology: Z-Brace Performance Designs has been working on this concept for over two years and is proud to present the first Z-BRACE concept canopy. In 1990 Performance Designs launched Excalibur, the first cross-braced canopy. this technology was designed and patented by Performance Designs and is being used in canopies from around the world. The Velocity high performance wing from PD is the world's most winningest cross-braced canopy to date. Cross-braced technology:A cross-brace holds a non-load rib flat with a conventional rib, in effect creating three loaded cells between line groups. The Z-Brace concept:The Z-Brace goes a step beyond the cross-brace, by diagonally bracing two additional non-loded ribs, which results in five cells between line groups. The Z-Brace concept canopy displayed at PIA was a 35 cell canopy. The Z-Brace technology and canopy is not yet available on any released products. PIA Contest WinnerAt the recent PIA Symposium PD displayed the new Z-Brace concept canopy described above. At their booth they had a contest where jumpers completed a short survey and then were invited to guess how many parts make up the Z-Brace canopy. For coming up with the correct answer people could win a free PD canopy of their choice. One jumper came up with the correct answer – 400 parts ! “Chilly-Willy” Del Campo from Chile was the lucky winner – the only one guessing the exact number of parts. Enjoy the new canopy Willy!!
-
 We have been dreaming about this for a long time and now it is real. In air communication systems, allowing us to talk and communicate in freefall, in the wind tunnel and under canopy. An ideal tool for instruction, but not limited to only just that. Flight Club is now using the in air communication systems acquired from RareDynamic.com. The in flight systems arrived just in time, on the second to last day of a Freefly skills camp with the Golden Knights Tandem Team. The Golden Knights chose to receive coaching from Flight Club and improve their Freefly skills to become better all around skydivers. They were the perfect group to introduce this technology to. The results were incredible. Both Flight Club instructors and The Golden Knights witnessed and experienced a much faster learning curve. The Knights produced positive results including faster reaction time and better understanding of what the instructors wanted from them. Other students agreed with the Knights. Diane Oelschlager (1202 jumps) said: "Absolutely kick ass technology! Hearing your instructor's calm soothing voice, instantly relaxes you and lets perform at your best." Cheri Johnson (130 jumps) added: " Not only did I see my instructor but I actually got to hear him. Even on landing! When the winds seriously picked up to he point where my canopy was almost flying backwards, it was comforting to hear a voice confirming my actions and guiding me down safely." Instructors agreed that when the student hears the command, there is a faster reaction time compared to making the association and translation of hand signals. The instructor can also give more elaborate instructions. In comparison, hand signals, are somewhat limiting; one could command “legs out”, however, how do you give someone the sign for a more complex message? It is simple, now with the air-to-air communication system you can clearly communicate in detail.This helps to avoid miscommunication and decrease anxiety and apprehension with students by helping to manage arousal levels through for example breathing. Instructors can continue to use hand signals as a secondary form of communication. "This system is totally off the hook", says Benjamin Forde (520 jumps). "I could not believe how clear it was. Imagine having Omar chatting with you and pointing out the kinks, real time, crystal clear, no more guessing, no more trying to remember the 20 things that happened during the jump once on the ground. I get it! I will get the learning equivalent of 3-5 traditional coach jumps for every one I do with this system and these guys... and under canopy, its awesome, swoop training anyone? You are no longer alone—it's THE absolute revolution in coaching." Flight Club offers in flight communication to all students for all disciplines. Visit their web site for more information on their courses. Flight Club
 -
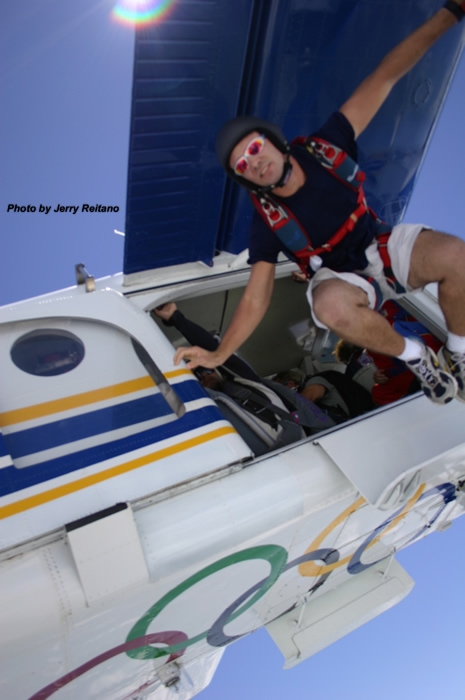
 Perris, CA (November 23,2004)- Pioneer B.A.S.E. jumper Jeb Corliss and Go Fast! - sponsored test pilot Luigi Cani, have paved the way for a world record landing attempt of a wing-suit—minus a parachute. Jeb and Luigi teamed up to gauge speeds and gather data to safely land Jeb’s wing-suit. Testing was critical, as no one has ever survived a landing attempt without a parachute. Jeb flew in free fall donning a parachute alongside Luigi, who was at the controls of the world’s smallest and fastest parachute—known as the ICARUS VX-39. The two were able to gather data using GPS systems attached to Luigi that tracked exact forward speeds, exact fall rate and glide angles needed for a safe landing. After two days of test piloting, Jeb Corliss said landing the wing-suit was possible as early as next year. "We found there is a definite and reasonable speed for a landing attempt sometime next summer. We’re now developing four different types of technologies to land safely—it’s very important to land with zero injuries," said Corliss after analyzing data from the test flight. Showcasing the evolution of the sport of skydiving, Luigi Cani remarked on the uniqueness of Jeb’s wing-suit project. "The testing shows the technology of the sport—nowadays we can jump a parachute that flies as fast as a person in free fall and currently we’re discovering technology to land a wing-suit without a parachute," said Cani. "If Jeb lands the wing-suit without a parachute and survives—he is going to be my hero," added Cani. About Go Fast Sports & Beverage Co. Go Fast Sports & Beverage Co. is the producer of Go Fast Energy Drink and Go Fast Sports Apparel. Headquartered in Denver, Colorado, Go Fast is involved with sports and athletes of all kinds – from triathlon, parachuting and mountain biking, to B.A.S.E. jumping, climbing, skier-x, motocross, kiteboarding and more. For more information, please visit www.GoFastSports.com, or call 303.893.1222 or email [email protected]
 -
The result of 6 continuous years of research and development, Phoenix-Fly proudly introduces the Vampire V-1 wingsuit. The PF Vampire V-1 wingsuit features: A revolutionary CAD-designed 3D arm wing Semi-rigid plastic ribs inside the arm and leg wings Newly designed leg wing leading edge Advanced leg wing design with increased surface area Increased back deflector size Integrated arm wing sleeve design Redesigned wingtip grips Adjustable arm tension swoop cords New low-drag materials New wing release handlesThe Vampire V-1 was designed with both skydivers and BASE jumpers in mind. All V-1 features are highly beneficial for both disciplines. For skydivers, the V-1 will enable you to fly further, faster, hang out in the clouds longer, with more controllable flocking dives flown in tighter formations. For wingsuit BASE jumpers, the V-1 is the ultimate choice, offering the best performance available and permitting longer flights, both in distance and delay. The V-1 is not an “off the shelf” product, but rather a tailor-made suit designed to fit exact flyer measurements. Each suit is unique and customized to fit your body, which maximizes comfort and performance. Price: 990 Euro or 1,250 USD With new revolutionary design, low-drag materials, custom-tailoring and higher performance, many people might wonder how the Vampire V-1 can be priced comparably to other wingsuits. Is this too good to be true? Absolutely not! Because of streamlined option offerings and scaled-down color selection, manufacturing complexity is greatly reduced. In addition, Phoenix-Fly’s overhead and operating costs have been simplified – a savings that is passed directly to our customers.The V-1 will be available beginning December 1, 2004 and order forms will be available on www.phoenix-fly.com from November 30. Note on lead times: During the initial launch phase of the V-1, Phoenix-Fly will be faced with the challenge of trying to keep up with demand. As observed with the initial launch of the PF Pants and Jackets, lead times may be up to 8-10 weeks, during which we will endeavour to keep you updated on status. Once order volume has stabilized, we’re aiming for a 6-8 week lead time. We ask for your patience during this time and promise that you will be rewarded with an exceptional state-of-the-art wingsuit that far surpasses anything that you’ve ever flown.
-
 Embry Riddle Aeronautical University is not only one of the top ranked aerospace engineering schools in the country, but it also produces a large number of our airline pilots. The university sits just four miles from Daytona Beach, one of the world’s most famous beaches - home of Bike Week, Spring Break and even the birthplace of NASCAR. While some ERAU students spend their free time relaxing and soaking up the sun, a select group of students use the beach as a backdrop for their aerial playground. ERAU Skydiving Club offers the ultimate thrill to students, faculty and staff, who wish to participate in a tandem or complete their AFF course and become a licensed skydiver. ERAUSC utilizes the impressive facilities at Skydive Deland, located in Deland, Florida, only 15 minutes from the university. Skydive Deland graciously offers discounts to club members. Within the first three weeks of school this semester (hurricanes permitting), the Skydiving Club has grown to over 40 members. Over a dozen new AFF students have completed their ground school and are ready to start becoming skydivers. ERAUSC’s popularity has grown throughout the local skydiving community over the past year. As a university, ERAU has looked past the negative stereotypes of the sport and now embraces truly what skydiving tries to accomplish. This is evident by the request for demonstration jumps into almost every major event for the university, including ERAU’s homecoming air show and static display this November. This year, ERAUSC has vowed to promote the sport of skydiving to even a larger number of students and expose them to every aspect of the sport. As of now, four separate teams, including three freefly and one female 4-way team are training to compete in Collegiate this year, once again being hosted in Lake Wales, Florida. For these ten college students, classes are spent day dreaming about their next opportunity to jump from a plane, rather than fly one. Unlike most people who compete in the USPA Nationals, many of these students have full time jobs and are full time students. Four of the students are part of the Reserve Officer Tanning Corps program for the Air Force and Army, some are pilots, and even a few are engineering students. One competitor has even been working for NASA for two years. The teams are not sponsored by local skydiving companies or dropzones. Part of what makes Collegiate such a great sport is that most of the competitors did everything in their power to raise money to compete. Very little funding is available through schools or local companies to support such a dream. It is nice to see how dedicated these college skydivers are to our sport.
 -
 Learning to fly our parachutes is absolutely necessary for long-term survival in this sport. The philosophy that the canopy is simply a means to get down from a skydive is gradually becoming a thing of the past. This may be as a result of individuals with such an attitude dropping out of the sport due to canopy-related injuries, or from the insurmountable fear that comes as a result of a lack of control over their experience. Regardless, many jumpers have been taking an increased interest in flying their parachutes better. Reading and talking about canopies is the beginning of this process. We must understand the principles that allow our canopies to fly. To make a real difference in our capabilities, however, we need to physically experiment with our parachutes in flight. We must practice in the real world. Here are a few exercises that will increase your abilities to save your own life, and enhance your feeling of control while under canopy: Pitch Control Exercises Manipulate the canopy on the pitch axis using the brakes. Look at canopy to notice the amount of pitch axis change. Notice the difference between "soft" and "sharp" inputs: slow application vs. quick. Why? Controlling the pitch angle is how we manipulate the angle of attack of the wing. Without a dynamic change to the angle of attack, we will be unable to increase the lift of the parachute enough to change the direction of flight from its normal full flight glide to level flight. This maneuver is essential for safe landings. Pitch Control With Bank Angle Begin a turn using a single steering toggle. Apply the opposite toggle while still in the turn. Experiment with soft versus sharp inputs to negate decent. Look at canopy to notice pitch changes.Why? Having the ability to control the pitch axis while in a bank is what gives the pilot the ability to control the decent rate while in a turn. The natural tendency is to loose altitude in a turn, but this is not necessarily the result of turning with bank angle. By increasing the angle of attack while in a bank, we can increase the amount of lift that the parachute is producing, and even alter the flight path to level flight despite significant bank angle. Dive Arrest: Toggle Turns Place the canopy in a spiral dive using a single steering toggle. Arrest the dive as quickly as possible by sharply applying the opposite toggle as well as the inside toggle; the inside toggle is not applied until the two are matched in the degree of input. When the toggles are matched, a short stab of collective brake pressure is usually all that is needed to achieve level flight. Exercise both banked recovery and wings level recovery. Why? Turning too low is the preliminary cause of many injuries in our sport. Unfortunately, most canopy pilots assume that bank angle must be eradicated before arresting the dive. This leads many to waste valuable altitude in the process of leveling the wing. In situations with very little altitude remaining, this may delay the collective brake application until it is too late. By rehearsing a transition to zero decent while still in a bank, the pilot becomes accustomed to applying the toggle on the outside of the turn as a learned instinct, reducing the chances of a turn leading to serious injury. Dive Arrest: Front Riser Dive Place the canopy in a dive using the front risers. Rehearse dropping the front risers and quickly stabbing the brakes. Rehearse both straight front riser dive recovery as well as turning dives. Why? While acceleration on final approach can be great fun and usually leads to longer swoops, the acquisition of speed is not really the hard part. What keeps us alive is the judgment and skills necessary to save us when we dive the canopy too close to the ground. If we rehearse the solutions to the dangers, the likelihood of a dive resulting in serious injury is reduced. Letting the front risers up slowly may be the best way to get a long swoop when the dive is rounded up slowly and with ample altitude. Unfortunately, this muscle memory may not serve us when we are really low. In the time it takes to smoothly let up on the front risers we may find ourselves planted in the ground like a shrubbery. Dropping the front risers allows the pilot to keep their hands down, ready to stab the brakes aggressively to arrest a mortal dive. A short, sharp, shock on the brakes may be all that is necessary to place the jumper back under the wing, and to the higher angle of attack that saves their life. Slow-Flight Practice Place the canopy in 90% brakes and hold for 60-90 seconds. Make controlled heading changes of 45-90 degrees. Notice the difference in responsiveness as compared to full flight turns. Notice that lifting a toggle on the outside of the turn reduces the risk of stalling the wing on the inside of the turn.Why? Most pilots spend the majority of their canopy ride in full flight. This means that the feeling of the canopy in this mode is most comfortable to most people. It also means that flying in deep brakes places many out of their comfort zone. This means that most people are feeling somewhat uncomfortable just prior to putting their feet on the ground every single jump. In fact, this anxiety often causes people to hold their breath, and then offset their steering toggles toward the end of the landing in order to get to the ground sooner. They simply want this part to be over. In order to land with great consistency, we must become intimately aware of the flight performance of our parachutes in very deep brakes. The more time we spend in this flight mode, the more comfortable we will be. If we are to land well, we must be as comfortable with deep brakes as we are with full flight. Brian Germain is the author of The Parachute and its Pilot, a canopy flight educational text. Brian is also the President of Big Air Sportz parachute manufacturing company, and teaches canopy flight courses all over the world. To learn more about parachutes, or to order the book, go to: www.BrianGermain.com .
 -
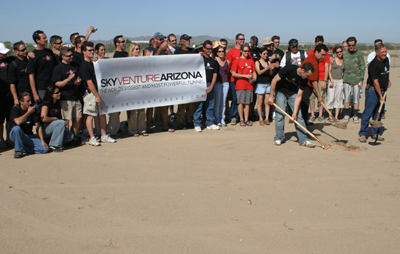 On September 7th, Skydive Arizona celebrated a ground breaking ceremony for the largest SkyVenture Wind-Tunnel ever, to be located right on the dropzone. Since then, construction has been underway for the only 14 foot tunnel that will satisfy flyers of all flying styles, using four 400 hp engines. Construction is expected to be complete in less than 70 days. There are many advantages to having a larger tunnel. This 14 foot diameter chamber will provide extra room for novice Relative Work flyers to practice 4-way. The additional room will increase the comfort level for newer tunnel flyers as they gain experience and adapt to the confined space. A total of 1,600 hp will easily lift Freeflyers and enable them to sharpen their skills within a few flying sessions. SkyVenture Wind-Tunnels have successfully proven themselves as extremely effective training-tools over the last years. Skydive Arizona’s world-champion staff will cater to your training needs and bring out the best in you. Competitive skydivers will be able to jump during the day, relax in the afternoon, and tunnel fly at anytime that fits their training schedule. Tunnel coaching will be available from highly experienced Tunnel flyers, in RW, Freefly, Freestyle and “Funstyle”. Arizona Airspeed, innovators of the tunnel-camp training concept, will provide coaching at any level with at least one Airspeed tunnel-camp per month. The tunnel facilities will host a Health-center with Yoga, Acupuncture and Guided Meditation, to add to the already offered services of Massage, Reiki and Pilates at the dropzone. Come to the sun, take advantage of the largest fleet of skydiving aircraft, rely on the Arizona weather and fly with the best. Skydive Arizona is the mecca of skydiving, with over 150,000 skydives made annually. As a global destination point for travelers the inclusion of the wind tunnel only serves to put the crowning touch on the most complete full service skydiving resort in the world. Whether you are a competitive skydiver, or someone that is looking to hone their skills SkyVenture Arizona is here …for you!
 -
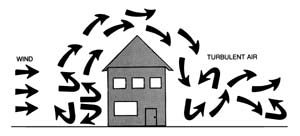 Most of your landings will be normal and in the center of the drop zone, but unusual things do happen like landing in water, in sudden high winds, descending through power lines or trees. TurbulenceAs mentioned earlier, bumpy air may be encountered at any altitude and it has been known to close end cells and upset canopies. Jumpers have been robbed of their wings to be left back in freefall at 75 feet. Bumpy air may occur on windy days and on hot, no-wind days. Keep your canopy inflated during turbulence by flying at one-quarter to one-half brakes and make gentle turns. If turbulence causes a partial canopy collapse of your canopy, bring the steering lines down to half to three-quarters brakes to help the canopy to reinflate. Turbulence near the ground may be caused when wind flows over obstacles such as buildings and tree lines. Avoid landing on the downwind side of any obstacle. The air may be bumpy or descending. The stronger the wind, the farther downwind the turbulence will exist and the taller the object, the higher the turbulence will be. Turbulence can be significant downwind as far as twenty times the object’s height. For a fifty-foot tree line, that could mean 1,000 feet downwind turbulence. Turbulence also occurs behind other ram-air canopies. Stay away from the area directly behind another canopy about 45 degrees up from the trailing edge. Dust DevilsDust devils are very dangerous. They can rob you of your canopy when you need it most — near the ground. Look for the spinning dust clouds. Unfortunately they can’t be seen over grass. One jumper landed, his canopy deflated and then it was reinflated by a dust devil. The swirling wind picked him up and then threw him back on the ground. He died from the impact. In windy conditions, pick up your deflated canopy immediately. In bad conditions, stand on it. High winds. If you find yourself in high winds, look behind you as you back up. Many jumpers back into power lines and fences. When landing in high winds, let go of one toggle as soon as your toes touch the ground. Keep the other toggle at the flare position and quickly pivot 180 degrees in the direction of the depressed toggle. Steer the canopy into the ground. Run toward and around it to collapse it. If necessary, continue pulling on that toggle and reel in its line to pull the canopy out from under itself. Once you are on your feet, stand on the canopy and remove your harness. Don’t let it reinflate and start dragging you all over again. ThunderstormsThunderstorms are violent vertical lifting of air masses, a phenomenon which can build cumulonimbus clouds from near the ground to anywhere from 50,000 to 75,000 feet. Thunderstorms possess violent updrafts and downdrafts along with lightning. While the West Coast of the U.S. has only around five thunderstorms each year, the northeast has 20, and Florida 80 to 90. Jumpers have been caught in cumulonimbus clouds for some pretty scary and wet rides. When the storm clouds appear, put the gear away. The Tree LandingThe tree landing is rarely hazardous if you “center” the tree. Your canopy will lower you gently into and through the trees as you slow further, breaking the thinner branches. You will probably go all the way through to the ground and make a normal parachute-landing fall on the other hand, if you clip a tree with a wing tip, your canopy may collasp, dropping you to the ground. If you can’t avoid the trees, face into the wind to minimize your ground speed, pull half brakes, and place your feet and knees tightly together so you won’t straddle a branch. Do not attempt to brake your descent by grasping limbs; you are better off going all the way through to the ground slowly than ending up sitting in the top of the tree. Prepare for a PLF. If you come to rest short of the ground, check your position. Students should wait for DZ personnel to come to their aid. If your feet are within three feet (1m) of the ground, unfasten your chest strap and then your (solid saddle) leg straps and drop to the ground. If you do not undo the chest strap first, you could injure your neck as you fall away. If you are up quite a way, relax and wait for help. If help does not arrive, you may have to climb down. Perhaps you are way off the DZ and dusk is approaching. It’s hard to shout continually, and it is nice to have a whistle in times like these. You may deploy the reserve canopy without activating the cut away mechanism (for S.O.S. type equipment, pull the metal cable out of its housing without disturbing the plastic-coated breakaway cables), let down the canopy and lines and then climb down hand over hand. If you let the narrow lines slip through your fingers and aren’t wearing gloves, you will receive painful friction burns, so go hand over hand. Keep your helmet on until you have both feet firmly on the ground. Its purpose is to protect your head from takeoff to touchdown, and you aren’t down yet. Power LinesYou must avoid power lines at all cost; the danger is just too great. Look for the high-tension wires. If you are at an unfamiliar DZ or land off target, look for poles; wires run between them invisibly. Keep power lines continually in mind from the time you open so you can avoid them. High-tension lines don’t look dangerous, but they strike with the speed and power of lightning. They may electrocute you in an instant or put you in the hospital with severe burns; it isn’t at all pleasant. If there is any question about clearing the lines, turn and run with the wind until you are past them and make the decision high enough. It will be better to land downwind than to land in power lines. If landing in the wires is inevitable, it is essential that you avoid touching more than one wire at a time. Any bird will tell you that it takes touching two wires to get zapped. If you are going into the wires, face your canopy into the wind to minimize horizontal drift, pull half brakes to make your final descent as close to vertical as possible. Drop your ripcord or anything else in your hands. Place your feet and knees firmly together with the toes pointed to avoid straddling a wire. Look for wires and wriggle and squirm as necessary trying to avoid touching more than one at a time. If you come to rest near the ground, check below to see what is underneath you. If there is no hazard below you and it is less than five feet to the ground — and assuming it is the main canopy that is hanging you from the wires you might decide to execute a breakaway and get away from the danger area as quickly as possible, but it would be better to wait for calmer heads to give you guidance in this matter. If there is a hazard below you or if it is your reserve parachute that is hanging you from the wires, you must wait calmly for competent, professional help. Any movement on your part may force an electrical contact. If a local resident walks up desiring to help you, ask them to call the power company and the DZ in that order. Warn would-be rescuers not to touch you or your gear until the power has been turned off. They could complete a circuit between you and the ground with fatal results. Once you get to the ground, be alert for broken power lines, they are like snakes hidden in the grass and they not only strike, they sometimes start fires. Never pull on a canopy attempting to remove it from the wires, it may be your very last good deed. Let the power company do it; it is their kind of work. Water LandingsThere are two types of water jumps — those you plan and those you don’t. An intentional water jump is an exciting, rewarding combination of aviation and water sports. But being unexpectedly blown out over a body of water is cause for great concern. In fact, while few jumpers have perished in a planned water jump, 48 perished in unexpected water landings between 1967 and 1984. These figures have dramatically decreased now that the use of ram-air canopies has become universal and floatation devices for operations within one mile of water are mandated by the BSRs. The procedures for these two very different types of landings are not the same. In an intentional water landing you will slide back in the saddle, undo the chest strap, the bellyband (if there is one), and loosen both leg straps slightly (unless you have a full saddle harness, in which case you can release one leg strap up high, then the last leg snap upon splashing down). This procedure is also recommended if you find yourself being blown unexpectedly out over the ocean or other immense body of water. When there is absolutely no question that you are going for a dunking, you should inflate your floatation device. Don’t get out of your gear until you get wet. Don’t break away when you think you are about to get wet. Depth perception over water is deceptive. You may think you’re at 20-feet, but you’re probably much higher. Without knowing how deep the water is, you almost guarantee yourself a landing injury if you don’t steer the canopy all the way to the surface. For landing purposes, assume the water is just a few inches deep. Take a deep breath and prepare to do a PLF. Line up your landing into the ground winds (you may have to use the sun’s position for a reference) and once you are wet, swim or work your way forward out of your gear. Don’t try to save the gear at first. Remember that it is replaceable, you aren’t. Worry about the gear later, when you are safely away from it. Better yet, let someone else (such as your water landing crew) worry about it. When making an intentional water jump, conditions are good, the jump is planned and the necessary flotation equipment is worn. The ingredients for tragedy, on the other hand, are born by being unprepared for the unexpected. The Basic Safety Requirements insist on carrying flotation gear when parachuting within one mile of any water deep enough to take a life, but there are times when one mile is not enough. A bad spot on a big load with high upper winds, sudden radical wind changes, or a popped round reserve as you exit at twelve grand, for examples, may carry you far from the friendly DZ. Some water requires more protection than just flotation gear, such as when a jumper punches through the ice in the wintertime. Most unintentional water landings are also unexpected. They take place in narrow rivers and small ponds; so small that you don’t know you are going into them until just a short distance from splashdown. There is no time to do much water-landing preparation, particularly if you are trying to avoid trees. As a result, you are going into the water in all your gear and your chances are poor. On the other hand, if you go through the intentional water landing procedure just in case and then miss the water only to land in the trees because you couldn’t spend enough time steering, you may subject yourself to other dangers. The greatest danger in water landings is becoming entangled in the net-like canopy and lines. In fact, we should think of: panic-canopy-entanglement-drowning. All are challenges, very much related, and either of the first two can lead to the others. If there is little wind in the small tree-protected pond, the canopy will deflate and fall straight down on you in a huge mess of tangled nylon fabric and lines. If you panic, you are sure to become caught in the trap. It seems logical, then, to try to avoid the canopy, or better yet, avoid the water landing. The procedure recommended for unintentional water landings is as follows: You are at 1,000 feet and the wind is backing you toward a water hazard. If you continue to face the wind, you may land short of it and if you turn to run, you may land on the other side of it, but one thing is for sure: you will land in the vicinity of it. So, take the action outlined below and then at double to triple the height of the trees, face into the wind to minimize your ground speed, pull your toggles to half brakes, and place your feet and knees firmly together in preparation for a PLF. Two Action System (TAS) Continue to steer, activate your flotation gear if you have it, undo your chest strap and your belly band if there is one. Loosen your leg straps so that you can slide the saddle forward a bit. Disconnect the RSL. Then, just before touchdown, reach for the canopy release handle. At the moment your feet get wet, not one moment sooner, activate the releases. The tensioned canopy will recoil upwards and even a mild wind will carry it away. Altitude is very difficult to judge, especially over flat ground or a large body of water. One is always tempted to drop out of the harness just before touching down, but what appears to be just a leg length may really be building height, so don’t break away until your feet are in the water.This procedure will leave you floating with your harness and reserve on but with the dangerous unpacked main canopy gone. Roll over on your back and take off the harness. Actually, the harness won’t hurt or restrict you and the packed reserve will even provide positive flotation. In fact, the reserve won’t become negatively buoyant for about three minutes. So, you can use it for temporary flotation. Single Operation System (S.O.S.). With the S.O.S. system, if you jettison the main canopy, the Stevens lanyard will activate the reserve. Allow yourself to get wet, bend forward and then swim or work your way forwards out of the loosened leg straps as quickly as possible. Get clear of the canopy. If the canopy does land on top of you anyway, grab it and follow/walk a seam to the edge of the canopy. There is no reason to panic as you can always lift the porous fabric to form a space to breathe. Once clear of the canopy, swim away using mostly your hands until you are clear of the lines. Keep kicking to a minimum, as pumping legs tend to draw lines and fabric toward them. If you should land in a river, even a slow moving one, you want to jettison your main as soon as possible. If it catches in the current it will drag you under and/or downstream away from your rescuers. Besides your reserve, certain other pieces of your gear may provide some flotation. Pneumatic soled jump boots, full shell helmets, knotted jumpsuits, etc.; they are all there for those who think to use them. You must undergo (dry) unintentional water-landing training for your USPA A license and (wet) live water training with full gear for the B license. These requirements have probably saved hundreds of lives so far. Buildings Landing on a building presents two distinct hazards. First, you might go through the roof of the building, which may lead to a broken or cut extremity. Second, if it is windy, you might find yourself being dragged off of the building and going for a second extremely hazardous landing. If you feel your life is in danger (such as being dragged off a high building), break away from the main as quickly as possible. Don’t worry about the reserve inflating — it won’t have enough of a chance to do so. If it is your reserve that put you on the building, try to collapse it as quickly as possible. If that doesn’t work, you’re going off the building in the wrong position for a second landing and there probably won’t be much of a chance to get into a PLF mode, but try to anyway. Other ObstaclesThere are many other landing obstacles that are potentially hazardous to parachutists such as ditches, fences, hard roads and even some unique ones like hot water geysers. These hazards at your DZ will be pointed out to you in your first jump course, probably with a marked aerial photograph. When visiting a new drop zone, be sure to check in with an instructor or the Safety & Training Advisor for a briefing on their local hazards and recommended alternate landing areas. When you are in the air, look for the danger areas. Invisible barbed wire runs between visible fence posts, power lines run between power poles, isolated buildings are served by electricity. Power lines, ditches, and fences often border roads, airplanes land on runways, etc. This should all be obvious, but sometimes it’s not. It is all new to you and the view is different: you are looking down at the terrain now, not horizontally. If an obstacle presents itself, steer your canopy to avoid it. Turn your canopy to run and land beyond it, if necessary. If you are going to strike an object, hit it feet-first. Successful landings under a parachute are like those in an airplane: the ones you walk away from are good. It is far better to land outside the target area and walk back than land on a fence and be carried back. Don’t let get home-itis get you. If you pass over the obstacle very low, you may not have sufficient altitude to turn into the wind for landing. It is then preferable to crab the canopy slightly and try to do your best forward PLF. But, obviously, the best solution is to think and plan ahead to avoid the obstacle in the first place. The most important rule about landing hazards is: Continually make efforts to avoid them. The second rule is: It is better to land flying downwind than to hit an obstacle.
 -
Accelerated FreeFall (AFF) EmergenciesAs you get ready to leave the aircraft, you are supposed to do a pre-exit check to make sure that your jumpmasters are ready to exit too. If you make an error in your exit count, you can fool your jumpmasters (JMs) into thinking that you are about to leave and they may end up pulling you off the aircraft before you are truly ready to go. If you leave at the wrong time in the count, you could be taking your jumpmasters in tow. This could lead to some awkward flying if you are not arched. You may be positioned in a reverse arch (like a cat standing on top of a toilet bowl) which will attempt to send your butt to earth. The exit timing depends upon you doing the exit count right so that your jumpmasters can exit with you, not before or after you. If you find yourself looking up at the sky or tumbling, arch hard for stability. Your jumpmasters will be doing their best to assist you in getting back to the proper belly-to-earth position. AFF:Loss Of One JumpmasterIf you sheared off one jumpmaster during the exit or one let go because he was not contributing to the stabilization of the formation, arch for stability and check with the remaining jumpmaster during your circle of awareness. If you get a headshake of “NO,” it may mean that the jumpmaster holding onto you is not quite comfortable with your stability at that time. On the other hand, it may mean that he doesn’t want you to go to the next portion of your tasks because the other jumpmaster is just about to re-dock on the formation and he wants that jumpmaster in the correct position before you continue with your tasks. You may or may not feel the other jumpmaster re-dock. Whenever you get a “NO,” simply arch a bit more, wait a few seconds, then do another circle of awareness. If you get a nod of “YES,” you may continue on with your skydiving tasks regardless of whether or not you have just one of both jumpmasters firmly holding onto you. AFF: Loss Of Both JumpmastersYou are in an extremely hazardous environment if you don’t have a jumpmaster holding onto you. The moment you realize this, arch and pull immediately. The following emergencies apply to either AFF or S/L program freefalls. Of course, in the S/L program, a jumpmaster might not be in the air with you during your freefall. Five-Second Rule For Loss Of StabilityHere’s a good rule for AFF or freefall. It is called the Five-Second Rule. If you are out of control, attempt to regain control by arching hard for five seconds. If you don’t recover stability by the end of that five-second period, pull your ripcord immediately (which one depends upon your altitude). This rule is normally taught to AFF students when they start their Level III training and it is applicable to all freefall students. Loss Of Altitude AwarenessIf you can’t determine what your altitude is because you can’t see your altimeter and you can’t see either of your jumpmasters’ altimeters, arch and pull immediately. The worst of all situations is to go into the ground at a high rate of speed simply because you didn’t know where you were. GogglesIf your goggles weren’t tight, they may come up off of your eyes and cause sight problems. You could simulate a practice pull position and try to hold them in their proper place, but it is probably better to end the freefall once the situation occurs. There is nothing worse than a distraction to disorient you and cause you to lose track of time and altitude. When in doubt, whip it out.
-
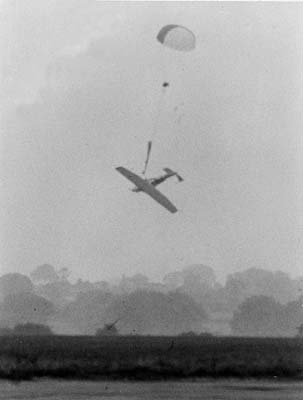 Exit Hazards-static LineWhen climbing out onto a step for a S/L exit, you need to firmly plant your feet on the step so that you don’t trip over yourself and fall off. If you do find yourself prematurely exiting the aircraft, merely arch hard for stability. Don’t grab the pilot chute or parachute as it comes by you. To do so may cost you your life. Exit Hazards-AFFWhen climbing out for an AFF exit, your jumpmasters are supposed to have good control of you. If you start to stumble, they will probably help you into position. If you do prematurely exit, at least one of them should have a hold of you and you will need to arch hard for stability. When climbing out, make sure your hands stay away from the jumpmaster’s ripcord handles. Occasionally a jumpmaster is launched off the step when a student grabs for the jumpmaster and snares a handle by mistake. Dangling Static LineAfter the jumpmaster dispatches each student, he will unhook the static line and stow it in the back of the aircraft or under the pilot’s seat. If he forgets to disconnect the static line, it is one ingredient for another horror story. During the scramble to exit, jumpers have managed to get those long pieces of webbing half-hitched around their ankle. The result is a surprising and abrupt halt just a short distance out the door. Due to the weight of the gear and the wind, it is impossible for the jumper to climb back up. There should be a knife in the plane to cut you loose and, of course, every experienced jumper in the plane should be carrying one. If there aren’t any knives handy, you will hope the pilot is sharp enough to think of breaking some glass out of one of the instruments in the panel because your alternatives are not terribly pleasant. Either you can pull your ripcord and risk jerking your leg off, or you can wait it out and suffer severe runway rash when the plane lands. One jumper caught in this situation lucked out, he was jumping a helicopter. The pilot set him down gently and red faced in front of everyone on the DZ. Student In TowOne of the more dramatic problems is the static line hang-up or student in tow. It occurs when you or some part of your equipment entangles with the static line preventing separation. You wind up suspended about ten feet below the aircraft by the long nylon web. This emergency is extremely rare and if it does occur, it will probably be because the static line is misrouted (perhaps under the harness). Maybe the error was missed in the equipment check, or you and the jumpmaster failed to keep the line high and clear as you moved into the door to jump, or you performed some wild gymnastic maneuver instead of a stable exit and became entangled in the line. Some students, despite all their training, yell arch thousand and then let go with the hands, leaving the feet firmly planted on the step, thus they perform a backloop upon exit. The in-tow/hang-up situation presents all of you with a perplexing situation. The jump ship will be more difficult to fly. In fact, the pilot may be unable to maintain altitude because of all the extra drag. Just as with the dangling static line situation, you do not want to pull the reserve or land with the plane. As with other emergencies, there is an accepted procedure. You, your jumpmaster and pilot must be familiar with it. The pilot will be diverting the aircraft to a safer, open area and will be trying to gain altitude. If you relax, you will probably assume a stable towing position either face or back to earth which is better than twisting in the wind. If you are conscious and your arms have not been injured, signal the jumpmaster by placing both hands on top of your helmet. Your hands will show you understand the situation and are ready to take corrective action. Your jumpmaster will signal he is ready too by holding up a knife. Now, your jumpmaster will cut the static line and you will fall away. Pull the reserve ripcord. Be sure you are cut loose before you pull. If you are unconscious or otherwise incapacitated, you won’t be able to give the OK signal to your jumpmaster. Your static line will still be cut but your jumpmaster (and you) will rely on your automatic activation device to deploy your reserve parachute. Back when reserves were worn in the front, jumpmasters could lower an unconscious student by unhooking their own reserve and attaching it to the static line. The static line had to have an extra ring for attachment to the reserve to make this method of rescue possible. There is also a second type of main canopy in-tow emergency to be considered. Normally, you fall away from the step so quickly that it is virtually impossible to tangle your canopy in the tail, but if one of your parachutes opens when you are on the step, entanglement may occur. If you find yourself in this situation, look up and determine which parachute is fouled on the aircraft. If it is the main parachute (which will be attached to risers that can be disconnected from the harness), look at your reserve ripcord handle, jettison your main and pull your reserve ripcord immediately, per the procedures that you were taught to use. If it is your reserve that is entangled on the aircraft, pulling the reserve/SOS ripcord would not change your situation but it will make your main canopy useless as it would be disconnected at the risers, therefore don’t pull the reserve ripcord handle. The fouled canopy may just self-destruct, putting you back into freefall, in which case you will need to deploy your main parachute to save your life. (If you deployed your main parachute while the reserve is fouled on the aircraft, you can assume that major structural damage will occur to that aircraft and anyone left inside that aircraft will have to perform their own emergency procedures.) Static Line Not Hooked UpOccasionally, despite all procedures, a student exits the jump plane without being attached to it. While hooking up the static line is the jumpmaster’s responsibility, you must verify that it is attached prior to exit. If you forget to check this and find yourself in freefall, follow the procedure for a total: pull your reserve ripcord. Pulling High Is DangerousEveryone else expects you to pull below 3,000 feet. If you pull higher, another freefalling skydiver could hit you. An open canopy descends at about 1,000 feet per minute and jumpruns are usually a minute apart. If you plan on pulling higher announce your decision to all before leaving the ground.
 -
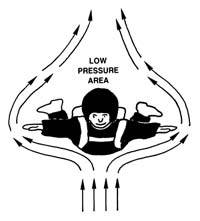 Common ripcord and hand-deployed pilot chute malfunctions are the lost handle and the hard pull. Submitted by plante Lost Handle Lost handle or out-of-sight hand-deployed pilot chute. Some ripcords are held in place by elastic webbing or Velcro® cloures. If the ripcords come out of these places, they may be blown out of your sight. Some puds (knobs or handles for hand-deployed pilot chutes) attach with Velcro closures, and some are stowed in elastic pockets. There are pros and cons to where these pilot chutes and deployment handles should be mounted. Either one may separate from the container and blow up behind you. Search for the ripcord (one time only) by following the harness to the ripcord housing with your hand. Search for a hand deployment device (one time only) with your hand by following the container to the area where it is supposed to be mounted — perhaps even as far as the closing grommet. If you can’t locate the handle immediately, pull your reserve ripcord. Practice this on the ground periodically. Lost handles and hand-deployed pilot chutes can also occur after the pull if you fail to pull far enough. Make sure you pull the ripcord all the way out of the housing, or if using a hand-deployed pilot chute, pull the pud to arm’s length before you release it. Hard Pull The hard pull may be caused by a bent or rough pin, a hand-deployed pilot chute bound up in its pouch, or you may have packed more canopy in the center of the container instead of filling the corners. If you feel resistance to your pull, give it two more quick tries (perhaps even with both hands while maintaining the arched body position) and then if that doesn’t deploy the main parachute, pull your reserve ripcord immediately. After a number of jumps, it is normal to become somewhat complacent about the pull; you may give it a relaxed, half-hearted jerk. The pull may take as much as 10 kg (22 lbs.) of force, so pull again. If continual hard pulls are bothering you, you might choose to spray a non-petroleum-based silicone or Teflon® fluid on your ripcord cable or your closing pin and your closing loop. This will make quite a difference and it will last for many jumps. You may occasionally have to do it again as dirt and grime builds up on your pin or ripcord cable system. Inspect your system for any signs of roughness. If they exist, get a rigger to replace the rough component with a smooth one. Pilot Chute Hesitation A problem you could have with your reserve deployment, or a main with a spring-loaded pilot chute, is the common pilot chute hesitation. Hesitations can happen to hand-deployed mains but they are not as common. Hesitations occur when the pilot chute momentarily flutters in the low-pressure area behind you rather than catching air. The hesitation may be caused by a bent or weak pilot chute spring, but usually the pilot chute is just sitting in the dead air space created behind you when you are in the stable position. Sometimes the pilot chute jumps upon release but fails to travel far enough to get a grip on the air rushing past you. It may drop back down on your back and just bounce around or just lay there. If it was hand-deployed, you may not have given it a good throw. To correct the problem, you may turn on your side during the post exit or pull count, allowing the airflow to inflate the pilot chute and pull it free, you may peek over your shoulder after pulling the ripcord, or you may sit up to dump (deploy your canopy). This last method of pulling, then sitting up (almost the start of a backloop) also reduces the opening forces on your shoulders, but it can lead to other problems such as trapping a tight-fitting deployment bag in its container. Consult with an instructor who is familiar with your system prior to attempting this type of maneuver. Pull-out v. Throw-out The pull-out and throw-out pilot chutes are preferred by experienced jumpers, but students (except IAD students) use the ripcord and coil spring pilot chute combination. For a detailed explanation of these three systems, see the chapter on equipment. Trapped Pilot Chute If the pilot chute is not properly stowed in its pocket, it may bunch up and jam when you try to extract it. The trapped pilot chute results in a hard pull that may or may not be cleared. If you find you have a hard pull, try one more vigorous pull before you go for your reserve. Pilot Chute In Tow Pilot chute in tow may be short or long. It is short when the pilot chute bridle is looped around something such as a harness strap. (A proper gear check could have avoided this problem.) If you have one of the rare bellyband mounted throw out models, make sure that the bellyband is not twisted. If the pilot chute bridle is wrapped around the harness (such as on a twisted bellyband or leg strap), tugging on it will only result in a (short) trailing pilot chute. Check the bridle routing during packing, have it checked in the equipment check prior to boarding the aircraft and check the routing again prior to exit. Twisted bellybands and twisted leg straps are a significant cause of pilot chutes in tow. The pilot chute in tow is long when the pilot chute pulls the bridle to its full extent but does not pull the pin securing the main container. The failure may be due to a damaged pilot chute (producing insufficient drag), a rough pin, a tight main container (canopy stacked too high), or a closing loop which is too short. The long pilot chute in tow is more likely on sub-terminal velocity jumps. Make sure the bridle-pin connection is not worn, that the pin is smooth and curved, not straight (unless it is supposed to be such as in pull-out pilot chute systems), and that the locking loop is not too short. If you are faced with a long pilot chute in tow, never try to clear it. A recent USPA article (Parachutist, June 1997) stated that if you have a pilot chute in tow, deploy the reserve immediately. Therefore, it is treated as a total malfunction. Other experts in the field take the position that if there is anything out behind the container, including a spring-launched or hand-deployed pilot chute, execute a cutaway and reserve deployment immediately. Note: Most student equipment is Single Operation System (SOS) oriented. This means that pulling the reserve handle will execute the cutaway (disconnect the main risers) then deploy the reserve all in one smooth action. A two-handle system requires a separate cutaway handle to be pulled to disconnect the risers, followed by a pull of the reserve ripcord. How to handle a pilot chute in tow has been the subject of great debate and much beer has been consumed discussing it. While there are exceptions and strong feelings about what has been stated above, time is usually too short to consider them. After the reserve starts to deploy, the main container may go slack enough that whatever kept it closed is no longer doing so, therefore the main may start to deploy. If the main was disconnected from the harness by the action of a cutaway, it will probably not be anything more than a temporary nuisance. However, one must always be prepared for possible entanglement of the two canopies whether a “cutaway” has or has not been performed.
 -
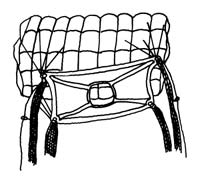 A malfunction is any failure of the system to provide a normal rate of descent and this includes loss of canopy control. Malfunctions are normally caused by one or a combination of the following: bad packing, poor body position during canopy deployment and/or faulty equipment. There are some malfunctions, however, that just happen (Acts of God); parachutes are good but not perfect. Failures of the main parachute can be divided into two areas. Either nothing comes out and you have a total malfunction or the canopy starts to open but something is wrong with it and you have a partial malfunction. Each of these two areas will be broken down still further in this chapter. It is because of the possibility of an equipment malfunction that the USPA’s Basic Safety Requirements list the opening altitude for students at 3,000 feet AGL. (For tandem jumps, it is set at 4,000 feet AGL. For A and B licensed skydivers, it is set at 2500 feet.) The BSRs and the FARs require that a second (reserve) parachute be worn for all sport jumping. It is important that you are drilled in its use. But even with the stated opening altitude safety margin or cushion, you must be aware of the time, speed and distances involved. If you exit the aircraft at 3,000 feet AGL, for example, you will begin to accelerate; you start off at zero vertical speed and then fall faster and faster until you reach terminal velocity (more about that later). If you didn’t have a parachute, it would take you about 22 seconds to reach the ground. In the case of a partial malfunction, you will have a little braking from your canopy and this means even more time. But even if you have a total, allowing for reaction time, you should be open under your reserve at well above 1,500 feet. In fact, while it seemed like an eternity to you, your friends on the ground will tell you that you performed your procedures quickly and efficiently; you will be surprised at how fast you react to a malfunction. Your main parachute takes 3-4 seconds to open and the reserve may be just slightly faster. Even at terminal velocity, which in a face-to-earth,stable position is about 110 mph, (the fastest you can fall in that position), four seconds translates into about 700 feet. If you haven’t been jerked upright by the sixth segment (second) of your exit or pull count, you should already be into the emergency procedure for a total malfunction. Static lines not hooked up, in-tow situations, lost or hard ripcord pull or pilot chute problems have already been discussed and won’t be repeated here. Total Malfunctions Of all the possible equipment malfunctions, the total (pack closure) is the safest to deal with because there is no other garbage over your head to interfere with the deploying reserve. While the total is the easiest malfunction to rectify, remember it also presents you with the least amount of time in which to act. Do not spend time trying to locate a lost handle; you do not have time. Do not waste time breaking away; a loose riser could tangle with a deploying reserve. When in doubt, whip it out. (Pull the reserve ripcord.) Partial Malfunctions A partial malfunction is one in which the canopy comes out of the container but does not properly deploy. The canopy may not inflate (e.g. a streamer that hardly slows your descent at all) or it may take on some air and be spinning violently (e.g. a line over or slider hang-up). You could have an end cell closure that will probably slow you enough for a safe landing. So, partial malfunctions may be major and minor. An additionally important consideration is that they may be stable or spinning. Most partials can usually be attributed to an error in packing or poor body position on opening. Some partials, however, just happen. Some partials are so minor, most instructors do not even classify them as malfunctions; they call them "nuisances." Some of these things that just happen are line twists, end cell closures and a slider that has not fully descended. These are correctable problems which you will be trained to handle. A good canopy is rectangular (square) and flies straight once the slider is down and the brakes are released. It is stable through the flare and turns properly with the correct toggle inputs. (Remember the controllability check?) Major partial malfunctions. Ones that you don’t waste time to correct. Bag lock presents you with trailing lines, bag and pilot chute but the canopy will not come out of the bag. This problem is not likely to clear itself. Breakaway and pull your reserve. Horseshoe. This malfunction can result from bad maintenance, failure to check equipment and incompatible canopy/container systems. It can happen when the locking pin or ripcord is dislodged from the closing loop, allowing the bagged canopy to escape before you have removed the pilot chute from its stowage pocket. The horseshoe can occur if you tumble during the deployment sequence, allowing the pilot chute to catch on your foot, your arm, or some other part of your body, but these are rare occurrences today. Another possibility is a poor launch of a pilot chute from your container, allowing it to fall back into your “burble” (the partial vacuum behind you) where it can dance around and snag on something, preventing it from properly deploying. Improper hand deploy procedures can lead to the pilot chute being caught on your arm. The danger of a horseshoe malfunction is that a pulled reserve may tangle with the horse-shoed main as it tries to deploy. If you experience a horseshoe, and you are using a hand deployment technique, pull the main’s hand deploy pilot chute immediately. Then, and even if you can’t pull the main hand deploy pilot chute, execute a breakaway and deploy the reserve. Chances are that there will be enough drag on the lines and canopy to separate the risers from their attachment points and present only a single line of “garbage” for the reserve to clear (rather than a horseshoed main). Violent spin. Unless you can tell immediately that you have an unstowed brake, breakaway and pull your reserve. If you have plenty of altitude and the problem is not compounded by line twists, push the toggles down to the crotch for two seconds, then let up slowly. If the spin continues, break away and pull your reserve. Line overs can occur when a brake lock releases during the opening sequence allowing one side of the canopy to surge forward over itself, or due to a packing error or an Act of God. If you are on a very high clear and pull, you may try to pull down on the end lines (by the risers) to make the other lines slip off. However, if you deployed at the normal pull altitude, you do not have time for this maneuver on the main. Break away and pull your reserve ripcord. If this happens on a square reserve, pulling down on the side the lines are over is your best hope, along with a great PLF. Partial Malfunctions That May Be Majors Or Minors Partial malfunctions that may be majors or minors. You may have time to make a decision as to how to handle them. Rips and tears are not common on ram-air canopies and may usually be ridden in. Even a rip from leading edge to trailing edge on one surface can probably be controlled. Internal rips may not be visible. See whether the canopy is controllable with toggle pressure no lower than your shoulder. If your controlability check indicates a serious problem, break away and pull your reserve ripcord. If the check does not indicate a serious problem, make slow, shallow turns and flare slowly for landing. The snivel is a slow, mushy opening. The canopy’s fabric weave opens up slightly after a few hundred jumps and becomes more porous. Higher permeability leads to sniveling. Look up after pulling to watch your canopy open. Learn to distinguish a slow-opening snivel from a never-opening streamer. Sometimes replacing the pilot chute will lead to quicker openings. Try packing the nose of the canopy in different positions but check with a rigger before you experiment. Contact the manufacturer about resetting the brakes two inches higher. Then the canopy will take to the air with the tail somewhat higher giving the leading edge a better bite of air. Slider hang-up, at the canopy. The slider may hang up at the top of the lines because it is caught in the lines or caught on the slider stops. Grommets become battered and rough as they slide down and hit the connector links at the risers. The links should be fitted with plastic sleeve buffers. Make sure the grommets are smooth. A slider hang-up at the canopy is a high-speed malfunction and will be hard to clear. You may be upright but you are descending quickly. There is little time to deal with a slider hang-up at the canopy, so jettison your main and pull your reserve ripcord. Slider hang-up, halfway. A slider hang-up halfway down the lines will slow you down but possibly not enough for landing. Check your altitude and if there is time (you are still above the decision altitude for emergency procedures), release the brakes and pull the toggles down to your crotch for two seconds in an effort to stall the canopy and relieve some of the spanwise spreading of the canopy. Repeat if necessary, pump the steering lines up and down. If the slider descends to within 10 or 12 inches of the connector links, that is close enough. Sometimes, the slider is caught higher in a suspension line or steering line. Let both toggles up to determine whether the canopy will fly straight. If you have to pull down the opposite toggle to more than shoulder level to maintain straight flight, the canopy will probably be unstable. If you don’t gain total control of the canopy by the decision altitude (sometimes called the hard deck), break away and pull your reserve ripcord. If the slider comes down the lines halfway and stops, the canopy has probably changed in some way. After you are safely on the ground, measure the line lengths and compare opposite lines. Check the slider grommets for damage. Bring the canopy to the equipment manager (if it is student gear), your rigger, or send it to the manufacturer for inspection. Broken suspension line(s). Most line breaks only put the canopy into a slight turn. Correct the turn with opposite toggle pressure. Occasionally the broken line causes the slider to hang up. Do a controllability check. If there is any internal damage to the canopy, it will not perform as expected. Failing a controllability check will dictate a breakaway and a reserve deployment. Minor Malfunctions Minor malfunctions are more like nuisances that can be dealt with and don’t threaten you unless they get worse or are complicated by other problems. Line twists. Sometimes, the bag rotates a few turns as it lifts off. Now you may find it difficult to get your head back to look up at the canopy. The problem is that the risers are closer together and twisted instead of spread. These twists can happen with or without your help. If you are kicking, rocking or twisting just as the bagged canopy lifts off, you can impart a twist to it. The principle is the same as when you give a Frisbee disc a flip of the wrist on launch. Line twists are more common on static line than freefall jumps. Determine quickly whether the canopy is flying straight, your altitude and which way the lines are twisted. Reach above your head, grab the risers and spread them to accelerate the untwisting. If necessary, throw your legs in the twist direction. Line twists are worse on a ram-air canopy than a round because you cannot pull down on the steering lines to control the canopy until the twists are cleared and this may take up to 30 seconds. If the canopy is spinning in the same direction, you may not be able to untwist faster than it is twisting. Do not release the brakes until untwisted. While you have the risers spread, check your canopy to make sure nothing else is wrong with it. A spinning canopy descends quickly. If you haven’t untwisted the lines by 1,800 feet AGL, break away and pull your reserve. Premature brake release. Ram-air canopies are packed with their brakes set to prevent the canopy from surging on opening. If one brake releases on opening, the canopy is likely to turn rapidly which can escalate into a spin and/or an end cell closure if not corrected immediately. If the canopy doesn't have line twists, grab both toggles and pull them down to your waist. (Grabbing both eliminates having to choose which one to pull.) This maneuver will release the other brake, reduce your forward speed, stop the turn and let you see if any lines are broken. If the premature brake release is compounded with line twists, releasing the other brake may have some or no effect. Be aware of your decision altitude and try to unspin from the line twists. If you are sure that just one steering line is still set in its deployment setting, you might try to release it. Broken steering line. When you find one of your steering lines has snapped or floated out of reach, release the other brake and steer the canopy by pulling down on the rear risers. Do not try to steer with one control line and the opposite riser. The turns will be inconsistent and you may find yourself in a dangerously low turn when you flare for landing. Pulling down on the risers may be hard but it will steer the canopy. The canopy will probably want to turn in the direction of the good control line. If you cannot make the canopy fly straight with the opposite riser, break away and pull your reserve. If the broken line wraps around the slider, do not try to pump the slider down any further. It will only make the turning worse. Reserve some energy to pull down on both risers at about ten feet from the ground to flare the landing. You want to start this flare lower because pulling down on the risers results in a more pronounced flare. Steering line(s) won’t release is similar to dealing with a broken steering line, except that one may release while the other won’t. If neither steering line releases, simply fly the canopy to a safe landing using the rear risers. If only one releases, then you can pull that steering line down to the point at which the canopy will fly straight, then control the direction the canopy flies by either using the rear risers or using the one working steering line. Quite often, you will have time to grab the riser of the steering line that won’t release and work towards getting it released. Be mindful of your altitude as you work on the problem. You don’t want to steer yourself to a hazardous landing while you are distracted with this release challenge. Pilot chute "under/over" problems. The pilot chute may fall over the leading edge of the canopy and re-inflate underneath, usually causing a turn in the distorted canopy. Attempt to stall the canopy slightly so that it backs up, possibly allowing the pilot chute to come back up and over the front of the parachute. If the canopy cannot be controlled with toggles, break away and pull your reserve ripcord. End cell closures occur when the pressure outside the canopy is greater than the pressure inside. They usually happen during canopy surge on opening but they can also be caused by radical turns or turbulent air. Turbulence can occur on hot, no-wind days, on windy days downwind of trees and buildings, and during stormy conditions. Lightweight jumpers under large canopies (called low wing loading) will experience end cell closure more frequently. To avoid end cell closure, fly with one-quarter to one-half brakes. To counteract end cell closure, push the toggles down to your crotch for a few seconds, until the cells inflate, then let the toggles up slowly. Repeat if necessary. End cell closures are not a major concern. Keep the canopy and land it if it is not spinning. If the end cells collapse below 200 feet, do not try to re-inflate them.Pull to half brakes to stabilize the canopy. When you flare for landing, the cells will probably pop open. Combination Malfunctions When confronted with more than one malfunction, correct for line twists first. The canopy will be uncontrollable until the twists are removed. When in doubt, whip it out, especially if you are at or below decision height (1800 feet AGL). Two Canopies Open You may find yourself confronted with two fully open canopies. This can happen in several ways: The automatic activation device on your reserve could fire when you are happily flying your canopy through 1,000 feet; you may have reacted very quickly to a pilot chute hesitation without effecting a breakaway; or the main release system may have failed to separate during an emergency procedure. If the two canopies take off at different times, they may not deploy into each other, but you need to be prepared to handle that possibility. At the Parachute Industry Association Symposium in Houston in 1997, a detailed report was presented on the performance of two ram-air canopies out — a very dangerous situation. First, quickly check the condition and position of the main and reserve canopies, then make your decision based upon the following: If the two canopies are flying side by side, steer yourself to a safe landing area by using gentle control inputs on the larger canopy. Due to the nearly doubled surface area supporting your weight, the effective lift of the parachute system will make flaring the canopies unnecessary. Flaring one could create a hazardous situation, especially close to the ground. If the two canopies are both flying downward towards the ground (called a downplane), jettison the main. Note:Certain reserve static line lanyards may have to be disconnected so as not to foul the reserve parachute when the main is disconnected. Ask your instructor about the specifics concerning your system. If the canopies are flying one behind the other and in the same direction (called a biplane), make gentle steering inputs with the lead canopy (which is usually the main). Do not release the rear canopy’s deployment brakes. Do not flare the landing. If the reserve container has opened but the reserve canopy has not yet, or not completely deployed, make gentle steering inputs with the main and try to haul in the reserve and stick it between your legs. Tandem Jumping Malfunctions Tandem jumping malfunctions may be aggravated because the weight is doubled while the effective drag area of the two falling bodies is not. As long as the drogue pilot chute has been deployed properly, freefall speeds are about the same as a single skydiver. If the drogue is not deployed or fails to work properly, the terminal velocity will be much faster than that of a single skydiver (110 mph); perhaps as much as 160-170 mph. The greater speed places a much greater strain on the parachute system and on the jumpers. Large Ring And Ripcord Handle Older harnesses used a plain round ring for the largest of the rings in the 3-Ring canopy releases. When the main canopy is jettisoned, the largest of the riser-release rings remains on the harness. If the rings flop down on the lift web, the one near the reserve handle may be mistaken for that handle. Both are large silver rings and the reserve handle may have shifted from its normal position. Some jumpers have broken away only to tug on the wrong ring. Some never lived to tell about it. Newer equipment may have a shaped large ring or a smaller (mini) ring that is more difficult to confuse with the reserve handle. If you have older equipment, you should be aware of this potential problem. Change Of Emergency Procedures Anytime you change your equipment or emergency procedures, make sure you are thoroughly trained. Practice in a suspended harness until proficient on the new equipment. Each corrective procedure is different and you must not waste precious seconds in an emergency thinking about what you should do. You must act automatically and quickly. Review your emergency procedures prior to each jump and touch all your handles before you proceed to the door. Breakaway Training Breakaway training is essential to assure that it will be accomplished completely, quickly and well. Training must take place in a suspended harness that is easy to rig up. Simply tie an old set of risers to an overhead beam and attach them to your harness. The drill must be repeated again and again until it becomes mechanical and automatic so that you will perform correctly and without hesitation should the time come. When you take your reserve in to be repacked, ask your rigger if you may practice the breakaway to include the reserve pull. It is a valuable experience and in this controlled environment, it is safe for your gear. Emergency Priorities Think about and review the seven priorities of skydiving: Pull - Open the parachute. Pull by the assigned altitude or higher - whether stable or not. Pull with stability - to improve canopy-opening reliability. Check the canopy - promptly determine if the canopy has properly opened and is controllable. If necessary, activate the reserve - perform the appropriate emergency procedures if there is any doubt that the main canopy is open properly and is controllable. Land in a clear area - a long walk back is better than landing in a hazardous area. Land safely - be prepared to perform a PLF with the feet and knees together to avoid injury. Canopy Collisions Let’s assume that your canopy has just opened properly and you are reaching up for the toggles when suddenly, you look ahead and see another canopy coming directly towards you. What should you do? If the collision is avoidable by steering to the right or left, choose the right. The turn to the right is virtually universal in all forms of navigation. If the collision is unavoidable, spread your arms and legs out to absorb the impact over the most surface area possible. Chances are that spreading out will allow you to bounce up and over the lines and canopy you will be colliding with. You may get a bit hurt, but you will be alive so long as you don’t make full body contact with the other jumper. If you find yourself entangled with another parachute, the general rule of thumb is that the lower person has the right to perform emergency procedures first. Communicate with each other as to what you want to do, what you’re going to do, then do it while you still have enough altitude to do it safely. Most canopy collisions occur during the landing phase of the skydive, when too many people are trying to get into one tiny area all at the same time. Vigilance in canopy control and choosing a less congested area can help avoid this emergency. If you do end up tangled at an altitude too low to break away (less than 500 feet AGL), ride about half brakes and get set to do a fantastic PLF.
 -
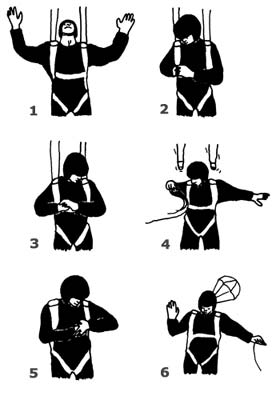 Jettisoning The Main CanopyBefore we talk about the series of problems you may encounter with your main canopy, it is important to discuss the types of cutaway (main canopy disconnection systems) that are in common use and their procedures. The breakaway or cutaway is an emergency procedure that involves jettisoning the main canopy prior to deploying the reserve. Originally, the cutaway was performed with a knife and the lines were cut to separate the canopy from the harness. Today, we use canopy releases to breakaway. The breakaway procedure should be executed immediately under rapidly spinning malfunctions because ever-increasing centrifugal forces will make arm movement difficult, and may cause you to lose consciousness (red-out) due to the blood flow to your eyes. The decision altitude for the breakaway is 1,800 feet. This is your safety margin, above this it is safe to try to clear the malfunction but at this point, all clearing work must stop. Watch your altitude. The breakaway must be commenced above 1,600 feet to assure you plenty of time to get the reserve out. Under high-speed malfunctions, you may be just seven seconds off the deck at this point, and it may be necessary to forget the breakaway and just pull the reserve. To breakaway, spread your legs (for lateral stability and push them back as far as possible while bending your knees about 45 degrees (only). Arch your back and pull your head back but keep your chin resting on your chest and your eyes on the handle(s). On release you will fall into a stable, face- to-earth position. Body position during the breakaway is very important. If you are not falling away correctly, you may become entangled in the canopy and/or lines of your deploying reserve. Even with good body position, breaking away from a violently spinning malfunction may throw you tumbling across the sky. The breakaway procedure is as follows: Two Action System(TAS)The TAS has two handles: Pull the first one (usually a Velcro-attached pillow handle located on the right-hand main lift web), to release both risers (a single point release). Then activate the reserve by pulling the other handle (usually located on the left-hand main lift web). A. Total malfunction (nothing out) Do not waste precious time breaking away; just pull the reserve. LOOK at the reserve ripcord handle and arch. REACH for the reserve ripcord handle with both hands. PULL the reserve ripcord handle with both hands. B. Partial malfunction (canopy out but not working properly) There are two schools of thought on how to perform the breakaway action using this system. The first one presented is in the USPA’s Skydivers Information Manual, “Section 8-3.16.” While it states “Look at the reserve ripcord handle...” (step 3), it says nothing about the choice of one hand or both on the breakaway handle. It is as follows: LOOK at the breakaway handle and arch. The arch should keep you from making a backloop when you jettison the main. REACH for the breakaway handle (presumably with both hands). LOOK at the reserve ripcord handle before breaking away. PULL the breakaway handle and throw it away while continuing to keep your eyes on the reserve handle. REACH for the reserve handle with both hands. PULL the reserve ripcord. CHECK over your shoulder for a pilot chute hesitation. CHECK your reserve canopy, look around and prepare to land. Note: For student equipment, and something that is becoming more popular on experienced jumper equipment, there is a device known as a reserve static line lanyard RSL (sometimes called a Stevens lanyard). This is a piece of webbing attached from the right side riser (or both risers on some systems) to the reserve ripcord cable. It is designed to pull the reserve ripcord out of its locking loop(s) as you fall away from the main parachute after that main canopy is cut away, thus allowing the reserve to deploy. When installed and operating properly, it will usually beat you to the manual deployment of the reserve. However, it should not be relied upon, for after all, along with an automatic activation device (AAD — described in Chapter 7), it is merely a back-up device to your proper execution of emergency procedures. This system can be disconnected (if necessary) by personnel who know what they are doing. It is a possibility that when you perform a breakaway using both hands on the breakaway handle, there is a fraction of a second of disorienting instability as the maneuver is executed. Although you are supposed to be looking at the reserve ripcord handle, you still need to move one or both hands to it from whatever position you are in at the conclusion of the breakaway-handle pull. The ripcord handle may move from where it was (on the harness) under the tension of the partial malfunction to a different position during this moment. It is a possibility that there may be an additional second or more of elapsed time as you reach for the reserve ripcord handle. Therefore, there is a second school of thought about performing the breakaway, which is, if you are about to execute a breakaway and you put your right hand on the breakaway handle and your left hand and thumb through the reserve ripcord handle, there will be no lost time reaching for the reserve ripcord after the breakaway is executed. Here is a typical scenario: LOOK at the breakaway handle and arch. The arch should keep you from making a backloop when you jettison the main. REACH for the breakaway handle with your right hand. REACH for the reserve ripcord handle with your left hand, placing your thumb through the handle to ensure that you have a firm grip on it. PEEL and PULL the breakaway handle to full right arm extension. Throwing it away is optional. Immediately after you’ve pulled the breakaway handle with your right hand, PULL the reserve handle out to full extension with your left hand. CHECK over your shoulder for a pilot chute hesitation. CHECK your reserve canopy, look around and prepare to land. In this scenario, there is no hesitation in looking for a reserve ripcord that may have moved, thus it may save a second or two of precious time. The Single Operation System (S.O.S)The Single Operation System is a one-handle/one-motion system. The S.O.S. has a combined handle, usually on the left main lift web, to release both risers and activate the reserve. The S.O.S. has a reserve static line lanyard (Stevens lanyard) from one riser to the reserve ripcord. The purpose of the S.O.S. is to eliminate one the motions in the breakaway sequence; that of separately pulling the cutaway handle. By pulling the reserve ripcord all the way, you accomplish both the breakaway and the reserve-ripcord pull in one complete action. With a two-action system, half a breakaway is worse than no breakaway at all unless you have an RSL. The S.O.S. usually produces full deployment of the reserve canopy in less than 100 feet. If you find an RSL on your piggyback harness/container assembly, you should leave it on. When you and your instructor develop enough confidence that you will pull the reserve after a breakaway, you can do away with the line if you wish. Total or Partial malfunction In the event of a total or partial malfunction: LOOK at the combination release/ripcord handle and arch. REACH for the combination handle with both hands. PULL the combination handle with both hands to full arm extension. REACH back with one hand, grasp the cables where they come out of the housing. PULL AGAIN to clear the cables and CHECK over shoulder for a pilot chute hesitation. CHECK the reserve canopy, look around and prepare to land. Never depend on the reserve static line device (Stevens lanyard). Always pull your reserve ripcord cable all the way out of the housing immediately after breaking away. Canopy Transfer Canopy transfer is a third type of breakaway procedure sometimes used in Canopy Relative Work by those who believe something is better than nothing. If your main canopy becomes damaged or tangled on a jump and it is still flying forward, you may pull your round reserve and drag it behind you, full of air. Once the reserve canopy is inflated, jettison the main. This maneuver is extremely risky with a square reserve canopy as two squares may fly around and into each other. This type of problem is discussed later on in detail. Harness shiftWhen you jettison the main canopy, your harness will shift downward taking the reserve ripcord location with it. Therefore, it is essential that you keep your eyes on the reserve ripcord handle, if your hand is not already grasping it, when jettisoning the main canopy. Now that we have covered cutaways (breakaways), let’s discuss when and where they are used.
 -
Hazard BriefingsEmergency procedures will vary from drop zone to drop zone to fit local conditions. There may be trees, rivers, power lines, hostile neighbors, prisons, highways or a girls’ school. In fact, those DZ’s lacking certain hazards may touch on the corrective action for every emergency but lightly. Therefore, when visiting a new DZ, it is imperative that you get a briefing on the area. Alcohol And DrugsIn order to achieve the greatest enjoyment from your skydiving experience, you will want to approach it with an unfogged mind. This means going to bed early the night before and going easy on the booze. Even the common cold will trouble you due to the changes in atmospheric pressure. If your mind and body are not operating at 100%, you will react with less efficiency in an emergency and you will enjoy the jumping less. Remember, the lower pressure at altitude amplifies the affects of alcohol and drugs. Health ConcernsJumping with a head cold can lead to ruptured sinuses and ruptured ear drums. The inner ear and the Eustachian tubes do not take kindly to large pressure changes when they are plugged. Infections in these areas can produce debilitating pain under normal jump conditions. In a few words — if you are sick or under the weather, don’t jump. Loading up on antihistamines and decongestants can cause other medical problems. There is always another day to enjoy a jump in good health. Scuba Diving AlertThere is no problem in descending into the water within 24 hours of jumping or flying, however, there is trouble waiting in doing the reverse. Scuba divers know to stay away from air travel for a period of 24 hours after their last descent below 30 feet (one atmosphere’s increase in pressure) so as to avoid the bends (nitrogen bubbles forming in the joints and blood stream). Since skydiving involves air travel, the same rule applies. Some Fear Is Good For YouIt has been said that the difference between fear and respect is knowledge. Most people fear skydiving because they don’t understand it. Fear is the result of ignorance and it is part of nature’s protective mechanism; it warns us to beware when we are on unfamiliar ground. The best way to cope with problems is to prevent them in the first place. The key is education. It is unfortunate when someone is injured while engaging in sport, but it is tragic when a second person is hurt for the same explainable and preventable reason.
-
Never smoke around aircraft, hangers or pumps. Both aviation fuel and aircraft dope present a great fire risk. When moving light aircraft, be careful where you push. They are covered with very light fabric or metal and are easy to damage. The pilot will show you where it is safe to apply pressure. Beware of the prop. It is difficult to see and will make quick mincemeat of anyone who walks into it. Always walk around the back of fixed-wing aircraft and in front of helicopters. Stand where the taxiing pilot can see you; his or her forward visibility is not good. Get into the habit. Leave the dog and the children at home, the airport is not a nursery. If a play area is made available to children at the DZ, remember that they are still your responsibility. If your airport has more than one runway, stay off the active one. It will normally be the one running the closest to the direction of the wind. Remember that planes usually takeoff and land into the wind so look for them downwind. Rules change from airport to airport and at some you will not even be allowed to cross the active. Do not walk down any runway and do not fly your canopy over one under 500 feet. Be nice to all the pilots, they have a lot of clout at the airport and you may need one to fly the jump ship. Be patient with the whuffos (spectators), they are public opinion.
-
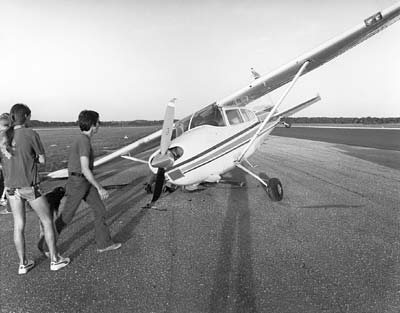 Airplane Problems Engine and structural failures. If the engine is going to fail, it will probably do so when the pilot reduces power after your full throttle takeoff. If the engine quits, he will attempt the best landing he can, straight ahead off the end of the runway. Since you are helmeted, padded with gear and strapped in, you need only assume the proper position to be prepared. Draw your knees up, tuck your head down, fold your hands across the back of your neck and hold your head down to resist whiplash. As soon as the plane comes to a stop, get out FAST. If you are nearest the door, get moving. There are people behind you who want to get out. There is always the danger of fire, particularly if the aircraft has suffered structural damage on impact. Watch where you step, the plane may have clipped through some power lines. They can zap you and they start grass fires. Remember that the wings of the airplane usually contain flammable fuel. Occasionally, the jump ship suffers a structural or other mechanical failure. Twisted-on parts sometimes twist off or a canopy may get draped over the tail jamming the controls. Depending upon the situation and the altitude, your jumpmaster will select one of two commands: PREPARE TO CRASH or GET OUT (jump). The dividing line is usually set at 1,000 feet above the ground since at this altitude there may be enough time for an orderly exit and the pilot will probably be able to land his glider on the runway. The jumpmaster might tell you to jump and pull your reserve on the theory that it is somewhat more reliable and may deploy faster than the main and/or he may be concerned about the setting of your AAD. His instructions will depend on the circumstances of the situation. So, if you are below 1,000 feet when the challenge occurs, you will land with the aircraft. If you are over 1,000 feet when the rubber band breaks, your jumpmaster may direct you to make a normal static line jump, but you will do it all a lot faster; swing out onto the step and go. Student freefallers may be directed to make a jump and pull; this is where they will open their mains as soon as they clear the aircraft, or the jumpmaster may sit them in the door, pull their reserve and simultaneously push them out. It all depends on the altitude at the time of the emergency. Licensed jumpers are next, then the jumpmaster and, in the case of severe structural failure, the pilot. The purpose of getting out of the plane is not only to remove you from the area of danger but to lighten the load making the aircraft easier to control. The jumpmaster goes next to last because he must take care of those in his charge. The pilot goes last (he wears a parachute too) so that he may wrestle the jump ship to keep it flying until you are gone. The above rules are general and are for students. Experienced jumpers may elect to exit lower. For example, if the aircraft is at 500 to 1,000 feet, an expert skydiver may elect to jump and pull the reserve (which presumably opens faster). Of course you will follow the instructions of your jumpmaster, but sometimes you have to make the decision yourself. In the excitement of solving the engine failure or other problem, the pilot may allow the airspeed to drop, stalling the plane and allowing it to spin. In this condition the aircraft drops fast and the centrifugal force may pin you against the side or ceiling. Now is the time make the decision to scramble and get out. Depending on the size of your jump ship and the procedure at your drop zone, your static line may be hooked up on the ground, at 1,000 feet, or on jump run. Whether or not your main is hooked up may determine what type of escape you can make in case of an aircraft emergency. For example, if you hook up prior to boarding, and the plane crashes on takeoff, when you unbuckle and get out, you can expect to unpack your main about eight to 15 feet from the door (the length of your static line). The final point to remember is to watch and listen to your jumpmaster for instructions. When you receive them, carry them out quickly and without panic. Open Parachute In The AirplaneSeveral times in the past, jumpers have been pulled through the side of the jump plane when a container opened and a canopy escaped out the door. Rarely does this result in a fatality but usually there is severe damage to both the jumper and the aircraft. If either the main or the reserve open prematurely in the aircraft, one of two things will happen; the pilot chute and/or canopy will either start out the door or remain in the plane. You have only one course of action for each situation. The jumper whose reserve escaped out the door of this aircraft was lucky; he survived. If the main container opens in the aircraft, it is usually the result of excessive movement by a person in the aircraft. This could happen when you constantly shift positions, rubbing the static line and/or closing flap on an interior surface or snagging the static line on something during movement in the aircraft (from one position to another). With the Instructor Assisted Deployment (IAD) method, these hazards are real because hand-deployed pilot chutes use small closing pins. With long plastic coated cables for a main ripcord, the hazard is much less likely, especially when the ends are tucked into housings on a closing flap. If the main container opens, it is a simple matter to move backward pinning the errant canopy against a wall or flat surface. Show the problem to your jumpmaster immediately. Once satisfied that you have it well secured, disconnect the main canopy from your harness by operating the canopy releases (the method depends on the type of system you are using — your jumpmaster will probably do this for you as well as disconnect your reserve static line device). This is so that if it should somehow get out the door later, you won’t be connected to it. Now sit on the canopy and pilot chute so they won’t get away and ride the plane down. Sometimes the reserve container will burst open while you are in the back of the plane. The pin works its way out, or perhaps since you are in the back of the plane, you are not vigilantly guarding your reserve ripcord handle and it is snagged out as you move around trying to find a comfortable position. Grab the reserve pilot chute and canopy, cover them and hold them tight. Call the jumpmaster’s attention to the problem immediately. The reserve creates a greater potential danger than the main because it cannot be quickly disconnected from the harness. The deploying reserved canopy pulled the static - line student off the step. If, however, either of your canopies start out the door while you’re attached to it, you will follow it out. You have, at most, two seconds, and if you hurry you will experience a near-normal canopy ride to somewhere in the vicinity of the airport. But if you are slow, the developing canopy will act as a giant anchor, extracting you not just through the door but, more than likely, through the side of the aircraft too, causing great injury to you, damage to the aircraft, and exposing others still in the aircraft to great danger. The best solution is prevention. Always guard and protect your static line and/or your ripcord(s), canopy release handle and pins.
 -
Larry Hill DZO of Skydive Arizona and sponsor of Arizona Airspeed returned to the sky at the World Free Fall Convention 2004 in Rantoul Illinois. Remarkably this was just eighteen months after total shoulder replacement surgery. Larry spends a fair amount of his time while on the drop zone in the main hangar giving hands on advice to the maintenance staff or out on the grounds behind a tractor. It isn't easy turning wrenches when making repairs on heavy equipment, especially if one of the major tools is broken such as a shoulder that doesn't allow for movement. At the time of Larry's replacement he had lost full range of motion in his shoulder. This coupled with the pain associated with the malady, prevented him from skydiving. Not only as a skydiver and a pilot was Larry affected, but the overall quality of his daily life was diminished as well. It was then that Larry opted for the total shoulder replacement. Shoulder replacement surgery is an option for treatment of severe arthritis of the shoulder joint. Arthritis is a condition that affects the cartilage of the joints. As the cartilage lining wears away, the protective lining between the bones is lost--when this happens, painful bone rubbing against bone arthritis develops. Severe shoulder arthritis is quite painful, and can cause restriction of motion. While this may be tolerated with some medications and lifestyle adjustments, there may come a time when surgical treatment is necessary. What is a total shoulder replacement?Total shoulder replacement surgery alleviates pain by replacing the damaged bone and cartilage with a metal and plastic implant. The shoulder joint is a ball-and-socket joint, much like the hip joint. The ball is the top of the arm bone (the humerus), and the socket is within the shoulder blade (scapula). This joint allows people an enormous range of motion at the shoulder. When shoulder replacement surgery is performed, the ball is removed from the top of the humerus and replaced with a metal implant. This is shaped like a half-moon and attached to a stem inserted down the center of the arm bone. The socket portion of the joint is shaved to clean bone and replaced with a plastic socket that is cemented into the scapula. Larry offers that his shoulder is the best that it has been in years and he is virtually pain free. Larry says that he is in high hopes of skydiving more often in the future, but for now he has mounds of dirt to move as Skydive Arizona makes way for its newest addition, the SkyVenture Arizona Wind Tunnel.
-
Dropzone.com today launched its voluntary Premier Membership service! The decision to move forward with voluntary user supported subscription services was made for a few reasons: I want to keep Dropzone.com on the web and without this, I can not pay the bills. We want to keep advertising content low and we want to provide you with the best possible service and the coolest features we can! That's it. Dropzone.com is a very advertising-lite site. We don't bombard you with pop-up ads. Even though we serve millions of pages every month we choose not to join large advertising syndicates and expose you to streams of irrelevant non-skydiving promotions and ads. We want to keep it that way. This also provides the highest value to our advertisers as their ads are not lost in a flood of outside noise. We continue to appreciate the support we receive from the skydiving industry in this.Rather than turning to large corporate sponsors from outside we'd chose to come to you, the community, for support. People have shown over the years that they are willing to donate and get involved. We very deliberately made a decision that nothing that has been free in the past will become part of the Premier services. You will be able to continue enjoying Dropzone.com exactly as you have without ever giving us a penny. That's the way I want it. We will create additional Premier features, and those users who find them valuable can subscribe on a voluntary basis. We think they're pretty neat! Thank you to everyone who have supported me through the years in all manner and ways. I hope you enjoy the Premier Features. As part of our Premier launch we have partnered with Aerodyne and one of our new premier members will win a complete system - container, main and reserve - from Aerodyne's line of products. Click on the link below for more information. More information and how to Subscribe for Premier Membership
-
For the first time Skydive Perris is organizing a tunnel training camp for women only at SkyVenture Perris. Nina Kuebler and Synchronicity are the organizers. In addition to what the Perris Performance Plus already offers, we now are hosting an all female 4-way tunnel and skydiving camp. DZ.com: Why organize a women’s only tunnel camp? Nina: The tunnel as a training tool has changed the way we skydive, so the learning curve for individual flying skill is much steeper. I find that a considerable number of skydivers, particularly females, think that the tunnel is something for “serious 4-way freaks” only, and therefore never consider trying it out themselves. By getting more people interested in newer training developments we certainly help the sport overall, thus giving as many people as possible the chance to feel the exhilaration of flying their body aggressively. Many females are intimidated by the somewhat competitive atmosphere of the predominantly male clientele and staff of “traditional” camps. After hosting several camps at Perris using the successful formula of tunnel flying and jumping, we have experienced how different skydivers respond to different coaching, particularly how females respond fruitfully to female coaching. DZ.com: That sounds kind of like the same concept as establishing the women’s division in 4-way in order to draw more females in the sport. Nina: Exactly. Last year we had 9 all girl teams competing at the US Nationals, which was a great turnout. It was also my first time to compete with an all girl team (4something, thanks again ladies!!!) With the nationals being in Perris, we are expecting an even more exciting female competition. DZ.com: Does the girl only camp also refer to the staff? Nina: Watching another woman fly powerfully and aggressively is certainly the strongest inspiration and motivation to do just he same. In other words: Yes, this is a stricktly female coaching staff. DZ.com: Do you in general support all girl events? Nina: I do believe in 4-way, in physical flying and strong moves – of which both genders are equally capable. I have benefited from male coaches, and being on a male team, I have learned to push myself to the greatest extent possible. However, my flying style is different from my male teammate’s style; therefore I think a female student can benefit from a female coach. I believe that there are an infinite number of individual learning behaviors. Consequently in the coach/student–relationship is paramount for the coach to communicate (in the physical demonstration and the verbal explanation) with any student in an understandable way. I am very much looking forward to share what I had the chance to learn in 6 years of training 4-way and 8-way with other females.
-
Triax Productions has partnered with Go Fast! Sports & Beverage Co. to release their second BASE jumping video, "Continuum II: Stories from the Edge." The film will premiere October 8-10th in Cañon City, Colorado at the 2nd Annual Royal Gorge Go Fast! Games, a legal B.A.S.E. jumping event. The feature will be officially released on October 16th at Bridge Day, the annual legal B.A.S.E. jumping event in Fayetteville, West Virginia. The feature, as its name implies, is more video-magazine style in its approach. Embracing the entire sport of B.A.S.E. jumping, the film includes athlete profiles, rigging/safety tips, B.A.S.E. jumping event coverage, epic survival stories, trick tips, stealth urban B.A.S.E. jumping, never before seen B.A.S.E. jumping footage from sites around the world, and of course, entertaining bloopers. Some of the sites visited for the film include Malaysia, Thailand, Switzerland, the 2003 Royal Gorge Go Fast Games, Mexico, Southwestern USA and Norway. "With the "Continuum II" film project, we saw an opportunity to support three athletes/entrepreneurs who have true ambition, vision and passion for bringing the reputation and portrayal of B.A.S.E. jumping to an entirely new level," says Heather Hill, VP Communications, Go Fast Sports & Beverage Co. "With continued efforts like this film project and the Royal Gorge Go Fast Games, we hope to help authenticate B.A.S.E. jumping's place in the world of extreme sports." Triax is made up of local Colorado B.A.S.E. jumpers/skydivers Damian Doucette, Chris Pope, and Kenyon Salo. Pope: "We tried to take a different spin on the standard B.A.S.E. jumping video and make it not only interesting to everyone, but informational as well. We were lucky enough to be able to profile a few great people for this video. I had a lot of fun making it! I love this stuff!" Salo: "The camera lens shows B.A.S.E. jumping in its true form, and really lets the viewer connect with the action and the intensity of the sport. The Continuum series strives for this connection, whether with an athlete or an object or an emotion, in each and every shot, and we hope we can bring B.A.S.E. jumping into a new realm through this kind of videography." Doucette: "In addition to some pretty cool base footage, we utilized techniques such as motion control, time-lapse and animated graphics to increase the overall production value." "Continuum II: Stories from the Edge," as well as the group's first release, "Continuum," will be available for sale through the company's website, www.triaxproductions.com as of October 1, 2004. For more information, please contact Chris Pope at 303.449.2091. Troy Widgery founded Go Fast Sports & Beverage Co., producers of Go Fast Energy Drink and Go Fast Sports Apparel, in 1996. For more information about Go Fast®, please contact Heather Hill at [email protected], call 303.893.1222 or visit www.GoFastSports.com.
-
Since Mirage Systems has a soft spot for the troops, we’d like to offer a special discount to any soldier (U.S. or Coalition) currently or recently deployed in Iraq or Afghanistan that wants to order a Mirage Systems container for personal use. We’ll need verification of qualification, including proof of deployment. Qualified participants get a base container discount of 50% and a 15% discount on options. Any participants can contact Mirage Systems directly at 386-740-9222 or e-mail at [email protected]. This offer is good until further notice.
-
As many of you already know, on Friday, August 13th, the category 4 Hurricane Charley hit Florida's west coast with winds of 145 mph. It cut through the state, right through Lake Wales, destroying the Florida Skydiving Center. The US CF Skydiving team was at Florida Skydiving Center, practicing for the upcoming World Championships in Croatia next month, when the hurricane hit. Thank God no one was killed or injured at the drop zone, although we are getting reports now that, so far, 16 people throughout Florida were killed by "Charley". The past two days, the US team has been there with the owner, Betty Kabeller-Hill and Roger Hill, going through the debris, searching for whatever they can salvage and cleaning up the terrible mess left by this destructive storm. They've had no power in the area for 3 days now and their cell phones are not getting a signal. Raul said the top half of the tower was on the ground. The phone line is working now. Betty said half the hanger is gone. "We've lost everything", she said. She also told me that there is no insurance. Some of the Mobile homes at Florida Skydiving Center were smashed to pieces and some were flipped over. People who lived at the drop zone are now homeless and I guess jobless too. The Skydiving community has been a family, always helping each other out in times of need. Here is an opportunity for us to reach out and help these people, our family, in their time of suffering and need. We've set up a "Florida Skydiving Center Disaster Fund" and a "FSC Employee Disaster Fund" for the people who lost their homes there. If you can help, please specify on your check or money order, the Disaster Fund you are contributing to and send your donation to Betty's home at: Florida Skydiving Center c/o Betty Kabeller-Hill 400 El Camino Drive #203 Winter Haven, FL 33884 If you want to use a bank wire transfer, Florida Skydiving Center already had an account set up for event registrations that you can use. Just specify in the Special Instructions that it is for the Disaster Fund. The account for bank wire transfers is: Wachovia Bank Routing # 063000021 Acct. # 2090002569803 Acct. name: Phoenix Air, Inc. If you have any questions, you can call the Florida Skydiving Center at 863-678-1003. Keep in mind that they are overwhelmed and hard at work trying to clean up. Anyone who can come out to help in the cleanup efforts, your help will be appreciated. Thanks! Gail Ramirez Forum Discussion and Updates PayPal Donation Information Lake Wales, Florida Skydiving Center Web Site