1 1

Safety

    Stalling For Success

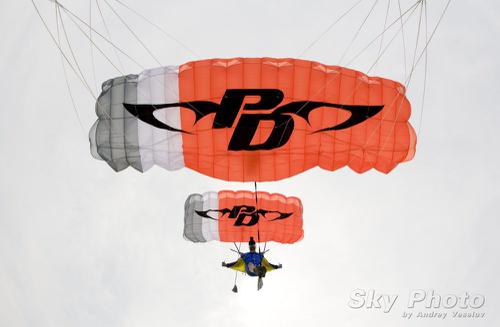
    Image by Andrey Veselov Stalling For Success: What You Don’t Know About Stalling Your Canopy Could Smack You. Hard.
    This, suffice it to say, could end badly.
    There was a balloon jump. (Whee!) The winds picked up at around 3,000’ and shoved your jolly crew rather far off-DZ. (Um…) You jumped anyway. (Whee!) You over-rotated your super-magnificent aerial and pulled a titch lower than you wanted to. (Um…) Your landing options are now -- well -- limited. And a little heavy on the obstacles. And kinda tiny. And now you’re on final. (Uh-oh.)
    Do you know where your stall point is?
    Probably not. Right about now, I bet you wish you did.
    In this regard, skydiving is unusual. After all, stall training is a foundational part of the training process in other air sports (paragliding, specifically), and there’s no question it’s vital. Considering how important it is to know the exact point at which your equipment stops flying, it’s surprising how few skydivers – even advanced ones – have seriously investigated the stall point of their canopies.
    Perhaps this is because the transition between the very-slow-flight and no-flight modes produces a stomach full of butterflies. It could also have something to do with the fact that skydiving canopy rides are much shorter than paragliding flights -- and, because the skydiving canopy is trimmed to fly down instead of up, comparatively easy to fast-forward. No matter what the root cause, the fact remains: knowing your stall point is an essential component of safe and skilled canopy flight. And there’s probably a lot that you probably don’t know -- yet. Here’s the skinny.
    1. You aren’t really in control up there.
    Sorry, buddy. Without understanding your system’s stall point, you are not in full control of your wing. Most notably, you’re at a significant disadvantage during the landing process, as the execution of a flare is the approach to a stall in very close proximity to the ground.
    2. It’s not about slow flight. It’s about no-flight.
    The lion’s share of ram-air canopy pilots believe that the definition of a stall is directly related to slow airspeed – that the “stall point” is when the canopy is flying too slowly to produce lift. Sound familiar? Yep. Unfortunately, while it often ends up being the case in practice, this isn’t actually true. The true “stall point” is defined as the moment when the parachute is no longer producing lift, no matter what the airspeed when you enter the maneuver. Bear with me here, because this has bearing on your jumping career.
    When a ram-air airfoil reaches an excessive “angle of attack,”* a stall results. As relative wind moves over an airfoil, it “curls” over and downward to create lift. However, when the pilot adjusts the airfoil to a higher angle with respect to the relative wind – often, but not always, by pulling hard on the brakes – he or she is effectively building a nylon wall against that relative wind, making it harder for the relative wind to follow its usual path and create lift. Finally, it reaches a point where it can’t. At any point that the angle of attack reaches that point, no matter what the airspeed, the pilot has a stall on his or her hands. When you understand the stall as a function of AoA, you can easily see how a ram-air airfoil can stall at high speed as well as low speed.
    This leads to an important fact: a higher-loaded wing will stall at a higher airspeed than its more lightly loaded counterpart. This is just another of the galaxy of reasons why it’s important to downsize your canopy thoughtfully and knowledgeably.
    3. You can choose your own adventure.
    Initiating a stall for the first time is not unscary. Don’t just stab the brakes and cross your fingers, though: manage the process. The rodeo quality of the stall depends on the type and sharpness of the inputs you use to get into it, and on your technique for stall recovery.
    Stalls entered using slow inputs tend to initiate a stall from slow speed and slight sink, making the stall more docile than those entered using quick, brutal inputs. The more aggressive and uneven you are in your entry, the more likely you are to introduce a bank angle at the entrance of the stall. This will stall the lower wing first, which can often result in a spin (and, maybe, line twists) during recovery.
    Another bit of advice: Don’t just reach for your brakes. Jumpers tend to initially experiment with stalls by monkeying around with their toggles – mostly, because they’re more familiar with those controls. That’s not really the best idea. Though rear-riser stalls “kick in” more suddenly than stalls initiated with the brakes (as they profoundly and quickly change the shape of the canopy using the C and D lines), recovering from them is smoother and easier.**
    ...and, of course, pull high. The “lab” is up at a nice, cushy altitude. Make sure to stop your experiments with a lot of margin between you and the dirt.
    4. You don’t have to go it alone.
    Look at your canopy’s manual to familiarize yourself with the stall dynamics you can expect from it. If there’s no information regarding stall behavior in the manual, contact the manufacturer and ask about it. They’re happy to help. So are canopy coaches.
    Ask, ask, ask.
    Then you might not have to ask the farmer to disentangle you from the fence, collect your scattered dignity and help you hobble to the road. That’s worth it, no?
    Here’s a great little video by AXIS Flight School that demonstrates a rear-riser stall. In this video, you can closely inspect the canopy’s reaction to the stall input.
    *The angle of attack, or AoA, is the angle between the cord line – visualized as a straight line between the leading edge and the trailing edge – and the relative wind that the airfoil is moving through.

    By admin, in Safety,

    Exit Order Safety

    Brian Germain and wife Laura Kraus launch an exit over Voss, Norway. Photo by Ron Holan There are many different views on exit order, although only some of them are based in science. The following exit order plan is based on the principle of "prop blast penetration": the degree to which a jumper remains under the aircraft based on the drag produced by their body position. When a jumper assumed a low drag body position, head down for instance, they follow a longer arc through the sky on their way to vertical descent.
    The fastest falling skydivers are freefliers, which means that they remain under the aircraft longest. If freefliers exit the aircraft first, their trajectory will take them toward, and often beyond the trajectory of flat flyers exiting after them. This fact has been proven time and again in the numerous close calls that have led to the creation of this exit order model. Therefore, the best way to create maximum separation between jumpers at deployment time is to have the FS "flat" jumpers exit before the freefliers, regardless of deployment altitude.
    Beyond this, we must also consider formation size when planning exit order. Since the last groups out of the airplane are more likely to land off the dropzone, large groups tend to exit before small groups based on the "needs of the many outweigh the needs of the few" principle of human civilization. I concur that this is a good plan, but for another set of reasons. Large groups tend to open lower than small groups due to task fixation and the need for adequate tracking time to create safe separation. This means participants of large formations should open closer to the dropzone. Further, smaller groups have the option of breaking off early, tracking perpendicular to the jumprun and pulling high to compensate for long spots, while the complexity of building a large formation makes it difficult to take such steps toward safety due to the peer pressure associated with the situation.

    Photo by Ron Holan
    The Exit Sequence
    So this brings us to the preliminary plan of sending the flat flyers out first, in groups largest to smallest, then the freefliers. However, since inexperienced freefliers most often remain under the aircraft for a shorter period of time than vertically oriented freefliers performing perfect zero angle of attack exits, the order should be lowest experience to highest. This also allows the more experienced freefliers to observe the exits of the novices, giving them the opportunity to give helpful advice, and to provide extra time in the door if necessary. If the previous skydiver or group is still under the airplane, do not jump. When in doubt, wait longer.
    Following the flats and then the vertical skydivers, we have the students and tandems. The order can be varied here, although there are some reasons to support sending the tandems out last. First, landing a tandem off the DZ is safer than landing a student into an unknown location. Second, students can sometimes get open lower than planned, which not only increases their risks of landing off, but puts the instructors at risk of landing off even more as they open lower than their students. Tandems on the other hand have the option of pulling whenever they see fit, which allows the camera flyer to get open high as well.
    The last groups to consider are those involved in horizontal skydives, such as tracking, "atmonauti" or steep tracking, and wingsuit pilots. The truth is, experienced horizontal skydivers can safety get out of the way of other jumpers quite easily, and can exit in any part of the order. However, in the case of two or more horizontal skydiving groups, plans must be created and followed with vigilance. For instance, one tracking group can exit first and track out and up the right side of the jumprun, while another group can exit last and offset toward the left side of the jumprun. Three horizontal groups on the same aircraft are best handled by adding a second pass, although there is a great deal of room for creative answers when wingsuit pilots are involved.

    Photo by Ron Holan
    Timing the Exits
    The amount of time between groups must vary based on the groundspeed of the aircraft. On a windy day, with an into-the-wind jump-run, the aircraft may move quite slowly across the ground, reducing separation between jumpers. This requires significant time between exits, perhaps as much as 15 seconds or more on a windy day or a slow airplane. The separation between groups can be increased quite easily on windy days by crabbing the aircraft with respect to the upper level winds, a practice that has become increasingly common at large dropzones. For a scientific explanation of exit separation, please read John Kallend’s PowerPoint, found here.
    Many jumpers believe that once the freefall is over, there is no way to prevent a collision. However, given the glide ratio of modern parachutes, we have the ability to close the gap quickly after opening by pointing our canopies in the wrong direction. Given the fact that the vast majority of skydivers will be opening reasonably close to the jumprun, immediately flying up or down the line of flight is pretty much always a poor choice. Therefore, once you have cleared your airspace and pulled, your job is to look for traffic in your immediate vicinity and then fly your parachute perpendicular to the jumprun heading. I like to call this “Canopy Tracking”. Once you verify that the others are open and note their location, you can begin to navigate toward the play area and then to the pattern entry point. This all requires a great deal of awareness and adaptability, as even the best plan can change quickly in a complex environment.
    The bottom line is this: keep talking. Every load is a brand new set of circumstances, and requires a good deal of thought and planning. Make sure everyone arrives at the loading area no later than the ten minute call to allow for healthy preparation time. Most accidents and close calls could have been easily avoided by skydivers talking to skydivers, and skydivers talking to pilots. Take your time in the door, keep your eyes open and take care of each other. It is a big sky up there, and when we work together, safety is the likely conclusion.
    Brian Germain is a skydiving safety advocate, and has written numerous books and articles on the topic. He has a regular spot on Skydive Radio called Safety First, and has made over 150 safety related videos, all available through AdventureWisdom.com

    By admin, in Safety,

    It's Not Only Size That Matters - Thoughts on Canopy Upsizing

    At 66 years of age and with a one year old hip replacement, it decided that it was time to upsize my main canopy. I currently jump an Aerodyne Triathlon 210, so I purchased a Performance Designs Spectre 230. I had heard good things about the Spectre, although I had not yet jumped a demo Spectre.
    Of course, I did not need any advice on how to use this canopy. I have almost 2300 jumps, a USPA Pro Exhibition rating, and have owned dozens of canopies. I thought I could land anything, especially my nice new big 230 square foot canopy.
    Little did I know that a "slightly elliptical" canopy would be so drastically different when making turns and in recovery than the more traditional Triathlons I have always jumped. So, my first mistake was that I never read the flight characteristics information in the sales literature, in particular, about the dive characteristics of this canopy. Many of the reviews said that the Spectre is described as “ground hungry”, and needs a deeper and faster flare to land well.
    My jumps on my new canopy:
    Jump #1: I tested my turns and my old style two-stage flares. Oh well. Not much of a stall. Maybe I just have to "learn" this new canopy. I used a straight-in approach on grass, but hit rather hard in very fast, sliding landing. Good thing the grass was damp.
    Jump #2: I decided to land into the pea gravel pit. A 10 mph crosswind at 45 degrees caused me to make a small correction on landing, then the wind side started to dive, a I pushed my flare, nothing, I hit hard, drove my right shoulder into the pea gravel pit, plowed a deep furrow through it, and went into a belly slide as I exited the peas. But this still counts for accuracy, right?
    Jump #3: After breakoff from a 15-way formation, and after too long of a track, I opened, and saw that I was rather far from the landing area. I decided to land in a small green field. I fortunately noticed the chain-link fence on all four sides of the field. Now I needed to burn off some altitude to get into this spot. I used one carving S-turn at quarter brakes, and then a last second turn to come straight in. However my canopy started to dive into the ground so fast that I never had a chance to get the “fast deep flare” that this canopy requires. I hit so hard that I caused six breaks in my leg and a partial shoulder dislocation. Rotor cuff surgery is now in my future too. It seems that in an stressful situation, I reverted to my old landing and flaring habits from my other canopies.
    So here are my comments and recommendation when jumping a new canopy (even when upsizing.)
    If most of your experience is on some of the more docile rectangular canopies, be careful if you change to even a slightly elliptical canopy, even if it is bigger. It will surprise you how differently it responds in turns, dives, and recovery.
    Bigger is not always enough to be better. (Sorry guys.) Read all of the reviews written about the canopy, and all about the flight characteristics. Talk to others who have owned one. Ask your Safety and Training Advisor and Rigger about the canopy and how it fits your style and experience.
    Open high and test everything you can up high. Practice steep as well as shallow turns. Test your flare and note the toggle pressure and location needed to find your stall point and "sweet spot". (Your brake settings may be different than on other canopies you have jumped.) Observe the dive speed and recovery traits at all brake locations, plan a straight in landing until you get experience, and that means more than one jump.
    Even if you have 2300 jumps like I do, read all of the articles you can find on canopy skills. At the very least, you will wind up with a checklist of things to look for to prepare for your first landings.
    In summary:
    I was careless but lucky. I have gone through many "could have - should have" thoughts, and offer my personal experience and observations as food for thought, and hope it may help others when changing canopy style or size.

    By admin, in Safety,

    When Should You Upsize Your Canopy?

    At the end of the day, skydiving is a dangerous sport. I’ve lost many friends and even family members– under properly functioning parachutes. We can’t regulate stupid behavior, but we can at least spread good information so more people can make wise decision.
    So why would someone consider upsizing?
    10. Cannot land consistently standing up. If you’re having troubles standing up consistently or even in the same area in all weather conditions, then you need to upsize and take a canopy course to understand the concepts basic flight characteristics.
    9. Not current. You can be uncurrent after a winter vacation without skydiving, coming off an injury or just life getting in the way. According to USPA, you are uncurrent if:
    A-license holders who have not jumped within 60 days
    B-license holders who have not made a freefall skydive within the preceding 90 days C- and D-license holders who have not made a freefall skydive within the preceding six months
    DZ policy: Every DZ has their own policy for uncurrent skydivers. Be sure to check in with them before coming out to the DZ to see what you may have to do. Also check the USPA Skydiver’s Information Manual for more info. 8. Jumping at a Higher Elevation. At higher elevations the canopy is going to perform faster and act more responsive because of the air being less dense. So landings will feel faster and turns will feel more aggressive. If you’re traveling to places like Colorado or Utah, you may want to pack a larger canopy.
    7. Gained Weight/Wearing Weight. Well, what can I say? Sometimes during the winter, it’s easy to pack on some pounds and that invariably negotiates your wingloading. Also, if you haven’t jumped all winter and you’ve accumulated a new wingloading, you may want to consider getting current on a bigger canopy.
    Next, if you’re a small girl, or decide to get on a 4-way team, you may be wearing weights. This added weight will definitely make your canopy fly differently than expected. So before making a decision on what canopy to buy or whether or not to downsize, consider the use of weights to make the best wingloading decision for your experience.
    6. Reserve Size. Generally, your main and reserve should be about the same size. If you were quick to downsize or couldn’t find the right sized container, but have a larger reserve, with little experience under a bigger canopy, may be a good reason to upsize your main. (Having the same sized canopies also reduces other problems should 2 canopies out occur.)
    5. Types of Jumps. Doing big ways? Wingsuiting? Demos? Some jumps may warrant a bigger parachute. When I do world record jumps, I usually opt for my bigger canopy so I’m not fighting my way through traffic and have a larger range of floating. Wingsuiting can cause line twists or other malfunctions and jumping a more docile canopy can help you negotiate them better. On demos, having a lower wingloading will give you more range to negotiate smaller landing areas or areas surrounded by obstacles – as long as you understand the flight dyamics of your wing.
    4. Age/Health/Agility. Take an inventory of your overall health. How are your knees? Wrists? Ankles? Eyesight? Depth perception? Reaction Time? These may be considerations to upsize.
    3. Attitude/Experience. Someone’s overall experience and attitude about the safety of themselves and others is a vital component in skydiving safety. Disregard for your own experience and/or safety is an obvious sign to upsize.
    2. Because You Downsized and You Shouldn’t Have. Having inconsistent landings? Not standing up your landings? Stabbing out your flare? Landing by touching down on your knees first then popping up to your feet thinking it was an awesome swoop? Spiraling in traffic cause it’s freakin’ fun on a small canopy when not necessary? Scared of line twists? Having a hard time kicking out of line twists? Not paying attention to others in the sky? Land downwind for fun? Don’t follow a landing pattern? What the hell is a landing pattern? Don’t understand the flight characteristics of your wing? Pretty much don’t follow the rules?
    1. Finally, if you cannot answer yes to all of these questions, you need to upsize:

    Can you land your main crosswind?
    Are you comfortable landing crosswind?
    Can you land your main downwind?
    Are you comfortable landing downwind?
    If you had to land out and the only option was a tight area surrounded by obstacles, do you know you could land your canopy accurately?
    Do you feel that you completely understand the flight characteristics of your wing?
    Do you understand what happens to the flare, landing pattern, stall characteristics and overall flight characteristics when you downsize?
    Have you used your rear risers & do you know why and when you’d need to use them?
    Have you used your front risers & do you know why and when you’d need to use them?
    Have you performed braked turns? Braked turns for landing?
    Can you land within 10 meters of a target center at least 5 times in a row?
    Did you take a canopy course beyond the B-license requirements? When I first started skydiving, I was young and pretty much invincible. I was on the fast track to get on a small canopy and go fast! And it’s all fun, until you get hurt or you watch someone die. I’d seen a lot of crazy things (especially people “getting away” with bad decisions) in my 20-year career, but in 2003, I witnessed my father’s fatal canopy collision. Then without your permission, things change.
    It’s amazing how death will completely transform your perspective on safety, especially when the sport is your livelihood.
    We spend more time under canopy than we do in freefall, so this is a moment to check in and evaluate how much canopy education have you gotten? My dad used to tell me, “take stock into your destiny.” So, take that Flight 1 course you’ve always wanted to, finish your B-license canopy training, ask questions, and just know, there ain’t no shame to upsize that thang!
    How at risk are you?
    Below is a canopy risk calculator that was created by the USPA, which can give you an idea of just how big of a safety risk you're at with your current canopy and experience level
    Calculate My Canopy Risk Useful Resources

    Barry Williams on Canopy Safety (Skydive Elsinore 2013 Safety Day) [Video]

    Barry Williams on Canopy & DZ Safety (Skydive Elsinore 2012 Safety Day) [Video]
    Performance Design's "Survival Skills for Canopy Control"
    Contributors: Melissa Lowe, Barry Williams and Jason Moledzki

    By admin, in Safety,

    Exit Separation

    On Saturday October 26, 2013 there was a near canopy collision by experienced jumpers. There were several factors which may have contributed to this event. I feel that a lack of understanding of exit separation was a major contributor.
    The winds of the day were posted: 24 knots at 12,000 feet, 22 knots at 9,000 feet and so on. I was on the first load, first out with a three way formation. I turned to the group behind me and asked for 10 seconds of separation. The response was “Why? That’s a lot of time.” Both of these jumpers have around 500 jumps. One has been jumping for over 10 years, the other for 9 years. One of these jumpers was part of the group that was involved in the near collision later that day.
    The incident: a near miss at opening time between two skydivers we will call jumper 1 and jumper 2. Jumper 1 left the plane first as part of an 8 way relative work group. Jumper 2, as part of a less experienced 2 way relative work group, left next with 5-6 seconds of separation. The second group left the plane flipping and having fun then got stable and continued a normal relative work dive. Jumper 1 was oriented to track up the line of flight decreasing his separation from the 2nd group. Jumper 1 further decreased his separation from the 2nd group by continuing to fly his canopy up the line of flight for 12 seconds. At which time he noticed one of the jumpers from the two way open pretty close. He then started looking for the other jumper from the two way group (jumper 2) and started a right rear riser turn. At this point, jumper 2 under a still deploying main fell past and within 20 feet of Jumper 1. Here is a link to the video of the opening sequence. This video was taken with a gopro camera and the jumpers in it are closer than they appear.
    Conclusions:

    1. The initial flipping on exit of the second group may have had the two way in an orientation to slide down the line of flight and therefore contributed to the second group moving towards the first group. If so this would have been only momentary and not a large contribution.
    2. Jumper 1 decreased separation by tracking up the line of flight. Although a contributing factor to the lack of separation, this was an appropriate action as on groups of 2 or larger all jumpers should track away from the radial center of the formation regardless of whether that puts them tracking up or down the line of flight as this will give them the greatest amount of separation from the members of their own group which would pose the greatest danger of collision at opening time. Jumpers tracking up the line of flight away from larger groups should always be aware of their direction and not “over track”.

    3. Jumper 1 was flying a small fast canopy, continuing to fly up the jump run, holding into the wind with his brakes still set. This decreased separation with the following group. Every skydiver should know where jump run is planned to be before boarding the aircraft. All jumpers should upon opening orient themselves as quickly as possible to fly perpendicular to jump run at least long enough to ensure the groups before and after them have opened.

    4. There is no question that mistakes were made on both sides, but there should also be no question that there would have been greater separation with 8 seconds at the door as called for in the chart below. In this case an extra 2 seconds separation would have equated to between 224-252 more feet of separation.
    We are also reminded of another incident we had a while back. Jumper 1 on a hop-n-pop leaves opens and flies up the line of flight. Jumper 2 leaves with about 5 seconds of separation and tracks down the line of flight. Jumper 2 tracks through Jumper 1’s canopy ripping it in half. Luckily neither one was injured.
    Another example is the video posted Iloveskydyving.org. This video clearly shows the following group giving 8 seconds of separation. Judging from their flying style it is obvious they are very skilled and not likely sliding through the air unintentionally. However, they still end up opening dangerously close to the group before them. We don’t know about what mistakes the group ahead may have made if any, but consider the problem may have been enough wind to dictate more time for adequate separation.
    Close Skydive Canopy CollisionAs Jumpers, we must have a basic understanding of the effects the ground speed of the aircraft has on the amount of time that we need to allow for the same amount of separation. I have heard swoopers say that the only good wind is no wind. They are saying this because in a no wind situation all things remain constant and consistent. Likewise at altitude if the aircrafts speed relative to the ground was always the same we would always give the same amount of time for the same amount of separation.
    What is adequate separation? In distance, the number I was taught is 1000 feet from center of formation to the center of the next formation for small groups. This number increases up to 2000 feet or more for groups of 8 or larger. Consider two 4 way groups lined up perfectly with jump run which will result in a jumper from each group tracking directly at one another. This allows each jumper to track 250 feet with 500 feet still left between them. The Skydivers Information Manual goes farther and recommends 1500 feet of separation for small groups and solos.
    What is adequate separation? In time, that will depend on the speed of the aircraft and the wind the aircraft is encountering. In other words, it will depend on the ground speed of the aircraft on jump run. See the chart put together by Phil Litke. These numbers should be considered minimums for 1000 feet of separation to be doubled for following groups of 8 or larger.
    Here are some examples of experienced jumpers and Tandem instructors giving between 13 and 31 seconds exit separation when the winds were very high. Also consider that these instructors are, for the most part, giving such separation on solos and 2 ways. As stated earlier, larger groups should be allowed more distance and therefore more time.
    We are all concerned about hosing the guys in the back of the plane by taking too long. I am not advocating that we give more time unnecessarily. If the speed of the aircraft dictates a certain amount of separation between groups this should include your set up, climb out, and count. I am not suggesting anyone taking longer than the conditions call for as this would create different problems such as people landing off, unnecessary go arounds, and wasted fuel. Most of us have had experienced people in the back of the plane yelling for people to hurry up and get out. This is because they feel you are taking too long to exit and will end up with them getting too far from the airport to make it back. If the winds are strong enough to necessitate a certain amount of separation then likewise the plane is moving slower relative to the ground, Freefall drift will be greater, and the acceptable opening spot may be farther from the landing zone.
    Every skydiver should know the acceptable exit and opening points for the conditions of the day. Many people land out without trying to make it back because it looks father than they are used to seeing. Without looking at the winds and calculating the opening spot before you go up you have very little chance of knowing for certain whether you will make it back, especially as the winds get higher and the spots get longer.
    One thing that you cannot control when you leave the aircraft is what the group behind you will do. We all should look after each other. By knowing how much separation to give you are looking out for yourself and the group ahead of you. Don’t be afraid to confirm with the group behind you that they will also wait an appropriate amount of time before exiting.
    Recommendation to reduce the likelihood of these type incidents:
    1. Phil Litke’s exit separation chart should be posted near the jumper closest to the pilot for easy reference on jump run.

    2. Upon turning onto jump run after the cut, the pilot will inform the close jumper of the aircrafts ground speed. This close jumper will look at the chart and determine how many seconds are needed. The number of seconds separation to give will be passed down to all jumpers on the load.

    3. If this turns out to be too great a burden for the pilot we should install a GPS unit near the door so that the jumpers can determine ground speed themselves and make all jumpers on the load aware of how many seconds separation to give.
    We all have to get on board for this to work. Our landing direction at our dropzone is mandatory. This has been the best proactive step towards promoting a safe landing area and smooth landing pattern I have seen since I have been with my dropzone. The chaos of 22 jumpers landing in every direction in light and variable winds seems to be behind us. Each of us knows no one landing against the assigned pattern will escape a talk with a staff member. Exit separation is as important a safety issue and should be treated with the same respect. It needs to be a matter of policy for consistency.
    There is not an original idea on this subject here. This is the best knowledge which my mentors passed on to me. Here are a couple of related articles which go into greater depth about these concepts and solutions to these problems. I hope it is clear we must go about things in a more thoughtful and consistent way to avoid similar incidents in the future.
    http://www.dropzone.com/safety/Exit/Exit_Separation_Revisited_628.html


    http://indra.net/~bdaniels/ftw/sg_skr_dealing_1_uppers.html

    By johnfallo, in Safety,

    Saved By The Beep

    Most of us agree that canopy control is the most important, and most difficult aspect of skydiving instruction. Within this broad objective is the ability to fly a safe and consistent landing pattern. This is crucial for everyone, from the highest level of experience down to the beginner. The clear necessity for improvement in this area has been demonstrated time and again with the unacceptable frequency of canopy collisions and low turn accidents that have plagued our sport for far too long.
    General aviation has implemented many new technologies to assist pilots in navigation. These tools have enhanced aviation safety, and such devices are not considered crutches, but a necessary part of safe flying. Similar advances are now commercially available for skydivers as well, but many do not include these instruments in their safety toolkit; least of all for primary instruction methodologies. It is time for this to change.
    Altitude awareness is not something that ends once the canopy opens. Knowing precisely how high we are throughout the approach and landing is vital for consistency, and many of the traditional analogue devices are unable to provide truly trustworthy data. The digital altimeters that are now widely available are accurate within ten feet or so, but they have one tragic flaw: the pilot must look away from the ground, and away from the traffic, in order to access the information.
    Having water available does not guarantee that the thirsty will drink, and as altitude diminishes and stress level increases, visual altimeters are used less and less. As many high performance pilots have come to realize, audible altimeters are an incredibly powerful aid for heads-up access to the information that saves their lives. The time has come to utilize these tools for students and intermediate skydivers as well.
    A pattern is a simply a series of invisible points in space, what some have come to refer to as "altitude-location check-points". With three or four ALC's, a canopy pilot can follow a preplanned path through space to a predictable landing point. When these ALC's are programmed into an audible device such as the Optima, with its impressive tolerance of + or - only ten feet, the distracting glances at a visual altimeter become mostly unnecessary. More importantly, I have found that my canopy piloting students who use such audible cues are more aware of their surroundings, and are far less likely to run into other canopies on the way to the target. Even more importantly, by having their eyes focused "outside the cockpit" so to speak, the canopy pilot learns exactly what the ground looks like at the various altitudes. Therefore, I have discovered, if there is an instrument failure in the future, they have "calibrated their eyeballs", and are aware when they are too low to execute a hard, descending turn.
    Many instructors have grown accustomed to preaching the party line that relying on instruments for canopy flight is inadvisable. Although there is some merit to training our eyes to recognize key altitudes, simply trusting our inborn instincts is not an effective way to accomplish this goal. When a “flat-line” beep goes off in your helmet that marks 300 feet AGL, and you happen to be looking at the ground at the time, you immediately become a better canopy pilot. Furthermore, when you are focused on your surroundings, rather than a dial on your wrist, you are more likely to make the necessary course corrections that lead to the target. The primary reason for missing the target is, and always will be, failure to maneuver when a course correction is necessary. When you always know how high you are, and are observing your location in relation the target, you are far more likely to make the change that puts you in the peas.
    The safety concerns regarding the use of audible devices for flying a pattern can be addressed with a few simple rules. The first rule is, if you don’t get the first beep, assume that the instrument has run out of battery life, or is improperly programmed. When the initial pattern beep comes, verify that this is in fact the altitude that you expected it to be by looking at your visual altimeter. If it is not, or you hear nothing at all, use your visual altimeter for the remainder of the jump, and sort it out on the ground. Above all else, your eyes are your default, and you can veto what the audible is telling you, or not telling you. If it doesn’t look right, put your parachute over your head and prepare to flare for landing.
    There have been many technological leaps that have changed the sport forever, and audible information for canopy flight is proving to be one of the most profound. By knowing exactly how high we are at all times, we can act appropriately. We can relax more as we fly our approach, and enjoy the simplicity and joy of landing our parachutes without worry. Above all else, the reduction of the stress within each canopy pilot, both student and expert, has proven itself to allow for the full expression of skill that training has made possible. When we embrace such advances, we can more easily expand into the pilots we were meant to become.
    BSG
    Brian Germain is a parachute designer and test pilot, and runs canopy flight skills and safety courses all over the world. Brian has made over 14,000 jumps in his 25 years in the sport. He is also the host of the “Safety First” segment on SkydiveRadio.com, and the creator of many educational You Tube videos. Brian is the author of the widely popular canopy flight text The Parachute and its Pilot, as well as Transcending Fear, Greenlight Your Life, and Vertical Journey. His upcoming book entitled “Vibe Matters, emotion is everything” will be coming out later this year, along with the long awaited educational packing video “No Sweat”. His websites are www.BIGAIRSportZ.com and www.Transcendingfear.com and his YouTube channel is: www.youtube.com/bsgermain

    By Deleted, in Safety,

    Launching 2, 3 and 4-Way Stars for Recreational RW

    Funneled exits are bound to happen once in a while on recreational RW loads, but they do not have to be the norm. With the leadership of a good load organizer and thorough dirt dives, jumpers with relatively little experience can soon be pulling off stable exits.
    In recreational RW, the most common type of exit is a Star (or “round” as it often called). In a Star exit, it is easier to control the exit chunk and maintain levels because all jumpers are looking into the center. The number of jumpers in the Star exit depends on factors such as jumper experience and the complexity of the skydive. For recreational loads with mixed experience levels, a 2, 3 or 4-way Star is probably large enough. Any bigger and the chance of a funnel increases.
    This article focuses on Star exits from left side-door aircraft such as Otters, Cessna Caravans and PAC750s because they are commonly used for formations larger than a 4-way. Also, because many recreational skydivers don’t do a lot of 4-way, terms such as Middle Floater and Rear Floater are used instead of 4-way terminology such as Outside Center and Tail.
    Deciding Who Will Be In The Base
    The simple solution is to put only experienced jumpers in the base, but that often doesn’t leave enough experienced jumpers further back in the lineup. An alternate solution is to put experienced jumpers outside the plane and lesser-experienced jumpers inside. This mix of experience levels can work quite well if everybody leaves on ‘GO’ and presents to the relative wind. Then, if the exit is less than perfect, the experienced jumpers are in a better position to control the exit chunk. For example, if one of the inside jumpers starts to flip over, it is sometimes possible for one of the outside jumpers to push against his back pack and help him settle back down into his slot.
    The Importance Of Dirt Diving The Exit
    The exit is just as important as remembering the points of the skydive. If the base is not there, no points will be turned anyway. So during the dirt dive, jumpers should pack it up and take grips exactly the way they expect to do it on jump run. This can prevent a lot of fumbling around for grips when they are lining up for real. If a mockup of the aircraft door is available, jumpers should use it. If not, they can make marks on the ground to represent the door.
    Typically, the organizer is positioned in the middle of the door and facing in so that he can see when everybody is in position before giving the count. Since full face helmets make it very difficult to hear the count, many organizers move their head or leg in time with the count. Some organizers swing their left leg out-in-out to indicate the Ready-Set-Go. (The second swing out represents the ‘Go’).
    Launching A 2-Way Star
    This exit uses a Middle Floater and 1 jumper inside the plane. As mentioned earlier, the most experienced jumper should be outside the plane because he is in a better position to control the inside jumper as the 2-way leaves the plane.
    Getting Into position
    1. With both hands holding onto the bar (or the top inside of the door if there is no bar), the Middle Floater rotates his body to the left so that his back pack goes out the middle of the door (so he doesn’t snag anything). His head follows until he is standing outside the plane with his right foot on the edge of the door and his left knee presented to the prop blast. His hands should be approximately shoulder-width apart.
    2. As soon as the Middle Floater turns around in the door, the Inside Jumper reaches between the Middle Floater’s arms then right and left for his arm grippers. This leaves both the Middle Floater’s arms free to fly and control the exit.
    3. As he takes grips, the Inside Jumper steps forward with his left foot, placing it on the edge of the door and crouching down (not on his knees) while keeping his chest cheated toward the prop blast and his back straight up and down. His right foot should naturally be a foot or two back inside the plane (helps ensure his body is cheated toward the prop blast).

    The Launch

    When the Inside Jumper is ready, he looks up at the Middle Floater.
    The Middle Floater gives the count and launches out, leading with his left knee and presenting his chest and hips to the prop blast. With his free hands he can help control the Inside Jumper if he starts to twist or turn off heading. He can also double grip the Inside Jumper for added stability.
    The Inside Jumper DOES NOT push but goes with the exit, keeping his head up and rotating his chest and hips toward the prop blast as he helps fly the 2-way on the relative wind.
    Both jumpers are responsible for keeping the 2-way on heading relative to the aircraft’s line of flight so that other jumpers on the skydive can go directly to their slots for a faster build. The 2-way is also responsible for maintaining a good fall rate.
    Launching A 3-Way Star
    This exit uses 2 floaters (a Rear and a Middle) and 1 jumper inside the plane. Again, the most experienced jumpers should be outside the plane.
    Getting Into Psition
    1. The Rear Floater climbs out first (see the photo of the Middle Floater climbing out for the 2-way).
    2. On the heels of the Rear Floater, the Middle Floater climbs out the same way, except he rotates his body to the right and stands pretty much in the middle of the door.


    3. As the Middle Floater climbs out, the Rear Floater grips the Middle Floater’s right arm gripper with his left hand.
    4. Both floaters are now standing outside the door and should be turned slightly toward the front of the aircraft with the inside of their left knees presented to the prop blast.


    5. The Inside Jumper gets in position the same way as described for the 2-way Star except he takes a left-hand grip on the Rear Floater’s right arm gripper and a right-hand grip on the Middle Floater’s left arm gripper. (Again, he steps toward the door with his left foot and places it near the edge of the door to ensure he is cheated toward the prop blast.)


    Launch

    When the Inside Jumper is ready, he looks up at the Middle Floater.
    The Middle Floater gives the count and launches out, leading with his left knee and presenting his chest and hips to the prop blast.
    The Rear Floater should anticipate the count and leave a split second early, hardly noticeable but just enough to place him on the lower end of the 3-way and looking up at it. (In 4-way, the Rear Floater, called the ‘Tail’, is always on the lower end of the formation to help anchor it on the relative wind.)
    The Inside Jumper DOES NOT push. He simply steps off, keeping his head up and rotating his chest and hips toward the prop blast as he helps fly the 3-way on the relative wind.
    All jumpers are responsible for keeping the 3-way on heading relative to the aircraft’s line of flight so that other jumpers on the skydive can go directly to their slots for a faster build. The 3-way is also responsible for maintaining a good fall rate.
    Launching A 4-Way Star
    This exit uses 2 floaters (a Rear and a Middle) and 2 jumpers inside the plane. As with the 2 and 3-way Star exits, the most experienced jumpers should be outside the plane.
    Getting Into Position
    1. The Rear and Middle floaters climb out the same way as described for the 3-way Star exit. (Note: The Rear Floater should stand a few inches forward of the rear door jamb so that the Inside Rear jumper does not hit his arm on exit.)
    2. While the two floaters are climbing out, the 2 inside jumpers (let’s call them Inside Rear and Inside Front to indicate their relative positions in the door) should step forward with their left foot and place it on the edge of the door, keeping their back pack backs straight up and down and their chests cheated toward the prop blast. They should crouch but not be on their knees. Their right foot should naturally be a foot or two back inside the plane.
    3. The Inside Rear jumper takes a left-hand grip on the Rear Floater’s right arm gripper and a right-hand grip on the Inside Front jumper’s left arm gripper.
    4. The Inside Front jumper takes a right-hand grip on the Middle Floater’s left arm gripper and can either leave his left hand free or reach back and double grip the Inside Rear jumper’s right arm.


    The Launch

    When the inside jumpers are ready, they look up at the Middle Floater.
    The Middle Floater gives the count and launches out, leading with his left knee and presenting his chest and hips to the prop blast.
    The Rear Floater should anticipate the count and leave a split second early (the same way as described for the 3-way exit).
    The inside jumpers DO NOT push. They basically step off and go with the Middle Floater, keeping their heads up and rotating their chests and hips toward the prop blast. The Inside Front jumper should also think about launching toward the front of the plane, and the Rear Inside jumper should think about helping to place the Inside Front jumper up and forward.
    No grip switching is necessary. If the 4-way is the base for a big-way, jumpers can take double grips for added stability.
    All jumpers are responsible for keeping the 4-way on heading relative to the aircraft’s line of flight so that other jumpers on the skydive can go directly to their slots for a faster build. The 4-way is also responsible for maintaining a good fall rate.
    Safety Tips

    Before boarding the plane and before jump run, jumpers should give each other pin checks.
    During the lineup and the exit, jumpers should always protect their handles.
    Before planning to launch larger exit chunks, jumpers should know how many jumpers are allowed in the door and at the back of the aircraft (so that the aircraft’s stall point is not jeopardized). If they don’t know, they should ask the pilot! As with other types of exits, methods for launching a Star can vary from one organizer to the next, from one 4-way team to the next, or even from one DZ to the next. The methods described in this article are ones that have worked successfully for this author on both 4-way and recreational loads. But no matter what method is used, success is much more likely if jumpers present as much as possible to the relative wind when lining up in the door and continue this through the launch.
    Finally, bigger is not always better. Most skydivers would rather swoop on a solid 2-way than chase a funneled 6 or 8-way base. A solid base allows everybody on the load to turn more points and get the most bang for their buck.

    By elightle, in Safety,

    The Abort Zone

    Landing your canopy in a specific place is a skill that we all must master. If you cannot land where you want to, eventually you will land someplace you don’t want to. Honing this skill is something that we all must pursue, and how we approach this will determine whether or not we survive the learning process.
    We must first learn how to land on a runway before striving to land on a specific point. When pilots try to skip this step, they often run into significant stumbling blocks, some of them requiring surgery. Once you are proficient at hitting the centerline of a runway with consistency, then you can move on to more specific targets such as entry gates and landing points.
    One of the most important aspects of any approach is the “entry angle”. Although we can often repair a flawed approach, there are limits to our course corrections. The parachute can only do so much. If you set up too close to the target or entry gate of the swoop course, you may be in for a painful lesson. Too tight is a very dangerous place to be.
    Even if you are flying a conservative approach, making gentle turns to final, this can still bite you. When a pilot strives to land on a target that is mostly underneath them, they are on what I call “the path of crazy shit”. You can almost hear the banjo music starting like in a chase scene in an old western. There is no graceful way to land on a target that is directly below you. The parachute wants to glide, and turning or diving to get there will always put your life at risk.
    If you are a swooper, the consequences of being too close to your entry gate are dire. You may have the potential to extend the dive of your canopy to make the entry gate, but all you will do is make a divot between the flags that mark the location of your final act of egoistic stupidity. Let it go, and live to swoop another day.
    If we are too far away from our entry gate, real or imaginary, our solutions are simple, and generally quite safe. “Shallowing” of the approach can easily be accomplished by letting off the dive early and/or holding a bit of brakes or rear risers. We do not often read incident reports about canopy pilots who died a horrible death as a result of holding two inches of rears to stretch their glide back to the target. Set up deep, and tighten up over several jumps.
    The hard part comes when you have set yourself up, started your dive, and are not sure if you can make the gate or not. You are tight and steep, and you think that if you make it you are going to be a hero. Hero or zero that is; only time will tell. If you hold your swoop in your hand like a butterfly, hoping it will not fly off, you will live far longer than if you squeeze it tightly and try to force a square peg into a round hole. Either it is there or it is not.

    You need to train yourself to know when you are too tight by knowing what it looks like when it is just right. Visualize the perfect entry, not too shallow, not too tight, with the target or entry gate out in front of you. Walk through the sequence, setting up tiny gates on the ground, and practice making aborts by lifting your eyes from the entry gate and landing long. If you are looking down at it, just let her fly, land safely, and go up and do it again. There is always the next jump.
    They key to a good abort procedure is training. Without physical rehearsal for physical activities, our cognitive understanding is useless. We have to practice arresting the dive over and over, and find new ways of putting our parachutes into level flight quickly.
    The first concept is: “Pitch Before Roll”. This means that the turn itself is less important than the pitch attitude of the canopy. When you are striving to pull up from a diving turn, increase the canopy’s pitch angle before striving to recover the roll. Bank angle does not kill people, descent rate does that. If you nose your parachute up, you will increase the angle of attack of the wing, which will give you the added lift that will reduce the decent rate. This will afford you the time to reduce your roll angle prior to touchdown. You literally create time.
    The second concept that supports healthy recovery technique is: “Sharp Inputs Create Sharp Results”. Slowly applying the brakes, regardless of the depth of the input, will never create the high rate of pitch change that shorter, sharp inputs can. This is the same reason why slow flares, when started at a very high altitude, will not cause an adequate change of direction of flight so as to create a level-off for a soft landing. Practice giving sharp stabs on the brakes while in a turn, and see what it does for you. If your weight increases dramatically, you know you are creating a change of direction, since inertia is resisting your change of motion.

    Another relevant concept with regards to saving yourself from a low turn is: “Give Up Some Heading”. If you strive to arrest your dive and stop the yaw too quickly, you are likely to wobble on the roll axis. This is because the increased lift on the low wing is bringing that wing up, beginning an oscillation about the roll axis. This can easily be prevented by allowing the turn to continue a bit following the increase in the angle of attack. Look into the turn, and let the wing follow through with its natural over-steer tendency, perhaps as much as 90 degrees when recovering from a fast turn. This overshoot can be as little as 20 degrees in a slower, carving turn. When you strike the toggles, do it with a short, strong burst-and-hold of 12-18 inches, but do it in an asymmetric manner that continues the current momentum of the turn. This will allow you to smoothly and slowly exit the turn and enter your final landing procedures gracefully.

    The last idea that seems to make a difference in how quickly you are able to pull up from a low turn is where you are looking: “Look Where You Want To Go”. If you are like most people, you will stare at your impending impact point on the ground, right until landing. By focusing your attention on what you don’t want, you inevitably make it happen. Somehow we are drawn toward whatever is in the center of our focus, so it is a far better plan to look toward where you intend to go, rather than where you are currently going. If you have turned too low, your current destination point is somewhere below you, while your intended flight path is in the general direction of the horizon. Lift your eyes, and make your parachute fly toward where you want to go. Focus is more than the object of attention, it is the shape of things to come.
    Aborting is a part of life. Humans are not perfect, and sometimes we are incapable of fixing our errors. Targets and entry gates are fun to shoot for, but not at the expense of our bodies. Aim to fly a clean approach every time, and let your gut tell you what to do. If it feels bad, it usually is. Do not let your desire to make the swoop course or the peas keep you from seeing what is right in front of you. Ego distorts our vision, as does passionate desire.
    The only way to see clearly is to remain calm, breathing slowly and completely throughout the approach, and maintain a positive mood as you set yourself up. If you start to feel scared, it is your cue to breathe more and try less. The perfect approach always feels easy. It flows like water. It is the result of good planning combined with good execution, made possible by positive emotion. Joy is thrust, fear is drag, ego is weight, and knowledge is lift. Maximize lift and thrust, and you will go far.
    Go Big
    Live Long

    BSG
    Brian Germain is the author or several popular skydiving books including: The Parachute and its Pilot, Transcending Fear, Vertical Journey and Greenlight Your Life. He also has a spot on Skydive Radio called “Safety First with Brian Germain. Brian runs canopy flight courses throughout the world, and does motivational keynote speaking on the topic of transcending fear. His website is: www.BrianGermain.com

    By Deleted, in Safety,

    10 Things to ask your potential Tandem or AFF student

    This is a lot of info I have learned over the years about interviewing potential tandem customers and AFF students who are either elderly, or have some disability or medical condition.
    I always try to relate the physical aspects of the skydive to that person and what might the consequences be. In particular, the airplane ride, the opening shock and the landing. All of these events have specific physiological effects on people and each person have different risks and will react differently to these effects.
    1. What is your height and weight? Obvious question. Do not exceed the weight limits of the gear. For tandems, weigh yourself with gear and everything on to know what your exit weight is going to be.
    Most tandem manufacturers have a 500lb (227kg) limit for their gear, so easy math will help you know what YOUR personal maximum tandem student weight is.
    Do not exceed the TSO for the AFF students rig. If you do and they get hurt, then that is simply defined as ‘gross negligence’ on your part and the waiver will mean virtually nothing in the case of a lawsuit.
    2. Do you have any metal in your body? Most people will know a great deal about accidents or surgeries that they have had and can tell you in great detail about it. A spinal fusion with plates/screws or a rod in a femur does not mean that someone cannot jump – but it might raise other questions about the stability of those joints and the consequences of a hard opening or a bad landing.
    But a rod in the lower spine could break several vertebrae if a hard landing occurs with the student landing on their butt, causing serious and/or more permanent injuries.
    3. Do you have any artificial joints? The question needs to be asked of everyone. A hip replacement is a dangerous thing for a 70 year-old or 80 year-old candidate. Opening shock alone could dislocate the joint. Knees as well. What is the range of that knee? Can you raise your legs for landing?
    4. Do you have any plumbing (catheters, colostomy bags, etc)? (Yes that’s right – I said COLOSTOMY BAG) While this may be awkward for you to talk about, it probably is not awkward for the student or person that might have one. If someone has one of these or similar devices installed, then it is probably as ‘normal’ to them as walking or breathing.
    But on a skydive, a catheter or bag can come loose or detach, and at the very least, would be a nasty mess to deal with. A lot of catheters are attached to a bag strapped to their leg. Many can be removed, relocated, drained or emptied prior to a jump.
    5. Do you have any other medical apparatus (Pacemaker, insulin pump, etc)? Again, they could have internal or external devices on their body. A pacemaker is often not a big deal. A external defibrillator might be a problem if it became detached during the skydive. Same for an insulin pump or a catheter used to feed medications into their body? Where is it? Will the harness rub against it? Can it be removed, relocated? What are the consequences of something happening to it?
    6. Are you taking a medication or something that can be administered by me in an emergency? Something like an asthma inhaler or a diabetic medication. If there is a chance of an asthma attack, then the tandem instructor can take the inhaler with them and administer it if needed.
    7. Do you have issues with heart or breathing? Someone with a weak or other heart condition, or congenital breathing problems may not even be able to breath properly at 10,000’ in an airplane. Combine that with the stress of a skydive, and you may end up with a medical emergency. Have they flown recently? What precautions do they take if any? And no, I do not recommend bringing their oxygen system on board the plane.
    Can they deal with an accelerated heart rate for an extended period of time? We all know that heart rates can rise to some 140+ just prior to and during the exit out of the airplane. Not everyone is able to handle that if they have some condition related to heart or blood pressure.
    8. What if my doctor says it’s OK for me to jump? While that may be good information to know, most doctors know little or nothing about skydiving. If you get the chance, talk to their doctor directly and explain the physical things that happen during a skydive.
    The airplane ride (hot, sweaty, cramped space and altitude issues). The adrenaline rush during exit and freefall (heart rate), the opening shock of the parachute, (several G’s of force and the potential for a very hard opening), the parachute ride (vertigo, motion sickness, tight and uncomfortable harness, reduced circulation) and the landing especially (forward motion instead of vertical, and how we can slide in (or not) and what is expected of the student during that phase and what can happen if it does not go well)
    9. What will an injury do to your quality of life? I have learned that this is probably one of the most important questions you can ask. An 80 year old with Osteoporosis may be able to skydive, but if they break an ankle, they may never walk again.
    Bones may not heal and they could spend the rest of their life in a wheelchair or worse. It is much the same for disabled folks. I always try to get a feel for what would happen to their life if they break something, because it CAN and it DOES happen.
    10. Do you have any sort of medical condition that can kill you in a 10-15 minute window? I ask this question as a catch-all. Basically there is a possible 10-15 minute window in the case of a tandem jump, (a high or early activation on a parachute resulting in a long ride down). During that time, the instructor cannot perform CPR, a tracheotomy, or rescue breathing. So if the student has any medical condition that would need to be attended to by emergency means, the tandem instructor is pretty much helpless to intervene during the skydive. If the student has any such condition, then perhaps a skydive is not a good idea.
    When in doubt, consult a doctor who IS a skydiver. There are plenty of them out there and most can advise you on the effects of a disease, surgery or medication on the process of skydiving.
    Just because the customer is standing in front of you right now and wants to jump right now, is not a reason to take them up. Offer to do some homework on their condition(s) and arrange for a future date to see if they can jump.
    I have taken up dozens of elderly, disabled, and paraplegic/quadriplegic students in my life. I have also REFUSED to take up dozens of them. Not everyone is capable of making a skydive. Not everyone should be making a skydive.
    David TK Hayes

    USPA D-18764

    CSPA D-486

    AFF, Tandem, IAD, S&TA;, Coach, PRO

    By admin, in Safety,

    An Inconvenient Truth Regarding PLF's

    When I started skydiving round parachutes were the only parachutes available. The landing under a round canopy had a high straight down component. Although Para Commanders had a noticeable forward speed under no wind conditions, landing in winds over 10 mph were again straight down. Due to straight down landings most injuries were to the ankles because one tended to sit down on the ankles during a less than perfect timing of the landing techniques required by round parachutes. Use of the Parachute Landing Fall (PLF) greatly reduced the extent and severity of landing injuries. Virtually all successful skydivers were experts at PLFs because not every landing was executed perfectly, no matter how many jumps one had, and sooner or later one had to land a round reserve. In the classroom it required a block of at least two hours to teach landing the parachute because so much of the time was devoted to teaching an actual PLF. The complete PLF technique is not a natural, readily apparent procedure. During the actual jump about half of the students would perform a PLF and the other half wouldn’t no matter how much time and practice was spent on PLFs. The injury rate was quite high. About 1 in 20 first jump students would suffer some type of ankle injury.

    With the advent of square parachutes, and particularly with the advent of placing students under square parachutes, the landing injuries changed. Each experienced person reading this article will realize that the injuries from landings that we see today are not limited to ankles. This is because the parachute is moving the jumper across the ground in almost all circumstances. However, there are cases were a person would be descending straight down even today. A high or rapid or deep flare by a student would be one example. In this case the PLF position for landing would definitely influence the ability of the student to walk away from their mistake.

    In my opinion there are instances when use of a PLF for a botched landing is NOT beneficial to the jumper. A downwind landing is such an instance. The PLF introduces a roll and a square parachute introduces a large amount of speed. For the sake of this example, assume the wind is blowing at ten mph. The jumper has made a mistake and is landing downwind. He/she has the presence of mind to have the toggles at his/her ribs (half flight) for an air speed of ten mph and a ground speed of 20 mph. Please bear with me for the easy math.

    20 mph = 20 mph X 5280 ft/hr = 105,600 ft/hr

    105,600 ft/hr = 105,600 ft/hr divided by 60 minutes/hour = 1,760 ft/min

    1,760 ft/min = 1,760 ft/min divided by 60 sec/min = 29.33 ft/second

    At 20 mph ground speed a person is moving 29.33 ft per second across the ground. At half flight the downward speed (3 to 5 mph) would be somewhere between 4.4 ft/sec and 7.33 ft/sec. I believe that in this example the best outcome for the jumper would be to try to absorb as much of the initial downward velocity as possible with their legs (knees bent and pressed tightly together) and then NOT ATTEMPT A PLF.
    The danger inherent to a high speed roll/tumble is a direct result of the laws of physics. An example using a cylinder will illustrate the principle. I am 52 inches around the shoulders so let’s talk about a perfectly round cylinder, 52 inches in circumference, moving in the air just above the ground and oriented perpendicular to the line of flight.
    At touchdown the cylinder is going to pick up a rotational (angular) velocity based upon the speed across the ground (linear velocity) divided by the circumference of the cylinder. Excluding friction, which will slow the cylinder by scraping, the cylinder will initially roll across the ground at 29.33 ft/sec divided by 52” (circumference) per rotation.

    52 inches divided by 12 inches per foot = 4.33 feet (circumference)

    29.33 ft/sec divided by 4.33 ft / rotation = 6.77 ROTATIONS PER SECOND!!!


    If this seems quite a lot, it is. However, this is why occupants of a rolling vehicle are thrown so far from the vehicle in a rollover car accident (buckle up?). In the rollover case the rotational speed (angular velocity) of the vehicle rolling is translated to the linear velocity of the thrown body. The thrown objects, including unbuckled occupants, are thrown hundreds of feet.

    Returning to the skydiver, I am not a perfect cylinder. I am more of an imperfect ellipse (oval) seen from above. This is not to my benefit in a rolling landing as the ground (not perfectly smooth) will have a tendency to turn me into a round object by attempting to break off my protrusions (shoulders, arms, knees, etc.) This is complicated by the fact that the PLF was developed using round parachutes which did not have flare capability. As such the arms in a round canopy PLF were above the head, elbows bent and cushioning the head from the sides. This positioning essentially extends the arms along the long axis of the cylinder. With a square parachute our hands are down at our sides (hopefully) controlling the flare. During the rotation of a PLF, and particularly a rotation of 6.77 rpm, the hands and arms are thus exposed to quite a bit of trauma due to impact with the ground, more than once, as the roll proceeds.

    What one hopes for is the best case scenario where the jumper is rolling from shoulder to shoulder across the ground. The worst case scenario would be tumbling head to toe across the ground. Unless one is a trained gymnast this would expose the head and neck to several impacts with the ground. A real life roll/tumble would probably fall somewhere between these two extremes. At a rotational speed of 6.77 rpm a PLF would risk head and neck injury. At a rotational speed of 6.77 rpm, even a perfect PLF has great risk to shoulders, arms, hips and legs.

    There is a solution to this downwind landing possibility. It is easy to train and easily understood by newcomers and experienced skydivers alike. The simplest way to prepare for as many landing scenarios as possible is to assume the PLF position, fly the parachute and slide on one hip in the event of a forward motion, high speed landing. I teach our students to envision holding a dollar bill between their knees and squeezing a quarter between their glutes (“feet and knees, dollar and a quarter”). Actually doing so puts one into the PLF position.

    When the person discovers a downwind mistake has been made, he/she should assume this PLF position. At touch down the jumper should try to absorb as much as possible of the downward impact with their feet but lean back in the harness. Under no circumstances should the person allow themselves to be thrown head first. The jumper wants to stay on their feet as long as possible, tending to sitting down. As the person sits down he/she wants to transition (during the squat) onto a hip. One does not want to impact directly onto the butt. The spine will tolerate torsion (bending) but very little compression. Sitting down directly onto the butt could cause spinal problems on its own (disks and vertebrae). Absorbing the actual butt touchdown with the hip will allow the spine to flex. Hitting a rock with the tailbone while sliding across the ground could be quite painful as a likely result is a cracked tailbone. Hitting a rock with the hip while sliding across the ground might possibly bruise the hip, an easier recovery than any spinal injury. The jumper should perform a baseball slide into second base ensuring that they remain sliding feet first. The person will get dirty. Done properly, one may see damage to the leg strap cover on the hip, but a dirty/torn jumpsuit and/or a dirty/scraped hip cover will be all that one sees.

    During a proper landing (into the wind) and under reasonable conditions, if a person is in a PLF position (feet and knees, dollar and a quarter) accompanied by a flare anywhere near half–flight, the parachute will lay the student down in the first half of a PLF. This is all that is necessary with a properly sized square canopy. The “lay down” is a result of the fact that most students are not true into the wind at touchdown and thus the square parachute almost always imparts some degree of forward AND sideward motion to the student.

    The occurrence of downwind landings is relatively rare. However, bear in mind that most of these are done by a jumper off student status (off radio assistance). This person has received very little if any formal instruction since the first solo landing class. So the technique must be simple to learn, retain and execute months after the initial training.

    Since I began teaching this concept, decades ago, I have not had a single jumper injury related to downwind landings when my advice was put into practice.

    My motivation for writing this article comes from the words that I hear when traveling to other drop zones and the words that I read in articles such as “Incident Reports”, “…you should have done a PLF”. This is not always the case, particularly with today’s parachutes. A PLF is no longer a panacea for all conditions. I also want to point out that, in my opinion, the instructor showing a first jump student a PLF accomplishes nothing at all. Having each student perform a PLF on the ground is no better. For a person to learn a PLF requires repetitions by the student, MANY repetitions, from an elevated platform.

    A person or publication telling anyone that he/she should have done a PLF, which the person has never actually learned, is not accomplishing what the student needed and the knowledge that the publication is trying to disseminate.

    By admin, in Safety,

1 1