1 1

Safety

    Side by Side - A Two Out Story

    April 1st is typically a day for trickery, but the only fool this year was me, and the only trickster was my main canopy!
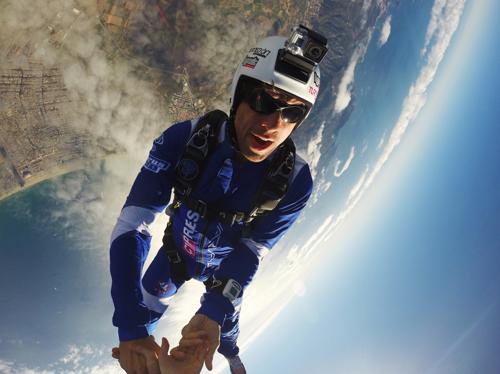
    I decided to make a last-minute trip to Skydive Perris with friends to make a balloon jump, but when it was winded out, the generous CReW Dawgs at Elsinore came up with all the gear my friend and I would need to make some beginner CReW jumps. The first jump on borrowed gear went great, but as we packed up my coach informed me the gear I was borrowing was a pull-out, and briefed me on how to use it. We planned a four-stack and lucked out with a camera jumper.
    As we get out of the plane, I pulled weak and ended up with no canopy. I knew from previous coaching that it’s a bad idea to take a Lightning terminal, so I went straight to reserve. As the reserve came out, I was kicking myself that I wasn’t going to be able to participate in the CReW jump, and would have plenty of time to think about how I got into this mess as my teammates got to play. I decided to fly over and watch, and that’s when I noticed the pilot chute bouncing around on my back. “I should get rid of that,” I thought, and reached for my cutaway handle. I didn’t even have a grip on it before my main came out and settled gently next to my reserve.
    Next thing I know, the camera flyer is in front of me, pointing and laughing. “What do I do?” I screamed, and he just laughed harder. “Well,” I thought, “if he’s not freaking out, why should I?”
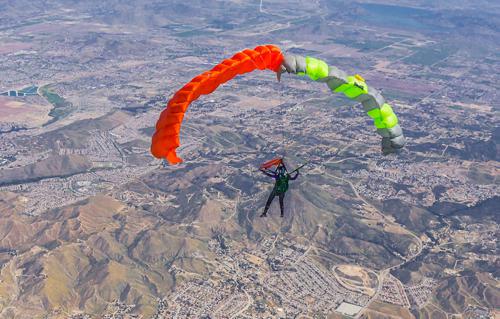
    So I didn’t freak out. Instead, I worked to get back to the dropzone. No easy task, as I’d soon find out. A west-blowing wind was sending me back over the Ortegas, and with twice the fabric over my head, I was struggling to get any forward movement at all. Unbeknownst to me, my coach flew under me, shouting at me to chop. I tried to force some separation between the two canopies to do just that, but I couldn’t trust myself to hold the reserve away from the main long enough to go for my cutaway handle. Because the two canopies were trimmed so similarly, they really wanted to fly together, although the particular configuration I was flying really wanted to fly south. Considering the town of Elsinore was south, I spent a whole lot of time and energy just keeping the pair flying straight.

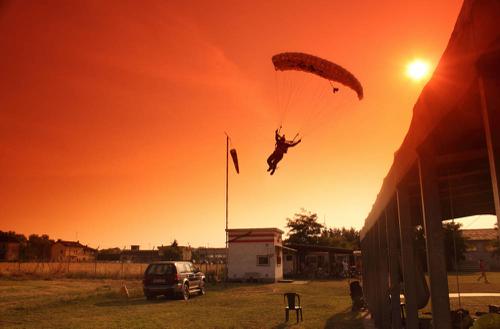
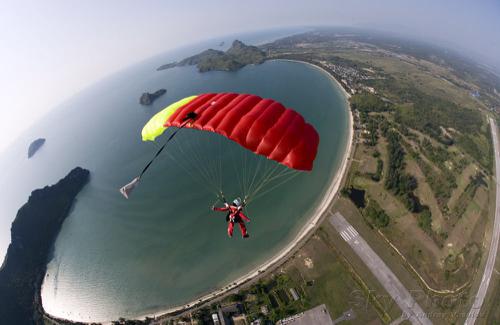
    Image by David Sands (D29444) Imagine pulling straight out of the plane under a large canopy, unable to do much besides try to keep your canopies flying straight and think about the sequence of events that got you here. Imagine looking down and going through your tree-landing procedure, and then multiplying that by two. Imagine trying to figure out how you’re going to steer the two canopies onto one of the small access roads on the mountains.
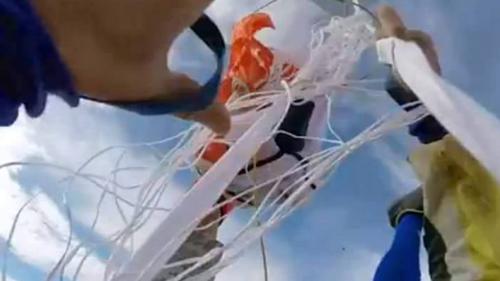
    With 1,000 feet to spare, I made it to the field I was aiming for, just at the foot of the Ortegas. I tried the usual landing-out procedure, transposing my pattern onto the field, but my canopies kept wanting to steer to the right, into the small neighborhood next to the field. So instead I just aimed my canopies at a small patch of grass in the field, and hit it gently without flaring. My legs were shaking and I couldn’t stop laughing nervously. It took me three tries to daisy chain my lines, and one of the Elsinore staff members had come to pick me up before I even made it out of the field.
    My coach, feeling responsible for me, landed in the mountains and called Elsinore to let them know what had happened. It took some time, but they found him, having landed without incident. Once I got back to the dropzone, I cracked a beer and waited for the shaking in my legs to go away.
    Lessons Learned
    The main takeaway from this is to know your gear. I was briefed very thoroughly by my coach on how to use a pull-out system, and practiced multiple times on the plane. Yet when it came time to pull, I didn’t fully extend my arm, and ended up with a pilot chute in tow. To me that was always one of the scariest malfunctions there are, because there are two schools of thought on how to handle it. One is to go straight to reserve, as I did, and one is to cutaway and go to reserve. In hindsight, I stand by my choice, because cutting away could have fired my main directly into my reserve.
    The other scary thing about this particular malfunction was that it was a two-out that was flying stable. One school of thought is that you should cut away to avoid a downplane, and the other is that if you’re flying stable, you can pilot it to an open area, which is what I did. If I had downplaned, I could have cut away my main and flown my reserve down, but I wasn’t convinced I could keep the canopies apart long enough to get to my cutaway handle. The problem with this scenario is that, under different circumstances, a dust devil could have blown my canopies into a downplane close to the ground, and I might not have been able to chop my main at all.
    One last thing I would change is that I would have taken my cell phone. If I had gotten hurt in the mountains without any way to access emergency care, things could have been a lot worse. I’ve since invested in a small prepaid phone to keep in my jumpsuit pocket.
    In the end, I stand by my choices, and acknowledge that there was a lot of luck that kept me from disaster that day. I regret that my coach got stuck in the mountains, but I’m grateful that he was willing to look out for me. I faced the two malfunctions I feared the most on one jump and managed to walk away with a swollen ankle and a wounded sense of pride.
    Will I still do CReW? Every chance I get! And I’d trust the riggers, CReW Dawgs, staff, and other jumpers at Elsinore any day.

    By admin, in Safety,

    How To Be A Better Wingsuit Student

    All Images by Scotty Burns Scotty Burns Breaks Down Your Pre-FJC Checklist
    Scotty Burns is a skydiver with fixed-wing pilot blood in his veins. He started skydiving on his 18th birthday, because his first commercial aviation gig--towing banners--included an obligatory parachute. He decided that he wanted to learn how it worked, just in case he had to use it. The rest, of course, is history.
    While today Scotty owns and operates the Flyteskool wingsuit academy in DeLand, Florida, his airborne specialties go far beyond inflatable nylon. For almost two decades, he’s held Commercial Multi-Engine Instrument Airplane (and helicopter) ratings, with a couple thousand hours of PIC (pilot-in-command) time. It’s his Wingsuit Instructor Examiner role that most folks in skydiving recognize Scott in most readily, however, as he’s spent the last ten years training over a thousand baby-bird wingsuit students at dropzones all over the world (and as the Wingsuit I/E for Skydive University).
    Scotty’s pilot-first-skydiver-also training techniques have helped to make wingsuit flying safer for everyone over the years--and, in the process, he has seen the good, the bad and the ugly when it comes to wingsuit wannabes. If you’re interested in the good and interested in avoiding the bad and the ugly, listen up. Scotty has a few things to say to you before you show up for that wingsuit FJC.

    Here it is--in his own words...
    Slow Your Roll
    A lot of the issues that we’re starting to see over and over these days point right back to the same root cause: rushing. People are really wanting to start flying wingsuits as quickly as possible, almost in spite of the rest of the sport. To save money, they’ll get in and do 150 hop-and-pops. They just jump their ass off for the numbers and don’t focus on building actual skills in freefall or under canopy. Their canopy skills are especially crappy, because hardly any of these guys have done any canopy coaching. They just want to get to jump number 200 and they assume they’ll figure it out.
    Round out your skills.
    One of the first things that I would recommend people do that want to get into wingsuiting is to laser focus on building a well-rounded set of skills, and to do so early. On your way to that first hundred jumps, learn all the other disciplines that you can. Go out and do a bunch of RW jumps. Learn how to turn points and do different exits, and get comfortable doing that. Learn how to do some head-down. Get into some angle flying and tracking jumps, because it is really going to help you learn how to control the air as you get further into your skydiving career. Flying a wingsuit is not an unrelated accessory to this progression. It requires all the work that comes before.

    That said: As you learn to fly a wingsuit, you are becoming a lot more of a pilot or an airman than you are a skydiver. There are a lot of differences between jumping with a wingsuit and jumping without a wingsuit. There are a lot of skills and experience that you need to have that you really don’t learn in any other form of skydiving. That is not an oversight on the part of your teachers; these skills are simply not necessary in other disciplines.
    Learn to fly your canopy, then your wingsuit.
    Your wingsuit is not how you land. Your canopy is. And in our discipline, it is much more common to have to land out, in a place you don’t want to--like someone’s backyard, or a parking lot--under a reserve, not so uncommonly. Statistically speaking, you are much more likely to get injured close to the ground in that wingsuit. Your ability to put yourself down safely in a place you wouldn’t normally want to go because you didn’t have any other choice is an extremely important skill. Get canopy coaching, and plan on the worst possible case scenario.
    Ease off the YouTube.
    Don’t spend your time watching every wingsuit video on Vimeo. It is cool and all, but it becomes a liability at a point. For instance: I had a student come out just the other day who has been working in the industry for a couple of years and has been waiting to start flying wingsuits. At my ground school, he was talking over me half the time and telling me what he had learned through all of these BASE videos that he had seen. He was acting unteachable. He is a really nice guy, but if he wasn’t in the industry, I would have had to tell him to go home.
    Take it easy. Then take it easier.
    Because one of the most important things about flying a wingsuit is your ability to relax, there is a huge difference between what most people see in videos before they learn how to fly and what they should actually be doing when they first put on that suit. There is a huge difference between what people do that are BASE jumping with a wingsuit--the decisions they’re making, and the gear they are flying--versus what somebody at 200 jumps is going to do. And it’s also important to remember that a lot of the guys in those videos are no longer with us. Some of the most talented human beings you would ever know or ever dream up. So what does that tell you? That means that it doesn’t take much to screw up, so you’d better take the long, thorough road.

    On that first jump, remember: You’re not trying to go out and break any records. You’re trying to make sure that you can get out safely and fly a pattern and pull with stability. You should aim to fly at 60 or 70%. You wouldn’t jump into a brand new race car and mash the pedal to the floor to get it out of the dealership. he amount of drag that you produce in that wingsuit versus the drag you produce on a normal jumpsuit is 6 or 8 times as much--easily--so it only takes about an eighth of the amount of input to get the same kind of response. The more you can relax, the better off you will be.
    Planning for Plan B is not optional.
    Planning for that worst possible case scenario has always got to be in the back of your head because it is going to happen. It might not happen today or tomorrow, but it is going to happen and it is probably going to happen at the worst possible time. Making sure that you have got that out is very important. Modern wingsuits are tiny little F16s without engines. It is really easy to find yourself miles away from where you were supposed to be. I have had to land in more people’s backyards than I care to admit to. Most of the time it wasn’t that I personally made a mistake; it was because shit just happens in this sport, and you have to be ready. You can make great decisions and still shit can go down. Then you end up having to rely on emergency skills that you had better hope are there.
    Keep it simple.
    Most people that are getting into it just want it so bad and they try too hard. If you can just relax and smile, listen to your coach and do as you were taught (and not what you learned from videos), you can keep yourself doing this for the next 15 or 20 years--versus being broken, giving up on it, or worse.

    It is incredible to see how far the wingsuiting discipline has come. It’s really sad that so many of our friends aren’t still around to see the changes. That’s why it is even more important for people to seek out the best information--and the best instruction--they can.

    By nettenette, in Safety,

    Exit Checklist For Camera Users

    If you add a little pressure, simple things can quickly become not-simple things.
    For the amount that most of us understand about how they really work, the modern cameras we employ for skydiving are close enough as to be made of magic. Yet despite their tiny size, amazing quality and all-round wonderfulness - we still regularly miss out on capturing quality footage of a jump for the most arbitrary reasons. A little bit of forethought and the application of a simple routine can aid ones consistency when it comes to getting the shot.
    You may well snort derisively and roll your eyes at the thought of reading an article about how to switch a camera on - yet let you that has never missed a great bit of action for the sake of some small piece of angry-making bullshit stupidity cast the first stone. The best analogy I have to represent the advantages of a sensible and efficient method for a repeated process is think about packing and how much of a frustrating pain in the ass it was (be honest) at the start. Learning to pack and getting it right is not only about understanding the need to fold your parachute a certain way so it will go into your container (and come out again) - it is as much about the knowing right spot to put your knee so the fabric doesn’t escape and where to hold it down with your elbow so you can have both hands free for the next bit. How many things in your life are there to which you can draw parallels with this?
    There is much satisfaction to be found in developing your ability to get ready quickly and efficiently in the plane. Here are a few tips:
    The Plan:
    Adding things to your in-aircraft routine should not come at the expense of any of the stuff you have learned to do that makes you safe. If you are skipping over running through your drills because you are constantly fucking around with your camera you might forget them at the crucial moment - so don’t. Even in the speediest of flying machines you have time to do things both necessary and desirable, but always remember your priorities. Checking that your pilot chute is not hanging out is vastly more important than which recording mode you are in.
    Lenses:
    It is very easy to get some manner of obfuscating crap on your lens. Action cameras all have teensy little apertures onto which a single grubby fingerprint is enough to ruin your footage of the bestest jump ever and make you very sad. Condensation is very popular too - especially with big temperature changes from altitude to ground level. Moisture developing on (or even in) your camera during a jump is unavoidable but not cleaning it up before the next one definitely is.
    You should have a suitable cleaning cloth somewhere about your person - tucked away into the lining of your helmet is good as it makes it very difficult to bring one without the other. For extra points you can attach it to your helmet with some string, or you could even carry a spare one which you might magnanimously gift to some clothless boob and appear as a minor hero/enormous geek in front of like four people.
    Cutaway:
    More and more frequently dropzones are requiring that any helmet with a camera on is fitted with a cutaway system - which are available in many forms and levels of quality. The best idea is always invest in a good one that someone has made using science that will actually work rather than bodge something together yourself from that box of old skydiving bits you keep under your bed for no good reason.
    A worthy part of your pre-jump process is to give this a quick look and see if all is well, and that nothing has become worn or unseated that might result in no camera attached to your head and some cognitive dissonance about wether you can be bothered to scour the landscape looking for it.
    Using Time:
    For maximum sensible-ness you should perform your camera checks with enough time that you can fix potential problems without freaking either yourself or anyone else out if something is amiss. Realising on jump-run that your memory card is full or your lens is dirty is too late. If you had a spare thirty seconds you might be able to go into your settings and delete something to free up space, or give the front a quick clean - but not when everyone is already climbing out on the side of the plane and waiting for your ass.
    Conclusion
    Being correctly prepared in a timely fashion is but one step in getting good footage, yet an important one. Felling relaxed and properly ready lends itself to nailing the jump, and the exact form of your personal routine will develop with time and practice. Stick to the plan, don’t bump your head on the way out and remember that you get what your head is pointing at, not just your eyes.

    By joelstrickland, in Safety,

    Why We Boogie

    The History of a Silly Name


    Image by Andrey Veselov
    It’s hard to imagine that, not too long ago, a skydiving get-together was a rare thing indeed.
    Today, as you’ve no doubt noticed, there are hundreds of ‘em. In fact, almost every drop zone, no matter how small, has at least one official yearly boogie to celebrate its local jumpers. Namibia! Fiji! A tiny little beach town in Kenya*! A big field in Montana! Where two or three are gathered in its name, behold: you’ve got a boogie on your hands.
    Some of these events are immense, filling the skies with dozens of wildly various aircraft, hundreds of skydivers and a whirling (terrifying?) smorgasbord of disciplines. Others are comparably tiny. Despite their differences, most boogies are a reliably good time.
    It stands to reason that a group of skydivers would find any excuse to come together in a frenzied combination of daytime skydiving and nighttime frivolity–but when did the first one take place, and how did it come by such a goofy name?
    Read on.
    The Birth of a Boogie
    The modern skydiving boogie may owe its existence to a film: specifically, the first major skydiving film released to the public, called Gypsy Moths.
    Shortly after the film’s much-lauded debut, one of the skydivers featured in the film – a prominent skydiving athlete named Garth “Tag” Taggart – was asked to put together a “just-for-fun” skydiving event in his hometown of Richmond, Indiana. Until then, skydivers only really, officially gathered for USPA-officiated competitions at regional and national meets. In September of 1972, Garth arranged that seminal event, which is recorded in Pat Work's fascinating record of early skydiving (entitled "United We Fall").
    Where Did the Term “Boogie” Come From?
    The term “boogie” derived from a comic motif developed by fringe cartoonist R. Crumb.** The motif features a “boogie man” striding confidently across an abstract landscape with the phrase “Keep On Truckin’” emblazoned above. The word “boogie” doesn’t appear anywhere within the motif, but the story goes that Garth Taggart was inspired by the image. He was also probably influenced by use of the word in New Zealand skydiving circles, as well as by its use as a then-trendy name for an, ahem, wild party. In any case, Taggart picked that moniker to describe the Richmond RW Festival on its event t-shirts, and the term stuck. Firmly.
    These get-togethers have sometimes been referred to as “jumpmeets”--in the olden days, when the organizers didn’t want to saddle the event with the term’s then-obvious, hard-partying implications--but “boogie” is how we’ve really come to know the phenomenon.
    Hilariously enough, those historic shirts didn’t actually use the word “boogie.” Due to an unfortunate misspelling on the hastily-printed giveaways, they described the event as a “boggie.” Snicker snicker.
    The First Boogie Kicks Off
    However confused the naming, that original event brought together more than a hundred skydivers from all over the US to practice the then-relatively-new RW discipline. The Richmond City Boys’ Club hosted the event, making significant revenue by charging non-skydivers an admission fee.
    That first boogie (or “boggie,” if we’re being historically accurate) saw some formations that were, for the time, pretty damn groundbreaking. In "United We Fall," Pat Work notes that the athletes “made several big stars out of a Twin Beech and a DC-3.” Work goes on to remember that “[a]ll the self-styled, super-hero RW types made three tries at a 30-man, and succeeded in FUBAR-ing all three in front of the lens of Carl Boenish.” The botched jump didn’t cripple the event, however. “Everyone else just giggled and went up and made 18-mans […] with no problems[.]” That night, the skydivers and some lucky spectators enjoyed a raucous bonfire, dancing and screenings of some of the most seminal skydiving videos on record.
    The Boogie Evolves
    In the years immediately following that first boogie, the quickly growing sport of skydiving started to earn a bad-boy reputation amongst the general public (who didn’t much care about it previously, when the sport was tiny and firmly on the fringes). For several years, the city of Richmond out-and-out banned skydiving for fear of its freakshow excesses.***
    By the time the 1970s were drawing to a close, however, that original boogie had become very official. It turned into the USPA Nationals--whaddaya know.
    Boogies Today
    The phenomenon of the boogie holds to the much same spirit as Garth “Tag” Taggart’s founding principle: fun. These days, however, they’re also used as a venue for major skydiving competitions, world records, vendor demonstrations, charity efforts and loci for training.
    Across the board, these events retain one important historical value: the nominal “boogie” itself.
    We come for the party, right?
    *Which I just finished attending.
    **If you aren’t aware of R Crumb, treat yourself to a Google image search. You’re welcome.
    ***Apparently, it was proving too logistically difficult to lock up their daughters--and sons, for that matter.

    By nettenette, in Safety,

    A Packing List For The Boogie-Bound


    Exits at the Baltic Boogie 2015
    Image by Konwent Photography There are a number of ways to kneecap a boogie, and they often have something to do with your gear bag: a forgotten helmet that lands you in a beat-up student ProTec all week; a forgotten suit that leaves you slippery and gripless; the dreaded out-of-date repack card.
    When you’re gathering up everything you need for a week of rapid-fire skyjumpin’ in a far-off location, it’s easy to forget a (key) detail here and there. Maybe this--my personal packing checklist--might help.*
    The Basics
    Rig(s)
    Helmet(s)
    Suit(s) (wingsuit/tracking suit/belly suit/tunnel suit/freefly suit/sit suit/dinosaur onesie/all of the above)
    Dytter
    Altimeter
    Gloves
    Your preferred skydiving kicks
    Your credit card (and a healthy sense of realism about how thoroughly it’s about to be abused)Paperwork
    In-date parachute association license

    In-date reserve repack card

    AAD air travel card (like the one, from Cypres, or this one, from Vigil) so you aren’t caught off guard at any check-in you may pass through during your skydiving careerRig Protection
    Packing mat/drag mat: preferably, with a sun cover, riser holders and at least one pocket (If your mat doesn't have a sun cover, bring an old towel to cover your gear during any short moments you need to leave it in the sun.) Bonus points if you sew your own. Extra bonus points if you sew me one.

    A sturdy, high-quality suit hanger with molded shoulders (to hang up your suit(s) well away from the dirty hangar floor)Tools
    Several pull-up cords (or your trusty power tool)

    Leatherman, Swiss Army knife or other sturdy multi-tool

    Line routing card

    Hemostat or tweezers (for those moments when your fingers are just too big for the job)Replacement Materials
    Extra closing loops

    Rubber bands, both large and small (or Tube Stoes, if that’s your jam)

    Any special batteries you might need for your doodadsLogging and Note-Taking Materials
    Logbook. (If you don't keep a digital version, keep the paper book in a Ziploc bag because--let’s be real--you always spill either coffee or beer on that thing.)

    Ballpoint pen

    Pencil/eraser

    Sharpie

    Notepad (for sharing information with other skydivers, such as phone numbers and scrawled threats)

    Labeling tape (to mark everything with your identifying information)Camera Stuff
    * Note: Obviously, serious, like, aerial cinematographers have a much more nuanced kit than this. This is a starting point. Label everything.
    Camera. Or, y’know, cameras...but try not to cover the entire surface area of your body with ‘em.

    Waterproof case

    Non-waterproof case (for dry situations where you prefer better sound over better equipment security)

    Mounts

    Mount wrench

    Sync/charge cable

    Microfiber lens cleaning cloth and solution

    Extra SD cards, labeled clearly with identifying numbers (those little SD card wallets are nice)Comfort
    Buff(s)

    Non-perishable "emergency" snacks

    A water bottle (or rollable Platypus bottle) with flavor packets, teabags or whatever else entices you into actually sucking on the thing at regular intervals

    UV-protective sunglasses

    Sunscreen

    Kneepads

    Clean sweat rag

    Ponytail holders

    Rehydration packets (because that beer truck may well sneak up on your blind side)Additional Tips
    Label everything. Lots of skydivers on the DZ will have exactly the same items that you do in their packing kit for skydiving, from closing tools to helmets. If unlabeled items go missing from your kit, it’s likely not an issue of dishonesty -- just mistaken identity. Labeling often solves the problem before it arises.
    Keep it clean and organized. Keep like with like in separate bags within the larger gear bag, and keep everything protected from dust, dampness, dirt and sun. Make it easy to find every individual item, and you’ll save hours of time in the long run.
    Get an idea for what your access to the facilities is going to look like at the boogie.
    We’re talking cooking; laundry; showers. If you’ll need to carry in coins for showers and laundry--or if you’ll have to pre-buy something like laundry soap before you drive out into the hinterlands, or something along those lines--you’ll be glad you knew about it and planned accordingly.
    Ask around about the experience you can expect at the boogie you’re planning to attend. Skydivers who have been there before will be glad to run down the highlights and challenges for you. Even better: you might end up convincing them to join you for a reprise.
    *If you have additions to this list, by all means PM me!

    By nettenette, in Safety,

    How To Land A Parachute In A Tree

    Damage Control for Unwilling Christmas Ornaments

    Image by Corrado MarianiChristmas ornaments are lovely, aren’t they? Glossy, colorful baubles, swinging gaily from the bushy branches of a fragrant fir, make our little hearts sing along with the season they decorate.
    They are not, however, excellent role models for air sports athletes.
    If you ever end up gracing some branches with your majesty, the United States Parachute Association would first like you to take your enforced treetop time to think very carefully about how you got there. According to the SIM, “properly preparing for the canopy flight by observing the winds,” “planning an appropriate landing pattern” and “choosing the correct exit and opening points” will generally keep you out of the foliage.
    In short: you messed up, kid.
    ...But let’s move on.
    If you discover that you’re on an imminent collision course with a tree, you need to know your 8-step damage control plan. Here’s what to do.
    1. Make sure you’re flying into the wind.
    Do not downwind a tree landing. You may not have a sock to steer by, but – hey, lucky you! – you have at least one tree for reference. Watch the movement of its branches to determine the wind direction.
    2. Fly in half-brakes.
    Your aim is to slow down your canopy as much as possible for the impact. Fly your final approach in half brakes, taking care not to stall your canopy in the process.
    3. Go for the middle.
    Your aim is to impact at the central trunk of the tree. If you miss the middle of the tree, you run the risk of clipping the tree with a line or a cell, collapsing your canopy and dumping you on the ground in a yowling pile.
    4. Keep your $#!* together.
    As you do in a properly executed parachute landing fall (“PLF”), hug your body towards the midline, as though you were inside a mummy-style sleeping bag. Keep your legs springy at the knee, but hug them snugly towards the midline. Continue to fly your canopy until you contact the tree.
    Just before impact, draw your forearms together so that your elbows sit at the stomach and your hands over the face. This position protects your belly, ribs and chest from being lanced by branches.
    5. Keep your hands to yourself.
    Resist the urge to grab limbs to stop your fall, as this will only leave vast areas of your body unprotected from veritable armies of sharp branches that are about to mobilize for the attack.
    6. Assume a hard landing.
    More often than not, a parachutist who lands in a tree does not stay in the tree. Usually, the jumper falls right through, snapping branches and leaving shredded bits of canopy all the way down. Keep that PLF position as best you can, in order to make the landing as soft as possible when the tree finally sees fit to deposit you at its feet.
    7. Get comfortable.
    Have you actually managed to stay in the tree? Oh, great. Stay there.
    A great many injuries occur not during a jumper’s actual tree landing, but from the jumper’s failed attempt to detach themselves from their mangled equipment and climb down. In general, if you’re more than a meter or so over the ground and you have any hope of rescue, wait for that rescue to arrive.
    If you’re phoneless, radioless, jumping-buddyless, out of public earshot and generally hooped for help, you’d better hope you have a hook knife handy.
    You'll use the hook knife to -- gulp -- disentangle yourself from the spiderweb of lines you're likely encased in. This is necessary to prevent you from accidentally throttling yourself, and from sustaining a serious rope-burn injury if a branch cracks and sends those knifelike lines through your tender outer layers.
    You'll probably cry a little bit with every line you cut. Ain't no shame in it.
    8. Be grateful.
    Even if you shred your pricey gear, rejoice if you walk away from a tree landing uninjured. Gear can be replaced -- and you lucked out, you lucky duck. See the bright side.

    By nettenette, in Safety,

    The Straight and Narrow - Cross-Wind Landings

    Image by Andrey VeselovNobody’s going to argue that landing directly into the wind is the best way to go, but we’re not always that lucky. Got a long, narrow path between obstacles? Unless you’re super-duper lucky and the wind direction seems to have been designed entirely for your landing pleasure, you’ve got yourself a crosswind landing, my friend.
    If you jump at a busy DZ with a super-strict canopy pattern, you’ve undoubtedly honed your crosswind skills. Great--but that’s not the only place that crosswind landings rear their skinny heads. For instance: you’ll find them lurking at an overpopulated boogie, where the landing area is a human forest with a clear patch at the very edge…or a forehead-slapper of an off landing, where your only choice is a road...or pretty much every beach landing, ever.
    The importance of your landing direction should override the wind direction in a number of circumstances. Here’s how to make it work.
    1. Stop bellyaching and get used to it, already.
    Ask any airplane pilot: landing with the wind at an angle to the runway is, like, totally normal. Ask any beach-dropzone bum or coastal-soaring pilot, and they’ll definitely elaborate on the benefits of landing smoothly with the wind pushing in hard from the side.
    Let go of the worry. Your ram-air wing is perfectly capable of flying with the nose pointed at an angle to the runway. That maneuver even has a name: “crabbing.” (The difference between the direction the nose is pointing and the pilot’s path--“ground track”--is called the “crab angle,” which always kinda makes me think of melted butter and tongs.)
    2. Get lined up.
    If you’ve got a long, narrow path in front of you, guess what? You’ve got yourself a landing strip. Start humming ‘The Danger Zone’ into your helmet and get ready, Goose.
    Your biggest task when you line up a landing is to snag yourself as much of a headwind as possible while keeping away from the obstacles you’re certainly avoiding. Anything up to a 90-degree crosswind will work. (Your task: to avoid any kind of tailwind, if at all possible.)
    If you have a choice, use the longest runway you can find to increase your margin for error.
    3. Get creative.
    As you come in on that final, you’re going to be doing something of a dance with whatever wind is pushing at you from the side. You can be assured that this wind is going to be pushing you toward something you do not want to fly into. It may be pushing you unevenly. And it may be pushing you pretty damn hard.
    Your approach, therefore, is necessarily going to be a little less cut-and-dry than your typical downwind/base/final box. You’ll most certainly notice that your downwind leg is not actually, like, downwind and you’re not getting the distance you’re used to. What’s usually your base leg is likely to be the actual downwind, so stay vigilant and don’t let it shove you into an obstacle.
    4. Hold your focus.
    As you tuck into your final approach, glue your eyes on the middle of the far end of the runway. Nail them there. Staple them there. Weld them there. Do not start looking at the obstacles to either side, or you are very likely to get suddenly intimate with them.
    5. Let it do its thing.
    From there, you have one single job: to keep the wing/canopy level while you fly in a straight line.
    Not so bad, right? Calmly make the necessary inputs without overcorrecting. Let the nose point in whatever direction it needs to point.
    Warning: this bit of the flight might seem pretty wiggly. Don’t let that motion distract you from maintaining your heading. Any inputs required to keep that straight-line heading will simply increase your crab angle and point your nose into the wind, slowing you down.
    6. Come to a full and complete stop.
    To flare in a crosswind, make a slight adjustment to your normal procedure: use moderate emphasis on the upwind brake to get into a wind-facing position. (Please note that “moderate emphasis” does not mean “full-on, panicked toggle punch.”)
    7. High-five somebody.
    If it’s a beach landing and you managed to drop your canopy in the saltwater, go ahead and high-five the side of your own face--but no matter what, slap that palm to something. You deserve it.

    By nettenette, in Safety,

    Your First Reserve Ride - Go Time

    Dave Rhea gives his Skyhook a workout over northern Arizona

    Photo Credit: Dave Rhea
    You’re as ready as you’ll ever be. Right?
    You know what a malfunctioning main looks like. You know the sequence*. You’ve done your homework (like we reviewed last time). Before you pull that handle, though, make sure you know the rest of the story: how to make that reserve ride as un-traumatic an experience as possible.
    1. Do not overthink it
    If you believe that your main is unlandable, you are going to have a reserve ride. Lots of skydivers have landed under reserves, realizing later that the problem was solvable.
    Lots of skydivers have also gone in while striving to sort out malfunctions that did not get solved.
    Pick your poison.
    2. Do not worry about stability
    This is the very least of your problems, as you are on the world’s most intractable timer. Worry ONLY about altitude.
    3. Pull the cutaway handle until no lower than 1,000 feet
    If your pull is sufficiently low (shame on you for that, by the way--gotta say it) and you have an unlandable main, you’ll be testing your reserve’s opening characteristics in the most potentially lethal way. Take note: the USPA not-so-recently raised the minimum deployment altitude even for eminently experienced D-licensed jumpers. Initiating a reserve ride below 1,000 feet isn’t always deadly, but it has an unnerving tendency to be. Don’t take the chance.
    4. Hold on to your handles
    ...or, y’know, do your best. If you manage it, you’ll save a bit of money, and you’ll save face when you land.
    5. Make sure it’s out
    Arch and look over your shoulder for the reserve pilot chute. Reserves deploy fast, so this head position may rattle your neck – but if the pilot chute is somehow caught in your burble, this should either shake it loose or make it clear to you that you need to do some burble intervention, stat.
    6. Keep an eye on your free-floating main
    However: do not try to chase it and grab it in the air. (People have died doing that, bigshot.) Don’t “chase the bag” if it means you’ll land in a dangerous LZ. Use landmarks to get a bead on where the gear is headed, then take a deep breath, leave it to the fates, and prioritize your mortal coil.
    7. Remember: Your Cutaway, Your Business
    When you land a reserve, you’re going to be the talk of the DZ (for about five minutes, usually). During that five minutes – longer, if the loads are turning slowly – you’ll probably be approached by a gamut of big talkers and would-be mentors, questioning your malfunction and eager to discuss your decision to cut away.
    My advice: speak to your trusted mentors and co-jumpers about it in private, and tell the rest to go suck an egg. When you suddenly need to get proactive about saving your life in the sky, make no mistake: you are absolutely alone. In the entire world, there exists only you and two handles. Your cutaway is your business. You were there. They were not.
    Review your own footage to determine the nature of the malfunction and review alternative methods of correction, if applicable.
    8. Buy a bottle of posh booze for the rigger who packed the reserve you rode, and keep the reserve pin for posterity.
    It’s tradition.
    * Arch, look down at your handles, grasp the handles, pull cutaway, pull reserve.

    By nettenette, in Safety,

    Your First Reserve Ride - Laying The Foundation

    Michael Huff has a hard time saying goodbye.

    Photo credit: Michael HuffAre you ready to be alone in the sky with a malfunctioning parachute and two little handles?
    Though there are skydivers with thousands of jumps who have never experienced the fun of a cutaway, don’t be fooled: it’s not a question of “if,” it’s a question of “when.” Don’t feel ready? You’re not alone – but there are a number of proven ways to boost your confidence (and, therefore, safety).
    1. Stay Current
    I know. It’s not your fault. Your home DZ is seasonal – or it’s far away – or it’s a tandem factory that keeps sullen fun jumpers on the ground.
    Whether it is or isn’t your motivation that’s the problem, the fact remains: long lapses between jumps are dangerous. They dull skills, heighten apprehensions, create a sense of unfamiliarity with aircraft and degrade the muscle memory you have carefully built around your gear, which is of vital importance in the event of a reserve ride.
    It’s vital to your career as a skydiver – especially, at the beginning – to make the effort to jump every couple of weeks. Make the effort and get up there.
    2. Prepare
    The USPA Skydiver Information Manual puts it rather dryly: “Regular, periodic review, analysis, and practice of emergency procedures prepares you to act correctly in response to problems that arise while skydiving.”
    Rephrased in a slightly more compelling manner: practicing might save your life, especially if you’re a newer skydiver who isn’t quite as accustomed to the stresses of freefall as an old-timer. Here’s a two-item to-do list to tip you in the right direction:
    Deploy your reserve for every repack. Have you ever deployed the reserve for your current skydiving rig? If not, the result may surprise you. You’ll learn the direction of pull for your gear, as well as the force you’ll need to exert. If your rigger watches the process, he/she can watch the deployment and identify potential problems. Even if you have deployed your own reserve, a repack is an unwasteable drill opportunity.
    Practice emergency procedures in your DZ’s training harness. (You may feel like a dork, especially if you’ve already been skydiving for a little while. Go on a quiet weekday and do it anyway.)
    3. Do The Little Dance
    Before each and every jump, the USPA advises skydivers to “review the procedures to avoid emergency situations and the procedures to respond to emergencies if they occur.”
    This doesn’t have to mean poring over your SIM like you’re cramming for a test. It does, however, require a little bit of work before every jump--just to make sure that your muscle memory is fresh and your brain is prepared for puckersome eventualities.
    Touch your handles in sequence before you enter the plane. It is not beneath you. Being blasé about basic safety doesn’t make you more awesome. If you ever happen to share a plane with an energy-drink teammate or a world-class coach, watch ‘em closely and you’ll see what I mean.
    Check that your reserve handle is seated, while you’re at it. A loose reserve handle can deliver a reserve ride without the fun of a malfunctioning main – and you don’t want that, do you? Right! So: now you’ve done what you can to be ready for a potential reserve ride on any given skydive. Next time, we’ll talk about what to do when your main decides to give you the pop quiz.

    By nettenette, in Safety,

    The Other Certification Every Skydiver Needs: A WFR Card

    Image by Juan MayerIt happens so fast.
    You’re coming down from a great jump. You land, laughing, and whip around for the imminent high-five with a huge smile on your face. That smile drops right along with the friend framed in your view. Something happened in those last few feet of flight--you don’t know what, but that triumphant swoop turned into a spectacular case-in, and your friend’s screaming, and you’re running towards him at top speed, and his leg is at a crazy angle, and there’s blood. Lots of blood.
    What the hell do you do now?
    Wouldn’t you like to have a plan?
    Even if you have no intention of becoming a medical pro--or even a uniformed first responder--you can get a short education that might make you the deciding beneficial factor in someone’s very worst day...maybe even yours. This curriculum is comprehensive and practical, integrating the essential principles and skills required to assess and manage medical problems you might come across, especially but not specifically in isolated and extreme environments. It doesn’t have a name that implies its usefulness for skydiving, sure--”Wilderness First Responder” sounds like a course built just for Search-and-Rescue burlies--but hear me out. You need this. Here’s why.
    1. Help is not always immediately at hand.
    Wilderness First Response certifications are meant to be used in earnest when the caregiver and receiver are essentially stranded in remote circumstances. While skydiving drop zones aren’t generally beyond the furthest reaches of civilization, they’re never in the center of it, either. Response times are not, as a rule, immediate.
    Any medical education is of enormous benefit, of course, but--for a regular-strength skydiver--the ROI of a WFR is pretty damn dead-on. The WFR course is about intelligent, informed self-reliance in the absence of immediate help. In the wilderness setting that the course was designed around, the priority is to figure out whether you can semi-self rescue, to assess what additional resources you need, and to methodically stabilize yourself and/or others until the cavalry rolls up. In the dropzone setting, this training is just as useful.
    2. Whether or not you’re trained, you will always be the first responder to your own injuries. Make those early minutes count.
    If you end up injured during an emergency landing that’s outside the drop zone--and you don’t have a charged, functioning method of communication--then you’ll be waiting for help to find you. If you happen to be conscious in that interim (hooray lucky you), WFR training will give you a method for understanding your injury, stabilizing it and tracking its progress for later reporting. Without training, you’ll likely just lie there, terrified, in blinding pain--or make your injuries worse with incorrect responses.
    3. You should be off the list of dead-weight liabilities and on the list of assets.
    Skydiving is a sport that demands proactive personal responsibility in the context of a mutually supportive, risk-educated community. We all understand this. That said: While a WFR certification does not confer the knowledge of a full EMT, it makes the bearer a much stronger member of the greater support team.
    A baseline education in first response moves you from a gasping member of the horrified crowd to a literate, assisting partner in incident management, though your role in the moment will, in all statistical likelihood, be quite procedurally basic.
    4. You should dial up your powers of observation.
    We’re not just talking about cardiac arrest and gaping wounds, here. WFR training will help you recognize subtle symptoms in a way that could help you change the outcome. Dehydration? Hypoxia? Heat illness? These are real-life dropzone problems, and your awareness could make a big difference in someone’s day.
    5. You’ll get important certifications.
    Successful completion of a WFR course will generally earn you a two-year Adult & Child CPR certification as well as the obvious Wilderness First Responder certification. This may or may not be an important piece of paper for you in a technical sense, but current CPR certification makes you a secret superhero in a world where lives are often saved by trained, responsive passers-by.
    5. It’s a really good time. Seriously.
    Wilderness First Response courses are generally administered in, predictably, wilderness settings. I did mine with the National Outdoor Leadership School (NOLS) with the full majesty of the Yosemite Valley as the backdrop. My partner did his in the Grand Canyon country of Flagstaff, Arizona. WFR courses are offered in highly visitable settings all over the States--indeed, the world--and y’know what? There are few better-invested ways to spend a week in nature than learning life-saving, life-changing skills in a close-knit group of fellow adventurers.
    Y’know, like the close-knit group of fellow adventurers with whom you share your sky--and who are counting on you to be the best team member you can possibly be.
    Live up to it.

    By nettenette, in Safety,

1 1