1 1

Safety

    The 6 Laws of Exit Order You Really Need to Know

    Image by Joel StricklandDoes exit order seem like some kind of obscure semi-religious ritual? Do you go through the motions without really understanding the moving parts?
    If so, yikes--but you’re certainly not alone. Luckily, understanding the logic behind the order is a pretty straightforward affair, and the entire sky will be better off if you wrap your head around it. Ready? Okay. Commit this to memory.
    1. In the name of science, get the $#&$ out.
    It may seem like hollow tradition to hustle out the door on exit, but it’s not. As a matter of fact, there are serious calculations behind the art of exiting the plane efficiently. On a calm day, an aircraft on jump run covers around 175 feet per second of flight (that equates to a mile every 30 seconds or so). Translated into stopwatch terms, that means that--on that same calm day--no more than 60 seconds can pass from the moment the first jumpers leave the airplane to the moment the last jumper exits.
    For practical purposes, taking into consideration how much ground the average square canopy can cover, every jumper in the plane has to be out during a two-mile jump run. If they don’t, some are bound to land out (or a chilly second pass is going to be served up to the sulky remainder).
    2. Don’t mess up the pilot’s math.
    If your group is about to be the first big handful of meatballs out of the plane but you suddenly split up into smaller groups, you’re messing with the pilot’s chi. After all, the jump pilot has more to calculate when he/she turns on that little green light than you might realize. He/she has to calculate about how much time each group will take to exit, and make sure the green light goes on at the correct distance from the DZ to accommodate the aforementioned 60-second countdown.
    As a rule, the group that will have the slowest climb-out should leave first. Big group? Light goes on farther out from the DZ to allow for a slower climb-out. Little group? The light goes on closer to the DZ.
    How can you help? Jump the plan you give manifest, and the pilot can give everybody a good spot.
    3. Jealously guard your real estate.
    If you’re a Big Sky Theory kinda jumper who assumes vertical separation is going to save you from a meat-traffic collision, you are not working from scientific facts. Horizontal separation is the only separation that really counts up there, so make sure your group has a chunky slot of sky all to yourselves.
    Never place big bets (like: your continued existence) on your fellow skydivers pulling at the altitude they swear by. A tiny brainfart (or a big malfunction) will eat up that vertical separation before you can say “what happened to pulling at 3,500, toolbox?!.”
    4. Horizon-pointing belly buttons go behind downward-pointing belly buttons.
    When freefly folks get out first, they tend to become part of an undelicious freefall sandwich. Here’s why: On a typical skydive, a pair of freefliers will clock a 45-second freefall and open at around 3,000 AGL. Let’s say that pair is followed by a belly group with a 10-second climb-out.
    This is going to sound like a math word problem, but bear with me: If one of those freefliers has a canopy with a 30MPH forward speed (which will move forward at around 45 feet per second, assuming little-to-no wind), opens 30 seconds before the belly group and turns right back toward the DZ, the variables are stacking up for a collision. Those 30 seconds of flight will drive the freeflier forward by about 1,300 horizontal feet--a measly 400 feet from the middle of the belly folks, which a solid six-second track can cover. If you add wind to the equation and the RW group gets blown even further into the path of the freefly pair, the likelihood of a meetup gets even uglier.
    When freefly groups get out after belly groups, the picture gets a lot healthier. The fast fallers get their horizontal separation, predicated on their shorter climb-out and faster descent rate. Wind becomes a positive safety factor instead of a negative one; slower fallers simply blow farther away.
    5. With longer flights comes greater responsibility.
    Tracking groups, high pulls and wingsuits get to snuggle with the pilot (and/or the tandem pairs) in the way back of the plane. Why? First off, they’re mobile: if they’re doing it right, they’ll use all that horizontal power to get the hell away from jump run--and get back from a longer spot.
    If they’re not doing it right, however, they’re fully within their capability to truck through everybody’s personal piece of sky on the way down. The moral of the story: longer freefall (or, in the high-pull case, general airtime) requires greater awareness and responsibility on the part of the nylon pilot.
    6. Don’t be the heat-seeking meat missile.
    That’s the bottom line, really. Everybody in the sky is counting on you.
    (Me, for instance.)

    By nettenette, in Safety,

    Jumping at a New DZ: Your Battle Plan


    Photo by Jeff AgardJust moved across the country? Heading out to boogie in a strange new land? Impromptu road trip? If you’re not used to jumping at new-to-you DZs, reorienting yourself to a new conveyor-belt-to-the-sky is a bit daunting. But never fear, brave adventurer: if you walk in knowing what you need to do, you’ll be golden. Here’s a checklist to help make the process a little easier on you.
    Before you arrive:
    1. Do a preliminary scan for unpleasant surprises. Find out as early as possible if the dropzone (or the specific event you’re planning to jump) has special requirements that could keep you on the ground.
    2. Budget. Get pricing on jump tickets, DZ accommodation and registration fees. This is a good time to check the jump-ticket refund policy and find out if there are extra charges for credit cards.
    3. Ask about facilities. If you’re going to be squaring up to swampy summertime port-o-lets, miles-off RV hookups, co-ed showers (rawr) or anything else outside your comfort zone, you’ll want to know as early as possible so you can make a battle plan.
    4. Make sure you’ve packed all your documentation. At the very least, you’ll need an in-date reserve repack card, your parachuting organization ID and your logbook. In some cases, you’ll also need your AAD travel documents and proof of medical insurance, too. Travel insurance is never a bad idea, either.
    When you arrive:
    1.Get the lay of the land. You’ll be spending a lot of time in the hangar and in the waiting areas, so get oriented. Pick a prime spot for your gear (hopefully, near an electrical outlet). Find the bathrooms and the fridge. Identify the load monitors, if there are any. Find out if there’s a separate window for manifest, or if the main office does it all.
    2. Rock up to the office. Fill out the waiver, get a gear-and-paperwork check and buy your tickets.
    3. Get briefed. You’ll likely be pounced on when you land in the office, but just in case: Pin somebody down to give you a complete briefing of the dropzone’s map and rules. Do not get on the plane without a briefing.
    Get clear on the manifest procedure. It seems like every DZ on the planet does this differently, and it can really get in the way if you’re not on board. Are you going to have to pay in advance, pay as you go, or pay at the end of the day? How does the ticket system work?
    Learn the exit order and separation rules. Many drop zones have very specific procedures in place, while others assume you should know where you belong. Watch how the local jumpers organize themselves, and ask lots of questions if you don’t get clear instruction.
    Check out the satellite map. You can expect a dropzone representative to use an overhead map of the dropzone and its surrounds to brief you. The rep will describe how to use recognizable landmarks to spot the dropzone from the air and review landing area obstacles, power lines, bodies of water, nasty neighbors, turbulence, the “beer line” and uneven terrain. Use this time to memorize your outs.
    Find out if there’s a special hard deck for this DZ. If there is one, it might be (way) higher than your personal hard deck.
    Check out the wind indicators. Find them on the overhead map, then peek at them in person while you take yourself on a tour of the main (and alternate, if applicable) landing areas. If there are tetrahedrons, ask if they’re trustable or if they’re “sticky.”
    Know the landing pattern. Landing patterns are not the same across dropzones, ranging from first-one-down-sets-it to a regular Busby Berkeley choreography of established patterns that never, ever change. Until you’ve internalized the unique rhythm, it’s best to give the main landing area a wide berth for your first handful of jumps at a new DZ. Make sure you know the rules and areas for swooping and hook turns, whether or not you plan to do them. (Don’t be the big canopy that tugboats lamely across the zoomy canopies’ path.)
    Figure out the loading procedure. Find out how the calls are announced and where you need to be to hear them. If there are shuttles to the plane, you’ll need to know what the call is to be on the shuttle. If there’s a retrieval from the landing area, make sure you know where it is (and hoof it over there right after touchdown). 4. Get on a load! Make an organizer friend (or be your own organizer friend) and keep an open mind about what jumps you want to do.
    5. Buy the good beer to share at greenlight. It’s basically, like, a housewarming that you throw for yourself. You’ll feel at home before you know it.

    By nettenette, in Safety,

    Chopping Is Just The Beginning

    A reserve ride is an exciting adventure no matter how many jumps you have under your belt. Preparatory training is obviously the best way to ensure that you walk away unscathed, but it is my experience that the simulations we create are not as realistic as they could be. In many cases, many of us will argue, they are not as good as they need to be.
    The purpose of this article is to suggest possible improvements to the state of the art in emergency procedure training. If we envision beyond what we have done in the past, improvement is assured, and the safe conclusion of parachute malfunctions will increase in frequency. If we can simulate cutaway jumps more realistically, skydivers will be calmer in emergency situations, and more skillful. Elaborate simulation, in my experience, will also result in greater awareness and recall, more efficient actions, and less emotional trauma once the event is over.
    The first issue to be addressed by our sport as a whole is our simulation equipment. Although a vest with handles may be very helpful for establishing the general flow of handle-pulling, it is a far cry from what the event will actually feel like. Many jumpers have reported, upon landing from their first cutaway, that things did not feel or look remotely the way they expected. Handles were not where the jumper expected them to be, pull forces were not what they anticipated, nor was the feeling of the experience similar to the training process that was supposed to prepare them for this event. It is my experience, however, that when we take thoughtful steps to improve our training methods and equipment, the gap between expectation and reality can be closed significantly.
    The most important piece of equipment in any simulation is the mind. Creating a clear visualization of the scenario is essential, no matter how silly it may look to bystanders. The job of the Instructor in these situations is to provide insightful clarification, ideally based on their own experience. Set the emotional stage for the student in every possible way, describing the details as clearly as possible, leaving nothing out. Allow yourself to get wrapped up in the excitement that is inevitable in such experiences. This will not only make the simulation feel more real, it will help illuminate the natural mental reaction of the student to intense stress. If over-reaction or under-reaction is apparent, further training is necessary. If the student failed to perform, the instructor simply has more work to do.

    It continues to be my strong opinion that a suspended harness is absolutely essential for the best possible training. Given the vast amount of money we now spend on aircraft and student gear, skimping on this key element of teaching equipment is shortsighted, and most often a product of laziness and compromise. If building a hanging harness cost thousands of dollars, the financial argument might hold more merit, but this is most decidedly not the case. There are many possible methods that cost very little, and can be created in just an hour or two. I know, I build a new hanging harness at almost every dropzone I travel to in the process of running my canopy skills and safety courses. I do this because I want to offer my course participants the best possible training, and because an alarming percentage of skydiving schools have done away with this vital piece of training equipment. This needs to change if we are to improve the safety of our sport.
    Let's start with the actual harness. When I find suspended harnesses in use, most often the actual rig is an uncomfortable, dilapidated old rig from the early 1980's, hung from the ceiling by attachment points that are way too close together to simulate a realistic experience. In the best cases, there is a three-ring setup that allows the jumper to cut away and drop a few inches. This is a great training aid, but what if the rig was a more modern adjustable harness that could accurately reflect the fit and handle placement of the rig they will actually be jumping? For that matter, what if we hung them in the rig they were actually going to jump? What if the suspension apparatus was long enough to practice kicking out of line-twists? What if the toggles simulated the resistance of an actual parachute using bungees or weights? What if you pulled on straps attached to the bottom of the harness each time they flared, to simulate the pitch change? What if, as crazy as it sounds, you went to the local hardware store and picked up a high-powered carpet blower, a.k.a. “snail fan”, and angled it up at the harness to reflect the feeling of the relative wind? This is the kind of outside-the-box thinking that creates better simulations, and better training. Further, this is how we prepare our students for an actual malfunction and reduce the risk of pilot error.

    For experienced jumpers, I highly recommend hanging up in your own rig. This will clarify handle placement under load, allow you to explore strap tightness possibilities, and give you the opportunity to experience actual pull forces when your repack cycle is up. If you do not have stainless steel hardware on your rings, please use fabric connection points rather than the carabiner attachment displayed in these photos.
    Another key element of malfunction simulation is to follow through with the complete jump, rather than stopping after the handles are pulled. In reality, the adequate performance of emergency procedures is just the first in a long list of steps that lead to a safe landing. For instance, what if the cutaway harness had Velcro reserve toggles that needed to be first peeled upward and then pulled downward? Many people, myself included, have tried simply pulling the reserve toggles downward to find that they would not release. Missing details like this can lead to a student feeling more angst than is necessary, and can result in further stress-induced mistakes with major consequences. Additionally, proper exploration of the reserve canopy is important for a good flight pattern, accuracy and landing flare following a malfunction. How much slack is in the brake lines? Where is the stall point? What is the flare response on this brand new canopy? A good cutaway followed by a broken ankle on landing is still a bad day. Simulate the whole jump, and there will be fewer surprises.

    The final issue I want to cover on the topic of better emergency procedures training is the inclusion of deliberate adrenaline management efforts following the deployment of the reserve canopy. Carrying the emotional momentum of a malfunction all the way to the ground definitely increases the chances of a lousy landing. High levels of stress takes time to sluff-off, but a skilled operator also knows how and when to slow down. Once you have pulled all the handles you need to pull, taking three long, slow, deep breaths while gazing at the horizon with a smile of relief on your face can change your mood, and your fate. Get your composure back, and your optimism will follow. From there, skill is just a short step away. This process can and should be included in every emergency procedure simulation to create a habit that is likely to be carried out in the sky. Following such quiescent procedures allows the mind to more easily let go of the recent past and focus on the present moment and the near future:
    1) Check altitude and location

    2) Find a safe landing area

    3) Explore the reserve

    4) Fly a good pattern

    5) Flare beautifully

    6) Walk away with a smile on your face

    7) Thank your rigger
    A malfunction does not need to be viewed as an emergency, especially if you are truly prepared; it is just a change of plans. A complete simulation can be the difference between a horrifying emergency and a well-executed contingency plan. If we handle it well, a main parachute malfunction can actually be fun. I have found few experiences more rewarding than a complicated situation that I figured out on the fly, and despite my fear, I kept my head and did the right thing. In short, a parachute malfunction is an opportunity to prove to yourself and the world that you can handle yourself in a crisis, and with realistic training, your success can be an inevitable conclusion.
    About the Author: Brian Germain is a parachute designer, author, teacher, radio personality, keynote speaker with over 15,000 jumps, and has been an active skydiver for 30 years. He is the creator of the famed instructional video "No Sweat: Parachute Packing Made Easy", as well as the critically acclaimed book The Parachute and its Pilot. You can get more of Brian’s teaching at Adventure Wisdom, Big Air Sportz, Transcending Fear, and on his vast YouTube Channel

    By BrianSGermain, in Safety,

    4 Ways to Avoid Pilot-Chute-In-Tow Malfunctions

    Image by Joe NesbittLast week, we talked about the mighty kerfuffle that is the pilot-chute-in-tow malfunction.
    So...who wants to have one?
    Nobody!
    Right. So now that we’ve established that, we can get down to the business of avoiding the hell out of those. There are four big steps you can take to lessen your risk of a PCiT, and there’s a good chance you’re currently messing up at least one of them.
    1.Cock it up (so it doesn’t cock your jump up).
    Your collapsible pilot chute is a demanding partner. Her deal is this: no foreplay, no canopy.
    Most of the time, you’re good about it. You guys have a really established routine at this point, right? From the time you’ve got your nylon laid out on the floor to the time you wrap your legs around it to finish it off, you follow a very predictable routine. Somewhere in there, you give that collapsible pilot chute a tug and get her indicator window nice and blue. Everybody’s happy.
    But what happens when you get distracted? If you end up ignoring your PC for a surprise debrief or a dance break or an awkward conversation with the meaty contents of the best-fitting freefly suit you’ve seen all week, make no mistake: she’s going to get her revenge. Failure to cock the collapsible pilot chute, after all, is the leading statistical cause of PCiTs.
    The solution here is simple: focus. Give your pack job the attention it deserves, in the same order every time. (It’s never a bad idea to include that little indicator window on a quick gear check, either.)
    2. Do what you’re told.
    I know. You’re the boss of you, and I’m not your real mom, and manufacturers are basically like corporate drones, and the USPA is a bunch of guys throwing canes and slippers at kids who merrily chase balls onto their collective lawn. You do what you want.
    That said: maybe you should do what you’re told every once in awhile.
    This is revolutionary stuff, I know. But the manufacturers’ instructions for bridle routing and main-flap-closing aren’t just there to give you something else to toss giddily out of the box when your new container arrives. As any pro packer will tell you, those yawn-inducing closing procedures differ dramatically between brands. If you’re using the wrong one for your particular equipment, you’re setting yourself up for a container lock.
    3. Watch the news.
    Along those lines: be on the lookout for updates. Remember a few years back, when all those photos came out of closing pins stabbing neatly through the middle of their bridles? It kinda looked like a fabric samurai drama, but it was pretty serious -- several jumpers, jumping different equipment, experienced pilot-chutes-in-tow in this same manner. In response, manufacturers posted updates to their manuals, changing the closing procedures for their containers to lessen the risk.
    The moral of the story is this: Maybe you’re still doin’ it the old way and have managed to be lucky so far. (Emphasis on: so far.)
    You can also investigate pull-out -- as opposed to throw-out -- pilot chute systems, if you like to be on the oddball end of technology.
    4. Embrace the transient nature of our linear existence.
    Nothing is forever, dear reader. All seasons pass. All kittens turn into old cats. Your pilot chute and bridle will eventually wear out. Thus is the way of the world.
    We know you love your pilot chute and bridle. They love you back. They yank that nylon out of the bag for you over and over and over without complaint. They get dragged across the grass and the filthy packing mat and the Arizona desert for you. They get stepped on and sat on and waved around willy-nilly when you need to get someone’s attention on the other side of the hangar. But they can’t do it forever.
    Collapsible pilot chutes lose effectiveness when their little kill lines shrink. If that line shortens to the point that the PC can’t inflate fully, you will probably end up with a dead pilot chute flapping around above you in freefall while you count to yourself in your helmet.
    Insufficient drag to pull the closing pin = PCiT.
    Like many existential tragedies, this doesn’t happen overnight. Have you noticed little hesitations after you throw? Are they getting longer? Have you noticed the aging process creeping up on your little bitty sub-parachute in the form of obvious wear? Cuddle up on the couch with her, read The Velveteen Rabbit together, cry a little bit and give your old, loyal PC a Viking funeral.
    She deserves it.

    By nettenette, in Safety,

    Choices, Choices: Pilot-Chute-In-Tow Malfunctions and You

    Curt Vogelsang captures some hot canopy-on-canopy action. Y’know when you don't feel like getting out of bed in the morning? Your main parachute is likely a lot brighter-eyed and bushier-tailed than you are, but every once in a good long while it just doesn't feel like getting out and doing its job. Y’know? Relatable.
    Kidding aside: When you throw your hand-deployed pilot chute but the container stays closed -- trapping the main deployment bag inside, helpless to deliver you a parachute -- you’ve gotchaself a pilot-chute-in-tow. In other words: you’ve got nothing out, which makes you the clenchy, concerned (and hopefully very temporary) owner of a high-speed mal.
    You’d better get on that, buddy. Stat.
    But how?
    Deploy the reserve immediately or cut away first and then deploy the reserve?
    One Handle or Two Handles: The Cagematch
    If you’re not sure which you’d choose,* you’re certainly not the first. This particular point has been the subject of roaring contention since the invention of the BOC, my friends. (Guaranteed: the comments section below will corroborate my statement. I can sense people sharpening their claymores and dunking their arrows in poison even now.)
    There’s a school that says -- well, duh -- get your damn reserve out, like right now what are you waiting for. There’s another school that calls that school a bunch of mouth-breathing pasteeaters. The latter group insists that you'd better go through the procedures you know lest you mess it up when it counts. They usually follow up by spitting on a photograph of the first group’s mother and wondering aloud why the first group is even allowed to skydive. Then they start punching each other.


    Images by Joe Nesbitt The USPA Skydiver’s Information Manual doesn’t make a move to break up the fight. It stands clear of the flying arms and legs and says, “Y’know -- they both kinda have a point.” Section 5-1 of the manual says this, verbatim:
    “Procedure 1: Pull the reserve immediately. A pilot-chute-in-tow malfunction is associated with a high descent rate and requires immediate action. The chance of a main-reserve entanglement is slim, and valuable time and altitude could be lost by initiating a cutaway prior to deploying the reserve. Be prepared to cut away.
    “Procedure 2: Cut away, then immediately deploy the reserve. Because there is a chance the main could deploy during or as a result of reserve activation, a cutaway might be the best response in some situations.”
    Let’s look a little closer at the options, then, shall we?
    Option One: Not Even Gonna Bother With That Cutaway Handle.

    Pro: Immediately yanking out that reserve saves a step. When AGL counts (and golly, doesn’t it?), saving a step can save a life. Many skydivers are quick to point out specific incidents in which jumpers with PCiTs have gone in with sealed magical backpacks, having failed to pull both handles (or pull any handle at all) while the clock was ticking. Gulp.
    Con: It takes the pressure off (in a potentially bad way). As the reserve leaves the container, there’s a chance that it can take the sealing pressure off the flaps that are keeping the main container closed. The main can then leap to freedom and deploy at the same time as the reserve. At this point, you might wind up with an entanglement, a side-by-side, biplane or downplane to figure out.**
    Option Two: Get Off The Field, Main Parachute. Reserve, You’re In!

    Pro: It’s the same stuff you’ve been taught to do for every other reserve-requisite malfunction. ...If you initiate the reserve deployment clearly, confidently, and as early as possible, of course. After all: making a one-off exception for a single kind of malfunction can be tricky. A jumper might well spend a little too much time thinking it over (‘Am I going for my reserve handle first right now? ‘Cause that’s weird. Is that okay?’) when they should just be yanking the stuffing out of their emergency handles. Going through the real-life motions of the little dance you do before you get on every load makes more sense to your body, for sure.
    Con: You’re adding more complexity to the situation than you may realize. Especially if you don’t have secure riser covers, the (jealous?) cut-away main risers might sneak out of the container and grab for the reserve as it deploys. Another thing: the main is very likely to wiggle free, detach from the harness as soon as it catches air and do its best to entangle with your Option B. The latter kerfuffle is made much more likely when you add a single-sided reserve static line to the mix, turning the already-dismaying situation into something of a tug-of-war. Neither of these choices sounds like the cherry on top of a lovely afternoon; I know. At some point, however, you may be forced to make one. If you do, you’d better have a plan in mind.
    Not in the mood to make that choice? Me neither. Luckily, there are some steps you can take to better your chances of never seeing a PCiT -- and in next week’s article, I’ll tell you what they are.
    ---------
    *If you have a Racer (or any container with a cross-connected RSL), you do not have a choice. You must pull the reserve without cutting away. Do not pass ‘go,’ do not collect $200. In that particular configuration, the main will choke off the reserve if the cutaway has been pulled. If this unnerves you, get thee to a rigger to discuss it.
    **Head over the PIA.com to check out a handy study they did in 1997 regarding the management of two-out situations. It’s called the “Dual Square Report.”

    By nettenette, in Safety,

    On-Point Off-Landings: A Primer

    Sylvia Tozbikian wiggles her way back to the DZ after an off landing in a graveyard“Off” ain’t such a bad thing.
    As skypeople, we love “off.” Offbeat. Offhand. Offside. And, y’know -- we’re all a little off, really. Off landings should fit right into our oddball little world. Unfortunately, lots of skydivers tend to be ill prepared for an unscheduled landing out in the real world. Are you one of ‘em? Here’s how to get ready for a surprise skydiving adventure.
    1. Be a nerd about it.
    Sure, the airborne life throws you curveballs sometimes -- but there are variables here that you can control, y’know. Work ‘em.
    If you only ever land that thing in a schoolbook configuration in the exact same landing area, you’re not going to enjoy the steep learning curve of an off landing. Hang out with a canopy coach for a weekend to workshop your braked flight (and, y’know, braked landings) in a structured, feedback-rich environment. The more thoroughly you train your body and brain to execute these maneuvers, the less you’ll panic when you look down and realize you’re hanging over an endless sea of potential ouch.
    Also: always jump with a charged method of communication.
    2. Speak up.
    Very likely, your off landing is going to be your fault, and it’s probably because you didn’t pay attention (to winds aloft, to the jump run, to your opening altitude, to where you were pointing your pretty new wingsuit…). If it’s the pilot’s fault, you should know it by the time you’re standing at the door and lookin’ down. If the spot is off, don’t leave the plane. Ask for a go-round.
    3. Look out for yourself.
    If you’re at the caboose end of a group and you can’t spot from the door, make a habit of quickly spotting as soon as you run out. If you notice that your compatriots failed to notice that they were getting out of the plane somewhere in the next state, evaluate your options. If it’s safe, then you should peace out earlier and pull higher, crossing fingers that the extra altitude will get you home.
    That said, don’t be a dick. If the particular skydive you’re doing is safer for everyone if all members conform to the freefall and breakoff plan, then congratulations: you’re landing out.
    4. Curb your optimism.
    At this point in your journey into offland, you might be under one of two available parachutes. Your first responsibility after ensuring that whatever’s out is controllable is to realistically determine where you’re headed. If you feel like you just-might-maybe make it to the main LZ, make sure you’re not just-might-maybeing your way into a power station or highway or forest or whatever might be in the intervening territory. If you’re not sure -- or if the middle ground is an alligator farm -- then you should bin that Pollyanna attitude and get real. Put your entire brain on the task of on finding a safe alternative that takes into consideration your current position and the wind direction.
    5. Mind invisible canopy-eaters.
    Once you’ve picked a spot and are toodling down to make your acquaintance with it, you should start getting as picky as possible. You’ll obviously be headed for what appears to be an open space, but wait -- are there invisible monsters lurking? Trees, buildings and other solid objects can throw serious turbulence if they’re upwind (and livestock can wander into the picture very quickly). Keep that in mind as you’re planning.
    6. Play the field.
    As much as possible, be a commitmentphobe. Make sure you don’t have blinders on to other landing areas that might save your ass in the event of surprise fences, power lines, turbulence monsters, stampeding herds and other obstacles you didn’t notice from on high.
    7. Embrace it.
    If you’ve always been on, you can be assured that off is coming. Get real and get ready, and you’ll be much better...off. (Snicker, snicker.)

    By nettenette, in Safety,

    4 Smart Questions That Shut Down The Spin Cycle

    How to Avoid Spinning Malfunctions
    Image by Oliver NöthenAh, to be swung madly around the ballroom of the sky.
    If you like that sort of thing, of course. Most of us, y’know, don’t.
    Even though they’re eminently preventable, spinners remain a very statistically significant cause of cutaways. There’s good news, however: A little attention will go a long way towards making sure you aren’t dancing downward under a misbehaving main. Here’s how to get your body, brain and gear set up right.
    1. Are you bungling the basics?
    If spinning mals come up more than occasionally for you, consider whether you need to send yourself back to packing (or body-position) school. Might be the case.
    2. Are you just being loopy?
    Back when side ponytails were sexy and just about everything smelled like Teen Spirit, the skydiving industry used Velcro to secure toggles to risers. When manufacturers made the switch to the velcro-free designs we see now, they forgot about something vitally important: the long, floppy bights in the steering line that were now suddenly exposed to the rodeo ride of the deployment process.
    Those mile-long bights took the opportunity to lasso anything they could. A particular favorite: hands. One misplaced toggle grab, and a skydiver could easily find him/herself in a compromising bondage situation with their control lines. The bights happily welcomed guide rings into the act. It was a ready-made recipe for a super-solid spinner, and it was ugly.
    Soon, every single manufacturer’s rig designs had integrated line stowing features (“keepers”). There’s a reason the changes were made: as a jumper, you need that line tucked safely away until you’re good and ready to release the brakes. That said: Many of those old risers are still around, unmodified. Even more bafflingly, some skydivers don’t bother stowing the lines during the packing process (presumably, to save 20 seconds or so). If that’s you, you know what to do. And if you have Velcro on your risers, for the love of god check it for airworthiness.
    3. Are your cat’s eyes conspiring against you?
    Toggles love the cat’s eyes of brake lines. They dive at the chance to snuggle and lock in a spinny embrace.
    It’s no wonder that’s the case: after all, their relationship is really hot. The heat that’s generated by the slider’s travel over the lines has a shrinking effect on the system, creating a kind of Chinese fingertrap for your toggle seating. With one toggle in and one toggle out, you’re going to be going for a ride.
    A rigger can quickly suss out if your cat’s eyes are in good shape: big enough for the toggle to pull out smoothly, but not so capacious that the toggle’s fat bits can pass through. If they need replacing, do it.
    4. Do you know when to let go?
    Spinning malfunctions are sneaky bastards. For all their preventability, they have killed people. Make no mistake: Once you’re looking at one, you need to take it seriously.
    The most important thing you need to remember is this: a spinning malfunction is not a line twist. When you’re under a docile, level main that’s flying cheerfully along as you swear at it, you’re looking at a line twist. When you’re not directly below a canopy that’s flying level -- when it’s flinging you outwards as it heads for the ground -- you are on the business end of a spinner. The first is an inconvenience. The latter is a mal, and you’d better get on it.
    As wing loading increases, so does the violence of the spin, and the likelihood that you’re going to kick out of it quickly dissolves. So: Don’t fight it. Just get rid of it. Take some quality time with your reserve. You’ll be glad you did.

    By nettenette, in Safety,

    Wing-loading and Parachute Performance

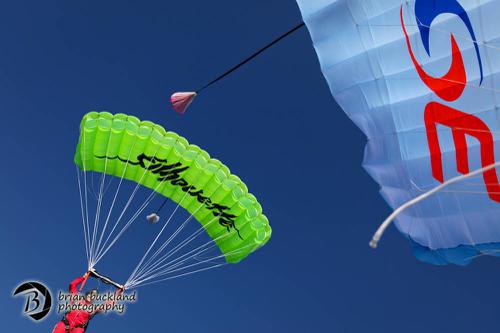
    Image by Brian Buckland It is common knowledge that wing-loading has profound effects on the way parachutes perform. Furthermore, it appears that even if the wing-loading is exactly the same between two otherwise identical parachutes, different size canopies fly quite differently. In other words, if you fly a 210 square foot parachute of a given design with lots of additional weight to achieve a loading of say, one pound per square foot, a 150 at the exact same wing-loading will usually have a steeper glide ratio, faster turns, and demonstrate a longer recovery arc following a high airspeed maneuver. This means that, regardless of the wing-loading, all small canopies are high performance, and should be treated accordingly. There are many explanations for this non-linear relationship, and in this article I will discuss some of the most significant governing variables.
    Test flight data shows us that small wings, regardless of wing-loading, will be more radical than their larger counterparts, all other design aspects being equal, however the degree to which they are different depends of the model of the canopy. Nevertheless, the trend is consistent and predictable. The most common explanation for these differences is that it is due to differences in line length. Smaller canopies do have shorter lines on the whole. Although it is true that some aspects of a parachute’s performance increases as line length reduces, this only applies to mobility about the roll, pitch and yaw axis. The effects on recovery arc tend to have the opposite response to line length. In other words, a parachute with longer lines tends to exhibit a longer recovery arc. To explain these counter-intuitive effects, we must look elsewhere for an explanation.
    The other aspect, previously unconsidered, is the relationship of the canopy's internal volume to its surface area. Essentially, the volume displaced by the airfoil can be thought of as a key aspect of the overall DRAG. Of course the shape of the wing itself is vitally relevant to the drag coefficient, but for the purposes of this discussion, let’s focus on the effects of drag from the perspective of simple air displacement, like a footprint in the sky. The fatter the airfoil, the more drag it will exhibit. This means that a “fat” parachute will sit at a higher angle of attack in full flight, based on the balance of power between the airfoil's drag (D1) and that of the suspended load, the jumper (D2). Further, the drag value of a “fat” airfoil will increase markedly with airspeed, and therefore large objects will suffer more drag than “skinny” airfoils at high speed. The wing, therefore, will “want” to return to the overhead position more aggressively on fatter airfoils, as a general rule.
    Let's take those aerodynamic principles to the realm of parachute sizing. When a parachute design is scaled, for the most part, the entire wing is scaled simultaneously. This is the same geometric progression as a matchbox car: same three dimensional proportions, but a different size. When we want to make a parachute larger, we simply multiply each dimension by a “scale factor”, a single number that will result in the size change we desire.
    When we apply this mathematical model to parachute designs, we create an unwanted effect: disproportionate scale factors relating to area and volume. Simply put, the number we use to scale the parachute is based on the "square footage" of the wing, and this is of course, a square function (X²). The volume on the other hand, is governed by a cube function, (X³). This means that when we increase the height of the rib at the same rate as the span and the chord, we inadvertently make the wing too fat as we scale upwards, and too thin when we scale down. This is one of the reasons why a 120 flies very differently than a 170, even at the exact same wing-loading and body drag component. The wings only appear to be the same, but they are most decidedly not the same from a volumetric perspective.
    So, one might say, why don't we make the height of the airfoil on smaller wings greater, and that of larger wings smaller, proportionately? This is sometimes done and it works to a certain degree. However, if we were to search for a formula that would allow us to scale the volume at the same rate as the area, we would have to keep the rib height the same on all sizes of a design. I worked this out with a brilliant Tasmanian mathematician on flight back from Sydney many years ago. A 120 with the same rib as a 190? That doesn't quite pass the gut check, does it? Only the middle sizes would fly right, and beyond a few degrees of freedom, the system would collapse into chaos, because the fat little wings would have too much drag to be efficient and the big wings would have too little lift to land well, and would be prone to collapse in turbulence due to their flimsy nature by virtue of their low volume. A simple answer does not appear to exist, at least not yet.
    The heart of the problem is the fact that our industry has grown accustomed to the use of "pounds per square foot" as our way of quantifying parachute size. This leads to the erroneous belief that a given "wing-loading" will result in similar performance for all parachutes regardless of size. This is most certainly not the case, and is dangerously misleading for light weight jumpers striving for that magical one pound per square foot wing-loading. A 120 is inappropriate for someone with less than 100 jumps no matter how much they weigh. So, what do we do? Firstly, we honor the differences in parachute sizes, and downsize very carefully. We make our steps downward based on actual ability and frequency of jumping, and we look for any excuse we can to upsize. In addition to remaining conservative with regards to canopy size, we must go to greater lengths to understand the nature of performance and size.
    If it is true that performance trends do not appear linear with regards to parachute size, then perhaps the solution is a curved ruler. To that end, I have offered a complex sizing chart to the world that reflects the non-linear nature of parachute sizing and performance for the purpose of downsizing guidance. This easy-to-operate chart has been adopted by many national organizations and local dropzones as the official guidelines for parachute size relative to experience. Born from a brilliant but arguably conservative Swedish chart created by my good friend and colleague, Ola Jameson, who was the Head of Safety (Riksinstructor) for the SFF at the time. My somewhat less conservative version of the “sizing chart” offers suggestions for parachute size relative to weight, rather than simple wing-loading alone as the defining factor. This allows the recommended parachute size for a heavy person to be a higher wing-loading than that which is suggested for a lighter person. It is available HERE.
    The sizing chart does not suggest when the jumper should downsize, but rather limits the degree to which they should decrease their parachute size based on the complex aerodynamic principles effected by wing geometry. The "chart trap" is always a risk with such things, when jumpers automatically step down in size because the chart suggests that a change is reasonable. Decisions based on parachute size and design should always be made based on the actual ability of the jumper, and the other governing factors described in the 22 pages of modifying text that follow the chart.
    Another consideration I will now put forth to the skydiving community is a fundamental change to the way we define parachute size. Based on the discussion above, a two-dimensional analysis is insufficient to describe what a parachute will do in the sky, and "pounds per square foot" is a very limited 2-D relationship. I suggest that a better model for parachute size definition is Pounds (or kilos) per Cubic foot (or cubic meter). The metric numbers would be far easier to work, if we can get the Yanks and Brits to let go of the Imperial system; but we have to pick our battles, don't we. By using lbs/ft³, we will effectively remove the 2-D bias from the "ruler" as it were, and make the relevant differences more numerically obvious. It may sound like a radical idea at first, but so was the ram air canopy when that showed up, but look how well that worked out. Just because a change is difficult does not make it less necessary.
    In the interest of moving this new paradigm forward, and in the spirit of the immortal words of Mahatma Gandhi, I will be the change I wish to see in the world. Here are the volumes of my parachutes. It is my hope that other manufacturers will follow suit, in the interest of transparency of our parachutes’ designs, for the good of the skydiving public.
    The topic of parachute performance prediction is vast, and must continue to be discussed in scientific terms. We must do this because, as one of the few (mostly) self-governing branches of aviation, we are the only true experts in our field. We are the ones who must think outside the old box of established paradigms, and change when change is necessary. We will continue to improve our sport in every way, simply because we love our sport so much that we want to know more, and grow more. The universal passion for knowledge exhibited throughout the skydiving community leads us to a very high level of mutual respect for our fellow jumpers. This precious commodity of solidarity is rare in this world, and we must allow that connection to lead us to always reach for safer procedures built on our ever-increasing understanding of that which saves our lives. Improvement in matters relating to safety is just love of life in motion, and love must be adaptable and smart if it is to last in a complex world. Again and again, skydivers prove to me that they are highly intelligent adventurers committed to safety, and very much worthy of my respect. We will adapt, and we will thrive.
    About the Author: Brian Germain is a parachute designer, author, teacher, radio personality, keynote speaker with over 15,000 jumps, and has been an active skydiver for 30 years. He is the creator of the famed instructional video "No Sweat: Parachute Packing Made Easy", as well as the critically acclaimed book The Parachute and its Pilot. You can get more of Brian’s teaching at Adventure Wisdom, Big Air Sportz, Transcending Fear, and on his vast YouTube Channel

    By admin, in Safety,

    What You’re Doing Wrong As A Skydiving Student

    And What You Can Do To Fix It

    Image by Gary WainwrightI’m not a teacher.
    I’m forehead-slappingly, eyes-avertingly, hide-your-facingly terrible at it, actually.
    Luckily, I’m lucky enough to count as friends some of the best airsports teachers in the world. (Whew.)
    This article is a collection of short answers from several of these. They’re top-level coaches/instructors/examiners, and their experience spans in several disciplines. They’re also incredibly wise, beautiful souls. I went to them with this question, so important for all of us students on the edge of the world:
    If you could cure all your students of one thing they do that gets in their own way, what would it be?
    Here’s what they had to say.
    Listen up.
    “Rushing. I see a lot of students that are determined to pack too many things into one jump. Then they end up flailing; when they don't nail the first part, they're confused as to whether to go back and work on the first part or move on to the next part anyway. They lose a lot of time, and they get very frustrated. Pick one thing. Do it perfectly. Stop. Then move on to the next thing.”

    - Joel Strickland: Freefly & Tunnel Coach; Double British National Champion, Freefly & Freestyle
    “If I could cure all my students of one thing, it would be to erase the idea that everything about them is static and unchangeable. Once a student believes in their own self-efficacy -- believes in the idea that all that they are is changeable in a positive direction -- believes that everything from their physical reactions to their fears can be modified and updated -- anything is possible for them to learn.

    - Matt Blank: Wingsuit Skydiving Coach, Lightning Flight Wingsuit & Freefly School
    “I’d get them to stop watching YouTube. That creates pre-conceived notions of what they should be doing. Either that, or I’d encourage them not to freefly from jump 26 to jump 199 -- when they do, their belly skills suck dust when it comes to their FFC.”

    - Douglas Spotted Eagle, Wingsuit Skydiving Instructor
    “Often, they don’t respect the progression and embrace their inexperience. You must do both.
    It makes sense to one day aspire to wingsuit BASE jump from a cliff, but it can be difficult to focus your efforts where they are the most effective if you’re fast-forwarding years into your career. Your instructor, who you possibly selected because he or she wingsuit BASE jumps, wants you to focus more on finding the range of your beginner or intermediate wingsuit -- and recovering from instability in it -- before talking about how the wingsuit BASE start works. I find that many students seem to want faster returns for their efforts, and they seem to get frustrated with their own learning process.
    I can appreciate the way that we latch onto that dream of human flight, but i want to pass on an outlook where each individual skill is a whole and complete activity by itself that takes time and effort to master before being combined with other skills. So when you combine a set of skills (for example: rigging, canopy control, site selection, weather, bodyflight, wingsuiting and experience in the subterminal base environment), then you can make smart decisions. When you lack experience or skills in a certain area, you begin to lose the full picture.”

    - David Covel: Wingsuit Coach, BASE FJC Instructor, AFF Instructor, TI
    “I would cure them of self-doubt. It takes courage and confidence to challenge yourself to change your behavior and improve your skill in any area of your life. It's amplified when applied to an extreme sport.
    A lack of belief in your own potential can manifest itself in many ways: fear, nervousness, indifference even laziness. Understanding that you have the control and ability to consciously change your own actions is a very empowering fact that can unlock all levels of improvement. You have to commit to change.”

    -Maxine Tate: Canopy Piloting Instructor, Flight-1; US & UK National Champion; Coach Examiner; AFFI/Evaluator
    “I would cure this one thing that gets in students’ way: hubris. Assume you know nothing about the sport you are learning. No one assumes that they know everything about the sport they are learning, but the worst students just aren't really listening when the instructor is talking.
    In general, girls are better at listening than the boys. I think with the boys, especially with really good skydivers, there is a certain amount of ego that prevents accepting that there are things in BASE that they know nothing about. Think about this: almost EVERY BASE course that my partner Marta [Empinotti] and I teach, we learn something. This is because we know we don't know everything, so we keep our eyes and ears open, hoping to learn something new that we can analyze, assimilate and share with others in our beloved sport.”

    - Jimmy Pouchert: Co-Founder & Chief Instructor, APEX BASE; Freefly Coach
    “Over-amping. The ability to breathe even (especially) when scared, and to get into a focused zone before a jump, makes the biggest difference between a skydive that feels rushed and out of control and one in which a lot of learning and growth takes place. Even very experienced skydivers often feel nervous before their first wingsuit jump or when trying something new. The key is to trust that your ground preparation will serve you in the air, and to focus on one thing at a time starting with deep breaths, releasing tension, and visualizing the perfect exit.”

    - Taya Weiss, Owner/Head Instructor at Lightning Flight
    "We all have a tendency to look at the negative first, so I would remind all my students to start by pointing out three positive aspects about their previous skydive and then focus on one or two -- maximum, two -- areas of improvement. Positive reinforcement, combined with constructive criticism, goes a long way towards improving performance and attitude."

    - Lawrence de Laubadere: Freefly Coordinator, Lightning Flight Wingsuit & Freefly School
    “If I could cure all my students of one thing, it'd be expectation. As I tell them all, “If it's not fun, it's not worth it!” Learning to fly is not unlike so many other things in life: sex, making friends, etc. The harder you try, the harder it is.
    When I try to teach someone something in the tunnel, they often feel (natural) disappointment if they can't do it how they see others doing it. But it's not my goal to get you doing perfect layouts from the start. I'm looking for the components from my students: staying relaxed, looking where they should be, keeping the legs straight, etc. All I need them to do is smile, have fun, and keep making those baby steps. No expectations, no disappointment. In the end, I think attitude is one of the trickiest skills in progression.”

    -Dave Rhea: Instructor, Bodyflight Stockholm

    By nettenette, in Safety,

    How To Land Where No One Has Landed Before (The Star Trek Trick)

    ...Or Where Everyone Else Is Landing, But That’s Beside the Point
    Image by Wolfgang Lienbacher You’ve seen Star Trek, you big nerd -- so you know the answer to this question: When everybody’s staring out the front of a spaceship as it slams into warp speed, what are they looking at?
    Don’t make that face. This absolutely applies to skydiving.
    The answer, of course, is that they’re staring dramatically out into a starfield. Within that starfield, the outside stars are streaked into blurs and the center stars are distinct, clear and individual. At any given moment, the spaceship is headed towards the clear stars in the center of the frame.
    Gene Roddenberry and his glitter-stirring co-wizards didn’t come up with that out of nowhere. they used a classic model, called the Radial Optic Flow Pattern (or ROFP), to base their screensaver-worthy visuals upon. Originally defined by scientist James J. Gibson, Radial Optic Flow has greatly driven the development of an “ecological” approach to visual perception. This approach investigates human vision in the context of the natural environment (as opposed to a laboratory).
    It may sound obscure, but that same model is the one you, as a skydiver, should consciously use if you’d rather land in the peas than the trees. Here’s how.
    Velocity Fields and FOEs
    As a human in motion, your field of view – your very own spaceship windshield – is called your “velocity field.” Within that velocity field, when you’re traveling along a straight path (with no eye, head or body rotation), your heading is nailed quite precisely by the unmoving focus of expansion (FOE) in the center of your vision. How precisely? Well, a 2008 Oxford University study found that humans can use the FOE in optic flow to estimate their heading within one degree of the visual angle, and that’s good – because the FOE is exactly where you’re going.
    As opposed to a paraglider – which can go up just as handily as down, in the right conditions* – a skydiving canopy has one essential mode: forward/down. A ROFP for forward movement describes expansion – like the stars in the front windshield of the spaceship as it rushes towards the FOE described by the still stars in the middle. (As our skydiving canopies can’t really go backwards, we won’t worry about the “reverse thrusters” mode.)
    Image by Wolfgang Lienbacher
    Where’s My FOE?
    If you’re flying your skydiving canopy straight, your FOE is easy to pick off: it’s the place in your vision that isn’t dropping, rising, or side-sliding. As you approach the landing area, the FOE remains central while the rest of the field expands proportionally more quickly.
    If you’re throwing a bunch of canopy inputs into the mix, however, it’s much more difficult to determine FOE. That’s because you’re introducing a “rotational component of lamellar flow,” which forces the retinal flow pattern not to be radial anymore, thereby making it difficult to recover the original heading.
    How to “Energize” Your Accuracy:
    When you set up your landing, choose objects on the ground and notice whether they’re moving up or down in your velocity field. Notice the still spot that indicates your FOE. Notice how accurate you can make your landings by fixing your FOE on your intended spot landing.
    As you learn to determine your FOE close-up, start to work on spotting your FOE from higher and higher altitudes. By doing this, you’ll train yourself to know instantly if the spot is off and you’ll need to choose an alternate landing area.
    Keep your FOE on the target, not an obstacle. When I was racing motorcycles, I used to refer to this trick as my “eye magnets.” That sounds just as silly as spending four hours in a makeup chair getting a rubber Klingon face glued on, but it’s not: your gaze truly is functionally magnetic. You'll head inexorably towards the one tree in the landing area you’re terrified of hitting (and thus staring at). Conversely, you'll kinda-magically turn away from that tree without any other conscious inputs if you “unstick” your gaze and attach it firmly to open turf. Improperly applied eye magnets are referred to less-cutely as “target fixation.”
    Many skydivers refer to this phenomenon as “the accuracy trick,” which seems unfair – there are a lot of helpful tools for accuracy, of which this is only one. That said, consistently landing where you want to is a great way for a skydiver to live long and prosper.
    (Shh. You know you giggled.)
    ** For this reason, “the accuracy trick” is a little trickier to use for paraglider pilots, because visual cues have a tendency to bounce around as the wing is affected by thermic “bubbles” near ground level.

    By nettenette, in Safety,

1 1