Submit Article

Skydiving News and Articles

Select A Category

Pick a Category

Is It Time For A Reline: Here's How to Know

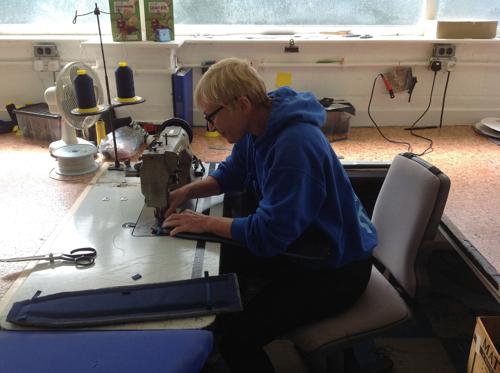
Do your suspension lines have a noticeable five-o'clock shadow? Maybe it’s time for your gear to spend the weekend with your friendly neighborhood rigger. If you’re unsure, you’re not alone--plenty of skydivers hem and haw about this particularly important aspect of canopy maintenance.
Looking for a little more convincing? Here’s a brief education on line maintenance by Karen Saunders, one of the few (and one of only two women) to hold the lofty Advanced Rigger ticket from the British Parachute Association. Karen has seen enough fuzzy line sets to give any sane canopy pilot the night sweats, and she wants to make sure it’s not you that gets to live the nightmare of a mid-swoop snap.
1. Go with your gut.
“Trust your instincts. If you think that maybe your lines are looking a bit shabby, they probably are. Most people will look at their line set and say, That looks a bit shit, but I’ll do something about it tomorrow. Tomorrow turns into a week, and then a month. Before you know it, you’ll have a line snap or an off-heading opening. Fix it before you create yourself some problems.”
2. Know what you’ve got.
“The most important thing is to know what type of line is on your parachute. Most people don’t--and if they don’t, then they won’t know how many jumps they can expect to get out of that line set before it needs to be replaced. And they also won’t know whether to expect to have line shrinkage or whether it is going to go the other way and simply snap when it reaches the end of its life cycle. Vectron and HMA will do just that if you don’t take care of them: Snap. They won’t give you a warning aside from the fact that they will start to fray as they age.
The other thing to think about is where your line set actually comes from. Most people will buy their line sets from manufacturers, but there are riggers out there that will make cheaper line sets themselves. I can spot a manufactured line set from anything else in a flash, but most people couldn’t--and maybe that’s the line set have got on your canopy that you bought from somebody in good faith. It is always best before you buy anything to get it checked out.”
3. Get some visual reference.
“Once you know what line type is on your parachute, look at Performance Designs’ line wear charts for your lines to get an idea of what wear actually looks like. It may surprise you. Using that reference as an example, you can see how deterioration looks over a given period of time and what percentage of strength you lose.
You can test your new knowledge immediately by looking at the bottom part of your brake lines and the stabilizers. Those lines are always going to take the brunt of the wear. Generally, having the bottom part of your brake lines replaced at the first sign of wear is going to save you a whole world of problems.”
4. Watch for the warnings (if you have a line type that broadcasts them).
“If your lines are made of Spectra or Dacron and you need a reline, you can expect to get some bad openings: an off-heading or big surges after opening. That’s generally because the slider is moving up and down your lines, heating them up and shrinking them.
If your parachute opens and it is not on-heading, then it is generally an indication that it is going out of trim. You need to get somebody to look at that. When you do, they might look at it and tell you that the lines are okay; maybe it’s just your body position causing the problem. If they look at your lines and go holy shit, man, you need to replace straight away, then you have your answer. Either way, you’ll have peace of mind.”
5. Don’t get tunnel vision.
“Don’t just look at your lines. Your lines are suspended by some binding tape which needs checking as well. Especially after a hard opening, be sure to look at the tape where each line is attached to your canopy, as well as the fabric around it.
Kill lines are another thing. Everybody forgets that a kill line wears out in the same way as a suspension line, except a lot more quickly. If your kill line is made out of Spectra and has shortened, then you’re going to start having problems with your openings. The dead giveaway is finding that your pilot chute is turned virtually inside out every time you land.
A kill line wears throughout the bridle. The weakest point doesn’t have to be at the bottom or top--it can snap right in the middle--so make sure you pull it through from both ends when you check it. Pull it as far as you can from one end and then pull it as far as you can from the other end to have a good look.
Finally: If you’re getting a new line set, please, please, please replace your slinks as well. Don’t put a new line set on it and put an old set of slinks on it. That defeats the object of this exercise. They are not infallible. They do fail, and the last thing you want is for a slink to fail at 200 feet, because you’re not going to survive that.”
6. Remember: The integrity of your lineset isn’t a good place to save a few bucks.
“The costs to reline aren’t as bad as you might think. I can tell you roughly what I charge, but I can’t speak for other riggers. That said, I will always look at something for free, and if someone asks me for it, I will always give my advice for free, and that’s also the way most of the riggers I know like to work.
I charge 15 pounds, which equates to about 20 U.S. dollars, to replace both lower brake lines. If the lowers go from the cascade all the way to the toggle, I charge 40 pounds--which is something like $60. If you compare that amount of money to losing a brake line when you’re flaring--or when you are at 100 feet--you see the value. You have to weigh the cost of your own safety.
If you don’t happen to have a rigger on your dropzone, then go to an experienced jumper. See them and say, Hey, I’m a bit worried about this. What do you think I should do? If they look at it and start laughing, you have your answer.”

By admin, in Gear,

A Guide To Traveling With Your Gear

Anything precious in your bag, sir?

Introduction
Getting into skydiving opens up many opportunities for travel. You might live somewhere where the weather is shit all the time, or simply want to take advantage of the beautiful places available to jump around the world. Traveling with your gear can be a worrisome experience. If you are at all sensible, you should already own both a standard travel insurance policy for your belongings and some additional cover that concerns your physical being and any event in which it smooshes into something unforgivingly solid. However, unless you either arrange additional extended insurance (or jump some wonky old contraption built of very dubious elements), the coverage you are paying for is unlikely greater than the value of a set of modern skydiving gear. Your magical backpack is precious to you, and while traveling abroad you will likely feel most inclined to keep your eyes and hands on it at all possible times.
Checked or Carry On?
Once successfully embarked on your career as a skydiver, sooner or later someone will share with you a horror story involving airport security and a parachute. The exact details of this tale are variable, but it will usually involve massive injustice on the part of very ignorant and uncool staff against an innocent and harmless skydiver who just wanted to be perpetually within four feet of their gear by taking it into the aircraft cabin as carry-on luggage - only to be harassed, hassled and sometimes ultimately denied. Situations that escalate this far are rare, but they happen enough among a relatively small community of people to then hang in our collective consciousness as a potential problem - prompting the anxious conundrum of either checking-in one’s rig and thus entertaining the very slim but real possibility of it vanishing forever, or sending it forth through the scanner and risk having to cause a scene because some jobsworth insists on popping your reserve and causing a hundred people in the line behind you to all miss their flights.
What Is This Thing?
What is it about a parachute system that draws the attention of security personnel? It seems logical it would be your AAD that is the most curious element: a mysterious little box complete with a with a couple of protruding wires, a numeric display an activation button (eeek!). In fact, the Cypres unit (the AAD everyone should own) does indeed utilise a very small amount of gunpowder in its design (30 milligrams) - although you should not say this to anyone in charge of aeroplanes. It is up to you to not say this and it is important not to say this. Despite being officially harmless according to all the aviation authorities that matter, try explaining away this nugget of information well enough to be allowed to continue on your journey.


Official looking visual aids can occasionally be very useful.
Over many years of traveling as a freefly team, we eventually realised that frequently enough one of us would have to explain how a parachute does (and more importantly - does not) work that we began to rotate who went first through security, therefore being the one to get their rig out and do the explaining. We discovered that it seemed not to matter. Sometimes both the first and second rig would pass unassumingly through the scanner, only for the third to be set aside needing the guided tour - thus leaving the two initial team members on their way into the terminal, chortling at the unlucky third and musing about how mystifying and stupid the process is - as if a single rig is but 33% suspicious and only the cumulative effect of several examples passing by in succession is enough to make the final one stand out as suspect.
Each time an inspection was required we began to quiz airport staff in turn about what they see that makes one’s gear a thing of interest to them. Although as of yet we have received no definitive answers as to exactly why, it appears that the combination of the reserve cable and pilot chute spring that draw attention. A metal cable spiralling into the centre of things just looks unfamiliar enough to be potentially wrong and bad.
What Are The Rules?


The gentleman on the left thinks it is cool to go through the airport like this. He is wrong.
As far as all the major aviation authorities are concerned, there is nothing about a complete parachute system that categorises it as forbidden to travel in either the cabin or the hold of any commercial aircraft. Individual airlines might have their own rules for various types of sporting equipment (which you should remember to look up before you go anywhere), but these are much more likely to concern weight allowances and excess baggage fees than any specific security rules.
There are various formal documents available that concern skydiving equipment, but I am yet to meet any airport staff in the world that have actually read them. As such, each transit situation will depend entirely on the personal experience of those charged with viewing your bags - and can range from cow-eyed unconcern (most common), through mild curiosity (sometimes) all the way to haughty indignation that you would dare attempt to take such a thing onto an aeroplane and put everyone’s lives in immediate danger (sucks to be you).
What Happens If You Need To Explain?
Be nice. Always, always, be nice. Airport staff at any step of the way can very quickly ruin not only your travel day - but you whole trip if they feel it is necessary - and smile-kill you while they do so. If you are required to give a presentation, usually a quick explanation while they swab your harness for naughty residues will suffice and you will be on your merry way. If their concern does persist past this point it will probably be because whoever you are talking to is somewhat (possibly very) convinced that your canopy can suddenly and dramatically fully inflate in the cabin, thus freaking everyone the fuck out and covering the windscreen or something. The best course of action here is just keep repeating in a soothing tone “That is impossible” and “It doesn’t work like that” while remembering to be nice. If that doesn’t work you can even have the employee in question deploy your main pilot chute limply onto the floor. Go nuts! Have them pop the pin and send your deployment bag down to join it. Not matter what happens through this interaction try to make it as fun as possible and educate the staff a little bit about your gear and doing your bit for those that come after. You never know - the difference you make here might mean as much as the next person who passes this way meeting their connection or not.


Success

Conclusion
Many people have traveled with their parachutes as carry-on many times, to many places, for many years, with no problems. Every now and then someone just has shitty luck and another tale of woe spreads it’s wings. If things do go badly for you and there is now way out other than to pop your reserve and/or get everything out in exquisite detail, just get it over with. The best play regardless of how far you have to go down this road is always make security personnel feel that they are doing the right thing. Inside you will be seething with rage but if you are a dick to them in even the smallest way nothing good will come of it other than a long conversation in a windowless room. So be nice.
Things To Remember:

1. Put Your Rig In A Bag
You will look super cool wandering around the terminal with your straps all dangling and your G3 clipped to a hip ring like a six-gun. Right up until someone spills sub-standard guacamole all over you.
2. Get Some Paperwork
Airtec produce a nifty credit card thingy that you can whip out to look like a stone-cold professional. It shows an x-ray of a rig that explains why Cypres units are fine for travel and does not mention gunpowder at all. Other AADs are possibly available. For the extra careful there is also a selection of formal documents available in different languages that you can print out and keep in a ring-binder.


By admin, in Gear,

Freefall Data Systems LLC Launch New Altimeters

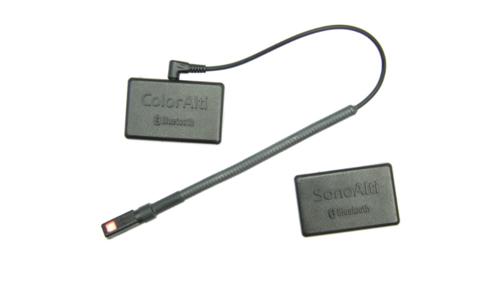
Freefall Data Systems LLC launched two brand new skydiving altimeters on December 18, 2017. SonoAlti an audible altimeter that can be set using Bluetooth® wireless technology. ColorAlti is a patent-pending reconception of the peripheral vision LED altimeter. It can also be set using a free app called FDS Altis that is available on Apple’s App Store or Google Play.
SonoAlti


SonoAlti was conceived to remedy the classic problem many jumpers have of trying to set—or remember how to set—their audible altimeters. It has three different types of alarms (ascent, freefall, and canopy) and up to eight of each type can be set. The volume of each type of alarm can be set individually and the user can select from a sound bank of 64 different alarms. The unit is always on and has a rechargeable lithium polymer battery with a life of approximately 200 jumps or three months. Although it is not its primary function, SonoAlti also includes a speed tracker feature, which allows the user to get real-time feedback during a jump of vertical descent speed via beeps. In addition, SonoAlti tracks jump numbers as well as freefall and canopy time. Using the app, one can obtain information about the last recorded jump and view altitude and vertical speed graphs (up to seven minutes of data). These graphs can be saved as photos to the user’s mobile device.
ColorAlti


For ColorAlti, Freefall Data Systems LLC took the idea of peripheral vision altitude awareness and started from scratch. Unlike Elemental Technologies’ now defunct Chroma, ColorAlti contains a color LED, enabling it to display up to 256 different colors. The altimeter can be used in two different modes: continuous and discrete. In continuous mode, the light on the altimeter gradually blends through the colors of the rainbow according to two altitudes and colors of the user’s choice. In discrete mode, the light abruptly shifts to user-defined colors at altitudes of the user’s choosing. Up to eight of these discrete alerts can be programmed for ascent, freefall, and canopy. The unit has a flexible yet rigid gooseneck housing that is able to stay in place even at very high freefall speeds.
Freefall Data Systems LLC
CEO and Senior Engineer Casey Mongoven (D-33972) founded Freefall Data Systems LLC in 2016 in Lompoc, California. Casey designs all hardware and software for FDS products. He is also an active USPA Coach Examiner, AFF and Tandem Instructor with over 3000 jumps.
http://freefalldatasystems.com/

https://www.facebook.com/FreefallDataSystems

By admin, in Gear,

Understanding Camera Switches

Introduction
Taking photos while skydiving is easier today than it has ever been, yet doing the job properly remains serious business. Camera technology marches ceaselessly forwards, and while the gap between the products aimed at the casual consumer and the lofty professional is narrowing - any freefall photographer that considers themselves proper job will very likely rock a stand-alone stills camera as part of their setup.

Try as you might - you will never be this cool. Action cameras are great. Their small size, plus both the features they present and the quality of media they capture make them highly useful for everything from skydiving to attaching to your cat to find out where it goes at night. However - any occasion you have to directly compare the images recorded by these teeny wonders with those of a more traditional camera will highlight the superior quality a dedicated stills unit has to offer.
The exponentially multiplying capacity of digital memory means that with a GoPro or whatever, you can just set it going at some point before the start of your jump, forget all about it until at least ten minutes after you finish packing then sift through an ungodly amount of chaff later in search of the choicest shots to share about the place. Everybody knows this is cheating though, and that photos created serendipitously by a piece of gadgetry that happens to be attached to your forehead is not your work - but is in fact the subtotal of all human endeavour leading up to this exact point, where you got lucky.
A stills camera is the tool of the craftsperson and must be activated manually when something awesome happens. There are a few choices available for this, all of which involve using your mouth to activate the camera and get the job done. As with a lot of things in skydiving, people sometimes feel very passionately about what they believe to be correct tool for the job and will offer to fight you to the death for besmirching their good word by thinking differently - and camera switches are no exception. While all pretty straightforward to operate, they each have some subtle strengths and weaknesses so a little forethought might help you arrive at what is best for you.


This man is called Trunk. Trunk runs a company called GetHypoxic. If you are building a camera platform or simply wish to geek out about skydiving technology - this is your guy.

Bite Switch
The bite switch is either straight or L-shaped with a section somewhere in the middle that you hold between (specifically) your front teeth and bite softly to operate.
The Good:
Good Feedback: Of the choices available a bite switch provides the most satisfying little clicks to reassure you that you are getting shit done.
The Bad:
- Head Movement: Operating a bite switch involves moving your jaw a little bit to bite down, which can put a visible wiggle in your framing - particularly if you are capturing video.
- Moisture. If you eventually chew through the plastic casing, condensation or saliva can get inside and short out the connections.


Blow Switch
The blow switch is a small unit about the size of your thumb that you mount to the outside of your helmet. The part that goes into your mouth is a straw-like tube that you blow into to activate the camera.
The Good:
- Durability. With no wires and such directly in your mouth there are fewer parts that are subject to moisture or wear, and you cannot damage it by biting too much.
The Bad:
- Low Feedback. With nothing that clicks actually pressing against any part of your mouth you do not receive any direct indication of operation from the device itself.
- Breathing. The action of blowing into a tube to depress the button can potentially disrupt your breathing, and vice-versa - having to breathe at some point can interrupt your photo taking.
- Gunk. Clean it, you filthy animal.

Tongue Switch
The tongue switch is usually L-shaped. You grip it between your teeth wherever it feels most comfortable and depress a little button with the tippy end of your tongue.
The Good:
- Separate Actions. By holding the switch with one part of your mouth and operating the button with another, this option has a sensible tactile nature.
- Flexibility. You can hold this switch anywhere amongst your teeth that feels right for you.
The Bad:
- Due to the available mobility, the internal wiring can wiggle loose and the switch possibly wear out over time.
- Moisture. As with the bite switch - if you eventually chew through the plastic casing, condensation or saliva can get inside and short out the connections.
- Hilarity. If you use a tongue switch you will quickly grow very, very tired of jokes about your increased sexual powers - from pretty much everybody.

A tongue switch and a bite switch respectively. Photographed on a moist houseplant.


This is me.
The truth is that all these devices work perfectly well. I have a tongue switch now because I have always had a tongue switch. I don’t remember why that was my choice and yet I see no reason to change it. Every now and then someone will tell me it is a worthless piece of shit good only for the bin, yet I rarely miss a photo.
There is immense satisfaction to be found in ‘getting the shot’ and if you are serious about the role of aerial photographer a good stills camera is essential. High pressure situations like freefall turn small issues into bigger ones, and although just a small element your mouth switch is an important piece of your camera helmet. One that works well for your needs over something not-quite-right can be the crucial difference between kicking ass or not kicking ass much more often than you think.

By admin, in General,

Todd Shoebotham Talks Pilot Chutes

Todd Shoebotham, Owner and President of Apex BASE, Helps Jumpers Get the Details Right
Note: This article discusses pilot chutes in a BASE environment and should not be used in relation to skydiving.
Ah, the pilot chute.
Our beloved little workhorse, it’s the first thing we take out and the last thing we put in. It gets dragged around. It gets abused. For all the obsessive fawning we do over our canopies, our pilot chutes get surprisingly little love.
If you’re looking to change that--and learn a little more about the sizes and styles of pilot chutes that you should invite on your BASE jumping adventures--then you’ve come to the right place. We pinned down the inimitable Todd Shoebotham and picked his brain about it in order to share his infinite wisdom with our beloved public. We’re pretty sure you’re going to learn a few things, so lean in and listen!
1. Keep your fingers out of harm’s way.
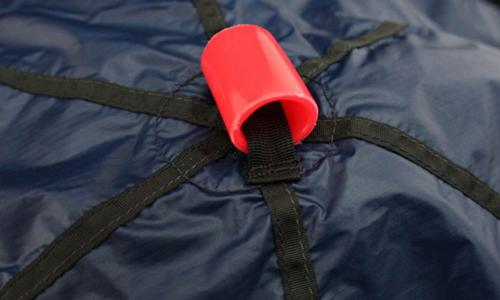
Does your pilot chute have a tube handle? According to Todd, the data suggests that fingers have an uncanny tendency to make their way into that little tunnel at pull time, which can make for some seriously awkward Chinese-finger-trap deployments. “A few people have reported reaching back and going up to the knuckle into the PVC,” Todd says. “Or getting their fingers underneath the handle. When you’re reaching back, that’s certainly not what you want.”
This problem can be solved in multiple ways. If you do have a PVC-style handle with a potential finger trap, Todd recommends taping over the ends in order to eliminate this possibility. Apex pilot chutes forego the tube for handles that wrap rubberized, textured fabric around a solid foam cylinder.
“Compared to the old-style PVC handle, this is much lighter, too,” Todd explains, “And that lightness helps the pilot chute get orientated properly.”

2. Travel with a well-curated collection.
Since pilot chutes are available in everything from little 32-inch versions to behemoth 52-inchers, it can be challenging to determine what you really need to carry in your gear bag as a traveling jumper. Todd suggests that carrying a quiver of three to four will reliably cover your bases.
“On the smaller end, we typically set people up with 36-inch pilot chutes,” he explains, “But we still stock the 32s. The 32-inch PC is probably the least-popular one in our range, because we believe they only belong on the lightest parachutes.”
“We used to see 36s on wingsuit-specific rigs,” Todd adds, “But we’ve been seeing a lot of people with wingsuits favor bigger PCs because of their lower airspeed at deployment.”
From there, Todd suggests having a 42--”the workhorse in the middle”--which covers your standard Potato Bridge jumping, and a 46- or 48-incher, depending on the size of your canopy, for objects more along the lines of a low cliff or structure.
If you have a little more room in your luggage and you’re looking to jump a lot of subterminal objects, Todd suggests a 38-inch pilot chute. “Most people aren’t going to be using a 36 or a 38 handheld,” he says. “If you’re in that 5-to-6 second range, it’s a nice pilot chute to have, the 38. It is a slightly different pilot chute. It is not as strong of a pull, but you still have plenty of room there. I might not use it on all 400-foot objects, but definitely on some of them, and it is a little nicer flying with a slightly smaller pilot chute.”
3. Make adjustments to compensate for your choices.
According to Todd, there are mistakes to be made here in both directions. On one hand, unnecessarily oversizing is an easy mistake to make. While it’s not necessarily dangerous, it can negatively affect your jump if you don’t keep your delay relative to your PC choice (and create unnecessary distortion to the canopy during extraction, to boot).
“If you don’t have the appropriate pilot chute for your jump and you don’t adjust your delay accordingly,” Todd says, “You might not like the results. If you were going to extremes in exposing a big pilot chute to a lot of airspeed, you would be stressing out parts of the canopy and your body. For instance: if you should really be using a 42 but you have a 46, you’d better go a little short on this one and enjoy the view from under canopy a little longer rather than taking your normal delay for that jump. I know you don’t want to, but that’s the pilot chute you’ve got.”
“Also keep in mind,” he continues, “That we have seen peculiar behavior when some large pilot chutes are jumped slider-up. You can get some pretty weird interaction if you do that; the slider just seems more reluctant to come down. Personally, I think it has to do with the distortion that the canopy went through during line stretch; at any rate, we do not recommend it.”
Take object familiarity into consideration.
Since larger pilot chutes generally provide snappier openings, Todd asserts that object familiarity is a major factor to consider when choosing a pilot chute.
“If it is your local object and you’ve really got things dialed in, I can see downsizing,” Todd says. “But if you’re a visiting jumper, you’re going to probably need to treat it a little differently. For example: If all the locals are using a 46, I’ll probably be using a 48 to stack the cards in my favor. If I make enough jumps there to become comfortable with the surroundings, I can see transitioning down to the 46.”
“At the end of the day,” he insists, “You have to remember: In BASE jumping, really small changes in performance do matter. Make sure you’re prepared.”

By admin, in Gear,

How the Pros Keep Their Canopies In Perfect Form

Canopy wear-and-tear can sneak up on you--and, if you’re new(ish) to the swooping trade, you might not know exactly what parts of your equipment need extra attention. Since a dedicated canopy pilot plies his trade on the basis of impeccable nylon, only a seasoned pro’s advice on the matter will do. To that end, I caught up with multi-disciplinary virtuoso Pete Allum to ask him for his best tips and tricks for keeping that kit in fighting shape.
Pete started skydiving in 1979, and it didn’t take long for him to clamber up on his first podium. Since 1985, Pete has stood on national- and world-level podiums almost every year (sometimes, more than once). In the pursuit of all that gold--and in the course of his extensive coaching work--Pete has made more than 32,000 skydives. It’s safe to say, then, that he’s seen a few canopies through their life cycles. Here’s what he has to say on the subject.
1. Pack your own parachute as much as possible.
When you’re hopping and popping like a broken record, the last thing you probably want to do is wiggle around on a packing mat. Pete suggests that you should suck it up and make the effort, because your personal attention is the most important factor in your gear’s fitness. After all, your packer’s job is to get it in the container. Your gear’s overall well-being is your job.
“If I’m jumping 20 times a day,” Pete explains, “I certainly won’t be packing it every time, but I want to make sure I have my own eyes on it regularly. Even if I have a very heavy schedule, I’ll make sure to pack it myself at least a couple of times a week. That gives me the opportunity I need to see the things I wouldn’t if I only jumped it. When it’s in my hands, I can check for problems like closing pin damage, dinged grommets and center cell discoloration from sweat.”
2. Don’t be shy. Keep your standards high.
Non-ideal openings accelerate wear-and-tear on your gear (as well as your body), so it falls to you to make sure that some standards are being upheld when a third party is compressing your fabric. Pete advocates a professional, proactive position, especially when it comes to stows.
“Packing stows vary widely, and not everyone is aware of how important it is to be consistent,” Pete admonishes. “So it’s a good idea to make sure your packer is using the same large stows throughout and double-wrapping every stow on the bag.”
Finally, make sure the packer is dressing the container’s flaps correctly. If they don’t, Pete notes that creases will form, building memory in the fabric over time. These ever-deepening furrows can cause degradation as the container ages.
3. Watch the wear points on the lines.
With high performance comes high mechanical stress. A small, aggressive canopy has a tendency to shake the system like an energetic rottweiler thrashes a favorite chew toy, so you’ll need to keep an even more vigilant eye on your canopy’s wear points: especially the lower control lines and the places at the top and bottom of your lines where your grommets like to grind. If there’s even a hint of fraying on your lines, bringing your gear to a rigger should rise to the top of the to-do list.
“When I’m in Florida, it’s the easiest thing in the world to bring it over to Performance Designs, so I’ll pop over at the earliest sign of wear,” Pete says. “When I’m farther afield, my standards have to relax a little, but it’s still a top priority to get it done.”
4. Give your pilot chute an extra look.
Pete recommends that you check for wear at the bridle attachment point at every opportunity. Beyond that, he notes that you should occasionally tug out the kill line and check it for fraying, twisting and shortening.
“The system has a couple of inches of margin,” Pete explains, “But if the kill line measures outside that allowance, you need to take it to a rigger.”
5. Keep an eye on how many jumps you’ve already put on the canopy.
Especially if you aren’t a logbook-lovin’ kinda jumper, it’s easy to lose track of a canopy’s jump numbers. According to Pete, that will need to change. When it comes to jump numbers, swoopers don’t enjoy the luxury of unintentional ignorance.
“Especially if you’ve been jumping someplace hot and/or dusty, it pays to know exactly how far along you are,” Pete advises. “As soon as the ticker goes over 200 jumps, I start to pay way more attention, even though the line set is expected to last much longer than that.”


6. Be an active participant in a high-caliber team.
When your zoomy descent becomes the focus of your skydiving days, your need for a professional team of advisers increases exponentially. Take time to build relationships with the very best, most enthusiastically recommended riggers, packers and coaches you can find, and don’t hesitate to reach out to them for guidance. It takes a village to raise a safe (and super) swooper, after all.
To pursue the perfect swoop under the matchless tutelage of Pete Allum, reach out to him through Flight-1.

By admin, in Gear,

10 Gift Ideas for Skydivers 2017

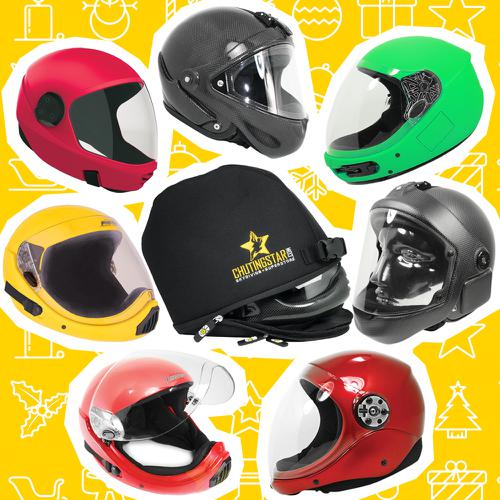
We're back again for the 2017 festive season, bringing you some gift ideas for your skydiving buddies or family members. We've spoken to the guys over at ChutingStar and Para Gear, and asked them what they recommend to those looking to fill some the stockings with some skydiving gifts, while at the same time, not breaking the bank.

Full-Face Helmets - $285-$428
Get a free ChutingStar Helmet Bag with the purchase of any Full-Face Helmet on ChutingStar.com. Just put both items in your cart and the ChutingStar Helmet Bag will be discounted 100% at checkout! ChutingStar stocks full-face helmets from Cookie, Bonehead and Square1 in all sizes and colors.
Available at ChutingStar


Selection of Goggles
Provide your mate with quality eye protection, with an affordable gift of goggles. Para-Gear offers a variety of skydiving goggles to fit your price range.
Available at Para-Gear


Manufactory MX Series Shorts - $149
MX Series Skydiving Shorts are triple-needle stitched with reinforced seams and bartacks on all high stress areas. A Cordura Nylon exterior with an internal breathable mesh liner allows effortless comfort with structural integrity. Available in 4 colorways in sizes 2XS to 2XL!
Available at ChutingStar


Glow Face Alt III Galaxy - $169
Meters and Black Only. The phosphorescent face provides a background glow to assist in low light conditions. The glow lasts over 2 hours in complete darkness, and is perfect for either night jumps or those sunset loads when it starts to get dark.
The Glow Face Altimaster III Galaxy features a field replaceable lens. In case your lens gets scratched or cracked you will now be able to replace it yourself instead of having to send it to get serviced.
Available at Para-Gear


USPA Skydiving Calendar 2018 - $15
13 months of incredible 11x14-inch photographs by skydiving's best photographers! The 2018 USPA Skydiving Calendar is the perfect holiday gift.
Available at ChutingStar


Cookie G3 Helmet - $379
Welcome to the G3 headgear, Cookies latest release full-face headgear and a result of significant refinement of the previous full-face headgear.
The G3 features the original VMech Visor Locking System that works unlike any other in the industry. The system makes for easy opening and positive locking of the headgear visor.
The visor is 2mm polycarbonate and features a complex curved design for extra strength, unsurpassed field of view and an anti-fog coating.
The headgear's cinching system is simple and secure, adjustment can be made to customize the headgear fit and once locked down just throw the headgear on and jump.
Available at Para-Gear


Parachuting Flipping Santa Musical Christmas Ornament - $24
This large parachuting Santa Claus sings Jingle Bells while he performs front flips and back flips under a round parachute! The perfect skydiver Christmas ornament!
Available at ChutingStar


Power Tools - $19.95
Want a great stocking stuffer with a low price? Give your loved one a Power Tool packing tool in holiday colors!
Available at Para-Gear

Dropzone.com Picks
In addition to the products above, selected by both ChutingStar and Para-Gear, we've selected some of our own staff recommendations for gifts this season.

Turned On GoPro Status Indicator - $79
The first true hard-wired status indicator for extreme sports, tells you the exact status of your GoPro Camera while it’s mounted on your head. Its ultra-bright LEDs shine unmistakably in your peripheral vision: blue for “standby,” red for “record” and yellow for “warning/error.”
The Turned On device gets your mind back in the game -- and off your headgear-mounted GOPRO® HERO3, HERO3+ and HERO4. As you know, optimal performance in extreme sports requires an absolutely clear head (and nothing good can happen when personal safety takes a backseat to a blinking light).
Available at Para-Gear

Aluminum Personal Rig & Helmet Wall Rack -
$99
Tired of seeing your spouse's gear lying around causing a clutter? The personal rig &
helmet wall rack will provide an ideal way to store their skydiving gear in a style way that keeps their helmet and rig up on the wall.
Available at ChutingStar
Happy shopping!

By admin, in News,

Case Study: How to Make A Really Good Life In Skydiving

How NZ Aerosports General Manager Attila Csizmadia Found His Niche
When I talk to Attila Csizmadia, he’s out of breath. He has just finished shaking down his four-year-old son for a set of puckishly “stolen” car keys, and it was a hell of a hunt.
“Sorry,” he says, “I was running around the house like crazy looking for them.”
Hidden keys are certainly not the only thing Attila runs after during the course of any given day. Since 2005, he has been the General Manager of NZ Aerosports--the central hub of operations for one of the sport’s most innovative, prolific and beloved parachute manufacturers. This is a dream job for a lot of skydivers, naturally, but it didn’t come easily. Indeed, one can’t help but think that running an office staffed with 30 to 40 staff is excellent preparation for the rigors of parenthood. The four-year-old is one of Attila’s two; the other is 13 years old--not far off from the age Attila was when he first started skydiving.
“I am not sure if [my sons] will skydive or not,” he muses. “If they want to and they ask me for it, then I’m going to make it happen. It’s up to them.”
It’s worth mentioning that if Attila’s boys start jumping, they’ll be a third-generation legacy. His own father was a skydiver and, though he stopped jumping when Attila was born, he’s much of the reason that Attila dove into the parachuting industry.
“He was jumping in Hungary, where we’re from,” Attila explains. “He was old-school, a military guy. As I was growing up, he was in keeping contact with his friends that were still jumping, and they were always talking about skydiving, even when I was a little kid. Then, when I was about 14 years old, I was talking to one of his friends who was still jumping; listening to his skydiving stories. I remember saying--and meaning it--that I could never skydive. But then a friend of mine brought it up. He’d just watched a record attempt or something on TV. He begged me to try it with him, and I agreed. He stopped after five jumps; it changed my life.”
“For me as a 16-year-old, getting into that group of people was just perfect,” Atilla remembers. “I was in school. It was all boys. I didn’t enjoy it. But then I went out to the dropzone and there was this friendly, crazy bunch. I was like, this is totally me. It felt like coming home.”
It was 1988. At the time, Hungary was still Communist country. Everyone skydiver in the country jumped really old, really dodgy military gear that was “15 years behind the rest of the world,” and every skydiver in the country knew every other skydiver in the country.
In 1991, the World Championships were held in what was then Czechoslovakia. They brought out some helicopters for the event, and the German, French and Italian 4-way team all came to Hungary to train.
“They were jumping these square parachutes that we’d never seen in real life before,” Attila laughs. “These guys were swooping, and we were just, like: what is happening here?! It was like watching spaceships land. We didn’t know what was possible. When these guys came here in these jumpsuits and small gear and like awesome canopy work, we were blown away. And I was inspired to start doing 4-way and competing.”
A few years of hard work later, Hungary had a young team.
“Because it was a new sport in Hungary,” he grins, “We won the Nationals pretty easily. Then we were the national team for a long time--almost 10 years. I was burning to get out there and travel and to jump everywhere I could overseas and to get a better rig and just do more.” He split his time between the US and Hungary for about five years, studiously avoiding European winters; he switched his seasonal pattern to Australia when he went to the World Championships there in 1999. To date, in fact, he has competed in no less than seven world championships.
“The last time I tried it, I couldn’t extend my visa,” he explains. “So there I was, facing returning to the middle of a European winter. I just couldn’t do it; there was nothing for me there.”
His solution: Hop the channel to New Zealand. He got a work visa and picked up a job at a dropzone throwing drogues and teaching AFF. He soon joined the NZ 4-way team. Everything was going well--but then the tone changed.
“My boss at the DZ was becoming a real a**hole,” he explains, “And I just desperately wanted to leave, but no one was hiring. Everybody had their staff. I needed to keep that work visa or I was going to be thrown right back to Hungary.”
As a last-ditch effort, he asked a couple of friends who worked for NZ Aerosports and if they were hiring. They were. It was 2005. Attila went right to work making line sets and cutting canopies.
“When I started working here, I thought I knew a lot about parachutes because I had been flying them a lot,” he says, wryly. “But when I got into the manufacturing side of it, I realized how little I actually knew. I found it really interesting and wanted to learn more and more.”
He found a peerless mentor in NZ Aerosports’ legendary founder/mad scientist/gear innovator/party animal, Paul ‘Jyro’ Martin.
“Jyro enjoyed that I was really interested in this stuff, and he just gave me so much information,” Attila says. “Then the guy who was managing the company at that time left. Jyro asked me if I wanted to do it. Of course I said yes.” It had been just six months since Attila had first accepted the job.
At the time, NZ Aerosports was a much smaller company. They only made six canopies at that time, and they had two sewing machinists. When Attila started managing, he was still the one cutting all the canopies. As he did so, he’d always have the office phone on him, taking orders; he’d be sorting out emails and charging credit cards with one hand and shipping out the canopies with the other. The work was, to put it mildly, intense. “One of my main tasks,” he laughs, “Was making sure the beer fridge was always full.”
“At the beginning it was really hard,” he relates. “I didn’t have any background in the business and hardly knew anything about it. English is a second language for me, so that made it a little bit harder too. I had to pretty much figure out everything for myself. At a certain point, I almost gave up because it was so stressful and things were not going really well. But then we pulled ourselves together with the manufacturing and started developing some new canopies. First, we released the JFX. We hired some new people, which brought in a nice newenergy. Then we met Julien [Peelman, Aerodynamics Engineer], and we started working on some of the really new canopies. There was no way I was leaving after that.”
Now, the NZ Aerosports office buzzes with the work (and play) of about forty people, all of whom report to Attila.
“It was a big learning curve, figuring out how to manage such a large number of people and deal with personal issues so that they still enjoy working together with all their differences-- the cultural gaps, the religious gaps and the age gaps between them. We have a big range. The youngest [staffers] are fresh out of school, and then we have some 60-something-year-old people working right next to them. We have people from Fiji...Canada...from all around the world, really. It’s like a dropzone.”
If you talk to anybody at NZ Aerosports, they’ll tell you that much of that vibrant energy came from Jyro’s influence--and, in March of 2017, we lost him. The loss of “the soul of the company” took a massive toll on the community that had formed at his feet, and Attila had to work even harder through his mourning. However, the spirit that Jyro instilled--in Attila, in his team at large and in the business--kept it from coming unglued.
“It is good to make some money, sure, but Jyro made sure it has never been our number-one motivation,” Attila explains. “You can see that the team is here all day, every day, working hard, and we always wanted to create a really nice environment for them that they truly enjoy working in. Because of that, people don’t really leave here. We’ve hardly changed any staff since I got here in 2005, and I think it’s because this is just a really good place to be. We all really pulled together when we lost Jyro. I think that’s what saved us--the people here, and our customers’ faith.”
Attila insists that that faith--the passionate support of the NZ Aerosports fan base--is the phenomenon that really drives the machine.
“I think that people respond to the fact that we are always trying new stuff; that we’re always improving,” he says. “That’s the part that’s interesting for us. We aren’t just developing new products. We actually want to make better products, and so we’re always searching for improvements on the designs. We have like 20 skydivers working here, so it is not just about driving revenue. I think that’s why people relate to it so strongly. This has always been more of a lifestyle than a business.”
If NZ Aerosports is indeed about lifestyle, Attila is great evidence that they’ve nailed the art.
“I think I found what I was trying to find in my personal life--a balance between family, the hobby and the business--in NZA,” he smiles. “I think that was always my goal, even if I didn’t know it at the time. Right now I feel that I’m in a really good place, and I’m ready for whatever comes next.”

By admin, in News,

When Right is Wrong

By Bryan Burke, Safety and Training Advisor
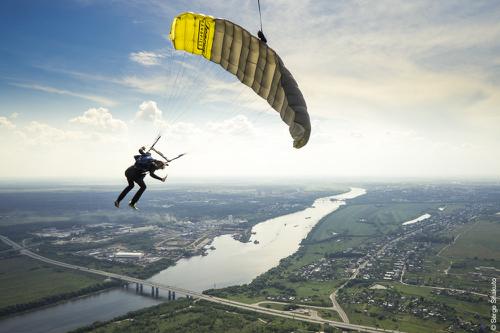
Image by Serge ShakutoIn March of 2017 I posted a review of a canopy collision that took place at Skydive Arizona on December 30, 2016. The post included two videos, one shot by a participant in the collision and one shot by an outside observer. The videos make it pretty clear what happened and I hoped they would spur discussion about traffic management. If you have not read the thread in the Incidents Forum and watched the videos it might be helpful to do so before reading on. Before going on, though, let me caution the readers about a few things. One, some of the comments to my post are stated in a way that suggests the commentator knew what was actually going on in the heads of the two who collided. We don't know, and this kind of baseless assertion seriously diminishes the usefulness of the Forum. Two, if you watch closely there was traffic to both right and left of the overtaking canopy. Lens distortion makes it hard to know just where it was in the final seconds before the collision, but it may have affected the decision making of the top canopy pilot. We could argue endlessly about whether or not the top pilot could have avoided the collision. The fact is that he did not come up with a solution to the problem fast enough to avoid it. Three, the landing area is tight even without heavy traffic. Nevertheless, this collision could have occurred anywhere because it essentially was caused by one parachute turning into the path of another, which is the ultimate cause of almost every canopy collision. Finally, Skydive Arizona does have a lot of guidelines because we have a lot of visitors from drop zones that apparently don't. Breaking the rules isn't a grounding offense in most situations. In this particular case I doubt if either collision participant was actively thinking about those guidelines. In all likelihood the bottom jumper let established habits override the guidelines, and the other was trying to deal with that.
I found it worrisome that several people staunchly defended the concept that "Low Canopy has Right of Way" overrides all other considerations under canopy. In this case the low canopy was almost entirely responsible for the collision and the event never would have occurred if that person had flown in a safe, predictable manner. I want to review the concept of Right of Way and challenge whether it is even a useful or safe idea to teach in skydiving when expressed as an absolute. If we are going to retain the concept we need to understand the origins and the exceptions.
Technically the term Right of Way has nothing to do with navigation by boat, car, parachute, or other conveyance. It is a legal term to describe access to property. For example, if my land is surrounded on all sides by someone else's land, I can be granted a legal Right of Way to my land. Similarly, if tradition allows the public to cross private land at a specific place, a Right of Way exists.
At some point the phrase was adopted to nautical traffic, although technically the proper phrasing is "give way" as "In situation X, vessel 1 gives way to vessel 2." But to be absolutely clear, the rules about who gives way in traffic have a lot of exceptions, all based on common sense. Ultimately they are intended to minimize confusion and de-conflict traffic problems, but they are not in any way absolute rules. Here are some examples:
A powered vessel gives way to a sailing vessel. Unless the powered vessel is actively fishing, or needs a deep channel that the sailboat does not. And any sailor with an iota of experience and common sense knows that sailing a yacht in front of a massive container ship is a sure way to be run down, regardless of your unpowered status.
Between two sailboats, the default rule is that a vessel on a port tack gives way to one on a starboard tack. For those who aren't sailors, that means if the wind is coming over your left side, you give way to a boat that has the wind coming over its right side. In fact this is probably where the phrase "right of way" comes from because the boat on the starboard tack is to the right of a line drawn back to front through the boat on the port tack, and vice versa. Eventually this was applied to cars: if two cars were approaching a crossroads, the one to the right had ‘right of way.’

Obviously this didn't work very well with cars, or we would not need four-way stop signs or roundabouts. But for the purposes of this discussion, we're much more like sailboats than we are like cars or powerboats.
To further confuse things, if we go back to sailing there are many more exceptions to the rule. A windward vessel gives way to leeward. Shallow draft gives way to deep draft in a narrow channel. An overtaking vessel gives way to the slower vessel, ideally passing to the rear if they are on different courses. But most importantly for applying these guidelines to skydiving, the vessel being overtaken is obliged to maintain course and speed, or if it must maneuver, clearly signal its intention!
Parallels in skydiving would be that a canopy over open area should give way to one over obstacles, higher to lower, and so on. But regardless of the guidelines, it is understood that the root rule is all flight in the landing pattern must be predictable! Without predictable flight no set of guidelines or rules can prevent collisions. This collision came down to that: an unnecessary and unpredictable turn into the path of an overtaking canopy.
Let's also get over the idea that all parachutes are similar in handling characteristics and therefore a blanket rule can keep them safely separated. For example, USPA asks Group Member Drop Zones to separate "high performance" landings from - presumably - ordinary landings. What does that mean? A Valkyrie at 2.4 on a straight approach is going as fast as a Sabre 2 at 1.2 coming out of a 180. It's too much to ask skydivers to sort themselves by canopy type, wing loading, and flying style other than by a general designation of high performance landing areas. In Skydive Arizona's case, we limit one landing area to turns of 90 or less, and nowhere do we allow turns over 180. (Except when the jumper exits on a pass dedicated to HP landing.) However, we do ask that people refrain from S turns or flying at an angle across the final approach. This is something we should expect of everyone, and if everyone does it, there should be minimal problems with a fast parachute finding a clear lane next to a slow parachute. In the collision in question, the low parachute failed in the most basic of navigation duties: maintain course and speed and make your intentions clear.
This is a cultural issue. Older skydivers or those taught by older skydivers may have been taught that right-of-way is absolute, taught without the essential caveat “maintain course and speed, make intentions clear.” It may also involve drop zone culture; wide open DZs without much traffic seem to neglect canopy control skills and DZs where people don't travel much may spend little time teaching their jumpers what to look out for when they visit a big DZ. We used to teach people to fly in deep brakes and perform S turns to fine tune their landing point. Now we know this is dangerous in traffic and we don't teach it any more.
There is no reason a big seven cell can't safely land in the same area as a tiny, ultra-high performance canopy, but not when using obsolete rules of the road. The low person does not have the right to turn into the path of an overtaking canopy, period. Finally, low or high, never assume you know where all the traffic is. The assumption you should make is that there is overtaking traffic above and behind, in your blind spot, and you must fly predictably to minimize the chances of them colliding with you.

By bryanburke, in General,

4 Reasons You Need to Escape Wintertime and Jump in South Africa

Exit at Mother City Skydiving. Image by Christopher Teague If the long flight puts you off--or if you’re new to the whole African-continent thing--let me be the first to tell you to get over it and get down here. You’ll be so glad you did. When the skydiving season is literally cooling off in the northern hemisphere, the southern hemisphere is just heating up. And it gets good.
While December-friendly dropzones in the States tend to be one-trick ponies (I’m looking at you, middle-of-the-desert DZs), their South African counterparts offer more than drafty hangars and lukewarm swimming pools for your landside entertainment. Much, much more. In fact, this author insists that every skydiver in the Northern Hemisphere should get a gear bag together and abandon bad weather for points south. (Spoiler: Sure, it’s about the jumping--but it’s about so much more than the jumping. When it comes to adventures, Africa never disappoints.)
Reason #1: Trip-of-a-lifetime ways to get your boogie on.
December is smack-dab in the middle of the summer boogie season in South Africa, so skydivers have even more incentive to book the trip. Skydive Mossel Bay, for instance, is planning some seriously sweet turbine-fueled freefly shenanigans for December 16-31. You can expect gold-medal coaching, all the organized jumps your fluttery little heart desires, a flurry of exotic aircraft, landing after landing on the bay’s powdered-sugar beach and a South-African-style party you’ll be talking about for years (if you register in time). If that’s not enough, point your navel at the ground and make some shapes at the belly-themed JBay Boogie, where you’ll jump with a view of the world-famous righthand pointbreak that is Jeffrey’s Bay. (Pro tip: Book both boogies and bring all your swimwear.)

View of the Cape Town area, with Table Mountain, as seen from Signal Hill. Image by Bryn De Kocks If you end up in-country in November instead, don’t despair: There’s the Tonto Boogie up in Johannesburg from November 25-27. Sure, there’s no jaw-dropping ocean view--but there are plenty of planes, plenty of organizers, plenty of new friends and plenty of good vibes to make up the difference, and the “braai” (bar-b-que) is legendary AF.
Reason #2: (You guessed it.) Animals.
Want to wake up on the right side of the bed for a long day of jumping? Try taking a private open-air shower while listening to lions make big-kitty noises on the ridges nearby. That’s totally possible at Skydive Mossel Bay, which is just down the road from five-star safari digs at Botlierskop Private Game Reserve. If you feel like taking a coastal drive to explore around Mossel, do it with a purpose: You’re just a couple of hours from canoodling with pachyderms at the Knysna Elephant Park.

African Penguins along the Western Cape coast. If you end up heading inland to do some jumping at Skydive Robertson, take a day to explore the “kloofing” (hiking) around McGregor village, where several beautiful conservation areas provide many miles of baboon-dodging along your route between the various waterfalls and bushman’s caves. And if you’re kicking around Mother City, take a long afternoon to swim with the penguins, go dassie-spotting on Table Mountain or stroll around Kirstenbosch National Botanical Gardens. (Insider tip: Don’t miss the summer concert series.)
Reason #3: Chain restaurants and sorry Mexican food? Nopey nopey nope.
The exchange rate is currently favorable enough to turn your dropzone food strategy into a downright white-tablecloth affair, so don’t miss the opportunity. Skydive Mossel Bay sits right next to some of the best beachside braai spots in the country, as well as a couple of standout oyster bars and several coffee shops that are well worth a visit. Skydive Robertson’s choice spot in the Robertson Wine Valley puts a posh spin on the green light, offering up dozens of tasting rooms for your boozy perusal. Then, of course, there’s Mother City Skydiving--which is less than an hour from what is (in this author’s opinion as well as the Telegraph’s) the world’s best city, replete with gastronomic stunners, artisanal cocktails served in suitably slinky venues and pop-up supper clubs.
Reason #4: You’ve always wanted to.
You’ve wanted to see Africa for yourself since you first saw ‘The Lion King.’ (C’mon. You know damn well that’s true.) And now, as a mostly-grown-up skydiver, you have the perfect excuse to finally go: Staying current. There’s a nice bonus, too, for the moment: With the exchange rate being what it is, your USD--or GBP, if that’s your thing--are going to go surprisingly far towards those bucket-list African adventures. (Y’know: shark diving; cheetah snuggling; dancing around with the kids in an actual-factual village.)
...So it’s settled then. I’ll see you in December up in the big, blue African sky.
Right?
Right.

By admin, in News,