Submit Article

Skydiving News and Articles

Select A Category

Pick a Category

Skydiver's Anonymous

For the average weekend-warrior, skydiving is the great escape. The end of each dreary workweek is met with excitement and anticipation. Time to skydive! This is our chance to be with friends who share our passion, and escape the mundane, while we embrace life on our own terms. But with every wild weekend at the dz come the frustrations of another Monday morning…back to “reality”.
And as the weekend highs become increasingly potent, so, too, do the lows of the following week back in the “real world”. This is a problem. Or at least is has been for me.
Skydiving is so much more than the physical act of each jump. It’s exciting, challenging, rewarding, and – at times – incredibly fulfilling. It also brings a sense of community, place, and purpose to the lives of many of us. The bonds created at the dz are strong, and the times spent together with friends in the mutual pursuit of pleasure can be as rich and vital as nearly any other human experience. This is why we jump.

But not everyone has something equally rewarding or exciting waiting for them at home. In fact, many of the dedicated skydivers I’ve known sacrifice a substantial amount of their time, energy, and resources in support of those two sacred days each week that they get to spend doing what they love. In many ways, it’s like a drug.
The comparisons are obvious:

It’s expensive
It’s exciting and intoxicating
It’s quite addictive
It leaves you in withdrawal when you’re unable to jump
It’s not always socially acceptable (sometimes even forbidden by friends / loved ones)
It can eventually have negative effects on other parts of your life (relationships, finances, etc.)
It can consume your mind and thoughts even when you’re not jumping
It can begin to rule your life, as you reshape your time, energy and resources to better support your habit
What, then, becomes of our prior reality? It’s hard to replicate the floods of dopamine and surges of endorphins unleashed over the course of a weekend in the sky. And as you progress in skydiving towards more demanding disciplines that require greater focus and dedication, all else can become comparatively dull and uninspired.
But there are no support groups for us crazy few. No meetings to attend with mantras to repeat aloud in sober solidarity. We’re left to our own devices – bored and daydreaming about our next fix. This duality doesn’t sit well. At least not with me. I’ve had a very difficult time adjusting to a life split between two utterly separate and diametrically opposed worlds – one of hedonism and excitement, and the other of drudgery and toil.


For me, these two paths could no longer be bridged. I’ve had to choose. And I’ve always been a much more talented hedonist than I have a cubicle-rat, so my choice was fairly clear. Granted, not everyone is in a position to completely cutaway. Some of you have spouses, kids, mortgages, magazine subscriptions, softball practices, and various other entanglements with which to contend.
These types of responsibility have always terrified me. But I’m very interested in hearing from you! How is it that you, the reader, who I presume lives to some extent in both of these worlds at once, is able to reconcile them? What sacrifices must you make? How do you divide your time between the sky (the friends, the bonfires and other sanctioned mayhem) and the so-called “real world”? Perhaps there’s something I’ve missed in my pursuit of balance. And I’d love to hear what that might be. Your thoughts and personal insights are welcomed and invited below!

By admin, in General,

World Championships in Freestyle Swooping Coming This August

FAI Swoop Freestyle World Championships 2017 will be the first ever World Championships in the urban parachuting discipline, freestyle swooping, and it will take place in the heart of Denmark's capital, Copenhagen, August 25 and 26 2017 - making this the premiere of a whole new urban world championship settings: Taking world class air sport to the people in the middle of great cities.
18 of the best canopy piloting athletes in the world will battle it out for the first ever world championship title in the freestyle discipline over two phenomenal days of high octane parachuting athleticism in the centre of Copenhagen. Over 100.000 spectators will be watching the event live with millions watching online and behind the screens worldwide.
The event format is the idea of two Danish entrepreneurs and in only three years, the event has grown massively and has revolutionised the sport.

Swooping is the new darling of parachuting and the freestyle discipline is the most spectator friendly and adrenaline seeking within human flight.The high-impact, adrenalin-fuelled discipline of Freestyle Canopy Piloting is known as Swooping, and involves parachutists flying at high-speed across a ‘Swooping Pond’ to score points based on style and execution.
Canopy pilots jump out of a plane or helicopter in 1,500 m/5,000 feet altitude, release the canopy straight away and start to navigate towards the surface immediately. To gain great speed, they make a series of turns before reaching ground level, and right before they make contact with the surface, they straighten out and with speeds up to 150 km/90 miles per hour, they do their freestyle trick on the water surface before landing on a platform on the water right in front of the spectators.
From local pilot project to official world championships
With the world championship stamp from the The World Air Sports Federation, FAI, the Danish organizers have gone from an idea and a pilot project to an official world championship in only three years.
"In the space of three years we have gone from an idea and pilot project with 10,000 spectators to an internationally recognised platform with hundreds of thousands now following live and behind screens across the globe. We have taken the sport on a journey, with the athletes now seeing themselves in a professional light and professional settings in the heart of major cities whereas they before were used to competing in small airports without spectators or media coverage. We have managed to bring the environment and talent together in a major project within the city and now with official recognition and the World Championship we are a step closer to realising our dream of a World Series," George Blythe, CEO of A. Sports, the organisers of the FAI Swoop Freestyle World Championships says.
International federation: We could not have a better venue than Copenhagen
"Freestyle Swooping really is one of the most exciting and dynamic air sports to watch. So it is very exciting, and my genuine pleasure, to welcome the athletes to the very first FAI Swoop Freestyle World Championships in Copenhagen. There couldn’t be a better venue than in the heart of this great city. It really is unique, and will help bring this rapidly growing sport to thousands of spectators both in the city and through the media. I would like to wish all the competitors, organisers, and volunteers a fun, safe and fair competition. I am looking forward to following this amazing event," FAI President Frits Brink said.
"The FAI Swoop Freestyle World Championships adds another dimension to our work with sporting events. Here we are talking about an event that has been developed in Denmark and now has been appointed official world championships. That fact is a cadeau to the organisers and the partners behind," says Lars Lundov, CEO, Sport Event Denmark which partners the event.
FACTS:
FAI Swoop Freestyle World Championships 2017
Training and Swoop Night Lights Friday August 25, Qualifying and Finals Saturday August 26 2017.
Location: Peblinge Lake, Queen Louise's Bridge, central Copenhagen.
18 parachute pilots from 12 countries.
It's the first swoop freestyle world championships ever in freestyle swooping (canopy piloting).

Website
Facebook page
Instagram
Facebook event

By admin, in News,

Indoors Outdoors - Translating Between The Tunnel & The Sky (Part 4)

Part Four: Belly Flying


It is probably important clarify exactly what we are talking about when referring to belly positions. Not to be confused with ‘Relative Work’ or ’Formation Skydiving’ or whatever saucy nomenclature is used in your part of the world for gathering up your bootie friends and doing as many doughnuts and thingys as you can - within the sphere of freefly training ‘belly’ means the various forms in which the side of your body with your belly on it is presented towards the wind.
An important part of evolving into a wise and learned freefly type is the difference between merely teasing belly flyers for being lame and actually meaning it. Serious flat flying is very technical and contained within it are many of the concepts it is crucial to understand to fly competently in other orientations - such as developing spacial awareness, using multiple surfaces of your body at the same time to control both place and position, and the processes of planning and executing bigger, more complex skydives.
The better you are at one element of flying the easier the others are to learn.
Freefly is about mastering movement across all three axis, any way up and at any angle, and learning to fly with the wind hitting the front parts of your body is not only as important as any and all of the other parts - it is available right from the start. There are a couple of very good reasons why good belly basics are not something to dismiss or overlook. Firstly, the circumstances you are training under (indoors or from aircraft) require you to achieve some kind of basic proficiency anyway - so why not use the opportunity to cram as much of it into your brain as possible? Secondly - down the road when you are ready to attempt some of the more advanced tricks and transitions, understanding more advanced methods of how to fly on your belly will help a great deal.
How Does Belly Carving Work?
The general rules about learning to carve in (or from) a belly position are the same as doing so on your back. The mechanics of carving do not change wether you are head up or head down, facing inwards or outwards, and if flying on high speeds or low speeds:

The combination of a drive and a turn creates a carve.
When carving, the input with your body required to generate the turn part of the equation is small. Controlling everything else is the same - the surfaces you apply to the wind to alter your speed both horizontally and vertically remain constant, so when you are learning to carve in the tunnel you are training the same movements and positions that you use for tracking and angle jumps. You start flat and work up through to higher speeds and steeper angles - which is directly reflected by the skydives you perform as you build your confidence with tracking jumps.
Orientation and Awareness
It cannot be overstated how important spacial awareness is. As you work through the various stages in a training programme there are drills in which you are re-programming your muscle memory to do the exact opposite of what it has normally done every time in your life up to this point. Up is down, left is right, forwards is backwards. It takes time and is frequently frustrating, so anywhere you can find the opportunity to gain a head start is valuable. The same drill we discussed in the last chapter - where you can fly in a flat orientation (on your back) and switch (as far as your brain is concerned) between a head up and a head down position simply by moving your head is also applicable when on your belly. The opposite version of the same procedure has a comparable outcome and similar advantages:

Helping you to fly an outface carve in the tube without losing control or getting dizzy.
Setting you up for learning to fly head down positions and then perform transitions between head up and head down without being bamboozled by it.
Progressing your angle skydives into steeper and steeper positions while maintaining safety and awareness.

  As we touched upon in the previous chapters, as you push through the training stages the symbiosis not only between each orientation of flight but that of the indoor and outdoor environments becomes more and more apparent. Knowing some details of how things all work together with each other hopefully de-mystifies the process somewhat and puts you on the good foot from the start. Getting to where your ambitions lie is a long road and the key to a more rewarding and fulfilling time with it is to recognise each step of the way as being of equal value. Every small push forwards is an important victory and an essential part of the bigger picture.
 

Know Your Gear: Harness and Container Systems Part 1

Know your gear series: Harness, fitting to your body and effects to consider.
by Damian Alvarez
The harness is a fundamental piece of your skydiving gear. As such, you know it like the back of your hand, right? Maybe the answer is "well, not really". Many experience jumpers will answer that. Most novice jumpers looking for their first rig also often neglect the importance of a harness that fits them. Coming from "one size fits nobody" student gear, they don't even know how a harness should fit them. This might change once they order their first custom harness/container system, if they ever do. If you want to know your gear a bit better, or if you want to inform yourself a bit better about what you should look for when buying a harness/container, either new or second hand, then this article is for you.
What is a Skydiving Harness?
The harness is the part of your harness/container system that is designed to keep your body attached to your canopies. In today's sport skydiving gear, the harness and container are 2 different but inseparable pieces. It wasn't always like that. In the 60s and early 70s harnesses and containers were interchangeable. That allowed to quickly swap components as needed. While this might seem like a good idea at first, these systems had their own set of problems. They were heavy due to the additional hardware needed, and error prone, as they had more room for assembling errors. In the 70s manufacturers started to integrate both into a single harness/container system, hiding part of the harness in the backpad of the container. This concept stays with us almost 50 years later.
Even though the harness and container are today a single unit, it is important to know that the container is built around canopy sizes, and the harness is built around body dimensions. A byproduct of these two pieces of gear being inseparable, is that rookies typically focus on a single thing: the range of canopies they can fit in the container. That is not an issue when they are buying a custom harness/container (as long as the body measurements provided to the manufacturer are accurate), but novice jumpers start their skydiving career typically by buying used gear. Take a look at your DZ next time you are there, and pay close attention to how different harnesses fit their owners. I bet you'll find a few ill-fitting harnesses among new jumpers. Later on we'll see why this is important. But first, we have to know a bit more about the harness itself.
Basic Harness Components and Construction
Before getting into the details of harness construction, it makes sense to take a look at the webbing and tape types used for it. Distinguishing webbing and tape is not obvious. Generally it is considered webbing anything wider than 1" and with a tensile strength higher than 1000 lbs, and tape anything less than any of these 2 parameters. The table summarizes the most common webbing and tape types in harness construction. The pictures below show how they look like and how to distinguish them.
Common webbings and tapes used in harnesses. Kind    Type Tensile strength Width Common use Webbing    Type 7  6000 lbs (2721 kg) 1 23/32" (4.3 cm)  MLW, laterals and risers    Type 8  4000 lbs (1814 kg) 1 23/32" (4.3 cm)  Risers and straps    Type 12  1200 lbs (544 kg) 1 23/32" (4.3 cm)  Reinforcement around rings    Type 13   7000 lbs (3175 kg) 1 23/32" (4.3 cm)  MLW and straps    Type 17  2500 lbs (1134 kg) 1" (2.5 cm)  Chest straps, main risers    3" Type 4  1800 lbs (816 kg) 3" (7.6 cm)    Confluence wraps Tape    Type 4-B  1000 lbs (453 kg) 1" (2.5 cm)   Reinforcement around rings and confluence wraps

Type 7 webbing. Has yellow lines at the edge. Photo: Bally Ribbon Mills

Type 8 webbing. Has a black centerline. Photo: Bally Ribbon Mills

Type 12 webbing. Has red lines at the edge. Photo: Bally Ribbon Mills

Type 13 webbing. Has black lines at the edge. Photo: Bally Ribbon Mills

Type 17 webbing. Photo: Bally Ribbon Mills

3" Type 4 webbing (Spec. PIA-W-4088). Do not confuse with Type 4 tape. Some authors consider this as tape, not webbing, due to the low tensile strength it has (relative to its width). Photo: Bally Ribbon Mills

Type 4-B tape (Spec. PIA-T-5038). Do not confuse with 3" Type 4 webbing. Photo: Bally Ribbon Mills
Now, you can try and take a look at your harness. Can you identify the different types of webbing and tapes used on it? If you do take a look, you'll also notice that in most parts of the harness you have actually two layers of webbing instead of one. There are two reasons for it: to make a stronger harness, and to prevent slippage.

Harness diagram with its main components.
Now that we know what are the materials used, we can get into the different parts on a harness. Any sport skydiving harness has the following components:
Detachable main risers:
These are the risers that you are most familiar with. They are attached to the rest of the harness via the 3-rings system, and they depart with the canopy when you cut away. They are also some of the parts of the harness that see the most wear. The most common type are the "mini-risers" with "mini-rings". These are made of Type 17 webbing. During the transition period where this style of risers became popular, there were occurrences of riser breakage close to the grommet used for the 3-ring system. This was particularly dangerous with RSL equipped rigs, as if the riser broke below the RSL attachment ring (while the opposite riser stayed attached), your reserve could fire into a trailing main, and you'd be set for a bad day. The Collins lanyard, the double-sided RSL system, or the LOR system try to prevent that from happening, by either releasing the other riser, or by keeping the reserve pilot chute in the container until both risers leave. Regardless of these solutions, to diminish the chances of mini-riser breakage, most manufacturer reinforced their mini-risers with a piece of Type 4 tape sewed between the front and back risers at the grommet area. Parachutes de France opted for an alternative solution, reversed risers, that avoid the grommet piercing the webbing altogether. With these changes, the number of risers breaking was reduced drastically, and is today almost unheard of.
If you are a student, you are probably more familiar with the "normal" risers, ie: the ones with Type 8 webbing and full size rings. These risers are stronger than mini-risers, and the leverage provided by their bigger rings allow to cutaway with less force. They are however bulkier and have more drag in flight, and have fallen out of fashion among most sport skydivers.
Non-detachable reserve risers:
These are the risers that you will get to know one day during a cutaway, if you haven't done so already. They are an integral part of the harness. In many harnesses they are part of the same webbing of your MLW, instead of a separated piece of webbing sewed to it. They are normally Type 7, even though other materials are possible.
Main lift web (MLW):
The main lift web, typically shortened to MLW, is the piece of webbing that holds the whole harness together. It takes all the load from opening and during flight, all the way from the risers (either main or reserve) to the leg straps, where you are hanging/seating. Due to that, it is typically the strongest part of the harness, made of Type 7, 8 or 13. Even though this is the strongest part of the harness, it doesn't necessarily mean that other parts are significantly weaker. It can be further divided in upper MLW and lower MLW. Conceptually, you can think about the lower MLW as the part that goes from the chest rings (or chest strap junction) to the hip rings, where your handle pockets are sewed. The upper MLW is the part that goes from the chest rings (or chest strap junction) to the upper part of the junction between MLW, reserve risers, and diagonal back straps. The length of the MLW is normally fixed, except in some student or tandem gear. In these cases the length can be adjusted to accommodate the sizes of different users.
Chest strap:
The chest strap is one of the 3 straps you have to fasten to adjust your harness. It secures your torso in place, and keeps it in the space formed by the chest strap, the MLW, and the back straps. It is not designed to take a huge load, since most of it is transferred from the risers to the leg straps by the MLW. The webbing used has typically a lower tensile strength. It is normally either Type 8 or Type 17. The hardware to fasten the chest strap has been also certified with lower loads than leg straps hardware (500 lbs. vs 2500 lbs.).
There are jumpers today "abusing" their chest straps, by putting a load on them that they weren't designed for. Think of hybrids or Mr. Bills. Harnesses are typically "overbuilt", so they are unlikely to fail due to these practices, particularly with hybrids, due to the limited stress induced in the seams, webbing and hardware (for a 2 belly flier + 1 freeflyer hybrid, just 100—150 lbs. hang from each chest strap). However, on Mr. Bills, the load can be significantly higher. A careful jumper should try to hang on the upper MLW on a Mr. Bill, instead of the chest strap.
Leg straps:
The leg straps are the remaining 2 adjusting points of your harness, besides the chest strap. They are attached to the hip rings or sewed directly to the MLW. In some older designs without rings, they could also be part of the same piece of webbing of the MLW. They need to be strong, but sometimes they aren't as sturdy as the MLW. They can be Type 7, 8 or 13.
Freefly bungee:
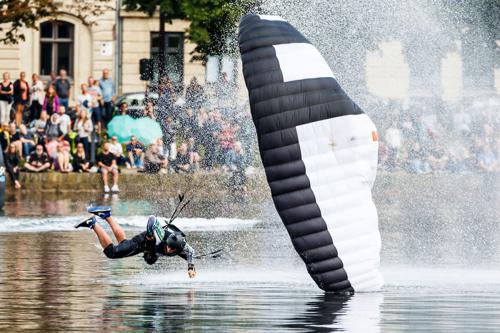
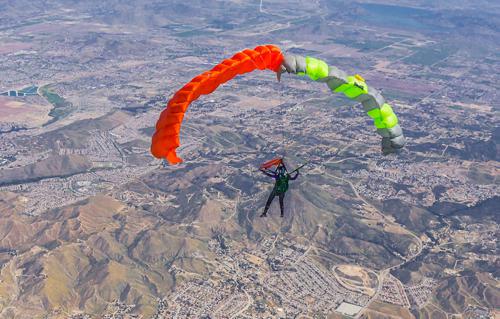
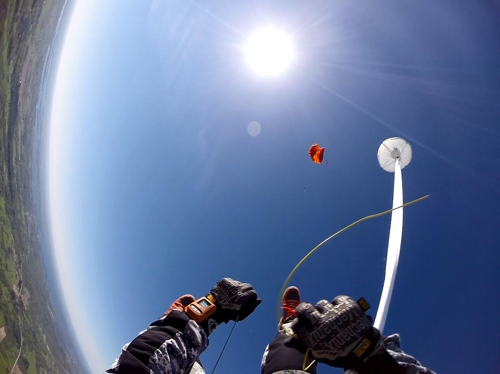
The elastic cord that attaches both leg straps isn't necessarily a part of the harness. However, it has a small but very important function. It prevents the leg straps from slipping up your leg towards your knee. The largest "hole" in your harness is right there, between your laterals and your leg straps, waiting to mess up your day when you have a premature opening while sit flying. Tandem harnesses have a "Y" strap that has essentially the same function. If you don't want to find yourself in a difficult situation like the granny on the video, use this simple addition to your harness. If you still think that this can't happen in a sport harness, well, take a look at the remaining 2 videos and think again.
 
 
Laterals:
The laterals are some of the most commonly overlooked parts of the harness. They are relatively small and out of sight, so people tend to forget about them. They are the parts that join the MLW (or the hip rings, depending on the harness design) with the bottom end of the diagonal back straps. This last junction is hidden inside the backpad of the container. They also form an horizontal back strap, which I am considering here as part of the laterals itself, even though strictly speaking, it is not. They are normally made of Type 8 webbing, but Type 7 or 13 are also possible. Their only function is keeping your rig close to your back. It is a simple but important function, and we'll come back to it in part 3 of this series of articles.
Diagonal back straps:
If laterals are overlooked, it is safe to say that the diagonal back straps are completely ignored. They sit below your reserve risers and typically wrapped in fabric, and they are completely out of sight from that point on and all of the way to where they meet the horizontal back strap AKA (in this article at least) laterals. Even with the reserve tray completely open, they are out of sight, trapped between the backpad and the bottom fabric of the reserve tray. Like laterals, they can be made of Type 8, 7 or 13. Their function is holding your torso in place and keeping the whole harness together. Without them, the container would support a higher stress, which would wear it and break rather sooner than later. There are multiple configurations possible for them. They can have an "X" arrangement, where the left shoulder straps crosses the back and joins the lateral at the right side, and vice versa. They can also have a "V" arrangement, where the webbing goes down from one shoulder, wraps the horizontal back strap, and goes up again until it reaches the opposite shoulder. Other arrangements are also possible —like "U" for instance, but manufacturers don't discuss these details openly and knowing what is really used would require tearing open the containers.
Hardware:
The hardware binds together 2 or more pieces of webbing, either permanently or temporarily. Taking a look at the hardware used in harnesses, you can see 3 different types from the functional point of view:
Fastening hardware:
These are the quick fit adapters found in chest straps and leg straps. For the leg strap adapters there are 3 common types: thread-thru, thread-thru with locking bar, and flip-flop, shown in the pictures. All of them are rated for 2500 lbs. The chest strap has a lightweight thread-thru quick fit adapter, rated for 500 lbs, independently of the width of the chest strap.

Thread-thru leg strap adapter.


Thread-thru leg strap adapters with locking bars.


Flip-flop leg strap adapter.
3-Rings:
These are the 3 rings we are all familiar with. There are two variants: The original, rated for either 2500 lbs or 5000 lbs, depending on the particular model, and the mini version (RW-8), rated for 2500 lbs. The tandem variants are slightly different in the large ring to allow to connect the student harness, and are always rated for 5000 lbs.
Hip and chest rings:
These rings are optional and normally use the same type of ring found in the large ring used in the 3 rings system. In some cases the ring is completely flat, as opposed to the large ring in the 3 rings system, which are bent at the point where they are connected with the MLW. Some rigs have a completely round hip ring, instead of using the large ring from the 3 rings system.
Junctions:
Obviously all the different pieces of webbing have to join somehow. These junctions can be of 4 types:
Rings:
In a ring junction, the webbing goes around the ring folded on itself —typically with a reinforcement tape in between the ring and the webbing—, and is locked in place with a stitching that follows a given pattern. It is important to note that the pattern is not arbitrary. Its shape, thread and number of stitches per inch determine the strength of the junction.

Hip ring with Type 8 and Type 4 as reinforcement at the leg straps. Note how the ring is completely flat.
Stitching points:
Normal stitched joints are simply that, points were 2 or more pieces of webbing are sewed together with a particular pattern.

Chest strap junction with Type 8 and Type 7 webbings.

Hip webbing sandwich with Type 7, Type 8 and Type 12 webbings.


3 rings junction where you can see most of the webbing types used in modern harnesses. Note how the large ring is bent at the webbing loop, instead of being flat.


Layers in a confluence wrap below the 3 rings system.
Confluence wraps:
Confluence wraps are similar to the previous type, but there a piece of reinforcement tape wraps the junction to make it stronger. These reinforcement tapes are particularly important in high stress areas, like where the 3 rings, the reserve risers, and the MLW meet. One thing to consider when two pieces of webbing are sewed together, is that the strength required to break that junction is way lower when "peeling" than when "shearing". A manufacturer can in most cases design its joints to prevent situations where peeling forces are applied. However, depending on the harness design, these situations might occur. Confluence wraps are added to strengthen joints that are at risk. A couple of years ago, some BASE rig manufacturers had to modify the construction of their harnesses because of this. If you want to know more I suggest you take a look at this excellent article.
The confluence wrap that stitches together the MLW, reserve risers, main risers and diagonal back straps is normally hidden in the mud flap. But some manufacturers —not all— have another confluence wrap that you have seen a thousand times but probably didn't pay attention to it: the wrap that traps the 3 rings locking loop in the main risers.
Adjustable hardware:
Here 2 pieces of webbing are locked in place together with a fastener. As we saw before, they are normally located in the chest strap and leg straps, but there are other possible points, like in student harnesses or belly bands.
End of Part 1
Hopefully by now you feel a bit more confident about the construction of your harness. This is important knowledge to better understand part 2, where we will take a look at the different articulations and other options possible in modern harnesses. Part 3 will focus on the proper fitting of the harness, and how a bad fitting can affect our performance or safety in the air. Stay tuned for more!

By admin, in Gear,

Why You're Normally Deviant (And Why You Shouldn't Be)

“This particular aircraft doesn’t have seatbelts, but we only have it for this one boogie--and we’ve never had a forced landing, anyway.”
“There’s no AAD in this rig, but I’m only going to jump it this once while my regular rig is being repacked. It’s just so I don’t miss the record attempt. I’ll be back on my regular rig on the next load.”
“We always jump in cloud here. Otherwise we’d never get to jump! The pilot has GPS, anyway, obviously, and he’s never been wrong.”
The final sentence--which always follows, right?--is the kicker:
“I’m sure it will be fine.”
Are you? Really?
USPA Director of Safety and Training Jim Crouch introduced a really important concept in April’s Parachutist (‘Safety Check’; April 2017). In it, he brings up The Challenger Launch Decision, written by sociologist Diane Vaughan. Vaughn very usefully summarized the kernel of this human tendency. She even coined a term for it: the “normalization of deviance.” Normalization of deviance comes up pretty much everywhere in life (foregoing your helmet just to bike down to the neighborhood park; speeding; not bothering with the condom). High-variable, high-pressure, high-safety-requisite circumstances breed the normalization of deviance like bunnies at a bunny swinger’s convention.
For some insight into how the normalization of deviance affects you in your airsports career, let NASA Astronaut Mike Mullane bend your ear. Mullane was a fighter pilot in 1978, when he was selected as a Mission Specialist in the first group of Space Shuttle Astronauts. He chalked up three space missions (aboard the Shuttles Discovery and Atlantis), spending more than 350 hours in the void. And, solely in the years after he celebrated his 60th birthday, Mullane summited Mt. Kilimanjaro, Mt. Rainier and 35 of Colorado’s 14,000+ers. You can safely assume that Col. Ret. Mullane is an expert in managing his own risk envelope and that of those around him--and, yet, even he is still influenced by the normalization of deviance. How ‘bout that.
Why is it so tough to fight immunity to unacceptable risk? Cause damn, it’s hard. It’s cultural; it’s about preserving a certain quality of relationship. It’s personal; it’s about preserving a certain self-image. Finally, it’s transactive; it’s about trading off a potentially good experience now for the chance to have more good experiences later, in the absence of much data at ****all.
“The natural human tendency,” Mullane notes, “Particularly in pressured circumstances, to want to take a safety shortcut. [You say,] ‘I’ve done a [jump] like this a thousand times in the past, and nothing bad has ever happened. I can certainly do it this one time [...] and nothing bad is going to happen. [...] The absence of something bad happening when I took this safety shortcut means that it’s safe to do so again.’”
There will always be a next time. And you’re going to be mightily tempted to do it again. When you do it--whatever ‘it is--enough times, the shortcut becomes the norm. The loop is reinforced. In Mullane’s words, “The deviance is now invisible to you.”
And when invisible deviance leaves a very visible mess? Well, Diane Vaughn coined another term in her book for that eventuality: a “predictable surprise.” Those involved in the Challenger debacle readily admit that the explosion (and the resulting deaths) constituted a predictable surprise. So does a catastrophic wingsuit collision in the absence of one jumper’s AAD. So does a plane full of broken jumpers after a forced seatbeltless landing (of which--make no mistake--there are very many). So does a double tandem fatality at a dropzone with an it’ll-be-fine attitude towards instructor training.
Image by Brett Kistler The itchy issue we face as airsports athletes is that we’re not under pressure from the government, as Mullane and NASA were. We’re not under pressure from the market. The pressure you’re under on the dropzone is your own. If you think it’s a good idea to scratch, you can damn well go ahead and scratch. You can roll your eyes at anyone who gets after you for it--the manifest; your buddy; your team at the Nationals. Most of the time, though, you don’t. You stay on the load, and--probably significantly more than nine times out of ten--you build another nanolayer on your normalization-of-deviance callus.
The old triusm that familiarity breeds complacency makes a little more sense, no? That newbies are generally more risk-averse than intermediate-to-mid-career jumpers (a trend which tends to reverse as the jumper amasses significant empirical data)? That you’re more willing to do--well--gloriously stupid shit at a dropzone you know really well, as opposed to one you’re just visiting?
Take it from Richard Feynman, compared the practice of predictive reasoning to Russian Roulette: “The fact that the first shot got off safely is little comfort for the next. [...] Nature cannot be fooled.”
In real life, of course, it’s more uncertain than that. He was talking about binary predictive reasoning (with an either-A-or-B result). We’re not playing a binary game when we’re jumping and flying; we’re not playing Russian roulette. Honestly, we don’t even know how many bullets are in that gun. But we’d better remember that it is a gun, and it is loaded, somewhere in there--and the safety culture we’ve inherited is a desperate attempt to introduce proven failsafes in the face of our old nemesis, randomness.
Walking out to the pointy end is fun. Randomness is fun. Deviance is fun. That’s a big part of why we do this, right? That said: understanding why we make the decisions we make--and, perhaps, even learning to make better ones--can do much to extend a career.
For more, do yourself a solid and check out Vaughn’s The Challenger Launch Decision, which originally coined the phrase. It’s a riveting read--and I bet you’ll readily recognize the culture which worked to create the conditions for the tragedy.

By nettenette, in General,

Indoors Outdoors - Translating Between The Tunnel & The Sky (Part 3)

Part Three: Back Flying
Backflying, in the manner that you learn as the entry point into freefly training in the tunnel, is not something much done up in the sky. Back tracking yes, and transitioning through your back from one place or position to another also yes, but static backfly not so much. Nonetheless, it is a crucial skill for many reasons - not only as a safety position that you can control at any speed, but also to build your awareness and ability with more advanced techniques.
These days, people understand much better the importance of being able to backfly with confidence. From the perspective of coaches and instructors the resistance to students spending time learning this skill is more manageable than it was not such a long time ago. If you are feeling morbid and have substantial gap in you day, go dig up an old tunnel monkey and set them off about teaching backfly - then watch as their eyes bulge and the veins on their neck stick out.
Investing in you backfly skills now will save you a lot of time and money later.
The ways in which this orientation sets you up for strong progression are important and various. Not only is it your rescue position when practicing high speed drills in the tunnel, it is the jumping off point for understanding carving, how to build your back tracking and angle flying skills, and develop your awareness when switching between head up and head down.
How Does Back Carving Work?
Carving all works in the same way regardless of which way, which way up, or on which side you are approaching it:
The combination of a drive and a turn creates a carve.
If you just drive in a straight line with no turn then you fly straight into the wall. If you just turn and don’t drive at all then you spin on the spot. The balance between these two inputs dictates the size of the carve. Ok, so now jump back to just driving and not turning - when learning to carve hitting the wall is not your goal, but what if there is no wall to hit? The surfaces you use to control your speed and pitch are the same wether you are going around in a circle or in a straight line, so the muscle memory and technique you develop while learning to carve in the tunnel is immediately applicable to your angle jumps. Hooray!


Orientation and Awareness
So much of learning how to fly is teaching your brain and your body to do the opposite of what it is naturally programmed to do. Slow is fast, left is right, up is down. When practicing moves that are initially complicated and difficult, it can be very challenging to consider any other factors than simply getting to body position right. As your skills grow so does your ability to process more information - such as where you are, where anyone else is, where you have just come from and where you are going.
Awareness drills that you can practice early on help greatly toward overwriting your brain with the correct information about which inputs move you in which direction.
For example, transitioning from head up to head down while facing the same way switches the direction of you whole body - shoulders, head, eyes, brain - everything that was on your left side is now on your right side and vice versa. Without training your body to understand how this effects movement and swap things around accordingly, you will find yourself going the wrong way because it feels correct to go the wrong way.

Building your understanding of how, why and when to switch direction is a vital part of moving around safely and with purpose while freeflying.
So start now. When you are flying on your back looking down across your chest towards your feet you are in a head up position. When you are flying on your back with your chin up as far as it will go, your eyes pointing backwards and the top of you head down towards the net you are in a head down position. It does not matter that your body remains horizontal - for all intents and purposes you brain is learning the differences between the two. When you move on to higher wind speeds and and positions that are tougher on both your body and attention, having been aware of how this works from the start and including it in your training will help a lot with how fast you move on.
So, right from the start there are things you can do in the tunnel that will improve your skydiving. Learning to freefly properly is something that requires attention to detail and practicing backfly skills on low wind speeds in no way diminishes the rate at which you learn.


Indoors Outdoors - Translating Between The Tunnel & The Sky (Part 2)

Of all the basic orientations and body positions available, good old sitfly is the one that changes the most between indoor and outdoor flying. If you have done any head up training in a tunnel, your coach will very likely have been hitting you over the head from the very beginning about how you need to use your back more and your arms less. Learning to freefly is about understanding how each and every surface of your body can be presented to the wind in different ways that work together to create lift and drive. Your back is the biggest single surface that you have - and as such knowing how to use it properly and from early on not only makes flying head up easier on every other surface you use, it feeds into many, many other skills.
Head Up Is Cool
Just a mere handful of years ago it was much more common that sitfly abilities were seen as another frustrating speed bump on the way to ‘getting head down’ - and as with belly and backfly only the minimum possible understanding and skill development was needed (or tolerated) before you do the ‘proper flying’ that was cool and not lame. In no small part thanks to the macroscopic nature of modern tunnel training people now seem to mostly accept and understand that the path to improving as a flyer is one that embraces good foundational skills that cover all the orientations properly. The ways that programming your body via repetition to understand movement and build both confidence and awareness have such a strong symbiotic relationship that the better you are at one thing, the easier it is to learn another.

 
Even a well fitting harness might develop space that can hinder your movement  
Being diligent and thorough with something that is comparatively easy will make the harder thing easier and you will get it much quicker.
Also, some imaginative people did awesome, progressive things with their feet pointing at the ground and as a result we have learned that doing head up flying is as challenging, rewarding and fun as anything else. With bigway records and complex feetsdown angle flying becoming more and more regular - head up has never been more exciting.
What About My Parachute?
Herein lies the difference. Your container assembly is made from a really grippy material and from the ass-end is not so aerodynamic. Also, as often as not, when flying head up your body position will generate a little (or a big) space between your back and your rig, exposing more surfaces to the wind that you need to consider. The sum total of these factors is that your rig hampers your ability to use your back to get about the place, and the balance of how you move shifts over to the other surfaces you have available - your arms and legs. When learning to sitfly a good coach will explain and demonstrate exactly how all the surfaces of your body work together and how to safely manage the difference between indoor and outdoor movement. Once you have learned how to do it, using your back for movement in the tunnel is easy peasy. When you put on a parachute and try the same thing while skydiving you will feel like your rig is trying to anchor you on the spot and you must adapt how you fly accordingly.
Technical Difficulties
While the following is true of other positions, a good early example of how developing good technique between the tunnel and sky is with sit. The tunnel is an enclosed space in which you need to generate the correct amount of lift with your body to fly and remain in the right place - whereas In the sky there is no net to worry about so strength and diligence with your body position becomes less important to maintain a position.
There is stability in speed and it is easier on your body to fly fast.

 
Understanding how to use your limbs important  
So, in the sky things feel a little looser and jumps tend to fly a little faster. This is great when applying things you have learned in the tube, as once you remember to be subtle you will have it nailed to the wall - but it is important to be aware that the same adaptation in reverse means it is easy to develop sloppiness and wind up battling with inefficient and tiring technique when you go back inside. The way to avoid this is always consider your body position as part of your pre and post jump process. When running through the plan in your brain, picture yourself flying in a proud, efficient position and break down the movements you are aiming for into each surface you will bring to bear on the wind. Afterwards, include analysis of not only what you did, but of how you did it as part of your personal de-brief. if there is video of the jump go through it frame by frame and deconstruct exactly what is happening with your body and how the changes you make effect your movement.

Side by Side - A Two Out Story

April 1st is typically a day for trickery, but the only fool this year was me, and the only trickster was my main canopy!
I decided to make a last-minute trip to Skydive Perris with friends to make a balloon jump, but when it was winded out, the generous CReW Dawgs at Elsinore came up with all the gear my friend and I would need to make some beginner CReW jumps. The first jump on borrowed gear went great, but as we packed up my coach informed me the gear I was borrowing was a pull-out, and briefed me on how to use it. We planned a four-stack and lucked out with a camera jumper.
As we get out of the plane, I pulled weak and ended up with no canopy. I knew from previous coaching that it’s a bad idea to take a Lightning terminal, so I went straight to reserve. As the reserve came out, I was kicking myself that I wasn’t going to be able to participate in the CReW jump, and would have plenty of time to think about how I got into this mess as my teammates got to play. I decided to fly over and watch, and that’s when I noticed the pilot chute bouncing around on my back. “I should get rid of that,” I thought, and reached for my cutaway handle. I didn’t even have a grip on it before my main came out and settled gently next to my reserve.
Next thing I know, the camera flyer is in front of me, pointing and laughing. “What do I do?” I screamed, and he just laughed harder. “Well,” I thought, “if he’s not freaking out, why should I?”
So I didn’t freak out. Instead, I worked to get back to the dropzone. No easy task, as I’d soon find out. A west-blowing wind was sending me back over the Ortegas, and with twice the fabric over my head, I was struggling to get any forward movement at all. Unbeknownst to me, my coach flew under me, shouting at me to chop. I tried to force some separation between the two canopies to do just that, but I couldn’t trust myself to hold the reserve away from the main long enough to go for my cutaway handle. Because the two canopies were trimmed so similarly, they really wanted to fly together, although the particular configuration I was flying really wanted to fly south. Considering the town of Elsinore was south, I spent a whole lot of time and energy just keeping the pair flying straight.

Image by David Sands (D29444) Imagine pulling straight out of the plane under a large canopy, unable to do much besides try to keep your canopies flying straight and think about the sequence of events that got you here. Imagine looking down and going through your tree-landing procedure, and then multiplying that by two. Imagine trying to figure out how you’re going to steer the two canopies onto one of the small access roads on the mountains.
With 1,000 feet to spare, I made it to the field I was aiming for, just at the foot of the Ortegas. I tried the usual landing-out procedure, transposing my pattern onto the field, but my canopies kept wanting to steer to the right, into the small neighborhood next to the field. So instead I just aimed my canopies at a small patch of grass in the field, and hit it gently without flaring. My legs were shaking and I couldn’t stop laughing nervously. It took me three tries to daisy chain my lines, and one of the Elsinore staff members had come to pick me up before I even made it out of the field.
My coach, feeling responsible for me, landed in the mountains and called Elsinore to let them know what had happened. It took some time, but they found him, having landed without incident. Once I got back to the dropzone, I cracked a beer and waited for the shaking in my legs to go away.
Lessons Learned
The main takeaway from this is to know your gear. I was briefed very thoroughly by my coach on how to use a pull-out system, and practiced multiple times on the plane. Yet when it came time to pull, I didn’t fully extend my arm, and ended up with a pilot chute in tow. To me that was always one of the scariest malfunctions there are, because there are two schools of thought on how to handle it. One is to go straight to reserve, as I did, and one is to cutaway and go to reserve. In hindsight, I stand by my choice, because cutting away could have fired my main directly into my reserve.
The other scary thing about this particular malfunction was that it was a two-out that was flying stable. One school of thought is that you should cut away to avoid a downplane, and the other is that if you’re flying stable, you can pilot it to an open area, which is what I did. If I had downplaned, I could have cut away my main and flown my reserve down, but I wasn’t convinced I could keep the canopies apart long enough to get to my cutaway handle. The problem with this scenario is that, under different circumstances, a dust devil could have blown my canopies into a downplane close to the ground, and I might not have been able to chop my main at all.
One last thing I would change is that I would have taken my cell phone. If I had gotten hurt in the mountains without any way to access emergency care, things could have been a lot worse. I’ve since invested in a small prepaid phone to keep in my jumpsuit pocket.
In the end, I stand by my choices, and acknowledge that there was a lot of luck that kept me from disaster that day. I regret that my coach got stuck in the mountains, but I’m grateful that he was willing to look out for me. I faced the two malfunctions I feared the most on one jump and managed to walk away with a swollen ankle and a wounded sense of pride.
Will I still do CReW? Every chance I get! And I’d trust the riggers, CReW Dawgs, staff, and other jumpers at Elsinore any day.

By admin, in Safety,

The RSL and Skyhook Debate

Image by Mike Barta So…you just crushed an 8-way angle jump, stacked tight and flying fast. Damn that feels good. Or maybe it was a Sunday night sunset BFR with all the sky-fam that stuck around till the very end of another awesome weekend at the dropzone. Perfect! Or maybe you’re six jumps into a busy day, flying camera for tandems, and you’ve just finished break-off and are watching that giant tandem wing smack open as you sink away. Whichever it is, if what happens next involves a turbulent mess of canopy flapping and flailing above you, or spinning-you-up violently beneath it, its decision time…and fast.
But, if you’re anything like me, and find that in that moment your brain is still rapidly processing the various factors in play (as opposed to immediately switching into survival mode and initiating an instinctual, muscle-memory-based set of EPs), it’s possible that one of your first thoughts will be “is my RSL connected”? And, if so, “if I chop this, is my reserve headed directly into this bag of shit as it deploys”?
I’ve only personally dealt with this scenario twice. The most recent occurred under a rapidly spinning mal while wearing a (small-ish) wingsuit and flying what most would consider an inappropriate canopy for wingsuit skydiving (my bad, I know). And while my canopy choice may have been shameful, I’m not ashamed to say that this experience had my heart rate pounding…but not because of the malfunction. And not even because of the violent spinning and inevitable disorientation. I quickly realized that I hadn’t disconnected my RSL – which I typically do when flying my wingsuit – and was afraid that if I employed my standard emergency procedures my main and my reserve were about to get really friendly with one-another.
Luckily, that didn’t happen, and I lived to fly another day (under a much safer and more suitable wing I might add). However, since that experience, I’ve spent a lot of time thinking about and discussing the use of RSLs and Skyhooks with jumpers of all ages and disciplines, wherever I fly. And while there is no debate that both RSL and Skyhook technology save invaluable time and altitude in many malfunction situations – and there is ample data available to prove just that – their use remains a polarizing issue, with certain skydiving disciplines disproportionately biased for, or against, the use of these now-standard safety features.
If you don’t believe me (or perhaps had never given it much thought) take a look around the next time you’re at a big dz and take note of who’s using RSLs and who isn’t…and what type of flying it seems like they’re doing. You may be surprised at what you observe. Or, if you’re even braver, try bringing it up around the campfire or at the bar after a few post-jump beverages. Warning: be prepared for the shit-storm you may have just lit.
At any rate, to better present both sides of this debate, I asked a few friends to share their views and their own reasoning as to why they choose to use, or shun, RSLs and Skyhooks. What follows is a series of brief quotes and explanations from these conversations.
Justin Price – Justin is a PD Factory Team member, a Flight 1 instructor, and a world-class canopy pilot who competes at the pinnacle of the sport.
JP: “I think the Skyhook and RSL are great backup devices for the everyday skydiver. However, if you are jumping a highly loaded canopy (2.8 range or higher) having a skyhook could lead to some unforeseen malfunctions. I don't believe the manufacturers have done any real testing with canopies loaded this much having spinning malfunctions with the Skyhook. I have seen 1 skyhook reserve deployment from a spinning canopy loaded around 3.0 where an entanglement could be present.”

Image by Mike McGowen Think about the configuration of a skyhook deployment, you have the malfunctioning canopy at the apex attached to the bridle with a free bag, still with the locking stows, on one side of the bridle and the spring loaded pilot chute on the other side. Now as the spinning main is deploying the system there seems to be the possibility of the main spinning violently enough to have the reserve pilot chute wrap underneath the free bag trapping the locking stow from coming out. So until some real testing has been done proving that this is not possible I’m not going to be the first skydiver to have that malfunction while doing hop n pops or if jumping something loaded that high.”
Sandy Grillet – Sandy is a very prominent sales rep for UPT, who’s also recognized to be among the best belly organizers in the biz. He has decades in the sport and his skydiving resume speaks for itself.
Sandy: “OK - in the last 5 years I lost two really good friends because they had the same thoughts as you. One of them had a spinner out of control and before he could get cutaway hit another jumper under canopy. He ended up cutting away still high enough to get a reserve but not high enough to reactivate his AAD. He pulled just high enough to go-in at line stretch. We believe the body-to-body collision under canopy dazed him enough to slow his reflexes on both the cutaway and the reserve pull.

Image by Henrik Csuri The sad thing is that he and I had an hour long conversation about Skyhooks and RSLs 10 days before. The guy he hit was another friend of ours and he is convinced a Skyhook would have saved him. I've lost a lot of friends over the years but that one was tough to wrap my mind around.
I truly believe that if more people understood the physics behind what happens during normal cutaways without RSLs - cutaways with normal RSLs and then cutaways with Skyhooks - everyone would use them. As you said, it’s personal preference. I would be happy to have another conversation with you to give my perspective of the physics.”
Scotty Bob – Scotty likely needs very little introduction. His exploits in wingsuit BASE are accessible and heavily viewed online by skydivers, BASE jumpers, and whuffos alike. And his current involvement with wingsuit skydive coaching (both as a load organizer, private coach, and now most recently with Squirrel’s ‘Next Level’ program) has him bouncing from one dz to the next – along with his crew of usual suspects – to help raise the next generation of little birdies right.

Image by Dan Dupuis Scotty: “They are a great idea, and have definitely added to the safety net, especially for younger jumpers. That being said, their use should not be mandatory due to the ever changing aspects of our sport. The option to be in direct control of one’s emergency procedures from start to finish should be in the hands of each individual jumper, not a blanket rule.

I currently do not use an RSL. I want to activate my reserve opening with my reserve handle. Just a personal preference.”
Anthony TJ Landgren – TJ is an all-around badass. There is very little at which he doesn’t excel in the worlds of canopy sport and body-flight. He’s an OG swooper, a wingsuit ninja, an elite tunnel coach, and now a highly sought-after XRW guru.
TJ: “Over the years a lot of people asked me would I, or have I ever, jumped with an RSL? My answer is yes I have jumped an RSL, but only for 1000 jumps or so. I had an RSL back when I jumped a Sabre. I was told that RSLs are great when you are new in the sport and as an extra safety precaution.
Once I started jumping a Stiletto, I was told they can cause more harm than good. Stilettos were the first fully elliptical canopy and they were awesome. The only problem was that if you got line twist it was a bitch to get out of them because the canopy will dive and pick up more speed. I had a really low chop when I had 2000 jumps on a stiletto 135, I was spinning hard once I cut away I needed to get away from the canopy and open my reserve. I was so happy not to have an RSL because two weeks prior to that my friend Cris cut away a stiletto 150 with an RSL and he had 4 line twist on his reserve and barely time to get out of his reserve line twist before hitting the ground. That's when I knew I would never use an RSL ever again.

Image by Raymond Adams I believe in pulling a bit higher so that I have more time to deal with a malfunctioning parachute. I feel RSLs and Skyhooks give people false security in pulling low, which I try to avoid. I was told that when dealing with a malfunction: check your altitude, deal with the situation, and always have hard deck that you know you can't fix this malfunctioning parachute and it's time to get rid of it.
I have 16 cutaways in over 26,000 jumps and 1 was an RSL save (not by choice).
I Believe people that have over 1000 jumps or jump a high performance canopy should really think about whether an RSL is going to help, or if it will only make things worse. I hope this help you to make an educated decision about RSLs and Skyhooks.”
Will McCarthy – Will is the closest thing here to an “average” skydiver. Although, having grown up on a dz, and grown into the DZO of my favorite dropzone in Canada (Skydive Gananoque), he’s been around the sport long enough to know and have seen a thing or two. Most days, Will is hucking drogues and/or flying camera, but he’s done it all over the years – from AFFI, to belly big-ways, to wingsuit, to CRW and swooping.
Will: “As a DZO and our S&TA;, my reply is always, it depends. For people learning to skydive, including tandem students, I think they're a great legal out, as in "we use every piece of safety equipment available". And if you're going to use an RSL, spend the extra money and get a MARD/Skyhook. For experienced skydivers, I personally feel that the use of an RSL or MARD/Skyhook system unintentionally promotes complacency.

Image by Justin Dempsey The number of times I've personally seen an incorrectly routed/assembled RSL leads me to believe that the complacency is getting worse. People are afraid of doing anything to their gear, (assembly or even packing it, in a lot of cases) and a blind faith in the technology increases the risk that when something outside a "normal" malfunction occurs, it won't be handled correctly.
I don't use one unless I'm jumping a tandem rig. But we also don't allow them to be used on paid camera slots or CRW jumps, either.”
My final thoughts on this reflect much of what was said above. Both of my rigs have an RSL because I like to have the option of using it for specific types of jumping. While I hate to admit it, there are certain jumps where I know that I’m going to be pulling lower than usual – flying my tracking suit solo on a hop-and-pop is one such example. And in situations like that, where I’m under a Sabre 150 and feel pretty confident that it’s not gonna spin-up-on-me or toss-me-around violently, I like the comfort of knowing that if I do have to chop, my RSL will likely save me some valuable altitude. However, when I slap on the big wingsuit, I feel far less comfortable having the RSL connected. In that instance, I make sure to disconnect it and secure it (safely and correctly) to the cable housing. Also, as TJ similarly pointed out, I’ll be deliberately pulling higher on big wingsuit flights so that I have ample altitude to deal with, and separate myself from, any malfunctions that might arise.
Hopefully reading this will have given you cause to consider where you’re at in your own jumping – taking into account an honest self-assessment of your level of skills and experience – but also your specific discipline(s) of choice and, thus, what makes the most sense for you. To borrow a mantra from wingsuit BASE, a safe-bet for many styles of jumping is fly fast and pull high. If you can abide by those two tenets, regardless of your choice as to whether or not to use an RSL, you’ll be all-the-better for it.
Stay safe folks.

By admin, in Gear,

Hybrid Valkyrie Available Now!

“Performance Designs has once again raised the bar. The flight characteristics seem even sharper than my standard Valkyrie. The canopy has amazing acceleration with complete confidence in the power of the rears or toggles to change directions or level out if needed. If you are serious about your chosen discipline and serious about canopy choice, for me, there is no better swoop machine to allow you to maximize both freefall and canopy time.” - Brian Vacher
You love your Valkyrie. You've been jumping her for the past two years. She gives you the buttery smooth openings, with the responsiveness and power you crave! Now you're wanting more...and we're ready to give it to you!
Introducing the Hybrid Valkyrie - everything you love about the Valkyrie but more. We incorporated sail fabric into the Valkyrie's ribs to give her more power, more responsiveness and longer swoops than an all ZP constructed Valkyrie. Think of her as a "Valkyrie on steroids" with more sensitivity in the harness and more stopping power than ever before. Available as an option when purchasing your next custom wing, the sail ribs are a great addition for the seasoned Valkyrie owner. And it gets even better, the Hybrid Valkyrie option is only $100.
When choosing between the all ZP and Hybrid Valkyrie, keep in mind that the sail ribs will increase pack volume by about a half size in comparison to the all ZP Valkyrie. The overall lifespan of the canopy is similar to that of an all ZP wing.

Photo by: Wolfgang Lienbacher The Hybrid Valkyrie is available to order now, contact your dealer and get your custom Hybrid Valkyrie ordered.
Demos and stock canopies will be available in the coming weeks.


Flight Characteristics and FAQs available here.

By karlm, in Gear,