1 1

Safety

    On-Point Off-Landings: A Primer

    Sylvia Tozbikian wiggles her way back to the DZ after an off landing in a graveyard“Off” ain’t such a bad thing.
    As skypeople, we love “off.” Offbeat. Offhand. Offside. And, y’know -- we’re all a little off, really. Off landings should fit right into our oddball little world. Unfortunately, lots of skydivers tend to be ill prepared for an unscheduled landing out in the real world. Are you one of ‘em? Here’s how to get ready for a surprise skydiving adventure.
    1. Be a nerd about it.
    Sure, the airborne life throws you curveballs sometimes -- but there are variables here that you can control, y’know. Work ‘em.
    If you only ever land that thing in a schoolbook configuration in the exact same landing area, you’re not going to enjoy the steep learning curve of an off landing. Hang out with a canopy coach for a weekend to workshop your braked flight (and, y’know, braked landings) in a structured, feedback-rich environment. The more thoroughly you train your body and brain to execute these maneuvers, the less you’ll panic when you look down and realize you’re hanging over an endless sea of potential ouch.
    Also: always jump with a charged method of communication.
    2. Speak up.
    Very likely, your off landing is going to be your fault, and it’s probably because you didn’t pay attention (to winds aloft, to the jump run, to your opening altitude, to where you were pointing your pretty new wingsuit…). If it’s the pilot’s fault, you should know it by the time you’re standing at the door and lookin’ down. If the spot is off, don’t leave the plane. Ask for a go-round.
    3. Look out for yourself.
    If you’re at the caboose end of a group and you can’t spot from the door, make a habit of quickly spotting as soon as you run out. If you notice that your compatriots failed to notice that they were getting out of the plane somewhere in the next state, evaluate your options. If it’s safe, then you should peace out earlier and pull higher, crossing fingers that the extra altitude will get you home.
    That said, don’t be a dick. If the particular skydive you’re doing is safer for everyone if all members conform to the freefall and breakoff plan, then congratulations: you’re landing out.
    4. Curb your optimism.
    At this point in your journey into offland, you might be under one of two available parachutes. Your first responsibility after ensuring that whatever’s out is controllable is to realistically determine where you’re headed. If you feel like you just-might-maybe make it to the main LZ, make sure you’re not just-might-maybeing your way into a power station or highway or forest or whatever might be in the intervening territory. If you’re not sure -- or if the middle ground is an alligator farm -- then you should bin that Pollyanna attitude and get real. Put your entire brain on the task of on finding a safe alternative that takes into consideration your current position and the wind direction.
    5. Mind invisible canopy-eaters.
    Once you’ve picked a spot and are toodling down to make your acquaintance with it, you should start getting as picky as possible. You’ll obviously be headed for what appears to be an open space, but wait -- are there invisible monsters lurking? Trees, buildings and other solid objects can throw serious turbulence if they’re upwind (and livestock can wander into the picture very quickly). Keep that in mind as you’re planning.
    6. Play the field.
    As much as possible, be a commitmentphobe. Make sure you don’t have blinders on to other landing areas that might save your ass in the event of surprise fences, power lines, turbulence monsters, stampeding herds and other obstacles you didn’t notice from on high.
    7. Embrace it.
    If you’ve always been on, you can be assured that off is coming. Get real and get ready, and you’ll be much better...off. (Snicker, snicker.)

    By nettenette, in Safety,

    How To Land A Parachute In A Tree

    Damage Control for Unwilling Christmas Ornaments

    Image by Corrado MarianiChristmas ornaments are lovely, aren’t they? Glossy, colorful baubles, swinging gaily from the bushy branches of a fragrant fir, make our little hearts sing along with the season they decorate.
    They are not, however, excellent role models for air sports athletes.
    If you ever end up gracing some branches with your majesty, the United States Parachute Association would first like you to take your enforced treetop time to think very carefully about how you got there. According to the SIM, “properly preparing for the canopy flight by observing the winds,” “planning an appropriate landing pattern” and “choosing the correct exit and opening points” will generally keep you out of the foliage.
    In short: you messed up, kid.
    ...But let’s move on.
    If you discover that you’re on an imminent collision course with a tree, you need to know your 8-step damage control plan. Here’s what to do.
    1. Make sure you’re flying into the wind.
    Do not downwind a tree landing. You may not have a sock to steer by, but – hey, lucky you! – you have at least one tree for reference. Watch the movement of its branches to determine the wind direction.
    2. Fly in half-brakes.
    Your aim is to slow down your canopy as much as possible for the impact. Fly your final approach in half brakes, taking care not to stall your canopy in the process.
    3. Go for the middle.
    Your aim is to impact at the central trunk of the tree. If you miss the middle of the tree, you run the risk of clipping the tree with a line or a cell, collapsing your canopy and dumping you on the ground in a yowling pile.
    4. Keep your $#!* together.
    As you do in a properly executed parachute landing fall (“PLF”), hug your body towards the midline, as though you were inside a mummy-style sleeping bag. Keep your legs springy at the knee, but hug them snugly towards the midline. Continue to fly your canopy until you contact the tree.
    Just before impact, draw your forearms together so that your elbows sit at the stomach and your hands over the face. This position protects your belly, ribs and chest from being lanced by branches.
    5. Keep your hands to yourself.
    Resist the urge to grab limbs to stop your fall, as this will only leave vast areas of your body unprotected from veritable armies of sharp branches that are about to mobilize for the attack.
    6. Assume a hard landing.
    More often than not, a parachutist who lands in a tree does not stay in the tree. Usually, the jumper falls right through, snapping branches and leaving shredded bits of canopy all the way down. Keep that PLF position as best you can, in order to make the landing as soft as possible when the tree finally sees fit to deposit you at its feet.
    7. Get comfortable.
    Have you actually managed to stay in the tree? Oh, great. Stay there.
    A great many injuries occur not during a jumper’s actual tree landing, but from the jumper’s failed attempt to detach themselves from their mangled equipment and climb down. In general, if you’re more than a meter or so over the ground and you have any hope of rescue, wait for that rescue to arrive.
    If you’re phoneless, radioless, jumping-buddyless, out of public earshot and generally hooped for help, you’d better hope you have a hook knife handy.
    You'll use the hook knife to -- gulp -- disentangle yourself from the spiderweb of lines you're likely encased in. This is necessary to prevent you from accidentally throttling yourself, and from sustaining a serious rope-burn injury if a branch cracks and sends those knifelike lines through your tender outer layers.
    You'll probably cry a little bit with every line you cut. Ain't no shame in it.
    8. Be grateful.
    Even if you shred your pricey gear, rejoice if you walk away from a tree landing uninjured. Gear can be replaced -- and you lucked out, you lucky duck. See the bright side.

    By nettenette, in Safety,

    The Stall

    The stall is one of the least explored and most feared aspects of flying. Avoidance of this flight mode causes many canopy pilots to be uncomfortable with flying slowly, and unpracticed in this important art. This article will discuss the governing variables relating to the stall, in hopes that this knowledge will help parachute pilots to become less afraid of this essential aspect of the flying experience.
    First we must explore what a stall is. The assumption made by most canopy pilots is that the stall is caused by slow speed flight. This is not true. It is correlated with low speed flight, but a wing can stall at high speed too. A stall is caused by an excessive angle of attack. When the relative wind flows over an airfoil, it is bent in the general direction of down. This causes an opposite force called "Lift". When the orientation of the airfoil is changed to a higher angle with respect to the relative wind, it is said to have an increased angle of attack.
    Air is quite cooperative. It is willing to be redirected and still flow in a fairly organized manner…up to a point. At a specific angle, all airfoils fail to bend the air into submission. This discrete angle of attack is referred to as a stall. It is coupled with a sudden drop in lift, and thus a significant increase in decent rate. Whether you are flying an F-16 or a Lotus 190, recovery from a stall is always the same: the pilot must reduce the angle of attack. On an airplane this requires forward pressure on the yolk or stick. On a parachute, we are simply required to let off the downward pressure on the toggles or rear risers that has increased the angle of attack in the first place.
    Each parachute stalls and recovers differently. Depending on several governing variables, some parachutes will recovery nicely from a stalled configuration no matter what the recovery technique, while others will require very careful execution. Let's take a look at these issues one by one.
    The characteristics of a stall on any ram air canopy are based on two main variables, and several lower order variables. The most significant governing variable is the flight mode when the stall is reached. If the canopy is in a sink, rather than level flight (zero decent surf), it will tend to stall in a more forgiving and docile manner. The second primary variable is the attitude about the roll axis when the stall is reached. In other words, if there is any bank angle when the stall precipitates, it will cause the lower wing to stall first, resulting in significant yaw energy, which can result in line twists.
    There are several other things to consider when testing the stall of a canopy, including: canopy design, density altitude, wing-loading, aggressiveness of the control input, and most importantly, recovery technique. This will be discussed next.
    If the wing is allowed back into forward flight quickly, it will dive aggressively toward the ground, causing a drop in the angle of attack, as well as the lift and therefore the overall line tension. This may allow the wing to surge below the suspended weight (you), and possibly cause a jumper/canopy entanglement. Further, if the release of the brakes is asymmetrical, the lack of line tension can allow the wing to surge unevenly about the yaw axis, causing line-twists.
    The key to stalling any wing is to enter the stalled configuration in a sink, with the wing level and static about the roll axis. As soon as the stall is reached, the toggles (or rear risers) should be released only a few inches to allow for only a slight drop in the angle of attack. As soon as the brakes are released, the jumper should be prepared for a sudden increase in toggle pressure, as the tail of the parachute is about to get hit with a pulse of relative wind. If the pilot is unprepared for this, the toggles will usually be pulled upward and possibly in an uneven manner, often resulting in an aggressive stall recovery that may result in line twists.
    When the brakes are released quickly to the full flight position, the wing doesn't have much drag. This means that there is very little to prevent it from surging forward in the window. When the brakes are released slowly, and then held down just above the stall point, the wing has a great deal of drag. You have two big barn doors at the back of the wing helping to prevent and aggressive surge.
    Further, as you become more familiar with the stall and recovery characteristics of your wing, you may begin to fly "actively" with respect to the recovery process. In other words, as soon as the wing begins to fly forward in the window, the pilot jerks on the brakes to dampen the forward surge. It is important to do this minimally enough to prevent re-stalling the wing. A well-timed reapplication of the brakes during the recovery process will significantly reduce the amount of altitude lost in the stall. This can be very useful in the event of a low altitude stall. This maneuver can be practiced in relative proximity to another canopy in deep brakes. Be sure to keep your distance when you do this. By definition, a stall is a loss of control of the wing.
    Rear riser stalls tend to be sharper at the onset, but quicker on the recovery. Therefore it is advisable to stall the parachute on the rear risers first before attempting to stall it on the brakes. Further, such maneuvers should always be performed at an altitude that will allow for a safe cutaway.
    Given all of these concerns, one must ask "Why should I stall my parachute in the first place". There are several valid reasons why each jumper should rehearse stalls at altitude.

    In high angle of attack approaches, such as may be necessary in a tight landing area, stalls can happen inadvertently while maneuvering. This is why it is also important to practice slow flight maneuvering by lifting the toggle on the outside of the turn, rather than depressing the one on the inside of the turn.
    In order to reach a (near) zero ground-speed on a no-wind day, the pilot must have full "Toggle Authority". In other words, if the toggles are set too long, the pilot will be unable to access the slowest possible airspeed, and therefore will be forced to land with more ground-speed without the advantage of a headwind. Being able to finish the flare completely and then let up after landing to prevent the stall from pulling you onto your heels in an essential part of any no wind landing.
    When you decide to practice stalls, I suggest taking the process step by step. Simply honking your brakes down with your eyes squinting in negative expectation usually results in a wild ride, and sometimes a cutaway. Try hanging out in slow flight for a while. Bring your toggles down to a bit more than half brakes and leave them there. If you are above the stall point, it isn't going to just stall all by itself. Watching people fly in deep brakes is usually similar to watching them light a firecracker. Your parachute isn't going to explode…promise.
    When you get your canopy into the deep brake mode, take a deep breath in and let it out slowly. Relax your muscles. Let your legs hang limp. I find that nervous pilots can't connect with their parachute because it isn't touching their bones. If you soften your muscles, your will allow the leg straps to sink into you so that you can feel what is happening with the newest addition to your body: your wing. By truly relaxing under canopy, we begin to sober up from the adrenalin that is blurring our vision and skewing our perspective toward the negative.
    Stalls are an essential part of flight. If you are to be fully in control over the wing, you must explore all aspects of your parachute's performance envelope. Ultimately, flying slowly is the most important aspect of flight because we land in slow flight. The more comfortable you are with your slow flight skills, the better your touchdown will be. Remember, the definition of a good flight is one that ends well.
    BSG
    www.BrianGermain.com
    BIGAIR SPORTZ

    By BrianSGermain, in Safety,

    Another Look at No-Wind Landings

    The advice Brian Germain provides in his article titled "Surviving the No Wind Landing" might help you achieve consistent, comfortable landings on days when the winds are calm. Unfortunately, other jumpers might not be as successful when trying to follow that same advice.
    Some of the techniques described in "Surviving the No Wind Landing" are slightly advanced, and jumpers who are just trying to perfect basic flaring skills might find those techniques difficult to use. Other information in that article might be helpful to people flying certain specific sizes and types of canopies, but we might discover that this information does not actually apply to a significant number of canopies in common use.
    The first piece of advice Brian offers is to "make sure you level off within touching distance from the ground." This can certainly lead to softer landings, particularly in calm winds. There is only one problem: if many jumpers fear no-wind landings, there are probably even more who are afraid of flaring too high. For some people the game is over at the instant they realize they have made that mistake: they expect the worst, stop flying, and start panicking.
    In an effort to always level off within touching distance from the ground some jumpers develop a habit of consistently flaring too low. Another common problem occurs when people reach for the ground with their feet, believing they are within touching distance when they are actually a few feet high. People who suffer from these habits are often pleasantly surprised, and see a remarkable improvement in their landings, when they learn that it is not actually necessary to level off with your feet right at ground level. Many modern canopies are actually very forgiving of a high flare.
    Understanding the Stall
    A very common concern is that a canopy will stall if it is flared too high. Brian reinforces this concern when he mentions the importance of arriving at the ground "before the stall breaks." To understand why flaring slightly high is not necessarily a problem we need to take a closer look at the concept of a stall.
    "Stall" has a very specific meaning in aviation. It is a significant decrease in lift caused by a separation of airflow that occurs when a wing reaches its critical angle of attack. Understand? No? Okay, then imagine a car driving down the highway, heading toward a curve in the road. Most highways have gentle curves, for good reason, because cars tend to fly off the road if a curve is too sharp.
    Now think about the relative wind blowing in your face under canopy. Your canopy bends that relative wind to create lift. Pulling down on both toggles pulls the tail of the canopy down and bends the relative wind even more, creating even more lift. The further you pull the toggles down the more lift is created, up to a certain point.
    The "critical angle of attack" is the point where the curve becomes too sharp and the relative wind separates from the canopy like a car flying off of the road. This separation results in a sudden and dramatic loss of lift. The term "stall" refers specifically to the sudden loss of lift that occurs in this particular situation.
    Image 1 shows a canopy being intentionally stalled. In frame "A" the brave and handsome test jumper is putting the canopy into brakes, pulling the tail down and increasing the curve that the relative wind must follow. In frame "B" we see the canopy in very deep brakes, but not yet in a stall. The canopy is curving the relative wind sharply and creating a lot of lift. In this flight mode it is flying slowly through the air with a very low rate of descent.
    In frame "C" the canopy has reached the critical angle of attack. The lift is rapidly decreasing as the canopy begins to stall. In frame "D" the canopy has entered a full stall.
    When flaring it is obviously important to have your feet on the ground before your canopy stalls. But let's think about a student canopy. Student canopies are traditionally not supposed to stall when the toggles are held all the way down in a full flare. They are either specifically designed that way or are rigged with extra slack in the brake lines.
    What about a slightly smaller canopy, such as one that might be used by a novice or intermediate jumper? If the brake lines are set to the correct length specified by the manufacturer, many canopies in this category also will not stall when the toggles are held all the way down in a full flare. They will simply maintain a slow forward speed and low rate of descent, just like frame "B" in image 1. Even if they do stall it might not occur until the toggles have been held all the way down for a number of seconds: sometimes five or six seconds, maybe even more. Jumpers who fly these types of canopies don't really need to be too concerned about an accidental stall.
    You may be surprised to learn that some small, "high-performance elliptical" canopies also will not stall with the toggles held all the way down, or at least not until they've been held there for a few seconds. Whether or not a particular canopy will stall when it is held in a full flare depends on several factors, including the model and size of the canopy, the length of the brake lines, the length of the risers, and length of the jumper's arms.
    When held in a full flare a significant number of canopies will simply maintain a relatively low airspeed and rate of descent, at least for several seconds. This knowledge can be very helpful when we talk about flaring high. Look at image 2. In frame "A" we see a jumper reaching level flight with his toes about six feet above the ground. Tragedy? Not really. There are only three things he needs to do: 1) wait wait wait; 2) keep it straight; and 3) FINISH!
    "Wait" means stop pulling the toggles down as soon as you realize you've started flaring too high. Save the rest of the flare for later. "Keep it straight" is important, too. You want to look at a point on the ground out in front of you and keep the canopy flying straight toward that point, just like driving your car down a straight road. And when the canopy starts to drop you back toward the ground, just before your feet touch down, push the toggles down and FINISH your flare, as we see in frame "B." In most cases doing this will result in a reasonably soft, stand-up landing as we see from the last two frames. Even if you don't land softly, look at frames "B" and "C" again. What body position are you in when you finish your flare properly? Looks like you're ready for a PLF, doesn't it?
    Granted, you will achieve softer landings on calm-wind days if you level off right above the ground, but that is a skill that needs to be developed through practice. An important step in that process is learning to relax and stay focused if you do flare high. This will allow you to keep flying the canopy and finish the flare properly, which will improve your landings in all conditions.
    Practice at Altitude
    We can see the importance of knowing whether or not your canopy will stall when held in a full flare. How can you find this out? Yep, you guessed it. Under canopy, in your holding area, above 2000', after checking thoroughly for other canopies, push those toggles all the way down and see if that baby stalls. If you've never stalled a canopy before you may want to get some advice from an instructor or coach before trying it.
    So try it. Did your canopy stall? No? Makes flaring seem a bit less intimidating, doesn't it? Or was the canopy easier to stall than you expected? If so, you may want to have it checked out by a rigger.
    Some canopies are relatively easy to stall, even with the brake lines set to the correct length. If you are jumping one of these canopies then hopefully you've already perfected your landing technique under something more forgiving.
    If you can't stall your canopy just by holding the toggles down, does that mean you won't be able to get enough stopping power at the end of your flare? Some people believe so, and Brian touches on this point in his article when he stresses the importance of making sure your brake lines are "short enough:"
    Brake Line Settings
    "Most manufacturers set the brake lines to allow for a certain amount of slack so that when the front risers are applied with the toggles in the hands, there is no tail input. This, coupled with shorter risers... will prevent you from reaching your parachute's slowest flying speed."
    In reality, many popular canopies do not come from the factory with this much slack in the brake lines. For example, people who jump a Sabre2 from Performance Designs or a Triathlon from Aerodyne Research might prefer to have the brake lines lengthened a few inches beyond the factory setting if they use their front risers a lot. Even then, they might not lengthen them to the point where there will be no tail input all when the front risers are used. Even canopies specifically designed for swooping won't necessarily have the brake lines set that long.
    Is there really anything wrong if your canopy does have a bit of extra slack in the brake lines? Usually not. Even with the brake lines "detuned" on a student canopy, we still expect students to learn how to stand up their landings. In fact, many popular canopies used by experienced jumpers will also slow down enough for a comfortable landing even if you cannot reach the canopy's absolute slowest flying speed: plenty of people achieve soft stand-up landings in calm winds under canopies that will not stall when the toggles are held in a full flare. Even jumpers who have intentionally lengthened their brake lines for swooping can still achieve comfortable landings in calm winds.
    Is there anything wrong with shortening your brake lines? In some cases, yes! Especially if they are shortened so much that they pull the tail down when your toggles are in the full glide position. As an example, look closely at the tail of the canopy in image 3. It seems like the jumper is pulling the toggles down slightly, but a closer inspection reveals that his hands are all the way up.
    Having a canopy's brake lines set too short like this can significantly reduce the flare power on some canopies and make them noticeably more difficult to land, particularly on calm-wind days. Excessively short brake lines are more common than many people realize and frequently go unnoticed. It is a common mistake for someone to shorten a canopy's brake lines because it appears that the canopy "doesn't have enough flare at the bottom end," when the real problem is that the brake lines are already too short!
    If you're really convinced that your brake lines are too long there are a few steps you should take before having them shortened. On your next jump, after you've released your brakes, put your toggles all the way up against the guide rings and look up at the tail of your canopy. Don't forget to watch where you're going and look out for other canopies. If your canopy looks like the one in image 3 then forget about having the brake lines shortened. They probably need to be lengthened instead.
    If your canopy seems difficult to land you can also have a rigger measure the suspension lines and compare them to the manufacturer's specifications. It's possible that your canopy has simply gone out of trim and is due for a reline.
    Once these steps have been completed then get some of your landings videotaped and see if you are finishing your flare properly. Look at the jumper in image 4, just as he is touching down. Does he need shorter brake lines to get a better flare? No, he needs to push his toggles all the way down and FINISH flaring before he touches down. Most jumpers finish their flares at least slightly better than the jumper in image 4, but not finishing completely is one of the most common flaring problems. Brian makes a very good point about this: "the brake lines can only work if they are pulled."
    If you are still absolutely convinced that you need shorter brake lines then follow another good piece of advice Brian gives and only shorten them an inch at a time. Make several jumps, preferably in different wind conditions, before shortening them any more. And remember that you can significantly reduce a canopy's flare power by shortening the brake lines too much.
    There is usually some excess brake line left over when the toggles are tied onto a canopy, and there are front row seats in purgatory for people who cut this excess brake line off. That excess line should be finger-trapped back into the brake line or secured in a similar fashion in case the brake lines need to be lengthened later on. A qualified rigger should know how to do this correctly.
    What else might affect your landing on a calm-wind day? Brian discusses the importance of keeping the canopy flying straight during the flare, and not allowing it to bank or turn. He emphasizes this by stating that "any tilt in the roll axis will result in a premature stall of the parachute…. due to an effect known as 'load factor.'"
    Load Factor
    If we are going to introduce "load factor" into our discussion then let's do the math. At a bank angle of 30 degrees load factor will increase stall speed by approximately 8%. A bank angle of 45 degrees will increase stall speed by 20%.
    The exact stall speed of a ram-air canopy will depend on several factors, but let's use 5 mph (8 km/h) as an example. In that case, a 30-degree bank angle while flaring will only increase your stall speed by 0.4 mph (0.64 km/h). To increase stall speed by 1 mph (1.6 km/h) you will need a bank angle of 45 degrees while flaring, which is a pretty sporty maneuver by most people's standards.
    While load factor might sound important, is a 0.4 mph increase in stall speed a significant consideration when landing your canopy? Probably not. Nonetheless, is it important to keep the canopy flying straight while you flare? Absolutely. Even without a stall occurring, banking or turning while you flare can cause you to touch down at a higher speed. You will probably also land with your body off balance, and fall over sideways.
    A bank or turn during the flare is most commonly caused by reaching for the ground with one foot. You can usually see yourself doing this on video, and might even feel yourself doing it while it's happening. This problem can easily be avoided if you focus on looking straight ahead, keeping your body straight, and flaring evenly.
    What should your feet be doing? Do you need one foot below you and one out in front as you prepare to touch down? That probably will happen naturally just as you stand up at the end of your flare without putting any extra effort into making it happen. And putting extra effort into making it happen could cause you to reach for the ground with one foot.
    If you need to think about anything while you're flaring, think about keeping your feet together as you get into level flight, and continue keeping them together while you fly the canopy in a straight line across the ground as far as possible. If everything is going smoothly then as the canopy sets you down you can just stand up as if you were getting out of a chair. Your feet know what to do.
    Look at image 5 below. We see a jumper flaring his canopy with his feet and knees together, knees slightly bent. Looks like he's simply maintaining a good PLF position, doesn't it? As he finishes his flare and the canopy sets him down, his feet come apart slightly to accept his weight.

    Harness Body Position
    What about leaning forward in the harness? Is "freeing your body from the pitch of the system" a crucial part of flaring? Look at image 5 again. A pitch change does occur when the nose of your canopy tilts up at the beginning of the flare. This pitch change is what puts the canopy into level flight, and the pitch change is actually created by the movement of your body under the canopy. In fact, it can be extremely helpful to view your body as an integral part of the parachute system instead of separating yourself from it. Feeling your body swing in conjunction with the canopy's movement is an important part of doing effective practice flares.
    If you like to lean forward in the harness and it seems to help your landings, that's fantastic. It feels nice and looks cool. But it's also not a problem if you simply sit still in the harness and let your feet swing out slightly in front of you as you flare. Your body will rock up onto your feet as your feet touch down and accept your weight. You can either "lean forward into the experience," as Brian suggests, or maintain a more laid-back pose if you prefer. Whichever one feels more comfortable is the best one for you.
    The technique Brian calls the "Seagull Landing," where you dip down below standing height then rise up again at the end of the flare, also feels good and looks cool if you do it correctly. You'll do it correctly if you develop the technique naturally while you practice good basic flaring skills. Putting too much conscious effort into achieving a "Seagull Landing" is similar to the belief that you must level off right at ground level every time: it can result in the same problems and bad habits. Most canopies will slow down just fine if you level off a comfortable distance above the ground and simply maintain level flight through the remainder of the flare.
    In general, it might help to stop thinking about a "no-wind landing" as being significantly different from a "normal" landing. The basic skills that you use to land in stronger winds will also help you land softly in calm winds. Any bad habits you develop might not hurt your landings too much when there is some wind to slow you down, but those habits are usually still present and affecting your flare to some degree, and can be eliminated by practicing proper techniques.
    Eliminating those bad habits by keeping things simple, letting yourself relax, and focusing on good basic flaring techniques will go a long way to improving your landings in all conditions. Soon you'll be just as confident landing on calm day as you are on windier ones, and you may even start to prefer calm-wind landings.
    Experienced skydiving instructors and coaches, like those in any other sport, develop their own opinions, philosophies, and teaching methods. The advice you get from one person may be quite different from what someone else tells you. This can actually be a good thing sometimes, because the advice that helps one person may not be equally helpful to others.
    The most basic, fundamental principles of aerodynamics can be used to describe the flight of any wing, so some of the things you learn about one canopy will certainly apply to others. However, specific performance characteristics can vary greatly from one aircraft to another: a 210 sq. ft. canopy does not perform exactly the same way as a 107, and a Triathlon does not perform exactly like a Sabre2. A Sabre2 does not perform exactly like a Lotus, and a Lotus does not perform exactly like a Twin Otter.
    When discussing canopy performance and flying techniques the most important piece of advice I give my students is this: don't passively accept anything anyone says, including anything that I tell you. Think about it, and if it doesn't make sense keep asking questions until it does. More importantly, experiment in the air and see for yourself if it's really true.
    Also, remember to breathe.
    Scott Miller
    References:

    Direction of Commander, Naval Air Systems Command, United States Navy. Aerodynamics for Naval Aviators. Washington: Naval Air Systems Command, 1960. Revised 1965.
    Germain, Brian. "Surviving the No Wind Landing." Dropzone.com. Sep 05 2007. (accessed October 13, 2007)

    By admin, in Safety,

    Jumping at a New DZ: Your Battle Plan


    Photo by Jeff AgardJust moved across the country? Heading out to boogie in a strange new land? Impromptu road trip? If you’re not used to jumping at new-to-you DZs, reorienting yourself to a new conveyor-belt-to-the-sky is a bit daunting. But never fear, brave adventurer: if you walk in knowing what you need to do, you’ll be golden. Here’s a checklist to help make the process a little easier on you.
    Before you arrive:
    1. Do a preliminary scan for unpleasant surprises. Find out as early as possible if the dropzone (or the specific event you’re planning to jump) has special requirements that could keep you on the ground.
    2. Budget. Get pricing on jump tickets, DZ accommodation and registration fees. This is a good time to check the jump-ticket refund policy and find out if there are extra charges for credit cards.
    3. Ask about facilities. If you’re going to be squaring up to swampy summertime port-o-lets, miles-off RV hookups, co-ed showers (rawr) or anything else outside your comfort zone, you’ll want to know as early as possible so you can make a battle plan.
    4. Make sure you’ve packed all your documentation. At the very least, you’ll need an in-date reserve repack card, your parachuting organization ID and your logbook. In some cases, you’ll also need your AAD travel documents and proof of medical insurance, too. Travel insurance is never a bad idea, either.
    When you arrive:
    1.Get the lay of the land. You’ll be spending a lot of time in the hangar and in the waiting areas, so get oriented. Pick a prime spot for your gear (hopefully, near an electrical outlet). Find the bathrooms and the fridge. Identify the load monitors, if there are any. Find out if there’s a separate window for manifest, or if the main office does it all.
    2. Rock up to the office. Fill out the waiver, get a gear-and-paperwork check and buy your tickets.
    3. Get briefed. You’ll likely be pounced on when you land in the office, but just in case: Pin somebody down to give you a complete briefing of the dropzone’s map and rules. Do not get on the plane without a briefing.
    Get clear on the manifest procedure. It seems like every DZ on the planet does this differently, and it can really get in the way if you’re not on board. Are you going to have to pay in advance, pay as you go, or pay at the end of the day? How does the ticket system work?
    Learn the exit order and separation rules. Many drop zones have very specific procedures in place, while others assume you should know where you belong. Watch how the local jumpers organize themselves, and ask lots of questions if you don’t get clear instruction.
    Check out the satellite map. You can expect a dropzone representative to use an overhead map of the dropzone and its surrounds to brief you. The rep will describe how to use recognizable landmarks to spot the dropzone from the air and review landing area obstacles, power lines, bodies of water, nasty neighbors, turbulence, the “beer line” and uneven terrain. Use this time to memorize your outs.
    Find out if there’s a special hard deck for this DZ. If there is one, it might be (way) higher than your personal hard deck.
    Check out the wind indicators. Find them on the overhead map, then peek at them in person while you take yourself on a tour of the main (and alternate, if applicable) landing areas. If there are tetrahedrons, ask if they’re trustable or if they’re “sticky.”
    Know the landing pattern. Landing patterns are not the same across dropzones, ranging from first-one-down-sets-it to a regular Busby Berkeley choreography of established patterns that never, ever change. Until you’ve internalized the unique rhythm, it’s best to give the main landing area a wide berth for your first handful of jumps at a new DZ. Make sure you know the rules and areas for swooping and hook turns, whether or not you plan to do them. (Don’t be the big canopy that tugboats lamely across the zoomy canopies’ path.)
    Figure out the loading procedure. Find out how the calls are announced and where you need to be to hear them. If there are shuttles to the plane, you’ll need to know what the call is to be on the shuttle. If there’s a retrieval from the landing area, make sure you know where it is (and hoof it over there right after touchdown). 4. Get on a load! Make an organizer friend (or be your own organizer friend) and keep an open mind about what jumps you want to do.
    5. Buy the good beer to share at greenlight. It’s basically, like, a housewarming that you throw for yourself. You’ll feel at home before you know it.

    By nettenette, in Safety,

    Collapses and Turbulence

    There are many variables to consider when looking into a canopy collapse:
    What was the pilot doing?
    How fast was the canopy flying when it collapsed?
    Where was the pilot flying?
    What is the canopy design?
    What is the wing-loading?
    Was there any re-active solution employed? These are the principle considerations, but not the only ones. I will take each one separately.
    1) The way in which a parachute is flown can increase or decrease the "G" loading on the lines. A rapid release of one or both brakes significantly increases the chances that the canopy will collapse. This allows the parachute to surge forward to a lower angle of attack, decreasing the lift of the parachute. This reduces the amount of energy exerted by the parachute away from the suspended load, allowing the "negative" portion of the lift to take over and allow the wing to fly towards the jumper.
    2) Airspeed is what creates lift. Lift is what causes the wing to strive to fly up and away from the jumper. This is the formula for line tension and therefore stability. The slower you are flying, the more likely your parachute will collapse due to low internal pressure and low line tension.
    3) Was the wing flying in clean air when the collapse occurred? This is an important part of the question. All parachutes can collapse in "bad" air. We must always fly considering the invisible dangers that the sky presents us. If you wouldn't fly a kite there, don't fly or land your parachute there.
    4) Certain parachute designs do better in turbulence than others. I must avoid pointing fingers here, as this is a volatile industry that can be taken down by non-skydiving lawyers. Nevertheless, certain wings have an increased propensity to go "negative" when presented with adverse condition, while others bump around a bit and keep on flying. This is a complex issue, and the best way to decide which parachute to buy and fly is to listen to the actual statistics, and to your own experience when flying a particular design. I have not experienced any kind of collapse on the parachutes I fly, ever.* If you have on yours, you may want to reconsider what is over your head.
    *(This does not include nasty, ill-conceived prototypes that seemed like a good idea at the time. I am talking about production-model canopies here)
    5) Parachutes perform differently at different wing loadings. The lighter the wing loading, the slower it will fly. This means that the internal pressurization of the wing will be less on larger canopies. In general, lightly loaded parachutes experience more small collapses than heavily loaded ones. Not only is there less internal pressure in the wing, but the dynamic forces area also less with decreased airspeed. This means that the average line tension tends to be less on a lightly loaded wing, and the wing tends to have a increased propensity to surge forward in the window when flying at low air speeds. This is why very small, highly loaded parachutes tend to experience fewer distortions, especially when flown at high speed. Flying at high speed increases the drag of the canopy itself, relative to the jumper, so the relative wind holds the parachute back in the window and at a higher angle of attack. This is why I make carving, high "G", high speed turns to final approach heading, especially in turbulence. The speed actually reduced the chances of a collapse by increasing the forces that keep the parachute at the end of the lines. I am literally increasing my wing loading by flying fast and at high "G's", and the increases velocity reduces the amount of time that I fly in bad air. I am not saying that you should downsize just to increase your stability. I am saying that until your skills and knowledge are ready to fly smaller, faster parachutes, you should stay out of the sky until the winds come down. I still haven't been hurt by a jump I didn't do.
    6) This is all about "Pitch Control". If you are flying a good design with lots of airspeed and significant line tension, and in a reasonable location that has no obvious precursors for collapse, you can only deal with a collapse in a re-active manner, as you have addressed all of the relevant variables up to this point. If your wing tries to aggressively surge forward in the window, you must notice it and quickly stab the brakes to bring it to the back of the window. A collapse always begins by a surge to a low angle of attack, but there is very little time to deal with the problem before I folds under. Here are the signs:
    The first sign is a change in Pitch. The wing moves forward in the window. This is the limited flying space over your head. Too far forward and it collapses. Too far back and it stalls.
    The "G" loading drops dramatically and almost instantly. In other words, your apparent weight in the harness drops because the wing is producing less lift. This is the time to jerk on your brakes: quickly, sharply, but not more than about 50% of the total control stroke. This action is to pull the wing back in the window, not to stall the parachute. By putting the wing further back in the window, we are increasing the angle of attack. This increases the lift, and forces the wing to fly away from the suspended load and thereby increase the line tension. This can prevent a collapse entirely, or cause the wing to recover to stable flight before things get really out of control.
    If the wing is allowed to collapse, it may recover quickly on its own. This is why the more modern airfoils have the fat point (Center of Lift) so far forward. It causes the wing to pitch nose-up when it begins to fly again, bringing it back to the end of the lines. Nevertheless, parachutes can still collapse fully, which often involves significant loss of altitude and possibly a loss of heading. If your wing goes into a spin because of a collapse, your job is to stop the turn first, as you increase the angle of attack. If it is spinning, there is less chance of recovery until the flight path is coordinated and the heading stable.
    Conclusions:

    Don't fly an unstable parachute. If it is prone to collapse, ground the parachute. Do not sell it to an unsuspecting jumper at another drop zone. These people are your brothers and sisters.
    Don't fly in crappy air. Land in wide open spaces, in light winds, and never directly behind another canopy.
    Practice stabbing your brakes in response to forward surges on the pitch axis. This must become a "learned instinct" that requires no thought at all. Like pulling emergency handles, pulling the wing to the back of the window when the lines get slack is essential for safe skydiving.
    Keep flying the parachute. If your parachute does something funny near the ground, don't give up. If you keep your eyes on YOUR ORIGINAL HEADING, you will unconsciously do things that will aid your stability and keep you from getting hurt. Looking toward what you don't want is how you make it occur. I hope this little article helps you understand the phenomenon of collapses a bit better. I know as well as anyone how painful a collapse can be. I do not want to go back to that wheelchair, and I don't want anyone else to have to experience that either. You morons are my family, and if information can help protect you, I will give it until my lungs are out of air.
    Blue Skies, Sky People.

    Bri
    Article Discussion

    BIGAIR SPORTZ

    By BrianSGermain, in Safety,

    Exit Separation Revisited

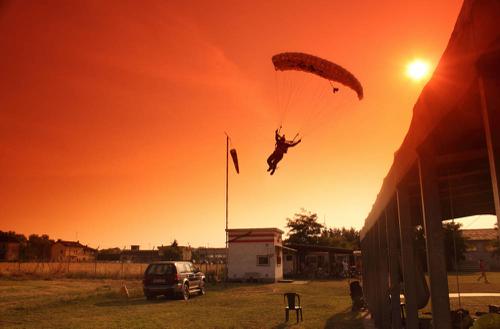
    Exit separation has become a point of contention at many DZ's lately. Years ago, when belly flying was the rule and the Cessna 182 was the aircraft at most DZ's, exit separation wasn't too much of a big deal - you gave the other group (if there was another group) some time and then you went. With the aircraft in popular use 15-20 years ago, it was hard to exit very quickly to begin with, and so the issue never came up very often.


    Bill von Novak started skydiving in 1991 at a small DZ in New York. Since then he has become an S+TA, an AFF, tandem and static line instructor, and has set two world records in large formation skydiving. He lives with his wife Amy in San Diego.


    Since then, several factors have conspired to make exit separation more of an issue. First off, there are more people freeflying. Freeflyers, especially head down groups, drift differently than belly flyers, and thus need different considerations when planning for exit separation. Faster canopies mean that people who open facing each other need more distance to deal with a potential collision. Large aircraft with big doors can hold several larger groups, and those groups can get out those big doors more quickly. Finally, GPS spotting has removed some of the delay between groups. It's rare to see people even check the spot before beginning their jam-up.
    I first became aware of this issue in 1994, when I started jumping at Brown Field in San Diego. We went through a series of aircraft as we grew, from Cessna 206's to King Airs to Beech-99's, none of which had GPS. In addition, we were less than a mile from the US-Mexico border, which meant our jump runs had to be east-west and our spots had to be dead on. Several instructors were "designated spotters" and we would argue over 100 yard differences in jump run offset and exit location. After a while we got pretty good at spotting.
    As our aircraft became larger, exit separation became more of an issue. We had a few close calls, and so we agreed to start allowing more space between groups. At first it was essentially trial and error - we would leave some amount of time (10 seconds or so) between groups and increase that time whenever someone felt they were too close to someone else. After a while, we began to get a feel for how much time was required. We knew that if the upper winds were strong and the plane was just creeping along the ground, we had to leave more time. We also knew that if we let the freeflyers get out first, we had a problem almost every time. We ended up with a system that worked for us, and had essentially no problems with collisions or close calls after that.
    During this time I was also traveling in the summers to different boogies and I noticed a wide variety of exit separation techniques. By far the most common technique was some amount of fixed time - the next group would pause, then climb out and go, without knowing what the upper winds were doing or what the spot was. The next most common technique was similar but they added a "leave more time if it's windy" clause to their delay. There was also a class of jumpers who looked out the door to tell how much separation to leave; these jumpers either looked at angle of the departing group or the ground to tell how much space to leave.
    This got me thinking. What really works and what doesn't? I tried a few methods on my own, from the "45 degree" method to a purely ground-based method. After some experiments, a group of skydivers collaborated via email and internet and came up with the actual math behind separation, the physics that determines how far the center of group A will be from the center of group B after they open. But before diving into the math, there are a few basic concepts to cover.
    What we care about. When we're talking about separation at opening time, we don't really care about where we are in relationship to the plane or even the ground - what we care about is how far we will be in the air horizontally from the next group that opens. So for our purposes, the airplane and the ground don't really matter, and someone watching from either of those places may not get the same "picture" of things that we get. (Of course, we do care about our relationship to the ground when it comes to spotting and landing on the DZ, but that's a separate issue.)

    How we fall. In most freefall (tracking dives and wingsuits excepted) we fall essentially straight down with respect to the air. If there's wind, the wind blows us at whatever speed it's blowing. If the wind is doing 30kts at altitude, a group of skydivers will be doing 30kts as they drift with the wind. It's also important to realize how your trajectory changes after you open. At a freefall speed of 100kts, a 30kt wind will slightly deflect your trajectory, because it's a small fraction of your total speed. Once under canopy and descending at 10kts, it will deflect your trajectory a tremendous amount, since it is now a very large part of your speed. Of course, under canopy you have much more control over your own horizontal speed, and the winds may add or subtract from your canopy's groundspeed depending on the direction you are facing.

    Speeds. When discussing speeds, it's important to define units. There is feet per second, which is very useful for people who are trying to figure out how far they want to be from another group. At 100 feet per second, 10 seconds gives you 1000 feet, which is about as easy as it gets. You may also hear the terms indicated airspeed, true airspeed, and groundspeed, in both knots and miles an hour. These can all be converted back and forth as needed . Now that all that's out of the way, the math is pretty simple. The distance you will get between group centers is the speed of the aircraft plus the speed of the winds at opening altitude, multiplied by the time you leave between groups. That's it. So if the aircraft is flying into the wind doing 80 knots per its GPS, and the winds at opening altitude are 10 knots from the same direction, and you are waiting 10 seconds between groups, you are going to get (80+10 = 90 kts, which is 153 feet per second) 1530 feet between groups.
    It gets a little more complicated when the winds are not from the same directions. If the winds at opening altitude are opposite jump run, you have to subtract them rather than add them. If the winds at opening altitude are from the side, it's the same as zero winds at opening altitude when it comes to separation.
    If you put these equations into a spreadsheet and play with the numbers, some basic patterns emerge. If the headwinds at altitude are strong you have to leave more time. If the plane is slow (i.e. it's indicated airspeed on jump run is low) you have to leave more time. If the winds at opening altitude are strong as well, and from the same direction, you can safely leave less time. (Or, preferably, just leave the same amount of time and you'll end up with even more separation.) If the winds at opening altitude are opposite from jump run, that's the worst case, and you have to leave even more time.
    Some people have a problem visualizing how winds at opening altitude can possibly cause them trouble if they leave enough distance on exit. The question is usually phrased as "don't all jumpers follow the same path out of the plane?" And they definitely do. To visualize why this can still cause you problems, take a look at the separation diagram shown below.


    Drawing showing exit separations
    In the first drawing, there is no wind after exit, and the first group breaks off, tracks, opens, and flies their canopies away from the center for the first few seconds, which is what they should be doing on most formation skydives. (After that, it's a good idea to turn away from line of flight once you're sure you are clear of others in your group.) The second group arrives 10-15 seconds later, shortly after the first group has opened their parachutes, with some room to spare.
    The second drawing shows what happens when there are winds are the same all the way down. Notice that the "cone" caused by the breakoff and the canopy flight has shifted strongly to the right. This is because (as mentioned before) once their parachutes are open, the wind affects their trajectory more strongly. As with the first example, it is assumed that everyone flies away from the center for the first few moments. That means the jumper flying into the wind makes no progress and comes straight down, while the jumper flying downwind gets a boost in groundspeed..
    The third drawing shows where you can run in to problems. In this drawing, the winds after exit are from the opposite direction. You get the same skewing of the cone, but now the edge of the cone is getting dangerously close to the trajectory of the next group. This is a case where the same separation at exit led to trouble because of opposite winds at opening altitude.
    This leads naturally to the question "how much separation do you really need?" That depends on the group. 1000 feet should probably be an absolute minimum for any belly formation skydiving. That means that two four-ways can exit, fall straight down the pipe, track 300 feet from center on breakoff, and then still have 300 feet to deal with avoiding a potential collision after opening. With the speeds of today's canopies, that's a bare minimum. If the group size grows to two 10-ways, 2000 feet might be a wiser separation. If a low-time RW group backslides a bit, again, 1500 feet might be needed to be clear of them at opening time.
    So how does a jumper who doesn't want to carry around a calculator figure out how much time to leave between groups? One very simple way is to just look out of the plane and wait until it has covered 1000 feet, then go. This method, originally suggested by Skratch Garrison, takes much of the figuring out of exit separation. It can be hard to determine how far 1000 feet is on the ground, but fortunately most DZ's come with a handy ruler - a runway. A 3000 foot runway allows you to put 3 groups out along its length with a bit of margin thrown in. This method also has the tremendous advantage that it requires people to look out the door, and that means they are more likely to see traffic, high canopies or clouds that could pose a hazard to their skydive.
    Another simple way is time-based. There are several tricks you can use to determine how long to wait. One common one is to always leave at least 7 seconds, then if the upper winds are strong divide them by 2 and wait that number of seconds. (Faster aircraft sometimes use divide by 3.) So if the winds are 30kts you wait 15 seconds between groups. This technique uses some math but isn't too bad.
    A third technique that seems to be popular for some reason is the 45 degree method. In this method, jumpers wait until the previous group passes through an imaginary 45 degree line before they exit. The problem with this method is that the jumpers never pass through that 45 degree angle, or pass through it so quickly (under 1 second) that it's not useful for determining separation. The numbers confirm this. What you see out the door depends purely on speed of the aircraft, fallrate of the jumpers and type of exit. If the plane is going slower than freefall speed, the group may start out above the 45 degree line, but will drop below the line in less than a second and never rise above it again. If the plane is going faster than freefall speed (which is rare) the jumpers stay above the line and never cross it at all. A good head-down exit will tend to move jumpers lower in the picture. Winds will not affect the picture; an exit in 5kt uppers looks the same as an exit in 50kt uppers.
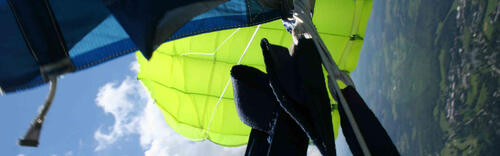
    There has been some friction over this issue. The 45 degree method has a lot of supporters because it's so simple and makes a sort of intuitive sense. Beyond that, it actually seems to work for some people - although it's likely that the extra time it takes to locate and stare at the previous group has something to do with the reason the next group usually leaves enough time. To show that this doesn't work, two cameras were fixed at a 45 degree angle and mounted on a boom outside an Otter's door (see pictures below.) Pictures and video of several jump runs both into the wind and downwind were taken and magnified to determine how close each group was to the imaginary 45 degree line, which was essentially the center of the images. The pictures confirmed the basic problems of the 45 degree rule. RW groups, falling a little faster than the aircraft, never quite passed behind the 45 degree line. Freeflyers, going much faster than the aircraft, stayed well below the 45 degree line for as long as they were visible in the stills (about 30 seconds.)


    Some version of the 45 degree method may work for some people. It may be that the simple act of looking out the door delays them enough, or their subconscious may see the group moving slowly along the ground (because the aircraft's groundspeed is low) and send a warning message to the rest of their brain - "hey, hold up a minute." But waiting for a true 45 degree angle simply does not work.
    Another issue that has become more important lately is exit order. Some places still put freeflyers out first, and that doesn't make much sense. In 30kt uppers, a belly flyer who leaves 10 seconds and gets out after freeflyer will open 100 feet from him, but if the belly flyer goes first and the freeflyer leaves the same time he will open 2200 feet from the freeflyer. RW groups, since they are in freefall longer, drift farther downwind before opening. It seems like a no-brainer to choose an exit order that used this to your advantage and increased, rather than decreased, separation distances. You can certainly wait 20 seconds after the freefly groups before the belly groups exit if there is some other reason why the freeflyers have to exit first, but at most DZ's it's hard to ensure that 20 seconds, especially since waiting so long almost guarantees long spots or a goaround.
    Below are two diagrams that show how exit order can affect separation.

    Belly out first diagram

    Freefly out first diagram
    One reason given at DZ's to explain a backwards exit order is that freeflyers open sooner and therefore are beginning to descend before the next group gets there. Bryan Burke of Skydive Arizona has pointed out that you simply cannot trust vertical separation - one premature deployment or malfunction and all that vertical separation is gone. Even during a normal skydive, when you add up altimeter error, pull timing and snivel distance, you can easily get a jumper opening 1000 feet from where he expected to be open. In fact, Bryan points out that at Skydive Arizona, the primary reason high pullers get out last is not for separation but rather because they are the ones that can make it back from a bad spot.
    Every drop zone is going to have a different set of rules and a different approach to exit order. Some work well, some don't work as well. Jumpers have to understand the factors that can reduce group separation so they can make informed decisions about when they want to exit and what kind of exit orders they are comfortable with.

    By admin, in Safety,

    Three People Narrowly Escape in Tandem Collision (Video)

    Three people were lucky to be left alive after a collision between a TI, tandem client and a cameraman. The incident, which was uploaded to Facebook, shows an initial clip of the cameraman's point of view as he makes contact with the top of the TI's canopy. Unconfirmed reports suggest that the cameraman was supposed to be recording the next tandem but had insufficient exit separation between himself and the previous tandem.
    The cameraman involved in the incident commented on the video on social media with the following:
    Regardless of fault, this video serves as a good lesson as to why exit separation remains a crucial factor in reducing collisions in flight. There were no reports of serious injury from the incident, which was only inches from a very different ending.
     

    By Administrator, in Safety,

    High stress situations- what's the deal?

    This should be a relatively simple question, right? After all we learn them before we even go for our first skydive. Some people find it easy and some very difficult to deal with Emergency situations. So difficult that they couldn’t. It all depends how procedures are thought and consequently perceived. Motivations set goals and goals define perception, therefore instructors, manufacturers and riggers might give you slightly different versions on what would work best. Who decides?  Education is the key, but only the right education! However, different opinions should be seriously considered as things change. This is very important as we have a strong tendency to reject ideas that fail to fit our preconceptions, labeling those ideas as unworthy of consideration— nonsense, irrelevant, weird, or mistaken

    “Of the 308 fatalities that were reported between 1993-2001, 264 (86%) were categorized as Human Error, indicating that human error was deemed to be the principal causal factor in the mishaps”, this study was done in the USA. So 264 people executing emergency procedures during this period made a fatal mistake. The same study concluded that- “Within skydiving training and education programs, specific attention should be given to human error, and training should be deliberately aimed at reducing human error mishaps.” This was concluded 20 years ago. What do you think has been done with relation to this? Not much, and in regards to reducing human error things have gotten even more complicated. 

    In order to execute the correct emergency procedures, we need to identify the malfunction correctly and perform the correct action from all the available options. 

    Here’s an example of one way to teach them:

    This is just an example. Looks good and it’s in color too, well presented and not that difficult to understand. There are many different types of these around. Are they the real deal?

    They should be, if they are around. And are they what the education needs? This type diagrams are consequence of the typical industrial type of education. The idea with the diagrams is that you learn it and when you need to respond to a malfunction situation- just execute the actions! That’s how computers work. Fast and accurate. But that’s not what happens in our heads. We are organic creatures. Skydiving is a high pace activity and we don’t have time to freeze, bring out the diagram with situations from the library, pick the right one and execute it. According to Adler (1991) and Schramm-Nielsen (2001), the decision-making process is comprised of specific stages including the recognition of the problem, search of information, alternatives, assessment of alternatives, selection of an alternative, implementation, control and feedback. Stress can also have an impact on each stage of the decision-making process (Moschis, 2007). Janis and Mann (1977) conclude that perceived stress in the decision-making process is a major cause of bad decisions and errors. And this is understandable- if we don’t know or understand what’s going on- the brain puts us in the pray response- freeze, fight, flight.

    Consequently, the following issues arise from the diagram way to learn emergency procedures- our nervous systems are not fast enough and humans are not “Stimuli response machine” when skydiving, nor while acting under any pressure or stress. This “Stimuli response machine” theory of human behavior was from the middle of the last century and it says that when you are presented with a problem, you consider it, make a decision and act. However, this mechanism is true and works ONLY when everything that happens goes to plan, we have time, we are not under pressure and have enough time to think. This rarely happens in real life, let alone when dealing with emergencies in skydiving.

    More importantly, diagrams and words are not how we think in skydiving and in general. What? What am I talking about?

    A new study led by Elinor Amit, an affiliate of the Psychology Department, shows that people create visual images to accompany their inner speech even when they are prompted to use verbal thinking, suggesting that visual thinking is deeply ingrained in the human brain while speech is a relatively recent evolutionary development. 

    “This suggests that we can’t really go beyond the here and now and think in abstract ways about other people, places, or times,” Amit said. “This is the way our brains are wired, and there may be an evolutionary reason for this [because] we haven’t always been verbalizers. For a long time, we understood our world visually, so maybe language is an add-on.

    “That has important implications because if we are truly grounded in the here and now, what does that mean about how we develop public policy?” she added. “Do we need to help people overcome their bias to focusing on the here and now? This is something we may need to be aware of.”
    This is relevant to skydiving as when we think about skydiving we imagine pictures, frames, short clips. Human life and behavior is organized around our vision. This is another fact that separates us from animals as they have their life organized around smell. This is very important as it gives us the ability to build images in our heads and run simulations. But this is only possible if the training goes past the diagrams and involves video or photographs. Hey, it’s not really possible to see what’s exactly happening after you throw your pilot chute so we feel and build pictures in our head of the developing opening sequence. If our brain detects any mismatch with what’s supposed to happen- we are alerted to get ready. RAS is activated. 
    Visualization is widely used in skydiving. So why did we stop using it for emergency procedures training? I know people that haven’t seen any emergency procedures visual aids since they finished their AFF course 10 years ago. Even worse, it’s actually hard to find updated video of emergency procedures done right in real situation. 

    If things do not go as planned, the emotional system- the ancient brain takes over and acts. The systems that are activated in the stress situations have been studied in depth. More details are to be in different publication but one good example is the RAS- reticulate activating system, located mainly in the hippocampus. It keeps track of everything that doesn’t go to plan so we can react. This is the system that wakes you up at night if something wrong is happening- loud noise, anomaly in the environment, etc.  The same system helps you drive your car when you are brain wondering and think about something else, whatever it is. It will alert you and help make a decision when the traffic light gets red so you can stop in response.  What actually happens when things go wrong is – the hippocampus modulates the process there, primes the amygdala in case things go really wrong and it primes the hypothalamus, the part of our brain responsible for exploration /we need to find a solution/. The result is you are ready! The question is how worried should you be? And that depends on how ready you are for the emergency.

    The “Stimuli response machine” emergency procedures diagrams have some other inbuilt problems. One is that not all situations that happen are described, so they don’t give you a course of action for them. These should be resolved with the help of autonomous and divergent thinking. In order to do that we need have the necessary information. In skydiving, the necessary information involves equipment education and how parachute systems work. Unfortunately, there’s practically no formal education incorporated for licensed skydivers in this area. In other words, licensed skydivers unless they are riggers, luck the resources they need to deal with some situations. This can lead to developing of negative emotions in skydivers. The chronic overwhelm caused by these negative emotions can also harm the hippocampus, which is crucial for learning: this is where short-term memories, like what we've just heard or read, are converted to long- term memories, so we can recall them later. The hippocampus is extraordinarily rich in receptors for cortisol, so our capacity to learn is very vulnerable to stress. If we have constant stress in our lives, this flood of cortisol actually disconnects existing neural networks; we can have memory loss. We must learn to make our own interpretations rather than act on the purposes, beliefs, judgments, and feelings of others.

    So, what should we do? Practice and science show that the more prepared we are, the faster the solution and better the outcome is. How we perceive the situations in skydiving has immense influence on the outcome and the perception depends on our knowledge and experience. The ability to generate and then select the appropriate course of action is based on the decision maker’s “reading” of the situation—in other words, their ability to assess the situation and predict how it will evolve over the next few seconds. If equipment knowledge and understanding the process is in play, then dealing with emergency situations is significantly simplified. “In general, for freefall emergencies they come down to- If your main canopy is out or there’s a reason to believe it can come out- jettison the main and deploy the reserve. If the main parachute is not coming out- deploy your reserve! All these should be done high enough.” Knowing your equipment and how it works also fits the biological reasons to perceive the emergency situations as challenge and not as threat and to get into the competence/ confidence loop which means -less stress. In other words- we perceive the emergency situation as challenge, not threat.

    The right education? Well, looks like we need to work on it!  

    All the above is just scratching the surface on the subject. It doesn’t explain everything and nothing in our brain does one thing only. Also, there are other factors in making decisions under stress too. However, humans have the necessary response abilities to act in high stress situations. They have been developing in the evolution for more than 300 million years. These abilities are very effective and we use them daily in our lives, in sports and even in skydiving. All these should be deeply utilised in the skydive training, not ignored!

    Maybe it’s time the available knowledge to be implemented for updating the skydiving education. Skydivers’ safety depends on that!

    Kras
     

    By glhsystems, in Safety,

    Downsizing Checklist

    While I was an S+TA, I spent a considerable amount of time telling people they shouldn't be loading their canopies so heavily. 90% of the time it didn't work. Skydivers can have a bit of an ego, and when I told them they probably shouldn't downsize yet they heard "I think you're a crappy canopy pilot who can't handle a smaller wing." So they downsized and broke their legs, backs and pelvises with some regularity.
    A few years back I met up with Brett, one of the people I'd been lecturing to whle I was an S+TA. He told me that he wished he'd listened to me back then. He had broken his femur during a botched landing, been out of the sport for a while, and then came back and really learned to fly his canopy. He took a canopy control course and actually upsized to get more performance out of his canopy. He ended up coming in first in one of the events at the PST that year.
    That started me thinking. Maybe the approach I was taking was wrong. Since jumpers tend not to listen to other people who tell them they're not as good as they think they are, perhaps if you could give them better tools to evaluate themselves they could make better decisions about canopy choices. It's one thing to have some boring S+TA guy give you a lecture about not having any fun under canopy, quite another to try to perform a needed manuever under canopy - and fail. In that case there's no one telling you you can't fly the canopy, it's just blatantly obvious.
    So I came up with a list of canopy control skills everyone should have before downsizing. Some are survival skills - being able to flat turn would have saved half a dozen people this year alone. Some are canopy familiarization skills - being able to do a gentle front riser approach teaches you how to judge altitude and speed at low altitudes, and how to fly a parachute flying faster than its trim airspeed, a critical skill for swooping. It's important to do these BEFORE you downsize, because some manuevers are a little scary (turning at 50 feet? Yikes!) and you want to be on a larger canopy you're completely comfortable with before trying such a thing.
    The short version of the list is below. Before people downsize, they should be able to:
    flat turn 90 degrees at 50 feet
    flare turn at least 45 degrees
    land crosswind and in no wind
    land reliably within a 10 meter circle
    initiate a high performance landing with double front risers and front riser turn to landing
    land on slight uphills and downhills
    land with rear risers
    Details:


    1. Flat turn 90 degrees at 50 feet.
    This is the most important of all the skills. The objective of this manuever is to change your direction 90 degrees losing as little altitude as possible, and come out of the manuever at normal flying speed. Coming out at normal flying speed means you can instantly flare and get a normal landing. If you can do this at 50 feet, and come out of the manuever with normal flying speed at 5 feet, you can flare and land normally.
    Every year people die because they decide they simply have to turn at 100 feet and know only one way to do it - pull down a toggle. The parachute dives and they hit the ground at 40mph. To prevent this, not only do you have to know how to flat turn, but you have to practice it enough that it becomes second nature. Then when you do need it, you won't have to think about it.
    To pull off this manuever, start by toggle turning the parachute gently. IMMEDIATELY follow that with some opposite toggle. The idea is that you want to flare just a little to counteract the canopy's desire to dive. Continue adding opposite toggle until you've stopped the turn. At this point let both toggles all the way up. If you feel the parachute accelerate after you let go of the toggles (i.e. it feels like you just flared) use less opposite toggle next time. If you feel like the parachute is diving, like you just did a toggle turn, use more opposite toggle next time. Basically you want to start the turn with one toggle, stop it with the other one, and use just enough toggle to keep the wing from diving but not so much that it does a flare.
    It should go without saying that this manuever should be practiced up high before you ever try it down low. If and when you do try it out low, start at lesser angles (i.e. try a 15 degree turn first) make sure the pattern is clear and make sure conditions are good (soft ground, good winds.) Work up gradually to a full 90 degree turn. I do think it's important to try at least a gentle flat turn very low; we are horrible judges of exact altitudes when we're at 1000 feet, and it's hard to tell if you've lost 50 feet or 200 in a turn. By trying it out down low, you'll get a better sense of what it can do for you, and you'll have the "sight picture" better set in case you have to use it for real one day.
    A variation on this is to go to half brakes and then let one brake up. This gives you a flat turn, but by flaring first you "use up" some of the canopy's energy so you can't turn as effectively. On the plus side the turn happens more slowly. If you are about to hit a tree and want to make a last minute turn, this variation might be the way to go, as it combines a turn and a flare, thus reducing your speed before impact. A version of this is currently taught in the ISP, so it might be a good way to make your first flat turns before transitioning to the less-braked variety.

    2. Flare turn at least 45 degrees.
    This does two things - it gives you another tool in your arsenal to dodge last minute obstacles, and teaches you to fly your canopy all the way through to the landing. The #1 mistake jumpers with new HP canopies make is to "reach out to break their fall" while they're flaring; this of course turns the canopy in the direction they are reaching. Most people decide that this is due to a side gust just as they're landing. I remember one jumper at Brown who, amazingly enough, experienced a side gust seconds before he landed (and always from the right) 40-50 times in a row! Learning to flare turn will help eliminate this problem.
    To flare turn, start with a normal flare, then flare slightly more with one toggle. The canopy will turn. Bring the other toggle down to match it, and the canopy will straighten out. It's a dynamic process; rather than put the toggles at a certain position, you have to speed up one toggle for a second, then speed up the other to match it, before you level them and finish the flare. If you balloon upwards, then don't flare as quickly. If you drop to the ground, bring both toggles down more aggressively when they are 'split.' One thing that helps people is to think about where your canopy is rather than what it's doing. Use the toggles to put it off to one side for a moment, then use them to put it back over your head.
    This can be hard to practice with a large canopy. I can pull off a 45 degree turn on a Manta, but the flare is over so fast that it's hard to explain what I just did. It's much easier on a canopy loaded around 1:1, so you may want to wait on this one until you get to that loading.
    Note that if you combine a flare turn with a flat turn, you can pull off nearly a 180 degree turn at just above 50 feet. Also note that knowing how to do flat and flare turns doesn't mean you can always turn at 50 feet and get away with it - sometimes it's better to accept a downwind landing than make a turn at a dangerously low altitude. But if you do have to turn low (say, you're on course for the electrified fence around the pit bull farm) a flat/flare turn will let you either turn and land normally or turn and minimize the damage caused by landing in a turn.

    3. Land crosswind and in no wind.
    These are straightforward. No wind landings are pretty easy; the only issue is that your perception of speed and altitude will be off. Since you seem to be moving faster over the ground when there's no wind (which you actually are) it can seem like a good idea to add just a little brake to 'slow you down' before you land. Resist that urge! Keep that speed in your canopy; you can turn the speed into a good flare only if you start the flare with decent (i.e. full flight) speed.
    Crosswind landings can be a little more tricky because of that strong tendency to want to "reach out to break your fall." Counter this by flaring with your hands in towards the center of your body. You may have to PLF on these landings, since you'll have some decent forward speed and have some sideways motion from the wind. If you want to get fancy, try a flare turn after you start your flare on the crosswind landing - you can easily pull off a standup landing if you get turned enough before you put your feet down.
    If these work well you may want to try a downwind landing. The benefit to doing that is it will prepare you to accept a downwind landing in the future; you won't be tempted to turn too low to avoid it. Choose an ideal day for this one, with a slippery landing area (wet grass is perfect) low winds and a clear landing area. Prepare to PLF, and think about "laying it down" on your thigh as you land to start sliding. You can slide across grass at 30mph without getting hurt, but planting your feet and cartwheeling at those speeds can be very dangerous.

    4. Land reliably within a 10 meter circle.
    This is essentially the PRO requirement. This is critical because your accuracy skills are what will keep you from having to turn low. It's very comforting to know that you can land in any 50ish foot clearing if you find yourself having to land out; it's especially important as you get to smaller canopies that need longer and longer runways to land well. Your only option may be a section of road, and you may have to hit the beginning of the road dead-on to have enough room to slow down.
    The subject of canopy accuracy is too long to do justice to here, but the top 3 hints I've heard are:
    - If you're not sure if you're going to make it over a wire or tree, look at what it's doing with respect to the background. If more background is appearing from beneath the wire or tree, you're probably going to make it.
    - As you look at the ground, most points will seem to move away from a central point. Some will rise, some will fall, some will go out to the side. If you look long enough you'll find one point that's not moving - that's where you're going to land if the winds don't change all the way in (which is rare.)
    - Going into brakes usually makes you land short in high winds, but can extend your glide in no wind. Front risers almost always make you land shorter.


    5. Initiate a high performance landing with double fronts, and a front riser turn to landing.
    I am pretty convinced that front riser high performance landings are a lot safer than toggle turn high performance landings, and double fronts are the safest of all. If you do it too low, or become worried about the landing - just drop the risers and you're back to normal flight.
    For double front riser landings, set up a normal landing, aiming for a point a little farther away than you normally do. At 100 feet or so, pull down both front risers. Your canopy will drop and accelerate. At some point above the ground (30-10 feet depending on your canopy) drop the front risers. Your canopy will begin to recover. Before it completes the recovery to normal flight, you should be at flare altitude. Start the flare normally. You may need to use less toggle than normal, since the canopy is now going faster than you're used to, and the same amount of toggle gives you more lift. You will also plane out farther, since you have more speed you have to bleed off before you come to a stop.
    For front riser turns to landing, first try front riser turns out above 1000 feet and get used to how your canopy recovers. Then start by coming in 10 degrees off the windline, and making a gentle front riser turn to line up with the wind at ~100 feet. The canopy will dive and accelerate, so be prepared to drop the front riser instantly and flare if you have to. Also be prepared to steer in the flare, since the canopy may not have stopped turning completely before the flare begins. Done correctly, you'll start the flare with more forward speed, giving you a longer planeout.
    Make sure your flares are smooth for this! A smooth flare generates more lift for a longer period of time than "stabbing" the brakes. However, don't start the flare at 30 feet - starting the flare that high will slow the canopy down, negating the effects of the front riser approach. If you do find yourself stabbing the brakes to prevent hitting the ground, move the altitude at which you start front risering up.
    Probably the most critical skill you will get from this exercise is the development of the "sight picture." Below 200 feet your altimeter is pretty useless, and you should be looking at traffic and the landing area anyway. Eventually you'll develop a sense of what "picture" you should see just before you start that riser turn. The picture will vary with wind, landing area etc. If you arrive at the point where you would normally start the front riser turn, and the picture's not right - abort it and land normally.
    Once you have the picture down, and are doing front riser turns that transition to gradual flares, then start increasing the angle. Once you get to 90 degrees you're going to be gaining a lot of speed, so be sure to adjust your sight picture up to compensate. As always, bail by dropping the risers if you feel like there's anything wrong. Once you drop the risers, level the wing with your toggles and prepare to flare. At worst you'll have to land crosswind - but that's a skill you should have by this point anyway.

    6. Land on slight uphills and downhills.
    Often, land away from the DZ isn't perfectly flat; sometimes you can't tell this until you're at 20 feet. To prepare for this, find a place in your LZ that's not perfectly flat, scope it out, and plan on landing there. There's not too much magic concerning landing on a slope. You flare more aggressively to land going uphill, less aggressively to land going downhill.
    Obviously not all DZ's have slopes. If you don't have a good slope on your DZ somewhere, you may have to put this one off until you're at a DZ that does have one. Beaches are a good place to practice this, since they have pretty predictable slopes down to the water, and overrunning the landing just means you get wet.

    7. Land with rear risers.
    Knowing how to land with rear risers can help you deal with a canopy problem like a broken or stuck brake line, and can help you make a better land/cutaway decision when you do have such a problem.
    Again, this is best practiced up high. See how far you can pull the rear risers before the canopy stalls. It will stall much earlier with rear risers; memorize where that happens so you don't do it near the ground.
    When you try it for real, choose an ideal day - steady moderate winds, soft ground, clear pattern. Be sure to try this for the first time on a largish canopy (one of the reasons you should do these things before downsizing.) Leave your hands in the toggles and wrap your whole hand around the rear riser. That way if things go awry you can drop the risers and flare normally. Start the flare at a normal flare altitude, and prepare to PLF. You may get the sort of lift you're used to, but you probably won't slow down as much before you're near that stall point. Make sure your feet are on the ground (sliding preferably) before you get there.
    On smaller canopies, you may want to start the flare with rear risers. Then, once the canopy is leveled out, drop the risers and finish the flare with the toggles (which are still around your hands.) That way you get your vertical speed to zero, which is the critical part of a safe slide-in landing, and can still stop the canopy without hitting the ground going too fast. (This is also a technique used by swoopers to extend their swoops BTW.)

    The above list is not meant to include all the skills you need to safely fly a canopy; it’s just a checklist for a cross-section of skills you should have before downsizing. Some of these will be easier on a larger canopy, and can be practiced right away. Landing downwind, for example, is easier on a larger canopy simply because it can slow you down more before stalling. Some skills are more difficult on a larger canopy. It can be difficult to get a planeout at all on a larger F-111 canopy, so practicing things like a flare turn may best wait until you approach a 1:1 loading on a ZP canopy. At that loading, the canopy begins to perform more along the lines of how we expect a HP canopy to fly. More importantly, skills like the flare turn become both possible and necessary to practice, so you can hone your skills while you are under a canopy that tolerates minor mistakes.
    As I mentioned in the beginning, these are skills you should learn before you downsize, although some (like the flare turn) can be difficult to practice at very light loadings. If you can't do some of them yet? Get some coaching; it makes a lot more sense to learn them on your larger canopy, before you start jumping a smaller canopy that scares you. Once you can do them all, then try the smaller canopy. And if someday someone cuts you off under the smaller canopy, you'll have the reactions you learned under the larger canopy. Even if you haven't completely adapted those manuevers to the smaller canopy yet, those reactions will more likely than not save your life.

    By billvon, in Safety,

1 1