Submit Article

Skydiving News and Articles

Select A Category

Pick a Category

Report From Baltic Boogie 2015

Baltic Boogie takes place every year in July in Poland, on peninsula Hel. Only few days a year skydivers can gather in this specific place to benefit from spectacular views and awesome jumps over Baltic Sea.


The temporary dropzone is located just in the middle of the narrow piece of land. The landing area is really tiny, wind conditions are often demanding - after all paradise for surfers equates to a lot of waiting for skydivers, which is why there is a jump limit (100 or higher, depending on current conditions) and only licensed skydivers are allowed to jump.
However, despite these limitations, the place really is awesome for jumping. Blue to the left, blue to the right and blue above! For some skydivers even one single jump over Jastarnia is worth showing up for. For this year the organizers put a limit of 80 slots, which was booked within 3 weeks from registration opening. Skydivers from 7 countries invaded the northern part of Poland and - more important - the sky above it. Germany, Switzerland, Australia, Sweden, Netherlands, France, UK and Spain.


Performance Designs brought demo canopies, Gregor van den Eynden (Sonic Flywear) and Jared Harris (Flyspot windtunnel) were taking care of load organizing, so when it actually was possible to jump, plane was going up and down all day long, right up until sunset.
"If only the weather was more skydive-friendly I would be very happy" - says Sebastian Dratwa, boogie organizer - "But we’ve put a lot of work to prepare everything and the time when we were jumping was amazing. Thanks everyone for coming and see you next year!"
All pictures have been gathered and prepared by Kuba Konwent, but it's a common work of many skydivers: Kuba Konwent, Carlos (Artur Karwowski), Jared Harris, Sebastian Dratwa, Grzegorz Ciesielski and Marta Molinska.

By admin, in Events,

How Density Affects Your Destiny

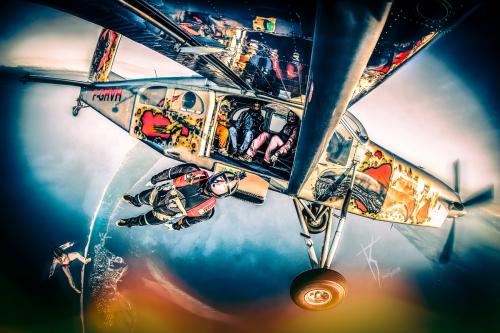
When Tiptoe Landings Disappear Into Thin Air
When you come screaming in and tumble halfway down the landing area at a new dropzone, it’s unlikely that you would chalk your misery up to “pressure altitude corrected for nonstandard temperature and humidity.”
Maybe, however, you should – and if you know a little more about how it works, maybe you won’t find yourself in that grass-stained position. It’s called density altitude, and the struggle is real.
1. Remember the ball pit.
You remember playing in the ball pit in the indoor playground, right? You’d take a running leap into the middle of the pit, diving into a big, forgiving pile of colorful plastic that cushioned your fall. If you took a running leap into a ball pit with just a few scattered balls rolling around at the bottom, you’d expect a different result.
The sky is kinda like that.
When we talk about air density, we’re referring to the number of air molecules in a given volume of space. High-density air has more molecules -- more balls. Low-density air has fewer.
2. Respect the ball pit.
Just like an empty ball pit doesn’t slow you down on your way to the floor, low-density air doesn’t slow down the wing as much as high-density air does. This changes the canopy’s flying dynamics, making the system fly faster – sometimes, much faster – than normal.
As you might imagine from the term “density altitude,” altitude has a lot to do with the density of air. It’s inversely proportionate, so higher altitudes have lower density altitude – fewer air molecules in a given volume – than lower altitudes. This makes sea-level landings more docile than those at, say, Mile-Hi Skydiving in Denver or Skydive the Wasatch in Utah.
3. Factor in the other variables.
Altitude density is not simply another name for air density. It’s affected by a few more factors. Altitude density combines the effects of temperature, humidity and weather systems with altitude to measure the altitude at which your airfoil behaves as though it’s flying. If you travel for boogies, you may have experienced this in your skydiving career: with a few temperature and pressure changes, your canopy might behave as though it’s flying at Mile-Hi when you’re jumping in Moab.
If you’re a little confused by that, you’re not alone.
The key to understanding is to know that density altitude tells you where your canopy “thinks” it’s flying under standard temperature and pressure conditions, that highly evasive moment of total equilibrium. The “standard” comes from the fact that temperature and pressure decrease predictably as altitude increases. As such, a “standard” temperature and pressure can be assigned to any given spot on the altitude scale, dropping proportionally with altitude from the standard 15 degrees Celsius at sea level.
Take a weather system through that same point, however, and you’ll need to start making some adjustments. a high-pressure area pushes more air density into the equation, and a low-pressure system does the opposite. Heat it up, and the molecules spread apart, lessening the pressure/density; cool it down, and the molecules snuggle in together, increasing the pressure/density.
Humidity is a little more complicated, but super-interesting. When the weather is humid, we tend to describe the air as “heavy.” That description is utterly (and somewhat surprisingly) unscientific, as water vapor weighs almost half as much as dry air. When it’s humid, heavy dry-air molecules such as oxygen and nitrogen are replaced by much lighter water molecules, greatly decreasing the density of the air.
4. Review the Cliff Notes.
It’s easy to misunderstand (or misremember) the terminology. High density altitude means fast landings. Low density altitude means slower landings.
Altitude and temperature are the factors that will deliver the most noticeable changes to the way your canopy flies. Humidity will affect your experience less. (Remember that – in this order – low, cold and dry equals slow, that high, hot and wet equals fast.)
Consider upsizing to a more docile rental canopy if you’re making a big jump in density altitude (for example, from a coastal DZ to a high-mountain DZ).
Higher density altitude? Your canopy will eat up more altitude in a turn and stall at a faster forward speed. Be ready.
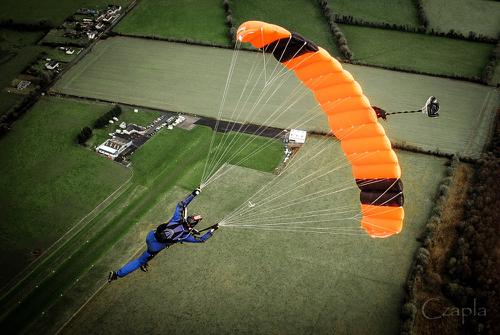
When you’re setting up a landing in a place with a significantly higher density altitude than you’re used to, give yourself plenty of room to land (and a bit of privacy for a PLF, if you care about such things). You won’t be able to just plop it down as you’re accustomed to, so focus on flying your canopy all the way through the flare and your almost-certainly-necessary run-out.

By nettenette, in General,

A helmet that fully integrates GoPro 3 and 4 series

The issue of helmets with cameras interfering with the deployment sequence is well-trodden, to include on dropzone.com. In France, new safety regulations produced by the Federation Française de Parachutisme, the sole, recognized sports authority for leisure skydiving, have become extremely stringent regarding camera mounts, and in particular, the way they protrude. So a French skydiver, Olivier Hiolle, developed a helmet specifically integrating the most current cameras of the day, i.e., GoPro 3 and 4 series. The result is astounding. The GoPro is fully inside the helmet, which has a frontal window. The top of the helmet is flat in order to accommodate other cameras. Of course, that would be a departure from the initial idea of having no protuberance, but there is no other way to carry larger devices. The helmet itself is a "true" helmet, in the sense that it is made of strong, resilient fabric and serious cushioning that will effectively protect the head in case of shock. We are well beyond the degree of protection afforded by basic helmets, in moulded plastic, whose protective function does not go much further than just providing a convenient attachment for a camera. I have ordered one and flown with it a dozen times. The fit is extremely comfortable and natural. I have a GoPro 3+. I purchased, as an extra, a USB cable that remains coiled inside the helmet. That way, I never manipulate the GoPro directly, apart from activating the bluetooth by slipping my little finger into the lodgment of the camera. From then on, I use the remote control. When I wish to download the pictures or load the battery, I just pull the cable out of its lodgment and plug it where it needs to go. The angle is perfect, no vibration whatsoever, and good sound under canopy (in the sense that I can hear myself grumbling and commenting on the approach). This is a new one-man firm, who makes each helmet by hand, to include the color. Prices are reasonable, including options such as color (other than white or grey for the fiberglass version), cable, chin strap. By design, the strap, whether chin or basic, has a quick release handle. This is the website: http://www.skyvisionpara.com/index.html, which, at present, is only in French. Be aware that the photos I lifted from the webpage are not as good as the current product. It is a much more polished work than that. But the photos do give an idea of the design.

By elreg, in Gear,

Why Your Canopy Is Slapping You Around

Image by Lukasz SzymanskiAh, your canopy.
When you first got together, everything was great. A few tussles over crispy, slippery fabric were the biggest issues you two had. You packed carefully -- lovingly, even -- or you were at least habitually spying on your packer. And after freefall, it was a joy to reach for that pilot chute.
Now, things are horribly, horribly different.
What happened?
Maybe it’s because you stopped paying attention -- or maybe because you’re both getting older -- but something has changed. There have been some bad moments. Violent moments, even. There was that time that you landed from a jump with a three-ring mark and a stunned expression on your face. Your friends asked what happened to you. You started to wonder if it’s time to say goodbye for good.
Don’t thumbtack that “for sale” sign to the corkboard too quickly, friend. You can save this relationship. Here’s how.
1. Wrap your head around the dynamics involved.
When a ram-air canopy opens in freefall, the dynamics of that opening are controlled by two processes: cell inflation (air pressurizing the airfoil through the nose inlets) and bottom-skin spreading (the side-to-side spreading action that takes place as relative wind rushes against the bottom of the canopy). You might not be aware of how separate these processes are, but they are quite distinct.
Even without cell inflation, bottom-skin spreading is such an efficient phenomenon that a canopy can open entirely by this method, before the cells have a chance to inflate and pressurize. Since the force of that kind of opening is brutal enough to be quite literally fatal, square skydiving canopy designers invented a system to put on the all-important brakes -- the humble slider.
That funny little square has a single function: to sync up bottom-skin spreading with cell inflation. A correctly packed slider stays at the very top of the lines during the early part of inflation, kept there by the same forces that would smack the canopy open with bottom-skin inflation.
2. Help your slider help you.
Make quartering your slider the most important part of your pack job. Be thorough about it. Draw the folds evenly between each of the four line groups, then tug the center of the slider straight down to settle the grommets snugly against the stops. A slider that’s sorted out in this way is a slider that is most likely to present itself correctly to the relative wind (and therefore do its job optimally).
3. Avoid getting dumped.
Optimizing your slider is only the first step in the process. The second, as you might imagine, has to do with your tangled handfuls of marionette strings. Incorrect line stows can release prematurely -- or, colloquially, “dump” -- resulting in a configuration wherein the canopy inflates before line stretch. When the lines catch up to the nylon, the jumper gets one heckuva headbanger. (Picture a Great Dane running at full tilt to the end of a long, long leash.)
4. Keep the right amount of pressure on.
It should take roughly 8 to 12 pounds of pressure to pull your lines from the stows. If you’ve gotten complacent (or too tired to be trusted), you’re probably going to pay for it.
5. Use the rule of thumb.
The loops of line on the outside of each rubber band stow (technically called “bights”) should be approximately two inches long. If that’s longer than you’re used to, that’s normal -- but know that right-sized bights keep about a quarter of the stowed line on the outside of the stow, minimizing the lines’ ability to dump. Luckily, two inches is about the size of the average human thumb, so you have a ready reference when you’re on the packing mat.
If you happen to have stowless gear, your line dump issues are probably related to uneven folding of the lines (or lazy bag closure). The same pressure principle applies to the closing bands on your system: close the bag with 8-12 pounds of pressure, equal on each side.
6. Get professional help.
If you go through all those steps and you’re still not on good terms with your canopy, look elsewhere for guidance. Take your canopy to a rigger for inspection. You may discover a deeper problem -- and he/she might just be able to fix it right up. (There’s no shame in a little counseling, after all. Love is worth it.)

By admin, in Gear,

Squirrel Reveal Wingsuit Targeted Epicene Canopy

The guys over at Squirrel have just released a video for their latest canopy, the Epicene. The almost 4-minute long video, which includes a "Rick Roll", also discusses why the Epicene is a great canopy for wingsuit pilots.
While Squirrel have historically focused primarily on BASE orientated products, the Epicene is focused towards the skydiving community, though wingsuit flyers in particular. Squirrel have stated that while the Epicene is the best choice for wingsuit flying, it is also perfectly adequate for free flyers as well.
The Epicene is built with wingsuit openings in mind and is made in such a way that it reduces the risk for line twists and unpredictability, while at the same time opening quickly and also catering to the responsiveness.
The video also puts focus on the pack size of the canopy, with both TJ Landgren and Mike Swanson praising the F-111 hybrid canopy's pack volume.
While Squirrel first began releasing information about this canopy mid-2014 it only fairly recently went on sale to the public, and you can find more information on the Squirrel website.
Editor's Note: Adjustments were made to this article regarding previously misstated information relating to time of release.

By admin, in Gear,

How To Buy Used Skydiving Gear (The Smart Way)

Image by Trigger
Hey, new skydiver! Congratulations. That A-license stamp looks great in the middle of your forehead. Very flattering.
Now that you’re in the fold, do yourself a favor: don't dally at the rental counter. It’s an investment (and somewhat counterintuitive) but trust me: you will find it much more cost-effective to buy your first set of gear than to keep renting, but If this is your first set of skydiving gear, you should buy used -- and spend the money you save on jumping. Here’s how to do it right.
How to Buy a Used Reserve Parachute

Get comfortable with the idea. Picking up a used reserve -- if it’s in spotless shape -- is a smart place to save a lot of cash. Riggers tend to agree that the cost of a brand-new reserve isn’t justified.
Choose a damage-free reserve -- no patches, please -- with less than ten rides. Less than five is better.
If your reserve is old enough to vote, it’s too old to jump.
How to Choose a Used Main Canopy

Look for a main with as few jumps on it as you can afford. Newer canopies fly better -- and, importantly, flare better -- than older canopies, because the passing seasons make the fabric more porous. As a rule, you can expect a harder landing from an older canopy.
It can be tricky, but your best move is to choose a used main with its original line set. Even honest resellers don’t often know for certain the canopy’s actual jump numbers, and the condition of the line set is an inspecting rigger’s best clue.
Find out where your canopy used to live. If it was jumped seasonally at grassy drop zones, it’ll be in much better condition than a year-round desert dropzone. That silicate desert dust chews up the fabric’s protective coating. Beware of beach DZs, too: seawater landings can result in very serious, sneaky damage.
Be picky. Do your best to find an undamaged main canopy -- even one that’s been meticulously repaired. These are hard enough to resell that it’s rarely worth the up-front savings.
Image by Halldor92572

How to Buy a Used Harness/Container System

Do not look for a container first. There are so many reasons why this is the case. You must know the exact sizes of both of your canopies before you can choose a harness/container to fit them.
Have a rigger measure your body. Don’t go it alone. Harnesses are sized and carefully proportioned to both height and weight, and you’ll save yourself time by eliminating the guesswork.
Ask the seller for the serial number. Then contact the manufacturer with your sizes. Ask the rep whether it’s a good fit for your body and canopies.
Impossible to fit? Don’t worry. As you’ve undoubtedly noticed by now, non-standard body types are not uncommon in skydiving. However, new A licenses with unique body types sometimes face an uphill battle. Resizing a harness is almost always an option, but it’s can be so expensive that buying simple, new gear may make more sense. If this is you, research the basic, no-bells-and-whistles container systems available: for instance, the Dolphin, the Genera and the Shadow Racer.
How to Buy a Used AAD

Be sure that the used AAD meets your basic requirements. Determine that the AAD on offer is within its service life, has met the proper maintenance schedule and is approved for your container system. (Note that both the Cypres II and the Vigil II are waterproof, but the earlier (I) versions are not. Beach/lake dropzone? You know your answer.)
Determine your timeline. When you buy an AAD – whether used or new – you’re paying a fixed cost per year. The quality of the AAD doesn’t change over time within its approved lifespan, so don’t worry about snagging a unit within a couple years of expiration. (Just save your pennies while the time runs out.)
Buy new, if you can afford it. AADs are very easy to resell. Purchasing a new one is not a bad choice if you have the cash.
General Advice for Buying Used Parachuting
Equipment

Keep an open mind. It’s unlikely that you’ll find a container that matches all the other criteria and comes in your colors. Accept that fact early.
Pay a trusted rigger to conduct a pre-purchase inspection on any used gear you buy. The inspection will run you about $25 (or a matching amount of beer). Ask him or her to write down a list of issues – including potential ones – and the cost to remedy them, as if you’re buying a used car.
Trust your instincts. If you don't like any potential component of your new skydiving kit — even one that has been suggested to you by a skydiving friend or a rigger or a boogie rep – do not buy it. You'll never be happy with it, and starting out with gear you dislike will adversely affect your entire skydiving career. Love the gear you’re in, and you’ll be a better skydiver for it.


By admin, in Gear,

GoPro Goes Small With The Hero 4 Session

GoPro announced the latest addition to their line of action cameras this week with the reveal of the GoPro Hero 4 Session. The Session is small, really small -- about the same size as an ice cube and according to GoPro, it has been in development for several years now. With its reduced size, it will allow for easier mounting, especially for those looking for something to strap to their wrists.
Unfortunately, early reports suggest that the decrease in size does not come without a cost. You should not expect the same recording quality, nor the features that are present with the Hero 4 Silver or Black. In their venture to create their smallest action camera yet, GoPro had to make sacrifices on both fronts and you'll only be seeing still images with a maximum resolution of 8 megapixels from the Session. Being less than 1.5 inches in diameter, it goes without saying that you won't be receiving any touch screen or image preview functionality.
The cube design features a small LCD screen at the top and just two buttons, the main of which will control all your recording settings and control, while the smaller button is merely a wifi on/off button. Bound to be frustrating to some is that one cannot change between single and burst mode through the camera and requires use of the GoPro app in order to change these settings. There are some positives to mention though, with battery life being one of them. The Hero 4 Session is able to last up to 2 hours while running, better than the battery life seen in the other Hero 4 cameras.
Recording Abilities
While one may expect 4k recording from the Hero 4 Session, you're not going to find it. You can however record at a maximum of 30fps at 1440p or 60fps at 1080p. For those looking to get 100fps out of their recording, you will be able to do so at a 720p recording resolution. Overall it is somewhat to be expected, given the size and already clear limitations with the product, however we would have liked to at least see 100fps at 1080p and perhaps 60fps at the 1440p range.
The reality is still however, that for the most part 4k recording is overkill and for vast majority of uses 1080p will suffice just fine.
Another potentially frustrating aspect to the Session design is because of the cubed shape, some early testers of the camera found that it was easy to hold the wrong way around without noticing. This is likely not going to be a problem for too many people, who will have the device mounted, but for those going handheld, make sure you don't hold it at 90 degrees, or you'll need to do some post-process rotation adjustments.
From what we've seen, it appears as though the Session is intended for those looking to create easy and quick HD videos, in the occasional circumstances where the other GoPro models may be too large. Priced at a whopping $400, we are struggling to see too many reasons for the average athlete to opt for the Session over the Hero 4 Silver, which at the same price comes with 4k recording, 4 more megapixels as well as a touch screen.
It's Not All Doom and Gloom
Don't get too caught up in the negative aspects of the Hero 4 Session however, it's still an extremely competent looking camera and while the recording quality may not be the best that GoPro has given us, it's more than enough for your average user who isn't looking for the clearest quality around.
It comes standard with 10 meter water proofing, meaning no extra housing needed for most practical uses.
The most obvious of the positives however, is the size. Being less than 1.5 inches allows for its use in situations where you may otherwise have struggled. For those who use wrist mounts for their GoPro, the session will definitely serve a purpose. A question that will also obviously come to the minds of many, will be how it compares to the other GoPro series with regards to snag risk.
While we haven't been able to see first hand how the Session will handle a snag scenario, there is a lot less surface area so the odds of your lines getting caught seem lower, but the way the mount clamp is positioned in relation to the camera itself, it seems that there remains a risk for snagging between the clamp and the camera. This is something that could be helped a lot by the development of custom mounts, which will no doubt be developed some time after release.
If you're currently an owner of a Hero 3 or Hero 4 and shoot regular helmet mounted video footage, we can't see any reason for you to switch out for the Hero 4 Session, but if you're looking for an extra camera for a wrist mount or another area where size is an important factor, the Hero 4 Session may be worth looking into -- if you're willing to fork out the $400.

By admin, in News,

Robert Harris Explains His Homemade Wingsuit Project

We recently talked with Robert Harris, who took it upon himself to build his own homemade wingsuit. After years of motocross racing, Robert started skydiving five years ago, and since then has attained over 1600 jumps, his D-license as well as AFF and coach ratings. However, what made us want to talk to him, was having seen that he had developed his own DIY wingsuit at home. He talks to us about what inspired him, how he made it and most importantly, how it flew.
What made you want to develop this DIY wingsuit?
I have always liked knowing how things are made, when I was a kid I took everything apart to try and figure out how it worked and hopefully put it back together before my parents found out. This didn't stop as I got older, although it changed to learning, so I could make things.
Shortly after I started wingsuiting I decided I was going to make a wingsuit someday. So last year I asked for a sewing machine for Christmas and didn't get one as no one knew what kind I wanted and I didn't either. I had gotten to use a sewing machine back in middle school home ec class but didn't care about learning sewing, wish they had told me I could make parachutes and wingsuits back then as I would have paid way more attention.
After talking to my dz's rigger Sally and some other people and decided to get a singer 20u, after over a month of trying to buy one I found one on Craigslist from an old lady that really never used it for 400$. Then I started sewing. First a pillow case, then a miniature version of my Leia that I made into a traction kite, a belly band, canopy continuity bag, and weight belt. After all of those projects I finally decided it was time to start my wingsuit project.
What experience do you have in aeronautics or aviation product development?
I don't really have much, but I have started an online class on Aeronautical Engineering to learn more about designing airfoils. I hope to learn to do some equations to determine glide and speed of a given airfoils parameters and hopefully eventually learn CFD(Computational Fluid Dynamics) to push the envelope of what can be done in wingsuits I make later.
What were your expectations when starting this project?
I was told by quite a few people that I was crazy for wanting to make a wingsuit or that it was too hard and I didn't have a chance. I didn't really care about the designing process when I first started I just wanted to assemble a suit and fly it. I didn't care if it was the best performing suit I just wanted to say I had done it. Although I think I have caught the bug, now I want to make another one and try some new ideas we haven't seen in the wingsuit world yet.
Could you explain your creation process to us?
When I started I picked one of my wingsuits as a starting platform. I took measurements all over the outside of the suit, and decided to change the arm wings completely as I didn't want to outright copy the suit. I simplified some parts trying to make it out as few as pieces as possible. After all the outside pieces were made came the challenging part of making the ribs. I was originally going to make it with back fly vents so tried to make an airfoil shape that would be as good either on back or belly. I drew out where the ribs would be placed and measured how long they would need to be on the top and bottom skins and as far as thickness goes I knew how wide I wanted the thickest one and the thinnest, to figure out the rest I used some math to taper from the biggest to smallest.
After I started sewing I scraped the backfly vents but left the ribs how they where as after putting the fronts on I didn't want to deal with the headache of the backfly ones as well. I spent a couple days making patterns and writing everything down as I did it to make it easier for possibly making another one. After the patterns were all done and checked for fit against each other I started cutting them all out of some parapac I got from JoAnn's fabric with my new hot-knife my girlfriend got me for my birthday. This part went relatively quickly and only took about a day total. Then came the weekend and jumping time, it was hard to pull myself away from my project but I needed to train for the last swoop meet of the season. As weather got crappy I started the sewing. I figured it would be best to get the hardest part done first the arm wings as if I couldn't get those done there was no point in even making the tail.
I started with sewing the ribs to front or bottom skin of the suit and quickly learned the sewing the ribs and vents on together was a pain. I did every step on both wings at the same time so I could try and make it as symmetrical as possible and knew they where both put together in the same order. I felt really accomplished when I finished both arm wings and was ready to push through the tail wing quickly before my swoop comp. The tail wing went together pretty easily after making the arm wings and before I knew it I had 3 wings that needed to be put together. After missing a couple of weekdays jumping as I sat busy behind my blue Singer I had finally finished! I was so excited after 23 hours of sewing to go jump it but jumping had already stopped for the day.


And how did it fly when you took it out?
I really wanted to get some outside video of its (cough cough) first fight. Go figure, none of the normal wingsuiters where around, I eventually asked my friend Paul who has done only a handful or two of wingsuit jumps if he would try. I gave him an I-bird I use for teaching and rig to borrow so he wouldn't be jumping his velo. We talked about the dirt dive and manifested for a load. As we climbed to altitude all I could think about was my family and girlfriend and how dangerous this could be. I did a lot of practice touches of all my handles and went through my emergency procedures as I always do but did way more of them.
On the 2 min call we did all the normal handshakes and then I buckled my helmet and zipped up my arm wings. As all the other jumpers were getting off the plane my heart started racing, I used all my yoga experience to get my breathing in check as I walked to the door of the Twin Otter, I could tell Paul was nervous as well. I had him exit before me as I wanted a nice exit shot, as I hopped out from a poised position in the door all I could think was please don't let the suit blow apart! I made sure to keep all my wings shut down on exit and waited to see the tail before I ever so slowly opened my wings.
I got my wings open and started flying, I was ecstatic at this point as the suit was staying in one piece. I started my first turn shortly after and was surprised at how stable it was. It took a little bit for Paul and I to get together but around 10k we got together shortly after my practice pull to see if there would be any issues and it was the easiest one I have done in awhile. We flew with each other for a bit and then about 7k I wanted to see what I could do with it.
I started a small dive then went in max flight. I decided I would pull higher then normal as I was still jumping my normal wingsuit canopy a Jfx 84 at 4,500 feet. I came in to land with 90 degree turn for nice little swoop. Shortly after Paul landed close by and celebrated an awesome jump!
I have never been so excited and nervous on any of my 1600 plus skydives or 4 base jumps yet alone together. After I landed I had to message family and girlfriend to let them know I was ok, they were all pretty scared about me doing it. Since the 1st jump I have only done 1 more on the suit and it was a time run, I got 2 min and 20sconds out of it, which was defiantly shy of the 3-3.5 min I should have gotten out of that size suit. Turns out the fabric I used was my biggest downfall, it didnt have a coating on it like parapac used in other suits so it was constantly bleeding air out and never achieved max pressure.
What was the biggest challenge in creating your wingsuit?
The biggest challenge by far was trying to figure out what order everything gets put together in, I spent a couple days alone trying to piece it together in my head to figure it out. Although I had to unpick a few parts because of misalignment I did not have to unpick anything because of the order I put it together in.
Do you feel that your venture was a success?
In the end I feel I achieved my goals I set out for the project and learned tons along the way! I look forward to starting my next suit when I return from visiting my girlfriend in London. I already have tons of things I want to try try and do but the major thing will be a fabric that has zero porosity.
About Robert Harris (D-31584): I grew up racing motocross at a early age and after many years of racing I stopped because I was tired of breaking myself. I still rode and one day on the way from riding I got a call about getting to do a free tandem. Of course I said yes much to my parents dismay, they thought skydiving was too dangerous at the time and realize now its more dangerous then motocross. I had loved motocross for the jumps as I loved the feeling of flying through the air. Skydiving was just that pure flying and as soon as I landed I signed up for Aff. One year after I started I had 200 jumps and started wingsuiting on jump 201. My 2nd year in I had my D-license and got interested in Canopy Piloting as well. Since then I have gotten my coach and Aff ratings and am currently on my 5th year of skydiving and have just over 1600 jumps.

By admin, in Gear,

Not All Training is for Students: Recognizing and Preventing Groupthink in the Skydiving Community

Image by Brian BucklandWhen we discuss training in the skydiving community we usually refer to training students or teaching experienced skydivers new techniques. However, we seldom discuss how to train our staff so they are safer and more effective. By grooming your staff you can make your drop zone more enjoyable for your customers and in turn, make your business more profitable. Today, I would like to discuss a psychological situation that can affect the staff as well as other skydivers. That situation is known as Groupthink.
What is groupthink?
Simply put, it is a condition that occurs when a closely cohesive group has a tendency to make bad decisions because the group pressure becomes so great, everyone starts to ignore moral judgments and sound decision making. Groups that are more susceptible to this phenomenon are tightly cohesive, have a similar background, and have a lack of clear rules for decision making. As for me, I cannot think of a more cohesive group of individuals with, similar backgrounds, than a group of skydiving professionals. Please don’t get me wrong, it is not a bad thing that we are a cohesive group of people. We just need to be able to recognize when our staff, or group, is beginning to fall into a groupthink mentality.
So, what are the symptoms of groupthink?
In 1972 a social psychologist named Irving Janis identified eight symptoms of groupthink. As you read through these I ask that you think to yourself about a time where you actually witnessed one or more of these at a drop zone.
1. The feeling of invulnerability – Creates excessive optimism that encourages taking extreme risks.
2. Collective rationalizations – Members ignore warnings and do not reconsider their assumptions.
3. Beliefs in inherent morality – Members believe in the rightness of their cause and therefore ignore the ethical or moral consequences of their decisions.
4. Stereotyped views of “outsiders”– Negative views of “enemy” make effective responses to conflict seem unnecessary.
5. Direct pressure on dissenters – Members are under pressure not to express arguments against any of the group’s views.
6. Self-censorship – Doubts and deviations from the perceived group consensus are not expressed.
7. Illusion of unanimity – The majority’s view, and judgments, are believed to be unanimous.
8. Self-appointed ‘mindguards’ – Members protect the group and the leader from information that is problematic or contradictory to the group’s cohesiveness, view, and/or decisions.
I’m sure most people can relate to a few of these symptoms and to make it perfectly clear, just because you see one or two of these does not necessarily mean that a groupthink situation is going on… but then again it could. Since we know the symptoms, what can we do to prevent a groupthink situation, or to try to remedy the effects of a situation already happening?
Let’s start by defining what we call a group. A group can be something small and organized like a team. It can be a little bit larger such as the staff of a DZ. Or it can be a group of people with a common cause such as free flyers or belly flyers. Now, let’s address the problem. One way to help prevent group think from setting in is to designate a member of the group as a devil’s advocate. This person will be the one to think outside the box and to ask the questions “what if” and “why”. The devil’s advocate should also suggest alternate plans or ways of doing things. It is important that the devil’s advocate does not just go through the motions, but makes meaningful suggestions and the group discusses them. This will keep everyone’s head focused on moral and safe decisions and not just out of habit dismiss all suggestions.
Another preventive measure is for the leader to set aside an amount of time to survey warning signs. To define the leader, it can be a team coach, the DZO/DZM, but at a minimum it should be the S&TA.; This doesn’t have to be a big formal inspection, just a time to walk around the DZ so you can hear and see what people are doing and planning. In this case, someone will probably hear signs of groupthink before they see actions. Listen to what people are planning. Listen to what they are encouraging others to do. At the same time take note on how their words and actions are affecting others, especially the less experienced skydivers.
Finally, for members of the group; you should all routinely talk to someone from outside the group that is trusted and has a valued opinion. These talks should be one-on-one and preferably not with the same person. This will give you a fresh point of view and help you to make the best decision, not necessarily the one that goes along with the group.
By keeping an eye on each other not just by doing gear checks, but by letting people know when you start to observe behavior that could lead to unsafe practices, you can help make our sport safer. Let’s face it. Being a skydiver means taking calculated risks. We need to work together to keep the odds in our favor.

By coreyangel, in General,

10 Things To Note Regarding Malfunctions

Image by Juan MayerWhen are you going to be alone in the sky with a useless bag of laundry and two little handles?
If it hasn’t happened yet, it’s going to. Sure, there are skydivers with thousands of jumps who have never had to make alternate nylon plans. But don’t be fooled: your first reserve ride is not a question of “if.” It’s a question of “when.” If you don’t feel ready, you’re not alone. Here are ten proven ways to boost your confidence and safety.
1.Stay current
Long lapses between jumps are dangerous. Time on the ground dulls skills, sharpens apprehensions and weighs down your jump with the clammy fog of unfamiliarity. Most importantly, it unravels the easy muscle memory you’ve spent so much time and effort to develop -- and muscle memory is of primary importance in the event of a reserve ride. Especially at the beginning of your skydiving career, you’ve got to make the effort to jump at least every couple of weeks.
2. Give ‘er a spin
Do yourself a favor and deploy your reserve for every repack. You’ll learn the unique direction of pull for your gear, and you’ll be able to feel out the force you’ll need to exert. If your rigger watches the process, he/she can keep an eye on the deployment and identify potential problems. (Even if you have deployed your own reserve, a repack is an unwasteable drill opportunity for a refresher.)
3. Just touch your stupid handles, Mr. Bigshot, OK? Sheesh
Touch your handles in sequence before you enter the plane. It is not beneath you. Being blasé about basic safety doesn’t make you more awesome -- it just makes you more blasé. While you’re at it, check that your reserve handle is seated (so you don’t end up on a reserve ride without the yeehaw fun of a malfunctioning main).
4. Don’t overthink it
It’s simple, really. If you believe that your main is unlandable, you’re going to have a reserve ride. Sure -- lots of skydivers have landed under reserves only to realize in hindsight that they could have solved the problem. However, lots of skydivers have gone in while striving to sort out malfunctions that did not improve. If those are the choices, which would you rather be?
5. Get your priorities straight
Do not worry about stability. This is the very least of your problems. Worry about altitude. cutaway) handle no lower than 1,000 feet. Initiating a reserve ride below 1,000 feet isn’t always deadly, but it has an unnerving tendency to be. Don’t take the chance.
6. Hold on tight
After you pull your handles out completely, hold on to ‘em. You’ll save some money, and you’ll save face when you land.
7. Make sure it’s out
This is kinda your last shot at nylon, so you’ll want to be sure it’s working. Arch and look over your shoulder for the reserve pilot chute. Reserves deploy fast, so this head position is gonna butter your bread – but if the pilot chute is somehow caught in your burble, this should either shake it loose or make it clear to you that you need to do some burble intervention, stat.
8. Don’t chase after your ex(-parachute)
I’m going to go out on a limb here and tell you not try to run after it and grab it in the air. (People have, y’know, died doing that.) You broke up with each other for a reason, after all; you can reconcile after everybody’s had a little time to cool down. Instead, get your head together and use landmarks to identify where the gear is headed. Then take a deep breath, leave it to the fates, and work on navigating your meat to a safe landing.
9. Tell the peanut gallery to sit and spin
When you land a reserve, you’re going to be the talk of the DZ (for about five minutes, usually). During that five minutes – longer, if the loads are turning slowly – you’ll probably be approached by a receiving line of would-be mentors. They’re gonna question your malfunction, and they’re gonna be eager to discuss your decision to cut away.
My advice: speak to your trusted mentors and co-jumpers about your little adventure in private, and tell the rest to go suck an egg. You were there. They were not. When you need to save your life in the sky, you are absolutely alone. In the entire world, there exists only you and two handles. Your cutaway is your business.
10. Go to the liquor store
Buy a bottle of posh booze for the rigger who packed the reserve you rode. It’s tradition.

By admin, in Gear,