We have a newer and more comprehensive action camera shootout available.
We set out with 6 of the most popular models of action cameras in an all-out camera review. Our desire was to uncover the answer to the question "What is the best POV camera on the market?", and at the same time determine the strengths and weaknesses of the cameras being reviewed. The overall performance results were a little surprising to us... Could the GoPro be dethroned?
It’s the “Me” generation, and modern action cameras provide transparent windows into the very lifestyles of these individuals. “Check out what I’m doing” seems to be the prevalent theme. Quite a few electronics manufacturers have recognized the vast market for small HD cams. As a result, action cameras have undergone a tremendous shift from the low-resolution bullet cameras of 5 years ago. Today, we have POV cameras that shoot 24p, 4k resolutions, p120 frame rates for overcrank/super slow motion, and a whole lot more.
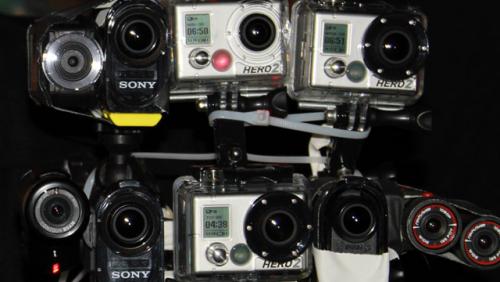
Setting out to find the best action cam, I assembled a collection of mounting points onto my Bonehead Flattop Pro camera helmet. This skydiving helmet is perfect for testing cams in the most demanding situations. On this helmet I have mounted:
Sony HDR AS15 (3 ea)
GoPro Hero 2 (3 ea)
Replay XD (3 ea)
JVC Adixxion (1 ea)
Drift Innovations HD (1 ea)
Contour Roam2 (1 ea)
It’s a total of 12 cameras on top, plus one wrist-mounted for documentation.
When possible, each of the action cameras are tested in one of three modes:
1920x1080p30 (Full HD/30 progressive frames per second)
1280x720p60 (HD/60 progressive frames per second)
1280x720p120 (HD/ 120 progressive frames per second)
In this comparison, the following criteria shall be observed:
Overall quality in identical lighting conditions
Quality in low light
Audio quality
Features/flexibility
Ease of use/setup/ out-of-box experience
Slow motion/over-crank quality
Third party support
Codec/post production
And off we go…
Overall Quality
This is the most subjective conversation of the lot. Rather than shooting charts, I chose to shoot actual subjects/scenes. Subjectively speaking, the Sony HDR AS15 is the best of the group in the most common 1920x1080p30 modes. Colors are natural, whites are white, blacks are black, and the gamut is smooth. There is no banding from the codec, and the dynamic range is broad.
Watch this video full
screen for best comparison.
The GoPro Hero2 produces a warmer overall image and it appears warm, but balanced when viewed alone. Standing next to the AS15, however, the Hero2 image reveals itself to be softer and less contrasted, with colors that selectively pop and/or are over saturated due to the more limited dynamic range. In the below image, note that clouds appear as ‘industrial haze’ vs being white. However, some people do prefer a more warm color to neutral/proper white balance. White balance is as much an aesthetic preference as it is a standard. My eye (and post workflow) prefers neutral colors. *
Low Light
Next, low light tests are performed. The purpose of this test is to see how well each camera performs in low light conditions. Typically, small format cameras are very challenged in low-light scenes, due to the small image sensors filled with high pixel values. Many sports activities take place early morning/late afternoon, or inside cramped quarters.
Low light scenes are where the Exmor processor (used in the Sony HDR AS15) outshines all others. Although the images have a blue cast, color tone is closer to the ‘eye-view’ of the scene. The 1280x720p60 modes in the GoPro Hero 2 and the Sony HDR AS15 proved to yield the best overall images for clarity, smooth motion, and exposure, but they display quite different in presentation.
Among these cameras, it’s interesting to see the differing methods used for handling the range of white to black: blooming whites to light the scene or reducing whites to balance the color. Although the Drift HD has less noise than other images, it also is the least useful image overall in how little information is contained in the frames. The Sony AS15 shows more noise than the GoPro Hero2 in p120 modes, yet also has more of a useful image. The gain can be brought up in post on the Hero2 (I did look at this), and the noise becomes about equal. However, the AS15 also offers better clarity, sharper edges, and smoother contrasts.
Audio Quality
Sound reproduction is an important part of the video experience. Audio was tested both with and without waterproof housings on relevant cameras. This is a no-brainer. Waterproof box or not, the Sony HDR AS15 wins the audio test quite handily. With a stereo mic and 16bit audio, the AS15 trumps all the competitors in every way. Adding the waterproof box to the Hero2 or Contour Roam renders them nearly useless. Drift, JVC, Contour+ and RePlayXD all are water resistant to shallow depths, and do not need housings. Therefore audio quality outside an external housing was superior to the Hero2 in all examples.
As you can tell from the helmet setup pictures, we tested one GoPro and one Sony inside their housings, but without their respective front lens assemblies. This was not only to match up lenses, but to also give each action camera the best audio opportunity possible. Audio is a somewhat important part of action sports, and isn’t forgotten by most of the manufacturers. Sony, GoPro, Drift,Replay, Contour+ all allow for external microphones to be connected. It is important to note that the Sony HDR AS15 offers no audio in p60 or p120 modes.
Features/Flexibility
This is incredibly subjective, as one person’s pleasure is another person?s pain. In my view, this is where everything outside of image quality becomes part of the purchase decision. I reviewed what I like/don’t like/found missing in each of the cameras. This section has no specific rhyme nor reason; it’s merely my personal impressions of the camcorders themselves, without looking at the packaging or image quality. It was easy to compare image quality, as all of the cameras use the .mp4 codec, packaged in a variety of containers such as .mov and .mp4. Bitrates are similar on all of the cameras, so the real variations come in the imagers, lenses, and usability.
Lenses are varied from 115 degrees to 180 degrees on these cameras. Some have selectable Field of View, and where possible, I selected as close to 120 degrees FOV as possible to best service the similarities in the test. Only Sony and JVC offer stabilizers, so the stabilizers were disabled for most of these tests. In the ATV stabilizer tests, Sony HDR AS15 performed significantly better than the JVC Adixxion.
RePlay XD
I LOVE the simplicity of this camera. One button powers up the camera, it vibrates and provides LED feedback for record, pause, and battery level information. It is water resistant, and can be stashed almost anywhere due to its tubular aircraft aluminum form. RePlay offers several mounting options, including swivel/ball head mounts made from aluminum billet. Quite simply put, it’s a tough camera. RePlay offers a mounting ring that allows for wide angle lenses to be attached to the camera. Since the lens is only 61 degrees in width, it is substantially tighter than any of its competitors, and a wide angle adapter will be necessary in some situations. The lens rotates, allowing for side or flat-mount surfaces. This camera is a staple in the NASCAR circuit, and it’s easy to see why. It also offers HDMI output for live previewing or uncompressed output to a Ninja or similar device. The HDMI output can feed an wireless HDMI system for broadcasting over a remote area. Additionally, RePlay offers a waterproof cable connection for underwater HDMI use, perfect for placing the camera under water while monitoring or recording above water.
For advanced users, the RePlay XD has certain settings that may be modified in a Notepad application (one that is .txt only). This allows users to customize the camera.
Out of the box, this camera is ready to roll including a MicroSD
card.
Battery life is approximately 2 hours in 1080 mode.
RePlay also provides users with a very nice Cordura case for storage.
The camera cannot free-stand due to the round body; a beanbag with weight is the only way this camera can sit on its own. Fortunately, the RePlay comes with several plastic stick-on mounts. This camera uses a proprietary mount system, but in reality any conduit mount/tiedown works nicely.
Click Here to See Pricing, Ratings, and Reviews on Amazon.com
JVC Adixxion
I was excited to check out this camera because JVC brings great things to the table. They mark the second professional camera company joining the HD POV fray, which makes it clear that POV is a strong bet in broadcast B-roll cameras. The form factor is nice, and I love the standard ¼ camera thread provided on two sides for side or top mounting on a helmet, roll bar, fuselage, or whatever. The camera is easy to operate, using two buttons for control. Menus are easy to navigate, and users may configure vertical or horizontal positions. JVC also has wifi available on the camera, and can stream live to UStream directly from the camera without a PC. Also there are Android and iPhone apps available for external camera control/linking. JVC uses WiVideo to configure the camera. I could not get the app to function with the camera on my laptop, tablet nor two cell phones. The camera locked up and required battery removal on multiple attempts to configure the wireless setup (ver 0483). It does upload directly to UStream without any difficulty.
Otherwise, users will need to install an SD card (purchased separately) and the device is ready to roll. My test unit was charged to approximately 10% of life.
A beautiful feature on this camera is the electronic stabilization mode. It smoothes out images very nicely (yes, this works for skydiving, as it is EIS). The image quality does suffer with the stabilizer engaged.
Battery life is approx 110 mins in 1080 mode.
I found the camera buttons clunky, and the mounts that come with the camera had several of us scratching our heads, wondering “WTH were they thinking?”. Perhaps because of the standard thread mount, JVC felt that creative mounting solutions should come from the user? The camera comes with a plastic ball swivel stick-on mount that cannot be trusted in any sort of medium impact activity. The Addixxion will easily snap out of the ball swivel. It also comes with a rubber mount to go on an elastic goggle headband such as ski goggles, similar to the “jockstrap” mount that is available for the GoPro.
Click Here to See Pricing, Ratings, and Reviews on Amazon.com
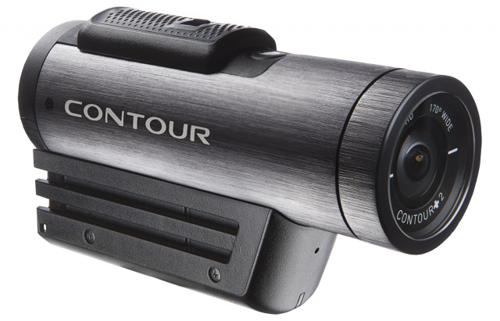
Contour
Contour really stepped their game up with the + model, offering Bluetooth
control of the camera and preview over a cell phone or tablet (low framerate).
Similar to the RePlay, Contour thoughtfully provides a MicroSD card in the box
(why doesn’t everyone do this?)
The camera features a GPS receiver that embeds the GPS signal in the video stream. Some users may find great benefit in this feature. It’s fun to open the GPS data in GoogleEarth, playback the waypoints while watching earth, and re-live the experience. GoogleEarth may be screencapped for additional (and interesting) B-Roll footage.
Recording can be enabled simply by sliding the locking record switch forward. The camera automatically goes into record mode, so there’s no clumsy fumbling with small buttons that one sometimes cannot see due to mounting systems.
The Contour+ does have some external controls for features such as white balance (accessed via cell or tablet device over BlueTooth. Video may be streamed over HDMI, as with most of the other cameras.
Out of the box, this action camera is ready to roll including a MicroSD card BlueTooth preview and control is a nice addition, although it was very choppy and slow on my Samsung Galaxy SIII phone and Galaxy Tab2.
Battery life is approximately 90 minutes of continuous record in 1080 mode.
The form factor is very well thought-out for most applications; however, the proprietary mount system is a personal dislike. The camera cannot freestand due to the rounded bottom. A mount, housing, or similar device is required to use this system. Mounting the camera on a tripod requires additional adapters not easily found due to limited distribution. Contour is the only camera that comes with a tether in case the camera is knocked free from its mount. While this may be desirable in some sports, in skydiving, BASE jumping, or paragliding, it is not a wanted feature.
Click Here to See Pricing, Ratings, and Reviews on Amazon.com
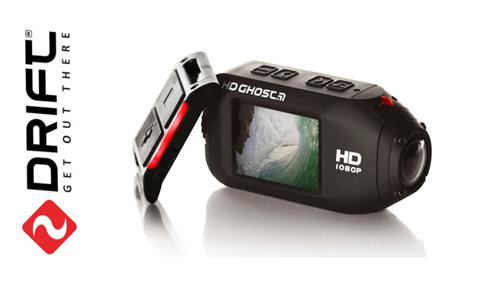
Drift HD
This camera wasn’t originally on my list of cameras to test, as it has always seemed like a toy camera company to me (I had one of their original SD cameras and found it wanting). However, pressure from several friends around the world caused me to re-think my position.
The RF remote control is cool. It lets the user configure the camera(s) for remote start/stop, and it can sync multiple cameras. With a rotatable lens, the camera may be placed at any angle. One can monitor over a streaming HDMI output, or use a built-in preview screen that may be powered down to save on battery life (this is a big plus in this camera). The packaging is pretty nice too , acting as a case for the gear. Only RePlay and Drift offer a package to store the camera when not in use; I like this feature.
The rotatable lens isn’t without flaws. In vertical mode the angular distortion all but renders this camera useless, due to the already-challenged quality of image.
With a battery life of only 45 minutes in 1080 mode, this is not a camera for lengthy shooting. Drift does offer an extended life battery… you’ll want it if this is the camera you choose to purchase.
The Drift comes with a pair of stick-on mounts, a strap mount, and the remote control. The remote is necessary in gloved environments: the big buttons are easy to hit, while the camera’s tiny buttons are easy to miss even when not wearing gloves. The Drift HD can free-stand without any assistance, and the standard ¼ camera thread on the camera body makes it easy to mount on a tripod.
Click Here to See Pricing, Ratings, and Reviews on Amazon.com
Sony HDR AS15
The HDR AS15 is one of the newest camera choices, and it’s Sony’s first foray into this market. The switchable FOV from 120 to 170 is terrific. I’m a bigger fan of the narrower views as they don’t distort the image, and provide a closer to ‘natural’ image. The glass lens is a Zeiss, and it does not disappoint. Coupled with the Exmor sensor/imager, it is a beautiful combination. A one-button camera-on/record enable feature makes this identical to the Contour+ for speed to record.
Out of the box, this camera is ready to roll, minus a needed MicroSD card (purchased separately).
The AS15 offers wireless control and camera setup. Connecting to my Galaxy SIII, Tab2 10.5, and iPhone 4s was simple and painless. Each camera has a control code printed on a sticker. I don’t care for this; Sony should provide more than one sticker, or better yet, print the code inside each camera. If the code is lost, it’s not easy reconnecting without linking via USB to discover the password. Using wireless for constant monitoring cuts the battery life by around 25%. The wireless is challenged in a way, as only one unit may be controlled at a time. Had Sony used a different network scheme, multiple cameras could have been controlled from a cell or tablet device. Hopefully they’ll look into this with future updates. Operating the camera is easy: the two menu buttons are simple and the menu flow is logical.
The electronic stabilization system is standard Sony sweet smoothness, and no one can really compare with what Sony has given users of stabilization modes. Sony uses the CyberShot batteries, both standard and extended life. The camera comes with two battery trays. This is a benefit, as batteries may be found at any Walmart, Best Buy, or other big-box store.
Sony’s mounting system is the most robust of all the various camcorders; a standard ¼ camera thread in the bottom of the waterproof housing is easy to mount. Compared with the non-precision plastic mounts offered by GoPro, JVC, Drift, and RePlay, the massive ABS plastic mounts provided by Sony are rock solid and will not chatter in even the most extreme vibrating environments. Outside the box, the camera doesn’t mount well to anything without some sort of other mount assist. The camera cannot free-stand because of its rounded bottom. Additionally, the external mic connector and HDMI connector are in the bottom of the camera. Sony has a box with LCD monitor available for the camera, making it more bulky, but also utilizes this accessory port on the bottom of the camcorder. With the LCD/box option, the AS15 may be easily mounted on a tripod or other mounting system.
Click Here to See Pricing, Ratings, and Reviews on Amazon.com
GoPro Hero2
This is the camera that changed up the world of action sport photography, and which has been the longest running action sports camera in the market, now in its third version.
GoPro comes out of the box with a squarish form-factor, sharing the ‘box’ format with the Drift and JVC cameras as opposed to the longer, more slim stylings of the RePlay XD, Contour, and Sony camcorders.
The 170 degree lens may be switched to a 127 FOV (used for most of these tests) via menu settings.
The menus are the most challenging aspect of using this camera; alternating between the power/function button and the shutter/select button can become confusing, even for the most seasoned user. I have around 20 of these cameras, and still sometimes have to go all the way through the menu cycle to reach the desired setting. Out of the box this camera is almost ready to roll, coming with a partially charged battery, 2 mounts, and a waterproof box (SD Card not included).
GoPro offers a WiFi backpack system for 99.00, but I could not get it to work with my cell phone. The remote start/stop switch worked properly. The remote system may be paired with multiple GoPro’s for simultaneous start/stop.
GoPro uses a proprietary mounting system, but this is of little consequence. One can go to Walmart or other big-box store and purchase additional and widely varied mounts. GoPro offers far more mounting options than any of the competition. At first glance, this is very nice of them; however, they need to offer a wide variety of mounts simply because they are proprietary. To mount a GoPro on a tripod, for example, will cost another 10.00 just for the adapter to mate its proprietary mount with a standard ¼ camera receiver.
Click Here to See Pricing, Ratings, and Reviews on Amazon.com
Overcrank/Slow-Motion Modes
Overcrank/Slow motion not only allows for better viewing of very fast action, it also adds drama and lends a sense of timelessness to fast and exciting scenes. All of the cameras in this shootout offer a p60 mode in 1280x720 mode.
Only the Sony HDR AS15 and the GoPro Hero 2 offer p120 modes.
Sony records p120 in a true 1280x720 mode. GoPro Hero2 records a resolution of 848x480 when in p120 mode.
One frustration with GoPro: they pack the frames, so the NLE doesn’t see the native stream. Sony flags (and plays back over HDMI) the proper slow motion/overcranked content. There is a benefit to the non-standard method GoPro uses, as it allows for real-time playback “on the set,” although editors will have to manage the timeshift in post.
In this video, both p60 and
p120 modes can be compared in well-lit conditions.
In this video, both p60 and
p120 modes can be compared in very dark conditions.
In this p120 scene, the
image goes from brightly backlit to exposure-compensated. I appreciate that the
camera does not bloom nor pop when the exposure shifts.
“Rugged-ness”
Ok, this wasn’t part of the original plan, but it’s well worth mentioning. Riding on ATV’s with these little cameras made it obvious that people are going to break them if they put the camera into harm’s way.
RePLAY XD easily walks away with this; you can stand on them, drive a car over them, drop them from great heights (I dropped one from several hundred feet), and they’ll come right back asking for more. The JVC is well-built too; JVC claims they can be dropped from 6’ and survive, but frankly speaking, any of these cameras can survive a 6’ drop, so that’s somewhat of a chuckle for a marketing bullet point.
In their external cases, the GoPro and Sony are both very tough. The lens is the weakest point on any of these cameras, which again is a nod to RePlay, as they have a replaceable cover over the lens while keeping a virtually indestructible low profile. Out of the box, the Sony is perhaps the most fragile, with the GoPro and Drift HD being in the same categories.
Third Party Support
This category easily belongs to GoPro. They’ve been in the market longer than anyone, and until the announcement of the GoPro Hero3, the form factor hasn’t changed, allowing third party vendors to build custom-molded helmets, aluminum billet mounts, custom-colored housings, and even camera controls. That being said, Sony, RePlay, and Contour all offer additional mounts, housings, LCD displays, cabling systems, remotes, and other accessories. Additionally, Sony, JVC, and Drift all offer standard threads which eliminates the need for a large portion of the third-party tools built for GoPro cameras.
Codec/Post Production
All of the action cameras in the shootout are using the h.264 codec (AVC) packaged in one of two containers. Apple users of Mountain Lion OS are able to directly stream video from all the cameras on their machines. Windows users who run Windows XP or newer will have no difficulty playing back footage from these cameras. The Galaxy Tab2 has no problems playing back the files directly from the cameras or cards in a card reader with no transfer of data.
For editing, all Windows applications will natively edit the files without difficulty. Users of Adobe Premiere CS5.5 or newer can edit native files on their Mac, but users of FCPX and FCP Studio7 will need to log/import the files and convert them to AIC or ProRes. This is one place where the shootout yielded a surprise; I’d expected Sony to use the superior AVCHD codec vs using AVC. The HDR AS15 is mainstreamed by using the AVC codec, which puts Sony squarely in the middle of a group where they could’ve had a significant advantage over the competition. To sum up this segment: none of the cameras have an advantage over the others in post, with the exception of the GoPro H2 with the ProTune upgrade installed (the 35mbps rate may have some transcode advantages in post, depending on the subject).
SUMMARY
With all features, shapes, sizes, and mounts aside, it boils down to two main challenges for the best action camera: image quality and ease of use. In all image-related aspects of this shootout, the Sony HDR AS15 easily offers a superior image quality over all competitors. For low-light, brightly lit, and overcrank modes both bright and dark, all members of my team and I selected the Sony AS15 footage. In blind tests with others, they selected the AS15 as best of all images.
In 1080p30 mode, my preferences (in order)
Sony HDR AS 15
GoPro Hero2
RePlay XD
In 720p60 mode, my preferences (in order)
Sony HDR AS15
GoPro Hero2 (this is GoPro’s best mode, IMO)
RePlay XD
In 720p120 mode, my preferences (in order)
Sony HDR AS15
GoPro Hero 2
In low-light environments, my preferences (in order)
Sony HDR AS15
GoPro Hero2(p60mode)
Contour+ (p60 mode)
For color accuracy, my preferences (in order)
Sony HDR AS 15
GoPro Hero2
RePlay XD
(It was a difficult choice between the RePlay XD and the JVC Adixxion when the subject was well-lit/sunlighted subjects, with the JVC lens protector removed. The RePlay’s sharper edges gave it the advantage).
GoPro, Replay, Sony, and JVC offer white balance settings either through menus or through .txt-based edits of the camera’s operation set up. All of these tweaks were avoided; every camera was “out of the box” for best/most fair comparison.
Images from the JVC and the Drift HD are simply too soft for any sort of professional use. Removing the JVC lens protector (not recommended) somewhat improves the image.
Overall, most every one of the cameras offers features, form, or function that other cameras do not have; particularly when looking at factors outside of image quality. For me, the final image quality matters most of all, and it’s the aspect we tested most thoroughly in this shootout.
Keep your focus tight,
dse
Joel Hindman, Darren Burke, Andreea Olea, Tom van Dyck, Karl Gulledge, John
Hamilton, Chris Warnock, Lob Lobjoit, Sydney Owen-Williams, Skydive Elsinore
contributed to this article.
About The Author
DOUGLAS SPOTTED EAGLE is an audio and video pro. He is a Grammy recipient with DuPont, Peabody, and Telly awards lining his studio; he is also a participant/producer in multiple Emmy winning productions. Douglas is the Managing Producer for Sundance Media Group, Inc. and VASST, authoring several books and DVDs and serving as a trainer and consultant for videographers, software manufacturers and broadcasters. He is the author or co-author of several digital media titles including Digital Video Basics (VASST), The FullHD (VASST), and Vegas Editing Workshop (Focal Press) among many others. Douglas is an accomplished aerial photographer who thrives in the adrenaline-filled world of fast-action videography. He is active as a multimedia producer, trainer, and presenter, utilizing the latest technology as part of his workflow.
Editors Note: We are aware that the above review lacks the competition of the GoPro HD Hero 3, which was released shortly after we completed the review. We are as interested as you are to see how the HD Hero 3 compares to the other action cams reviewed in this article, in particular the Sony AS15 and we aim to bring you the answer to that question in the near future.