0

Gear

    How to Buy New Skydiving Gear

    (With The Minimum Hit To Your Credit Rating)
    You want it. Bad.
    And you want it your way.
    In your colors.
    And nothing’s gonna stop you.
    If you’ve already done your time at the rental counter (and put some more mileage on a set of used gear, as you must), you’re well within your rights to be ogling the hot new nylon. Custom fit, hotshot technology and all the look-at-me embroidery a jumper could want? Just take my money.
    You’re no doubt aware that this purchase is going to rival car-buying in the cash outlay -- there’s really no way around it. That said, there are some steps you can take to get the best possible deal on your new skyrig.
    1. Use the best brains you know (including yours).
    Start by asking your mentor’s opinion. Then ask your rigger’s opinion. Then ask your hero’s opinion. Ask the very smartest people you know to make their recommendations before you start the conversation with dealers and factory reps (who are, naturally, highly persuasive folk). There’s a labyrinth of pricey options to consider. Expert advice will help you navigate it without losing your shirt on poshity-posh back pads and tie-dye.
    You’ll have to be very honest with yourself about your skill level, your height and weight, the discipline you’ll spend the most time practicing, your annual jump numbers and your (realistic) total budget.

    Spoiler: this is not the fun part.
    2. Be a brand snob.
    Y’know those skydiving gear brands that buy front-fold real estate in all the parachuting association magazines? The ones that always seem to have a pop-up and a smiling face at the major boogies? The ones that place their logos like the tap of a knighting sword on the fine shoulders of the world-champion teams?
    Those are the brands you want.
    This might feel a little like selling out to snazzy marketing. It’s not. If you play your cards right, you’ll have plenty of time in your career to experiment with fringe gear; for now, you need what a top-of-the-food-chain manufacturer brings to the table, namely:
    1. Well-tested components, created in a well-established factory, and the attendant safety track record.
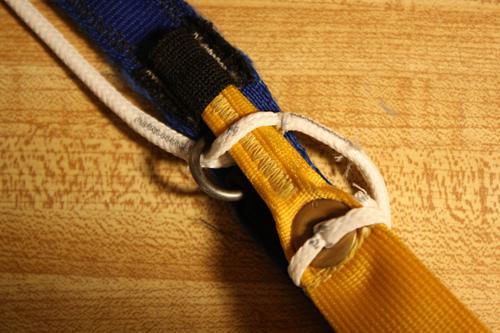
    2. Equipment that’s familiar to any given rigger, thus easier to fix -- with parts that aren’t hard to replace
    Later on, you’ll have the requisite knowledge and experience to branch into buying specialty equipment, experimenting with less-tested technology and trying out the offerings of lesser-known manufacturers. At this point, however, you don’t know what you don’t know – and that can be dangerous. It can also be very, very expensive.
    3. Try before you cry.
    Another benefit of buying from a major manufacturer: the ubiquitous demo.
    The cardinal rule in airsports gear-buying is a simple one: never buy it until you’ve tried it.
    Another note: you’ll certainly see demos on-hand at any major skydiving boogie, but do yourself a favor and evaluate gear outside the frantic context of crowded airspace. (When you’re not constantly chasing a hangover. Yes. You. I know this.)
    4. Blend it.
    *Everything* doesn’t have to be new, you know. In fact, it’s a really good idea to save money by blending new components with old, if you do it intelligently.
    If -- after weighing the value benefits -- you decide to go all-in, try to buy everything together for a package discount. Shop the large gear shops to compare their (often attractive) package offerings. Since they’re all assembling their deals from the same major-manufacturer components, you can feel perfectly confident purchasing the one with the lowest price.
    5. Repeat after me: dolla dolla bill, y’awl.
    Cash, if you can scrounge it together, is going to net you the best price. It’ll give you the best position to negotiate around taxes and shipping fees, and might just let you wiggle out from under the credit card charge that most dealers fold into to their baseline pricing.
    6. Slow your roll.
    Take your time as a buyer on the market -- it pays off. After a couple of seasons, you’ll start to pick up the rhythm of yearly and seasonal sales. Go to as many boogies as you can, browsing the gear and sniffing out event discounts. (Don’t forget to stay for the raffle! Major gear giveaways land in lucky laps.) Get to know your local dealers, who might cotton to you and let you know when there’s a price shift on the horizon.
    Soon enough, all that waiting will pay off -- and you’ll be swaggering to the plane in a shiny new kit that just screams “I will cry like a tiny child if I don’t stand up this landing.”
    7. Buy a stiff-bristled Brush of Shame.
    Just do it.
     

    By admin, in Gear,

    Toggles Matter

    It is often the little things in our skydiving day that change the way things go. Paying attention to the details can make all the difference when it comes to preventing malfunctions, and when we get lazy, tired or complacent, our attention gets fuzzy and unfocused. That is when we make mistakes that we regret. One area that often results in malfunctions is errors in stowing our toggles, and there are quite a few ways in which we can perform this seemingly simple act incorrectly, only some of which will be discussed in this article.
    The most obvious aspect of this necessary part of packing that we can mess up is the depth of the toggle in the keeper. If we do not push the toggle sufficiently into its fabric keeper, the toggle will eventually unstow during deployment.

    Premature brakes releases result in countless cutaways each year. Each time we chop, we risk losing our main canopy and our freebag; a very expensive mistake.
    Another facet of stowing our toggles that can result in a premature “brake-fire” is insufficient tension on the portion of the brake line that leads to the canopy.
    This slack can allow a sharp tug of the brake line near the toggle, causing it to pop out of the keeper, and even snap the line itself. A healthy practice when setting your brakes is to pull upward on the brake line above the toggle, ensuring that everything is loaded against the toggle properly.
    Yet another common error when stowing the steering toggles is to pass the toggle through the brake line above the guide ring.
    This will almost always result in a premature brake release. It will also usually result in damage to the fabric toggle keeper, as the load on the brake line will go directly to the keeper rather than to the guide ring. I see this one quite a lot, and the jumper is always blown away when I point it out while they are packing. Better a moment of embarrassment on the ground than a premature brake fire in the sky.
    On that note, if you experience a premature brake release, or snap a brake line during deployment, your canopy will turn. On many parachutes, this turn can be quite fast, and it is likely to increase in both airspeed and rate of rotation. This means that time is of the essence when dealing with this kind of malfunction. This, however, does not mean that the correct response is to claw for the stowed toggle like a crazed monkey. Yes, you do need to unstow the remaining toggle, but having this singular goal in mind has resulted in many cutaways, AAD fires and even some fatalities. When you open up in a spin, your first job is to try to stop the spin, while remaining aware of your altitude. If you apply opposite harness input or simply pull the rear riser on the side of the canopy that has experienced the toggle release or broken line, you will slow the situation down. By holding a heading, you will be losing much less altitude, and will afford yourself the time and brain power to properly execute whatever procedure is next.
    Also key to your safety is the condition of your equipment. For instance, if the toggle keeper has become loose due to wearing over time, even sufficiently stowed toggles will unstow prematurely. Since we stow the toggle in the same way every time, the toggle eventually becomes deformed, narrower at the load point, which can cause the toggle to jam when you try to release it.
    Also contributing to this possibility is the inevitable shrinkage of the “cat’s-eye” hole in the brake line on spectra lined canopies. This is caused by heating of the line due to friction as you unstow your toggles. The melting point of spectra is 297 F and the material’s response to heat is shrinkage, unlike George Castanza. Most cat’s eyes begin at about 25 millimeters on new canopies, and by 3 or 400 jumps, it reduces to a 19 or 18 millimeter passage. When combined with a narrow point in the toggle, a brake-lock malfunction is quite likely. This problem can easily be avoided through regular replacement of the mid and lower brake lines, and pinching of the toggle with plyers to create a uniform width.
    When the tip of the toggle fails to extract from the cat’s-eye, it is possible that the jumper unstowed the toggles in a gentle, slow motion, allowing the friction to hold the toggle in place inside the brake line. This phenomenon can often be avoided by making it a habit to always unstow the toggles with a sharp, snapping motion. This method has served me well for many years, and has totally eliminated the “stuck toggle” malfunction for me.
    On the topic of toggles that do not want to release, we have another malfunction that shows up from time to time. There are many things you can do with your excess brake line, depending on your particular riser design and your personal preferences. Some skydivers choose to pass the excess line through keepers on the opposite side of the riser. This is perfectly acceptable. If, however, the free end of the brake line is passed down through the keepers and then around the bottom of the toggle, a complete failure to release is possible.
    This occurs when the upward relative wind blows the brake line up over the toggle during opening.
    The jumper then can grab the toggles below this loop of line and unstow, causing an irreparable knot around the keeper loop on the opposite side of the riser.
    Another way that jumpers sometimes cause a toggle-lock is by passing the excess brake line through the soft links, and then securing the end of the loop through the tip of the toggle. Although this method has proven to be perfectly safe, and may make it easier to pull the slider down after opening, a serious danger exists. If the soft links are not sewn in place with tack-cord, the loop of brake line can get caught on the tab or ring on the soft link, causing a locked toggle malfunction.
    It is true that a toggle-lock does not need to result in a cutaway. If the jumper cuts the brake line with a hook knife, the parachute will fly straight. Nevertheless, this fix requires the canopy pilot to land with a rear riser flare, something that many are not prepared to do. If you have never performed this maneuver in premeditated circumstances, you are not likely to perform the task well in an emergency. As I often say, there is no such thing as an emergency if you have practiced the solutions; it is just a change of plans.
    The last toggle-related problem that I will discuss is failure to stow the excess brake line at all. It is true that many jumpers have been leaving “free range” brake line for many years without incident. In most cases, these are jumpers with small canopies who have very little excess brake line to deal with due to the size of their parachutes. Regardless, it is my experience that it is just a matter of time before this free line snags on something. It might be your GoPro. It might be someone else’s GoPro. It might be the door of the airplane or something even worse that I can’t even think of. The bottom line is, the procedure of stowing your excess line costs you only a few seconds, but it can save your life. Deal with it, please.
    It is the smallest of details that usually result in the worst and best experiences on the dropzone. Skydiving is a sport of tiny issues that add up to big consequences, and if we continue to enjoy the process of paying attention to these little particulars, we can continue to enjoy the sport for a very long time. If we flippantly skip off the tops of the waves so-to-speak, and pretend that the danger does not exist, this sport will prove us wrong in the most painful and terrifying ways. We are always at risk when we skydive, but fear is not what keeps us safe. It is attention to the details, and the positive emotions that come as a result of knowing that we are doing everything we can think of to stay alive. If we are happy, we are more skillful, and skill definitely increases the chances of a happy landing.
    About the Author: Brian Germain is a parachute designer, author, teacher, radio personality, keynote speaker with over 15,000 jumps, and has been an active skydiver for 30 years. He is the creator of the famed instructional video "No Sweat: Parachute Packing Made Easy", as well as the critically acclaimed book The Parachute and its Pilot. You can get more of Brian’s teaching at Adventure Wisdom, Big Air Sportz, Transcending Fear, and on his vast YouTube Channel

    By admin, in Gear,

    A helmet that fully integrates GoPro 3 and 4 series

    The issue of helmets with cameras interfering with the deployment sequence is well-trodden, to include on dropzone.com. In France, new safety regulations produced by the Federation Française de Parachutisme, the sole, recognized sports authority for leisure skydiving, have become extremely stringent regarding camera mounts, and in particular, the way they protrude. So a French skydiver, Olivier Hiolle, developed a helmet specifically integrating the most current cameras of the day, i.e., GoPro 3 and 4 series. The result is astounding. The GoPro is fully inside the helmet, which has a frontal window. The top of the helmet is flat in order to accommodate other cameras. Of course, that would be a departure from the initial idea of having no protuberance, but there is no other way to carry larger devices. The helmet itself is a "true" helmet, in the sense that it is made of strong, resilient fabric and serious cushioning that will effectively protect the head in case of shock. We are well beyond the degree of protection afforded by basic helmets, in moulded plastic, whose protective function does not go much further than just providing a convenient attachment for a camera. I have ordered one and flown with it a dozen times. The fit is extremely comfortable and natural. I have a GoPro 3+. I purchased, as an extra, a USB cable that remains coiled inside the helmet. That way, I never manipulate the GoPro directly, apart from activating the bluetooth by slipping my little finger into the lodgment of the camera. From then on, I use the remote control. When I wish to download the pictures or load the battery, I just pull the cable out of its lodgment and plug it where it needs to go. The angle is perfect, no vibration whatsoever, and good sound under canopy (in the sense that I can hear myself grumbling and commenting on the approach). This is a new one-man firm, who makes each helmet by hand, to include the color. Prices are reasonable, including options such as color (other than white or grey for the fiberglass version), cable, chin strap. By design, the strap, whether chin or basic, has a quick release handle. This is the website: http://www.skyvisionpara.com/index.html, which, at present, is only in French. Be aware that the photos I lifted from the webpage are not as good as the current product. It is a much more polished work than that. But the photos do give an idea of the design.

    By elreg, in Gear,

    Why Your Canopy Is Slapping You Around

    Image by Lukasz SzymanskiAh, your canopy.
    When you first got together, everything was great. A few tussles over crispy, slippery fabric were the biggest issues you two had. You packed carefully -- lovingly, even -- or you were at least habitually spying on your packer. And after freefall, it was a joy to reach for that pilot chute.
    Now, things are horribly, horribly different.
    What happened?
    Maybe it’s because you stopped paying attention -- or maybe because you’re both getting older -- but something has changed. There have been some bad moments. Violent moments, even. There was that time that you landed from a jump with a three-ring mark and a stunned expression on your face. Your friends asked what happened to you. You started to wonder if it’s time to say goodbye for good.
    Don’t thumbtack that “for sale” sign to the corkboard too quickly, friend. You can save this relationship. Here’s how.
    1. Wrap your head around the dynamics involved.
    When a ram-air canopy opens in freefall, the dynamics of that opening are controlled by two processes: cell inflation (air pressurizing the airfoil through the nose inlets) and bottom-skin spreading (the side-to-side spreading action that takes place as relative wind rushes against the bottom of the canopy). You might not be aware of how separate these processes are, but they are quite distinct.
    Even without cell inflation, bottom-skin spreading is such an efficient phenomenon that a canopy can open entirely by this method, before the cells have a chance to inflate and pressurize. Since the force of that kind of opening is brutal enough to be quite literally fatal, square skydiving canopy designers invented a system to put on the all-important brakes -- the humble slider.
    That funny little square has a single function: to sync up bottom-skin spreading with cell inflation. A correctly packed slider stays at the very top of the lines during the early part of inflation, kept there by the same forces that would smack the canopy open with bottom-skin inflation.
    2. Help your slider help you.
    Make quartering your slider the most important part of your pack job. Be thorough about it. Draw the folds evenly between each of the four line groups, then tug the center of the slider straight down to settle the grommets snugly against the stops. A slider that’s sorted out in this way is a slider that is most likely to present itself correctly to the relative wind (and therefore do its job optimally).
    3. Avoid getting dumped.
    Optimizing your slider is only the first step in the process. The second, as you might imagine, has to do with your tangled handfuls of marionette strings. Incorrect line stows can release prematurely -- or, colloquially, “dump” -- resulting in a configuration wherein the canopy inflates before line stretch. When the lines catch up to the nylon, the jumper gets one heckuva headbanger. (Picture a Great Dane running at full tilt to the end of a long, long leash.)
    4. Keep the right amount of pressure on.
    It should take roughly 8 to 12 pounds of pressure to pull your lines from the stows. If you’ve gotten complacent (or too tired to be trusted), you’re probably going to pay for it.
    5. Use the rule of thumb.
    The loops of line on the outside of each rubber band stow (technically called “bights”) should be approximately two inches long. If that’s longer than you’re used to, that’s normal -- but know that right-sized bights keep about a quarter of the stowed line on the outside of the stow, minimizing the lines’ ability to dump. Luckily, two inches is about the size of the average human thumb, so you have a ready reference when you’re on the packing mat.
    If you happen to have stowless gear, your line dump issues are probably related to uneven folding of the lines (or lazy bag closure). The same pressure principle applies to the closing bands on your system: close the bag with 8-12 pounds of pressure, equal on each side.
    6. Get professional help.
    If you go through all those steps and you’re still not on good terms with your canopy, look elsewhere for guidance. Take your canopy to a rigger for inspection. You may discover a deeper problem -- and he/she might just be able to fix it right up. (There’s no shame in a little counseling, after all. Love is worth it.)

    By admin, in Gear,

    Squirrel Reveal Wingsuit Targeted Epicene Canopy

    The guys over at Squirrel have just released a video for their latest canopy, the Epicene. The almost 4-minute long video, which includes a "Rick Roll", also discusses why the Epicene is a great canopy for wingsuit pilots.
    While Squirrel have historically focused primarily on BASE orientated products, the Epicene is focused towards the skydiving community, though wingsuit flyers in particular. Squirrel have stated that while the Epicene is the best choice for wingsuit flying, it is also perfectly adequate for free flyers as well.
    The Epicene is built with wingsuit openings in mind and is made in such a way that it reduces the risk for line twists and unpredictability, while at the same time opening quickly and also catering to the responsiveness.
    The video also puts focus on the pack size of the canopy, with both TJ Landgren and Mike Swanson praising the F-111 hybrid canopy's pack volume.
    While Squirrel first began releasing information about this canopy mid-2014 it only fairly recently went on sale to the public, and you can find more information on the Squirrel website.
    Editor's Note: Adjustments were made to this article regarding previously misstated information relating to time of release.

    By admin, in Gear,

    How To Buy Used Skydiving Gear (The Smart Way)

    Image by Trigger
    Hey, new skydiver! Congratulations. That A-license stamp looks great in the middle of your forehead. Very flattering.
    Now that you’re in the fold, do yourself a favor: don't dally at the rental counter. It’s an investment (and somewhat counterintuitive) but trust me: you will find it much more cost-effective to buy your first set of gear than to keep renting, but If this is your first set of skydiving gear, you should buy used -- and spend the money you save on jumping. Here’s how to do it right.
    How to Buy a Used Reserve Parachute

    Get comfortable with the idea. Picking up a used reserve -- if it’s in spotless shape -- is a smart place to save a lot of cash. Riggers tend to agree that the cost of a brand-new reserve isn’t justified.
    Choose a damage-free reserve -- no patches, please -- with less than ten rides. Less than five is better.
    If your reserve is old enough to vote, it’s too old to jump.
    How to Choose a Used Main Canopy

    Look for a main with as few jumps on it as you can afford. Newer canopies fly better -- and, importantly, flare better -- than older canopies, because the passing seasons make the fabric more porous. As a rule, you can expect a harder landing from an older canopy.
    It can be tricky, but your best move is to choose a used main with its original line set. Even honest resellers don’t often know for certain the canopy’s actual jump numbers, and the condition of the line set is an inspecting rigger’s best clue.
    Find out where your canopy used to live. If it was jumped seasonally at grassy drop zones, it’ll be in much better condition than a year-round desert dropzone. That silicate desert dust chews up the fabric’s protective coating. Beware of beach DZs, too: seawater landings can result in very serious, sneaky damage.
    Be picky. Do your best to find an undamaged main canopy -- even one that’s been meticulously repaired. These are hard enough to resell that it’s rarely worth the up-front savings.
    Image by Halldor92572

    How to Buy a Used Harness/Container System

    Do not look for a container first. There are so many reasons why this is the case. You must know the exact sizes of both of your canopies before you can choose a harness/container to fit them.
    Have a rigger measure your body. Don’t go it alone. Harnesses are sized and carefully proportioned to both height and weight, and you’ll save yourself time by eliminating the guesswork.
    Ask the seller for the serial number. Then contact the manufacturer with your sizes. Ask the rep whether it’s a good fit for your body and canopies.
    Impossible to fit? Don’t worry. As you’ve undoubtedly noticed by now, non-standard body types are not uncommon in skydiving. However, new A licenses with unique body types sometimes face an uphill battle. Resizing a harness is almost always an option, but it’s can be so expensive that buying simple, new gear may make more sense. If this is you, research the basic, no-bells-and-whistles container systems available: for instance, the Dolphin, the Genera and the Shadow Racer.
    How to Buy a Used AAD

    Be sure that the used AAD meets your basic requirements. Determine that the AAD on offer is within its service life, has met the proper maintenance schedule and is approved for your container system. (Note that both the Cypres II and the Vigil II are waterproof, but the earlier (I) versions are not. Beach/lake dropzone? You know your answer.)
    Determine your timeline. When you buy an AAD – whether used or new – you’re paying a fixed cost per year. The quality of the AAD doesn’t change over time within its approved lifespan, so don’t worry about snagging a unit within a couple years of expiration. (Just save your pennies while the time runs out.)
    Buy new, if you can afford it. AADs are very easy to resell. Purchasing a new one is not a bad choice if you have the cash.
    General Advice for Buying Used Parachuting
    Equipment

    Keep an open mind. It’s unlikely that you’ll find a container that matches all the other criteria and comes in your colors. Accept that fact early.
    Pay a trusted rigger to conduct a pre-purchase inspection on any used gear you buy. The inspection will run you about $25 (or a matching amount of beer). Ask him or her to write down a list of issues – including potential ones – and the cost to remedy them, as if you’re buying a used car.
    Trust your instincts. If you don't like any potential component of your new skydiving kit — even one that has been suggested to you by a skydiving friend or a rigger or a boogie rep – do not buy it. You'll never be happy with it, and starting out with gear you dislike will adversely affect your entire skydiving career. Love the gear you’re in, and you’ll be a better skydiver for it.


    By admin, in Gear,

    Robert Harris Explains His Homemade Wingsuit Project

    We recently talked with Robert Harris, who took it upon himself to build his own homemade wingsuit. After years of motocross racing, Robert started skydiving five years ago, and since then has attained over 1600 jumps, his D-license as well as AFF and coach ratings. However, what made us want to talk to him, was having seen that he had developed his own DIY wingsuit at home. He talks to us about what inspired him, how he made it and most importantly, how it flew.
    What made you want to develop this DIY wingsuit?
    I have always liked knowing how things are made, when I was a kid I took everything apart to try and figure out how it worked and hopefully put it back together before my parents found out. This didn't stop as I got older, although it changed to learning, so I could make things.
    Shortly after I started wingsuiting I decided I was going to make a wingsuit someday. So last year I asked for a sewing machine for Christmas and didn't get one as no one knew what kind I wanted and I didn't either. I had gotten to use a sewing machine back in middle school home ec class but didn't care about learning sewing, wish they had told me I could make parachutes and wingsuits back then as I would have paid way more attention.
    After talking to my dz's rigger Sally and some other people and decided to get a singer 20u, after over a month of trying to buy one I found one on Craigslist from an old lady that really never used it for 400$. Then I started sewing. First a pillow case, then a miniature version of my Leia that I made into a traction kite, a belly band, canopy continuity bag, and weight belt. After all of those projects I finally decided it was time to start my wingsuit project.
    What experience do you have in aeronautics or aviation product development?
    I don't really have much, but I have started an online class on Aeronautical Engineering to learn more about designing airfoils. I hope to learn to do some equations to determine glide and speed of a given airfoils parameters and hopefully eventually learn CFD(Computational Fluid Dynamics) to push the envelope of what can be done in wingsuits I make later.
    What were your expectations when starting this project?
    I was told by quite a few people that I was crazy for wanting to make a wingsuit or that it was too hard and I didn't have a chance. I didn't really care about the designing process when I first started I just wanted to assemble a suit and fly it. I didn't care if it was the best performing suit I just wanted to say I had done it. Although I think I have caught the bug, now I want to make another one and try some new ideas we haven't seen in the wingsuit world yet.
    Could you explain your creation process to us?
    When I started I picked one of my wingsuits as a starting platform. I took measurements all over the outside of the suit, and decided to change the arm wings completely as I didn't want to outright copy the suit. I simplified some parts trying to make it out as few as pieces as possible. After all the outside pieces were made came the challenging part of making the ribs. I was originally going to make it with back fly vents so tried to make an airfoil shape that would be as good either on back or belly. I drew out where the ribs would be placed and measured how long they would need to be on the top and bottom skins and as far as thickness goes I knew how wide I wanted the thickest one and the thinnest, to figure out the rest I used some math to taper from the biggest to smallest.
    After I started sewing I scraped the backfly vents but left the ribs how they where as after putting the fronts on I didn't want to deal with the headache of the backfly ones as well. I spent a couple days making patterns and writing everything down as I did it to make it easier for possibly making another one. After the patterns were all done and checked for fit against each other I started cutting them all out of some parapac I got from JoAnn's fabric with my new hot-knife my girlfriend got me for my birthday. This part went relatively quickly and only took about a day total. Then came the weekend and jumping time, it was hard to pull myself away from my project but I needed to train for the last swoop meet of the season. As weather got crappy I started the sewing. I figured it would be best to get the hardest part done first the arm wings as if I couldn't get those done there was no point in even making the tail.
    I started with sewing the ribs to front or bottom skin of the suit and quickly learned the sewing the ribs and vents on together was a pain. I did every step on both wings at the same time so I could try and make it as symmetrical as possible and knew they where both put together in the same order. I felt really accomplished when I finished both arm wings and was ready to push through the tail wing quickly before my swoop comp. The tail wing went together pretty easily after making the arm wings and before I knew it I had 3 wings that needed to be put together. After missing a couple of weekdays jumping as I sat busy behind my blue Singer I had finally finished! I was so excited after 23 hours of sewing to go jump it but jumping had already stopped for the day.


    And how did it fly when you took it out?
    I really wanted to get some outside video of its (cough cough) first fight. Go figure, none of the normal wingsuiters where around, I eventually asked my friend Paul who has done only a handful or two of wingsuit jumps if he would try. I gave him an I-bird I use for teaching and rig to borrow so he wouldn't be jumping his velo. We talked about the dirt dive and manifested for a load. As we climbed to altitude all I could think about was my family and girlfriend and how dangerous this could be. I did a lot of practice touches of all my handles and went through my emergency procedures as I always do but did way more of them.
    On the 2 min call we did all the normal handshakes and then I buckled my helmet and zipped up my arm wings. As all the other jumpers were getting off the plane my heart started racing, I used all my yoga experience to get my breathing in check as I walked to the door of the Twin Otter, I could tell Paul was nervous as well. I had him exit before me as I wanted a nice exit shot, as I hopped out from a poised position in the door all I could think was please don't let the suit blow apart! I made sure to keep all my wings shut down on exit and waited to see the tail before I ever so slowly opened my wings.
    I got my wings open and started flying, I was ecstatic at this point as the suit was staying in one piece. I started my first turn shortly after and was surprised at how stable it was. It took a little bit for Paul and I to get together but around 10k we got together shortly after my practice pull to see if there would be any issues and it was the easiest one I have done in awhile. We flew with each other for a bit and then about 7k I wanted to see what I could do with it.
    I started a small dive then went in max flight. I decided I would pull higher then normal as I was still jumping my normal wingsuit canopy a Jfx 84 at 4,500 feet. I came in to land with 90 degree turn for nice little swoop. Shortly after Paul landed close by and celebrated an awesome jump!
    I have never been so excited and nervous on any of my 1600 plus skydives or 4 base jumps yet alone together. After I landed I had to message family and girlfriend to let them know I was ok, they were all pretty scared about me doing it. Since the 1st jump I have only done 1 more on the suit and it was a time run, I got 2 min and 20sconds out of it, which was defiantly shy of the 3-3.5 min I should have gotten out of that size suit. Turns out the fabric I used was my biggest downfall, it didnt have a coating on it like parapac used in other suits so it was constantly bleeding air out and never achieved max pressure.
    What was the biggest challenge in creating your wingsuit?
    The biggest challenge by far was trying to figure out what order everything gets put together in, I spent a couple days alone trying to piece it together in my head to figure it out. Although I had to unpick a few parts because of misalignment I did not have to unpick anything because of the order I put it together in.
    Do you feel that your venture was a success?
    In the end I feel I achieved my goals I set out for the project and learned tons along the way! I look forward to starting my next suit when I return from visiting my girlfriend in London. I already have tons of things I want to try try and do but the major thing will be a fabric that has zero porosity.
    About Robert Harris (D-31584): I grew up racing motocross at a early age and after many years of racing I stopped because I was tired of breaking myself. I still rode and one day on the way from riding I got a call about getting to do a free tandem. Of course I said yes much to my parents dismay, they thought skydiving was too dangerous at the time and realize now its more dangerous then motocross. I had loved motocross for the jumps as I loved the feeling of flying through the air. Skydiving was just that pure flying and as soon as I landed I signed up for Aff. One year after I started I had 200 jumps and started wingsuiting on jump 201. My 2nd year in I had my D-license and got interested in Canopy Piloting as well. Since then I have gotten my coach and Aff ratings and am currently on my 5th year of skydiving and have just over 1600 jumps.

    By admin, in Gear,

    10 Things To Note Regarding Malfunctions

    Image by Juan MayerWhen are you going to be alone in the sky with a useless bag of laundry and two little handles?
    If it hasn’t happened yet, it’s going to. Sure, there are skydivers with thousands of jumps who have never had to make alternate nylon plans. But don’t be fooled: your first reserve ride is not a question of “if.” It’s a question of “when.” If you don’t feel ready, you’re not alone. Here are ten proven ways to boost your confidence and safety.
    1.Stay current
    Long lapses between jumps are dangerous. Time on the ground dulls skills, sharpens apprehensions and weighs down your jump with the clammy fog of unfamiliarity. Most importantly, it unravels the easy muscle memory you’ve spent so much time and effort to develop -- and muscle memory is of primary importance in the event of a reserve ride. Especially at the beginning of your skydiving career, you’ve got to make the effort to jump at least every couple of weeks.
    2. Give ‘er a spin
    Do yourself a favor and deploy your reserve for every repack. You’ll learn the unique direction of pull for your gear, and you’ll be able to feel out the force you’ll need to exert. If your rigger watches the process, he/she can keep an eye on the deployment and identify potential problems. (Even if you have deployed your own reserve, a repack is an unwasteable drill opportunity for a refresher.)
    3. Just touch your stupid handles, Mr. Bigshot, OK? Sheesh
    Touch your handles in sequence before you enter the plane. It is not beneath you. Being blasé about basic safety doesn’t make you more awesome -- it just makes you more blasé. While you’re at it, check that your reserve handle is seated (so you don’t end up on a reserve ride without the yeehaw fun of a malfunctioning main).
    4. Don’t overthink it
    It’s simple, really. If you believe that your main is unlandable, you’re going to have a reserve ride. Sure -- lots of skydivers have landed under reserves only to realize in hindsight that they could have solved the problem. However, lots of skydivers have gone in while striving to sort out malfunctions that did not improve. If those are the choices, which would you rather be?
    5. Get your priorities straight
    Do not worry about stability. This is the very least of your problems. Worry about altitude. cutaway) handle no lower than 1,000 feet. Initiating a reserve ride below 1,000 feet isn’t always deadly, but it has an unnerving tendency to be. Don’t take the chance.
    6. Hold on tight
    After you pull your handles out completely, hold on to ‘em. You’ll save some money, and you’ll save face when you land.
    7. Make sure it’s out
    This is kinda your last shot at nylon, so you’ll want to be sure it’s working. Arch and look over your shoulder for the reserve pilot chute. Reserves deploy fast, so this head position is gonna butter your bread – but if the pilot chute is somehow caught in your burble, this should either shake it loose or make it clear to you that you need to do some burble intervention, stat.
    8. Don’t chase after your ex(-parachute)
    I’m going to go out on a limb here and tell you not try to run after it and grab it in the air. (People have, y’know, died doing that.) You broke up with each other for a reason, after all; you can reconcile after everybody’s had a little time to cool down. Instead, get your head together and use landmarks to identify where the gear is headed. Then take a deep breath, leave it to the fates, and work on navigating your meat to a safe landing.
    9. Tell the peanut gallery to sit and spin
    When you land a reserve, you’re going to be the talk of the DZ (for about five minutes, usually). During that five minutes – longer, if the loads are turning slowly – you’ll probably be approached by a receiving line of would-be mentors. They’re gonna question your malfunction, and they’re gonna be eager to discuss your decision to cut away.
    My advice: speak to your trusted mentors and co-jumpers about your little adventure in private, and tell the rest to go suck an egg. You were there. They were not. When you need to save your life in the sky, you are absolutely alone. In the entire world, there exists only you and two handles. Your cutaway is your business.
    10. Go to the liquor store
    Buy a bottle of posh booze for the rigger who packed the reserve you rode. It’s tradition.

    By admin, in Gear,

    SFly Release Ridge Wingsuit

    SFly have just announced their latest addition to their wingsuit products, with the release of the Ridge. The Ridge has been in development for a while, and saw extensive testing taking place over the past months. The suit will cater towards the more advanced flyers and was developed with skilled BASE jumpers in mind.
    Introduction
    The new SFLY RIDGE is a wing suit 100% designed for mountain flying. The RIGDE has been developed since the very beginning for the demanding and experienced wingsuit BASE jumpers who open always­ shorter exits and seek for new lines requiring more and more glide performance without compromising on speed.
    Its key features are :


    ­ Ultra short starts


    ­ High glide ratio


    ­ High speed


    ­ Ultra clean pull
    The RIDGE development has been made possible by a 15 month collaboration between Stephane Zunino, original SFly designer, François Gouy, mountain guide who has opened numerous exits, and Julien Peelman, aerodynamic engineer mostly known for its high performance parachute canopies designs like the Icarus Petra and the Icarus Leia by NZ Aerosports.
    Numerous test­ pilots have tried the various prototypes that have led to the final version: Soul Flyers Fred Fugen and Vince Reffet, as well as the Frenchies from Vercors: Maël Baguet, Vincent Cotte, Jean­Philippe Gady, and Matthieu Leroux.
    Last summer François Gouy used a RIDGE prototype to open mythical exits in the french Alps, such as Ceüse or Les Rouies, thanks to both the short starts and the high glide performance.

    Overall Design
    The RIDGE is probably bigger than other suits.
    The RIDGE has a high arm sweep, and a longer and thicker leg wing than other wing suits in this category.
    Leading edge

    The RIDGE leading edge is designed to match both the best possible aerodynamic performance with the easiest pull. That is why we have split the sleeves in 2 parts: the upper arm, made of parapack with an under layer of soft foam the lower arm, made of neoprene. And we have assembled these 2 parts with a diagonal cut so as to maximize the surface of the combined parapack­foam leading edge.
    Finally we have added an inflated cell behind the arm in order to fully fill­ in the sleeve and to get rid of that empty space between the back of the arm and the arm wing. This cell is connected and inflated by the arm wing.


    Partitioning
    The RIDGE is partitioned in a way to offer the a super tight fit around your body.
    This allows better wing control at all times and a great agility.
    Start
    The large inlets with opened airlocks allow an ultra fast inflation of both arm wings and leg wing.
    The higher arm sweep and the larger surface of the RIDGE enable the wing to catch air as on as soon as your feet lift from the ground. Because of its thicker profile the RIDGE starts flying even at very low speed, allowing quicker forward motion start. These unique features give the Ridge an unmatchable exiting profile.
    Glide
    The high glide performance of the RIDGE is the result of the balance between surface and profile.
    Because of its unique profile/surface balance, the RIDGE has an excellent glide ratio. Whatever the wind conditions, our test pilots have experienced and recorded a better glide ratio than with with other wingsuits.
    Speed
    The drag created by the large surface and the thickness of the suit is compensated by the extended length of the leg wing, allowing the RIDGE to easily match and outcome in speed the other wingsuit of its category. The RIDGE is remarkably fast and easy to fly in any wind conditions.
    Agility
    The unique partitioning and tight fit around the body make the RIDGE an easy and fun wing suit to fly, yet very responsive. The RIDGE allows aggressive dives as well as sharp turns without loosing control. What’s more, because this wing suit is highly pressurized, it has a incredible lift power in flight.
    Opening
    The pull is ultra clean thanks to the bevel shaped wrist end of the sleeve. The soft neoprene patch behind the elbow gives extra freedom of movement to ensure an easy bending of the arm and a clean pull. Your hand will reach the pilot chute handle naturally no matter how long you’ve been flying.
    Canopy deployment
    The neoprene half sleeves allow both an easy punch­out and a high risers reach-
    up.
    More information can be found at the SFly Website

    By admin, in Gear,

    Garmin Announces New Virb X and Virb XE HD Cameras

    Garmin have just announced two new action camera models that will be released this summer. The Virb X and the Virb XE are the latest attempt from the US founded company to establish themselves as more than just a sports equipment and navigation manufacturer. The original Garmin Virb action cam was released just less than two years ago, and showed that Garmin can do cameras too. After the release of the Virb, which was met with overwhelmingly positive reviews from both users and critics alike, they then introduced the Virb Elite, which added new functionality and recording options.
    The new Virb X and Virb XE cameras seem to be quite a step up from the Virb Elite, and it appears that the duo is a response from Garmin to the GoPro Hero 4 series which was released last year. However, the focus of Garmin seems to be different to that of GoPro.
    First thing we noticed, was the change in design from the original Virb cameras. Garmin have moved away from the flatter, elongated design that we saw in their first models and instead have adopted the more square approach, resembling that of the Sony and GoPro devices. In their press release Garmin brings attention to the flat lens cover in the front, aimed to help water in sliding off easier.
    At this point, with the original Virb being released in 2013 - we decided not to focus on how Garmin has improved on its previous Virb - but rather with how it compares to one of the most popular modern action cams out there today, the mid-level GoPro Hero 4 Silver.
    Recording vs Connectivity/Functionality
    Many would have expected the new Virb X and Virb XE to support 4k video recording, as it's a direction where most action cam manufacturers seem to be focusing. However, the Virb X will only offer a maximum recording resolution of 1080p, while the Virb XE will allow for 1440p at 30fps. By comparison, the GoPro Hero 4 Silver offers users up to 15fps at 4K, 30fps at 2.7k and up to 48fps at 1440p - as well as offering the standard HD recording options.
    Instead of focusing on increasing resolution, Garmin have put their trust in the development of connectivity and storage. Despite falling short on recording options both the Virb X and the Virb XE surpass the Hero 4 Silver in terms of connectivity and increased storage capability. Whether or not this will be as easy to sell as telling people that the camera can record 4k video, is yet to be seen, but perhaps Garmin is onto something. Despite the ability to record in 4k video, in every day practice it is not often that one will actually be able to make proper use of that resolution of recording, and most individuals still record at 1080p.
    Of particular interest to skydivers, is the added ability to overlay recorded data through both standard camera functionality, as well as extra information which can be included through the connectivity between the camera and a sports device. This means that pitch and roll data, speed data, elevation and more can be recorded and overlaid onto the video. See the video below for a demonstration of what is available with the new Virb cameras.
    Unlike the Hero 4 Silver, both of the new Virb cameras will come with GPS built in. Both the Virb and Virb XE will take Micro-SD cards, and support up to 128GB cards. Both the earlier Virb Elite and the GoPro Hero 4 Silver support up to 64GB cards, so the fact that the new Garmin cameras can handle double the storage space, will definitely be marked as a big positive by many.
    Other noteworthy functionality:
    The inclusion of a gyroscope based accellerometer is another feature that is not present in a lot of the other action cameras currently on the market.
    Both the Virb X and the Virb XE will also be waterproof to 50m, without needing any additional casing.
    Both cameras will have multi-camera live control and preview for up to 10 cameras.
    ANT+ connectivity


    Pricing
    On paper it appears as though the Virb X and Virb XE are going to be valid choices to look at when looking to buy one of the new action cameras on the market. They look good, offer some great functionality and did I mention that they were well priced?
    The Virb X will retail for just $299 while you'll need to drop $399 for the Virb XE.
    Final Thoughts
    Despite being stuffed with great new connectivity and some nifty new features, there are some questions

    raised over the choice to stick to limited recording options for both cameras. Currently the Virb X offers

    very limited options even for recording in 1080p in comparison to its competition. The Virb X offers only 25 and

    30fps at 1080p, where we would have liked to see 60fps being offered. Similarly, Garmin could have really

    put their foot down by offering 4k recording on the Virb XE.
    Because of the low price though, if 4k recording isn't on your list of priorities but you find yourself

    wanting the flexibility of being able to shoot at 1080p/60fps, the Virb XE can offer you that.
    The real test is yet to come when subjects like how it handles transition between lighting conditions, low

    light noise levels and video quality can be tested hands on.
    Compare the Virb X, Virb XE and GoPro Hero 4 Silver


    Feature
    Garmin Virb X
    Garmin Virb XE
    GoPro Hero4 Silver


    Wifi
    Yes
    Yes
    Yes


    Bluetooth
    Yes
    Yes
    Yes


    Accellerometer
    Yes
    Yes
    No


    Preview Screen
    No
    No
    Yes


    GPS
    Yes
    Yes
    No


    Recharge Method
    USB
    USB
    Mini-USB


    Recording Time
    2 Hours
    2 Hours
    2 Hours


    Storage Type
    Micro-SD
    Micro-SD
    Micro-SD


    Maximum Storage Size
    128GB
    128GB
    64GB


    4K Recording
    No
    No
    12.5/15 fps


    2.7k Recording
    No
    No
    24/25/30 fps


    1440p Recording
    No
    30 fps
    24/25/30/48 fps


    1080p Recording
    25/30 fps
    24/25/30/48/50/60 fps
    24/25/30/48/50/60 fps


    960p Recording
    25/30 fps
    50/60/100 fps
    50/60/100 fps


    720p Recording
    25/30/50/60 fps
    25/30/50/60/100/120 fps
    35/50/60/100/120 fps


    WVGA Recording
    120 fps
    240 fps
    240 fps


    Camera Megapixels
    12 MP
    12 MP
    12 MP


    Burst Mode
    10 p/sec
    30 p/sec
    30 p/sec


    Sport Computer Control
    Yes
    Yes
    No


    ANT+ Connectivity
    Yes
    Yes
    No


    Sport Data Overlay
    Yes (Garmin Apps)
    Yes (Garmin Apps)
    No


    Phone Remote Connectivity
    Yes
    Yes
    Yes


    Multi-Cam Control
    Up to 10 Cams
    Up to 10 Cams
    No


    USB Connection
    USB
    USB
    Mini-USB


    Micro-HDMI
    No
    No
    Yes


    Price
    $299
    $399
    $399


    By admin, in Gear,

0