NeoXS from Parasport - Review
Powerful, small, and flexible, the new NeoXS from Parasport is the newest product in audible altimeters available to skydivers. If you’re a freeflyer, wingsuiter, speedskydiver, or a relative work skydiver, you’ve probably already recognized the need and value of a trustworthy audible.
Slightly smaller than other audible devices, it is also slightly thicker. The casing is a combination of heavy-duty cast aluminum and plastic. The NeoXS fits inside of any skydiving helmet set up for an internal audible, and with a little work can be made to fit on the outside of any helmet set up for external mounting. Although there is no cradle currently available for the NeoXS, it should be easy to mount on goggles if jumping without a fraphat or helmet.
The Right Stuff-
Heavy and tough, this is one tool you won’t have to worry about dropping on the floor. The test unit sent to me survived several drops from an 8’ height onto carpet, linoleum, and concrete without missing a beat. The aluminum case is available in multiple colors, making it easy to spot in a gear box or bag, or on the ground at the DZ. It also makes it easy to engrave your name and license number for quick identification and loss prevention.
With three alarms for freefall and three alarms for swooping modes, the NeoXS may be set up for any skydiving discipline. Alarms may be set to various volume levels, and you’ll want to be exceptionally careful with the highest levels of volume. This small package is LOUD when set to the high-volume setting. On one jump, I used standard foam earplugs to see if I could hear the device at full volume, and the cutting pitch and squeals easily penetrated the foam ear plugs. This can be of significant benefit to hard-of-hearing skydivers or for those that like to wear earplugs in the aircraft, and would prefer to leave them in during freefall.
The NeoXS is slightly smaller than most audibles, but not significantly so. It'll fit the audible pocket in any skydiving helmet.
Skydivers that enjoy multiple disciplines will appreciate the various profile modes the NeoXS offers. Going from a tandem to an AFF to a wingsuit jump? No problem. This unit stores up to four profiles, allowing very rapid switching from one profile to another. Simply push the joystick three times to enter "edit" mode, move the joystick to the left to change the profile, and put the NeoXS back in the audible pocket. The audible always resets automatically but can be manually reset.
Another benefit is the always-locked modes of the unit, making it impossible to accidentally change profiles when the unit is left in a gear bag.
The unit may easily be reset for new MSL altitudes, simply by entering the configuration mode and using the joystick, reset the zero point of the device.
What You'll Love (in a nutshell)
3 freefall signals
3 canopy warnings
countdown timer
real time altitude display while climbing to altitude
simplified programming of warning altitudes
4 user programmable profiles
Can be set EXTREMELY LOUD (user selectable volume)
May be programmed during climb to altitude
It's heavy (durable aluminum). It won't crush in your gearbag
The Not-So-Right Stuff-
The owners manual could use some improvement. It’s not immediately clear how to program the profiles, or which profile is being used. Actually programming the unit makes the profile modes perfectly clear, however. The same may be said for swoop modes. Better diagramming might alleviate this small concern, or perhaps some on-line help. Once the programming dialog is accessed, the procedures for setting altitudes become readily self-evident.
The only major concern with the unit is that the small joystick sits slightly higher than the recessed area in which the joystick is mounted. The recessed area makes it obvious that the manufacturer wanted to prevent the joystick from being accidentally knocked about, but the joystick does slightly protrude above the recess.
The joystick is marginally elevated. Initially, this suggested a problem, but in working with the unit in real-world situations, it is not an issue due to the unit always being locked. Three button pushes are required just to unlock the unit, and then the joystick is used to enter programming modes.
The unit also offers no backlight, making it difficult to set up for night jumps or in those wee hours of the morning. The LCD is clear and textually driven, however.
What You Might Not Love
Owners manual is weakly written
Joystick button is slightly higher than body/recessed space
No backlight for night-time programming
It's heavy, weighs nearly double compared to other audibles (I personally like the heavier weight.)
General Comments:
Although the owners manual could use some improvement, the only real challenge encountered was figuring out how to unlock the unit. (This is achieved by repeatedly pressing the joystick until the lock icon first flashes and then turns off.) A quick glance at the owners manual was required to determine how to unlock the unit after a few minutes of trying to do it by instinct.
Once I’d unlocked the unit, I put the manual down to see if I could self-start the programming procedure based. I could, and it was very instinctive once I’d reached the unlocked stage.
The four main menu options are Profile, Swoop, Alarm, and Configure. Programming for Meters or Feet display is offered in the Profiles menu, with three altitudes available. Additionally, unique volumes may be programmed for swoop alarms vs freefall alarms.
Alarm altitudes cannot be programmed lower than a subsequent altitude, thus preventing accidental programming errors.
The NeoXS is easily opened with a normal screwdriver. No special tools or jewelers-sized screwdrivers are required. The unit does not need to be opened to change batteries (you can see the battery door in the housing), I simply like disassembling things to see what they're made of. The reason for the weight is obvious; this is not thin, easily crushed aluminum.
*(Opening the NeoXS will void your warranty, do not try this at home, kids!)
The alarms are varied, allowing for each alarm to play a distinct tone and pattern, thus eliminating confusion about what alarm is for what altitude.
As a side note, I wouldn't mind seeing a manufacturer develop personally-created alarms such as one recorded by a user. Wouldn't it be cool to hear your own voice at the third warning saying "Hey buddy, it's time to pull?" All that would be involved is either a USB connection to a computer, or a microphone built into the audible. It would be difficult to output audio frequencies that cut through the noice properly, yet wouldn't a voice be more fun than a screech? But I digress...
In evaluating the unit, the joystick could not be accidentally moved in “real-world” scenarios, but in putting it in the helmet and using fingers to move the unit around, I was able to “accidentally” hit and move the joystick but could not affect the programming modes, as the unit is virtually always locked. It is impossible to leave the unit unlocked, as it returns to a locked mode 30 seconds after programming input is ceased. Therefore, it’s impossible to accidentally change the modes by moving the unit around inside a helmet pocket or other location.
The unit uses one CR2430 battery and offers a very long life. These batteries are easy to find at most any grocery or large retail store.
All in all, I like this little audible. After having used it for a little over a month, I feel pretty good about the quality, durability, design, and how it functions. I’d first seen it when it was announced at Reno PIA 2007 when Paulo from Parasport overheard me complaining about a particular audible I had (A Cool n' Groovy Fridge Company audible) and its lack of adjustable features. When he set the NeoXS to screaming, it had everyone anywhere near covering their ears, it was so loud. The fact that it can be taken down to a nominal level is great for those that still have fully intact hearing. Levels may be checked on the ground, so it's not an exercise in aerial experimentation to determine which volume levels are best for you.
At $170.00 USD, the price is right too, and makes it an accessible cost point for most any skydiver.
Overall, this is a very tough, well designed and manufactured tool for skydivers and from my perspective, should be part of any consideration in purchasing an audible altimeter.
~douglas
Turned On by Hypoxic
In May of 2014 the skydiving-focused electronics company Hypoxic began a Kickstarter campaign that sought out a goal funding of $30,000 in order to develop a status indicator for the GoPro action camera. Despite dominating the market for several years, neither GoPro or its primary competitors come with a feature or piece of hardware that allows the user to easily determine the status of the camera or its recording. For sports where the GoPro is mounted out of sight, such as the popular helmet mounting method, this can often cause hesitation when trying to remember whether you may have pressed record or whether you put the SD card back. Hypoxic's goal was to try and provide a useful and easy way of determining whether the camera is functioning as it should, while also removing that hesitation from the minds of the jumper.
As quoted from the Kickstarter page: "In our sports, these uncertainties are not just unsettling: they’re dangerous. As an athlete, you know: before riding down this line, starting this race, jumping out of this plane, launching down this mountain, you need an absolutely clear head. Nothing good can happen when personal safety takes a backseat to a blinking light."
By the end of June last year, the Kickstarter campaign had raised $43,049, more than $13,000 over the original target amount. Incentives for backers ranged from stickers for those that pledged $5 or more, to Turned On units with early shipping for backers that pledged over $180.
Over the past 6 months the Kickstarter units have been sent to the backers of the campaign and were well received. The Turned On units have now begun shipping to outlets and are available for public purchase.
What Does It Do?
The Turned On unit makes use of 3 colored LED lights to provide information as to the status of the camera. When the camera is recording, the light will be solid red. When it is on standby a blue light will be displayed. When an error is present it will display either a solid yellow or a flashing yellow light. When the light is flashing yellow, it indicates a potential impending interruption to recording, such as low card space, low battery or high temperature. A solid yellow light indicates an error and in this case, the camera will not be able to record, such as in situations where the card is missing or corrupt.
The device will work in all modes, and show the active recording light whether you're recording video or shooting a series of images in burst mode.
What separates the Turned On indicator from other indicators on the market is the detailed level of information provided. Most other indicators simply use an on/off system that will display whether or not the camera is recording or even just whether the power is on, which is often unreliable - especially in cases when the camera may be in stand by mode.
Compatibility and Support
Currently there is limited compatibility with the Turned On, and will require one of the following GoPro cameras: GoPro Hero 4 Black, GoPro Hero 4 Silver, GoPro Hero 3+ Black, GoPro Hero 3 Black.
Supported Versions
GoPro Hero 4 Black - v1.02.00
GoPro Hero 4 Silver - v1.0.2.00
GoPro Hero 3+ Black - v1.04.00
GoPro Hero 3 Black - v3.00.00
There are two build of the Turned On available, the H3+/H4 and the H3. The H3+/H4 is designed for use with the GoPro Hero 3+ and GoPro Hero 4 cases, while the H3 model is for use with the GoPro Hero 3 case.
Hypoxic are already looking to expand the development to include more of the GoPro models and claim to be exploring compatibility that goes back to the GoPro Hero 2.
Where to Get One?
Dealers that are listed with selling the Turned On units are as follows:
Chuting Star - Skydive the Farm, GA
Patrick Kaye - Skydive Dubai, Dubai, UAE
Para-Gear - Skokie, IL
Ranch Pro Shop / Tonfly USA - Skydive the Ranch, NY
The Drop Shop - Skydive Chicago
Gold Coast Skydivers - Gold Coast Skydivers, LA
Sunshine Factory - ZHills, FL
Rock Sky Market - Chicago Skydive Center, IL
Xtreme Video - Skydive Carolina, Chester, SC
HYPOXIC - Chandler, AZ
As of the release of this article, the MSRP for the Turned On units was listed as $99.
More information and installation guides can be found on the Turned On Website.

Sony Announce Two New Action Cams
Sony FDR-X1000V
Sony have started off the first quarter of 2015 with a couple of action camera announcements that are likely to excite fans of the Sony series. At CES 2015, which was hosted last week, Sony unveiled two new models of action cameras, venturing into the 4k action cam market. Sony are no newcomers to 4k recording products and have been selling 4k recording devices for a few years already, but moving in the direction of smaller and cheaper recording devices such as action cameras is a big step towards general consumers. Along with the new announcement for the 4k action camera, was the announcement of a new HD action camera, a new version of one of the company's popular cameras.
The first of the two cameras announced at CES is the FDR-X1000V, the 4k action cam product that will aim to compete with the new GoPro Hero 4. The X1000V will be able to record 4k video (3840x2160) at 30fps, with focus also being placed on enhancements to the HD recording options, stabilization and frame rate. The enhancements in stability come from an upgrade to the company's trademarked "SteadyShot" technology, which is promoted as being 3 times better at handling certain vibrations. With stabilization being such an important part of recording skydiving footage, it will be interesting to see how the X1000V does in comparison to the other Sony action cams on the market. Also beneficial, especially to skydivers - is the new, enhanced wind noise reduction.
While the focus of the X1000V definitely appears to be the ability to record in 4K, the camera also boasts some impressive recording abilities at both full HD and standard HD. Up to 120fps is supported for Full HD recording, while Standard HD allows for 240fps recording.
Sony HDR-AS200V
The second camera to be announced is the new HDR-AS200V. Last year Sony unveiled the AS100V, which in turn became quite a popular action cam. The AS series of Sony action cameras have in fact probably been the most used Sony product for skydivers, with the releases of the AS15, AS30 and AS100 in just a few short years. We've done extensive testing on some of these models in the past, and they have always performed well, with the Sony AS30 coming out on top in our Action Cam Shootout last year.
The AS200V will receive the same boost in stabilization and noise reduction as the above-mentioned X1000V, while offering recording in 60fps at 1080p, 120fps at 720p and 240fps in the WVGA video format.
New Features For X1000V and AS200V
Sony have extended most of the new features they have developed to both of these cameras, and it appears that the only real differences between models will be the ability for 4k recording on the X1000V, as well as a more enhanced underwater casing that is provided with it.
Built in GPS & Action Cam Movie Creator
Action Cam Movie Creator is software that is included with both the models and allows for the easy creation of videos, which can also use the built-in GPS to display the GPS details in an overlay of the video.
Highlight Movie Maker
For those who don't want to spend the time creating a movie from a series of clips, the Highlight Movie Maker will offer the ability to quickly and easily produce smaller mp4 video format highlights of a video, along with being able to add music to the video. The Highlight Movie Maker uses an algorithm to detect where the action is happening within the video, and then cuts out scenes which it detects as unimportant.
Live View Remote
With the new cameras come a new live view LCD remote. The Sony RM-LVR2 is a waterproof (to 3 meters) offers extensive control over both the AS200V and the X1000V, with the ability to control recording, playback, deletion of files. The live view functionality also means that you'll be able to get a clear preview of what is being recorded.
Release Dates & Pricing:
The X1000V and AS200V will be available from March with the X1000V being priced at $500, packaged with the enhanced SPK-X1 waterproof case. For the live view remote bundle, you will be paying $600.
The AS200V will go for $300, and include the SPK-AS2 waterproof case and tripod mount. The live view remote bundle will also cost $100 extra, and set you back $400.

SFly Release Ridge Wingsuit
SFly have just announced their latest addition to their wingsuit products, with the release of the Ridge. The Ridge has been in development for a while, and saw extensive testing taking place over the past months. The suit will cater towards the more advanced flyers and was developed with skilled BASE jumpers in mind.
Introduction
The new SFLY RIDGE is a wing suit 100% designed for mountain flying. The RIGDE has been developed since the very beginning for the demanding and experienced wingsuit BASE jumpers who open always shorter exits and seek for new lines requiring more and more glide performance without compromising on speed.
Its key features are :
Ultra short starts
High glide ratio
High speed
Ultra clean pull
The RIDGE development has been made possible by a 15 month collaboration between Stephane Zunino, original SFly designer, François Gouy, mountain guide who has opened numerous exits, and Julien Peelman, aerodynamic engineer mostly known for its high performance parachute canopies designs like the Icarus Petra and the Icarus Leia by NZ Aerosports.
Numerous test pilots have tried the various prototypes that have led to the final version: Soul Flyers Fred Fugen and Vince Reffet, as well as the Frenchies from Vercors: Maël Baguet, Vincent Cotte, JeanPhilippe Gady, and Matthieu Leroux.
Last summer François Gouy used a RIDGE prototype to open mythical exits in the french Alps, such as Ceüse or Les Rouies, thanks to both the short starts and the high glide performance.
Overall Design
The RIDGE is probably bigger than other suits.
The RIDGE has a high arm sweep, and a longer and thicker leg wing than other wing suits in this category.
Leading edge
The RIDGE leading edge is designed to match both the best possible aerodynamic performance with the easiest pull. That is why we have split the sleeves in 2 parts: the upper arm, made of parapack with an under layer of soft foam the lower arm, made of neoprene. And we have assembled these 2 parts with a diagonal cut so as to maximize the surface of the combined parapackfoam leading edge.
Finally we have added an inflated cell behind the arm in order to fully fill in the sleeve and to get rid of that empty space between the back of the arm and the arm wing. This cell is connected and inflated by the arm wing.
Partitioning
The RIDGE is partitioned in a way to offer the a super tight fit around your body.
This allows better wing control at all times and a great agility.
Start
The large inlets with opened airlocks allow an ultra fast inflation of both arm wings and leg wing.
The higher arm sweep and the larger surface of the RIDGE enable the wing to catch air as on as soon as your feet lift from the ground. Because of its thicker profile the RIDGE starts flying even at very low speed, allowing quicker forward motion start. These unique features give the Ridge an unmatchable exiting profile.
Glide
The high glide performance of the RIDGE is the result of the balance between surface and profile.
Because of its unique profile/surface balance, the RIDGE has an excellent glide ratio. Whatever the wind conditions, our test pilots have experienced and recorded a better glide ratio than with with other wingsuits.
Speed
The drag created by the large surface and the thickness of the suit is compensated by the extended length of the leg wing, allowing the RIDGE to easily match and outcome in speed the other wingsuit of its category. The RIDGE is remarkably fast and easy to fly in any wind conditions.
Agility
The unique partitioning and tight fit around the body make the RIDGE an easy and fun wing suit to fly, yet very responsive. The RIDGE allows aggressive dives as well as sharp turns without loosing control. What’s more, because this wing suit is highly pressurized, it has a incredible lift power in flight.
Opening
The pull is ultra clean thanks to the bevel shaped wrist end of the sleeve. The soft neoprene patch behind the elbow gives extra freedom of movement to ensure an easy bending of the arm and a clean pull. Your hand will reach the pilot chute handle naturally no matter how long you’ve been flying.
Canopy deployment
The neoprene half sleeves allow both an easy punchout and a high risers reach-
up.
More information can be found at the SFly Website
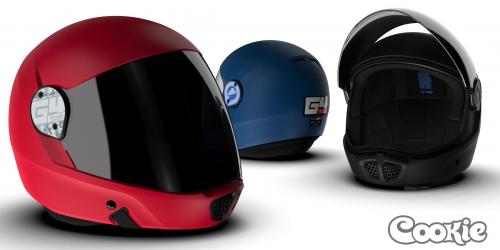
Cookie Releases G4 Helmet
After years of research and design, the Cookie G4 helmet is now available for sale. The full-face helmet is certified to Skydiving and Wind Tunnel Helmet Standard XP S 72-600. To achieve this standard, helmets must pass impact and snag resistance testing.
New features
- Ventilation control: The user can now adjust airflow into the helmet using the chin bar actuator (two switches inside the helmet).
- Additional head coverage: The G4 offers more coverage at the back of the head compared to the G3. This is especially appealing to dynamic tunnel flyers.
- Quiet: The new design seals the visor to the helmet for a much quieter flying experience.
- Easy maintenance: The closing mechanism is similar in operation to the G3 but designed to offer little or no maintenance for the life of the helmet.
- Cool: Two rear ventilation ports allow hot air to leave the helmet and the liner is a breathable material, providing a cooler experience.
Color and customization options
The G4 is available for sale in the following matte colors: black, white, dark blue, red, charcoal, tactical green, royal blue, lime green, electric blue, orange, purple, yellow and pink.
Several side plate color and engraving options are available. The G4 side plate has a slightly larger footprint, ideal for custom engraving. G4 visors are tested and certified for optical qualities. They have an anti-fog inside and anti-scratch outside and are available in clear, tinted, and blue-mirrored colors.
Sizing
The G4 is available in sizes x-small through xx-large. Sizing varies slightly from G3,so users should review the sizing chart or try one on before purchase. The G4 retails at $439 USD and is available for purchase at www.flycookie.com or from your favorite Cookie dealer.
By Administrator, in Gear,

Cookie G4 Skydiving Helmet Review
Review by Joel Strickland
Cookie Composites are quick to admit that there was a fair element of luck involved in their success with the G3. At the time of release in the early teens, the tunnel industry was exploding - and the full face helmet was crossing over from the province of close-in disciplines where you need to be extra careful about catching a knee or an elbow in the face - to pretty much everyone. Flyers were after a greater level of comfort while training for extended periods of time indoors while retaining a level of communication akin to open helmets. People wanted to be able to see each other’s whole face - and with the G3 you could. Skydiving soon followed suit, because you could now wear your cool sunglasses underneath your lid and see all the big grins in the pictures and video.
While lucky with the timing, Cookie had purposefully pulled off a crucial victory with their product - it occupied a particular sweet spot between form and function that appeals greatly to skydivers. The G3 was desirably fancy - but not too posh or too shiny to the point where it stood out as worthy of mockery. A few scratches and a couple of stickers later, and it had become (in the most positive of terms) part of the furniture of skydiving. While there were functional alternatives available, the G3 became iconic - as much so as the L+B device on your wrist or the Cypres unit in your rig.
Over the last few seasons there has been a growing grumble in our sport about the level of protection offered by helmets specifically designed for flying. The biggest and most successful company is always going to be the softest target for conversations about the actual value a helmet with no impact protection material has for your brain in an accident, and the G3 has come under fire against new offerings from competing companies that have been through tests and carry a certification. The concerns over safety are certainly valid, yet these conversations would often neglect that for a very long time we were all basically completely fine with what was on offer, and from day one - if we had been genuinely more concerned about safety over comfort and style - everyone single one of us always had the option of wearing a $20 Protec just like we all did when learning to skydive in the first place.
In the meantime, Cookie Composites have quietly and diligently created the G4 - extensively researching every single material and design element to give us what we have been asking for. Instead of rushing something out, Cookie worked alongside others in the industry to help develop a brand new rating with the specific requirements of both the skydiving and tunnel environments in mind.
While purposefully retaining the same balance of form and function, up close it is clear that it is a complete redesign - applying many lessons learned from its predecessor. Here are the main differences that you likely care about the most:
Recessed Visor: High speed flying combined with any looseness in the springs could create a distracting visor vibration on a G3. The new design has the visor recessed to fit flush all-round with the shell to eliminate this effect. It also looks great.
Audible Pockets: While perfectly fine for a lot of people, many of us with funny shaped faces were squeezed by our audibles despite any amount of wiggling. Cookie have rebuilt the pockets - and now they fit into the shell with zero intrusion into the space where your head is supposed to be. Now I can jump with two sets of beeps, hearing them perfectly yet feeling nothing - unthinkable for me previously with even the largest G3.
Metal Springs: With the old design, over time the rubber springs would stretch out and require replacing - a process that even the most generous can only describe as a pain in the ass. While Cookie took steps to remedy this with good post-purchase support, they were always going to be searching for a new system. The G4 visor mechanism has done away completely with the rubber and now uses a metal spring arrangement that should eliminate the maintenance routine.
Rear Protection: While maintaining the same general look, the new shell goes down a little further at the back to offer some more coverage in a sensitive area. This does make the hole where you put your head a wee bit smaller, and changes slightly the familiar back-forward motion of putting on a G3, to something more akin to donning a motorcycle helmet.
Impact Rated: Now there is deformable material inside. The big design battle Cookie faced was to create a helmet that would pass the crash tests while always remaining something sleek and light that skydivers would embrace as the right thing. The G4 is a little bit bigger and a little bit heavier than the G3 - but comparing them with one in each hand there is really not much in it. With the redesigned interior allowing a bit more space around the ears, it does feel like a bigger helmet when you first wear it - but that is coming from someone who has been wearing a G3 for work since the day it was released.
The unsolved problem (for now) is that while the Cookie G4 as sold qualifies for this new rating specific to skydiving, the tests are very precise indeed. As soon as you make any modifications at all to the weight or shape you are no longer using the helmet that has been qualified - you are using something else. The truth is that the myriad what and where of how we mount cameras makes practical testing out of reach. Along with impacts, a part of the new rating are thorough snag tests - and adding even the smallest, sleekest camera mounts would fail them.
The question we now face is that is it safe to assume that a helmet designed from the ground up with impact protection in mind going to provide a greater level of protection in a crash regardless of where you stick a camera on it? I know what I believe.
The driving force behind Cookie Composites - Jason Cook and Jeremy Hunt - speak passionately about their company and their products. A quick hello turns into two hours of sharing their experiences creating the G4. The lessons from the previous design have been studied, revised and thoroughly applied - along the way investigating and investing in all manner of materials, theories and processes to make it the best it can possibly be. Cookie’s success this decade has given the company the knowledge and the practical means to deliver a new product that should occupy the same place in our sport that its predecessor has done for many years. Their visual presence and the level at which they support our sport can make Cookie Composites can seem like a big company, but at a basic level it is still a handful of skydivers tinkering around in a workshop, putting in a great deal of time and effort to make something that works the best for their friends and their community around the world. Long may it continue.
Does the G4 live up to the hype? Yes. Yes it does.
Voyages of a Skydiver
Captain’s Log 2010, 0210, Manifest asks for proof of currency and jump numbers, along with the reserve data card from my rig…These are the voyages of Average Skydiver.
Many of us grew up hearing a similar introduction to Star Trek episodes, as required by Starfleet Command. A captain’s log is nothing more than a logbook chronicling the journeys and adventures of a spaceship, boat, airplane, or other craft that carries persons or cargo.
Logbooks are the basic standard of proving jump numbers in the world of skydiving. Jump numbers are a basic indicator of skydiving experience. A logbook may also be a means of keeping track of where you’ve been, what you’ve done, and who you did it with. Logbooks may be fun, or they can be boring.
Skydivers are required to keep a logbook of sorts at the least until an A or other beginning license is achieved that indicates the “student” status has passed. Many dropzones require a written logbook if a visiting jumper wishes to jump. The logbook not only demonstrates the number of jumps, but should indicate skydiver currency as well.
If the goal is to become an instructor of sorts, logbooks must be kept until 500 or even 1000 jumps, depending on where the skydiver lives. Riggers are required to keep logs of reserves packed, and it’s a good idea to keep a log for any major repairs done to any skydiving equipment for purposes of “present recall." The same can be said for keeping student logs, or at the least, logging information about students you've taught. Something may come up later in their jumping career. Remember your Coach course?
Logbooks might be as simple as a logging audible that keeps track of jumps and as complex as handwritten journals that contain every last detail about each jump, and everything in between.
A logbook is a journal of skydiving history. For some, bragging rights related to jump numbers may be enough. For others, recalling who was on a jump, the type of jump, the formations achieved, length of freefall, and much more become part of the bigger picture.
Every AFF instructor learns how to fill out a logbook with encouraging information and reinforcement of a student jump while providing “code” so that any subsequent instructor has some information about the strengths and weaknesses of the student. Students will generally improve faster if provided specifics in their logbook, and the logbook will serve as a historical record of their first jumps.
Logbooks also preserve records for those that come after someone has retired or deceased. A most special moment was at the memorial service for Gary Douris, where some of his logs were brought out for the attending public to view. Howls of laughter rang across the courtyard at S’nore as people read log entries saying that “So and so had been grounded” and “XXX couldn’t arch but he deployed OK, so he was ready for a longer delay."
Samplings of logbooks can be seen here, courtesy of Eike Hohnendahl and myself.
Some folks have expressed shock and awe at Eike’s logbooks, which are as meticulous as the man himself. Each jump is logged for place, date, exit point, landing point, participants in the jump, any exciting or interesting moments in the jump. Also included are copies of any payment for a jump, type of main used, and any special equipment used. In many cases, photos of the jump are also included. These logbooks take time, time that most are probably not willing to put into logging each jump. The skydiver making 15 jumps in a day likely isn’t able to log with such tremendous detail.
Some skydivers may wish to only keep jumps logged in an electronic logger as mentioned above, and never enter data into any computer or logbook. This is perfectly fine too.
CHEATING JUMPS
A famous logbook entry, referred to as the “P-51” entry, is named for the kind of pen used to fill in the logbook with false/padded jumps.
Although meant in fun, inflated jump numbers are no joke. Lying in a logbook is predominantly a game of lying to yourself, but may carry over into falsification of records, if the logbook is being used to affirm and prove jump numbers for the purposes of achieving ratings or participation in an event. Ultimately, falsified logbooks impress only yourself and no one else.
INSTRUCTOR AND SPECIAL JUMPS
My own method has been to keep a detailed record of every jump using the L&B; Jumptrack software, until I became an instructor. I keep a separate log of students and the type of instructional jump ie; Coach Jump, AFF jump, Wingsuit FFC, Wingsuit Coach, etc. The Instructional Logbook is kept in paper form, and in most instances I ask the student to sign the logbook, simply because I enjoy re-reading the logbooks at later points, and being able to show students “lookie here, remember when you did your AFF Cat D jump with me? That was a fun ride, yeah?”
CHOOSING A LOGBOOK
When choosing a logbook, consider how you’d like to log jumps. If you like to write, be sure the logbook has enough space and is comfortable to write in. Do you want to be able to put photos in the logbook? Be sure it’s large enough to hold those photos. If electronic logging is preferred, there are several applications available, including software as simple as Excel or other database software. Software tools like Paralog and Jumptrack interface directly with electronic loggers such as the Neptune, Altitrack, or ProTrack altimeters/audibles. Some logbooks allow for the import of GPS data for tracking jumps, wingsuit flights, or long distance canopy flight. The logging software may display a graph of exit point, speed, deployment, and offer fields to store indexed data such as total freefall time, type of skydive, aircraft used, etc.
No matter how jumps are logged and chronicled, it’s a good idea to keep a logbook for at least the first 500 or 1000 jumps, if ratings are to be achieved. If nothing else, logbooks can provide great entertainment during the off-season or after a day’s jumping has occurred. They’re a great place to store phone numbers, email addresses, photos of special jumps, and to remember all those “beer” experiences.
And when you're sitting around on a dark windy day with nothing to do but make up lies (No sh**, there I was) and drink beer with friends, a well-kept logbook will only add to the fun.

Less Weight, Feels Great
Tonfly is well known for their camera helmets. Designed in Italy, built in Slovakia, their carbon fiber helmet designs are a bit different than everyone else.
When Giovanni Suzzi, president of Tonfly, offered up an opportunity to review his newest helmets, I was expecting them in the mail in two separate boxes. When UPS dropped the package at my door, I was certain an error had been made due to the lightness of the single package. I was shocked to find two helmets inside. These helmets weigh almost nothing, but yet are incredibly strong, solid, and as protective as any skydiving helmet I’ve ever worn.
“The helmets are made from a tighter carbon fiber weave,” says “Sonic” Bayrasli, exclusive distributor for Tonfly in the USA. “This contributes to a marginally higher cost.”
The 2X and 3X helmets are definitely a unique grade of helmet. The exceptional lightweight means less fatigue at the end of a long day of skydiving. This also allows for a thicker padding inside, thus quieting the helmet more than any helmet of the same class.
Both helmets sport an audible pocket over the right ear, made specifically for the L&B; Optima, Solo II, or Protrack devices. This unique pocket allows for external access without crowding the wearer’s head. There is also room for a second audible over the left ear, perfect in size for a Flysight (wingsuiter’s tool) or other standard size audible.
The ladder-strap chin cup provides for a secure mount. However, I discovered that if the chin cup isn’t reasonably centered in the ladder straps/on the chin, the release catches can easily be knocked loose. Equal tension on both sides of the chincup is fairly important for the most secure fit. As with earlier models of the Tonfly helmets, the 2X and 3X helmets use a carbon fiber chincup covered with a vanity cup emblazoned with the Tonfly logo. This vanity cup is available in many colors to match any custom color scheme a buyer might come up with.
Speaking of custom… Tonfly offers the 2X and 3X in all sorts of custom colors with logos put in place as designed by a buyer. I asked for some unique logos and color combinations and Tonfly was more than obliging.
Both helmets are designed for mounting a single camera on top. Neither helmet is designed as a helmet for both video and stills; these are made to be as light as possible. A Zkulls mounting ring is provided on both helmets (optional) along with a molded space for the GetHypoxic HypEye camera controller (optional). The 3X also provides a debrief port for the HypEye control/debriefing system (optional). This is very useful for team debriefs, viewing video immediately after a jump where a DV, HDV, or AVCHD camcorder is used and an HDMI cable isn’t available. This also means that the AV connector on the camera won’t need to be disconnected, thus saving wear and tear on the camera connector (a common point of failure).
Two very unique features set the 3X apart from it’s brother; the air pump system that allows the base of the helmet to conform to the wearer’s head, and a “crown” that allows the user to quickly shift the angle of the camera by as much as 15 degrees forward or back.
The air pump system is terrific for wearers with long hair; it makes the helmet ‘feel’ like a full face helmet in the way it contains hair. Those with short hair will appreciate the additional quiet that the custom conformation option provides. It takes 4-5 pumps to make the helmet tight against my head, and I have medium-length hair. The small air release nipple next to the pump provides an instant release of air, but in truth, it’s impossible to make the helmet uncomfortably tight, even with the air pumped as tight as the internal bladder allows.
The slotted mounting plate allows users to change the camera angle, albeit not instantly. This is very useful for wingsuit pilots or freeflyers. Wingsuiters will like the ability to shift a camera forward (angled more downward) which allows for easier capture of a formation in a vertical slot, and freeflyers will like the additional angles for flying close in small groups. Changing the angle of the platform requires a slotted screwdriver and a couple of minutes. It’s very easy. However, the screws are also extremely light weight, so use care when turning them so as to not strip their threads.
As mentioned before, the adjustable camera platform also provides access to the video debrief port found on the HypEye camera control system. On a personal note, I’ve found this feature invaluable not only because it reduces wear/tear on the camera AV port, but also because it allows for a very fast connection to both television and computer monitors (if equipped with a composite input).
Wingsuit students use Tonfly Helmets at Skydive Elsinore. Each is equipped with a custom-color L&B; Optima, courtesy of L&B.;
Both helmets share the same chincup and ladder characteristics.
What I don’t like about these helmets:
The screws that hold the camera platform to the 3X are thin metal and easy to strip. Tonfly could address this by including a couple of extra screws/receivers with each helmet (they’re very difficult to find here in the USA).
The ladder straps on both the 3X and the 2X don’t hold as well as their older brothers in the CCM/CC1 realm.
What I do like about these helmets:
Super comfortable on the head. No pressure points anywhere.
Extremely lightweight (hence the “X” in their name, perhaps?)
Very strong. I’ve been knocked in the head by several students, one of them wearing boots sharp enough to chip the paint on the helmet, but I didn’t feel a thing. I was also hit by a newbie wingsuiter hard enough to cost me a battery, lens, and destroyed camera; one can only imagine how much of my skull was protected by this lightweight helmet.
The fit. I don’t know what Tonfly does exactly, but I appreciate the way this helmet fits. Students often comment on how much they love the fit of the helmet too. Mine is a size 59; it seems to be an average size.
The camera system on the 3X simply rocks. I love how it works, how it feels when I’m flying, and provides the angle I prefer with wingsuit students.
Quiet. The 3X is the most quiet helmet I’ve ever jumped.
Read more of DSE's writing on his blog.
Robert Harris Explains His Homemade Wingsuit Project
We recently talked with Robert Harris, who took it upon himself to build his own homemade wingsuit. After years of motocross racing, Robert started skydiving five years ago, and since then has attained over 1600 jumps, his D-license as well as AFF and coach ratings. However, what made us want to talk to him, was having seen that he had developed his own DIY wingsuit at home. He talks to us about what inspired him, how he made it and most importantly, how it flew.
What made you want to develop this DIY wingsuit?
I have always liked knowing how things are made, when I was a kid I took everything apart to try and figure out how it worked and hopefully put it back together before my parents found out. This didn't stop as I got older, although it changed to learning, so I could make things.
Shortly after I started wingsuiting I decided I was going to make a wingsuit someday. So last year I asked for a sewing machine for Christmas and didn't get one as no one knew what kind I wanted and I didn't either. I had gotten to use a sewing machine back in middle school home ec class but didn't care about learning sewing, wish they had told me I could make parachutes and wingsuits back then as I would have paid way more attention.
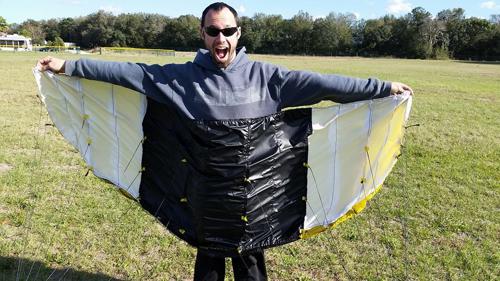
After talking to my dz's rigger Sally and some other people and decided to get a singer 20u, after over a month of trying to buy one I found one on Craigslist from an old lady that really never used it for 400$. Then I started sewing. First a pillow case, then a miniature version of my Leia that I made into a traction kite, a belly band, canopy continuity bag, and weight belt. After all of those projects I finally decided it was time to start my wingsuit project.
What experience do you have in aeronautics or aviation product development?
I don't really have much, but I have started an online class on Aeronautical Engineering to learn more about designing airfoils. I hope to learn to do some equations to determine glide and speed of a given airfoils parameters and hopefully eventually learn CFD(Computational Fluid Dynamics) to push the envelope of what can be done in wingsuits I make later.
What were your expectations when starting this project?
I was told by quite a few people that I was crazy for wanting to make a wingsuit or that it was too hard and I didn't have a chance. I didn't really care about the designing process when I first started I just wanted to assemble a suit and fly it. I didn't care if it was the best performing suit I just wanted to say I had done it. Although I think I have caught the bug, now I want to make another one and try some new ideas we haven't seen in the wingsuit world yet.
Could you explain your creation process to us?
When I started I picked one of my wingsuits as a starting platform. I took measurements all over the outside of the suit, and decided to change the arm wings completely as I didn't want to outright copy the suit. I simplified some parts trying to make it out as few as pieces as possible. After all the outside pieces were made came the challenging part of making the ribs. I was originally going to make it with back fly vents so tried to make an airfoil shape that would be as good either on back or belly. I drew out where the ribs would be placed and measured how long they would need to be on the top and bottom skins and as far as thickness goes I knew how wide I wanted the thickest one and the thinnest, to figure out the rest I used some math to taper from the biggest to smallest.
After I started sewing I scraped the backfly vents but left the ribs how they where as after putting the fronts on I didn't want to deal with the headache of the backfly ones as well. I spent a couple days making patterns and writing everything down as I did it to make it easier for possibly making another one. After the patterns were all done and checked for fit against each other I started cutting them all out of some parapac I got from JoAnn's fabric with my new hot-knife my girlfriend got me for my birthday. This part went relatively quickly and only took about a day total. Then came the weekend and jumping time, it was hard to pull myself away from my project but I needed to train for the last swoop meet of the season. As weather got crappy I started the sewing. I figured it would be best to get the hardest part done first the arm wings as if I couldn't get those done there was no point in even making the tail.
I started with sewing the ribs to front or bottom skin of the suit and quickly learned the sewing the ribs and vents on together was a pain. I did every step on both wings at the same time so I could try and make it as symmetrical as possible and knew they where both put together in the same order. I felt really accomplished when I finished both arm wings and was ready to push through the tail wing quickly before my swoop comp. The tail wing went together pretty easily after making the arm wings and before I knew it I had 3 wings that needed to be put together. After missing a couple of weekdays jumping as I sat busy behind my blue Singer I had finally finished! I was so excited after 23 hours of sewing to go jump it but jumping had already stopped for the day.
And how did it fly when you took it out?
I really wanted to get some outside video of its (cough cough) first fight. Go figure, none of the normal wingsuiters where around, I eventually asked my friend Paul who has done only a handful or two of wingsuit jumps if he would try. I gave him an I-bird I use for teaching and rig to borrow so he wouldn't be jumping his velo. We talked about the dirt dive and manifested for a load. As we climbed to altitude all I could think about was my family and girlfriend and how dangerous this could be. I did a lot of practice touches of all my handles and went through my emergency procedures as I always do but did way more of them.
On the 2 min call we did all the normal handshakes and then I buckled my helmet and zipped up my arm wings. As all the other jumpers were getting off the plane my heart started racing, I used all my yoga experience to get my breathing in check as I walked to the door of the Twin Otter, I could tell Paul was nervous as well. I had him exit before me as I wanted a nice exit shot, as I hopped out from a poised position in the door all I could think was please don't let the suit blow apart! I made sure to keep all my wings shut down on exit and waited to see the tail before I ever so slowly opened my wings.
I got my wings open and started flying, I was ecstatic at this point as the suit was staying in one piece. I started my first turn shortly after and was surprised at how stable it was. It took a little bit for Paul and I to get together but around 10k we got together shortly after my practice pull to see if there would be any issues and it was the easiest one I have done in awhile. We flew with each other for a bit and then about 7k I wanted to see what I could do with it.
I started a small dive then went in max flight. I decided I would pull higher then normal as I was still jumping my normal wingsuit canopy a Jfx 84 at 4,500 feet. I came in to land with 90 degree turn for nice little swoop. Shortly after Paul landed close by and celebrated an awesome jump!
I have never been so excited and nervous on any of my 1600 plus skydives or 4 base jumps yet alone together. After I landed I had to message family and girlfriend to let them know I was ok, they were all pretty scared about me doing it. Since the 1st jump I have only done 1 more on the suit and it was a time run, I got 2 min and 20sconds out of it, which was defiantly shy of the 3-3.5 min I should have gotten out of that size suit. Turns out the fabric I used was my biggest downfall, it didnt have a coating on it like parapac used in other suits so it was constantly bleeding air out and never achieved max pressure.
What was the biggest challenge in creating your wingsuit?
The biggest challenge by far was trying to figure out what order everything gets put together in, I spent a couple days alone trying to piece it together in my head to figure it out. Although I had to unpick a few parts because of misalignment I did not have to unpick anything because of the order I put it together in.
Do you feel that your venture was a success?
In the end I feel I achieved my goals I set out for the project and learned tons along the way! I look forward to starting my next suit when I return from visiting my girlfriend in London. I already have tons of things I want to try try and do but the major thing will be a fabric that has zero porosity.
About Robert Harris (D-31584): I grew up racing motocross at a early age and after many years of racing I stopped because I was tired of breaking myself. I still rode and one day on the way from riding I got a call about getting to do a free tandem. Of course I said yes much to my parents dismay, they thought skydiving was too dangerous at the time and realize now its more dangerous then motocross. I had loved motocross for the jumps as I loved the feeling of flying through the air. Skydiving was just that pure flying and as soon as I landed I signed up for Aff. One year after I started I had 200 jumps and started wingsuiting on jump 201. My 2nd year in I had my D-license and got interested in Canopy Piloting as well. Since then I have gotten my coach and Aff ratings and am currently on my 5th year of skydiving and have just over 1600 jumps.

First Look At The Squirrel Swift 2
Squirrel are soon releasing their Swift 2 and Funk 2 wingsuits, which are now available for pre-orders. We're excited to bring you this first look at the Swift 2.
Image by Dan Dupuis
New smaller planform
New profile
New leading edge construction
New arm sweep
More R&D; per square inch than any suit in its class
The SWIFT 2 is an entirely new design that brings a higher level of efficiency and performance to the beginner-intermediate class. This is the most balanced and versatile beginner-intermediate design that we have flown, and we think it represents a meaningful step forward in wingsuit design. In the same way that the FREAK has upset the intermediate class market, the SWIFT 2 offers performance and ease of use in a ratio that we think is unique in the category.
Compared to the SWIFT, the SWIFT 2 has less surface area yet more glide performance, range, and speed. What this means is that the SWIFT 2 is easier to fly than its predecessor, and offers higher performance. This has been accomplished by increasing efficiency in the profile and planform.
Traditionally, wingsuit manufacturers have added surface area to a design in order to increase “performance”. But, as surface area increases, so does difficulty. Surface area is the one factor in wingsuit design that cannot be cheated: if it’s bigger, it’s potentially more difficult to fly. Our mission at Squirrel is to maximize the efficiency of each design by focusing on glide and speed gains that come as a result of profile improvements and drag reduction, instead of simply increasing surface area. When we increase the performance of a suit without reducing the comfort and ease of use, it can be considered a “free” upgrade. That is the focus of the SWIFT 2.
Image by Avalon Wolf
The SWIFT 2 planform has less arm wing surface at the wingtip section of the span, increasing the aspect ratio and improving handling and ease of use. The wing root chord has been slightly increased, adding range and stability particularly in applications such as flocking. The added surface at the wing root enables smoother pitch adjustment and increases roll stability by supporting the pilot’s CG and hips. This also eases transitions from belly to back fly positions. The leg wing stance is also narrower than the original SWIFT.
A new arm sweep and leading edge construction, taken directly from the FREAK, has reduced drag and improved agility. The SWIFT 2 feels considerably more compact than its predecessor, or any other wing in its class, thanks to these factors being combined with a profile also adapted from the FREAK. The FREAK profile was chosen for its moderate thickness and excellent behavior across a wide range of speeds.
THE RANGE
Versatility is a key tenet of the SWIFT 2 design. Arm and leg wing pressure can be adjusted via the internal wing zips, allowing a softer and more manageable ride for newer pilots, acrobatic pilots looking for rapid transition and ease in flips where wing area has to be rapidly compressed. With zips closed, the SWIFT 2 delivers the range, performance, and stability needed for high or low speed flocking.
INLETS
The SWIFT 2 inlets are adapted from our newest high-performance suits, and feature a more efficient intake with less drag than the original SWIFT. Back-fly inlets are offered as an option, and make the SWIFT 2 a fun and agile suit for freestyle flying and steeper, more advanced, formations.
LEADING EDGE
Leading edge construction is a complicated matter in wingsuit design. Performance can be enhanced by creating a rigid structure over the arm, but this results in a significant reduction in passive safety. We have focused on this part of our wingsuits since the beginning of our development and we are constantly striving to create the best balance of comfort and performance. The SWIFT 2 leading edge is adapted from the FREAK, and features a grained non-flexible main arm segment with a flexible Glideskin arc at the wrist for BOC and riser/brake toggle access. The interior is finished in Lycra, which provides a smooth surface for skin or clothing to slide across, and houses the optional leading edge foam. Never underestimate the importance of an easy pull and access to your risers. Brake and riser access is a learned skill: practice it thoroughly!
PLANFORM
The SWIFT 2 planform is completely new, and was chosen for its distribution of surface at the wing tip and wing root. Additionally, the sweep and stance are similar to the FREAK and FUNK 2, making the transition to our more advanced suits feel more natural.
PROFILE
The SWIFT 2 profile is adapted from the FREAK, modified only to fit the smaller planform and shorter chord. Thickness and camber was chosen for stability across a wide range of speeds and angles of attack.
Image by Luis Lopez Mendez
FEATURES
We believe that all performance-enhancing features in a wingsuit should be standard. If it's important to performance flying or improves ease-of-use, then it's included in the price of your suit. Padded and reinforced foot cavities, chest pocket / belly-cam access, internal pressure-zips, nut-sack storage compartment, mylar reinforced leading edge, and rubber BASE soles are all standard features in all of our suits.
ACCESS
In BASE and Skydiving, easy BOC and brake toggle access has proven to yield the safest and most reliable deployments. We firmly believe in the mantra, "Keep it Simple and Safe". For that reason, we designed a suit for which arm cutaways are unnecessary, BOC access is clean thanks to the extended wing root that helps to prevent the trailing edge from covering your PC, and risers / brake toggles can be accessed without unzipping. The arm sweep, wrist-cut, and leading edge construction have all been engineered for a balance of safety and performance.
PERFORMANCE
The SWIFT 2 has an exceptional amount of performance for its surface area. No other suit in this size range delivers as much speed, glide, or range. Ease of use is a critical factor for this class of suit, and the newest pilots will instantly appreciate the SWIFT 2’s stability in an arched position. If you have questions about flying your SWIFT 2 at any level of performance, please don't hesitate to contact us! We are always here to answer your questions.