0

Gear

    Introducing The Squirrel Snatch BASE Pilot Chute

    The Squirrel Snatch is a revolutionary new product that sees the first BASE targeted development of a toroidal design for a pilot chute. Although the design has been used extensively in the development of non-sport parachutes for over 40 years, until now it's never been manufactured for BASE or skydiving. The idea was born from a discussion between the company's co-designer and CRW expert, Jim Rasmussen.
    The toroidal design (also known as a Pulled-Down-Apex design) that the Snatch uses, is a complex and costly product to produce and was no small undertaking by the company. The Snatch has a three dimensional partial toroidal shape and is joined together with two mesh cones, allowing for extremely high drag co-efficiency. Squirrel Wingsuits discuss the differences between the shape of a toroidal design and that of the common pilot chute by saying, "Traditional PCs are two circles sewn together around the edges, typically one of ZP and one of mesh, with a piece of line or webbing connecting the center of each circle together at a specific distance. When pulled from the center of the mesh circle and dragged through a fluid, it inflates into a rough approximation of a pulled-down-apex shape, but with a large amount of distortion and error, with a wrinkled and asymmetric circumference. Imagine crumpling up a single piece of paper until it forms the 3D shape you want to design - it won't look good, nor be an accurate representation of a 3D surface. Yet that is the current basis of traditional PCs: an approximate and inefficient 2D design meant to perform a task that requires a 3D shape."
    Squirrel used an ellipse with a 7:10 (H:W) ratio, with an axis offset of 20% of the width in the development of the torus. The tangent formed with the cones and partial torus was calculated precisely to ensure that the ZP had a smooth transition with the mesh. This allows for the ability to maintain a smooth error-free perimeter on the pilot chute.
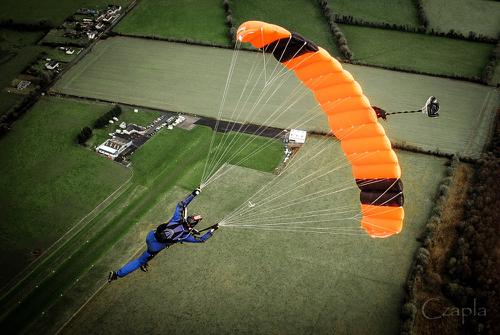
    Innovation aside, the most impressive part about the Snatch is the enhanced performance over regular double circle pilot chutes. Because of the shape of standard pilot chutes, the surface area is usually met with an imbalance of stress, with some areas being pulled more than others, and material being "loose". The randomness aspect that is present in these regular pilot chutes gets minimized with the toroidal design of the Snatch. Unlike normal PCs which are constantly changing shape as airflow moves around the creases and wrinkles, the toroidal design inflates to its intended shape and remains that way, without the pulsing that is usually witnessed.
    When inflated, the Squirrel Snatch takes the shape of a 3D object, with specifically calculated gores.
    This increase in inflation performance is easily seen in testing where far superior stability was witnessed in both wind tunnel and field testing.
    Symmetry is one of the most important factors in the performance of a pilot chute, and each Snatch is guaranteed to be symmetric, with the build tolerance being set at a stringent 1mm +/-.
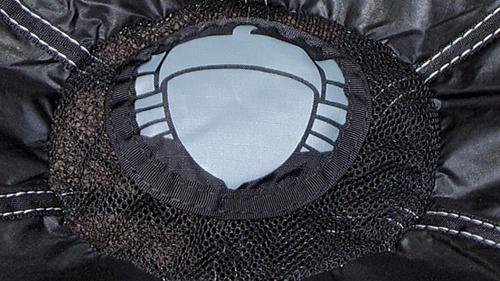
    The focus with the Snatch has not only been on general performance and innovation, but also on safety. Squirrel decided that due to the suggested risks involved with heavy handles, and their involvement in entanglements, that they wanted to produce the lightest possible design, without compromising on durability. The decrease in weight means that bridle entanglements become less likely. The Snatch uses hexagonal carbon-fiber handles for sizes 32, 34, 36 and 38. The 42 featured a pad-patch top with no carbon, while the 46 and 48 are handle-free, for hand held use.
    The Snatch already has several skydivers wondering whether or not they will be able to use it on their skydiving rig, or whether the company plans to release a skydiving specific toroidal PC in the future, as well as whether or not this is a development that could change the development and focus of PCs in general.
    Squirrel have open sourced the design, in the attempt to get more BASE jumping what they consider to be a higher performance and safer design. For those looking to build their own toroidal PC, you can get in contact with Squirrel via e-mail and they will provide you with the 2D patterns for all sizes.

    By admin, in Gear,

    USPA & PIA Team to Revise FAA Repack Rule

    Re-run with USPA permission.
    After years of effort by USPA and the Parachute Industry Association, the FAA has approved a new final rule that will lengthen the parachute repack cycle from 120 days to 180 days. The final rule appeared in the Federal Register last month, and will take effect on December 19, 2008. The effort had more twists and turns than a funneled 20-way, but the change happened when PIA and USPA joined together and finally convinced the FAA to grant a 180-day repack cycle.
    USPA initiated the first run at the change in 1998 when its board of directors approved a motion authorizing USPA to petition the FAA for the rule change. At the time, the FAA was preparing to revise Part 105. However, the FAA declined to include the lengthened repack cycle as part of its Part 105 revision in 2001, saying the initiative didn't have full industry support.
    In early 2005, Allen Silver, a well-known rigger and PIA’s Rigging Committee chair, initiated discussion with the FAA about accepting a petition for an exemption that would allow a 180-day repack cycle. Getting FAA agreement, PIA and USPA formed a task group to develop the petition language. This resulted in an effort in which all aviation groups, whose pilots used emergency parachutes, including the Aircraft Owners and Pilots Association, the Experimental Aircraft Association and the Soaring Society, among others, to join PIA and USPA in jointly petitioning the FAA for an exemption to the regulations addressing those parachutes. The exemption requested a 180-day repack cycle for the emergency parachutes worn by pilots, as well as the sport parachutes used by skydivers. The joint PIA-USPA petition was submitted in July 2005. Ironically, while the FAA saw good cause for a lengthened repack cycle, the agency said its own rules prevented it from granting an exemption to so many beneficiaries; exemptions were intended for small groups. The FAA denied the petition for exemption.
    However, acknowledging the support of so many pilots, riggers and skydivers, the FAA declared that it would publish its own Notice of Proposed Rulemaking to lengthen the repack cycle, which it did on May 22, 2007. At urging by USPA and PIA, nearly all of the hundreds of comments to the docket were in favor of the proposal. The end result is a final rule published this week granting the lengthened repack cycle.
    "This result shows what can happen when two organizations like USPA and PIA decide to work together on common goals," said USPA Executive Director Ed Scott. "We look forward to doing even more together for the benefit of skydivers." PIA President Cliff Schmucker said, "The 180-day repack rule change is a fine example of what PIA and USPA can accomplish working as one. Together we will endeavor to continue improving safety for parachute users.”
    For answers to frequently asked questions about the new Rule, please visit either the USPA or PIA (.pdf) online.

    By admin, in Gear,

    AirLock

    There is a considerable amount of chatter about “valved” parachutes going around these days. Many skydivers believe that airlocked parachutes are the way of the future, while others see the introduction of this new technology as a temporary fad. In this article I will discuss the pros and cons, as objectively as I can, to this new development in parachute design.
    Simply put, an “Airlock” is a system designed to contain the internal pressure of a ram-air canopy, and therefore its airfoil shape. In short, the air goes in, but it doesn’t go out. If the wing’s shape is not reliant upon the relative wind (created by airspeed), then the performance range is consequently expanded and enhanced in every respect. In addition, the theory holds, such a self-contained airfoil will not distort or be otherwise adversely effected by turbulent flying conditions.
    Parachute designers have worked towards the goal of a valved parachute since the very birth of the ram-air canopy. Domina Jalbert, the man to whom credit is given for developing the world’s first ram-air canopy, was among the first to design such a system. Although his “valve” didn’t exactly revolutionize the industry, the spirit of Jalbert’s concept of a self-contained airfoil continued to possess (and obsess) the minds of inventors worldwide. Some twenty years later, I too got enthralled with this quest.
    I got involved with the airlock project as the result of a near-fatal collapse of my para glider in 1993. From my wheelchair, I began designing various systems to keep the air in the wing, with mixed success. I built scores of miniature parachutes, experimenting with every type of valve I could imagine. I discovered that regardless of the type of valve, I had to retain the leading edge “scoop” of the airfoil in order to maintain adequate internal pressure. I realized that there are many ways to achieve this end, but found only one method that stood head-and-shoulders above the rest. So I brought my idea to the only person I could think of that might be crazy enough to actually build it: Tony Uragallo. He hired me on the spot.
    Tony and I did extensive research on the valve concept over the course of three years. Some of our designs were incredible, while others weren't worth the fabric we built them out of. It was an age of synthesis, a time of wild creative genius and misdirected insanity. We eventually developed a product that we were proud of, and marketed it as “The Jedei”. As expected, the market received it with mixed emotions. Now that there are literally hundreds of these canopies flying all over the world, the pros and cons of valved parachutes have become much more readily observable. The safety and performance advantages of the design seem to be very well received. Pilots of valve parachutes have observed significantly longer landing surfs, even without dangerous acceleration maneuvers. This is due to the lack of “wing shrinkage” as the airspeed decreases. Furthermore, owners report that the wing feels far more stable in turbulence, exhibiting little or no span wise compression, even in the nastiest of conditions. The most exciting news is what has not been reported: there have been no documented canopy collapses due to turbulence whatsoever...Not One.
    Clearly the primary objective has been achieved. Consequently, a valved-parachute “cult” has formed; a sector of the skydiving population that refuses to jump anything that isn't valved. Supporters of the movement shun the use of “open-celled” parachutes in much the same way as early Zero-P jumpers avoided F-111 canopies. Although the supporters are adamant, they all have reported similar shortcomings to the airlocks.
    The disadvantages to the design seem to be born of the same attribute that attracts airlock customers in the first place... the air doesn't come out of the wing, whether you like it or not. For instance, after landing on an excessively windy day, you may be in for a bit of a fight if you haven’t developed a technique for “downing” the parachute. No one has reported any injuries as a result of being dragged after landing, and the hassle is something the owners seem to be willing to trade for the performance gains. The bottom line is: "would you rather have a bit of struggle with getting the air out on the ground, or a whole lot of struggle getting it back in during flight?"
    The drop zone packers usually have a bone to pick with the airlock concept as well. As the air tends to stay inside the wing longer, the airlocks sometimes require an extra step in the packing process. Most packers have adapted a technique of laying the parachute in a side-pack configuration, and then rolling their bodies across the canopy from tail to nose. Once most of the air is out, the parachute packs up the same as any Zero-P canopy. Although the packers’ gripe is valid, one must keep in mind that if it were solely up to the packers, we’d all be jumping F-111 parachutes.
    Lastly, there is the issue of cutaways. It is true that a few people have lost their valved canopies after cutaways. An undeniable side-effect to the airlocks is that the parachute can sometimes drift further after a cutaway than an “open-cell” canopy. This is usually not the case, but the possibility does exist. Interestingly, all of the despondent owners have replaced their lost parachutes with new valved canopies, an unarguable sanction of the technology.
    The final question still remains: “Is it all worth it?”... Is the theoretical safety margin afforded by parachute valve systems worth the new problems that they create? The fate of the airlock parachute remains in the hands of the skydiving community... the future is still to be decided. The airlock may be just another passing facet of the “Techno Fad”, or a permanent feature of the sport that will develop into the industry standard. As always, the direction and nature of the accepted technology is determined solely by the consumer, not the inventor.
    Brian S. Germain
    D-11154
    April 8, 1997
    Also known as a competitive freeflyer and lecturer, Brian Germain is the CEO of BiG Air Sportz, a new Colorado-Based parachute manufacturer. An avid skydiver with over 5000 jumps, Brian is the sole Patent holder on the “AirLock”, (U.S. Patent 5,573,207).
    The airlock technology is currently available through BiG AiR on a limited basis, and will shortly be available from Performance Designs, Inc., and Precision Aerodynamics, Inc once PD's exclusive license expires. Although the airlock technology available from BiG AiR is arguably significantly different from that licensed to Performance Designs, Precision has decided to wait until the expiration of PD's license (July 31) to release BiG AiR's line of canopies in the U.S.
    Source:
    Rec.Skydiving
    Subject: Airlock Article by Brian
    Date: 11/08/1999
    Author: Zenfreefall

    By admin, in Gear,

    Cookie G4 Skydiving Helmet Review

    Review by Joel Strickland
    Cookie Composites are quick to admit that there was a fair element of luck involved in their success with the G3. At the time of release in the early teens, the tunnel industry was exploding - and the full face helmet was crossing over from the province of close-in disciplines where you need to be extra careful about catching a knee or an elbow in the face - to pretty much everyone. Flyers were after a greater level of comfort while training for extended periods of time indoors while retaining a level of communication akin to open helmets. People wanted to be able to see each other’s whole face - and with the G3 you could. Skydiving soon followed suit, because you could now wear your cool sunglasses underneath your lid and see all the big grins in the pictures and video.
    While lucky with the timing, Cookie had purposefully pulled off a crucial victory with their product - it occupied a particular sweet spot between form and function that appeals greatly to skydivers. The G3 was desirably fancy - but not too posh or too shiny to the point where it stood out as worthy of mockery. A few scratches and a couple of stickers later, and it had become (in the most positive of terms) part of the furniture of skydiving. While there were functional alternatives available, the G3 became iconic - as much so as the L+B device on your wrist or the Cypres unit in your rig.

    Over the last few seasons there has been a growing grumble in our sport about the level of protection offered by helmets specifically designed for flying. The biggest and most successful company is always going to be the softest target for conversations about the actual value a helmet with no impact protection material has for your brain in an accident, and the G3 has come under fire against new offerings from competing companies that have been through tests and carry a certification. The concerns over safety are certainly valid, yet these conversations would often neglect that for a very long time we were all basically completely fine with what was on offer, and from day one - if we had been genuinely more concerned about safety over comfort and style - everyone single one of us always had the option of wearing a $20 Protec just like we all did when learning to skydive in the first place.
    In the meantime, Cookie Composites have quietly and diligently created the G4 - extensively researching every single material and design element to give us what we have been asking for. Instead of rushing something out, Cookie worked alongside others in the industry to help develop a brand new rating with the specific requirements of both the skydiving and tunnel environments in mind.

    While purposefully retaining the same balance of form and function, up close it is clear that it is a complete redesign - applying many lessons learned from its predecessor. Here are the main differences that you likely care about the most:
    Recessed Visor: High speed flying combined with any looseness in the springs could create a distracting visor vibration on a G3. The new design has the visor recessed to fit flush all-round with the shell to eliminate this effect. It also looks great.
    Audible Pockets: While perfectly fine for a lot of people, many of us with funny shaped faces were squeezed by our audibles despite any amount of wiggling. Cookie have rebuilt the pockets - and now they fit into the shell with zero intrusion into the space where your head is supposed to be. Now I can jump with two sets of beeps, hearing them perfectly yet feeling nothing - unthinkable for me previously with even the largest G3.
    Metal Springs: With the old design, over time the rubber springs would stretch out and require replacing - a process that even the most generous can only describe as a pain in the ass. While Cookie took steps to remedy this with good post-purchase support, they were always going to be searching for a new system. The G4 visor mechanism has done away completely with the rubber and now uses a metal spring arrangement that should eliminate the maintenance routine.
    Rear Protection: While maintaining the same general look, the new shell goes down a little further at the back to offer some more coverage in a sensitive area. This does make the hole where you put your head a wee bit smaller, and changes slightly the familiar back-forward motion of putting on a G3, to something more akin to donning a motorcycle helmet.
    Impact Rated: Now there is deformable material inside. The big design battle Cookie faced was to create a helmet that would pass the crash tests while always remaining something sleek and light that skydivers would embrace as the right thing. The G4 is a little bit bigger and a little bit heavier than the G3 - but comparing them with one in each hand there is really not much in it. With the redesigned interior allowing a bit more space around the ears, it does feel like a bigger helmet when you first wear it - but that is coming from someone who has been wearing a G3 for work since the day it was released.

    The unsolved problem (for now) is that while the Cookie G4 as sold qualifies for this new rating specific to skydiving, the tests are very precise indeed. As soon as you make any modifications at all to the weight or shape you are no longer using the helmet that has been qualified - you are using something else. The truth is that the myriad what and where of how we mount cameras makes practical testing out of reach. Along with impacts, a part of the new rating are thorough snag tests - and adding even the smallest, sleekest camera mounts would fail them.
    The question we now face is that is it safe to assume that a helmet designed from the ground up with impact protection in mind going to provide a greater level of protection in a crash regardless of where you stick a camera on it? I know what I believe.

    The driving force behind Cookie Composites - Jason Cook and Jeremy Hunt - speak passionately about their company and their products. A quick hello turns into two hours of sharing their experiences creating the G4. The lessons from the previous design have been studied, revised and thoroughly applied - along the way investigating and investing in all manner of materials, theories and processes to make it the best it can possibly be. Cookie’s success this decade has given the company the knowledge and the practical means to deliver a new product that should occupy the same place in our sport that its predecessor has done for many years. Their visual presence and the level at which they support our sport can make Cookie Composites can seem like a big company, but at a basic level it is still a handful of skydivers tinkering around in a workshop, putting in a great deal of time and effort to make something that works the best for their friends and their community around the world. Long may it continue.
    Does the G4 live up to the hype? Yes. Yes it does.

    By Meso, in Gear,

    Parachute Systems Service Bulletin for Vortex Container

    PRODUCT SERVICE BULLETIN 2016-01 (PSB # 2016 - 01)
    ISSUE DATE: 4th January 2016

    SUBJECT: Stainless Steel Mini Base Ring

    STATUS: Ground Equipment Until Further Notice

    IDENTIFICATION: PSB # 2016-01
    Affected Vortex Rigs: To be updated ASAP.
    Subject to a notification on Saturday, Jan 2nd, 2016, from our dealer in Holland that a stainless steel mini base ring presented with a problem on a Vortex container on its fourth jump (DOM October 2014), we are immediately advising all customers with a Vortex that has “DSF” stamped base rings (flip the base ring over and if its stamped DSF) to ground their equipment until we can ascertain which batch is impacted and obtain more detail from the manufacturer. We are diligently pursuing this information in as quick a time as possible. We will post serial numbers of potentially affected Vortex's as soon as we have the manufacturers’ confirmed information and steps that need to be taken to resolve this issue.
    Please be assured that Parachute Systems will make all efforts as quickly as possible to resolve this issue.
    Discussions regarding this issue are being discussed on Parachute Systems' Facebook page.
    This bulletin will be updated as more information on the affected containers are provided.
    UPDATE - Permanent Grounding For All Vortex Harness Containers With DSF Ring

    An update has been provided by Parachute Systems that has seen the permanent grounding of all Vortex containers with the affected DSF ring.
    "While the hardware manufacturers believe the compromised stainless steel ring could be an isolated incident, and expert opinion has confirmed this is very possible, in the absence of being able to test every single ring quickly and efficiently, both companies have decided that they will not risk the possibility of even one Harness Container in the field with a potentially faulty stainless steel ring.
    It has been decided, therefore, that every Vortex Harness Container with the stainless steel hardware as referenced in the Bulletin and stamped “DSF” BE GROUNDED PERMANENTLY"
    This grounding does NOT pertain to the Vortex Harness Containers that do not have the referenced stainless steel hardware per the Bulletin and stamped “DSF">
    It has been further agreed to by both companies, that EVERY Vortex harness container that has the stainless steel hardware as referenced in the initial Bulletin, will be replaced with a brand new identical Harness Container as the original order.
    The replacement phase (VORTEX REPLACEMENT PROGRAM) will commence immediately and the closing date for the receipt of claims under this program is December 31st 2016."
    More information available in the Service Bulletin
    They have also made a recall form Available on Their Website

    By admin, in Gear,

    Why Your Canopy Is Slapping You Around

    Image by Lukasz SzymanskiAh, your canopy.
    When you first got together, everything was great. A few tussles over crispy, slippery fabric were the biggest issues you two had. You packed carefully -- lovingly, even -- or you were at least habitually spying on your packer. And after freefall, it was a joy to reach for that pilot chute.
    Now, things are horribly, horribly different.
    What happened?
    Maybe it’s because you stopped paying attention -- or maybe because you’re both getting older -- but something has changed. There have been some bad moments. Violent moments, even. There was that time that you landed from a jump with a three-ring mark and a stunned expression on your face. Your friends asked what happened to you. You started to wonder if it’s time to say goodbye for good.
    Don’t thumbtack that “for sale” sign to the corkboard too quickly, friend. You can save this relationship. Here’s how.
    1. Wrap your head around the dynamics involved.
    When a ram-air canopy opens in freefall, the dynamics of that opening are controlled by two processes: cell inflation (air pressurizing the airfoil through the nose inlets) and bottom-skin spreading (the side-to-side spreading action that takes place as relative wind rushes against the bottom of the canopy). You might not be aware of how separate these processes are, but they are quite distinct.
    Even without cell inflation, bottom-skin spreading is such an efficient phenomenon that a canopy can open entirely by this method, before the cells have a chance to inflate and pressurize. Since the force of that kind of opening is brutal enough to be quite literally fatal, square skydiving canopy designers invented a system to put on the all-important brakes -- the humble slider.
    That funny little square has a single function: to sync up bottom-skin spreading with cell inflation. A correctly packed slider stays at the very top of the lines during the early part of inflation, kept there by the same forces that would smack the canopy open with bottom-skin inflation.
    2. Help your slider help you.
    Make quartering your slider the most important part of your pack job. Be thorough about it. Draw the folds evenly between each of the four line groups, then tug the center of the slider straight down to settle the grommets snugly against the stops. A slider that’s sorted out in this way is a slider that is most likely to present itself correctly to the relative wind (and therefore do its job optimally).
    3. Avoid getting dumped.
    Optimizing your slider is only the first step in the process. The second, as you might imagine, has to do with your tangled handfuls of marionette strings. Incorrect line stows can release prematurely -- or, colloquially, “dump” -- resulting in a configuration wherein the canopy inflates before line stretch. When the lines catch up to the nylon, the jumper gets one heckuva headbanger. (Picture a Great Dane running at full tilt to the end of a long, long leash.)
    4. Keep the right amount of pressure on.
    It should take roughly 8 to 12 pounds of pressure to pull your lines from the stows. If you’ve gotten complacent (or too tired to be trusted), you’re probably going to pay for it.
    5. Use the rule of thumb.
    The loops of line on the outside of each rubber band stow (technically called “bights”) should be approximately two inches long. If that’s longer than you’re used to, that’s normal -- but know that right-sized bights keep about a quarter of the stowed line on the outside of the stow, minimizing the lines’ ability to dump. Luckily, two inches is about the size of the average human thumb, so you have a ready reference when you’re on the packing mat.
    If you happen to have stowless gear, your line dump issues are probably related to uneven folding of the lines (or lazy bag closure). The same pressure principle applies to the closing bands on your system: close the bag with 8-12 pounds of pressure, equal on each side.
    6. Get professional help.
    If you go through all those steps and you’re still not on good terms with your canopy, look elsewhere for guidance. Take your canopy to a rigger for inspection. You may discover a deeper problem -- and he/she might just be able to fix it right up. (There’s no shame in a little counseling, after all. Love is worth it.)

    By admin, in Gear,

    Sony Announce Two New Action Cams

    Sony FDR-X1000V Sony have started off the first quarter of 2015 with a couple of action camera announcements that are likely to excite fans of the Sony series. At CES 2015, which was hosted last week, Sony unveiled two new models of action cameras, venturing into the 4k action cam market. Sony are no newcomers to 4k recording products and have been selling 4k recording devices for a few years already, but moving in the direction of smaller and cheaper recording devices such as action cameras is a big step towards general consumers. Along with the new announcement for the 4k action camera, was the announcement of a new HD action camera, a new version of one of the company's popular cameras.
    The first of the two cameras announced at CES is the FDR-X1000V, the 4k action cam product that will aim to compete with the new GoPro Hero 4. The X1000V will be able to record 4k video (3840x2160) at 30fps, with focus also being placed on enhancements to the HD recording options, stabilization and frame rate. The enhancements in stability come from an upgrade to the company's trademarked "SteadyShot" technology, which is promoted as being 3 times better at handling certain vibrations. With stabilization being such an important part of recording skydiving footage, it will be interesting to see how the X1000V does in comparison to the other Sony action cams on the market. Also beneficial, especially to skydivers - is the new, enhanced wind noise reduction.
    While the focus of the X1000V definitely appears to be the ability to record in 4K, the camera also boasts some impressive recording abilities at both full HD and standard HD. Up to 120fps is supported for Full HD recording, while Standard HD allows for 240fps recording.

    Sony HDR-AS200V The second camera to be announced is the new HDR-AS200V. Last year Sony unveiled the AS100V, which in turn became quite a popular action cam. The AS series of Sony action cameras have in fact probably been the most used Sony product for skydivers, with the releases of the AS15, AS30 and AS100 in just a few short years. We've done extensive testing on some of these models in the past, and they have always performed well, with the Sony AS30 coming out on top in our Action Cam Shootout last year.
    The AS200V will receive the same boost in stabilization and noise reduction as the above-mentioned X1000V, while offering recording in 60fps at 1080p, 120fps at 720p and 240fps in the WVGA video format.

    New Features For X1000V and AS200V
    Sony have extended most of the new features they have developed to both of these cameras, and it appears that the only real differences between models will be the ability for 4k recording on the X1000V, as well as a more enhanced underwater casing that is provided with it.
    Built in GPS & Action Cam Movie Creator
    Action Cam Movie Creator is software that is included with both the models and allows for the easy creation of videos, which can also use the built-in GPS to display the GPS details in an overlay of the video.
    Highlight Movie Maker
    For those who don't want to spend the time creating a movie from a series of clips, the Highlight Movie Maker will offer the ability to quickly and easily produce smaller mp4 video format highlights of a video, along with being able to add music to the video. The Highlight Movie Maker uses an algorithm to detect where the action is happening within the video, and then cuts out scenes which it detects as unimportant.
    Live View Remote
    With the new cameras come a new live view LCD remote. The Sony RM-LVR2 is a waterproof (to 3 meters) offers extensive control over both the AS200V and the X1000V, with the ability to control recording, playback, deletion of files. The live view functionality also means that you'll be able to get a clear preview of what is being recorded.
    Release Dates & Pricing:
    The X1000V and AS200V will be available from March with the X1000V being priced at $500, packaged with the enhanced SPK-X1 waterproof case. For the live view remote bundle, you will be paying $600.
    The AS200V will go for $300, and include the SPK-AS2 waterproof case and tripod mount. The live view remote bundle will also cost $100 extra, and set you back $400.

    By admin, in Gear,

    A Guide To Traveling With Your Gear

    Anything precious in your bag, sir?

    Introduction
    Getting into skydiving opens up many opportunities for travel. You might live somewhere where the weather is shit all the time, or simply want to take advantage of the beautiful places available to jump around the world. Traveling with your gear can be a worrisome experience. If you are at all sensible, you should already own both a standard travel insurance policy for your belongings and some additional cover that concerns your physical being and any event in which it smooshes into something unforgivingly solid. However, unless you either arrange additional extended insurance (or jump some wonky old contraption built of very dubious elements), the coverage you are paying for is unlikely greater than the value of a set of modern skydiving gear. Your magical backpack is precious to you, and while traveling abroad you will likely feel most inclined to keep your eyes and hands on it at all possible times.
    Checked or Carry On?
    Once successfully embarked on your career as a skydiver, sooner or later someone will share with you a horror story involving airport security and a parachute. The exact details of this tale are variable, but it will usually involve massive injustice on the part of very ignorant and uncool staff against an innocent and harmless skydiver who just wanted to be perpetually within four feet of their gear by taking it into the aircraft cabin as carry-on luggage - only to be harassed, hassled and sometimes ultimately denied. Situations that escalate this far are rare, but they happen enough among a relatively small community of people to then hang in our collective consciousness as a potential problem - prompting the anxious conundrum of either checking-in one’s rig and thus entertaining the very slim but real possibility of it vanishing forever, or sending it forth through the scanner and risk having to cause a scene because some jobsworth insists on popping your reserve and causing a hundred people in the line behind you to all miss their flights.
    What Is This Thing?
    What is it about a parachute system that draws the attention of security personnel? It seems logical it would be your AAD that is the most curious element: a mysterious little box complete with a with a couple of protruding wires, a numeric display an activation button (eeek!). In fact, the Cypres unit (the AAD everyone should own) does indeed utilise a very small amount of gunpowder in its design (30 milligrams) - although you should not say this to anyone in charge of aeroplanes. It is up to you to not say this and it is important not to say this. Despite being officially harmless according to all the aviation authorities that matter, try explaining away this nugget of information well enough to be allowed to continue on your journey.


    Official looking visual aids can occasionally be very useful.
    Over many years of traveling as a freefly team, we eventually realised that frequently enough one of us would have to explain how a parachute does (and more importantly - does not) work that we began to rotate who went first through security, therefore being the one to get their rig out and do the explaining. We discovered that it seemed not to matter. Sometimes both the first and second rig would pass unassumingly through the scanner, only for the third to be set aside needing the guided tour - thus leaving the two initial team members on their way into the terminal, chortling at the unlucky third and musing about how mystifying and stupid the process is - as if a single rig is but 33% suspicious and only the cumulative effect of several examples passing by in succession is enough to make the final one stand out as suspect.
    Each time an inspection was required we began to quiz airport staff in turn about what they see that makes one’s gear a thing of interest to them. Although as of yet we have received no definitive answers as to exactly why, it appears that the combination of the reserve cable and pilot chute spring that draw attention. A metal cable spiralling into the centre of things just looks unfamiliar enough to be potentially wrong and bad.
    What Are The Rules?


    The gentleman on the left thinks it is cool to go through the airport like this. He is wrong.
    As far as all the major aviation authorities are concerned, there is nothing about a complete parachute system that categorises it as forbidden to travel in either the cabin or the hold of any commercial aircraft. Individual airlines might have their own rules for various types of sporting equipment (which you should remember to look up before you go anywhere), but these are much more likely to concern weight allowances and excess baggage fees than any specific security rules.
    There are various formal documents available that concern skydiving equipment, but I am yet to meet any airport staff in the world that have actually read them. As such, each transit situation will depend entirely on the personal experience of those charged with viewing your bags - and can range from cow-eyed unconcern (most common), through mild curiosity (sometimes) all the way to haughty indignation that you would dare attempt to take such a thing onto an aeroplane and put everyone’s lives in immediate danger (sucks to be you).
    What Happens If You Need To Explain?
    Be nice. Always, always, be nice. Airport staff at any step of the way can very quickly ruin not only your travel day - but you whole trip if they feel it is necessary - and smile-kill you while they do so. If you are required to give a presentation, usually a quick explanation while they swab your harness for naughty residues will suffice and you will be on your merry way. If their concern does persist past this point it will probably be because whoever you are talking to is somewhat (possibly very) convinced that your canopy can suddenly and dramatically fully inflate in the cabin, thus freaking everyone the fuck out and covering the windscreen or something. The best course of action here is just keep repeating in a soothing tone “That is impossible” and “It doesn’t work like that” while remembering to be nice. If that doesn’t work you can even have the employee in question deploy your main pilot chute limply onto the floor. Go nuts! Have them pop the pin and send your deployment bag down to join it. Not matter what happens through this interaction try to make it as fun as possible and educate the staff a little bit about your gear and doing your bit for those that come after. You never know - the difference you make here might mean as much as the next person who passes this way meeting their connection or not.


    Success

    Conclusion
    Many people have traveled with their parachutes as carry-on many times, to many places, for many years, with no problems. Every now and then someone just has shitty luck and another tale of woe spreads it’s wings. If things do go badly for you and there is now way out other than to pop your reserve and/or get everything out in exquisite detail, just get it over with. The best play regardless of how far you have to go down this road is always make security personnel feel that they are doing the right thing. Inside you will be seething with rage but if you are a dick to them in even the smallest way nothing good will come of it other than a long conversation in a windowless room. So be nice.
    Things To Remember:

    1. Put Your Rig In A Bag
    You will look super cool wandering around the terminal with your straps all dangling and your G3 clipped to a hip ring like a six-gun. Right up until someone spills sub-standard guacamole all over you.
    2. Get Some Paperwork
    Airtec produce a nifty credit card thingy that you can whip out to look like a stone-cold professional. It shows an x-ray of a rig that explains why Cypres units are fine for travel and does not mention gunpowder at all. Other AADs are possibly available. For the extra careful there is also a selection of formal documents available in different languages that you can print out and keep in a ring-binder.


    By admin, in Gear,

    What To Ask Yourself Before You Mess With Your AAD

    Image by Ralph Turner You probably have one meaningful interaction with your AAD: you chase the red light.
    Poke, poke, poke, watch. ...Zero. Okay. Off you go.
    Just a quick note, friend: you might want to poke a little deeper. According to the USPA, there have been no less than nine fatalities related to AAD fires at designated firing altitudes that did not result in fully inflated canopies before impact. The point is that these guys chased the red light just fine, but there was likely a difference between what the AAD was told to do and the actual conditions of the jump. A couple hundred extra feet could have made the difference between nine annoying repacks and nine funerals.
    Food for thought, y’know.
    If your equipment is new-ish, your AAD probably has a feature that allows you to change its activation altitude. It’s good to know that feature exists, and it’s good to know how it works -- because it helps you understand that mysterious little whatsit in your rig a little better when you do.
    If you’re ready to explore, do a little introspection first. Here are the important questions to ask yourself before you change the activation altitude on your AAD:
    1.Do you want this to be forever, or just-for-now?
    Most currently manufactured automatic activation devices let you offset the device’s activation altitude to allow for a one-time altitude differential between takeoff and landing area. This will be a factor for you only if you’re making a single wahoo at a dropzone with a significant altitude differential between takeoff and LZ -- or if you’re doing a demo jump with an offset. This method resets when the device turns off.
    If you need a change that sticks around a little longer, don’t despair: both the Cypres 2 and Vigil 2+ have a way to increase the activation altitude until you change it back again. Your owner’s manual will explain how to do this.
    2. What’s the difference?
    The Cypres 2 adjusts in increments of 100 feet, from 750 up to 1,650. The Vigil adjusts in 150-foot increments. For example, if you have a Cypres you’ll add increments +100 feet for a higher landing zone compared to the take-off and increments of -100 feet for a lower landing zone.
    3. When’s it going to give the all-clear?
    When you make a positive altitude correction, the AAD will still disarm at its standard number of feet above the ground zero reference -- the exact same altitude as it does when no altitude correction is set. When a negative altitude correction is applied, however, it will disarm at its standard number of feet above the preset negative altitude correction -- the new landing zone.
    4. How forgetful are you?
    If you’re the type of person to run into sliding glass doors at full clip, wear your shirt inside-out all day and/or infuriate your spouse/partner/lover by brainfarting every single anniversary, beware: Adjusting the activation altitude on your AAD might not be the best idea for total space cadets. To avoid a two-out, you’re going to need to remember that setting and ensure that you’ve got an open, functional main no lower than 1000 feet above it.
    Remember: a slow opening messes with that margin. Think about density altitude, and think about your packing choices.
    Another liability for nutty professors: turning on your AAD in the landing area of one dropzone and driving to another dropzone with a different altitude without resetting the AAD. (Work out how much of a kerfuffle that could be.)
    Finally, balance your know-how with your need. Bryan Burke, Skydive Arizona S&TA; (and über-adventuring renaissance man) has this to say about it: “I’m willing to bet that, for most skydivers, messing around with an AAD is likely to cause more problems than it’s going to solve.”
    5. Which way are you pointing your belly button?
    You may be surprised to know that your body position directly affects your AAD’s activation altitude. AADs work using the metrics of measured air pressure and measured time. Those two parameters allow the little guy to calculate your pretty-much-exact altitude (±3 feet or so) at any given moment as a function of the registered air pressure, as well as your vertical speed related to a pressure variation within a certain period of time.
    But wait! Does that air pressure change depending on where your body has oriented that little AAD? Why, yes. Yes it does, smartypants.
    A belly position puts your AAD in a burble. This changes the atmospheric air pressure registered by your AAD by up to 10 millibars. Interestingly, that works out to a difference of ±260 feet. In an AAD activation scenario, 260 feet is y’know kindof a big deal. The AAD senses that the belly-to-earth jumper is higher than they actually are -- kinda like a policeman working the exit road of a music festival. Be aware.
    6. Why do you even have this little gadget?
    If you have an AAD in order to make your skydiving life painlessly safer, you need to know that it’s not the foolproof set-it-and-forget-it piece of furniture you might think it is. You put so much faith in that thing that you really ought to get to know it a little better. There will, after all, likely be a fatality number ten...and it doesn’t have to be you.

    By nettenette, in Gear,

    Turned On by Hypoxic

    In May of 2014 the skydiving-focused electronics company Hypoxic began a Kickstarter campaign that sought out a goal funding of $30,000 in order to develop a status indicator for the GoPro action camera. Despite dominating the market for several years, neither GoPro or its primary competitors come with a feature or piece of hardware that allows the user to easily determine the status of the camera or its recording. For sports where the GoPro is mounted out of sight, such as the popular helmet mounting method, this can often cause hesitation when trying to remember whether you may have pressed record or whether you put the SD card back. Hypoxic's goal was to try and provide a useful and easy way of determining whether the camera is functioning as it should, while also removing that hesitation from the minds of the jumper.
    As quoted from the Kickstarter page: "In our sports, these uncertainties are not just unsettling: they’re dangerous. As an athlete, you know: before riding down this line, starting this race, jumping out of this plane, launching down this mountain, you need an absolutely clear head. Nothing good can happen when personal safety takes a backseat to a blinking light."
    By the end of June last year, the Kickstarter campaign had raised $43,049, more than $13,000 over the original target amount. Incentives for backers ranged from stickers for those that pledged $5 or more, to Turned On units with early shipping for backers that pledged over $180.
    Over the past 6 months the Kickstarter units have been sent to the backers of the campaign and were well received. The Turned On units have now begun shipping to outlets and are available for public purchase.

    What Does It Do?
    The Turned On unit makes use of 3 colored LED lights to provide information as to the status of the camera. When the camera is recording, the light will be solid red. When it is on standby a blue light will be displayed. When an error is present it will display either a solid yellow or a flashing yellow light. When the light is flashing yellow, it indicates a potential impending interruption to recording, such as low card space, low battery or high temperature. A solid yellow light indicates an error and in this case, the camera will not be able to record, such as in situations where the card is missing or corrupt.
    The device will work in all modes, and show the active recording light whether you're recording video or shooting a series of images in burst mode.
    What separates the Turned On indicator from other indicators on the market is the detailed level of information provided. Most other indicators simply use an on/off system that will display whether or not the camera is recording or even just whether the power is on, which is often unreliable - especially in cases when the camera may be in stand by mode.

    Compatibility and Support
    Currently there is limited compatibility with the Turned On, and will require one of the following GoPro cameras: GoPro Hero 4 Black, GoPro Hero 4 Silver, GoPro Hero 3+ Black, GoPro Hero 3 Black.
    Supported Versions
    GoPro Hero 4 Black - v1.02.00

    GoPro Hero 4 Silver - v1.0.2.00

    GoPro Hero 3+ Black - v1.04.00

    GoPro Hero 3 Black - v3.00.00
    There are two build of the Turned On available, the H3+/H4 and the H3. The H3+/H4 is designed for use with the GoPro Hero 3+ and GoPro Hero 4 cases, while the H3 model is for use with the GoPro Hero 3 case.
    Hypoxic are already looking to expand the development to include more of the GoPro models and claim to be exploring compatibility that goes back to the GoPro Hero 2.

    Where to Get One?
    Dealers that are listed with selling the Turned On units are as follows:
    Chuting Star - Skydive the Farm, GA

    Patrick Kaye - Skydive Dubai, Dubai, UAE

    Para-Gear - Skokie, IL

    Ranch Pro Shop / Tonfly USA - Skydive the Ranch, NY

    The Drop Shop - Skydive Chicago

    Gold Coast Skydivers - Gold Coast Skydivers, LA

    Sunshine Factory - ZHills, FL

    Rock Sky Market - Chicago Skydive Center, IL

    Xtreme Video - Skydive Carolina, Chester, SC

    HYPOXIC - Chandler, AZ
    As of the release of this article, the MSRP for the Turned On units was listed as $99.
    More information and installation guides can be found on the Turned On Website.

    By admin, in Gear,

0