Search the Community
Showing results for tags 'freeflying'.
Found 9 results
-
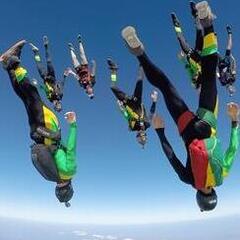
until*March 8th- March 12th, 2022 - To register send email to [email protected]* Visit & follow the Facebook event page: SDPR ANGLES 2022 for event information and updates. ***LIMITED SLOTS*** We are set and live for registration! Skydive Puerto Rico invites you to come enjoy the best of island skydiving: spectacular views, irie vibes, first class organizing, sunset beach loads, beach swoops, rum cocktails, parties, and of course, island shenanigans. Every year this event gets better and better, just ask anybody who has joined the camp. We will be offering 4 full days of super fun and comprehensive body flight organizing, with a day off in between to enjoy the beach, go to the old city, visit the rainforest, go sightseeing, and explore the outdoors! The layout is as follows: TUE-DAY 1, WED-DAY 2, WED-SUNSET PARTY, THU-*DAY OFF*, FRI-DAY 3, SAT-DAY 4, SAT-CLOSING PARTY. *Stay tuned for tours, and new to this year "SPECIAL" day off options, so you can plan ahead. This camp will focus mainly on tracking/angle flying and all around body flight. All jumps will be performed via a Caravan airplane/s @ 14,000 feet of altitude. The organizers for SDPR Angles 2022 will soon be announced. Type of jumps will be decided and planned based on group discussion, interest, and skill level. Options may vary focussing on Freefly (HD and HU) exits. We will approach the skydiving with slot specific flying, transitions (belly to back, back to belly, head to feet, feet to head), layouts, pitch progression, direction switches, angle-pitch efficiency, body mechanics, break-offs, and going fast. The idea is to fortify these specific disciplines in order to progressively gain more awareness and to start flying more dynamic. These are just some of the things we can focus on, yet the jumps will be catered to the skill level of the groups, and more importantly have a good balance between learning and having fun. All levels are welcomed, but participants must have tracking flying experience and be comfortable/safe jumping in groups of 4-6 flyers. (If you have any doubt whatsoever please contact the event organizer). Groups will be organized into similar skill levels ranging from beginner to advanced. Daily layout: Wheels up @ 9:00 AM for a total of 6 jumps per group. Last loads of the day will be beach jumps. SDPR Angles offers the best of both worlds: a destination vacation event with a progressive learning environment.
-
*March 8th- March 12th, 2022 - To register send email to [email protected]* AND Visit the Facebook event page: SDPR ANGLES 2022 for event details and updates. ***LIMITED SLOTS*** We are set and live for registration! Skydive Puerto Rico invites you to come enjoy the best of island skydiving: spectacular views, irie vibes, first class organizing, sunset beach loads, beach swoops, rum cocktails, parties, and of course, island shenanigans. Every year this event gets better and better, just ask anybody who has joined the camp. We will be offering 4 full days of super fun and comprehensive body flight organizing, with a day off in between to enjoy the beach, go to the old city, visit the rainforest, go sightseeing, and explore the outdoors! The layout is as follows: TUE-DAY 1, WED-DAY 2, WED-SUNSET PARTY, THU-*DAY OFF*, FRI-DAY 3, SAT-DAY 4, SAT-CLOSING PARTY. *Stay tuned for tours, and new to this year "SPECIAL" day off options, so you can plan ahead. This camp will focus mainly on tracking/angle flying and all around body flight. All jumps will be performed via Caravan airplanes @ 14,000 feet of altitude. The organizers for SDPR Angles 2022 will soon be announced. Type of jumps will be decided and planned based on group discussion, interest, and skill level. Options may vary focussing on Freefly (HD and HU) exits. We will approach the skydiving with slot specific flying, transitions (belly to back, back to belly, head to feet, feet to head), layouts, pitch progression, direction switches, angle-pitch efficiency, body mechanics, break-offs, and going fast. The idea is to fortify these specific disciplines in order to progressively gain more awareness and to start flying more dynamic. These are just some of the things we can focus on, yet the jumps will be catered to the skill level of the groups, and more importantly have a good balance between learning and having fun. All levels are welcomed, but participants must have tracking flying experience and be comfortable/safe jumping in groups of 4-6 flyers. (If you have any doubt whatsoever please contact the event organizer). Groups will be organized into similar skill levels ranging from beginner to advanced. Daily layout: Wheels up @ 9:00 AM for a total of 6 jumps per group. Last loads of the day will be beach jumps. SDPR Angles offers the best of both worlds: a destination vacation event with a progressive learning environment.
-
untilSkyonStage is an artistic skydiving game involving 5 different contests: Freefly/Freestyle 2 way (one performer one cameraflyer) Freefly/Skydance 3 way (two performers one cameraflyer) Freefly/Skydance 5 way (four performers one cameraflyer) Wingsuit acro 3 way (2 performers one cameraflyer) Skysurf (one performer one cameraflyer) One jump only. One Free Routine. Create your contest jump at any DZ of your choice. Mixed nationalities welcomed. Enter one contest only or all of them. Register your Teams within October the 12th 2020 and send your final choreography within December 1st 2020. Any of your training jumps that cover the video requirements (check Rule Book on the website) could be used later on as the contest routine, so if you like, you can start creating your possible routine jump now and register later. Awards and medals for the winning teams. Special award for the competitor who entered most of the games and placed best Overall. 10 Best choreographies per contest will be published on skyonstage website. All video routines will be pubblished on related skyonstage youtube and vimeo channel. Form your teams, have fun in creating a choreography, send your video #skyonstage
-

-
The winter is coming and you’re thinking about where you're going to jump to clear your winter doldrums. When you get to where you want to jump, everybody needs to freshen up their skills, maybe learn some new ones. One of the most popular skills to learn is Headdown. As a coach I have seen a lot of ways to learn the position. Some people, if you manually stick them in the position and hold them there, will learn it in a few jumps. Other fliers don't have it so easy. Well this article is for you! We will learn what to concentrate on in the Headdown position, but more importantly how to work around the problem with other skills, which I think contribute and can sculpt the Headdown position. These skills being back flying, flat back tracking and flat belly tracking. HeaddownHeaddown is probably the most technical of the freefly positions. It requires balance, skill, strength, and a refined technique. I teach the straddle position first, because it is easier to balance and conceptualize early on. You should have your head, shoulders, hips, and ankles completely in line. Your head should be pointing straight towards the Earth with your field of view consisting of the horizon with a half sky/half ground ratio. People who fly on their bellies a lot usually have a huge arch in their torso, which causes them to go to a back track, or belly track (we will get to how that is important later). Others usually have a kink in their hip so their shoulders and head are in one plane and their hips and ankles in another plane. This causes a steep track on their belly. Most of the concentration, once you have acquired the skill of keeping your body all in one plane, should be concentrated on the hips, legs and feet. First, You should have tension in your butt so you are straight, this can fix the hinged at the hip problem addressed above. Second, you should squeeze your quads taught so they push outwards, but remain in the same plane as everything else and keep the full extent of your leg straight. Third, you should have your toes flexed up towards your head. Picture yourself hanging from a bar upside down by your feet. You should feel air on your toes when you get it right. Pressure should be felt on your toes much like someone standing on your feet. Once you have the straddle position, the progression calls for 360 turns both ways, forward and backward motion, and then docks. We won't get into the technique of daffy Headdown, but it is extremely useful to slow down, fly in the tunnel with the lower speeds, and for heavier people to fly with others. Back FlyPeople often ask why they need to learn to fly on their back. The answer is simple. Headdown is a balance between flying on your back and on your belly. When the Headdown position is correct, no wind should be felt on your back or belly. This position requires the awareness of air being on your back or belly, so you can achieve no air on the torso. Since most people can fly on there belly relatively well, then it is imperative for you to learn how to fly on your back to acquire the Headdown position. The back fly position can be attained in the tunnel first, because it is much safer. Start on the grate. Relax your torso so it is convex. Put your hands above your head, and relax them. Do not push down towards the grate unless you want to slow down, or go up! Let your head relax and sit in line with your torso, while looking straight above. Keep your hips 90 degrees just like sitting in a chair. Keep your legs wide for stability. Back fly also has many everyday uses. Flying with tandems on your back is not only fun, but honestly the best video angle. When you are flying with an inexperienced sit flier and they cork you can match their speed on your back, until they can get vertical again. Lastly, you can use back fly to fly with relative workers, or once again get an interesting camera angle from below. Two words of caution! First, tighten up your rig when you fly on your back because the rig tends to shift from the wind below and can turn you. Second, I do not recommend flying on your back with other people unless you can competently fly in the wind tunnel on your back with a coach, as not to cause a huge difference in speed and thus a high speed collision. TrackingWhen first learning the Headdown position people either track towards the coach or away. I think it is very useful to learn to flat track on your belly and back. If you learn to fly both positions well with a coach, then control of the Headdown position is easier. Belly flat tracking is a little different than the steep track taught in the majority of AFF programs. A flat track has the ankles, hips and shoulders all in one plane. The progression suggests to learn to turn left and right, adjust your fall rate with your torso, and finally increase your speed with your legs. Turn left and right with your arms first as to make the adjustment slow. Then start to adjust the trim of your body for more powerful turns. Adjust your fall rate in tracking by arching to go down, and cupping with your torso to go up. Lastly, squeeze your quads tight for speed. Back tracking is fun and challenging. It can be used in Headdown, to track up to formations and to close huge distances. Make sure to slow down well before you reach your target. The first problem most people have when they back track is they have a kink at the hip. This creates more of a back fly rather than a track. Squeeze your butt, or push your hips forward to get flat. To gain more speed, put your legs together and press your ankles down slightly. With all these positions and abilities under your belt, Headdown will be easier to learn. The awareness and skills you learn from these alternate positions can in the end help you conquer Headdown. Remember, try to freshen up with a coach and in the tunnel before you start flying with other people. Headdown, along with these other positions is never easy, but persistence mixed with awareness and the right guidance always pays off. Swoop high, don't lag on jump run, and pack your instructor's parachute. Later! The New School Fligh University Web Site Steven Blincoe is the founder of The New School Flight University in Lake Wales, Florida. He has 4,000 jumps total and 300 hours of Skyventure Orlando wind tunnel time. If you would like to contact him you can at blincoe.org, or 530-412-2078.
-
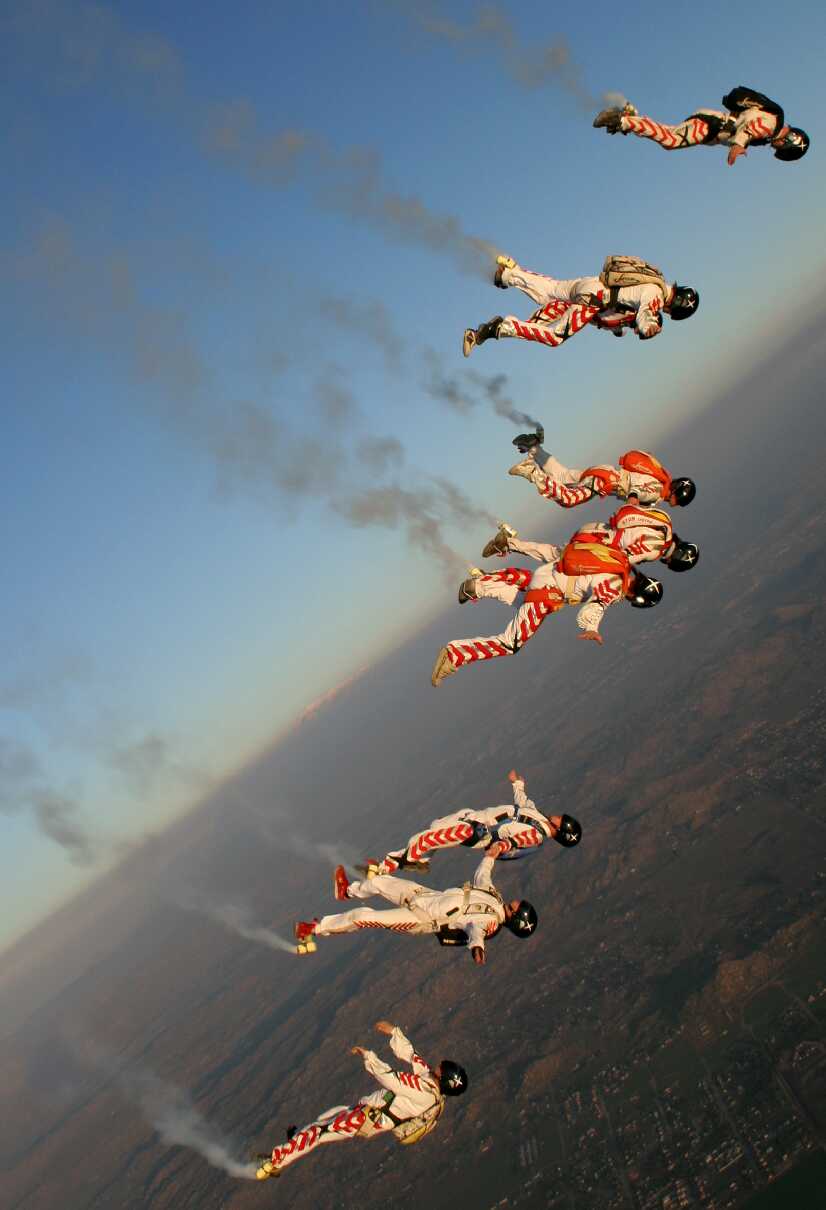
Whether you are interested in freeflying as a main discipline, or you only want to make the occasional "fun jump", you will still want to follow the best and safest learning progression. Though freeflying can be a very fun discipline to take part in, it can also be very dangerous if you get it wrong. It is not something to rush into. You should take your time and enjoy the experience of flying in this new dimension. This article will introduce you to the steps you need to take to have a safe and fun experience and carry on doing so throughout your freeflying career. Not Just VerticalFreeflying isn’t just about learning to fly headup and headdown, it’s everything (yes belly flying too). As your skills improve you will realize that you can use all angles and positions between headup and headdown. Once you are proficient on your back, belly, feet and head, you will see that everything flows together and you end up moving in between these positions with ease. To get to this stage you need to have a solid base in all these positions and an understanding of what the air is doing to your body. Too many people, especially now that freeflying is becoming so popular, go straight to headup flying after AFF and quickly move to headdown. The majority of these people are limiting themselves in the future and will find that they have to go back and learn basic belly flying and back flying to progress any further. I will now go through the steps I believe necessary to become proficient at this discipline. Future articles in this series will go through some of these steps in more detail, explaining how to do them, how to practice them, and drill dives to improve these skills. You should try to learn these skills in the order listed to increase the learning curve. Belly FlyingThe most important thing is to become proficient on your belly. This doesn’t mean you need to become a 4-way master, but learning how to move around the sky with control certainly helps (especially now that hybrids are becoming more common). You should learn the following: Fall rate control Horizontal movement (forwards, backwards and sidewards) Center point turns Diving to a formation Docking on a formation Superpositional moves (e.g. sidesliding while moving forwards – known as carving) Break off procedures (flat tracking) It also helps if you experiment with barrel rolls, forward loops and back loops to get used to not just being on your belly. All these skills will become very beneficial in the future. The other advantage to learning to fly on your belly is that you will be getting used to flying close to other people and will be learning the necessary skills to do this, even though it is in a different position. TrackingBy now, you should have already learned how to flat track. It’s time to take tracking one step further. Find a coach or someone who has experience leading tracking dives and learn the following: Tracking on exit Heading control Fall rate control Speed control (speeding up/slowing down) Moving Sideways Break off procedures (different on tracking dives)Tracking is a big part of freeflying. Learning these skills will help on breakoff, especially with larger groups, and will also help you when it comes to tracking dives. Back FlyingBack flying is the first big step towards learning headup flight. You won’t be able to see the ground and you will start to get used to feeling the air on your back and the other side of your legs. This skill can be used a lot in freeflying when you get low on a jump or become unstable. This position is used to get back where you want to be, while preventing corking (suddenly lose speed) and hurting someone. You should learn: Heading control Fall rate control Horizontal movement (forwards, backwards and sidewards) Turns Barrel rolls from belly flying to back flying and back again Front/Back loops from belly flying to back flying and back againThe advantage of back flying is that its speed range is huge. You can stay with a belly formation quite easily, but you can also speed up so that headdown flyers can stay with you without a problem. This diversity is what makes it such a useful technique in freeflying. Headup FlyingThis is where things start to get a bit different. Because you are in a vertical orientation, you have to learn how to move your body differently, move your arms and legs differently, whilst remembering that arching doesn’t make you stable at all. In later articles we will cover all of this in a lot of detail, explaining how and why, but you must always remember that an article is in no way a substitute for a coach. Whenever you have the chance, get coaching! Things you need to learn: Heading control Fall rate control Horizontal movement (forwards, backwards and sidewards) Turns Transitions (cartwheels, front loops, back loops) Independent arm movement (altimeter checks, taking docks, etc) Correct exit technique Breakoff procedures (you can’t simply go to your belly and track)Headup flying is much faster than any of the other positions. Because of this, every movement has a much larger effect than it would if you were going slower. The air is moving over you much faster and therefore has much more power behind it. Therefore, you have to be very careful with your movements to ensure the safety of yourself and others. Back TrackingBack tracking is a very important skill in freeflying, especially when starting to learn headdown. During breakoffs it adds a whole new perspective and gives you more awareness. Once you have learned headdown this position will open up more angles and add fluidity to your jumps. Backtracking is what I call a power position, this means that when your learning it you have to put in a lot of energy to keep an efficient position and to speed up, etc.. Things you should learn: Back tracking exit Heading control Fall rate control Speed control (forwards/backwards) Moving Sideways Break off procedures (different on tracking dives) Transitions (back to belly/belly to back) Once you have learned these skills, try going on a tracking dive, getting next to the base and transitioning to your back track position, while staying relative. Talk to an experienced freefly coach and ask about leading a tracking dive; you’ll learn a lot. HeaddownLearning headdown brings a whole new level to your freeflying. Everything flows together much better and you can move around the sky with more ease. While moving around becomes so much easier, collisions become much more of a danger and you must be even more cautious. This position is not a power position. By this I mean that once you are used to keeping your legs wide you will be able to move around smoothly and fast without having to push into your movement. Again you should aim to learn the basics before you start work on complex manoeuvres. Use this list: Correct exit technique for jumping with others Heading control Fall rate control Turns Horizontal movement (forwards, backwards and sidewards) Transitions (front loop, back loop and cartwheel) both to/from headup and from headdown to headdown Independent arm movement (altimeter checks, presenting for docks, etc) Correct breakoff proceduresOnce you’ve done this you can start to work on using your skills to take docks, carve, etc. Jumping with OthersWhen you start to jump with other freeflyers, you have a lot more to think about, including where the other jumpers in your group are at all times. As a minimum you should specify the following for a freefly jump with others: Exit Content of jump (don’t just say ‘we’ll see what happens’, have a plan and stick to it) Base (specify someone as a person, everyone should then work towards them for a level) Breakoff (what is the breakoff height, make sure everyone knows where the others are and do not go straight to their belly and track, slowly decrease your speed as you track away)When you are just learning freeflying you should only be jumping solo or with an experienced freeflyer. Use the following as a rough guide to how many people, maximum, you should be jumping with: 0-100 freefly jumps: Solo’s or 2 Ways 100-300 freefly jumps: Up to 3 ways maximum 300-500 freefly jumps: Up to 5 people maximum After this I try to use good judgement and common senseIf you have only ever done 2-ways then at the most you should only allow yourself to go on 3-ways. SafetyFreeflying can involve a huge range of speeds, trajectories and positions, which presents us with many possibly dangerous situations. Because of this you need to ensure you have the correct training and also the right equipment. Your container should fit well. You should not use a leg throwaway system, only BOC throw out or pull out is acceptable. The leg straps should fit right and not easily slip down your legs. You should also have some kind of bungee between the two leg straps to make sure they do not move around in freefall. It should have good riser and bridle protection with an absolute maximum of 1” exposed bridle near the BOC. Your pins and flaps should be tight. A good test is to gently lift your rig by each pin cover separately - if the covers stays closed then you’re good to go, but if the cover opens when lifting then get the opinion of an experienced rigger. You should have a minimum of 2 altimeters: one visual and one audible. This is important as when you are learning to freefly it can be difficult to see your visual altimeter and it is easy to forget that you will be falling much faster than you would be if belly flying. The audible altimeter will remind you of this. Wear a hard helmet. Don’t think you can get away without a helmet or just a frapp hat. Hard helmets might not save you from everything, but can mean the difference between life and death. If you’re just starting freeflying, don’t even think about wearing a camera helmet. This just adds to the list of new things you will have to think about and will take your awareness away from other more important matters. Some people get away with a full face helmet but if you are learning to freefly then I would suggest an open face. This allows you to keep better eye contact with your coach or other jumpers. Any clothing you wear should be durable and secure. It shouldn’t be able to cover any of your handles and shouldn’t be excessively baggy. A good all round freefly suit will do the job. When learning headup, a lot of people like to wear trousers and a baggier top to help them. If you’re doing this, then make sure the top is tucked in well and is secure. You should always use an AAD of some form when freeflying. You can easily have collisions when freeflying and closing speeds can be upwards of 100mph. It is also very easy to lose altitude awareness. An AAD could save your life, fatal collisions have happened to very experienced freeflyers, why couldn’t it happen to you? The next article in this series will concentrate on how to do the things mentioned in this progression list. There will be ground exercises and tips on performing these in the sky. Louis Harwood is a freeflyer from the UK and jumps at Target Skysports, in Hibaldstow. He has competed for the last two years in the Artistic nationals, he has two silver and one gold medal in B catagory freefly, freestyle and skysurf. www.avalore.co.uk
-
 Atmonauti is a human flight technique, body free, invented by Marco Tiezzi in 1998. Developed and perfected with the help of Gigliola Borgnis, it was presented for the first time in 2000 at the World Freestyle Competitions, the European Espace Boogie, and the Eloy Freefly Festival. The technique consists of flying diagonal with a determinate relation between angle and trajectory speed of the body, to obtain an air stream that permits lift and a precise control of flight. The aim is to fly in formation at the same level and angle, and to be able to perform different aerial games, such as freestyle, three-dimensional flight formation with grip, or acrobatic freefly maneuver (see the 'guinnes' page in www.atmonauti.com). All this is not executed in the normal vertical trajectory of the gravity force. The atmonaut creates his own diagonal trajectory, and thanks to this technique, he regulates with extreme precision all the parameters, such as the angle (trim), speed, and direction, becoming a real 'flight pilot' of his own body. The term 'Atmonauti' ('atmonauts' in English), coined by Marco Tiezzi, is defined as: Atmosphere Navigators (like 'astronauts', that mean astro=space nauts=navigators), the ideal 'definition' of this new way of fly. Revolutionizing the concept of skydiving, where all the different disciplines are performed in the vertical fall (the trajectory of the gravity force), Atmonauti fly is a very complex kind of 'relative' work that occurs during a real 'flight'. There is a considerable horizontal displacement, and above all longer flight time. In fact, the Atmonauti fly permits the jumper to remain in the air for a 50% longer time in respect to the vertical free flight, confirming a real 'human fly performance'. In continuous development and evolution, the Atmonauti fly marked another important step in 2001. Gigliola Borgnis discovered the possibility of flying in the angle trajectory with the feet first instead of head first, realizing something that was considered impossible since then... another revolution that confirms and opens the potential of the Atmonauti fly! In 2002, Marco Tiezzi invented the "Atmonauti tandem", experimenting with the technique to maintain the same angle and speed of a normal Atmonauti fly, but with double the weight (without drogue of course). The tandem Atmonauti offers the passenger the exceptional possibility of trying a real sensation of flying, instead of falling. In 2002 Atmonauti became a reality, known and practiced all over the world. The Atmonauti fly also entered into the compulsory of FAI competitions of free style and freefly. At the end of 2003, the short-film "Atmosphere Navigators", composed of only images in Atmonauti angle fly, won first place in the Flyboyz Film Festival for its unique images and technical contents of the highest level. (The movie is available at www.atmonauti.com.) And again, in October, 2004, Marco discovered the possibility to fly Atmonauti in the wind tunnel: "Tunnelnauts" = "wind tunnel navigators". That consisted of flying around all the perimeter of the tunnel in a side Atmonauti position. Gigliola Borgnis and Marco Tiezzi, of Team Atmonauti, will feature another article on the Technique of Atmonauti Fly in the near future. Until then, more information on beginning your "Atmosphere Navigation" can be found on their website at www.atmonauti.com.
 -
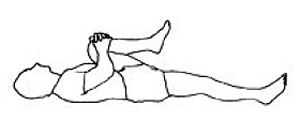 Freeflying is a physically demanding sport (as are other disciplines in skydiving) and like any physical activity it is much easier to damage your body if you do not prepare your body properly. Stretching helps prepare your body for the physical activity it is about to go through, by offering some of the following benefits: Relaxes your body (which is always good in freeflying) Helps your coordination and allows for easier movement Gives you a greater range of motion Increases your body awareness Improves circulation so if you do damage your body it will repair quickerA lot of freeflyers seem to think stretching takes a long time and that it isn’t important. It is very important and if you plan on jumping for a long time then stretching is the way to allow you to keep on jumping as you get older. Stretching can take a long time but it can also be a short 10 minutes in the morning. The following is a short and basic stretching routine to help you prepare yourself in the morning. This doesn’t mean you should only do this in the morning when you go jumping, try to do this every morning, it only takes 10 minutes. Guidelines for stretchingIf you do not stretch right you can damage your body just as bad as if you do not stretch. Some people think that stretching should be painful, this is wrong. You should feel comfortable in your stretch, feeling a mild tension in the area that your are stretching. You should never bounce into a stretch, take your time, and ease into it until you feel the mild tension mentioned earlier. Stretching routineYou should try to do this routine every morning to get the best effect. Start off by making sure you are warm, a hot shower to warm you up in the morning can help. Start by lying on your back, keeping your spine flat to the floor and look up at the ceiling/sky with your head. Start with one leg, bend it at the knee and pull it towards your chest until you feel a mild tension. Hold this position for 20 seconds and then move onto the other leg, taking a 10 second rest in between. [Figure 1] Next, lay on your back, keeping everything straight and looking up at the ceiling with your head. Bend your legs, keeping your feet flat on the floor. Place your hands behind your head and lift it up until you feel a tension in the back of your neck, still keeping the rest of your back on the floor. Hold this tension position for 5 seconds and then slowly lower your head back to the floor. Repeat this 3 times. [Figure 2] This is a good one if you have bad landings and find you hurt your ankles every now and then. Sit on the floor and have one leg flat. Grab the other leg just above the ankle. Rotate your foot clockwise providing a slight resistance with your other hand. Repeat this 20 times and then do the same but rotating your foot anti clockwise. Do not rush this. Now do the same with your other leg, again making sure you do not rush yourself. [Figure 3] Start by leaning against a wall with your head resting on your hands. One leg should be closer to the wall and bent with the foot facing straight forward. The other leg should be straight and behind you, foot facing the wall and the heel touching the floor. Slowly push your hips forwards, keeping your back straight, stop when you feel a mild tension in your calf. Hold this position for 30 seconds and then slowly move your hips back and relax. Repeat with the other leg, again taking your time. [Figure 4] Start by standing up straight with your feet shoulder width apart and facing straight forward. Slowly start bending from the hips keeping your knees slightly bent at the same time. Relax your neck and arms, keep bending until you get a slight stretch in the back of your legs. Hold this for 20 seconds and then slowly move back up. [Figure 5] Start by standing with the side of your body next to a wall, put the palm of your hand closest to wall against it just a bit higher than your head. Now slowly and gently turn your body away from the wall until you feel a mild tension in your shoulder, You should be between one and two feet away from the wall at this point. Hold this position for 15 seconds and then slowly turn back and relax for a few seconds. Now repeat this with your other hand. [Figure 6] Start by sitting on the floor and put the soles of your feet together, hold onto your toes. Now start to gently pull your self forwards towards your feet. Make sure you are moving from your hips and not bending from your shoulders or back. To help try resting your elbows on your knees for stability, this will make it easier. Keep moving forwards until you feel a good stretch in your groin. Hold this position for 40 seconds and then slowly move back and relax. [Figure 7] Now you’ve finished the stretching routine make sure you wrap up warm to get the best effect. Do this every morning and you will see a marked improvement in your flexibility and you will be much more relaxed in the air. Louis Harwood is a freeflyer from the UK and jumps at Target Skysports, in Hibaldstow. He has competed for the last two years in the Artistic nationals, he has two silver and one gold medal in B catagory freefly, freestyle and skysurf. www.avalore.co.uk
 -
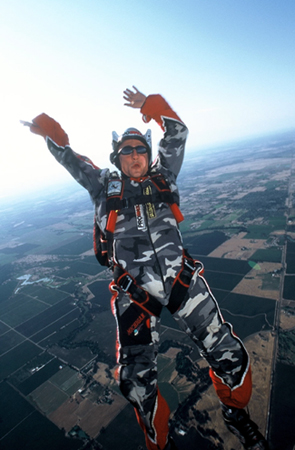 So, you can sit fly with your friends in a group or fly in a two way. The first step to being a free flier, Congratulations! Once you have reached this level you might ask yourself “what’s next?” Today is your lucky day because this article is for you! After you have learned the basic position which we will cover in a second, the skill set you want to learn is 6 points of motion and then docking. This will allow you to interact with your friend in the sky and not just be a base. Sit Fly: The PositionServing as an introduction to free fly, this position is pretty difficult to get without some instruction. The idea is to sit in the sky just like you are sitting in a chair with a few minor exceptions. First you want to have your legs about shoulder width apart. Second, you want to have your heels aligned with your knees as not to catch any air on your shins. The foot should be flat just like if you had it sitting on the ground. It is imperative to have even consistent heel pressure when you sit fly, or you will be on your toes which makes it difficult to improve your mobility. Keep your feet pointing straight forward at all times! In sit fly your body follows your heels and your hips so you need to have a strong platform to work from. Third, you must consistently have a 90 degree angle at your hips to fly strait down. Sit up not back. Pretend you have a string pulling your head strait up while keeping that 90 degree angle. Sitting up will then add a quaint arch to your torso which will help you keep from falling back. Lastly, relax your arms so they keep right at head level. Do not press down on your arms in the neutral position. Pressing down the arms is a common fault of most new sit flyers. It causes you to press your torso forward catching air on it and then consequently backsliding. If you have problems with the position get some coaching in the wind tunnel, SkyVenture has made learning the sit fly position a snap for the student and the instructor. Let’s move on to movement, shall we! Sit Fly: 6 points of MotionSpeeding up will be the first point of motion we learn. Simply press your heels down while keeping flat feet and having your hips, torso and heels in alignment. It is not necessary to straighten you legs. A small adjustment of your surface area will increase your speed greatly. Practice sitting up against a wall in the sit fly I described above, then by pressing through your heels stand up to a half squat, not all the way up and then settle back down into the sit. Do it slowly, erratic movements usually create horizontal space, so stand up and down smoothly. The reason we try not to straighten are legs at first, is because straight limbs usually create stiffness. In order to keep control of the position you must be supple. Slowing down is the next thing we learn. This can be done a few ways. I use them all, so it would be best to learn as many ways as you can. The first way to slow down is to press your arms down. Remember to keep sitting up while you do this or you will back slide from leaning forward. The second way to slow down is to bring your knees in a bit and then flare out your heels. This is my preferred way to slow down. This position increases your surface area a lot because your legs are a larger wing then your arms. This is also ideal because this leaves your arms free to dock or to use sign language to your friend. This position became popular in the wind tunnel because larger people needed to use there legs to keep them off the grate. Lastly if you really need to slow down learn to back fly in the wind tunnel. The back fly position will help you close huge vertical gaps quickly, for example if your friend corks up. A word of caution, learn to back fly with a coach in the wind tunnel before you use it with your friends. Using the back fly position without proper control can cause a vertical speed variation between you and your partner which can cause a high speed collision if you are not careful. Moving forward is our next task. Forward motion is the hardest yet most used motion in sit fly. It is technically difficult to learn so it might take some time. It is the most used point of motion because most people are back sliding in sit fly or back slide when they try something new. To move forward, get back in the half squat position or the downward motion. Then press your hips forward as far as you can while keeping your heels shoulder width apart and your feet facing forward. The best way to practice this is on the ground by leaning as far back as you can while free standing. Forward is a balance move that is why it is so hard. It also takes a little momentum in the sky to move forward so you might have to hold the position a few seconds before you actually realize you are moving. Keep those heels down! Moving backward is the easiest of the 6 points of motion. Most people are back sliding at first when they learn the sit fly position. To move backwards simply keep in the sit fly position and lean forward a bit. It doesn’t take much to rocket backwards, so immediately go back to the neutral position. The last two positions are side sliding left and right. They are tough. We won’t go into them in depth here because that would be a little advanced for this article. Besides carving is much more fun and seems to be a little more useful in every day flying. To carve go forward with a slight turn in your hips. Sit fly: Docking Docking your friend for the first time is probably the most fun you can have sit flying. This move is tough for some so listen up! First you must get your arms level with what you are going to dock. Move up or down. Then move forward slowly and stop at the target you want to dock so it is just out of your reach. Stabilize your heels by pressing down slightly. This is the key to docking; if you turn while you dock it is probably because your feet slide one way or the other. After you have stabilized reach with your hand up at the target not out. If you reach out your torso will follow and you will back slide, maybe pulling your friend with you. Make sure your arm is 90 degrees from your torso. Try not to shift with your torso. Have your arm and hand move independently of your torso. Fly your hand into the target and then dock the hand or foot lightly. If you grab on too hard you might contort your position so you fly away. Dock lightly. If you feel tension in the dock let go and go back to neutral, breathe deeply and try again. Keep in mind that this stuff is not easy for everybody. Don’t be afraid to ask for help or to get coaching. The SkyVenture wind tunnel is also a great tool when it comes to learning these basics of sit fly. Steven Blincoe is the Founder of The New School Flight University. He has 4,000 free fly jumps and over 300 hours in the SkyVenture Orlando wind tunnel. You can contact him at 530-412-2078 or [email protected] for advice.