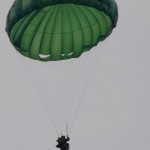
anj4de 0 #1 September 6, 2011 Hello... This post is directed to the riggers out there who are familiar with the MC1-1B/C/D series and the SF-10A series of troop parachutes. I made my first SF-10A jump on Saturday. My buddy was jumping as well that day, he has 3 MC1-1C chutes one of which he jumped that day. He reported that one of the chutes, the one he likes best, turns really nicely while the other two are a bit like lame ducks! On my jump I made the observation that my SF-10A even though it turned nicely (nothing in comparison to the PD260 I was jumping since May) it did not want to develop any significant forward movement. First I thought it was just me and my "ass meter" that was spoiled from the ram air chute...but when I looked at the videos a couple of times and when I re-called the details of the decent it dawned my that my chute does not perform like the ones I saw in videos from elsewhere. The SF-10A or FS-14 as it is called as well is said to be able to make up to 10kts. forward...! So this afternoon I sat down and looked at the steering toggles of my chute...the red lines seem to be shortened quite a bit by making knots under the toggles. If I understand the principle of the SF-10A construction correctly that means my 4 valves on top of the canopy will be kept in a half shut position, limiting the forward movement and making turns slower. Then I rang my buddy and asked him to check out his -1Cs...and he reported that the two lame ducks have significant slack in the steering line, which on a 7TU config would have the same result, lower turn rate! Now all of those three chutes came from the US. In order to finally proof my suspicion (still not 100% sure, hence the post) I rang my son in law who is an active duty rigger in the German Army. He told me when stretching an an MC-1* on the packing table the steering lines should have a slight tension and the wooden toggles should rest at the metal rings on the risers! My buddy's MCs clearly have major slack in the steering lines when stretched out. Now here is the hypothetical conclusion: Where all those chutes that came from the US somehow "tuned down" in order to prevent rockies from messing up when jumping? Both, the SF-10A and the MC-1s clearly so far fly well below their normal flight envelope. Not being a certified rigger I am only guessing here...so if some of the experts could help me out? thanks a lot UweFor once you have tasted flight you will walk the earth with your eyes turned skywards, for there you have been and there you will long to return. -Leonardo da Vinci Quote Share this post Link to post Share on other sites
LouDiamond 1 #2 September 7, 2011 Recommended Control Toggle Tie off Method for the SF10A / MC6/7 Main Parachute 1) In servicing: The SF10A main parachute was originally designed for use with MC1-1 risers (Natick drawing number 11-1-2149). The original toggle tie off mark was established specifically for the guide ring location on those risers. The guide ring location on the MC6/7 risers (Natick drawing 11-1-7271) is in a different location. The difference is approximately 4 inches. This distance must be accounted for when setting the toggles. 2) Routine maintenance and toggle adjustment: The SF10A parachute has been designed to tie off the toggle only once at in servicing. No further adjustments are needed during the service life of the parachute unless the lower control lines are replaced. The lower control line length to the toggle tie off is based on the location of the guide ring mounted on the riser. The guide ring on an MC1-1 riser is located approximately 14 inches from the top. Using the original manufacturing drawing dimension (286 inches) and tensioning (14 pounds applied once), the toggle tie off mark for an SF-10A canopy on MC1-1 risers is 286 inches. The tie off distance for the MC6/7 risers requires an additional 4 inches for a total distance of 290 inches when measured under 14 pounds of tension. It is important to note that 14 pounds tension should only be applied once and for less than 30 seconds. If a second measuring is needed, the lower control line must be allowed to relax back to its nominal state. At least one hour should be allowed for the line to relax after tensioning to 14 pounds. The manufacturer believes that a significant portion of the issues with lower control line length on the SF-10A and MC6/7 parachutes are directly related to multiple toggle tie off methods and differences in riser guide ring locations.They recommend accounting for the multiple toggle tie off methods and differences in riser guide ring locations by using the suspension line connector links (L-bars) as the primary dimensional reference. This method sets the lower control line length relative to the suspension lines from the connector link up and sets the toggle tie off relative to any guide ring location. The top bar (the one with the suspension lines) is used as the key reference for this method. Recommended Toggle Tie off Method for SF-10A & MC6/7 Parachutes: 1) Lay the parachute out on a packing table. 2) Clamp the top of the lower control line at the girth hitch to the packing table. 3) Using a spring scale, place the lower control line under 14 pounds of tension. NOTE: Do not hold tension longer than 30 seconds. 4) Measure from the top of the stitching at the girth hitch loop. 5) Place a mark at 272 inches. 6) Remove tension. 7) Align this mark to the center of the top L-bar. 8) Hold in position by clamping the lower control line and L-bar to the packing table. 9) Thread the lower control line through the guides and guide ring. 10) Hold the lower control line under light hand tension (1-3 pounds). 11) Place a mark one inch below the ring and release tension. 12) With the lower control line threaded through the guides and guide ring, tie a tight single overhand knot centered on the mark created below the ring (previous step). 13) Thread the toggle on the lower control line and slide it against the knot. 14) Tie a second tight single overhand knot forcing the toggle against the first knot. 15) Tie a third tight single overhand knot below the second knot as a safety. 16) Repeat for the other side."It's just skydiving..additional drama is not required" Some people dream about flying, I live my dream SKYMONKEY PUBLISHING Quote Share this post Link to post Share on other sites
anj4de 0 #3 September 7, 2011 Hello Scott Exactly what I needed! Thanks a lot...great stuff! And now off to the packing table...Blue Skies Uwe For once you have tasted flight you will walk the earth with your eyes turned skywards, for there you have been and there you will long to return. -Leonardo da Vinci Quote Share this post Link to post Share on other sites
RIGGER160 0 #4 September 8, 2011 QuoteRecommended Control Toggle Tie off Method for the SF10A / MC6/7 Main Parachute 1) In servicing: The SF10A main parachute was originally designed for use with MC1-1 risers (Natick drawing number 11-1-2149). The original toggle tie off mark was established specifically for the guide ring location on those risers. The guide ring location on the MC6/7 risers (Natick drawing 11-1-7271) is in a different location. The difference is approximately 4 inches. This distance must be accounted for when setting the toggles. 2) Routine maintenance and toggle adjustment: The SF10A parachute has been designed to tie off the toggle only once at in servicing. No further adjustments are needed during the service life of the parachute unless the lower control lines are replaced. The lower control line length to the toggle tie off is based on the location of the guide ring mounted on the riser. The guide ring on an MC1-1 riser is located approximately 14 inches from the top. Using the original manufacturing drawing dimension (286 inches) and tensioning (14 pounds applied once), the toggle tie off mark for an SF-10A canopy on MC1-1 risers is 286 inches. The tie off distance for the MC6/7 risers requires an additional 4 inches for a total distance of 290 inches when measured under 14 pounds of tension. It is important to note that 14 pounds tension should only be applied once and for less than 30 seconds. If a second measuring is needed, the lower control line must be allowed to relax back to its nominal state. At least one hour should be allowed for the line to relax after tensioning to 14 pounds. The manufacturer believes that a significant portion of the issues with lower control line length on the SF-10A and MC6/7 parachutes are directly related to multiple toggle tie off methods and differences in riser guide ring locations.They recommend accounting for the multiple toggle tie off methods and differences in riser guide ring locations by using the suspension line connector links (L-bars) as the primary dimensional reference. This method sets the lower control line length relative to the suspension lines from the connector link up and sets the toggle tie off relative to any guide ring location. The top bar (the one with the suspension lines) is used as the key reference for this method. Recommended Toggle Tie off Method for SF-10A & MC6/7 Parachutes: 1) Lay the parachute out on a packing table. 2) Clamp the top of the lower control line at the girth hitch to the packing table. 3) Using a spring scale, place the lower control line under 14 pounds of tension. NOTE: Do not hold tension longer than 30 seconds. 4) Measure from the top of the stitching at the girth hitch loop. 5) Place a mark at 272 inches. 6) Remove tension. 7) Align this mark to the center of the top L-bar. 8) Hold in position by clamping the lower control line and L-bar to the packing table. 9) Thread the lower control line through the guides and guide ring. 10) Hold the lower control line under light hand tension (1-3 pounds). 11) Place a mark one inch below the ring and release tension.12) With the lower control line threaded through the guides and guide ring, tie a tight single overhand knot centered on the mark created below the ring (previous step). 13) Thread the toggle on the lower control line and slide it against the knot. 14) Tie a second tight single overhand knot forcing the toggle against the first knot. 15) Tie a third tight single overhand knot below the second knot as a safety. 16) Repeat for the other side. Did this come from the manual? Quote Share this post Link to post Share on other sites
LouDiamond 1 #5 September 8, 2011 QuoteDid this come from the manual? It came/comes from the Manufacturer."It's just skydiving..additional drama is not required" Some people dream about flying, I live my dream SKYMONKEY PUBLISHING Quote Share this post Link to post Share on other sites
RIGGER160 0 #6 September 8, 2011 Wow. None of that info made it to us. We just measure 290 inches at 14 lbs and mark where the first knot needs to go. Quote Share this post Link to post Share on other sites