What is In a First Aid Kit
We all know that our sport can be dangerous and deadly when accidents occur. When they do occur the best defense is to be prepared to deal with the injuries that may be present. The local paramedics should be called right away but what if your DZ is isolated from the local town or maybe the injury is minor and does not need professional help.
What sort of things should you have on your Drop Zone? Where should the first aid equipment be located? What involvement can the local rescue squad, fire department and police department have?
All of these questions will be addressed.
While one DZ with a trained medical professional may have first aid equipment items A, B, C, D and E. A local DZ without trained personnel may only have A and B. There are many things that can be useful in the case of an emergency but many medical supplies can be dangerous and deadly if you do not have the proper knowledge to use them.
Every DZ should have a basic first aid kit. The kit should include bandages to control bleeding, ice packs for injuries, slings for upper extremity injuries, splints for fractures, ace wraps for sprains, sterile saline or hydrogen peroxide or isopropyl alcohol to clean cuts and abrasions.
What else should you have? Shears or heavy scissors to cut off clothing, jump suits or rigs if the need arises. A watch with a second hand. This will allow you to accurately check the pulse or respirations per minute. A stethoscope and blood pressure cuff. These are fairly simple to use and you can learn quickly from a trained medical professional how to take an accurate blood pressure. A pen and notepad can be invaluable. They can be used to record the time of injury, pulse, respirations, blood pressure, phone numbers and also to mark where a pulse can be felt on an injured arm or leg.
What else can be useful?
There are many things that can be useful to someone trained in the medical field. Things that I have found useful at the DZ are oxygen tanks and masks, cervical collars and intravenous equipment to start fluid resuscitation to name a few. These are not things that should be used haphazardly and can be harmful if not used properly by trained medical professionals.
However, if you are the DZO or ST&A; at a local DZ and have trained paramedics, nurses or physicians discuss with them what they would be comfortable having available in the event of emergency and have that equipment available to them.
Where should you put the First Aid Kit
The kit should be placed in a central location. It should be easily accessible and everyone that will be involved in the case of an injury should know its location. There is no point in having it locked in a locker or office if everyone has to go searching for the person with the key. At some larger DZ's there may realistically be a need for more than one first aid kit depending on the layout of the DZ.
If you have a trained medical professional on the DZ and have supplies that should be used only by those with a medical license, separate the equipment. Have a central, accessible kit containing only basic equipment including bandages, ice packs, splints, etc. In a more secure location have a second first aid kit with more advanced equipment that will only be given to those who are trained to use it.
Get People Involved
For the past few years at Skydive Cross Keys the DZO has worked closely with the local fire department and rescue squad. Every spring the local departments come to the DZ with all of their equipment. On site at the DZ they practice extricating a skydiver from a tree and run drills with different accident scenarios.
The fire and rescue personnel also get familiarized with skydiving equipment and learn first hand about the helmets, jumpsuits and rigs.
Give your local squad a call and find out if they would be interested in doing similar drills at your DZ.
Get the local authorities prepared if you are planning upcoming events at your DZ. If you have a boogie, competition or other large event planned let the local fire and rescue department know when the event will run and how many skydivers you expect. This allows the medical personnel to be prepared for injuries. Most large events that are held at my home DZ have an ambulance stationed at the DZ throughout most of the day.
As the busy skydiving season approaches for many DZ's step back and evaluate if you are as prepared as you can be. Talk to local jumpers who are medically trained. Open up the old first aid kit that is on the DZ. Are there things that need to be replaced or added to make the kit complete? Call the local ambulance or fire department and invite them to come to the DZ, practice their drills and receive an introduction to the gear they might run into.
Accidents do happen, and the best medicine is to be prepared when it happens.
Three People Narrowly Escape in Tandem Collision (Video)
Three people were lucky to be left alive after a collision between a TI, tandem client and a cameraman. The incident, which was uploaded to Facebook, shows an initial clip of the cameraman's point of view as he makes contact with the top of the TI's canopy. Unconfirmed reports suggest that the cameraman was supposed to be recording the next tandem but had insufficient exit separation between himself and the previous tandem.
The cameraman involved in the incident commented on the video on social media with the following:
Regardless of fault, this video serves as a good lesson as to why exit separation remains a crucial factor in reducing collisions in flight. There were no reports of serious injury from the incident, which was only inches from a very different ending.
By Administrator, in Safety,
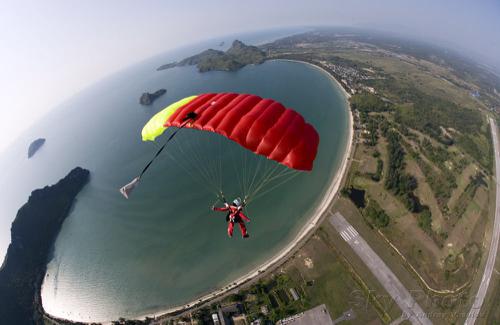
The Straight and Narrow - Cross-Wind Landings
Image by Andrey VeselovNobody’s going to argue that landing directly into the wind is the best way to go, but we’re not always that lucky. Got a long, narrow path between obstacles? Unless you’re super-duper lucky and the wind direction seems to have been designed entirely for your landing pleasure, you’ve got yourself a crosswind landing, my friend.
If you jump at a busy DZ with a super-strict canopy pattern, you’ve undoubtedly honed your crosswind skills. Great--but that’s not the only place that crosswind landings rear their skinny heads. For instance: you’ll find them lurking at an overpopulated boogie, where the landing area is a human forest with a clear patch at the very edge…or a forehead-slapper of an off landing, where your only choice is a road...or pretty much every beach landing, ever.
The importance of your landing direction should override the wind direction in a number of circumstances. Here’s how to make it work.
1. Stop bellyaching and get used to it, already.
Ask any airplane pilot: landing with the wind at an angle to the runway is, like, totally normal. Ask any beach-dropzone bum or coastal-soaring pilot, and they’ll definitely elaborate on the benefits of landing smoothly with the wind pushing in hard from the side.
Let go of the worry. Your ram-air wing is perfectly capable of flying with the nose pointed at an angle to the runway. That maneuver even has a name: “crabbing.” (The difference between the direction the nose is pointing and the pilot’s path--“ground track”--is called the “crab angle,” which always kinda makes me think of melted butter and tongs.)
2. Get lined up.
If you’ve got a long, narrow path in front of you, guess what? You’ve got yourself a landing strip. Start humming ‘The Danger Zone’ into your helmet and get ready, Goose.
Your biggest task when you line up a landing is to snag yourself as much of a headwind as possible while keeping away from the obstacles you’re certainly avoiding. Anything up to a 90-degree crosswind will work. (Your task: to avoid any kind of tailwind, if at all possible.)
If you have a choice, use the longest runway you can find to increase your margin for error.
3. Get creative.
As you come in on that final, you’re going to be doing something of a dance with whatever wind is pushing at you from the side. You can be assured that this wind is going to be pushing you toward something you do not want to fly into. It may be pushing you unevenly. And it may be pushing you pretty damn hard.
Your approach, therefore, is necessarily going to be a little less cut-and-dry than your typical downwind/base/final box. You’ll most certainly notice that your downwind leg is not actually, like, downwind and you’re not getting the distance you’re used to. What’s usually your base leg is likely to be the actual downwind, so stay vigilant and don’t let it shove you into an obstacle.
4. Hold your focus.
As you tuck into your final approach, glue your eyes on the middle of the far end of the runway. Nail them there. Staple them there. Weld them there. Do not start looking at the obstacles to either side, or you are very likely to get suddenly intimate with them.
5. Let it do its thing.
From there, you have one single job: to keep the wing/canopy level while you fly in a straight line.
Not so bad, right? Calmly make the necessary inputs without overcorrecting. Let the nose point in whatever direction it needs to point.
Warning: this bit of the flight might seem pretty wiggly. Don’t let that motion distract you from maintaining your heading. Any inputs required to keep that straight-line heading will simply increase your crab angle and point your nose into the wind, slowing you down.
6. Come to a full and complete stop.
To flare in a crosswind, make a slight adjustment to your normal procedure: use moderate emphasis on the upwind brake to get into a wind-facing position. (Please note that “moderate emphasis” does not mean “full-on, panicked toggle punch.”)
7. High-five somebody.
If it’s a beach landing and you managed to drop your canopy in the saltwater, go ahead and high-five the side of your own face--but no matter what, slap that palm to something. You deserve it.
By nettenette, in Safety,
The Stall
The stall is one of the least explored and most feared aspects of flying. Avoidance of this flight mode causes many canopy pilots to be uncomfortable with flying slowly, and unpracticed in this important art. This article will discuss the governing variables relating to the stall, in hopes that this knowledge will help parachute pilots to become less afraid of this essential aspect of the flying experience.
First we must explore what a stall is. The assumption made by most canopy pilots is that the stall is caused by slow speed flight. This is not true. It is correlated with low speed flight, but a wing can stall at high speed too. A stall is caused by an excessive angle of attack. When the relative wind flows over an airfoil, it is bent in the general direction of down. This causes an opposite force called "Lift". When the orientation of the airfoil is changed to a higher angle with respect to the relative wind, it is said to have an increased angle of attack.
Air is quite cooperative. It is willing to be redirected and still flow in a fairly organized manner…up to a point. At a specific angle, all airfoils fail to bend the air into submission. This discrete angle of attack is referred to as a stall. It is coupled with a sudden drop in lift, and thus a significant increase in decent rate. Whether you are flying an F-16 or a Lotus 190, recovery from a stall is always the same: the pilot must reduce the angle of attack. On an airplane this requires forward pressure on the yolk or stick. On a parachute, we are simply required to let off the downward pressure on the toggles or rear risers that has increased the angle of attack in the first place.
Each parachute stalls and recovers differently. Depending on several governing variables, some parachutes will recovery nicely from a stalled configuration no matter what the recovery technique, while others will require very careful execution. Let's take a look at these issues one by one.
The characteristics of a stall on any ram air canopy are based on two main variables, and several lower order variables. The most significant governing variable is the flight mode when the stall is reached. If the canopy is in a sink, rather than level flight (zero decent surf), it will tend to stall in a more forgiving and docile manner. The second primary variable is the attitude about the roll axis when the stall is reached. In other words, if there is any bank angle when the stall precipitates, it will cause the lower wing to stall first, resulting in significant yaw energy, which can result in line twists.
There are several other things to consider when testing the stall of a canopy, including: canopy design, density altitude, wing-loading, aggressiveness of the control input, and most importantly, recovery technique. This will be discussed next.
If the wing is allowed back into forward flight quickly, it will dive aggressively toward the ground, causing a drop in the angle of attack, as well as the lift and therefore the overall line tension. This may allow the wing to surge below the suspended weight (you), and possibly cause a jumper/canopy entanglement. Further, if the release of the brakes is asymmetrical, the lack of line tension can allow the wing to surge unevenly about the yaw axis, causing line-twists.
The key to stalling any wing is to enter the stalled configuration in a sink, with the wing level and static about the roll axis. As soon as the stall is reached, the toggles (or rear risers) should be released only a few inches to allow for only a slight drop in the angle of attack. As soon as the brakes are released, the jumper should be prepared for a sudden increase in toggle pressure, as the tail of the parachute is about to get hit with a pulse of relative wind. If the pilot is unprepared for this, the toggles will usually be pulled upward and possibly in an uneven manner, often resulting in an aggressive stall recovery that may result in line twists.
When the brakes are released quickly to the full flight position, the wing doesn't have much drag. This means that there is very little to prevent it from surging forward in the window. When the brakes are released slowly, and then held down just above the stall point, the wing has a great deal of drag. You have two big barn doors at the back of the wing helping to prevent and aggressive surge.
Further, as you become more familiar with the stall and recovery characteristics of your wing, you may begin to fly "actively" with respect to the recovery process. In other words, as soon as the wing begins to fly forward in the window, the pilot jerks on the brakes to dampen the forward surge. It is important to do this minimally enough to prevent re-stalling the wing. A well-timed reapplication of the brakes during the recovery process will significantly reduce the amount of altitude lost in the stall. This can be very useful in the event of a low altitude stall. This maneuver can be practiced in relative proximity to another canopy in deep brakes. Be sure to keep your distance when you do this. By definition, a stall is a loss of control of the wing.
Rear riser stalls tend to be sharper at the onset, but quicker on the recovery. Therefore it is advisable to stall the parachute on the rear risers first before attempting to stall it on the brakes. Further, such maneuvers should always be performed at an altitude that will allow for a safe cutaway.
Given all of these concerns, one must ask "Why should I stall my parachute in the first place". There are several valid reasons why each jumper should rehearse stalls at altitude.
In high angle of attack approaches, such as may be necessary in a tight landing area, stalls can happen inadvertently while maneuvering. This is why it is also important to practice slow flight maneuvering by lifting the toggle on the outside of the turn, rather than depressing the one on the inside of the turn.
In order to reach a (near) zero ground-speed on a no-wind day, the pilot must have full "Toggle Authority". In other words, if the toggles are set too long, the pilot will be unable to access the slowest possible airspeed, and therefore will be forced to land with more ground-speed without the advantage of a headwind. Being able to finish the flare completely and then let up after landing to prevent the stall from pulling you onto your heels in an essential part of any no wind landing.
When you decide to practice stalls, I suggest taking the process step by step. Simply honking your brakes down with your eyes squinting in negative expectation usually results in a wild ride, and sometimes a cutaway. Try hanging out in slow flight for a while. Bring your toggles down to a bit more than half brakes and leave them there. If you are above the stall point, it isn't going to just stall all by itself. Watching people fly in deep brakes is usually similar to watching them light a firecracker. Your parachute isn't going to explode…promise.
When you get your canopy into the deep brake mode, take a deep breath in and let it out slowly. Relax your muscles. Let your legs hang limp. I find that nervous pilots can't connect with their parachute because it isn't touching their bones. If you soften your muscles, your will allow the leg straps to sink into you so that you can feel what is happening with the newest addition to your body: your wing. By truly relaxing under canopy, we begin to sober up from the adrenalin that is blurring our vision and skewing our perspective toward the negative.
Stalls are an essential part of flight. If you are to be fully in control over the wing, you must explore all aspects of your parachute's performance envelope. Ultimately, flying slowly is the most important aspect of flight because we land in slow flight. The more comfortable you are with your slow flight skills, the better your touchdown will be. Remember, the definition of a good flight is one that ends well.
BSG
www.BrianGermain.com
BIGAIR SPORTZ
By BrianSGermain, in Safety,

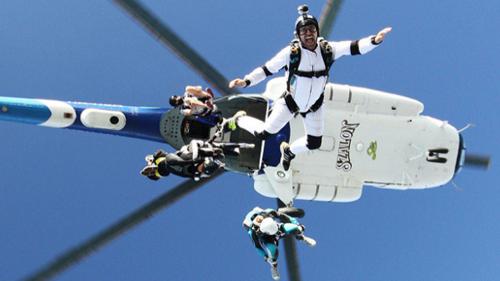
The Other Certification Every Skydiver Needs: A WFR Card
Image by Juan MayerIt happens so fast.
You’re coming down from a great jump. You land, laughing, and whip around for the imminent high-five with a huge smile on your face. That smile drops right along with the friend framed in your view. Something happened in those last few feet of flight--you don’t know what, but that triumphant swoop turned into a spectacular case-in, and your friend’s screaming, and you’re running towards him at top speed, and his leg is at a crazy angle, and there’s blood. Lots of blood.
What the hell do you do now?
Wouldn’t you like to have a plan?
Even if you have no intention of becoming a medical pro--or even a uniformed first responder--you can get a short education that might make you the deciding beneficial factor in someone’s very worst day...maybe even yours. This curriculum is comprehensive and practical, integrating the essential principles and skills required to assess and manage medical problems you might come across, especially but not specifically in isolated and extreme environments. It doesn’t have a name that implies its usefulness for skydiving, sure--”Wilderness First Responder” sounds like a course built just for Search-and-Rescue burlies--but hear me out. You need this. Here’s why.
1. Help is not always immediately at hand.
Wilderness First Response certifications are meant to be used in earnest when the caregiver and receiver are essentially stranded in remote circumstances. While skydiving drop zones aren’t generally beyond the furthest reaches of civilization, they’re never in the center of it, either. Response times are not, as a rule, immediate.
Any medical education is of enormous benefit, of course, but--for a regular-strength skydiver--the ROI of a WFR is pretty damn dead-on. The WFR course is about intelligent, informed self-reliance in the absence of immediate help. In the wilderness setting that the course was designed around, the priority is to figure out whether you can semi-self rescue, to assess what additional resources you need, and to methodically stabilize yourself and/or others until the cavalry rolls up. In the dropzone setting, this training is just as useful.
2. Whether or not you’re trained, you will always be the first responder to your own injuries. Make those early minutes count.
If you end up injured during an emergency landing that’s outside the drop zone--and you don’t have a charged, functioning method of communication--then you’ll be waiting for help to find you. If you happen to be conscious in that interim (hooray lucky you), WFR training will give you a method for understanding your injury, stabilizing it and tracking its progress for later reporting. Without training, you’ll likely just lie there, terrified, in blinding pain--or make your injuries worse with incorrect responses.
3. You should be off the list of dead-weight liabilities and on the list of assets.
Skydiving is a sport that demands proactive personal responsibility in the context of a mutually supportive, risk-educated community. We all understand this. That said: While a WFR certification does not confer the knowledge of a full EMT, it makes the bearer a much stronger member of the greater support team.
A baseline education in first response moves you from a gasping member of the horrified crowd to a literate, assisting partner in incident management, though your role in the moment will, in all statistical likelihood, be quite procedurally basic.
4. You should dial up your powers of observation.
We’re not just talking about cardiac arrest and gaping wounds, here. WFR training will help you recognize subtle symptoms in a way that could help you change the outcome. Dehydration? Hypoxia? Heat illness? These are real-life dropzone problems, and your awareness could make a big difference in someone’s day.
5. You’ll get important certifications.
Successful completion of a WFR course will generally earn you a two-year Adult & Child CPR certification as well as the obvious Wilderness First Responder certification. This may or may not be an important piece of paper for you in a technical sense, but current CPR certification makes you a secret superhero in a world where lives are often saved by trained, responsive passers-by.
5. It’s a really good time. Seriously.
Wilderness First Response courses are generally administered in, predictably, wilderness settings. I did mine with the National Outdoor Leadership School (NOLS) with the full majesty of the Yosemite Valley as the backdrop. My partner did his in the Grand Canyon country of Flagstaff, Arizona. WFR courses are offered in highly visitable settings all over the States--indeed, the world--and y’know what? There are few better-invested ways to spend a week in nature than learning life-saving, life-changing skills in a close-knit group of fellow adventurers.
Y’know, like the close-knit group of fellow adventurers with whom you share your sky--and who are counting on you to be the best team member you can possibly be.
Live up to it.
By nettenette, in Safety,

The Importance of Ear Protection While Skydiving
Not wearing earplugs on every skydive? Hear me out (while you still can): It’s pretty damn important to add a pair to your every-jump kit, and your excuses probably don’t hold up to expert scrutiny.
What expert? A lofty one. Last week, I got to talk to Dr. Anna Hicks* at length about the thorny matter of skydiving with a cold (watch the February issue of Parachutist for that one). At one point, our conversation took a slight diversion towards hearing damage. The content of that more than deserves its own moment in the sun: Our delicate soundholes, and the damage we don’t have to do them.
So: Why aren’t you wearing earplugs on every jump?
1. Because it’s not that big a deal.
If you like listening to things other than phantom roaring, then sorry. It kinda is.
Each of us is born with 15,000 sound-sensing cells per ear. (I like to think of ‘em as magical hearing hair, because that’s kinda what they look like.) Hearing loss occurs when they die. It’s not just noise exposure that kills them; certain medications and other environmental factors and do it, too, but those are freak deaths by comparison. Once they’re gone, they’re gone. Birds, fish, and amphibians have the ability to grow back magical hearing hair. Mammals, like your average skydiver, lack the ability to regenerate these cells. All we can do is stick in a hearing aid and hope for the best.
You don’t have to take my word for it. Talk to anybody who suffers from tinnitus and ask them if they’d have taken precautions to prevent it.
2. Because I don’t jump that much.
Dr. Hicks begs to differ.
“I see so many skydivers that have damaged their hearing,” she notes. “Even if you’re just doing 100 jumps a year, every time you jump, the engine is noisy, and the freefall is noisy, too. Over your skydiving career, that adds up to a lot of noise exposure.”
“I still find some people that can’t be bothered with ear plugs even in the wind tunnel,” she adds, “but our hearing is too important not to take ten seconds to put them in every time. You don’t want to end up not able to hear your friend at the pub because you knackered your hearing from too much noise exposure.”**
3. Wearing earplugs in freefall is dangerous.
If it’s not just laziness that’s keeping you from protecting your hearing, it might be a misplaced sense of safety. Dr. Hicks wears hers from ground to ground, and she recommends that you do too, even if it’s just on the way up to altitude.
“I am a big advocate with any patient I see,” she says, “especially those whose job is skydiving, to wear ear plugs at least on the way up and ideally on the way down as well. Earplugs do not prevent situational awareness, stop you from being able to talk to your students, or to hear shouts under canopy. You can hear what you need to hear, usually you can actually hear your audible altimeter better because the background freefall crackle is reduced, and vitally, [wearing earplugs] reduces the longer-term damage we can experience from our sport.”
Some people discover that they find a problem equalizing if they have earplugs in on the way down. Dr. Hicks’ advice: If equalizing is a problem for you, try using the vented plugs (which you can buy from a pharmacy for a few dollars) to better equalize during descent.
4. I can’t afford the nice ones and the foam ones cause ear infections.
According to Dr. Hicks, that is not a thing. As long as the plugs are rated, they’ll provide the protection you need. “You can wear posh ear plugs or the cheap foam ones like you get in the tunnel,” she says. “Either-or.”
According to a study of sixty long-range patrol-aircraft crew members, the idea that disposable foam earplugs cause ear infections is a total myth. The crew members were randomly divided into three groups: one wearing fancy custom-molded earplugs, the second using foam earplugs that they washed after each use, and the third group using foam earplugs washed only once per week. The study lasted eight weeks and included examinations by a medical officer as well as skin scrapings for bacterial culture and fungal examinations. The results indicated no fungal infections or clinically significant bacterial infections, and no differences in positive bacterial culture between the groups.
Moral of the story: roll ‘em up and stick ‘em in. They’re going to prevent a heck of a lot more damage than they could possibly cause, and 50-year-old you (who doesn’t have to have the TV on FULL BLAST ALL THE TIME) will thank you.
*Dr. Hicks is a certified badass. An active-duty Aviation Medicine specialist in the British Regular Army, she has logged more than 4,000 jumps over 15 years in the sport, many of which as the Outside Center for the multi-medaled British 4-way team NFTO. Dr. Hicks is also a British Parachute Association Accelerated Freefall Instructor and formation skydiving coach, as well as a Skydiving Instructor at Britain’s legendary Skydive Netheravon. Oh: and she was Tom Cruise’s personal aviation doc during the filming of the latest Mission: Impossible reboot. ‘Nuff said.
**Confused? Ask a British person for a translation.
By nettenette, in Safety,
The Abort Zone
Landing your canopy in a specific place is a skill that we all must master. If you cannot land where you want to, eventually you will land someplace you don’t want to. Honing this skill is something that we all must pursue, and how we approach this will determine whether or not we survive the learning process.
We must first learn how to land on a runway before striving to land on a specific point. When pilots try to skip this step, they often run into significant stumbling blocks, some of them requiring surgery. Once you are proficient at hitting the centerline of a runway with consistency, then you can move on to more specific targets such as entry gates and landing points.
One of the most important aspects of any approach is the “entry angle”. Although we can often repair a flawed approach, there are limits to our course corrections. The parachute can only do so much. If you set up too close to the target or entry gate of the swoop course, you may be in for a painful lesson. Too tight is a very dangerous place to be.
Even if you are flying a conservative approach, making gentle turns to final, this can still bite you. When a pilot strives to land on a target that is mostly underneath them, they are on what I call “the path of crazy shit”. You can almost hear the banjo music starting like in a chase scene in an old western. There is no graceful way to land on a target that is directly below you. The parachute wants to glide, and turning or diving to get there will always put your life at risk.
If you are a swooper, the consequences of being too close to your entry gate are dire. You may have the potential to extend the dive of your canopy to make the entry gate, but all you will do is make a divot between the flags that mark the location of your final act of egoistic stupidity. Let it go, and live to swoop another day.
If we are too far away from our entry gate, real or imaginary, our solutions are simple, and generally quite safe. “Shallowing” of the approach can easily be accomplished by letting off the dive early and/or holding a bit of brakes or rear risers. We do not often read incident reports about canopy pilots who died a horrible death as a result of holding two inches of rears to stretch their glide back to the target. Set up deep, and tighten up over several jumps.
The hard part comes when you have set yourself up, started your dive, and are not sure if you can make the gate or not. You are tight and steep, and you think that if you make it you are going to be a hero. Hero or zero that is; only time will tell. If you hold your swoop in your hand like a butterfly, hoping it will not fly off, you will live far longer than if you squeeze it tightly and try to force a square peg into a round hole. Either it is there or it is not.
You need to train yourself to know when you are too tight by knowing what it looks like when it is just right. Visualize the perfect entry, not too shallow, not too tight, with the target or entry gate out in front of you. Walk through the sequence, setting up tiny gates on the ground, and practice making aborts by lifting your eyes from the entry gate and landing long. If you are looking down at it, just let her fly, land safely, and go up and do it again. There is always the next jump.
They key to a good abort procedure is training. Without physical rehearsal for physical activities, our cognitive understanding is useless. We have to practice arresting the dive over and over, and find new ways of putting our parachutes into level flight quickly.
The first concept is: “Pitch Before Roll”. This means that the turn itself is less important than the pitch attitude of the canopy. When you are striving to pull up from a diving turn, increase the canopy’s pitch angle before striving to recover the roll. Bank angle does not kill people, descent rate does that. If you nose your parachute up, you will increase the angle of attack of the wing, which will give you the added lift that will reduce the decent rate. This will afford you the time to reduce your roll angle prior to touchdown. You literally create time.
The second concept that supports healthy recovery technique is: “Sharp Inputs Create Sharp Results”. Slowly applying the brakes, regardless of the depth of the input, will never create the high rate of pitch change that shorter, sharp inputs can. This is the same reason why slow flares, when started at a very high altitude, will not cause an adequate change of direction of flight so as to create a level-off for a soft landing. Practice giving sharp stabs on the brakes while in a turn, and see what it does for you. If your weight increases dramatically, you know you are creating a change of direction, since inertia is resisting your change of motion.
Another relevant concept with regards to saving yourself from a low turn is: “Give Up Some Heading”. If you strive to arrest your dive and stop the yaw too quickly, you are likely to wobble on the roll axis. This is because the increased lift on the low wing is bringing that wing up, beginning an oscillation about the roll axis. This can easily be prevented by allowing the turn to continue a bit following the increase in the angle of attack. Look into the turn, and let the wing follow through with its natural over-steer tendency, perhaps as much as 90 degrees when recovering from a fast turn. This overshoot can be as little as 20 degrees in a slower, carving turn. When you strike the toggles, do it with a short, strong burst-and-hold of 12-18 inches, but do it in an asymmetric manner that continues the current momentum of the turn. This will allow you to smoothly and slowly exit the turn and enter your final landing procedures gracefully.
The last idea that seems to make a difference in how quickly you are able to pull up from a low turn is where you are looking: “Look Where You Want To Go”. If you are like most people, you will stare at your impending impact point on the ground, right until landing. By focusing your attention on what you don’t want, you inevitably make it happen. Somehow we are drawn toward whatever is in the center of our focus, so it is a far better plan to look toward where you intend to go, rather than where you are currently going. If you have turned too low, your current destination point is somewhere below you, while your intended flight path is in the general direction of the horizon. Lift your eyes, and make your parachute fly toward where you want to go. Focus is more than the object of attention, it is the shape of things to come.
Aborting is a part of life. Humans are not perfect, and sometimes we are incapable of fixing our errors. Targets and entry gates are fun to shoot for, but not at the expense of our bodies. Aim to fly a clean approach every time, and let your gut tell you what to do. If it feels bad, it usually is. Do not let your desire to make the swoop course or the peas keep you from seeing what is right in front of you. Ego distorts our vision, as does passionate desire.
The only way to see clearly is to remain calm, breathing slowly and completely throughout the approach, and maintain a positive mood as you set yourself up. If you start to feel scared, it is your cue to breathe more and try less. The perfect approach always feels easy. It flows like water. It is the result of good planning combined with good execution, made possible by positive emotion. Joy is thrust, fear is drag, ego is weight, and knowledge is lift. Maximize lift and thrust, and you will go far.
Go Big
Live Long
BSG
Brian Germain is the author or several popular skydiving books including: The Parachute and its Pilot, Transcending Fear, Vertical Journey and Greenlight Your Life. He also has a spot on Skydive Radio called “Safety First with Brian Germain. Brian runs canopy flight courses throughout the world, and does motivational keynote speaking on the topic of transcending fear. His website is: www.BrianGermain.com
The 6 Laws of Exit Order You Really Need to Know
Image by Joel StricklandDoes exit order seem like some kind of obscure semi-religious ritual? Do you go through the motions without really understanding the moving parts?
If so, yikes--but you’re certainly not alone. Luckily, understanding the logic behind the order is a pretty straightforward affair, and the entire sky will be better off if you wrap your head around it. Ready? Okay. Commit this to memory.
1. In the name of science, get the $#&$ out.
It may seem like hollow tradition to hustle out the door on exit, but it’s not. As a matter of fact, there are serious calculations behind the art of exiting the plane efficiently. On a calm day, an aircraft on jump run covers around 175 feet per second of flight (that equates to a mile every 30 seconds or so). Translated into stopwatch terms, that means that--on that same calm day--no more than 60 seconds can pass from the moment the first jumpers leave the airplane to the moment the last jumper exits.
For practical purposes, taking into consideration how much ground the average square canopy can cover, every jumper in the plane has to be out during a two-mile jump run. If they don’t, some are bound to land out (or a chilly second pass is going to be served up to the sulky remainder).
2. Don’t mess up the pilot’s math.
If your group is about to be the first big handful of meatballs out of the plane but you suddenly split up into smaller groups, you’re messing with the pilot’s chi. After all, the jump pilot has more to calculate when he/she turns on that little green light than you might realize. He/she has to calculate about how much time each group will take to exit, and make sure the green light goes on at the correct distance from the DZ to accommodate the aforementioned 60-second countdown.
As a rule, the group that will have the slowest climb-out should leave first. Big group? Light goes on farther out from the DZ to allow for a slower climb-out. Little group? The light goes on closer to the DZ.
How can you help? Jump the plan you give manifest, and the pilot can give everybody a good spot.
3. Jealously guard your real estate.
If you’re a Big Sky Theory kinda jumper who assumes vertical separation is going to save you from a meat-traffic collision, you are not working from scientific facts. Horizontal separation is the only separation that really counts up there, so make sure your group has a chunky slot of sky all to yourselves.
Never place big bets (like: your continued existence) on your fellow skydivers pulling at the altitude they swear by. A tiny brainfart (or a big malfunction) will eat up that vertical separation before you can say “what happened to pulling at 3,500, toolbox?!.”
4. Horizon-pointing belly buttons go behind downward-pointing belly buttons.
When freefly folks get out first, they tend to become part of an undelicious freefall sandwich. Here’s why: On a typical skydive, a pair of freefliers will clock a 45-second freefall and open at around 3,000 AGL. Let’s say that pair is followed by a belly group with a 10-second climb-out.
This is going to sound like a math word problem, but bear with me: If one of those freefliers has a canopy with a 30MPH forward speed (which will move forward at around 45 feet per second, assuming little-to-no wind), opens 30 seconds before the belly group and turns right back toward the DZ, the variables are stacking up for a collision. Those 30 seconds of flight will drive the freeflier forward by about 1,300 horizontal feet--a measly 400 feet from the middle of the belly folks, which a solid six-second track can cover. If you add wind to the equation and the RW group gets blown even further into the path of the freefly pair, the likelihood of a meetup gets even uglier.
When freefly groups get out after belly groups, the picture gets a lot healthier. The fast fallers get their horizontal separation, predicated on their shorter climb-out and faster descent rate. Wind becomes a positive safety factor instead of a negative one; slower fallers simply blow farther away.
5. With longer flights comes greater responsibility.
Tracking groups, high pulls and wingsuits get to snuggle with the pilot (and/or the tandem pairs) in the way back of the plane. Why? First off, they’re mobile: if they’re doing it right, they’ll use all that horizontal power to get the hell away from jump run--and get back from a longer spot.
If they’re not doing it right, however, they’re fully within their capability to truck through everybody’s personal piece of sky on the way down. The moral of the story: longer freefall (or, in the high-pull case, general airtime) requires greater awareness and responsibility on the part of the nylon pilot.
6. Don’t be the heat-seeking meat missile.
That’s the bottom line, really. Everybody in the sky is counting on you.
(Me, for instance.)
By nettenette, in Safety,
The "D" Point by Brian S. Germain
Although there are many ways to improve one’s accuracy in parachuting, I have found no better way than flying a consistent pattern. By connecting a series of invisible points in the sky, “Altitude-Location-Checkpoints” as I call them, we can create a consistent flight path that makes us more predictable in the air, as well as significantly increasing our chances of landing on target. The typical pattern, made up of three distinct turn points, I will now argue is not quite enough to get to the target with the consistency we are looking for.
The standard flight pattern for a ram air parachute involves a downwind leg, a cross wind leg, and an into-the wind leg, also know as the final approach. This pattern is defined by three distinct turn points, “A” (Base to Final), “B” (Downwind to Base), and “C” (pattern entry point). It is true that if we are prepared to modify our approach in light of new information along the way, we can hit the target. But wouldn’t it be nice to get there without needing to modify our flight path, to just sail along and turn when the altitude is right? That is exactly what the inclusion of a fourth turn point does.
The trouble with the standard pattern is that there is a good deal of guesswork when it comes to the length of the Base leg. Depending on the glide ratio of the parachute, the location of the turn to Base leg will vary widely. The better the relative glide ratio, the farther the turn to Base needs to be from the target. Our ability to adapt to this changing environment is spotty at best, and often requires substantial correction along the way. This creates traffic conflicts, as well as varying airspeed and decent rate, making life far more difficult for us, and for the canopies behind us. In most cases, the length of the Base Leg needs to be longer than we think.
This becomes an even more important issue for swoopers setting themselves up for a high speed approach. If the length of the Base Leg is incorrect, the pilot is forced to either float in the brakes or “S-Turn” prior to the initiation of the dive. This has consequences to the approach, even if they manage to reach the Initiation Point at the correct altitude. If they are flying significantly faster than usual when they arrive at the initiation point, they may lose much less altitude in the turn due to the increased front riser pressure upon initiation. If they are flying significantly slower than usual, they may lose a much greater amount of altitude in the turn, and find themselves hooking into the ground. It is my experience that, aside from the altitude of the Initiation, the selection of the “B” point is the most important aspect of a high speed approach.
If we simply add another checkpoint prior to the entry into the Downwind Leg, we can take the guessing out of the process. Assuming that the turn points are equidistant in altitude (300, 600 and 900 feet), we can simply add another unit above the original pattern entry to create a fourth, or “D” point, precisely on the wind-line, upwind of the target. What this does is, it creates a Pre-Base Leg, which shows us exactly how long the Base Leg needs to be. In other words, if the altitude between the points is 300 feet, the “D” point is at 1200 feet.
The beauty of the data that this “D” point brings us is, we discover the exact length of the base leg without choosing the precise location of the “B” point prior to exit. This means that we can fly this pattern at a new drop zone, or when we are landing off, and learn where the altitude-location-checkpoints are for that specific landing area. It doesn’t help us with the “depth” of the pattern points, but it puts us in the ballpark, assuming that we have a rough idea of our canopy’s glide ratio.
When the winds pick up, this method still works perfectly well. The crab angle on the Pre-Base Leg is equivalent to the angle of crab on the Base Leg. Note that the horizontal distance of the offset from the target on the downwind leg on a windy day is exactly the same as it would be on a no wind day (A to B = Anw to Bnw). This is only true if we do not compensate for the side-slip of our ground track due to the crosswind legs.
However, even when we do choose to compensate for diagonal crabbing on the base leg and create a “Holding Crab”, if we create the same crab angle on the Pre-Base Leg, we end up on the perfect final approach despite the complex situation. This is easily accomplished by simply making our goal to fly a box pattern on the ground, flying our Pre-Base and Base Legs perpendicular to the wind-line.
Also note that the length of the base leg is longer on the No Wind condition than it is on a windy day on which we perform a Holding Crab on the crosswind legs. This is due to the reduced groundspeed when in a Holding Crab, and the diminished glide ratio that comes as a result of it. If you aren’t pointed where you are going, you will not move there quite as quickly.
This method assumes something that many canopy pilots do not have: a trustworthy altimeter. A standard dial-type, analog altimeter is not sufficient to give us the kind of accuracy we are looking for. Even the digital dial-type is not usually graded in such a way that we can distinguish units of one hundred feet or less. These are freefall altimeters. For the precise data required by today’s canopy pilots, we need digital altimeters with digital read-outs. Even better, many of us have found, is the heads-up advantage of an audible altimeter designed for canopy flight such as the Optima and Neptune. If you have an audible alert telling you where you are, it is far easier to keep your eyes looking outside the cockpit and on the action that may require your instantaneous reactions. All that being said, your eyes have ultimate veto power. If things do not look right, your instruments must be ignored. Too many skydivers have hit the ground due to complete faith in their instruments that let them down due to mechanical problems, battery issues or some unconsidered technical malfunction.
Assuming that you use this accuracy technique the way it was intended, and you notice what is happening as it is happening, you can take a huge step forward in consistently hitting your target runway. It will take a while to dial-in your approach so that you actually hit the target, but the target is always a secondary goal to hitting the centerline of the runway and turning to final at a reasonable altitude. If you plan your pattern well, using four distinct points along the way, you can change what you are capable of handling as a canopy pilot. Not only will you feel better about yourself, you will increase the likelihood that you will live a long, healthy life. That, of course, is the mark of a great skydiver.
In addition to being a highly experienced skydiver with over 14,000 jumps, Brian Germain is the author of several books including The Parachute and Its Pilot, Transcending Fear, Vertical Journey, and Green Light. He is currently designing canopies for Aerodyne Research, and offers canopy flight courses worldwide. For more about Brian’s Books, Seminars and Parachutes, visit his websites: www.BigAirSportz.com and www.TranscendingFear.com

Swooping is Not a Crime
A large sector of the skydiving population is currently in danger of extinction. This is because of the widespread proliferation of new DZ rules that prohibit 270 turns for landing or ban high speed approaches entirely. Consequently, many jumpers now find themselves homeless and considering alternate sports - not a good thing for skydiving.
These new restrictions come in the name of safety. We have lost many
friends this year due to canopy collisions, and the management at
several dropzones has responded by adding new rules in an effort to
prevent such accidents from happening in the future. There are several
aspects within this direction of policy that concern me.
Remember 9-11? We felt unsafe after the tragedy, and so we willingly
gave up many of our rights as free citizens. Now they are taking
nail-clippers away from little old ladies. It is getting ridiculous, as
is the policy banning advanced approaches. It is a knee-jerk reaction to
fear, and I think we all know where that slippery slope leads.
"My rights end where your rights begin."
This is the fundamental idea that forms civilization. In other words, if I fly my parachute into you in the pattern, I am in the wrong. I think everyone agrees with this and it therefore can and should be asserted that if my behavior does not have an effect on anyone else, I should be allowed to continue to do what I am doing, provided I am doing it in a safe manner.
We all need to challenge ourselves. This is what keeps us showing up at the dropzone every weekend. Thousands of people enjoy the challenge of high speed approaches and define the swoop landing as an essential part of their experience. They wait all week to get a few jumps in over the weekend, and now many of them are unable to get what they came for. To take that away is to cut many people off from the very reason why they skydive in the first place. Is that really where we want to go with this?
We cannot afford to alienate anyone. There are precious few experienced skydivers in the world and I would argue that we are the reason for the dropzone in the first place. I understand that there are a few DZOs that are doing very well running purely tandem operations, but this is the exception, rather than the rule. Most dropzones are a business of passion, rather than a pragmatic financial pursuit. If we wanted to make a million dollars, we would have done something else with our time. We do this because we love it.
The atmosphere created by having fun jumpers around is essential to the success of a dropzone, even if the profit is significantly less. Sport jumpers give the tandem students a reason to come back and learn how to skydive. They come back for the jumping, true, but they also come back for the connection to other people. They want to be part of a community, as do we all. We must therefore allow all aspects of the sport to continue to proliferate so that our numbers may grow.
It is that simple.
We can create sustainable solutions.
It is possible. We simply need to think things through and adapt to the changing needs of a growing sport. I remember the debate on my dropzone as to whether or not we wanted to let the students jump ram air canopies. Many were concerned that the "squares" were too much responsibility and that students could not be trusted. Are we saying the same thing about ourselves now?
We need to trust each other. True, we need to create a structured environment in which we can create a degree of predictability in the air over our DZs. Otherwise none of us would be able to manage all the variables in our heads. But as soon as we start back-peddling away from danger, we are becoming more similar to the groundlings we pass on the road on the way to the dropzone.
We must have specific runways where the high speed pilots can land safely, out of the way of everyone else. We must communicate our intentions in the loading area. We must create sustainable vertical separation before reaching pattern altitude. Most importantly, we must increase our level of awareness under canopy so that no matter what the circumstances, we can fly in traffic without risk of running into each other. We do this by remaining calm and keeping our eyes open.
We need to stop pointing fingers and making over-protective rules, and simply do what we need to do in order to be safe and still have fun. Let's work together and unite as a whole to make the dropzone a welcoming place for everyone.
Brian Germain
www.TranscendingFear.com