Search the Community
Showing results for tags 'gear'.
Found 157 results
-
 Let me ask you this: When was the last time that you saw the pilot running down a safety checklist on the jump plane? Photographer: BatCam If you’re paying attention, you certainly have--or at least seen the clipboard stuffed somewhere in the cockpit, lookin’ official. Metal-tube pilots have an actual checklist to run down to confirm the safety of the gear that heaves us all up into the sky. That’s a great idea -- it’s a reasonably complicated system, and a checklist ensures that nothing’s being forgotten. Now: when have you ever seen a nylon pilot with a clipboard and a pen, spinning briskly around in front of a mirror and checking things off? Yeah--never. Even though a wingsuit has lots of little safety details that need to be confirmed before every flight, our before-takeoff checklist exists only in our heads--and it’s significantly more complicated than a standard skydiving gear check. Let’s make that checklist a little easier to remember, hey? A gear check should be a mantra. Here’s the abbreviated checklist to add to your “standard” skydiving gear check: The Four-Three Wingsuit Check 3 Checks 3 Straps 3 Handles 3 Zeroes Here’s what it means. Three ChecksThis will be familiar to any skydiver, since it’s been a recommendation since the dawn of the sport: you should perform a pre-flight gear check three times. Perform one in the hangar, one before hoppin’ on the plane and one before you exit. Also: Never underestimate the value of another pair of eyeballs during this process. Three StrapsTwo leg straps and one chest strap are the only things that keep us skydivers from being skyfallers. All wingsuits cover up two-thirds of those vital bits of webbing; some wingsuits (in BASE mode) obscure the chest strap as well*. As you might imagine, fatalities--and many close calls--have resulted. Check them with your eyeballs before you’re zipped in. Some suits fit snugly enough that the straps seem tightened when they’re not (gulp!), and once those straps are out of sight, they can easily slip out of mind. After you’re zipped in, you can check your legs by lifting your shoulders and feeling for the pull of the leg straps. Three HandlesMake sure you know exactly where all three of your handles are, and that they’ll be available to you while you’re flying. Your cutaway and reserve handles must be readily accessible and visible to you in flight -- so make sure your suit is fitted and attached in a way that puts those handles on proud display. Switching from BOC to leg pouch? Switching from leg pouch to BOC? Best be damn sure you know which one you’re wearing. Three ZerosZero Holes When you’re fully zipped in, every zipper on the suit should be zipped and every cable should be properly routed. If a zipper is down, you’re in for a rodeo. Your wingsuit closure zippers aren’t the casual affair at the front of your pants, either, my friends. Check: Are the female and male ends mated properly so that each tooth of the zipper alternates? This is checked at the fitting end of the zipper. If that’s not done properly, you risk losing that wing in flight (or potentially shifting the zipper during deployment, which can cause jamming and possible damage). Eminent wingsuit athlete and coach Matt Blank has additional advice. “I have my students zip their arms all the way closed,” he explains, “Then touch their handles and then open both arm zippers. This insures that the clothing they have on under their suit does not inhibit the student from reaching his or her handles--or is a risk for being caught in zippers if they need to rapidly unzip after deployment.” Look at your pressure zippers, too. Are the pressure relief zippers in the appropriate place for the flight, and symmetrical from arm to arm? For beginner flight, we quite often unzip the pressure zippers, which naturally comes at a cost to performance. As we advance in the sport, we may zip them partially closed or closed all the way. In either case, check for symmetry. If one arm is zipped differently than the opposite, the suit will have an asymmetric inflation--causing an unbalanced flight. Image submitted by bruno.ferrazza Zero Dangles Check for dangly anything: cables, webbing, half-stowed pilot chutes, camera bits, etc. As a rule, dangly bits are bad. Oh. and another thing: Never disconnect your RSL for wingsuit jumps. Take it from Richard Webb, one of the discipline’s most experienced and respected athletes (as well as the founder of the science-forward, no-nonsense human flight information source Top Gun BASE). “I've been saved by an RSL when my reserve pillow got sucked into my wingsuit on a spinning malfunction,” Webb explains. “It literally saved my life. I didn't have an AAD at the time. Now, I will never wingsuit without an RSL. Ever. I strongly endorse RSL use for all wingsuit ops. The data is conclusive. Even on spinning malfunctions on tiny cross-braced canopies, RSLs and Skyhooks work remarkably well at getting you under an inflated reserve safely with minimal line twists.” Zero on Your Altitude Indicators Make sure your AAD is on (and reads zero), as well as your other altitude indicators -- and that you can see your visual alti while you’re in flight mode. If you wingsuit with an AAD, you need to know this: most AADs will not fire at even modest wingsuit speeds. That said, they have saved wingsuit pilots who got little-bunny-foo-food on the way down, so don’t let that dissuade you from turning yours on. The Rest of the RecipeA good gear check requires that you know your gear. As a wingsuit pilot, it falls on you to become intimately familiar with the design, operation and function of the suit you’re whizzing around in. If you’re checking your flocking buddy and you’re not familiar with his/her particular equipment, ask. (If your buddy doesn’t seem to know what the hell he/she is wearing, take that as a warning.) Allow your intuition some room to breathe, here. Check for a comfortable range of motion, that the configuration makes sense to you and that you feel good in the suit. You can rest assured that if you don’t feel good in the suit, you’re not going to have a good time. *Sound confusing? Yeah. Well. It is. Wingsuit design varies widely by brand and model--sometimes, with some manufacturers, even within the model. Wingsuits are often built to be configured differently, depending on the jump specs, the container design, pilot preference and--I dunno--current mood. You are likely going to have questions. Ask them of your mentors and the manufacturer of your suit.
 -
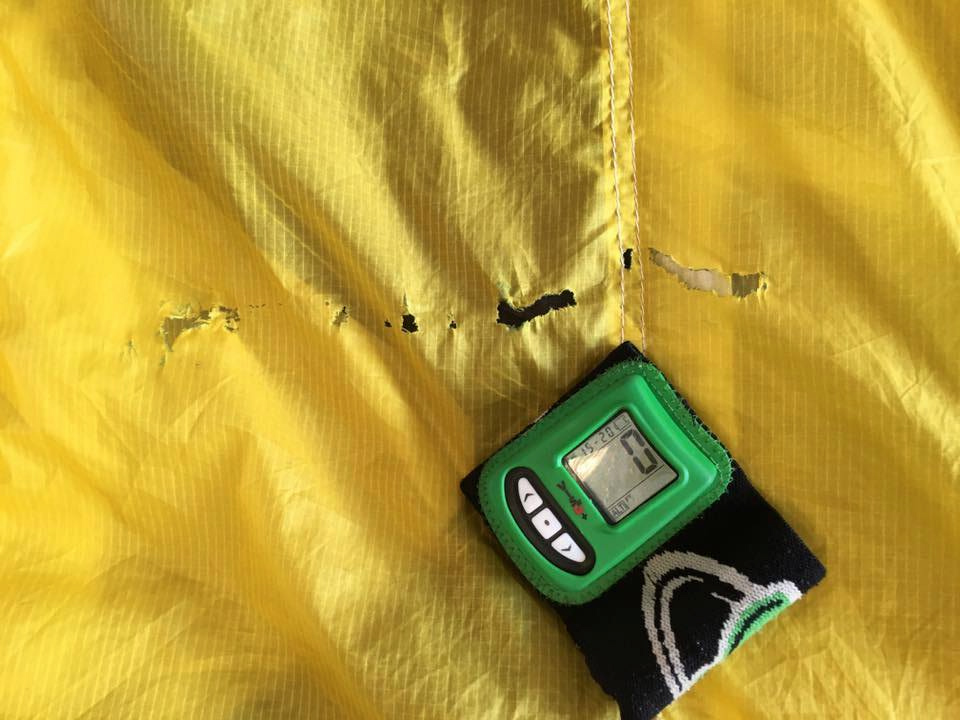 Image by Keith CreedyC’mon...just how much damage can one little line really do? Actually--lots. When a suspension line gets out-of-place and slides across neighboring nylon, another line, or another skydiver (in a collision scenario), the damage can be catastrophic. The lines connecting your mortal coil to your nylon conveyance are, after all, thin strands of extremely strong material – and, in deployment and flight, they move very, very fast. Line burn is, as you have no doubt extrapolated by now, caused by the generation of heat by friction. The amount of heat a fast-moving line generates is enough to literally melt the canopy – and, under certain circumstances, the line itself. Here are the questions you’ve gotta answer in order to avoid cooking your precious canopy. 1. How melt-resistant are your lines?Both F-111 and ZP nylon melt at 417 degrees Fahrenheit. That’s a lower melting point than almost all the common suspension line materials (Dacron®, Vectran® and HMA), which melt when exposed to heat levels of 482-932 degrees. There is, however, one exception: Spectra®. Spectra®, that tender little princess, melts at just 297 degrees. Even if they literally melt a hole in the canopy, all lines but Spectra® will likely survive the incident unscathed. If you have Spectra® lines, however, check them carefully if you discover line burn on your canopy – they are likely sufficiently damaged to require replacement. 2. Is that crease really a crease?Most modern sport canopies used to be made of F-111 nylon. These days, for lots of reasons--from performance to fading mitigation--they’re generally constructed of ZP (zero-porosity) fabric. The behavior of these two materials under stress varies widely. When an F-111 canopy suffers line burn, the damage tends to be localized – often, sufficiently contained to be landable. ZP fabric is not so forgiving: high-speed line burns tend to cause major structural disintegrity. In addition to that, burn damage to ZP fabric can be difficult to identify, often appearing as a simple crease in the fabric – though testing to that crease finds it to have been massively reduced in tensile strength. (For this reason, Performance Designs doesn’t use zero-P fabric in their reserve canopies.) 3. Are you packing for a smacking?According to the United States Parachute Association, incorrect packing is the most common source of line burn. The other cause, of course, is canopy collision – but that is a subject for another article entirely. To reduce your risk: Don’t throw your canopy in the bag. Take a moment to mindfully arrange the lines towards the center of the pack job, making sure that rogue lines aren’t nestled deep in the fabric where they could cause burn. Mind your slider. Keep the slider flush against the slider stops and tucked between the line groups. Not only will this help to mitigate opening shock, it will help to manage the lines as the canopy deploys and keep them from unnecessary intimacy from the neighboring fabric. Clear your stabilizers. The stabilizers (the “ears” of fabric that come down slightly on each lateral side of the canopy) have a tendency to tuck themselves in towards the lines when you’re pro-packing. Make sure they’re clear. 4. Have you already been burned? Look for melting and discoloration. Line-burn damage looks very different than puncture damage (or any other clean cut or rip). Check your lines. If you notice burn damage on your canopy, it means that the nylon most certainly came into contact with your lines. To check lines for burn damage, use your hands more than your eyes. While seared lines often show signs of melting at the burn point, the easiest way to determine damage is by feel: an undamaged line will feel smooth if you pinch it and slide your fingers down, while burned (or otherwise damaged) lines will feel bumpy and rough. Get help. If you notice evidence of line burn – or what you suspect to be line burn – on your canopy or lines, take the damage to your rigger for inspection as soon as possible. Don’t freak out! In many cases, the damage can be repaired simply and economically, with replacement suspension lines and patching. Don’t be a dick. If you notice any damage on a rental (or student) rig, don’t hesitate to point it out to your coach or the rental office, whether or not you believe the damage happened “on your watch.” You’d want the same treatment--and you don’t want to be burning your fellow skydivers. Right?
 -
 No-Punches-Pulled Advice From A Long-Time Suit Dealer Image by Joel StricklandYou might think twice--or three times, or never--about dropping many hundreds of dollars on a dapper tuxedo. A skydiving suit, however? Shut up and take my money, dear manufacturer. Just make sure it’s in my colors and that the sponsor logos are right. When you’re slinging that kind of cash around, the last thing you want is for the object of your ardent longing to show up too loose, too tight, too short, or too long--and, due to a bafflingly high instance of improper measuring on the part of the buyer, that happens all the time. Take it from Joel Strickland, double British gold medalist (in both freestyle and freefly) and dealer for the venerable Vertical Suits. He’s been wrapping innocent skydivers in measuring tape for some years now, and he has excellent advice for the un- (or under-) initiated. 1. Relax.“Measuring is not as difficult as people think it is,” Strickland soothes, “So, if you follow a few simple rules, it is pretty straightforward.” In other words: don’t get too nervous about this. 2. Get someone to help. “While it’s technically possible to measure yourself,” Strickland explains, “It is not recommended. There will be some touching. Try not to make it weird.” 3. Make it a dress rehearsal.Strickland advises everyone who comes to him for a fitting to wear what he/she would normally wear under a suit: base layers, thermals, underpants, jeans, whatever’s usually under there. You’ll want that suit to fit comfortably over your usual undergirdings, not strain over a pair of baggy, beloved chinos you didn’t wear to the fitting. 4. Follow the video. “It is difficult to get it wrong if you use the talking pictures,” Strickland says. “We live in the future. Few people are ever more than ten feet from a device that will let you do this. No excuses.” He’s referring specifically to the Vertical Suits fitting video, of course, but similar helping hands are available from other suit manufacturers. 5. Measure twice, cut once. “Always measure twice,” Strickland insists. “Maybe switch hands or stand on the other side and do it the other way around. Perhaps switch the limb being measured. See that the numbers match up.” 6. Don’t tweak. “Suit design has grown into a very precise process using science and maths and brains,” Strickland says. “The manufacturers ask for a lot of measurements for a reason, and the best results come from sticking to the plan. If you mess with them, it can throw out the form of the suit and compromise its awesomeness.” 7. Let the company know about your special needs.If you do require a specific area to be looser--for example, if you wear a brace--reach out to the manufacturer for advice instead of altering your measurements to suit what you think the suit requires. They’ve almost certainly seen your issue before and can give you the best advice. 8. Don’t fudge the numbers.Your measurements now are what counts. “If you want your suit to fit,” Strickland sighs, “Do not adjust anything based the diet you just started or the gym membership you just bought.” 9. Be gentle. “When wielding the tape measure,” he continues, “You should be aiming for tickle, not strangle.” 10. Come as you are. When being measured, stand naturally. “Don’t puff out your chest or suck in your stomach or clench your buttocks or whatever,” Strickland explains. Your suit will feel better, fly better and look better if it fits you as you really are, right now. 11. Look to the experts, if you really want to nail it.The best way to get all of this stuff done is to seek out one of your chosen suit’s stable of official dealers. “In and around all the places where skydiving is popular,” Strickland advises, “There are people who work closely with the company as boots on the ground to help.” These dealers have the benefit of many years of combined experience, as well as a direct line to the manufacturer for questions. They’ve generally tried and tested many different jumpsuits through the years, and can offer horse’s-mouth feedback on any issues or questions you might have. Sniff around at boogies or events--not just under the loudly-logo’d tents, but in the crowds, as well. “They will go on and on,” Strickland assures. “You will wish they would shut up about it after a while.”
 -
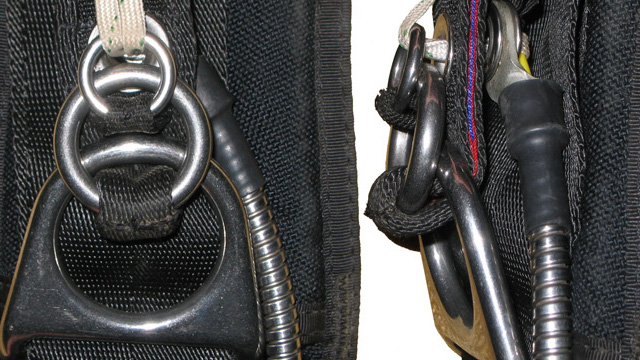 Three-ring systems look pretty tough. They’re made of thick, heavy metal, after all – what could possibly go wrong? Bad news: lots. The rings are husky little guys, that’s true. However, they depend on the webbing behind them–and the cutaway cables that fasten them in the ready position–in order for them to work. It behooves you to know when and how to maintain the system. How Sloppily Maintained 3-Ring Systems Can Cause a Bad DayNylon webbing, the material used to make skydiving (and BASE, for that matter) risers, stiffens over time to conform to the position in which it’s usually stored. Sometimes, they “set” so firmly in that position that the risers can’t flex the backing nylon–and can’t detach from the harness when the jumper engages the cutaway system, especially during a low-drag malfunction (such as a streamer). This, of course, is a very bad thing. The B-SidesYou’ve probably gotten used to looking at the little snowmen of your three-rings during your preflight gear checks. Great! How often do you look behind them? The loop that connects the cutaway cable to the three-ring system can get dangerously abraded over time. You should peek at it every time you pack. The Deep TracksTo keep your three-rings in proper working order, the three-rings need to be manually disassembled, the cables checked and the webbing treated to a little massage. For skydivers, this is the stuff of riggers. According to Federal Aviation Regulation Part 65-111, skydivers “must be under the supervision of a rigger when performing any maintenance on a parachute system.” Don’t let your rigger have all the fun, though. Having a hand in the process has the significant benefit of familiarizing you with the operation of the system and increasing your confidence that it’ll be there when you need it. The best advice is to go through these steps every three months, whether or not you’ve been jumping the rig. Check your user’s manual for specific instructions. You can always find this on the manufacturer’s website. Pull the cutaway handle. Set the cutaway and connected cables on a clean surface. (Do not pull the reserve handle – unless you need a repack, of course.) Inspect the Velcro on the cutaway handle and the seating on the harness. You may need to use a stuff brush to “fluff” the Velcro and clean off any adherence-preventing dirt, especially if you jump at a dusty drop zone. Check the ends of each cutaway cable to be sure they haven’t developed any kinks or rough edges. Run a microfiber cloth over each cable. While you do, check for smoothness. Disassemble the risers. Carefully check each riser for signs of wear. Look especially carefully at the white loop that “locks” the cutaway cable to the three-ring system. (You should be checking this loop each time you pack the rig, but this process gives you a better, closer look.) Twist and flex the webbing of each riser near the ring system. You can safely be vigorous. You’ll likely feel the problem-causing stiffness as you do this. Reassemble the system. Refer to your user’s manual to ensure you’ve done it correctly. Before your next jump, have an experienced jumper or a rigger confirm that the system is correctly reassembled. Enjoy a little more gear confidence, dear reader. You’ve earned it.
 -
 Image by Lukasz SzymanskiPaul Iglin has been brokering used skydiving gear for more than a decade. He’s seen it all. He has definitely seen your kind before, and wants you to know a few things about the buying process, so you don’t make the same mistakes he’s seen over – and over – and over. I asked him what people need to know about buying used skydiving gear when they begin the process, and he had plenty of sage advice to share. Here’s what he has to say about it. 1. Curb your enthusiasm.“Your job as a buyer is to get the right gear at the right time and at the right point in your skydiving career. It’s not as easy as it sounds. Every once in a while I have had people contact me who have not actually started skydiving yet. It is very rare, but it happens. They are clueless – and they are dangerous to themselves from a financial standpoint, because they have no idea what they’re buying. I tell them to go to somebody else; I won’t sell them gear. Before you start shopping for gear, you need to know what you are shopping for. So, if you don’t: Stop right there. Good shape, good brand, good used gear at the right price: Make no mistake; that’s hard to find. In skydiving gear, the supply-and-demand curve is really messed up. There’s very little supply and very high demand. It’s also seasonal. Come March and April, everybody rushes to find gear, and then demand stays strong all the way through end of the season around September. Try to shop outside that time frame if you can.” 2. Don’t trust your friends.“Man, people get their advice from some terrible sources. A lot of the time, they’ll just go to their friends. But when you’re a new jumper, most likely your friends are also newer jumpers who basically don’t know jack****. Their understanding is very, very narrow; they have blinders on. Like: they bought themselves a brand-new Infinity rig with a brand-new Optimum with a brand-new Sabre 2, and it works for them, so that’s what they tell their friends to get. Now, it doesn’t necessarily mean that the gear they’re recommending is the worst. It just means that these people don’t have a statistically relevant sample, so their opinion doesn’t really count for anything. And they always tell whoever’s asking that ‘this is the best,’ as opposed to making the correct statement: ‘This is the one I have, and it works well for me.’” 3. Do your homework.“All of this ties into the fact that people often just don’t do proper research. How do you do proper research? Well, whenever people ask me this question, I tell them this: Look at the gear as tier A, B and C as far as manufacturers, quality and pricing. I’m going to go ahead and throw some manufacturers’ names out there. You have your tier-A manufacturers: your Vectors; your Javelins; your Mirages; your Infinities. All those guys have been around for a long time. There are no questions about quality. They are very reputable. All the options are available. Then you have your tier-Bs: Icons, Wings, Perigees, whatever Dolphin became and a whole lot of other brands that are either obscure or very localized to another continent or a particular country. Avoid the latter if you’re a new jumper, because you don’t know what the **** you’re doing. You may have somebody try to sell you another brand that’s technically TSO’d, but you’re really going to suffer when you try to resell. You’ll have a hard time finding replacement parts if you are outside of the country of manufacture – and you’re going to get killed on shipping, and support is going to be pretty crappy. Be aware. Your can ask any rigger what the tier-C manufacturer is. They’ll tell you.” 4. Make peace with your pants size.“One of the biggest mistakes I see people make is being a over-optimistic about their weight. It happens a lot, because it’s usually people who are just slightly overweight that make the biggest mistakes. For example: a 5’10”, 180-pound person says, ‘I am going to be exiting at 210 pounds, so I should get a 210, But I’m going to work out and lose weight, so I’m going to go with a 190.’ I immediately tell them not to shop for the future. You shop for right now. If you need a 210 based on your current body weight, for chrissakes get a 210. Because in my experience -- and this is 15 years of skydiving speaking -- it is very unlikely that you will actually get to that goal weight. Sorry. It is possible, sure, but nobody has ever gotten hurt because their canopy was bigger rather than smaller. Don’t be stupid about it.” 5. Then add to that number. More than you think.“The other problem that I see a lot of people early on in their careers -- and a lot of times even as they become experienced skydivers with a couple of hundred jumps -- is that people don’t account for exit weight. People add a couple of pounds and call it a day, and that’s completely wrong. You step out of the shower, and that’s your body weight. Then you put on your clothes. You put on your boots. You put on your rig. You put on your helmet and whatever suit you wear and your cameras and whatever else you’re jumping with. Then you step on the scale, and that’s your exit weight. You know all that already. Even knowing that, a lot of people don’t bother with the scale and egregiously underestimate what their rig weighs. A lot of people estimate 15 pounds for gear. Seriously?! What the **** are you talking about? You are going to put on 10 pounds just of clothing and boots alone. Then a canopy weighs about eight pounds. Your container weighs 8-12 pounds, depending on the amount of hardware. Your reserve? About six pounds. Your AAD, even, weighs six ounces. Your jumpsuit is going to add another couple of pounds. None of that stuff is magically weightless. Add 30 pounds for your gear. Maybe more. Don’t underestimate! You’re only hurting yourself.” 6. Consult the chart.“The loading chart that I share with my customers – Brian Germain’s chart -- is the easiest one that I think is out there. I’m not necessarily saying it is the best one; I just think it’s the easiest to grasp. What he says is this: If you have 100 jumps or less, you should load one-to-one or less. For every 100 jumps, increase your wing loading by .1. That means that if you have 300 jumps, there is no reason you shouldn’t be jumping the 1.3 wing loading. Of course, you have caveats. People who jump at high-altitude dropzones and people who jump in very windy areas will need to choose different gear than people who jump at sea level, and so on and so forth. If you live in Colorado, you should probably jump a bigger canopy, because the air is thinner. If you jump where it’s really, really windy, you may get away with a slightly smaller canopy because you really do need the speed. Also, keep your head.“If you get a 170, you weigh 210 pounds and you’re 50 jumps into the sport, you are not doing anybody any favors. You may survive. You may not. But I certainly won’t be the person selling you a 170-square-foot canopy.” In general, please: Don’t go into it blind. Ask very experienced people for advice. And if you come to me as a buyer, expect me to tell it like it is. Because I will.”
 -
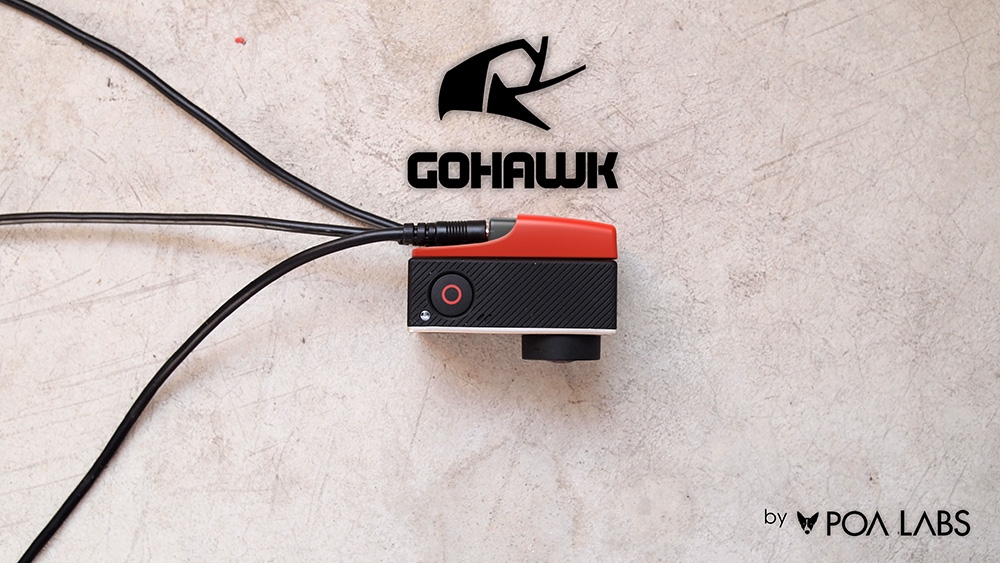 POA Labs has announced the launch of the GoHawk, an expansion pack for the GoPro Hero4 that adds three new levels of functionality for POV Still and Video photographers. The GoHawk adds three new camera ports, allowing the user to connect: Remote shutter button. Save time by only shooting photos when you want to. Choose from hands-free mouth switches or a thumb triggered handlebar switch. Works with any 2.5mm remote shutter switch. Remote LED indicator lets you know that your camera is on and recording. The bendable indicator can be mounted in your helmet or wrapped around your handlebars. Auxiliary USB Power Input for extended shooting - plug into any battery pack and never run out of power again. The GoHawk enhances the process of shooting POV photos with your GoPro Hero4. Choose from a mouth-operated shutter button (best for chest or helmet mounted cameras) or a handlebar-mount push button (ideal for handlebar mounted cameras, cyclists, and motorcyclists). Simply plug your switch of choice into the GoHawk and start shooting! For still photographers, the GoHawk can be used in Continuous or Burst photo modes to capture the pictures you want, and ONLY the pictures you want. You’ll never have to spend hours sorting through the contents of a full memory card for that one magical shot. If you shoot video, you can easily start and stop recording using any external shutter switch. With the bendable LED indicator.you’ll never have to worry if your camera is on, taking a photo, or recording. A blue standby LED lets you know that your camera is on and flashes to let you know when your battery is low. A red record/shutter LED mimic’s the GoPro’s own shutter button lights no matter what mode you’re in. No special software is needed to operate the GoHawk. Simply plug it in and start shooting. The GoHawk is perfect for photographers and videographers who value the durability, price, and compact size of their GoPro’s, but need more control over how they capture the action. For more information, visit: the kickstarter page If you're interested in backing this project, you can support it on their kickstarter page, which is now live. About POA Labs POA Labs is a Portland-based product incubator focused on developing new and innovative products that enhance the lives of people who take their fun seriously. We want to enable our customers to do more - do it better, do it easier, and do it safer. Have more fun.
 -
 Aerodyne recently announced the release of their new canopy, the Pilot7. This new main, which was initially developed with wingsuiters in mind, is a 7-cell variation of the popular Pilot canopy which Aerodyne have sold for over a decade. The original Pilot canopy is in fact the company's most successful product, with the 9-cell elliptical holding an average rating of 4.67/5 based off 69 votes in our gear section. Aerodyne say they found their design for the Pilot7 heavily influenced by the strengths of the initial Pilot, and wanted to ensure that the new canopy lived up to the expectations set by its older sibling. Something for EveryoneBoth beginner flyers and experienced wingsuit pilots have reportedly demoed the Pilot7 with great results and public feedback as to the performance of the canopy. The company claims the Pilot7 provides 'superbly consistent openings', while in flight offers the pilot something fun and agile, while still remaining stable and easy to fly. "It has a flat glide and a powerful flare, likely more so than any 7-cell you’ve experienced.", claim Aerodyne. It was clear that solid, reliable openings were a key factor for this canopy during development, and testimonials from those who have been demoing the Pilot7 seem to confirm that Aerodyne have really hit the nail on the head with regards to the reliability of openings. While the focus of the Pilot7 was wingsuiting, Aerodyne say they expect that the canopy may become popular in other demographics of jumpers. Due to forgiving openings, handling characteristics and low pack volumes of the canopy, it could serve as a great choice for all skydiving skill groups, however could prove especially useful for beginner skydivers. MaterialsThe standard version of the Pilot7 will come in ZP, while there are also the options for Aerodyne's honeycomb low pack volume ZPS and their new UltraLPV material. "This builds the top skin and stabilizers from ZPX, and the ribs and bottom skin from FX-11 (the low pack volume material used in the SmartLPV). We use the ZLX lines to create an amazingly low pack volume canopy." Available sizes: 117, 137, 147, 167, 187, 207, 227, 247 sq ft.
 -
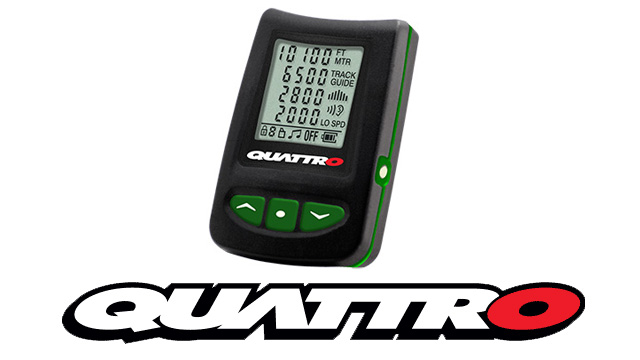 Altitude awareness is easily the most important aspect of skydiving and it’s no wonder that audible alert systems were one of the first technological inventions in the earlier days of skydiving. Like most things technical, significant advances have been made, and any device that provides information/feedback during a skydive is a valuable addition to any skydiver’s tool kit. Larsen and Brusgaard, the foremost authority on altitude-measuring/awareness devices, launched a new product named the “Quattro,” in early 2014. With four user-programmable altitude notifications/alarms, the Quattro has become incredibly popular. Why?It’s important to understand what an audible offers skydivers involved in precision activities. Once relegated only to scream at a skydiver that they’d missed their point of deployment, audibles are now used for indicating user-controlled altitude alarms, while still providing feedback for deployment, hard deck, cutaway, or other altitudes warnings. From a wingsuiting perspective, I cannot imagine anyone not owning a Quattro. With the ability to generate seven notifications in flight, wingsuiters have no reason to not be set for exact breakoff points, maneuver points, deployment, entry and exit gate-points for performance training, competition points, and the list goes on and on. Wingsuiters fall at different rates, and with radically different wingsuits, everyone has different needs and wants. With this in mind, I’ve put together a few bullet points on where the Quattro benefits wingsuiter pilots. COACHING: Frequently, wingsuit coaches have a “no more work altitude” that is different than deployment altitudes. For example, I want students to not perform tasks below 6000’ but frequently continue stable flight until 4,500. As a coach, I want these notification alarms in addition to my own personal alarms of 3,500’ and 2500’ and my hard-deck alarm at 1600’. As an FFC/First Flight Course coach, students are given specific tasks at specific altitudes on the climb to altitude. The Quattro provides three “climb to altitude” alarms that a coach might use to remind him of those points where the student should be providing feedback or information. For example, students might be giving a verbal description of the skydive at 5000’ or indicating their countdown and waveoff point at 6,000’. In any event, climb-to-altitude alarms serve a multitude of value. PERFORMANCE TRAINING: Wingsuiters competing in FAI Performance Categories need to enter their performance gate at 3000m/9842’ and exit the gate at 2000m/6562’ and while the mandatory Flysight can provide these entry/exit indicators, competitors can benefit from a pre-gate announcement that the Quattro can provide, in addition to deployment indicators. ACRO COMPETITION: In Wingsuit Acro, the competition clock starts as the competitors exit. In non-compulsory jumps, synchronization is frequently part of the jump, and having set points for an action, particularly where wingsuiters may not be facing each other (back to back flying), an alarm or series of alarms can provide valuable timing information. The multiple alarms are also good for notifying competitors when they’ve reached their competitive deck, while still providing the “standard” three alarms for deployment, reminder, and hard-deck. HIGH ALTITUDE JUMPS: Wingsuiters engaging in high altitude jumps are flummoxed that most audible systems cannot provide feedback above 10,000’. The Quattro is capable of informing the wingsuiter as high as 19,990. Although the Quattro offers a broad spectrum of alarm settings, users are not required to enable them, and this is one of the features I appreciate most about the Quattro; users may configure the system to be as personal as needed, turning on/off various alarm points. Wingsuiters focused on performance frequently do not want to look at their wrist or chest mount altimeters if they’ve got a good performance groove happening, and full-face helmets often make it impossible to see chest-mount altimeters when in a performance configuration; an audible provides valuable feedback when cranking a chin around to see a visual may have a negative impact on performance. The unit allows for offsets, so if the landing area is a different elevation than the point of take-off, audible settings can be user-adjusted if the offset is known. Otherwise, the unit will recalibrate itself every 14 hours to the last MSL point of take-off. Manually zeroing the Quattro is as easy as pressing the center button a couple of times (this is the same procedure for generating altitude off-sets). As with previous L&B; products, the Quattro uses a pair of 2325 batteries, easily found at most any electronics store or grocery store that offers a wide variety of button batteries. In my experience, the batteries seem to be good for about 1000 jumps, or about a year. However, the Quattro and Optima seem to be very forgiving when the battery indicator says “replace me.” I’ve tacked on another 300 jumps after the indicator told me I had an empty battery. While just about any discipline in skydiving can benefit from the Quattro’s numerous features, wingsuiting is one aspect of the sport that frequently demands “more.” Wingsuiters love data, feedback, and algorithms designed just for them, and the Quattro certainly delivers. It probably helps that some of the folks at L&B; are avid wingsuit pilots, and have taken time out to really dig into what makes wingsuiting and wingsuiters just “a bit different” than other skydivers, and in the Quattro, they’ve really done it well. Although I’m not a speed skydiver, I can only surmise the multiple alarms would also benefit the speed discipline. Several helmet manufacturers have recognized the value of L&B; products, and have custom-fit slots for the Quattro (or Optima2, Solo) audible, and some have given exterior access to the audible. One feature I very much appreciate in my Tonfly helmets is that I can access the audible from the outside, letting me know my altitude settings are correct, that my battery is good, and that the unit is active (I frequently turn it off if I’m not going to be jumping for a few days). The unit display turns off after 14 hours, but will reactivate if it senses a climb to altitude. Unless manually turned off, it is always ready to jump. During frequent/daily jump cycles, I don’t bother to turn off my Quattro. By the way, for the color coordination-conscious skydiver, these are available with custom-configuration buttons, just like the Optima and Viso.
 -
 NZ Aerosports released the original Icarus Safire in 1999. They followed up in 2001 with the release of the Safire2, and she went on to become their biggest selling mainstream canopy, and one of the most popular beginner and intermediate canopies on the market. About five years ago, there began to be rumours of a Safire 3 and Crossfire 3 being developed, but the development of Petra and Leia stole the limelight and the research and development hours, and kept the company preoccupied for a few years. But last year NZ Aerosports started making some noise about them again, and since there's been a few teaser posts on their Facebook page about these new wings. Everyone wants to know when the Safire 3 and Crossfire 3 will be released, but the team at NZ Aerosports are staying tight lipped on that one. They have stated that the Safire 3 will be first to go public. And they've released a bit of information about what we can expect to see in the Safire 2's successor. They say they are also working hard on the Crossfire 3 project and that it’s going to be ready later in the year than the Safire 3, but it’s looking pretty good! The starting point for the Safire 3 project was reshaping the Safire 2 in the same software and using the same 3D design technique used to design Petra and Leia. They’ve kept the crossport design and repartition the same, to reduce surface distortion and improve load bearing, and the 3D lineset design, which gives a more accurate shape in flight. They’ve used the same elliptical lobe, so the shape of the canopy given by the way the lineset attaches now follows a true ellipse. And they’ve added their statement Powerband that flattens the 3D panels more accurately and reduces fabric stretch to keep the new design true to it’s shape in flight. These are some of the design changes you can expect from the Safire 2 to Safire 3: New planform totally reshaped through true 3D design Proportionally tuned air inlets that open wider in the centre of the canopy and less toward the tips New brake configuration, providing a more efficient flareIt won't be more 'high performance' than the Safire 2, because it is aimed at the same type of pilot that flies them now, but she will be more efficient and responsive, have a better glide and an even more powerful flare. The Safire3 Project: Opening Progression from NZ Aerosports Ltd on Vimeo. When the Safire 3 comes to market she will be available exclusively from NZ Aerosports in New Zealand, and NZ Aerosports dealers.
 -
 Squirrel are soon releasing their Swift 2 and Funk 2 wingsuits, which are now available for pre-orders. We're excited to bring you this first look at the Swift 2. Image by Dan Dupuis New smaller planform New profile New leading edge construction New arm sweep More R&D; per square inch than any suit in its class The SWIFT 2 is an entirely new design that brings a higher level of efficiency and performance to the beginner-intermediate class. This is the most balanced and versatile beginner-intermediate design that we have flown, and we think it represents a meaningful step forward in wingsuit design. In the same way that the FREAK has upset the intermediate class market, the SWIFT 2 offers performance and ease of use in a ratio that we think is unique in the category. Compared to the SWIFT, the SWIFT 2 has less surface area yet more glide performance, range, and speed. What this means is that the SWIFT 2 is easier to fly than its predecessor, and offers higher performance. This has been accomplished by increasing efficiency in the profile and planform. Traditionally, wingsuit manufacturers have added surface area to a design in order to increase “performance”. But, as surface area increases, so does difficulty. Surface area is the one factor in wingsuit design that cannot be cheated: if it’s bigger, it’s potentially more difficult to fly. Our mission at Squirrel is to maximize the efficiency of each design by focusing on glide and speed gains that come as a result of profile improvements and drag reduction, instead of simply increasing surface area. When we increase the performance of a suit without reducing the comfort and ease of use, it can be considered a “free” upgrade. That is the focus of the SWIFT 2. Image by Avalon WolfThe SWIFT 2 planform has less arm wing surface at the wingtip section of the span, increasing the aspect ratio and improving handling and ease of use. The wing root chord has been slightly increased, adding range and stability particularly in applications such as flocking. The added surface at the wing root enables smoother pitch adjustment and increases roll stability by supporting the pilot’s CG and hips. This also eases transitions from belly to back fly positions. The leg wing stance is also narrower than the original SWIFT. A new arm sweep and leading edge construction, taken directly from the FREAK, has reduced drag and improved agility. The SWIFT 2 feels considerably more compact than its predecessor, or any other wing in its class, thanks to these factors being combined with a profile also adapted from the FREAK. The FREAK profile was chosen for its moderate thickness and excellent behavior across a wide range of speeds. THE RANGE Versatility is a key tenet of the SWIFT 2 design. Arm and leg wing pressure can be adjusted via the internal wing zips, allowing a softer and more manageable ride for newer pilots, acrobatic pilots looking for rapid transition and ease in flips where wing area has to be rapidly compressed. With zips closed, the SWIFT 2 delivers the range, performance, and stability needed for high or low speed flocking. INLETS The SWIFT 2 inlets are adapted from our newest high-performance suits, and feature a more efficient intake with less drag than the original SWIFT. Back-fly inlets are offered as an option, and make the SWIFT 2 a fun and agile suit for freestyle flying and steeper, more advanced, formations. LEADING EDGE Leading edge construction is a complicated matter in wingsuit design. Performance can be enhanced by creating a rigid structure over the arm, but this results in a significant reduction in passive safety. We have focused on this part of our wingsuits since the beginning of our development and we are constantly striving to create the best balance of comfort and performance. The SWIFT 2 leading edge is adapted from the FREAK, and features a grained non-flexible main arm segment with a flexible Glideskin arc at the wrist for BOC and riser/brake toggle access. The interior is finished in Lycra, which provides a smooth surface for skin or clothing to slide across, and houses the optional leading edge foam. Never underestimate the importance of an easy pull and access to your risers. Brake and riser access is a learned skill: practice it thoroughly! PLANFORM The SWIFT 2 planform is completely new, and was chosen for its distribution of surface at the wing tip and wing root. Additionally, the sweep and stance are similar to the FREAK and FUNK 2, making the transition to our more advanced suits feel more natural. PROFILE The SWIFT 2 profile is adapted from the FREAK, modified only to fit the smaller planform and shorter chord. Thickness and camber was chosen for stability across a wide range of speeds and angles of attack. Image by Luis Lopez MendezFEATURES We believe that all performance-enhancing features in a wingsuit should be standard. If it's important to performance flying or improves ease-of-use, then it's included in the price of your suit. Padded and reinforced foot cavities, chest pocket / belly-cam access, internal pressure-zips, nut-sack storage compartment, mylar reinforced leading edge, and rubber BASE soles are all standard features in all of our suits. ACCESS In BASE and Skydiving, easy BOC and brake toggle access has proven to yield the safest and most reliable deployments. We firmly believe in the mantra, "Keep it Simple and Safe". For that reason, we designed a suit for which arm cutaways are unnecessary, BOC access is clean thanks to the extended wing root that helps to prevent the trailing edge from covering your PC, and risers / brake toggles can be accessed without unzipping. The arm sweep, wrist-cut, and leading edge construction have all been engineered for a balance of safety and performance. PERFORMANCE The SWIFT 2 has an exceptional amount of performance for its surface area. No other suit in this size range delivers as much speed, glide, or range. Ease of use is a critical factor for this class of suit, and the newest pilots will instantly appreciate the SWIFT 2’s stability in an arched position. If you have questions about flying your SWIFT 2 at any level of performance, please don't hesitate to contact us! We are always here to answer your questions.
 -
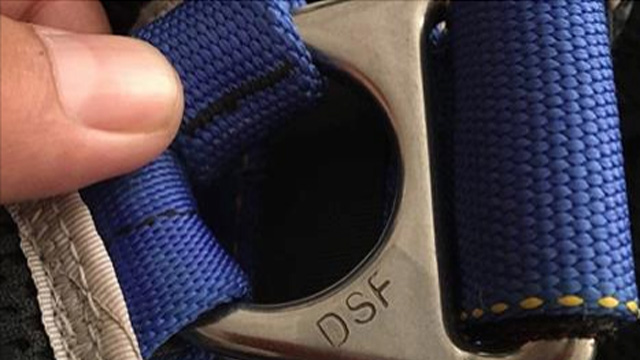 PRODUCT SERVICE BULLETIN 2016-01 (PSB # 2016 - 01) ISSUE DATE: 4th January 2016 SUBJECT: Stainless Steel Mini Base Ring STATUS: Ground Equipment Until Further Notice IDENTIFICATION: PSB # 2016-01 Affected Vortex Rigs: To be updated ASAP. Subject to a notification on Saturday, Jan 2nd, 2016, from our dealer in Holland that a stainless steel mini base ring presented with a problem on a Vortex container on its fourth jump (DOM October 2014), we are immediately advising all customers with a Vortex that has “DSF” stamped base rings (flip the base ring over and if its stamped DSF) to ground their equipment until we can ascertain which batch is impacted and obtain more detail from the manufacturer. We are diligently pursuing this information in as quick a time as possible. We will post serial numbers of potentially affected Vortex's as soon as we have the manufacturers’ confirmed information and steps that need to be taken to resolve this issue. Please be assured that Parachute Systems will make all efforts as quickly as possible to resolve this issue. Discussions regarding this issue are being discussed on Parachute Systems' Facebook page. This bulletin will be updated as more information on the affected containers are provided. UPDATE - Permanent Grounding For All Vortex Harness Containers With DSF Ring An update has been provided by Parachute Systems that has seen the permanent grounding of all Vortex containers with the affected DSF ring. "While the hardware manufacturers believe the compromised stainless steel ring could be an isolated incident, and expert opinion has confirmed this is very possible, in the absence of being able to test every single ring quickly and efficiently, both companies have decided that they will not risk the possibility of even one Harness Container in the field with a potentially faulty stainless steel ring. It has been decided, therefore, that every Vortex Harness Container with the stainless steel hardware as referenced in the Bulletin and stamped “DSF” BE GROUNDED PERMANENTLY" This grounding does NOT pertain to the Vortex Harness Containers that do not have the referenced stainless steel hardware per the Bulletin and stamped “DSF"> It has been further agreed to by both companies, that EVERY Vortex harness container that has the stainless steel hardware as referenced in the initial Bulletin, will be replaced with a brand new identical Harness Container as the original order. The replacement phase (VORTEX REPLACEMENT PROGRAM) will commence immediately and the closing date for the receipt of claims under this program is December 31st 2016." More information available in the Service Bulletin They have also made a recall form Available on Their Website
 -
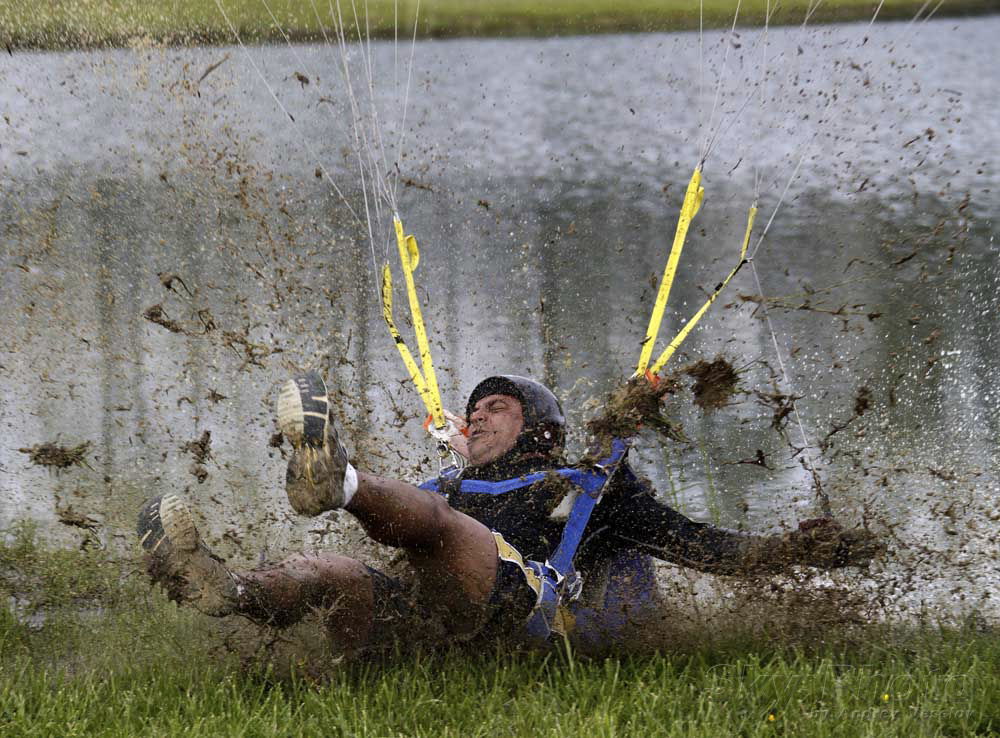 A Spa Day For Your Skydiving Rig Image by Andrey VeselovCharlie Chaplin has nothing on you. That landing was nothing less than *art*. You managed to use that doofus downwind setup to milk every last opportunity for comedy out of your return to earth. You nailed the exaggerated “uh-oh” expression. You executed the perfect shortbus flare. You transitioned majestically from a banana-peel touchdown to a ten-foot skid through the one spot of mud in the landing area. You, my friend, are awesome. Now, you’re going to have a nice laundry day. Here’s how. Wait for it.If you’ve managed to drag your beautiful gear through the mud, you’re going to have to stare at it in shame for a while before you make a move. Wait for it to dry completely -- which may take a couple of days -- then scrub off what you can with a dry brush. Take it apart.Remove both canopies from the rig. (Do this after performing a practice reserve deployment -- as you always do before a repack, right?) Remove your AAD from the rig. Remove all hardware: reserve handles, risers, RSL, hook knife, etc. If you’re not comfortable doing this yourself, ask for help from a rigger. Treat your rig like a dog....or, at least, like you’re administering a doggie bathtime. Gather a big plastic tub, gentle detergent (such as Woolite or castile soap) and a nylon scrub brush. Fill the tub about halfway with lukewarm -- not hot -- water. Dunk your empty rig and agitate it in the soapy water, but don’t let it sit and soak. After the container is fully saturated, go at it with your scrubber. Repeat the dunk-and-shake cycle. Once your rig is good and scrubbed, empty the tub and refill it with soapless, lukewarm water. Dunk and dunk and dunk, emptying and refilling the tub as necessary, until not even the tiniest hint of soap remains. (Dried-on soap is a filth magnet.) ...Or treat your rig like fine lingerie.You can machine-wash a rig, but you’d better make sure you act like it’s a set of ridiculously fancy, spendy underthings. (Ridiculously fancy, spendy underthings with hip rings, of course, that need to be strapped up with athletic tape to keep them from denting the inside of your machine…) Put your empty, hardwareless, Velcro-mated rig in a mesh laundry bag and run it with gentle detergent on the delicate cycle. String it up.Hang your wet skydiving container in a dry place that isn’t exposed to direct sunlight. As you get it set up, straighten every flap and fold to prevent wrinkles from locking in. Keep tabs untucked. If your rig has Cadmium hardware, you’ll need to do a thorough hand-drying pass with a towel at the very beginning to prevent rust. Stop time.Okay. You can’t stop time. You can, however, encourage the time between cleanings to maybe slow down a little bit. After your rig is spotlessly, white-glove-test-ready, make-your-mama-proud clean -- and as dry as the beer truck at the end of the Skydive Arizona Christmas Boogie -- you can apply a single coating of fabric protection, such as Scotchgard, to shield it against redirtying. Check the manufacturer’s recommendation for application before you get all spray-happy. That said, the general advice is to apply three whisper-light coats of protectant, making sure each coat is dry before applying a new one. Make sure you do this in a well-ventilated area (lest you waterproof your lungs). Get out, damned spot.Keep a baggie of stain-removing wipes in your skydiving gear kit. They’re a lifesaver for little oopsies. Take a canopy course....or start working at a laundromat to save money. Your call, Charlie.
 -
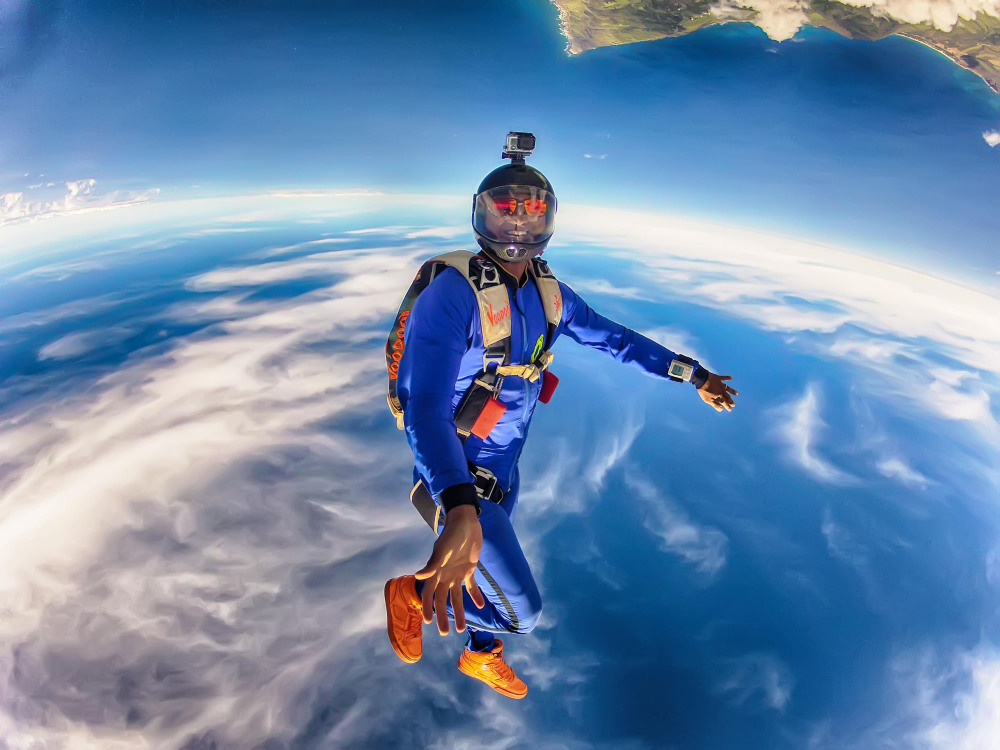 Image by Ralph TurnerYou probably have one meaningful interaction with your AAD: you chase the red light. Poke, poke, poke, watch. ...Zero. Okay. Off you go. Just a quick note, friend: you might want to poke a little deeper. According to the USPA, there have been no less than nine fatalities related to AAD fires at designated firing altitudes that did not result in fully inflated canopies before impact. The point is that these guys chased the red light just fine, but there was likely a difference between what the AAD was told to do and the actual conditions of the jump. A couple hundred extra feet could have made the difference between nine annoying repacks and nine funerals. Food for thought, y’know. If your equipment is new-ish, your AAD probably has a feature that allows you to change its activation altitude. It’s good to know that feature exists, and it’s good to know how it works -- because it helps you understand that mysterious little whatsit in your rig a little better when you do. If you’re ready to explore, do a little introspection first. Here are the important questions to ask yourself before you change the activation altitude on your AAD: 1.Do you want this to be forever, or just-for-now? Most currently manufactured automatic activation devices let you offset the device’s activation altitude to allow for a one-time altitude differential between takeoff and landing area. This will be a factor for you only if you’re making a single wahoo at a dropzone with a significant altitude differential between takeoff and LZ -- or if you’re doing a demo jump with an offset. This method resets when the device turns off. If you need a change that sticks around a little longer, don’t despair: both the Cypres 2 and Vigil 2+ have a way to increase the activation altitude until you change it back again. Your owner’s manual will explain how to do this. 2. What’s the difference? The Cypres 2 adjusts in increments of 100 feet, from 750 up to 1,650. The Vigil adjusts in 150-foot increments. For example, if you have a Cypres you’ll add increments +100 feet for a higher landing zone compared to the take-off and increments of -100 feet for a lower landing zone. 3. When’s it going to give the all-clear? When you make a positive altitude correction, the AAD will still disarm at its standard number of feet above the ground zero reference -- the exact same altitude as it does when no altitude correction is set. When a negative altitude correction is applied, however, it will disarm at its standard number of feet above the preset negative altitude correction -- the new landing zone. 4. How forgetful are you? If you’re the type of person to run into sliding glass doors at full clip, wear your shirt inside-out all day and/or infuriate your spouse/partner/lover by brainfarting every single anniversary, beware: Adjusting the activation altitude on your AAD might not be the best idea for total space cadets. To avoid a two-out, you’re going to need to remember that setting and ensure that you’ve got an open, functional main no lower than 1000 feet above it. Remember: a slow opening messes with that margin. Think about density altitude, and think about your packing choices. Another liability for nutty professors: turning on your AAD in the landing area of one dropzone and driving to another dropzone with a different altitude without resetting the AAD. (Work out how much of a kerfuffle that could be.) Finally, balance your know-how with your need. Bryan Burke, Skydive Arizona S&TA; (and über-adventuring renaissance man) has this to say about it: “I’m willing to bet that, for most skydivers, messing around with an AAD is likely to cause more problems than it’s going to solve.” 5. Which way are you pointing your belly button? You may be surprised to know that your body position directly affects your AAD’s activation altitude. AADs work using the metrics of measured air pressure and measured time. Those two parameters allow the little guy to calculate your pretty-much-exact altitude (±3 feet or so) at any given moment as a function of the registered air pressure, as well as your vertical speed related to a pressure variation within a certain period of time. But wait! Does that air pressure change depending on where your body has oriented that little AAD? Why, yes. Yes it does, smartypants. A belly position puts your AAD in a burble. This changes the atmospheric air pressure registered by your AAD by up to 10 millibars. Interestingly, that works out to a difference of ±260 feet. In an AAD activation scenario, 260 feet is y’know kindof a big deal. The AAD senses that the belly-to-earth jumper is higher than they actually are -- kinda like a policeman working the exit road of a music festival. Be aware. 6. Why do you even have this little gadget? If you have an AAD in order to make your skydiving life painlessly safer, you need to know that it’s not the foolproof set-it-and-forget-it piece of furniture you might think it is. You put so much faith in that thing that you really ought to get to know it a little better. There will, after all, likely be a fatality number ten...and it doesn’t have to be you.
 -
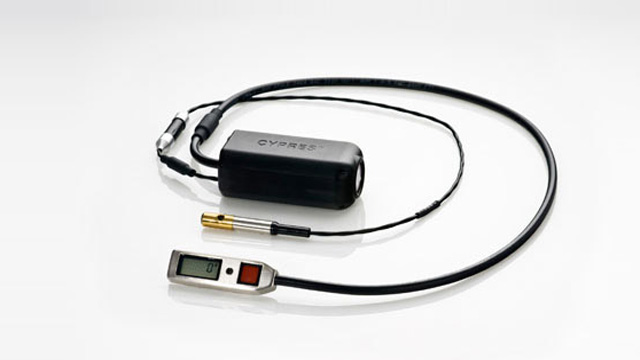 The world of skydiving offers those who choose to take the leap of faith a rush like non-other. The sport has grown far beyond anything its pioneers could have ever imagined. This growth has raised the demand for the establishment of advanced safety protocols in drop zones around the world. Container systems, main and reserve parachutes and basic safety procedures have all made this sport safer for all its users. One particular invention however, stands out above the rest and it is the automatic activation device or AAD for short. An AAD is a small, technically advanced device which activates a cutter that severs the reserve closing loop when the user is falling at or greater than a predetermined speed (roughly 78 MPH) and at or lower than a predetermined altitude (roughly 750 feet AGL). The device is equipped with a small computer designed to compute the skydiver’s speed of travel by using the surrounding air pressure. AADs have been common to skydivers for decades but recent years have brought about amazing change to this industry. CYPRES and Vigil AADs have become two of the leading manufacturers of AADs in recent years. When turned on, the AADs computer chip uses an advanced pressure monitoring system to determine a skydiver’s altitude and fall rate. If a skydiver passes the predetermined altitude at a faster than predetermined fall rate, the system sends a signal to a small cutter built into the parachute’s container. Once activated the cutter severs the reserve line retaining pin, causing the reserve chute to immediately deploy. Essentially, both CYPRES and Vigil AADs are meant to perform in very similar ways. Historically, each company has built and fine-tuned their respective devices to fit various disciplines in the sport. Cypres 2 AADCYPRES which is short for Cybernetic Parachute Release System was developed by AirTec, a German company founded in 1990. Company founder Helmut Cloth decided to replace the old and faulty technology for opening devices of the time with a more reliable device. The result was revolutionary: the first CYPRES was ready in 1991 and became the first electronic opening device in the skydiving world. Shortly after hitting the market the CYPRES AAD sales grew to nearly 5,000 units per year. Developers continued working hard on making sure all the feedback from its users was implemented into their new products. In a little over a decade, CYPRES AAD sales rocketed to over 80,000 units. Airtec saw the overwhelming demand for their product and in 2007 developed the CYPRES 2. Within two years the CYPRES 2 broke the magic barrier of 50,000 units sold. The successes and reliability of the CYPRES 1 and 2 were celebrated throughout drop zones worldwide in 2011 during CYPRES’ 20 year anniversary. Since then the company has continued to provide a great piece of equipment with the backing of thousands of saved lives all over the world (CYPRES, 2014). The Vigil AAD shares many similarities to its competitor and was also designed to add a wider range of safety measures for skydivers. Nearly a decade after CYPRES’ great successes, Vigil was introduced. Immediately after being marketed the Vigil began flying off the shelves in record numbers. Designed by the Belgium company Advanced Aerospace Designs in 1999, the Vigil AAD system offered its users unique patented features. Features such as: a patented cutter device (circular knife) that cuts the reserve loop twice, water resistant technology, and a multimode option which allows for three different modes: PRO – STUDENT – TANDEM, all make the Vigil unique. These features make the Vigil a highly sought after piece of equipment for skydivers of all disciplines but even more so by drop zone management staff wanting to use one AAD for multiple modes of operations. In addition to calculating a skydiver’s rate of travel by using the surrounding air pressure, Vigil also uses an additional activation technique. Once the door opens and you leave the airplane, the Vigil AAD will calculate the time left over before reaching the activation altitude (Vigil, 2014). Since its appearance, the Vigil has sold upwards of 70,000 units and continues to increase sales annually. Vigil AADAside from their successes, the overarching factor in this equation is the consumer, as is in any supply-demand industry. The initial cost of purchasing an AAD unit is about the same, approximately $1,400. Many consumers view this as a steep price to pay especially when also calculating the maintenance costs throughout the lifecycle of an AAD. The additional cost of ownership includes battery replacement and scheduled maintenance, which calculates to be roughly $75 per year. The Vigil AAD claims to have a 20 year lifespan with no mandatory service requirements. The CYPRES AAD, however, is said to have a 12.5 year life expectancy with required maintenance at the four and eight year marks after activation. Many skydivers take these two factors well into consideration before committing to any purchase. Thankfully the CYPRES and Vigil AADs are readily available to ship to locations worldwide. The ease and effortlessness involved with purchasing an AAD makes it very convenient for anyone in the market for one. The decision of which one is the better choice is strictly up to the buyer’s personal preference and skill level. Both CYPRES and Vigil have been tried and proven over many years and thousands of documented lives saved. All in all, the sport is lucky that jumpers have a good choice of automatic activation devices. Few jumpers wore them before they came to their present level of accuracy and reliability, and members of the gray-haired set who still remember friends they lost when no-pulls/low-pulls dominated the fatality reports will mostly agree that the added cost of skydiving due to AADs has been worth it (Parachutist, 2010). Thanks for reading, Blue Skies!
 -
 The first tracking suit was a humble thing indeed. Invented by pioneers of the tracking discipline in the unforgiving terrain atop Norway’s bigwall exits, the first suits were resourceful repurposings of the stuff they already had on-hand – the rain gear required by Norway’s reliably inclement weather, and the cigarettes they used to while away the time as they waited for it to pass. The “big idea” was simple: increase a tracker’s surface area, and he/she can use it to fly longer, flatter, faster and farther from the danger posed by the solid object behind him. With this in mind, someone -- no one quite remembers who -- burned cigarette holes in their waterproofs, positing that enough air would enter the holes to afford meaningful inflation. Somewhat miraculously, it worked. The rest, as they say, is history. The first purpose-built version, the original Phoenix Fly tracking suit, was introduced in 2004. Until recently, it has seen little serious competition: suit tracking was born by and for the BASE environment, and non-BASE-jumpers had little interest in it outside of its contested, folk-wisdomy usefulness as a stepping stone to wingsuiting. The past year has changed everything. Skydiving and BASE have both seen an unprecedented boom in participating athletes -- as well as a notable rise in tracking as a specialization. Whether the boom owes to a sharp increase in wingsuit-related incidents or to a renewed interest in tracking subdisciplines such as angle flying is unclear, but the empirical evidence speaks for itself. In any case, suit manufacturers have responded with an explosion of new technologies and designs. The new range aims for lighting-fast inflation, foolproof pressurization, optimized lift-drag ratios and multi-orientational usability. In a couple of cases, the designs even introduce wingsuitesque one-piece construction into the mix. I five brand-new suits through their paces in both the BASE and skydiving environments to find out which provide an optimum performance in different circumstances. Here’s the rundown on my findings.* *You will note that I am one human, and that, while I have quite a lot of time in tracking suits, I am not any kind of god, savant or superwoman. Your experience may vary from mine. Heck, it’s likely to. By Joel Strickland The Suits Phoenix-Fly Power Tracking Suit Currently the most popular tracking suit on the market, Phoenix Fly’s Power Tracking Suit is the more powerful baby brother of Phoenix Fly’s venerable and much-beloved Original Tracking Suit. Along with a bigger general profile, the new suit integrates thicker stiffening fabric, additional gear pockets on the jacket, tougher construction, mesh lining and inlets redesigned to deliver quicker pressurization. Aerialists love its forgiving transitions, and the power zone is relatively easy for lower-experience trackers to find (though Phoenix-Fly suggests a minimum of 120 jumps on the Original Tracking Suit before putting on the Power). I found the Power Tracking Suit to be instantly comfortable, and its construction to be thoughtful and solid. While the suit doesn’t have the raw power of some of the other new offerings, it’s accessible, predictable and confidence-inspiring – which is probably why so many personal-best tracks have been performed in it. Pressurized Tube 4 The Tube 4’s predecessor, the Tube 3, was a polarizing piece of gear. Trackers either loved or hated it, citing distinct roll-and-yaw wiggliness and unpredictability during the transition. In response, Pressurized redesigned the Tube 4 from the ground up. Features include inflation-staging leg inlets, zipper safeties and a thicker arm profile. Long, strong stiffeners at the front of the calf effectively smooth the leg profile. Backfly inlets are available (though not standard), and zippers aside the leg open up a sizeable extension to the leg volume. Given my previous experience with the Tube 3, I was expecting a rodeo when I tested the new suit in the BASE environment. I was shocked by the new suit’s ease of use: it was a baby-smooth ride from the get-go. Though it took a bit of trial-and-error to find the power zone, the Tube 4’s transition was among the smoothest I’d ever experienced. I had a couple of nagging issues with the Tube 4’s construction. For one, I found the vent-stiffening material easily malforms – and quickly “learns” the new shape – when the suit is folded for packing. (Overnight storage on a wide-shouldered hanger reduces the problem, but doesn’t solve it; after all, the suit has to go into a stash bag sometime.) Beyond that, I was constantly fighting my suit’s sticky zippers. Tony Suits Masai There’s no denying that the Tony Masai, wingsuit manufacturer TonySuits’ first tracking offering, is a head-turner. I was the subject of several baffled stares as I marched across Skydive Empuriabrava in it – probably, because the one-piece Masai looks neither like a tracking suit nor a wingsuit but an idiosyncratic combination of both. Where other tracking suits are distinctly baggy, aiming to inflate across the entire body, the central body of the Masai is unusually trim. This decidedly anomalous design inflates via both front and back inlets on a set of tubular fabric “rails” that run from armpit to ankle and down the inseams. The jumper’s rig zips in just like a wingsuit. The Masai comes standard with Cordura booties, stealth-rubber soles, backfly inlets and a humorously roomy zippered pocket positioned right on the seat. When I first geared up in the Masai, I was worried about inflation. In other, far looser suits, a slight bend in the limbs doesn’t noticeably deform the inflating portion of the suit; on the Masai, however, slight changes in the articulation of legs and arms pulled the fabric unnervingly taut to the body. When I jumped it, however, my worries were instantly dispelled. While the Masai tended to misbehave in a steep dive, the suit kept its inflation admirably through the rest of the test maneuvers, achieved solid marks for distance and delivered the crispest transition to and from backfly of any tested suit. S-Fly Cruise Fly Your Body’s first addition to the field, the Cruise, is getting a lot of attention, and not just because it’s the suit that Fred Fugen and Vince Reffet used for their record-breaking freefly-tracking jump from the Burj Dubai. The Cruise is massive, it’s intelligently designed, and it’s delivering eyebrow-raising results from trackers with low jump numbers. The suit features several industry-first advancements. Internal airlocks maintain pressurization. Thumbloops on both sides (so they remain available whether you track with palms up or down) keep the arm stable. An integrated deflector improves airflow around the jumper’s rig. The Cruise comes standard with both front and back inlets and removable booties (as well as the option to order rubber with a BASE tread). The wide, one-piece design inflates centrally -- very differently from a two-piece design, which is necessary cinched around the waist. (Jumpers can expect this to result in yaw instability during the first few jumps.) The Cruise’s optimal flying technique moves closer to that of a wingsuit than a born-and-bred tracking suit, and it’s a lot for a newer jumper to handle. However, an athlete with some experience -- and the time and willingness to put a few skydives on the suit -- will likely have the same take-away I did: something akin to jaw-on-the-floor disbelief. Squirrel Sumo The Squirrel Sumo is aptly named: it’s a very burly suit. It’s so voluminous, in fact, that it’s likely to be mistaken for a small wingsuit in a stash bag. The Sumo comes standard with a bevy of thoughtful details: loads of oversized, difficult-to-deform Mylar inlets, a close-fitting collar and cuffs to prevent air escape, three Mylar-reinforced toe tension settings, Cordura reinforcements and brawny industrial-grade zippers. Uniquely, Squirrel’s suit also includes Velcro-fastened stabilizers on the inner leg to prevent its abundance of fabric from jostling out of position on exit. All that fabric, flown correctly, delivers rocketship power. My first skydives on the Sumo were gainers from the back of a military Casa over the open ocean off the coast of Panama, and the suit ferried me back to the island landing area with room to spare. I was pleased to see that it was racking up similar distances to smaller flocking wingsuits without much dialing-in. In full flight, the Sumo felt rock-solid. As with any other large suit – especially one that inflates as quickly and sizeably as the Sumo – BASE exits proved a trickier proposition, though the field-leading start speed is well worth the effort to workshop. Note: Squirrel purpose-built the Sumo to maintain solid internal pressure in order to outfly aggressive exits in the BASE environment. Because of that laser focus, you won’t find backfly inlets on the Squirrel. [Originally published in Skydive Dubai’s now-defunct Dropzone Magazine, Fall 2014]
 -
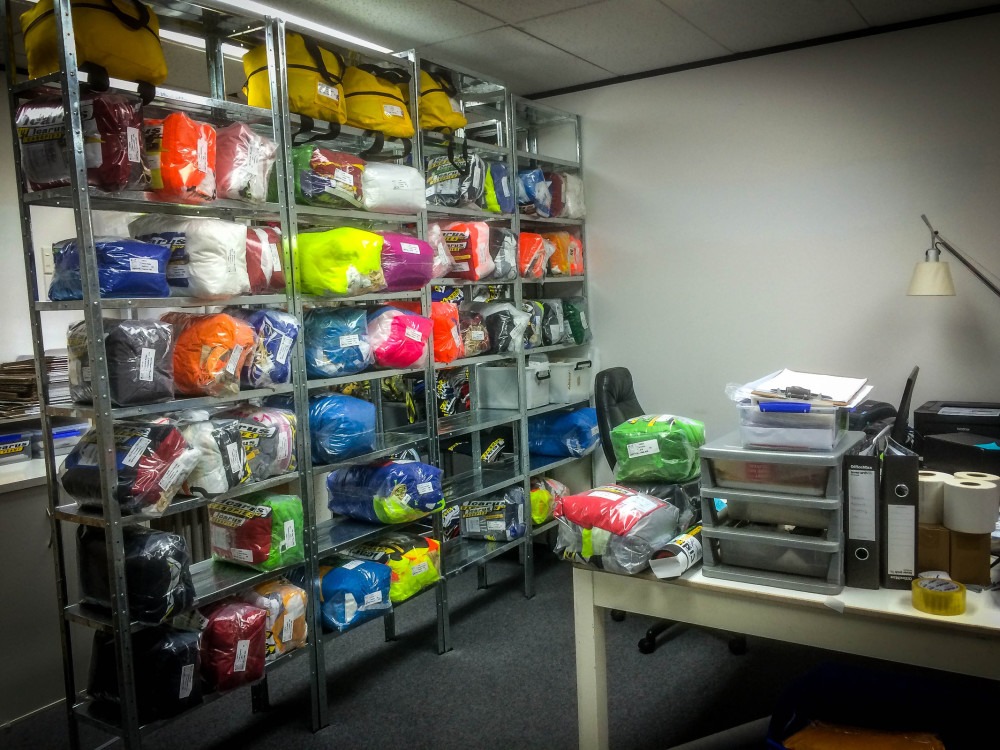 (With The Minimum Hit To Your Credit Rating) You want it. Bad. And you want it your way. In your colors. And nothing’s gonna stop you. If you’ve already done your time at the rental counter (and put some more mileage on a set of used gear, as you must), you’re well within your rights to be ogling the hot new nylon. Custom fit, hotshot technology and all the look-at-me embroidery a jumper could want? Just take my money. You’re no doubt aware that this purchase is going to rival car-buying in the cash outlay -- there’s really no way around it. That said, there are some steps you can take to get the best possible deal on your new skyrig. 1. Use the best brains you know (including yours). Start by asking your mentor’s opinion. Then ask your rigger’s opinion. Then ask your hero’s opinion. Ask the very smartest people you know to make their recommendations before you start the conversation with dealers and factory reps (who are, naturally, highly persuasive folk). There’s a labyrinth of pricey options to consider. Expert advice will help you navigate it without losing your shirt on poshity-posh back pads and tie-dye. You’ll have to be very honest with yourself about your skill level, your height and weight, the discipline you’ll spend the most time practicing, your annual jump numbers and your (realistic) total budget. Spoiler: this is not the fun part. 2. Be a brand snob. Y’know those skydiving gear brands that buy front-fold real estate in all the parachuting association magazines? The ones that always seem to have a pop-up and a smiling face at the major boogies? The ones that place their logos like the tap of a knighting sword on the fine shoulders of the world-champion teams? Those are the brands you want. This might feel a little like selling out to snazzy marketing. It’s not. If you play your cards right, you’ll have plenty of time in your career to experiment with fringe gear; for now, you need what a top-of-the-food-chain manufacturer brings to the table, namely: 1. Well-tested components, created in a well-established factory, and the attendant safety track record. 2. Equipment that’s familiar to any given rigger, thus easier to fix -- with parts that aren’t hard to replace Later on, you’ll have the requisite knowledge and experience to branch into buying specialty equipment, experimenting with less-tested technology and trying out the offerings of lesser-known manufacturers. At this point, however, you don’t know what you don’t know – and that can be dangerous. It can also be very, very expensive. 3. Try before you cry. Another benefit of buying from a major manufacturer: the ubiquitous demo. The cardinal rule in airsports gear-buying is a simple one: never buy it until you’ve tried it. Another note: you’ll certainly see demos on-hand at any major skydiving boogie, but do yourself a favor and evaluate gear outside the frantic context of crowded airspace. (When you’re not constantly chasing a hangover. Yes. You. I know this.) 4. Blend it. *Everything* doesn’t have to be new, you know. In fact, it’s a really good idea to save money by blending new components with old, if you do it intelligently. If -- after weighing the value benefits -- you decide to go all-in, try to buy everything together for a package discount. Shop the large gear shops to compare their (often attractive) package offerings. Since they’re all assembling their deals from the same major-manufacturer components, you can feel perfectly confident purchasing the one with the lowest price. 5. Repeat after me: dolla dolla bill, y’awl. Cash, if you can scrounge it together, is going to net you the best price. It’ll give you the best position to negotiate around taxes and shipping fees, and might just let you wiggle out from under the credit card charge that most dealers fold into to their baseline pricing. 6. Slow your roll. Take your time as a buyer on the market -- it pays off. After a couple of seasons, you’ll start to pick up the rhythm of yearly and seasonal sales. Go to as many boogies as you can, browsing the gear and sniffing out event discounts. (Don’t forget to stay for the raffle! Major gear giveaways land in lucky laps.) Get to know your local dealers, who might cotton to you and let you know when there’s a price shift on the horizon. Soon enough, all that waiting will pay off -- and you’ll be swaggering to the plane in a shiny new kit that just screams “I will cry like a tiny child if I don’t stand up this landing.” 7. Buy a stiff-bristled Brush of Shame. Just do it.
 -
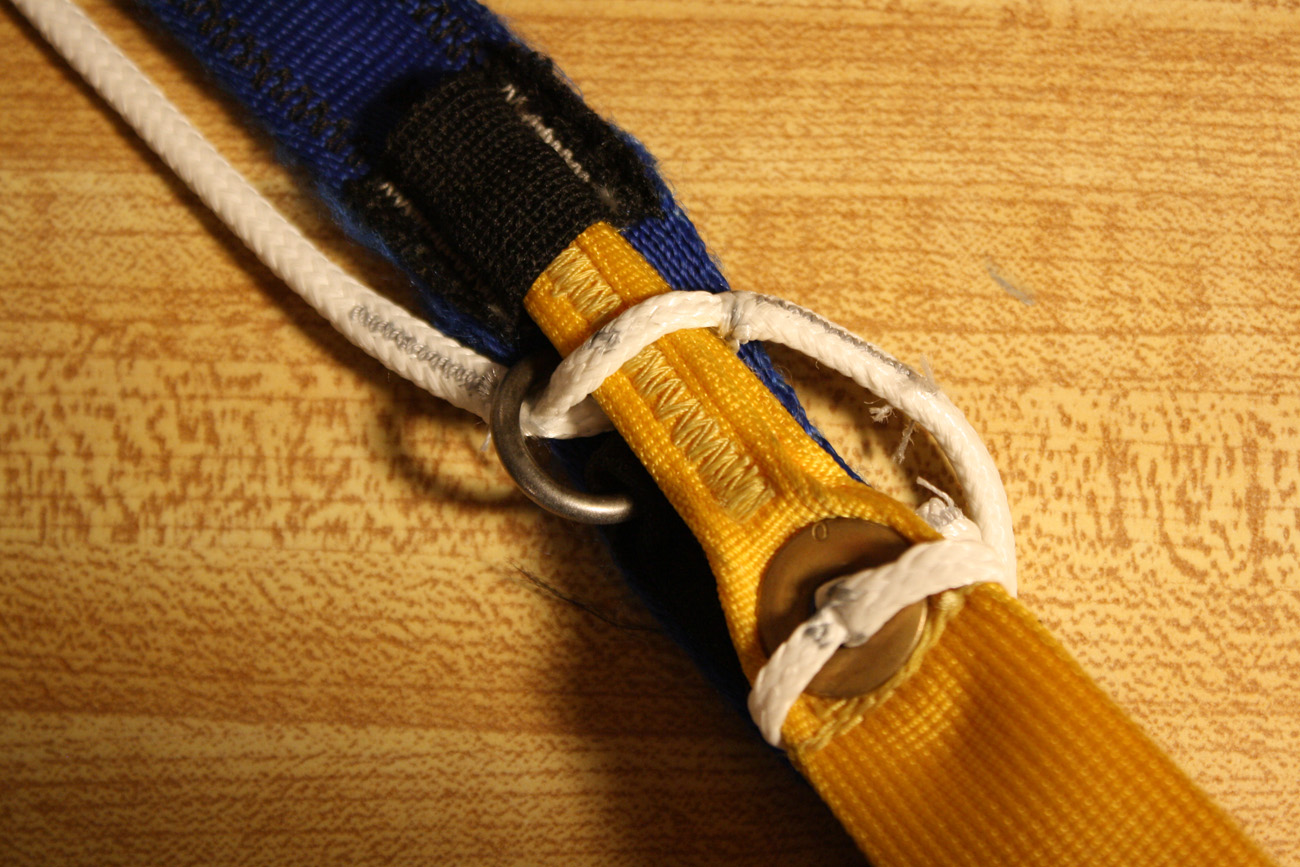 It is often the little things in our skydiving day that change the way things go. Paying attention to the details can make all the difference when it comes to preventing malfunctions, and when we get lazy, tired or complacent, our attention gets fuzzy and unfocused. That is when we make mistakes that we regret. One area that often results in malfunctions is errors in stowing our toggles, and there are quite a few ways in which we can perform this seemingly simple act incorrectly, only some of which will be discussed in this article. The most obvious aspect of this necessary part of packing that we can mess up is the depth of the toggle in the keeper. If we do not push the toggle sufficiently into its fabric keeper, the toggle will eventually unstow during deployment. Premature brakes releases result in countless cutaways each year. Each time we chop, we risk losing our main canopy and our freebag; a very expensive mistake. Another facet of stowing our toggles that can result in a premature “brake-fire” is insufficient tension on the portion of the brake line that leads to the canopy. This slack can allow a sharp tug of the brake line near the toggle, causing it to pop out of the keeper, and even snap the line itself. A healthy practice when setting your brakes is to pull upward on the brake line above the toggle, ensuring that everything is loaded against the toggle properly. Yet another common error when stowing the steering toggles is to pass the toggle through the brake line above the guide ring. This will almost always result in a premature brake release. It will also usually result in damage to the fabric toggle keeper, as the load on the brake line will go directly to the keeper rather than to the guide ring. I see this one quite a lot, and the jumper is always blown away when I point it out while they are packing. Better a moment of embarrassment on the ground than a premature brake fire in the sky. On that note, if you experience a premature brake release, or snap a brake line during deployment, your canopy will turn. On many parachutes, this turn can be quite fast, and it is likely to increase in both airspeed and rate of rotation. This means that time is of the essence when dealing with this kind of malfunction. This, however, does not mean that the correct response is to claw for the stowed toggle like a crazed monkey. Yes, you do need to unstow the remaining toggle, but having this singular goal in mind has resulted in many cutaways, AAD fires and even some fatalities. When you open up in a spin, your first job is to try to stop the spin, while remaining aware of your altitude. If you apply opposite harness input or simply pull the rear riser on the side of the canopy that has experienced the toggle release or broken line, you will slow the situation down. By holding a heading, you will be losing much less altitude, and will afford yourself the time and brain power to properly execute whatever procedure is next. Also key to your safety is the condition of your equipment. For instance, if the toggle keeper has become loose due to wearing over time, even sufficiently stowed toggles will unstow prematurely. Since we stow the toggle in the same way every time, the toggle eventually becomes deformed, narrower at the load point, which can cause the toggle to jam when you try to release it. Also contributing to this possibility is the inevitable shrinkage of the “cat’s-eye” hole in the brake line on spectra lined canopies. This is caused by heating of the line due to friction as you unstow your toggles. The melting point of spectra is 297 F and the material’s response to heat is shrinkage, unlike George Castanza. Most cat’s eyes begin at about 25 millimeters on new canopies, and by 3 or 400 jumps, it reduces to a 19 or 18 millimeter passage. When combined with a narrow point in the toggle, a brake-lock malfunction is quite likely. This problem can easily be avoided through regular replacement of the mid and lower brake lines, and pinching of the toggle with plyers to create a uniform width. When the tip of the toggle fails to extract from the cat’s-eye, it is possible that the jumper unstowed the toggles in a gentle, slow motion, allowing the friction to hold the toggle in place inside the brake line. This phenomenon can often be avoided by making it a habit to always unstow the toggles with a sharp, snapping motion. This method has served me well for many years, and has totally eliminated the “stuck toggle” malfunction for me. On the topic of toggles that do not want to release, we have another malfunction that shows up from time to time. There are many things you can do with your excess brake line, depending on your particular riser design and your personal preferences. Some skydivers choose to pass the excess line through keepers on the opposite side of the riser. This is perfectly acceptable. If, however, the free end of the brake line is passed down through the keepers and then around the bottom of the toggle, a complete failure to release is possible. This occurs when the upward relative wind blows the brake line up over the toggle during opening. The jumper then can grab the toggles below this loop of line and unstow, causing an irreparable knot around the keeper loop on the opposite side of the riser. Another way that jumpers sometimes cause a toggle-lock is by passing the excess brake line through the soft links, and then securing the end of the loop through the tip of the toggle. Although this method has proven to be perfectly safe, and may make it easier to pull the slider down after opening, a serious danger exists. If the soft links are not sewn in place with tack-cord, the loop of brake line can get caught on the tab or ring on the soft link, causing a locked toggle malfunction. It is true that a toggle-lock does not need to result in a cutaway. If the jumper cuts the brake line with a hook knife, the parachute will fly straight. Nevertheless, this fix requires the canopy pilot to land with a rear riser flare, something that many are not prepared to do. If you have never performed this maneuver in premeditated circumstances, you are not likely to perform the task well in an emergency. As I often say, there is no such thing as an emergency if you have practiced the solutions; it is just a change of plans. The last toggle-related problem that I will discuss is failure to stow the excess brake line at all. It is true that many jumpers have been leaving “free range” brake line for many years without incident. In most cases, these are jumpers with small canopies who have very little excess brake line to deal with due to the size of their parachutes. Regardless, it is my experience that it is just a matter of time before this free line snags on something. It might be your GoPro. It might be someone else’s GoPro. It might be the door of the airplane or something even worse that I can’t even think of. The bottom line is, the procedure of stowing your excess line costs you only a few seconds, but it can save your life. Deal with it, please. It is the smallest of details that usually result in the worst and best experiences on the dropzone. Skydiving is a sport of tiny issues that add up to big consequences, and if we continue to enjoy the process of paying attention to these little particulars, we can continue to enjoy the sport for a very long time. If we flippantly skip off the tops of the waves so-to-speak, and pretend that the danger does not exist, this sport will prove us wrong in the most painful and terrifying ways. We are always at risk when we skydive, but fear is not what keeps us safe. It is attention to the details, and the positive emotions that come as a result of knowing that we are doing everything we can think of to stay alive. If we are happy, we are more skillful, and skill definitely increases the chances of a happy landing. About the Author: Brian Germain is a parachute designer, author, teacher, radio personality, keynote speaker with over 15,000 jumps, and has been an active skydiver for 30 years. He is the creator of the famed instructional video "No Sweat: Parachute Packing Made Easy", as well as the critically acclaimed book The Parachute and its Pilot. You can get more of Brian’s teaching at Adventure Wisdom, Big Air Sportz, Transcending Fear, and on his vast YouTube Channel
 -
The issue of helmets with cameras interfering with the deployment sequence is well-trodden, to include on dropzone.com. In France, new safety regulations produced by the Federation Française de Parachutisme, the sole, recognized sports authority for leisure skydiving, have become extremely stringent regarding camera mounts, and in particular, the way they protrude. So a French skydiver, Olivier Hiolle, developed a helmet specifically integrating the most current cameras of the day, i.e., GoPro 3 and 4 series. The result is astounding. The GoPro is fully inside the helmet, which has a frontal window. The top of the helmet is flat in order to accommodate other cameras. Of course, that would be a departure from the initial idea of having no protuberance, but there is no other way to carry larger devices. The helmet itself is a "true" helmet, in the sense that it is made of strong, resilient fabric and serious cushioning that will effectively protect the head in case of shock. We are well beyond the degree of protection afforded by basic helmets, in moulded plastic, whose protective function does not go much further than just providing a convenient attachment for a camera. I have ordered one and flown with it a dozen times. The fit is extremely comfortable and natural. I have a GoPro 3+. I purchased, as an extra, a USB cable that remains coiled inside the helmet. That way, I never manipulate the GoPro directly, apart from activating the bluetooth by slipping my little finger into the lodgment of the camera. From then on, I use the remote control. When I wish to download the pictures or load the battery, I just pull the cable out of its lodgment and plug it where it needs to go. The angle is perfect, no vibration whatsoever, and good sound under canopy (in the sense that I can hear myself grumbling and commenting on the approach). This is a new one-man firm, who makes each helmet by hand, to include the color. Prices are reasonable, including options such as color (other than white or grey for the fiberglass version), cable, chin strap. By design, the strap, whether chin or basic, has a quick release handle. This is the website: http://www.skyvisionpara.com/index.html, which, at present, is only in French. Be aware that the photos I lifted from the webpage are not as good as the current product. It is a much more polished work than that. But the photos do give an idea of the design.
-
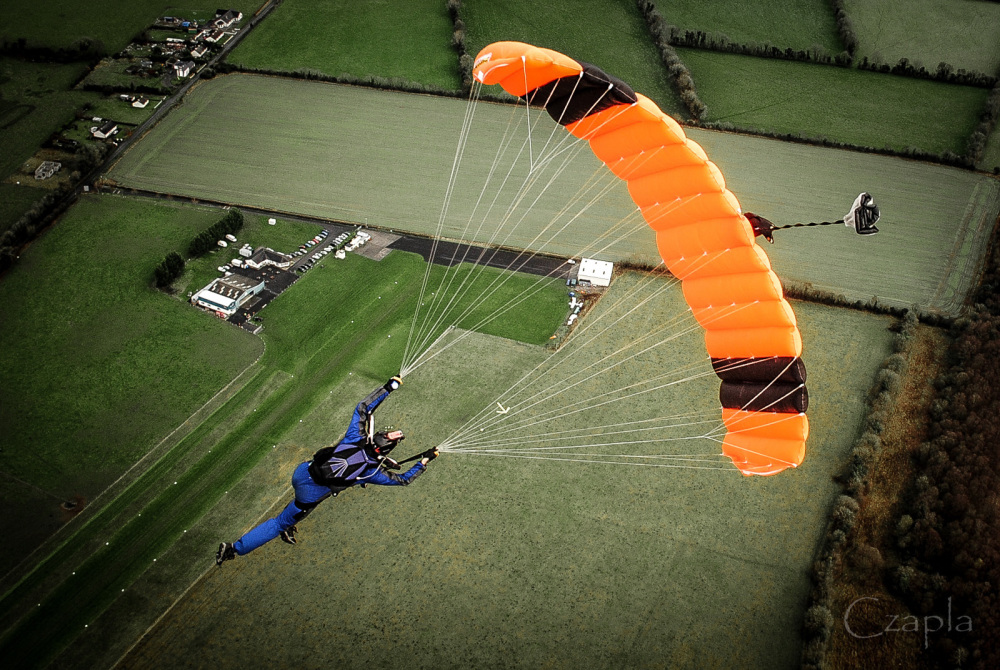 Image by Lukasz SzymanskiAh, your canopy. When you first got together, everything was great. A few tussles over crispy, slippery fabric were the biggest issues you two had. You packed carefully -- lovingly, even -- or you were at least habitually spying on your packer. And after freefall, it was a joy to reach for that pilot chute. Now, things are horribly, horribly different. What happened? Maybe it’s because you stopped paying attention -- or maybe because you’re both getting older -- but something has changed. There have been some bad moments. Violent moments, even. There was that time that you landed from a jump with a three-ring mark and a stunned expression on your face. Your friends asked what happened to you. You started to wonder if it’s time to say goodbye for good. Don’t thumbtack that “for sale” sign to the corkboard too quickly, friend. You can save this relationship. Here’s how. 1. Wrap your head around the dynamics involved.When a ram-air canopy opens in freefall, the dynamics of that opening are controlled by two processes: cell inflation (air pressurizing the airfoil through the nose inlets) and bottom-skin spreading (the side-to-side spreading action that takes place as relative wind rushes against the bottom of the canopy). You might not be aware of how separate these processes are, but they are quite distinct. Even without cell inflation, bottom-skin spreading is such an efficient phenomenon that a canopy can open entirely by this method, before the cells have a chance to inflate and pressurize. Since the force of that kind of opening is brutal enough to be quite literally fatal, square skydiving canopy designers invented a system to put on the all-important brakes -- the humble slider. That funny little square has a single function: to sync up bottom-skin spreading with cell inflation. A correctly packed slider stays at the very top of the lines during the early part of inflation, kept there by the same forces that would smack the canopy open with bottom-skin inflation. 2. Help your slider help you.Make quartering your slider the most important part of your pack job. Be thorough about it. Draw the folds evenly between each of the four line groups, then tug the center of the slider straight down to settle the grommets snugly against the stops. A slider that’s sorted out in this way is a slider that is most likely to present itself correctly to the relative wind (and therefore do its job optimally). 3. Avoid getting dumped.Optimizing your slider is only the first step in the process. The second, as you might imagine, has to do with your tangled handfuls of marionette strings. Incorrect line stows can release prematurely -- or, colloquially, “dump” -- resulting in a configuration wherein the canopy inflates before line stretch. When the lines catch up to the nylon, the jumper gets one heckuva headbanger. (Picture a Great Dane running at full tilt to the end of a long, long leash.) 4. Keep the right amount of pressure on.It should take roughly 8 to 12 pounds of pressure to pull your lines from the stows. If you’ve gotten complacent (or too tired to be trusted), you’re probably going to pay for it. 5. Use the rule of thumb.The loops of line on the outside of each rubber band stow (technically called “bights”) should be approximately two inches long. If that’s longer than you’re used to, that’s normal -- but know that right-sized bights keep about a quarter of the stowed line on the outside of the stow, minimizing the lines’ ability to dump. Luckily, two inches is about the size of the average human thumb, so you have a ready reference when you’re on the packing mat. If you happen to have stowless gear, your line dump issues are probably related to uneven folding of the lines (or lazy bag closure). The same pressure principle applies to the closing bands on your system: close the bag with 8-12 pounds of pressure, equal on each side. 6. Get professional help.If you go through all those steps and you’re still not on good terms with your canopy, look elsewhere for guidance. Take your canopy to a rigger for inspection. You may discover a deeper problem -- and he/she might just be able to fix it right up. (There’s no shame in a little counseling, after all. Love is worth it.)
 -
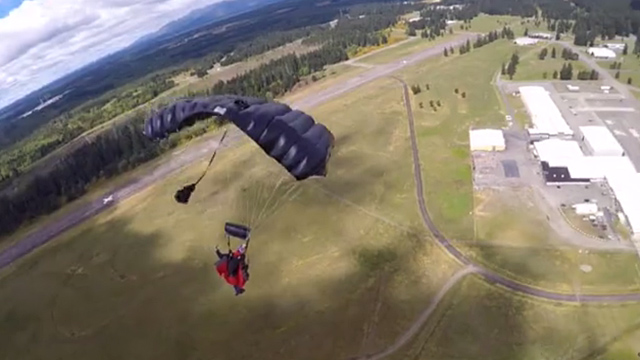 The guys over at Squirrel have just released a video for their latest canopy, the Epicene. The almost 4-minute long video, which includes a "Rick Roll", also discusses why the Epicene is a great canopy for wingsuit pilots. While Squirrel have historically focused primarily on BASE orientated products, the Epicene is focused towards the skydiving community, though wingsuit flyers in particular. Squirrel have stated that while the Epicene is the best choice for wingsuit flying, it is also perfectly adequate for free flyers as well. The Epicene is built with wingsuit openings in mind and is made in such a way that it reduces the risk for line twists and unpredictability, while at the same time opening quickly and also catering to the responsiveness. The video also puts focus on the pack size of the canopy, with both TJ Landgren and Mike Swanson praising the F-111 hybrid canopy's pack volume. While Squirrel first began releasing information about this canopy mid-2014 it only fairly recently went on sale to the public, and you can find more information on the Squirrel website. Editor's Note: Adjustments were made to this article regarding previously misstated information relating to time of release.
 -
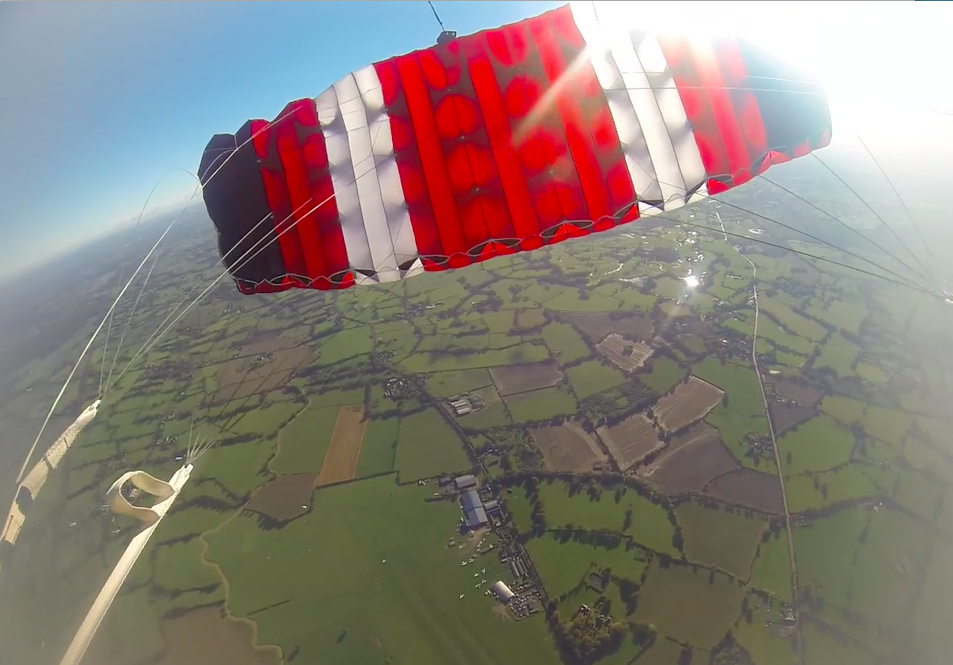 Image by TriggerHey, new skydiver! Congratulations. That A-license stamp looks great in the middle of your forehead. Very flattering. Now that you’re in the fold, do yourself a favor: don't dally at the rental counter. It’s an investment (and somewhat counterintuitive) but trust me: you will find it much more cost-effective to buy your first set of gear than to keep renting, but If this is your first set of skydiving gear, you should buy used -- and spend the money you save on jumping. Here’s how to do it right. How to Buy a Used Reserve Parachute Get comfortable with the idea. Picking up a used reserve -- if it’s in spotless shape -- is a smart place to save a lot of cash. Riggers tend to agree that the cost of a brand-new reserve isn’t justified. Choose a damage-free reserve -- no patches, please -- with less than ten rides. Less than five is better. If your reserve is old enough to vote, it’s too old to jump. How to Choose a Used Main Canopy Look for a main with as few jumps on it as you can afford. Newer canopies fly better -- and, importantly, flare better -- than older canopies, because the passing seasons make the fabric more porous. As a rule, you can expect a harder landing from an older canopy. It can be tricky, but your best move is to choose a used main with its original line set. Even honest resellers don’t often know for certain the canopy’s actual jump numbers, and the condition of the line set is an inspecting rigger’s best clue. Find out where your canopy used to live. If it was jumped seasonally at grassy drop zones, it’ll be in much better condition than a year-round desert dropzone. That silicate desert dust chews up the fabric’s protective coating. Beware of beach DZs, too: seawater landings can result in very serious, sneaky damage. Be picky. Do your best to find an undamaged main canopy -- even one that’s been meticulously repaired. These are hard enough to resell that it’s rarely worth the up-front savings. Image by Halldor92572 How to Buy a Used Harness/Container System Do not look for a container first. There are so many reasons why this is the case. You must know the exact sizes of both of your canopies before you can choose a harness/container to fit them. Have a rigger measure your body. Don’t go it alone. Harnesses are sized and carefully proportioned to both height and weight, and you’ll save yourself time by eliminating the guesswork. Ask the seller for the serial number. Then contact the manufacturer with your sizes. Ask the rep whether it’s a good fit for your body and canopies. Impossible to fit? Don’t worry. As you’ve undoubtedly noticed by now, non-standard body types are not uncommon in skydiving. However, new A licenses with unique body types sometimes face an uphill battle. Resizing a harness is almost always an option, but it’s can be so expensive that buying simple, new gear may make more sense. If this is you, research the basic, no-bells-and-whistles container systems available: for instance, the Dolphin, the Genera and the Shadow Racer. How to Buy a Used AAD Be sure that the used AAD meets your basic requirements. Determine that the AAD on offer is within its service life, has met the proper maintenance schedule and is approved for your container system. (Note that both the Cypres II and the Vigil II are waterproof, but the earlier (I) versions are not. Beach/lake dropzone? You know your answer.) Determine your timeline. When you buy an AAD – whether used or new – you’re paying a fixed cost per year. The quality of the AAD doesn’t change over time within its approved lifespan, so don’t worry about snagging a unit within a couple years of expiration. (Just save your pennies while the time runs out.) Buy new, if you can afford it. AADs are very easy to resell. Purchasing a new one is not a bad choice if you have the cash. General Advice for Buying Used Parachuting Equipment Keep an open mind. It’s unlikely that you’ll find a container that matches all the other criteria and comes in your colors. Accept that fact early. Pay a trusted rigger to conduct a pre-purchase inspection on any used gear you buy. The inspection will run you about $25 (or a matching amount of beer). Ask him or her to write down a list of issues – including potential ones – and the cost to remedy them, as if you’re buying a used car. Trust your instincts. If you don't like any potential component of your new skydiving kit — even one that has been suggested to you by a skydiving friend or a rigger or a boogie rep – do not buy it. You'll never be happy with it, and starting out with gear you dislike will adversely affect your entire skydiving career. Love the gear you’re in, and you’ll be a better skydiver for it.
 -
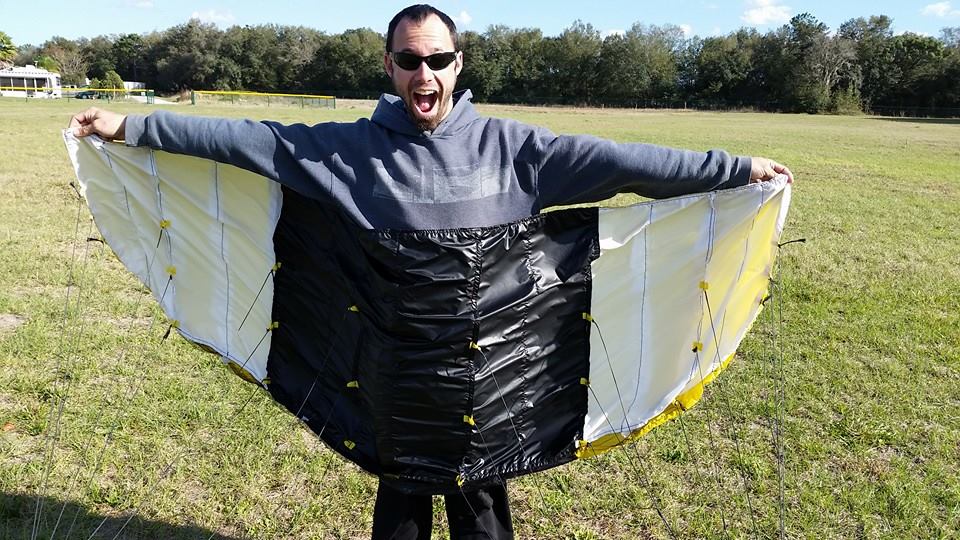 We recently talked with Robert Harris, who took it upon himself to build his own homemade wingsuit. After years of motocross racing, Robert started skydiving five years ago, and since then has attained over 1600 jumps, his D-license as well as AFF and coach ratings. However, what made us want to talk to him, was having seen that he had developed his own DIY wingsuit at home. He talks to us about what inspired him, how he made it and most importantly, how it flew. What made you want to develop this DIY wingsuit? I have always liked knowing how things are made, when I was a kid I took everything apart to try and figure out how it worked and hopefully put it back together before my parents found out. This didn't stop as I got older, although it changed to learning, so I could make things. Shortly after I started wingsuiting I decided I was going to make a wingsuit someday. So last year I asked for a sewing machine for Christmas and didn't get one as no one knew what kind I wanted and I didn't either. I had gotten to use a sewing machine back in middle school home ec class but didn't care about learning sewing, wish they had told me I could make parachutes and wingsuits back then as I would have paid way more attention. After talking to my dz's rigger Sally and some other people and decided to get a singer 20u, after over a month of trying to buy one I found one on Craigslist from an old lady that really never used it for 400$. Then I started sewing. First a pillow case, then a miniature version of my Leia that I made into a traction kite, a belly band, canopy continuity bag, and weight belt. After all of those projects I finally decided it was time to start my wingsuit project. What experience do you have in aeronautics or aviation product development? I don't really have much, but I have started an online class on Aeronautical Engineering to learn more about designing airfoils. I hope to learn to do some equations to determine glide and speed of a given airfoils parameters and hopefully eventually learn CFD(Computational Fluid Dynamics) to push the envelope of what can be done in wingsuits I make later. What were your expectations when starting this project? I was told by quite a few people that I was crazy for wanting to make a wingsuit or that it was too hard and I didn't have a chance. I didn't really care about the designing process when I first started I just wanted to assemble a suit and fly it. I didn't care if it was the best performing suit I just wanted to say I had done it. Although I think I have caught the bug, now I want to make another one and try some new ideas we haven't seen in the wingsuit world yet. Could you explain your creation process to us? When I started I picked one of my wingsuits as a starting platform. I took measurements all over the outside of the suit, and decided to change the arm wings completely as I didn't want to outright copy the suit. I simplified some parts trying to make it out as few as pieces as possible. After all the outside pieces were made came the challenging part of making the ribs. I was originally going to make it with back fly vents so tried to make an airfoil shape that would be as good either on back or belly. I drew out where the ribs would be placed and measured how long they would need to be on the top and bottom skins and as far as thickness goes I knew how wide I wanted the thickest one and the thinnest, to figure out the rest I used some math to taper from the biggest to smallest. After I started sewing I scraped the backfly vents but left the ribs how they where as after putting the fronts on I didn't want to deal with the headache of the backfly ones as well. I spent a couple days making patterns and writing everything down as I did it to make it easier for possibly making another one. After the patterns were all done and checked for fit against each other I started cutting them all out of some parapac I got from JoAnn's fabric with my new hot-knife my girlfriend got me for my birthday. This part went relatively quickly and only took about a day total. Then came the weekend and jumping time, it was hard to pull myself away from my project but I needed to train for the last swoop meet of the season. As weather got crappy I started the sewing. I figured it would be best to get the hardest part done first the arm wings as if I couldn't get those done there was no point in even making the tail. I started with sewing the ribs to front or bottom skin of the suit and quickly learned the sewing the ribs and vents on together was a pain. I did every step on both wings at the same time so I could try and make it as symmetrical as possible and knew they where both put together in the same order. I felt really accomplished when I finished both arm wings and was ready to push through the tail wing quickly before my swoop comp. The tail wing went together pretty easily after making the arm wings and before I knew it I had 3 wings that needed to be put together. After missing a couple of weekdays jumping as I sat busy behind my blue Singer I had finally finished! I was so excited after 23 hours of sewing to go jump it but jumping had already stopped for the day. And how did it fly when you took it out? I really wanted to get some outside video of its (cough cough) first fight. Go figure, none of the normal wingsuiters where around, I eventually asked my friend Paul who has done only a handful or two of wingsuit jumps if he would try. I gave him an I-bird I use for teaching and rig to borrow so he wouldn't be jumping his velo. We talked about the dirt dive and manifested for a load. As we climbed to altitude all I could think about was my family and girlfriend and how dangerous this could be. I did a lot of practice touches of all my handles and went through my emergency procedures as I always do but did way more of them. On the 2 min call we did all the normal handshakes and then I buckled my helmet and zipped up my arm wings. As all the other jumpers were getting off the plane my heart started racing, I used all my yoga experience to get my breathing in check as I walked to the door of the Twin Otter, I could tell Paul was nervous as well. I had him exit before me as I wanted a nice exit shot, as I hopped out from a poised position in the door all I could think was please don't let the suit blow apart! I made sure to keep all my wings shut down on exit and waited to see the tail before I ever so slowly opened my wings. I got my wings open and started flying, I was ecstatic at this point as the suit was staying in one piece. I started my first turn shortly after and was surprised at how stable it was. It took a little bit for Paul and I to get together but around 10k we got together shortly after my practice pull to see if there would be any issues and it was the easiest one I have done in awhile. We flew with each other for a bit and then about 7k I wanted to see what I could do with it. I started a small dive then went in max flight. I decided I would pull higher then normal as I was still jumping my normal wingsuit canopy a Jfx 84 at 4,500 feet. I came in to land with 90 degree turn for nice little swoop. Shortly after Paul landed close by and celebrated an awesome jump! I have never been so excited and nervous on any of my 1600 plus skydives or 4 base jumps yet alone together. After I landed I had to message family and girlfriend to let them know I was ok, they were all pretty scared about me doing it. Since the 1st jump I have only done 1 more on the suit and it was a time run, I got 2 min and 20sconds out of it, which was defiantly shy of the 3-3.5 min I should have gotten out of that size suit. Turns out the fabric I used was my biggest downfall, it didnt have a coating on it like parapac used in other suits so it was constantly bleeding air out and never achieved max pressure. What was the biggest challenge in creating your wingsuit? The biggest challenge by far was trying to figure out what order everything gets put together in, I spent a couple days alone trying to piece it together in my head to figure it out. Although I had to unpick a few parts because of misalignment I did not have to unpick anything because of the order I put it together in. Do you feel that your venture was a success? In the end I feel I achieved my goals I set out for the project and learned tons along the way! I look forward to starting my next suit when I return from visiting my girlfriend in London. I already have tons of things I want to try try and do but the major thing will be a fabric that has zero porosity. About Robert Harris (D-31584): I grew up racing motocross at a early age and after many years of racing I stopped because I was tired of breaking myself. I still rode and one day on the way from riding I got a call about getting to do a free tandem. Of course I said yes much to my parents dismay, they thought skydiving was too dangerous at the time and realize now its more dangerous then motocross. I had loved motocross for the jumps as I loved the feeling of flying through the air. Skydiving was just that pure flying and as soon as I landed I signed up for Aff. One year after I started I had 200 jumps and started wingsuiting on jump 201. My 2nd year in I had my D-license and got interested in Canopy Piloting as well. Since then I have gotten my coach and Aff ratings and am currently on my 5th year of skydiving and have just over 1600 jumps.
 -
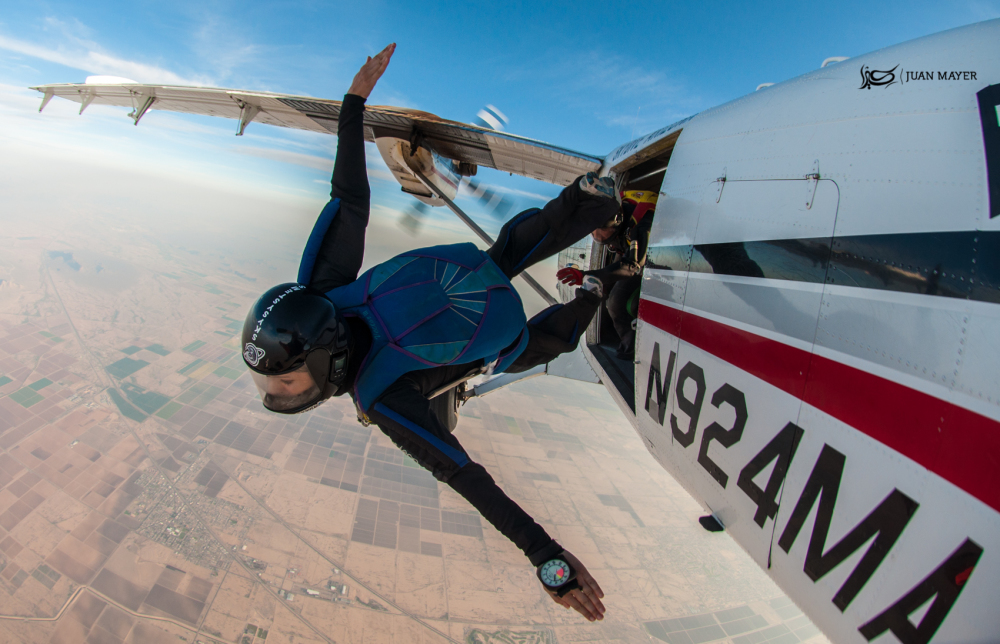 Image by Juan MayerWhen are you going to be alone in the sky with a useless bag of laundry and two little handles? If it hasn’t happened yet, it’s going to. Sure, there are skydivers with thousands of jumps who have never had to make alternate nylon plans. But don’t be fooled: your first reserve ride is not a question of “if.” It’s a question of “when.” If you don’t feel ready, you’re not alone. Here are ten proven ways to boost your confidence and safety. 1.Stay current Long lapses between jumps are dangerous. Time on the ground dulls skills, sharpens apprehensions and weighs down your jump with the clammy fog of unfamiliarity. Most importantly, it unravels the easy muscle memory you’ve spent so much time and effort to develop -- and muscle memory is of primary importance in the event of a reserve ride. Especially at the beginning of your skydiving career, you’ve got to make the effort to jump at least every couple of weeks. 2. Give ‘er a spin Do yourself a favor and deploy your reserve for every repack. You’ll learn the unique direction of pull for your gear, and you’ll be able to feel out the force you’ll need to exert. If your rigger watches the process, he/she can keep an eye on the deployment and identify potential problems. (Even if you have deployed your own reserve, a repack is an unwasteable drill opportunity for a refresher.) 3. Just touch your stupid handles, Mr. Bigshot, OK? Sheesh Touch your handles in sequence before you enter the plane. It is not beneath you. Being blasé about basic safety doesn’t make you more awesome -- it just makes you more blasé. While you’re at it, check that your reserve handle is seated (so you don’t end up on a reserve ride without the yeehaw fun of a malfunctioning main). 4. Don’t overthink it It’s simple, really. If you believe that your main is unlandable, you’re going to have a reserve ride. Sure -- lots of skydivers have landed under reserves only to realize in hindsight that they could have solved the problem. However, lots of skydivers have gone in while striving to sort out malfunctions that did not improve. If those are the choices, which would you rather be? 5. Get your priorities straight Do not worry about stability. This is the very least of your problems. Worry about altitude. cutaway) handle no lower than 1,000 feet. Initiating a reserve ride below 1,000 feet isn’t always deadly, but it has an unnerving tendency to be. Don’t take the chance. 6. Hold on tight After you pull your handles out completely, hold on to ‘em. You’ll save some money, and you’ll save face when you land. 7. Make sure it’s out This is kinda your last shot at nylon, so you’ll want to be sure it’s working. Arch and look over your shoulder for the reserve pilot chute. Reserves deploy fast, so this head position is gonna butter your bread – but if the pilot chute is somehow caught in your burble, this should either shake it loose or make it clear to you that you need to do some burble intervention, stat. 8. Don’t chase after your ex(-parachute) I’m going to go out on a limb here and tell you not try to run after it and grab it in the air. (People have, y’know, died doing that.) You broke up with each other for a reason, after all; you can reconcile after everybody’s had a little time to cool down. Instead, get your head together and use landmarks to identify where the gear is headed. Then take a deep breath, leave it to the fates, and work on navigating your meat to a safe landing. 9. Tell the peanut gallery to sit and spin When you land a reserve, you’re going to be the talk of the DZ (for about five minutes, usually). During that five minutes – longer, if the loads are turning slowly – you’ll probably be approached by a receiving line of would-be mentors. They’re gonna question your malfunction, and they’re gonna be eager to discuss your decision to cut away. My advice: speak to your trusted mentors and co-jumpers about your little adventure in private, and tell the rest to go suck an egg. You were there. They were not. When you need to save your life in the sky, you are absolutely alone. In the entire world, there exists only you and two handles. Your cutaway is your business. 10. Go to the liquor store Buy a bottle of posh booze for the rigger who packed the reserve you rode. It’s tradition.
 -
 SFly have just announced their latest addition to their wingsuit products, with the release of the Ridge. The Ridge has been in development for a while, and saw extensive testing taking place over the past months. The suit will cater towards the more advanced flyers and was developed with skilled BASE jumpers in mind. Introduction The new SFLY RIDGE is a wing suit 100% designed for mountain flying. The RIGDE has been developed since the very beginning for the demanding and experienced wingsuit BASE jumpers who open always shorter exits and seek for new lines requiring more and more glide performance without compromising on speed. Its key features are : Ultra short starts High glide ratio High speed Ultra clean pull The RIDGE development has been made possible by a 15 month collaboration between Stephane Zunino, original SFly designer, François Gouy, mountain guide who has opened numerous exits, and Julien Peelman, aerodynamic engineer mostly known for its high performance parachute canopies designs like the Icarus Petra and the Icarus Leia by NZ Aerosports. Numerous test pilots have tried the various prototypes that have led to the final version: Soul Flyers Fred Fugen and Vince Reffet, as well as the Frenchies from Vercors: Maël Baguet, Vincent Cotte, JeanPhilippe Gady, and Matthieu Leroux. Last summer François Gouy used a RIDGE prototype to open mythical exits in the french Alps, such as Ceüse or Les Rouies, thanks to both the short starts and the high glide performance. Overall Design The RIDGE is probably bigger than other suits. The RIDGE has a high arm sweep, and a longer and thicker leg wing than other wing suits in this category. Leading edgeThe RIDGE leading edge is designed to match both the best possible aerodynamic performance with the easiest pull. That is why we have split the sleeves in 2 parts: the upper arm, made of parapack with an under layer of soft foam the lower arm, made of neoprene. And we have assembled these 2 parts with a diagonal cut so as to maximize the surface of the combined parapackfoam leading edge. Finally we have added an inflated cell behind the arm in order to fully fill in the sleeve and to get rid of that empty space between the back of the arm and the arm wing. This cell is connected and inflated by the arm wing. Partitioning The RIDGE is partitioned in a way to offer the a super tight fit around your body. This allows better wing control at all times and a great agility. Start The large inlets with opened airlocks allow an ultra fast inflation of both arm wings and leg wing. The higher arm sweep and the larger surface of the RIDGE enable the wing to catch air as on as soon as your feet lift from the ground. Because of its thicker profile the RIDGE starts flying even at very low speed, allowing quicker forward motion start. These unique features give the Ridge an unmatchable exiting profile. Glide The high glide performance of the RIDGE is the result of the balance between surface and profile. Because of its unique profile/surface balance, the RIDGE has an excellent glide ratio. Whatever the wind conditions, our test pilots have experienced and recorded a better glide ratio than with with other wingsuits. Speed The drag created by the large surface and the thickness of the suit is compensated by the extended length of the leg wing, allowing the RIDGE to easily match and outcome in speed the other wingsuit of its category. The RIDGE is remarkably fast and easy to fly in any wind conditions. Agility The unique partitioning and tight fit around the body make the RIDGE an easy and fun wing suit to fly, yet very responsive. The RIDGE allows aggressive dives as well as sharp turns without loosing control. What’s more, because this wing suit is highly pressurized, it has a incredible lift power in flight. Opening The pull is ultra clean thanks to the bevel shaped wrist end of the sleeve. The soft neoprene patch behind the elbow gives extra freedom of movement to ensure an easy bending of the arm and a clean pull. Your hand will reach the pilot chute handle naturally no matter how long you’ve been flying. Canopy deployment The neoprene half sleeves allow both an easy punchout and a high risers reach- up. More information can be found at the SFly Website
 -
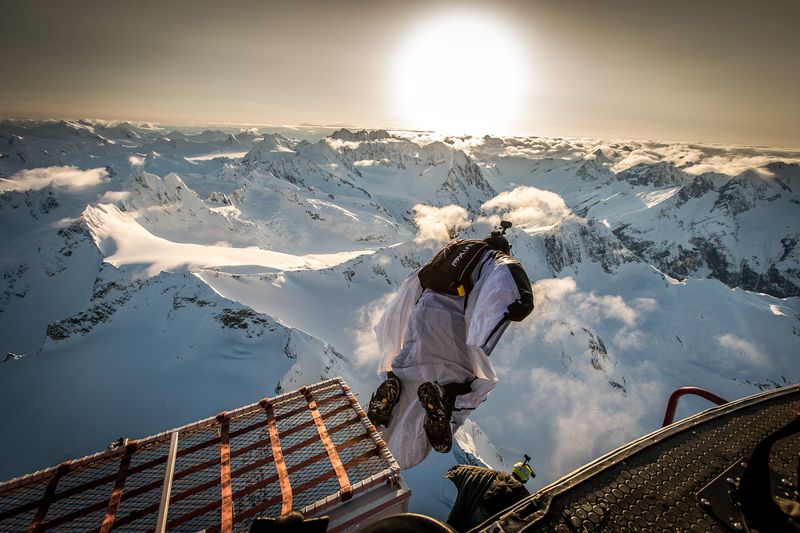 Garmin have just announced two new action camera models that will be released this summer. The Virb X and the Virb XE are the latest attempt from the US founded company to establish themselves as more than just a sports equipment and navigation manufacturer. The original Garmin Virb action cam was released just less than two years ago, and showed that Garmin can do cameras too. After the release of the Virb, which was met with overwhelmingly positive reviews from both users and critics alike, they then introduced the Virb Elite, which added new functionality and recording options. The new Virb X and Virb XE cameras seem to be quite a step up from the Virb Elite, and it appears that the duo is a response from Garmin to the GoPro Hero 4 series which was released last year. However, the focus of Garmin seems to be different to that of GoPro. First thing we noticed, was the change in design from the original Virb cameras. Garmin have moved away from the flatter, elongated design that we saw in their first models and instead have adopted the more square approach, resembling that of the Sony and GoPro devices. In their press release Garmin brings attention to the flat lens cover in the front, aimed to help water in sliding off easier. At this point, with the original Virb being released in 2013 - we decided not to focus on how Garmin has improved on its previous Virb - but rather with how it compares to one of the most popular modern action cams out there today, the mid-level GoPro Hero 4 Silver. Recording vs Connectivity/FunctionalityMany would have expected the new Virb X and Virb XE to support 4k video recording, as it's a direction where most action cam manufacturers seem to be focusing. However, the Virb X will only offer a maximum recording resolution of 1080p, while the Virb XE will allow for 1440p at 30fps. By comparison, the GoPro Hero 4 Silver offers users up to 15fps at 4K, 30fps at 2.7k and up to 48fps at 1440p - as well as offering the standard HD recording options. Instead of focusing on increasing resolution, Garmin have put their trust in the development of connectivity and storage. Despite falling short on recording options both the Virb X and the Virb XE surpass the Hero 4 Silver in terms of connectivity and increased storage capability. Whether or not this will be as easy to sell as telling people that the camera can record 4k video, is yet to be seen, but perhaps Garmin is onto something. Despite the ability to record in 4k video, in every day practice it is not often that one will actually be able to make proper use of that resolution of recording, and most individuals still record at 1080p. Of particular interest to skydivers, is the added ability to overlay recorded data through both standard camera functionality, as well as extra information which can be included through the connectivity between the camera and a sports device. This means that pitch and roll data, speed data, elevation and more can be recorded and overlaid onto the video. See the video below for a demonstration of what is available with the new Virb cameras. Unlike the Hero 4 Silver, both of the new Virb cameras will come with GPS built in. Both the Virb and Virb XE will take Micro-SD cards, and support up to 128GB cards. Both the earlier Virb Elite and the GoPro Hero 4 Silver support up to 64GB cards, so the fact that the new Garmin cameras can handle double the storage space, will definitely be marked as a big positive by many. Other noteworthy functionality: The inclusion of a gyroscope based accellerometer is another feature that is not present in a lot of the other action cameras currently on the market. Both the Virb X and the Virb XE will also be waterproof to 50m, without needing any additional casing. Both cameras will have multi-camera live control and preview for up to 10 cameras. ANT+ connectivity PricingOn paper it appears as though the Virb X and Virb XE are going to be valid choices to look at when looking to buy one of the new action cameras on the market. They look good, offer some great functionality and did I mention that they were well priced? The Virb X will retail for just $299 while you'll need to drop $399 for the Virb XE. Final ThoughtsDespite being stuffed with great new connectivity and some nifty new features, there are some questions raised over the choice to stick to limited recording options for both cameras. Currently the Virb X offers very limited options even for recording in 1080p in comparison to its competition. The Virb X offers only 25 and 30fps at 1080p, where we would have liked to see 60fps being offered. Similarly, Garmin could have really put their foot down by offering 4k recording on the Virb XE. Because of the low price though, if 4k recording isn't on your list of priorities but you find yourself wanting the flexibility of being able to shoot at 1080p/60fps, the Virb XE can offer you that. The real test is yet to come when subjects like how it handles transition between lighting conditions, low light noise levels and video quality can be tested hands on. Compare the Virb X, Virb XE and GoPro Hero 4 Silver Feature Garmin Virb X Garmin Virb XE GoPro Hero4 Silver Wifi Yes Yes Yes Bluetooth Yes Yes Yes Accellerometer Yes Yes No Preview Screen No No Yes GPS Yes Yes No Recharge Method USB USB Mini-USB Recording Time 2 Hours 2 Hours 2 Hours Storage Type Micro-SD Micro-SD Micro-SD Maximum Storage Size 128GB 128GB 64GB 4K Recording No No 12.5/15 fps 2.7k Recording No No 24/25/30 fps 1440p Recording No 30 fps 24/25/30/48 fps 1080p Recording 25/30 fps 24/25/30/48/50/60 fps 24/25/30/48/50/60 fps 960p Recording 25/30 fps 50/60/100 fps 50/60/100 fps 720p Recording 25/30/50/60 fps 25/30/50/60/100/120 fps 35/50/60/100/120 fps WVGA Recording 120 fps 240 fps 240 fps Camera Megapixels 12 MP 12 MP 12 MP Burst Mode 10 p/sec 30 p/sec 30 p/sec Sport Computer Control Yes Yes No ANT+ Connectivity Yes Yes No Sport Data Overlay Yes (Garmin Apps) Yes (Garmin Apps) No Phone Remote Connectivity Yes Yes Yes Multi-Cam Control Up to 10 Cams Up to 10 Cams No USB Connection USB USB Mini-USB Micro-HDMI No No Yes Price $299 $399 $399