1 1

General

    Your Skydiving New Years Resolution: Get Coaching

    New skydiver? Not-so-new skydiver? Rusty skydiver? Supple, current little tiger of a skydiver? Doesn’t matter. If there’s only going to be one skydiving item on your list of New Years’ resolutions, better make it this one: Get coaching. Real coaching. Pro coaching. Regularly.
    Getting coaching to “be a better skydiver” is like going to the gym to “be a hotter human.” Done properly, it’s gonna work--but it’s worth much more than that shiny face value. Which is to say: There are off-label benefits. Professional, reasonably regular coaching is bound to brush up your skills, advance you into new disciplines and polish your performance--and it’ll have some other benefits you might not even see coming.
    It might just keep you in the sport.
    If there’s a jumper who’s immune to recurrency nerves, I haven’t met them. (...Just watch the comments below fill up with bluster. Just watch.) Anyone who’s spent a tall stack of weeks hiding on the ground from the lapse rate is likely to find themselves at least a little at a loss. 
    The USPA defines recurrency by its own criteria, sure--but personal recurrency is often a different beast altogether. No joke: it’s rough to head out for that first jump after your own personal currency threshold has passed, whether yours is two weeks or two months. The most reliable way to avoid the recurrency jitters is by never getting recurrent, and lots of ex-skydivers have done just that.
    The hack: Spend that whole recurrency day--not just the first jump--with a coach. Don’t do it because you have to. Do it because you know that, with a coach alongside you, you’ll feel professionally supported in your effort. Do it because you’ll be able to rebuild your skills much faster than if you were just out there on your own, trying to remember what goes where and how and when.
    It’ll help you to better manage your time.
    Managing the limited time you have available on any given skydive doesn’t come naturally to most people. Evidence: What happens when most jumpers fail to nail the first part of the skydive? They end up confused. Do they go back and work on the first part, or move on to the next part regardless? Everybody usually ends up just making cow faces at each other for a few precious seconds, then rushes to make something happen before *ping!* break-off.
    Working with a coach helps with that. Their job is to help you to pick one thing to work on, polish it up and move on with confidence. (There’s a financial factor here, too: Because you’ll learn more on fewer jumps, you might just end up breaking even, despite adding the cost of coaching into the equation.)
    It’ll help you get into that elusive zone.
    Jumping buddies are wonderful. Obviously. That said: Great coaches are actually magic, and that magic is focus. When you’re working with a coach, you’ll brief the jump beforehand, visualize it together, dirt dive it together, review it in the plane on the way up, jump that h*ckin jump and brief it again in the afterglow. Because you’re paying for the privilege, you’re highly unlikely to be scrolling, winking at manifest or doing acro yoga when you’re supposed to be paying attention to the dive flow.
    The careful, procedural work you do with a coach often defines the difference between a skydive that feels rushed and out-of-control and one in which a lot of learning and growth has taken place. Bonus: Your ability to focus is likely to get a bit more muscular as your flying skills develop.

    Freefly coach Joel Strickland jumps with Zack Line at the Oklahoma Skydiving Center.
    It’ll boost (and/or perhaps change the flavor of) your confidence.
    Just like you, your insecurity loves to prance around in costume. Insecurity can look like fear; like nervousness; like indifference. It can also look like a vaudeville performance of its opposite, true confidence.
    The still, deep waters of true confidence are the source of all the fun skydiving has to offer. Problem: Those waters are well-guarded. Working with a competent, professional skydiving coach often provides the key: because suddenly s/he realizes that they not only can indeed improve but that they are indeed improving on every jump.
    It’s kinda a fireworks show from there. Once a student believes in their ability to make positive changes in their skydiving performance--that everything, from their physical reactions to their fears, can and will be modified and updated when they get guidance and put in the work--it suddenly becomes possible for that student to make mad progress on a shorter timeline than they imagined. 
    It’s a more scalable, check-offable resolution than you might think.
    The more coached jumps you do, the better. (Obviously.) Equally obviously, doing loads of coached jumps isn’t financially feasible for most rank-and-file skydivers. Instead of discarding the idea altogether, make it feasible. Saddling up for a pile of coached jumps every weekend would be spectacular, but making the commitment to yourself to make a couple of coached jumps per month is better than not committing to any at all. 
    Getting regular, professional advice and feedback will contribute mightily to your life in the sky. You’ll be able to pass the knowledge on to the folks you jump with on the regular. And 2019 might just be the year you bust through that next skydiving goal! Bonne chance.
     

    By nettenette, in General,

    Big BANG/Small Bucks

    AVCHD has exploded on the consumer and pro-sumer
    scene
    like a new star at the Oscars, and the CX100 is the newest “actor”
    in the AVCHD lineup from Sony.
    Packed into a small body measuring 2” W x 2.25” H x
    4” L (including factory battery) and 2” W x 2.25”H x 5” L with the more
    practical NP90 battery, this small “brick” weighs in between 11 and 14
    ounces, depending on the battery chosen. Short description; this
    camcorder is a mini-brick.


    The CX100 is a very
    small package. The lens is a 30mm thread, if you’ll be adding wide
    or telephoto lenses.


    The CX100 records a 1920 x 1080i image
    on a Memory
    Stick Pro Duo card, with record times up to 340 minutes on the included
    8GB stick, but it’s more practical to record to the highest quality
    video in most situations, reducing recording time to approximately 40
    minutes on an 8GB card, or 115 minutes on a 16GB card.  There are other
    modes, and these are useful for recording surveillance, low motion, or
    even simple scenes, but for best quality, most users will likely find
    the 16Mbps FH mode to be the preference.
    Most exciting is that this camcorder brings the
    award-winning Exmor™ imager to the consumer world. Exmor is the heart of
    the professional EX-series camcorders, which have become standards in
    the broadcast world. What this means to consumers is a more clean image,
    less noise in low-light, and a smoother image overall. It’s a single .20
    CMOS imager, but don’t be fooled by single and small. Technology has
    brought CMOS to a new level of quality that previous generations of  CCD-dependent
    camcorders. CMOS has shown itself to be the new future of virtually all
    imaging devices from the very low cost cell cams to high end
    professional production cameras. Exmor is currently the king of small
    imagers.
    Small is the key with this camcorder.
    Tiny and light
    weight, this camcorder fits snugly into the palm. It’s very ergonomic,
    being curved on the right side and square on the left side.


    This camcorder has a
    manual open/close for the lens cover. The LCD panel will notify
    users if the Record button is engaged while the lens cover is
    closed.


    The lens housing is very simple; it’s a 30mm
    threaded lens with a manual lens cover. It’s a Zeiss lens, identical to
    lenses found on previous HDR series camcorders. Optical width (35mm
    equivalent) is 42mm wide zoomed in to 497mm, so the camcorder isn’t
    quite wide enough for action sports or close-in work, but is plenty wide
    for the average user. While the camcorder does offer digital zoom, like
    most digital zooms, it’s not terribly useful due to the small sensor
    sizes. It’ll work well in a pinch, on a tripod/non-moving, or in a
    situation where the image acquisition is more important than image
    quality. Exposure is controlled via menu touchscreen, as is shutter
    speed, although the camera does not offer full manual control. There are
    nine exposure modes plus an Auto mode, giving users ten options for
    exposure control.
    Two microphone ports are found beneath the lens
    housing.
    The 2.5” LCD panel flips open and rotates; there is
    no clasp or latch holding it in place. The panel may be closed with the
    screen facing out, as with all previous models in this series. This is a
    big preview screen and it looks terrific.
    The controls are very simple.
    There is no normal
    on/off switch on the camcorder; opening and closing the LCD panel turns
    on/off the power to the camcorder. Power can be turned off with the LCD
    Panel open by pressing the on/off switch found beneath the LCD panel.


    The buttons, levers,
    and ports are few on the CX100; most of the options are found in
    the menu options.


    Also found beneath the LCD panel is a one-touch
    Disc Burn button to burn card contents straight to a DVD via the USB
    connector. Next to this is found a Play button for playback modes. Even
    when the camcorder is in Camera mode, pressing the Play button will put
    the camcorder in to Playback mode. Beneath the Disc Burn button is a
    Display button. Pressing this button once turns off most of the
    displayed information, thus allowing more of the preview screen to be
    seen. Pressing again turns off all display items, leaving the preview
    screen blank. Pressing/holding the button turns the preview off
    completely, thus allowing this camcorder to be used in a dark room
    without the LCD providing a source of light. In this mode, there is no
    recording indicator at all. The LCD screen is the only indication of
    recording; the camcorder does not have a Tally light. Next to the
    Display button is an “Easy button” that allows the camcorder to set all
    parameters of operation. Manual focus, exposure, and other modes are
    disabled when the Easy mode is engaged. Finally, there is a Reset button
    to reset all parameters of the camcorder back to factory setting.
    With the LCD Panel closed, the camcorder has three
    buttons; Record start/stop, Photo, and Zoom lever. With Record Mode
    enabled, the CX100 is able to take continual still photographs at a
    resolution up to 4Mp. However, there is a time lag between shots; expect
    about one still every 3 seconds, hardly fast enough for many sport
    photography modes.


    The Photo button and
    the Zoom lever are found on the top of the camcorder. The Photo
    button is a bit inconvenient if the camcorder is being held in a
    standard palm configuration. It fits under the index finger, but
    it’s hard to press the button without moving the camera during
    video recording.


    The stripped-down nature of this camcorder belies
    its intelligence. The camcorder is extremely smart, able to sense up to
    eight faces on the screen and calculate exposure based on these faces.
    Additionally, if the still modes are being used, the camcorder can sense
    smiles, and shoot automatically when it sees a smile. Now if it only had
    an “ugly” sensor that would prevent it from taking ugly photos, or a
    ‘composition’ setting that could prevent badly composed photos from
    being taken. Maybe in the next generation.
    Spot focus, spot metering, slow-shutter are all
    available on this camcorder, along with the previously mentioned nine
    exposure modes. Menus are relatively simple in this camcorder, but there
    are some menus the average user will want to pay attention to.


    There is no LANC on
    this (or any other file-based camcorder system. Remote control is
    achieved through the AV/R port. Pictured here is a HypEye D Pro
    control/indicator system.


    In the “General” menu mode (preview screen/menu
    button, page two under the Toolbox), there are five menu options. In
    this menu, Auto Shutoff, Calibration, and Power On By LCD are the
    important options. First, disable Auto Shutoff unless you’re okay with
    the camera powering down after five minutes of disuse. In the
    action-sports world, this is a non-starter, so disable this mode. Next,
    calibrate the screen for your personal finger touches. Different size
    fingers will touch the menu differently. Next, disable the Power On By
    LCD option if a remote is part of the planned operation of the
    camcorder. For example, when using the HypEye D Pro remote/camera
    indicator, the LCD panel must be opened first, then the HypEye may be
    enabled and will control the camcorder. If the Power On By LCD option is
    disabled, the HypEye D Pro will be able to turn on/off the camcorder,
    start/stop recording, and control functions of the camcorder while the
    camcorder is in a box or cage. It becomes a hands-free operation when
    the Power On By LCD option is disabled.


    If a remote on/off
    system is part of the operation of the CX100, be sure to go into
    this menu and disable the Power On by LCD option.


    In this same Toolbox menu, you’ll want to scroll to
    Page One of the menu options, and select the Face Function Set menu.
    Disable Face Detection, and disable Smile Shutter features. This will
    significantly speed the auto-focus functions of the camcorder. This same
    menu is where you’ll set the movie or photo modes of the camcorder.

    In the next menu, you’ll want to set the camcorder
    to record to external media, unless you’ll plan on downloading
    everything from the internal memory to an external hard drive. There is
    a huge benefit to this process; if you’ve filled or forgotten a memory
    stick, now you’ve got a way to record. Imagine being on a cliff wall or
    aircraft and realize you have no memory stick, or the stick is full.
    Simply switch to “Internal Memory” mode and you’ve just gained nearly 60
    minutes of high-quality recording in FH mode!
     
    Be certain to enable X.V. Color in the menu for the
    most rich and natural colors during playback to any X.V. enabled
    HD display. X.V. is standard in Sony displays, but XVYcc is an up and
    coming standard in home video/theatre. The color information is embedded
    in the video stream, and having it will not harm the image of non-XV (HDMI
    1.3) systems, but will be immediately apparent in XV displays.


    Disabling Automatic
    Off will be important to action sport photographers.


    If you need to share media, no worries. You can
    easily dub media from a mem stick to the internal Flash memory, or dub
    from the internal Flash memory out to a media stick. If Firewire has
    been your primary means of sharing video files, MSPD is now your
    transport medium for sharing video. From skateboarders to skydivers,
    this feature will be much loved, much appreciated, and much late in
    file-based recording systems.


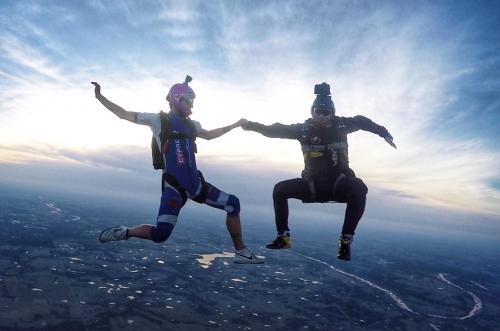
    "The Sony CX100 with incredible HD quality in such a small form
    factor complemented by electrical stabilization and solid state
    media; is the best camera on the market for daily capturing
    skydiving and other action sports."


    Mark Kirschenbaum – Get Hypoxic/Skydiving Videographer


    Another ‘feature’ of this camcorder is the image
    stabilization system. For the past two years, almost all Sony models
    have been Optically Stabilized, or OIS. This is terrific for those that
    stand around with camcorders in their hands, but for those that are
    mounting camcorders to skateboards, helmets, aircraft struts,
    motorcycles, or anything else that has heavy, inconsistent vibration,
    OIS is a bane, not a benefit. Soft, juddery images are sometimes the
    result of OIS systems. The CX100 offers EIS, or Electronic Image
    Stabilization. Granted, for those that stand around with camcorders in
    their hands, EIS may not be quite as preferable, but for everyone else,
    EIS is golden. Action sports photographers have been begging for EIS to
    return to small-format camcorders. Sony has finally obliged.


    The bottom of the
    CX100 offers a metal-threaded/encased tripod mount with a
    removable bezel.


    All in all, the Sony CX100 is a dream camera for
    the low-budget videographer, the action sport photographer, or the
    independent production looking for a crash cam. At a retail of 599.00,
    its street price is somewhat lower, and available everywhere. In Black,
    Red, and Silver, there are even multiple color choices for the
    color-coordinated videographer/photographer. There is little to want
    for, given the size, weight, and cost of the CX100.


    The CX100 is very small, and will
    fit on any helmet camera mount system. Consider using gaffers tape
    to hold the battery if the mounting system does not support the
    battery bottom.

    Cookie Composites
    has announced they'll offer a box for the CX100 around the same
    time the camcorder ships.

    (pictured helmet is a Cookie Composites ROK)


    Weaknesses are found in the potential “oops” factor
    of leaving a lens cover on while using a remote, and in the opportunity
    to miss menu options in a hurry. Lack of audio input means extra care
    should be taken to capture decent sound; if a housing is used, be sure
    to leave an opening for audio. These are small pitfalls for the large
    scope of what this mini-monster brings to the table.
    Congratulations to Sony’s design team; in my
    estimation, this is the best small-format camcorder for the buck. Ever.
    ~dse

    By Deleted, in General,

    Marketing To The Millennials

    Have you ever been at a restaurant and observed a group of people not speaking to one another because everyone was staring at their phones? The age group most likely to be "engaging" this way are people born between the years 1980 and 1996 - the Millennial generation.
    There’s a lot of good news about Millennials for the skydiving industry (for example, they put experiential value ahead of ‘stuff’), but there's some bad news too: many of us haven't adjusted our marketing plan to capture the Millennial market. We've only just begun to dip our toes into the vast ocean of digital marketing which would enable us to meet Millennials where they are - online. Having a functional website and a Facebook page is no longer enough; to effectively reach this demographic, we need to be fully immersed in the channels they are using and understand why they use them.
    Why You Need To Be Marketing To Millennials
    Although skydiving caters to individuals between 16 (depending on your country) and 106, the number one target demographic for the skydiving industry is men and women between the ages of 25 and 34. Have a look at your Facebook Insights and you'll probably notice that the largest percentage of your fan base usually falls within this category. And this category fits squarely within the age range of the Millennial generation.
    Love or hate their addiction to smartphones and tablets, there’s no denying that 18-34 year olds are an important segment, if not the MOST important segment of your customer base, and their influence is growing.
    According to a recent U.S. Census Bureau, Millennials will surpass Baby Boomers as the largest living generation in 2015. In the U.S., Millennials are responsible for an estimated 1.3 trillion dollars in annual spending. This number will only increase as more Millennials reach their peak income earning years over the next two decades.
    The future success of your business will depend in large part on your ability to properly market your services to the Millennial generation. As digital natives, the way Millennials interact, view, and engage with the world around them is completely different from previous generations. Their preferences are different, their values are different, and their spending habits are very different.
    Companies who want to effectively tap into this growing demographic are going to have to embrace a completely new marketing strategy that takes these differences into account. In a recent report, “How Millennials Are Changing the Face of Marketing Forever,” The Boston Consulting Group outlines the ideal marketing strategy for capturing the Millennial generation. They call it reciprocal marketing and describe it as follows:
    “Instead of being a process that is led and pushed by companies, modern marketing is an ecosystem that is influenced by some factors that a company can control and some that are beyond its control. It is a system in which marketers, customers, and potential customers perpetually exchange experiences, reactions, emotions, and buzz.”

    How To Create An Effective Reciprocal Marketing Campaign
    1. Be WHERE Your Customers Are
    To effectively reach Millennials, companies must be present online and offline; they must have a strong mobile presence.
    According to the Pew Research Center, roughly 83% of Millennials now own a smartphone. Of those, 50% report that their preferred device for accessing the internet is their smartphone. This means many of your potential customers are accessing your website on a mobile device.
    Have you visited your website on a smartphone or tablet lately? How does it look? Is it easy to read and navigate, or do you have to constantly pinch and expand to see the text?
    Millennials are the instant gratification generation - If your website is not responsive (meaning it automatically adjusts to fit any size screen or device), chances are they won't be sticking around for long, and you won't be getting their business.
    2. EMBODY What Your Customers Aspire to Be
    Millennials are looking to connect with brands that reflect their values and project who they aspire to be. What do Millennials value? Luxury, adventure, excitement, travel, and authenticity – to name a few. They describe their generation as tech savvy, modern, risk taking, rebellious, smart and humorous.
    If you want to strike a chord with Millennials, make sure that your company’s messaging, imagery and personality reflect what they value. This shouldn't be too difficult - what could be more adventurous, exciting, authentic, and rebellious than skydiving?
    And there's more great news for our industry: a recent poll found that Millennials place a higher value on life experiences than on physical possessions. In fact Millennials’ spending habits are the driving force behind the new “experience economy.” 78% of Millennials said they would rather spend money on a memorable experience than on an object; 72% indicated that they would likely spend more money on experiences than physical things next year; and 72% reported suffering from FOMO (fear of missing out), a condition that is driving them to engage in more experiences so they can “keep up” (i.e. post pictures and status updates of their exciting life experiences) with their social networks.
    3. ENGAGE with Your Customers to Build Trust
    If you want to build customer loyalty among Millennials, you must engage with them. Millennials desire to interact and share their experiences and opinions with companies through social media. Research indicates that recognition is extremely important to Millennials so when you open up a dialogue make sure you are prompt to reply to customers who engage with you. Make them feel as if they have a personal relationship with your brand.
    Millennials are overwhelmingly skeptical. Only 19% believe people can be trusted. This means a company has to work hard to gain and maintain their trust. Authentic engagement via social media is one of the best ways to do this. When you build loyalty with Millennials who have already used your services, you encourage them to share their opinion of your company with their friends. And because Millennials’ purchasing decisions are largely influenced by friends and family, making your current customers brand advocates will reassure their social circle that you are a trustworthy company to do business with.
    Social Media - Quick Facts
    52% of Millennials follow/like their favorite brands online via social media channels.
    Facebook is still by far the most popular social media channel with Millennials, but more users are engaging with multiple platforms daily.
    Relevant platforms:
    2014 Usage Statistics (18-29 years old)
    Facebook = 87%
    Twitter = 37%
    Instagram = 53%

    By admin, in General,

    100-Way Canopy Formation World Record Team to Receive 2019 Path of Excellence Award

    The International Skydiving Museum & Hall of Fame is proud to honor the 100-Way Canopy Formation World Record Team with the museum Path of Excellence Award. The presentation will be made at the 2019 Hall of Fame Celebration at Skydive Perris, Perris, California, on Friday afternoon, October 18, prior to the Welcome BBQ. There will also be a tribute jump honoring the awardee.
    Many groups, companies and teams have played a prominent role in the growth and development of our sport with their exceptional contribution in the form of innovation, performance and/or competitive excellence, leadership, education, safety, sponsorship and/or philanthropy, aviation, design/invention and/or manufacturing, sport promotion, and photograph/videography. The Path of Excellence Award is specifically for entities – groups, companies, organizations or teams for significant contribution(s) of enduring high value to the world of skydiving and is a prestigious award in both name and distinction. Award nominees are voted on by supporters of the museum including ambassadors, counselors, trustees, members of the Hall of Fame, and major donors. 
    On November 21st, 2007 the world’s largest canopy formation was built over the Florida Skydiving Center in Lake Wales, a record that still stands today. The formation was so large that the Miami Air Traffic Control Center monitored the formation on radar to keep other aircraft from coming into close proximity to the formation. The formation weighed 20,388 pounds and was 290 feet tall and 175 feet wide. In comparison, a 747-400 jet is only 231 feet long and the Wright brother’s first flight was not quite one third the distance as the formation is tall. Even though the 100 way formation was built in 2007, the journey to this record started 6 years earlier.
     It all began at the end of 2001 when Chris Gay was talking to a couple of friends about the last world record of 46 skydivers back in 1994. The conversation started with questions of how difficult it is to organize such an event and ended with an agreement to organize a 50 way canopy formation the following year. Little did they know this would lead to a 5 year road to the 100 way Canopy Formation Largest Formation World Record.
    The first event was in 2002 with the goal of setting a new US record. With the help of Betty Hill of the Florida Skydiving Center and Paul Fayard of Fayard Enterprises, the organizers had an outstanding place to host the event and a great fleet of aircraft to jump from. When not only 1, but 5 50-way canopy formations were built during the same day and an unofficial world record 56-way, it was realized with proper design, training and organization that the elusive triple digit 100 way canopy formation could be possible. The most difficult part would be convincing the canopy formation community that these ideas were necessary. However, following such a successful event gave the leverage and credibility that was needed to convince the community that changes were needed in technique and equipment. Even so it was an uproar when the announcement was made for standard slick jumpsuits, line sets and a given wing loading of 1.30-1.375 based on your position in the formation. It was explained for the safety of the group anyone wanting to be on the 2003 64 way world record attempts would have to sign and abide by a contract. This event was, once again, a complete success of not only multiple 64-way formations in the same day, but a 70-way formation the following day as well. After that success, the group saw the importance of correct engineering of the formation, proper techniques and standardized equipment.
    During the next couple of attempts, the design and engineering of the formation was critical in order to have a stable formation upon its completion. This meant it maybe quasi stable during part of the build and would require the jumpers to learn to fly it during this phase. This was achieved by using tight jumpsuits in the center of the formation and baggy jumpsuits on the outside of the formation. Also, standard line trims and lengths were required. Lastly, learning where to place the older and slower canopies versus the newer or faster canopies. A better way to communicate the starburst breakdown to the jumpers was also needed and for this task Kirk Vanzandt volunteered. Performance Designs help in keeping their PD Lightning demo parachutes available and also assisted with quick turnaround for repairs that were critical over the years and during training and the actual events. Rusty Vest inspected and assessed each Lightning parachute at these events to place each canopy in the best place in the formation based on wear and age. The above changes along with newer training and docking techniques and standard wing loading helped build great flying 81 and 85 way canopy formation in 2005 and a 100 way canopy formation in 2007.
    The 100 Way World Record utilized five aircraft, the first aircraft dropped 9 jumpers from 20,000 feet. The second dropped 27 jumpers from 18,000 feet. The third dropped 29 jumpers from 16,000 feet and the final two aircraft dropped the remaining 35 jumpers from 13,000 feet. The formation took approximately 11 minutes and 30 seconds to build and was held for 12 seconds. It was completed on the fifth attempt and captured on HD video by seven videographers from around the world. The formation consisted of jumpers from 14 countries including 56 from the United States, 7 from Australia, 7 from Germany, 6 from the Netherlands, 6 from Great Britain, 5 from Russia, 3 from Canada, 2 from Brazil, 2 from Egypt, 2 from France, 1 from Argentina, 1 from Belarus, 1 from Belgium and 1 from Finland.
    Special thanks to Kirk Vanzandt, Betty Hill, Paul Fayard, Rusty Vest, and Performance Designs for their support and assistance with this journey to the 100-way. The videographers that captured the incredible images that showcased the 100 Way CF World Record to the world were Bruno Brokken, Gustavo Cabana, JC Colclasure, Norman Kent, Keith MacBeth, Pam Pangburn, and Bryan Scott.
    2002 US Record 50Ways and Unofficial World Record 56Way
    Organizers: Chris J. Gay, Dave Richardson, Mark Gregory
    2003 World Records 64Ways and 70Way
    Organizers: Chris J. Gay, Dave Richardson, Mark Gregory, Mike Lewis
    2005 World Record 81Ways and 85Way
    Organizers: Chris J. Gay, Brian Pangburn, Dave Richardson, Mike Lewis
    2007 World Record 100Way
    Organizers: Chris J. Gay, Brian Pangburn, Christophe Balisky, Mike Lewis
    Since 2010, as part of the International Skydiving Museum & Hall of Fame awareness and fund raising efforts, the museum has held an annual weekend event celebrating the sport and history of skydiving.  “The Celebration is an exciting and prestigious three day event that brings generations of skydivers together. The celebration honors the glory days of our past and showcases the marvels of today’s equipment and skydiving skill of today’s superstars and inspires younger jumpers to make their mark,” said James F. Curtis III, President/CEO of the Board of Trustees for the museum.
    This year’s celebration will feature a 10-Way Speed STAR WARS competition, forums featuring Luke Aikins and Alan Eustace, a Pioneers Lunch sponsored by Strong Enterprises and much more. After a weekend of skydiving activities and non-skydiving activities that has something for everyone, the International Skydiving Hall of Fame Induction Ceremony will take center stage continuing the tradition of honoring legends, leaders and pioneers of our sport.  This year’s inductees are Irena Avbelj (Slovenia), Chuck Collingwood (posthumous) USA, Kate Cooper-Jensen USA, Patrick de Gayardon (posthumous) France, Alan Eustace USA, John P. Higgins USA, Andy Keech Australia, Tom Sanders USA, Deke Sonnichsen USA, and John “Lofty” Thomas (posthumous) Great Britain. More than 400 skydiving enthusiasts from around the world will be in attendance at the fundraiser which is expected to raise more than $100,000 for the museum.  For more information about the International Skydiving Museum & Hall of Fame and the Celebration Event, visit www.skydivingmuseum.org or contact museum administrator, Nancy (Kemble) Wilhelm, at 407/900-9997 (direct line) or [email protected]
    Photo by:  Keith MacBeth

    By Meso, in General,

    A Different Way to Boogie

    Will Penny and Johannes Bergfors Want to Take You Places
    First, let’s get one thing straight: Johannes Bergfors and Will Penny don’t necessarily have, like, a problem with tent camping, beer trucks and zoo loads. They like that stuff just fine -- they just do things a little differently, is all. And they do them differently in very interesting places.
    Will and Johannes met at a FlajFlaj event in California a few years ago. Johannes’ video chops attracted Will’s attention. Will invited him to Paradise Portugal to film him and his Flynamic teammate, Yohann Aby, as they trained for the World Championships.
    “I’d never been in a [skydiving] team,” Johannes muses, “And I was interested in how a team at that level went into the training process.”
    True to eager form, Johannes didn’t just film the jumps. He started bringing the camera into the teammates’ daily lives and started interviewing them incisively about their process. He made a documentary about it. (It’s called Work. It’s great. You should watch it.)
    As you might imagine, Johannes and Will worked really well together, right off the bat, and the scope was bound to expand sooner-or-later. That flashpoint moment came along when Johannes saw a photo of a beautiful beach dropzone in Kenya.
    “It was beautiful,” he remembers, “And I wanted to organize an event there because I was pretty sure it was the only way I was going to be able to go.”
    Up until that point, Johannes had been hired by lots of other events as a videographer and coach. He’d even organized “some smaller stuff” in his native Sweden. Along the way, he’d seen what had been done well and poorly. He knew for certain that he needed a co-organizer to pull it off; Will, with their established rapport and Will’s deep connections in skydiving, was the natural choice. Since he’s a South African with extensive connections around the rest of the continent and parents in the hospitality industry, Will had even more vital bona fides for the task -- and, happily, he was keen.
    The pair kept the first event intentionally small -- a beta test, right-sized for a home run. Participants stayed together in a beachside villa, steps from the dropzone. The skydiving was calibrated to be decidedly quality-over-quantity. A top-shelf chef was on-hand to cook every meal. (Johannes was once a chef himself, so he knows a thing or two about that.) They called it “Skyfari”: a nod to its African venue, for certain, but also to its emphasis on exploration over logbook-stuffing. 
    Unsurprisingly, the event nailed its goals. There were already plans being made for the next one by the time the first one wrapped.
    “These are all all inclusive events,” Johannes explains, “where we are focusing on giving inspiring experiences to participants. That is something we are super grateful to be able to do.”
    Since that first Kenyan foray, Will and Johannes have done four other events in this style. The first three shared the Skyfari name; the fourth and fifth, held on Will’s home turf, the southernmost point of South Africa, was called Skydive South Africa: Southern Tip. (Hashtag: #justthetip. Of course.)
    For a little descriptive flavor: the Southern Tip event was a pop-up drop zone in the picturesque little Afrikaaner hamlet of Arniston, where Will’s family connections to hospitality are strong.
    “It is not a place you drive through,” Johannes explains. “It’s a special place, especially for Will, because as he was growing up, when his parents were working in tourism, they traveled around Africa and lived in different places, but they always had their house in Arniston as a getaway.  They would go there for the weekend and spend time there and just enjoy this little gem of a place.”
    “It is also a very special place in the world for many reasons,” he continues, “Did you know that Table Mountain alone has a larger variety of plants than all of Great Britain? The Western Cape plant kingdom takes up the area of ½ a percent of the African continent but it hosts 20% of the species. All of that is mind-blowing to me. On these events, we fill the days with extracurricular activities to enjoy what’s special about the places we travel to. Our participants are really into it.”

    The event logistics, of course, look very different than those of a standard boogie. For Arniston, for example, the event took advantage of a cute little dirt-strip airfield. They brought in a 206, a pilot and ground crew. There were six participants, making a ratio of 1.75 staff to each participant. Accommodation-wise, the event rented a beautiful two-level villa with sweeping sea views from almost every room, facing the sunrise every morning. A private chef cooked for the group three times a day.
    When the group wasn’t jumping onto the most pristine beach of Arniston, they were marauding around the Western Cape with great big smiles on. They went surfing; out for dinner a few times; out-and-about in Cape Town. On one memorable morning, they went horseback riding together on an empty beach. After they cavorted down the beach for an hour or so, they took the saddles off the horses and swam with them. Magic.
    “It is all inclusive from the moment they arrive until they leave,” Johannes notes. “All the experiences are included. Because the conditions in a situation like this are very hard to guess ahead-of-time, we don’t stipulate a certain amount of included jumps -- we say you are going to do up to 8 jumps, but it is not decided if we are going to 6, or 5, or 2, because we cannot guarantee it.”

    “We also tell the participants they have to be ready to go at any time,” Johannes adds. “Because we have a very small margin to play with in terms of weather, airspace limitations and surrounding logistics. We have to be dynamic in decision making. We are constantly armed in the sense that when all of the parameters are on our side, then we are going to strike. As a jumper in that situation, you have to be ready all the time. We are super transparent with all this and explain this very well to the participants, because in a group this small, everybody’s buy-in really matters. And we get it.”
    To roll with those variables, Skyfari participants can’t be fresh off the AFF boat. The event requires each jumper to have at least 500 jumps -- and, on account of the inn-hopps, at least 50 jumps on the canopy they’re flying. Due to the group’s small size, Will and Johannes are able to flex their strategy to fit.
    “The last time it was quite an experienced group; this time a bit less experienced,” Johannes says. “We adjusted our plan. In general, the beaches around Arniston are quite long and wide, but they are super windy.  We can’t $&*% up because there are sharks in the water.”
    These days, Will and Johannes are expanding their horizons yet again. They’re heading to the Maldives for the next one -- and launching an educational project called High School together (an extensive, professional post-jump-course education targeted to the jumper with 20-500 jumps who’s looking to find and fill skills and knowledge gaps). For these two, it’s all about going places -- in the world, in your sports and in your own personal scope -- and the thing they want most is a cadre of keen fellow adventurers along for the ride.
    Take it from Skyfari participant David Beneviste, who has done two events so far:
    “The group and the chemistry we had were incredible,” David says. “We were laughing all the time. And it was an adventure! The more I get to know Will and Johannes, the more I want to go travel with them. Whenever I can swing it, I will certainly do it again.”
    Curious about participating in an upcoming event? Check out https://www.johannesbergfors.com/events for more details.
     

    By nettenette, in General,

    Camera Considerations 101

    Flying with a camera can be a lot of fun, and is a reasonably easy goal for new skydivers to achieve.
    The USPA SIM Section 6.8E recommends that a skydiver have 200 skydives before putting on a camera. The first question often asked is “Why 200 jumps?” I believe the answer to that question is that in times past, the D license (which at one time required only 200 jumps) meant that a skydiver had experienced enough of the basics of skydiving that he/she could begin exploring additional responsibilities during a skydive. By no means is anyone with only 200 jumps generally prepared to be a good nor safe camera flyer, but everyone needs a benchmark from which to begin. This article isn’t about debating the merits of jump numbers; I’d recommend potential camera flyers stick with the SIM and the findings of the USPA.
    Before beginning, you’ll need to make a couple of gear decisions straight off, and this article is to help you prepare for those decisions.
    HEADGEARChoosing a helmet is the first and potentially most important decision in flying a camera. There are a lot of good helmets out there; each manufacturer has their own ideas about why their helmets may be better than another helmet. What your first decision will be isn’t as much about a brand, but rather a type.

    P>There are two types of helmets; those that are primarily side mount, and those that are primarily top mount. Most side mount helmets do offer at least a small top area to which a second camera or other fixture may be mounted. Most of the top-mount helmets are designed to place everything on the top of the helmet. Each type of helmet has its own advantages and disadvantages.
    Freeflyers and inside RW/FS skydivers tend to prefer side mount camera helmets not only because of the profile of the helmet, but due to the way the air moves around the helmet. Those that are shooting four/eight-way FS might prefer a top mount not only due to the greater stability of a flat-top profile, but that the larger top area allows for two cameras to be mounted (one acts as a backup in case a camera fails in competition). Commercial photographers tend to prefer flat top systems so that they can mount larger cameras, or have enough space to mount a DSLR and video camera from the same perspective point.
    One point to consider aside from the primary flying format; top mount helmets with properly centered weight are less injurious to the neck over repetitive openings.
    VIDEO CAMERAVideo camera models change pretty quickly, so it’s pointless to recommend models vs features.
    While recommending a brand is tempting to avoid, Sony camcorders have a strong position in the skydiving market for several reasons.

    -External control. This is very important, as you’ll want to know whether the camera is on, recording, battery failing, or nearly out of media. There are a couple brands of control devices that provide this information.
    -Electronic Image Stabilization (EIS). This is fairly important for freeflying, and much less of an issue for tandem shooters. Avoid Optical Image Stabilization in most cases. The floating lenses of an OIS system makes it difficult to shoot a stable image under any but the most optimal shooting situations (very difficult to achieve).
    Small is in; cameras don’t need to be large to produce large results. Keep weight on your head to a minimum and your neck will thank you over hundreds or thousands of openings.
    If your intent is to wear a camera merely to document skydives with friends, low-cost camcorders such as the GoPro Hero and similar small cameras are wonderful. If your eventual goal is to work towards shooting tandems or teams, you’ll want to consider a higher quality camera. A current favorite is the Sony CX series of camcorders.
    LENSESMost camcorders do not offer lens widths sufficient for most inside or tandem-oriented skydiving. Wide angle lens adapters are commonly found on camcorders used for skydiving. For most skydiving use, a .5 or double field of view lens is sufficient. If you’re flying inside video for FS or Freeflying, a .3 or more than double wide field of view is generally desired. Anything more wide than a .3 is typically going to be relegated to handcam or specialized use.
    Depending on the size of the camera’s lens thread, a step-up or step-down ring might be necessary. Step-down rings almost always assure a vignetted shot (black circle around your video frame), whereas step-up rings rarely cause a vignette. Step-up and step-down rings are very inexpensive. Some are plastic, others are aluminum. Some professionals prefer plastic rings so that if a riser strike or line catches on a lens and tears it off, the plastic ring will give way before damaging the camera. While this is likely true, plastic rings also deteriorate in strength when exposed to sunlight. If you use a plastic step ring, be sure to periodically inspect it to be sure it’s not become brittle or cracked due to sun exposure.
    RINGSIGHTSAlthough it’s tempting to want to outfit a helmet with everything right from the start, it’s a good idea to add parts one step at a time. A ringsight is a good tool for some disciplines; it helps the videographer know where the camera lens is looking, and some types of ringsights help with framing and distance.
    Ringsights aren’t necessary for inside shooting of FS or Freeflying. No matter what, a ringsight is a snag hazard regardless of how much care is taken to prevent it from being so. The risk can be lessened, but not entirely removed. The ringsite should be one of the last accessories added to a camera helmet.
    In lieu of a ringsight, consider a “paper asshole” or a punch hole reinforcement sticker, mounted on your goggles. This can serve the same purpose and yet completely remove the snag hazard of a ringsight. A circle or dot can be drawn on goggles as well.
    To sight in a dot on a goggle; face a plain wall on which, you’ve taped a target. A paper plate works well for this exercise. Stand back from the wall at a distance of about ten feet. Put on the camera helmet, turn on the camera, and have a friend hold your head/helmet so the paper plate is dead center in the camera’s display. Keep your eye looking forward; don’t be tempted to roll the eyeball up/down/sideways. Keep it straightforward. It might take a moment to get comfortable holding your eye straightforward while a friend guides your head/helmet to the centerpoint/target.
    Once you’ve relaxed, focused on the target, and the target is in the center of the camera, mark your goggles (one side only, usually the right side) with a DRY ERASE marker. Remove the helmet, remove the goggles/glasses, and then put them back on and check to see that a reasonably accurate target acquisition occurs. Otherwise, repeat the aiming/targeting process.
    It’s worth mentioning once again however, a ringsite should be one of the last accessories added to a camera helmet when you’re a newcomer to camera flying. A ringsight adds an unnecessary snag hazard.
    STILL CAMERAAgain, it’s very tempting to buy a camera helmet with everything in one shot, and as mentioned previously, is a poor decision for newcomers to camera flying. Learning to fly with a video camera will help develop the skills necessary for flying a still camera.
    DSLR cameras are popular, as they record stills to a memory card, making for fast previewing of photos taken during a skydive, and for tandems, DSLR’s are necessary for fast delivery of photos to tandem students. Though Canon and Nikon are both popular brands of cameras for skydiving, most any kind of camera can be modified to accept a bite, tongue, blow, or hand switch for taking skydiving photographs.
    MOUNTING DEVICESThe device used for mounting a still or video camera to the camera helmet is critical, particularly for video cameras. If the mounting device isn’t rock-solid, the camera will shake or shudder in freefall, resulting in an unstable image. Sometimes this shudder/shake will be blamed on the video camera when the blame lies squarely on the camera mount. Check whatever mounting device you’re considering to be sure it will not move either at the time of purchase, or after it’s been in use for a period of time. Personally, I’m a big fan of the Cookie Composites Padlock systems and the Really Right Stuff mounting systems. Neither are inexpensive, but if you want solid video and clean stills, a solid mounting system is critical.
    CONTROLLING SYSTEMSCamcorders and still cameras need hands-free operation. Video cameras can be manually started/stopped in the aircraft, but for convenience and comfort, most camera flyers use a control system of some sort. Sony tapeless systems offer essentially one controller choice; the HyPeye products from GetHypoxic. All of the camera control systems also offer an indicator that indicates the status of the camcorder such as Power On/Off, Standby, and Record modes. In lieu of these indicator devices, you can always wear a small mirror on the wrist next to the altimeter, and view the Record light on the camcorder. I’d recommend a plastic mirror vs a glass mirror in case your wrist strikes the side of the aircraft.
    Still cameras/DSLRs require some sort of trigger device to cause the camera to snap a shot. Conceptus manufactures tongue and bite switches for Canon cameras. Custom Nikon switches are available from The Ranch Pro Shop and other resellers. Some Pentax cameras use the Canon connection (2.5mm plug).
    It’s difficult to recommend a bite switch, hand switch, tongue switch, or blow switch; everyone has a preference. I personally prefer a tongue switch, but many friends like bite switches. Some like hand switches. You can also “roll your own” from inexpensive parts available at Radio Shack.
    JUMP SUIT/CLOTHINGSome camera flyers opt for jumping with or without a camera suit, or a suit with “wings.” Although it’s a personal preference, camera wings provide the camera flyer a more stable flying platform (when used correctly) provide the for a great deal of range and control that isn’t quite so easy to achieve when wearing a standard jumpsuit or freefly suit. If you’re looking at flying with tandems, wings are often an important part of the jump. If you’re shooting freefly work, you probably won’t want to wear wings.
    There is a lot to learn about flying a camera. Getting good at RW is perhaps the best thing you can do to prep for flying a camera with tandems and four/eight way teams. Understanding burbles, trapdoors, safe zones, and having good belly skills that include side sliding, the ability to orbit, and a very broad fallrate are all important aspects of camera flying.
    This article does not discuss the challenges of camera flying and make no mistake; there are many dangers. One such danger, is that the camera flyer is always focused on the action in front, and never able to turn to see what’s happening behind him/her. Another danger is that in order to “get the shot” some camera flyers lose altitude awareness and may find themselves well below appropriate deployment altitudes.
    Spend time talking to the camera flyers on your dropzone, reading the forums, and pay attention to some of the videos you’ll find on Skydivingmovies.com, YouTube, and Vimeo. All have examples of good and bad camera flying. You can learn a lot just from watching the techniques of others.

    By DSE, in General,

    Dangers of Being a Hero - Camera Safety Advice

    Norman Kent is not only one of the leading skydive photographers, but he is also an advocate for safety relating to freefall photography and the use of mounted cameras within skydiving. Norman has been jumping with a camera since the mid-70s when at only 25 jumps, he strapped on a Kodak Instamatic.
    Over the past 40 since, Norman has established himself as a leader in the skydiving photography world and is a well respected member of the community.
    In the past, we've run several articles relating to the safety of camera usage. In 2013, Melissa Lowe published a piece titled "Hey Bro, Check Out My GoPro" which tackled the topic and included conversation with Norman Kent over the potential safety issues of the camera.
    Since that time, the popularity of action camera use in extreme sports has skyrocketed, with more and more individuals focus being shifted towards the media capture side of the jump. Norman Kent has released a new video on his Youtube channel titled "Dangers of Being a Hero", in which he addresses and revisits some of the topics relating to action cam safety.
    In the video Norman runs through several series of video which illustrate just how easy it is for snagging to occur on the camera, and continues to express how despite the fact that many people feel as though the risks are exaggerated, that the incidents are occurring, even if only rarely has it thus far resulted in death or injury.
    "It's not the equipment itself, it's the attitude of 'it's only a GoPro'"
    Norman Kent continues on in the video to look at alternate mounts that can be used to minimize snag potential and further ways in which one may be able to increase their safety when flying under a camera.

    By admin, in General,

    AFF Training - Level 2

    Napoleon Skydiving Center: Level 2 - Body Awareness
    Now that you have your feet wet, we will start working on trim maneuvers. There are a lot of things to accomplish on this level, so don't waste time geeking the camera. Once you are under canopy, try a few spiral turns (above 1500' please).
    TLOs


    Maximum free arm time.
    3 PRCTs.
    Heading awareness during freefall.
    Trim control or body awareness exercises.
    Relaxed, arched body position through entire freefall.
    Pull by 3500 feet, look over right shoulder to observe pilot chute launch.

    Dive Flow


    Running Description
    Hotel Check: Check In, Check Out.
    Exit Count: C-182 Prop, Up, Down, Arch; Otter Center, Out, In, Arch.
    HARM Check: Heading, Altimeter, Reserve JM, Main JM.
    PRCT: Arch, Look, Reach, Touch, Check 3 times.
    Short Circles: to maintain altitude awareness between maneuvers.
    Team Turn: initiated by looking over the arm in the direction of the desired turn to pick a heading refrence. Then bend his/her upper body 20 degrees at the waist in the direction of the turn. At the same time, drop the shoulder the turn is moving toward by 2-3 inches. Keep hands and arms still -- all motions are preformed from the waist. As the desired heading is aquired, return to a neutral boxman position.
    Forward Motion: initiated by extending legs (straightening them at the knees) while simaltanously bending arms at the shoulders to form a 'lazy W'. Hold for 3 seconds and
    return to a neutral boxman position.
    5-5 Signal: at 5500 feet.
    Pull: Arch, Look, Reach, Pull, Check at 5000 feet.
    Primary Canopy Check: Shape, Spin, Speed, Twist.
    Release Toggles
    Secondary Canopy Check: Slider, Endcells, Tears, Lines.
    Controllability Check: turns and flares OK.
    Canopy Control: halfway down, halfway back.
    Setup For Landing: Downwind at 1000', Base at 500', Final at 200'.
    Prepare to Land: at 50'.
    Flare: at 10', feet and knees together, PLF if necessary.
    Collapse the Canopy, Field Pack, and Return.
    Level 1

    Level 2

    Level 3

    Level 4

    Level 5

    Level 6

    Level 7

    Level 8

    By admin, in General,

    Exceeding Expectations

    Image by Lukasz SzymanskiThe challenge for any business is to exceed the expectations of its customers, especially when expectations are already high. The businesses that can pull this off will gain loyalty and earn valuable word of mouth marketing from their satisfied customers.
    Exceeding expectations is a challenge for the skydiving industry. Everyone who books a skydive already has very high expectations… after all, this is a major event in many people’s lives.
    Having traveled and visited drop zones all over the US, one of the biggest issues I see is a narrow sightedness when it comes to the guest experience. Too often, drop zones are focused on doing just one thing well: the skydive. Though this is definitely what we should be focused on (it’s what people are there for), we’ve lost sight of the complete experience; if the operation isn’t running efficiently, high expectations will turn to disappointment in short order.
    The common culprit in a poor customer experience is wait times. No one likes to wait. Yet here we are, charging a premium price, taking reservations and then expecting people to happily wait for several hours before they jump.
    Informing customers about wait times over the phone and in e-mail confirmations (usually 3 - 5 hours) doesn't make this practice any more acceptable or palatable to our customers who are conditioned to expect instant gratification. In a world where we can order something on Amazon.com and have it show up at our doorsteps the next day (or in some markets, the same day), we shouldn’t expect our customers to adapt to our antiquated practices. Rather, we should be challenging ourselves to find ways to better adapt to modern customer expectations. If we fail to do this, we will undoubtedly face the fallout of negative reviews online.
    How To Exceed Expectations
    To exceed expectations, a business must recognize its weaknesses through the eyes of the customer. The best way to do this is to ask them. However, if you want honest feedback, don’t survey your customers immediately after their skydive; they’ve just had one of the most amazing experiences of their lives, of course their immediate feedback will be positive. When I managed a DZ, I was always under the impression that we were doing a great job because when I surveyed customers following their skydive they always raved about their experience. Only when I started to survey our guests 24 hours after their jumps did I become aware of organizational problems that needed to be addressed. These ranged from employee language on the plane, (not good when your business is located in the Bible Belt) to major frustrations with wait times, to dissatisfaction with media quality. If you want to have a finger on the pulse of your organization, survey your guests after they’ve had time to come down from their initial adrenaline high. If they’re dissatisfied, they’ll typically tell you!
    Understand The Touch Points
    There are usually 20 interactive points of contact that a customer will have with a drop zone. If a DZ wants to gain a competitive advantage in a busy marketplace and see digital word of mouth marketing spread, they should be focused on improving these customer touch points. The goal should be to reach a five star level of service at every touch point. This is not an easy task, but it’s what has separated brands like Disney, The Four Seasons, REI and Zappos from all of their competition. This way of thinking should not be precluded from skydiving - especially considering the time and expense that goes into running a DZ. If we’re investing so much time and money into our operation, why not be the best we can be?
    Below is a list of 20 customer touch points every DZ should be aware of. I challenge all of my clients to rate themselves on a scale of 1 to 5 with 1 being poor and 5 being excellent. The caveat is that the score for each touch point must be graded on the organization’s weakest link within the category. For example, if four out of five instructors give great service and one is average, then the score must be graded on the weakest instructor. Now you see the challenge!
    The Touch Points

    Website
    Social Media
    E-mail exchanges
    Phone Interactions
    Road Signage
    Parking Lot (the condition of it)
    Greeting at manifest
    Condition of the bathrooms
    Quality of DZ Food (snack bar or vending machines)
    Quality of training
    Wait Times to Make Skydive
    Presentation of the Jumpsuits
    Presentation of the Instructor
    Presentation of the Videographer
    The Aircraft
    The Ride to Altitude
    The Skydive
    Time it Takes To Receive Media
    Quality of the Media
    Quality of Materials (certificate of achievement)
    The Closing (defined as a thought out ending highlighting accomplishment) In today’s digital world, word of mouth can make or break a business. If you want to leverage this powerful tool to your benefit, then you have to start consistently exceeding customer expectations. Take a step back and view your business through the eyes of the customer. Focus on the entire experience, not just one element within it. Remember, the actual skydive is only one component of the overall customer experience. Strive to make every component as incredible as the skydive itself, and you’ll turn customers into raving fans.

    By admin, in General,

    Climb Out, Freak Out, Chill Out

    A beginners guide to filming competitive 4-way
    This article is for jumpers that already have some experience flying camera and are trying to expand on their knowledge of how to film formation-teams in a competition setting. I will focus mainly on 4-way, because I believe it to be the most difficult FS discipline to film (aside from VFS), due to the many different exits and faster key speeds. However, once you have a firm grasp of shooting 4-way, the same principles can be applied to 8-way and larger formations.
    During a competition, whether it be a local meet or the nationals, it is vital that you give yourself all the advantages you can to do the job right. It is advisable that you jump with two cameras with differing wide-angle lenses. Film the team with the tighter view in mind, so if a grip goes out of frame, you can always revert back to the other camera with the wider view. The difference between first and second place can come down to only one point. So our goal is to have an “NJ free” (Non Judgeable) competition for all 10 rounds. If at any time during a jump a grip goes out of frame, the videographer can cost the team a point or more. Jumping with two cameras is not necessary for training, however you want to do a few training jumps before a meet with the exact set up that you are planning on using. This may expose any flaws or issues with your equipment.
    Training should be more difficult for you than competition. Push yourself to fly close to the formation. Train with your back up wide-angle lens, this will force you to be closer and more aggressive in getting the shots you need. This will make every competition feel much easier. Do not be afraid to try new things. Sometimes we have to leave our comfort zones to learn something that may benefit us in the long run.
    Climb OutIn most cases the camera flyer is in charge of the spot. Not having to worry about this little detail allows the team to focus on their jump. As you climb out on the camera step, think of flying your body as soon as you expose yourself to the airflow. Even though you are on the airplane, miss-presenting yourself to the wind can make your job a lot more difficult.
    You can practice climbing around on the airplane while it is parked. Get a feel for where everything is. Continue to practice until you can climb out of the plane in a smooth and controlled manner. Speed will come with time. Do not forget to practice climbing back into the plane. Sometimes you will find yourself climbing out right as the red light turns back on. If possible, one of your teammates can block some of the wind and help you get back inside. Remember to become familiar with different aircrafts when you travel to another drop-zone to train or compete.
    Freak OutNever trust an exit count! It is easy to get impatient on the camera step, waiting for the team to get ready. Teams can sometimes take a while in the door to get ready, especially if they are trying something new. Do not interpret a “wiggle” as a count. Be patient and watch for other signs like a helmet releasing a head jam.
    Every team’s exit count is different. Before every jump, most teams will take the time to dirt dive and practice their exit from a mock-up. You can learn a lot about the team by just simply watching them on the ground, so take as many opportunities as you can to learn the exit count and timing.
    Leading or Peeling?The exits covered here are from an otter, a left-handed door.
    Keep in mind that your relative position to the team is much closer on the aircraft than what it will be in freefall. You will need to create this gap quickly during the exit by falling slow. This is where camera wings and strong legs can be very helpful.
    Teams and coaches prefer the leading exit over the peel exit, because it gives them a great view of their timing, presentation, and heading. This method is much more conducive for the video debrief.
    For this exit I have my left foot on the camera step and my right hand on the handle. (When you have your right foot on the step, you expose more of your body to the exiting team.) After the team has given the count and is in the process of leaving the airplane, I find it helpful to try and run my right hand across the fuselage. I try to feel the rivets of the plane as I kick off the step. This helps ensure that I am in the correct position relative to the formation. As for your timing on this exit, you will know you have left too early when you can see the bottom of the airplane, and you will have left too late if you make contact with the team. For all exits, this is where your timing becomes crucial.
    Peeling is usually considered the safer choice of the two exits, because you leave right after the team. This way, you will not leave too early because of a misinterpreted count and you do not have to worry about the teams burble.
    For this exit, I have my right foot on the step with my right hand on the handle. I swing my body back so that my left foot is touching the fuselage. Now all I have to do is wait for them to come out the door. Leave with the last person and follow the team down the hill. Remember to present your hips correctly into the relative wind and keep the team in those cross hairs.
    Chill OutAfter the exit, all you have to do is keep the team’s grips in frame for the next 35 seconds. Remember that the different formations rarely stay in one place. As the team transitions from one formation to the next, you may have to adjust your own relative position to the team to keep them all in frame. Improving your individual flight skills will allow you to make these necessary corrections quickly and without thought.
    Although the “hard part” is over, you still have to be in the right position to get a judgeable video. Being close enough is the first part, but probably more importantly is being “steep” enough. Your angle in relationship to the formation is crucial. The steeper you can get, the better. It is very difficult to see all the grips when you are shallow. This is especially true on exit. If at any point, other than the exit, you can see sky, you are not steep enough. You should also only be able to see the top/back of the team’s helmets (no faces). The distance from the team will vary on the size lens you are using.
    An additional detail to pay attention to is the background. As the videographer, you can make the judge’s job easier by turning to a heading with a solid background, such as a forest, lake, desert floor, etc. Multicolored backgrounds, such as buildings can make the image very distracting and the formations harder to judge.
    Doh!Making contact with the formation can occur either on exit or in free fall. We want to avoid this scenario at all costs; however, accidents can and do happen. If you find yourself falling towards a formation, get as big and flat as you can! The last thing you should do is ball-up. Your natural reaction is to protect yourself, but by doing this you will only make things worse. Not only have you sacrificed all your lift and will now impact the team with greater speed, you have also given up on the chance that your airflow may be returned to you as the formation continues to move to the next point.
    I think that it is a good idea for camera flyers to understand what the team is exiting and how the formation will fly. I believe that a deeper understanding is necessary than just to know whether a formation is long or round. Being able to anticipate a formation’s movements, direction, and timing will greatly improve your video quality. Be pro active! Ask your team what formations they are going to perform. It will take some time, but being able to “speak” a little 4-way will not hurt.
    You can educate yourself on these formations by reviewing the IPC dive pool online. Memorize how each formation flies as it comes out the door; more importantly, think about how they might block your airflow. As the team debriefs their jumps, you should do the same. Take a look at your own timing, framing, and distance. Strive to make each video jump better than your last.
    Competition vs. TrainingWhen it comes to competition camera flying, there is a big difference between a “Gun for Hire” and a Teammate. In order to make this transition, you need to change your approach and mind-state from just being there for the ride, to being part of the action. As a teammate, you are taking on much more responsibility than a “gun for hire”, such as: archiving and cataloging all media footage, taking pictures, submitting photos to magazines and sponsors (if applicable), checking in with manifest for calls, spotting, chasing down cutaways, etc. Your team needs to be able to depend on you to do all of these things. Creating a great training environment becomes key. The more the team can focus on their training, the better.
    Helping a team to perform at their best can also aid you in achieving your best. Being able to perform at your peak during a high-stress competition can be very satisfying and rewarding. A positive attitude and an eagerness to learn is the start of becoming a good competitor. Hard work and embracing the training process is what will turn you into a great competitor.

    By admin, in General,

1 1