0

Gear

    Preventing Camera Snags

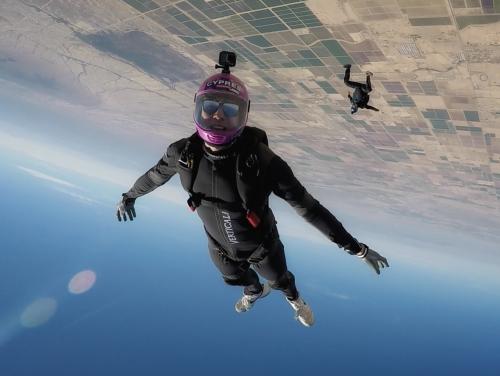
    Image by Ralph Turner
    Remember when getting a camera onto your helmet required power tools, soldering irons, hot knives and makeshift camera mounts? Um--probably not.
    It wasn’t so long ago, really, that you had to have access to a workshop to get a camera on your head. Back then they were, like, really big, too. And it was obvious that cameras were problems waiting to happen. Those behemoths could--and regularly did--snap the stuffin’ out of the jumpers’ necks, making jumpers literally painfully aware that the camera posed additional safety considerations.
    With the advent of the GoPro, jumping with a camera started to seem, well, obvious. Just peel off the little sticker on the mount, slap it somewhere on your helmet, clip in the little plastic doohickey and away you go. Set it and forget it! You won’t even know it’s there!
    ...until it decides to get all uppity and grab a handful of your lines at an inopportune moment, that is.
    Here are the key questions you oughta be asking yourself before you end up in a spiderweb of your own making.
    1. Should I even be jumping this thing?
    The USPA actually recommends that you be the proud bearer of a C license before you jump a camera, and that you’ve jumped everything else on your person at least 50 times before. If that causes you to make a big, exasperated noise, consider this: your overall bodyflight and canopy skills need to be beyond reproach before you add the risks and distractions of a camera.
    2. What am I actually going to do if it all goes pear-shaped?
    You’ll need to make a decision about what the exact steps you’ll take if part of your system ends up snagged on your camera. Go through the individual components: bridle, pilot chute, lines, etc. Talk to your S&TA; about these details to check your intuition.
    Perhaps, if your helmet allows, you’ll fit it with a cutaway system so your helmet doesn’t impede your life-saving efforts. That said: Talk to someone who has actually had to use a quick-release chinstrap setup under duress. Yes, it’s great that they exist. No, they are not failsafe.
    If you don’t install a cutaway system, you’re going to have to be able to get that helmet off your head yourself. This is, suffice it to say, not the easiest thing to do while spinning and plummeting and stuff.
    If you’re convinced your flimsy-seeming little mount will pop right off when it counts, think again. It seems that, at least when you don’t want them to come off, those GoPro mounts are tougher than they look. (A lot tougher.)
    3. What’s it worth to me to buy a safer mount?
    The free mounts that come with your camera have that one thing going for ‘em: They are, y’know, free. You don’t have to buy anything else. They are gratis. No more exchange of funds involved.
    Free, however, sometimes isn’t the way to go.
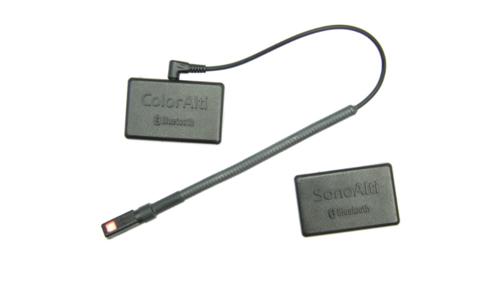
    As ubiquitous as they have become, the venerable GoPro was not invented for skydiving. Check out the array of sky-specific aftermarket mounts that aim to eliminate that looming snag hazard. Ask the camera flyers you admire what mounts they prefer (and why).
    4. Can I anti-snag myself in the absence of after-market parts?
    If you just don’t see yourself buying an alternative mount, you shouldn’t just throw up your hands and leave it to the fates. You should still make the effort to reduce your snag hazards. The SIM has some advice for industrious DIYers:
    All edges and potential snag areas should be covered, taped or otherwise protected.
    Necessary snag points on helmet-mounted cameras should at least face away from the deploying parachute.
    A pyramid shape of the entire camera mounting system may deflect lines better than an egg shape.
    Deflectors can help protect areas that can’t be otherwise modified to reduce problems.
    All gaps between the helmet and equipment, including mounting plates, should be taped or filled (hot glue, etc.).
    Protrusions, such as camera sights, should be engineered to present the least potential for snags.
    Ground testing should include dragging a suspension line over the camera assembly to reveal snag points. That last one is key, so I’ve gone ahead and put that sucker in bold.
    5. What’s my decision altitude?
    There is very little in this life that’s more distracting than getting a dangly brake line looped around your helmet camera and whipping into a brutal spin. The wha huh OH CRAP OH NO moment turns into GET IT OFF GET IT OFF GET IT OFF and, before you know it, your dytter is giving you the business.
    So: it’s a smart idea to bump your deployment altitude up a little big to give you more time to extricate yourself. More variables require more buffer and, make no mistake, that light little fluff of a sports camera is an additional variable to be reckoned with.
    6. Is this thing going to put me on the facepalm-inducing-incidents list?
    ...Because that, at the end of the day, is a more important question than “is it on?”

    By nettenette, in Gear,

    Wearing Earphones While Skydiving

    If you're wanting audio on your jump a frustrating issue you may face is the matter of achieving clear and loud quality (via headphones or speakers) inside your helmet during freefall. The loud noise and intense conditions both inside the plane and during freefall require a certain volume, clarity, and portability that many audio setups simply won’t provide. In this article we will walk you through some different audio setups that can keep the music or communications flowing while in freefall. The audio setup for you is going to depend on how you spend your time in the sky, so keep that in mind when looking for the right audio gear for you!
    What if I want to listen to music while skydiving or parachuting?
    Firstly, we'd like to make it clear that when it comes to skydiving with music we realize that there are contrasting opinions on whether it is safe or not. We'd suggest that anyone who wishes to jump with earphones in are aware of potential safety risks. We asked the guys over at outeraudio.com to make some recommendations on what one should look for when buying earphones to jump in.
    Ask yourself, what is it I want to hear while skydiving? If it is music, most wireless Bluetooth headphones will work when connected to your music playing device or cell phone. There's a few styles of headphones that can fit in your helmet, but in-ear headphones will typically fit a wider range of helmets. The quality of the earphones will change between both make and model, and taking a look at an audio review website will usually make you more confident in your purchase. Many skydivers complain about the hassle of a headphone wire, and you should know that Bluetooth headphones may encounter connection difficulties under the conditions experienced when jumping, so be aware of that ahead of time and look for products which are reputed for their bluetooth connection quality. You should also be careful if you intend to use AirPods or true wireless headphones that aren’t connected to one another as they will be prone to falling out of your ears! The best way to mitigate this is by using fitness/ergonomic fit earbuds that cling to your ears.
    Hearing any audio in general during freefall can be quite difficult. Between the high speeds and loud noise, you will need to either have a high volume or a really well fitting earphone which isolates outside noise well, you may even want to look into a cheap headphone amplifier if you find that you're unable to get the volume that you want from the default setup. We recommend a cheap one because headphone amps can be quite expensive, and the intense conditions you are in while skydiving may lead to you losing your amp or breaking it. If you do opt to use an amplifier, you should consider housing it away from the waist, or anywhere that is likely to have impact from an imperfect landing.
    Another option for listening to music in the air while skydiving is motorcycle helmet speakers. These speakers are designed to fit inside most varieties of motorcycle helmets, so they may or may not fit your particular helmet. That being said, these speakers are created with discrete designs so that they can slip tightly inside a typical helmet. In addition to their small and thin shape, these speakers usually come with adhesive and mounting hardware so that the speakers stay snugly attached to your helmet for extended periods of time.

    When looking at options, here's a few manufacturers which you can consider:
    JBL Sony  Sennheiser Panasonic Philips  Bose What about In-Air Communication?
    The above example audio set up will work just fine for audible GPS interfacing, I recommend wired earbuds because there is simply less of a chance that your very important audio signal is lost mid-air compared to Bluetooth headphones. Using Bluetooth headphones is still a possibility of course. If you are using a device like a FlySight or another audio GPS system, a headphone amplifier may be your new best friend if you find the signal to be too quiet during noisy conditions. Many skydivers manually attach their headphones to the inside of their helmets for added stability during their descent, this could be a possibility for you as well! And it's pretty easy to create a quick DIY solution.
    Canopy Relative Work relies heavily on communication. Audio signals cutting out or becoming disconnected during a jump will make this sport impossible to do because of its heavy reliance on constant communication. CRW will require very high quality in-helmet communication equipment that goes beyond your average pair of headphones and you should consult with an experienced jumper for recommendations regarding this type of communication heavy gear.
    What’s the best solution for you?
    Depending on your specific needs you will probably choose a different setup for your audio source in the air. Look at your current gear and what you already own and ask yourself, what you will be doing after you successfully bring your audio rig with you up into the sky? In many cases it may be as simple as buying a high quality set of bluetooth earphones that can work with your mobile device. In other cases you may want to do a little DIY work inside of your helmet to set up an audio situation where you have the best possible quality, with the most comfort possible.

    Do you use any earphones or speakers inside of your helmet? Whether you're an experienced CRW jumper or just a music fanatic, leave a comment below and let us know what you use inside your helmet.

    By Administrator, in Gear,

    Introducing the PD Horizon - The easy ‘off button’ to end your wingsuit flight

    The wait is over! No one is more excited than we are here at Performance Designs. After years of development, hard work, and dedication we are delighted to announce our first wingsuit specific canopy, Horizon, is ready to order.
    In 2013 Performance Designs began development on a wing with emphasis on eliminating deployment problems caused by the large burble of wingsuits without sacrificing a great flare or responsive handling. When you have been making canopies as long as we have here at Performance Designs, this process is always evolving. The one thing that never changes is our high standard for quality, performance, and our focus on providing excellent products to everyone in our skydiving community.
    The result, we think the Horizon has the best openings and the best landing power of any canopy in its class! Best of all the Horizon gives you the ability to upsize as many as two full sizes compared to a non-crossbraced ZP main. This means you can fit a larger canopy in your existing rig for wingsuit jumps. No need for a new container!
    The Horizon features

    7 cell construction
    Hybrid ZP and low-bulk 30 denier fabric
    consistent and reliable openings
    efficient glide when it counts
    responsive handling and a powerful flare
    slider presentation snaps
    HMA or Vectran Lines
    packs 1-2 sizes smaller than a similar ZP main
    Introductory Retail Price- $2100
    Available in sizes 120-135-150-170-190 Horizon’s openings are stress free and comfortable, but they don't eat up a lot of altitude. Although this canopy was not designed to win any swoop meets, the response in flight is quite a pleasant surprise. With its agile response to control inputs, the Horizon is a joy to fly. It has a fairly long control range with excellent slow flight characteristics. Its dynamic response to braked flight turning inputs makes it an excellent canopy to conserve altitude as you fly back home from a long spot. The Horizon continues to uphold the landing performance that Performance Designs customers have come to expect. With a quick response to proper flare input it is easy to predict the “sweet spot” for a nice easy shutdown no matter what the wind is doing.
    Pack volume has been reduced significantly by combining our proprietary low-bulk fabric technology with our well known Zero-P fabric. In fact, the Horizon typically packs two(2) sizes smaller than a similar non-cross braced ZP main. The incredibly small pack volume easily facilitates easy upsizing for safety.
    In short, the Horizon is an easy off button to transition from wingsuit flight to canopy flight stress free.

     
    Pablo Hernandez landing at Skydive Dubai.
    Photo by: Ivan Semenyaka  
    Do you have any questions? We might have some answers below!
    When can I get one?
    A: We will be accepting orders from PD’s Authorized Dealers as of today! (May 10th 2017). Standard production time will apply to the Horizon. These lead times are posted on the PD website at www.performancedesigns.com
    How do I buy one?
    The Horizon will be sold through PD’s Authorized dealer network. Interested customers should contact their local dealer to discuss if this canopy is right for them.
    Can I jump this without my wingsuit?
    We can’t tell you what to do with your canopy. Most people like the way the Horizon opens in freefall at terminal speeds when properly configured and packed. However, in order to get the most bang from your buck we recommend saving the Horizon for its intended wingsuiting purpose.
    How long will this canopy last?
    Putting a specific number on the lifespan of any canopy is quite difficult as it is impossible to consider all of the ever-changing variables that affect that canopy. A person who does 1000 jumps a year will go through equipment a lot faster than a person who does 100 jumps a year…and that is just one small piece of the puzzle. Our proprietary low-permeability, low-bulk fabric has proven to be more forgiving when subjected to the wake turbulence of a wingsuit deployment. We have added ZP to the center top skin and across the leading edge to enhance the performance and longevity of the Horizon. However, it does not possess the same durability that a canopy constructed of all ZP material would have. Following our recommendations for wing loading and taking the proper care of your equipment will go a long way toward getting the most out of your wing. With proper care the Horizon should bring you joy and happiness for several hundred jumps.
    What size should I buy?
    The fabrics utilized in the Horizon’s construction are part of what make this canopy so well suited for wingsuit skydiving. Because the characteristics of this fabric combination are different from traditional ZP, jumping a Horizon that is too small or loaded too high could demand a little more from the canopy pilot to ensure comfortable landings (when compared to an all ZP canopy in a similar size and design). Size your Horizon one (1) or 2 (two) sizes BIGGER than the smallest ZP canopy you are comfortable with.

     
    Roberta Mancino flying over Perris Valley Skydiving.
    Photo by: Sebastian Alvarez  
    Your Wing Loading is also a critical factor in the performance of your Horizon canopy.
    Check out our Wing Loading chart on the Horizon page of our website.
    When considering what size wing is best for you, the size of the reserve in the container that you intend to use should also be strongly considered.
    It is always advisable to consult a certified wingsuit coach/ instructor when selecting a canopy to optimize your wingsuiting experience. For more information visit the Horizon page on our website www.performancedesigns.com
    Additional Information:
    Horizon Packing Manual

    Horizon Flight Characteristics

    Horizon FAQs

    By karlm, in Gear,

    Reviewing Vertical's Viper Elite

    The amount of suit designs there are to choose from continues to grow, and selecting the right one to meet your needs can be a confounding process. Why are there so dang many and what are they all for?
    The simple truth is there are a lot of ways to fly your body. Our sport is divided by both line-in-the-sand disciplinary boundaries, such as wether-or-not you require booties and grippers to ply your trade - but also on macro levels inside sub-disciplines that have evolved together with the modern freefly scene. The ultimate grail quest of any company that designs suits is surely to come up with something so exquisitely crafted and manufactured that it should eclipse all else, transcending choice altogether by being totally awesome at all the things. The reality is that there is no single combination of pattern and material that serves all areas of a flying career as well as something focused on and aimed at a particular niche. The result of this is it can be difficult to choose one from a toolbox of designs when you are pushing at the edges of you skillset in all directions at the same time - hungry to get good everywhere right now. What you are left with is having to make a wise and honest choice about the kind of suit you really need.
    Up to the point where you might be seriously considering investing multiple jumpsuits to apply where and when you need them, you should be approaching an expensive purchase with practicality in mind. A slinky squeezy suit might be all the rage right now, but if you are continually sinking out on all your mates then you have not chosen wisely. The opposite of this is also true - if you are prioritising the time, money and effort on some quality tunnel time then a fitted design that will help build good technique and feels like a second skin might be just the job. When assessing which suit is best for you, the right kind of eyes are the same ones you should be using to choose a parachute: a smaller, more advanced canopy will not make you a better pilot - the path to success is getting the right thing for where your skills are currently.
    The Viper Elite is a further refinement of Vertical’s flagship Viper template - already previously tweaked into the Viper Pro. While it is possible to simplify these iterations as each being more advanced than the last, to do so would be disservice to the thoughtful work and overall consideration that Vertical have put into their range. If you do find yourself tumbling down the freefly rabbit hole - ultimately reaching the level where you are coaching, competing, or simply flying enough that the only real way forward is to own more than a single suit, then Vertical has all your needs covered, from the specifics of bendy freestyle to powerful lines, static shapes and everything in-between.
    At this point in my flying career I have utilised all the styles and types of suit - from back-in-the-day Talsan bagginess, through the first generations of tunnel-is-a-sport-now rethinks and all the way up to the damn-I-should-eat-less looks of right here and right now. The Viper Elite is my favourite out of all the suits I have owned. This is not because Vertical have created a better suit or some kind of revolutionary design, but because it represents the best intersection of materials and design characteristics with my personal abilities and the specific requirements I have for it. The place that this suit occupies on the spectrum of performance characteristics has, for me, the widest band of usability - it feels equally as good both indoors and under a parachute harness, and I love putting it on either at the dropzone or the tunnel. When flying in either environment, any concessions made to the other are as small as I have encountered - leaving the suit feeling tailored to both the tube and the big blue.
    Pros and Cons
    As stated above - there is no single suit design that covers every aspect of flying. Here is a look at some of the advantages and disadvantages of the Viper Elite.
    Spandex: This super stretchy material is at the central compromise between power and mobility, and its use and placement is often the most important consideration when creating a new design. The Viper Elite has spandex in the areas you would expect to see on a pure-bred tunnel suit, with additional panels for underneath where your parachute harness goes. Even the best quality spandex will shift and flap when put under pressure from the wind and in the tunnel you might feel this in a few places at certain angles, but it does allow for full, unrestricted mobility in both environments.
    Squeezy Fit: The closer a suit fits your body, the more you are relying on your true shape to fly. The better you understand how your true shape flies the more graceful you look and feel. The Viper Elite is very much a squeezy suit so all the extra stuff has been removed, such as the mesh lining and any pockets. This is good for the fit of the suit around your body and subsequently your technique, but it does mean you will need to wear some kind of base layer for comfort and find another solution for the things you like to take with you while skydiving - such as your phone, lip balm, bungees, pull ups etc. etc.
    Reinforcements: In line with it’s two Viper siblings, the Elite has Cordura covering the elbows and knees. In an ideal world none of us would ever crash or wear out our suits by dragging our limbs about on various surfaces - like the net or the glass at the tube, the floor/wall/roof of the plane, or whatever your landing area is made of, but we do any they do. The plus here is that the Viper Elite will last longer in those hard-wearing areas than if it was made without Cordura, the minus is that every extra of fabric used in the construction of a suit moves it a little bit away from the actual shape of your body.
    If you, like many, are buried up to the eyeballs in the possibilities of flying your body, and are committed to the rewards of getting it right across both environments - Vertical may well have created the best single tool produced thus far.

    By joelstrickland, in Gear,

    Freefall Data Systems LLC Launch New Altimeters

    Freefall Data Systems LLC launched two brand new skydiving altimeters on December 18, 2017. SonoAlti an audible altimeter that can be set using Bluetooth® wireless technology. ColorAlti is a patent-pending reconception of the peripheral vision LED altimeter. It can also be set using a free app called FDS Altis that is available on Apple’s App Store or Google Play.
    SonoAlti


    SonoAlti was conceived to remedy the classic problem many jumpers have of trying to set—or remember how to set—their audible altimeters. It has three different types of alarms (ascent, freefall, and canopy) and up to eight of each type can be set. The volume of each type of alarm can be set individually and the user can select from a sound bank of 64 different alarms. The unit is always on and has a rechargeable lithium polymer battery with a life of approximately 200 jumps or three months. Although it is not its primary function, SonoAlti also includes a speed tracker feature, which allows the user to get real-time feedback during a jump of vertical descent speed via beeps. In addition, SonoAlti tracks jump numbers as well as freefall and canopy time. Using the app, one can obtain information about the last recorded jump and view altitude and vertical speed graphs (up to seven minutes of data). These graphs can be saved as photos to the user’s mobile device.
    ColorAlti


    For ColorAlti, Freefall Data Systems LLC took the idea of peripheral vision altitude awareness and started from scratch. Unlike Elemental Technologies’ now defunct Chroma, ColorAlti contains a color LED, enabling it to display up to 256 different colors. The altimeter can be used in two different modes: continuous and discrete. In continuous mode, the light on the altimeter gradually blends through the colors of the rainbow according to two altitudes and colors of the user’s choice. In discrete mode, the light abruptly shifts to user-defined colors at altitudes of the user’s choosing. Up to eight of these discrete alerts can be programmed for ascent, freefall, and canopy. The unit has a flexible yet rigid gooseneck housing that is able to stay in place even at very high freefall speeds.
    Freefall Data Systems LLC
    CEO and Senior Engineer Casey Mongoven (D-33972) founded Freefall Data Systems LLC in 2016 in Lompoc, California. Casey designs all hardware and software for FDS products. He is also an active USPA Coach Examiner, AFF and Tandem Instructor with over 3000 jumps.
    http://freefalldatasystems.com/

    https://www.facebook.com/FreefallDataSystems

    By admin, in Gear,

    First Look At The Squirrel Swift 2

    Squirrel are soon releasing their Swift 2 and Funk 2 wingsuits, which are now available for pre-orders. We're excited to bring you this first look at the Swift 2.
    Image by Dan Dupuis

    New smaller planform
    New profile
    New leading edge construction
    New arm sweep
    More R&D; per square inch than any suit in its class
    The SWIFT 2 is an entirely new design that brings a higher level of efficiency and performance to the beginner-intermediate class. This is the most balanced and versatile beginner-intermediate design that we have flown, and we think it represents a meaningful step forward in wingsuit design. In the same way that the FREAK has upset the intermediate class market, the SWIFT 2 offers performance and ease of use in a ratio that we think is unique in the category.
    Compared to the SWIFT, the SWIFT 2 has less surface area yet more glide performance, range, and speed. What this means is that the SWIFT 2 is easier to fly than its predecessor, and offers higher performance. This has been accomplished by increasing efficiency in the profile and planform.
    Traditionally, wingsuit manufacturers have added surface area to a design in order to increase “performance”. But, as surface area increases, so does difficulty. Surface area is the one factor in wingsuit design that cannot be cheated: if it’s bigger, it’s potentially more difficult to fly. Our mission at Squirrel is to maximize the efficiency of each design by focusing on glide and speed gains that come as a result of profile improvements and drag reduction, instead of simply increasing surface area. When we increase the performance of a suit without reducing the comfort and ease of use, it can be considered a “free” upgrade. That is the focus of the SWIFT 2.

    Image by Avalon Wolf The SWIFT 2 planform has less arm wing surface at the wingtip section of the span, increasing the aspect ratio and improving handling and ease of use. The wing root chord has been slightly increased, adding range and stability particularly in applications such as flocking. The added surface at the wing root enables smoother pitch adjustment and increases roll stability by supporting the pilot’s CG and hips. This also eases transitions from belly to back fly positions. The leg wing stance is also narrower than the original SWIFT.
    A new arm sweep and leading edge construction, taken directly from the FREAK, has reduced drag and improved agility. The SWIFT 2 feels considerably more compact than its predecessor, or any other wing in its class, thanks to these factors being combined with a profile also adapted from the FREAK. The FREAK profile was chosen for its moderate thickness and excellent behavior across a wide range of speeds.
    THE RANGE
    Versatility is a key tenet of the SWIFT 2 design. Arm and leg wing pressure can be adjusted via the internal wing zips, allowing a softer and more manageable ride for newer pilots, acrobatic pilots looking for rapid transition and ease in flips where wing area has to be rapidly compressed. With zips closed, the SWIFT 2 delivers the range, performance, and stability needed for high or low speed flocking.
    INLETS
    The SWIFT 2 inlets are adapted from our newest high-performance suits, and feature a more efficient intake with less drag than the original SWIFT. Back-fly inlets are offered as an option, and make the SWIFT 2 a fun and agile suit for freestyle flying and steeper, more advanced, formations.
    LEADING EDGE
    Leading edge construction is a complicated matter in wingsuit design. Performance can be enhanced by creating a rigid structure over the arm, but this results in a significant reduction in passive safety. We have focused on this part of our wingsuits since the beginning of our development and we are constantly striving to create the best balance of comfort and performance. The SWIFT 2 leading edge is adapted from the FREAK, and features a grained non-flexible main arm segment with a flexible Glideskin arc at the wrist for BOC and riser/brake toggle access. The interior is finished in Lycra, which provides a smooth surface for skin or clothing to slide across, and houses the optional leading edge foam. Never underestimate the importance of an easy pull and access to your risers. Brake and riser access is a learned skill: practice it thoroughly!
    PLANFORM
    The SWIFT 2 planform is completely new, and was chosen for its distribution of surface at the wing tip and wing root. Additionally, the sweep and stance are similar to the FREAK and FUNK 2, making the transition to our more advanced suits feel more natural.
    PROFILE
    The SWIFT 2 profile is adapted from the FREAK, modified only to fit the smaller planform and shorter chord. Thickness and camber was chosen for stability across a wide range of speeds and angles of attack.

    Image by Luis Lopez Mendez FEATURES
    We believe that all performance-enhancing features in a wingsuit should be standard. If it's important to performance flying or improves ease-of-use, then it's included in the price of your suit. Padded and reinforced foot cavities, chest pocket / belly-cam access, internal pressure-zips, nut-sack storage compartment, mylar reinforced leading edge, and rubber BASE soles are all standard features in all of our suits.
    ACCESS
    In BASE and Skydiving, easy BOC and brake toggle access has proven to yield the safest and most reliable deployments. We firmly believe in the mantra, "Keep it Simple and Safe". For that reason, we designed a suit for which arm cutaways are unnecessary, BOC access is clean thanks to the extended wing root that helps to prevent the trailing edge from covering your PC, and risers / brake toggles can be accessed without unzipping. The arm sweep, wrist-cut, and leading edge construction have all been engineered for a balance of safety and performance.
    PERFORMANCE
    The SWIFT 2 has an exceptional amount of performance for its surface area. No other suit in this size range delivers as much speed, glide, or range. Ease of use is a critical factor for this class of suit, and the newest pilots will instantly appreciate the SWIFT 2’s stability in an arched position. If you have questions about flying your SWIFT 2 at any level of performance, please don't hesitate to contact us! We are always here to answer your questions.

    By admin, in Gear,

    A Great Suit Fit By The Numbers

    No-Punches-Pulled Advice From A Long-Time Suit Dealer
    Image by Joel Strickland You might think twice--or three times, or never--about dropping many hundreds of dollars on a dapper tuxedo. A skydiving suit, however? Shut up and take my money, dear manufacturer. Just make sure it’s in my colors and that the sponsor logos are right.
    When you’re slinging that kind of cash around, the last thing you want is for the object of your ardent longing to show up too loose, too tight, too short, or too long--and, due to a bafflingly high instance of improper measuring on the part of the buyer, that happens all the time. Take it from Joel Strickland, double British gold medalist (in both freestyle and freefly) and dealer for the venerable Vertical Suits. He’s been wrapping innocent skydivers in measuring tape for some years now, and he has excellent advice for the un- (or under-) initiated.
    1. Relax.
    “Measuring is not as difficult as people think it is,” Strickland soothes, “So, if you follow a few simple rules, it is pretty straightforward.” In other words: don’t get too nervous about this.
    2. Get someone to help.
    “While it’s technically possible to measure yourself,” Strickland explains, “It is not recommended. There will be some touching. Try not to make it weird.”
    3. Make it a dress rehearsal.
    Strickland advises everyone who comes to him for a fitting to wear what he/she would normally wear under a suit: base layers, thermals, underpants, jeans, whatever’s usually under there. You’ll want that suit to fit comfortably over your usual undergirdings, not strain over a pair of baggy, beloved chinos you didn’t wear to the fitting.
    4. Follow the video.
    “It is difficult to get it wrong if you use the talking pictures,” Strickland says. “We live in the future. Few people are ever more than ten feet from a device that will let you do this. No excuses.”
    He’s referring specifically to the Vertical Suits fitting video, of course, but similar helping hands are available from other suit manufacturers.
    5. Measure twice, cut once.
    “Always measure twice,” Strickland insists. “Maybe switch hands or stand on the other side and do it the other way around. Perhaps switch the limb being measured. See that the numbers match up.”
    6. Don’t tweak.
    “Suit design has grown into a very precise process using science and maths and brains,” Strickland says. “The manufacturers ask for a lot of measurements for a reason, and the best results come from sticking to the plan. If you mess with them, it can throw out the form of the suit and compromise its awesomeness.”
    7. Let the company know about your special needs.
    If you do require a specific area to be looser--for example, if you wear a brace--reach out to the manufacturer for advice instead of altering your measurements to suit what you think the suit requires. They’ve almost certainly seen your issue before and can give you the best advice.
    8. Don’t fudge the numbers.
    Your measurements now are what counts. “If you want your suit to fit,” Strickland sighs, “Do not adjust anything based the diet you just started or the gym membership you just bought.”
    9. Be gentle.
    “When wielding the tape measure,” he continues, “You should be aiming for tickle, not strangle.”
    10. Come as you are.
    When being measured, stand naturally. “Don’t puff out your chest or suck in your stomach or clench your buttocks or whatever,” Strickland explains. Your suit will feel better, fly better and look better if it fits you as you really are, right now.
    11. Look to the experts, if you really want to nail it.
    The best way to get all of this stuff done is to seek out one of your chosen suit’s stable of official dealers. “In and around all the places where skydiving is popular,” Strickland advises, “There are people who work closely with the company as boots on the ground to help.”
    These dealers have the benefit of many years of combined experience, as well as a direct line to the manufacturer for questions. They’ve generally tried and tested many different jumpsuits through the years, and can offer horse’s-mouth feedback on any issues or questions you might have. Sniff around at boogies or events--not just under the loudly-logo’d tents, but in the crowds, as well.
    “They will go on and on,” Strickland assures. “You will wish they would shut up about it after a while.”

    By nettenette, in Gear,

    NeoXS from Parasport - Review

    Powerful, small, and flexible, the new NeoXS from Parasport is the newest product in audible altimeters available to skydivers. If you’re a freeflyer, wingsuiter, speedskydiver, or a relative work skydiver, you’ve probably already recognized the need and value of a trustworthy audible.
    Slightly smaller than other audible devices, it is also slightly thicker. The casing is a combination of heavy-duty cast aluminum and plastic. The NeoXS fits inside of any skydiving helmet set up for an internal audible, and with a little work can be made to fit on the outside of any helmet set up for external mounting. Although there is no cradle currently available for the NeoXS, it should be easy to mount on goggles if jumping without a fraphat or helmet.
    The Right Stuff-
    Heavy and tough, this is one tool you won’t have to worry about dropping on the floor. The test unit sent to me survived several drops from an 8’ height onto carpet, linoleum, and concrete without missing a beat. The aluminum case is available in multiple colors, making it easy to spot in a gear box or bag, or on the ground at the DZ. It also makes it easy to engrave your name and license number for quick identification and loss prevention.
    With three alarms for freefall and three alarms for swooping modes, the NeoXS may be set up for any skydiving discipline. Alarms may be set to various volume levels, and you’ll want to be exceptionally careful with the highest levels of volume. This small package is LOUD when set to the high-volume setting. On one jump, I used standard foam earplugs to see if I could hear the device at full volume, and the cutting pitch and squeals easily penetrated the foam ear plugs. This can be of significant benefit to hard-of-hearing skydivers or for those that like to wear earplugs in the aircraft, and would prefer to leave them in during freefall.


    The NeoXS is slightly smaller than most audibles, but not significantly so. It'll fit the audible pocket in any skydiving helmet. Skydivers that enjoy multiple disciplines will appreciate the various profile modes the NeoXS offers. Going from a tandem to an AFF to a wingsuit jump? No problem. This unit stores up to four profiles, allowing very rapid switching from one profile to another. Simply push the joystick three times to enter "edit" mode, move the joystick to the left to change the profile, and put the NeoXS back in the audible pocket. The audible always resets automatically but can be manually reset.
    Another benefit is the always-locked modes of the unit, making it impossible to accidentally change profiles when the unit is left in a gear bag.
    The unit may easily be reset for new MSL altitudes, simply by entering the configuration mode and using the joystick, reset the zero point of the device.
    What You'll Love (in a nutshell)
    3 freefall signals
    3 canopy warnings
    countdown timer
    real time altitude display while climbing to altitude
    simplified programming of warning altitudes
    4 user programmable profiles
    Can be set EXTREMELY LOUD (user selectable volume)
    May be programmed during climb to altitude
    It's heavy (durable aluminum). It won't crush in your gearbag
    The Not-So-Right Stuff-
    The owners manual could use some improvement. It’s not immediately clear how to program the profiles, or which profile is being used. Actually programming the unit makes the profile modes perfectly clear, however. The same may be said for swoop modes. Better diagramming might alleviate this small concern, or perhaps some on-line help. Once the programming dialog is accessed, the procedures for setting altitudes become readily self-evident.
    The only major concern with the unit is that the small joystick sits slightly higher than the recessed area in which the joystick is mounted. The recessed area makes it obvious that the manufacturer wanted to prevent the joystick from being accidentally knocked about, but the joystick does slightly protrude above the recess.

    The joystick is marginally elevated. Initially, this suggested a problem, but in working with the unit in real-world situations, it is not an issue due to the unit always being locked. Three button pushes are required just to unlock the unit, and then the joystick is used to enter programming modes.
    The unit also offers no backlight, making it difficult to set up for night jumps or in those wee hours of the morning. The LCD is clear and textually driven, however.
    What You Might Not Love
    Owners manual is weakly written
    Joystick button is slightly higher than body/recessed space
    No backlight for night-time programming
    It's heavy, weighs nearly double compared to other audibles (I personally like the heavier weight.)
    General Comments:
    Although the owners manual could use some improvement, the only real challenge encountered was figuring out how to unlock the unit. (This is achieved by repeatedly pressing the joystick until the lock icon first flashes and then turns off.) A quick glance at the owners manual was required to determine how to unlock the unit after a few minutes of trying to do it by instinct.
    Once I’d unlocked the unit, I put the manual down to see if I could self-start the programming procedure based. I could, and it was very instinctive once I’d reached the unlocked stage.
    The four main menu options are Profile, Swoop, Alarm, and Configure. Programming for Meters or Feet display is offered in the Profiles menu, with three altitudes available. Additionally, unique volumes may be programmed for swoop alarms vs freefall alarms.
    Alarm altitudes cannot be programmed lower than a subsequent altitude, thus preventing accidental programming errors.


    The NeoXS is easily opened with a normal screwdriver. No special tools or jewelers-sized screwdrivers are required. The unit does not need to be opened to change batteries (you can see the battery door in the housing), I simply like disassembling things to see what they're made of. The reason for the weight is obvious; this is not thin, easily crushed aluminum.
    *(Opening the NeoXS will void your warranty, do not try this at home, kids!)
    The alarms are varied, allowing for each alarm to play a distinct tone and pattern, thus eliminating confusion about what alarm is for what altitude.
    As a side note, I wouldn't mind seeing a manufacturer develop personally-created alarms such as one recorded by a user. Wouldn't it be cool to hear your own voice at the third warning saying "Hey buddy, it's time to pull?" All that would be involved is either a USB connection to a computer, or a microphone built into the audible. It would be difficult to output audio frequencies that cut through the noice properly, yet wouldn't a voice be more fun than a screech? But I digress...
    In evaluating the unit, the joystick could not be accidentally moved in “real-world” scenarios, but in putting it in the helmet and using fingers to move the unit around, I was able to “accidentally” hit and move the joystick but could not affect the programming modes, as the unit is virtually always locked. It is impossible to leave the unit unlocked, as it returns to a locked mode 30 seconds after programming input is ceased. Therefore, it’s impossible to accidentally change the modes by moving the unit around inside a helmet pocket or other location.
    The unit uses one CR2430 battery and offers a very long life. These batteries are easy to find at most any grocery or large retail store.
    All in all, I like this little audible. After having used it for a little over a month, I feel pretty good about the quality, durability, design, and how it functions. I’d first seen it when it was announced at Reno PIA 2007 when Paulo from Parasport overheard me complaining about a particular audible I had (A Cool n' Groovy Fridge Company audible) and its lack of adjustable features. When he set the NeoXS to screaming, it had everyone anywhere near covering their ears, it was so loud. The fact that it can be taken down to a nominal level is great for those that still have fully intact hearing. Levels may be checked on the ground, so it's not an exercise in aerial experimentation to determine which volume levels are best for you.
    At $170.00 USD, the price is right too, and makes it an accessible cost point for most any skydiver.
    Overall, this is a very tough, well designed and manufactured tool for skydivers and from my perspective, should be part of any consideration in purchasing an audible altimeter.
    ~douglas

    By admin, in Gear,

    Birdman Announces Katana Wingsuit Release

    Just days after we brought you an article on the Ninja wingsuit by Birdman, they have come out with a press release for the anticipated Katana wingsuit. We mentioned the Katana in last weeks article, touching on whether or not the Katana was in fact a renaming of what was originally advertised as the Samurai, while in development. The Katana is Birdman's third wingsuit in their 2013 line, following the Blade III and Ninja. The Katana wingsuit has been developed by Jari Kuosma and Shin Ito and focuses on speed and distance, where as the Blade III was a flocking suit and the Ninja was an acrobatics suit.
    The Katana wingsuit sports large wings and quatro-wing design with a drag reduction system which enhances the flow of air on the top of the wing, allowing for quicker speeds and longer distance in flight. The design still allows for quick and flat turns without having to maximize the surface area. Birdman wanted to develop a wingsuit that while being large, was extremely quick and at the same time capable of easy maneuverability.


    Technical Specifications:
    Aerodynamically shaped, transparent reinforced sail material with BIRDMAN DRS.
    Emergency cut-away for arms.
    10 mm YKK zippers.
    Reinforced 3D air-intakes with air-locks.
    Hook knife pocket outside.
    Two inner pockets.
    Reinforced 2 mm thick leather bootie.
    High collar.
    210D double coated extra sturdy nylon.
    Semi- rigid long- and short ribs made from BoPET material.
    Fully breathable inner lining for comfort.
    Thick protective knee & bootie area.
    Leading edge: Aerodynamically shaped, transparent reinforced sail material.
    Thick, moisture absorbing back pad made from Spandex.
    Large size erected air-inlets with airlocks.
    Back deflector and leg wing DRS.
    Semi-rigid and shaped leading edge.
    10 mm wide YKK zipper. Sales for the Birdman Katana start in November 2013.
    Birdman is a company with a long history in skydiving and was one of the first companies to produce wingsuits to skydivers, over a decade ago. The company is has undergone some changes after taking a hiatus and now pushing their new line of products in 2013.

    By admin, in Gear,

    Shimano Enters the POV Camera Market With the CM-1000

    Action cameras are popping up all over the place, from all sorts of companies. Garmin shocked a few with their release of the Garmin Virb in the third quarter of last year. Now it's the Japanese manufacturer Shimano that has joined the party. Unlike some of the other action camera competitors, Shimano is a long standing company founded in 1921, but is typically known for their cycling, snowboarding and fishing equipment.
    Shimano will be releasing their first POV action camera in May this year, which will look to compete with brands like GoPro, Contour and Sony. The new 'CM-1000' as it's called, certainly has some interesting features that could allow it to challenge the competitors. Unlike most other POV cameras the CM-1000 is waterproofed to 30 feet without the requirement of any additional housing. The weight is also very impressive, weighing in at just 86 grams; more than half that of the GoPro Hero 3 Black Edition when waterproof housing is attached.
    The most impressive feature for us is the aperture of the camera lens which sits at F2.0, as opposed to most competitors' F2.8. This full-stop increase in light will allow for better low-light performance from the camera, a topic that is often focused on and often falls short in some manufacturers. The sensor is also very impressive, boasting a 16 megapixel backlit CMOS sensor, likely able to produce high quality still images as well as full HD video.
    The CM-1000 will come with multiple lens modes, a standard 135 degree view as well as an ultra wide angle 180 degree view. Another pretty cool feature is the auto image rotation, which will automatically rotate the picture to the correct orientation, regardless of how you hold the camera. Bells and whistles come in the form of ANT+ capabilities, allowing users to connect the device to training devices and heart-rate monitor. Especially useful for those who like to keep track of their data.
    While one would imagine that coming from a company who is renowned for their cycling gear, that their camera would be focused towards cyclists. The CM-1000 seems to target all POV users, with the company's focus put on things like waterproofing.
    In summary, the CM-1000 looks impressive on paper, it has what appears to be a high quality sensor, a large aperture and is light weight. It is however important to remember that these are only a fraction of variables that will affect the overall video and image quality. And it will be interesting to see how the camera handles transition in lighting, as that's always an important factor with POV cameras. Though if it performs as one would expect from a company with a history of quality products and a large development budget, this camera is definitely worth keeping an eye on.
    Shimano's CM-1000 will come with a lens cover and two mounts (one adhesive and the other helmet mount) and USB cable.
    The CM-1000 will set you back $299 on release.

    By admin, in Gear,

0