0

Gear

    Is It Time For A Reline: Here's How to Know

    Do your suspension lines have a noticeable five-o'clock shadow? Maybe it’s time for your gear to spend the weekend with your friendly neighborhood rigger. If you’re unsure, you’re not alone--plenty of skydivers hem and haw about this particularly important aspect of canopy maintenance.
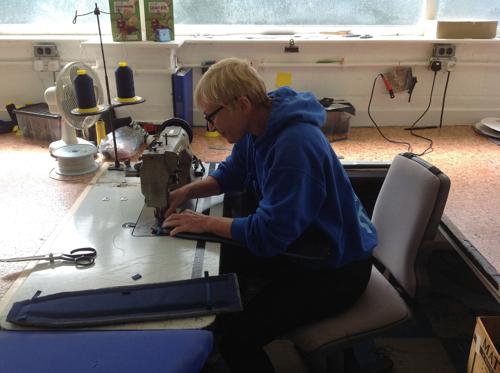
    Looking for a little more convincing? Here’s a brief education on line maintenance by Karen Saunders, one of the few (and one of only two women) to hold the lofty Advanced Rigger ticket from the British Parachute Association. Karen has seen enough fuzzy line sets to give any sane canopy pilot the night sweats, and she wants to make sure it’s not you that gets to live the nightmare of a mid-swoop snap.
    1. Go with your gut.
    “Trust your instincts. If you think that maybe your lines are looking a bit shabby, they probably are. Most people will look at their line set and say, That looks a bit shit, but I’ll do something about it tomorrow. Tomorrow turns into a week, and then a month. Before you know it, you’ll have a line snap or an off-heading opening. Fix it before you create yourself some problems.”
    2. Know what you’ve got.
    “The most important thing is to know what type of line is on your parachute. Most people don’t--and if they don’t, then they won’t know how many jumps they can expect to get out of that line set before it needs to be replaced. And they also won’t know whether to expect to have line shrinkage or whether it is going to go the other way and simply snap when it reaches the end of its life cycle. Vectron and HMA will do just that if you don’t take care of them: Snap. They won’t give you a warning aside from the fact that they will start to fray as they age.
    The other thing to think about is where your line set actually comes from. Most people will buy their line sets from manufacturers, but there are riggers out there that will make cheaper line sets themselves. I can spot a manufactured line set from anything else in a flash, but most people couldn’t--and maybe that’s the line set have got on your canopy that you bought from somebody in good faith. It is always best before you buy anything to get it checked out.”
    3. Get some visual reference.
    “Once you know what line type is on your parachute, look at Performance Designs’ line wear charts for your lines to get an idea of what wear actually looks like. It may surprise you. Using that reference as an example, you can see how deterioration looks over a given period of time and what percentage of strength you lose.
    You can test your new knowledge immediately by looking at the bottom part of your brake lines and the stabilizers. Those lines are always going to take the brunt of the wear. Generally, having the bottom part of your brake lines replaced at the first sign of wear is going to save you a whole world of problems.”
    4. Watch for the warnings (if you have a line type that broadcasts them).
    “If your lines are made of Spectra or Dacron and you need a reline, you can expect to get some bad openings: an off-heading or big surges after opening. That’s generally because the slider is moving up and down your lines, heating them up and shrinking them.
    If your parachute opens and it is not on-heading, then it is generally an indication that it is going out of trim. You need to get somebody to look at that. When you do, they might look at it and tell you that the lines are okay; maybe it’s just your body position causing the problem. If they look at your lines and go holy shit, man, you need to replace straight away, then you have your answer. Either way, you’ll have peace of mind.”
    5. Don’t get tunnel vision.
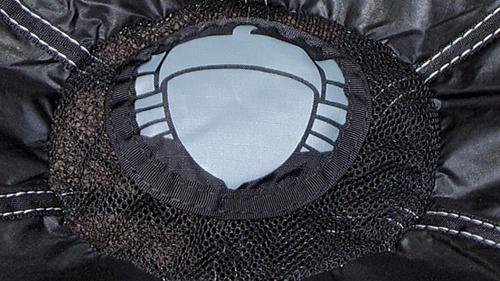
    “Don’t just look at your lines. Your lines are suspended by some binding tape which needs checking as well. Especially after a hard opening, be sure to look at the tape where each line is attached to your canopy, as well as the fabric around it.
    Kill lines are another thing. Everybody forgets that a kill line wears out in the same way as a suspension line, except a lot more quickly. If your kill line is made out of Spectra and has shortened, then you’re going to start having problems with your openings. The dead giveaway is finding that your pilot chute is turned virtually inside out every time you land.
    A kill line wears throughout the bridle. The weakest point doesn’t have to be at the bottom or top--it can snap right in the middle--so make sure you pull it through from both ends when you check it. Pull it as far as you can from one end and then pull it as far as you can from the other end to have a good look.
    Finally: If you’re getting a new line set, please, please, please replace your slinks as well. Don’t put a new line set on it and put an old set of slinks on it. That defeats the object of this exercise. They are not infallible. They do fail, and the last thing you want is for a slink to fail at 200 feet, because you’re not going to survive that.”
    6. Remember: The integrity of your lineset isn’t a good place to save a few bucks.
    “The costs to reline aren’t as bad as you might think. I can tell you roughly what I charge, but I can’t speak for other riggers. That said, I will always look at something for free, and if someone asks me for it, I will always give my advice for free, and that’s also the way most of the riggers I know like to work.
    I charge 15 pounds, which equates to about 20 U.S. dollars, to replace both lower brake lines. If the lowers go from the cascade all the way to the toggle, I charge 40 pounds--which is something like $60. If you compare that amount of money to losing a brake line when you’re flaring--or when you are at 100 feet--you see the value. You have to weigh the cost of your own safety.
    If you don’t happen to have a rigger on your dropzone, then go to an experienced jumper. See them and say, Hey, I’m a bit worried about this. What do you think I should do? If they look at it and start laughing, you have your answer.”

    By admin, in Gear,

    Introducing UPT's Mutant Swoop Rig

    The Mutant is a purpose-built swoop harness and container system that is a swooping game changer!
    Designed by Vince Reffet and Blikkies Blignaut, the Mutant is significantly different than a standard sport rig. The risers connect at the hips, similar to that of a speed flying harness, and control is initiated more by weight input than toggle pressure. The laid back, supine position of the pilot reduces drag which ensures a super long and fast swoop.
    This innovation significantly changes the flying dynamics of the canopy which means the Mutant is not suitable for all flyers. Jumping the Mutant requires training and a high level of experience; those with speed flying harness experience will realize an easier transition than those with no supine harness experience.


    Here's what some of the early testers have to say about the Mutant:
    It only took me a few seconds under canopy to realize that the increase in performance with the Mutant was phenomenal.
    The performance envelope is increased and the sensitivity through the harness is shocking. After a couple of jumps I up-sized to give me time to get used to the increased in control.
    I feel like the harness adds another dimension to the canopy, like it's on steroids!
    -Pete Allum

    The biggest benefit from flying a MUTANT harness is that you can control your pitch angle just by using weight shift , there is no need to pull the front risers to dive neither to use the rear risers to recover if done right, just leaning forward makes you dive and leaning backwards helps you to recover with less wing distortion as you barely apply any input on the rears.
    -Pablo Hernandez

    This harness is so awesome! It is the most comfortable harness period.
    It's the next step up in high performance parachute flying. Relearning to fly using the hip attachments is fun and challenging. The mutant harness automatically makes you feel like you just down-sized. It turns your katana into a velocity and velo into a peregrine.
    -Jarrett Martin


    "I think the name says it all :D Mutant. A hybrid between a paragliding harness and a skydiving one. I have been intrigued by it since the first time I heard about it and when I saw it I realized it is the obvious step ahead. It is very fun to fly but because it is so different, we will have to relearn and redefine a lot of what we know about swooping. The skydivers with a paragliding/speedflying background will have an easier transition to it. I am excited to figure it out even though I know it might take me some time. It is definitely worth the effort. The next generation of skydiving harnesses is finally here!"
    -Cornelia Mihai

    My bro and teammate Vince Reffet has been working on it for a long time and I can only thank him for putting all these efforts into it!! This harness is a door open to a new era of skydiving, it's been a long time that I didn't have that much fun under canopy!!! I did a lot of speed riding and paragliding and the mutant is a way to get the power of the canopy control that you can have under a paragliding wing but in skydiving! such a blast to go from a position that is standing up to seating and then be able to use the weight to move so fast and so powerful!! it is really a new world. thank you vine and thank you UPT!!!
    -Fred Fugen


    Stay tuned for updates about the Mutant release.

    By admin, in Gear,

    Introducing The Squirrel Snatch BASE Pilot Chute

    The Squirrel Snatch is a revolutionary new product that sees the first BASE targeted development of a toroidal design for a pilot chute. Although the design has been used extensively in the development of non-sport parachutes for over 40 years, until now it's never been manufactured for BASE or skydiving. The idea was born from a discussion between the company's co-designer and CRW expert, Jim Rasmussen.
    The toroidal design (also known as a Pulled-Down-Apex design) that the Snatch uses, is a complex and costly product to produce and was no small undertaking by the company. The Snatch has a three dimensional partial toroidal shape and is joined together with two mesh cones, allowing for extremely high drag co-efficiency. Squirrel Wingsuits discuss the differences between the shape of a toroidal design and that of the common pilot chute by saying, "Traditional PCs are two circles sewn together around the edges, typically one of ZP and one of mesh, with a piece of line or webbing connecting the center of each circle together at a specific distance. When pulled from the center of the mesh circle and dragged through a fluid, it inflates into a rough approximation of a pulled-down-apex shape, but with a large amount of distortion and error, with a wrinkled and asymmetric circumference. Imagine crumpling up a single piece of paper until it forms the 3D shape you want to design - it won't look good, nor be an accurate representation of a 3D surface. Yet that is the current basis of traditional PCs: an approximate and inefficient 2D design meant to perform a task that requires a 3D shape."
    Squirrel used an ellipse with a 7:10 (H:W) ratio, with an axis offset of 20% of the width in the development of the torus. The tangent formed with the cones and partial torus was calculated precisely to ensure that the ZP had a smooth transition with the mesh. This allows for the ability to maintain a smooth error-free perimeter on the pilot chute.
    Innovation aside, the most impressive part about the Snatch is the enhanced performance over regular double circle pilot chutes. Because of the shape of standard pilot chutes, the surface area is usually met with an imbalance of stress, with some areas being pulled more than others, and material being "loose". The randomness aspect that is present in these regular pilot chutes gets minimized with the toroidal design of the Snatch. Unlike normal PCs which are constantly changing shape as airflow moves around the creases and wrinkles, the toroidal design inflates to its intended shape and remains that way, without the pulsing that is usually witnessed.
    When inflated, the Squirrel Snatch takes the shape of a 3D object, with specifically calculated gores.
    This increase in inflation performance is easily seen in testing where far superior stability was witnessed in both wind tunnel and field testing.
    Symmetry is one of the most important factors in the performance of a pilot chute, and each Snatch is guaranteed to be symmetric, with the build tolerance being set at a stringent 1mm +/-.
    The focus with the Snatch has not only been on general performance and innovation, but also on safety. Squirrel decided that due to the suggested risks involved with heavy handles, and their involvement in entanglements, that they wanted to produce the lightest possible design, without compromising on durability. The decrease in weight means that bridle entanglements become less likely. The Snatch uses hexagonal carbon-fiber handles for sizes 32, 34, 36 and 38. The 42 featured a pad-patch top with no carbon, while the 46 and 48 are handle-free, for hand held use.
    The Snatch already has several skydivers wondering whether or not they will be able to use it on their skydiving rig, or whether the company plans to release a skydiving specific toroidal PC in the future, as well as whether or not this is a development that could change the development and focus of PCs in general.
    Squirrel have open sourced the design, in the attempt to get more BASE jumping what they consider to be a higher performance and safer design. For those looking to build their own toroidal PC, you can get in contact with Squirrel via e-mail and they will provide you with the 2D patterns for all sizes.

    By admin, in Gear,

    Introducing The Safire 3 by NZ Aerosports

    NZ Aerosports released the original Icarus Safire in 1999. They followed up in 2001 with the release of the Safire2, and she went on to become their biggest selling mainstream canopy, and one of the most popular beginner and intermediate canopies on the market.
    About five years ago, there began to be rumours of a Safire 3 and Crossfire 3 being developed, but the development of Petra and Leia stole the limelight and the research and development hours, and kept the company preoccupied for a few years. But last year NZ Aerosports started making some noise about them again, and since there's been a few teaser posts on their Facebook page about these new wings.


    Everyone wants to know when the Safire 3 and Crossfire 3 will be released, but the team at NZ Aerosports are staying tight lipped on that one. They have stated that the Safire 3 will be first to go public. And they've released a bit of information about what we can expect to see in the Safire 2's successor. They say they are also working hard on the Crossfire 3 project and that it’s going to be ready later in the year than the Safire 3, but it’s looking pretty good!
    The starting point for the Safire 3 project was reshaping the Safire 2 in the same software and using the same 3D design technique used to design Petra and Leia. They’ve kept the crossport design and repartition the same, to reduce surface distortion and improve load bearing, and the 3D lineset design, which gives a more accurate shape in flight. They’ve used the same elliptical lobe, so the shape of the canopy given by the way the lineset attaches now follows a true ellipse. And they’ve added their statement Powerband that flattens the 3D panels more accurately and reduces fabric stretch to keep the new design true to it’s shape in flight.


    These are some of the design changes you can expect from the Safire 2 to Safire 3:
    New planform totally reshaped through true 3D design
    Proportionally tuned air inlets that open wider in the centre of the canopy and less toward the tips
    New brake configuration, providing a more efficient flare It won't be more 'high performance' than the Safire 2, because it is aimed at the same type of pilot that flies them now, but she will be more efficient and responsive, have a better glide and an even more powerful flare.
    The Safire3 Project: Opening Progression from NZ Aerosports Ltd on Vimeo.
    When the Safire 3 comes to market she will be available exclusively from NZ Aerosports in New Zealand, and NZ Aerosports dealers.

    By admin, in Gear,

    Introducing the PD Horizon - The easy ‘off button’ to end your wingsuit flight

    The wait is over! No one is more excited than we are here at Performance Designs. After years of development, hard work, and dedication we are delighted to announce our first wingsuit specific canopy, Horizon, is ready to order.
    In 2013 Performance Designs began development on a wing with emphasis on eliminating deployment problems caused by the large burble of wingsuits without sacrificing a great flare or responsive handling. When you have been making canopies as long as we have here at Performance Designs, this process is always evolving. The one thing that never changes is our high standard for quality, performance, and our focus on providing excellent products to everyone in our skydiving community.
    The result, we think the Horizon has the best openings and the best landing power of any canopy in its class! Best of all the Horizon gives you the ability to upsize as many as two full sizes compared to a non-crossbraced ZP main. This means you can fit a larger canopy in your existing rig for wingsuit jumps. No need for a new container!
    The Horizon features

    7 cell construction
    Hybrid ZP and low-bulk 30 denier fabric
    consistent and reliable openings
    efficient glide when it counts
    responsive handling and a powerful flare
    slider presentation snaps
    HMA or Vectran Lines
    packs 1-2 sizes smaller than a similar ZP main
    Introductory Retail Price- $2100
    Available in sizes 120-135-150-170-190 Horizon’s openings are stress free and comfortable, but they don't eat up a lot of altitude. Although this canopy was not designed to win any swoop meets, the response in flight is quite a pleasant surprise. With its agile response to control inputs, the Horizon is a joy to fly. It has a fairly long control range with excellent slow flight characteristics. Its dynamic response to braked flight turning inputs makes it an excellent canopy to conserve altitude as you fly back home from a long spot. The Horizon continues to uphold the landing performance that Performance Designs customers have come to expect. With a quick response to proper flare input it is easy to predict the “sweet spot” for a nice easy shutdown no matter what the wind is doing.
    Pack volume has been reduced significantly by combining our proprietary low-bulk fabric technology with our well known Zero-P fabric. In fact, the Horizon typically packs two(2) sizes smaller than a similar non-cross braced ZP main. The incredibly small pack volume easily facilitates easy upsizing for safety.
    In short, the Horizon is an easy off button to transition from wingsuit flight to canopy flight stress free.

     
    Pablo Hernandez landing at Skydive Dubai.
    Photo by: Ivan Semenyaka  
    Do you have any questions? We might have some answers below!
    When can I get one?
    A: We will be accepting orders from PD’s Authorized Dealers as of today! (May 10th 2017). Standard production time will apply to the Horizon. These lead times are posted on the PD website at www.performancedesigns.com
    How do I buy one?
    The Horizon will be sold through PD’s Authorized dealer network. Interested customers should contact their local dealer to discuss if this canopy is right for them.
    Can I jump this without my wingsuit?
    We can’t tell you what to do with your canopy. Most people like the way the Horizon opens in freefall at terminal speeds when properly configured and packed. However, in order to get the most bang from your buck we recommend saving the Horizon for its intended wingsuiting purpose.
    How long will this canopy last?
    Putting a specific number on the lifespan of any canopy is quite difficult as it is impossible to consider all of the ever-changing variables that affect that canopy. A person who does 1000 jumps a year will go through equipment a lot faster than a person who does 100 jumps a year…and that is just one small piece of the puzzle. Our proprietary low-permeability, low-bulk fabric has proven to be more forgiving when subjected to the wake turbulence of a wingsuit deployment. We have added ZP to the center top skin and across the leading edge to enhance the performance and longevity of the Horizon. However, it does not possess the same durability that a canopy constructed of all ZP material would have. Following our recommendations for wing loading and taking the proper care of your equipment will go a long way toward getting the most out of your wing. With proper care the Horizon should bring you joy and happiness for several hundred jumps.
    What size should I buy?
    The fabrics utilized in the Horizon’s construction are part of what make this canopy so well suited for wingsuit skydiving. Because the characteristics of this fabric combination are different from traditional ZP, jumping a Horizon that is too small or loaded too high could demand a little more from the canopy pilot to ensure comfortable landings (when compared to an all ZP canopy in a similar size and design). Size your Horizon one (1) or 2 (two) sizes BIGGER than the smallest ZP canopy you are comfortable with.

     
    Roberta Mancino flying over Perris Valley Skydiving.
    Photo by: Sebastian Alvarez  
    Your Wing Loading is also a critical factor in the performance of your Horizon canopy.
    Check out our Wing Loading chart on the Horizon page of our website.
    When considering what size wing is best for you, the size of the reserve in the container that you intend to use should also be strongly considered.
    It is always advisable to consult a certified wingsuit coach/ instructor when selecting a canopy to optimize your wingsuiting experience. For more information visit the Horizon page on our website www.performancedesigns.com
    Additional Information:
    Horizon Packing Manual

    Horizon Flight Characteristics

    Horizon FAQs

    By karlm, in Gear,

    Introducing The Kraken

    “She’s a wing of legends. The Kraken is the ultimate 'party in the front and business at the back', she's super responsive and holds tight when pushed hard. She is the canopy equivalent of Che Guevara, Marilyn Monroe and Brian Jones all in one. The Kraken is a must have for any wingsuiter and will have the pilot grinning ear to ear as they fly back to whatever landing area they can make it to. Kidding. Kinda.”
    We have released the Kraken, finally! Designing the Kraken was a long process because it was new to us: the Kraken is our very first wingsuit specific parachute. Traditionally NZ Aerosports has focused more on flight performance than on opening a canopy in a wingsuit wake. So it took us a few years, but ended up with a very technical end result: a canopy full of cool features and ideas that makes it very different from any existing wingsuit canopy. The result is a low bulk, long lasting canopy with very reliable and stable openings that lands like a dream.
    Typically, canopies low(er) in aspect ratio and ellipticity (fat 7-cell canopies) have better heading performance, and stability in flight. The problem with this is that wings shaped like this are not exactly renowned for their glide performance and sharp handling. The solution to this problem was a combination of ideas floating around the head of NZ Aerosports’ aeronautical engineer Julien Peelman, and the production and test jump team. We looked to our deep understanding of modern day wings, aerodynamics, and type of ingenuity that produces world class skydiving parachutes – our trademark.
    Key features of the Kraken
    3D Designed: We are now using Catia V5 to design canopies. This is one of the most advanced 3D CAD softwares available. It gives us more freedom to design the canopy down to the finest details and helps generate the most accurate panels possible. The result is a more accurate shaping, a smoother surface, and better aerodynamic efficiency.
    CFD Tested: The Kraken shape has been tested using CFD (Computational Fluid Dynamics), which gives us, among other things, a better understanding of her behavior in turbulence and during recovery.

    Photo Chris Stewart
    Anticipating the zag: First debuted in our Crossfire 3, The Kraken is designed so its panels are designed directly in the shape they will have during flight by taking into account the Zig-Zag distortion. This spreads the load evenly through the fabric and makes the wing more structurally efficient.
    New Rib Shape: The Kraken has benefited from research on rib shaping that was originally used to design our new range of hyper-performance wings, Petra and Leia.
    New Crossport Design: Crossports have been strategically placed in the Kraken to have the least influence on the upper surface shape while allowing a good air circulation between the chambers. They are bigger toward the center of the canopy to help with symmetrical openings. They have also been designed with an elliptical shape that optimizes their area while reducing the upper surface distortion.
    Powerband: We've added the split leading edge Powerband to all our new canopies since we pioneered it with Petra. It allows us to better control the aerodynamic shape in the nose area, which prevents parasitic drag.
    Curves in the right places:
    We’ve realised that by sewing our reinforcing tape in parabolas (arcs) on the ribs, we spread the load applied to the top surface more efficiently, meaning less distortion and a more efficient top surface.
    Don’t say slit:
    We’ve put a vent on the lower surface to help promote fast center cell inflation. This means better, more on heading openings in the messy wake of a wingsuit. It’s not a gaping hole like a BASE vent, it’s a… horizontal opening... that seals after full inflation.
    There’s a hole in my slider?!:
    We became so fond of vents that we put one in the slider! We found that by creating a channel for the air to go straight through, we reduced the crazy oscillation often seen during parachute openings. Those oscillations can contribute to off headings etc, so that’s nice!
    Big holes:
    To help out its closest neighbors, the crossports leading from the center cell to the closest outboard cells are enlarged. Promoting symmetrical central inflation means promoting on heading openings!
    Keeping it short:
    Shorter lines mean more flight stability, and easier rectification of any pesky line twists – both good things for the whole wingsuit deal!
    High-tech, low bulk:
    Because it’s 2019, we haven’t used untreated cloth (F-111) for our wingsuit canopy. Instead, we’ve tracked down a low bulk ZP (treated with silicone) fabric, and used that for the majority of the wing, with the Powerband and top center panel made out of standard ZP for extra longevity.
    Riser equality:
    We’ve included a bit of internal structure that means your bridle will load both your risers more evenly during the early stages of deployment. Because of how it looks, we’ve called it the ‘Bow-tie’ – and as we all know, equality is classy!

    Photo Chris Stewart
    Little tail thingys:
    Mini-ribs in the tail of a canopy sharpens its profile, which reduces drag and increases glide performance by “a lot more than we thought”.  This translates to more fun in the sky, and a better flare on the ground. 7 cells are not usually known for their amazing flare power, so it all helps!
    Improve your pull-out game with a snatch:
    Symmetry is good, and so it is with your pilot chute. We’ve discovered that using snatches help with our wingsuit openings, so we have stocked up on them and highly recommend to purchase one with all Kraken purchases!
    Inward Rotated end cell:
    While most ribs are perpendicular to the lower surface, the end rib is rotated inward to reduce the size of the end cell and prevent it from losing its shape. This reduces tip vortices and induced drag.

    Photo Chris Stewart
    New line trim:
    Despite being a relatively docile canopy, the rectangular planform has been compensated with a trim just a notch steeper than you would think. This helps with up wind penetration, fun and is one of the reason for the great flare.
    New Stabilizer shape:
    The shape of the stabilizer has been modernized to prevent it from flapping too much in flight. It also helps the slider to sit in the right position. Custom Sizing The Kraken is available in any size between 119 and 189 so that you can get the perfect wing loading for you at this stage in your canopy progression.
    See the Kraken’s key features interactively on Emersya: https://emersya.com/showcase/5GFIH0C9Q0
    Key flight characteristics of the Kraken
    Openings The modern day wingsuit is capable of  incredible glide, but this efficiency brings its own set of complications when designing a parachute to match. The biggest factor is the turbulent wake formed behind the wingsuit – right where the parachute is deployed. Kraken openings are quick but not hard – you’ll feel inflation immediately. The vent helps control the heading. Once the center cell and adjacent cells inflate, the canopy slowly pressurises with a predictable reliability. The Kraken will sail on level seas even with linetwists! Inputs Intuitive and precise, each input delivers a predictable response. From opening to landing the Kraken is a confidence builder. Toggles Big inputs will produce an immediate response - the pilot will feel in control from first point of contact.
    Stall point
    The slow flight characteristics were a very important design factor for the Kraken, so there is plenty of warning before she stalls, and will recover to normal flight in an easy and stress free transition when slowly letting the toggles back up.
    Rear risers
    There’s lots of feel and response – the Kraken has fantastic glide! Milk those rears and disprove the myth that all wingsuiters land off! Front Risers F is for fun! Yep, the Kraken can dive!
    Performance
    The Kraken has loads of zip! Fly her nice and slow for those busy landing patterns when you want lots of vertical separation. Or dive her at the ground and drag some turf. There’s plenty of fun to be had!
    Recovery Arc
    The recovery arc is longer than typically experienced with similar 7 cell designs. For someone who wants to have their cake ( a nice sensible wingsuit canopy) and eat it too (swoop the shit out of it), then go go go! Flare The Kraken has a wide range of performance, the flare is one of the most important aspects - she wont disappoint. Those nil wind tiptoe landings will feel very natural. More information available from:
     

    By Meso, in Gear,

    Introducing the Garmin VIRB Action Camera

    Get ready for the Garmin VIRB, the latest new action camera to be revealed. While Garmin are well known for their GPS navigation devices, the company also boasts a variety of other technology devices, many of which revolve around maritime activity. In recent years Garmin has released several marine radio communication devices, as well as dabbling in the production of camera technology. However, Garmin has decided to take a step in a new direction - joining companies such as GoPro, Sony, Contour and JVC in the production of POV action cameras. It's a brave step by Garmin, but if they manage to effectively integrate the device with their other products, there may well be room for them in the GoPro dominated market.
    Garmin VIRB Design
    Upon first sight the device is quite good looking with an appealing display screen on the top of the camera, and a large power button on the side of the device. For those who helmet mount their action cams, this small change from what other cameras typically offer can really make things easier, allowing you to feel whether or not the device has been turned on or off. The build of the device looks almost like a hybrid between the Contour and the Drift HD action cams. The main concern when looking at the VIRB design, is the convex lens, which seems to extend a fair degree out from the camera. While the Sony AS15 has a similar design, there is no getting around the fact that the exposure of the lens would in turn pose a risk of damage, especially in sports where you'd expect the camera to take a knock. Garmin do show an image of the VIRB with lens covering housing attached, but it remains unclear whether this extra housing is the underwater housing, which is an extra option. The device will be made available in either black or white.
    Technical Details
    The VIRB is as expected, a high definition recording device that will allow video recording in 1080p quality, with a 16 megapixel CMOS processor and allow for up to three hours of filming from a full charge. Data is recorded onto a MicroSD card, with a recommendation of Class 10 - as to be expected with HD recording. The device will also sport a 2000mAh rechargeable Lithium-ion battery. Out of the box the VIRB is waterproof for 30 minutes to a depth of 1 meter, while the purchase of a scuba diving housing device will extend that depth to 50 meters. The display screen is 1.4" large and while remaining on, uses very little battery life. The "WideVü" lens is comprised of 9-element glass and offers the user three modes of recording: Wide, Medium and Narrow. Built in lens distortion correction and stabilization enhances video quality.
    True 1080p HD Recording
    16 Megapixel CMOS Processor
    1.4" Chroma Display
    2000mAh Lithium-ion Battery
    ANT+ Wireless Connectivity
    VIRB Desktop Software
    Waterproofing
    Wi-fi Connectivity (Elite)
    Device Pairing
    It is clear that from the start Garmin would have to provide a form of functionality that separates them from other action camera manufacturers on the market, and this is where device paring comes into play. Using ANT+, the VIRB will be able to connect with other Garmin devices such as watches, remotes and cycling computers. While Garmin hasn't revealed exactly what one can achieve with the pairing of their devices with the VIRB, it certainly opens up a new avenue that most of the other action cameras lack.
    Options and Pricing
    There will be two VIRB options available, the basic VIRB device which will retail for $299.99 and then the VIRB Elite which will set you back $399.99. The differences between the two devices lie mainly in the functionality available. The VIRB Elite will offer wifi connectivity, allowing you to connect the device to your iPhone or Android smartphone. In my opinion the main selling point for the Elite is the ability to track your elevation, speed and other variables. This data will then be able to be overlayed on your video. While certainly limited to a small group of people, when in "Ski Mode" the device will also be able to detect whether or not one is on a chairlift and in turn pause recording for that period.
    With the VIRB scheduled for a September release, there isn't enough video footage to really make a claim as to the camera's quality. Though it's expected that the camera will rank up along with the other action cams out there, and it's certainly worth keeping an eye on. In the mean time, for a preview of the device's recording quality, you can view the official advertising video for the Garmin VIRB below.

    By admin, in Gear,

    Inspecting your Gear

    Most jumpers realize the importance of having their reserve parachutes repacked every 120 days in accordance with F.A.A. regulations. We know that this is not just a reserve repack but is also an inspection of our reserve canopy and also our harness and container assembly. Most parachute riggers will gladly accept your complete rig and inspect the main canopy and its components as well as inspect and repack the reserve (and will rightfully charge extra for this service). However, some of us do not give our main canopy to our rigger and more importantly some of us make so many jumps between reserve repacks that even a thorough inspection every 120 days might not be often enough to find potential problems with our gear. It is for these reasons that we should know the procedures for checking the parts of our gear that get the most wear.
    The following is a list of items on your main canopy assembly that you should inspect occasionally. This inspection should never be a substitute for a periodic inspection by a rigger but should supplement your rigger's inspection in between reserve repacks. If you find a problem with your gear, your rigger will be glad to advise you on what to do.
    A special note for those of you who usually have someone else pack your main parachute: Unless you have made some arrangement with your packer to do this inspection while they pack and unless they know what to look for, you are giving up this opportunity to check your gear each time they pack for you!
    Pilot Chute-
    Your pilot chute is one of the most critical items on our list of things to check on our gear, after all, the pilot chute is the thing that starts the deployment sequence at pull time. The pilot chute is also one of the most likely things for us to abuse. How many of us have left it dragging when walking in from the landing area?
    First check the handle attachment at the top of the pilot chute. After a number of jumps the stitching can loosen and come out. If this happens and the handle comes off it will probably happen at the worst possible time. For those of you that have had your handle converted to a custom handle like a Hacky Sack, pay particular attention to the modification. Some of this stitching will be inside the pilot chute.
    Check the seams of the pilot chute and the condition of the fabric. This is very important for those of you that have a large grommet in your deployment bag to allow it to slide over the pilot chute to collapse it. A very small tear or burn in the fabric may result in a large rip at 120 miles-per-hour. If your pilot chute blows up and you have a very tight container, there may not be enough drag to pull the pin.
    Bridle-
    Your pilot chute bridle has several important areas to check. The top of your bridle may be permanently sewn to your pilot chute or may have a loop sewn at the end. In either case you should check the stitching for security.
    Further down the bridle is usually a section of Velcro to secure your bridle to your container and it should be in good condition. Your bridle needs to be firmly attached to your container so that there is less chance of snagging it on anything that could pull your pin and cause your container to be opened prematurely.
    Next on the bridle is the pin that holds your container closed. The most important thing to check is the attachment of the pin to the bridle. This is the area that has the most stress, especially if your container is tight. Most manufacturers attach the pin with 3 bar-tack stitches which is very secure, but even bar-tack stitching can loosen. If your pin is attached by any other type of stitching it would be a good idea to have a rigger look at it as well.
    Continue by looking at the closing pin itself. Some pins were manufactured with a plating that tends to chip off making it harder to pull through the closing loop and also causing excess wear to the loop. Stainless steel replacement pins are available and work much better.
    On the other end of the bridle check the stitching on the loop where it attaches to the main canopy and check for wear at the point where it rubs against the grommet in the deployment bag.
    For those of you that have collapsible pilot chutes there is one more area to look at. Check for wear on the line that runs inside the bridle and pulls down on the top of the pilot chute. Fortunately most of these designs are fail-safe, and will still deploy your canopy correctly although not collapse the pilot chute later.
    If you have any problem at all with your bridle and it is a standard non-collapsible type, keep in mind that you can get a new and complete assembly from the manufacturer at a reasonable price. If you have the type of bridle that loops through the pilot chute attachment point it will also be very easy to replace.
    Bag-
    Your deployment bag is a straightforward item on the list and seldom requires much work, but it does take some abuse from dragging and forcing a canopy in it when you pack. You need to check the seams and stitching for this stress including the loops that the rubber bands attach to.
    Check that the grommets are securely in place and that they have no rough edges inside, particularly the one that the bridle passes through.
    If your bag has Velcro, make sure it is in good condition.
    Canopy-
    Although your main canopy is made up of many parts, this is a short list of the items that need the most attention. A more complete inspection should be done by a rigger periodically.
    First check the bridle attachment point at the top center of the canopy. This area gets a good deal of stress during deployment. Check the stitching and for stress around the attachment point.
    Check the general condition of the fabric. There may be some tiny snags or pin holes but there should be no rips or seams that have pulled out.
    Check the general condition of the suspension lines. A little roughness in the lines is not unusual but if any of the fibers in the line are broken have a rigger take a look.
    Check the slider fabric and seams like you did for the canopy and then check the condition of the grommets. The grommets should be securely seated in the edges of the slider and they should have no rough edges inside.
    Check the connector links to make sure the barrels have not turned and loosened. Slider stops are a good idea here because they not only protect the slider grommets, but they also prevent the barrels of the links from turning.
    Risers-
    The risers are the final area of your main canopy assembly to be inspected.
    Check the security of the large harness type stitching at both the top loop and at the rings. Make sure the grommets near the rings are securely seated and have no rough edges inside.
    Make sure the Velcro on the toggles and on the risers is in good enough condition to secure the toggles onto the risers.
    The risers should occasionally be released from the harness to check the operation of the release system. The webbing should be flexed enough to take the stiffness out of riser and the release cable should be checked for cleanliness and ease of operation. The manufacturers of harness and container systems devote whole sections of the owner's manual to describing the operation and maintenance of the 3-ring release. Read the manual and understand how it works.
    Rig-
    Your rigger will inspect your harness and container assembly when repacking the reserve, but several items should be inspected more often.
    The Velcro that the bridle is attached to should be in good condition as well as the pilot chute pouch. Be sure that the pouch contains the pilot chute well enough that it cannot come out accidentally but still allow it to be comfortably extracted.
    Lastly and very important is the closing loop. It should be the right length for the size canopy packed into the container and should not be worn so much that it could break from the pressure and cause a premature opening.
    In Conclusion-
    This inspection list has included the items that are most likely to show wear and need further attention from a rigger. Although it seems like there are a lot of things to look for, just remember that almost everything on this list is something that you look at every time you pack. Simply taking the time to look closely and knowing what to look for will go a long way toward keeping your gear safe and in good condition.

    By admin, in Gear,

    Inside Squirrel Wingsuits

    There are constant advancements in the development of human flight and over the past decade in particular we’ve seen some pretty ground breaking achievements, thanks both to the pilots who push the envelopes and the gear manufacturers that are constantly coming up with new products, and researching the way forward with regards to these items.
    We had a chat with Matt from Squirrel Wingsuits, one of the new wingsuit manufacturer on the block.
    On your facebook group you mention that this venture is one of a collaborative nature and that there are some 'elite wingsuiters' involved in the project. Are you able to provide names of those who are involved?
    Squirrel was originally founded by Matt Gerdes, Luc Armant, and Dave Barlia. After a year of intensive work, Dave was not able to reconcile the inherent workload with his family life and returned to fun jumping. Currently the day-to-day operation is Matt Gerdes and Mike Steen, with testing and development the responsibility of us plus a list of team pilots that will be released on the website soon.
    You mention on the Squirrel website that "If you want something done right, you have to do it yourself". That philosophy seems to be the primary reasoning behind the development of Squirrel. It is clear that you guys felt as though something was not being done correctly by other modern wingsuit manufacturers; is there something in specific that you felt was lacking in the current market and that there was a dire need for that had to be developed?
    In 2009 there weren’t a lot of people jumping “big” wingsuits in the BASE environment. Jade Tatom was the only person I had met who had ever BASE jumped a Tony suit. At that time (summer 2009) I felt that I had outgrown the suit I was flying and I was looking for something new but I didn’t want a Vampire because everyone else had a Vampire. I decided to get a “big” suit and immediately realized that it was awesome in the BASE environment. For 2009 and most of 2010, lots of people sneered at me and the other guys who were jumping these new big suits… there was an incredible amount of poop-talking that went on here at the Dropzone forum, in hindsight it’s really sad but it’s funny seeing so many of the people who were adamantly against big suits flying them now. I have to give Andy West and Dean Potter credit for being smarter than I was and basically enjoying their suits in private. I was a loud proponent of big suits and convinced as many people as I could (which turned out to be a lot) that wingsuit BASE was more fun with bigger wings… and by the end of 2011, a lot of people had figured out that more surface area is potentially advantageous in many ways. Anyone familiar with the evolution of wingsuit design in the past 3 years knows the rest of the story.
    I have liked every suit I’ve owned, for the most part. Tony makes great wingsuits and his and Jeff’s designs have (in my opinion) revolutionized the sport. But in 2011 I almost died twice and decided that I either had to quit jumping, or figure out a solution to the issue. In the end, Squirrel was the solution. If I die BASE jumping, now at least it will be in my own suit ;-)

    What is different about Squirrel wingsuits that sets them apart from the competition? Why would one be making a better choice by going for Squirrel as opposed to one of the other guys?
    If you look at the suit and fly it and can see and feel the difference, then you will know if the suit is for you or not for you. Deciding which suit to fly is (and should be) a very personal choice. I’ve tried my best to describe some of the details that are unique to our suits on our website, but I would never claim that our suit is better than another. It’s something that each jumper needs to experience and decide for themselves.
    The company is quite new, as are the products that have been released. How has reception been thus far?
    The feedback has been even better than we hoped. Our main concern is delivery times at this point.

    How many products do you currently have for sale, and how many are in development, with any possible release periods for upcoming products?
    The Colugo will be on general sale in late February. The Aura, a slightly larger suit, will follow. The Swift, our entry-level suit, will come this summer.
    How much time or effort has been spent into the research, specifically aerodynamic research for these suits. Are they going to be offering anything special with the way they fly? Anything you can tell us about the procedure that has lead up to the production.
    We are very lucky to have Luc Armant on board. He and Fred Pieri were instrumental in establishing the planform and profiles. Luc and Fred work for Ozone Paragliders, which for the past few years has been widely recognized as the world leader in high performance paraglider designs (currently about 80% of the top competition pilots are flying Ozone, which is insane in a sport with almost 50 brands).
    Luc and Fred are both complete and total geniuses, and their understanding of flexible airfoils is unparalleled. They have had some wild and awesome ideas, but there are major restrictions for wingsuits because we need them to be comfortable and safe (in my opinion safety and comfort come before performance) before we need them to be fast and efficient. Some of our early prototypes had massively stiff arms with reinforced tri-laminate surfaces and mostly-rigid profiles. The performance was amazing but you couldn’t even sit comfortably in the airplane. We remedied some of that with complex arm-release systems using magnets and Lycra and other things, but in the end it was all just too much going on when you’re standing on the exit point.


    Simplicity is so incredibly important in our sport. The first phase of development really made clear that comfort and confidence are the main priorities. A natural flying position, very clean and easy access to the BOC and brakes, and fast start-arc* in the BASE environment are our first priorities. When you start pushing speed and glide performance too much, inevitably there are sacrifices. We’re very happy with the performance but for me the most important thing is having the maximum amount of confidence that I’m going to get a fast, balanced, and predictable start, and then be able to reach my BOC clean and clear on every jump. I think that this is what pilots will appreciate on every jump.
    It’s human nature to be obsessed with performance, and I am not against that obsession, but I think that choosing suits based on their theoretical glide and losing sight of things like a fast start-arc and a really clean pull is a mistake. Nothing else matters when you can’t get your PC. In the past year we’ve seen more and more jumpers ordering the biggest suit possible – and while I agree that big is fun, I also think that we have to stay focused on ease of use and agility, especially for BASE jumping. And a lot of jumpers are not getting this point. The phenomena is like the opposite of skydive canopies, where jumpers feel cooler when they are flying something smaller; it seems like a lot of BASE jumpers want to be wearing the biggest suit they can, even though they would be able to fly much better lines in a more moderate design.
    *We define the “start-arc” as the vertical distance consumed at the point at which the jumper crosses an imaginary line extended at a 45 degree angle from the cliff edge.
    Your primary focus at the moment seems to be on attracting BASE jumpers, do you ever plan on expanding focus to skydivers as well?
    Every BASE jumper is a skydiver, too. Or at least they should be. In my opinion, skydiving is the single most important thing that you can do to improve your wingsuit BASE jumping. One of the most important features on our suits is the Innie-Outie zip system, which allows you to zip your BASE harness inside the suit and profit from the increased wing area and reduced drag which results, or you can zip your skydive harness onto the outside of the suit which allows you to access your handles safely and easily with no funny-business. Our focus will always be on wingsuit BASE jumping, that’s just who we are, but we all love to skydive and all of our suits are designed to be skydived safely and easily.
    Are there any professionals, whose names one may know busy flying Squirrel suits at the moment, and if so, who are they?
    Stay tuned for the list.

    By admin, in Gear,

    Icarus Release New Products for 2002

    Icarus Canopies are releasing 3 new products for the summer season. These designs incorporate new plan form shaping techniques that Icarus designers have been working on for the past 18 months. 7 years ago, Icarus designers pioneered a new plan form shape with the EXTreme FX. The Icarus Safire, Omega and EXTreme VX followed incorporating similar shaping techniques. The Icarus Crossfire expanded on that principle integrating additional surface shaping.
    These designs incorporated many innovations including full surface shaping, constant cell proportions, and lowered wing tips. All engineered to reduce drag, increase lift (at high and low speeds), increase rigidity and create even cell pressurization eliminating the perceived benefit of airlocks. These shaping techniques took parachutes beyond standard ram air designs and created true wing shapes with increased performance at both ends of the spectrum.
    A bi-product of this increased performance and control range was an increased toggle stroke making the toggle control range longer and flare point deeper than other designs at the time. While this longer control range was labeled a disadvantage by some rivals at the time, many have released competing designs with similar characteristics due to the increased efficiency these more precise wings create.
    With similar parachutes entering the market, our design team has been engineering plan form shapes which integrate the benefits of these designs plus further increasing the parachutes efficiency by incorporating precise and immediate toggle and riser control.
    Our 2002 products incorporate varying shaping techniques depending on the specific target audience of each design resulting from this program.
    Upon completion of this program these 3 designs have been undergoing market evaluation over the past few months. Specifically we have been comparing them with other products in the same target markets to ensure supremacy when compared with competing products. Now confident that we have once again solidly achieved this goal, we are releasing 3 exciting new designs.

    The Icarus Omni is the latest innovation in 7 cell canopy design. 7 cell canopies such as the Icarus Omega, PD Spectre or Aerodyne Triathlon gained popularity because of their ease of use and gentle characteristics. The disadvantage with 7 cells is their reduced lift making it difficult to get back from long spots and inferior flare characteristic when compared with 9 cell designs. While this is often no issue for beginners or at lighter wing loadings many seasoned skydivers also prefer the ease of use that comes with 7 cell canopies and are prepared to sacrifice lift and glide for this benefit.
    The Omni answers these issues offering the largest range of flight currently available on an all purpose 7 cell canopy.
    The Icarus Omni is a 7-Cell, Semi and lightly elliptical, Zero Porosity canopy. It has been designed as an all purpose canopy with soft on-heading openings, predictable flight characteristics, light toggle and riser pressure and with the added advantage of an increased glide ratio and greater flare power when compared with other 7 cell designs.
    The result, a 7 cell with an increase operating range, usable for all facets of modern skydiving.
    At lighter wing loading (below .9 PSF) it is a good transition or first canopy or for someone who likes to take it easy. At heavier wing loading (up to 1.5 PSF) it will have noticeable performance while maintaining soft openings and better landings than other 7 cell designs.
    We recommend it for wing loading from .75 PSF to 1.5 PSF.

    4 years ago we released the Icarus Safire. A revolutionary canopy, being the first all purpose 9 cell canopy to include a lightly & truly elliptical platform shape offering superior openings and flight characteristics compared to competing mid-performance range 9 cell designs at the time.

    We new that the superior characteristics of this design, such as a lightly & truly elliptical platform shape combined with constant cell proportioning would not be ignored by other canopy manufacturers. This style of design would become the benchmark for mid-range performance canopies and other manufacturers would build similar designs as we have recently seen.
    The Safire 2, like the original Safire is a truly elliptical canopy with a light shaping incorporating a constant cell aspect ratio which consistently controls the airfoil shape across the canopy, maintaining increased rigidity and reducing drag.
    The Safire 2 is an enhanced version of the original Safire incorporating new trim and plan form shaping techniques. Its openings are arguably the sweetest of any canopy in its class. So much so that you'd swear it was a 7 cell opening above your head. We have also integrated an even greater glide ratio, more nimble and very predicable flight characteristics, responsive flight controls both on toggles and risers, a shorter recovery arc to maintain a higher level of safety for mid-range jumpers and a powerful flare.
    The Safire 2 is designed to fly best at wing loading of .75 to 1.6. At the lower end, the Safire flies forgivingly and is an ideal transitional canopy. At the higher loading, it is a fast-moving smooth-handling ride that outperforms other canopies in its class.

    2 years ago we revolutionized what was possible with a 9 cell (non-cross braced) canopy.
    The Icarus Crossfire is categorically a step up in performance from any other 9 cell in the world. Its swoop capability almost rivals cross-braced canopies such as the EXTreme FX and Velocity while maintaining many other more desirable flight characteristics.
    Our target audience with the Crossfire has always been the many Stiletto pilots wanting the next step in canopy evolution. PD did a great job with the Stiletto and it remained un-rivaled for years. However, design concepts and construction techniques improve and we were able to release the Crossfire, a canopy aspiring to this market with increased performance characteristics, a longer recovery arc, an incredible swoop distance and with openings that are unparalleled.
    With our latest design innovations we are able to take the Crossfire performance even further. The Crossfire 2 has the same impressive opening and swoop capabilities with some of the most responsive toggle and riser turns of any canopy in the market. It has a light riser pressure and an incredible recovery arc.
    The Crossfire 2 is a highly elliptical, constant cell aspect ratio, closed nose, fully and surface shaped inflatable wing capable of unrivaled performance. It will out perform any non cross-braced 9 cell available; Openings, toggle turns, riser turns, dives, swoop distance and flare -period!
    Recommended wing loadings are 1.4 - 2.2.
    Icarus Guarantee:
    Icarus is the only company in the market to offer an unconditional 31 day satisfaction guarantee. Icarus guarantees that our products perform as advertised with superior characteristics to competing products.
    If for any reason a customer is not entirely satisfied we will replace the product or refund the customer, no questions asked. Refer www.icaruscanopies.com for details.
    Full details of these products will be available on Icarus Canopies website www.icaruscanopies.com from 10 May 2002.
    For additional information contact:
    Simon Mundell
    [email protected]
    (630) 562-2735
    Photos:
    Crossfire2, Omni – Steve Utter
    Safire2 – Mike Sanders

    By admin, in Gear,

0