Leaderboard


Popular Content
Showing content with the highest reputation since 05/22/2021 in Articles
-
1 point
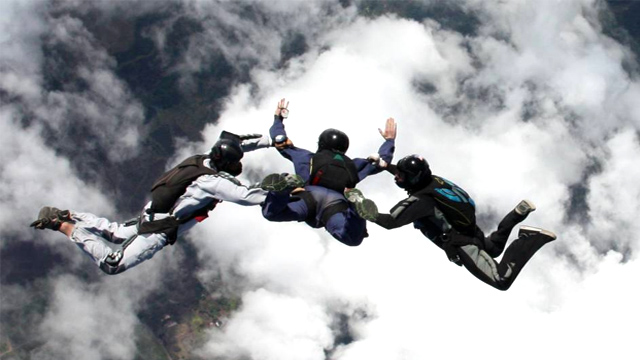
 Image by Russell M. WebbIf I've learned one thing in my 35 years in the sport, it's that it is very difficult to get most skydivers interested in safety. Years ago, when it became obvious that my hand deploy pilot chute and 3-ring release made it possible to deploy a malfunction, and then breakaway from it, 500 feet faster than the existing internal pilot chutes and Capewell canopy releases allowed, a lot of jumpers simply started deploying their mains 500 feet lower. Utterly negating the increase in safety these systems offered. Even today, most jumpers think that because all gear has a TSO tag on it, one piece of gear is as safe as another. Unfortunately, that is not true, and most jumpers will choose "fashion" over safety every time. Here are just a few examples of what I mean, starting in the '60's, right up to the present day. The army found out that if you put 2 foot band of fine netting around the skirt of a round parachute, you eliminate the most common deployment malfunction, the partial inversion. The trick worked so well that airborne troop static line malfunctions went from 1 in 250 to 1 in 250,000. WOW! So, a company that made round sport reserves (there were no square reserves yet) came out with an "anti-inversion netted" reserve. NO ONE bought it. You know why, of course...It packed up 10% bigger. Jumpers past up a proven 1,000 times increase in safety for smaller pack volume. Believe it or not, there is a similar, thought not nearly as drastic, choice jumpers are making when they buy a square reserve today. Let me explain. The first square canopies came without sliders, so they had to be built tough. This meant, among other things, that there was tape running spanwise (from right to left) between the line attachment points. With the advent of the slider and softer opening canopies, some companies began leaving the spanwise reinforcing tapes out of their square reserves. Why? Because they cost less to build, and (you guessed it) they packed smaller. This proved to be a wise choice, (at least in the marketing department) because although jumpers very often choose their mains for performance and durability, the almost always always choose their reserves base only on price and pack volume. While reserves without spandwise tapes are fine in most situations, as we have seen recently, they tend to fall apart when skydivers push the envelope. (ie. big people on tiny canopies, going head down at high altitudes.) Safety doesn't seem to be any larger a consideration than it was when they passed up anti-inversion netted round reserves in the '60's. Standard size (large) 3-ring release systems have never given a solo jumper any problem. They ALWAYS release easily and NEVER break. However, mini 3-rings look neater, so that's all people will buy. No matter all the reports of hard or impossible breakaways or broken risers. Don't get me wrong, Properly made, and maintained, mini 3-ring release systems will handle anything even the newest ZP canopy with microlines can dish out. Unfortunately, because they are now being pushed right to their design limit, they must be made EXACTLY right. And a lot of manufacturers either can't or won't. On the other hand, a large 3-ring system has so much mechanical advantage, that even a poorly made system will still work just fine. But then fashion is much more important than safety, isn't it? Spectra (or micro-line) is strong and tiny, so it reduces both pack volume and drag , which means you get a smaller rig and a faster canopy. Unfortunately, It has a couple of "design characteristics" (this is manufacturer talk for "problems") It is very slippery (less friction to slow the slider), and stretches less than stainless steel. This is why it hurt people and broke so many mini risers when it was first introduced. Now, I must say that the canopy manufacturers did a wonderful job handling these "characteristics" by designing new canopies that opened much slower than their predecessors. However, the fact still remains, that if you do have a rare fast opening on a microlined canopy, Spectra (or Vectran) will transmit that force to you (and your rig) much, much faster, resulting in an opening shock up to 300% higher than if you have Dacron lines. (It's sort of like doing a bungee jump with a stainless steel cable. At the bottom of your fall, your body applies the same force to the steel cable as it would to a rubber bungee cord, but because steel doesn't stretch, your legs tears off.) So why would I have a fast opening? Well for one thing, you, or your packer might forget to "uncollapse" your collapsible slider. BAM! Or perhaps you're zipping along head down at 160 mph with a rig that wasn't designed for it, and you experience an accidental container opening. BAM again. The point is this: If you want to push the envelope, and get all the enjoyment this sport has to offer, and do it "safely", you need to make careful choices in the gear you jump. If you weigh 200 lbs. and do a lot of head down, perhaps you really shouldn't be using a reserve without spanwise reinforcement, mini 3-rings, or a canopy with micro lines. No matter how much you weigh, you should educate yourself about gear, and then only jump gear that is designed for how you jump. So many fatalities occur because of decisions jumpers make BEFORE even getting in the airplane. Don't join that group. Be smarter than that. Fashion, at least in skydiving, can get you killed. ~ Bill Booth
 -
1 point
 There are many variables to consider when looking into a canopy collapse: What was the pilot doing? How fast was the canopy flying when it collapsed? Where was the pilot flying? What is the canopy design? What is the wing-loading? Was there any re-active solution employed?These are the principle considerations, but not the only ones. I will take each one separately. 1) The way in which a parachute is flown can increase or decrease the "G" loading on the lines. A rapid release of one or both brakes significantly increases the chances that the canopy will collapse. This allows the parachute to surge forward to a lower angle of attack, decreasing the lift of the parachute. This reduces the amount of energy exerted by the parachute away from the suspended load, allowing the "negative" portion of the lift to take over and allow the wing to fly towards the jumper. 2) Airspeed is what creates lift. Lift is what causes the wing to strive to fly up and away from the jumper. This is the formula for line tension and therefore stability. The slower you are flying, the more likely your parachute will collapse due to low internal pressure and low line tension. 3) Was the wing flying in clean air when the collapse occurred? This is an important part of the question. All parachutes can collapse in "bad" air. We must always fly considering the invisible dangers that the sky presents us. If you wouldn't fly a kite there, don't fly or land your parachute there. 4) Certain parachute designs do better in turbulence than others. I must avoid pointing fingers here, as this is a volatile industry that can be taken down by non-skydiving lawyers. Nevertheless, certain wings have an increased propensity to go "negative" when presented with adverse condition, while others bump around a bit and keep on flying. This is a complex issue, and the best way to decide which parachute to buy and fly is to listen to the actual statistics, and to your own experience when flying a particular design. I have not experienced any kind of collapse on the parachutes I fly, ever.* If you have on yours, you may want to reconsider what is over your head. *(This does not include nasty, ill-conceived prototypes that seemed like a good idea at the time. I am talking about production-model canopies here) 5) Parachutes perform differently at different wing loadings. The lighter the wing loading, the slower it will fly. This means that the internal pressurization of the wing will be less on larger canopies. In general, lightly loaded parachutes experience more small collapses than heavily loaded ones. Not only is there less internal pressure in the wing, but the dynamic forces area also less with decreased airspeed. This means that the average line tension tends to be less on a lightly loaded wing, and the wing tends to have a increased propensity to surge forward in the window when flying at low air speeds. This is why very small, highly loaded parachutes tend to experience fewer distortions, especially when flown at high speed. Flying at high speed increases the drag of the canopy itself, relative to the jumper, so the relative wind holds the parachute back in the window and at a higher angle of attack. This is why I make carving, high "G", high speed turns to final approach heading, especially in turbulence. The speed actually reduced the chances of a collapse by increasing the forces that keep the parachute at the end of the lines. I am literally increasing my wing loading by flying fast and at high "G's", and the increases velocity reduces the amount of time that I fly in bad air. I am not saying that you should downsize just to increase your stability. I am saying that until your skills and knowledge are ready to fly smaller, faster parachutes, you should stay out of the sky until the winds come down. I still haven't been hurt by a jump I didn't do. 6) This is all about "Pitch Control". If you are flying a good design with lots of airspeed and significant line tension, and in a reasonable location that has no obvious precursors for collapse, you can only deal with a collapse in a re-active manner, as you have addressed all of the relevant variables up to this point. If your wing tries to aggressively surge forward in the window, you must notice it and quickly stab the brakes to bring it to the back of the window. A collapse always begins by a surge to a low angle of attack, but there is very little time to deal with the problem before I folds under. Here are the signs: The first sign is a change in Pitch. The wing moves forward in the window. This is the limited flying space over your head. Too far forward and it collapses. Too far back and it stalls. The "G" loading drops dramatically and almost instantly. In other words, your apparent weight in the harness drops because the wing is producing less lift. This is the time to jerk on your brakes: quickly, sharply, but not more than about 50% of the total control stroke. This action is to pull the wing back in the window, not to stall the parachute. By putting the wing further back in the window, we are increasing the angle of attack. This increases the lift, and forces the wing to fly away from the suspended load and thereby increase the line tension. This can prevent a collapse entirely, or cause the wing to recover to stable flight before things get really out of control. If the wing is allowed to collapse, it may recover quickly on its own. This is why the more modern airfoils have the fat point (Center of Lift) so far forward. It causes the wing to pitch nose-up when it begins to fly again, bringing it back to the end of the lines. Nevertheless, parachutes can still collapse fully, which often involves significant loss of altitude and possibly a loss of heading. If your wing goes into a spin because of a collapse, your job is to stop the turn first, as you increase the angle of attack. If it is spinning, there is less chance of recovery until the flight path is coordinated and the heading stable. Conclusions: Don't fly an unstable parachute. If it is prone to collapse, ground the parachute. Do not sell it to an unsuspecting jumper at another drop zone. These people are your brothers and sisters. Don't fly in crappy air. Land in wide open spaces, in light winds, and never directly behind another canopy. Practice stabbing your brakes in response to forward surges on the pitch axis. This must become a "learned instinct" that requires no thought at all. Like pulling emergency handles, pulling the wing to the back of the window when the lines get slack is essential for safe skydiving. Keep flying the parachute. If your parachute does something funny near the ground, don't give up. If you keep your eyes on YOUR ORIGINAL HEADING, you will unconsciously do things that will aid your stability and keep you from getting hurt. Looking toward what you don't want is how you make it occur. I hope this little article helps you understand the phenomenon of collapses a bit better. I know as well as anyone how painful a collapse can be. I do not want to go back to that wheelchair, and I don't want anyone else to have to experience that either. You morons are my family, and if information can help protect you, I will give it until my lungs are out of air. Blue Skies, Sky People. Bri Article Discussion BIGAIR SPORTZ
 -
1 point
 This article by Alain Bard is meant as a general guide. We highly recommend contacting your local rigger and instructor before using any of the information provided in this article. In the years I’ve been a rigger, I’ve often seen the results of skydivers’ gear buying experiences. Most experiences go well, but some do not, and result in the buyer having to re-sell an inappropriate piece of gear they bought. In this article, I am going to try to lay down some advice on how to go about choosing gear. I’m going to try to not go into brand specifics, but rather which components you should get and in what order, buying new or used, and sizing. New vs. Used? Let’s tackle this one first. Should you buy new or used? Traditional advice is that if this is your first set of gear: you should buy used. You’ll probably only use your first set of gear for the first 100 jumps or so. If you buy used skydiving gear, you can save some money (over new) while jumping your first set of gear, and take your time figuring out what you really want before you commit to buying new equipment. Let’s break it down though. So to put together a rig, you have to get 4 components: a harness/container, a reserve parachute, an Automatic Activation Device (AAD) and a main parachute. Whether to buy each of these pieces new or used depends on the piece. AAD Let’s start with the easy one: the AAD. Used or new does not matter, as you’re paying a fixed cost per year for these units. This fixed cost per year varies between $80-160 per year depending on which unit you choose. If budget is an issue, and you can find one used, grab it. Used AADs are rare as they expire faster than the skydiving gear they are in. If your budget allows, you can buy new. AADs are super easy to re-sell if you ever need to. Reserve Parachute Next up: the reserve parachute. For newbies, I always recommend buying a used reserve parachute, as you can save a significant amount of money here, and the benefit of a new reserve isn’t really justified over the cost of a new one. Reserve parachutes don’t get used very often, and even after 10 years, are usually in next to perfect condition. A 10-year old reserve of the same design is the same as a brand new one, it’s just cheaper to buy. Ensure the reserve has less than 5 or so “rides” and is no older than 15-18 years old. Also, ensure it has no holes, patches or repairs, or if it does, make sure the cost is much less, and consider sending it back to the factory to have it checked out first. Main Parachute For the main parachute, my advice is the opposite to a reserve. I recommend buying a main with as few jumps as possible (under 200 if possible). Buying a new main parachute is preferable, if budget allows. You will use this parachute to save your life 99.9% of the time. Its condition matters. Age isn’t really that much of a concern as much as the number of jumps. I like to make sure a main parachute still has its original lines, because you can tell the number of jumps by the condition of the lines. Trying to estimate the number of jumps on a canopy after a reline is sometimes difficult if the parachute fabric has been kept clean, dry and out of the sun. Another consideration is where the jumps were made. A parachute that was jumped in the summer in Canada or the US Northeast on green grass for only 6 months of each year will be in much better condition than one jumped all year round in desert-like or beach locations. Sand really eats away at the fabric coating and gets into the seams. If budget is really an issue, then a modern-design (last 10-15 years) used main parachute with more jumps is OK too, but make sure to have your rigger take a look and don’t pay too much for it, as it’s not going to be worth as much. Again, ensure it has no holes, patches or repairs, or if it does, make sure pay much less, and consider sending it back to the factory to have it checked out first. Harness/Container Last is the harness/container, for 80% of newbies, a used harness/container is probably the right way to go. Newbies tend not to land on their feet 100% of the time, and if you get a used harness/container a little dirty or scuffed up, it won’t matter as much. The problem is getting the right size for both the canopies *and* for your body (ie. harness size). Sizing for canopies is easy enough, but then sometimes it’s difficult to find the perfect sized harness. Having a harness that is a little too big or too small isn’t the end of the world, but it’s not as comfortable as a made-to-measure harness. If the harness is more than a little too big or too small, then resizing a harness is always an option, but it may cost more to have a harness resized than the harness/container is worth. For 20% of newbies, their body type makes it almost impossible to find a used harness/container. I’m talking about the 6’ guy who weighs 120lbs, or the 4’8” girl who weighs 95lbs, or on the other end of the spectrum, what you’ll find advertised as “big-boy rigs” for really large and/or heavy people. For these people that fall outside the average body types, while resizing a harness is sometimes an option, getting a new harness/container is sometimes a better option. Some manufacturers make basic rigs with no bells or whistles that end up costing less than a used, fully featured harness/container. I’m talking about rigs like the Shadow Racer and the Rigging Innovations Genera. These are great rigs at an even better price. Also, if you are a serving military member, some manufacturers offer incentives (up to 30% off) on new gear. This is a great deal, and a no-brainer. If you are eligible for such discounts, get new stuff! Before I move on, I want to mention that when you buy used, you will have to keep an open mind when it comes to colors. It’s the price you pay to save some money. So now WHAT should I buy, but more importantly – in what order? So you’ve been jumping a certain size main for a while and think you’re ready to downsize and get a different set of gear. Great! Let’s go through it. One of the biggest gear-buying mistakes is choosing (or buying) a harness/container first, and then trying to fit the canopies into a container that was not sized for those canopies, so…. Here’s the order in which you should think about it: Select the Reserve canopy first. Select an appropriately sized reserve. Your reserve should be big enough to not seriously hurt or kill you in the event of an unconscious reserve landing (no flare). This means that your reserve should be sized according to your wing loading on that reserve. For most people, that means I recommend getting a reserve at least one size bigger than the main you intend to jump. So if you think you want to jump a 150-size main parachute, get a 160 or 170-size reserve, and if you're a big guy that jumps a tiny cross-braced canopy, you'll maybe still want a 170-sized reserve (4-8 times larger than your main). You’ll thank me when you actually need to use the reserve. Then, pick a main, any main. Well, not really, but decide on the size of main you want to jump. You can pick the type of main later, but decide on size now. Now you can think about a harness/container! Then and only then start doing the research on what brand of harness/container you want based on the features you think are important to you. Look at harness/container manufacturers’ published volume charts to see which size container you would need to fit the reserve. You want to pick a size of container that fits the reserve and is described as “soft” or “normal” fit (if those descriptors are available). Stay away from a “tight” reserve fit at all costs. You’ll quickly notice that not all the manufacturers offer combinations that will fit a reserve that’s larger than a main. That’s really a shame. You should really ask those manufacturers why they don’t offer this. An expensive solution to this problem is a low-bulk reserve, which is marketed a being able to pack one size smaller than a regular reserve. So, if you want a container combination that fits a regular 150-sized main, and only fits a 150-size reserve, a low-bulk 160 reserve may be an option. Careful though, it doesn’t scale down. For instance, a low-bulk 126 reserve may not fit in a 113-sized container, or it may fit but be so tight that it interferes with the normal deployment of the reserve. This is bad, and should be avoided. So you’ve picked a reserve, and you know what size of harness/container you need, only then should you start looking at the classifieds to see if you can find something that has the right size harness attached to it. If you find something that you think fits, or described by the seller as fitting someone your size, ask the seller for the serial number of the harness/container. Then contact the manufacturer of the rig (even if it was made 10 or 20 years ago), and ask them what size the harness was made to fit. Most manufacturers keep data on all the rigs they have ever built, and will be happy to disclose this information to you, and discuss whether it would fit you based on your measurements. There is no need for guessing games. You can know before you even buy whether or not the harness/container will fit you. The only exception to this rule is if the harness has previously been re-sized, which is uncommon. Main Parachute 7-cell, 9-cell, F111, ZP, Hybrid, low bulk, square, semi-elliptical, elliptical, air locked, cross-braced, etc., etc… There are many mains on the market today. There is no right or wrong answer here. It depends on what you want to do. I’ll have to save this topic for another article. Refer to my comments above on age and condition. Don’t forget the AAD! The last part is to get an AAD. As long as the AAD in question is within its service life, has been maintained at the proper interval (if required), operates normally, and is approved for the harness/container you want to put it in, then you’re good to go. So there you have it. It’s not always obvious at first, so I hope this guide will help some of you out. Alain Bard has been an active skydiver since 2003. Alain holds the following CPSA ratings: D CoP, Skydiving Coach Level 2, Jumpmaster (JM), Ground Control Instructor (GCI), Skydive School Instructor (SSI), Skydive School Examiner (SSE), Exhibition Jump Rating (EJR), Parachute Rigger (RA). He is also a Tandem Instructor. Alain is a certified Hot Air Balloon Pilot (Transport Canada) Alain is a certified Paramotor Pilot (Transport Canada) Alain is a certified Paraglider Pilot (HPAC) You can find out more about Alain at his website: http://bard.ca
 -
1 point
 Today recognizes the 216th anniversary of the first parachute jump, made back in 1797 by French aeronaut André-Jacques Garnerin. Garnerin, who was born on the 31 January 1769 was a student of the legendary ballooning pioneer, Jacques Charles. Charles himself, a decade before Garnerin's record was set, set a record of his own when along with Robert brothers, he became the first to used a hydrogen-filled balloon for manned flight. Garnerin, no doubt heavily inspired by his professor, began to forge his own path in the aeronautics world, becoming the Official Aeronaut of France. France was undoubtedly the hot spot for aeronautic discovery and innovation in the 18th century, and in 1783 it was the Frenchman, Sébastien Lenormand who invented what is considered the first modern parachute. The original design that was used by Garnerin for the first parachute jump was naturally a far cry from what we are familiar with today. The parachute itself was made from silk and was approximately 23 feet in diameters. The device was constructed using rope to connect the basket to the edges of the material. Prior to ascent the parachute resembled a closed umbrella and consisted of a pole which ran down the middle, with rope that ran through the pipe. This was used to attach the parachute to the balloon that he would be ascending with. The occasion of the first parachute jump itself took place in Parc Monceau, Paris on the 22 October 1797. Garnerin made ascent to a height of around 3,000 feet, before cutting the rope that connected the parachute to the balloon, and in turn allowed him to begin his descent. The descent was anything but smooth and Garnerin had to deal with the basket swaying violently during the flight, as well as having what could be described as a bit of a rough landing, with the basket scraping along the ground. In the end though, Garnerin had successfully completed the first parachute jump and paved the way for modern parachuting. Despite the fact that Garnerin was the first to perform a manned descent with a parachute, it is worth noting that 12 years prior to this, Jean Pierre Blanchard had used a parachute with a basket attached to perform parachuting demonstrations using a dog as a passenger. While given the advances made in France each year in the latter part of the 18th century, it was inevitable that a manned parachute jump would occur. It was Garnerin who made it happen first and can in turn be seen as the first modern parachuter in the world. Google honored this anniversary by adding a parachuting game to the Google doodles. Be sure to go check it out!