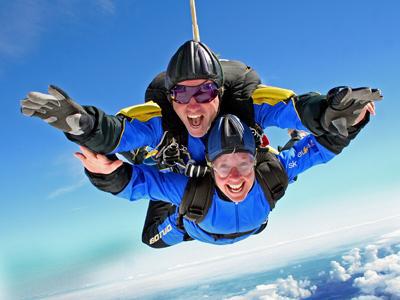
The Abort Zone
Landing your canopy in a specific place is a skill that we all must master. If you cannot land where you want to, eventually you will land someplace you don’t want to. Honing this skill is something that we all must pursue, and how we approach this will determine whether or not we survive the learning process.
We must first learn how to land on a runway before striving to land on a specific point. When pilots try to skip this step, they often run into significant stumbling blocks, some of them requiring surgery. Once you are proficient at hitting the centerline of a runway with consistency, then you can move on to more specific targets such as entry gates and landing points.
One of the most important aspects of any approach is the “entry angle”. Although we can often repair a flawed approach, there are limits to our course corrections. The parachute can only do so much. If you set up too close to the target or entry gate of the swoop course, you may be in for a painful lesson. Too tight is a very dangerous place to be.
Even if you are flying a conservative approach, making gentle turns to final, this can still bite you. When a pilot strives to land on a target that is mostly underneath them, they are on what I call “the path of crazy shit”. You can almost hear the banjo music starting like in a chase scene in an old western. There is no graceful way to land on a target that is directly below you. The parachute wants to glide, and turning or diving to get there will always put your life at risk.
If you are a swooper, the consequences of being too close to your entry gate are dire. You may have the potential to extend the dive of your canopy to make the entry gate, but all you will do is make a divot between the flags that mark the location of your final act of egoistic stupidity. Let it go, and live to swoop another day.
If we are too far away from our entry gate, real or imaginary, our solutions are simple, and generally quite safe. “Shallowing” of the approach can easily be accomplished by letting off the dive early and/or holding a bit of brakes or rear risers. We do not often read incident reports about canopy pilots who died a horrible death as a result of holding two inches of rears to stretch their glide back to the target. Set up deep, and tighten up over several jumps.
The hard part comes when you have set yourself up, started your dive, and are not sure if you can make the gate or not. You are tight and steep, and you think that if you make it you are going to be a hero. Hero or zero that is; only time will tell. If you hold your swoop in your hand like a butterfly, hoping it will not fly off, you will live far longer than if you squeeze it tightly and try to force a square peg into a round hole. Either it is there or it is not.
You need to train yourself to know when you are too tight by knowing what it looks like when it is just right. Visualize the perfect entry, not too shallow, not too tight, with the target or entry gate out in front of you. Walk through the sequence, setting up tiny gates on the ground, and practice making aborts by lifting your eyes from the entry gate and landing long. If you are looking down at it, just let her fly, land safely, and go up and do it again. There is always the next jump.
They key to a good abort procedure is training. Without physical rehearsal for physical activities, our cognitive understanding is useless. We have to practice arresting the dive over and over, and find new ways of putting our parachutes into level flight quickly.
The first concept is: “Pitch Before Roll”. This means that the turn itself is less important than the pitch attitude of the canopy. When you are striving to pull up from a diving turn, increase the canopy’s pitch angle before striving to recover the roll. Bank angle does not kill people, descent rate does that. If you nose your parachute up, you will increase the angle of attack of the wing, which will give you the added lift that will reduce the decent rate. This will afford you the time to reduce your roll angle prior to touchdown. You literally create time.
The second concept that supports healthy recovery technique is: “Sharp Inputs Create Sharp Results”. Slowly applying the brakes, regardless of the depth of the input, will never create the high rate of pitch change that shorter, sharp inputs can. This is the same reason why slow flares, when started at a very high altitude, will not cause an adequate change of direction of flight so as to create a level-off for a soft landing. Practice giving sharp stabs on the brakes while in a turn, and see what it does for you. If your weight increases dramatically, you know you are creating a change of direction, since inertia is resisting your change of motion.
Another relevant concept with regards to saving yourself from a low turn is: “Give Up Some Heading”. If you strive to arrest your dive and stop the yaw too quickly, you are likely to wobble on the roll axis. This is because the increased lift on the low wing is bringing that wing up, beginning an oscillation about the roll axis. This can easily be prevented by allowing the turn to continue a bit following the increase in the angle of attack. Look into the turn, and let the wing follow through with its natural over-steer tendency, perhaps as much as 90 degrees when recovering from a fast turn. This overshoot can be as little as 20 degrees in a slower, carving turn. When you strike the toggles, do it with a short, strong burst-and-hold of 12-18 inches, but do it in an asymmetric manner that continues the current momentum of the turn. This will allow you to smoothly and slowly exit the turn and enter your final landing procedures gracefully.
The last idea that seems to make a difference in how quickly you are able to pull up from a low turn is where you are looking: “Look Where You Want To Go”. If you are like most people, you will stare at your impending impact point on the ground, right until landing. By focusing your attention on what you don’t want, you inevitably make it happen. Somehow we are drawn toward whatever is in the center of our focus, so it is a far better plan to look toward where you intend to go, rather than where you are currently going. If you have turned too low, your current destination point is somewhere below you, while your intended flight path is in the general direction of the horizon. Lift your eyes, and make your parachute fly toward where you want to go. Focus is more than the object of attention, it is the shape of things to come.
Aborting is a part of life. Humans are not perfect, and sometimes we are incapable of fixing our errors. Targets and entry gates are fun to shoot for, but not at the expense of our bodies. Aim to fly a clean approach every time, and let your gut tell you what to do. If it feels bad, it usually is. Do not let your desire to make the swoop course or the peas keep you from seeing what is right in front of you. Ego distorts our vision, as does passionate desire.
The only way to see clearly is to remain calm, breathing slowly and completely throughout the approach, and maintain a positive mood as you set yourself up. If you start to feel scared, it is your cue to breathe more and try less. The perfect approach always feels easy. It flows like water. It is the result of good planning combined with good execution, made possible by positive emotion. Joy is thrust, fear is drag, ego is weight, and knowledge is lift. Maximize lift and thrust, and you will go far.
Go Big
Live Long
BSG
Brian Germain is the author or several popular skydiving books including: The Parachute and its Pilot, Transcending Fear, Vertical Journey and Greenlight Your Life. He also has a spot on Skydive Radio called “Safety First with Brian Germain. Brian runs canopy flight courses throughout the world, and does motivational keynote speaking on the topic of transcending fear. His website is: www.BrianGermain.com
10 Things to ask your potential Tandem or AFF student
This is a lot of info I have learned over the years about interviewing potential tandem customers and AFF students who are either elderly, or have some disability or medical condition.
I always try to relate the physical aspects of the skydive to that person and what might the consequences be. In particular, the airplane ride, the opening shock and the landing. All of these events have specific physiological effects on people and each person have different risks and will react differently to these effects.
1. What is your height and weight? Obvious question. Do not exceed the weight limits of the gear. For tandems, weigh yourself with gear and everything on to know what your exit weight is going to be.
Most tandem manufacturers have a 500lb (227kg) limit for their gear, so easy math will help you know what YOUR personal maximum tandem student weight is.
Do not exceed the TSO for the AFF students rig. If you do and they get hurt, then that is simply defined as ‘gross negligence’ on your part and the waiver will mean virtually nothing in the case of a lawsuit.
2. Do you have any metal in your body? Most people will know a great deal about accidents or surgeries that they have had and can tell you in great detail about it. A spinal fusion with plates/screws or a rod in a femur does not mean that someone cannot jump – but it might raise other questions about the stability of those joints and the consequences of a hard opening or a bad landing.
But a rod in the lower spine could break several vertebrae if a hard landing occurs with the student landing on their butt, causing serious and/or more permanent injuries.
3. Do you have any artificial joints? The question needs to be asked of everyone. A hip replacement is a dangerous thing for a 70 year-old or 80 year-old candidate. Opening shock alone could dislocate the joint. Knees as well. What is the range of that knee? Can you raise your legs for landing?
4. Do you have any plumbing (catheters, colostomy bags, etc)? (Yes that’s right – I said COLOSTOMY BAG) While this may be awkward for you to talk about, it probably is not awkward for the student or person that might have one. If someone has one of these or similar devices installed, then it is probably as ‘normal’ to them as walking or breathing.
But on a skydive, a catheter or bag can come loose or detach, and at the very least, would be a nasty mess to deal with. A lot of catheters are attached to a bag strapped to their leg. Many can be removed, relocated, drained or emptied prior to a jump.
5. Do you have any other medical apparatus (Pacemaker, insulin pump, etc)? Again, they could have internal or external devices on their body. A pacemaker is often not a big deal. A external defibrillator might be a problem if it became detached during the skydive. Same for an insulin pump or a catheter used to feed medications into their body? Where is it? Will the harness rub against it? Can it be removed, relocated? What are the consequences of something happening to it?
6. Are you taking a medication or something that can be administered by me in an emergency? Something like an asthma inhaler or a diabetic medication. If there is a chance of an asthma attack, then the tandem instructor can take the inhaler with them and administer it if needed.
7. Do you have issues with heart or breathing? Someone with a weak or other heart condition, or congenital breathing problems may not even be able to breath properly at 10,000’ in an airplane. Combine that with the stress of a skydive, and you may end up with a medical emergency. Have they flown recently? What precautions do they take if any? And no, I do not recommend bringing their oxygen system on board the plane.
Can they deal with an accelerated heart rate for an extended period of time? We all know that heart rates can rise to some 140+ just prior to and during the exit out of the airplane. Not everyone is able to handle that if they have some condition related to heart or blood pressure.
8. What if my doctor says it’s OK for me to jump? While that may be good information to know, most doctors know little or nothing about skydiving. If you get the chance, talk to their doctor directly and explain the physical things that happen during a skydive.
The airplane ride (hot, sweaty, cramped space and altitude issues). The adrenaline rush during exit and freefall (heart rate), the opening shock of the parachute, (several G’s of force and the potential for a very hard opening), the parachute ride (vertigo, motion sickness, tight and uncomfortable harness, reduced circulation) and the landing especially (forward motion instead of vertical, and how we can slide in (or not) and what is expected of the student during that phase and what can happen if it does not go well)
9. What will an injury do to your quality of life? I have learned that this is probably one of the most important questions you can ask. An 80 year old with Osteoporosis may be able to skydive, but if they break an ankle, they may never walk again.
Bones may not heal and they could spend the rest of their life in a wheelchair or worse. It is much the same for disabled folks. I always try to get a feel for what would happen to their life if they break something, because it CAN and it DOES happen.
10. Do you have any sort of medical condition that can kill you in a 10-15 minute window? I ask this question as a catch-all. Basically there is a possible 10-15 minute window in the case of a tandem jump, (a high or early activation on a parachute resulting in a long ride down). During that time, the instructor cannot perform CPR, a tracheotomy, or rescue breathing. So if the student has any medical condition that would need to be attended to by emergency means, the tandem instructor is pretty much helpless to intervene during the skydive. If the student has any such condition, then perhaps a skydive is not a good idea.
When in doubt, consult a doctor who IS a skydiver. There are plenty of them out there and most can advise you on the effects of a disease, surgery or medication on the process of skydiving.
Just because the customer is standing in front of you right now and wants to jump right now, is not a reason to take them up. Offer to do some homework on their condition(s) and arrange for a future date to see if they can jump.
I have taken up dozens of elderly, disabled, and paraplegic/quadriplegic students in my life. I have also REFUSED to take up dozens of them. Not everyone is capable of making a skydive. Not everyone should be making a skydive.
David TK Hayes
USPA D-18764
CSPA D-486
AFF, Tandem, IAD, S&TA;, Coach, PRO
Launching 2, 3 and 4-Way Stars for Recreational RW
Funneled exits are bound to happen once in a while on recreational RW loads, but they do not have to be the norm. With the leadership of a good load organizer and thorough dirt dives, jumpers with relatively little experience can soon be pulling off stable exits.
In recreational RW, the most common type of exit is a Star (or “round” as it often called). In a Star exit, it is easier to control the exit chunk and maintain levels because all jumpers are looking into the center. The number of jumpers in the Star exit depends on factors such as jumper experience and the complexity of the skydive. For recreational loads with mixed experience levels, a 2, 3 or 4-way Star is probably large enough. Any bigger and the chance of a funnel increases.
This article focuses on Star exits from left side-door aircraft such as Otters, Cessna Caravans and PAC750s because they are commonly used for formations larger than a 4-way. Also, because many recreational skydivers don’t do a lot of 4-way, terms such as Middle Floater and Rear Floater are used instead of 4-way terminology such as Outside Center and Tail.
Deciding Who Will Be In The Base
The simple solution is to put only experienced jumpers in the base, but that often doesn’t leave enough experienced jumpers further back in the lineup. An alternate solution is to put experienced jumpers outside the plane and lesser-experienced jumpers inside. This mix of experience levels can work quite well if everybody leaves on ‘GO’ and presents to the relative wind. Then, if the exit is less than perfect, the experienced jumpers are in a better position to control the exit chunk. For example, if one of the inside jumpers starts to flip over, it is sometimes possible for one of the outside jumpers to push against his back pack and help him settle back down into his slot.
The Importance Of Dirt Diving The Exit
The exit is just as important as remembering the points of the skydive. If the base is not there, no points will be turned anyway. So during the dirt dive, jumpers should pack it up and take grips exactly the way they expect to do it on jump run. This can prevent a lot of fumbling around for grips when they are lining up for real. If a mockup of the aircraft door is available, jumpers should use it. If not, they can make marks on the ground to represent the door.
Typically, the organizer is positioned in the middle of the door and facing in so that he can see when everybody is in position before giving the count. Since full face helmets make it very difficult to hear the count, many organizers move their head or leg in time with the count. Some organizers swing their left leg out-in-out to indicate the Ready-Set-Go. (The second swing out represents the ‘Go’).
Launching A 2-Way Star
This exit uses a Middle Floater and 1 jumper inside the plane. As mentioned earlier, the most experienced jumper should be outside the plane because he is in a better position to control the inside jumper as the 2-way leaves the plane.
Getting Into position
1. With both hands holding onto the bar (or the top inside of the door if there is no bar), the Middle Floater rotates his body to the left so that his back pack goes out the middle of the door (so he doesn’t snag anything). His head follows until he is standing outside the plane with his right foot on the edge of the door and his left knee presented to the prop blast. His hands should be approximately shoulder-width apart.
2. As soon as the Middle Floater turns around in the door, the Inside Jumper reaches between the Middle Floater’s arms then right and left for his arm grippers. This leaves both the Middle Floater’s arms free to fly and control the exit.
3. As he takes grips, the Inside Jumper steps forward with his left foot, placing it on the edge of the door and crouching down (not on his knees) while keeping his chest cheated toward the prop blast and his back straight up and down. His right foot should naturally be a foot or two back inside the plane (helps ensure his body is cheated toward the prop blast).
The Launch
When the Inside Jumper is ready, he looks up at the Middle Floater.
The Middle Floater gives the count and launches out, leading with his left knee and presenting his chest and hips to the prop blast. With his free hands he can help control the Inside Jumper if he starts to twist or turn off heading. He can also double grip the Inside Jumper for added stability.
The Inside Jumper DOES NOT push but goes with the exit, keeping his head up and rotating his chest and hips toward the prop blast as he helps fly the 2-way on the relative wind.
Both jumpers are responsible for keeping the 2-way on heading relative to the aircraft’s line of flight so that other jumpers on the skydive can go directly to their slots for a faster build. The 2-way is also responsible for maintaining a good fall rate.
Launching A 3-Way Star
This exit uses 2 floaters (a Rear and a Middle) and 1 jumper inside the plane. Again, the most experienced jumpers should be outside the plane.
Getting Into Psition
1. The Rear Floater climbs out first (see the photo of the Middle Floater climbing out for the 2-way).
2. On the heels of the Rear Floater, the Middle Floater climbs out the same way, except he rotates his body to the right and stands pretty much in the middle of the door.
3. As the Middle Floater climbs out, the Rear Floater grips the Middle Floater’s right arm gripper with his left hand.
4. Both floaters are now standing outside the door and should be turned slightly toward the front of the aircraft with the inside of their left knees presented to the prop blast.
5. The Inside Jumper gets in position the same way as described for the 2-way Star except he takes a left-hand grip on the Rear Floater’s right arm gripper and a right-hand grip on the Middle Floater’s left arm gripper. (Again, he steps toward the door with his left foot and places it near the edge of the door to ensure he is cheated toward the prop blast.)
Launch
When the Inside Jumper is ready, he looks up at the Middle Floater.
The Middle Floater gives the count and launches out, leading with his left knee and presenting his chest and hips to the prop blast.
The Rear Floater should anticipate the count and leave a split second early, hardly noticeable but just enough to place him on the lower end of the 3-way and looking up at it. (In 4-way, the Rear Floater, called the ‘Tail’, is always on the lower end of the formation to help anchor it on the relative wind.)
The Inside Jumper DOES NOT push. He simply steps off, keeping his head up and rotating his chest and hips toward the prop blast as he helps fly the 3-way on the relative wind.
All jumpers are responsible for keeping the 3-way on heading relative to the aircraft’s line of flight so that other jumpers on the skydive can go directly to their slots for a faster build. The 3-way is also responsible for maintaining a good fall rate.
Launching A 4-Way Star
This exit uses 2 floaters (a Rear and a Middle) and 2 jumpers inside the plane. As with the 2 and 3-way Star exits, the most experienced jumpers should be outside the plane.
Getting Into Position
1. The Rear and Middle floaters climb out the same way as described for the 3-way Star exit. (Note: The Rear Floater should stand a few inches forward of the rear door jamb so that the Inside Rear jumper does not hit his arm on exit.)
2. While the two floaters are climbing out, the 2 inside jumpers (let’s call them Inside Rear and Inside Front to indicate their relative positions in the door) should step forward with their left foot and place it on the edge of the door, keeping their back pack backs straight up and down and their chests cheated toward the prop blast. They should crouch but not be on their knees. Their right foot should naturally be a foot or two back inside the plane.
3. The Inside Rear jumper takes a left-hand grip on the Rear Floater’s right arm gripper and a right-hand grip on the Inside Front jumper’s left arm gripper.
4. The Inside Front jumper takes a right-hand grip on the Middle Floater’s left arm gripper and can either leave his left hand free or reach back and double grip the Inside Rear jumper’s right arm.
The Launch
When the inside jumpers are ready, they look up at the Middle Floater.
The Middle Floater gives the count and launches out, leading with his left knee and presenting his chest and hips to the prop blast.
The Rear Floater should anticipate the count and leave a split second early (the same way as described for the 3-way exit).
The inside jumpers DO NOT push. They basically step off and go with the Middle Floater, keeping their heads up and rotating their chests and hips toward the prop blast. The Inside Front jumper should also think about launching toward the front of the plane, and the Rear Inside jumper should think about helping to place the Inside Front jumper up and forward.
No grip switching is necessary. If the 4-way is the base for a big-way, jumpers can take double grips for added stability.
All jumpers are responsible for keeping the 4-way on heading relative to the aircraft’s line of flight so that other jumpers on the skydive can go directly to their slots for a faster build. The 4-way is also responsible for maintaining a good fall rate.
Safety Tips
Before boarding the plane and before jump run, jumpers should give each other pin checks.
During the lineup and the exit, jumpers should always protect their handles.
Before planning to launch larger exit chunks, jumpers should know how many jumpers are allowed in the door and at the back of the aircraft (so that the aircraft’s stall point is not jeopardized). If they don’t know, they should ask the pilot!
As with other types of exits, methods for launching a Star can vary from one organizer to the next, from one 4-way team to the next, or even from one DZ to the next. The methods described in this article are ones that have worked successfully for this author on both 4-way and recreational loads. But no matter what method is used, success is much more likely if jumpers present as much as possible to the relative wind when lining up in the door and continue this through the launch.
Finally, bigger is not always better. Most skydivers would rather swoop on a solid 2-way than chase a funneled 6 or 8-way base. A solid base allows everybody on the load to turn more points and get the most bang for their buck.
Saved By The Beep
Most of us agree that canopy control is the most important, and most difficult aspect of skydiving instruction. Within this broad objective is the ability to fly a safe and consistent landing pattern. This is crucial for everyone, from the highest level of experience down to the beginner. The clear necessity for improvement in this area has been demonstrated time and again with the unacceptable frequency of canopy collisions and low turn accidents that have plagued our sport for far too long.
General aviation has implemented many new technologies to assist pilots in navigation. These tools have enhanced aviation safety, and such devices are not considered crutches, but a necessary part of safe flying. Similar advances are now commercially available for skydivers as well, but many do not include these instruments in their safety toolkit; least of all for primary instruction methodologies. It is time for this to change.
Altitude awareness is not something that ends once the canopy opens. Knowing precisely how high we are throughout the approach and landing is vital for consistency, and many of the traditional analogue devices are unable to provide truly trustworthy data. The digital altimeters that are now widely available are accurate within ten feet or so, but they have one tragic flaw: the pilot must look away from the ground, and away from the traffic, in order to access the information.
Having water available does not guarantee that the thirsty will drink, and as altitude diminishes and stress level increases, visual altimeters are used less and less. As many high performance pilots have come to realize, audible altimeters are an incredibly powerful aid for heads-up access to the information that saves their lives. The time has come to utilize these tools for students and intermediate skydivers as well.
A pattern is a simply a series of invisible points in space, what some have come to refer to as "altitude-location check-points". With three or four ALC's, a canopy pilot can follow a preplanned path through space to a predictable landing point. When these ALC's are programmed into an audible device such as the Optima, with its impressive tolerance of + or - only ten feet, the distracting glances at a visual altimeter become mostly unnecessary. More importantly, I have found that my canopy piloting students who use such audible cues are more aware of their surroundings, and are far less likely to run into other canopies on the way to the target. Even more importantly, by having their eyes focused "outside the cockpit" so to speak, the canopy pilot learns exactly what the ground looks like at the various altitudes. Therefore, I have discovered, if there is an instrument failure in the future, they have "calibrated their eyeballs", and are aware when they are too low to execute a hard, descending turn.
Many instructors have grown accustomed to preaching the party line that relying on instruments for canopy flight is inadvisable. Although there is some merit to training our eyes to recognize key altitudes, simply trusting our inborn instincts is not an effective way to accomplish this goal. When a “flat-line” beep goes off in your helmet that marks 300 feet AGL, and you happen to be looking at the ground at the time, you immediately become a better canopy pilot. Furthermore, when you are focused on your surroundings, rather than a dial on your wrist, you are more likely to make the necessary course corrections that lead to the target. The primary reason for missing the target is, and always will be, failure to maneuver when a course correction is necessary. When you always know how high you are, and are observing your location in relation the target, you are far more likely to make the change that puts you in the peas.
The safety concerns regarding the use of audible devices for flying a pattern can be addressed with a few simple rules. The first rule is, if you don’t get the first beep, assume that the instrument has run out of battery life, or is improperly programmed. When the initial pattern beep comes, verify that this is in fact the altitude that you expected it to be by looking at your visual altimeter. If it is not, or you hear nothing at all, use your visual altimeter for the remainder of the jump, and sort it out on the ground. Above all else, your eyes are your default, and you can veto what the audible is telling you, or not telling you. If it doesn’t look right, put your parachute over your head and prepare to flare for landing.
There have been many technological leaps that have changed the sport forever, and audible information for canopy flight is proving to be one of the most profound. By knowing exactly how high we are at all times, we can act appropriately. We can relax more as we fly our approach, and enjoy the simplicity and joy of landing our parachutes without worry. Above all else, the reduction of the stress within each canopy pilot, both student and expert, has proven itself to allow for the full expression of skill that training has made possible. When we embrace such advances, we can more easily expand into the pilots we were meant to become.
BSG
Brian Germain is a parachute designer and test pilot, and runs canopy flight skills and safety courses all over the world. Brian has made over 14,000 jumps in his 25 years in the sport. He is also the host of the “Safety First” segment on SkydiveRadio.com, and the creator of many educational You Tube videos. Brian is the author of the widely popular canopy flight text The Parachute and its Pilot, as well as Transcending Fear, Greenlight Your Life, and Vertical Journey. His upcoming book entitled “Vibe Matters, emotion is everything” will be coming out later this year, along with the long awaited educational packing video “No Sweat”. His websites are www.BIGAIRSportZ.com and www.Transcendingfear.com and his YouTube channel is: www.youtube.com/bsgermain
How safe is your reserve
Well, it’s a fair question!
“Parachutist”, the official publication of the US parachute Association published:
Malfunction, Malfunction, Malfunction—The 2017 Fatality Summary
by Paul Sitter
Sunday, April 1, 2018
“Reserve systems—which include the reserve container, pilot chute, bridle, freebag and canopy—are extremely reliable, but there are no guarantees in skydiving. Looking at the last 10 years, reserves failed to save jumpers in about 6 percent of the fatalities. “
The assumption that properly executed emergency procedures at the right height is enough for the reserve to open is just not entirely true! Reserve malfunctions are fact of life!
We learn something every day in skydiving…..if we want to…Which brings the question- how familiar are you with the reserve parachute emergency situations and procedures?
There are numerous factors that affect the reserve openings- container, pack tightness, container materials, body position, MARD systems and packing techniques. Nowadays more skydivers use MARD systems that put them in not that favourable position for the reserve to open.
The following PIA investigation gives some clarity and recommendations on some reserve openings:
https://www.pia.com/wp-content/uploads/PIA-TR-401LowReserveOpeningInvestigationReport91316.pdf?fbclid=IwAR23JVBJHs8yHajcKIRSVbbYpSfbuNXMalH10d9gJzYHSrZcu7t2ui1XQrM
But can something be done while packing reserves in order to reduce the risk of malfunction?
Skydiving history has shown that neat pack jobs open better than messy ones! The ones that are packed with consideration for the opening, add even more to the safety. That’s why we don’t pack reserves flat pack, it just doesn’t make sense anymore and It used to be the standard.
Things change!
Reserve packing techniques that take into consideration the development of the sport and parachute designs are possible, available and can make the sport safer! They involve techniques that significantly increase the reliability of the reserve parachutes openings! Here are some of them:
1. Realistic way of placing the slider during packing. This has several functions – ensures the slider is inflated at the same time or even before the rest of the canopy. It is very important, especially in terminal openings and also ensures slider is not launched down the lines immediately after coming out of the freebag. This also ensures the slider is inflated symmetrically, allows proper separation for the four line groups and time for the load on the lines to be more evenly distributed!
2. S- folding the reserve canopy before inserting it into the Free bag that ensures the least form memory is present on the lines above the slider! Form memory, stiff lines and uneven line tension are the main reasons for tension knots. The specific canopy S folding also ensures the least changes in the canopy alignment when inserting it into the free bag.
3. Additional separation of the line groups, ensure their full separation before stowing them into the Freebag!
4. Freestowing the lines using figure 8 pattern that doesn’t allow the different bights to mix disorderly lines between each other! It is used for high bulk lines with form memory that need to be stowed in small compartment stowing pouch! This ensures orderly extraction of the lines from the free bag!
Skydiving as well as skydiving equipment, materials and rigging are in constant evolution!
We challenge the status quo because skydiving equipment, education and techniques can be improved in order to increase safety. Equipment development and modification are driving force in the evolution of our sport.
GLH Systems
By glhsystems, in Safety,
Are You Ready?
This article is about today’s crucial importance of education in Skydiving and Rigging and what part of it are procedures and rules.
“You have to be ready for every situation!”- this is a popular expression lately and it makes perfect sense. But what does it mean, how do we prepare in order to be “ready”, what training is necessary, where do we get it, what knowledge do we need, is the training from our first jump course enough, etc. etc.? All good questions. Here, we are going to answer some of them. Obviously, it all comes down to EDUCATION! The right EDUCATION!
In order to survive a skydive we need- knowledge, skills and experience! There is nothing else we can rely on when it is time to resolve any situation up there than ourselves and what we know. Interestingly, in recent years, the concept of “following procedures and rules” has been pushed through Skydiving more and more and now it wrongly has been assumed as the main way of dealing with difficult situations. “Following procedures and rules” is very important, actually it is extremely important. Following procedures and rules means that certain important things are going to get done in the necessary order. This evidently ensures the safety in skydiving to a big extent. Is that enough? Both, the short and the long answers are -NO.
The definition for “Procedure” is- a series of actions are conducted in a certain order or an established or official way of doing something. It is a term coming from the mechanics, and it works well in the factories. Following procedures there ensures things are done the correct way in order a certain process to be carried out. Skydiving, Rigging, training and education are not manufacturing processes. There simply cannot be procedures that cover what will happen on a jump. Every jump is different to some extent, done by different people, from different altitudes, different airplanes, and with different equipment! Equipment checks, packing procedures, post deployment procedures etc are good examples for procedures we use today. They are just part of the education and should not be mistaken for sufficient good training in Skydiving and Rigging. Also, “Procedures” can and have to change often, when situation requires that, especially in emergencies.
So, what exactly is the difference between Procedures and education- following procedures covers only several things that need to be done in specific situations while good education is what prepares us to resolve a wide range of problems in wide range of different situations. There is a big difference between the two!
Unknown situations, Extreme weather conditions/phenomenon/, Unknown equipment and other factors/mostly human ones/ are important part of the education in Skydiving and standard “procedures” do not cover wide range of what happens in these. The insufficient training in these areas is a reason for a big part of the serious injuries and deaths.
Unknown situations- well they happen, and we must deal with them. It is important to know what can help us. Broken control line on deployment, 3000 ft height, no line twist, steerable canopy and the canopy turns. Do you have to cut away? Yes, there’s many answers, and they all depend on the particular situations. Winds, distance from landing area, main canopy, spot, etc, etc, etc.
Unusual and extreme weather conditions/phenomenon/- looks like a good idea to know how to handle strong wind gusts, turbulence, dust devils, etc. Let us say you are at 2000 ft under a good canopy and there is sudden wave of strong wind- 30-40 kts on the surface. This changes your original plan, but you still must land, nobody stayed up there. What is the approach you need now, can you fly your canopy backwards facing into the wind, what are the implications flying the canopy crosswind? Now your knowledge comes to play.
Unknown equipment. What constitutes unknown equipment? Well, obviously the equipment you do not know, and If you do not know what is in your reserve tray- that makes it new when it’s time to use it. A good example is using MAARD systems. After cutaway, RSL opens your reserve tray and initiates the reserve opening sequence regardless in what position you are, sometimes spinning, spinning on your back etc. Any other position than belly to earth, slightly head up is less favourable for the reserve opening.
What is the difference between untreated Spectra lines /PD reserves/ and treated/stiffer/ Spectra lines?
Other factors/mostly human ones/- yes, very important to know how you would react when you are first time in particular situations. If you lack the necessary time and resources/knowledge/ and you are to deal with situation that you do not know how to resolve, the “freeze, fight or fly” response takes into action, and you could forget even the things you knew.
Nowadays, these factors are sometimes left outside the scope of the things considered important in training and in operations. Again- knowledge, skills and experience is what we need, and only good education and training can provide them. Following standard operating procedures are not enough!
Well, if you create a system to do something- do not be surprised it does it!
It is not a big surprise these factors are important and ignoring them causes problems.
Turns out there is a huge amount that can be done, and education is very important.
“The ability to generate and then select the appropriate course of action is based on the decision maker’s “reading” of the situation—in other words, our ability to assess the situation and predict how it will evolve over the next few seconds. “The more knowledge you have on how things work- better chance of reading the situation. Knowing what is in the reserve container, what the closing sequence is, how and when the MARD works, why the RSL was invented and implemented, what the reserve pilot chute is, can affect the way we read and PERCIEVE emergency situations. These things are important and being familiar with them could save your life. In emergency, people have reacted in different way depending on how they see the situation. As a result, if you know how all the equipment works and what you have, often you do not need to stop, think and then act. Action becomes inbuilt into your reflexes- we jump out of the way of fast approaching car before we even think about it. The same thing happens when you are driving a car- you are not constantly thinking how much input you should apply to different muscles of your limbs in order to maintain a straight line- it is all done subconsciously. You need to think only when you the situation changes, and you need to decide which way you need to turn at an intersection.
The alternative is when you do not know how equipment works in emergency situation- you execute only what you are told- pull some handles, hopefully in the right sequence. If this does not go well- you will need a lot of luck because you do not have time! If we are not sure exactly what is the problem, we need time to realise exactly what is happening, to run different simulations and to decide what course of action to take and execute it. In skydiving- we DO NOT have time. Unfortunately, the current Skydiving “Emergency procedures” diagram-based education here simply fails in many aspects.
All these- “Unknown situations, Extreme weather conditions/phenomenon/, Unknown equipment and other factors/mostly human/ factors” are interrelated. Educating ourselves in one of them, significantly improves the overall outcome as this positively affects all other factors. Let us say we significantly improve our knowledge in “Unknown equipment” /how equipment works/, this significantly improves our ability to handle weather phenomenon/very important/, unknown situations/extremely important/, Human factors/increases the competence confidence loop and anxiety level/ and this improves following procedures as they are understood better.
Getting back to- “You have to be ready for every situation!”- it means that we must be prepared as much as possible for what is coming at us in skydiving. We must know how to prevent and handle situations that have happened before, and we need to be able to tackle even situations that have not happened to us or in general.
Unfortunately to me it looks like we were closer to the right education 30 years ago than today. The reasons for that are complex, however the education providing the necessary knowledge, needs to reflect the modern equipment we have, the already gained experience in skydiving, educational psychology etc.
Luckily, we know all this! We just need to implement what we know again!
It is every skydiver’s personal responsibility to learn how to survive after passing their student status.
Do not wait! Ask! Seek information! Learn! Request a good education, your life depends on it! Ask WHY and HOW! If whoever is teaching you, cannot explain WHY and HOW, ask someone that knows!
Where do we start?
You can start with the manuals for your parachutes and AAD!
Kras Bankov
GLH Systems
Photo, courtesy of “Jump Dogs Display Team”
By glhsystems, in Safety,