1 1

Safety

    Five Quality Canopy Skills Every Beginner Should Have

    So you whipped through your student program, graduated AFF, moving towards or already got your A license, eyeing a rig to buy and well on your way to your first 100 jumps. Canopy or parachuting skills are an integral part of every training program, but are also the most important skills these days. There are five quality canopy skills every student should know: awareness of your rig and canopy, awareness of your self and others in the pattern, awareness of target and setup, good depth perception, and a proper two stage flare.
    A Few Parachuting Tips That Are Very Important

    1. Awareness Of Your Rig And Canopy
    Developing awareness of your rig comes with time. Unfortunately, when you're a student, time is not a comfort you always have. You need to be comfortable and confident with your rig on every jump. If it is a new rig you're jumping, wear it around the house, while your cooking dinner, sitting on the couch or doing chores so that you can get used to it.
    If you rent rigs, get suited up extra early like on the twenty minute call, so you can go through all your emergency procedures. This comfort and confidence is paramount when you are up in the air. If you are not confident in your parachuting equipment, you will have "gear fear" and this can affect your judgment.
    If you have a new rig and there are things you don't like about the rig, change them. You would be surprized the little things a rigger can do to make a rig fit better. I recommend buying a custom rig when you have reached a size you will be on for a while 190-170 sq feet on average. Even with a new rig, small alterations can be made. The easiest fixes that I see students can do is a bungee cord to connect your leg straps, padded reserve handle, shortening the closing loop, and modifying the laterals to make the rig fit tighter. All these modifications are freefly specific but a tighter rig is a safer rig.
    Know your canopy when parachuting. Know each stage of deployment and the equipment on your canopy which is responsible for each stage. Learn how to pack! Packing your parachute is an intimate way to get to know your equipment. If you can pack your rig well, you will more likely have a greater understanding of your equipment and confidence with it. Packing comes with experience. Pack at home over and over again, watch people pack, and ask lots of questions. If a packing course is offered, take it.
    I know when I was starting out, I wasn't that interested in my canopy. It was a docile vehicle to get me from 3,000 feet to the ground, which I had to pack every time to go up. I definitely feel different about my canopy now. When you are under canopy and not in the pattern above 1000 feet, play with your canopy, practice your landings over and over again. Experiment with front risers, rear risers and toggles.
    Two intricate tips with your equipment can improve the performance of your canopy immensely. The first is simple, stow your slider and bring it down behind your head. Keep weary of where you are located relative to the drop zone, and other jumpers. Don't mess with the slider as you might end up in another county. Stowing your slider helps reduce drag and can increase your glide. It also gets rid of that annoying flapping noise.
    The second tip is for a student who can land on his target consistently. After your slider is stowed elongate your chest strap all the way out, without undoing it. Practice on the ground. You want your chest strap to be as wide as possible for three reasons: the canopy is designed to fly like this as it increases the glide of your canopy, second it gives you another control surface to fly, that being your hips, and lastly it allows you to lean forward in your harness which gives you more control. All three of these points can be seen on a good canopy pilot and a moderate student can start practicing these skills early on in his career, even though it will play a bigger part later.
    When your chest strap is elongated your hips are now hooked directly to your canopy instead of your shoulders through the harness. It will be hard to turn the canopy with your hips at first especially with large canopies, but it can be done. Simply scissor your legs and throw the leading leg over the trailing leg and lean in to it. Then try it the other way. This will become more important when you get to sizes like 150 sq feet and below.
    A word of caution, don't spend too much time elongating your chest strap under the canopy while you are parachuting, you definitely will end up in a different county. Opening shock makes it more difficult to elongate the chest strap then on the ground. The buckles cinch up with opening shock to make sure you don't fall out. Do not undo your chest strap! If you elongate the chest strap properly you will not fall out of the harness. The canopy will feel slightly wilier but nothing dangerous. Stow your slider and elongate your chest strap before you unstow the brakes. This will make it infinitely easier. If you unstowed your brakes already, let the alterations go and remember to do these things on the next jump. You must have a certified instructor watch over you when you practice on the ground and in the air. Make sure these alterations are done before 1000-1500 ft. Be careful, use common sense.
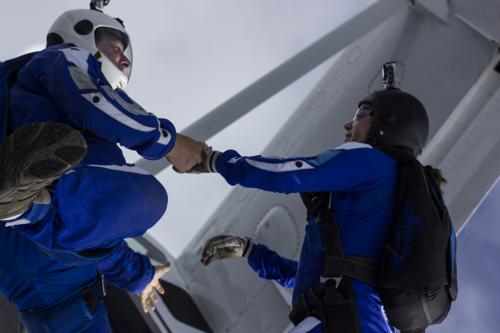
    2. Awareness Of Your Self And Others While Parachuting
    I have briefly touched on this subject already, but since canopy collisions and landing off are a reality, awareness of yourself and others is a Quality Skill unto it self. Always know where you are relative to the drop zone. Are you up wind or downwind? Can't tell, figure it out! Watch the wind on the trees, or a nearby lake. Watch other skydivers, are they landing in the same direction your facing, or the opposite.
    I tell my students to watch the drop zone in the plane and where you are relative to it and the wind. This serves multiple purposes: you gain an awareness of where the pilot is in his jump run and his tendencies, you have a better understanding of the area you are jumping and potential outs and hazards, and on jump run you will be able to anticipate where you will be if you look out the window while other people are getting out.
    Look out for other people under canopy, especially during and right after opening. Check your canopy then look for others immediately. Look up and down the jump run for the people who got out before you and right after you. Get a visual then go through your checklists of things to do. If you are playing with your canopy up high always look before you turn or yank on a control surface. Find the pattern; be mindful of people out side the pattern. Do not spiral in the pattern. The best way to have clear space around you is to go last and deploy high.
    One easy thing that you can do especially when you are traveling to a different drop zone is find how they operate their pattern. You would be surprised how many experienced jumpers do not ask about or forget the pattern. I think this is the biggest problem at destination DZs where people are visiting. Follow the rules laid out; the rules are there for you as skydiver's safety and the safety of others.
    3. Awareness Of Your Target And Setup
    You should be aware of where your landing target is in freefall. I have left countless jumps early because the spot was off, people took to long in the door and spread the spot to thin, or the wind was stronger when we exited then when we took off. The point is, develop an awareness of where your target is in freefall by doing solos. Don't be afraid to deploy a little early if you see you are entirely too long to get back.
    After you are open and you have made sure the canopy is safe, you have made your control checks and alterations, size up the distance and altitude you have from your target. Execute the pattern your instructor and you have gone over. Try to stay up wind of your target before you start to execute your pattern. Go over in your head, how you are going to execute, see the legs of your pattern, check for others, and then go!
    Hitting your target is not done in the last 150 feet, that is how people get hurt. Hitting your target comes from proper briefing of the landing area before the jump, your spot, and how you set up for your pattern at 1000 feet. Good target acquisition comes from practice but also preparation.
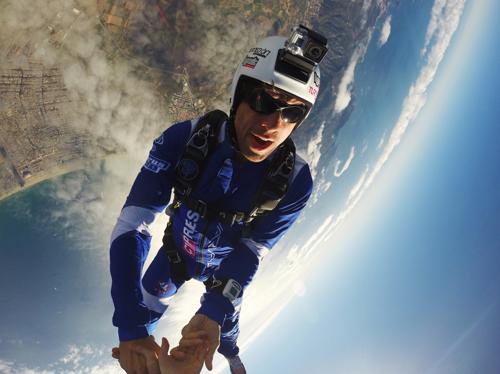
    4. Good Depth Perception
    Depth perception is a key element of being a good canopy pilot. It is a learned skill but can be greatly improved through various techniques. If you wear glasses please tell your instructor. Do not be ashamed of your sight. Your sight will put you at a great disadvantage if you do not use your glasses or contacts while parachuting. With proper use of glasses and contacts you can enjoy the sport with no problems. If your goggles don't fit your glasses buy ones that do. If you do not like glasses and your contacts dry up, change your goggles to a snugger fit, or possibly look into laser surgery. I know many people in the sport who swear by laser surgery. The bottom line is that when you skydive, use what you use to drive your car. Skydiving is as critical as getting behind the wheel with your eye sight.
    If your sight isn't a problem or you use one of the corrective measures above, you can dramatically increase your depth perception of the drop zone and the ground. Look at the drop zone while you are in the plane and gage it with your altimeter so you get an idea of how high you are. Get a highly visible altimeter and don't forget it on the ground! When you get within the last 150 feet do a quick check for people around you, then lock in on your target. When you get 50 feet from your target, shift your eye sight from looking down to looking in front of you. Open your vision so you still include the ground but try to look forward. Begin your two stage flare at about 10-15 feet depending on the winds. Keep your vision open and wide; do not fixate on the target. Consult your instructor.
    5. A Proper Two Stage Flare
    I know some drop zones do not condone a two stage flare. Do not buck the trend on this one. If your drop zone doesn't allow it, come to me I will teach you. Ask your instructor about the two stage flare. I know from my experience some students have a tough enough time doing a symmetrical flare at the proper altitude. So maybe the two stage flare is not right for you, right now. I do believe it is an important part of being a good canopy pilot, and mixed with all the alterations mentioned above can give you your first swoops coming straight in with no riser input. In fact I have seen students who collapse and stow their slider, elongate their chest strap, and use a proper two stage flare swoop 50-60 feet with no wind.
    The two stage flare is quite simple.10-15 feet above the ground quarter flare your canopy. This action planes out your canopy and translates your vertical motion forward. Make sure that the flare is quartered not a half flare. There is a dramatic difference. A quarter flare will plane the canopy out and accelerate you forward; a half flare will distort your canopy and make you sink. When you are five feet above the ground, full flare to come to a complete stop. I see many people just leave the canopy in a quarter or half flare. This action makes you hit the ground moving forward and a little hard, you might have to run it out.
    Make sure you have a consistent symmetrical flare on target before you practice a two stage flare. The two stage flare is difficult without video to show you what you are doing. So, get coaching with video, people just telling you what to do will not get it done. You must have feedback and video is the best for this. Also if your instructor uses radio this is a plus, but not essential.
    I have commented on many things in this article. Do not try to do them all at once. Concentrate on one thing per jump. Focus on one thing for 20 jumps if you get flustered easily, till you get it right and it becomes habit.
    If you incorporate all these things with the over site of a quality coach, you can swoop coming straight in with no riser input on target safely negotiating others and the physical hazards around you. Be very careful under canopy while you are parachuting. Nothing replaces common sense, good judgment and asking lots of questions. You too can be an excellent canopy pilot with these five quality skills.

    Steven Blincoe has 4,000 jumps and 300 Skyventure hours in the wind tunnel. He is the founder of the New School Flight University in Orlando, Florida. He also has 10 years of experience in the sport coaching, competing, and filming. Steven Blincoe can be reached by phone 530-412-2078 USA, or by email [email protected]. You can also go to www.blincoe.org.

    By admin, in Safety,

    Exit Separation Revisited

    Exit separation has become a point of contention at many DZ's lately. Years ago, when belly flying was the rule and the Cessna 182 was the aircraft at most DZ's, exit separation wasn't too much of a big deal - you gave the other group (if there was another group) some time and then you went. With the aircraft in popular use 15-20 years ago, it was hard to exit very quickly to begin with, and so the issue never came up very often.


    Bill von Novak started skydiving in 1991 at a small DZ in New York. Since then he has become an S+TA, an AFF, tandem and static line instructor, and has set two world records in large formation skydiving. He lives with his wife Amy in San Diego.


    Since then, several factors have conspired to make exit separation more of an issue. First off, there are more people freeflying. Freeflyers, especially head down groups, drift differently than belly flyers, and thus need different considerations when planning for exit separation. Faster canopies mean that people who open facing each other need more distance to deal with a potential collision. Large aircraft with big doors can hold several larger groups, and those groups can get out those big doors more quickly. Finally, GPS spotting has removed some of the delay between groups. It's rare to see people even check the spot before beginning their jam-up.
    I first became aware of this issue in 1994, when I started jumping at Brown Field in San Diego. We went through a series of aircraft as we grew, from Cessna 206's to King Airs to Beech-99's, none of which had GPS. In addition, we were less than a mile from the US-Mexico border, which meant our jump runs had to be east-west and our spots had to be dead on. Several instructors were "designated spotters" and we would argue over 100 yard differences in jump run offset and exit location. After a while we got pretty good at spotting.
    As our aircraft became larger, exit separation became more of an issue. We had a few close calls, and so we agreed to start allowing more space between groups. At first it was essentially trial and error - we would leave some amount of time (10 seconds or so) between groups and increase that time whenever someone felt they were too close to someone else. After a while, we began to get a feel for how much time was required. We knew that if the upper winds were strong and the plane was just creeping along the ground, we had to leave more time. We also knew that if we let the freeflyers get out first, we had a problem almost every time. We ended up with a system that worked for us, and had essentially no problems with collisions or close calls after that.
    During this time I was also traveling in the summers to different boogies and I noticed a wide variety of exit separation techniques. By far the most common technique was some amount of fixed time - the next group would pause, then climb out and go, without knowing what the upper winds were doing or what the spot was. The next most common technique was similar but they added a "leave more time if it's windy" clause to their delay. There was also a class of jumpers who looked out the door to tell how much separation to leave; these jumpers either looked at angle of the departing group or the ground to tell how much space to leave.
    This got me thinking. What really works and what doesn't? I tried a few methods on my own, from the "45 degree" method to a purely ground-based method. After some experiments, a group of skydivers collaborated via email and internet and came up with the actual math behind separation, the physics that determines how far the center of group A will be from the center of group B after they open. But before diving into the math, there are a few basic concepts to cover.
    What we care about. When we're talking about separation at opening time, we don't really care about where we are in relationship to the plane or even the ground - what we care about is how far we will be in the air horizontally from the next group that opens. So for our purposes, the airplane and the ground don't really matter, and someone watching from either of those places may not get the same "picture" of things that we get. (Of course, we do care about our relationship to the ground when it comes to spotting and landing on the DZ, but that's a separate issue.)

    How we fall. In most freefall (tracking dives and wingsuits excepted) we fall essentially straight down with respect to the air. If there's wind, the wind blows us at whatever speed it's blowing. If the wind is doing 30kts at altitude, a group of skydivers will be doing 30kts as they drift with the wind. It's also important to realize how your trajectory changes after you open. At a freefall speed of 100kts, a 30kt wind will slightly deflect your trajectory, because it's a small fraction of your total speed. Once under canopy and descending at 10kts, it will deflect your trajectory a tremendous amount, since it is now a very large part of your speed. Of course, under canopy you have much more control over your own horizontal speed, and the winds may add or subtract from your canopy's groundspeed depending on the direction you are facing.

    Speeds. When discussing speeds, it's important to define units. There is feet per second, which is very useful for people who are trying to figure out how far they want to be from another group. At 100 feet per second, 10 seconds gives you 1000 feet, which is about as easy as it gets. You may also hear the terms indicated airspeed, true airspeed, and groundspeed, in both knots and miles an hour. These can all be converted back and forth as needed . Now that all that's out of the way, the math is pretty simple. The distance you will get between group centers is the speed of the aircraft plus the speed of the winds at opening altitude, multiplied by the time you leave between groups. That's it. So if the aircraft is flying into the wind doing 80 knots per its GPS, and the winds at opening altitude are 10 knots from the same direction, and you are waiting 10 seconds between groups, you are going to get (80+10 = 90 kts, which is 153 feet per second) 1530 feet between groups.
    It gets a little more complicated when the winds are not from the same directions. If the winds at opening altitude are opposite jump run, you have to subtract them rather than add them. If the winds at opening altitude are from the side, it's the same as zero winds at opening altitude when it comes to separation.
    If you put these equations into a spreadsheet and play with the numbers, some basic patterns emerge. If the headwinds at altitude are strong you have to leave more time. If the plane is slow (i.e. it's indicated airspeed on jump run is low) you have to leave more time. If the winds at opening altitude are strong as well, and from the same direction, you can safely leave less time. (Or, preferably, just leave the same amount of time and you'll end up with even more separation.) If the winds at opening altitude are opposite from jump run, that's the worst case, and you have to leave even more time.
    Some people have a problem visualizing how winds at opening altitude can possibly cause them trouble if they leave enough distance on exit. The question is usually phrased as "don't all jumpers follow the same path out of the plane?" And they definitely do. To visualize why this can still cause you problems, take a look at the separation diagram shown below.


    Drawing showing exit separations
    In the first drawing, there is no wind after exit, and the first group breaks off, tracks, opens, and flies their canopies away from the center for the first few seconds, which is what they should be doing on most formation skydives. (After that, it's a good idea to turn away from line of flight once you're sure you are clear of others in your group.) The second group arrives 10-15 seconds later, shortly after the first group has opened their parachutes, with some room to spare.
    The second drawing shows what happens when there are winds are the same all the way down. Notice that the "cone" caused by the breakoff and the canopy flight has shifted strongly to the right. This is because (as mentioned before) once their parachutes are open, the wind affects their trajectory more strongly. As with the first example, it is assumed that everyone flies away from the center for the first few moments. That means the jumper flying into the wind makes no progress and comes straight down, while the jumper flying downwind gets a boost in groundspeed..
    The third drawing shows where you can run in to problems. In this drawing, the winds after exit are from the opposite direction. You get the same skewing of the cone, but now the edge of the cone is getting dangerously close to the trajectory of the next group. This is a case where the same separation at exit led to trouble because of opposite winds at opening altitude.
    This leads naturally to the question "how much separation do you really need?" That depends on the group. 1000 feet should probably be an absolute minimum for any belly formation skydiving. That means that two four-ways can exit, fall straight down the pipe, track 300 feet from center on breakoff, and then still have 300 feet to deal with avoiding a potential collision after opening. With the speeds of today's canopies, that's a bare minimum. If the group size grows to two 10-ways, 2000 feet might be a wiser separation. If a low-time RW group backslides a bit, again, 1500 feet might be needed to be clear of them at opening time.
    So how does a jumper who doesn't want to carry around a calculator figure out how much time to leave between groups? One very simple way is to just look out of the plane and wait until it has covered 1000 feet, then go. This method, originally suggested by Skratch Garrison, takes much of the figuring out of exit separation. It can be hard to determine how far 1000 feet is on the ground, but fortunately most DZ's come with a handy ruler - a runway. A 3000 foot runway allows you to put 3 groups out along its length with a bit of margin thrown in. This method also has the tremendous advantage that it requires people to look out the door, and that means they are more likely to see traffic, high canopies or clouds that could pose a hazard to their skydive.
    Another simple way is time-based. There are several tricks you can use to determine how long to wait. One common one is to always leave at least 7 seconds, then if the upper winds are strong divide them by 2 and wait that number of seconds. (Faster aircraft sometimes use divide by 3.) So if the winds are 30kts you wait 15 seconds between groups. This technique uses some math but isn't too bad.
    A third technique that seems to be popular for some reason is the 45 degree method. In this method, jumpers wait until the previous group passes through an imaginary 45 degree line before they exit. The problem with this method is that the jumpers never pass through that 45 degree angle, or pass through it so quickly (under 1 second) that it's not useful for determining separation. The numbers confirm this. What you see out the door depends purely on speed of the aircraft, fallrate of the jumpers and type of exit. If the plane is going slower than freefall speed, the group may start out above the 45 degree line, but will drop below the line in less than a second and never rise above it again. If the plane is going faster than freefall speed (which is rare) the jumpers stay above the line and never cross it at all. A good head-down exit will tend to move jumpers lower in the picture. Winds will not affect the picture; an exit in 5kt uppers looks the same as an exit in 50kt uppers.
    There has been some friction over this issue. The 45 degree method has a lot of supporters because it's so simple and makes a sort of intuitive sense. Beyond that, it actually seems to work for some people - although it's likely that the extra time it takes to locate and stare at the previous group has something to do with the reason the next group usually leaves enough time. To show that this doesn't work, two cameras were fixed at a 45 degree angle and mounted on a boom outside an Otter's door (see pictures below.) Pictures and video of several jump runs both into the wind and downwind were taken and magnified to determine how close each group was to the imaginary 45 degree line, which was essentially the center of the images. The pictures confirmed the basic problems of the 45 degree rule. RW groups, falling a little faster than the aircraft, never quite passed behind the 45 degree line. Freeflyers, going much faster than the aircraft, stayed well below the 45 degree line for as long as they were visible in the stills (about 30 seconds.)


    Some version of the 45 degree method may work for some people. It may be that the simple act of looking out the door delays them enough, or their subconscious may see the group moving slowly along the ground (because the aircraft's groundspeed is low) and send a warning message to the rest of their brain - "hey, hold up a minute." But waiting for a true 45 degree angle simply does not work.
    Another issue that has become more important lately is exit order. Some places still put freeflyers out first, and that doesn't make much sense. In 30kt uppers, a belly flyer who leaves 10 seconds and gets out after freeflyer will open 100 feet from him, but if the belly flyer goes first and the freeflyer leaves the same time he will open 2200 feet from the freeflyer. RW groups, since they are in freefall longer, drift farther downwind before opening. It seems like a no-brainer to choose an exit order that used this to your advantage and increased, rather than decreased, separation distances. You can certainly wait 20 seconds after the freefly groups before the belly groups exit if there is some other reason why the freeflyers have to exit first, but at most DZ's it's hard to ensure that 20 seconds, especially since waiting so long almost guarantees long spots or a goaround.
    Below are two diagrams that show how exit order can affect separation.

    Belly out first diagram

    Freefly out first diagram
    One reason given at DZ's to explain a backwards exit order is that freeflyers open sooner and therefore are beginning to descend before the next group gets there. Bryan Burke of Skydive Arizona has pointed out that you simply cannot trust vertical separation - one premature deployment or malfunction and all that vertical separation is gone. Even during a normal skydive, when you add up altimeter error, pull timing and snivel distance, you can easily get a jumper opening 1000 feet from where he expected to be open. In fact, Bryan points out that at Skydive Arizona, the primary reason high pullers get out last is not for separation but rather because they are the ones that can make it back from a bad spot.
    Every drop zone is going to have a different set of rules and a different approach to exit order. Some work well, some don't work as well. Jumpers have to understand the factors that can reduce group separation so they can make informed decisions about when they want to exit and what kind of exit orders they are comfortable with.

    By admin, in Safety,

    Exit Separation

    On Saturday October 26, 2013 there was a near canopy collision by experienced jumpers. There were several factors which may have contributed to this event. I feel that a lack of understanding of exit separation was a major contributor.
    The winds of the day were posted: 24 knots at 12,000 feet, 22 knots at 9,000 feet and so on. I was on the first load, first out with a three way formation. I turned to the group behind me and asked for 10 seconds of separation. The response was “Why? That’s a lot of time.” Both of these jumpers have around 500 jumps. One has been jumping for over 10 years, the other for 9 years. One of these jumpers was part of the group that was involved in the near collision later that day.
    The incident: a near miss at opening time between two skydivers we will call jumper 1 and jumper 2. Jumper 1 left the plane first as part of an 8 way relative work group. Jumper 2, as part of a less experienced 2 way relative work group, left next with 5-6 seconds of separation. The second group left the plane flipping and having fun then got stable and continued a normal relative work dive. Jumper 1 was oriented to track up the line of flight decreasing his separation from the 2nd group. Jumper 1 further decreased his separation from the 2nd group by continuing to fly his canopy up the line of flight for 12 seconds. At which time he noticed one of the jumpers from the two way open pretty close. He then started looking for the other jumper from the two way group (jumper 2) and started a right rear riser turn. At this point, jumper 2 under a still deploying main fell past and within 20 feet of Jumper 1. Here is a link to the video of the opening sequence. This video was taken with a gopro camera and the jumpers in it are closer than they appear.
    Conclusions:

    1. The initial flipping on exit of the second group may have had the two way in an orientation to slide down the line of flight and therefore contributed to the second group moving towards the first group. If so this would have been only momentary and not a large contribution.
    2. Jumper 1 decreased separation by tracking up the line of flight. Although a contributing factor to the lack of separation, this was an appropriate action as on groups of 2 or larger all jumpers should track away from the radial center of the formation regardless of whether that puts them tracking up or down the line of flight as this will give them the greatest amount of separation from the members of their own group which would pose the greatest danger of collision at opening time. Jumpers tracking up the line of flight away from larger groups should always be aware of their direction and not “over track”.

    3. Jumper 1 was flying a small fast canopy, continuing to fly up the jump run, holding into the wind with his brakes still set. This decreased separation with the following group. Every skydiver should know where jump run is planned to be before boarding the aircraft. All jumpers should upon opening orient themselves as quickly as possible to fly perpendicular to jump run at least long enough to ensure the groups before and after them have opened.

    4. There is no question that mistakes were made on both sides, but there should also be no question that there would have been greater separation with 8 seconds at the door as called for in the chart below. In this case an extra 2 seconds separation would have equated to between 224-252 more feet of separation.
    We are also reminded of another incident we had a while back. Jumper 1 on a hop-n-pop leaves opens and flies up the line of flight. Jumper 2 leaves with about 5 seconds of separation and tracks down the line of flight. Jumper 2 tracks through Jumper 1’s canopy ripping it in half. Luckily neither one was injured.
    Another example is the video posted Iloveskydyving.org. This video clearly shows the following group giving 8 seconds of separation. Judging from their flying style it is obvious they are very skilled and not likely sliding through the air unintentionally. However, they still end up opening dangerously close to the group before them. We don’t know about what mistakes the group ahead may have made if any, but consider the problem may have been enough wind to dictate more time for adequate separation.
    Close Skydive Canopy CollisionAs Jumpers, we must have a basic understanding of the effects the ground speed of the aircraft has on the amount of time that we need to allow for the same amount of separation. I have heard swoopers say that the only good wind is no wind. They are saying this because in a no wind situation all things remain constant and consistent. Likewise at altitude if the aircrafts speed relative to the ground was always the same we would always give the same amount of time for the same amount of separation.
    What is adequate separation? In distance, the number I was taught is 1000 feet from center of formation to the center of the next formation for small groups. This number increases up to 2000 feet or more for groups of 8 or larger. Consider two 4 way groups lined up perfectly with jump run which will result in a jumper from each group tracking directly at one another. This allows each jumper to track 250 feet with 500 feet still left between them. The Skydivers Information Manual goes farther and recommends 1500 feet of separation for small groups and solos.
    What is adequate separation? In time, that will depend on the speed of the aircraft and the wind the aircraft is encountering. In other words, it will depend on the ground speed of the aircraft on jump run. See the chart put together by Phil Litke. These numbers should be considered minimums for 1000 feet of separation to be doubled for following groups of 8 or larger.
    Here are some examples of experienced jumpers and Tandem instructors giving between 13 and 31 seconds exit separation when the winds were very high. Also consider that these instructors are, for the most part, giving such separation on solos and 2 ways. As stated earlier, larger groups should be allowed more distance and therefore more time.
    We are all concerned about hosing the guys in the back of the plane by taking too long. I am not advocating that we give more time unnecessarily. If the speed of the aircraft dictates a certain amount of separation between groups this should include your set up, climb out, and count. I am not suggesting anyone taking longer than the conditions call for as this would create different problems such as people landing off, unnecessary go arounds, and wasted fuel. Most of us have had experienced people in the back of the plane yelling for people to hurry up and get out. This is because they feel you are taking too long to exit and will end up with them getting too far from the airport to make it back. If the winds are strong enough to necessitate a certain amount of separation then likewise the plane is moving slower relative to the ground, Freefall drift will be greater, and the acceptable opening spot may be farther from the landing zone.
    Every skydiver should know the acceptable exit and opening points for the conditions of the day. Many people land out without trying to make it back because it looks father than they are used to seeing. Without looking at the winds and calculating the opening spot before you go up you have very little chance of knowing for certain whether you will make it back, especially as the winds get higher and the spots get longer.
    One thing that you cannot control when you leave the aircraft is what the group behind you will do. We all should look after each other. By knowing how much separation to give you are looking out for yourself and the group ahead of you. Don’t be afraid to confirm with the group behind you that they will also wait an appropriate amount of time before exiting.
    Recommendation to reduce the likelihood of these type incidents:
    1. Phil Litke’s exit separation chart should be posted near the jumper closest to the pilot for easy reference on jump run.

    2. Upon turning onto jump run after the cut, the pilot will inform the close jumper of the aircrafts ground speed. This close jumper will look at the chart and determine how many seconds are needed. The number of seconds separation to give will be passed down to all jumpers on the load.

    3. If this turns out to be too great a burden for the pilot we should install a GPS unit near the door so that the jumpers can determine ground speed themselves and make all jumpers on the load aware of how many seconds separation to give.
    We all have to get on board for this to work. Our landing direction at our dropzone is mandatory. This has been the best proactive step towards promoting a safe landing area and smooth landing pattern I have seen since I have been with my dropzone. The chaos of 22 jumpers landing in every direction in light and variable winds seems to be behind us. Each of us knows no one landing against the assigned pattern will escape a talk with a staff member. Exit separation is as important a safety issue and should be treated with the same respect. It needs to be a matter of policy for consistency.
    There is not an original idea on this subject here. This is the best knowledge which my mentors passed on to me. Here are a couple of related articles which go into greater depth about these concepts and solutions to these problems. I hope it is clear we must go about things in a more thoughtful and consistent way to avoid similar incidents in the future.
    http://www.dropzone.com/safety/Exit/Exit_Separation_Revisited_628.html


    http://indra.net/~bdaniels/ftw/sg_skr_dealing_1_uppers.html

    By johnfallo, in Safety,

    Exit Order Safety

    Brian Germain and wife Laura Kraus launch an exit over Voss, Norway. Photo by Ron Holan There are many different views on exit order, although only some of them are based in science. The following exit order plan is based on the principle of "prop blast penetration": the degree to which a jumper remains under the aircraft based on the drag produced by their body position. When a jumper assumed a low drag body position, head down for instance, they follow a longer arc through the sky on their way to vertical descent.
    The fastest falling skydivers are freefliers, which means that they remain under the aircraft longest. If freefliers exit the aircraft first, their trajectory will take them toward, and often beyond the trajectory of flat flyers exiting after them. This fact has been proven time and again in the numerous close calls that have led to the creation of this exit order model. Therefore, the best way to create maximum separation between jumpers at deployment time is to have the FS "flat" jumpers exit before the freefliers, regardless of deployment altitude.
    Beyond this, we must also consider formation size when planning exit order. Since the last groups out of the airplane are more likely to land off the dropzone, large groups tend to exit before small groups based on the "needs of the many outweigh the needs of the few" principle of human civilization. I concur that this is a good plan, but for another set of reasons. Large groups tend to open lower than small groups due to task fixation and the need for adequate tracking time to create safe separation. This means participants of large formations should open closer to the dropzone. Further, smaller groups have the option of breaking off early, tracking perpendicular to the jumprun and pulling high to compensate for long spots, while the complexity of building a large formation makes it difficult to take such steps toward safety due to the peer pressure associated with the situation.

    Photo by Ron Holan
    The Exit Sequence
    So this brings us to the preliminary plan of sending the flat flyers out first, in groups largest to smallest, then the freefliers. However, since inexperienced freefliers most often remain under the aircraft for a shorter period of time than vertically oriented freefliers performing perfect zero angle of attack exits, the order should be lowest experience to highest. This also allows the more experienced freefliers to observe the exits of the novices, giving them the opportunity to give helpful advice, and to provide extra time in the door if necessary. If the previous skydiver or group is still under the airplane, do not jump. When in doubt, wait longer.
    Following the flats and then the vertical skydivers, we have the students and tandems. The order can be varied here, although there are some reasons to support sending the tandems out last. First, landing a tandem off the DZ is safer than landing a student into an unknown location. Second, students can sometimes get open lower than planned, which not only increases their risks of landing off, but puts the instructors at risk of landing off even more as they open lower than their students. Tandems on the other hand have the option of pulling whenever they see fit, which allows the camera flyer to get open high as well.
    The last groups to consider are those involved in horizontal skydives, such as tracking, "atmonauti" or steep tracking, and wingsuit pilots. The truth is, experienced horizontal skydivers can safety get out of the way of other jumpers quite easily, and can exit in any part of the order. However, in the case of two or more horizontal skydiving groups, plans must be created and followed with vigilance. For instance, one tracking group can exit first and track out and up the right side of the jumprun, while another group can exit last and offset toward the left side of the jumprun. Three horizontal groups on the same aircraft are best handled by adding a second pass, although there is a great deal of room for creative answers when wingsuit pilots are involved.

    Photo by Ron Holan
    Timing the Exits
    The amount of time between groups must vary based on the groundspeed of the aircraft. On a windy day, with an into-the-wind jump-run, the aircraft may move quite slowly across the ground, reducing separation between jumpers. This requires significant time between exits, perhaps as much as 15 seconds or more on a windy day or a slow airplane. The separation between groups can be increased quite easily on windy days by crabbing the aircraft with respect to the upper level winds, a practice that has become increasingly common at large dropzones. For a scientific explanation of exit separation, please read John Kallend’s PowerPoint, found here.
    Many jumpers believe that once the freefall is over, there is no way to prevent a collision. However, given the glide ratio of modern parachutes, we have the ability to close the gap quickly after opening by pointing our canopies in the wrong direction. Given the fact that the vast majority of skydivers will be opening reasonably close to the jumprun, immediately flying up or down the line of flight is pretty much always a poor choice. Therefore, once you have cleared your airspace and pulled, your job is to look for traffic in your immediate vicinity and then fly your parachute perpendicular to the jumprun heading. I like to call this “Canopy Tracking”. Once you verify that the others are open and note their location, you can begin to navigate toward the play area and then to the pattern entry point. This all requires a great deal of awareness and adaptability, as even the best plan can change quickly in a complex environment.
    The bottom line is this: keep talking. Every load is a brand new set of circumstances, and requires a good deal of thought and planning. Make sure everyone arrives at the loading area no later than the ten minute call to allow for healthy preparation time. Most accidents and close calls could have been easily avoided by skydivers talking to skydivers, and skydivers talking to pilots. Take your time in the door, keep your eyes open and take care of each other. It is a big sky up there, and when we work together, safety is the likely conclusion.
    Brian Germain is a skydiving safety advocate, and has written numerous books and articles on the topic. He has a regular spot on Skydive Radio called Safety First, and has made over 150 safety related videos, all available through AdventureWisdom.com

    By admin, in Safety,

    Exit Emergencies

    Exit Hazards-static Line
    When climbing out onto a step for a S/L exit, you need to firmly plant your feet on the step so that you don’t trip over yourself and fall off. If you do find yourself prematurely exiting the aircraft, merely arch hard for stability. Don’t grab the pilot chute or parachute as it comes by you. To do so may cost you your life.
    Exit Hazards-AFF
    When climbing out for an AFF exit, your jumpmasters are supposed to have good control of you. If you start to stumble, they will probably help you into position. If you do prematurely exit, at least one of them should have a hold of you and you will need to arch hard for stability.
    When climbing out, make sure your hands stay away from the jumpmaster’s ripcord handles. Occasionally a jumpmaster is launched off the step when a student grabs for the jumpmaster and snares a handle by mistake.
    Dangling Static Line
    After the jumpmaster dispatches each student, he will unhook the static line and stow it in the back of the aircraft or under the pilot’s seat. If he forgets to disconnect the static line, it is one ingredient for another horror story. During the scramble to exit, jumpers have managed to get those long pieces of webbing half-hitched around their ankle. The result is a surprising and abrupt halt just a short distance out the door. Due to the weight of the gear and the wind, it is impossible for the jumper to climb back up. There should be a knife in the plane to cut you loose and, of course, every experienced jumper in the plane should be carrying one. If there aren’t any knives handy, you will hope the pilot is sharp enough to think of breaking some glass out of one of the instruments in the panel because your alternatives are not terribly pleasant. Either you can pull your ripcord and risk jerking your leg off, or you can wait it out and suffer severe runway rash when the plane lands. One jumper caught in this situation lucked out, he was jumping a helicopter. The pilot set him down gently and red faced in front of everyone on the DZ.
    Student In Tow
    One of the more dramatic problems is the static line hang-up or student in tow. It occurs when you or some part of your equipment entangles with the static line preventing separation. You wind up suspended about ten feet below the aircraft by the long nylon web. This emergency is extremely rare and if it does occur, it will probably be because the static line is misrouted (perhaps under the harness). Maybe the error was missed in the equipment check, or you and the jumpmaster failed to keep the line high and clear as you moved into the door to jump, or you performed some wild gymnastic maneuver instead of a stable exit and became entangled in the line. Some students, despite all their training, yell arch thousand and then let go with the hands, leaving the feet firmly planted on the step, thus they perform a backloop upon exit.
    The in-tow/hang-up situation presents all of you with a perplexing situation. The jump ship will be more difficult to fly. In fact, the pilot may be unable to maintain altitude because of all the extra drag. Just as with the dangling static line situation, you do not want to pull the reserve or land with the plane. As with other emergencies, there is an accepted procedure. You, your jumpmaster and pilot must be familiar with it.
    The pilot will be diverting the aircraft to a safer, open area and will be trying to gain altitude. If you relax, you will probably assume a stable towing position either face or back to earth which is better than twisting in the wind.
    If you are conscious and your arms have not been injured, signal the jumpmaster by placing both hands on top of your helmet. Your hands will show you understand the situation and are ready to take corrective action. Your jumpmaster will signal he is ready too by holding up a knife. Now, your jumpmaster will cut the static line and you will fall away. Pull the reserve ripcord. Be sure you are cut loose before you pull.
    If you are unconscious or otherwise incapacitated, you won’t be able to give the OK signal to your jumpmaster. Your static line will still be cut but your jumpmaster (and you) will rely on your automatic activation device to deploy your reserve parachute.
    Back when reserves were worn in the front, jumpmasters could lower an unconscious student by unhooking their own reserve and attaching it to the static line. The static line had to have an extra ring for attachment to the reserve to make this method of rescue possible.
    There is also a second type of main canopy in-tow emergency to be considered. Normally, you fall away from the step so quickly that it is virtually impossible to tangle your canopy in the tail, but if one of your parachutes opens when you are on the step, entanglement may occur. If you find yourself in this situation, look up and determine which parachute is fouled on the aircraft. If it is the main parachute (which will be attached to risers that can be disconnected from the harness), look at your reserve ripcord handle, jettison your main and pull your reserve ripcord immediately, per the procedures that you were taught to use.
    If it is your reserve that is entangled on the aircraft, pulling the reserve/SOS ripcord would not change your situation but it will make your main canopy useless as it would be disconnected at the risers, therefore don’t pull the reserve ripcord handle. The fouled canopy may just self-destruct, putting you back into freefall, in which case you will need to deploy your main parachute to save your life. (If you deployed your main parachute while the reserve is fouled on the aircraft, you can assume that major structural damage will occur to that aircraft and anyone left inside that aircraft will have to perform their own emergency procedures.)
    Static Line Not Hooked Up
    Occasionally, despite all procedures, a student exits the jump plane without being attached to it. While hooking up the static line is the jumpmaster’s responsibility, you must verify that it is attached prior to exit. If you forget to check this and find yourself in freefall, follow the procedure for a total: pull your reserve ripcord.

    Pulling High Is Dangerous
    Everyone else expects you to pull below 3,000 feet. If you pull higher, another freefalling skydiver could hit you. An open canopy descends at about 1,000 feet per minute and jumpruns are usually a minute apart. If you plan on pulling higher announce your decision to all before leaving the ground.

    By admin, in Safety,

    Exit Checklist For Camera Users

    If you add a little pressure, simple things can quickly become not-simple things.
    For the amount that most of us understand about how they really work, the modern cameras we employ for skydiving are close enough as to be made of magic. Yet despite their tiny size, amazing quality and all-round wonderfulness - we still regularly miss out on capturing quality footage of a jump for the most arbitrary reasons. A little bit of forethought and the application of a simple routine can aid ones consistency when it comes to getting the shot.
    You may well snort derisively and roll your eyes at the thought of reading an article about how to switch a camera on - yet let you that has never missed a great bit of action for the sake of some small piece of angry-making bullshit stupidity cast the first stone. The best analogy I have to represent the advantages of a sensible and efficient method for a repeated process is think about packing and how much of a frustrating pain in the ass it was (be honest) at the start. Learning to pack and getting it right is not only about understanding the need to fold your parachute a certain way so it will go into your container (and come out again) - it is as much about the knowing right spot to put your knee so the fabric doesn’t escape and where to hold it down with your elbow so you can have both hands free for the next bit. How many things in your life are there to which you can draw parallels with this?
    There is much satisfaction to be found in developing your ability to get ready quickly and efficiently in the plane. Here are a few tips:
    The Plan:
    Adding things to your in-aircraft routine should not come at the expense of any of the stuff you have learned to do that makes you safe. If you are skipping over running through your drills because you are constantly fucking around with your camera you might forget them at the crucial moment - so don’t. Even in the speediest of flying machines you have time to do things both necessary and desirable, but always remember your priorities. Checking that your pilot chute is not hanging out is vastly more important than which recording mode you are in.
    Lenses:
    It is very easy to get some manner of obfuscating crap on your lens. Action cameras all have teensy little apertures onto which a single grubby fingerprint is enough to ruin your footage of the bestest jump ever and make you very sad. Condensation is very popular too - especially with big temperature changes from altitude to ground level. Moisture developing on (or even in) your camera during a jump is unavoidable but not cleaning it up before the next one definitely is.
    You should have a suitable cleaning cloth somewhere about your person - tucked away into the lining of your helmet is good as it makes it very difficult to bring one without the other. For extra points you can attach it to your helmet with some string, or you could even carry a spare one which you might magnanimously gift to some clothless boob and appear as a minor hero/enormous geek in front of like four people.
    Cutaway:
    More and more frequently dropzones are requiring that any helmet with a camera on is fitted with a cutaway system - which are available in many forms and levels of quality. The best idea is always invest in a good one that someone has made using science that will actually work rather than bodge something together yourself from that box of old skydiving bits you keep under your bed for no good reason.
    A worthy part of your pre-jump process is to give this a quick look and see if all is well, and that nothing has become worn or unseated that might result in no camera attached to your head and some cognitive dissonance about wether you can be bothered to scour the landscape looking for it.
    Using Time:
    For maximum sensible-ness you should perform your camera checks with enough time that you can fix potential problems without freaking either yourself or anyone else out if something is amiss. Realising on jump-run that your memory card is full or your lens is dirty is too late. If you had a spare thirty seconds you might be able to go into your settings and delete something to free up space, or give the front a quick clean - but not when everyone is already climbing out on the side of the plane and waiting for your ass.
    Conclusion
    Being correctly prepared in a timely fashion is but one step in getting good footage, yet an important one. Felling relaxed and properly ready lends itself to nailing the jump, and the exact form of your personal routine will develop with time and practice. Stick to the plan, don’t bump your head on the way out and remember that you get what your head is pointing at, not just your eyes.

    By joelstrickland, in Safety,

    Essay on Exit Order

    From an aircraft operations standpoint, as a general rule whichever group will have the slowest climb out should leave first. On a calm day the aircraft on jump run covers about 175 feet per second, or one mile in 30 seconds. Assuming the practical distance that a square canopy open at 2,000 feet can cover is at most about one mile, that means that the first people out would just barely make the landing area from one mile short, while the last would be able to make it back from one mile long. In other words, all jumpers have to be out in a two mile long jump run or some will land out, or a second pass will be required. In time terms, on a calm day no more than 60 seconds can elapse from when the first jumpers leave the airplane to when the last jumper exits. At busy events with several aircraft flying, second passes are not an option.
    Let's take a sample jump run, where a large group will take up to 20 seconds to climb out, a 4-way 12 to 15, 2-ways six to eight, solos five, and AFF students about 12 to 15. Our load has an 8-way, two 4-ways, two 2-ways, a solo, and one AFF. That adds up to between 70 and 80 seconds from green light to last out. But it is possible to make it all on one jump run if the eight way gets out first, because the pilot figures at least 15 to 20 seconds for the first climb out. That brings us back to 60 seconds from first out to last out, and one pass. Needless to say, we don't want to do an extra pass because 2-ways want to leave before 8-ways.
    (If the 2-ways get out first, the pilot can only count on a five to ten second climb out. He has to put the light on 1/3 to 1/2 mile closer to the dz than he would for the slow climb out.)
    That's the timing reason why small groups shouldn't leave first. Now lets talk about separation from other jumpers. First of all, anyone who counts on vertical separation for safety is out of touch with reality. I see people in freefall at 1,500 feet and lower routinely, so just because someone plans to open at 2,500 doesn't mean you should bet your life on it. Everyone needs to open in their own column of air. Horizontal separation is the only guarantee of security. The only real reasons - and they are good ones - why students and tandems get out last are that a student is more likely to balk or ride down, and that canopies opening high can get back from a longer spot. I repeat, horizontal separation is the only guarantee of safety. Vertical separation is a nice idea but cannot be counted on since a minor loss of awareness or a long snivel will eliminate it instantly.
    Now, a quick digression about fall rates. Follow these categories out or time their videos if you don't believe me. Light freestylists doing routine freestyle do not fall significantly faster than a fast falling four way. Freeflyers fall about 30% faster than normal. Small skyboards fall fairly fast, if the rider is standing, but big ones fall very slow - slower than most RW, usually about the same speed as tandems. Because of their exits, they must leave first, and because of their complex emergency procedures, they must pull high. Leaving first and pulling high defies conventional wisdom, yet not once have we had a problem with slow falling skysurfers getting out first and pulling at 3,500. In fact, as long as the first person pulls higher than the break off altitude of the following group, they are a contribution to safety, not a detriment, provided adequate time was left between groups at the exit.
    We do have a recurring problem maintaining safe separation when the freeflyers get out first. Typically a freefly pair will have a forty five second freefall and open at 2,500 to 3,000 feet. Let's imagine that they are followed by an RW group that has a 10 second climb out. Now, let's say you are a freeflyer jumping a Stiletto. A Stiletto (assuming a 30 mph forward speed, which I can document is a reliable figure) covers about 45 feet per second on a calm day. If you open 30 seconds (shorter freefall plus exit separation time) before the RW group leaving after you and turn directly towards the dz (which you will, since otherwise you can't make it back from getting out first unless you cheat on the climb out, spot for yourself, and force the pilot to go around, which REALLY pisses us off) in that 30 seconds you will cover over 1,300 horizontal feet. This would put you about 400 feet from the center of a group leaving the plane ten seconds after you. In theory, that would just barely be enough, except that a good tracker can do about 70 feet per second, so if they track towards you for six seconds they are right on top of you. Furthermore, a modern canopy descends about 800 feet in 30 seconds (also documented) so if one of you pulls at 3,000 to get back from a short spot, for camera effect, or whatever - by the time you are at 2,000 you are well into the danger zone of the group that followed you.
    So far, the big sky theory has taken care of us most of the time but I have heard of a couple close calls and more than once found myself directly over the freeflyers if they leave first. Having seen the consequences of freefaller/canopy collision more than once, I want to minimize the possibilities. And they go way up as soon as we add wind to the exercise. Here's why. In a 30 mile per hour breeze, the plane only covers 130 feet per second, instead of 175. In ten seconds of exit separation, the airplane only covers 1,300 horizontal feet instead of 1,750. Worse still, the RW group is in freefall for a longer time, and consequently gets blown further. Let's say the freeflyer is in freefall for 45 seconds, and the RW for 70. In 45 seconds you get blown nearly 2,000 horizontal feet. The RW blows just over 3,000. That leaves only 300 feet of horizontal separation without taking tracking or canopy movement into account! Make the winds 50 miles per hour, and the RW group drifts over 1,800 horizontal feet further than the freeflyers! Meanwhile, in ten seconds the plane only covers 1,100 feet. A 20 second exit separation will still have the RW group opening 400 feet from the freeflyers, not counting canopy movement or tracking!
    Having opened right over freeflyers before, and having just heard from several expert skydivers who narrowly missed freeflyers, and having watched RW groups blow over freeflyers on windy days, I think we have a problem. You might say, make sure the groups leave longer between exits. Well, we do tell them, but if they wait 20 seconds instead of ten, that still doesn't solve the problem because Freeflyers still fly under them under canopy. So for fast fallers your only choice if you want to get out first is to always fly perpendicular to the line of flight for 30 seconds before turning towards the dz. While I am confident most of you are aware enough to do this, it brings us back to the original time on jump run problem. Basically, Skydive Arizona isn't willing to do a lot of second passes just so freeflyers can get out first.
    Getting out last except for students solves virtually every problem. You control the horizontal separation, so you can ensure you won't be overtaking anyone in freefall. The windier it gets, the safer you are because you get extra separation by having slower fallers blow away from you. Students take long climb outs and pull real high, so no problem there: just get open and fly off the wind line for a few seconds to be clear of them in the unlikely event that they are in freefall at 2,500 feet.
    As for the argument that the canopy separation is necessary in the landing area, I don't buy it. Opening over the top instead of short, you can spiral down to make sure you get on the turn around loads. As for congestion at the landing area, no one else on the loads seem to have any problem, although you may not always get to land right by the fence.
    Please give this some thought. Unless one of you gives me an extremely convincing reason why you need to leave first, such as a safe spot for the skyball, I will make it standard policy that exit order will always be
    1) skysurfers

    2) freefall groups, largest to smallest, regardless of fall rate

    (Note (Skr): I believe this is a typo since the real rule is: )

    (2a - relative work groups, largest to smallest and then )

    (2b - fast fall groups, largest to smallest and then )
    (3 - AFF and tandems )


    3) AFF and tandems, plus any other very high openings. The main reason for high openings leaving last is not separation, it's that they can make it back from a long spot!

    By admin, in Safety,

    Emergencies In The Aircraft

    Airplane Problems

    Engine and structural failures. If the engine is going to fail, it will probably do so when the pilot reduces power after your full throttle takeoff. If the engine quits, he will attempt the best landing he can, straight ahead off the end of the runway. Since you are helmeted, padded with gear and strapped in, you need only assume the proper position to be prepared. Draw your knees up, tuck your head down, fold your hands across the back of your neck and hold your head down to resist whiplash. As soon as the plane comes to a stop, get out FAST. If you are nearest the door, get moving. There are people behind you who want to get out. There is always the danger of fire, particularly if the aircraft has suffered structural damage on impact. Watch where you step, the plane may have clipped through some power lines. They can zap you and they start grass fires. Remember that the wings of the airplane usually contain flammable fuel.
    Occasionally, the jump ship suffers a structural or other mechanical failure. Twisted-on parts sometimes twist off or a canopy may get draped over the tail jamming the controls.
    Depending upon the situation and the altitude, your jumpmaster will select one of two commands: PREPARE TO CRASH or GET OUT (jump). The dividing line is usually set at 1,000 feet above the ground since at this altitude there may be enough time for an orderly exit and the pilot will probably be able to land his glider on the runway. The jumpmaster might tell you to jump and pull your reserve on the theory that it is somewhat more reliable and may deploy faster than the main and/or he may be concerned about the setting of your AAD. His instructions will depend on the circumstances of the situation.
    So, if you are below 1,000 feet when the challenge occurs, you will land with the aircraft. If you are over 1,000 feet when the rubber band breaks, your jumpmaster may direct you to make a normal static line jump, but you will do it all a lot faster; swing out onto the step and go. Student freefallers may be directed to make a jump and pull; this is where they will open their mains as soon as they clear the aircraft, or the jumpmaster may sit them in the door, pull their reserve and simultaneously push them out. It all depends on the altitude at the time of the emergency. Licensed jumpers are next, then the jumpmaster and, in the case of severe structural failure, the pilot. The purpose of getting out of the plane is not only to remove you from the area of danger but to lighten the load making the aircraft easier to control. The jumpmaster goes next to last because he must take care of those in his charge. The pilot goes last (he wears a parachute too) so that he may wrestle the jump ship to keep it flying until you are gone.
    The above rules are general and are for students. Experienced jumpers may elect to exit lower. For example, if the aircraft is at 500 to 1,000 feet, an expert skydiver may elect to jump and pull the reserve (which presumably opens faster).
    Of course you will follow the instructions of your jumpmaster, but sometimes you have to make the decision yourself. In the excitement of solving the engine failure or other problem, the pilot may allow the airspeed to drop, stalling the plane and allowing it to spin. In this condition the aircraft drops fast and the centrifugal force may pin you against the side or ceiling. Now is the time make the decision to scramble and get out.
    Depending on the size of your jump ship and the procedure at your drop zone, your static line may be hooked up on the ground, at 1,000 feet, or on jump run. Whether or not your main is hooked up may determine what type of escape you can make in case of an aircraft emergency. For example, if you hook up prior to boarding, and the plane crashes on takeoff, when you unbuckle and get out, you can expect to unpack your main about eight to 15 feet from the door (the length of your static line).
    The final point to remember is to watch and listen to your jumpmaster for instructions. When you receive them, carry them out quickly and without panic.
    Open Parachute In The Airplane
    Several times in the past, jumpers have been pulled through the side of the jump plane when a container opened and a canopy escaped out the door. Rarely does this result in a fatality but usually there is severe damage to both the jumper and the aircraft.
    If either the main or the reserve open prematurely in the aircraft, one of two things will happen; the pilot chute and/or canopy will either start out the door or remain in the plane. You have only one course of action for each situation.
    The jumper whose reserve escaped out the door of this aircraft was lucky; he survived.
    If the main container opens in the aircraft,
    it is usually the result of excessive movement by a person in the aircraft. This could happen when you constantly shift positions, rubbing the static line and/or closing flap on an interior surface or snagging the static line on something during movement in the aircraft (from one position to another). With the Instructor Assisted Deployment (IAD) method, these hazards are real because hand-deployed pilot chutes use small closing pins. With long plastic coated cables for a main ripcord, the hazard is much less likely, especially when the ends are tucked into housings on a closing flap. If the main container opens,
    it is a simple matter to move backward pinning the errant canopy against a wall or flat surface. Show the problem to your jumpmaster immediately. Once satisfied that you have it well secured, disconnect the main canopy from your harness by operating the canopy releases (the method depends on the type of system you are using — your jumpmaster will probably do this for you as well as disconnect your reserve static line device). This is so that if it should somehow get out the door later, you won’t be connected to it. Now sit on the canopy and pilot chute so they won’t get away and ride the plane down.
    Sometimes the reserve container will burst open while you are in the back of the plane. The pin works its way out, or perhaps since you are in the back of the plane, you are not vigilantly guarding your reserve ripcord handle and it is snagged out as you move around trying to find a comfortable position. Grab the reserve pilot chute and canopy, cover them and hold them tight. Call the jumpmaster’s
    attention to the problem immediately. The reserve creates a greater potential danger than the main because it cannot be quickly disconnected from the harness.
    The deploying reserved canopy pulled the static - line student off the step.
    If, however, either of your canopies start out the door while you’re attached to it, you will follow it out. You have, at most, two seconds, and if you hurry you will experience a near-normal canopy ride to somewhere in the vicinity of the airport. But if you are slow, the developing canopy will act as a giant anchor, extracting you not just through the door but, more than likely, through the side of the aircraft too, causing great injury to you, damage to the aircraft,
    and exposing others still in the aircraft to great danger.
    The best solution is prevention. Always guard and protect your static line and/or your ripcord(s), canopy release handle and pins.

    By admin, in Safety,

    Downsizing Checklist

    While I was an S+TA, I spent a considerable amount of time telling people they shouldn't be loading their canopies so heavily. 90% of the time it didn't work. Skydivers can have a bit of an ego, and when I told them they probably shouldn't downsize yet they heard "I think you're a crappy canopy pilot who can't handle a smaller wing." So they downsized and broke their legs, backs and pelvises with some regularity.
    A few years back I met up with Brett, one of the people I'd been lecturing to whle I was an S+TA. He told me that he wished he'd listened to me back then. He had broken his femur during a botched landing, been out of the sport for a while, and then came back and really learned to fly his canopy. He took a canopy control course and actually upsized to get more performance out of his canopy. He ended up coming in first in one of the events at the PST that year.
    That started me thinking. Maybe the approach I was taking was wrong. Since jumpers tend not to listen to other people who tell them they're not as good as they think they are, perhaps if you could give them better tools to evaluate themselves they could make better decisions about canopy choices. It's one thing to have some boring S+TA guy give you a lecture about not having any fun under canopy, quite another to try to perform a needed manuever under canopy - and fail. In that case there's no one telling you you can't fly the canopy, it's just blatantly obvious.
    So I came up with a list of canopy control skills everyone should have before downsizing. Some are survival skills - being able to flat turn would have saved half a dozen people this year alone. Some are canopy familiarization skills - being able to do a gentle front riser approach teaches you how to judge altitude and speed at low altitudes, and how to fly a parachute flying faster than its trim airspeed, a critical skill for swooping. It's important to do these BEFORE you downsize, because some manuevers are a little scary (turning at 50 feet? Yikes!) and you want to be on a larger canopy you're completely comfortable with before trying such a thing.
    The short version of the list is below. Before people downsize, they should be able to:
    flat turn 90 degrees at 50 feet
    flare turn at least 45 degrees
    land crosswind and in no wind
    land reliably within a 10 meter circle
    initiate a high performance landing with double front risers and front riser turn to landing
    land on slight uphills and downhills
    land with rear risers
    Details:


    1. Flat turn 90 degrees at 50 feet.
    This is the most important of all the skills. The objective of this manuever is to change your direction 90 degrees losing as little altitude as possible, and come out of the manuever at normal flying speed. Coming out at normal flying speed means you can instantly flare and get a normal landing. If you can do this at 50 feet, and come out of the manuever with normal flying speed at 5 feet, you can flare and land normally.
    Every year people die because they decide they simply have to turn at 100 feet and know only one way to do it - pull down a toggle. The parachute dives and they hit the ground at 40mph. To prevent this, not only do you have to know how to flat turn, but you have to practice it enough that it becomes second nature. Then when you do need it, you won't have to think about it.
    To pull off this manuever, start by toggle turning the parachute gently. IMMEDIATELY follow that with some opposite toggle. The idea is that you want to flare just a little to counteract the canopy's desire to dive. Continue adding opposite toggle until you've stopped the turn. At this point let both toggles all the way up. If you feel the parachute accelerate after you let go of the toggles (i.e. it feels like you just flared) use less opposite toggle next time. If you feel like the parachute is diving, like you just did a toggle turn, use more opposite toggle next time. Basically you want to start the turn with one toggle, stop it with the other one, and use just enough toggle to keep the wing from diving but not so much that it does a flare.
    It should go without saying that this manuever should be practiced up high before you ever try it down low. If and when you do try it out low, start at lesser angles (i.e. try a 15 degree turn first) make sure the pattern is clear and make sure conditions are good (soft ground, good winds.) Work up gradually to a full 90 degree turn. I do think it's important to try at least a gentle flat turn very low; we are horrible judges of exact altitudes when we're at 1000 feet, and it's hard to tell if you've lost 50 feet or 200 in a turn. By trying it out down low, you'll get a better sense of what it can do for you, and you'll have the "sight picture" better set in case you have to use it for real one day.
    A variation on this is to go to half brakes and then let one brake up. This gives you a flat turn, but by flaring first you "use up" some of the canopy's energy so you can't turn as effectively. On the plus side the turn happens more slowly. If you are about to hit a tree and want to make a last minute turn, this variation might be the way to go, as it combines a turn and a flare, thus reducing your speed before impact. A version of this is currently taught in the ISP, so it might be a good way to make your first flat turns before transitioning to the less-braked variety.

    2. Flare turn at least 45 degrees.
    This does two things - it gives you another tool in your arsenal to dodge last minute obstacles, and teaches you to fly your canopy all the way through to the landing. The #1 mistake jumpers with new HP canopies make is to "reach out to break their fall" while they're flaring; this of course turns the canopy in the direction they are reaching. Most people decide that this is due to a side gust just as they're landing. I remember one jumper at Brown who, amazingly enough, experienced a side gust seconds before he landed (and always from the right) 40-50 times in a row! Learning to flare turn will help eliminate this problem.
    To flare turn, start with a normal flare, then flare slightly more with one toggle. The canopy will turn. Bring the other toggle down to match it, and the canopy will straighten out. It's a dynamic process; rather than put the toggles at a certain position, you have to speed up one toggle for a second, then speed up the other to match it, before you level them and finish the flare. If you balloon upwards, then don't flare as quickly. If you drop to the ground, bring both toggles down more aggressively when they are 'split.' One thing that helps people is to think about where your canopy is rather than what it's doing. Use the toggles to put it off to one side for a moment, then use them to put it back over your head.
    This can be hard to practice with a large canopy. I can pull off a 45 degree turn on a Manta, but the flare is over so fast that it's hard to explain what I just did. It's much easier on a canopy loaded around 1:1, so you may want to wait on this one until you get to that loading.
    Note that if you combine a flare turn with a flat turn, you can pull off nearly a 180 degree turn at just above 50 feet. Also note that knowing how to do flat and flare turns doesn't mean you can always turn at 50 feet and get away with it - sometimes it's better to accept a downwind landing than make a turn at a dangerously low altitude. But if you do have to turn low (say, you're on course for the electrified fence around the pit bull farm) a flat/flare turn will let you either turn and land normally or turn and minimize the damage caused by landing in a turn.

    3. Land crosswind and in no wind.
    These are straightforward. No wind landings are pretty easy; the only issue is that your perception of speed and altitude will be off. Since you seem to be moving faster over the ground when there's no wind (which you actually are) it can seem like a good idea to add just a little brake to 'slow you down' before you land. Resist that urge! Keep that speed in your canopy; you can turn the speed into a good flare only if you start the flare with decent (i.e. full flight) speed.
    Crosswind landings can be a little more tricky because of that strong tendency to want to "reach out to break your fall." Counter this by flaring with your hands in towards the center of your body. You may have to PLF on these landings, since you'll have some decent forward speed and have some sideways motion from the wind. If you want to get fancy, try a flare turn after you start your flare on the crosswind landing - you can easily pull off a standup landing if you get turned enough before you put your feet down.
    If these work well you may want to try a downwind landing. The benefit to doing that is it will prepare you to accept a downwind landing in the future; you won't be tempted to turn too low to avoid it. Choose an ideal day for this one, with a slippery landing area (wet grass is perfect) low winds and a clear landing area. Prepare to PLF, and think about "laying it down" on your thigh as you land to start sliding. You can slide across grass at 30mph without getting hurt, but planting your feet and cartwheeling at those speeds can be very dangerous.

    4. Land reliably within a 10 meter circle.
    This is essentially the PRO requirement. This is critical because your accuracy skills are what will keep you from having to turn low. It's very comforting to know that you can land in any 50ish foot clearing if you find yourself having to land out; it's especially important as you get to smaller canopies that need longer and longer runways to land well. Your only option may be a section of road, and you may have to hit the beginning of the road dead-on to have enough room to slow down.
    The subject of canopy accuracy is too long to do justice to here, but the top 3 hints I've heard are:
    - If you're not sure if you're going to make it over a wire or tree, look at what it's doing with respect to the background. If more background is appearing from beneath the wire or tree, you're probably going to make it.
    - As you look at the ground, most points will seem to move away from a central point. Some will rise, some will fall, some will go out to the side. If you look long enough you'll find one point that's not moving - that's where you're going to land if the winds don't change all the way in (which is rare.)
    - Going into brakes usually makes you land short in high winds, but can extend your glide in no wind. Front risers almost always make you land shorter.


    5. Initiate a high performance landing with double fronts, and a front riser turn to landing.
    I am pretty convinced that front riser high performance landings are a lot safer than toggle turn high performance landings, and double fronts are the safest of all. If you do it too low, or become worried about the landing - just drop the risers and you're back to normal flight.
    For double front riser landings, set up a normal landing, aiming for a point a little farther away than you normally do. At 100 feet or so, pull down both front risers. Your canopy will drop and accelerate. At some point above the ground (30-10 feet depending on your canopy) drop the front risers. Your canopy will begin to recover. Before it completes the recovery to normal flight, you should be at flare altitude. Start the flare normally. You may need to use less toggle than normal, since the canopy is now going faster than you're used to, and the same amount of toggle gives you more lift. You will also plane out farther, since you have more speed you have to bleed off before you come to a stop.
    For front riser turns to landing, first try front riser turns out above 1000 feet and get used to how your canopy recovers. Then start by coming in 10 degrees off the windline, and making a gentle front riser turn to line up with the wind at ~100 feet. The canopy will dive and accelerate, so be prepared to drop the front riser instantly and flare if you have to. Also be prepared to steer in the flare, since the canopy may not have stopped turning completely before the flare begins. Done correctly, you'll start the flare with more forward speed, giving you a longer planeout.
    Make sure your flares are smooth for this! A smooth flare generates more lift for a longer period of time than "stabbing" the brakes. However, don't start the flare at 30 feet - starting the flare that high will slow the canopy down, negating the effects of the front riser approach. If you do find yourself stabbing the brakes to prevent hitting the ground, move the altitude at which you start front risering up.
    Probably the most critical skill you will get from this exercise is the development of the "sight picture." Below 200 feet your altimeter is pretty useless, and you should be looking at traffic and the landing area anyway. Eventually you'll develop a sense of what "picture" you should see just before you start that riser turn. The picture will vary with wind, landing area etc. If you arrive at the point where you would normally start the front riser turn, and the picture's not right - abort it and land normally.
    Once you have the picture down, and are doing front riser turns that transition to gradual flares, then start increasing the angle. Once you get to 90 degrees you're going to be gaining a lot of speed, so be sure to adjust your sight picture up to compensate. As always, bail by dropping the risers if you feel like there's anything wrong. Once you drop the risers, level the wing with your toggles and prepare to flare. At worst you'll have to land crosswind - but that's a skill you should have by this point anyway.

    6. Land on slight uphills and downhills.
    Often, land away from the DZ isn't perfectly flat; sometimes you can't tell this until you're at 20 feet. To prepare for this, find a place in your LZ that's not perfectly flat, scope it out, and plan on landing there. There's not too much magic concerning landing on a slope. You flare more aggressively to land going uphill, less aggressively to land going downhill.
    Obviously not all DZ's have slopes. If you don't have a good slope on your DZ somewhere, you may have to put this one off until you're at a DZ that does have one. Beaches are a good place to practice this, since they have pretty predictable slopes down to the water, and overrunning the landing just means you get wet.

    7. Land with rear risers.
    Knowing how to land with rear risers can help you deal with a canopy problem like a broken or stuck brake line, and can help you make a better land/cutaway decision when you do have such a problem.
    Again, this is best practiced up high. See how far you can pull the rear risers before the canopy stalls. It will stall much earlier with rear risers; memorize where that happens so you don't do it near the ground.
    When you try it for real, choose an ideal day - steady moderate winds, soft ground, clear pattern. Be sure to try this for the first time on a largish canopy (one of the reasons you should do these things before downsizing.) Leave your hands in the toggles and wrap your whole hand around the rear riser. That way if things go awry you can drop the risers and flare normally. Start the flare at a normal flare altitude, and prepare to PLF. You may get the sort of lift you're used to, but you probably won't slow down as much before you're near that stall point. Make sure your feet are on the ground (sliding preferably) before you get there.
    On smaller canopies, you may want to start the flare with rear risers. Then, once the canopy is leveled out, drop the risers and finish the flare with the toggles (which are still around your hands.) That way you get your vertical speed to zero, which is the critical part of a safe slide-in landing, and can still stop the canopy without hitting the ground going too fast. (This is also a technique used by swoopers to extend their swoops BTW.)

    The above list is not meant to include all the skills you need to safely fly a canopy; it’s just a checklist for a cross-section of skills you should have before downsizing. Some of these will be easier on a larger canopy, and can be practiced right away. Landing downwind, for example, is easier on a larger canopy simply because it can slow you down more before stalling. Some skills are more difficult on a larger canopy. It can be difficult to get a planeout at all on a larger F-111 canopy, so practicing things like a flare turn may best wait until you approach a 1:1 loading on a ZP canopy. At that loading, the canopy begins to perform more along the lines of how we expect a HP canopy to fly. More importantly, skills like the flare turn become both possible and necessary to practice, so you can hone your skills while you are under a canopy that tolerates minor mistakes.
    As I mentioned in the beginning, these are skills you should learn before you downsize, although some (like the flare turn) can be difficult to practice at very light loadings. If you can't do some of them yet? Get some coaching; it makes a lot more sense to learn them on your larger canopy, before you start jumping a smaller canopy that scares you. Once you can do them all, then try the smaller canopy. And if someday someone cuts you off under the smaller canopy, you'll have the reactions you learned under the larger canopy. Even if you haven't completely adapted those manuevers to the smaller canopy yet, those reactions will more likely than not save your life.

    By billvon, in Safety,

    Deployment Emergencies

    Common ripcord and hand-deployed pilot chute malfunctions are the lost handle and the hard pull.
    Submitted by plante
    Lost Handle
    Lost handle or out-of-sight hand-deployed pilot chute. Some ripcords are held in place by elastic webbing or Velcro® cloures. If the ripcords come out of these places, they may be blown out of your sight. Some puds (knobs or handles for hand-deployed pilot chutes) attach with Velcro closures, and some are stowed in elastic pockets. There are pros and cons to where these pilot chutes and deployment handles should be mounted. Either one may separate from the container and blow up behind you. Search for the ripcord (one time only) by following the harness to the ripcord housing with your hand. Search for a hand deployment device (one time only) with your hand by following the container to the area where it is supposed to be mounted — perhaps even as far as the closing grommet. If you can’t locate the handle immediately, pull your reserve ripcord. Practice this on the ground periodically.
    Lost handles and hand-deployed pilot chutes can also occur after the pull if you fail to pull far enough. Make sure you pull the ripcord all the way out of the housing, or if using a hand-deployed pilot chute, pull the pud to arm’s length before you release it.
    Hard Pull
    The hard pull may be caused by a bent or rough pin, a hand-deployed pilot chute bound up in its pouch, or you may have packed more canopy in the center of the container instead of filling the corners. If you feel resistance to your pull, give it two more quick tries (perhaps even with both hands while maintaining the arched body position) and then if that doesn’t deploy the main parachute, pull your reserve ripcord immediately. After a number of jumps, it is normal to become somewhat complacent about the pull; you may give it a relaxed, half-hearted jerk. The pull may take as much as 10 kg (22 lbs.) of force, so pull again. If continual hard pulls are bothering you, you might choose to spray a non-petroleum-based silicone or Teflon® fluid on your ripcord cable or your closing pin and your closing loop. This will make quite a difference and it will last for many jumps. You may occasionally have to do it again as dirt and grime builds up on your pin or ripcord cable system. Inspect your system for any signs of roughness. If they exist, get a rigger to replace the rough component with a smooth one.
    Pilot Chute Hesitation
    A problem you could have with your reserve deployment, or a main with a spring-loaded pilot chute, is the common pilot chute hesitation. Hesitations can happen to hand-deployed mains but they are not as common. Hesitations occur when the pilot chute momentarily flutters in the low-pressure area behind you rather than catching air. The hesitation may be caused by a bent or weak pilot chute spring, but usually the pilot chute is just sitting in the dead air space created behind you when you are in the stable position. Sometimes the pilot chute jumps upon release but fails to travel far enough to get a grip on the air rushing past you. It may drop back down on your back and just bounce around or just lay there. If it was hand-deployed, you may not have given it a good throw.
    To correct the problem, you may turn on your side during the post exit or pull count, allowing the airflow to inflate the pilot chute and pull it free, you may peek over your shoulder after pulling the ripcord, or you may sit up to dump (deploy your canopy). This last method of pulling, then sitting up (almost the start of a backloop) also reduces the opening forces on your shoulders, but it can lead to other problems such as trapping a tight-fitting deployment bag in its container. Consult with an instructor who is familiar with your system prior to attempting this type of maneuver.
    Pull-out v. Throw-out
    The pull-out and throw-out pilot chutes are preferred by experienced jumpers, but students (except IAD students) use the ripcord and coil spring pilot chute combination. For a detailed explanation of these three systems, see the chapter on equipment.
    Trapped Pilot Chute
    If the pilot chute is not properly stowed in its pocket, it may bunch up and jam when you try to extract it. The trapped pilot chute results in a hard pull that may or may not be cleared. If you find you have a hard pull, try one more vigorous pull before you go for your reserve.
    Pilot Chute In Tow
    Pilot chute in tow may be short or long. It is short when the pilot chute bridle is looped around something such as a harness strap. (A proper gear check could have avoided this problem.) If you have one of the rare bellyband mounted throw out models, make sure that the bellyband is not twisted. If the pilot chute bridle is wrapped around the harness (such as on a twisted bellyband or leg strap), tugging on it will only result in a (short) trailing pilot chute. Check the bridle routing during packing, have it checked in the equipment check prior to boarding the aircraft and check the routing again prior to exit. Twisted bellybands and twisted leg straps are a significant cause of pilot chutes in tow.
    The pilot chute in tow is long when the pilot chute pulls the bridle to its full extent but does not pull the pin securing the main container. The failure may be due to a damaged pilot chute (producing insufficient drag), a rough pin, a tight main container (canopy stacked too high), or a closing loop which is too short. The long pilot chute in tow is more likely on sub-terminal velocity jumps.
    Make sure the bridle-pin connection is not worn, that the pin is smooth and curved, not straight (unless it is supposed to be such as in pull-out pilot chute systems), and that the locking loop is not too short.
    If you are faced with a long pilot chute in tow, never try to clear it. A recent USPA article (Parachutist, June 1997) stated that if you have a pilot chute in tow, deploy the reserve immediately. Therefore, it is treated as a total malfunction. Other experts in the field take the position that if there is anything out behind the container, including a spring-launched or hand-deployed pilot chute, execute a cutaway and reserve deployment immediately. Note: Most student equipment is Single Operation System (SOS) oriented. This means that pulling the reserve handle will execute the cutaway (disconnect the main risers) then deploy the reserve all in one smooth action. A two-handle system requires a separate cutaway handle to be pulled to disconnect the risers, followed by a pull of the reserve ripcord.
    How to handle a pilot chute in tow has been the subject of great debate and much beer has been consumed discussing it. While there are exceptions and strong feelings about what has been stated above, time is usually too short to consider them. After the reserve starts to deploy, the main container may go slack enough that whatever kept it closed is no longer doing so, therefore the main may start to deploy. If the main was disconnected from the harness by the action of a cutaway, it will probably not be anything more than a temporary nuisance. However, one must always be prepared for possible entanglement of the two canopies whether a “cutaway” has or has not been performed.

    By admin, in Safety,

1 1