Clean Up Your Turns
"Turn coordination" is a topic that, until recently, has been mostly unapplied to ram-air parachute aerodynamics. In simplest terms, this refers to the degree to which a flight vehicle is aligned to the relative wind during a turn. Another way to look at this is the degree to which a turning aircraft is pointed at the relative wind with regards to the yaw axis.
A "clean turn", from an aerodynamic perspective, is one that keeps the nose of the aircraft pointed at the relative wind throughout the turn. When flying airplanes, this prevents the passengers from spilling their drinks, as well as saving fuel and preserving airspeed. In parachutes however, this aspect of turning has mostly been ignored. As parachutes become faster and faster, the time has come to begin thinking about this aspect of our canopy flight for several very important reasons.
The first has to do with the ability of the pilot to level off at any point during the turn. Lets face it, sometimes the ground creeps up on us. Flying an aerodynamically sound turn increases the likelihood that you will be able to convert your airspeed into lift in a timely manner. If you are sliding sideways through the sky because you are simply jamming a toggle down, you are not prepared to interface with the planet. The relative wind is jumping across the bumps on your parachute, creating turbulent flow, while the suspension line load is getting shifted to one side of your canopy. When you attempt to stab out of an uncoordinated turn, there is a hesitation before the parachute begins to change direction and level off. If the ground gets to you before this happens you may find yourself watching Oprah in your hospital bed for a while (not that I have anything against Oprah).
The second reason for flying a coordinated turn has to do with overall parachute stability. In an uncoordinated turn, the nose of your parachute is not pointed at the oncoming relative wind. It is sliding sideways. This means that the pressure in your wing is being compromised, in addition to the wingtip on the outside of the turn being presented to the relative wind. If you hit turbulence during this kind of "sloppy" turn, you are much more likely to experience a collapse of this side of the parachute. In other words, if you are turning right, your left wing more likely to fold under. Interestingly, when an aggressive, uncoordinated toggle turn is released, the opposite tends to happen. When the right toggle is released, the right wing surges forward as the drag is released and it is presented to the relative wind, opening the door for a collapse on right side of the parachute. Either way, this can result in way too much daytime TV.
A fundamental problem...
There is a fundamental problem with the way in which most of us were taught how to turn our parachutes. They said: "if you want to turn right, pull down the right toggle." Simply pulling on a toggle increases the drag on the right side of the parachute, retreating that wing tip. At the beginning of the turn, it is purely "yaw" energy. It is like the pilot of an airplane stepping on the rudder pedal. As a discrete action, steering toggles are an incomplete input. We need some "roll" energy.
The harness is more than a way to attach the jumper to the parachute. It is also a way to manipulate the canopy itself. If the right leg reaches for the earth as the left hip reaches for the sky, the parachute will turn to the right. It is true that smaller parachutes will respond quicker to such inputs than larger ones, with elliptical canopies responding the quickest, but harness input will have an affect all parachutes. Most importantly, when used at the initiation of a turn, harness steering converts a toggle turn into a coordinated maneuver. This is true if you are under a Lotus 190 or a Samurai 95.
When flying an airplane, all turns begin by initiating roll energy with the ailerons, (rotating the yolk), followed by an application of the rudder to coordinate the turn. The old airplanes had a string on the cowling (hood) to show the direction of the wind-flow, while newer ones have slip indicators on the instrument panel. If only we had such information while we were flying our canopies. Ah, but we do…
Trailing behind your wing is all the yaw axis coordination data you will ever need. It is called your pilot-chute. If you are flying a coordinated turn, your bridle will remain parallel to the ribs of your canopy throughout the turn. If at any point it goes slack, whips around like a snake or drifts off to one side, you are not flying a clean turn. You are not carving your wing through the sky; you are skidding out of control. The relative wind is not following the valleys of your ribs; it is hopping over the bumps, tumbling into chaos.
Try this on your next jump. Look up at your canopy while you are flying straight and simply yank a steering toggle down to the ½ brake position. You will immediately see what I am talking about as your pilot-chute swings off to one side. Next, lean in your harness, lifting one leg-strap to yield direct roll axis input. It may turn and it may not, depending on the wing. This is not important. Then, while holding the harness input, pull the steering toggle to turn toward the direction of your harness input. You will notice that the pilot-chute is trailing straight back, even in a sharp turn.
Once you have experienced your first real coordinated parachute turn, it is time to develop new habits. This takes time. I find that when learning a new skill like this, it is best to have a simple way to remember the process. In this case, try using the following sequence for every turn you make: 1) LOOK, 2) LEAN and 3) TURN. This is mnemonic was taught to me by a great paragliding instructor and skydiver, J.C. Brown. Rather than thoughtlessly jamming a toggle down, look where you are about to go, lean in the harness to establish the roll, and finally, pull the toggle down to flow deeper into the maneuver.
When you play with this kind of turn, you will find that the parachute simply feels better; that you feel more in control over the wing. You will also find that you can better bump both brakes down during the turn in order to reduce your decent rate, or even level off completely. While practice is necessary to perfect the technique, all parachute have the ability to transition from a descending turn into a level flight turn, into a soft beautiful landing. If you know how to carve your way out of a low turn, there will never be a reason to hook into the ground, ever.
Although many skydivers still think of their parachute simply as a means to get back down to the ground after a skydive, learning how to use the system the way it was meant to be used will increase the chances that you will get back down to the ground safely. Gravity pulls equally on those who love canopy flight as those who abhor it. From twenty years of teaching parachute flight I have learned this: you can only become great at something that you love. The more you understand, the more you will explore. The more you explore, the more you will feel control. The more in control you feel, the more you will love it. And that, ladies and gentlemen, is what it is all about.
BSG
Brian Germain is a parachute designer, test pilot, advanced canopy flight instructor and author. Brian's book The Parachute and its Pilot has become the worldwide source for canopy flight information and is available at a gear store near you, or through Brian's website: www.BigAirSportZ.com
Flight Planning for Safety
In any aviation activity proper flight planning is critical to safety, and skydiving is no exception. If you take the time beforehand to plan for various eventualities, you don't waste precious time making decisions when they arise.
Preflight
Familiarize yourself with aerial views of the DZ and surrounding area, if they are available. Note locations of obstacles and pick likely outs for bad spots in various directions.
Check weather reports, if possible, and note forecast winds at altitude, cloud conditions and any approaching fronts. You are less likely to be blindsided by rapid changes in conditions when informed of their likelihood.
Turn on your AAD, if so equipped. Make sure your hook knives are accessible.
Find out who on the formation has audible or visible altimeters, AADs and RSLs; make sure they are all operational and properly initialized.
Check your and your partners' gear.
Make sure you are in agreement on breakoff and opening procedures and altitudes.
Face into the wind and see where the sun is. Its position should be the same when you are on final and there is no wind indicator available.
Exit
Know what groups are around you, what they are doing and what delay is planned between groups (ask around before and after boarding). The Skydive Arizona policy of large to small slow-faller groups, followed by large to small fast-faller groups, followed by students, followed by tandems is the best all-around approach in the business.
The more of a delay between groups you can arrange, the better. DO NOT assume that any reasonable delay is reason not to pay attention to other groups in the air - LOOK AROUND!
Freefall
Dock gently, from the level of the formation. DO NOT swoop into a formation, but make the final approach smooth and deliberate.
DO NOT EVER get above or below a formation. Inadvertent deployment can become fatal fast if people are above each other.
If low, stay near and to the side of the formation until breakoff. Do NOT begin tracking before breakoff altitude, and DO NOT do anything to increase vertical separation..
Track flat at a common level. DO NOT drop out of a formation vertically. If you have an inadvertent deployment when you are below the formation, the likelihood of someone getting killed is significant. The greatest likelihood of an inadvertent deployment is right after exposing the pilot chute pouch to direct air stream - like when dropping out of a formation in a stand-up.
Track to a clear sector while watching the people on either side. While flat tracking, it is easy to split the difference between the people to either side by looking under your arms.
Canopy Flight
Open at an appropriate altitude. Between two and three thousand feet is reasonable for a high traffic event; any higher opening (for CRW or whatever) should be arranged with the pilot.
Do NOT spiral down through a high traffic area. If spiraling to lose altitude, get well off the wind line to stay clear of the spot for other groups, and LOOK AROUND. In a turn, the direction of most likely collision is at the leading edge of the canopy in the direction of the turn, and there is a blind spot where a collision may occur between jumpers whose canopies blocked their view of each other until right before the collision. I reiterate - SPIRALING IN HIGH TRAFFIC IS DANGEROUS!
The safest flight path when opening above the landing area is to fly the canopy away from the landing area, perpendicular to jumprun, until far enough out to allow a long, shallow approach to the landing area (leave enough room for obstacle clearance).
LOOK AROUND NEAR THE GROUND! Don't fixate on your landing, but pay attention to who is in the area. Keep your head on a swivel, and periodically scan for potential traffic.
Do not execute unplanned turns near the ground. If you are cut off on final, executing an avoidance turn must not be a possible response.
Landing
The safest landing areas are the least popular ones with the most outs. Landing in congested areas or where ground traffic is allowed (e.g., the camping area) can be an invitation to disaster.
If you must turn for traffic or obstacle avoidance while setting up to land, use a FLAT TURN. If you don't know how to do so, find out from someone experienced in the maneuver and practice at altitude until you have the procedure wired.
Keep your head on a swivel after touchdown. Even if you land under complete control, you might want to dodge someone who is swooping where they should not. If landing out is inevitable, or if safely making it to a designated landing area is in doubt:
Pick an open area in which to land by 1,000 feet (300 metres). Corn can be over 12'(4m) tall (a cornfield is NOT like an unmown lawn), so landing between rows and preparing for a PLF will reduce the likelihood or extent of injury.
Any changes of color on the ground probably have barbed wire along the boundary. Land parallel to any area changes.
Locate any telephone poles or other wire supports by 500 feet (150 metres), and set up to avoid the wires that are sure to go between them.
Identify the lay of the land by 500 feet (150 metres), and set up to land alongside any hills. Do NOT land uphill or downhill, REGARDLESS of what the wind is doing.
If there is any doubt about the landing surface, or if you are sure to have excess speed on touchdown (like when stuck with a downwind landing) execute a PLF and roll out the landing. Keeping feet and knees together, and not using hands or elbows to break the fall can greatly help avoiding injury.
The "D" Point by Brian S. Germain
Although there are many ways to improve one’s accuracy in parachuting, I have found no better way than flying a consistent pattern. By connecting a series of invisible points in the sky, “Altitude-Location-Checkpoints” as I call them, we can create a consistent flight path that makes us more predictable in the air, as well as significantly increasing our chances of landing on target. The typical pattern, made up of three distinct turn points, I will now argue is not quite enough to get to the target with the consistency we are looking for.
The standard flight pattern for a ram air parachute involves a downwind leg, a cross wind leg, and an into-the wind leg, also know as the final approach. This pattern is defined by three distinct turn points, “A” (Base to Final), “B” (Downwind to Base), and “C” (pattern entry point). It is true that if we are prepared to modify our approach in light of new information along the way, we can hit the target. But wouldn’t it be nice to get there without needing to modify our flight path, to just sail along and turn when the altitude is right? That is exactly what the inclusion of a fourth turn point does.
The trouble with the standard pattern is that there is a good deal of guesswork when it comes to the length of the Base leg. Depending on the glide ratio of the parachute, the location of the turn to Base leg will vary widely. The better the relative glide ratio, the farther the turn to Base needs to be from the target. Our ability to adapt to this changing environment is spotty at best, and often requires substantial correction along the way. This creates traffic conflicts, as well as varying airspeed and decent rate, making life far more difficult for us, and for the canopies behind us. In most cases, the length of the Base Leg needs to be longer than we think.
This becomes an even more important issue for swoopers setting themselves up for a high speed approach. If the length of the Base Leg is incorrect, the pilot is forced to either float in the brakes or “S-Turn” prior to the initiation of the dive. This has consequences to the approach, even if they manage to reach the Initiation Point at the correct altitude. If they are flying significantly faster than usual when they arrive at the initiation point, they may lose much less altitude in the turn due to the increased front riser pressure upon initiation. If they are flying significantly slower than usual, they may lose a much greater amount of altitude in the turn, and find themselves hooking into the ground. It is my experience that, aside from the altitude of the Initiation, the selection of the “B” point is the most important aspect of a high speed approach.
If we simply add another checkpoint prior to the entry into the Downwind Leg, we can take the guessing out of the process. Assuming that the turn points are equidistant in altitude (300, 600 and 900 feet), we can simply add another unit above the original pattern entry to create a fourth, or “D” point, precisely on the wind-line, upwind of the target. What this does is, it creates a Pre-Base Leg, which shows us exactly how long the Base Leg needs to be. In other words, if the altitude between the points is 300 feet, the “D” point is at 1200 feet.
The beauty of the data that this “D” point brings us is, we discover the exact length of the base leg without choosing the precise location of the “B” point prior to exit. This means that we can fly this pattern at a new drop zone, or when we are landing off, and learn where the altitude-location-checkpoints are for that specific landing area. It doesn’t help us with the “depth” of the pattern points, but it puts us in the ballpark, assuming that we have a rough idea of our canopy’s glide ratio.
When the winds pick up, this method still works perfectly well. The crab angle on the Pre-Base Leg is equivalent to the angle of crab on the Base Leg. Note that the horizontal distance of the offset from the target on the downwind leg on a windy day is exactly the same as it would be on a no wind day (A to B = Anw to Bnw). This is only true if we do not compensate for the side-slip of our ground track due to the crosswind legs.
However, even when we do choose to compensate for diagonal crabbing on the base leg and create a “Holding Crab”, if we create the same crab angle on the Pre-Base Leg, we end up on the perfect final approach despite the complex situation. This is easily accomplished by simply making our goal to fly a box pattern on the ground, flying our Pre-Base and Base Legs perpendicular to the wind-line.
Also note that the length of the base leg is longer on the No Wind condition than it is on a windy day on which we perform a Holding Crab on the crosswind legs. This is due to the reduced groundspeed when in a Holding Crab, and the diminished glide ratio that comes as a result of it. If you aren’t pointed where you are going, you will not move there quite as quickly.
This method assumes something that many canopy pilots do not have: a trustworthy altimeter. A standard dial-type, analog altimeter is not sufficient to give us the kind of accuracy we are looking for. Even the digital dial-type is not usually graded in such a way that we can distinguish units of one hundred feet or less. These are freefall altimeters. For the precise data required by today’s canopy pilots, we need digital altimeters with digital read-outs. Even better, many of us have found, is the heads-up advantage of an audible altimeter designed for canopy flight such as the Optima and Neptune. If you have an audible alert telling you where you are, it is far easier to keep your eyes looking outside the cockpit and on the action that may require your instantaneous reactions. All that being said, your eyes have ultimate veto power. If things do not look right, your instruments must be ignored. Too many skydivers have hit the ground due to complete faith in their instruments that let them down due to mechanical problems, battery issues or some unconsidered technical malfunction.
Assuming that you use this accuracy technique the way it was intended, and you notice what is happening as it is happening, you can take a huge step forward in consistently hitting your target runway. It will take a while to dial-in your approach so that you actually hit the target, but the target is always a secondary goal to hitting the centerline of the runway and turning to final at a reasonable altitude. If you plan your pattern well, using four distinct points along the way, you can change what you are capable of handling as a canopy pilot. Not only will you feel better about yourself, you will increase the likelihood that you will live a long, healthy life. That, of course, is the mark of a great skydiver.
In addition to being a highly experienced skydiver with over 14,000 jumps, Brian Germain is the author of several books including The Parachute and Its Pilot, Transcending Fear, Vertical Journey, and Green Light. He is currently designing canopies for Aerodyne Research, and offers canopy flight courses worldwide. For more about Brian’s Books, Seminars and Parachutes, visit his websites: www.BigAirSportz.com and www.TranscendingFear.com
An Inconvenient Truth Regarding PLF's
When I started skydiving round parachutes were the only parachutes available. The landing under a round canopy had a high straight down component. Although Para Commanders had a noticeable forward speed under no wind conditions, landing in winds over 10 mph were again straight down. Due to straight down landings most injuries were to the ankles because one tended to sit down on the ankles during a less than perfect timing of the landing techniques required by round parachutes. Use of the Parachute Landing Fall (PLF) greatly reduced the extent and severity of landing injuries. Virtually all successful skydivers were experts at PLFs because not every landing was executed perfectly, no matter how many jumps one had, and sooner or later one had to land a round reserve. In the classroom it required a block of at least two hours to teach landing the parachute because so much of the time was devoted to teaching an actual PLF. The complete PLF technique is not a natural, readily apparent procedure. During the actual jump about half of the students would perform a PLF and the other half wouldn’t no matter how much time and practice was spent on PLFs. The injury rate was quite high. About 1 in 20 first jump students would suffer some type of ankle injury.
With the advent of square parachutes, and particularly with the advent of placing students under square parachutes, the landing injuries changed. Each experienced person reading this article will realize that the injuries from landings that we see today are not limited to ankles. This is because the parachute is moving the jumper across the ground in almost all circumstances. However, there are cases were a person would be descending straight down even today. A high or rapid or deep flare by a student would be one example. In this case the PLF position for landing would definitely influence the ability of the student to walk away from their mistake.
In my opinion there are instances when use of a PLF for a botched landing is NOT beneficial to the jumper. A downwind landing is such an instance. The PLF introduces a roll and a square parachute introduces a large amount of speed. For the sake of this example, assume the wind is blowing at ten mph. The jumper has made a mistake and is landing downwind. He/she has the presence of mind to have the toggles at his/her ribs (half flight) for an air speed of ten mph and a ground speed of 20 mph. Please bear with me for the easy math.
20 mph = 20 mph X 5280 ft/hr = 105,600 ft/hr
105,600 ft/hr = 105,600 ft/hr divided by 60 minutes/hour = 1,760 ft/min
1,760 ft/min = 1,760 ft/min divided by 60 sec/min = 29.33 ft/second
At 20 mph ground speed a person is moving 29.33 ft per second across the ground. At half flight the downward speed (3 to 5 mph) would be somewhere between 4.4 ft/sec and 7.33 ft/sec. I believe that in this example the best outcome for the jumper would be to try to absorb as much of the initial downward velocity as possible with their legs (knees bent and pressed tightly together) and then NOT ATTEMPT A PLF.
The danger inherent to a high speed roll/tumble is a direct result of the laws of physics. An example using a cylinder will illustrate the principle. I am 52 inches around the shoulders so let’s talk about a perfectly round cylinder, 52 inches in circumference, moving in the air just above the ground and oriented perpendicular to the line of flight.
At touchdown the cylinder is going to pick up a rotational (angular) velocity based upon the speed across the ground (linear velocity) divided by the circumference of the cylinder. Excluding friction, which will slow the cylinder by scraping, the cylinder will initially roll across the ground at 29.33 ft/sec divided by 52” (circumference) per rotation.
52 inches divided by 12 inches per foot = 4.33 feet (circumference)
29.33 ft/sec divided by 4.33 ft / rotation = 6.77 ROTATIONS PER SECOND!!!
If this seems quite a lot, it is. However, this is why occupants of a rolling vehicle are thrown so far from the vehicle in a rollover car accident (buckle up?). In the rollover case the rotational speed (angular velocity) of the vehicle rolling is translated to the linear velocity of the thrown body. The thrown objects, including unbuckled occupants, are thrown hundreds of feet.
Returning to the skydiver, I am not a perfect cylinder. I am more of an imperfect ellipse (oval) seen from above. This is not to my benefit in a rolling landing as the ground (not perfectly smooth) will have a tendency to turn me into a round object by attempting to break off my protrusions (shoulders, arms, knees, etc.) This is complicated by the fact that the PLF was developed using round parachutes which did not have flare capability. As such the arms in a round canopy PLF were above the head, elbows bent and cushioning the head from the sides. This positioning essentially extends the arms along the long axis of the cylinder. With a square parachute our hands are down at our sides (hopefully) controlling the flare. During the rotation of a PLF, and particularly a rotation of 6.77 rpm, the hands and arms are thus exposed to quite a bit of trauma due to impact with the ground, more than once, as the roll proceeds.
What one hopes for is the best case scenario where the jumper is rolling from shoulder to shoulder across the ground. The worst case scenario would be tumbling head to toe across the ground. Unless one is a trained gymnast this would expose the head and neck to several impacts with the ground. A real life roll/tumble would probably fall somewhere between these two extremes. At a rotational speed of 6.77 rpm a PLF would risk head and neck injury. At a rotational speed of 6.77 rpm, even a perfect PLF has great risk to shoulders, arms, hips and legs.
There is a solution to this downwind landing possibility. It is easy to train and easily understood by newcomers and experienced skydivers alike. The simplest way to prepare for as many landing scenarios as possible is to assume the PLF position, fly the parachute and slide on one hip in the event of a forward motion, high speed landing. I teach our students to envision holding a dollar bill between their knees and squeezing a quarter between their glutes (“feet and knees, dollar and a quarter”). Actually doing so puts one into the PLF position.
When the person discovers a downwind mistake has been made, he/she should assume this PLF position. At touch down the jumper should try to absorb as much as possible of the downward impact with their feet but lean back in the harness. Under no circumstances should the person allow themselves to be thrown head first. The jumper wants to stay on their feet as long as possible, tending to sitting down. As the person sits down he/she wants to transition (during the squat) onto a hip. One does not want to impact directly onto the butt. The spine will tolerate torsion (bending) but very little compression. Sitting down directly onto the butt could cause spinal problems on its own (disks and vertebrae). Absorbing the actual butt touchdown with the hip will allow the spine to flex. Hitting a rock with the tailbone while sliding across the ground could be quite painful as a likely result is a cracked tailbone. Hitting a rock with the hip while sliding across the ground might possibly bruise the hip, an easier recovery than any spinal injury. The jumper should perform a baseball slide into second base ensuring that they remain sliding feet first. The person will get dirty. Done properly, one may see damage to the leg strap cover on the hip, but a dirty/torn jumpsuit and/or a dirty/scraped hip cover will be all that one sees.
During a proper landing (into the wind) and under reasonable conditions, if a person is in a PLF position (feet and knees, dollar and a quarter) accompanied by a flare anywhere near half–flight, the parachute will lay the student down in the first half of a PLF. This is all that is necessary with a properly sized square canopy. The “lay down” is a result of the fact that most students are not true into the wind at touchdown and thus the square parachute almost always imparts some degree of forward AND sideward motion to the student.
The occurrence of downwind landings is relatively rare. However, bear in mind that most of these are done by a jumper off student status (off radio assistance). This person has received very little if any formal instruction since the first solo landing class. So the technique must be simple to learn, retain and execute months after the initial training.
Since I began teaching this concept, decades ago, I have not had a single jumper injury related to downwind landings when my advice was put into practice.
My motivation for writing this article comes from the words that I hear when traveling to other drop zones and the words that I read in articles such as “Incident Reports”, “…you should have done a PLF”. This is not always the case, particularly with today’s parachutes. A PLF is no longer a panacea for all conditions. I also want to point out that, in my opinion, the instructor showing a first jump student a PLF accomplishes nothing at all. Having each student perform a PLF on the ground is no better. For a person to learn a PLF requires repetitions by the student, MANY repetitions, from an elevated platform.
A person or publication telling anyone that he/she should have done a PLF, which the person has never actually learned, is not accomplishing what the student needed and the knowledge that the publication is trying to disseminate.
Parachute Landing Fall, AKA: The PLF
When first learning to skydive, at least in the US, you attend a first jump course (FJC) that usually lasts between four and five hours on the ground, then you go up in a plane and jump. There are several methods of instruction including Accelerated Free Fall (AFF), Instructor Assisted Deployment (IAD), Static Line (SL), or a combination of the three called the Integrated Student Program (ISP). While all of these methods of instructions are different, they all have one thing in common: gravity. You have to land your parachute. This is where the PLF comes into play. It is also where numerous accidents happen, sometimes due to sliding in, rather than doing a PLF. This is understandable, since tandem pairs land this way for safety reasons. Besides standing up the landings (the preferred method), this is the landings students see most often.
When skydiving first began, all of the equipment was military surplus. This included round canopies, so naturally the PLF was brought along as the safest way to land. Over time, and thanks to the innovation of early pioneers of the sport, the equipment evolved into the square (and now elliptical) canopy, which brought its own problems, like needing a slider to control the opening, and also alleviated the issue with hard landings, mostly. Now, rather than falling more or less wherever the wind blew you, you could steer and fly the canopy much the same as a glider, since the canopy is now a pressurized wing. When you want to land, you fly a landing pattern and pull both steering toggles down and flare, much the same as an airplane would by using flaps. This allows you to bleed off forward speed and land softly standing up (theoretically). Like all things skydiving, when it works, it works really well, but when it doesn't work, it can kill you.
I was a skydiver before going airborne, so when it came time to learn how to PLF, I thought I had an advantage since I had been taught how. Boy was I wrong. They had a platform you climbed on and rode a zip line to gain forward speed and then you let go to learn how to PLF in a simulated landing. I could not keep my feet together, so the Blackhat (instructor) tied my boots together. I had to hop around all day, but I have not had a problem keeping my feet together since.
In airborne school, they take two weeks to train you how to jump out of planes compared to five hours in skydiving. Most of that time is preparing you to land. As there is no way to steer the round canopy other than slipping on landing (pulling the risers to go sideways a little) or facing into the wind, and no way to flare or slow down the speed, the PLF is needed to prevent injury. I have seen a jumper fall about 50 feet and do a PLF and walk away with a few bruises.
While I understand that time is limited and it is hard to prepare a student for all possibilities, I feel that more time should be spent on PLFs during the FJC, at least an hour, and that students should do at least five correct PLFs before every jump. This is standard procedure before doing an airborne jump, and includes all jumpers being led through the entire jump by a jumpmaster, including their emergency procedures. If we put every student through this before every day of jumping, it would help prevent injuries.
The reason students choose to slide in rather than PLF is observation. Since this is the way a tandem pair lands in order to prevent injury, it is assumed to be safe. It is, when properly taught. It is easier to injure yourself sliding in or trying to run out a landing than doing a PLF. I know of at least two serious injuries sustained sliding in that a proper PLF would have prevented. One case ended with a cage around the lower vertebrae.
I made a jump at an unfamiliar DZ on rental gear and the winds were a little high, about 15 mph, so I ended up landing long. When I turned on final, there were some power lines in front of me and I was headed straight for them. I turned around and did a downwind landing, and a PLF into the hard-as-a-rock, newly plowed field, ending up with some scratches when I landed. I was going about 20 mph forward speed. Had I slid in or tried to run it out, I would most likely have broken something. Another time I jumped at an unfamiliar DZ, I chose to PLF instead of running it out, and while walking back stepped in a gopher hole. Had I hit that while running out the landing, I would have broken my ankle.
A proper PLF has five points of contact: the balls of the feet, calf, thigh, buttock, and pull-up muscle (deltoid). When you prepare to hit the ground, keep your feet and knees together, slightly bent, in preparation to absorb the impact. When you fall, hit all the points of contact in order, while rolling on the ground. A proper PLF will allow you to absorb all of the energy and dissipate it by rolling, rather than staying stiff and breaking bones or tearing ligaments and tendons. I kick my feet together when approaching my landing to ensure my feet are together and knees bent, ready to hit the ground and roll. That way, if I don't bleed off enough speed to land standing up, I am already prepared to roll and do it without thinking. If I am going slowly enough, I have a nice stand up landing. Although the goal is standing it up, it is best to be prepared for a PLF, especially if you are fond of your ankles and spine.
Blue skies.
Article written by @sfzombie13
Static, Dynamic and Accelerated Stalls
Before discussing static and dynamic stalls we should first review some terms involving stability. Static stability refers to how something behaves in a steady state. A parachutist suspended under a normally functioning canopy would usually be said to have positive static stability. That is to say that when not changing the position of the toggles or risers, things like airspeed and heading will not change very much from one moment to the next.
Dynamic stability refers to what happens after something has been disturbed from its static state. Once a parachutist changes the position of the toggles or risers, dynamic stability comes into play as the body swings under the canopy.
A static stall refers to what airplane pilots would call a slow deceleration, approach to landing or simply a normal stall. Basically, at an altitude from which it will be safe to recover from the stall, slowly increase the angle of attack and let airspeed bleed off. Keep increasing the angle of attack, gently, until the stall happens.
Under a parachute, this is fairly simple. Slowly pull the toggles down and wait. Do not pull down the toggle so quickly that you swing forward from your normal position under canopy. Hold the toggles all the way down and wait. You should notice the sound of the airspeed decreasing, perhaps a slight rocking in the saddle and then perhaps a noticeable increase in descent rate.
This is a basic stall. For all intents and purposes it is the most genteel stall your canopy will demonstrate.
Recover from the stall by decreasing the angle of attack -- let the toggles up and resume flight.
The dynamic stall is different because of the suspended weight swinging under the canopy.
Again at an altitude from which it will be safe to recover, begin the maneuver from full flight -- toggles all the way up. This time instead of slowly pulling the toggles down, pull them down as quickly and as far as you can and hold them there.
A few different things are happening this time around.
Because your airspeed initially hasn't changed all that much, but you've increased the angle of attack dramatically, the wing is now creating a lot more lift. A function of creating lift however is also the creation of drag. Your canopy as a result will not only go up but also slow down. Your body on the other hand is following Newton's first law of motion and will continue at its current speed and direction. Unfortunately this also asymmetrically loads the front and rear risers, which continues to further increase the wing's angle of attack.
It's a vicious little circle there for a moment or two as increasing the angle of attack slows the canopy more and more. As your body swings farther and farther forward, rapidly, the wing exceeds the critical angle of attack and it stalls.
Your body may have been thrown quite a bit forward of the leading edge of the wing and even slightly upwards of your normal place under the canopy. As a result, your body may feel a much more definite falling or even backward motion than it did during the static stall.
Stalls can happen at any airspeed and at any attitude. All that is required is for the wing to exceed the critical angle of attack.
Up to this point in this discussion, we've been looking at stalls in a fairly normal manner. If you didn't know better you may have thought that the stall had something to do with the speed of the wing or its attitude in relationship with the horizon.
That's normal. Many people make this mistake. After all, we've demonstrated the stalls from a slow deceleration and with a fairly normal relationship to the horizon, earth and sky. That's about where most discussions on the subject begin and end. So, some people might make the mistake of thinking that a stall can only happen if you're flying too slow or if the leading edge of the wing is pointed toward the sky.
Unfortunately, this is just dead wrong.
To make matters worse, some maneuvers that you may perform, turns for example, create G force. Basically, your body wants to continue in a straight line but is getting pulled in another direction by lift. As the bank angle increases, so does the G force. In an airplane, maintaining altitude during a turn, the G force increases at a rate equal to one divided by the cosine of the bank angle. So, at a bank angle of 60 degrees the G force will be 2.
You might not get exactly 2 Gs under a parachute turning with a 60 degree bank though since generally you're not maintaining the altitude and the equation becomes quite a bit more complicated taking into account your descent rate, but in most cases it will definitely be greater than 1.
So what does this have to do with stalls?
As the G force increases so does the amount of lift required to offset it. With the same angle of attack, the airspeed at which the stall occurs will be increased by the square root of the G force. Airplane pilots would call this an accelerated stall.
Let's say you're pulling a sustained 2 Gs pulling out of a steep swoop, your canopy will have an accelerated stall at 1.414 times its static stall speed.
The really insidious part of this is when a person is snapping the toggles down to pull out of a too steep and too low swoop, the dynamic stall comes into play. The body continues in a straight line, increasing the angle of attack and aggravating the stall with really bad results.
It's my opinion that this could be the primary factor in some botched hook turn landings.
Paul Quade is a Certified Flight Instructor and the camera flyer for the Open Class 4-way team, Perris Lightwave.
Emergencies In The Aircraft
Airplane Problems
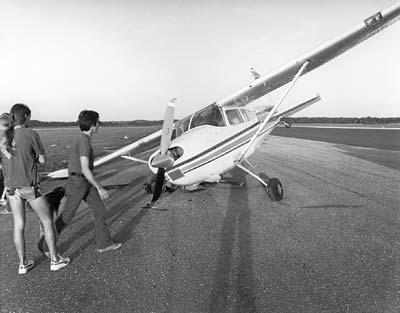
Engine and structural failures. If the engine is going to fail, it will probably do so when the pilot reduces power after your full throttle takeoff. If the engine quits, he will attempt the best landing he can, straight ahead off the end of the runway. Since you are helmeted, padded with gear and strapped in, you need only assume the proper position to be prepared. Draw your knees up, tuck your head down, fold your hands across the back of your neck and hold your head down to resist whiplash. As soon as the plane comes to a stop, get out FAST. If you are nearest the door, get moving. There are people behind you who want to get out. There is always the danger of fire, particularly if the aircraft has suffered structural damage on impact. Watch where you step, the plane may have clipped through some power lines. They can zap you and they start grass fires. Remember that the wings of the airplane usually contain flammable fuel.
Occasionally, the jump ship suffers a structural or other mechanical failure. Twisted-on parts sometimes twist off or a canopy may get draped over the tail jamming the controls.
Depending upon the situation and the altitude, your jumpmaster will select one of two commands: PREPARE TO CRASH or GET OUT (jump). The dividing line is usually set at 1,000 feet above the ground since at this altitude there may be enough time for an orderly exit and the pilot will probably be able to land his glider on the runway. The jumpmaster might tell you to jump and pull your reserve on the theory that it is somewhat more reliable and may deploy faster than the main and/or he may be concerned about the setting of your AAD. His instructions will depend on the circumstances of the situation.
So, if you are below 1,000 feet when the challenge occurs, you will land with the aircraft. If you are over 1,000 feet when the rubber band breaks, your jumpmaster may direct you to make a normal static line jump, but you will do it all a lot faster; swing out onto the step and go. Student freefallers may be directed to make a jump and pull; this is where they will open their mains as soon as they clear the aircraft, or the jumpmaster may sit them in the door, pull their reserve and simultaneously push them out. It all depends on the altitude at the time of the emergency. Licensed jumpers are next, then the jumpmaster and, in the case of severe structural failure, the pilot. The purpose of getting out of the plane is not only to remove you from the area of danger but to lighten the load making the aircraft easier to control. The jumpmaster goes next to last because he must take care of those in his charge. The pilot goes last (he wears a parachute too) so that he may wrestle the jump ship to keep it flying until you are gone.
The above rules are general and are for students. Experienced jumpers may elect to exit lower. For example, if the aircraft is at 500 to 1,000 feet, an expert skydiver may elect to jump and pull the reserve (which presumably opens faster).
Of course you will follow the instructions of your jumpmaster, but sometimes you have to make the decision yourself. In the excitement of solving the engine failure or other problem, the pilot may allow the airspeed to drop, stalling the plane and allowing it to spin. In this condition the aircraft drops fast and the centrifugal force may pin you against the side or ceiling. Now is the time make the decision to scramble and get out.
Depending on the size of your jump ship and the procedure at your drop zone, your static line may be hooked up on the ground, at 1,000 feet, or on jump run. Whether or not your main is hooked up may determine what type of escape you can make in case of an aircraft emergency. For example, if you hook up prior to boarding, and the plane crashes on takeoff, when you unbuckle and get out, you can expect to unpack your main about eight to 15 feet from the door (the length of your static line).
The final point to remember is to watch and listen to your jumpmaster for instructions. When you receive them, carry them out quickly and without panic.
Open Parachute In The Airplane
Several times in the past, jumpers have been pulled through the side of the jump plane when a container opened and a canopy escaped out the door. Rarely does this result in a fatality but usually there is severe damage to both the jumper and the aircraft.
If either the main or the reserve open prematurely in the aircraft, one of two things will happen; the pilot chute and/or canopy will either start out the door or remain in the plane. You have only one course of action for each situation.
The jumper whose reserve escaped out the door of this aircraft was lucky; he survived.
If the main container opens in the aircraft,
it is usually the result of excessive movement by a person in the aircraft. This could happen when you constantly shift positions, rubbing the static line and/or closing flap on an interior surface or snagging the static line on something during movement in the aircraft (from one position to another). With the Instructor Assisted Deployment (IAD) method, these hazards are real because hand-deployed pilot chutes use small closing pins. With long plastic coated cables for a main ripcord, the hazard is much less likely, especially when the ends are tucked into housings on a closing flap. If the main container opens,
it is a simple matter to move backward pinning the errant canopy against a wall or flat surface. Show the problem to your jumpmaster immediately. Once satisfied that you have it well secured, disconnect the main canopy from your harness by operating the canopy releases (the method depends on the type of system you are using — your jumpmaster will probably do this for you as well as disconnect your reserve static line device). This is so that if it should somehow get out the door later, you won’t be connected to it. Now sit on the canopy and pilot chute so they won’t get away and ride the plane down.
Sometimes the reserve container will burst open while you are in the back of the plane. The pin works its way out, or perhaps since you are in the back of the plane, you are not vigilantly guarding your reserve ripcord handle and it is snagged out as you move around trying to find a comfortable position. Grab the reserve pilot chute and canopy, cover them and hold them tight. Call the jumpmaster’s
attention to the problem immediately. The reserve creates a greater potential danger than the main because it cannot be quickly disconnected from the harness.
The deploying reserved canopy pulled the static - line student off the step.
If, however, either of your canopies start out the door while you’re attached to it, you will follow it out. You have, at most, two seconds, and if you hurry you will experience a near-normal canopy ride to somewhere in the vicinity of the airport. But if you are slow, the developing canopy will act as a giant anchor, extracting you not just through the door but, more than likely, through the side of the aircraft too, causing great injury to you, damage to the aircraft,
and exposing others still in the aircraft to great danger.
The best solution is prevention. Always guard and protect your static line and/or your ripcord(s), canopy release handle and pins.
Essay on Exit Order
From an aircraft operations standpoint, as a general rule whichever group will have the slowest climb out should leave first. On a calm day the aircraft on jump run covers about 175 feet per second, or one mile in 30 seconds. Assuming the practical distance that a square canopy open at 2,000 feet can cover is at most about one mile, that means that the first people out would just barely make the landing area from one mile short, while the last would be able to make it back from one mile long. In other words, all jumpers have to be out in a two mile long jump run or some will land out, or a second pass will be required. In time terms, on a calm day no more than 60 seconds can elapse from when the first jumpers leave the airplane to when the last jumper exits. At busy events with several aircraft flying, second passes are not an option.
Let's take a sample jump run, where a large group will take up to 20 seconds to climb out, a 4-way 12 to 15, 2-ways six to eight, solos five, and AFF students about 12 to 15. Our load has an 8-way, two 4-ways, two 2-ways, a solo, and one AFF. That adds up to between 70 and 80 seconds from green light to last out. But it is possible to make it all on one jump run if the eight way gets out first, because the pilot figures at least 15 to 20 seconds for the first climb out. That brings us back to 60 seconds from first out to last out, and one pass. Needless to say, we don't want to do an extra pass because 2-ways want to leave before 8-ways.
(If the 2-ways get out first, the pilot can only count on a five to ten second climb out. He has to put the light on 1/3 to 1/2 mile closer to the dz than he would for the slow climb out.)
That's the timing reason why small groups shouldn't leave first. Now lets talk about separation from other jumpers. First of all, anyone who counts on vertical separation for safety is out of touch with reality. I see people in freefall at 1,500 feet and lower routinely, so just because someone plans to open at 2,500 doesn't mean you should bet your life on it. Everyone needs to open in their own column of air. Horizontal separation is the only guarantee of security. The only real reasons - and they are good ones - why students and tandems get out last are that a student is more likely to balk or ride down, and that canopies opening high can get back from a longer spot. I repeat, horizontal separation is the only guarantee of safety. Vertical separation is a nice idea but cannot be counted on since a minor loss of awareness or a long snivel will eliminate it instantly.
Now, a quick digression about fall rates. Follow these categories out or time their videos if you don't believe me. Light freestylists doing routine freestyle do not fall significantly faster than a fast falling four way. Freeflyers fall about 30% faster than normal. Small skyboards fall fairly fast, if the rider is standing, but big ones fall very slow - slower than most RW, usually about the same speed as tandems. Because of their exits, they must leave first, and because of their complex emergency procedures, they must pull high. Leaving first and pulling high defies conventional wisdom, yet not once have we had a problem with slow falling skysurfers getting out first and pulling at 3,500. In fact, as long as the first person pulls higher than the break off altitude of the following group, they are a contribution to safety, not a detriment, provided adequate time was left between groups at the exit.
We do have a recurring problem maintaining safe separation when the freeflyers get out first. Typically a freefly pair will have a forty five second freefall and open at 2,500 to 3,000 feet. Let's imagine that they are followed by an RW group that has a 10 second climb out. Now, let's say you are a freeflyer jumping a Stiletto. A Stiletto (assuming a 30 mph forward speed, which I can document is a reliable figure) covers about 45 feet per second on a calm day. If you open 30 seconds (shorter freefall plus exit separation time) before the RW group leaving after you and turn directly towards the dz (which you will, since otherwise you can't make it back from getting out first unless you cheat on the climb out, spot for yourself, and force the pilot to go around, which REALLY pisses us off) in that 30 seconds you will cover over 1,300 horizontal feet. This would put you about 400 feet from the center of a group leaving the plane ten seconds after you. In theory, that would just barely be enough, except that a good tracker can do about 70 feet per second, so if they track towards you for six seconds they are right on top of you. Furthermore, a modern canopy descends about 800 feet in 30 seconds (also documented) so if one of you pulls at 3,000 to get back from a short spot, for camera effect, or whatever - by the time you are at 2,000 you are well into the danger zone of the group that followed you.
So far, the big sky theory has taken care of us most of the time but I have heard of a couple close calls and more than once found myself directly over the freeflyers if they leave first. Having seen the consequences of freefaller/canopy collision more than once, I want to minimize the possibilities. And they go way up as soon as we add wind to the exercise. Here's why. In a 30 mile per hour breeze, the plane only covers 130 feet per second, instead of 175. In ten seconds of exit separation, the airplane only covers 1,300 horizontal feet instead of 1,750. Worse still, the RW group is in freefall for a longer time, and consequently gets blown further. Let's say the freeflyer is in freefall for 45 seconds, and the RW for 70. In 45 seconds you get blown nearly 2,000 horizontal feet. The RW blows just over 3,000. That leaves only 300 feet of horizontal separation without taking tracking or canopy movement into account! Make the winds 50 miles per hour, and the RW group drifts over 1,800 horizontal feet further than the freeflyers! Meanwhile, in ten seconds the plane only covers 1,100 feet. A 20 second exit separation will still have the RW group opening 400 feet from the freeflyers, not counting canopy movement or tracking!
Having opened right over freeflyers before, and having just heard from several expert skydivers who narrowly missed freeflyers, and having watched RW groups blow over freeflyers on windy days, I think we have a problem. You might say, make sure the groups leave longer between exits. Well, we do tell them, but if they wait 20 seconds instead of ten, that still doesn't solve the problem because Freeflyers still fly under them under canopy. So for fast fallers your only choice if you want to get out first is to always fly perpendicular to the line of flight for 30 seconds before turning towards the dz. While I am confident most of you are aware enough to do this, it brings us back to the original time on jump run problem. Basically, Skydive Arizona isn't willing to do a lot of second passes just so freeflyers can get out first.
Getting out last except for students solves virtually every problem. You control the horizontal separation, so you can ensure you won't be overtaking anyone in freefall. The windier it gets, the safer you are because you get extra separation by having slower fallers blow away from you. Students take long climb outs and pull real high, so no problem there: just get open and fly off the wind line for a few seconds to be clear of them in the unlikely event that they are in freefall at 2,500 feet.
As for the argument that the canopy separation is necessary in the landing area, I don't buy it. Opening over the top instead of short, you can spiral down to make sure you get on the turn around loads. As for congestion at the landing area, no one else on the loads seem to have any problem, although you may not always get to land right by the fence.
Please give this some thought. Unless one of you gives me an extremely convincing reason why you need to leave first, such as a safe spot for the skyball, I will make it standard policy that exit order will always be
1) skysurfers
2) freefall groups, largest to smallest, regardless of fall rate
(Note (Skr): I believe this is a typo since the real rule is: )
(2a - relative work groups, largest to smallest and then )
(2b - fast fall groups, largest to smallest and then )
(3 - AFF and tandems )
3) AFF and tandems, plus any other very high openings. The main reason for high openings leaving last is not separation, it's that they can make it back from a long spot!

Flying and Landing High Performance Parachutes Safely
I. Working on Conservative Approach Techniques
A well planned approach makes good landings easier to accomplish, while most bad
landings come after a poor approach. It follows then, that working on improving a variety of
approach techniques is the first step.
A. Control your canopy with smooth toggle movements.
Fly your downwind, base, and final approach smoothly, keeping control inputs to an absolute minimum. This makes it easier for others to predict what you are doing. The canopy will fly more efficiently, and it also helps to make the canopy more stable in turbulence.
B. Once you're pleased with your landings, experiment with making approaches at
various speeds.
Getting a good landing with less float after the flare will help you land in small areas. Doing this requires a slower approach. But if you are too slow, you will land hard! It takes considerable skill to land softly after a slower approach, so practicing this in an open area is important.
C. Learn how slowly you can approach and still get a reasonable landing.
Again, landing well after a slow approach requires practice and considerable work on flaring technique. How slow you can make a safe approach depends on your wing-loading, the design of the parachute, and how good your technique is. It takes a lot of practice to get good landings after a slow approach, but the result is more options for different landings, and greater safety.
D. Even if you are conservative, learn how to make a straight-in approach using a
small amount of front risers.
Make sure your canopy is very stable in this flight mode first. Just 1 to 3 inches of riser will produce quite a change in the approach speed and landing. By becoming familiar with the slightly higher speeds of this approach, you will
be better prepared should the unexpected happen and you find yourself screaming along after making an evasive maneuver to avoid traffic near the ground.
E. If you are an aggressive canopy pilot and like SWOOP landings, it is very important to practice straight-in approaches at various speeds.
You may have to make a slow approach one day, and you need to stay good at it. You may not even realize how slow you can approach and still be safe. Its better to practice in good conditions so that you are prepared for the worst. Most new canopies can be flown straight in, even at very high wing-loadings, with proper technique. If you can't do it, you probably need to work on technique.
II. Working on High-Speed Approaches
A. Learn when to say no to a high-speed approach.
There are times when high-speed approaches are unsafe, due to heavy traffic in the air or on the ground, when you are angry or tired, when you are disappointed with your performance, or when the weather conditions are marginal. Make sure you err on the cautious side! You can make that swoop landing on a later jump when conditions improve only if you survive this jump!
B. Verify that the technique you wish to use works well with the canopy you are using.
Some canopies have unusual flight characteristics that can take hundreds of jumps to fully explore. Do this exploration up high away from other traffic. Some canopies can
become unstable using certain techniques.
C. Stay with straight-in approaches, working on flaring technique for many jumps to
obtain the longest swoop possible before attempting any turning approaches.
Many people do not work on improving their technique long enough before trying aggressive
turning approaches. Many tend to react too late to changing circumstances, and then over control afterwards. The result is reduced canopy efficiency, which reduces the distance of the resulting swoop. It also indicates that the jumper is over his limit of safety.
D. If you are doing turning approaches, try to develop several different techniques for controlling the rate of altitude Ioss compared to the rate of turn.
1. Over a period of many jumps, find out how much you can vary the altitude loss in a turn by using different control inputs.
2. In these experiments you will find that some techniques will produce extremely high altitude loss with only a moderate rate of turn (Example: Steep front riser spiral).
3. In these experiments you will also find that some techniques will produce low altitude loss, even with a fairly high rate of turn (Example: Carving toggle turn).
E. When setting up for your turning approach, try to set up for a turn that will allow for a great altitude loss with very little turn rate being required.
1. If you're sure you've set up your approach high enough, start the high altitude loss turning technique. As you make the turn, evaluate the altitude loss. Always be
ready to change the turn into one that produces less altitude loss. Starting real high and knowing many turning techniques allows you to have plenty of outs. Try to start all your turning approaches with enough altitude to make the high altitude loss turn safe. Choose the turning method you feel is appropriate. If you notice during the turn that you do not have sufficient safety margin, change the turn technique to one that allows for less altitude loss. Now you have your margin for
safety back again.
2. If you are sure you are too low to try the high altitude loss turn, and even a medium altitude loss turn does not look like a good possibility, consider landing slightly crosswind, if traffic permits. Avoid the low turn! If it looks like you need to start with a low altitude loss turn method, you are in a dangerous situation! If you turn anyway, and you do survive, slap yourself for being so stupid! Vow to never get caught in that situation again! Don't judge your approach technique as good
just because you walked away from the landing!
F. Avoid becoming trapped into the habit of using only one turning technique that requires an exact starting altitude for success.
Favoring one turning technique, especially a low altitude method such as a sharp snapping toggle turn followed by burying both toggles, is very risky. Because the canopy tends to pull out of the dive almost the same way each time, you require an exact starting altitude and perfect judgement each time. Nobody can be that perfect! One day your judgement will be a little bit off, and you will crash. Or you may have some turbulent air, which will affect your approach, and you will crash. Do not fall into the too common trap of thinking that you've completed the learning process! No one has!
G. Learn the concept of the "corner" and stay out of it.
The corner represents the change from a
vertical diving approach to a horizontal swoop. Make that corner as round as possible. (A large
radius pullout started higher is safer than a sharp pullout started lower).
1. If the canopy's natural tendency to pull out gets you to level flight without pulling any toggles at all, then you were not very far into the corner. This is the safer method.
2. If you need to pull the toggles down to get out of the vertical part of the approach before you can start your flare, then you were too vertical too close to the ground! This is better than hitting the ground, but its very dangerous and should be taken as a severe warning. The biggest problem with this is that the average experienced jumper does not
see this as being as dangerous as it really is. Slap yourself for being so stupid, and promise not to get caught like that again. Instead, do everything higher, and start the pullout earlier. Again, the idea is to prevent having to be perfect just to survive.
3. As you can see, the measure of safety on your swoop is how little toggle it takes to get to level flight. If you are pulling toggles down hard and late, you need to start the turn much higher, so that you will need less toggle to pull out of the dive. You may also need to learn how to perceive, far sooner, that you are getting too far into the corner. This way you can apply a little toggle up higher, rather than a lot of toggle at the last instant. In other words, you need to work more on better planning of the approach. Probably a less
steep approach would help!
H. Avoid these hook turn traps.
1. The courtesy trap.
You can only pay so much attention to being courteous to others while under canopy. Do not pay so much attention to others that you forget to leave yourself plenty of safe options too.
2 The dropping winds trap.
This is one example of failing to adjust for the changing conditions as the day progresses. People who have been flying the same downwind approach to the landing area all day tend to get very used to the sight picture that they have. As the wind drops, this sight picture will change, as the wind will no longer be helping you get back to the landing area so quickly. But you may continue to try and fly the old sight picture. If you are getting caught by this, you will feel you are sinking faster than you expected while on downwind, so you try and float in the brakes a bit more than previously. In an attempt to keep the same landing spot as earlier, you may find yourself trying to float downwind a little farther as well. All this adjusting eats up airspeed and altitude, both of which are needed to turn into the wind. If you are also tired from a day of jumping, you might find yourself ignoring these signs, turning too low to survive.
3. The "I'm really Gonna swoop this time" trap.
This is a situation where the jumper is so enthusiastic about his swoop landings, that they forget about everything else! They see their desired approach as the only possibility and will attempt that approach regardless of whether there are problems with traffic, spectators, winds, or turbulence. They forget that other options exist, and are very likely to have an accident.
4. The race horse trap.
Jumper making mistake number three (above) has fallen into the race horse trap. Race horses sometimes wear blinders on their eyes to restrict their vision. Sometimes jumpers pay so much attention to their own approach that they don't see anything else, just like the race horse. Collisions near the ground are often caused by this, so its very dangerous.
III. Working on Improving Landings
A. Altitude control is the key to no-wind landings.
It is not so important to be at an exact
specific altitude when starting the flare, but it is very important how high you are when you finish the flare. You should finish the flare so that you have no rate of descent (or at least your minimum rate of descent) when your feet are at ground level.
B. For the best landings, transfer the weight from harness to ground gently and gradually.
If you are at zero rate of descent with feet at ground level, you can gently press your feet on the ground while you continue to sit in the harness. With the first step, you can remove a little weight from the harness, by stepping only lightly on the ground, and more heavily on the next steps, until all your weight is transferred from the harness to the ground. To do this you must have the zero rate of descent at ground level, not higher. You must also maintain adequate flying speed during this time. No parachute or any other wing is capable of supporting you at no foward airspeed!
C. Be careful to avoid using your hands and arms for balancing or protecting yourself during the flare and landing.
As you will see in the video, the canopy will respond to every toggle movement (or shifting in the harness), even when you are well into the
transition to the ground.
D. Watch the landings of other people and get video of your landings. Look for these
common errors.
1. Lifting one toggle at touchdown.
This is the balance trap. If you feel like you are falling to one side, you may try to stick an arm out for balance, which turns the canopy. You may think it was a side gust.
2. Extending a hand out to protect yourself.
This is the protection trap. By extending your hand out to the ground to protect yourself, you unknowingly steer the canopy that direction.
3. Stabbing the ground with your feet.
This is done usually in anticipation of a hard landing. It hurts the legs and feet, and is usually accompanied by lifting both toggles backwards and upwards, which compounds the situation by causing the canopy to dive harder at the ground.
4. Fighting the wind.
This is letting one toggle come up and pushing the other one down prematurely, in anticipation of difficulties in getting the canopy on the ground in high winds. This can produce some really ugly accidents. Make sure you're really on the ground first, then get the canopy on the ground.
5. Tunnel vision.
Though we try our best to avoid it, all of us tend to concentrate more on our flight path as we get closer to landing time. Sometimes swoopers or
accuracy jumpers start having this problem much higher up. This is very dangerous! Try to keep looking around and seeing people!
6. Flaring too slowly, too high, or too far, etc...
Experiment more while up high. Watch other peoples landings and watch videos of your
own landings. Usually this is a perception problem.
IV. Conclusion
A. Acknowledge your current limitations.
B. Constantly play "what if" situations when you're flying.
C. If in doubt choose the conservative option.
D. Create safe situations for yourself and others.
E. VOW TO BECOME A STUDENT OF CANOPY CONTROL AGAIN.
F. Have fun!
Exit Checklist For Camera Users
If you add a little pressure, simple things can quickly become not-simple things.
For the amount that most of us understand about how they really work, the modern cameras we employ for skydiving are close enough as to be made of magic. Yet despite their tiny size, amazing quality and all-round wonderfulness - we still regularly miss out on capturing quality footage of a jump for the most arbitrary reasons. A little bit of forethought and the application of a simple routine can aid ones consistency when it comes to getting the shot.
You may well snort derisively and roll your eyes at the thought of reading an article about how to switch a camera on - yet let you that has never missed a great bit of action for the sake of some small piece of angry-making bullshit stupidity cast the first stone. The best analogy I have to represent the advantages of a sensible and efficient method for a repeated process is think about packing and how much of a frustrating pain in the ass it was (be honest) at the start. Learning to pack and getting it right is not only about understanding the need to fold your parachute a certain way so it will go into your container (and come out again) - it is as much about the knowing right spot to put your knee so the fabric doesn’t escape and where to hold it down with your elbow so you can have both hands free for the next bit. How many things in your life are there to which you can draw parallels with this?
There is much satisfaction to be found in developing your ability to get ready quickly and efficiently in the plane. Here are a few tips:
The Plan:
Adding things to your in-aircraft routine should not come at the expense of any of the stuff you have learned to do that makes you safe. If you are skipping over running through your drills because you are constantly fucking around with your camera you might forget them at the crucial moment - so don’t. Even in the speediest of flying machines you have time to do things both necessary and desirable, but always remember your priorities. Checking that your pilot chute is not hanging out is vastly more important than which recording mode you are in.
Lenses:
It is very easy to get some manner of obfuscating crap on your lens. Action cameras all have teensy little apertures onto which a single grubby fingerprint is enough to ruin your footage of the bestest jump ever and make you very sad. Condensation is very popular too - especially with big temperature changes from altitude to ground level. Moisture developing on (or even in) your camera during a jump is unavoidable but not cleaning it up before the next one definitely is.
You should have a suitable cleaning cloth somewhere about your person - tucked away into the lining of your helmet is good as it makes it very difficult to bring one without the other. For extra points you can attach it to your helmet with some string, or you could even carry a spare one which you might magnanimously gift to some clothless boob and appear as a minor hero/enormous geek in front of like four people.
Cutaway:
More and more frequently dropzones are requiring that any helmet with a camera on is fitted with a cutaway system - which are available in many forms and levels of quality. The best idea is always invest in a good one that someone has made using science that will actually work rather than bodge something together yourself from that box of old skydiving bits you keep under your bed for no good reason.
A worthy part of your pre-jump process is to give this a quick look and see if all is well, and that nothing has become worn or unseated that might result in no camera attached to your head and some cognitive dissonance about wether you can be bothered to scour the landscape looking for it.
Using Time:
For maximum sensible-ness you should perform your camera checks with enough time that you can fix potential problems without freaking either yourself or anyone else out if something is amiss. Realising on jump-run that your memory card is full or your lens is dirty is too late. If you had a spare thirty seconds you might be able to go into your settings and delete something to free up space, or give the front a quick clean - but not when everyone is already climbing out on the side of the plane and waiting for your ass.
Conclusion
Being correctly prepared in a timely fashion is but one step in getting good footage, yet an important one. Felling relaxed and properly ready lends itself to nailing the jump, and the exact form of your personal routine will develop with time and practice. Stick to the plan, don’t bump your head on the way out and remember that you get what your head is pointing at, not just your eyes.
By joelstrickland, in Safety,