Becoming a Camera Flyer
They're out there every weekend - you see them with the students, following the teams, part of the Freefly revolution. And now you've decided to join them. So you want to be a camera flyer, huh? Here's a few tips to consider before you rush out and buy that first video camera.
This article is intended to be a brief introduction to some of the things you need to consider if you want to fly a camera, and is in no way comprehensive. The intent is to get you to consider the choices and options available, and to try to match that with the intended use of the camera. Still cameras, camera helmets, and technique are not covered in this article.
Flying a camera is as fun as it gets skydiving - but it can turn your fun into an expensive and frustrating affair in a big hurry, and eat away at your precious jump money even faster. What's that? You don't expect to pay for your jumps if you fly a camera?
Well, you will - for at least the first 50 to 100 jumps, until your proficiency (NOT your flying skills) with the equipment and techniques has improved to make it worth while for someone else to pay your slot. This is an additional reason to ensure that the precious money you spend on camera equipment is not wasted due to inexperience.
First, as with any major purchase, you have to know what you are going to do with it. The same camcorder may be useful for tandems, AFF, 4-way, and Freeflying, but if you don't know which brand and model that is, you'll likely end up with something that does not do what you expect.
Next, start a list - are you intending to make money or just expand your fun? There's a huge difference in between those two answers, and while one does not preclude the other, you may not end up with the right tool for the job.
If at all possible, find a mentor! Go out of your way to find an experienced camera flyer and ask for their input. Find out how they got started and why, and what equipment they bought. Ask what hard and expensive lessons they learned - any camera flyer with experience will have a few eye-opening stories for you. They may cause you to reconsider the whole idea - and that's the point. Don't expect that they can drop everything on a Saturday afternoon to help - be reasonable and try to work within their hectic schedule.
Obviously, once you've done your homework, it's time to go shopping. In today's consumer environment, there are so many choices and options available it may seem overwhelming to know who to trust and where to go. Do you buy mail order or locally? Do you get the extended warranty they try to sell you? Do you need an extra battery? What about a wide-angle lens? How wide? This is one time it really pays to have a mentor.
Personally, I tell every new or want-to-be camera flyer to be careful and ensure that their purchases are what they intend. If you're intending to shoot the Freefly revolution and make awesome head-down videos, a large 3-chip camcorder is probably not what you want to buy. Of course, if you plan on challenging one of the well-known freefall photographers for title of "Top Dog" you may wish to find the most powerful and feature-heavy camera on the market.
By contrast, if you are just intending to shoot video for fun and as a point-of-view when you fun jump, then a basic camcorder with an ultra wide-angle lens(0.42x to 0.45x)may be just what you need. Most of Sony's PC series have become very popular as point-of-view cameras, with even the seasoned pros. For freeflying, they're a dream come true, offering great features, top quality images, and a fair price all in a tiny package that is easy to use.
In between is a vast assortment of choices, manufacturers, models, and formats. With both Sony and JVC making fine models that are as small as a paperback book, Mini-DV is now the single most popular format to shoot skydiving in.
If you intend to shoot videos for hire, such as tandems, check with the local video concession to see what they require. They can also give you an idea of what sort of experience they expect, and how to get it.
If you buy an analog camera, even Digital-8, it may be hard to sell later, and it surely will not
produce the clear and crisp image you're used to seeing from Mini-DV. Analog camcorders are also not nearly as small and light as Mini-DV.
Once you've decided on Mini-DV, the usual manufacturers are JVC and Sony. There are other options, but their equipment is not as robust or well-built as Sony and JVC. They are also not as popular, and while being popular does not mean much - it does mean others have similar equipment, have experience using it, and know what works well and what fails miserably using the camera.
Both manufacturers seem to be widely discussed on some of the Internet chat rooms related to video cameras, so there is a ready source of information for those with access. I have a personal preference for Sony - but that is solely based on MY opinion.
Sony is without question the most popular brand of camcorder that is found in the sport today. Sony builds top-quality equipment that is small and light, yet packed with features - some of which are useful and some of which are useless. Overall, the Sony line has a reputation for quality and is widely used - therefore it will probably be the easiest for you to learn and understand.
The models available seem to change almost daily. In 1996, when I first purchased the Sony PC-7 I own, it was a new and radical departure from camcorder design and sparked an entire line of miniature cameras from both Sony and JVC. Most of these models have very slight differences in features and functions, and are too numerous to discuss at length here.
JVC is also popular, but many models do not offer Firewire ports (for perfect digital copies) and do not offer the same image quality as Sony.
Prices for Mini-DV camcorders have dropped dramatically. My first Sony VX-700 cost over $2000, and the PC-7 was about the same. Today, many of the PC models from Sony sell on the street for $1000 or less. I have seen JVC models advertised as low as $750.
Once you have narrowed your search to a specific brand and model (or models) it's time to decide where to buy. I always try to go to a local business and make a point to get to know one of the sales people. I make them show me the model(s) I am interested in, tell them I'm serious about buying it, and inquire about price. I also tell them I am considering buying mail order, and why.
In many cases, the local retailer will not be able to match a mail order price. However, any mail order purchase has its own risks - which often outweigh the potential cost savings. Most on-line or magazine-ad merchants have large restock fees if the equipment is returned - even if it's their fault or broken when you get it.
They may also try to charge you extra for items the manufacturer intended to be included with the basic package - including batteries! I know of at least one merchant in New Jersey who shipped me an empty box - and charged me for it. When I called to complain, I was told I'd be charged a restock fee even though the box was empty. Buyer beware, indeed.
At any rate - wherever you buy your camera, ensure it is packaged with all of the accessories that are supposed to be included. It may require a visit to the manufacturer's web site, but the effort may save you heartache later on if something important is missing.
Most camcorders do NOT include a Step-up ring that may be required to mount one. Again, do your homework and know what to expect and what you will have to purchase separately.
Personally, I always buy one extra with the required adapters.
Once you actually do purchase the unit, I recommend one more step prior to purchasing your camera helmet - read the owner's manual thoroughly! Aside from being the best way to find out what buttons do what, it is also the only place you can learn what the different indicators and icons really mean.
Knowing that may help you later, when you're on jump run at sunset for the coolest dive of the year. There you are, fat, dumb, and happy, when your camera begins to display funny codes and weird symbols, while making grinding noises and spitting out digital tape.
Next up is buying a camera helmet - but that will have to wait for another installment. Remember - this was your idea! You wanted to fly a camera, even after I warned you…
About Robbie Culver
Robbie Culver is a freefall photographer with 2800 jumps, about 1800 with cameras. Robbie's still photography has been featured in Skydiving and Parachutist magazines, the USPA Calendar, and in various industry ads. His video credits include the staff of Roger Ponce's Color Concepts at the World Freefall Convention, the 1999 Lost Prairie Boogie video, and annual dropzone highlight videos. He and his wife Brenda skydive in the Chicago area, where Brenda is an aspiring 4-way competitor and CReW dog. They can be found most weekends at Chicagoland Skydiving in Hinckley. Examples of Robbie's work and tips on freefall photography can be found on his web site, www.skydreams.net.
AFF Students Are Awesome
AFF students are awesome! They are incredibly excited, nervous, and sometimes quite hilarious. Ben Lowe and I have complied some of our favorite experiences with teaching and getting to know some of our students over the last few years.
A graduated student of mine came up to me as calm as could be. The way he looked at me was that he was in trouble.I asked him, “What’s up?”
“I had a cutaway,” he replied.
“That’s awesome! You saved your life!” I replied as thrilled as could be.
“What type of malfunction did you have?”
“I think it was a hard opening.”
“How do you know it was a hard opening?”
“I opened up so hard I lost my shoes.”
Ben and I had a student who sheepishly walked in the student room on a Sunday morning.
“Good morning,” we said. “How are you?”
Laughing he replied, “I’m at church!”
Ben and I look puzzeld at each other, “Church?”
“Yes, I tell work that I have to go to Church Sunday mornings so I can jump!”
One of our favorite water training responses:
I had a student who wore a digital altimeter that recorded her freefall speeds and liked writing them down in her logbook. She was about my size, 5’3” 120 pounds. After one jump she ran out of a room holding her altimeter high.
“Melissa! Melissa! I reached a max speed of 168mph! That’s a freefly speed!”
Ben and I always give our student’s the opportunity to always ask us questions, even after they graduate. This was one of our favorite downsize questions:
We had a student who repeated Level 4 several times. Although discouraged, she kept moving forward and ended up graduating to her A-License. The following season after accumulating 100 jumps and tunnel time and ran up to Ben, “I want to do a jump with you to show off my bad ass 360° turns – in control!”
Ben had been working with a student on exits for several jumps. She finally just said, “I’m terrified about jumping out of the plane. I’m just gonna throw myself out, then get stable.”
I was walking into the student room and I had overheard several students giving shout outs for their landing stats.
“I have 2 corn landings,” one says.
“I have 1 corn and 1 bean landing,” says another.
“Oh yeah, I have 1 corn, 1 bean and 1 runway landing,” he said laughing with a few gasps and questions. Then another pipes up.
“Well I landed in the corn 2 miles away!” and the laughter ensued!
It’s pretty tough as an Instructor to beat YouTube these days. But you have to stand your ground!
Teaching is something Ben and I also take seriously as we know our actions will make a lasting impression. However, the rewards are great as we get to meet so many different people and watch them progress in the sport we’re so passionate about. If you’re an AFF student, I encourage you to keep going and keep learning!
Got any interesting stories about what you've heard coming from AFF students? Share them with us in the comments section below...
Find good articles here: http://www.melissaairheart.com/category/education/
By MissMelissa, in General,
Hey Bro, Check Out my Go Pro
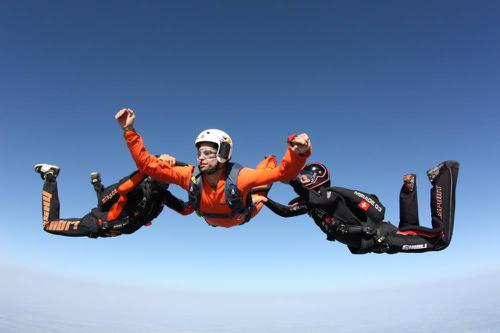
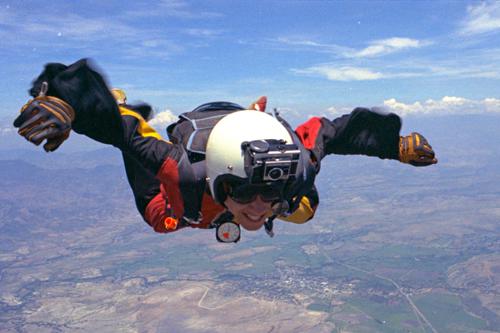
The sleek, low-profile design, an easy-to-use system, so small it’s hardly there, and it’s oh-so-glorious high quality images – the Go Pro, Hero. In this social media society, the Go Pro is seductive, yet it’s oh-so-risky. For all you rebels at heart, those willing to learn, and especially those with less than 200 jumps - let’s lay down some tracks about being courted to don the camera.
As an AFF Instructor and having been in the sport for nearly two decades, I have developed a hearty outlook about jumping a camera. But let’s slip on a bit of perspective mixed in with a bit of old school and new school thinking. So to round out this discussion, I interviewed two well-respected and well-known camera flyers about the topic – Norman Kent and Brian Buckland.
Norman Kent, a life-long photographer and artist has been jumping a camera since 1975. Norman only wanted to try skydiving once. However, he experienced something so captivating, he saw an opportunity to capture the moments of beauty that was so different and so freeing in the sky. He admitted to be a fast learner, however he first strapped on a camera only having 24 jumps – it was a Kodak Instamatic with 126 cartridges.
Norman didn’t have a skydiving photographer mentor. In fact, there weren’t many people strapping cameras on their heads in those days. It was an arduous and expensive venture for those willing to try. And for Norman, he made his own contraption by using a motorcycle helmet with no chin cup, wired a mechanical plunger, and confessed he didn’t know anything. So as he jumped his equipment, the air pushed the helmet up and the buckled strap choked him as the helmet moved all over his head and he fumbled in the sky. While these set backs were disappointing, it did not detour him. Instead, he was motivated to invent something that worked better - this approach lead to many camera helmet and jumpsuit innovations over his career, leaving a legacy of pioneering in camera flying.
I asked Norman what he thought of today’s USPA’s current regulations for jumpers to wait until they had 200 jumps to fly a camera. “Regulation is a good idea, a good guideline,” he says. “It sounds hypocritical to say because I started with the ‘yahoo’ approach, but it’s wise to wait.”
I’ve known Norman for a long time. I’ve seen him jump enormous contraptions carefully constructed upon his head. He’s a proficient and a well-respected camera flyer and we talked how different it is today with the Go Pro being so small. I ask him if he sees any dangers. “It all comes down to the attitude of the jumper,” he begins. “Because the Go Pro is small, it’s inviting people to use it who aren’t even in photography. It’s [jumping a camera] not so simple and there are dangers involved.”
Norman and I both agreed that there is a shift in thinking in skydiving from the renegade days of the past. The development of tandem jumping and social media have greatly changed the image our sport, attracting more types of people to experience skydiving that the thinking of the past has to change.
Norman elaborates, “People learn so differently that I’m not pro-regulating, I’m pro-educating. We need to develop a training or an awareness program [about jumping a camera.]” Although he recognizes the dangers happening, he also sees this as an opportunity for the sport. “This is an opportunity for coaches and instructors, for inventors, for schools…” Norman is currently working on a project for a You Tube production geared towards camera flying educational purposes coming out later this year.
Let’s bring it back in the day where these young lads photographed below are sporting some serious state-of-the-art camera gear in 1988.
Brian Buckland comes from an entirely different background. Brian made his first jump in 1994 and didn’t jump a camera until 5 years later and racked up about 500 jumps. Brian’s philosophy was to become a proficient flyer first; so he logged about 200 belly jumps, then learned how to freefly. During this time he notes that he was becoming more aware of his routine with gear checks, canopy skills, and landings. Finally the time came and he strapped on his first camera – a Canon Rebel 2000, with film.
Brian went to Radio Shack after buying an off-the-shelf flat top camera helmet to wire up a shutter release. He admits to being nervous since his routine greatly changed with having to be concerned with battery life, clean lenses, and correct camera settings, in addition to checking his gear and high fiving everyone. When he landed from his first jump, he looked over his wares and was surprised how well they turned out. He submitted them and they were published.
“I learned about photography after the fact [of getting the first photo published]. So I went to a continuing education course for photography and started translating that to the sky.” Over the years Brian has developed a systematic routine and is busy the entire flight making sure everything is in order prior to jumping. “It’s important to be comfortable with gear, build good habits, and safely skydive with others.”
Brian also didn’t have any skydiving photography mentors. However, he looked up to the likes of Norman Kent, Joe Jennings, Mike McGowan, Tom Sanders, Craig O’Brien and later, Jason Peters. Now with established photographers in the sport, I asked Brian what he thought of USPA’s camera regulations. “The numbers are decent because the time in sport and time in the air are important in building a comfort level. Adding something new when you’re new and not comfortable with the everything else, something like a camera becomes a distraction.”
Both Norman and Brian elaborated how the common attitude is, “it’s [Go Pro] not a camera, it’s so small, you-don’t-even-notice-it” attitude. Brian conveyed a story how, against his advice, a tunnel instructor with about 100+ jumps had lost two Go Pros! And we’ve all seen the photo on Facebook with an AFF student’s pilot chute wrapped around an instructor’s Go Pro. The Go Pro is a snag hazard and most people who wear them use non-cutaway helmets and screwed on mounts.
This is an excerpt from USPA on September 1st, 2011:
Adhering to Camera Recommendations
USPA has been receiving an increasing number of calls and e-mails from Safety & Training Advisors and instructors regarding what to do about inexperienced skydivers who want to jump with small-format video cameras, such as the GoPro. Many new jumpers seem to feel that the small camera does not pose a risk, and they simply want to wear the camera while jumping. For that reason, the new jumpers do not consider this to be a video jump that falls under the 200-jump recommendation in the Skydiver’s Information Manual [SIM].
The truth is that even though the camera itself may be small, it still represents a significant snag hazard to any jumper. This is especially true considering the various camera mounts jumpers use. In addition to the snag hazard, no matter how much a jumper thinks the camera will not become a distraction during the jump, it will. There are plenty of cases of newer jumpers forgetting to fasten chest straps or creating dangerous situations in freefall, etc., that were directly attributed to the distraction of the camera.
USPA’s camera recommendations appear in Section 6-8 of the Skydiver’s Information Manual. Be sure jumpers at your drop zone are following these guidelines. They exist for very important reasons.
The SIM is an excellent outline about camera safety and requirements, but it doesn’t educate. I agree that too many people have a careless attitude about the jumping camera equipment too soon and that we need more education. We’re fortunate to have an organization that mediates our government relations, memberships, insurance, etc. However, they do not govern, they suggest and that gives us the freedom to self-police safety amongst ourselves. If we want to see change for the better, we need to take it into our hands and pass on good information.
Allowing newbie’s to jump camera equipment just because they’re “heads up” isn’t a qualifier to allow them the privilege to wear one. I visited a DZ and asked the S&TA; about their policy of jumpers with sub 200 jumps wearing a Go Pro. The answer I received was, “If their heads up, it’s ok.” I quizzically looked at him and said, “How do you know he’s heads up? Have you jumped with him?” Two hundred jumps is, although not the best, a measure of experience. At least I can assume they’ve earned their B-license (including the canopy progression) and have a bit of time and experience. I don’t have a chance to jump with everyone to qualify someone with sub 200 jumps “heads up,” and who’s to judge whose heads up anyways?!
There’s so much more to just jumping a small-little-thing like the Go Pro. Because of social media, there are ethics that ought to be tied into this conversation. Excited newbie’s may use their footage unjustly and this effects more than the person jumping it. For example, Gerardo Flores – an uncurrent, 30-jump wonder sneaks a camera on his jump and has a “near death experience” that goes viral on the web. This situation affected the skydiving community negatively and gave a sneak peak to the public how “reckless” skydivers can be. Not to mention other videos that go live streaming on the web.
I asked Brian what advice he’d give to those thinking about jumping any kind of camera and he said, “Be comfortable with yourself well before strapping on a camera. Be proficient under the parachute, build your awareness, know your emergency procedures, know your gear and wear the proper gear. Then, learn about the camera prior to jumping it.”
Although Norman and Brian didn’t have mentors, both have been a huge help and inspiration to aspiring camera flyers over the years. Both have made themselves available to help give direction and may be reached through their websites, www.BrianBuckland.com and wwww.NormanKent.com. And stay tuned for Norman’s upcoming video on You Tube, "The Dangers of Being a HERO".
Now, for all you rebels at heart and those willing to learn, I cannot tell you what to do but share my experience. However, when you meet the camera flying requirements, it’s like earning the rite of passage to don a camera on your head. Throw in a bit of education in there and believe me, it’s totally cool and absolutely worth the wait.
By MissMelissa, in General,
Power-Pitching
This little article is about the art and science of skilfully and quickly pulling out of a dangerously low dive. You can apply this skill to many aspects of parachute flight, but the scope of this article will hone in on keeping you above ground if you turn too low, in more ways than one.
When you turn close to the ground, the likelihood of your survival has a great deal to do with suspension line tension. If you are not currently connected to your canopy, you can't pull out of a dive all that quickly. Maintaining positive "g's" requires a smooth reduction of the angle of attack when performing a turn or dive, and graceful coordinated turns throughout your approach. If you feel the parachute pulling away from you in a balanced manner, you are prepared to nose her up whenever you want to.
The process of pulling out of a dive clearly has something to do with bank angle, but it has much more to do with pitch. This is the fore-aft pendulum axis, like on a swing-set. If you begin increasing your pitch as soon as you get that funny feeling, and leave the rolling out for after you feel the load increase, you will recover far sooner than if you went straight to fixing the roll problem. Fly the pitch first, then progressively reduce the roll angle when you feel heavier. In doing so, you are literally creating time to fix your problems. In short, nose her up wherever you are, and then deal with the rest of your flight.
The pitch responds to a variety of inputs. A tap in the rear risers will nose you up a bit, as will releasing application of the front risers. Such inputs may even level you off to zero descent, provided that you have the altitude. Rears are, however, a terrible way to pull up from a dive executed dangerously low. When you get down and dirty, brakes simply have more bite.
Knowing that different inputs have different recovery times, this leads us to the exploration of what kind of brake input moves the pitch fastest. So it turns out, a short, sharp, powerful burst-and-hold of six to twelve inches will move your pitch more, sooner and more effectively than twice the quantity of control input when applied with a slower control motion. Fast works quicker. This is what I refer to as "Power Pitching", and it is an essential skill for all canopy pilots who would like to join the ranks of the old fart club.
It is all a matter of airspeed. When the angle of attack is increased swiftly, while the airspeed is still quite high, there is more effect to the direction of flight. When you are in half brakes, for example, you have a slower pitch response, and the resulting level-off is weak at best. Watch scared students land and you will get to see this principle over and over.
When a canopy is traveling at high speed, on the other hand, in the first one third of the control range, the bang-for-your-buck is far higher when it comes to maneuvering capability than the lower end of the range will ever hope to offer. This is because the wing is traveling faster, and drag increases as we go faster. That is why a patient pilot who waits for the correct time to flare and then gives one smooth, decisive motion from zero brakes to quarter brakes usually ends up with a glorious level off. The top of the control stroke is the heart of your power to change the direction of flight.
Consequently, if you fly smooth coordinated harness-led turns with your toggles mostly up and your tail out, your first pulse of brake application will pop you up out of a steep dive surprisingly quickly. It is true that some parachutes recover more powerfully from a dive than others due to good design, but every parachute recovers far sooner when good technique is used.
There are, however, limits to every technique. There is a point when a PLF is just not enough to prevent pain, and there is such a thing as a sloppy turn thrown too low. Don't do this if you want to get old. Fly consistent patterns that work for your landing area and parachute specifics, and relax into having more fun. Most of the time this stuff is not necessary at all. Once in a while, on the other hand, the one with the most Jedi skills wins.
In the end it is a calm heart combined with skilful execution that ultimately leads us to glorious recoveries and beautiful landings. As we grow into what it means to us to become a better skydiver, we reach for expansion of the diverse skill-set that will allow us to skydive with our grandchildren. Wonderfully, skill is more fun, and skill is safety.
Brian Germain is a parachute designer and test pilot, and runs canopy flight skills and safety courses all over the world. Brian has made over 14,000 jumps in his 25 years in the sport. He is also the host of the “Safety First” segment on SkydiveRadio.com, and the creator of many educational You Tube videos. Brian is the author of the widely popular canopy flight text The Parachute and its Pilot, as well as Transcending Fear, Greenlight Your Life, and Vertical Journey. His websites are www.BIGAIRSportZ.com and www.Transcendingfear.com and his YouTube channel is: www.youtube.com/bsgermain
Big BANG/Small Bucks
AVCHD has exploded on the consumer and pro-sumer
scene
like a new star at the Oscars, and the CX100 is the newest “actor”
in the AVCHD lineup from Sony.
Packed into a small body measuring 2” W x 2.25” H x
4” L (including factory battery) and 2” W x 2.25”H x 5” L with the more
practical NP90 battery, this small “brick” weighs in between 11 and 14
ounces, depending on the battery chosen. Short description; this
camcorder is a mini-brick.
The CX100 is a very
small package. The lens is a 30mm thread, if you’ll be adding wide
or telephoto lenses.
The CX100 records a 1920 x 1080i image
on a Memory
Stick Pro Duo card, with record times up to 340 minutes on the included
8GB stick, but it’s more practical to record to the highest quality
video in most situations, reducing recording time to approximately 40
minutes on an 8GB card, or 115 minutes on a 16GB card. There are other
modes, and these are useful for recording surveillance, low motion, or
even simple scenes, but for best quality, most users will likely find
the 16Mbps FH mode to be the preference.
Most exciting is that this camcorder brings the
award-winning Exmor™ imager to the consumer world. Exmor is the heart of
the professional EX-series camcorders, which have become standards in
the broadcast world. What this means to consumers is a more clean image,
less noise in low-light, and a smoother image overall. It’s a single .20
CMOS imager, but don’t be fooled by single and small. Technology has
brought CMOS to a new level of quality that previous generations of CCD-dependent
camcorders. CMOS has shown itself to be the new future of virtually all
imaging devices from the very low cost cell cams to high end
professional production cameras. Exmor is currently the king of small
imagers.
Small is the key with this camcorder.
Tiny and light
weight, this camcorder fits snugly into the palm. It’s very ergonomic,
being curved on the right side and square on the left side.
This camcorder has a
manual open/close for the lens cover. The LCD panel will notify
users if the Record button is engaged while the lens cover is
closed.
The lens housing is very simple; it’s a 30mm
threaded lens with a manual lens cover. It’s a Zeiss lens, identical to
lenses found on previous HDR series camcorders. Optical width (35mm
equivalent) is 42mm wide zoomed in to 497mm, so the camcorder isn’t
quite wide enough for action sports or close-in work, but is plenty wide
for the average user. While the camcorder does offer digital zoom, like
most digital zooms, it’s not terribly useful due to the small sensor
sizes. It’ll work well in a pinch, on a tripod/non-moving, or in a
situation where the image acquisition is more important than image
quality. Exposure is controlled via menu touchscreen, as is shutter
speed, although the camera does not offer full manual control. There are
nine exposure modes plus an Auto mode, giving users ten options for
exposure control.
Two microphone ports are found beneath the lens
housing.
The 2.5” LCD panel flips open and rotates; there is
no clasp or latch holding it in place. The panel may be closed with the
screen facing out, as with all previous models in this series. This is a
big preview screen and it looks terrific.
The controls are very simple.
There is no normal
on/off switch on the camcorder; opening and closing the LCD panel turns
on/off the power to the camcorder. Power can be turned off with the LCD
Panel open by pressing the on/off switch found beneath the LCD panel.
The buttons, levers,
and ports are few on the CX100; most of the options are found in
the menu options.
Also found beneath the LCD panel is a one-touch
Disc Burn button to burn card contents straight to a DVD via the USB
connector. Next to this is found a Play button for playback modes. Even
when the camcorder is in Camera mode, pressing the Play button will put
the camcorder in to Playback mode. Beneath the Disc Burn button is a
Display button. Pressing this button once turns off most of the
displayed information, thus allowing more of the preview screen to be
seen. Pressing again turns off all display items, leaving the preview
screen blank. Pressing/holding the button turns the preview off
completely, thus allowing this camcorder to be used in a dark room
without the LCD providing a source of light. In this mode, there is no
recording indicator at all. The LCD screen is the only indication of
recording; the camcorder does not have a Tally light. Next to the
Display button is an “Easy button” that allows the camcorder to set all
parameters of operation. Manual focus, exposure, and other modes are
disabled when the Easy mode is engaged. Finally, there is a Reset button
to reset all parameters of the camcorder back to factory setting.
With the LCD Panel closed, the camcorder has three
buttons; Record start/stop, Photo, and Zoom lever. With Record Mode
enabled, the CX100 is able to take continual still photographs at a
resolution up to 4Mp. However, there is a time lag between shots; expect
about one still every 3 seconds, hardly fast enough for many sport
photography modes.
The Photo button and
the Zoom lever are found on the top of the camcorder. The Photo
button is a bit inconvenient if the camcorder is being held in a
standard palm configuration. It fits under the index finger, but
it’s hard to press the button without moving the camera during
video recording.
The stripped-down nature of this camcorder belies
its intelligence. The camcorder is extremely smart, able to sense up to
eight faces on the screen and calculate exposure based on these faces.
Additionally, if the still modes are being used, the camcorder can sense
smiles, and shoot automatically when it sees a smile. Now if it only had
an “ugly” sensor that would prevent it from taking ugly photos, or a
‘composition’ setting that could prevent badly composed photos from
being taken. Maybe in the next generation.
Spot focus, spot metering, slow-shutter are all
available on this camcorder, along with the previously mentioned nine
exposure modes. Menus are relatively simple in this camcorder, but there
are some menus the average user will want to pay attention to.
There is no LANC on
this (or any other file-based camcorder system. Remote control is
achieved through the AV/R port. Pictured here is a HypEye D Pro
control/indicator system.
In the “General” menu mode (preview screen/menu
button, page two under the Toolbox), there are five menu options. In
this menu, Auto Shutoff, Calibration, and Power On By LCD are the
important options. First, disable Auto Shutoff unless you’re okay with
the camera powering down after five minutes of disuse. In the
action-sports world, this is a non-starter, so disable this mode. Next,
calibrate the screen for your personal finger touches. Different size
fingers will touch the menu differently. Next, disable the Power On By
LCD option if a remote is part of the planned operation of the
camcorder. For example, when using the HypEye D Pro remote/camera
indicator, the LCD panel must be opened first, then the HypEye may be
enabled and will control the camcorder. If the Power On By LCD option is
disabled, the HypEye D Pro will be able to turn on/off the camcorder,
start/stop recording, and control functions of the camcorder while the
camcorder is in a box or cage. It becomes a hands-free operation when
the Power On By LCD option is disabled.
If a remote on/off
system is part of the operation of the CX100, be sure to go into
this menu and disable the Power On by LCD option.
In this same Toolbox menu, you’ll want to scroll to
Page One of the menu options, and select the Face Function Set menu.
Disable Face Detection, and disable Smile Shutter features. This will
significantly speed the auto-focus functions of the camcorder. This same
menu is where you’ll set the movie or photo modes of the camcorder.
In the next menu, you’ll want to set the camcorder
to record to external media, unless you’ll plan on downloading
everything from the internal memory to an external hard drive. There is
a huge benefit to this process; if you’ve filled or forgotten a memory
stick, now you’ve got a way to record. Imagine being on a cliff wall or
aircraft and realize you have no memory stick, or the stick is full.
Simply switch to “Internal Memory” mode and you’ve just gained nearly 60
minutes of high-quality recording in FH mode!
Be certain to enable X.V. Color in the menu for the
most rich and natural colors during playback to any X.V. enabled
HD display. X.V. is standard in Sony displays, but XVYcc is an up and
coming standard in home video/theatre. The color information is embedded
in the video stream, and having it will not harm the image of non-XV (HDMI
1.3) systems, but will be immediately apparent in XV displays.
Disabling Automatic
Off will be important to action sport photographers.
If you need to share media, no worries. You can
easily dub media from a mem stick to the internal Flash memory, or dub
from the internal Flash memory out to a media stick. If Firewire has
been your primary means of sharing video files, MSPD is now your
transport medium for sharing video. From skateboarders to skydivers,
this feature will be much loved, much appreciated, and much late in
file-based recording systems.
"The Sony CX100 with incredible HD quality in such a small form
factor complemented by electrical stabilization and solid state
media; is the best camera on the market for daily capturing
skydiving and other action sports."
Mark Kirschenbaum – Get Hypoxic/Skydiving Videographer
Another ‘feature’ of this camcorder is the image
stabilization system. For the past two years, almost all Sony models
have been Optically Stabilized, or OIS. This is terrific for those that
stand around with camcorders in their hands, but for those that are
mounting camcorders to skateboards, helmets, aircraft struts,
motorcycles, or anything else that has heavy, inconsistent vibration,
OIS is a bane, not a benefit. Soft, juddery images are sometimes the
result of OIS systems. The CX100 offers EIS, or Electronic Image
Stabilization. Granted, for those that stand around with camcorders in
their hands, EIS may not be quite as preferable, but for everyone else,
EIS is golden. Action sports photographers have been begging for EIS to
return to small-format camcorders. Sony has finally obliged.
The bottom of the
CX100 offers a metal-threaded/encased tripod mount with a
removable bezel.
All in all, the Sony CX100 is a dream camera for
the low-budget videographer, the action sport photographer, or the
independent production looking for a crash cam. At a retail of 599.00,
its street price is somewhat lower, and available everywhere. In Black,
Red, and Silver, there are even multiple color choices for the
color-coordinated videographer/photographer. There is little to want
for, given the size, weight, and cost of the CX100.
The CX100 is very small, and will
fit on any helmet camera mount system. Consider using gaffers tape
to hold the battery if the mounting system does not support the
battery bottom.
Cookie Composites
has announced they'll offer a box for the CX100 around the same
time the camcorder ships.
(pictured helmet is a Cookie Composites ROK)
Weaknesses are found in the potential “oops” factor
of leaving a lens cover on while using a remote, and in the opportunity
to miss menu options in a hurry. Lack of audio input means extra care
should be taken to capture decent sound; if a housing is used, be sure
to leave an opening for audio. These are small pitfalls for the large
scope of what this mini-monster brings to the table.
Congratulations to Sony’s design team; in my
estimation, this is the best small-format camcorder for the buck. Ever.
~dse

Can Yoga Improve Your Skydiving - You Might Be Surprised
ByNadene Beyerbach
Want to improve your skydiving skills, but don’t have thousands of dollars to blow in the wind tunnel? Try yoga! Yoga has been around for thousands of years. What is commonly considered yoga in Western society is actually Hatha Yoga, focusing mainly on physical yoga postures. However, yoga is not just a series of postures or poses. Yoga is meant to integrate the mind, body and spirit, and to achieve a state of enlightenment. For skydiving, this means developing your insight, awareness and focus, as well as balance, flexibility and stability.
Not just an effective exercise for improving skydiving skills, yoga is also extremely convenient to practice at the dropzone. The simplicity of yoga means that you can do it virtually anywhere and need very little to get started. The most important thing you can do is wear comfortable, loose fitting clothing that you’re able to move easily in. A yoga mat is ideal, since it will allow you to grip with your feet and go deeper into the poses. However, poses can be done on grass, a towel or a blanket, if necessary. You can experiment with different yoga postures, breathing, meditation and relaxation exercises to see how they affect your skydiving. Try the following to get started:
Complete Breath: A complete, “three part” breath consists of deep, continuous breathing through the nose. It is referred to as “three part” breath because you breathe first into the throat, expanding through the ribs, then deep into the belly. Slowly exhale, drawing the belly back in. Slow, deep breathing both energizes the body and calms the mind. Try using complete breathing when you’re concentrating on flying a body position that requires a lot of effort. For a relaxed and stable exit, you can also try exhaling completely as you leave the aircraft.
Meditation/Relaxation: Simply close your eyes and focus on your breathing. Let your mind go blank. As thoughts enter your mind, just return your attention to your breath and let the thoughts float away. Meditation reduces stress and tension and improves concentration. Try meditating for a few moments on the ride to altitude before you begin any mental rehearsal. This will allow you to visualize your intention for the jump from a calm and centered place.
Physical Postures: There are many different types of yoga postures to explore. Standing poses, seated poses, forward bends, back bends, twists, inversions (upside down poses), balance poses and relaxation poses are just some of the different types of postures. Let’s take a more in-depth look at sun salutations, twists, inversions and balance poses.
Sun Salutations are an ideal warm-up for skydiving. Sun salutations are made up of a series of poses, flowing continuously from one move to the next. As you move through the poses be sure to hold each one for a few deep breathes. Begin by standing with your shoulders back and body properly aligned (Mountain Pose). Taking a deep breath, stretch your arms overhead, then fold forward at the hips and let your head hang toward the ground (Forward Fold). Step back with your left foot into a lunge. Follow with your right foot, pushing into your hands and feet to create an inverted V shape (Downward Dog). Lower your body toward the ground (Plank), then straighten your arms, looking up and lifting your chest toward the sky (Upward Dog). Now return to your starting position: Push back into Downward Dog, lunge on the right leg, fold forward, and finish by inhaling deeply in Mountain Pose. Try this sun salutation before gearing up for your next jump. You’ll instantly increase circulation, mobility, and flexibility.
Twists offer back relief for skydivers who do a lot of bellyflying. If you spend a great deal of time arching, try a Half Spinal Twist to release tension in your back. Sitting down, bend your right leg to bring your foot toward you. Lift your left foot and place it on the outside of your right knee. Looking over your left shoulder, place your left arm behind you and your right arm around your knee. Breathe deeply and twist through your spine. Along with relieving tension, spinal twists will increase flexibility in your back and neck to help you further improve your RW skills.
Inversions are poses performed upside down (with your feet above your head). They improve circulation and increase the flow of oxygen throughout the body. Inversions allow you to become comfortable in an upside down position and to work on balance with your center of gravity above your head. To try the Half Shoulder Stand, lie on your back and pull your knees to your chest. Support your back with your hands and straighten your legs above your body. Your weight should be on your shoulders, not your neck. Breathe deeply and remain strong through your core to help you balance. The Half Shoulder Stand is an excellent inversion to work on if you’re learning to fly head down.
Balance Poses deserve special attention when it comes to skydiving. There is no better way to develop balance, strengthen stabilizer muscles, and increase mind-body awareness. Warrior 3 (also known as Airplane) is a good pose to begin working on your balance. Start by standing tall and lifting your arms to shoulder-height. Place your weight on one leg, lifting the opposite leg and leaning forward until you form a straight line. Hold for a few deep breathes, then repeat on the opposite side. Holding a balance pose will quickly make you aware of your alignment and body position. If you do any freeflying, adding balance work to your routine could give you the edge you’re looking for.
Enjoy your adventures in yoga! Test out the suggestions in this article and continue to experiment with different postures to find what works best for you. Always work at your own pace and stop if you experience any pain or discomfort. Remember, it’s about the journey, not the destination, so don’t worry if you’re not an expert right away. To learn more, consider attending a yoga class or inviting an instructor to teach at your dropzone. With practice you’ll start to notice improvement in your skydiving skills through increased mind-body awareness, balance, focus and control. Keeping your body strong and flexible will also help to protect you from hard openings and not-so-perfect landings.
Blue skies, or as we say in yoga, Namaste.
Nadene Beyerbach is a skydiver and yoga instructor. She is certified by Body Training Systems as a Group Centergy instructor and is a member of the Canadian Yoga Association. Learn more about skydiving specific yoga at Flex Fly.
Recommended Safety Articles for Safety Month
March is safety month, and what better time than just before the Northern Hemisphere's summer season to refresh yourself on information you may be rusty on, or just become more educated in the various safety aspects. Last year we published an article with what we felt were some of the most important safety related articles published on Dropzone.com at that time. Since then we have had several new pieces of information published, that may help you in staying safe out there, from canopy control to exit separation. We've also included several safety day events that are happening around the world later this month.
Here's a list of what we feel are 5 of the most important articles submitted over the past year:
Teaching Students To Navigate The Landing Pattern
In our most recently published safety article, coach and IAD instructor rated Corey Miller discusses some of the core aspects of landing patterns and how students are taught to navigate them. The article focuses specifically only the way instructors relay landing information to students over radio, while perhaps not allowing the students to truly learn for themselves what is important to look for and more closely address the subject of learning to land as opposed to being told how to land.
Staying Current During Winter
While this article may be a bit late for the northern hemisphere, winter is approaching down south and many useful tips can be learned. In the article, Brian Germain discusses the benefits to staying current during the off season and provides readers with a number of useful exercises that can be done to ensure optimum efficiency when you return to the sky. There's numerous images included to help you understand the setups and how they work, as well as exercises that addresses specific individual disciplines.
Exit Order Safety
Another article by Brian Germain, on the topic of exit order safety. The main focus of the article revolves around establishing and discussion the different types of jumpers and how their time under the plane may vary, and in turn to establish who should jump when and why. Not only is the direct exit from the aircraft addressed, but the article further discusses exit order importance with regards to exit timing and landing area. In the comments section, Brian goes on to acknowledge the possible ambiguity in the term "prop-blast penetration", used in the opening paragraph and says that the term can be replaced by such terms as "forward throw", "relative wind penetration" or the more self-explanatory "horizontal distance traveled".
When Should You Upsize Your Canopy
The first of two very useful articles on the topic of canopy size, this article was a combined effort by Melissa Lowe, Barry Williams and Jason Moledzki. It uses numbered points to address 10 factors that one should look at when considering canopy size. Most of the time the thought is on downsizing, as one feels more comfortable with their current setup, but for some people - the solution to many of their problems may actually be to head in the other direction and consider upsizing their canopy. There are numerous variables involved that could prompt one to require an upsizing, from gaining weight to even jumping at a higher elevation. At the end of the discussion, there is a Canopy Risk calculator (created by the USPA), which is intended to act as a guideline for you to see how much of a safety risk you are with your current setup and skill level.
It's Not Only Size That Matters - Thoughts on Canopy Upsizing
The other canopy upsizing article we featured was submitted by Dave Kottwitz and focuses more on retelling lessons learned when he upsized from a Triathlon 210, to a Spectre 230. On his third jump on the new, larger canopy Dave ended up breaking his leg in six places as well as dislocating his shoulder. In the article, he looks at what caused the problems and why one has to realize that upsizing your canopy is not an immediate guarantee for an increase in safety.

How Green Is My Skydive
by Bryan Burke
Images by Serge Shakuto
Friends, co-workers, and visitors to Skydive Arizona often comment on my interest in environmental topics and my rather restrained consumption of goods and energy, at least by American standards. This is in sharp contrast to my job, which is helping to run the biggest drop zone on the planet. I freely confess I have probably pumped more jet fuel into jump planes than anyone on earth. My fuel supplier is on speed dial and I order 8,000 gallons of jet fuel with a 15 second phone call. When things are busy I make that call two or three times a week. National Championships or Holiday Boogie busy? Every other day.
Yet we strive to keep our operations as efficient as possible. This is good business: burn less fuel, save money. Over time, every incremental gain in efficiency saves a few gallons of fuel here and there, just as people who plan their weekly driving to minimize miles and maximize efficiency will see huge savings over time, in thousands of small increments.
I reconcile my environmental leanings with my job in this manner: if someone else was doing it, a lot more fuel would be wasted. On a busy day I figure my expertise and commitment to efficiency saves Skydive Arizona at least two Otter loads worth of fuel consumption.
Just how much does our sport consume, and how does that compare to other ways oil is used or wasted? The numbers that follow are rough - sometimes very rough. Comparisons are difficult because as numbers get bigger and bigger, they tend to get harder to evaluate for accuracy. Even rough numbers will give the curious reader something to think about.
A Twin Otter burns about 30 gallons of jet fuel per load. If a drop zone operates at high efficiency, meaning most loads are close to full, that works out to about 1.4 to 1.5 gallons per jumper through the door. Other jump aircraft can be assumed to come in somewhere near that figure. A Cessna 182 burns a lot less per load in volume, but in terms of jumpers per load and time flown, they aren’t that different. Single engine turbines are probably about as efficient as it gets. But on the other hand, if you lose an engine on an Otter, you’re still in an airplane. If you lose the engine on a PAC or Caravan, you’re in a glider. That’s the main reason Skydive Arizona likes to run twin engine jump ships.
Gasoline turns into Carbon Dioxide at a rate of about one gallon into 20 pounds. Jet fuel is a little less clean, coming in at 21 pounds per gallon. Therefore, for every 100 jumps you make, about 140 gallons of fuel are burned, and 2,940 pounds of carbon dioxide are emitted. That’s one and a half tons. Does your log book suddenly feel heavier?
If you are having trouble wrapping your head around this figure, think about the raw energy involved in getting to altitude for a skydive. Imagine climbing 13,000 feet on foot, say from the lowlands around Mt. Rainier to the summit, which is 14,411 feet above sea level. Skydive Arizona is 1,500 feet above sea level, so when your altimeter says 13,000 on jump run, you’re at about the same height as the summit of Mt. Rainier. It would take several days, lots of meals, and enormous effort to get to that summit on foot. We do it in 15 minutes using a jump plane. How? By turning long dead plants and animals into explosive energy funneled through a turbine engine.
By USPA’s figures, approximately 3 million jumps per year were made in the USA between 2007 and 2016, which works out to 4,200,000 gallons of fuel and 88,200,000 pounds of CO2. That’s 44,100 tons of CO2 emitted by skydiving in America each year. Multiply that by ten years and we’re talking about a lot of emissions!
Let’s look even further back. Based on the jump estimates published in the April 2013 edition of Parachutist, annual jump numbers were at or below 2,000,000 until the late 80s, then climbed steadily throughout the 90s to their current levels. This makes sense. Prior to 1990, turbine aircraft were few, equipment less reliable and “one size fits all,” and training less sophisticated. People packed their own rigs. The pace was just a lot slower. Improvements in all these areas allowed the sport to reach out to a much broader demographic, resulting in more jumps made.
Driven by curiosity I started pulling numbers off USPA’s bar graph estimating number of jumps per year through 2013 and then added on through 2016. I made my best rounding-off estimate, coming up with about 70 million jumps in the history of US skydiving through 2016.
Obviously as data gets harder to read, or scarcer, numbers get fuzzier. Rough numbers suggest that about half of all jumps made in the world take place in the USA, so globally the skydiving total might come to about 140 million jumps made in the entire history of the sport.
That would mean that since 1960, the sport has burned through somewhere around
196,000,000 gallons of fuel, sending about 2,058,000 tons of CO2 out the exhaust pipes.
How do we stack up against other fuel figures?
The State of California estimates that 26,221,917 gallons per year are burned by Off Highway Vehicles, including motorcycles, ATVs, and snowmobiles. That’s almost six times the total national fuel consumption for skydiving. Put another way, OHV recreation in California alone burns more than twice as much fuel as the entire world’s skydiving.
The Department of Defense is the world’s single largest buyer of fossil fuels, with an estimated consumption as high as 14 million gallons per day. That’s more than all skydivers in the world use in a year and a half.
To fly Air Force 1 to Hawaii and back is about 50,000 gallons of fuel, or about 36,000 jumps – enough fuel to run a mid-sized seasonal drop zone for a year.
So much for motorized comparisons. Let’s look at some other fossil fuel uses.
In my home state of Arizona coal-generated electrical power produced 33,402,462 tons of CO2 in the year 2016. In just one year, that works out to 16 times the entire skydiving fuel burn, globally, in all of history.
The Earth Policy Institute estimates that America’s bottled water demand requires 714,000,000 gallons of oil annually for materials, packing, storage, transport, and cooling. That works out to more than 80 years of jumps for the entire skydiving world at current levels of jumping.
In a more graphic image, the Pacific Institute says each bottle of drinking water would have to be filled about ¼ of the way up with oil to represent the energy it used! A gallon is 3.8 liters (which makes one jump about 5.3 liters, don’t you love math?) so you only need to drink about twenty-one 1-liter bottles of water or other beverages to waste as much oil as one skydive. Of course, this doesn’t count the energy used to get you to the DZ and make your rig, jumpsuit, and accessory equipment. Or make the airplane, pave the runway, and put up the hangar.
Then comes the most disheartening element of fuel of all, the waste.
The Exxon Valdez spill released about 11,000,000 gallons of fuel over the space of a few days, enough to supply the entire global fleet of jump ships with fuel to fly for over a year. Exxon Valdez pales compared to the ten largest spills in history, all of which amounted to more than 45 million gallons each. The Deepwater Horizon spill alone was estimated to be approximately 200 million gallons, which would cover all the skydives ever made in the world, with about 30 million gallons left over for rigs and jumpsuits, and shipping them to customers.
Here’s my favorite. Around three billion gallons of gasoline are estimated to be wasted annually in the USA by cars idled in traffic congestion. If that amount was used for skydiving, the entire world could keep jumping at current levels for another 350 years. Daily fuel wasted in American traffic jams is the equivalent of almost six million jumps, or an entire year of the entire world’s estimated skydives.
I didn’t bring up all these very dark comparisons to make skydiving look green against a black background. There’s just no way we can rationalize skydiving into being green. To visualize just how much CO2 you generate on each jump, take that 29.4 pounds of CO2 and visualize it as six five-pound bags of charcoal briquets. Every jump, piling up on the DZ. If a bag of briquets is about one cubic foot, even a small drop zone would have a big pile out back. Skydive Arizona would have enough to fill four structures the size of the Colosseum of Rome, plus one Parthenon.
On the other hand, clearly skydiving is a small element of the whole picture. At the personal level, if you are the average American your annual car emissions are the equivalent of 340 skydives per year.
Even so, how can it be justified?
Philosophically, I do it this way. Play is a fundamental need coming in right after food, water, shelter, and security. Skydiving is high quality play, as good as it gets, but it comes with a cost. We can’t eliminate that cost, but we can mitigate it by simply focusing on eliminating waste and inefficiency throughout our society and off-setting the damage through environmental restoration.
Wasteful use of oil, such as bottled water, cars stuck in traffic, industrial scale agriculture, consumer culture in general, and incredibly fuel consumptive military adventures around the globe are examples of where savings could be had. These require some personal and political commitment to steer away from a system that practically glorifies waste. Why not take that lesson skydiving with you? Maybe carpool to the DZ with a friend. Take an apartment closer to your job to avoid that wasteful commute or use mass transit to get to work. Buy a couple re-useable five-gallon water jugs to fill at a local water filtration facility, then refill smaller bottles from that rather than buying a pack of one-liter bottles for the weekend at the DZ. Set your air conditioning a little higher in summer and a little lower in winter. Make your driving as purposeful and efficient as possible by planning your errands carefully and buying a car that is practical rather than a statement about image.
Buy less stuff. Not only does stuff need to be moved from source to consumer, it must be mined, refined, transported to manufacturing plants, and so on. An I-phone 5S has a carbon footprint of 150 pounds - five skydives worth of fuel.
I find that visualization really helps me make immediate choices. If you visualize the bottom quarter of that throw-way beverage bottle as filled with bitter jet fuel that you must drink, you’ll never want to touch it again. Sodas, same way. All that high fructose corn syrup was grown on highly mechanized farms before it was heated, treated, dyed, stuffed into a plastic bottle, and trucked to its air-conditioned home in a machine! When I contemplate a road trip, I visualize chucking a five-pound bag of charcoal out of my window every five miles and ask myself just how important that trip is to me. It’s harder to hide from the truth this way. I’ll still make the trip, but I allow myself only so much total annual fuel consumption – a budget, if you will – and making that trip will require that I tighten up consumption in other areas. Most Americans could reduce their overall consumption of energy, goods, and services by at least a third with a little thought and better practice.
Finally, don’t waste money and fuel on lousy skydives! Focus on well planned jumps that have a high probability of success and the feeling of reward that comes with that. You’ll learn faster, be safer, and maybe be just a tiny bit greener too! There’s an old saying, “Dirt dives are free.” Use your time on the ground wisely and your time in the air will be well spent.
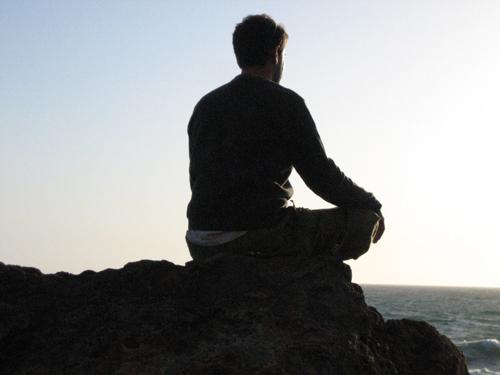
Meditation Preparation
Most skydivers exercise some form of mental preparation on the way to altitude. What most do not realize is how incredibly important this is. The mental state that we are in prior to exiting the airplane determines how we respond to any given situation, and this response is the most important contributing factor in how the situation ultimately evolves. In other words, mental preparation is every bit as important as a pin check.
What is Meditation?
It must first be clarified that the specific method of meditation is not important for the purposes of this discussion. There are many ways to attain a calm internal dynamic, and there are no wrong ways to meditate.
The goal of meditation is simple. We are striving to calm the mind, and develop a state that is devoid of thinking so we may calm back down to our state of basic sanity and health. This can be achieved through sitting practice, or through deliberate focus of attention toward a simple task such as walking or yoga. All of these pursuits result in the same kind of brain activity, which happens to be the direct opposite of the fear state.
In the emotional experience of fear, the brain becomes unbalanced. Certain parts of the cortex become deactivated, while others, most notably the older structures such as the Amygdala, become awakened. These ancient brain areas cause an unconscious escalation toward a preparatory "sympathetic" response, rather than the healing, balancing forces of our "parasympathetic" systems.
Interestingly, the first part of the brain to show significant diminished functionality during a fear response is the pre-frontal cortex. This is the newest part of the brain, responsible for higher cognitive functioning and is the source of willed action. This means that when we are afraid, we are no longer in control of our actions. Our choices gradually become dominated by our old brain that only knows three things: Fight, Flight and Freeze.
In walks the "parietal lobe" of the brain. Located on the crown of the head, this is the spatial orientation area. When the parietal lobe is working to help us orient ourselves in the world, we are not in a state of rest. When this part of the brain is under-stimulated or deprived of input, however, the quiescent (calming) systems of the mind and body take over to cool us down.
When the visual information coming into the visual cortex is interpreted by the parietal lobe, there are aspects of our visual experience that have not changed in the recent past. These aspects of our reality become "base frame", which is to say that we stop paying attention to them. When this occurs to a majority of the visual data, the parietal lobe is said to be in a state of "Deafferentation". (Newberg, 2001)
Deafferentation may be the cause of the altered states reported by mystics and spiritual seekers of all cultures. The common denominator across all the spiritual practices is the lack of changes in the data set coming into the visual cortex. This is accomplished simply by gazing in one particular direction for a long period of time.
When the parietal lobe is deprived of neural input, our parasympathetic processes begin to transform our state of consciousness, as demonstrated in brain scans such as SPECT and functional MRI. The resulting brain activity is most notably different from our normal waking consciousness, called "beta" activity. In fact, experienced meditators exhibit extremely balanced activity throughout the brain, referred to as "gamma synchrony" (Davidson, 2004). Further studies have shown that the balance of activity in the parietal lobe is significantly different from that experienced in "normal" consciousness (Newberg, 2002).
The interesting thing about the results of the many studies on meditation is the fact that repeated exposure to the meditative state seems to increase the effect. Buddhist monks with considerable meditation practice showed a much higher level of gamma synchrony than subjects with no previous experience (Davidson, 2005). It seems that practice really does make perfect.
What does this mean for you and me? These studies show that we are actually able to alter our brain's activity, and prevent stress from diminishing our cortical activity to the capacity of a caveman. All we need to do is take the time to practice a new way of operating our minds. Although there are many different methods of meditation, there are common aspects across the techniques that seem to create the most powerful effect. Following are some of the common elements.
Minimal change to the visual field, eyes open
Focusing on the breathing, particularly the out-breath
Balancing the posture to prevent physical discomfort
Letting go of thoughts as they come
Returning to the present moment
When you exit an aircraft in flight, you are going into battle. You must prepare in every way that you can to defend yourself against planetary impact. The most important tool of all is your awareness. When your mental speed increases due to fear or anything else, you are a danger to yourself and everyone near you.
How you find your way to the meditative state is your business. Your rituals are your personal avenue to the calm state, and it will look different for everyone. All that matters is that you take the time before each jump to cool out and let go of your thinking. That way, when some unconsidered possibility comes your way, you are relaxed and in balance, ready for anything.
BSG
Portions of this article are excerpts from Brian Germain's new book, Transcending Fear, 2nd edition. For more information regarding meditation as a tool for fear abatement and performance optimization, go to: www.TranscendingFEAR.com

Coaching in the World of Skydiving
A self-taught man usually has a poor teacher and a worse student. -Henny Youngman
Skydiving is a sport in which all all participants seek improvement in skill and confidence in their skills. Coaching plays a significant role in setting goals, testing the goals, and reviewing the tested goal. The illustrations in this article are from wingsuit students, and this conversation is predominantly directed towards coaches beyond Cat G/H USPA standards whether they’re teaching canopy control, freeflying, RW, wingsuiting, CRW, freestyle, accuracy, or any other aspect of the skydiving culture.
This article predominantly speaks to advanced coaching, yet the principles also apply to ISP coaching.
Students have a right to expect a quality experience. Students also have a right to expect that they’ll complete a training investment with greater skill, competence, knowledge, or a combination of abilities. Not only should coaches/instructors be well-versed and trained in how to instruct,they also must keep current in the sport using resources available via USPA, community education, advanced instruction, and reading books benefiting both the coach/instructor and the student in the long run. The USPA provides an excellent primer in the basics of training, yet it’s extremely beneficial if additional resources are pursued.
In short, being an effective coach/instructor involves continuing education and seeking the best methods and practices in teaching vs finding the fastest way to receive and keep a rating. A good coach or instructor creates the foundation upon which a student makes conscious decisions throughout their skydiving career.
A proper program provides kinesthetics, muscle memory training, horizontal and vertical training positions. Well-spent time on the ground provides for a much better in-air experience.
Unfortunately (as in any educational setting) there are coaches in skydiving who are good in the sport yet cannot skillfully teach. Many coaches do not understand the methodology behind practical training. Instead, students are taught using the theory of “this is how it worked for me, now you go do it.” A skilled trainer/coach/instructor, on the other hand, should be able to teach on virtually any topic to anyone, because they properly understand the process of breaking down a task or objective into a series of attainable goals that eventually combine into a skill or greater self-empowerment.
When one is seeking out a coach, identifying the person most naturally skilled in the objective you wish to achieve seems intuitive. However, selecting someone who is a world champion in this or an award winner of that, may actually be counter productive. The champion has spent most of their time refining the final 2% of their skill necessary to put them above another competitor. Further, they may not have the skill set to properly pass along their skill set, simply because it is self-contained, self-trained, and misses the logic and requirement to understand the skill from a no-knowledge starting point.
When one is making the decision to become a coach, having an instructional background or seeking training from a coaching professional or attending a few instructor-skills classes will make a significant difference in your effectiveness as a teacher. Most USPA Coach Examiners offer a basic level of instructional technique, yet it’s recommended that coaches receive additional training from outside educational resources.
Coaching isn’t about you. It’s about the student. Too much information too quickly is overwhelming and students are unable to retain key points. This is easily the number one mistake rookie coaches and instructors make when trying to help someone reach a goal. It’s especially true when helping someone new in their discipline or activity. While it seems like the right thing to do, it isn’t. Refrain from teaching about hips, head, arms, legs, feet, shoulders, elbows, knee pressure, stomach/core, and angular motion all at once.
It’s just not going to work.
A good coach understands biometrics, understands how to improve poor body position with a single (at most two) changes, and can process the cause of body position issues very quickly.
Additionally, a good instructor knows how to assess individual learning styles by asking a few short yet revealing questions. By applying techniques targeted for each person’s individual learning style, the training session becomes even more effective.
A capable and professional coach/instructor:
Has a series of goal-identifying questions.
Uses multi-layered listening skills.
Has learned both tactical and strategic coaching methods (do they have multiple methods to achieve a specific result?)
Discovers in-the-moment coaching opportunities that ignite an effective and fun dialog.
Crafts coaching approaches that lead to student success.
Understands the importance of “centering”.
Recognizes what levels of information are “TMI” at an individual level.
Can demonstrate flying skill to provide in-air feedback and proximity.
In the below video, a skydiver attended different wingsuit schools wanting to achieve the same objective. The two jumps are back to back. The video on the left is a coaching jump at School “A” and the right half of the video is the next coached jump/same task trained at School “B.”
School “B” uses a “pro-active coaching” method including kinesthetics/proprioception based on standard sport instruction.
The results demonstrate very different results for an identical task. Quality coaching does make a significant difference in speed and quality of advancement.
An “instructor” must determine whether they are a “Coach” or a “Counselor.” A coach provides direction to orient and train for a specific skill set agreed upon by student and coach. Coaching is a mentorship process. A counselor, on the other hand, is a supportive process where the student is largely responsible for self-training and obtains feedback from a peer more skilled in the task or discipline.
Using the above video, note the proximity of the coach to the student in the “B” side of the video. The coach knows in advance of where the student will be (In skydive coaching, the student is virtually always the base of the coached skydive). The student has specific tasks to perform that are tested on the ground prior to boarding aircraft. The coach has specific responses to perform when the student performs their portion of the objective. During the debrief, challenges to achieving the task are identified and discussed by the coach and student, with both parties providing input and feedback during the debrief process.
The coach is causing a poor body response/result via their position relative to the student, and providing incorrect hand signals. The student is forced to look up, creating a brake. The end result in this instance is deep potato-chipping and instability (as seen in the video).
SAFETY
A coach’s foremost responsibility is to the safety of the student. A primary motivation for students is to not only progress in their discipline of choice, but to also be safe in the pursuit of excellence.
In the above video, the coach intentionally flies into a hazardous situation where both he and the student are at risk (Left side of display. Aside from a violation of the FARS (in the USA), diving after a student into clouds is not something any coach should be doing. A coach should never add risk to a jump but rather, take all available steps to decrease risk to a student and themselves.
The coach/student combination on the right side of the image demonstrate proper proximity, keeping both student and coach in a safe environment.
Coaches/instructors must possess appropriate skills that ensure safe practices are at the fore of every jump.
In the above video (FFC-4) the coach intentionally flies into a high-risk situation. This is unacceptable. Aside from a violation of the FARS (in the USA), diving after a student into clouds is not something any coach should be doing. A coach should never add risk to a jump but rather, take all available steps to decrease risk to a student and themselves. Coaches/instructors must possess appropriate skills that ensure safe practices are at the fore of every jump.
BRIEF/DEBRIEF
New coaches often discover where they may have lacked in communicative skills during the initial training process (although these errors typically make themselves known in the ground test/dirt-dive phase) and find themselves improving as a result of beginning from a consistent training/debriefing method. A debrief session usually begins by asking the student for a self-assessment of the jump, and finishes by showing video after the coach has provided observations. This is also where professional instructors summarize the experience using the GROW method (Assess the Goal vs the Reality of the jump, identifying the Obstacles/Options challenging the task, and what our Way forward to success should be) or some facsimile of the process.
On the left is School “A” and on the right is School “B,” both being First Flight Course/wingsuit training examples. In the video on the right, the coach is flying to the student (student is base) and maintains proximity in order to best provide hand signals and responses to the student’s maneuvers. For video debriefing, the instructor should be close to best identify body position changes and how they affect flight.
Not being near the student also creates an unnecessary risk to everyone on the jump.
STUDENTS
When choosing a coach, look for;
Reputation for quality of instruction/experience in the discipline
A long-term safety record
Measurable tasks and progression that achieves a specific, desired outcome or finishing point.
Access to supplemental or specialized equipment (if necessary)
Availability, flexibility, and ability to create a program suited to individual needs
Cost of training/Value compared to cost
When meeting with a coach:
Set goals. A good coach will help define what’s achievable.
Define exactly how you and the coach will attain the goal. People are unique, and have different ways they learn, different paces at which they learn. Can the coach tailor their program to meet your needs?
Be sure that each jump includes a comprehensive debrief. This is critical to any progression in any discipline.
Remember that all training is not equal. Quality coaching may cost a small bit more, particularly discipline or activity-specific training. If it’s skill advancement or safety-related, it’s virtually always worth the minimally extra cost.
Receiving and providing coaching should be a win/win experience for both parties . Adding to a skillset benefits everyone in the sport, and improves the skill and safety culture within our sport.
Blue skies!
~dse
Further Reading:
http://www.grapplearts.com/Blog/2012/04/sensory-learning-styles/
http://www.lbspractitionertraining.com/pd-courses/practitioners/working-with-adult-learners/257-25-kinesthetic-learners
http://serendip.brynmawr.edu/exchange/node/1699
https://www.coachup.com/benefits_of_private_coaching
http://www.brianmac.co.uk/articles/article017.htm
About DSE:
Douglas Spotted Eagle/DSE (D-29060) is a trainer, producing and developing training systems and curricula for software and hardware developers and manufacturers such as Sony, Adobe, Canopus, Avid, Ulead, Panasonic, and Apple. He has developed standardized teaching methods specifically targeted to the skydiving environment, and is a full-time instructor at Skydive Elsinore as a Coach Examiner, AFFI, and PRO-rated skydiver.
The Skydive Elsinore Wingsuit School has instructed nearly 800 First Flight Courses, and over 4000 Wingsuit training jumps, and has developed a standardized training program used by many dropzones around the world.