0

Disciplines

    From Tunnel to Sky

    Training Wind Tunnel Students to be Great Skydiving Students
    by Kirk Verner and Gary Peek
    Photos by Michael Breweri
    Tunnel student Emily Young
      The advent of vertical wind tunnels has created not only an incredible new air sport, but has also provided us with a very realistic simulation of freefall skydiving. This simulation can be used to provide both accurate and efficient training for skydiving students.
    As wind tunnels proliferate around the world, more and more people are going to begin skydiving having already experienced flight in a wind tunnel. Many of them will come to skydiving having performed maneuvers that skydiving students experience not only in their initial skydives, but in their more advanced training jumps as well.
    At some point, nearly every dropzone and skydiving instructor will need to plan how to use this technology to both enhance and replace traditional training for freefall.
    Advice for the tunnel instructor:
    Keep in mind that the sport of skydiving and the skydiving industry are extremely concerned about legal issues and liability. Trusting a student's instruction outside of the normal skydiving channels is a huge leap of faith for both dropzones and skydiving instructors. It may be a long time before tunnel training for skydiving gains widespread acceptance, so have patience and try to cover all the bases during this transition.
    In all likelihood, a tunnel instructor is going to have to hold a skydiving instructional rating from a national organization in order for their instruction to be used toward skydiving, for example, an USPA AFF instructional rating in the US.
    Logging tunnel skills and experience
    In order for a person trained in a tunnel to transfer their skills and experience to skydiving, they are going to need some reasonable verification of their training. Tunnel management and tunnel instructors would do well to create their own logbook to help their students take proof of their time and skills to dropzones and skydiving instructors. This logbook should include items like the date, location, flight time, maneuvers, and instructor signature, but could also include multiple ways to contact the instructor, since using proof of tunnel training will be new to many dropzones and skydiving instructors. They will likely feel much more comfortable with their skydiving student if they can discuss their tunnel training with the tunnel instructor if needed. If a specialized tunnel logbook is not available, a skydiving logbook could be used just as well, with the advantage of the student already having a logbook when they start skydiving.
    Suggested progression for a tunnel student working toward being a skydiving student
      In order to allow an AFF instructor who does not have tunnel flying experience to feel comfortable with the progression of students you have trained in the tunnel, there are a number of skills that the student should be able to demonstrate. These can range from basic stability all the way to advanced maneuvers, depending on the amount of time spent on instruction in the tunnel.
    In most cases, a single phase of tunnel training will be all that a potential skydiving student will need. If the goal of the tunnel student is to skydive, they may be eager to do that as soon as possible.
    In some cases however, a tunnel student may have begun tunnel flying without the goal of skydiving in mind, and may have accumulated significant time in the tunnel before deciding to skydive. Or, they may prefer the efficiency of the tunnel to learn the more advanced maneuvers before skydiving. If the skills outlined in a second phase of training are learned, the student may be able to advance very quickly in their skydiving progression.
    Phase 1 -
    Phase 1 training would include basic stability, neutral body position, heading control, fall rate control, forward and backward motion, docking, simulated altimeter checks, and simulated pilot chute throws. This training can be used to provide the student with the basic stability and maneuvers to allow them to jump with a single AFF instructor and to quickly advance to skydives and aircraft exits that will deliberately introduce instability.
    Phase 2 -
    Phase 2 training would include controlled turns, intentional unstable maneuvers, "delta" and tracking body positions, and the backslide body position. This additional training can be used to allow the student to quickly perform the maneuvers necessary to advance to the "coached" phase of skydiving training.
      Ways to add realism to skydiving training in a tunnel
    In order to provide a more realistic simulation of skydiving, a tunnel instructor may have their student wear a skydiving rig along with one of the "Tunnel Wrap" or "Rig Condom" devices, used to enclose skydiving rigs in order to prevent accidental deployments when worn in tunnels. Also, a simulated altimeter training device can be helpful to allow the student to practice the position of their arm when checking altitude.
    Advice for the skydiving instructor:
    For legal liability reasons, all skydiving students need to be given instruction in all areas related to making a skydive. However, most of us realize that students that have been trained in a wind tunnel, especially in skills related to skydiving, are going to progress through the skydiving freefall skills at a rate that no traditional skydiving student could. This may allow for a considerable savings to the student in time and number of jumps.
    In all likelihood, a skydiving instructor is going to have to hold an instructional rating from a national organization in order to be be allowed to train students, for example, an USPA AFF instructional rating in the US.
    Aircraft
    A skydiving student of any kind may have no knowledge at all about aircraft and the dangers that they can present. Students need to know how to avoid propellers, enter the aircraft and position themselves properly, to protect their handles, and to find and wear their seatbelts. Remember that tunnel students are probably not used to having a rig on their back and may not realize what the flaps are rubbing up against.
    Since most skydiving exits from aircraft are difficult to simulate in a tunnel, a skydiving instructor will need to tell the student what to expect for a particular exit. The advantage for a tunnel trained student is that if an exit causes instability, the student will be able to correct this almost immediately and quickly continue with the skydive.
    Gear
    One thing that many tunnel students are unlikely to have experienced is having a parachute system on their back while flying. If the student rig is sized well for the student and adjusted well on their back, this will likely not be an issue at all since they have learned and felt a great deal of stability in their body during tunnel flight. However, if your dropzone is one of those who still uses one-size-fits-all student rigs with large parachute for all students you will need to pay close attention to the adjustment of the rig if the student is a small person.
    If a tunnel student has been flying in a tunnel for a while, or is very serious about tunnel flying, they may already have their own jumpsuit, helmet, and goggles. Their jumpsuit may or may not have grippers, so an instructor may not be able to easily take a grip on the student, but then again, why might they need to? If the student has enough tunnel time it is very unlikely that the instructor would need to take grips to control the student, but perhaps they would feel uncomfortable without grippers. If the student is required to wear the dropzone's jumpsuit it should be appropriately sized and probably be rather tight unless they are a larger student.
    If the student's personal helmet and eye protection is appropriate for skydiving then having them use their own gear would be best. But if the student is required to wear a radio for canopy guidance there might be some serious tradeoffs. If the dropzone uses radios that are mounted on the helmet, the student may need to wear the dropzone helmet and goggles. However, if the radio is mounted on the student's chest strap, then perhaps telling the student to raise the face shield on their helmet once under canopy to hear the radio better might be sufficient.
    Where will they be placed in our progression?
    One of the first questions that your student or your dropzone owner may ask about a tunnel trained student is "With their experience flying their body, what "level" or what "category" are we going to have them start with?" (In reality, you may need to create a level or category specifically for them for at least a few jumps.)
    Realize that there will be a huge difference between a student that has 15 minutes in a tunnel compared to one that has several hours. If the student's tunnel instructors have done specific training in preparation for their student learning to skydive, there may actually be only a few freefall related skills for the student to learn and demonstrate.
    Body Position
    When you are initially training your student and practicing a skydive on a creeper or other training device, you may see your tunnel trained student use a body position that is different than what you would normally train your skydiving student to use. Well, if your student has more than a few minutes of tunnel time using that body position, then you should usually just let them continue to use it. Trying to make them do something different that what they were initially trained to do will waste time and may make their performance worse. This also includes some maneuvers such as turns, which may be taught differently by tunnel instructors.
    Freefall maneuvers
    Most freefall maneuvers used in skydiving can be simulated and practiced in a tunnel, perhaps with the exception of the lengthy movements made during tracking or backsliding. Although tracking can be simulated in a tunnel, the skydiving instructor will still need to make sure that the student can track in a straight line in order to provide separation before deploying a parachute.
    Most skydiving instructors will be concerned with the altitude awareness of their tunnel trained student, and perhaps for good reason, given the extended period of working time provided by a tunnel. However, the normal training given to skydiving students regarding the dive flow should give the student sufficient time and altitude awareness. A simulated altimeter training device with an altitude that can be set to count down would be extremely valuable.
    Canopy control
    Knowledge of parachutes and how to fly them safely is something that no tunnel student will know until they are trained on it. All of the normal canopy training subjects will need to be taught. The good news is that the increased confidence that a tunnel trained student has in their freefall skills will allow them to relax and to use more of their energy and thought learning canopy skills.
    If your tunnel student turned skydiver is not catching on to canopy control after having mastered the freefall skills, you can always do what you would do to a student that started as a skydiver. They can always do a number of clear-and-pulls and concentrate on improving their canopy skills. This may also provided them with more opportunity to practice spotting in the aircraft.
    About the Authors
    Kirk Verner and Gary Peek have known each other for over 30 years. They both learned to skydive in the early 1980's at Archway Skydiving Centre in Sparta, Illinois, owned by Kirk's father Dave Verner. Both Kirk and Gary are on the United States Parachute Association Board of Directors, Kirk as a National Director and Gary as the Central Regional Director.
    Kirk managed the Paraclete wind tunnel for 10 years and now manages the Paraclete dropzone. Kirk is an active AFF instructor and teaches students trained in the tunnel to be skydivers using Paracletes' tunnel to skydiving program. Kirk is also a world champion formation skydiver, having been on the Arizona Airspeed teams for 13 years.
    Gary is an active Tandem and AFF instructor, and teaches students locally, as well as when he visits dropzones in the region. He is also a Master Parachute Rigger, a Commercial Pilot, and Cessna 182 jump pilot.

    By admin, in Disciplines,

    How To Get That Wind Tunnel Job - Vince Arnone Talks You In


    Image by Wolfgang Lienbacher
    When it comes to the windytube, Vince Arnone has a few solid miles under his belt. He’s worked in the wind tunnel industry since 2010 (and in the skydiving world for a few more years before even that). He runs Indoor Skydiving Source, a community-based resource for indoor skydiving and bodyflight.
    During his many years as a tunnel instructor--working with first-time flyers and skydivers alike--he has constantly been approached by wanna-be tunnel rats. If you’re one of them, he has some advice to share with you. I asked him some questions about it, and here’s what he had to say.
    Q: What’s the first step? Are there prerequisites?
    Vince: Just apply!
    At the end of the day, great timing and a solid application really is the key to working in the wind tunnel. Beyond that, there are a few important factors to consider before filling out that app.
    The physical requirements of the job should be the first thing you consider before seriously looking at getting a job as a wind tunnel instructor. Being a tunnel instructor, and especially working with first-time flyers, is a physically demanding job. Sometimes you work with children, but sometimes a 250lb man walks through the door. They are both your responsibility, and bothcan kick your ass!
    Both the IBA and Tunnel Instructor rating programs administer a physical fitness test that you must pass in order to be an instructor. The test normally includes pull-ups, sit-ups and running. You don't need to be superhuman, but being generally in shape is a good starter.
    Q: Do you need a lot of previous tunnel experience? Is it, like, only shredders need apply?
    Vince: No. The training will be part of the job, and it’s an investment. It goes like this.
    In order to work in a wind tunnel with first-time flyers, you need a tunnel instructor rating. Earning this rating requires a 3-4 week course which teaches you how to safely introduce and monitor a flyer's first flight. Most wind tunnels include this as part of your initial hiring period.
    You might have to sign a contract or have some money withheld from your paychecks to pay for the training, but rarely do you have to pay out-of-pocket for it. Training programs like this are designed to take anyone off the street with no previous experience and set them up with the key skills they need for the job.
    Q: Do you have any insider tips that might give an application the edge?
    Vince: If you remember one thing from this article, remember this: a staff at a wind tunnel is a close-knit team, and the team has to work well together. Because of this fact, knowing and having a standing relationship with other instructors or managers can make the difference when applying.
    A hiring manager is always looking for a good fit to the team, not just a skilled individual. This means they are looking for someone who will mesh well with the other instructors on the staff and work hard. This is the most important thing to remember when applying.
    If you don't know anyone, but you know the job is for you, don't worry! I don't mean that you have to be long-time buddies with someone at the tunnel in order to get a job. Hang around. Get to know the staff at the tunnel you want to work in. Show interest. Small acts like this will go a long way, and you just might learn about the tunnel and bodyflight in the process.
    Q: What should a potential tunnel employee do to prepare for the interview?
    Vince: Treat it like a “real interview.” Don’t be too casual about it. All the standard job application best practices apply.
    The opportunity to work in the wind tunnel is a unique -- and possibly life-changing -- one. Approach it with a good attitude and tons of passion, and see where it might take you. Good luck!
    Q: What are the major differences between tunnels for flyers with an eye on growth?
    Vince: Back when I first started--I guess I’m sounding old now--there were just so few tunnel jobs out there. The number of tunnels from 1982 to the year 2011 was around 40. From 2012 to 2015, that number jumped to around 80. Today, looking at the database, there are 113.
    So rather than jumping at ANY possibility--as someone who sees the tunnel job as an opportunity to grow their personal skills and maybe even start coaching--it really matters which tunnel you land at.
    The days where everyone would flock to a single tunnel because it was the only tunnel, only high speed tunnel, or only 14 ft tunnel, are long gone. There are more coming, too; since 2013, the number of tunnels opening each year has also exploded. This also means the number of instructor positions has grown. Just by the numbers, setting out to get an instructor job is more likely to end successfully. This also means that the experienced flying community has spread out.
    Consider working at a tunnel that mainly serves first-time clientele. There will be lower experienced flyer traffic, and the other instructors might not be flying- and coaching-focused. That’s a much different environment than a tunnel that sees experienced flyers as a larger percentage of their business.
    Working with experienced flyers and other coaches will play a big role in your personal progression. Surrounding yourself with people who have similar goals will immerse you in the culture. Consider the location and culture of the tunnel you land at. A location that will support your flying goals will help you reach them much quicker--and this is about you going all-in for personal development, isn’t it?

    By nettenette, in Disciplines,

    Useful Training for BASE, Right There on the Dropzone

    Courtesy Apex BASE: Pascal Constantineau flying his FLiK at Skydive Perris during his BASE canopy course with Dimitrije Dadic. (Of note: Square1 offers discounted rental rigs to people taking Dimitrije’s BASE canopy courses.)
    If you’re like most people, your idea of dropzone training for the stresses of the BASE environment involves trying to look nonchalant when you climb into a hot-air balloon basket. If you have no access to such a thing (and/or if you’re significantly smarter than the average bear) you’re probably looking for more. You know you need a way to get as many jumps under your belt as possible with your BASE parachute proudly overhead--preferably, with a reserve on standby. But how?
    “Skydiving your BASE canopy is by far the best way to learn canopy skills for BASE jumping before making a BASE jump,” says Steve Doherty, who served as Director of Operations of Apex BASE for five years. “In a perfect world, everyone would be able to jump their BASE canopy skydiving--a lot--before they ever took it out on a BASE jump.”
    Ideally, if you’re serious about this, you’re not just swapping gear willy-nilly on every dropzone day. You have a dedicated skydiving system, configured for the purpose. Here’s how to build it.
    The Canopy
    “It's only with the introduction of ultralight canopies that jumping BASE canopies at the dropzone has become a possible and useful activity,” he continues. “Anything you can use in the BASE environment, you can use in the skydiving environment--of course, in the skydiving environment, you have to manage your opening speed.”
    “If you take your whole BASE setup: mesh slider, BASE bridle and BASE pilot chute, you're going to have a very brisk skydiving opening,” he adds. “In our collective experience at Apex, we found that you can make two or three slider-up skydives on this kind of setup in a day and it's okay. If you were going to make five to ten, you need to start making modifications.”
    As any seasoned BASE jumper will tell you, nothing flies quite like an actual BASE canopy--so the goal is to get as close to it as possible. Athletes who want to train BASE canopy skills should choose an ultralight canopy and seek a skydiving container that fits it.
    That said: Athletes who want to get into flying a wingsuit with the intention of BASE jumping but don’t want to jump a BASE-sized canopy for all their wingsuit skydiving training now have some options.“On today’s market, you can find seven-cell, BASE-type canopies created for the skydiving environment. The benefit is that--while these canopies do have some of the distinctive BASE properties--you can jump all day and not feel it when you wake up the next morning.
    The Risers
    Forward-facing risers are more appropriate in the skydiving environment for a simple reason: the possibility of a horseshoe malfunction. During a horseshoe malfunction, forward-facing risers are the only type that you can reliably cut away.
    “During a horseshoe malfunction with rear-facing risers,” Doherty notes, “Your body will be in the way of the twisting movement that the three-rings need to do in order to release. So, when you’re jumping a two-parachute system, we always recommend jumping forward-facing risers.”
    The Container
    As you’ve certainly noticed by now: Apart from student gear, most of the containers available for sport use won't fit BASE canopies. According to Apex, the best way around that is to jump an ultra-light parachute. (Take, for instance, the Lobo: a 250 can pack up to the size of a skydiving 180.)
    “More and more drop zones are coming around to the idea of BASE jumping,” Doherty continues, “That is to say: Not assuming that it’s attracting bad publicity to the sport of skydiving. Nowadays, they're more willing to let their student gear be used. Here in Southern California, we suggest going to Square One. They have a huge selection of demo equipment, so it’s relatively easy to get the largest demo container they have and pack into it the largest BASE canopy that fits.”
    Most drop zones have a container that's sized for a 180/200. The Apex team have, however, not been able to find a non-tandem or -military container able to fit anything bigger than a 300+ made from F-111 fabric. (UltraLite PN-9 is a different story, and large canopies are more easily accommodated.)
    The D-Bag
    Talk to your local CReW dogs: You don't have to use a deployment bag when you skydive.
    “You can free-pack your BASE canopy into a properly-sized skydiving container, just like you do in your BASE container,” he says, “except the rectangle is a lot smaller, so you’ll have to stack it up.”
    If that sounds a little unnerving, ask for help. Doherty notes that a lot of the older generations of CReW skydivers are quite familiar with that deployment method, so ask them for advice.
    If you do use a D-bag, he insists that you’re using it correctly. Take note of what BASE canopy you're using. Not all BASE manufacturers use a metal ring at the top of the parachute. Some do use a metal ring, just like you'd find on a skydiving canopy. The Blackjack and Ace canopies built by Asylum also use a metal ring. Atair doesn't. And Apex doesn’t, either. To get this right, use a metal connect link to prevent the canopy from getting sucked up into the grommet of the bag. (Very importantly, the link needs to be inside the bag.)
    The Pilot Chute
    You are going to want to use a slightly larger pilot chute for a BASE canopy than you would if you were jumping a skydiving canopy, because the BASE canopy itself is much larger.
    “You don't need to use the same-sized pilot chute that you use in the BASE environment,” Doherty notes, “We recommend a 32" non-collapsible pilot chute for skydiving. It's much larger than a sky pilot chute, which is typically 28 inches.”
    The Bridle“We typically use a longer bridle in BASE jumping,” Doherty says. “You don't need to take the BASE bridle over to make the BASE canopy work. You'd want to use the bridle that was appropriate for whatever discipline you were doing in skydiving. We recommend using a normal skydiving bridle for normal skydiving freefalls. If you’re wingsuiting, we recommend using whatever bridle length you'd normally use for wingsuiting in the BASE environment.”
    The Slider
    You can use a mesh slider, but it’s not ideal.
    “In BASE, we’re so close to the ground that we tolerate--even welcome--brisk openings,” Doherty says. “But if you make five jumps on a mesh slider at terminal, you’re going to feel it. You won’t regret using a sail slider in the skydiving environment. That said: If you’re making hop-and-pops, a mesh slider is not a problem.”
    The Jumps
    Once you’re all geared up, there’s only one place to go: Up. And when you get there, you’ll have a few more things to think about.
    “When you're jumping a BASE canopy on the dropzone, you have to think about where you're going to be in the pattern,” Doherty advises. “You're jumping a parachute that's much larger than the other parachutes around you and you're going to descend a lot slower. Especially at large dropzones where they’re flying multiple aircraft and doing multiple load drops over the same area, this can get problematic. Stay out of the way.”
    The Mentality
    If you have access to a candy-colored, fire-powered dead-air machine, then by all means use it--but don’t rely on them as the sole training platform for your BASE-jumping skills. Commit to fine-tuning your BASE canopy skills (and that impossible-to-exaggerate-the-importance-of accuracy) before and between jumps from objects. Your bones, your friends and your family will thank you. And--as always--talk to your mentor and/or gear manufacturer to clarify any points that leave you unclear.

    By admin, in Disciplines,

    How to Tube: Buying and Using Time

    Tunnel time is not cheap. For casual flyers there is no real way to make it be cheap, short of selling your soul to a tunnel company for a position as an instructor. However, there are a few things to learn about the process of procuring time that can help make every minute as useful as possible.
    The important bit of information here is the more time you buy the less expensive it is per minute.
    For example - if you but 10 minutes of flying you will be paying a standard rate, but if you buy an hour you will qualify for a slightly cheaper category and save a small percentage on each minute. If you buy five hours you might qualify for the next cheapest level and save a little more. To qualify for the lowest rate that the facility offers you may have to commit to something like 20 hours of time. This is a lot of money to stump up for tunnel flying but if you are committed to getting good and have to cash to invest in it early then the savings start to make sense.
    Generally speaking there are a couple of ways to buy time - either from a tunnel or from a coach.
    Coaches make their money by purchasing time at the cheapest per-minute rate then selling it on to their students at a higher price and banking the difference as the fee for their services.
    As would make sense for an industry where different standards and levels of experience are available - coaching fees are not all the same. A multiple world champion with many years of experience might cost you more than a new instructor with a year of working at the tunnel under their belt. However, a general rule is:
    If you are buying smaller amounts of time the difference in price of buying form a tunnel or from a coach is negligible.
    
The advantage of buying from a coach:
    You get to learn stuff in a structured and efficient manner and you do not rely on the uncertain system of being coached by tunnel instructors.
    The advantage of buying from a tunnel:
    You may be at the stage in your flying where you can choose wether you need coaching or not. If you just want to zoom around practice without having to talk to anybody then you can. If you do want coaching for a session that you have already booked you can pay someone separately as a separate arrangement. If you want to invite your friends for some group play you can.
    Important: If you are relying on the tunnels instructors to teach you, remember that they learn on the job and might not be qualified to spot what you want to learn. Tunnel facilities often have a system with which to request an instructor of a high enough level to cover what you need, so don’t forget to ask (A good coach understands this system and will make the appropriate arrangements automatically). Remember that the more advanced you get the greater the chance that a tunnel instructor will not be able to teach you.
    For the majority of casual flyers it makes the most sense to buy time through a coach. This is because the best way to learn at the tunnel is from and experienced flyer that can effectively and efficiently communicate ideas, demonstrate techniques and provide a quality one-on-one service. The pool of instructors at your local tube may well be good coaches, but are often simply too busy to offer sufficient depth - and if the money you are is not really any different then the choice is an easy one.
    Some Tips:
    Look out for loopholes: If the tunnel is running a special promotion you might be a be able to take advantage of it. Buy-One-Get-One-Free on introductory flight packages you say? How many can you buy? Likely nobody cares that this is not proper pro-flyer time - certainly not the instructors. They would probably much prefer to teach you something for a session than process a family of newbies.
    Events: Tunnels might run special events for group flying - tunnel scrambles, night parties etc. Organised group events can be bags of fun and a great way to find flyers of a similar level to practice with.
    Last minute rates: If a tunnel has a particularly quiet period or a big group cancels at the last minute they might offer the empty time at a heavily discounted rate. This is often a regulars-only type thing - make nice with the right people and be sure the tunnel has your contact details.
    Locations: There are a lot of tunnels now, and a lot more on the way. Some places where you can train are cheap to fly to and cheap to live in. Depending on how much time you want to do it can cost less to go abroad than visit your closest tunnel. Plus you get to see somewhere else and maybe learn some stuff.

    By joelstrickland, in Disciplines,

    Competition Rules for Atmonauti Skydiving

    1. AUTHORITY
    The competition will be conducted under the authority granted by the Atmonauti
    Committee of the Sports Skydivers Association. All participants accept these rules and
    regulations as binding by registering as a competitor for the competition.
    2. DEFINITIONS
    2.1 Atmonauti Body Position
    Atmonauti is the term given to the technique that intentionally utilises the torso (as
    an aerofoil) to generate lift, while ‘diving’ at an angle of between 30deg – 75deg to
    generate relative wind required for lift.
    Use of the torso to achieve lift allows freedom of limbs to achieve a range of
    handgrips and foot docks, essential for the ARW2 and SFIDA competition formats.
    2.2 Atmonauti Relative Work
    2.2.1 Sequences and Blocks, including transitions and inters, to include
    Frontmonauti, Backmonauti and Footmonauti positions.
    2.2.1.1 Frontmonauti: Head first into relative wind, torso to earth
    2.2.1.2 Backmonauti: Head first into relative wind, back to earth
    2.2.1.3 Footmonauti: Feet first into relative wind, back to earth
    2.3 SFIDA “Challenge”
    Neutral Navigator sets direction, angle and speed, Competitors compete side by
    side of the Navigator and aim to score highest points for that jump by virtue of
    preset docks and grips, to include transitions.
    2.4 Team
    An Atmonauti Relative Work Team will consist of two (2) competitors and a
    videographer. For SFIDA no team will exist and two (2) competitors will compete
    against each other navigated by an appointed qualified navigator. The
    Videographer will be independent from the competitors.
    Grip and docks
    2.4.1 Grip: a recognisable stationary contact of the hand or hands of one
    competitor on a specified part of the body or harness of the other
    competitor, executed in a controlled manner.
    2.4.2 Dock: A recognisable stationary contact of the foot or feet of the one
    competitor on a specified part of the body or harness of the other
    competitor, executed in a controlled manner.
    2.5 Heading
    The direction in which the “leading edge” of the performer faces. further defined in
    terms of Backmonauti and Frontmonauti positions
    2.6 Leading edge
    A specific body part of the performer (either head or feet) which is the first point of
    contact with the relative wind generated from the angle of attack
    2.6.1 Frontmonauti: Head first into relative wind, torso to earth
    2.6.2 Backmonauti: Head first into relative wind, back to earth
    2.6.3 Footmonauti: Feet first into relative wind, back to earth
    2.7 Axis
    2.7.1 3 axis – F (flight direction), P (Perpendicular to F) & H (Horizontal)
    2.8 Atmonauti position
    Objective is to achieve head-on relative wind (or a custom “tube”) at an angle of
    between 30deg – 75deg to the ground, with horizontal movement in relation to the
    ground, whilst searching for lift with the torso - freeing up the limbs to achieve hand
    grips and foot docks.
    2.9 Move
    A change in body position, and/or a rotation around one or more of the three body
    axes or a static pose.
    2.10 Navigator
    Neutral Navigator responsible for setting direction, angle and speed. No eye contact
    or assistance should be present.
    2.11 No Fly Zone Frontmonauti<.p>
    Behind, below, and not on head level during the approach (i.e. must be above,
    ahead and on head level).
    2.12 No Fly Zone Backmonauti
    Ahead, above, and not on head level during the approach (i.e. must be below,
    behind and on head level).
    2.13 Head level
    The level of the approaches - utilising the head as reference in relation to the angle
    of attack set by Navigator.
    2.14 Total Separation
    Is when all competitors show at one point in time that they have released all their
    grips and no part of their arms or body have contact with another body.
    2.15 Inter
    Is an intermediate requirement within a block sequence which must be performed
    as depicted in the dive pool.
    2.16 Sequence
    Is a series of random formations/free moves and block sequences which are
    designated to be performed on a specific jump.
    2.17 Scoring move/formation
    Is a move which is correctly completed and clearly presented either as a free move
    or within a block sequence as depicted in the dive pool, and which, apart from the
    first move after exit, must be preceded by a correctly completed and clearly
    presented total separation or inter, as appropriate
    2.18 Infringement
    2.18.1 An incorrect or incomplete formation which is followed within working time
    by either
    2.18.1.1 Total separation or,

    2.18.1.2 An inter, whether correct or not.
    2.18.2 A correctly completed formation preceded by an incorrect inter or incorrect
    total separation
    2.18.3 A formation, inter, or total separation not clearly presented
    2.18.4 In SFIDA, where one or both competitors cause instability to the navigator,
    adversely affecting the other competitor on the same jump.
    2.19 Omission
    2.19.1 A formation or inter missing from the draw sequence
    2.19.2 No clear intent to build the correct formation or inter is seen and another
    formation or inter is presented and there is an advantage to the team
    resulting from the substitution.
    2.20 Working Time
    Is the period of time during which teams are scored on a jump which starts the first
    moment and competitor (other than the videographer) separates from the aircraft,
    as determined by the Judges and terminates a number of seconds later as specified
    in chapter 3.
    2.21 NV
    Moves, inters, or total separations not visible on screen due to meteorological
    conditions, or factors relating to the videographer's freefall video equipment that
    cannot be controlled.
    2.22 Rounds
    Minimum 1 round to call the meet.
    2.23 Backmonauti
    The performer will be on heading flying on his back with his back towards the earth.
    2.24 Frontmonauti
    The performer will be on heading flying at the defined angle as per atmonauti
    definition with his back towards the sky.
    2.25 Footmonauti
    The performer will be on heading feet-first flying at the defined angle as per
    atmonauti definition with his back towards the ground.
    2.26 Formation
    A record attempt formation is considered as built when two or more competitors fly
    on heading with a predefined dock or grip held for minimum 3 seconds, and is the
    basis for the Atmonauti Linked National/World Records. A free move formation,
    however, is merely a recognisable stationary contact of the hand/hands or foot/feet
    – and does not require to be held for 3 seconds as per record attempts.
    3. ROUTINES
    3.1 The discipline is comprised of SFIDA and Atmonauti Relative Work.
    3.2 Number of rounds:
    a. SFIDA: a total of 4 competition rounds will be completed with a minimum of one
    round to be completed before a meet can be called.

    b. ARW: a total of 5 competition rounds will be completed with a minimum of one
    round to be completed before a meet can be called.
    3.3 All SFIDA competitions will be judged by an elimination process where the two
    highest scoring competitors in any given round will compete against each other in the following round and the second and third ranking competitors will compete
    against each other and so forth.
    3.4 In the case of a tie for a specific round, the previous total points are added to
    identify the highest total average per competitor.
    3.5 Should a tie persist, a one jump tie breaker will be performed with the highest
    scoring competitor moving to the next round.
    3.6 A tie breaker may also be required for placing 1st, 2nd, 3rd.
    4. THE EVENTS
    4.1 The discipline will be comprised of the following events:
    4.1.1 ARW Events: Exit altitude is 11 000 feet AGL; working time is 40 seconds.
    4.1.2 SFIDA Events: Exit altitude is 11 000 feet AGL; working time is 40
    seconds.
    4.1.3 For meteorological reasons only, and with the consent of both the Event and Chief Judge, the Meet Director might change the exit altitude and/or working time and continue the competition. In this case the following
    conditions will apply:
    4.1.3.1 The working time will be:

    a. 20 or 40 seconds for the ARW Events

    b. 20 or 40 seconds for the SFIDA Events.

    The reduced working time must be used if the exit altitude is lowered (ref 4.1.1 and 4.1.2). The next round must commence if working time is changed and all competitors will be scored on
    the same working time for a specific round.
    4.1.3.2 The minimum exit altitude will be:

    a. 7 000 feet AGL for the ARW Events

    b. 7 000 feet AGL for the SFIDA Events.

    The maximum exit altitude will be 13 000 feet AGL for all
    events.
    4.2 Objective of the Event
    4.2.1 The objective of the event is for the a team (ARW) or single competitor
    (SFIDA) to complete as many scoring moves as possible within the given
    working time, while correctly following the sequence for the specific round.
    4.2.2 The accumulated total of all rounds completed is used to determine the
    placing of teams for ARW and the process of elimination as defined in chapter 3 is applied to determine the placing of individual SFIDA
    competitors.
    4.2.2.1 For ARW if two or more teams have equal scores the following order of procedures will be applied:
    4.2.2.1.1 For determining final standings:

    a. the highest score in any completed round;

    b. the highest score starting with the last completed
    round and continuing in reverse order, round by
    round until the tie is broken,

    c. the fastest time (measured to hundredths of a
    second) to the last common scoring move in the
    last completed round.

    d. one tie break round if possible (for the first three
    placings only).
    4.3 Performance Requirements
    4.3.1 Each round consists of a sequence of formations depicted in the dive pools
    of the appropriate annexes, as determined by the draw.

    4.3.2 It is the responsibility of the team or individual competitor to clearly present
    the start of working time, correct scoring moves, inters and total separation to the judges.
    4.3.3 Scoring moves need not to be perfectly symmetrical, but they must be
    performed in a controlled manner. Mirror images of moves and whole
    block sequences are not permitted.
    4.3.4 In sequences, total separation is required between block sequences,
    between free or random moves, and between block sequences and free
    moves.
    4.3.5 Where degrees are shown (180, 270, 360, 540) this indicates the approximate degrees and direction of turn required to complete the inter as intended. The degrees shown are approximately that amount of the circumference of the subgroup's centre point to be presented to the centre point(s) of the other subgroup(s). For judging purposes, the approximate degrees and direction of turn of subgroups centrepoints will be assessed using only the two dimensional video evidence as presented.
    4.3.6 Contact or grips are allowed between subgroups during execution of the
    inter.
    4.3.7 Where subgroups are shown, they must remain intact as a subgroup with
    only the depicted grips.
    4.3.8 Assisting handholds on other jumpers or their equipment within a
    subgroup/competitor or a scoring formation are permitted.
    5. GENERAL RULES
    5.1 Teams may consist of competitors of either or both sexes, except in the female
    event where (except for the videographer) all competitors must be female.
    5.2 The Draw
    5.2.1 The draw of the sequences will be supervised by the Chief Judge. Teams
    will be given not less than two hours knowledge of the results of the draw
    before the competition starts.
    5.2.2 Event Draws: All the «Block sequences» (numerically numbered) and the
    «Free moves» (alphabetically marked) shown in the appropriate annex will be singularly placed in one container. Individual withdrawal from the
    container, (without replacement) will determine the sequences to be jumped in each round. Each round will be drawn so as to consist of three
    or four scoring formations, whichever number is reached first. Alternatively this draw can be done on a Recognised electronic scoring/judging system as approved by the Meet Director and Chief Judge.
    5.2.3 Use of Dive Pool: Each block or formation will be drawn only once for the scheduled rounds of each competition. In the event that additional rounds are necessary, due to the tie-breaking jump-off, the dive pool for this round will consist of the blocks and free moves which were not drawn for the scheduled rounds. In the event that all of the remaining blocks and formations do not complete the tie breaking round, the draw will continue from an entire original dive pool in that event, excluding any blocks or formations which have already been drawn for that round.
    5.3 Competitors are not allowed to use a wind tunnel (freefall simulator) after the draw
    has been made.
    5.4 Jump Order
    5.4.1 Determined by a draw.
    5.4.2 Should conditions or availability not allow for Jump Order to be executed
    as per draw, Competitors ready and present shall be given first option to
    continue with the rounds.
    5.5 Video Transmission and Recording
    5.5.1 Each team shall provide the video evidence required to judge each round.
    Each freefall Videographer must use the video transmission system if
    provided by the Organiser.
    5.5.2 For the purpose of these rules, «freefall video equipment» shall consist of the complete video system(s) used to record the video evidence of the team’s freefall performance, including the camera(s), video media, tape recorder(s), and battery(ies). All freefall video equipment must be able to deliver a PAL digital signal through an IEEE 1395 compatible connection (Firewire) or composite video compatible connection.
    5.5.3 As soon as possible after each jump is completed, the freefall videographer must deliver the freefall video equipment (including the tape(s) used to record that jump) for dubbing at the designated dubbing station.
    5.5.4 Only one video recording will be dubbed and judged. Secondary video recordings may only be used in NV situations.
    5.5.5 The dubbing station will be as close to the landing area as possible.
    5.5.6 A Video Controller will be appointed by the Chief Judge prior to the start of the Judges’ Conference. The Video Controller may inspect a team’s freefall video equipment to verify that it meets the performance requirements as determined by him/her. Inspections may be made at any time during the competition which do not interfere with a team’s performance, as determined by the Event Judge. If any freefall video equipment does not meet the performance requirements as determined by the Video Controller, this equipment will be deemed to be unusable for the competition.
    5.5.7 A Video Review Panel will be established prior to the start of the official training jumps, consisting of the Chief Judge, the President of the Jury, and the Chairman, or acting Chairman, of the Atmonauti SSA Committee.
    Decisions rendered by the Video Review Panel shall be final and shall not be subject to protest or review by the Jury.
    5.5.8 If the Video Review Panel determines that the freefall video equipment has been deliberately tampered with, the team will receive no points for all competition rounds involved with this tampering.
    5.6 Exit Procedure
    5.6.1 Exit first (prior to FS, AE, Wingsuiting on the same jump run) at altitude.
    There are no limitations on the exit other than those imposed by the JM for
    safety reasons.
    5.6.2 The exit will be controlled by the Navigator in SFIDA and Team Principle in ARW2. Exit commands will be made using an appropriate signal system, and should be discussed prior to boarding with the pilot.
    5.6.3 Atmo groups will be required to fly minimum 45 degrees off jump run in order to create horizontal separation to freefall groups exiting after atmonauti group.
    5.7 Scoring
    5.7.1 A team will score one point for each scoring move performed in the sequence within the allotted Working Time of each round. Teams may continue scoring by continually repeating the sequence.
    5.7.2 For each omission two points will be deducted. If both the inter and the second move in a block sequence are omitted, this will be considered as only one omission.
    5.7.3 If an infringement in the scoring move of a block sequence is carried into the inter (ref. 2.8), this will be considered as one infringement only, provided that the intent of the inter requirements for the next formation is clearly presented and no other infringement occurs in the inter.
    5.7.4 The minimum score for any round is zero points, except where zero points have been awarded and penalty/ies imposed.
    5.8 Rejumps
    5.8.1 In a NV situation, the video evidence will be considered insufficient for judging purposes, and the Video Review Panel will assess the conditions and circumstances surrounding that occurrence. In this case a rejump will be given unless the Video Review Panel determines that there has been an intentional abuse of the rules by the team, in which case no rejump will
    be granted and the team’s score for that jump will be zero.
    5.8.2 Contact or other means of interference between competitors in a team and/or their Videographer shall not be grounds for the team to request a rejump with regards to ARW. In the case of the SFIDA category adverse whether conditions such as bad visibility (in cloud), any contact or other means of interference between the navigator and competitiors and/or between the Videographer shall be grounds for the individual competitors
    to request a rejump – granted at the sole discretion of the Atmonauti Event Judge.
    5.8.3 Adverse weather conditions during a jump are no grounds for protest. However, a rejump may be granted due to adverse weather conditions, at
    the discretion of the Chief Judge.
    5.8.4 Problems with a competitor’s equipment (excluding freefall video
    equipment) shall not be grounds for the team to request a rejump.
    5.9 Training Jumps
    5.9.1 Each team in each event will be given the option of one official training jump before the draw is made.
    5.9.2 The aircraft type and configuration, plus the judging and scoring systems to
    be used in the competition will be used for the official training jump.
    5.9.3 Two sequences will be created by the Chief Judge. Only teams performing
    one of these sequences will receive an evaluation and posted score.

    6. JUDGING
    6.1 The official training jump and competition jumps will be judged as the Videographer
    provides the video evidence. The Chief Judge may modify this procedure with the
    consent of the FAI Controller.
    6.2 The judging will, as far as practical circumstances allow (landings out, rejumps etc),
    be judged in the reverse order of placing.
    6.3 Three Judges must evaluate each team’s performance.
    6.4 The Judges will watch the video evidence of each jump to a maximum of three times at normal speed. If, after the viewings are completed, and within fifteen seconds of the knowledge of the result, the Chief Judge, Event Judge or any Judge on the panel considers that an absolutely incorrect assessment has occurred, the Chief Judge or Event Judge will direct that only that part(s) of the jump in question be reviewed. If the review results in a unanimous decision by the Judges on the part(s) of the performance in question, the score for the jump will be adjusted accordingly. Only one review is permitted for each jump.
    6.5 The Judges will use the electronic scoring system to record their evaluation of the performance. At the end of working time, freeze frame will be applied on each viewing, based on the timing taken from the first viewing only. The Judges may correct their evaluation record after the jump has been judged. Corrections to the
    evaluation record can only be made before the Chief Judge signs the score sheet. All individual Judge’s evaluation will be published.
    6.6 A majority of Judges must agree in the evaluation in order to;


    • credit the scoring move, or

    • assign an omission, or

    • determine an NV situation.

    6.7 The chronometer will be operated by the Judges or by a person(s) appointed by the
    Chief Judge, and will be started as determined in 2.13. If Judges cannot determine
    the start of the working time, the following procedure will be followed. Working time
    will start as the videographer separates from the aircraft and a penalty equal to 20%
    (rounded down) of the score for that jump will be deducted from the score for that
    jump.

    7. RULES SPECIFIC TO THE COMPETITION
    7.1 Title of the Competition: Atmonauti National/World/Continental Championships
    7.2 Aims of Atmonauti National/World/Continental Championships
    7.2.1 To determine National/World/Continental Champions of Atmonauti in the:


    • ARW (Atmo Relative Work),

    • SFIDA “Challenge”

    7.2.2 and


    • To determine the world standings of the competing teams,

    • To establish Atmonauti formation/distance/other world records,

    • To promote and develop Atmonauti,

    • To present a visually attractive image of the competition jumps and
    standings (scores) for competitors, spectators and media,

    • To exchange ideas, experience, knowledge and information, and
    strengthen friendly relations between the sport parachutists, judges, and
    support personnel of all nations,

    • To improve judging methods and practices.
    7.3 Composition of Delegations:
    7.3.1 Each delegation may be comprised of:

    • One (1) Head of Delegation,

    • One (1) Team Manager,

    • Freefall videographers as.7.3.4 and
    7.3.2 At a World/Continental Championship:

    • Two (2) ARW2 teams consisting of up to:
    Six (6) ARW2 Competitors

    • One (1) female ARW2 team consisting of up to:
    Three (3) female ARW2 Competitors

    • SFIDA contestants consisting of up to:
    Three (3) Individual Competitors
    7.3.3 At a World Cup:

    • Any number of teams per event (composed as for a World
    Championship) to be decided by the Organiser and announced in the
    bulletins.
    7.3.4 Videographers must be entered for each team as part of the delegation and must be a member of the Delegation’s NAC. A Videographer may be replaced at any time during the competition, (with the agreement of the FAI Controller). The evaluation process for the video evidence will be the same for any Videographer. Videographers may be one of the following:

    a. One person in addition to the team composition in 7.3.2. This competitor
    is to be considered as a team member for the purposes of awards and
    medals.

    b. Any other person (ref 7.3.6). This Videographer is eligible to receive
    awards and medals. This Videographer may jump as a ‘pool’ Videographer and is subject to the same regulations as other competitors on the team.
    7.3.5 If any ARW team consists of competitors from the SFIDA, they should be
    listed separately on the entry form.
    7.3.6 Any ARW competitor can only enter in one ARW team as ‘performer’ but may enter as a ‘pool’ Videographer. A competitor in the ARW event cannot also enter in the Female ARW event.
    7.4 Program of Events for SFIDA:
    7.4.1 The World Championships is comprised of:

    • Up to 8 rounds considered as selection rounds, and

    • Final rounds, consisting of 4 quarter finals, two semi finals, one runners
    up and one finals round.
    7.4.2 Time must be reserved before the end of competition to allow for the
    completion of the semi-final, final and runners up round.
    7.4.2.1. The quarter-final rounds will consist of the individuals with the 8
    highest scores from the selection rounds.
    7.4.2.2. The semi final rounds will consist of the individuals with the 4
    highest scores from the quarter-finals.
    7.4.2.3. The finals round will consist of the individuals with the 2 highest
    scores from the semi final rounds.
    7.4.2.4. The runners up round will consist of the lowest scores of each
    of the 2 semi finals rounds.
    7.4.3 A selection round left incomplete must be completed as soon as possible,
    but after the round in progress has been completed.
    7.4.4 If all the selection rounds are not completed at the starting time of the
    quarter-finals, the round in progress will become the semi final or final
    round as appropriate. Where this is the semi final, the next drawn round
    will be used for the final round. The following procedures will apply
    i) The round in progress will be completed if ten or less (in the case of
    semi finals) or six or less (in the case of finals) teams remain to jump.
    All scores for this round will count.
    ii) The round in progress will be performed by only the ten (in the case of
    semi finals) or six (in the case of finals) highest placed teams if more
    than ten (in the case of semi finals) or six (in the case of finals) teams
    remain to jump. The scores of any other teams in this round will be
    discarded.
    7.4.5 The competition will be organised during a maximum time frame of 5 competition days. Exceptions may be made where a bid is received for
    multiple FCE competitions at one time.
    7.5 Medals and Diplomas are awarded as follows:

    • All team members (ARW) and individuals (SFIDA) in the events will be awarded
    medals if placed First, Second or Third.

    • Certificates are awarded to all competitors that are placed First to Tenth.

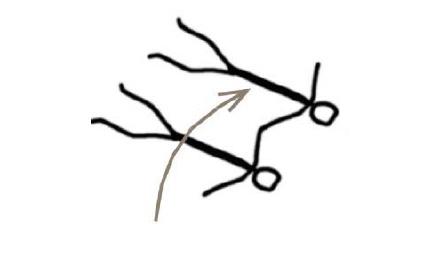
    8. DEFINITIONS OF SYMBOLS
    8.1 Coding in the Dive Pool annexes is as follows:
    8.1.1 Indicates Move by the competitor:
    See image 1 top right.
    8.1.2 Indicates transition on “defined’ axis by competitor in either direction:
    See image 2 top right.
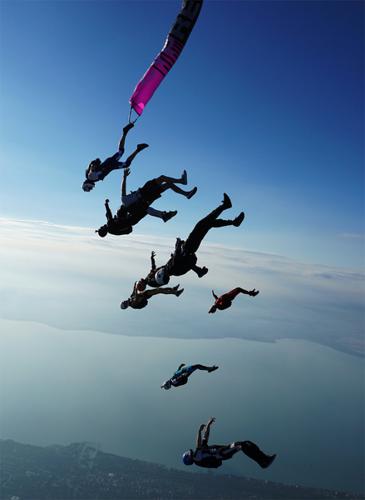
    8.2 Visualisation for dock/grip positions, (Ref: 2.5)
    See image 3 top right.

    See image 4 top right.

    By admin, in Disciplines,

    Canopy Safety on Large Formation Skydives

    Image by Andrey Veselov This article is a continuation of my previous article “Diving and Tracking Safety on Large Formation Skydives”. Some of that article is repeated here because maximum separation under canopy cannot be achieved without proper breakoff and tracking.
    On any skydive, it is critical that jumpers keep their heads on a swivel at all times. Nowhere is this more important than large formation skydives where separation is paramount and there is no place for canopies weaving in and out of traffic or front-riser spiraling below other jumpers and cutting them off in the landing area.
    A few years ago, Kate Cooper-Jensen and other big-way organizers compiled what they called “Rules of the Sky” for canopy piloting on big-way formation skydives. Cooper-Jensen makes sure that everybody knows about these rules at every big-way event she runs. This article reiterates those rules and provides a few additional rules a jumper must follow from the time he breaks off until he opens.
    Let’s start with responsibilities during breakoff and tracking.
    At breakoff, jumpers turn and track with their designated tracking groups. Breakoff turn directions should have already been established in the dirt dive to avoid collisions. But turn direction is one thing; how far to turn is another. Jumpers facing the center of the formation turn a full 180 degrees at breakoff. A jumper who is already facing, say, 45 degrees away from the center of the formation turns only about 135 degrees.
    Jumpers track with their groups for at least five seconds, staying level with their tracking leaders then fanning out a few degrees from the center until the designated opening altitude for their group.
    A “flat track” is required and absolutely no steep (or “dive”) tracking is allowed! If a jumper goes low, he moves off to the side, assumes a slow fall rate, and tries to get above the formation until the outer wave breaks off, at which time he turns and tracks as far as he can until 2500 feet.
    Jumpers on the outside of the formation break off first, track the furthest, and open the lowest. Jumpers in the middle break off next and track as far as they can until time to open (at the highest altitude on the load). Jumpers in the base ring track the least distance and open at a low altitude like the outer groups. These staggered openings make it is easier for jumpers to see each other and fly their canopies. Imagine how congested the skies would be if everybody on a 100-way opened at the same altitude.
    Image by Andrey Veselov As a jumper tracks, he scans the sky in front, below, and on either side. It is his responsibility to watch out for jumpers below. It is also his responsibility to check the sky directly above before he waves off. If another jumper appears directly above or below as he waves off, the jumper can continue tracking to get out of the way.
    Once a jumper is under a good canopy, the first thing he must do is grab his rear risers and be ready to yank down on a riser if another canopy is coming at him. The general rule is to yank down on the right rear riser if another canopy is approaching directly from the front. If a canopy is coming from another direction, however, say, from the right, it is obvious that the left rear riser should be used.
    Once the jumper is absolutely sure he is clear of other jumpers, he can collapse his slider, flip up his visor (if applicable), and release his brakes. However, jumpers on large formation loads are normally not permitted to remove booties under canopy.
    The jumper is now ready to navigate his canopy alongside other canopies in his group on their way to the landing area.
    Here are the “Rules of the Sky” that big-way jumpers must follow under canopy:
    Know the recommended canopy wing loading for the event. While not set in stone, a wing loading between 1.25 and 1.75 is typically recommended on large formation skydives so that all canopies will be flying at roughly the same speed. Weights increase a canopy’s wing loading and jumpers should already know if they can safely fly their canopies with the additional weight.
    Inspect a map of the DZ and landing areas prior to jumping. Know the “outs” and alternate landing areas. This applies mostly to visiting jumpers unfamiliar with the DZ.
    Know the designated landing direction and landing areas. At most DZs, jumpers follow a left-hand landing pattern unless the spot and wind direction make it impossible to do so. A mandatory landing direction is often assigned. If separate landing areas have been assigned to different sections of the formation, a jumper must follow the same pattern as his landing group.
    Note: Downwind or crosswind landings may be required by the predetermined landing direction or because of a wind shift after the first canopy lands. Jumpers should already possess the skills necessary to land their canopies crosswind or downwind.
    Do not cross over into the pattern of another group. If the spot is long, try to make it back to the designated landing area unless doing so would interfere with other jumpers trying to get to their landing areas. In this case, pick an alternate landing area before reaching 1000 feet.
    Enter the group’s landing pattern around 1000 feet. Follow but stay off to the side of other jumpers entering the landing pattern. Never fly directly behind another canopy. The leading jumper can’t see you and the depressurized air behind the leading canopy can cause your canopy to collapse.
    Make the final turn between 300 and 500 feet and make no more turns after that. On final approach, turn no more than 90 degrees and never perform S-turns, spiral or hook turns, or fly in deep brakes. This includes camera personnel, organizers, and DZ staff.
    After landing, turn around while stowing breaks, etc. This allows you to get out of the way of jumpers landing behind you. If the landing area is congested, move off to the side as quickly as possible while watching out for other jumpers trying to land.
    If landing off the DZ, gather in groups and walk together to the nearest road.
    If required, check in with the group’s/plane’s designated person. This is especially important if jumpers have landed off the DZ.
    Conclusion
    Safety starts with the attitudes and the actions of each and every one of us. While it is perfectly acceptable to demonstrate confidence and experience, it is never acceptable to show off with a blatant disregard for the rules and the safety of others. On the other end of the spectrum, it is never acceptable for a jumper to put himself on a load or in a slot that he is not experienced enough to handle. At one extreme there is over-confidence, at the other, lack of experience. Either one can kill.
    Reading fatality reports is a sad undertaking but it also makes us angry – angry that the poor judgment of a few puts the rest of us at risk and gives our sport bad press – angry that needless injuries and deaths still occur – and, finally, angry that dear friends had to make the ultimate sacrifice in order for the rest of us to learn.
    Big-way organizers can only do so much. They can invite the most experienced skydivers in the world, but if just one skydiver doesn’t follow the rules, the results can be fatal. So let’s police ourselves and follow the rules, not just on big-ways, but each and every time we strap on a rig or get a student ready for his first skydive. This sport is a heckuva lot of fun when we do.

    By admin, in Disciplines,

    Indoors Outdoors - Translating Between The Tunnel & The Sky

    Part One: Where Are We Now?

    Bodyflight has undergone significant evolution over the past few years. There are many tunnels now, with many more on the way - and the very best flying from formalised competitions attracts a great deal of attention from the outside world across the various media that we absorb into our brains every day.
    The techniques used to teach flying skills both indoors and outdoors are myriad and complex.
    Whether you are brand new to flying or a bit further down the road, the amount of information you are required to process during a short time in a stressful environment can be a heavy burden.
    Once you fall down the freefly rabbit hole, flying quickly gets very technical, and although many of the concepts are fairly simple to understand during the briefing - remembering and applying them while you are doing it is a different game.
    Indoor flight has taught us how to squeeze every efficiency from our bodies, gradually trimming the fat from the training process to where a lot can be achieved in a relatively short space of time. However, when new to the mysteries of the tube it can be confounding to watch exactly what coaches are asking their students to perform and be left wondering exactly how the various drills and techniques on display are relevant and applicable to one’s skydiving skills.
    The articles that follow are designed to clarify somewhat how tunnel flying and skydiving crossover with each other and address some of the questions people generally have at the beginning of the training process.

     
    Generic Coaching Disclaimer
     
    While it is certainly possible to learn some useful things from articles such as this, there is no substitute for good quality tuition. A coaching fee on top of what you are already paying for tunnel time or jump tickets will likely make things feel extra spendy, but for the amount it costs to employ someone with both the right knowledge and the means to convey it into your head will get you much further than the equivalent cash thrown at just trying to figure things out for yourself.
    Bodyflight is evolving quickly and expanding into every corner of the world. There are lots of coaches and many different opinions out there as to what exactly is the correct way to teach things. After reading this someone may well trot up to you and pontificate about how much of an unbearable ass I am and that what I say doesn’t count for shit all. Different approaches work for different people - and the more sources of information there are available to you the better equipped you can be to winnow the wheat from the chaff. I am writing from the position of eight years as a tunnel professional and have attempted to structure these words in a way that represents that which people most want to pick my brains about.
    Low Speed, High Speed, and the Follow Me Game
    The driving force behind how things have changed is the space available in which to fly. Some years ago tunnels were mostly smaller in diameter. Learning to fly used to be about getting the wind speed up as soon as could be, and that learning moves on lower speeds was a tedium to be rattled through as quickly as possible until you battled your way to head-down flying.
    As a general rule, tunnels then started getting bigger and as a result people began to discover a couple of very important things. The extra space meant that not only was it possible to present bigger, flatter, more efficient body positions to the wind - you could do so with more than one person (crucially - a coach and a student) at the same time.
    At this point, coaching via leading and following around the tunnel was already a thing, but bringing the format forward to the very beginning of the training process meant that a student could learn more things faster. A coach now had the room to quickly demonstrate something next to the student without more than the very minimum of time consumption and fuss, which is of tangible value in a place where very seconds mean monies, but also when leading and following is added into the process the student would then be approaching all the main concepts of getting shit done in the tunnel from day one.
    Following a coach from one position in the tunnel to another and performing structured moves in the same spot that they do engages the key elements of understanding how dynamic flying works. Not only are you practicing the moves themselves, you are learning lines and programming the management of space into your body, coaxing your awareness outwards to the environment you occupy. Good awareness is just as important for safe flying and a healthy learning curve in the tunnel as it is up in the sky.

     
    Low Speed and High Speed Training
     
    An unsophisticated way to think of the difference between low speed flying and high speed flying is as an indoor and outdoor skill set. In the simplest imaginable terms, low speed training teaches you how to fly all pretty in the tube and high speed training is where you learn skills to be better at skydiving. This is pretty reductive as while these things are not untrue, there is so much more value in understanding exactly where, why and how things cross over. The beautiful part is that the symbiosis between the two ways of doing things is so total that end result is greater than the sum of its parts. If bodyflight has put the hooks in you then chances are you desire to be a good flyer in both the sky and the tube - which is where the benefits really start to show. There are differences between the two environments which reveal themselves the more you learn. Adapting you skills from one place to the other takes a minute and does not happen automatically, but lots of what you learn translates from one environment to the other in valuable ways.
    The chapters that follow each represent one of the main orientations in which we fly - broken down into elements where attention is paid to the similarities and differences between indoor and outdoor zooming, and how to approach transitioning concepts and body positions successfully between the two environments.

    By joelstrickland, in Disciplines,

    Diving and Tracking Safety on Large Formation Skydives

    Image by Brian BucklandBy Ed Lightle
    This is the first of two articles geared toward safety on big-way formation skydives. This article deals mostly with the freefall part of the skydive whereas the second article “Canopy Safety on Large Formation Skydives” deals mostly with safety under canopy. To get the most benefit, it is recommended that you read both articles.
    In Formation Skydiving, hundreds of big-ways are completed every year without incident. This is a testament to both the skill level of today’s formation skydivers and the screening process utilized by big-way organizers. To qualify for most big-way events, a participant must obtain the recommendation of a big-way plane captain or organizer and must have recently participated in a big-way camp or big-way event.
    Organizers take safety seriously. A safety violation on a big-way, whether at a training camp or on a big-way attempt, will get a jumper benched when an honest learning mistake might not.
    Diving and tracking on big-ways are special areas of concern. With longer diving and tracking times and more jumpers in the air, big-ways naturally increase the risk of a freefall collision. But this risk can be eliminated if jumpers use good common sense and think safety on each and every jump. Here are some tips that can help.
    Watch Jumpers Ahead of You While Diving
    As soon as a diver leaves the plane and gets squared away, he must identify the base and the jumpers who will be docking ahead of him in the formation. He must keep them in sight while he dives, stops, sets up and moves in to dock. He should constantly scan the sky in front of him, starting from the base and extending all the way out to the person he will be docking on. He should keep an eye out for camera flyers as well.
    Because several divers are heading to the same sector of the formation, each diver must follow a straight line from the plane to the area outside the formation where he wants to be stopped and ready to follow jumpers ahead of him into his slot.
    A jumper should never dive directly behind another diver in case the leading diver comes out of his dive early. The trailing diver should always stay a few feet off to the side.
    Don’t Zigzag
    If a diver flares (comes out of his dive) early, he should not zigzag from side to side to bleed off altitude. If he does, he risks being hit by jumpers who are diving behind him. To bleed off altitude at this point, he should either get back into his dive (if he has a lot of distance to make up) or assume a fast fall position while keeping jumpers ahead of him in view.
    Get to the Red Zone on Time
    Another area of concern is getting down to the red zone in time. (The red zone is the area around and outside the formation where jumpers have stopped their dives and are lined up and moving straight ahead and down into their slots. From a camera flyer’s perspective, jumpers in the red zone look as if they are lined up in various seats in an imaginary football stadium as them move down to their slots on the field.)
    A jumper who arrives late in the red zone more than likely has to maneuver around jumpers who are already closing on their slots. He also prevents later divers from getting to their slots. All of this increases the chance of a collision.
    A more serious situation can occur when a jumper arrives so late that the first wave of jumpers is breaking off. This is not serious if he immediately turns and tracks away with this first wave. If he doesn’t, he risks a head-on collision.
    Break Off with Your Group
    To maximize horizontal separation and avoid congestion, jumpers on big-ways break off in “waves”. Imagine how congested it would be if everybody on a 100-way turned and tracked at the same time! On a 100-way, for example, the outer wave might break off around 7000 feet, the next wave around 6000 feet, the next wave at 5000 and so on until only the base group is left. Obviously, the outer wave tracks the furthest horizontal distance and the base tracks the shortest. Again, a jumper who doesn’t arrive in the red zone until break off should turn and track with the outer wave.
    Track with Your Group
    When their wave breaks off, jumpers should track away in groups. A group can consist of a few jumpers from one whacker and a few from an adjacent whacker with one jumper in the center of the group designated the tracking leader. At breakoff, jumpers from each whacker turn in the direction of the tracking leader, track side by side for a few seconds, then fan out away from the center.
    A jumper who goes low should move off to the side, assume a slow fall rate, and try to get above the formation until the outer wave breaks off, at which time he should turn and track away with them.
    Flat Track, Don’t “Dive” Track
    A jumper should stay level with other trackers in his group, and everybody should “flat track” to conserve altitude and maximize horizontal separation. “Dive” tracking (very steep tracking) is not acceptable behavior on a big-way,” says Kate Cooper-Jensen, big-way organizer and multiple world record holder, adding, “A jumper can almost stop dive tracking simply by choosing to alter his body position during the turn away from the formation.”
    To initiate a flat track, a jumper assumes a slow fall position while turning away from the formation, essentially de-arching as he turns. This prevents him from immediately dropping into a dive track below other jumpers in his group. Keeping his hips elevated as he finishes his turn, the jumper then locks his knees, points his toes, and points his head toward the horizon. His arms are initially extended 45 degrees away from his sides and his feet shoulder-width apart. As he picks up speed, he rolls his shoulders forward, and brings his arms closer to his sides and his feet closer together. He should feel the lift as he picks up speed.
    Open at the Same Altitude as Your Group
    As an additional safety measure, opening altitudes of the various waves are staggered to maximize separation and make it easier for jumpers to account for open canopies around them. According to one theory, groups in the middle wave open at the highest altitudes while the outside and base groups open at the lowest. The result is a curve of open canopies, starting lowest at the base, curving up in the middle then down again on the outsides.
    Conclusion
    A successful big-way is a team effort with the goal of building a completed formation the safest way possible. Diving and tracking on a big-way is like driving on the highway. A safe driver knows more than just how to push the accelerator and go fast. He maintains a safe distance from the driver in front, he doesn’t switch lanes without looking, and he doesn’t cut in front of other drivers just to beat them to the exit. He gets to where he needs to be in plenty of time without causing an accident. So does a safe big-way formation skydiver.

    By admin, in Disciplines,

    Indoors Outdoors - Translating Between The Tunnel & The Sky (Part 6)

    Part Six: Wrapping Things Up
    Before you have invested the considerable time and effort to persuade your brain how to understand freefly properly it can all feel rather difficult. Witnessing highly accomplished flying in both the sky and the tunnel appears akin to magic, and the road to being able to do all that stuff yourself can seem very long indeed. However - the key to mastering the necessary skills is about breaking down complicated positions and challenging movements into manageable, digestible elements. As you learn you will start to recognise moves that you can do as being pieces of the overall puzzle - building blocks that you can assemble in a variety of ways to achieve different results.
    Without proper guidance it can be difficult to take on board the amount of themes and concepts you are required to grasp, so hopefully this series of articles has offered up some insight into the methodology behind the ways we train. To get the most from your sessions with a coach it is important to not only understand what to do and how do it, but furthermore why you are doing it.
    Now that we have looked at the individual body positions, here are some general tips to help with progression:
    Slow Is Fast - The importance of being able to control your speed cannot be overstated. Mastery of a move is not the ability to do it fast but the ability to do the opposite - the slower you can do something the more your body is registering exactly what is happening with the surfaces you are using for control and the easier it is to inter the correct technique in your muscle memory. Low speed training is a very useful way to develop good technique as you must apply more of your body to the wind in order to make the positions work. Once you have practiced something enough the good technique should transfer though to higher speeds in the tube and on your skydives. Zoom!
    Range - This begins with being able to do things as slowly as possible. Zooming flat out is no good if you cannot get there and back safely, and merely being able to go fast does not count as having mastered something. Being able to apply and remove speed with precision means you truly understand how the mechanics of how something really works.
    Less Is More - The most efficient way to fly you body is to use all of it a little bit, rather than one part of it a lot. At the start of training a particular move or position the inputs might be exaggerated to emphasise the effect they have, but as you improve and work through the drills the goal is to use your body as effectively as possible. Pay attention to the very best flyers to see how conservative they are with the energy they expend in the tunnel. Aim to be as economical with your movements as you can.
    Personal Goals - The only person you are trying to be better than is you. Learning to freefly properly takes a lot of time and effort and money. Everybody went through the same steps and recognises the same frustrations - some things you will get relatively quickly, whereas other will take more time. It can be inspiring to watch people that have been flying for years but also very frustrating. Try not to focus your too much on the huge goals - it is important to remember that every small step forwards is of equal value as they are what adds up the the whole.
    Fill the Gaps - Being a truly good flyer is about breadth and depth. Try to resist letting your skillset lead you off by the nose in a single direction - instead use the training time and resources you have available to build your skills evenly. You may well be able to zoom like a motherfucker in a single position and a single direction, but once it gets like that it is all you are ever going to want to do at the expense of everything else. If this is already you then don’t think that revisiting weak areas is ‘going backwards’ - filling in any gaps in your abilities to bring them level is very much moving forwards. All the pieces matter.
    “Keep it loose. But keep it tight.” - James Brown

    By admin, in Disciplines,

    Indoors Outdoors - Translating Between The Tunnel & The Sky (Part 3)

    Part Three: Back Flying
    Backflying, in the manner that you learn as the entry point into freefly training in the tunnel, is not something much done up in the sky. Back tracking yes, and transitioning through your back from one place or position to another also yes, but static backfly not so much. Nonetheless, it is a crucial skill for many reasons - not only as a safety position that you can control at any speed, but also to build your awareness and ability with more advanced techniques.
    These days, people understand much better the importance of being able to backfly with confidence. From the perspective of coaches and instructors the resistance to students spending time learning this skill is more manageable than it was not such a long time ago. If you are feeling morbid and have substantial gap in you day, go dig up an old tunnel monkey and set them off about teaching backfly - then watch as their eyes bulge and the veins on their neck stick out.
    Investing in you backfly skills now will save you a lot of time and money later.
    The ways in which this orientation sets you up for strong progression are important and various. Not only is it your rescue position when practicing high speed drills in the tunnel, it is the jumping off point for understanding carving, how to build your back tracking and angle flying skills, and develop your awareness when switching between head up and head down.
    How Does Back Carving Work?
    Carving all works in the same way regardless of which way, which way up, or on which side you are approaching it:
    The combination of a drive and a turn creates a carve.
    If you just drive in a straight line with no turn then you fly straight into the wall. If you just turn and don’t drive at all then you spin on the spot. The balance between these two inputs dictates the size of the carve. Ok, so now jump back to just driving and not turning - when learning to carve hitting the wall is not your goal, but what if there is no wall to hit? The surfaces you use to control your speed and pitch are the same wether you are going around in a circle or in a straight line, so the muscle memory and technique you develop while learning to carve in the tunnel is immediately applicable to your angle jumps. Hooray!


    Orientation and Awareness
    So much of learning how to fly is teaching your brain and your body to do the opposite of what it is naturally programmed to do. Slow is fast, left is right, up is down. When practicing moves that are initially complicated and difficult, it can be very challenging to consider any other factors than simply getting to body position right. As your skills grow so does your ability to process more information - such as where you are, where anyone else is, where you have just come from and where you are going.
    Awareness drills that you can practice early on help greatly toward overwriting your brain with the correct information about which inputs move you in which direction.
    For example, transitioning from head up to head down while facing the same way switches the direction of you whole body - shoulders, head, eyes, brain - everything that was on your left side is now on your right side and vice versa. Without training your body to understand how this effects movement and swap things around accordingly, you will find yourself going the wrong way because it feels correct to go the wrong way.

    Building your understanding of how, why and when to switch direction is a vital part of moving around safely and with purpose while freeflying.
    So start now. When you are flying on your back looking down across your chest towards your feet you are in a head up position. When you are flying on your back with your chin up as far as it will go, your eyes pointing backwards and the top of you head down towards the net you are in a head down position. It does not matter that your body remains horizontal - for all intents and purposes you brain is learning the differences between the two. When you move on to higher wind speeds and and positions that are tougher on both your body and attention, having been aware of how this works from the start and including it in your training will help a lot with how fast you move on.
    So, right from the start there are things you can do in the tunnel that will improve your skydiving. Learning to freefly properly is something that requires attention to detail and practicing backfly skills on low wind speeds in no way diminishes the rate at which you learn.


    By joelstrickland, in Disciplines,

0