Flight Planning for Safety
In any aviation activity proper flight planning is critical to safety, and skydiving is no exception. If you take the time beforehand to plan for various eventualities, you don't waste precious time making decisions when they arise.
Preflight
Familiarize yourself with aerial views of the DZ and surrounding area, if they are available. Note locations of obstacles and pick likely outs for bad spots in various directions.
Check weather reports, if possible, and note forecast winds at altitude, cloud conditions and any approaching fronts. You are less likely to be blindsided by rapid changes in conditions when informed of their likelihood.
Turn on your AAD, if so equipped. Make sure your hook knives are accessible.
Find out who on the formation has audible or visible altimeters, AADs and RSLs; make sure they are all operational and properly initialized.
Check your and your partners' gear.
Make sure you are in agreement on breakoff and opening procedures and altitudes.
Face into the wind and see where the sun is. Its position should be the same when you are on final and there is no wind indicator available.
Exit
Know what groups are around you, what they are doing and what delay is planned between groups (ask around before and after boarding). The Skydive Arizona policy of large to small slow-faller groups, followed by large to small fast-faller groups, followed by students, followed by tandems is the best all-around approach in the business.
The more of a delay between groups you can arrange, the better. DO NOT assume that any reasonable delay is reason not to pay attention to other groups in the air - LOOK AROUND!
Freefall
Dock gently, from the level of the formation. DO NOT swoop into a formation, but make the final approach smooth and deliberate.
DO NOT EVER get above or below a formation. Inadvertent deployment can become fatal fast if people are above each other.
If low, stay near and to the side of the formation until breakoff. Do NOT begin tracking before breakoff altitude, and DO NOT do anything to increase vertical separation..
Track flat at a common level. DO NOT drop out of a formation vertically. If you have an inadvertent deployment when you are below the formation, the likelihood of someone getting killed is significant. The greatest likelihood of an inadvertent deployment is right after exposing the pilot chute pouch to direct air stream - like when dropping out of a formation in a stand-up.
Track to a clear sector while watching the people on either side. While flat tracking, it is easy to split the difference between the people to either side by looking under your arms.
Canopy Flight
Open at an appropriate altitude. Between two and three thousand feet is reasonable for a high traffic event; any higher opening (for CRW or whatever) should be arranged with the pilot.
Do NOT spiral down through a high traffic area. If spiraling to lose altitude, get well off the wind line to stay clear of the spot for other groups, and LOOK AROUND. In a turn, the direction of most likely collision is at the leading edge of the canopy in the direction of the turn, and there is a blind spot where a collision may occur between jumpers whose canopies blocked their view of each other until right before the collision. I reiterate - SPIRALING IN HIGH TRAFFIC IS DANGEROUS!
The safest flight path when opening above the landing area is to fly the canopy away from the landing area, perpendicular to jumprun, until far enough out to allow a long, shallow approach to the landing area (leave enough room for obstacle clearance).
LOOK AROUND NEAR THE GROUND! Don't fixate on your landing, but pay attention to who is in the area. Keep your head on a swivel, and periodically scan for potential traffic.
Do not execute unplanned turns near the ground. If you are cut off on final, executing an avoidance turn must not be a possible response.
Landing
The safest landing areas are the least popular ones with the most outs. Landing in congested areas or where ground traffic is allowed (e.g., the camping area) can be an invitation to disaster.
If you must turn for traffic or obstacle avoidance while setting up to land, use a FLAT TURN. If you don't know how to do so, find out from someone experienced in the maneuver and practice at altitude until you have the procedure wired.
Keep your head on a swivel after touchdown. Even if you land under complete control, you might want to dodge someone who is swooping where they should not. If landing out is inevitable, or if safely making it to a designated landing area is in doubt:
Pick an open area in which to land by 1,000 feet (300 metres). Corn can be over 12'(4m) tall (a cornfield is NOT like an unmown lawn), so landing between rows and preparing for a PLF will reduce the likelihood or extent of injury.
Any changes of color on the ground probably have barbed wire along the boundary. Land parallel to any area changes.
Locate any telephone poles or other wire supports by 500 feet (150 metres), and set up to avoid the wires that are sure to go between them.
Identify the lay of the land by 500 feet (150 metres), and set up to land alongside any hills. Do NOT land uphill or downhill, REGARDLESS of what the wind is doing.
If there is any doubt about the landing surface, or if you are sure to have excess speed on touchdown (like when stuck with a downwind landing) execute a PLF and roll out the landing. Keeping feet and knees together, and not using hands or elbows to break the fall can greatly help avoiding injury.
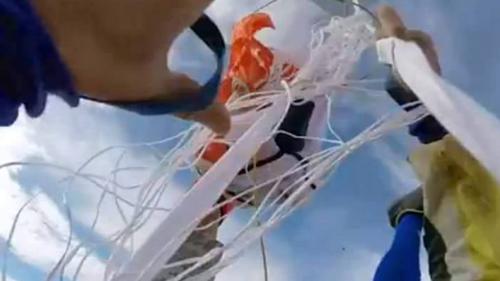
How To Land A Parachute In A Tree
Damage Control for Unwilling Christmas Ornaments
Image by Corrado MarianiChristmas ornaments are lovely, aren’t they? Glossy, colorful baubles, swinging gaily from the bushy branches of a fragrant fir, make our little hearts sing along with the season they decorate.
They are not, however, excellent role models for air sports athletes.
If you ever end up gracing some branches with your majesty, the United States Parachute Association would first like you to take your enforced treetop time to think very carefully about how you got there. According to the SIM, “properly preparing for the canopy flight by observing the winds,” “planning an appropriate landing pattern” and “choosing the correct exit and opening points” will generally keep you out of the foliage.
In short: you messed up, kid.
...But let’s move on.
If you discover that you’re on an imminent collision course with a tree, you need to know your 8-step damage control plan. Here’s what to do.
1. Make sure you’re flying into the wind.
Do not downwind a tree landing. You may not have a sock to steer by, but – hey, lucky you! – you have at least one tree for reference. Watch the movement of its branches to determine the wind direction.
2. Fly in half-brakes.
Your aim is to slow down your canopy as much as possible for the impact. Fly your final approach in half brakes, taking care not to stall your canopy in the process.
3. Go for the middle.
Your aim is to impact at the central trunk of the tree. If you miss the middle of the tree, you run the risk of clipping the tree with a line or a cell, collapsing your canopy and dumping you on the ground in a yowling pile.
4. Keep your $#!* together.
As you do in a properly executed parachute landing fall (“PLF”), hug your body towards the midline, as though you were inside a mummy-style sleeping bag. Keep your legs springy at the knee, but hug them snugly towards the midline. Continue to fly your canopy until you contact the tree.
Just before impact, draw your forearms together so that your elbows sit at the stomach and your hands over the face. This position protects your belly, ribs and chest from being lanced by branches.
5. Keep your hands to yourself.
Resist the urge to grab limbs to stop your fall, as this will only leave vast areas of your body unprotected from veritable armies of sharp branches that are about to mobilize for the attack.
6. Assume a hard landing.
More often than not, a parachutist who lands in a tree does not stay in the tree. Usually, the jumper falls right through, snapping branches and leaving shredded bits of canopy all the way down. Keep that PLF position as best you can, in order to make the landing as soft as possible when the tree finally sees fit to deposit you at its feet.
7. Get comfortable.
Have you actually managed to stay in the tree? Oh, great. Stay there.
A great many injuries occur not during a jumper’s actual tree landing, but from the jumper’s failed attempt to detach themselves from their mangled equipment and climb down. In general, if you’re more than a meter or so over the ground and you have any hope of rescue, wait for that rescue to arrive.
If you’re phoneless, radioless, jumping-buddyless, out of public earshot and generally hooped for help, you’d better hope you have a hook knife handy.
You'll use the hook knife to -- gulp -- disentangle yourself from the spiderweb of lines you're likely encased in. This is necessary to prevent you from accidentally throttling yourself, and from sustaining a serious rope-burn injury if a branch cracks and sends those knifelike lines through your tender outer layers.
You'll probably cry a little bit with every line you cut. Ain't no shame in it.
8. Be grateful.
Even if you shred your pricey gear, rejoice if you walk away from a tree landing uninjured. Gear can be replaced -- and you lucked out, you lucky duck. See the bright side.
By nettenette, in Safety,
Side by Side - A Two Out Story
April 1st is typically a day for trickery, but the only fool this year was me, and the only trickster was my main canopy!
I decided to make a last-minute trip to Skydive Perris with friends to make a balloon jump, but when it was winded out, the generous CReW Dawgs at Elsinore came up with all the gear my friend and I would need to make some beginner CReW jumps. The first jump on borrowed gear went great, but as we packed up my coach informed me the gear I was borrowing was a pull-out, and briefed me on how to use it. We planned a four-stack and lucked out with a camera jumper.
As we get out of the plane, I pulled weak and ended up with no canopy. I knew from previous coaching that it’s a bad idea to take a Lightning terminal, so I went straight to reserve. As the reserve came out, I was kicking myself that I wasn’t going to be able to participate in the CReW jump, and would have plenty of time to think about how I got into this mess as my teammates got to play. I decided to fly over and watch, and that’s when I noticed the pilot chute bouncing around on my back. “I should get rid of that,” I thought, and reached for my cutaway handle. I didn’t even have a grip on it before my main came out and settled gently next to my reserve.
Next thing I know, the camera flyer is in front of me, pointing and laughing. “What do I do?” I screamed, and he just laughed harder. “Well,” I thought, “if he’s not freaking out, why should I?”
So I didn’t freak out. Instead, I worked to get back to the dropzone. No easy task, as I’d soon find out. A west-blowing wind was sending me back over the Ortegas, and with twice the fabric over my head, I was struggling to get any forward movement at all. Unbeknownst to me, my coach flew under me, shouting at me to chop. I tried to force some separation between the two canopies to do just that, but I couldn’t trust myself to hold the reserve away from the main long enough to go for my cutaway handle. Because the two canopies were trimmed so similarly, they really wanted to fly together, although the particular configuration I was flying really wanted to fly south. Considering the town of Elsinore was south, I spent a whole lot of time and energy just keeping the pair flying straight.
Image by David Sands (D29444)
Imagine pulling straight out of the plane under a large canopy, unable to do much besides try to keep your canopies flying straight and think about the sequence of events that got you here. Imagine looking down and going through your tree-landing procedure, and then multiplying that by two. Imagine trying to figure out how you’re going to steer the two canopies onto one of the small access roads on the mountains.
With 1,000 feet to spare, I made it to the field I was aiming for, just at the foot of the Ortegas. I tried the usual landing-out procedure, transposing my pattern onto the field, but my canopies kept wanting to steer to the right, into the small neighborhood next to the field. So instead I just aimed my canopies at a small patch of grass in the field, and hit it gently without flaring. My legs were shaking and I couldn’t stop laughing nervously. It took me three tries to daisy chain my lines, and one of the Elsinore staff members had come to pick me up before I even made it out of the field.
My coach, feeling responsible for me, landed in the mountains and called Elsinore to let them know what had happened. It took some time, but they found him, having landed without incident. Once I got back to the dropzone, I cracked a beer and waited for the shaking in my legs to go away.
Lessons Learned
The main takeaway from this is to know your gear. I was briefed very thoroughly by my coach on how to use a pull-out system, and practiced multiple times on the plane. Yet when it came time to pull, I didn’t fully extend my arm, and ended up with a pilot chute in tow. To me that was always one of the scariest malfunctions there are, because there are two schools of thought on how to handle it. One is to go straight to reserve, as I did, and one is to cutaway and go to reserve. In hindsight, I stand by my choice, because cutting away could have fired my main directly into my reserve.
The other scary thing about this particular malfunction was that it was a two-out that was flying stable. One school of thought is that you should cut away to avoid a downplane, and the other is that if you’re flying stable, you can pilot it to an open area, which is what I did. If I had downplaned, I could have cut away my main and flown my reserve down, but I wasn’t convinced I could keep the canopies apart long enough to get to my cutaway handle. The problem with this scenario is that, under different circumstances, a dust devil could have blown my canopies into a downplane close to the ground, and I might not have been able to chop my main at all.
One last thing I would change is that I would have taken my cell phone. If I had gotten hurt in the mountains without any way to access emergency care, things could have been a lot worse. I’ve since invested in a small prepaid phone to keep in my jumpsuit pocket.
In the end, I stand by my choices, and acknowledge that there was a lot of luck that kept me from disaster that day. I regret that my coach got stuck in the mountains, but I’m grateful that he was willing to look out for me. I faced the two malfunctions I feared the most on one jump and managed to walk away with a swollen ankle and a wounded sense of pride.
Will I still do CReW? Every chance I get! And I’d trust the riggers, CReW Dawgs, staff, and other jumpers at Elsinore any day.

4 Smart Questions That Shut Down The Spin Cycle
How to Avoid Spinning Malfunctions
Image by Oliver NöthenAh, to be swung madly around the ballroom of the sky.
If you like that sort of thing, of course. Most of us, y’know, don’t.
Even though they’re eminently preventable, spinners remain a very statistically significant cause of cutaways. There’s good news, however: A little attention will go a long way towards making sure you aren’t dancing downward under a misbehaving main. Here’s how to get your body, brain and gear set up right.
1. Are you bungling the basics?
If spinning mals come up more than occasionally for you, consider whether you need to send yourself back to packing (or body-position) school. Might be the case.
2. Are you just being loopy?
Back when side ponytails were sexy and just about everything smelled like Teen Spirit, the skydiving industry used Velcro to secure toggles to risers. When manufacturers made the switch to the velcro-free designs we see now, they forgot about something vitally important: the long, floppy bights in the steering line that were now suddenly exposed to the rodeo ride of the deployment process.
Those mile-long bights took the opportunity to lasso anything they could. A particular favorite: hands. One misplaced toggle grab, and a skydiver could easily find him/herself in a compromising bondage situation with their control lines. The bights happily welcomed guide rings into the act. It was a ready-made recipe for a super-solid spinner, and it was ugly.
Soon, every single manufacturer’s rig designs had integrated line stowing features (“keepers”). There’s a reason the changes were made: as a jumper, you need that line tucked safely away until you’re good and ready to release the brakes. That said: Many of those old risers are still around, unmodified. Even more bafflingly, some skydivers don’t bother stowing the lines during the packing process (presumably, to save 20 seconds or so). If that’s you, you know what to do. And if you have Velcro on your risers, for the love of god check it for airworthiness.
3. Are your cat’s eyes conspiring against you?
Toggles love the cat’s eyes of brake lines. They dive at the chance to snuggle and lock in a spinny embrace.
It’s no wonder that’s the case: after all, their relationship is really hot. The heat that’s generated by the slider’s travel over the lines has a shrinking effect on the system, creating a kind of Chinese fingertrap for your toggle seating. With one toggle in and one toggle out, you’re going to be going for a ride.
A rigger can quickly suss out if your cat’s eyes are in good shape: big enough for the toggle to pull out smoothly, but not so capacious that the toggle’s fat bits can pass through. If they need replacing, do it.
4. Do you know when to let go?
Spinning malfunctions are sneaky bastards. For all their preventability, they have killed people. Make no mistake: Once you’re looking at one, you need to take it seriously.
The most important thing you need to remember is this: a spinning malfunction is not a line twist. When you’re under a docile, level main that’s flying cheerfully along as you swear at it, you’re looking at a line twist. When you’re not directly below a canopy that’s flying level -- when it’s flinging you outwards as it heads for the ground -- you are on the business end of a spinner. The first is an inconvenience. The latter is a mal, and you’d better get on it.
As wing loading increases, so does the violence of the spin, and the likelihood that you’re going to kick out of it quickly dissolves. So: Don’t fight it. Just get rid of it. Take some quality time with your reserve. You’ll be glad you did.
By nettenette, in Safety,
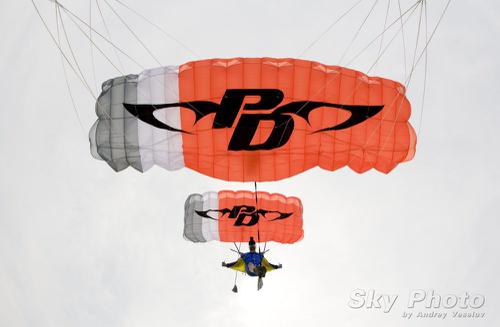
Stalling For Success
Image by Andrey Veselov
Stalling For Success: What You Don’t Know About Stalling Your Canopy Could Smack You. Hard.
This, suffice it to say, could end badly.
There was a balloon jump. (Whee!) The winds picked up at around 3,000’ and shoved your jolly crew rather far off-DZ. (Um…) You jumped anyway. (Whee!) You over-rotated your super-magnificent aerial and pulled a titch lower than you wanted to. (Um…) Your landing options are now -- well -- limited. And a little heavy on the obstacles. And kinda tiny. And now you’re on final. (Uh-oh.)
Do you know where your stall point is?
Probably not. Right about now, I bet you wish you did.
In this regard, skydiving is unusual. After all, stall training is a foundational part of the training process in other air sports (paragliding, specifically), and there’s no question it’s vital. Considering how important it is to know the exact point at which your equipment stops flying, it’s surprising how few skydivers – even advanced ones – have seriously investigated the stall point of their canopies.
Perhaps this is because the transition between the very-slow-flight and no-flight modes produces a stomach full of butterflies. It could also have something to do with the fact that skydiving canopy rides are much shorter than paragliding flights -- and, because the skydiving canopy is trimmed to fly down instead of up, comparatively easy to fast-forward. No matter what the root cause, the fact remains: knowing your stall point is an essential component of safe and skilled canopy flight. And there’s probably a lot that you probably don’t know -- yet. Here’s the skinny.
1. You aren’t really in control up there.
Sorry, buddy. Without understanding your system’s stall point, you are not in full control of your wing. Most notably, you’re at a significant disadvantage during the landing process, as the execution of a flare is the approach to a stall in very close proximity to the ground.
2. It’s not about slow flight. It’s about no-flight.
The lion’s share of ram-air canopy pilots believe that the definition of a stall is directly related to slow airspeed – that the “stall point” is when the canopy is flying too slowly to produce lift. Sound familiar? Yep. Unfortunately, while it often ends up being the case in practice, this isn’t actually true. The true “stall point” is defined as the moment when the parachute is no longer producing lift, no matter what the airspeed when you enter the maneuver. Bear with me here, because this has bearing on your jumping career.
When a ram-air airfoil reaches an excessive “angle of attack,”* a stall results. As relative wind moves over an airfoil, it “curls” over and downward to create lift. However, when the pilot adjusts the airfoil to a higher angle with respect to the relative wind – often, but not always, by pulling hard on the brakes – he or she is effectively building a nylon wall against that relative wind, making it harder for the relative wind to follow its usual path and create lift. Finally, it reaches a point where it can’t. At any point that the angle of attack reaches that point, no matter what the airspeed, the pilot has a stall on his or her hands. When you understand the stall as a function of AoA, you can easily see how a ram-air airfoil can stall at high speed as well as low speed.
This leads to an important fact: a higher-loaded wing will stall at a higher airspeed than its more lightly loaded counterpart. This is just another of the galaxy of reasons why it’s important to downsize your canopy thoughtfully and knowledgeably.
3. You can choose your own adventure.
Initiating a stall for the first time is not unscary. Don’t just stab the brakes and cross your fingers, though: manage the process. The rodeo quality of the stall depends on the type and sharpness of the inputs you use to get into it, and on your technique for stall recovery.
Stalls entered using slow inputs tend to initiate a stall from slow speed and slight sink, making the stall more docile than those entered using quick, brutal inputs. The more aggressive and uneven you are in your entry, the more likely you are to introduce a bank angle at the entrance of the stall. This will stall the lower wing first, which can often result in a spin (and, maybe, line twists) during recovery.
Another bit of advice: Don’t just reach for your brakes. Jumpers tend to initially experiment with stalls by monkeying around with their toggles – mostly, because they’re more familiar with those controls. That’s not really the best idea. Though rear-riser stalls “kick in” more suddenly than stalls initiated with the brakes (as they profoundly and quickly change the shape of the canopy using the C and D lines), recovering from them is smoother and easier.**
...and, of course, pull high. The “lab” is up at a nice, cushy altitude. Make sure to stop your experiments with a lot of margin between you and the dirt.
4. You don’t have to go it alone.
Look at your canopy’s manual to familiarize yourself with the stall dynamics you can expect from it. If there’s no information regarding stall behavior in the manual, contact the manufacturer and ask about it. They’re happy to help. So are canopy coaches.
Ask, ask, ask.
Then you might not have to ask the farmer to disentangle you from the fence, collect your scattered dignity and help you hobble to the road. That’s worth it, no?
Here’s a great little video by AXIS Flight School that demonstrates a rear-riser stall. In this video, you can closely inspect the canopy’s reaction to the stall input.
*The angle of attack, or AoA, is the angle between the cord line – visualized as a straight line between the leading edge and the trailing edge – and the relative wind that the airfoil is moving through.

How To Land Where No One Has Landed Before (The Star Trek Trick)
...Or Where Everyone Else Is Landing, But That’s Beside the Point
Image by Wolfgang Lienbacher
You’ve seen Star Trek, you big nerd -- so you know the answer to this question: When everybody’s staring out the front of a spaceship as it slams into warp speed, what are they looking at?
Don’t make that face. This absolutely applies to skydiving.
The answer, of course, is that they’re staring dramatically out into a starfield. Within that starfield, the outside stars are streaked into blurs and the center stars are distinct, clear and individual. At any given moment, the spaceship is headed towards the clear stars in the center of the frame.
Gene Roddenberry and his glitter-stirring co-wizards didn’t come up with that out of nowhere. they used a classic model, called the Radial Optic Flow Pattern (or ROFP), to base their screensaver-worthy visuals upon. Originally defined by scientist James J. Gibson, Radial Optic Flow has greatly driven the development of an “ecological” approach to visual perception. This approach investigates human vision in the context of the natural environment (as opposed to a laboratory).
It may sound obscure, but that same model is the one you, as a skydiver, should consciously use if you’d rather land in the peas than the trees. Here’s how.
Velocity Fields and FOEs
As a human in motion, your field of view – your very own spaceship windshield – is called your “velocity field.” Within that velocity field, when you’re traveling along a straight path (with no eye, head or body rotation), your heading is nailed quite precisely by the unmoving focus of expansion (FOE) in the center of your vision. How precisely? Well, a 2008 Oxford University study found that humans can use the FOE in optic flow to estimate their heading within one degree of the visual angle, and that’s good – because the FOE is exactly where you’re going.
As opposed to a paraglider – which can go up just as handily as down, in the right conditions* – a skydiving canopy has one essential mode: forward/down. A ROFP for forward movement describes expansion – like the stars in the front windshield of the spaceship as it rushes towards the FOE described by the still stars in the middle. (As our skydiving canopies can’t really go backwards, we won’t worry about the “reverse thrusters” mode.)
Image by Wolfgang Lienbacher
Where’s My FOE?
If you’re flying your skydiving canopy straight, your FOE is easy to pick off: it’s the place in your vision that isn’t dropping, rising, or side-sliding. As you approach the landing area, the FOE remains central while the rest of the field expands proportionally more quickly.
If you’re throwing a bunch of canopy inputs into the mix, however, it’s much more difficult to determine FOE. That’s because you’re introducing a “rotational component of lamellar flow,” which forces the retinal flow pattern not to be radial anymore, thereby making it difficult to recover the original heading.
How to “Energize” Your Accuracy:
When you set up your landing, choose objects on the ground and notice whether they’re moving up or down in your velocity field. Notice the still spot that indicates your FOE. Notice how accurate you can make your landings by fixing your FOE on your intended spot landing.
As you learn to determine your FOE close-up, start to work on spotting your FOE from higher and higher altitudes. By doing this, you’ll train yourself to know instantly if the spot is off and you’ll need to choose an alternate landing area.
Keep your FOE on the target, not an obstacle. When I was racing motorcycles, I used to refer to this trick as my “eye magnets.” That sounds just as silly as spending four hours in a makeup chair getting a rubber Klingon face glued on, but it’s not: your gaze truly is functionally magnetic. You'll head inexorably towards the one tree in the landing area you’re terrified of hitting (and thus staring at). Conversely, you'll kinda-magically turn away from that tree without any other conscious inputs if you “unstick” your gaze and attach it firmly to open turf. Improperly applied eye magnets are referred to less-cutely as “target fixation.”
Many skydivers refer to this phenomenon as “the accuracy trick,” which seems unfair – there are a lot of helpful tools for accuracy, of which this is only one. That said, consistently landing where you want to is a great way for a skydiver to live long and prosper.
(Shh. You know you giggled.)
** For this reason, “the accuracy trick” is a little trickier to use for paraglider pilots, because visual cues have a tendency to bounce around as the wing is affected by thermic “bubbles” near ground level.
By nettenette, in Safety,
Becoming An Experienced Convention Skydiver
For most of us that have been to the World Freefall Convention (WFFC) before, the excitement begins to build as soon as we drive up to the airport entrance and stop at registration. Just seeing canopies in the air is enough to get our adrenaline flowing and make us hurry to get in the sky so we can have as much fun as the people we see there already.
But wait! For safety's sake we need to slow down and take some time to familiarize ourselves with the convention facilities. In particular, those of you who have never been to the World Freefall Convention at least need to take a look at a map of the airport and convention site so you know where to find the best places to park, camp, and land your parachute safely.
There aren't many rules at the convention, but the ones we have are important, because they affect the safety and enjoyment of the convention by you and everyone else who attends. We skydivers are generally some of the most safety conscious people around, but the excitement and fast pace of a large skydiving event have the potential for making us forget or ignore the usual good judgment we use back at the home DZ. One of the most important safety rules that we ask you to follow is to not push yourself and exceed your skill or capabilities. This applies in several areas:
Getting On A Load
The World Freefall Convention has the widest variety of skydiving opportunities you may ever experience in a short period of time and at one location. You will have a chance to jump from many types of aircraft and be on many types and sizes of skydives that might not be available to you back at your home DZ. Load organizers will be available for all of the skydiving disciplines, as well as seminars, coaching, and formal instruction by well known skydivers in these areas. These people will do all they can to help you learn to skydive better and to help you get on skydives that are safe, fun, and challenging.
Most people who come to the convention seem to be interested mainly in freefall formation skydiving. If you are one of these jumpers the best bet is to start off with a group no larger than you usually jump with, and keep it simple until you are comfortable jumping with people you don't know and with figuring out where you are going to land. Even some experienced jumpers who have been to several conventions in the past try to first find a small group of jumpers and "warm up", while at the same time refamiliar- izing themselves with the convention at a relaxed pace. If you usually jump with small groups it wouldn't hurt to break off a little high on some of the first few loads so you can get some practice tracking a good distance from others in case you want to get on larger loads. Just be sure to use that time tracking, and don't open higher than recommended.
Once you have made a few jumps you may get the urge to try bigger formations, and a good way to start is by checking with the load organizers that are available at the convention. The organizers are there to help you get on a skydive quickly, and to plan safe and successful skydives for jumpers at all experience levels. If you have any questions about safety or what type of skydive might be appropriate for someone with your skydiving experience while at the convention, just ask one of the load organizers. They will be happy to help you even if you are not jumping on one of their loads, or if you already have a group with whom to skydive.
Landing
Landing areas at the convention are generally unrestricted and we would all like to keep them that way, but this depends on your good judgement and common sense. If you are experienced enough and are conservative, you can land right next to where you are parked or camped, but there are plenty of large open areas in which to land, and the short walk you will make back to your packing area in some situations might be well worth the additional safety. While under canopy you will need to constantly be checking for other jumpers that may not see you. Think ahead and plan your landing site and pattern while still high enough to avoid other canopies without requiring evasive maneuvers. Hook-turns (turns more than 90 degrees for landing) are allowed only on approach to the swoop pond (where they are expected) and must not be done anywhere else! As a reminder, there are some situations in which you will definitely want to land in a large open area:
If you are jumping a demo canopy with unfamiliar flight characteristics.
If you have any problems with your canopy and decide that it is safe to land anyway, for example, a broken steering line, an accidental step-though pack job, or a canopy connected backwards.
If you have a reserve ride.
Demo Gear
Most of the major manufacturers of skydiving gear will be at the convention and they will have gear available for you to see and to test jump. However, these people probably do not know you, and do not know your experience level and abilities. If you exaggerate your experience or ability when deciding what gear to try out you are only putting yourself and others in danger.
Canopies are the most likely piece of gear that you will have the opportunity to test jump and there will be a wide range of types and sizes available, some of them very high performance types. Be conservative, and take the manufacturer's advice on what canopy to try first. Most importantly, land in an open area that is away from other jumpers. A quick toggle turn required by suddenly finding another canopy in your path could be disastrous in an unfamiliar high-performance canopy.
The harness/container systems provided by the manufacturers to test jump or to use when trying out a canopy are always very nice pieces of gear, and some of them even allow you the option of where to put the pilot chute. Still, they are not the same as jumping your own gear. Make sure the rig fits well and that the leg straps are tight and securely in place. Practicing your pull before the skydive is a good idea.
In Conclusion
The World Freefall Convention can provide us with some of the greatest opportunities and most fun skydiving times of our lives, but we must exercise a good deal of caution to keep it that way. Please be careful so we can all share in the fun for years to come.
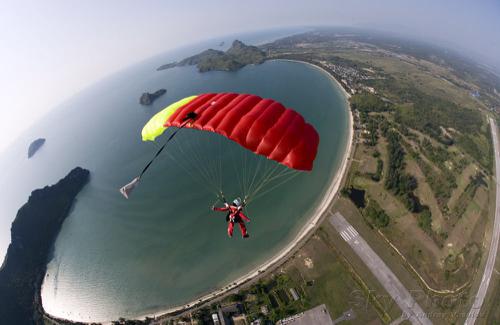
The Straight and Narrow - Cross-Wind Landings
Image by Andrey VeselovNobody’s going to argue that landing directly into the wind is the best way to go, but we’re not always that lucky. Got a long, narrow path between obstacles? Unless you’re super-duper lucky and the wind direction seems to have been designed entirely for your landing pleasure, you’ve got yourself a crosswind landing, my friend.
If you jump at a busy DZ with a super-strict canopy pattern, you’ve undoubtedly honed your crosswind skills. Great--but that’s not the only place that crosswind landings rear their skinny heads. For instance: you’ll find them lurking at an overpopulated boogie, where the landing area is a human forest with a clear patch at the very edge…or a forehead-slapper of an off landing, where your only choice is a road...or pretty much every beach landing, ever.
The importance of your landing direction should override the wind direction in a number of circumstances. Here’s how to make it work.
1. Stop bellyaching and get used to it, already.
Ask any airplane pilot: landing with the wind at an angle to the runway is, like, totally normal. Ask any beach-dropzone bum or coastal-soaring pilot, and they’ll definitely elaborate on the benefits of landing smoothly with the wind pushing in hard from the side.
Let go of the worry. Your ram-air wing is perfectly capable of flying with the nose pointed at an angle to the runway. That maneuver even has a name: “crabbing.” (The difference between the direction the nose is pointing and the pilot’s path--“ground track”--is called the “crab angle,” which always kinda makes me think of melted butter and tongs.)
2. Get lined up.
If you’ve got a long, narrow path in front of you, guess what? You’ve got yourself a landing strip. Start humming ‘The Danger Zone’ into your helmet and get ready, Goose.
Your biggest task when you line up a landing is to snag yourself as much of a headwind as possible while keeping away from the obstacles you’re certainly avoiding. Anything up to a 90-degree crosswind will work. (Your task: to avoid any kind of tailwind, if at all possible.)
If you have a choice, use the longest runway you can find to increase your margin for error.
3. Get creative.
As you come in on that final, you’re going to be doing something of a dance with whatever wind is pushing at you from the side. You can be assured that this wind is going to be pushing you toward something you do not want to fly into. It may be pushing you unevenly. And it may be pushing you pretty damn hard.
Your approach, therefore, is necessarily going to be a little less cut-and-dry than your typical downwind/base/final box. You’ll most certainly notice that your downwind leg is not actually, like, downwind and you’re not getting the distance you’re used to. What’s usually your base leg is likely to be the actual downwind, so stay vigilant and don’t let it shove you into an obstacle.
4. Hold your focus.
As you tuck into your final approach, glue your eyes on the middle of the far end of the runway. Nail them there. Staple them there. Weld them there. Do not start looking at the obstacles to either side, or you are very likely to get suddenly intimate with them.
5. Let it do its thing.
From there, you have one single job: to keep the wing/canopy level while you fly in a straight line.
Not so bad, right? Calmly make the necessary inputs without overcorrecting. Let the nose point in whatever direction it needs to point.
Warning: this bit of the flight might seem pretty wiggly. Don’t let that motion distract you from maintaining your heading. Any inputs required to keep that straight-line heading will simply increase your crab angle and point your nose into the wind, slowing you down.
6. Come to a full and complete stop.
To flare in a crosswind, make a slight adjustment to your normal procedure: use moderate emphasis on the upwind brake to get into a wind-facing position. (Please note that “moderate emphasis” does not mean “full-on, panicked toggle punch.”)
7. High-five somebody.
If it’s a beach landing and you managed to drop your canopy in the saltwater, go ahead and high-five the side of your own face--but no matter what, slap that palm to something. You deserve it.
By nettenette, in Safety,
Canopy Formation Part II
CANOPY FORMATION PARACHUTING
- CF (Part 2)
Part 1
may be read here
Packing the Canopy
You will want to pack your canopy for a CF jump in a way
which will ensure that:
it opens fast and reliably
it opens on heading
all canopies involved open with identical timing
A good way to achieve this is to pack the main similar to a reserve canopy, as the requirements for a reserve opening are about the same.
Indeed, many CF teams do so. Since there are different methods of reserve packing, it is recommended that all jumpers involved in a team or group should use the same packing method for safety reasons. Doing so reduces the probability
of collisions and unintended different opening levels to make sure that each team member has an optimal set up for his way to the formation.
Type of Exit and Exit Order
A good exit speed is 70 to 80 knots with little prop blast.
Newcomers to CF will enjoy greater success if the jumpers exit one after another
in the same way students perform “hop and pops” and remain stable. It is
essential to remain in a symmetrical body position until the canopy is
completely inflated to assure that the canopy opens on heading and continues
flying straight until you want to fly your pattern towards the docking position.
With experience comes a tighter exit timing, and this practice becomes even more
important.
If your canopy does not open on heading you can easily end
up in a dangerous collision or at least in a bad position during the approach to
the formation. Also, other jumpers can be disturbed as they try to avoid the
errant canopy.
In general you will exit in the order of your position in
the formation. Competition teams might use different techniques to speed up the
build of their first formation.
Timing
Teams with more experience will eventually develop an exit
with two or three jumpers standing in the door, jumping with only very little
delay, and pulling in sequence to create a perfect set up for the build of their
first point. In this type of exit, the last jumper leaving the plane (front
person in the door) deploys first. The next jumper deploys when he can see the
beginning deployment of the jumper above. This leads to a set up with the lower
canopy slightly in front, which creates a perfect set up for a final approach.
Set-Up for Building the Formation
In most cases it makes sense if the person flying the Base
sets up on heading, flying with a little brakes and slightly lower than the
jumpers that will dock next. That gives the next jumpers the potential to fly to
their docking position because altitude is our fuel.
A good position for the final approach of a single canopy
is slightly higher and to the side (perhaps slightly behind) of the canopy to
dock, onflying parallel with it.
The optimum setup of course depends on the flight
characteristics of the formation to dock on.
For docking on a fast sinking formation, it’s probable that
the setup will be lower than for docking on a floaty formation. The necessary
experience to estimate the perfect set up will only come with the jumper and
quality of your jumps
Body Position
Fig2.1
To keep your canopy flying straight with even controls, body position must be symmetrical. Shoulders should be square and arms in a “box position” with legs slightly spread and bent as shown in the sketch of a stack. If you lift one leg from that position while stretching the other one your canopy will start to turn towards the stretched leg. If done with intention, this can be a useful tool. For example, a stair step formation might benefit from stretched-leg control. Bent legs also provide the potential to compensate for tension in a formation and to dampen oscillations.
Reducing Altitude
When getting into the setup position for your final
approach to the formation you may find yourself higher than desired (if your are
too low or far behind you won’t be able to get into the formation).
There are different ways to lose extra altitude without
using much space. It always makes sense to stay in a small area because long
distance movements take much more time. Additionally you may interfere with the
waiting position of another jumper.
Furthermore, you might have difficulties estimating your
exact position. Below, you’ll find methods of losing altitude.
Cross Controls
If it is important to use very little space, you can easily
lose altitude by using cross controls. That means you’ll pull down one front
riser, then compensate the move your canopy would now make by applying the
toggle on the opposite side. Because the canopy is being distorted it sinks and
will pick up speed to the distorted side. The toggle action evens out this
momentum so that the canopy ends up sinking in place, assuming that the right
balance is applied. Doing so you can get into the desired set up position for
your final approach without disturbing another jumper in his set up position
close to the formation.
Rear Riser Stall
A similar result can be achieved by performing a rear riser
stall. To do so, you grab the connector links on your rear risers and pull them
down carefully. This is not very hard to do. Because the main part of the lift
is being created in the first third of the profile where the A- and B-lines are
attached to the front risers, this is a fairly light pull..
At first, the canopy will begin glide flatter without losing much speed. This range can be useful if you find yourself far away from the drop zone on a down wind flight pattern and want to get as close to the DZ as possible. If l the risers are pulled down a little further, the canopy will smoothly begin to stall and sink very fast. This technique can help to lose a
lot of altitude. However, it should be practiced with only two jumpers involved before being used in a big way jump. It is not recommended in a tight echelon as the canopy may come out of the stall bailing out to the side, and interfering with others in the lineup.
Rear Riser
If you are too low and need to gain altitude on the way to
your waiting position, or if you’ve gotten behind the formation, you can use
very light pressure on both rear risers to fly a fatter path without
losing much forward speed. This has to be done very carefully because it you
pull them down too much you will lose speed and only millimeters further, end up
in the rear riser stall previously mentioned.
About the oldest technique to lose altitude is the “sashay.” The sashay begins with a radical toggle turn away from the formation and then a reverse movement as soon as the canopy has tilted to the side; this movement is stopped out with both toggles. It is not very efficient, utilizing a lot of area and you may lose track of your position relative to the formation. It takes a lot of practice to get good results with this radical maneuver.
Over the Top
Also from rotations comes the “rotation over the top“. The move begins with going to deep brakes quickly. As soon as the canopy rocks back grab both front risers and quickly pull them down without letting go of your toggles. It takes less force than you might expect because if done at the right moment, the front riser pull will coincide with the canopy having almost no lift and no tension on the lines. Next, you riser down little further than your final
destination, release the risers, and swoop into your docking position by using
the toggles.
Today some successful teams are using a combination of the
two techniques mentioned above. However, these should be considered advanced
skills, to be discussed in another article.
Techniques for Approaches
The most challenging part of a CF jump is the build of the
initial two-way formation or the dock on a single canopy. Remember, a formation
will usually not perform as well as a single parachute. Docking on a larger
formation always gives you a little extra performance relative to the formation
since you have a single canopy with all of its lift potential. Good technique(s)
is/are required to dock with a single parachute of similar performance.
That means you’ll need to gain some momentum when
attempting to dock on a canopy flying by itself. The only way to do so is by
setting up higher and not too far behind the canopy you’ll be docking with.
The canopy to be docked upon should slightly hold brakes
to make things easier.
The docking jumper begins his approach setting from a
position with his feet approximately at the level of the canopy he’s docking on;
slightly behind or a little to the side. The approach is initiated by using
front risers to pick up speed and controlling the direction of flight. Now pilot
the canopy to a position slightly lower and slightly behind the final docking
point. The final move is performed via toggles (reducing speed), swooping up to
the desired level, and aiming the docking cell to the desired position (center
cell for a stack or end cell for a stair step). It is essential not to have too
much energy left when docking and also not to end up too low. If you end up too
low the dock will fail. If you find yourself having too much left-over energy,
you should abort the dock for safety reasons and use the potential energy to fly
to a good position for a new setup and another attempt.
Building the Formations
In principle, there are only two or three ways of making
approaches.
Building a Stack
To build a stack, the jumper who is docking sets up
slightly behind and above the canopy he’s docking on while the jumper to be
docked upon flies straight holding a little brakes. The lower canopy stays in
brakes until the docking center cell has touched his back. If the dock is
perfect and he has some experience, he can take foot grips hooking his feet
behind the center lines. If not, he can release his toggles and grab the docking
canopies nose get it into the right position and then take the foot
grips. Having done so, the lower canopy pilot gets back on the toggles to
control the formation. Never release the toggles before the docking canopy has
actually touched you because if you do, your own canopy picks up speed and flies
away from the canopy trying to dock.
In any case it is important that he releases both toggles
evenly to prevent the formation from spiraling.
It is also very important that the docking pilot can see at
least the lower legs of the jumper he’s docking on. Should the legs become
shorter and shorter you need to add more brakes. It an absolute NO to pass under
a jumper you intended to dock on. If you have the impression that this is about
to happen you must abort the attempted approach by either stalling radically or
turn away with one front riser pulled down. It can be extremely dangerous to fly
underneath and in front of a formation because your burbles can cause canopies
in the formation to collapse. Also you could lift up with the middle of your
canopy under the jumper you wanted to dock on ending up in a wrap. That means if
you perform any kind of dock on a formation you have to be in full control of
your canopy at all times and able to abort if not. Otherwise you are not
qualified to do CF jumps.
Fig
2.2
If
the docking canopy ends up higher than wanted, it’s not necessarily a
problem. The docking jumper can park his canopy with his nose in the center
against the lines of the top canopy and slide it down by moderately using his front
risers until the top jumper is able to reach for his grips.
Approaches to lower positions in a stack or plane will need a lower set up
than for high positions because the formation begins to sink more with its
size - especially the “plane” formation.
Speed teams may still want to dock positions three and four from a higher
position and perform a riser dock by aiming their slider to the jumpers feet instead of the center cell.
Building a Plane
A plane formation begins with a stack. Next, the top jumper
climbs down the center A-lines and once the slider has been reached, he now
hooks his feet behind the front risers of the lower jumper. The lower jumper
helps by putting on some brakes to increase the lift of his canopy. If the top
jumper needs to pull himself down on the A-lines, it must be done with
uniformity to prevent the formation from oscillating sideways.
Building a Stairstep
The Stairstep is the second basic type of formation. The technique for building a stairstep dock is similar to the techniques explained previously but because the Stairstep is far less solid than a stack or plane, everything has to be done with lighter input and greater precision.
The set up for the final approach is slightly to the side
of the formation. To make a clean straight and precise dock you’ll want to keep
it relatively short with not too much potential. You may start with one canopy
width to the side of your target canopy and your canopy slightly lower than the
canopy to dock. The approach should be from the side rather than from behind so
that the jumper to be docked upon has a good view of the line he wants to catch
as well as remaining in the clean air to the side of the docking canopy. Also in
this type of dock you should never get too low or lose sight of the target. The
docking end cell should end up at the hip to the shoulder of the docked body.
The docked jumper can now hook his outside foot behind the outside A-line of the
docking canopy with his body staying outside the docking cell. If the grip taker
should need to use a hand grip to guide the docking canopy to a good position
for taking ther foot grip he has to be well aware to maintain his body position
in the harness to prevent unwanted influence on the flight of his own canopy.
The docking pilot puts on some outside front riser trim as soon as the top
jumper has taken his grip to prevent his canopy from coming up on the opposite
side. After having set his canopy by doing so he may release some of that trim
or maybe even all of it. Sometimes it gives you enough trim to stretch the
outside leg to keep the bottom canopy flying nicely. Sometimes no further trim
is needed any more but still you should keep your hand on the outside front
riser ready to apply trim again if needed.
The set up for stairstep docks in lower positions may be
somewhat lower. None-the-less be aware that a stairstep formation flies fast and
flat compared to other formation types. If your setup is too low your docking
time may become very long.
The build of the stairstep, stack, or plane can of course
also be done in reverse order with the lower canopy flying in little brakes and
being the target and the top canopy flying the approach. The technique is
referred to as the Top-Dock and will be explained with techniques of
sequential CF later on.
Flying in the Formation
As in free fall skydiving you have to keep on flying after
you docked. In a stack for instance, especially in the bottom position, you need
to make sure that your canopy does not get too light and floats up. All canopies
should have slight tension on the center A-line to make the formation healthy.
In a plane it is important that all cells of all canopies
are inflated. If not the jumper in question can reinflate his closed cells by
putting on some brakes. Perhaps he will also have to maintain some toggle trim
to keep his canopy’s nose open. Also a jumper next to a closed cell can help by
pulling the nose open.
Good awareness is needed in formations with stairstep grips
like stairsteps, diamonds or boxes. Especially jumpers in lower positions need
to always keep their canopies from coming up or around. Possible techniques are:
outside front riser trim asymmetrical leg position and inside toggle.
Signals within the Formation
To signal information to other jumpers in the formation
there are two ways. You can either shout a command by addressing the jumper with
his name or use certain signs. In bigger formations it is more convenient in
most cases to use signals instead of vocal communication to avoid noise and
confusion. The signs and commands to use must be known well to everybody. In
case of vocal information you must never use negative commands. If for instance
you shout “don’t cut away!” and the other jumper misunderstands he will cut
away. In this case you should have said “hold on!” for example.
In large formations there are two very useful signals to
the jumper below you: Twisting your foot sideways means the jumper whose canopy
is on that foot needs to get lighter for example by putting on some brakes or
easing the front riser pressure if possible.
Shaking the foot vertically means get heavy which means put
on some front riser pressure or signal further down if the jumper(s) below is
(are) light on you as well.
Piloting a Formation
Stack and plane formations always follow the top canopy and
are controlled by the top jumper also called the pilot. The stair step needs
more caution than the stack because it is connected less stable. Diamond
formations act similar but in bigger formations the pilot might need some
assistance by all the out side wing people to help keep the formation flying
straight or to help turn the formation. Bigger diamonds are fairly inert. It
takes some time to make a big diamond turn.
The most attention is needed in stair steps. In a turning
stair step the bottom jumper always needs to compensate the change in the flight
characteristic of the turning stair step versus the straight flying one. If the
formation is turning away from him he needs to release some of his outside front
riser trim and if the formation turns towards him he needs to increase the trim
on his outside riser. Because the links in a stairstep formation are similar to
pivot points these formations need to be turned very carefully.
Separating a Formation
Separating a formation needs at least as much attention as building one, especially for safety reasons. Also should it be done high enough. Bigger formations should be separated at 1.500m (5.000ft) and smaller ones at 900m (3.000ft).
Small formations can be split in reverse order of building letting go one jumper after another. The jumper whose turn it is to go shouts the names of the ones holding him and they drop him. Then he clears the proximity of the formation immediately to give room for the next
jumper to leave it.
Larger formations in the shape of a diamond of up to 36 jumpers can be split by using a technique called STARBURST. The starburst is being started by the designated person calling “starburst! - starburst!” which is to be echoed through the formation. Then one person starts
a count down calling “ok – ten, nine…..two, one, break!“ Everybody else joins the count loudly to make sure that everybody is able to hear it. On “one” everybody get his hands on the controls and on break lets go of the grips to fly out of the formation radially away from the center.
Peter A. Pfalzgraf
Rheingaustr. 24
12161 Berlin
[email protected]
Your First Reserve Ride - Laying The Foundation
Michael Huff has a hard time saying goodbye.
Photo credit: Michael HuffAre you ready to be alone in the sky with a malfunctioning parachute and two little handles?
Though there are skydivers with thousands of jumps who have never experienced the fun of a cutaway, don’t be fooled: it’s not a question of “if,” it’s a question of “when.” Don’t feel ready? You’re not alone – but there are a number of proven ways to boost your confidence (and, therefore, safety).
1. Stay Current
I know. It’s not your fault. Your home DZ is seasonal – or it’s far away – or it’s a tandem factory that keeps sullen fun jumpers on the ground.
Whether it is or isn’t your motivation that’s the problem, the fact remains: long lapses between jumps are dangerous. They dull skills, heighten apprehensions, create a sense of unfamiliarity with aircraft and degrade the muscle memory you have carefully built around your gear, which is of vital importance in the event of a reserve ride.
It’s vital to your career as a skydiver – especially, at the beginning – to make the effort to jump every couple of weeks. Make the effort and get up there.
2. Prepare
The USPA Skydiver Information Manual puts it rather dryly: “Regular, periodic review, analysis, and practice of emergency procedures prepares you to act correctly in response to problems that arise while skydiving.”
Rephrased in a slightly more compelling manner: practicing might save your life, especially if you’re a newer skydiver who isn’t quite as accustomed to the stresses of freefall as an old-timer. Here’s a two-item to-do list to tip you in the right direction:
Deploy your reserve for every repack. Have you ever deployed the reserve for your current skydiving rig? If not, the result may surprise you. You’ll learn the direction of pull for your gear, as well as the force you’ll need to exert. If your rigger watches the process, he/she can watch the deployment and identify potential problems. Even if you have deployed your own reserve, a repack is an unwasteable drill opportunity.
Practice emergency procedures in your DZ’s training harness. (You may feel like a dork, especially if you’ve already been skydiving for a little while. Go on a quiet weekday and do it anyway.)
3. Do The Little Dance
Before each and every jump, the USPA advises skydivers to “review the procedures to avoid emergency situations and the procedures to respond to emergencies if they occur.”
This doesn’t have to mean poring over your SIM like you’re cramming for a test. It does, however, require a little bit of work before every jump--just to make sure that your muscle memory is fresh and your brain is prepared for puckersome eventualities.
Touch your handles in sequence before you enter the plane. It is not beneath you. Being blasé about basic safety doesn’t make you more awesome. If you ever happen to share a plane with an energy-drink teammate or a world-class coach, watch ‘em closely and you’ll see what I mean.
Check that your reserve handle is seated, while you’re at it. A loose reserve handle can deliver a reserve ride without the fun of a malfunctioning main – and you don’t want that, do you? Right! So: now you’ve done what you can to be ready for a potential reserve ride on any given skydive. Next time, we’ll talk about what to do when your main decides to give you the pop quiz.
By nettenette, in Safety,