Leaving The Nest
You're off student status, you have your own gear, and you're ready to strike out on your own for a change of scenery. Here's what you can expect to find, and here are some things to know, when you go to a new dropzone. It's worth spending some time to prepare for your adventure.
Before Leaving Town
There are many sources for finding dropzones, online or in print. Before leaving town, look up all of the possible dropzones listed within a reasonable range of where you'll be going. Start be searchng the Dropzone.com Dropzone Database. You can also try the USPA web site or search on Google for the state+skydive. Don't forget to ask other people about places they've been. Also, just because a dropzone doesn't have a turbine-engine plane, don't rule it out of consideration. You often learn more in one day at a small dz, finding out or applying things that aren't emphasized at larger dropzones. Check that your gear is in good condition and that your re-pack and AAD are in-date; more dropzones require and check both of these items. Bring a camera to take pictures with the people you meet. You may also want to bring water and food, because not all dropzones have this on site and may be far from a nearby gas station. If in doubt, call ahead and find out the specifics.
Finding The Dropzone
Mapquest is a great way to find your way to the town where the dz is located, but it's usually up to the dropzone to provide the final details for finding the actual facilities - this is a hit or miss situation, when it comes to how accurate this information is. Some places assume that you live in the region and are familiar with the area - then you find that not all of the road signs are visible or even present. Not all of the local gas station clerks will know of the small airports in the area, much less the dropzone. Be sure to have the dz number handy but don't be surprised if the phone is busy, or if you get diverted to an answering machine during the weekend, so be prepared and have printouts of all possible directions. Look for signs to the airport outside the city, or the large orange balls on power lines - these are dead give aways! However, there are times when two small airports are close together, confusing matters for you. If you time things right, you'll find canopies in the air and loads of cars parked out front, covered with skydiving stickers.
What to do when you arrive at a new DZ
Manifest is the best place to start - and every good dropzone should have someone who's willing to help you get in touch with the right people, for a complete briefing of the landing area and dropzone "rules", as well as hooking you up with some of the local jumpers. Be open and ready to jump with people of all skill levels, plus both styles of jumping (Freeflying and RW) - the more limits you put in place, the more likely you'll be stuck doing solo jumps. Be ready to do some solo jumps, in case you don't get hooked up with other jumpers who are willing to jump with you or when no one else is available to jump that day. You must be the one to ask others to jump with you; after all, you are the new kid on the block.
At manifest, complete their waiver, get a gear check, and find a spot for your gear bag. Depending on the size and location of the dropzone, be prepared for anything, when it comes to the bathroom facilities. Get the scoop on jump tickets - How-much-to-how-much (cost/altitude). Check on the charging and refund policy on jump tickets; often there is a charge-card percentage fee, slightly raising ticket prices. Most will give a full refund of the ticket value, but not the charge-card fee. Some will not refund your jump tickets but they usually don't have and expiration date, so you can use them whenever you happen to return. Buy only what you need, depending on these policies.
Get the lowdown on the manifest procedure for getting on a load. Do you pay in advance, pay as you go, pay at the end of the day? Also, do they use monitors to show the loads, do they announce names for the loads, or do they assume you know the load number you're on when they call it? Is there a separate window for manifesting, or do you go back to the main office?
Get a briefing on the basics:
The exit-order and separation rules - some places have very specific procedures and rules on these, others leave it up to you and your skills - ask and watch others.
Landing area obstacles - in addition to buildings, power lines, bodies of water, and the local farmer McNasty, some places have well-known areas of turbulence, small but harmful ditches, hills, or slopes, and hints on landing patterns to avoid them. Most places have several landmarks they use to locate the landing area, like highways, rivers, or lakes that form visual arrows pointing in the direction to look. Ask what is considered a good vs/ bad spot, for that particular dz, and the landmarks used for estimating this from the plane. Always ask where the beer line is located, if they don't mention it to you first.
Hard Decks - Some dropzones have set a hard deck as high as 3,000 ft AGL, for good reasons. It doesn't hurt to check on this, especially when the landing area is tight and surrounded by trees, lakes, or densely developed land.
Outs - Most dropzones have a good selection of areas to land out, but it's up to you to always stay aware of your surroundings; look out the plane's windows from time to time, to locate the landing area and the open areas around it - check with others to be sure you're not looking at swamps or thistle fields.
The prevailing winds - some places have both tetrahedrons and wind socks but not all of them use both or will have rules on when to use which of the two wind indicators. Find out what is most reliable because tetrahedrons tend to rust and stick.
Landing patterns - these vary as much as the winds - ranging from the first-one-down sets the pattern (and hopefully into the wind), to always using a left or right-hand pattern, or no particular rule except to avoid others. It's best to stay clear of others when possible and land a little further from the main landing area..
Swooping and hook turns - each dropzone owner has the discretion of allowing hook turns and often have an area designated for this and or swooping. If there is no area for this, keep alert while under canopy and ask if the people before you are going to hook turn or not, so you know not to follow their landing pattern (if the first-one-down rules are used).
Loading the plane - If you're lucky, you can walk to and from the plane and landing areas; everywhere else will require a bus, van, or trailer to one or both of these areas. Find out where you need to go for any of these options and how the loads are announced, so you don't miss your call for boarding the bus to the plane or hold up the trailer back to the packing area.
Gear Check - few places have a set rule for jumpers to do gear checks for the person sitting next to them. Therefore, it will often be up to you to ask for this.
Ask a lot of questions. Ultimately, you're responsible for your actions and should know all that's necessary to jump safely.
Your First Jump
You may end up doing a solo "orientation" jump as your first jump. Hopefully that will be the only solo you do and use it to take a good look at what happens on jump run, while others are exiting, and the ground features when in freefall. Have in mind a jump and an exit you'd like to practice. This helps you feel more at ease with what to expect. When jumping with others, this avoids the conversational volley of questions, "Whadaya wanna do? I dunno, whadayou wanna do?" Keep it simple; you're likely to end up working on matching fall rates on your first jump. Be sure to agree on a break-off altitude that's comfortable for you and not the people who have done the last 200+ jumps at their home dropzone. If the plane is different from any one you've been in, ask for suggestions for the exit.
Depending on your home dz location, in some areas it's a good idea to wear gloves, especially for your first jump, so you don't freeze your hands or in the event you land out and your landing isn't so smooth, and your hands run into rocks or "other natural abrasives". Check that your altimeter is zeroed, your dytters are set, and your AAD is activated.
Gear check, gear check, gear check - touch all handles and check all straps, then check those of the people around you and ask for someone else to check yours before exiting. You're taking in a lot of new information, so make sure you don't overlook anything. You wouldn't be the first to mis-route a chest strap but it could be the last time you'd ever jump.
On your way to altitude, remember to look out the windows so you can familiarize yourself with the surroundings and look for the landing area. Have in mind your landing approach. If you're doing a solo, and you're not sure about spotting, don't be afraid to ask the person before or after you to check the spot for you. It's a good idea to pull high, (be sure to let manifest and the jumpmaster and others on the load know) in order to give you enough time to adjust to the area and to have plenty of altitude to make it to the landing area.
Keep your head on a swivel. You're in new territories and you want to make it safely back to the landing area - avoid aggressive canopy pilots, hopefully they'll be on the ground before you land. Elect to land in a distant, wide-open area, which has less traffic; then move in closer on the next jump, if you feel comfortable.
At larger dropzones, there's usually a "packer's area" - ask, so you're not getting in someone's way of making money. Sometimes, if you accidentally set your rig in a packer's area and leave for a drink, you'll come back to find a packed rig and someone asking for payment. Smaller dropzones may not have any packers, so be sure you haven't forgotten how to pack your own rig. Also, at larger dropzones, there are sometimes separate packing areas for belly flyers and free flyers - a strange and unfortunate thing, in most cases.
Your Next Jumps
Some dropzones have landing areas at a different altitude than the packing area, especially when a bus/van/trailer is involved in moving between the landing area and loading area. Make the necessary adjustments to your AAD, hand altimeter, and dytter settings.
When You Leave
If you plan to go to a second dropzone during the same day, turn off your AAD before leaving and turn it back on again at the next location. Also, take pictures with the people you jumped with that day and add them to your logbook. Don't forget to swap e-mail addresses when you can. Find out if the dropzone has a stamp to put in your logbook, almost like a customs stamp for your passport.
Where To Stay
There can be many choices or just your car, so be sure to ask what's available; again, manifest is a good place to start. Many places have something on site, ranging from a couch in the hangar to a full-fledged house with all of the trimmings, and ranging in price from free to something that's usually within the budget of an avid skydiver. If you made friends that day, the local jumpers may offer to let you stay at their homes, another good reason to jump with others and not sticking to solo jumps. If you're not satisfied with these options, then nearby hotels often have discounts for skydivers, be sure to ask before making a reservation.
Going to different dropzones is a wonderful experience and it's even more exciting when you go alone, seeing it through your own eyes and not through someone else's expectations. You see and do things differently than you would in familiar surroundings; this also keeps you from becoming complacent in this unforgiving sport. The people you meet become instant friends, if you let them, given the common bond of skydiving.
Karen Hawes has jumped at dropzones in all 50 US States, 4 Canadian Provinces, Mexico, Puerto Rico, Spain and The Bahamas.
Saved By The Beep
Most of us agree that canopy control is the most important, and most difficult aspect of skydiving instruction. Within this broad objective is the ability to fly a safe and consistent landing pattern. This is crucial for everyone, from the highest level of experience down to the beginner. The clear necessity for improvement in this area has been demonstrated time and again with the unacceptable frequency of canopy collisions and low turn accidents that have plagued our sport for far too long.
General aviation has implemented many new technologies to assist pilots in navigation. These tools have enhanced aviation safety, and such devices are not considered crutches, but a necessary part of safe flying. Similar advances are now commercially available for skydivers as well, but many do not include these instruments in their safety toolkit; least of all for primary instruction methodologies. It is time for this to change.
Altitude awareness is not something that ends once the canopy opens. Knowing precisely how high we are throughout the approach and landing is vital for consistency, and many of the traditional analogue devices are unable to provide truly trustworthy data. The digital altimeters that are now widely available are accurate within ten feet or so, but they have one tragic flaw: the pilot must look away from the ground, and away from the traffic, in order to access the information.
Having water available does not guarantee that the thirsty will drink, and as altitude diminishes and stress level increases, visual altimeters are used less and less. As many high performance pilots have come to realize, audible altimeters are an incredibly powerful aid for heads-up access to the information that saves their lives. The time has come to utilize these tools for students and intermediate skydivers as well.
A pattern is a simply a series of invisible points in space, what some have come to refer to as "altitude-location check-points". With three or four ALC's, a canopy pilot can follow a preplanned path through space to a predictable landing point. When these ALC's are programmed into an audible device such as the Optima, with its impressive tolerance of + or - only ten feet, the distracting glances at a visual altimeter become mostly unnecessary. More importantly, I have found that my canopy piloting students who use such audible cues are more aware of their surroundings, and are far less likely to run into other canopies on the way to the target. Even more importantly, by having their eyes focused "outside the cockpit" so to speak, the canopy pilot learns exactly what the ground looks like at the various altitudes. Therefore, I have discovered, if there is an instrument failure in the future, they have "calibrated their eyeballs", and are aware when they are too low to execute a hard, descending turn.
Many instructors have grown accustomed to preaching the party line that relying on instruments for canopy flight is inadvisable. Although there is some merit to training our eyes to recognize key altitudes, simply trusting our inborn instincts is not an effective way to accomplish this goal. When a “flat-line” beep goes off in your helmet that marks 300 feet AGL, and you happen to be looking at the ground at the time, you immediately become a better canopy pilot. Furthermore, when you are focused on your surroundings, rather than a dial on your wrist, you are more likely to make the necessary course corrections that lead to the target. The primary reason for missing the target is, and always will be, failure to maneuver when a course correction is necessary. When you always know how high you are, and are observing your location in relation the target, you are far more likely to make the change that puts you in the peas.
The safety concerns regarding the use of audible devices for flying a pattern can be addressed with a few simple rules. The first rule is, if you don’t get the first beep, assume that the instrument has run out of battery life, or is improperly programmed. When the initial pattern beep comes, verify that this is in fact the altitude that you expected it to be by looking at your visual altimeter. If it is not, or you hear nothing at all, use your visual altimeter for the remainder of the jump, and sort it out on the ground. Above all else, your eyes are your default, and you can veto what the audible is telling you, or not telling you. If it doesn’t look right, put your parachute over your head and prepare to flare for landing.
There have been many technological leaps that have changed the sport forever, and audible information for canopy flight is proving to be one of the most profound. By knowing exactly how high we are at all times, we can act appropriately. We can relax more as we fly our approach, and enjoy the simplicity and joy of landing our parachutes without worry. Above all else, the reduction of the stress within each canopy pilot, both student and expert, has proven itself to allow for the full expression of skill that training has made possible. When we embrace such advances, we can more easily expand into the pilots we were meant to become.
BSG
Brian Germain is a parachute designer and test pilot, and runs canopy flight skills and safety courses all over the world. Brian has made over 14,000 jumps in his 25 years in the sport. He is also the host of the “Safety First” segment on SkydiveRadio.com, and the creator of many educational You Tube videos. Brian is the author of the widely popular canopy flight text The Parachute and its Pilot, as well as Transcending Fear, Greenlight Your Life, and Vertical Journey. His upcoming book entitled “Vibe Matters, emotion is everything” will be coming out later this year, along with the long awaited educational packing video “No Sweat”. His websites are www.BIGAIRSportZ.com and www.Transcendingfear.com and his YouTube channel is: www.youtube.com/bsgermain

Canopy Emergencies: Breakaway
Jettisoning The Main Canopy
Before we talk about the series of problems you may encounter with your main canopy, it is important to discuss the types of cutaway (main canopy disconnection systems) that are in common use and their procedures. The breakaway or cutaway is an emergency procedure that involves jettisoning the main canopy prior to deploying the reserve. Originally, the cutaway was performed with a knife and the lines were cut to separate the canopy from the harness. Today, we use canopy releases to breakaway. The breakaway procedure should be executed immediately under rapidly spinning malfunctions because ever-increasing centrifugal forces will make arm movement difficult, and may cause you to lose consciousness (red-out) due to the blood flow to your eyes.
The decision altitude for the breakaway is 1,800 feet. This is your safety margin, above this it is safe to try to clear the malfunction but at this point, all clearing work must stop. Watch your altitude. The breakaway must be commenced above 1,600 feet to assure you plenty of time to get the reserve out. Under high-speed malfunctions, you may be just seven seconds off the deck at this point, and it may be necessary to forget the breakaway and just pull the reserve.
To breakaway, spread your legs (for lateral stability and push them back as far as possible while bending your knees about 45 degrees (only). Arch your back and pull your head back but keep your chin resting on your chest and your eyes on the handle(s). On release you will fall into a stable, face- to-earth position.
Body position during the breakaway is very important. If you are not falling away correctly, you may become entangled in the canopy and/or lines of your deploying reserve. Even with good body position, breaking away from a violently spinning malfunction may throw you tumbling across the sky.
The breakaway procedure is as follows:
Two Action System(TAS)
The TAS has two handles: Pull the first one (usually a Velcro-attached pillow handle located on the right-hand main lift web), to release both risers (a single point release). Then activate the reserve by pulling the other handle (usually located on the left-hand main lift web).
A. Total malfunction (nothing out)
Do not waste precious time breaking away; just pull the reserve.
LOOK at the reserve ripcord handle and arch.
REACH for the reserve ripcord handle with both hands.
PULL the reserve ripcord handle with both hands.
B. Partial malfunction (canopy out but not working properly)
There are two schools of thought on how to perform the breakaway action using this system. The first one presented is in the USPA’s Skydivers Information Manual, “Section 8-3.16.” While it states “Look at the reserve ripcord handle...” (step 3), it says nothing about the choice of one hand or both on the breakaway handle. It is as follows:
LOOK at the breakaway handle and arch. The arch should keep you from making a backloop when you jettison the main.
REACH for the breakaway handle (presumably with both hands).
LOOK at the reserve ripcord handle before breaking away.
PULL the breakaway handle and throw it away while continuing to keep your eyes on the reserve handle.
REACH for the reserve handle with both hands.
PULL the reserve ripcord.
CHECK over your shoulder for a pilot chute hesitation.
CHECK your reserve canopy, look around and prepare to land.
Note: For student equipment, and something that is becoming more popular on experienced jumper equipment, there is a device known as a reserve static line lanyard RSL (sometimes called a Stevens lanyard). This is a piece of webbing attached from the right side riser (or both risers on some systems) to the reserve ripcord cable. It is designed to pull the reserve ripcord out of its locking loop(s) as you fall away from the main parachute after that main canopy is cut away, thus allowing the reserve to deploy. When installed and operating properly, it will usually beat you to the manual deployment of the reserve. However, it should not be relied upon, for after all, along with an automatic activation device (AAD — described in Chapter 7), it is merely a back-up device to your proper execution of emergency procedures. This system can be disconnected (if necessary) by personnel who know what they are doing.
It is a possibility that when you perform a breakaway using both hands on the breakaway handle, there is a fraction of a second of disorienting instability as the maneuver is executed. Although you are supposed to be looking at the reserve ripcord handle, you still need to move one or both hands to it from whatever position you are in at the conclusion of the breakaway-handle pull. The ripcord handle may move from where it was (on the harness) under the tension of the partial malfunction to a different position during this moment. It is a possibility that there may be an additional second or more of elapsed time as you reach for the reserve ripcord handle.
Therefore, there is a second school of thought about performing the breakaway, which is, if you are about to execute a breakaway and you put your right hand on the breakaway handle and your left hand and thumb through the reserve ripcord handle, there will be no lost time reaching for the reserve ripcord after the breakaway is executed. Here is a typical scenario:
LOOK at the breakaway handle and arch. The arch should keep you from making a backloop when you jettison the main.
REACH for the breakaway handle with your right hand.
REACH for the reserve ripcord handle with your left hand, placing your thumb through the handle to ensure that you have a firm grip on it.
PEEL and PULL the breakaway handle to full right arm extension. Throwing it away is optional.
Immediately after you’ve pulled the breakaway handle with your right hand, PULL the reserve handle out to full extension with your left hand.
CHECK over your shoulder for a pilot chute hesitation.
CHECK your reserve canopy, look around and prepare to land.
In this scenario, there is no hesitation in looking for a reserve ripcord that may have moved, thus it may save a second or two of precious time.
The Single Operation System (S.O.S)
The Single Operation System is a one-handle/one-motion system. The S.O.S. has a combined handle, usually on the left main lift web, to release both risers and activate the reserve. The S.O.S. has a reserve static line lanyard (Stevens lanyard) from one riser to the reserve ripcord. The purpose of the S.O.S. is to eliminate one the motions in the breakaway sequence; that of separately pulling the cutaway handle. By pulling the reserve ripcord all the way, you accomplish both the breakaway and the reserve-ripcord pull in one complete action. With a two-action system, half a breakaway is worse than no breakaway at all unless you have an RSL.
The S.O.S. usually produces full deployment of the reserve canopy in less than 100 feet. If you find an RSL on your piggyback harness/container assembly, you should leave it on. When you and your instructor develop enough confidence that you will pull the reserve after a breakaway, you can do away with the line if you wish.
Total or Partial malfunction
In the event of a total or partial malfunction:
LOOK at the combination release/ripcord handle and arch.
REACH for the combination handle with both hands.
PULL the combination handle with both hands to full arm extension.
REACH back with one hand, grasp the cables where they come out of the housing.
PULL AGAIN to clear the cables and
CHECK over shoulder for a pilot chute hesitation.
CHECK the reserve canopy, look around and prepare to land.
Never depend on the reserve static line device (Stevens lanyard). Always pull your reserve ripcord cable all the way out of the housing immediately after breaking away.
Canopy Transfer
Canopy transfer is a third type of breakaway procedure sometimes used in Canopy Relative Work by those who believe something is better than nothing. If your main canopy becomes damaged or tangled on a jump and it is still flying forward, you may pull your round reserve and drag it behind you, full of air. Once the reserve canopy is inflated, jettison the main. This maneuver is extremely risky with a square reserve canopy as two squares may fly around and into each other. This type of problem is discussed later on in detail.
Harness shift
When you jettison the main canopy, your harness will shift downward taking the reserve ripcord location with it. Therefore, it is essential that you keep your eyes on the reserve ripcord handle, if your hand is not already grasping it, when jettisoning the main canopy.
Now that we have covered cutaways (breakaways), let’s discuss when and where they are used.

Another Look at No-Wind Landings
The advice Brian Germain provides in his article titled "Surviving the No Wind Landing" might help you achieve consistent, comfortable landings on days when the winds are calm. Unfortunately, other jumpers might not be as successful when trying to follow that same advice.
Some of the techniques described in "Surviving the No Wind Landing" are slightly advanced, and jumpers who are just trying to perfect basic flaring skills might find those techniques difficult to use. Other information in that article might be helpful to people flying certain specific sizes and types of canopies, but we might discover that this information does not actually apply to a significant number of canopies in common use.
The first piece of advice Brian offers is to "make sure you level off within touching distance from the ground." This can certainly lead to softer landings, particularly in calm winds. There is only one problem: if many jumpers fear no-wind landings, there are probably even more who are afraid of flaring too high. For some people the game is over at the instant they realize they have made that mistake: they expect the worst, stop flying, and start panicking.
In an effort to always level off within touching distance from the ground some jumpers develop a habit of consistently flaring too low. Another common problem occurs when people reach for the ground with their feet, believing they are within touching distance when they are actually a few feet high. People who suffer from these habits are often pleasantly surprised, and see a remarkable improvement in their landings, when they learn that it is not actually necessary to level off with your feet right at ground level. Many modern canopies are actually very forgiving of a high flare.
Understanding the Stall
A very common concern is that a canopy will stall if it is flared too high. Brian reinforces this concern when he mentions the importance of arriving at the ground "before the stall breaks." To understand why flaring slightly high is not necessarily a problem we need to take a closer look at the concept of a stall.
"Stall" has a very specific meaning in aviation. It is a significant decrease in lift caused by a separation of airflow that occurs when a wing reaches its critical angle of attack. Understand? No? Okay, then imagine a car driving down the highway, heading toward a curve in the road. Most highways have gentle curves, for good reason, because cars tend to fly off the road if a curve is too sharp.
Now think about the relative wind blowing in your face under canopy. Your canopy bends that relative wind to create lift. Pulling down on both toggles pulls the tail of the canopy down and bends the relative wind even more, creating even more lift. The further you pull the toggles down the more lift is created, up to a certain point.
The "critical angle of attack" is the point where the curve becomes too sharp and the relative wind separates from the canopy like a car flying off of the road. This separation results in a sudden and dramatic loss of lift. The term "stall" refers specifically to the sudden loss of lift that occurs in this particular situation.
Image 1 shows a canopy being intentionally stalled. In frame "A" the brave and handsome test jumper is putting the canopy into brakes, pulling the tail down and increasing the curve that the relative wind must follow. In frame "B" we see the canopy in very deep brakes, but not yet in a stall. The canopy is curving the relative wind sharply and creating a lot of lift. In this flight mode it is flying slowly through the air with a very low rate of descent.
In frame "C" the canopy has reached the critical angle of attack. The lift is rapidly decreasing as the canopy begins to stall. In frame "D" the canopy has entered a full stall.
When flaring it is obviously important to have your feet on the ground before your canopy stalls. But let's think about a student canopy. Student canopies are traditionally not supposed to stall when the toggles are held all the way down in a full flare. They are either specifically designed that way or are rigged with extra slack in the brake lines.
What about a slightly smaller canopy, such as one that might be used by a novice or intermediate jumper? If the brake lines are set to the correct length specified by the manufacturer, many canopies in this category also will not stall when the toggles are held all the way down in a full flare. They will simply maintain a slow forward speed and low rate of descent, just like frame "B" in image 1. Even if they do stall it might not occur until the toggles have been held all the way down for a number of seconds: sometimes five or six seconds, maybe even more. Jumpers who fly these types of canopies don't really need to be too concerned about an accidental stall.
You may be surprised to learn that some small, "high-performance elliptical" canopies also will not stall with the toggles held all the way down, or at least not until they've been held there for a few seconds. Whether or not a particular canopy will stall when it is held in a full flare depends on several factors, including the model and size of the canopy, the length of the brake lines, the length of the risers, and length of the jumper's arms.
When held in a full flare a significant number of canopies will simply maintain a relatively low airspeed and rate of descent, at least for several seconds. This knowledge can be very helpful when we talk about flaring high. Look at image 2. In frame "A" we see a jumper reaching level flight with his toes about six feet above the ground. Tragedy? Not really. There are only three things he needs to do: 1) wait wait wait; 2) keep it straight; and 3) FINISH!
"Wait" means stop pulling the toggles down as soon as you realize you've started flaring too high. Save the rest of the flare for later. "Keep it straight" is important, too. You want to look at a point on the ground out in front of you and keep the canopy flying straight toward that point, just like driving your car down a straight road. And when the canopy starts to drop you back toward the ground, just before your feet touch down, push the toggles down and FINISH your flare, as we see in frame "B." In most cases doing this will result in a reasonably soft, stand-up landing as we see from the last two frames. Even if you don't land softly, look at frames "B" and "C" again. What body position are you in when you finish your flare properly? Looks like you're ready for a PLF, doesn't it?
Granted, you will achieve softer landings on calm-wind days if you level off right above the ground, but that is a skill that needs to be developed through practice. An important step in that process is learning to relax and stay focused if you do flare high. This will allow you to keep flying the canopy and finish the flare properly, which will improve your landings in all conditions.
Practice at Altitude
We can see the importance of knowing whether or not your canopy will stall when held in a full flare. How can you find this out? Yep, you guessed it. Under canopy, in your holding area, above 2000', after checking thoroughly for other canopies, push those toggles all the way down and see if that baby stalls. If you've never stalled a canopy before you may want to get some advice from an instructor or coach before trying it.
So try it. Did your canopy stall? No? Makes flaring seem a bit less intimidating, doesn't it? Or was the canopy easier to stall than you expected? If so, you may want to have it checked out by a rigger.
Some canopies are relatively easy to stall, even with the brake lines set to the correct length. If you are jumping one of these canopies then hopefully you've already perfected your landing technique under something more forgiving.
If you can't stall your canopy just by holding the toggles down, does that mean you won't be able to get enough stopping power at the end of your flare? Some people believe so, and Brian touches on this point in his article when he stresses the importance of making sure your brake lines are "short enough:"
Brake Line Settings
"Most manufacturers set the brake lines to allow for a certain amount of slack so that when the front risers are applied with the toggles in the hands, there is no tail input. This, coupled with shorter risers... will prevent you from reaching your parachute's slowest flying speed."
In reality, many popular canopies do not come from the factory with this much slack in the brake lines. For example, people who jump a Sabre2 from Performance Designs or a Triathlon from Aerodyne Research might prefer to have the brake lines lengthened a few inches beyond the factory setting if they use their front risers a lot. Even then, they might not lengthen them to the point where there will be no tail input all when the front risers are used. Even canopies specifically designed for swooping won't necessarily have the brake lines set that long.
Is there really anything wrong if your canopy does have a bit of extra slack in the brake lines? Usually not. Even with the brake lines "detuned" on a student canopy, we still expect students to learn how to stand up their landings. In fact, many popular canopies used by experienced jumpers will also slow down enough for a comfortable landing even if you cannot reach the canopy's absolute slowest flying speed: plenty of people achieve soft stand-up landings in calm winds under canopies that will not stall when the toggles are held in a full flare. Even jumpers who have intentionally lengthened their brake lines for swooping can still achieve comfortable landings in calm winds.
Is there anything wrong with shortening your brake lines? In some cases, yes! Especially if they are shortened so much that they pull the tail down when your toggles are in the full glide position. As an example, look closely at the tail of the canopy in image 3. It seems like the jumper is pulling the toggles down slightly, but a closer inspection reveals that his hands are all the way up.
Having a canopy's brake lines set too short like this can significantly reduce the flare power on some canopies and make them noticeably more difficult to land, particularly on calm-wind days. Excessively short brake lines are more common than many people realize and frequently go unnoticed. It is a common mistake for someone to shorten a canopy's brake lines because it appears that the canopy "doesn't have enough flare at the bottom end," when the real problem is that the brake lines are already too short!
If you're really convinced that your brake lines are too long there are a few steps you should take before having them shortened. On your next jump, after you've released your brakes, put your toggles all the way up against the guide rings and look up at the tail of your canopy. Don't forget to watch where you're going and look out for other canopies. If your canopy looks like the one in image 3 then forget about having the brake lines shortened. They probably need to be lengthened instead.
If your canopy seems difficult to land you can also have a rigger measure the suspension lines and compare them to the manufacturer's specifications. It's possible that your canopy has simply gone out of trim and is due for a reline.
Once these steps have been completed then get some of your landings videotaped and see if you are finishing your flare properly. Look at the jumper in image 4, just as he is touching down. Does he need shorter brake lines to get a better flare? No, he needs to push his toggles all the way down and FINISH flaring before he touches down. Most jumpers finish their flares at least slightly better than the jumper in image 4, but not finishing completely is one of the most common flaring problems. Brian makes a very good point about this: "the brake lines can only work if they are pulled."
If you are still absolutely convinced that you need shorter brake lines then follow another good piece of advice Brian gives and only shorten them an inch at a time. Make several jumps, preferably in different wind conditions, before shortening them any more. And remember that you can significantly reduce a canopy's flare power by shortening the brake lines too much.
There is usually some excess brake line left over when the toggles are tied onto a canopy, and there are front row seats in purgatory for people who cut this excess brake line off. That excess line should be finger-trapped back into the brake line or secured in a similar fashion in case the brake lines need to be lengthened later on. A qualified rigger should know how to do this correctly.
What else might affect your landing on a calm-wind day? Brian discusses the importance of keeping the canopy flying straight during the flare, and not allowing it to bank or turn. He emphasizes this by stating that "any tilt in the roll axis will result in a premature stall of the parachute…. due to an effect known as 'load factor.'"
Load Factor
If we are going to introduce "load factor" into our discussion then let's do the math. At a bank angle of 30 degrees load factor will increase stall speed by approximately 8%. A bank angle of 45 degrees will increase stall speed by 20%.
The exact stall speed of a ram-air canopy will depend on several factors, but let's use 5 mph (8 km/h) as an example. In that case, a 30-degree bank angle while flaring will only increase your stall speed by 0.4 mph (0.64 km/h). To increase stall speed by 1 mph (1.6 km/h) you will need a bank angle of 45 degrees while flaring, which is a pretty sporty maneuver by most people's standards.
While load factor might sound important, is a 0.4 mph increase in stall speed a significant consideration when landing your canopy? Probably not. Nonetheless, is it important to keep the canopy flying straight while you flare? Absolutely. Even without a stall occurring, banking or turning while you flare can cause you to touch down at a higher speed. You will probably also land with your body off balance, and fall over sideways.
A bank or turn during the flare is most commonly caused by reaching for the ground with one foot. You can usually see yourself doing this on video, and might even feel yourself doing it while it's happening. This problem can easily be avoided if you focus on looking straight ahead, keeping your body straight, and flaring evenly.
What should your feet be doing? Do you need one foot below you and one out in front as you prepare to touch down? That probably will happen naturally just as you stand up at the end of your flare without putting any extra effort into making it happen. And putting extra effort into making it happen could cause you to reach for the ground with one foot.
If you need to think about anything while you're flaring, think about keeping your feet together as you get into level flight, and continue keeping them together while you fly the canopy in a straight line across the ground as far as possible. If everything is going smoothly then as the canopy sets you down you can just stand up as if you were getting out of a chair. Your feet know what to do.
Look at image 5 below. We see a jumper flaring his canopy with his feet and knees together, knees slightly bent. Looks like he's simply maintaining a good PLF position, doesn't it? As he finishes his flare and the canopy sets him down, his feet come apart slightly to accept his weight.
Harness Body Position
What about leaning forward in the harness? Is "freeing your body from the pitch of the system" a crucial part of flaring? Look at image 5 again. A pitch change does occur when the nose of your canopy tilts up at the beginning of the flare. This pitch change is what puts the canopy into level flight, and the pitch change is actually created by the movement of your body under the canopy. In fact, it can be extremely helpful to view your body as an integral part of the parachute system instead of separating yourself from it. Feeling your body swing in conjunction with the canopy's movement is an important part of doing effective practice flares.
If you like to lean forward in the harness and it seems to help your landings, that's fantastic. It feels nice and looks cool. But it's also not a problem if you simply sit still in the harness and let your feet swing out slightly in front of you as you flare. Your body will rock up onto your feet as your feet touch down and accept your weight. You can either "lean forward into the experience," as Brian suggests, or maintain a more laid-back pose if you prefer. Whichever one feels more comfortable is the best one for you.
The technique Brian calls the "Seagull Landing," where you dip down below standing height then rise up again at the end of the flare, also feels good and looks cool if you do it correctly. You'll do it correctly if you develop the technique naturally while you practice good basic flaring skills. Putting too much conscious effort into achieving a "Seagull Landing" is similar to the belief that you must level off right at ground level every time: it can result in the same problems and bad habits. Most canopies will slow down just fine if you level off a comfortable distance above the ground and simply maintain level flight through the remainder of the flare.
In general, it might help to stop thinking about a "no-wind landing" as being significantly different from a "normal" landing. The basic skills that you use to land in stronger winds will also help you land softly in calm winds. Any bad habits you develop might not hurt your landings too much when there is some wind to slow you down, but those habits are usually still present and affecting your flare to some degree, and can be eliminated by practicing proper techniques.
Eliminating those bad habits by keeping things simple, letting yourself relax, and focusing on good basic flaring techniques will go a long way to improving your landings in all conditions. Soon you'll be just as confident landing on calm day as you are on windier ones, and you may even start to prefer calm-wind landings.
Experienced skydiving instructors and coaches, like those in any other sport, develop their own opinions, philosophies, and teaching methods. The advice you get from one person may be quite different from what someone else tells you. This can actually be a good thing sometimes, because the advice that helps one person may not be equally helpful to others.
The most basic, fundamental principles of aerodynamics can be used to describe the flight of any wing, so some of the things you learn about one canopy will certainly apply to others. However, specific performance characteristics can vary greatly from one aircraft to another: a 210 sq. ft. canopy does not perform exactly the same way as a 107, and a Triathlon does not perform exactly like a Sabre2. A Sabre2 does not perform exactly like a Lotus, and a Lotus does not perform exactly like a Twin Otter.
When discussing canopy performance and flying techniques the most important piece of advice I give my students is this: don't passively accept anything anyone says, including anything that I tell you. Think about it, and if it doesn't make sense keep asking questions until it does. More importantly, experiment in the air and see for yourself if it's really true.
Also, remember to breathe.
Scott Miller
References:
Direction of Commander, Naval Air Systems Command, United States Navy. Aerodynamics for Naval Aviators. Washington: Naval Air Systems Command, 1960. Revised 1965.
Germain, Brian. "Surviving the No Wind Landing." Dropzone.com. Sep 05 2007. (accessed October 13, 2007)
ZP Canopy Landing Tips and Techniques
Irrespective of how long you've been jumping, piloting today's high-speed canopies is not for the faint of heart. With thousands of landings on old zero performance canopies such as round 1.1s, PCs, Piglets, and Strato Stars, many of our founders are frankly fearful of fast canopies. Moreover, as canopy development continues in the present direction toward ever faster, smaller models, skydivers new and old need to be continuously educated on landing technique.
As one who recently returned to skydiving after a lengthy layoff (13 years) I knew I needed to get better acquainted with today's high-speed wings. They were obviously different from what I had been used to. Faster ... make that "swoopier" ... and although they looked to me to be more fun, there were too many people getting hurt under them. Wanting to avoid that, I set out to discover what I needed to know that I didn't about piloting these new canopies.
To provide some perspective, before learning these tips I'd rather have had to shoot down-wind accuracy on a round than land a small Z-Po 9-cell on a hot still day. Surprised? Remember that a landing in 110 F temperatures, say at Perris' 1,450 MSL, is like landing at 5-6,000 feet. One of the first persons I got turned onto was John LeBlanc, design engineer for Performance Designs. He explained that my old-fashioned notions about the handling characteristics of ram air wings have little relationship to designs now on the market. New high performance Z-pos are lighter and more durable, but they also demand much more attention to landing. Because what you don't know can hurt you, John tried to explain why I couldn't land a zero porosity canopy the same way as my old ram air.
Here is my understanding of how to land today's canopies. While some of these ideas, tips, and techniques are from John LeBlanc please remember that they are all filtered by an old time skydiver: all mistakes are my own. This is advice from a canopy expert interpreted by a relic:
Stepping up to the ground?
On a nice sunny day, John and I watched some landings at the DZ. He used his hands and feet to show me how, having picked my landing area, it should be done. 'You simply level out,' he told me. 'Convert your forward and down approach into forward speed. Eliminate any down for now, but stay inches off the ground.'
Inches? with a high forward speed? That seems scary; why not feet?
Says John: "The idea that neophytes should be several feet off the ground is okay for flying super big student gear, but it's not what the goal is, and is definitely not okay on the smaller stuff! Several feet up feels worse and worse as you go smaller, whether you're a neophyte or a self-acclaimed expert. As a result , we (Performance Designs) consider it unwise to go smaller (in canopy size) until you can consistently level out with feet at ground level under your existing canopy. Going smaller won't make it any easier, but rather it becomes more difficult!"
John compares good landing technique to getting off an escalator. "The down escalator is like the ideal descending approach, level off and landing." Escalators do offer a good canopy landing analogy. Both modes of transport demand coordinated, mindful movements at journey's end. Try visualizing a landing approach as John describes how your landing will resemble stepping off a descending escalator: "Now, think of an escalator. When it levels out, your feet are just below ground level by an inch or two. You can gently transfer your weight from the step (the harness) to the ground because you are at that level. The forward speed is no problem, because you're at ground level. You're stepping up onto the ground, rather than down to it."
"If the escalator dumped you off even as little as a foot high, the first few steps would be tough! This is because your forward speed is still there, as it will be on any no-wind landing. (If you level out too high) you crunch down with a (higher) rate of descent. This is why leveling off several feet up for neophytes is not a good idea. They have to come down sooner or later, and when they do, it will be with a (greater) rate of descent at the time of contact. With a little canopy, that will be a bad landing because it will hurt!" I mull this over.
There you are, storming across the turn, just above the ground. While you still have forward speed, your feet just brush the weed tops. As your speed decreases, you provide a tad more flare so as to maintain your feel of the grass. Then, just step up. Step up? Wait a minute, I protest. Easy enough for you to say that stepping out of my harness should be as simple as getting off an escalator, but if it's so easy why do so many people crash and burn? Obviously this analogy only applies to a smooth, known landing surface. Life and landing, I remind John, are both dangerous.
Yes, he agrees, "You are wise in emphasizing that brushing the feet applies to a known, smooth landing surface." and adds: but notes that "the altitude of your body should be the same, even if you're lifting your feet to stay clear of a poor surface until touch down time."
More importantly, John continues, "As wing loadings go over 1.1 lbs per sq. ft., this technique is a required for acceptable no-wind landings."
In my words, if you have a 150 square foot canopy and weigh 170 pounds, and your suspended weight per square foot of canopy exceeds a ratio of 1:1, then you gotta swoop the ground to avoid eating it. Then, a good landing will allow you to cautiously stand up out of your harness, starting from where the parachute is holding you up to where your feet are supporting you. The major tactile feedback is that your weight is transferred from your leg straps to your shoe soles.
Low wind landings and high speed dirt
What about the special challenges of no-wind landing conditions? "You will still stand up out of your harness," says John, "but you'll do so at a fast walk to a run, depending on canopy and wing loading. " The more wing load, the faster you'll have to run.
We watch several more landings in which many of the canopy pilots flare too high or too early. One thing hasn't changed about landing, I tell John. Landing softly requires precise timing. How do you time your flare?
He explains that if you flare too high, you'll land from higher up with an increased rate of descent, "if its done too soon, it results in a big gain in altitude, which means that you are too high (to land softly) again! " When you flare too high and then crash in on a little canopy, you'll likely get in a few front loops. Of course, if you flare too low or not at all, no matter what size canopy you're under you'll eat much dirt and still do several front loops.
People will laugh. Late flares are not considered good form; they tend to dirty your jumpsuit and gear. It's a good idea to avoid them, so you'll eat less dirt less often. As John adds that a good way to learn how, "is to figure it out on a bigger, more docile canopy. (less dirt eaten.)"
A backyard swing model
Remember the fun you had as a kid swinging in a backyard swing? You could go real high or not. You could even try to jump out at the top of the arc or lower. Or, if you had a littler kid in your lap, you'd just let the swing slow down to nearly stop and then just step out of the seat onto your feet. You do it so smoothly that there is no fear and no pain. It is satisfying. The little kid is happy but not scared. "The swing can be moving slow or fast, but if you get off at the right time, it's easy in either case." [to step out of the seat and onto your feet. No sweat, no fear. Like on a slow-moving swing, it's easier to time your touchdown under a bigger canopy], "The slow swing (big canopy) is easier to time, and the steps are slow. "
A fast moving backyard swing is something like a landing small fast canopy notes John, "The fast swing, (like a small canopy), is harder to time and the steps are quicker. But (even fast steps) don't hurt if you step (up) onto the ground at the bottom, when the rate of descent is exactly zero." Just imagine you are stepping out of that swing seat and onto your feet. If done smoothly it's fun, even satisfying. You've just had a good landing and you know it. But "Now try goofing on the timing ... get off on the upswing; things get real rough if you're moving fast! That is just like finishing your flare too high."
The transition from sitting in the harness to standing on the ground is subtle enough for another analogy. Thinking for a moment, he used a child's walking chair: and said something like 'I'm talking about those contraptions they put toddlers into. It's a seat with four wheels, and the kid's feet just barely touch the ground. They can paddle around and get into all sorts of trouble. Or they can quit paddling and just stand up. The difference is so smooth that they hardly notice whether it is their feet or the seat holding them up. That's what a good landing is like.' Yes, John said, "The walking chair analogy. Nice."
Putting this to practice, I find the idea of a two-stage flare is helpful for transitioning to the horizontal. First, flare with only about 6-12 inches of toggle. This converts the ground-rush into a swoop just above the ground. At the end of the swoop, when the canopy won't stay up any longer, depress (bury) the toggles for the second part of the flare.
After thinking about it, John added these remarks: "OK, I like the idea of a two-stage flare except for the part about burying the toggles at the end. This will make many canopies stall, and others might just quickly mush onto the ground. If your feet are at ground level, then this doesn't make much difference. You step up onto the ground just the same. But, if you haven't realized that you're a little higher than the ideal, you'll get a rude awakening when you bury the toggles. [Burying the toggles then] you drop down onto the ground with a thud."
He also strongly endorses flare-practice, before finial approach, while still high up, "I like... practicing the flare a lot. I do it on EVERY jump. its fun!" Practicing upstairs helps because you can hear and feel what your canopy is doing without the distraction of high speed dirt coming at you.
Keep "hands-on" canopy control
Canopy control inputs should be smooth and fluid, not abrupt and mechanical. Whatever landing you do make, says John, "you must still keep your hands controlling the canopy, even if you have the urge to swing your hands as you step (or run). If you are unknowingly moving the toggles, the canopy will do some unwanted maneuvers! People also use their hands for balance cause some pretty wild gyrations, too!"
However, "If you continue to fly the parachute properly when you are taking your first steps, [then] the parachute will continue to help support you during those initial steps. Again, this technique is not critical on a big canopy, but becomes more and more important as the wing loading increases."
So, remember, parachute canopies only do what you tell them to do. They are so responsive that heretofore unnoticed hand movements will give you yaw and cause you to veer off. In other words, they're responsive enough for perfect landings every time. Or they can turn a twitch into a turn. Keep your hands in sight so you always know what they're doing.
Smaller is not always smarter
While today's new smaller Z-Po parachute canopies are faster, most do appear to have wider safety margins than did the squares of yesterday. However, I'm convinced that going to a smaller canopy shouldn't be an automatic goal. For some of us, consistently painless landings require lower wing loadings via bigger canopies.
As PD's John LeBlanc puts it: "Square foot for square foot, today's canopies are generally more forgiving than those squares from years ago. But as you downsize from one size modern ram air to a smaller canopy of the same type, you give up some of that forgiveness.
"So, make sure you've really got things well under control before you even consider going smaller. On the larger canopy, little technique problems will not affect the softness of the landing noticeably, but the same poor technique will cause problems on the next size smaller canopy."
Pat Works, SCS-1
Legal Disclaimer: Serous injury or death can result from applying written techniques to a high speed sport. Although the quotes are from John LeBlanc, Neither he nor Performance Designs endorse, condone, apporve, or reccomend anything herein. Parachutes are dangerous: you could kill yourself using 'em.
Copyright 1994 by Pat Works
RWu Parachuting Publications
1656 Beechwood Ave. Fullerton CA. 92635
(714) 990-0369
FAX 529-4769
Wing-loading and Parachute Performance
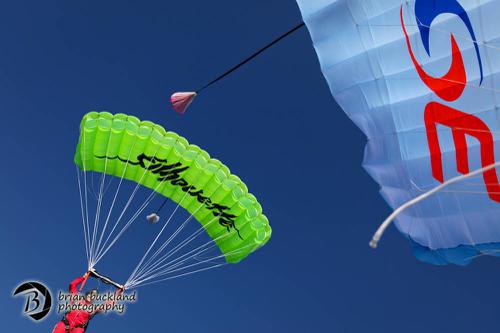
Image by Brian Buckland
It is common knowledge that wing-loading has profound effects on the way parachutes perform. Furthermore, it appears that even if the wing-loading is exactly the same between two otherwise identical parachutes, different size canopies fly quite differently. In other words, if you fly a 210 square foot parachute of a given design with lots of additional weight to achieve a loading of say, one pound per square foot, a 150 at the exact same wing-loading will usually have a steeper glide ratio, faster turns, and demonstrate a longer recovery arc following a high airspeed maneuver. This means that, regardless of the wing-loading, all small canopies are high performance, and should be treated accordingly. There are many explanations for this non-linear relationship, and in this article I will discuss some of the most significant governing variables.
Test flight data shows us that small wings, regardless of wing-loading, will be more radical than their larger counterparts, all other design aspects being equal, however the degree to which they are different depends of the model of the canopy. Nevertheless, the trend is consistent and predictable. The most common explanation for these differences is that it is due to differences in line length. Smaller canopies do have shorter lines on the whole. Although it is true that some aspects of a parachute’s performance increases as line length reduces, this only applies to mobility about the roll, pitch and yaw axis. The effects on recovery arc tend to have the opposite response to line length. In other words, a parachute with longer lines tends to exhibit a longer recovery arc. To explain these counter-intuitive effects, we must look elsewhere for an explanation.
The other aspect, previously unconsidered, is the relationship of the canopy's internal volume to its surface area. Essentially, the volume displaced by the airfoil can be thought of as a key aspect of the overall DRAG. Of course the shape of the wing itself is vitally relevant to the drag coefficient, but for the purposes of this discussion, let’s focus on the effects of drag from the perspective of simple air displacement, like a footprint in the sky. The fatter the airfoil, the more drag it will exhibit. This means that a “fat” parachute will sit at a higher angle of attack in full flight, based on the balance of power between the airfoil's drag (D1) and that of the suspended load, the jumper (D2). Further, the drag value of a “fat” airfoil will increase markedly with airspeed, and therefore large objects will suffer more drag than “skinny” airfoils at high speed. The wing, therefore, will “want” to return to the overhead position more aggressively on fatter airfoils, as a general rule.
Let's take those aerodynamic principles to the realm of parachute sizing. When a parachute design is scaled, for the most part, the entire wing is scaled simultaneously. This is the same geometric progression as a matchbox car: same three dimensional proportions, but a different size. When we want to make a parachute larger, we simply multiply each dimension by a “scale factor”, a single number that will result in the size change we desire.
When we apply this mathematical model to parachute designs, we create an unwanted effect: disproportionate scale factors relating to area and volume. Simply put, the number we use to scale the parachute is based on the "square footage" of the wing, and this is of course, a square function (X²). The volume on the other hand, is governed by a cube function, (X³). This means that when we increase the height of the rib at the same rate as the span and the chord, we inadvertently make the wing too fat as we scale upwards, and too thin when we scale down. This is one of the reasons why a 120 flies very differently than a 170, even at the exact same wing-loading and body drag component. The wings only appear to be the same, but they are most decidedly not the same from a volumetric perspective.
So, one might say, why don't we make the height of the airfoil on smaller wings greater, and that of larger wings smaller, proportionately? This is sometimes done and it works to a certain degree. However, if we were to search for a formula that would allow us to scale the volume at the same rate as the area, we would have to keep the rib height the same on all sizes of a design. I worked this out with a brilliant Tasmanian mathematician on flight back from Sydney many years ago. A 120 with the same rib as a 190? That doesn't quite pass the gut check, does it? Only the middle sizes would fly right, and beyond a few degrees of freedom, the system would collapse into chaos, because the fat little wings would have too much drag to be efficient and the big wings would have too little lift to land well, and would be prone to collapse in turbulence due to their flimsy nature by virtue of their low volume. A simple answer does not appear to exist, at least not yet.
The heart of the problem is the fact that our industry has grown accustomed to the use of "pounds per square foot" as our way of quantifying parachute size. This leads to the erroneous belief that a given "wing-loading" will result in similar performance for all parachutes regardless of size. This is most certainly not the case, and is dangerously misleading for light weight jumpers striving for that magical one pound per square foot wing-loading. A 120 is inappropriate for someone with less than 100 jumps no matter how much they weigh. So, what do we do? Firstly, we honor the differences in parachute sizes, and downsize very carefully. We make our steps downward based on actual ability and frequency of jumping, and we look for any excuse we can to upsize. In addition to remaining conservative with regards to canopy size, we must go to greater lengths to understand the nature of performance and size.
If it is true that performance trends do not appear linear with regards to parachute size, then perhaps the solution is a curved ruler. To that end, I have offered a complex sizing chart to the world that reflects the non-linear nature of parachute sizing and performance for the purpose of downsizing guidance. This easy-to-operate chart has been adopted by many national organizations and local dropzones as the official guidelines for parachute size relative to experience. Born from a brilliant but arguably conservative Swedish chart created by my good friend and colleague, Ola Jameson, who was the Head of Safety (Riksinstructor) for the SFF at the time. My somewhat less conservative version of the “sizing chart” offers suggestions for parachute size relative to weight, rather than simple wing-loading alone as the defining factor. This allows the recommended parachute size for a heavy person to be a higher wing-loading than that which is suggested for a lighter person. It is available HERE.
The sizing chart does not suggest when the jumper should downsize, but rather limits the degree to which they should decrease their parachute size based on the complex aerodynamic principles effected by wing geometry. The "chart trap" is always a risk with such things, when jumpers automatically step down in size because the chart suggests that a change is reasonable. Decisions based on parachute size and design should always be made based on the actual ability of the jumper, and the other governing factors described in the 22 pages of modifying text that follow the chart.
Another consideration I will now put forth to the skydiving community is a fundamental change to the way we define parachute size. Based on the discussion above, a two-dimensional analysis is insufficient to describe what a parachute will do in the sky, and "pounds per square foot" is a very limited 2-D relationship. I suggest that a better model for parachute size definition is Pounds (or kilos) per Cubic foot (or cubic meter). The metric numbers would be far easier to work, if we can get the Yanks and Brits to let go of the Imperial system; but we have to pick our battles, don't we. By using lbs/ft³, we will effectively remove the 2-D bias from the "ruler" as it were, and make the relevant differences more numerically obvious. It may sound like a radical idea at first, but so was the ram air canopy when that showed up, but look how well that worked out. Just because a change is difficult does not make it less necessary.
In the interest of moving this new paradigm forward, and in the spirit of the immortal words of Mahatma Gandhi, I will be the change I wish to see in the world. Here are the volumes of my parachutes. It is my hope that other manufacturers will follow suit, in the interest of transparency of our parachutes’ designs, for the good of the skydiving public.
The topic of parachute performance prediction is vast, and must continue to be discussed in scientific terms. We must do this because, as one of the few (mostly) self-governing branches of aviation, we are the only true experts in our field. We are the ones who must think outside the old box of established paradigms, and change when change is necessary. We will continue to improve our sport in every way, simply because we love our sport so much that we want to know more, and grow more. The universal passion for knowledge exhibited throughout the skydiving community leads us to a very high level of mutual respect for our fellow jumpers. This precious commodity of solidarity is rare in this world, and we must allow that connection to lead us to always reach for safer procedures built on our ever-increasing understanding of that which saves our lives. Improvement in matters relating to safety is just love of life in motion, and love must be adaptable and smart if it is to last in a complex world. Again and again, skydivers prove to me that they are highly intelligent adventurers committed to safety, and very much worthy of my respect. We will adapt, and we will thrive.
About the Author: Brian Germain is a parachute designer, author, teacher, radio personality, keynote speaker with over 15,000 jumps, and has been an active skydiver for 30 years. He is the creator of the famed instructional video "No Sweat: Parachute Packing Made Easy", as well as the critically acclaimed book The Parachute and its Pilot. You can get more of Brian’s teaching at Adventure Wisdom, Big Air Sportz, Transcending Fear, and on his vast YouTube Channel
Choices, Choices: Pilot-Chute-In-Tow Malfunctions and You
Curt Vogelsang captures some hot canopy-on-canopy action.
Y’know when you don't feel like getting out of bed in the morning? Your main parachute is likely a lot brighter-eyed and bushier-tailed than you are, but every once in a good long while it just doesn't feel like getting out and doing its job. Y’know? Relatable.
Kidding aside: When you throw your hand-deployed pilot chute but the container stays closed -- trapping the main deployment bag inside, helpless to deliver you a parachute -- you’ve gotchaself a pilot-chute-in-tow. In other words: you’ve got nothing out, which makes you the clenchy, concerned (and hopefully very temporary) owner of a high-speed mal.
You’d better get on that, buddy. Stat.
But how?
Deploy the reserve immediately or cut away first and then deploy the reserve?
One Handle or Two Handles: The Cagematch
If you’re not sure which you’d choose,* you’re certainly not the first. This particular point has been the subject of roaring contention since the invention of the BOC, my friends. (Guaranteed: the comments section below will corroborate my statement. I can sense people sharpening their claymores and dunking their arrows in poison even now.)
There’s a school that says -- well, duh -- get your damn reserve out, like right now what are you waiting for. There’s another school that calls that school a bunch of mouth-breathing pasteeaters. The latter group insists that you'd better go through the procedures you know lest you mess it up when it counts. They usually follow up by spitting on a photograph of the first group’s mother and wondering aloud why the first group is even allowed to skydive. Then they start punching each other.
Images by Joe Nesbitt
The USPA Skydiver’s Information Manual doesn’t make a move to break up the fight. It stands clear of the flying arms and legs and says, “Y’know -- they both kinda have a point.” Section 5-1 of the manual says this, verbatim:
“Procedure 1: Pull the reserve immediately. A pilot-chute-in-tow malfunction is associated with a high descent rate and requires immediate action. The chance of a main-reserve entanglement is slim, and valuable time and altitude could be lost by initiating a cutaway prior to deploying the reserve. Be prepared to cut away.
“Procedure 2: Cut away, then immediately deploy the reserve. Because there is a chance the main could deploy during or as a result of reserve activation, a cutaway might be the best response in some situations.”
Let’s look a little closer at the options, then, shall we?
Option One: Not Even Gonna Bother With That Cutaway Handle.
Pro: Immediately yanking out that reserve saves a step. When AGL counts (and golly, doesn’t it?), saving a step can save a life. Many skydivers are quick to point out specific incidents in which jumpers with PCiTs have gone in with sealed magical backpacks, having failed to pull both handles (or pull any handle at all) while the clock was ticking. Gulp.
Con: It takes the pressure off (in a potentially bad way). As the reserve leaves the container, there’s a chance that it can take the sealing pressure off the flaps that are keeping the main container closed. The main can then leap to freedom and deploy at the same time as the reserve. At this point, you might wind up with an entanglement, a side-by-side, biplane or downplane to figure out.**
Option Two: Get Off The Field, Main Parachute. Reserve, You’re In!
Pro: It’s the same stuff you’ve been taught to do for every other reserve-requisite malfunction. ...If you initiate the reserve deployment clearly, confidently, and as early as possible, of course. After all: making a one-off exception for a single kind of malfunction can be tricky. A jumper might well spend a little too much time thinking it over (‘Am I going for my reserve handle first right now? ‘Cause that’s weird. Is that okay?’) when they should just be yanking the stuffing out of their emergency handles. Going through the real-life motions of the little dance you do before you get on every load makes more sense to your body, for sure.
Con: You’re adding more complexity to the situation than you may realize. Especially if you don’t have secure riser covers, the (jealous?) cut-away main risers might sneak out of the container and grab for the reserve as it deploys. Another thing: the main is very likely to wiggle free, detach from the harness as soon as it catches air and do its best to entangle with your Option B. The latter kerfuffle is made much more likely when you add a single-sided reserve static line to the mix, turning the already-dismaying situation into something of a tug-of-war.
Neither of these choices sounds like the cherry on top of a lovely afternoon; I know. At some point, however, you may be forced to make one. If you do, you’d better have a plan in mind.
Not in the mood to make that choice? Me neither. Luckily, there are some steps you can take to better your chances of never seeing a PCiT -- and in next week’s article, I’ll tell you what they are.
---------
*If you have a Racer (or any container with a cross-connected RSL), you do not have a choice. You must pull the reserve without cutting away. Do not pass ‘go,’ do not collect $200. In that particular configuration, the main will choke off the reserve if the cutaway has been pulled. If this unnerves you, get thee to a rigger to discuss it.
**Head over the PIA.com to check out a handy study they did in 1997 regarding the management of two-out situations. It’s called the “Dual Square Report.”
By nettenette, in Safety,
How to survive the WFFC
It's summer again, and that means the summer boogies are in full swing. Big groups of jumpers are getting together at this and other boogies througout the world, jumping like crazy, trying new equipment and disciplines, and partying all night. While they can be a lot of fun, boogies also present some unique risks and dangers that we have to keep in mind if we want to make it through the summer without injury. Presented below are some tips to help keep you alive and jumping at the biggest skydiving boogie in the world.
1. Do only one new thing at a time. Many jumpers show up and are awed by the array of canopy demos, big ways, new planes (with new exits) and new styles of flying. Indeed, the WFFC is a great place to try new gear and jump new planes. But showing up, grabbing a demo rig with a tiny main, getting on a new type of airplane, and trying head down for the first time is not such a good idea. Want to try a new rig? Great! But first make a few jumps with your old rig. See if the canopy traffic near the landing area is OK with you. If it gets a little too intense, you're still in good shape, because you are familiar with your canopy, and are in a better position to handle lots of traffic. After your first few jumps on your current canopy, you can make a better decision whether a smaller canopy is a good idea, or if you want to land that smaller canopy in an alternate (i.e. larger, lower traffic) area.
2. Make small changes. If you do decide to jump that demo rig, talk to the folks at the canopy tent and get a canopy they recommend. I would hesitate to downsize more than one canopy size at a time at the WFFC, no matter how good you think you are. Put a few jumps on each size or style of canopy before going on to a more aggressive one, so you have some experience you can fall back on if the next landing doesn't go as well.
3. Know who you're jumping with. You're generally not going to know everyone on the dive, but at least make an effort to not to jump with all unknowns. Skydiving is still small enough that your friends probably know their friends, so ask around to determine their skill level. Ask them how many jumps they have, but be aware that this isn't always indicative of skills, and people sometimes lie about their number of jumps (which is really stupid.) The WFFC organizers are a good resource here, since they have a lot of experience matching people and planning safe dives. Even if you don't want to jump with them, you can ask them for recommendations on other people. Chances are one of the LO's knows them or has jumped with them at some point.
4. Jump with a clear head. The WFFC has some excellent parties. But if you were up all night, it might be a good idea to get a little sleep before jumping. Adrenalin can't always make up for a hangover or a lack of sleep, and you need all your wits about you when you're
in the air at the WFFC.
5. Plan your outs. The main landing area by manifest is popular, but a lot of people have gotten hurt trying to land there. If dense canopy traffic worries you, land somewhere else. Also, if you open and you think you may not make it back to the main landing areas, pick your outs at 2000 feet, not at 50 feet. You don't have too many options left at that altitude.
6. Learn to flat turn and flare turn. This is really important. You will be in big crowds of jumpers flying back. At some point, someone will cut you off. If it happens at 50 feet you have three choices: make a hard toggle turn (and plow into the ground at a painful speed) run into them or flat turn away. If it happens at ten feet, or after you have begun your flare, you have even fewer options. So be sure you can both flat turn (turn with minimal loss of altitude, using both brakes) and flare turn (turn right and left in the flare) before you get put in a position where you need those skills.
7. Plan your opening altitude and stick to it. At the WFFC, it can be dangerous to open high, since the next plane may be coming along on the same jump run just a few minutes later. There are some aircraft/loads that allow higher openings; check with manifest if you need a higher opening altitude to try out a new canopy (for example.)
The WFFC can be a dangerous place. But with a little planning and some common sense, you can spend your time at Rantoul jumping and partying rather than taking that "other" helicopter ride.
Survival Skills for Canopy Control
Landing Accidents
Avoid landing accidents by doing all you can to eliminate landing off the DZ.
As soon as you're open, evaluate the spot. When faced with a bad spot, quickly find out how far you can go by using the accuracy trick. You can greatly extend your parachute's capability to get you back to the DZ by learning how to use the entire control range to your advantage. The accuracy trick will help you learn how to quickly choose the best toggle or riser position for any bad spot. Why deal with unfamiliar hazards off the DZ? Avoid them through better canopy control.
A. The Accuracy Trick Defined
Find the point on the ground that doesn't move.
1. Choose a point on the ground in front of you. If it seems to move towards you (the angle gets steeper in your field of vision), then you will fly past that point. If the point seems to move up or away (the angle to the point gets flatter in your field of vision), then you won't make it that far, unless something changes. If you keep looking between these two points, you will find one point on the ground that does not appear to move in your field of vision at all. (The visual angle doesn't change.) I call that point the "special point" that doesn't move. The visual angle to all other points on the ground seem to move outward from this point as you travel towards it.
2. If the winds never changed, and you never moved your toggles, you would end up crashing into the ground right on that special point! If the winds do change, you can tell right away because the special point that wasn't moving will start to move as soon as the winds change. That means there is a new point that doesn't move. A new special point replaces the old one. That special point will also start to move if you change your toggle position.
B. Using The Old Accuracy Trick
1. When you have a tail wind and the spot is quite long:
Find the toggle position that would take you to a point furthest past the DZ. Then you will arrive at the DZ with the most altitude (and most options) remaining.
A simple rule such as, "on a long spot with a tailwind, fly half brakes," may be better than nothing, but it is far from ideal. To avoid the off-airport landing, you may need better performance than a simple guideline can give. With a strong tail wind, it is likely that going to deeper brakes will help even more, but how much brakes? Use the accuracy trick to choose what control position works the best in the particular tailwind you have at the time: Find the special point, then add some brakes. See how you have a new special point as you change the toggles? If the visual angle to the new point is flatter, you are doing better. The visual angle to the old point will get steeper and steeper. Now add some more brakes. If your field of vision changes again just as described, then you're doing even better. Each time you change the toggles, (or each time the wind changes), you will have a new special point. Add more brakes. You're flying really slowly now. If the visual angle to the new point is steeper, then you're not doing as well. If this is the case, the visual angle to the old point will get flatter and flatter. So reduce the brakes back to the optimum. 2. If you have a tailwind coming slightly from one side, and you have a long spot, quickly choose the right crab angle to fly a straight path to the DZ.
You've turned towards the DZ and have chosen the best brake position that would take you to a point furthest past the DZ by using the accuracy trick described above. You can draw an imaginary straight line between you and the special point, through the intended landing point. If you start drifting off this line, immediately make a crab angle that will keep you on this line. See how the visual angle to the special point changes as you create the crab angle? Adjust the brakes to put that special point in the best position again. If you were really deep in the brakes, you will probably need less brakes after you create a crab angle.
Do not "home" back to the DZ by pointing straight at it while drifting sideways. Since the crosswind will blow you slightly off the wind line, you will likely readjust your heading again and again to point back towards the DZ, without ever counteracting the crosswind at all. This means you will be flying a long arc back to the DZ. The quickest way back is a straight line, so crab rather than home! 3. What about a headwind on a long spot?
If you have a headwind, the special point that doesn't move will be quite close to you. If you need to fly past this point to get to a safe landing area, you will probably need to use front risers. (Make sure your canopy is quite stable on front risers before using this technique) How much front risers? Use the accuracy trick to find out! Try a little front riser and the special point will move. (The angle will start changing). Try a little more and it will move again. Try a little more. Did the point move the wrong direction? That's too much front riser. See how this method works to determine the best control position in any bad spot situation? How about a headwind coming from slightly from one side?
4. Don't forget to leave yourself plenty of safety margin.
Use the accuracy trick in this way to get back to a safe place, but be careful to avoid fixating on this technique so much that we forget to use our safe options while they still exist. Make sure you leave yourself plenty of altitude and maneuvering room to plan a safe approach and landing.
II. Learn To Fly Defensively
A. Defensive Flying Has Two Basic Parts
1. Developing such high skill that you get to the ground safely in spite of the stupid things people are doing all around you.
2. Developing such good judgement that you make your decisions in a way that helps create safer situations for yourself and others.
B. Stage The Approaches To Avoid Heavy Traffic
Many of the worst accidents are collisions that occur at landing time, often because there are just too many canopies going too many directions to be safe! Staging the traffic can help reduce this risk.
1.To create more seperation from other traffic.
After opening decide quickly whether it is best to float or dive, assuming the spot is good enough to allow for some maneuvering. The goal is to prevent a high frequency of landings occurring in a short period of time. Less traffic density means less chance of an accident. This is similar to the idea that eliminating tailgating reduces the chance of accidents on the highway. To stage the approaches to the landing area, you must look way ahead and predict how the traffic will arrive at the landing area. Then, adjust your fight path so that you have as little traffic as possible when you are landing. The more people on the load using this technique the better! Noticing heavy traffic when you're already on final approach is too late! Planning is the name of the game.
2. How do you stage the approaches?
First, look all around you after opening. See where everyone is. Ask yourself two questions: Are you near the top of the bunch or near the bottom? Is your canopy loaded more heavily or more lightly than the others? Then:
If you're more towards the bottom, and have an average wing loading for the group: You should land as soon as possible. You're trying to stretch out the time period that all the landings will occur by getting the landing process started sooner. If you don't do this, you may start crowding up the traffic behind you, just like a car driver would if he drove slowly in the fast lane.
If you're more towards the bottom, but have a big floaty canopy: The faster traffic will probably catch up and pass you. Where would you prefer this to happen? If you dive down and try to set up on final approach early, you will probably be passed during your final approach. In this case, assuming the spot is good, it might be better to float in the brakes right from the start. This will force the faster traffic to pass you while you are still quite high. Being passed up high is safer than being passed on final approach.
If you're more towards the top: You should try to float in the brakes. You're trying to stretch out the time period that all the landings will occur, by landing later. This is easy if you are on a larger floaty canopy.
What if you're more towards the the top, but you have a high wing loading? If you're loaded heavily, you can still probably float in brakes quite well. Try to stay up with the big floaty canopies, until you find the biggest gap in the traffic that is below you. Then you fly down and fill that biggest gap. That gap is usually just in front of the big floaty canopies.
C. Learn The Habits Of Others
Anticipating the actions of others will help keep you out of trouble.Here are some examples:
1. The indecisive slow poke.
This is someone with a big canopy that likes to do sashays while in the final approach area. If you're flying a much faster canopy, don't follow him on his downwind leg. You may get stuck behind him, needing to pass him on late final. The problem is, you may not be able to predict where he will be when you pass! Better to pass him earlier on, or turn your base leg early, landing more up-wind than him. Perhaps you can land somewhere else. Just don't cut him off, because he might get overloaded by the whole thing and make a mistake, causing an accident.
2. The last-second hook turner.
This guy loves to do low toggle-turns, way lower than you're willing to risk. If you're following him back from a bad spot, don't wait for him to turn into the wind before you do! You'll probably be turning lower than you want to be! If he is following close behind you and below you, he might be obstructing your turn into the wind. Remove yourself from this situation while there is still plenty of altitude.
3. Have you ever known someone who likes landing downwind for fun?
In today's jumping environment, you have to be ready for anything, so keep lots of options open.
D. Diffuse The Hot Landing Area
This you do by taking the initiative to land somewhere else.
Walking is healthy! It's better than being carried back on a stretcher. By choosing to land somewhere else, rather than joining into the already crowded traffic on final to the "cool" landing area, you'll make it safer for yourself, as well as making the "cool" landing area a little less crowded for the others.
E. Check The Spot Early During The Skydive
Many marginal spots are made worse by aimlessly wandering around for a few seconds while figuring out where you are. If you can do so quickly, check the spot during climb out if you're a floater waiting for others to climb out. Check it if you have an idle second or two during freefall. Checking the spot early and frequently will give you advance warning of a bad spot. You will know, right away, which direction to fly the canopy. You might even decide to leave a touch early, to start getting safe separation sooner, and therefore permit a little higher opening too.
F. Improve Your Tracking
You'll get safe separation sooner, if you improve your tracking. Then you can deploy your canopy higher and avoid problems with bad spots. This will help you avoid the off-airport landing. You can also get more separation, which will reduce chances of a collision during opening.
1. How much separation is necessary?
The higher the wing loading on the load, the more separation is required. Most people are way too comfortable with way too little separation! You should be able to have an off-heading opening facing directly towards another jumper and still have enough separation to allow for a rear riser turn to avoid a collision. Blaming off-heading openings for canopy collisions is a major cop-out.
2. To Improve your tracking, first improve your attitude: be dissatisfied!
You must be dissatisfied with your present tracking, or you will have no real incentive to improve. Satisfaction with your tracking is a trap and an ego protection device. This ego protection device helps you make your bad excuses for poor tracking more believable. One bad excuse is, "That jerk tracked right over my head when I was ready to pull." Really? Or did you track too steeply and not see where you were going? Be dissatisfied and you'll get constant improvement.
3. With your attitude changed, now experiment with technique.
Many people have not really experimented with body positions for tracking, so you often see poor tracking. I suggest that you occasionally devote an entire skydive just to tracking. You'll have plenty of time to experiment. Make sure you track away from the line of flight, to avoid conflicts with other jumpers.
4. Avoid these common errors:
Arching. This is OK for a beginner, but it causes a steep track. De-arching makes the track flatter. Try bending a little at the waist.
Knees and ankles bent. This slows the track, making it mushy and steep. Straight knees and pointed toes are better, and they should push down onto the relative wind.
Arms up, streamlined with relative wind. This causes a steeper track also. The arms should be pressing down onto relative wind to make the track flatter.
Legs and arms too close together. This does not help the speed much, and usually causes difficulty avoiding a rolling motion side to side. A slightly spread position, with feet almost shoulder width, and hands 6" 12" from torso is better because it aids in stability and makes it easier to deflect more relative wind. 5. When you leave a formation and track up and away, rather than down and away, you're starting to get the hang of it!
On most jumps the fall rate is fast while doing RW, and the body is arched. Since the track should be de-arched and flat, a good track may actually have a lower descent rate than the formation!
III. Conclusions
I have not covered reducing the risks of normal landings and swoop landings because that will be addressed in a different seminar. As you can see, I believe that most of the canopy survival skills are a combination of improving skills and developing better judgment. Because of my emphasis on improvements, there can be no end to this process, and no real conclusion. I do not wish to fall into the too common trap of thinking that I've completed my learning process and I'm safe from harm. I've seen that this is a deadly trap. That is why I would like to encourage you all to share your ideas on the subject with me. I hope I have presented to you some thought provoking ideas and concepts that you can use to help you reduce the risk of accidents at your DZ.
What is In a First Aid Kit
We all know that our sport can be dangerous and deadly when accidents occur. When they do occur the best defense is to be prepared to deal with the injuries that may be present. The local paramedics should be called right away but what if your DZ is isolated from the local town or maybe the injury is minor and does not need professional help.
What sort of things should you have on your Drop Zone? Where should the first aid equipment be located? What involvement can the local rescue squad, fire department and police department have?
All of these questions will be addressed.
While one DZ with a trained medical professional may have first aid equipment items A, B, C, D and E. A local DZ without trained personnel may only have A and B. There are many things that can be useful in the case of an emergency but many medical supplies can be dangerous and deadly if you do not have the proper knowledge to use them.
Every DZ should have a basic first aid kit. The kit should include bandages to control bleeding, ice packs for injuries, slings for upper extremity injuries, splints for fractures, ace wraps for sprains, sterile saline or hydrogen peroxide or isopropyl alcohol to clean cuts and abrasions.
What else should you have? Shears or heavy scissors to cut off clothing, jump suits or rigs if the need arises. A watch with a second hand. This will allow you to accurately check the pulse or respirations per minute. A stethoscope and blood pressure cuff. These are fairly simple to use and you can learn quickly from a trained medical professional how to take an accurate blood pressure. A pen and notepad can be invaluable. They can be used to record the time of injury, pulse, respirations, blood pressure, phone numbers and also to mark where a pulse can be felt on an injured arm or leg.
What else can be useful?
There are many things that can be useful to someone trained in the medical field. Things that I have found useful at the DZ are oxygen tanks and masks, cervical collars and intravenous equipment to start fluid resuscitation to name a few. These are not things that should be used haphazardly and can be harmful if not used properly by trained medical professionals.
However, if you are the DZO or ST&A; at a local DZ and have trained paramedics, nurses or physicians discuss with them what they would be comfortable having available in the event of emergency and have that equipment available to them.
Where should you put the First Aid Kit
The kit should be placed in a central location. It should be easily accessible and everyone that will be involved in the case of an injury should know its location. There is no point in having it locked in a locker or office if everyone has to go searching for the person with the key. At some larger DZ's there may realistically be a need for more than one first aid kit depending on the layout of the DZ.
If you have a trained medical professional on the DZ and have supplies that should be used only by those with a medical license, separate the equipment. Have a central, accessible kit containing only basic equipment including bandages, ice packs, splints, etc. In a more secure location have a second first aid kit with more advanced equipment that will only be given to those who are trained to use it.
Get People Involved
For the past few years at Skydive Cross Keys the DZO has worked closely with the local fire department and rescue squad. Every spring the local departments come to the DZ with all of their equipment. On site at the DZ they practice extricating a skydiver from a tree and run drills with different accident scenarios.
The fire and rescue personnel also get familiarized with skydiving equipment and learn first hand about the helmets, jumpsuits and rigs.
Give your local squad a call and find out if they would be interested in doing similar drills at your DZ.
Get the local authorities prepared if you are planning upcoming events at your DZ. If you have a boogie, competition or other large event planned let the local fire and rescue department know when the event will run and how many skydivers you expect. This allows the medical personnel to be prepared for injuries. Most large events that are held at my home DZ have an ambulance stationed at the DZ throughout most of the day.
As the busy skydiving season approaches for many DZ's step back and evaluate if you are as prepared as you can be. Talk to local jumpers who are medically trained. Open up the old first aid kit that is on the DZ. Are there things that need to be replaced or added to make the kit complete? Call the local ambulance or fire department and invite them to come to the DZ, practice their drills and receive an introduction to the gear they might run into.
Accidents do happen, and the best medicine is to be prepared when it happens.