1 1

Safety

    Exit Order Safety

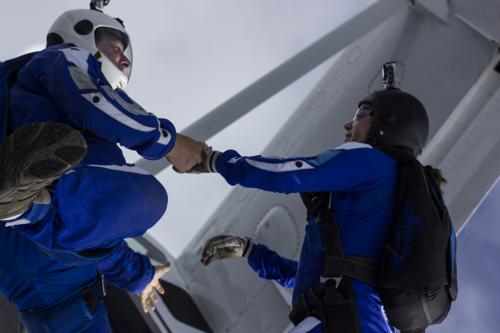
    Brian Germain and wife Laura Kraus launch an exit over Voss, Norway. Photo by Ron Holan There are many different views on exit order, although only some of them are based in science. The following exit order plan is based on the principle of "prop blast penetration": the degree to which a jumper remains under the aircraft based on the drag produced by their body position. When a jumper assumed a low drag body position, head down for instance, they follow a longer arc through the sky on their way to vertical descent.
    The fastest falling skydivers are freefliers, which means that they remain under the aircraft longest. If freefliers exit the aircraft first, their trajectory will take them toward, and often beyond the trajectory of flat flyers exiting after them. This fact has been proven time and again in the numerous close calls that have led to the creation of this exit order model. Therefore, the best way to create maximum separation between jumpers at deployment time is to have the FS "flat" jumpers exit before the freefliers, regardless of deployment altitude.
    Beyond this, we must also consider formation size when planning exit order. Since the last groups out of the airplane are more likely to land off the dropzone, large groups tend to exit before small groups based on the "needs of the many outweigh the needs of the few" principle of human civilization. I concur that this is a good plan, but for another set of reasons. Large groups tend to open lower than small groups due to task fixation and the need for adequate tracking time to create safe separation. This means participants of large formations should open closer to the dropzone. Further, smaller groups have the option of breaking off early, tracking perpendicular to the jumprun and pulling high to compensate for long spots, while the complexity of building a large formation makes it difficult to take such steps toward safety due to the peer pressure associated with the situation.

    Photo by Ron Holan
    The Exit Sequence
    So this brings us to the preliminary plan of sending the flat flyers out first, in groups largest to smallest, then the freefliers. However, since inexperienced freefliers most often remain under the aircraft for a shorter period of time than vertically oriented freefliers performing perfect zero angle of attack exits, the order should be lowest experience to highest. This also allows the more experienced freefliers to observe the exits of the novices, giving them the opportunity to give helpful advice, and to provide extra time in the door if necessary. If the previous skydiver or group is still under the airplane, do not jump. When in doubt, wait longer.
    Following the flats and then the vertical skydivers, we have the students and tandems. The order can be varied here, although there are some reasons to support sending the tandems out last. First, landing a tandem off the DZ is safer than landing a student into an unknown location. Second, students can sometimes get open lower than planned, which not only increases their risks of landing off, but puts the instructors at risk of landing off even more as they open lower than their students. Tandems on the other hand have the option of pulling whenever they see fit, which allows the camera flyer to get open high as well.
    The last groups to consider are those involved in horizontal skydives, such as tracking, "atmonauti" or steep tracking, and wingsuit pilots. The truth is, experienced horizontal skydivers can safety get out of the way of other jumpers quite easily, and can exit in any part of the order. However, in the case of two or more horizontal skydiving groups, plans must be created and followed with vigilance. For instance, one tracking group can exit first and track out and up the right side of the jumprun, while another group can exit last and offset toward the left side of the jumprun. Three horizontal groups on the same aircraft are best handled by adding a second pass, although there is a great deal of room for creative answers when wingsuit pilots are involved.

    Photo by Ron Holan
    Timing the Exits
    The amount of time between groups must vary based on the groundspeed of the aircraft. On a windy day, with an into-the-wind jump-run, the aircraft may move quite slowly across the ground, reducing separation between jumpers. This requires significant time between exits, perhaps as much as 15 seconds or more on a windy day or a slow airplane. The separation between groups can be increased quite easily on windy days by crabbing the aircraft with respect to the upper level winds, a practice that has become increasingly common at large dropzones. For a scientific explanation of exit separation, please read John Kallend’s PowerPoint, found here.
    Many jumpers believe that once the freefall is over, there is no way to prevent a collision. However, given the glide ratio of modern parachutes, we have the ability to close the gap quickly after opening by pointing our canopies in the wrong direction. Given the fact that the vast majority of skydivers will be opening reasonably close to the jumprun, immediately flying up or down the line of flight is pretty much always a poor choice. Therefore, once you have cleared your airspace and pulled, your job is to look for traffic in your immediate vicinity and then fly your parachute perpendicular to the jumprun heading. I like to call this “Canopy Tracking”. Once you verify that the others are open and note their location, you can begin to navigate toward the play area and then to the pattern entry point. This all requires a great deal of awareness and adaptability, as even the best plan can change quickly in a complex environment.
    The bottom line is this: keep talking. Every load is a brand new set of circumstances, and requires a good deal of thought and planning. Make sure everyone arrives at the loading area no later than the ten minute call to allow for healthy preparation time. Most accidents and close calls could have been easily avoided by skydivers talking to skydivers, and skydivers talking to pilots. Take your time in the door, keep your eyes open and take care of each other. It is a big sky up there, and when we work together, safety is the likely conclusion.
    Brian Germain is a skydiving safety advocate, and has written numerous books and articles on the topic. He has a regular spot on Skydive Radio called Safety First, and has made over 150 safety related videos, all available through AdventureWisdom.com

    By admin, in Safety,

    When Should You Upsize Your Canopy?

    At the end of the day, skydiving is a dangerous sport. I’ve lost many friends and even family members– under properly functioning parachutes. We can’t regulate stupid behavior, but we can at least spread good information so more people can make wise decision.
    So why would someone consider upsizing?
    10. Cannot land consistently standing up. If you’re having troubles standing up consistently or even in the same area in all weather conditions, then you need to upsize and take a canopy course to understand the concepts basic flight characteristics.
    9. Not current. You can be uncurrent after a winter vacation without skydiving, coming off an injury or just life getting in the way. According to USPA, you are uncurrent if:
    A-license holders who have not jumped within 60 days
    B-license holders who have not made a freefall skydive within the preceding 90 days C- and D-license holders who have not made a freefall skydive within the preceding six months
    DZ policy: Every DZ has their own policy for uncurrent skydivers. Be sure to check in with them before coming out to the DZ to see what you may have to do. Also check the USPA Skydiver’s Information Manual for more info. 8. Jumping at a Higher Elevation. At higher elevations the canopy is going to perform faster and act more responsive because of the air being less dense. So landings will feel faster and turns will feel more aggressive. If you’re traveling to places like Colorado or Utah, you may want to pack a larger canopy.
    7. Gained Weight/Wearing Weight. Well, what can I say? Sometimes during the winter, it’s easy to pack on some pounds and that invariably negotiates your wingloading. Also, if you haven’t jumped all winter and you’ve accumulated a new wingloading, you may want to consider getting current on a bigger canopy.
    Next, if you’re a small girl, or decide to get on a 4-way team, you may be wearing weights. This added weight will definitely make your canopy fly differently than expected. So before making a decision on what canopy to buy or whether or not to downsize, consider the use of weights to make the best wingloading decision for your experience.
    6. Reserve Size. Generally, your main and reserve should be about the same size. If you were quick to downsize or couldn’t find the right sized container, but have a larger reserve, with little experience under a bigger canopy, may be a good reason to upsize your main. (Having the same sized canopies also reduces other problems should 2 canopies out occur.)
    5. Types of Jumps. Doing big ways? Wingsuiting? Demos? Some jumps may warrant a bigger parachute. When I do world record jumps, I usually opt for my bigger canopy so I’m not fighting my way through traffic and have a larger range of floating. Wingsuiting can cause line twists or other malfunctions and jumping a more docile canopy can help you negotiate them better. On demos, having a lower wingloading will give you more range to negotiate smaller landing areas or areas surrounded by obstacles – as long as you understand the flight dyamics of your wing.
    4. Age/Health/Agility. Take an inventory of your overall health. How are your knees? Wrists? Ankles? Eyesight? Depth perception? Reaction Time? These may be considerations to upsize.
    3. Attitude/Experience. Someone’s overall experience and attitude about the safety of themselves and others is a vital component in skydiving safety. Disregard for your own experience and/or safety is an obvious sign to upsize.
    2. Because You Downsized and You Shouldn’t Have. Having inconsistent landings? Not standing up your landings? Stabbing out your flare? Landing by touching down on your knees first then popping up to your feet thinking it was an awesome swoop? Spiraling in traffic cause it’s freakin’ fun on a small canopy when not necessary? Scared of line twists? Having a hard time kicking out of line twists? Not paying attention to others in the sky? Land downwind for fun? Don’t follow a landing pattern? What the hell is a landing pattern? Don’t understand the flight characteristics of your wing? Pretty much don’t follow the rules?
    1. Finally, if you cannot answer yes to all of these questions, you need to upsize:

    Can you land your main crosswind?
    Are you comfortable landing crosswind?
    Can you land your main downwind?
    Are you comfortable landing downwind?
    If you had to land out and the only option was a tight area surrounded by obstacles, do you know you could land your canopy accurately?
    Do you feel that you completely understand the flight characteristics of your wing?
    Do you understand what happens to the flare, landing pattern, stall characteristics and overall flight characteristics when you downsize?
    Have you used your rear risers & do you know why and when you’d need to use them?
    Have you used your front risers & do you know why and when you’d need to use them?
    Have you performed braked turns? Braked turns for landing?
    Can you land within 10 meters of a target center at least 5 times in a row?
    Did you take a canopy course beyond the B-license requirements? When I first started skydiving, I was young and pretty much invincible. I was on the fast track to get on a small canopy and go fast! And it’s all fun, until you get hurt or you watch someone die. I’d seen a lot of crazy things (especially people “getting away” with bad decisions) in my 20-year career, but in 2003, I witnessed my father’s fatal canopy collision. Then without your permission, things change.
    It’s amazing how death will completely transform your perspective on safety, especially when the sport is your livelihood.
    We spend more time under canopy than we do in freefall, so this is a moment to check in and evaluate how much canopy education have you gotten? My dad used to tell me, “take stock into your destiny.” So, take that Flight 1 course you’ve always wanted to, finish your B-license canopy training, ask questions, and just know, there ain’t no shame to upsize that thang!
    How at risk are you?
    Below is a canopy risk calculator that was created by the USPA, which can give you an idea of just how big of a safety risk you're at with your current canopy and experience level
    Calculate My Canopy Risk Useful Resources

    Barry Williams on Canopy Safety (Skydive Elsinore 2013 Safety Day) [Video]

    Barry Williams on Canopy & DZ Safety (Skydive Elsinore 2012 Safety Day) [Video]
    Performance Design's "Survival Skills for Canopy Control"
    Contributors: Melissa Lowe, Barry Williams and Jason Moledzki

    By admin, in Safety,

    How To Land Where No One Has Landed Before (The Star Trek Trick)

    ...Or Where Everyone Else Is Landing, But That’s Beside the Point
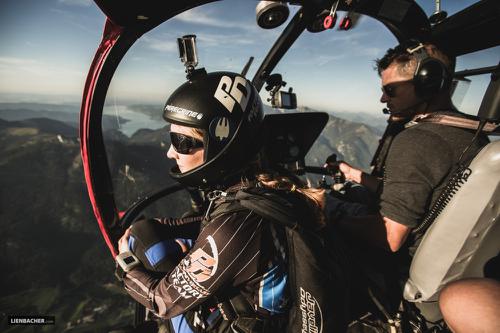
    Image by Wolfgang Lienbacher You’ve seen Star Trek, you big nerd -- so you know the answer to this question: When everybody’s staring out the front of a spaceship as it slams into warp speed, what are they looking at?
    Don’t make that face. This absolutely applies to skydiving.
    The answer, of course, is that they’re staring dramatically out into a starfield. Within that starfield, the outside stars are streaked into blurs and the center stars are distinct, clear and individual. At any given moment, the spaceship is headed towards the clear stars in the center of the frame.
    Gene Roddenberry and his glitter-stirring co-wizards didn’t come up with that out of nowhere. they used a classic model, called the Radial Optic Flow Pattern (or ROFP), to base their screensaver-worthy visuals upon. Originally defined by scientist James J. Gibson, Radial Optic Flow has greatly driven the development of an “ecological” approach to visual perception. This approach investigates human vision in the context of the natural environment (as opposed to a laboratory).
    It may sound obscure, but that same model is the one you, as a skydiver, should consciously use if you’d rather land in the peas than the trees. Here’s how.
    Velocity Fields and FOEs
    As a human in motion, your field of view – your very own spaceship windshield – is called your “velocity field.” Within that velocity field, when you’re traveling along a straight path (with no eye, head or body rotation), your heading is nailed quite precisely by the unmoving focus of expansion (FOE) in the center of your vision. How precisely? Well, a 2008 Oxford University study found that humans can use the FOE in optic flow to estimate their heading within one degree of the visual angle, and that’s good – because the FOE is exactly where you’re going.
    As opposed to a paraglider – which can go up just as handily as down, in the right conditions* – a skydiving canopy has one essential mode: forward/down. A ROFP for forward movement describes expansion – like the stars in the front windshield of the spaceship as it rushes towards the FOE described by the still stars in the middle. (As our skydiving canopies can’t really go backwards, we won’t worry about the “reverse thrusters” mode.)
    Image by Wolfgang Lienbacher
    Where’s My FOE?
    If you’re flying your skydiving canopy straight, your FOE is easy to pick off: it’s the place in your vision that isn’t dropping, rising, or side-sliding. As you approach the landing area, the FOE remains central while the rest of the field expands proportionally more quickly.
    If you’re throwing a bunch of canopy inputs into the mix, however, it’s much more difficult to determine FOE. That’s because you’re introducing a “rotational component of lamellar flow,” which forces the retinal flow pattern not to be radial anymore, thereby making it difficult to recover the original heading.
    How to “Energize” Your Accuracy:
    When you set up your landing, choose objects on the ground and notice whether they’re moving up or down in your velocity field. Notice the still spot that indicates your FOE. Notice how accurate you can make your landings by fixing your FOE on your intended spot landing.
    As you learn to determine your FOE close-up, start to work on spotting your FOE from higher and higher altitudes. By doing this, you’ll train yourself to know instantly if the spot is off and you’ll need to choose an alternate landing area.
    Keep your FOE on the target, not an obstacle. When I was racing motorcycles, I used to refer to this trick as my “eye magnets.” That sounds just as silly as spending four hours in a makeup chair getting a rubber Klingon face glued on, but it’s not: your gaze truly is functionally magnetic. You'll head inexorably towards the one tree in the landing area you’re terrified of hitting (and thus staring at). Conversely, you'll kinda-magically turn away from that tree without any other conscious inputs if you “unstick” your gaze and attach it firmly to open turf. Improperly applied eye magnets are referred to less-cutely as “target fixation.”
    Many skydivers refer to this phenomenon as “the accuracy trick,” which seems unfair – there are a lot of helpful tools for accuracy, of which this is only one. That said, consistently landing where you want to is a great way for a skydiver to live long and prosper.
    (Shh. You know you giggled.)
    ** For this reason, “the accuracy trick” is a little trickier to use for paraglider pilots, because visual cues have a tendency to bounce around as the wing is affected by thermic “bubbles” near ground level.

    By nettenette, in Safety,

    Choices, Choices: Pilot-Chute-In-Tow Malfunctions and You

    Curt Vogelsang captures some hot canopy-on-canopy action. Y’know when you don't feel like getting out of bed in the morning? Your main parachute is likely a lot brighter-eyed and bushier-tailed than you are, but every once in a good long while it just doesn't feel like getting out and doing its job. Y’know? Relatable.
    Kidding aside: When you throw your hand-deployed pilot chute but the container stays closed -- trapping the main deployment bag inside, helpless to deliver you a parachute -- you’ve gotchaself a pilot-chute-in-tow. In other words: you’ve got nothing out, which makes you the clenchy, concerned (and hopefully very temporary) owner of a high-speed mal.
    You’d better get on that, buddy. Stat.
    But how?
    Deploy the reserve immediately or cut away first and then deploy the reserve?
    One Handle or Two Handles: The Cagematch
    If you’re not sure which you’d choose,* you’re certainly not the first. This particular point has been the subject of roaring contention since the invention of the BOC, my friends. (Guaranteed: the comments section below will corroborate my statement. I can sense people sharpening their claymores and dunking their arrows in poison even now.)
    There’s a school that says -- well, duh -- get your damn reserve out, like right now what are you waiting for. There’s another school that calls that school a bunch of mouth-breathing pasteeaters. The latter group insists that you'd better go through the procedures you know lest you mess it up when it counts. They usually follow up by spitting on a photograph of the first group’s mother and wondering aloud why the first group is even allowed to skydive. Then they start punching each other.


    Images by Joe Nesbitt The USPA Skydiver’s Information Manual doesn’t make a move to break up the fight. It stands clear of the flying arms and legs and says, “Y’know -- they both kinda have a point.” Section 5-1 of the manual says this, verbatim:
    “Procedure 1: Pull the reserve immediately. A pilot-chute-in-tow malfunction is associated with a high descent rate and requires immediate action. The chance of a main-reserve entanglement is slim, and valuable time and altitude could be lost by initiating a cutaway prior to deploying the reserve. Be prepared to cut away.
    “Procedure 2: Cut away, then immediately deploy the reserve. Because there is a chance the main could deploy during or as a result of reserve activation, a cutaway might be the best response in some situations.”
    Let’s look a little closer at the options, then, shall we?
    Option One: Not Even Gonna Bother With That Cutaway Handle.

    Pro: Immediately yanking out that reserve saves a step. When AGL counts (and golly, doesn’t it?), saving a step can save a life. Many skydivers are quick to point out specific incidents in which jumpers with PCiTs have gone in with sealed magical backpacks, having failed to pull both handles (or pull any handle at all) while the clock was ticking. Gulp.
    Con: It takes the pressure off (in a potentially bad way). As the reserve leaves the container, there’s a chance that it can take the sealing pressure off the flaps that are keeping the main container closed. The main can then leap to freedom and deploy at the same time as the reserve. At this point, you might wind up with an entanglement, a side-by-side, biplane or downplane to figure out.**
    Option Two: Get Off The Field, Main Parachute. Reserve, You’re In!

    Pro: It’s the same stuff you’ve been taught to do for every other reserve-requisite malfunction. ...If you initiate the reserve deployment clearly, confidently, and as early as possible, of course. After all: making a one-off exception for a single kind of malfunction can be tricky. A jumper might well spend a little too much time thinking it over (‘Am I going for my reserve handle first right now? ‘Cause that’s weird. Is that okay?’) when they should just be yanking the stuffing out of their emergency handles. Going through the real-life motions of the little dance you do before you get on every load makes more sense to your body, for sure.
    Con: You’re adding more complexity to the situation than you may realize. Especially if you don’t have secure riser covers, the (jealous?) cut-away main risers might sneak out of the container and grab for the reserve as it deploys. Another thing: the main is very likely to wiggle free, detach from the harness as soon as it catches air and do its best to entangle with your Option B. The latter kerfuffle is made much more likely when you add a single-sided reserve static line to the mix, turning the already-dismaying situation into something of a tug-of-war. Neither of these choices sounds like the cherry on top of a lovely afternoon; I know. At some point, however, you may be forced to make one. If you do, you’d better have a plan in mind.
    Not in the mood to make that choice? Me neither. Luckily, there are some steps you can take to better your chances of never seeing a PCiT -- and in next week’s article, I’ll tell you what they are.
    ---------
    *If you have a Racer (or any container with a cross-connected RSL), you do not have a choice. You must pull the reserve without cutting away. Do not pass ‘go,’ do not collect $200. In that particular configuration, the main will choke off the reserve if the cutaway has been pulled. If this unnerves you, get thee to a rigger to discuss it.
    **Head over the PIA.com to check out a handy study they did in 1997 regarding the management of two-out situations. It’s called the “Dual Square Report.”

    By nettenette, in Safety,

    The Other Certification Every Skydiver Needs: A WFR Card

    Image by Juan MayerIt happens so fast.
    You’re coming down from a great jump. You land, laughing, and whip around for the imminent high-five with a huge smile on your face. That smile drops right along with the friend framed in your view. Something happened in those last few feet of flight--you don’t know what, but that triumphant swoop turned into a spectacular case-in, and your friend’s screaming, and you’re running towards him at top speed, and his leg is at a crazy angle, and there’s blood. Lots of blood.
    What the hell do you do now?
    Wouldn’t you like to have a plan?
    Even if you have no intention of becoming a medical pro--or even a uniformed first responder--you can get a short education that might make you the deciding beneficial factor in someone’s very worst day...maybe even yours. This curriculum is comprehensive and practical, integrating the essential principles and skills required to assess and manage medical problems you might come across, especially but not specifically in isolated and extreme environments. It doesn’t have a name that implies its usefulness for skydiving, sure--”Wilderness First Responder” sounds like a course built just for Search-and-Rescue burlies--but hear me out. You need this. Here’s why.
    1. Help is not always immediately at hand.
    Wilderness First Response certifications are meant to be used in earnest when the caregiver and receiver are essentially stranded in remote circumstances. While skydiving drop zones aren’t generally beyond the furthest reaches of civilization, they’re never in the center of it, either. Response times are not, as a rule, immediate.
    Any medical education is of enormous benefit, of course, but--for a regular-strength skydiver--the ROI of a WFR is pretty damn dead-on. The WFR course is about intelligent, informed self-reliance in the absence of immediate help. In the wilderness setting that the course was designed around, the priority is to figure out whether you can semi-self rescue, to assess what additional resources you need, and to methodically stabilize yourself and/or others until the cavalry rolls up. In the dropzone setting, this training is just as useful.
    2. Whether or not you’re trained, you will always be the first responder to your own injuries. Make those early minutes count.
    If you end up injured during an emergency landing that’s outside the drop zone--and you don’t have a charged, functioning method of communication--then you’ll be waiting for help to find you. If you happen to be conscious in that interim (hooray lucky you), WFR training will give you a method for understanding your injury, stabilizing it and tracking its progress for later reporting. Without training, you’ll likely just lie there, terrified, in blinding pain--or make your injuries worse with incorrect responses.
    3. You should be off the list of dead-weight liabilities and on the list of assets.
    Skydiving is a sport that demands proactive personal responsibility in the context of a mutually supportive, risk-educated community. We all understand this. That said: While a WFR certification does not confer the knowledge of a full EMT, it makes the bearer a much stronger member of the greater support team.
    A baseline education in first response moves you from a gasping member of the horrified crowd to a literate, assisting partner in incident management, though your role in the moment will, in all statistical likelihood, be quite procedurally basic.
    4. You should dial up your powers of observation.
    We’re not just talking about cardiac arrest and gaping wounds, here. WFR training will help you recognize subtle symptoms in a way that could help you change the outcome. Dehydration? Hypoxia? Heat illness? These are real-life dropzone problems, and your awareness could make a big difference in someone’s day.
    5. You’ll get important certifications.
    Successful completion of a WFR course will generally earn you a two-year Adult & Child CPR certification as well as the obvious Wilderness First Responder certification. This may or may not be an important piece of paper for you in a technical sense, but current CPR certification makes you a secret superhero in a world where lives are often saved by trained, responsive passers-by.
    5. It’s a really good time. Seriously.
    Wilderness First Response courses are generally administered in, predictably, wilderness settings. I did mine with the National Outdoor Leadership School (NOLS) with the full majesty of the Yosemite Valley as the backdrop. My partner did his in the Grand Canyon country of Flagstaff, Arizona. WFR courses are offered in highly visitable settings all over the States--indeed, the world--and y’know what? There are few better-invested ways to spend a week in nature than learning life-saving, life-changing skills in a close-knit group of fellow adventurers.
    Y’know, like the close-knit group of fellow adventurers with whom you share your sky--and who are counting on you to be the best team member you can possibly be.
    Live up to it.

    By nettenette, in Safety,

    4 Ways to Avoid Pilot-Chute-In-Tow Malfunctions

    Image by Joe NesbittLast week, we talked about the mighty kerfuffle that is the pilot-chute-in-tow malfunction.
    So...who wants to have one?
    Nobody!
    Right. So now that we’ve established that, we can get down to the business of avoiding the hell out of those. There are four big steps you can take to lessen your risk of a PCiT, and there’s a good chance you’re currently messing up at least one of them.
    1.Cock it up (so it doesn’t cock your jump up).
    Your collapsible pilot chute is a demanding partner. Her deal is this: no foreplay, no canopy.
    Most of the time, you’re good about it. You guys have a really established routine at this point, right? From the time you’ve got your nylon laid out on the floor to the time you wrap your legs around it to finish it off, you follow a very predictable routine. Somewhere in there, you give that collapsible pilot chute a tug and get her indicator window nice and blue. Everybody’s happy.
    But what happens when you get distracted? If you end up ignoring your PC for a surprise debrief or a dance break or an awkward conversation with the meaty contents of the best-fitting freefly suit you’ve seen all week, make no mistake: she’s going to get her revenge. Failure to cock the collapsible pilot chute, after all, is the leading statistical cause of PCiTs.
    The solution here is simple: focus. Give your pack job the attention it deserves, in the same order every time. (It’s never a bad idea to include that little indicator window on a quick gear check, either.)
    2. Do what you’re told.
    I know. You’re the boss of you, and I’m not your real mom, and manufacturers are basically like corporate drones, and the USPA is a bunch of guys throwing canes and slippers at kids who merrily chase balls onto their collective lawn. You do what you want.
    That said: maybe you should do what you’re told every once in awhile.
    This is revolutionary stuff, I know. But the manufacturers’ instructions for bridle routing and main-flap-closing aren’t just there to give you something else to toss giddily out of the box when your new container arrives. As any pro packer will tell you, those yawn-inducing closing procedures differ dramatically between brands. If you’re using the wrong one for your particular equipment, you’re setting yourself up for a container lock.
    3. Watch the news.
    Along those lines: be on the lookout for updates. Remember a few years back, when all those photos came out of closing pins stabbing neatly through the middle of their bridles? It kinda looked like a fabric samurai drama, but it was pretty serious -- several jumpers, jumping different equipment, experienced pilot-chutes-in-tow in this same manner. In response, manufacturers posted updates to their manuals, changing the closing procedures for their containers to lessen the risk.
    The moral of the story is this: Maybe you’re still doin’ it the old way and have managed to be lucky so far. (Emphasis on: so far.)
    You can also investigate pull-out -- as opposed to throw-out -- pilot chute systems, if you like to be on the oddball end of technology.
    4. Embrace the transient nature of our linear existence.
    Nothing is forever, dear reader. All seasons pass. All kittens turn into old cats. Your pilot chute and bridle will eventually wear out. Thus is the way of the world.
    We know you love your pilot chute and bridle. They love you back. They yank that nylon out of the bag for you over and over and over without complaint. They get dragged across the grass and the filthy packing mat and the Arizona desert for you. They get stepped on and sat on and waved around willy-nilly when you need to get someone’s attention on the other side of the hangar. But they can’t do it forever.
    Collapsible pilot chutes lose effectiveness when their little kill lines shrink. If that line shortens to the point that the PC can’t inflate fully, you will probably end up with a dead pilot chute flapping around above you in freefall while you count to yourself in your helmet.
    Insufficient drag to pull the closing pin = PCiT.
    Like many existential tragedies, this doesn’t happen overnight. Have you noticed little hesitations after you throw? Are they getting longer? Have you noticed the aging process creeping up on your little bitty sub-parachute in the form of obvious wear? Cuddle up on the couch with her, read The Velveteen Rabbit together, cry a little bit and give your old, loyal PC a Viking funeral.
    She deserves it.

    By nettenette, in Safety,

    Your First Reserve Ride - Go Time

    Dave Rhea gives his Skyhook a workout over northern Arizona

    Photo Credit: Dave Rhea
    You’re as ready as you’ll ever be. Right?
    You know what a malfunctioning main looks like. You know the sequence*. You’ve done your homework (like we reviewed last time). Before you pull that handle, though, make sure you know the rest of the story: how to make that reserve ride as un-traumatic an experience as possible.
    1. Do not overthink it
    If you believe that your main is unlandable, you are going to have a reserve ride. Lots of skydivers have landed under reserves, realizing later that the problem was solvable.
    Lots of skydivers have also gone in while striving to sort out malfunctions that did not get solved.
    Pick your poison.
    2. Do not worry about stability
    This is the very least of your problems, as you are on the world’s most intractable timer. Worry ONLY about altitude.
    3. Pull the cutaway handle until no lower than 1,000 feet
    If your pull is sufficiently low (shame on you for that, by the way--gotta say it) and you have an unlandable main, you’ll be testing your reserve’s opening characteristics in the most potentially lethal way. Take note: the USPA not-so-recently raised the minimum deployment altitude even for eminently experienced D-licensed jumpers. Initiating a reserve ride below 1,000 feet isn’t always deadly, but it has an unnerving tendency to be. Don’t take the chance.
    4. Hold on to your handles
    ...or, y’know, do your best. If you manage it, you’ll save a bit of money, and you’ll save face when you land.
    5. Make sure it’s out
    Arch and look over your shoulder for the reserve pilot chute. Reserves deploy fast, so this head position may rattle your neck – but if the pilot chute is somehow caught in your burble, this should either shake it loose or make it clear to you that you need to do some burble intervention, stat.
    6. Keep an eye on your free-floating main
    However: do not try to chase it and grab it in the air. (People have died doing that, bigshot.) Don’t “chase the bag” if it means you’ll land in a dangerous LZ. Use landmarks to get a bead on where the gear is headed, then take a deep breath, leave it to the fates, and prioritize your mortal coil.
    7. Remember: Your Cutaway, Your Business
    When you land a reserve, you’re going to be the talk of the DZ (for about five minutes, usually). During that five minutes – longer, if the loads are turning slowly – you’ll probably be approached by a gamut of big talkers and would-be mentors, questioning your malfunction and eager to discuss your decision to cut away.
    My advice: speak to your trusted mentors and co-jumpers about it in private, and tell the rest to go suck an egg. When you suddenly need to get proactive about saving your life in the sky, make no mistake: you are absolutely alone. In the entire world, there exists only you and two handles. Your cutaway is your business. You were there. They were not.
    Review your own footage to determine the nature of the malfunction and review alternative methods of correction, if applicable.
    8. Buy a bottle of posh booze for the rigger who packed the reserve you rode, and keep the reserve pin for posterity.
    It’s tradition.
    * Arch, look down at your handles, grasp the handles, pull cutaway, pull reserve.

    By nettenette, in Safety,

    It's Not Only Size That Matters - Thoughts on Canopy Upsizing

    At 66 years of age and with a one year old hip replacement, it decided that it was time to upsize my main canopy. I currently jump an Aerodyne Triathlon 210, so I purchased a Performance Designs Spectre 230. I had heard good things about the Spectre, although I had not yet jumped a demo Spectre.
    Of course, I did not need any advice on how to use this canopy. I have almost 2300 jumps, a USPA Pro Exhibition rating, and have owned dozens of canopies. I thought I could land anything, especially my nice new big 230 square foot canopy.
    Little did I know that a "slightly elliptical" canopy would be so drastically different when making turns and in recovery than the more traditional Triathlons I have always jumped. So, my first mistake was that I never read the flight characteristics information in the sales literature, in particular, about the dive characteristics of this canopy. Many of the reviews said that the Spectre is described as “ground hungry”, and needs a deeper and faster flare to land well.
    My jumps on my new canopy:
    Jump #1: I tested my turns and my old style two-stage flares. Oh well. Not much of a stall. Maybe I just have to "learn" this new canopy. I used a straight-in approach on grass, but hit rather hard in very fast, sliding landing. Good thing the grass was damp.
    Jump #2: I decided to land into the pea gravel pit. A 10 mph crosswind at 45 degrees caused me to make a small correction on landing, then the wind side started to dive, a I pushed my flare, nothing, I hit hard, drove my right shoulder into the pea gravel pit, plowed a deep furrow through it, and went into a belly slide as I exited the peas. But this still counts for accuracy, right?
    Jump #3: After breakoff from a 15-way formation, and after too long of a track, I opened, and saw that I was rather far from the landing area. I decided to land in a small green field. I fortunately noticed the chain-link fence on all four sides of the field. Now I needed to burn off some altitude to get into this spot. I used one carving S-turn at quarter brakes, and then a last second turn to come straight in. However my canopy started to dive into the ground so fast that I never had a chance to get the “fast deep flare” that this canopy requires. I hit so hard that I caused six breaks in my leg and a partial shoulder dislocation. Rotor cuff surgery is now in my future too. It seems that in an stressful situation, I reverted to my old landing and flaring habits from my other canopies.
    So here are my comments and recommendation when jumping a new canopy (even when upsizing.)
    If most of your experience is on some of the more docile rectangular canopies, be careful if you change to even a slightly elliptical canopy, even if it is bigger. It will surprise you how differently it responds in turns, dives, and recovery.
    Bigger is not always enough to be better. (Sorry guys.) Read all of the reviews written about the canopy, and all about the flight characteristics. Talk to others who have owned one. Ask your Safety and Training Advisor and Rigger about the canopy and how it fits your style and experience.
    Open high and test everything you can up high. Practice steep as well as shallow turns. Test your flare and note the toggle pressure and location needed to find your stall point and "sweet spot". (Your brake settings may be different than on other canopies you have jumped.) Observe the dive speed and recovery traits at all brake locations, plan a straight in landing until you get experience, and that means more than one jump.
    Even if you have 2300 jumps like I do, read all of the articles you can find on canopy skills. At the very least, you will wind up with a checklist of things to look for to prepare for your first landings.
    In summary:
    I was careless but lucky. I have gone through many "could have - should have" thoughts, and offer my personal experience and observations as food for thought, and hope it may help others when changing canopy style or size.

    By admin, in Safety,

    The Importance of Ear Protection While Skydiving

    Not wearing earplugs on every skydive? Hear me out (while you still can): It’s pretty damn important to add a pair to your every-jump kit, and your excuses probably don’t hold up to expert scrutiny.
    What expert? A lofty one. Last week, I got to talk to Dr. Anna Hicks* at length about the thorny matter of skydiving with a cold (watch the February issue of Parachutist for that one). At one point, our conversation took a slight diversion towards hearing damage. The content of that more than deserves its own moment in the sun: Our delicate soundholes, and the damage we don’t have to do them.
    So: Why aren’t you wearing earplugs on every jump?
    1. Because it’s not that big a deal.
    If you like listening to things other than phantom roaring, then sorry. It kinda is.
    Each of us is born with 15,000 sound-sensing cells per ear. (I like to think of ‘em as magical hearing hair, because that’s kinda what they look like.) Hearing loss occurs when they die. It’s not just noise exposure that kills them; certain medications and other environmental factors and do it, too, but those are freak deaths by comparison. Once they’re gone, they’re gone. Birds, fish, and amphibians have the ability to grow back magical hearing hair. Mammals, like your average skydiver, lack the ability to regenerate these cells. All we can do is stick in a hearing aid and hope for the best.
    You don’t have to take my word for it. Talk to anybody who suffers from tinnitus and ask them if they’d have taken precautions to prevent it.
    2. Because I don’t jump that much.
    Dr. Hicks begs to differ.
    “I see so many skydivers that have damaged their hearing,” she notes. “Even if you’re just doing 100 jumps a year, every time you jump, the engine is noisy, and the freefall is noisy, too. Over your skydiving career, that adds up to a lot of noise exposure.”
    “I still find some people that can’t be bothered with ear plugs even in the wind tunnel,” she adds, “but our hearing is too important not to take ten seconds to put them in every time. You don’t want to end up not able to hear your friend at the pub because you knackered your hearing from too much noise exposure.”**
    3. Wearing earplugs in freefall is dangerous.
    If it’s not just laziness that’s keeping you from protecting your hearing, it might be a misplaced sense of safety. Dr. Hicks wears hers from ground to ground, and she recommends that you do too, even if it’s just on the way up to altitude.
    “I am a big advocate with any patient I see,” she says, “especially those whose job is skydiving, to wear ear plugs at least on the way up and ideally on the way down as well. Earplugs do not prevent situational awareness, stop you from being able to talk to your students, or to hear shouts under canopy.  You can hear what you need to hear, usually you can actually hear your audible altimeter better because the background freefall crackle is reduced, and vitally, [wearing earplugs] reduces the longer-term damage we can experience from our sport.”
    Some people discover that they find a problem equalizing if they have earplugs in on the way down. Dr. Hicks’ advice: If equalizing is a problem for you, try using the  vented plugs (which you can buy from a pharmacy for a few dollars) to better equalize during descent.
    4. I can’t afford the nice ones and the foam ones cause ear infections.
    According to Dr. Hicks, that is not a thing. As long as the plugs are rated, they’ll provide the protection you need.  “You can wear posh ear plugs or the cheap foam ones like you get in the tunnel,” she says. “Either-or.”
    According to a study of sixty long-range patrol-aircraft crew members, the idea that disposable foam earplugs cause ear infections is a total myth. The crew members were randomly divided into three groups: one wearing fancy custom-molded earplugs, the second using foam earplugs that they washed after each use, and the third group using foam earplugs washed only once per week. The study lasted eight weeks and included examinations by a medical officer as well as skin scrapings for bacterial culture and fungal examinations. The results indicated no fungal infections or clinically significant bacterial infections, and no differences in positive bacterial culture between the groups.
    Moral of the story: roll ‘em up and stick ‘em in. They’re going to prevent a heck of a lot more damage than they could possibly cause, and 50-year-old you (who doesn’t have to have the TV on FULL BLAST ALL THE TIME) will thank you.
    *Dr. Hicks is a certified badass. An active-duty Aviation Medicine specialist in the British Regular Army, she has logged more than 4,000 jumps over 15 years in the sport, many of which as the Outside Center for the multi-medaled British 4-way team NFTO. Dr. Hicks is also a British Parachute Association Accelerated Freefall Instructor and formation skydiving coach, as well as a Skydiving Instructor at Britain’s legendary Skydive Netheravon. Oh: and she was Tom Cruise’s personal aviation doc during the filming of the latest Mission: Impossible reboot. ‘Nuff said.
    **Confused? Ask a British person for a translation.

    By nettenette, in Safety,

    4 Smart Questions That Shut Down The Spin Cycle

    How to Avoid Spinning Malfunctions
    Image by Oliver NöthenAh, to be swung madly around the ballroom of the sky.
    If you like that sort of thing, of course. Most of us, y’know, don’t.
    Even though they’re eminently preventable, spinners remain a very statistically significant cause of cutaways. There’s good news, however: A little attention will go a long way towards making sure you aren’t dancing downward under a misbehaving main. Here’s how to get your body, brain and gear set up right.
    1. Are you bungling the basics?
    If spinning mals come up more than occasionally for you, consider whether you need to send yourself back to packing (or body-position) school. Might be the case.
    2. Are you just being loopy?
    Back when side ponytails were sexy and just about everything smelled like Teen Spirit, the skydiving industry used Velcro to secure toggles to risers. When manufacturers made the switch to the velcro-free designs we see now, they forgot about something vitally important: the long, floppy bights in the steering line that were now suddenly exposed to the rodeo ride of the deployment process.
    Those mile-long bights took the opportunity to lasso anything they could. A particular favorite: hands. One misplaced toggle grab, and a skydiver could easily find him/herself in a compromising bondage situation with their control lines. The bights happily welcomed guide rings into the act. It was a ready-made recipe for a super-solid spinner, and it was ugly.
    Soon, every single manufacturer’s rig designs had integrated line stowing features (“keepers”). There’s a reason the changes were made: as a jumper, you need that line tucked safely away until you’re good and ready to release the brakes. That said: Many of those old risers are still around, unmodified. Even more bafflingly, some skydivers don’t bother stowing the lines during the packing process (presumably, to save 20 seconds or so). If that’s you, you know what to do. And if you have Velcro on your risers, for the love of god check it for airworthiness.
    3. Are your cat’s eyes conspiring against you?
    Toggles love the cat’s eyes of brake lines. They dive at the chance to snuggle and lock in a spinny embrace.
    It’s no wonder that’s the case: after all, their relationship is really hot. The heat that’s generated by the slider’s travel over the lines has a shrinking effect on the system, creating a kind of Chinese fingertrap for your toggle seating. With one toggle in and one toggle out, you’re going to be going for a ride.
    A rigger can quickly suss out if your cat’s eyes are in good shape: big enough for the toggle to pull out smoothly, but not so capacious that the toggle’s fat bits can pass through. If they need replacing, do it.
    4. Do you know when to let go?
    Spinning malfunctions are sneaky bastards. For all their preventability, they have killed people. Make no mistake: Once you’re looking at one, you need to take it seriously.
    The most important thing you need to remember is this: a spinning malfunction is not a line twist. When you’re under a docile, level main that’s flying cheerfully along as you swear at it, you’re looking at a line twist. When you’re not directly below a canopy that’s flying level -- when it’s flinging you outwards as it heads for the ground -- you are on the business end of a spinner. The first is an inconvenience. The latter is a mal, and you’d better get on it.
    As wing loading increases, so does the violence of the spin, and the likelihood that you’re going to kick out of it quickly dissolves. So: Don’t fight it. Just get rid of it. Take some quality time with your reserve. You’ll be glad you did.

    By nettenette, in Safety,

1 1