0

General

    How To Be A Good Passenger in a Jump Plane

    How to be a Good Passenger in a Jump Plane
    Note: Original text from an article written for April 1992 Parachutist. Since 1992 our fleet of jump airplanes has changed signifigantly. There are few planes like DC3's in use now which often have "loaders", and many pilots are now spotting airplanes with the help of the navigation equipment that is now more advanced. Please make adjustments for the changing technology. G.P. 2003
    This article is written in two parts covering some of the most typical jump plane situations you will experience. The first part will be of interest to new jumpers who are learning to spot and to jumpmaster themselves and who are jumping from small airplanes. The second part is for intermediate jumpers from a small drop zone who may soon consider visiting another drop zone or going to a skydiving event that has larger airplanes. It will also be good review for experienced jumpers who do not jump large airplanes very often and forget how to be a good passenger.
    Small Airplanes:
    Loading-
     
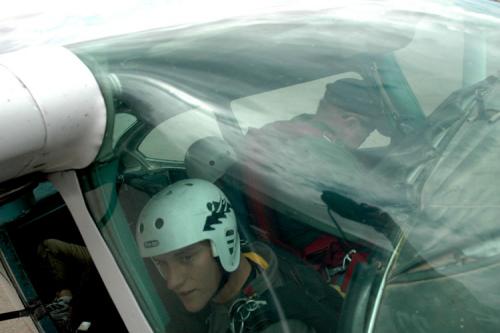
    Loading a small airplane will become different as you gain more experience in skydiving. You will be doing different exits than you did as a student and will need to be arranged differently in the airplane. First of all, take the advice of more experienced jumpers as to the most efficient place to be for your skydive. If you are in an airplane with students, follow the seating arrangement that the instructor specifies. Be careful as you get near the airplane if the engine is still running. The door of small airplanes is always near the prop and the airplane owner will not appreciate you bending the prop by backing into it. :) The least noisy time during your flight is during loading and is the best time to tell the pilot how high you are going and in what direction you want the jump run. The pilot needs to tell Air Traffic Control how high the plane is going and hopes you won't change your mind too many times on the way up. Tell the pilot if you will being doing Canopy Relative Work or will be opening high for some reason. Pilots don't want to do surprise CRW with canopies they don't know are up that high. The position of the seat belts in the airplane will usually dictate exactly where you will be sitting. If this position is uncomfortable just remember that the Federal Aviation Regulations state only that you must wear them only while the aircraft is in motion on the ground and during takeoff and landing. Make sure that everyone doesn't sit too far to the rear and make the plane out of balance. The pilot would not have much fun flying it in this condition. Ask the pilot for advice on loading if you do not know.
    Jump Run-
    When you know it is almost time to jump you will usually be getting to your knees and making final adjustments to your gear. In getting up, try not to pull yourself up by the pilot's rig or pull any important items off the plane in doing so. Check for any part of your gear that may have been moved while getting up in a crowded airplane, especially your hand deploy pilot chute. There should be no need to say very much to a pilot at this point if they were sufficiently briefed on the ground, but be alert and understanding about anything the pilot may say to you. Your jump may be delayed while waiting for another jump plane or from instructions from Air Traffic Control, and those instructions will be hard to hear if you are yelling about why you aren't on jump run yet.
    Spotting-
    You will always need to wait for a signal from the pilot before opening the door. If the airspeed is too high the door will receive excessive stress and might even come off. The airplane's owner would be very unhappy with you as well as the home owner whose roof the door lands on. Giving corrections to the pilot on direction of flight can be verbal by saying "5 RIGHT" or "5 LEFT", or by simply pointing in the direction to turn. Most pilots will correct about 5 degrees in the direction you indicate and then level out and wait for further corrections. If you point, make sure your hand is up where the pilot can see it. Try to keep the corrections to a minimum because the pilot probably lined you up on jump run pretty close anyway. If you correct back and forth too many times even the pilot will get lost. :) Most pilots will cut back on the power when you get out, but it is a good idea to call for a "CUT" anyway before exiting.
    Exiting-
    Try to exit the airplane and get into your position as quickly as possible so the pilot doesn't have to struggle to keep the airplane right side up. However, be careful not to bump things on the way out like your pilot chute. It is also not wise to lean on the pilot too much just to get that perfect exit position. If you push too hard on the pilot or lean on the yoke of the airplane you will have a very interesting sideways exit.
    Large Airplanes:
     
    Loading-
     
    Loading a large plane at a new drop zone or at a large skydiving event will likely be an exciting event for you. There may be several large groups on the plane and you may get the feeling of being herded into the airplane. This is just a sense of urgency on the part of the crew, after all, these larger airplanes are more expensive to operate and must be kept busy in order to make money. Try to do your share by paying attention and helping move things along.

    Although the props on larger planes are further from the door than on smaller planes there may be more of them and they may be on the sides on the plane where you are not used to avoiding them, so be careful. Many of the largest airplanes will have a crewmember called a "Loader" that is in charge of loading the airplane and determining the exit order of all the groups getting into the plane. The loader is a buffer between the jumpers and the pilot and has to keep the jumpers in line so the pilot can concentrate on more important things like flying. Pay attention to the loader because they will be able to load you as quickly and efficiently as possible. When seating yourself in the airplane you can note how the people ahead of you are seated and follow suit. Seating is usually very cozy in these airplanes even though it looks roomy when you first get in, so sit close. Somes planes have loading lines painted or taped across a rearward section of the airplane and all of the jumpers must be forward of this line. If you see that not everyone is going to fit in this area, you might as well scoot back and tighten it up before you get too comfortable because the loader is going to be mean and make you crowd together anyway. Seat belts will be available and you might have to look carefully to determine which one you should be using.
    After everyone is seated and you are taxiing out to the runway, take a look around the airplane. There may be a sign somewhere describing the plane's emergency procedures in case of engine failure. You will want to be familiar with these procedures and really follow them if the real thing happens rather than just getting up and running around all excited. Some planes might also have posted a diagram of the drop zone and the jump run for the day. This is important information for the person spotting and helpful to anyone jumping at an unfamiliar airport.
    Jump Run-
    When it is time to jump you will be getting up to make final adjustments to your gear. Check for any part of your gear that may have been moved while getting up in a crowded airplane. There may be room in a large airplane to have someone give you a pin check. Even if it is possible to completely stand up in the airplane, don't feel like you must do this until time for your group to line up and exit. This will help reduce crowding in the plane. All adjustments to your gear can be made while kneeling anyway. Try to continue to keep forward of the loading line by not spreading out too much. The airplane may climb better like this and you might just get some extra altitude. Try keeping the noise to a minimum in case you get instructions from the loader or spotter.
    Spotting-
    On the larger planes the loader may also do the spotting for the whole load. This is another reason you should pay attention to and be nice to the loader, so you will make it back to the airport. Another possibility is that the pilot may be spotting from up front by using instruments and giving the exit command directly or by relaying the command to the loader. If the load is being spotted by looking out the door, the corrections must be relayed to the pilot who possibly cannot see the spotter. Some airplanes have pushbutton switches on a panel that turn on lights that the pilot can see, or the loader may have a headset to talk to the pilot. If you are spotting you will need to learn how these work ahead of time. If the plane does not use one of these methods, the corrections must be relayed to the pilot by someone sitting near the pilot that can see the spotter. For this to work there must be a clear line of sight up to the cockpit. Do your part by keeping the isle clear.
    Exiting-
    Wait until the loader or spotter indicates that it is time for your group to line up and then do it quickly. If you are not in the first group, continue to stay forward until it is time for you to line up. Give the group ahead of you 5 to 10 seconds before your group exits, depending on the winds aloft, but don't be slower than that. The group behind you is using the same spot as you and larger airplanes are flying faster on jump run than smaller ones. You will know when you are taking too long to exit because the group behind you will begin objecting to your excessive delay. Everyone wants to make it back to the airport.
    Summary:
    This article has outlined the most common procedures that you will be following when jumping out of most airplanes. Hopefully it has given you some basics on how to be a good passenger on any aircraft whether it be an airplane, a helicopter, or a hot air balloon. If you ever have any questions about the procedures for a particular aircraft, just ask the pilot. They will be glad to help.

    By peek, in General,

    The Skydiving Handbook - Chapter 3 (Flying Your Body)

    The principles of freefall flight are quite simple; after all, you are dealing with just two things: your airfoil (body) and the wind. In a perfect, relaxed arch, or box man, you will fall straight down at a constant rate. To an observer falling along side, you appear stationary. You only seem to be falling relative to someone not in freefall, such as an observer in the airplane or on the ground.
    The box man is the neutral freefall position from which all maneuvers are carried out. Relative to a stationary observer, by altering your body position you can turn in place, move up and down, backwards and forwards, or sideways. You can even turn upside down or fly standing up. In fact, no one really knows the limits of body flying yet!
    From the box position you can easily initiate turns, forward, backward, and sideways movement, and changes in fall rate. From the side, the body presents a continuous smooth curve to the wind. The head is up, the arms higher thanthe body, and the legs are bent at a 45-degree angle, leaving the lower leg slightly extended into the wind.
    From above, the elbows are straight out from the shoulders and the hands are at least as far out as the elbows. The knees are slightly spead so that the feet are as wide apart as the elbows.
    Seen from the front, there is a smooth curve from side to side with the hips at the lowest point. Note that head, shoulders, and knees are all held high relative to the hips and chest.
    The basic moves are well understood. The most commonly used maneuvers are turns, forward and backward movement, and faster or slower falling. All are accomplished by changing the flow of air around your body. If you think of your box man as being balanced on his center in a neutral position, all he has to do to turn left is deflect more air off his right arm than his left. This is done by simply banking like an airplane - left arm down slightly, right arm up in proportion. The turn will continue until he resumes the neutral position. Lowering one knee relative to the other accomplishes the same thing. That's why an unintentional turn can often be stopped by assuming a neutral position and then giving a little "legs out" to increase awareness and balance the legs.
    Turns are also based on deflection of air. In the neutral position, equal amounts of air spill off both sides of the body. To turn right, our box man banks his arms, just as an airplane does in a turn. More air flows off the left side, creating a right turn. Note that the position of the arms relative to each other does not change; both arms tilt as a unit. The rest of the body remains neutral. To stop the turn, simply return to neutral.
    Forward motion works on the same principle of deflection. To deflect more air to the rear, resulting in forward motion, bring your arms back a few inches and extend your legs. This tips your body slightly head down, air rushes back off your torso and legs, and you slide forward. The two elements combine to create forward movement. Naturally the opposite motion - arms out and legs in - will make you backslide.
    Now think about how to go up and down. Everyone knows that given the same power, a streamlined vehicle can go faster than one that isn't. It slips through the air easier, just as a canoe knifes through the water more easily than a barge. So to speed up, you simply arch more, letting air slip off easily. Flatten out, or lower your knees and elbows, and you will fall slower. Incidentally, the faster you fall the more stable you are because your center of gravity is further below your control surfaces (arms and legs.)


    Test yourself:
    1. If you reverse your arch, what will happen? Is this position stable?
    2. Think about forward and backward motion. What would you do to fly sideways?
    Proceed to Chapter 4 (The Skydiving Universe)

    By admin, in General,

    Tandem Skydiving

    What Is Tandem Skydiving?
    Tandem skydiving is an extremely popular form of skydiving and an excellent introduction into the sport, it allows one to experience the adrenaline and excitement without having to commit excessively to the activity at hand. While AFF training and static-line jumping consists of hours of training prior to the jump, going tandem only requires around 30 minutes of ground preparation prior. The reason for this is that while both AFF and static-line skydives require you to learn how to control your canopy and establish a deep knowledge of maintaining specific body positions in free fall, with tandem skydiving you only need to know the basics about how you should position your body relative to your tandem master. The fact that your tandem instructor will be responsible for your chute leaves you with the ability to spend more of your effort focusing on the sheer excitement of the jump, as opposed to what procedure who'll be doing next.
    You, the tandem student, will be strapped to a tandem instructor by use of a secure harness system which makes use of a shoulder strap on either side, a chest strap which secures across your chest, as well as leg straps. You will be strapped onto the chest, or front side of the tandem master, so you can be sure that you'll have the best view in the house.
    While tandem jumps are most common as once off introductions to skydiving, they are also sometimes used in conjunction with training courses, specifically in the early stages of a course. Using tandem jumping in training methods when you want to learn how to skydive can be extremely effective as it allows the student to experience both freefall and canopy flight without the feeling of being thrown into the deep end, so to speak. There are also students who look to perform several tandem skydives prior to their training course in order to familiarize themselves with the environment.
    A tandem freefall generally lasts between 45 and 60 seconds, followed by a four minute canopy ride to the ground.
    Where To Start?
    For starters, you want to make sure that you are going to be skydiving at a drop zone that has a good reputation. There are over a thousand drop zones around the world and each offer a different experience, some good and some poor. Dropzone.com has been developed around helping you to find the best drop zone in the area of your choice, and providing you with user ratings and reviews to help you make your decision. Look for drop zones with large volumes of positive reviews, and take the time to read through them and see what issues other users may have experienced at any particular drop zone. Unlike static-line progression for example, tandem skydiving is done at almost every drop zone, so you should be fine in that area, but be sure to check and make sure.
    When comparing drop zones it's vital to make sure you that you understand what you will be receiving with your jump. A tandem skydive can take place between altitudes of anywhere from 10 000 to 14 000ft, if free fall time is of importance to you it's certainly worth querying this topic with the drop zone. Another important question is, if you're paying a lot for your jump, are they offering you the best services for the amount you're paying? Does your jump include video footage or still photography, most have this as an extra cost - so be sure to check what the drop zone is charging for their video services. And if it does offer video services, is this filmed from a mounted camera attached to the tandem instructor or are they pulling out all the stops and having a separate photographer joining the jump solely to take some quality photographs of your jump. These are all aspects which should be examined and considered when you're scouting for the best drop zone in your area.
    Once you've located a drop zone near to your destination, give them a call or send them an e-mail, they should be more than willing to address any questions you may have about your jump and guide you through the booking process, setting you up with a date to jump.
    Some Advice To Consider Before Making Your Tandem Jump
    While you're likely to be walked through the correct dos and don'ts during your pre-jump ground briefing, it doesn't hurt to prepare prior to the day for what you should be doing and what you shouldn't be doing for your jump.
    Remove jewelry and accessories prior to Tandem Skydiving. At 120mph, it begins very easy for loose jewelry or accessories to come loose during free fall and get lost. It's a good idea to leave the jewelry at home on the day of your jump.
    Remove piercings, specifically nipple rings. When the canopy is opened during flight, your chest strap will pull against you, and there have been cases where people have had nipple rings pulled when this occurs - learn from their mistakes. Remember that there are also harness straps around your legs, so be sure to remove all piercings that may be impacted. Removing all piercings leave less gambling for something getting snagged, but nipple and surface piercings are definitely best removed.
    Tie up your hair. Whether you're male or female, if you have long hair it is a wise idea to tie it up in a manner that makes it least likely to get caught in the harness at any stage - and also remain out of the TIs face. Tucking it into the helmet once tied is also not a bad idea.
    Stick close to your tandem instructor. Once you're leaving the manifest for your jump, be sure to remain close to your tandem instructor.
    Always listen to your tandem instructor. They are the ones that know best, despite what you think you know - as an inexperienced tandem skydiver, your tandem instructor should not be questioned when it comes to anything related to the procedure of, or the jump itself.
    Be respectful and polite. While you may be frustrated at things like weather holds, it's important to remain calm and realize that these events are often out of the control of the instructors and the manifest staff.

    Image by Lukasz Szymanski Tandem Instructors
    The tandem instructors or tandem masters are going to be the ones in control of your skydive. The fact that the tandem instructor has control over the safety of the jump has prompted strict rules and regulations, especially within the United States, as to who can lead a tandem jump. The current requirements set in place go a long way in providing peace of mind that you're going to be in excellent hands when in the air. Before a skydiver is able to be the tandem instructor on a jump, he has to go through several procedures.
    First he has to be an experienced skydiver with a minimum of 500 jumps and 3 years of skydiving experience to his name, secondly he must possess a 'master parachute license' which has to be issued by an FAA-recognized organization, such as the USPA (United States Parachute Association). Furthermore, they are required to undergo training and acquire a certification related to the canopy they are going to be flying. On top of these requirements, the USPA has a few more of their own. Up until late 2008 in the United States, one was able to either be a tandem master with a manufacturer's rating or a tandem instructor which required the USPA training, though this was changed and now requires all those leading tandem jumps in the United States to hold a tandem instructors rating. The details of the ratings systems and the requirements vary between countries.
    One thing that separates the best drop zones from a bad drop zone for those doing a tandem jump, is the attitude and behavior of their tandem instructor. Luckily, if you've done your research and found yourself a good drop zone, this shouldn't be a worry and you may well end up making a new friend in the process. A good instructor is one that is able to answer any questions you have, while at the same time making you feel comfortable and relaxed. The best instructors find a perfect balance between safety and professionalism and humor, after all the jump is pointless if you don't enjoy yourself.
    Should I Be Nervous About Tandem Skydiving?
    It's completely normal to feel nervous about skydiving, even those of us who seek adrenalin constantly have some level of nervousness at times. Jumping out of a perfectly good plane, whether it is while experiencing a tandem jump or even the thrill of wing suiting, is not something natural to us as humans, and you can be sure that you're not alone in what you feel. With that said though, as with many areas where what you're facing is foreign and unknown, your fear often tends to turn to excitement once you're in it. I have seen a countless number of first time tandem skydivers being a bit unsure in the beginning but once their feet touch the ground their mind set changes completely. These are often people performing a bucket list jump with no intention of ever skydiving again, but after they've experience the feeling of free fall, they are hooked - and often end up booking their AFF courses to become a licensed skydiver just a few days later. Tandem skydiving has an excellent safety record for most parts of the world and you can take comfort in the fact that according to the United States Parachute Association, around half a million people each year choose to tandem skydive in the US alone.
    How Much Does A Tandem Jump Cost?
    The price of tandem skydives vary between drop zones, generally you're looking in the price range of about $120 to in excess of $300. This cost can either include or exclude the cost of things like a camera man and a video copy of your skydive. We highly recommend that you look into the prices and the specifications at each drop zone. For more information read below...
    Things To Know About Tandems
    There are typically restrictions on age when it comes to performing a tandem jump, the exact age varies depending on country and drop zone. The typical requirement from most drop zones is 18, though some drop zones do allow for 16 to 18 year olds to perform a tandem jump as long as they have parental consent. It is best to speak to your local drop zone about their age policies.
    When booking a tandem skydive it's important to know what to expect, often once off tandem jumpers go in without knowing what a skydive entails, how drop zones operate and what to expect.
    Understand that skydiving hinges on the weather conditions, when the winds are too strong or it's too cloudy, or if there's fog - you may well find yourself on the end of a weather hold. This is an aspect of skydiving that no one is free from, and the experienced jumpers get just as disappointed when they don't get to head out. Weather holds can last anywhere from 5 minutes to 5 days, depending on the conditions.
    Because of this it's best to plan your skydive around your local weather, if you're in an area with lots of summer tropical rainfall - it may be best to book in the autumn or winter months when rainfall is less likely, otherwise booking for an earlier time in the day before daytime heating causes the development of thunder showers.
    In areas of winter rainfall, summer is obviously your best bet, though nothing can ever be guaranteed. There are areas where weather holds are rare, and if you're in one of these areas that sees little annual rainfall, you're likely to see your jump happen without any hassles.
    It's highly recommended that you discuss deposits and payments with the drop zones prior to booking. While most DZs will gladly discuss openly and honestly with you their rules and restrictions in regards to deposits and refunds, many fail to bring up this topic prior to finalizing their booking and they end up upset when they find out that there is no refund issued for deposits on jumps that are postponed due to weather holds.
    How Safe is Tandem Skydiving?
    A common question asked by those intrigued by the idea of a tandem jump, is whether or not it is safe. And just how safe it truly is. We've long tracked fatalities in our database and can help in easing some of the anxiety you may have around tandem skydiving safety. The reality is that as with any high risk sport, there is the potential for death, though with that said - tandem skydivers remain the least likely to suffer at the hands of a fatality than other jumpers. Between the years 2005 and 2019 there were less than 100 tandem fatalities, with our records pointing closer to around 60. In that same time frame, our records indicate a total of just more than 700 fatalities, meaning that less than 1 out of 10 skydiving fatalities were tied to tandem skydiving.

    The important thing to remember is also that tandem skydives are extremely popular and on average there are an estimated 250,000 tandem jumps performed each year in the United States. So while calling tandem jumps safe may be a bit of a subjective statement, the truth is there are a number of aspects of your daily life that hold more risk than completing a tandem jump.
    The Technical Side And Skydiving Gear
    There are a few things you should remember when you are looking at the more technical side of your skydiving gear.
    Skydiving canopies are designed specifically for certain disciplines of skydiving, for speed and immediate response smaller canopies are used - such as those designed for swooping, these smaller canopies are also more dangerous, allowing for less margin of error. For tandem skydiving, where safety takes priority, the canopies (parachutes) used are much larger than those that you find in swooping for example. This is both because the canopy is going to need to carry twice the regular skydiving weight and because of the desired gentle nature of the canopy flight.
    The rig that is used by your tandem instructor is set up so that it will provide optimum safety for you on your jump. The rig contains an AAD (automatic activation device) which is a safety device that is designed to automatically fire the main chute after a skydiver descends past a certain altitude and has not yet fired the main canopy. There is also the special tandem canopy, which will be the parachute that is deployed during freefall, also known as the main. There is also a reserve canopy, this is a backup that exists in case of a failure on the main, an example would be, if a main canopy opens with a line twist and one is not able to recover from it - the main would be cut and the reserve deployed. These are packed into what is known as the container, the backpack looking item on the back of the tandem instructor. The instructor will also be carrying an altimeter on him, usually around the wrist, which can provide visual or audio information on the progression of the descent, so that he can release the main canopy at the correct time.
    During free fall, you can expect to reach speeds of up to 120mph (180km/h).
    Once you've done your skydive, remember to come back to dropzone.com and let us know what you thought of your experience, by rating the drop zone you jumped at.
    Safety and Training Forum

    Find a place to jump in your area.


    By admin, in General,

    Ten things that may keep you alive

    Skydiving is a sport where you never stop learning. Even if you could, somehow, come to know everything, the sport is evolving constantly, and someone who's an expert one day is a newbie the next. Often, the learning we do isn't just academic - it can make us perform better, even keep us alive when there are problems. With that in mind, here are ten things that may keep you alive when things really hit the fan:
    1. Know your limits. Everyone's limits are different, and are based on their experience, background, physical and mental fitness, and natural abilities. Some people think well under pressure, some need to drill and drill so their natural tendency to freeze is overcome. Some are incredibly flexible, some need 'crutches' (like sleeves or weight) to control their fall rate. It's important to be honest with yourself when deciding your limits, even if it goes counter to the alpha mentality that most skydivers have. We're all human.
    2. Respect your limits. Don't do things you're not ready for, and don't let other people talk you into doing them. This comes up very often when women jumpers enter the sport - suddenly they have a lot of male friends who want to take them on 20 ways, free fly jumps, demos etc well before they'd ask a male jumper. And while it is technically possible to safely take someone with 20 jumps on a 20-way (you could do it with 19 AFF-JM's) it's usually a bad idea.
    3. Push your limits. This may seem in contradiction to 2) but it's important. Once you know your limits, and respect them, you can start overcoming them. Do you have a problem with fall rate? Find a slow (or fast) skydiver and do a 2-way, with the other jumper going slower and slower (or faster and faster.) Is your canopy control so-so? Try drills - learn to flat turn and flare turn, a little more on each jump. Follow someone else. Do no-contact CRW. Learn to sit fly.
    Pushing your limits isn't just a feel-good thing, it actually helps you survive in the sport. If you learn how to fly a small elliptical well, you will have much more control over your slightly larger square - and that can save your life if someone cuts you off on final. CRW can be fun, but can also be the difference between life and death if you have a cypres firing and have to land two canopies.
    4. Push your limits, one at a time. This is even more important. It's possible to learn to do demos, as long as you learn the basics - canopy control, obstacle landings, spotting. Trying to learn these all on your first demo is asking for trouble. Small canopies, same thing. You can certainly learn to jump a VX 97. Doing it all on one jump - going from a Sabre 150 to a VX 97 - is a huge mistake. First transition down to a smaller Sabre, then learn to fly it. Then switch to an elliptical of about the same size, and learn to fly _it_. Once you get to that VX 97, you will have the background to fly it well - and you will be much, much better prepared to fly any canopy in between.
    5. Learn flat and flare turns. You should be able to do a 180 in the air without your canopy diving at all, and you should be able to turn at least 45 degrees during your flare. Every year, several people die because they turn too low. I'm convinced that many of these aren't intentional hook turns, but accidental low turns to turn into the wind or avoid an obstacle. Knowing how to flat and flare turn might have saved their lives.
    6. Learn more about your gear. What color is your reserve? Your reserve toggles? If you ever look above your head and see four sets of risers, how will you tell them apart? What color is your freebag? You can learn all this by watching your rigger pack your reserve, and even more by doing it yourself (under supervision, of course.)
    Read up on TSO testing of your gear, and learn about the limits it was tested to. If you know that, you can keep your own flying within its operational limits. Learn about what's in a Cypres, and how it judges altitude. Learn the difference between Dacron and Spectra, and how to pack a pullout rig.

    7. Get related experience. Pilots have a distinct advantage over other jumpers when something goes wrong in the plane, because they know how to read the signs, and they know how to operate around aircraft. They have a better idea what to touch and what not to touch, and can more easily communicate with the pilot (and, in rare instances, ATC.) You don't have to get your instrument rating - even a few lessons will teach you a lot about aerodynamics, aircraft weight and balance, stabilized climbs and descents, elevator trim and its importance, etc.
    Or learn to climb. Serious climbers (except, possibly, sport-only climbers) are their own riggers, and understand the ideas behind an equalizing anchor, dynamic vs static rope, and nylon to nylon friction. Many of those transfer to the kind of rigging that gets done in skydiving, and if nothing else, will help you make sense of how rigs are designed.
    8. Get out of your drop zone. Drop zones tend to have "flavors" to them, and are sometimes homogenous when it comes to skills or equipment. Kapowsin, for example, seems to use nothing but Infinity's, and for a while Air Adventures was nearly 100% Reflex. Some drop zones are mainly free fly, some RW, some do a lot of demos. By getting away from the familiar, you'll learn more about other disciplines, other equipment, even other ways of thinking. You'll also meet some really cool people - you can't talk to Bryan Burke, John LeBlanc, Tony Domenico or Adam Filipino, for example, and not learn something. Unfortunately, not every drop zone has them, so you have to hit the road.
    9. Buy your beer. It sounds like a selfish tradition, designed to punish new jumpers. It's a whole lot more than that, though. The key is that, if you buy the beer and give it to people, they will ask you what it's for, and you will end up talking to people (up to 23) about what just happened. Since this usually happens at some significant time (say, right after your first cutaway) this is a really important time to talk about what just happened without being embarrassed about it. (Well, maybe you will be anyway, but tough.)
    On the flip side - if someone buys beer for the DZ, and you're an experienced jumper, don't just grab a bottle and run. Find out who bought it and why they bought it. That beer isn't quite free - the price is that you have to pass on the knowledge that _you_ first learned when it seemed like you were buying a case every other weekend.
    10. Teach others what you know. There is no better way to learn than to teach, and it helps others as well. If you want to become an expert at emergency procedures, teach part of a few first jump courses and watch other people screw their procedures up. If you want to learn a lot about RW, organize. If you want to learn more about skydiving in general, teach a graduate course. Just the act of putting everything down on paper and talking about it will lead you to research to make sure you're right, and you'll get feedback when you actually do the teaching.

    By admin, in General,

    Marketing Essentials for the Skydiving Industry

    Marketing execs love to throw around industry jargon to make themselves sound like marketing experts. Terms like ROI, target demographic, disposable income, call to action and spiral binders with graphs and charts showing positive gains look and sound legit. Don’t believe the hype.
    All this ‘marketing-speak’ sounds good, but the majority of marketing execs who work for broadcast, TV and print don’t understand the skydiving industry and mistakenly apply successful campaigns used for other industries to our own.
    Before buying in to a marketing plan, understand three major reasons why mass media ads don’t give a return:
    1. A Tough Call to Action. Strong marketing plans offer a call to action
    prompting an individual to respond to an ad. Few ads challenge people to do something that may result in one‘s death. Though death is an unlikely result, it weighs heavily for Joe Public to actually commit to calling a DZ and making a booking.
    2. Recruitment. Think about it, how many people come to a DZ alone? It happens, but it’s the exception to the rule. Students usually recruit a friend to share in the fear, anticipation and excitement of the experience. Not only does one need to spend time considering whether they should jump, but then need to recruit a friend, which takes time.
    3. Disposable Income. How many of us have an extra few hundred dollars lying around? Many mass media ads for activities are more affordable than your average price for a tandem skydive.
    Combine the obstacles of having to consider making a jump, recruiting a friend and saving money and you’ll find that a lengthy amount of time has gone by before the phone begins to ring. Some will argue that advertising creates brand awareness and this is true, but there will only be a small percentage who see and hear an ad that follow through all of the steps to make it to your DZ. Bottom line: a poor return on investment. Most DZO’s have been happy to break even on their mass media campaigns after they’ve launched.
    The Affordable and Effective Approach
    The most effective kind of marketing harnesses the exhilaration of your current customers. Firstly, give these guests a reason to come back to make a second jump. No longer does this need to be a ‘once in a lifetime experience.’ These guests will recruit their full-retail paying friends to experience life’s greatest adventure. Secondly, equip your guests with a means to advertise your DZ utilizing social media by sharing videos, photos and check-ins.
    Top Five Marketing Basics Every DZ Should be Implementing
    Online Reservations. If you’re a DZO who says that you don’t want to miss
    on the personal interaction with guests while making a booking, then this is the first marketing change to be made. If someone desires to spend money with your company at two o’clock in the morning, let them! Don’t force your potential customers to spend money with you on your terms.
    Social Media. The biggest corporations in the world are actively engaging with people through social media. If you are putting a couple posts out here and there then you’re missing a huge opportunity that the business world has come to embrace. Creating a social media plan is necessary, should be organized and well structured. This is a legitimate and inexpensive way to market the business.
    Video E-mails. Embrace your customer’s enthusiasm by using a service to e-mail guests their videos. Be sure the DZ’s branding, phone number and website is included because these videos will be shared everywhere. This is an example of getting your customers to market for you.
    Database Collection. Updating your DZ database is a critical piece to the marketing pie. Collecting e-mail addresses will allow for broadcasting your marketing message to a clientele that knows how great you are. A professionally designed newsletter offering specials during the holidays will reap rewards to the bottom line.
    Surveys. How do you know your strengths and weaknesses? Allow your customers to tell you by seeking their feedback. This should never be done at the DZ ten minutes after your guests have jumped. An online survey should be sent 24 hours after a jump allowing for anonymity and comfort to provide honest insight about the experience. In order to have a finger on the pulse of the operation and understand the weakest areas of the customer experience, surveys are invaluable.
    Finally, the best marketing is word of mouth. Examine every interaction your guests experience with the operation from the website, cleanliness of bathrooms, presentation of the instructor, cleanliness of jumpsuits etc. and be sure to amaze your customers. Having a plane with instructors who can safely execute skydives is not enough. The details that surround the experience is just as important as the skydive to ensure your customers aren’t just happy, but thrilled with the experience.

    By admin, in General,

    It’s Not Your Imagination. Skydiving Actually Changes the Shape of Time

    "We live longer in three seconds than some people live their entire lives."
    That's one of my favorite quotes from a fellow BASE jumper, and it was at the forefront of my mind as I read BBC broadcaster and psychology writer Claudia Hammond's new book, "Time Warped: Unlocking the Mysteries of Time Perception." The book tackles the alternately baffling and encouraging science behind our brains' relationship with the arbitrary measurements of our wristwatches.
    More to the point: It puts that information in a framework that makes total sense for an airsports athlete. Time works a little differently for us, after all. Linear time lies at the heart of the way we organize life, sure--but it also lies at the heart of the way we experience it. This might be the bigger concept--because what's within our own minds is under our own control.
    Skydivers--especially in high-stakes moments, like competitions and records--can relate to the curiously changing shape of time. Saturated with focus, it feels as though some experiences are being scrubbed through in super-fast-forward, while others are playing out almost frame-by-frame. It turns out that fluxes in time perception aren't simply an athletic and personal deficiency; these mental gymnastics around the concept of time's passage are a "defining feature of how the human mind works."It turns out that, in a physiological sense, the "slow-motion car crash" isn't a myth -- it's "a cognitive reality."
    Hammond's hypothesis is compelling in its simplicity: that the way we experience the passage of time is not an external process we're subjected to. Instead, time as we know it is actively created by our own minds. It isn't reliable and it is certainly not objective. Neuroscientists and psychologists call this "mind time," and Hammond describes how we as humans -- and, by extension, we as extreme athletes -- can shape it and use it to our own benefit.
    Much of the challenge we face as airsports athletes is exerting a practical amount of control over our physical and mental responses to overwhelming stimuli. No amount of mental gymnastics will turn a BASE exit with a seven-second rock drop into an exit with a 12-second rock drop; however, if we can start to see "mind time" as flexible and ourselves as active participants in our experience of it, Hammond suggests that we can stay in flight just a little longer in our own minds. (This is a deeply appealing and useful thought experiment for athletes who practice a sport that often requires us to dedicate days of our time for scant minutes of freefall.)
    "Time Warped" is a profoundly conceptual but still, somehow, practical book. It addresses the way our internal clocks dictate our lives and the ways in which mindfulness works as a tool to master that internal clock.
    One of the book's most beautiful passages sums it up brilliantly:
    "We will never have total control over this extraordinary dimension. Time will warp and confuse and baffle and entertain however much we learn about its capacities. But the more we learn, the more we can shape it to our will and destiny. We can slow it down or speed it up. We can hold on to the past more securely and predict the future more accurately. Mental time-travel is one of the greatest gifts of the mind. It makes us human, and it makes us special."
    Other Resources:
    Thinking, Fast and Slow by Daniel Kahneman

    Felt Time: The Science of How We Experience Time by Marc Wittmann

    By admin, in General,

    Improving Your Indoor Flying Outside The Tunnel

    How First-Person Videos Can Supplement Real-Life Learning
    Image by alphamedak If you’re like most people, there’s only one reason you’re not, like, the best tunnel flyer in the world. It’s the annoying digital thing that barks out at you from the driving room window. 00:00! 00:00! 00:00!
    The cruel little clock leaves you with a knuckle-biting question that lingers in the air: Is there training that you can do that optimizes the time you spend in the airflow while the damn thing isn’t ticking down?
    Apparently, there is. But let’s dig into a bit of theory, first.
    Embodied theories of learning and instruction are having something of a moment in airsports. When we talk about “embodied learning,” we’re talking about the ways our physical actions lay the neural groundwork for new information to take root in meaningful ways. That neural groundwork is a physical, real-world thing that’s being manufactured in your head right now. The material is called myelin, and its part in the process is called myelination. Without myelin, you’ll never nail that layout.
    Myelination is the method by which your brain paves the pathways you tell it are most important. Like wrapping a copper wire in rubber, it wraps the axons of those prioritized neurons, protecting the neuron and helping it conduct signals more efficiently. Repeatedly, deeply practicing a move--getting it a little wrong, making adjustments and trying again--is the most efficient way to build up that myelin and, by extension, get better at what you’re working on. (For more of this in a super-readable pop-sci format, check out Daniel Coyle’s The Talent Code.)
    When you only have a few minutes in the tunnel--or a few seconds, hopefully very occasionally, to mess with a malfunction--you need all the help you can get to get the myelination process wrapping neurons. If you’re not actually doing the activity you’re trying to myelinate, the trick is to make your brain believe that it is the actor that’s practicing the action.
    Learning physical skills has always begged for embodied learning methods, but modern technologies are hopping the fence in places between the things you absolutely have to be physically present to learn and the things you can reinforce--or even learn--on your own couch.
    Take, for example, the virtual reality malfunction videos released as a collaborative project between Sig.ma and the USPA. These are, in this author’s opinion, set to exponentially improve the way new skydiving students learn malfunction response. (Heck--they might even be instructive for you if you haven’t yet had the pleasure of seeing one or two of these babies overhead.)
    Visualization has proven useful for this kind of thing, but you have to keep in mind its limits: Visualization works, but only if you’re able to very realistically, very precisely visualize the task at hand. You already have to know what you’re doing first. Visualization is a very useful tool for competitors training for a world competition; it’s not terribly helpful for someone at the first stages of working on an outface snake. First-person/VR environments are for learning new stuff, and they do it very well.
    The results are in: first-person video works. Check out this 2017 study published in the Journal of Educational Psychology, which tested whether first-person videos were better task-teaching tools than third-person videos. (Sure, the study participants were assembling components on a circuit board, but doesn’t putting together a complicated line kinda feel all fussy-fiddly, too?) Across two experiments conducted in different labs, the first-person group performed the task more accurately, hands-down, and more time-efficiently to boot.
    There’s a problem, of course: It has not, historically speaking, been an easy task to find first-person video of tunnel flying. And that’s where Johannes Bergfors, a Swedish tunnel instructor and coach, comes in.
    Johannes has produced a fine set of these, available for free on YouTube, called First Perspective. Simply put, it’s a series of online videos filmed from the flyer’s POV. They show repetitive flying of dynamic flying motions on several speeds, both solo and duo. Filmed over a few days in the Flystation wind tunnel in Munich, local instructor Nick Poland flew the lead as Bergfors filmed following. (As a bonus, there are also some first-person videos posted there of non-single-move exchanges between Bergfors and Poland and also freestyles by the legendary Leonid Volkov.)
    "Your visual experience is a muscle memory,” Johannes explains. “For example, if you’re trained as a gymnast and have made a thousand front flips from the trapeze, then you will be more prepared to do a front layout, because you have already seen your world spin in front of you on the vertical axis so many times and will be able to navigate at the same time. If you don’t have that experience, you can expect everything to be a blur in front of you. Without that basis reference, you’ll have to perform a new type of body motion at the same time as your visual is dramatically changing."
    The idea for First Perspective has been on Bergfors’ to-do list for quite some time. Before he took his first tunnel gig in 2014, he had about 20 hours of tunnel time, which he’d paid for with a less-than-princely chef’s salary that made every second count.
    “Also, I was not a very good student,” Bergfors laughingly adds. “I was always complaining. My expectations were too high, and I spent a lot of time stressed out. I also had really lousy body control since I never really did any sports before that except for skydiving. If I had videos like these when I began, I think they could have helped me, and I think that’s probably true for a lot of people out there. I don’t claim it’s perfect, and it’s not a series of instructional videos about how to fly--it’s about what could be presented visually in front of you when you fly certain lines, and about teaching your body to embody this information in kind-of a sneaky way.”
    Johannes plans to expand and improve the collection in time. That said: It’s a damn good start. For those of us who’ve been looking for a way to invest in their progression without the clock ticking down the dollars, it’s a sweet discovery--and, hopefully, one of many emerging innovations for inspired airsports instruction.
    First Perspective on YouTube: https://tinyurl.com/fallrates2018

    By joelstrickland, in General,

    6 Strategies for Handling Negative Reviews

    Image by Vincent ReederDo you remember what it was like to go on a first date? Imagine inviting someone out that you felt was completely out of your league...beautiful, intelligent, witty - the whole package. I feel nervous just thinking about it. Naturally you'd want to leave a great impression. You hope that at the end of the night your date would say that it was the best date she'd ever been on. To reach this outcome, attention to detail is necessary. I'd wash my car, research restaurants to ensure the atmosphere was romantic, the food outstanding and the service excellent.
    Now visualize picking your date up. Think about how you feel physically: sweaty, nervous and a marathon-pumping heart rate. After you've practiced saying "Hello, you look beautiful tonight," (several times) you get out of the car, walk confidently up the driveway without revealing your internal emotions. Once she greets you at the door, your awareness levels are in hyperdrive - you notice everything in milliseconds - the way she looks from head to toe, how she smells… your subconscious notices what's behind her as she stands in the doorway. Is her place messy or neat? You take everything in.
    The emotions felt on a first date are how our students feel when arriving at the drop zone for the first time - out of their comfort zones, excited and nervous. Our students notice EVERYTHING from the moment they drive in to the parking lot until they've landed from their jump. As drop zone operators, we must remember that we are hosting the ultimate date - the opportunity to give someone a lifetime memory. Every detail on our date should be carefully examined - each customer point of interaction be brought to a five star standard. Our goal is to have our guests say that their experience was one of the best days of their lives.
    Bob Marley once sang, "You can't please all the people all the time…" No matter how hard we strive to exceed customer expectations, we will never be perfect.
    Smartphones have empowered consumers to become critics that effect how other consumers decide where to spend their money - with your business or with your competitor. When negative comments are posted about your business, how you react (or not react) can greatly effect the outcome. In this week's newsletter, we examine tips for handling negative feedback.
    6 Strategies For Handling Negative Reviews
    Tip 1: Don't Knee Jerk
    The natural response when reading criticism is to immediately become defensive and type out a quick response. DON'T DO THAT. Sit with the criticism for a while and let the initial shock that you've been publicly called out, settle. The walls aren't caving in and some of the criticism may have merit. Try to be objective and own your part in the criticism. The biggest mistake is not making necessary changes to ensure a similar review doesn't pop up in the future.
    Tip 2 - Join The Conversation
    After you've calmed down, it's better to join the conversation than ignore it. Negativity breeds negativity and joining the conversation is better than allowing one person's views to rumble into an avalanche of criticism that becomes unmanageable and viral. It's best to be non-confrontational, non-defensive and act as a caring human being. Be calm in your response and say sorry if you need to. Introducing yourself and showing that you're a real person puts a face to a business as opposed to a corporate entity with a PR spin. Pick and choose your battles as well. If someone is a tyrant and is abusive... the general audience will be able to discern that.
    Tip 3 - You Don't Have to be Right
    Realize that you don't have to be right. People who spend a lot of time online are used to companies trying to spin everything into a positive. If you're wrong, it's okay to say you're wrong. No one is perfect and it can be refreshing to see some honesty. Acknowledge and see if it's possible to find resolution by contacting the individual directly. If you can convert a critic into a fan of your business, the word of mouth spread is far greater. Criticism and how a customer's complaints are handled can be very valuable in spreading goodwill about your company.
    Tip 4 - Don't Get Caught Off Guard
    If you haven't done this yet, stop reading this newsletter and do it now. (I'll wait here while you get this done). Go to Google Alerts and plug in your company name. If anyone mentions your company online, you'll at least be in the know. It's never a good thing to have an online war raging about your company and have no awareness that it's even occurring.
    Tip 5 - Never Go Into A Diatribe (This is Queens English for "Don't show your ass.")
    Let's suppose the criticism you've received is misguided and wrong. The most common mistake is how people respond by: a). working themselves into a lather and taking a hard stance defending themselves and b). write a long-winded response that only fuels the comment thread (we see it on a daily basis within the forums of dropzone.com). When responding, keep calm and carry on (even if you want to rip someone's head off) and keep it relatively succinct. Rehashing each detail of the customer encounter WILL fuel more commentary from those watching the thread unfold. Keep in mind, you're not responding publicly to an audience of a few - it could be a few hundred. No matter how right you maybe, acting indignantly will only turn many people off.
    Tip 6 - Don't Hide- Be Transparent
    
 Many companies delete negative reviews - particularly off of social media feeds. Deleting people's posts can cause rancor for those watching things unfold and they WILL CALL YOU OUT on it. The best course of action is to respond. Of course, there are some people out there ('trolls') who are looking for trouble and are looking to pick a fight.. when things get abusive, it's time to pull them off.
    The Realities
    Anonymity empowers people to say things they normally wouldn't in the presence of others. Showing you're human, interested in helping to solve a problem and publicly apologizing will usually diffuse most situations.

    By admin, in General,

    Demo Skydiving for N00bs

    How To Be A Hero, Kinda
    Maybe you’re a limelight magnet and maybe you’re not-- but if you like to mess around with parachutes, the limelight might follow you regardless. Even if you don’t necessarily seek it out, there’s a chance that someone will find out you’re a skydiver and ask you to--well--jump into something. A grand opening, for instance, or a wedding, or a local event.
    Before you slink away, hold on! If you’ve got the experience under your belt, there’s really no reason to turn it down out-of-hand. This could be a great learning experience if you’re able to commit the time and wherewithal to put in the planning. Expanding your skill as a jumper is always a worthwhile endeavor.
    After all, a demo (or, as it is officially known, an exhibition/display jump) doesn’t have to be a stressful proposition. Unless you’re Kenyon Salo (or anyone else on the Denver Broncos Thunderstorm team), it doesn’t necessarily stipulate a nail-biting night jump that swoops you through a spiderweb of cables to a landing in front of a screaming stadium audience. It may surprise you that, for demo jumps performed under specific conditions, you don’t need a USPA D-license or a pro rating. Spoiler alert: It doesn’t even necessarily mean that you’re landing in front of an audience. Doing a demo jump simply means that you’re jumping into a location other than an official registered drop zone.
    To get a little clarity, I talked to Neil Amonson, who has been a demo jumper par excellence for quite some time. Once a member of the legendary GoPro Bomb Squad, Neil now runs Jump For Joy--an incredible skydiving-driven inspirational/educational youth project. (You should stop scrolling right now and sign up.) For a little help getting your homework started, read on.

    Give It Time
    A demo starts -- of course -- on the ground. If you’re approaching the idea of doing a demo jump for the first time, you should give yourself about a month’s worth of lead time to make all the necessary arrangements and file paperwork. Aside from the not-insignificant challenge of finding an aircraft to do the deed, you can expect more than a few checklists to work through, the details of which change according to the details of your unique jump plan.
    Determine Your Level.
    If you skew to the new, you’re very likely going to find your footing as a Level One or “Open Field” demo jumper.
    While the experience and license requirements are the same between the two. but Level One and Open Field jumps are classified differently based on area. If the landing area covers up to 500,000 square feet, the landing area is classified as Level One. If it clocks in at more than 500,000 square feet, that’s when it becomes a "open field.”
    “There are some little details between the two that makes a Level One slightly more advanced,” Neil explains. “For my jumps, when I measure up the LZ and see how many square feet it is, that lets me know how complex of a demo it is likely to be. ‘Open field’ is a piece of cake and very low stress. Level 1 is still pretty easy, but I probably couldn’t do it blindfolded. Level Two is more serious--and a stadium usually has my butt a little puckered.”
    “Because it shows up on the paperwork, I think the level system helps the FAA understand how much risk is involved,” he adds. “The lower the level of the LZ, the less they probably stress about the jump as well.”
    To jump into a Level One or Open Field LZ, you’re going to need at least a USPA C license and 200 jumps in your logbook, 50 of which must have been made within the past 12 months and five of which need to have been done on the same model and size canopy you’re planning to use on the demo.
    If you’re significantly more seasoned, you can hook up with an Instructor-Examiner and get your PRO rating to do Level Two demos. This is the rating you’ll need to jump into any stadium, no matter now big. (Ask anybody who has jumped into a stadium why that’s the case, and they’ll probably tell a rotor story that’ll curl your hair.)
    Assess the Landing Area
    If you’re considering a demo, your first stop should be a technical requisition of the landing area. (If this wasn’t going to be the top item on your list in the absence of advice, we would perhaps recommend binning the idea of a demo entirely.)
    If you’re a level-one demo jumper, you’ll need loads of room. You’ll soon see why the “open field” moniker applies. For a Level One jump, you’ll need to be jumping into a landing area no smaller than 250,000 square feet. When you’re jumping into an area over 500,000 square feet, you’re in an “open field.” Most open-field athletic areas constitute a Level One area.
    That might sound enormous--and it is, at a minimum of 500’x500’--but don’t sniff too soon. The additional stresses of a demo jump are going to make the experience sufficiently interesting to hold your attention.
    Get The Rest of Those Ducks In a Row
    After you’ve collected all your in-date identification (specifically, your parachuting license and reserve repack card) for presentation, you’ll be working with the aircraft operator to do the paperwork. Get ready to leap into the exciting world of waivers, any required secondary insurances and the holy NOTAM.
    Let’s take a second to define “NOTAM,” if this is the first time you’ve come across the term. NOTAM is an acronym that stands for “Notice to Airmen.”* A NOTAM is, essentially, a heads-up to pilots and the FAA at large that flags what you’re up to in the airspace. A NOTAM allows you and your aircraft to fly a stated altitude and pattern within a stated time window. As well as Google Maps, you’ll also be using a website called Skyvector to complete your filing, because the FAA will want see your LZ on a sectional chart as well as a satellite image.
    It’s important to note that a NOTAM is not a guarantee that your jump’s gonna happen. It can be turned down by the FAA. Neil suggests filing a 7711-2, also called the "Application for Certificate of Waiver or Authorization,” no matter what level of demo you’re planning.
    “While it's not required for Open Field and Level One landing areas, it's the one piece of the puzzle that absolutely ensures that everyone that needs to be on board is on board,” he explains. “It's basically the golden ticket from the FAA that says ‘we approve of your plan.’ I used to try and skirt the rules for doing the paperwork and--even though I was legal!--one time, the FAA called my pilot and told them not to let me jump because we disagreed on what type of landing zone it was. Ever since then, I’ve done a 7711-2 for every demo and I haven't had one turned down in ten years.”
    While page 169 of the SIM explains how to fill out a 7711-2, Neil says that a little mentorship will go a long way.
    “The best way to learn how to fill it out is to have a local pro-rated jumper--who has filled one out before--let you see one they’ve submitted,” he explains. “If you were just to look at the application, it’s kind of confusing, but when you see it filled out it makes more sense.”
    Take note: The higher-profile your jump, the more likely it is that the FAA will come out and watch to make sure you didn't ask permission for one thing and then do another.

    Dial In Your Comms and Your Crowd Control
    You’ll need to conspire with a ground crew to manage your adoring crowd in accordance with the guidelines in the SIM (unless you’ve figured something else out and gotten it officially waivered). For Level One demo jumps, the crowd management suggested by the USPA allows skydivers to drift over the spectators with sufficient altitude (250 feet) to prevent a hazard to anything or anyone on the ground. (That means you’ll be landing at least 50 feet from the spectators. The USPA, in its benevolent wisdom, doesn’t want you toddler-bowling.)
    “A rule that is often forgotten about,” Neil warns, “is the requirement for ground-to-air communications between the ground crew and aircraft. This is easy accomplished with a radio--or even texting, when you’re only going up to hop-and-pop altitude.”
    “There also needs to be a backup, if those comms are lost,” he adds, “that can signal to the jumpers that the LZ is not safe. That’s your ‘no comms’ plan. On my demos, the ground crew usually puts a big X down where we are supposed to land. We tell the ground crew that, if we lose comms and we should NOT jump, to remove the X from the LZ. If we look out of the plane and don't see the X marking the spot, we know something happened, and to stay in the plane. In all the years I’ve been doing demos, we've never actually needed to do this, but it's good that your ground crew knows, in case the FAA shows up, to make sure you are sticking to your plan.”
    ...And Don’t Jump When It’s Not Jumpable
    Great! So you have your filings approved, your ground crew is stoked, your crowd is assembled and your prop is turning...but the trees are bending over more than a little bit at the top and there’s weather creeping in. The USPA recommends a maximum wind of 15 mph for a demo jump. What now?
    “The hardest part of a demo just is knowing when NOT to jump,” Neil notes. “It is soooo hard to say no when it's game day and you just want to pull it off the winds are strong and gusty.”
    “Also watch out for the winds aloft,” he insists. “Your spot is everything. There have been a few times I've done demos where we’ve drifted into the next county, and that always happened because it was calm on the ground but NUKING up high-- our pilot wasn't a jump pilot so he didn't think it was important--and we mistakenly assumed that calm winds on the ground meant calm winds above the ground. Whoops.”
    Use Your New Skills For Good>
    Demo skydiving inspires people. It does! There’s something semi-magical about descending from on high and (hopefully) touching down like goddamn Tinkerbell in front of a cheering crowd. That crowd’s general concept of what-is-possible for themselves, the world and physics will change, at least a little bit, for the good...and that’s almost certainly worth the effort of prep and paperwork. N’est-ce pas?
    *This author looks forward to a verbiage change away from crusty old gendered language. “Notice To Airpersons,” perhaps?

    By admin, in General,

    Shredding the (Adaptive) Gnar

    Rosie Manning Breaks Down Accessibility Barriers in the Tunnel

    Raise your hand if someone you know has been seriously injured on a skydive. Everybody? Right. Now -- keep your hand raised if that inspired you to invent a whole new apparatus to get your friend back into flight mode. I’m willing to bet that very, very few hands have stayed raised. One of them is Rosie Manning’s.
    The first thing you should know about Rosie Manning is that her lissome form and noon-in-July demeanor might easily fool you. She’s sweet almost to a fault -- but then you start to realize that she has you direly outgunned in the brains department. This mechanical engineer can think in circles around most folks (and then take you to the tunnel and fly in circles around them -- but more on that later). If you ask her, she delicately shrugs it off as a survival instinct. 

     
    “When you study engineering as a girl,” she notes, “You’re already in an uphill battle. There were 200 guys and 9 girls in my degree. From day one, I was going against the wind.”
    As it turns out, Rosie thrives against the wind. She and one of the other nine girls in the program (Emily Whatton, a dynamo in her own right) joined the university’s skydiving club. At first, it was a lark, but by year two, both girls were hooked. Time flew. For the fourth and final year, the program participants were tasked with an individual project which made up the bulk of the students’ final grade -- and Rosie knew exactly what hers was going to be. It was that year -- 2016 -- that UK skydiver Ben White injured himself during a swoop. He came out of it alive, but paraplegic. Rosie figured she could use her project to help.
    “I was heavily addicted to skydiving at this point,” Rosie remembers, “and I really wanted to do a project that was skydiving-related. I had an idea.” Rosie sent Ben a message: How interested would you be in letting me design something for you to help you fly in the wind tunnel again? Unsurprisingly, he was entirely up for it. Bonus: Ben himself had studied robotics at university, so the process was uniquely collaborative.
    So far, so good: But there was still a baffled academia who had to buy in.
    “The first time I pitched the idea of the project to my tutor,” Rosie laughs, “He said, ‘Okay, so you’re telling me you want to throw a paraplegic person out of an airplane?’ Um...no. Then I spoke to quite a few of my other teachers about it to get some advice. They all told me it wouldn’t be possible.”
    “I just didn’t listen,” she grins. “I went and did it anyway.”


    Rosie, with Ben’s collaboration, set about designing a brace that would support Ben’s lower body for the purpose of tunnel flying. First problem: the university only allowed for a total project budget of 100 pounds.
    To solve her problem, she asked for help. Rosie went to a long list of orthopedic and prosthetic companies. Finally, she had a lucky break: she got an email back from a company in the UK called TruLife, whose Head of R&D, Shane Nickson, was a keen skydiver. He offered funding and help with manufacturing. TruLife ended up custom molding the carbon-fiber-and-titanium brace to Rosie’s design.
    The second challenge: tunnel time. This wasn’t too tough, luckily, as the owner-at-the-time of the UK’s Bodyflight Bedford was a super-cool guy who was happy to donate tunnel time to the project. Score.
    The third big roadblock was, again, academia. And it was a whopper.
    “We struggled making the project fit the specifications the university wanted,” she explains, “because the university wants you to show your preparation; the calculations; the justifications for all the choices.” In order to meet the requirements, the team had to build an external sensor system that would measure the angle of the wearer’s legs in different orientations: belly flying; back flying; free flying. From that data, they worked out the forces that would act on the wearer’s legs in each position to determine the required strength of the brace.
    “That actually took up a lot of the project,” Rosie notes. “And Ben was a huge help with that because he was a robotics guy, so he knew loads about the programming that was required.”

    After they finished the project -- after Rosie had left university -- she, Ben and two other friends entered the World Challenge in the rookie category.
    “There were only four teams in the category,” she remembers, “but it ended up being this huge battle with another team for third place. We just beat them, and I think the fact that our team beat another team that was completely able-bodied was probably the best day of this whole thing. We went up to collect our medals -- Ben, in his chair -- and we got the biggest cheer.”
    Such a triumphant, happy moment, no? But it came at such a confusing time.
    “To be honest, when I finished my degree, I honestly had no idea what I wanted to do,” Rosie remembers. “I knew that I pretty much hated the first three years of my degree but absolutely loved the final year. If knew that, if I was going to do engineering, it needed to be something I wanted to do -- something sport related -- because that’s what I love doing.”
    “I knew that going into a scheme with a huge company wasn’t for me,” she continues. “It would have been a super easy thing to do. Pretty much everyone in my degree went and did that because it’s the next step in the system they’ve set up for you. I didn’t know what I wanted to do, exactly, but I know I don’t want to do that.”
    So: Rosie and her friend Emily Whatton took off. The pair went traveling for a year with their partners -- also skydivers -- and the tiny amount of money the foursome had managed to save up. While on the road, Emily and her partner were offered jobs as tunnel instructors at Sirius Sport Resort in Finland. Six months later, Rosie got the call and joined them. While there, Sirius backrolled Rosie’s build of another tunnel mobility brace and started welcoming even more adaptive athletes into the bodyflight community, a fact of which Rosie is understandably proud.
    “Currently, there are two separate frames --” she explains, “a smaller one and a larger one, with different-sized straps that can be fitted with either one. If you have someone tall and skinny, you can use the longer frame with the shorter straps, and vice versa. For kids, we use the small frame and the smaller straps.”
    “It was quite hard to build it without really knowing what sizes of people we were going to get,” she adds, “but I was pretty pleased because the system can accommodate anyone from a tiny 8-year-old up to a fairly massive guy.”
    Users report that the biggest challenge for the adaptive flyer is fitting the brace to the body, because it has to go underneath their legs while the flier is seated in their wheelchair. Once they’re assisted from the chair into the airflow, it’s pretty much a snap.

    “[The brace] is at a set angle,” Rosie says, “so fliers with shorter legs have more forward drive and fliers with longer legs have more backward drive for him. That’s easy to manage; we just make sure that, when we brief them, we emphasize that they need to be really relaxed in the arms because we’re going to need to adjust the arm and hand position to counteract any drive that produces. Every [adaptive athlete] we’ve flown with so far seems to take that on board really well, and they fly beautifully.”
    The photos of Rosie’s adaptive athletes really speak for themselves.
    “I mean, it is fantastic,” Rosie enthuses. “I think that flying and skydiving is the greatest sense of freedom you can experience in this life. For an adaptive athlete -- someone that, maybe for their whole life, has been confined to a wheelchair -- it is a feeling that is like no other. Sharing that is super rewarding. I want to do a lot more of it.”
    Rosie recently relocated to work at a wind tunnel in Canada, but she certainly hasn’t abandoned that dream. Currently, she plans on taking her design in two different directions: continual development on the first-timer model, as well as a model designed for the specific needs of adaptive sport flying.
    “We got [Ben White] belly flying and back flying in the current design,” she explains, “but I want it to be able to do more. Ultimately, we want a design that makes freeflying possible. I’m thinking in baby steps -- take it to some low-speed back carving and belly carving; work up from there. I want to give anyone who wants to get involved in this sport  the opportunity to progress in it as well.”


    By nettenette, in General,

0