Luxfly, Tunnel Tech and the Mighty Braffs
It seems like tunnels are popping up everywhere, doesn’t it? As a dyed-in-the-wool aficionado of all vertically-oriented wind, this can hardly have escaped your notice. Another thing that hasn’t escaped your notice, we’re willing to bet, is that none of these tunnels have popped up within a lunch-break drive of your fine abode.
Wanna do something about that? Well: As it turns out, you can. And you can do it even if you’re not personally made of money. Want proof? Meet Steve Braff, a true tunnel-building dynamo. He and his wife/business partner, Magali share a deeper history in windytubes than pretty much anyone on the planet -- and now, they’re building Luxfly, the most exciting indoor skydiving wind tunnel project in Europe, using the brand-newest, top-of-the-line-est technology to do so (Tunnel Tech, to be specific -- but we’ll get to that later). Suffice it to say: The Braffs are a good example to follow.
Currently, Steve and Magali -- collectively known as their vertical wind tunnel consulting business, Starfly -- are keeping busy not just with Luxfly, but with .other tunnels around the world. As a point of note, Starfly is utterly unique -- Steve and Magali are the only people in the world who do this kind of work, helping others to build tunnels. Outside of Starfly, there are two industry operators: the customers, who want to have and operate tunnels, and the tunnel manufacturers, who want to sell vertical wind tunnel technology. Until Starfly, there’s been no one in between to smooth the steep, bumpy road to a grand opening.
Pretty in pink
“Right now, we have five projects in process,” he says. “But it varies. Sometimes, we help people out with optimizing their existing tunnels; sometimes, we help them start projects, or assist them in different phases. We work with a group of investors to which we propose our projects. The specific investors depend on the location and the host country. People who want to build tunnels can work with us at every stage. We can do it from A to the end.”
“Since I was a kid, my dream was always to fly like Superman,” Steve grins. “And that was the only thing I ever wanted to do.”
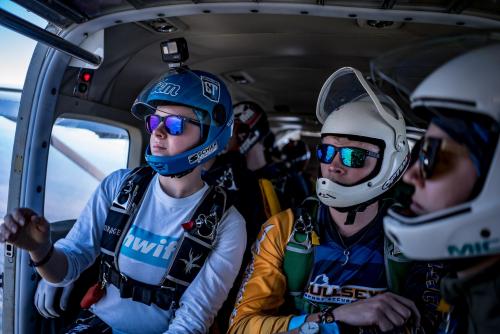
Steve started skydiving at 21 years old. He’s celebrating his 23rd year in the sport this year, with around 8,000 skydives, a thousand BASE jumps -- and, very importantly, lots and lots of hours in the windytube.
“I was always interested in the tunnel flying industry,” he explains. “It always amazed me, what people were doing in there.”
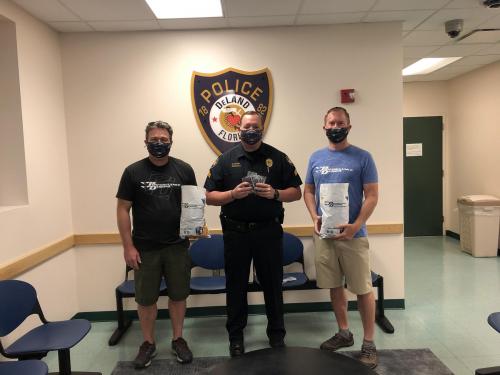
For a very long time, Steve funded his freefall habit by working at the family company: importing Italian coffee into the Braffs’ native Belgium. One day, after 15 years of working side-by-side with his brother, mom, sister and dad, he decided it was time for a change.
“I said: You know what, I think I'm going to quit,” he laughs, “And sell air. So I did.”
“There’s enough money around the world to serve everyone who wants to invest,” he insists. “The issue is that there aren’t enough ideas, or the people with the willingness to push them. When somebody tells me they’ve been trying [to get a tunnel started] for two years and they can’t seem to get the money together, I just tell them they need to push harder. Never give up. It only depends on you. The money is there, and you’ll unlock it if you try.”
Tunnel Tech airducts with Hubble-level surface precision and finishing
Steve doesn’t want you to think that he’s under the impression that it’s easy to convince someone to invest in something as big as a tunnel. The price tag of a windytube is plenty high for a project that most humans have only seen, occasionally, on TV.
“You need to transfer your passion to the investor,” he advises. “If you are capable of doing this, then you’re already doing great work on the investment. Even if you have a business plan and you can prove with paperwork that your wind tunnel is going to make a lot of money -- super nice presentations and Excel sheets and all the trimmings -- you still need to make your potential investors believe in it with their hearts. If they don't believe in it with their hearts, they will not invest.”
“Think about it,” he continues. “You’re asking them to invest millions of Euros in a building with wind blowing at 200 kilometers per hour through the walls. It is crazy. We still run into this all the time when we go to new contractors. Why all of this for a flight chamber? Why all of that construction around it? They don't understand.”
In 2006, after one false start at a Belgian dropzone, that decision took Steve and Magali to create a truly watershed moment in what the rest of the world knows as “indoor skydiving.” Inspired by the idea that training in the vertical wind tunnel could revolutionize skydiving -- at the time, a very new and unorthodox philosophy -- the pair decided to build the very first vertical wind tunnel facility in Belgium. It was called AirSpace and it was, in a word, visionary.
“I am a big fan of Apple, and their thing was always to think different,” Steve explains. “And that resonates with us, because it’s really the way we live. We are always trying to improve and make stuff differently; not to be just another tunnel. Our tunnel was a huge success because of that, and because we wanted to do everything we could for the for the flyers.”
Steve and Magali built “their” tunnel from scratch. To do so, they quit everything else in their lives to focus full-time on creating the facility -- including their home.
“My wife and myself, we decided we were going to go full on,” he smiles. “We wanted to know everything -- every bolt, every detail -- about our tunnel, and about the industry. So we left our rented house and moved into the contractor container on the construction site. We lived in it for a year. It was a really nice experience, day by day following the progress of construction.”
Steve and Magali Braff
Though ‘home’ was technically a shipping container for the Braffs that year, the heart of the idea behind that tunnel -- and, now, LuxFly -- was, charmingly, to make it into as homey a place as possible. The Braffs integrated a cozy lounge bar; as much wood as possible, moving away from the stainless-and-plastic aesthetic that pervaded (and still pervades) the vertical wind tunnel oeuvre; a deep sense of comfort and place.
“We were insistent that it had to be like a house,” Steve says. “I wanted people to come in and walk around in their bare feet. When I saw that for the first time, it felt like success to me.”
The year it took to build AirSpace -- still fast for a tunnel project, which is normally it is two years from the point of financing, securing building permits and organizing all the construction to the grand opening -- taught Steve and Magali a boatload.
“Sure, it was a lot of ups and downs -- a lot of them -- more downs than ups, okay -- but, at a certain point, you have to look at it a bit like the stock market,” he explains. “You need to be patient and you need to keep believing in it. That is your only source of strength. Not depending on anyone. It's yourself; your own belief.”
The tunnel truly bloomed under the Braffs’ management. This is one couple, however, that doesn’t make a habit of resting on laurels, no matter how comfortable they might be. After a few years, they decided to sell it and move on. It felt like time to grapple with another project (this time, on the border with Luxembourg), and to start helping other would-be tunnel owners with their own projects.
“We earned a lot of experience over the course of all those years,” Steve says. “We traveled a lot, both skydiving and tunnel flying. We have seen a lot of wind tunnels. We took all those ideas we discovered over the years and we put them into in Luxfly. It's going to be super, super, super special.”
According to Steve, Luxfly is going to be “the 2020 version of tunnel flying.” The design aesthetic -- still a secret, as of publication -- promises to be groundbreaking. The pair decided to make another, perhaps even bigger change: a total technology rethink. While AirSpace used top-of-the-line-at-the-time German tech (ISG), the Braffs decided to build Luxfly with Tunnel Tech, a multinational vertical wind tunnel technology company that’s making huge strides forward in safety and efficiency.
“I must say [Tunnel Tech] have blown us away with the quality of their product,” Steve explains. “First of all, I’ve known Slava, the CEO, for many years. When I heard he was making his own technology -- and that they were building a 15-foot with less power consumption than a 14-foot -- I got very curious. Then I started following their projects in Japan, in Moscow and in Korea, and I was totally convinced.”
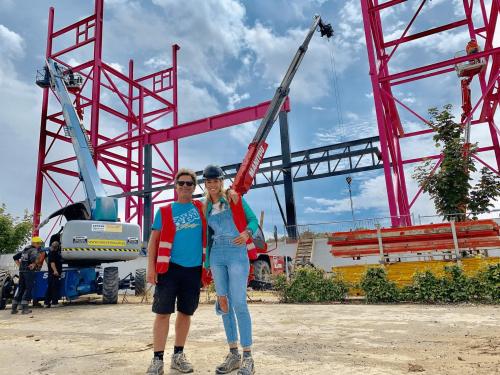
The LuxFly structure & the Tunnel Tech machine are ready for assembly
“It was a risk, of course, because it’s a new company, and it always feels safer to go with a company that has built 15 tunnels versus somebody that has built three,” he continues. “But that’s our history. With Airspace, for example, I think we were the fourth ISG tunnel; perhaps the fifth. So being the fourth Tunnel Tech wind tunnel doesn’t feel so crazy. Tunnel Tech really are rethinking every part of the tunnel -- how we can do better, better and better -- contrasts a lot with where now a lot of manufacturers are now. When you have a certain design that's working and selling, the tendency is to just keep it until people demand something new. Tunnel Tech keeps well out in front of that.”
With Luxfly’s gala grand opening set for the end of January, Steve and Magali are up to their eyeballs in preparations. They insist, however, that they are always available to help people out -- to make new tunnel dreams a reality.
“We are passionate people,” he smiles. “We just want to share our love of flying.”