Search the Community
Showing results for tags 'safety'.
Found 179 results
-
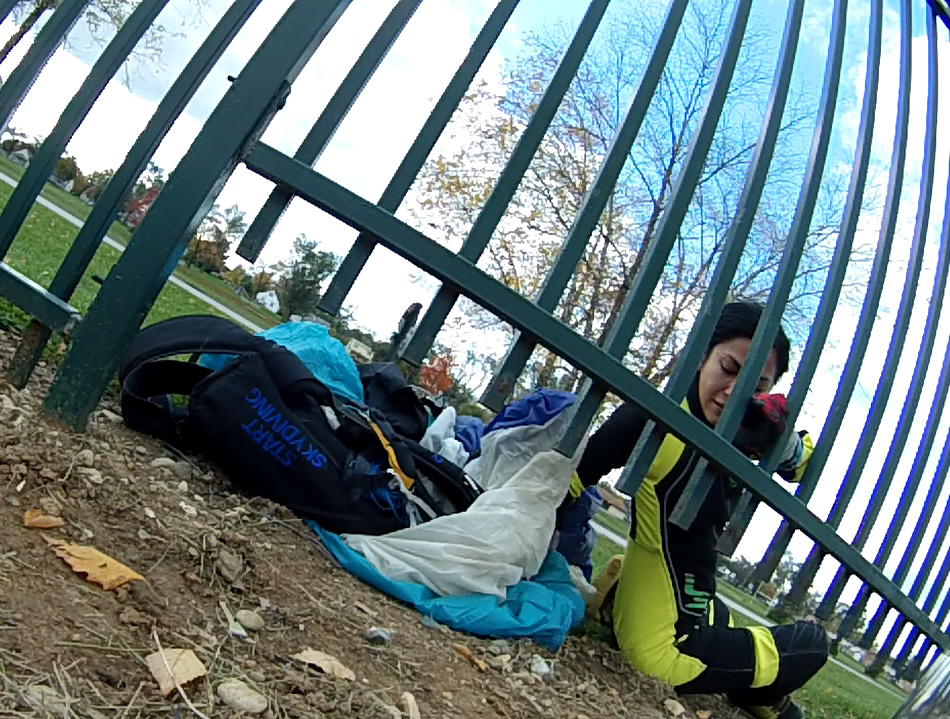
 Image by Juan MayerIt happens so fast. You’re coming down from a great jump. You land, laughing, and whip around for the imminent high-five with a huge smile on your face. That smile drops right along with the friend framed in your view. Something happened in those last few feet of flight--you don’t know what, but that triumphant swoop turned into a spectacular case-in, and your friend’s screaming, and you’re running towards him at top speed, and his leg is at a crazy angle, and there’s blood. Lots of blood. What the hell do you do now? Wouldn’t you like to have a plan? Even if you have no intention of becoming a medical pro--or even a uniformed first responder--you can get a short education that might make you the deciding beneficial factor in someone’s very worst day...maybe even yours. This curriculum is comprehensive and practical, integrating the essential principles and skills required to assess and manage medical problems you might come across, especially but not specifically in isolated and extreme environments. It doesn’t have a name that implies its usefulness for skydiving, sure--”Wilderness First Responder” sounds like a course built just for Search-and-Rescue burlies--but hear me out. You need this. Here’s why. 1. Help is not always immediately at hand.Wilderness First Response certifications are meant to be used in earnest when the caregiver and receiver are essentially stranded in remote circumstances. While skydiving drop zones aren’t generally beyond the furthest reaches of civilization, they’re never in the center of it, either. Response times are not, as a rule, immediate. Any medical education is of enormous benefit, of course, but--for a regular-strength skydiver--the ROI of a WFR is pretty damn dead-on. The WFR course is about intelligent, informed self-reliance in the absence of immediate help. In the wilderness setting that the course was designed around, the priority is to figure out whether you can semi-self rescue, to assess what additional resources you need, and to methodically stabilize yourself and/or others until the cavalry rolls up. In the dropzone setting, this training is just as useful. 2. Whether or not you’re trained, you will always be the first responder to your own injuries. Make those early minutes count.If you end up injured during an emergency landing that’s outside the drop zone--and you don’t have a charged, functioning method of communication--then you’ll be waiting for help to find you. If you happen to be conscious in that interim (hooray lucky you), WFR training will give you a method for understanding your injury, stabilizing it and tracking its progress for later reporting. Without training, you’ll likely just lie there, terrified, in blinding pain--or make your injuries worse with incorrect responses. 3. You should be off the list of dead-weight liabilities and on the list of assets.Skydiving is a sport that demands proactive personal responsibility in the context of a mutually supportive, risk-educated community. We all understand this. That said: While a WFR certification does not confer the knowledge of a full EMT, it makes the bearer a much stronger member of the greater support team. A baseline education in first response moves you from a gasping member of the horrified crowd to a literate, assisting partner in incident management, though your role in the moment will, in all statistical likelihood, be quite procedurally basic. 4. You should dial up your powers of observation.We’re not just talking about cardiac arrest and gaping wounds, here. WFR training will help you recognize subtle symptoms in a way that could help you change the outcome. Dehydration? Hypoxia? Heat illness? These are real-life dropzone problems, and your awareness could make a big difference in someone’s day. 5. You’ll get important certifications.Successful completion of a WFR course will generally earn you a two-year Adult & Child CPR certification as well as the obvious Wilderness First Responder certification. This may or may not be an important piece of paper for you in a technical sense, but current CPR certification makes you a secret superhero in a world where lives are often saved by trained, responsive passers-by. 5. It’s a really good time. Seriously.Wilderness First Response courses are generally administered in, predictably, wilderness settings. I did mine with the National Outdoor Leadership School (NOLS) with the full majesty of the Yosemite Valley as the backdrop. My partner did his in the Grand Canyon country of Flagstaff, Arizona. WFR courses are offered in highly visitable settings all over the States--indeed, the world--and y’know what? There are few better-invested ways to spend a week in nature than learning life-saving, life-changing skills in a close-knit group of fellow adventurers. Y’know, like the close-knit group of fellow adventurers with whom you share your sky--and who are counting on you to be the best team member you can possibly be. Live up to it.
 -
 Image by Joel StricklandDoes exit order seem like some kind of obscure semi-religious ritual? Do you go through the motions without really understanding the moving parts? If so, yikes--but you’re certainly not alone. Luckily, understanding the logic behind the order is a pretty straightforward affair, and the entire sky will be better off if you wrap your head around it. Ready? Okay. Commit this to memory. 1. In the name of science, get the $#&$ out.It may seem like hollow tradition to hustle out the door on exit, but it’s not. As a matter of fact, there are serious calculations behind the art of exiting the plane efficiently. On a calm day, an aircraft on jump run covers around 175 feet per second of flight (that equates to a mile every 30 seconds or so). Translated into stopwatch terms, that means that--on that same calm day--no more than 60 seconds can pass from the moment the first jumpers leave the airplane to the moment the last jumper exits. For practical purposes, taking into consideration how much ground the average square canopy can cover, every jumper in the plane has to be out during a two-mile jump run. If they don’t, some are bound to land out (or a chilly second pass is going to be served up to the sulky remainder). 2. Don’t mess up the pilot’s math.If your group is about to be the first big handful of meatballs out of the plane but you suddenly split up into smaller groups, you’re messing with the pilot’s chi. After all, the jump pilot has more to calculate when he/she turns on that little green light than you might realize. He/she has to calculate about how much time each group will take to exit, and make sure the green light goes on at the correct distance from the DZ to accommodate the aforementioned 60-second countdown. As a rule, the group that will have the slowest climb-out should leave first. Big group? Light goes on farther out from the DZ to allow for a slower climb-out. Little group? The light goes on closer to the DZ. How can you help? Jump the plan you give manifest, and the pilot can give everybody a good spot. 3. Jealously guard your real estate.If you’re a Big Sky Theory kinda jumper who assumes vertical separation is going to save you from a meat-traffic collision, you are not working from scientific facts. Horizontal separation is the only separation that really counts up there, so make sure your group has a chunky slot of sky all to yourselves. Never place big bets (like: your continued existence) on your fellow skydivers pulling at the altitude they swear by. A tiny brainfart (or a big malfunction) will eat up that vertical separation before you can say “what happened to pulling at 3,500, toolbox?!.” 4. Horizon-pointing belly buttons go behind downward-pointing belly buttons.When freefly folks get out first, they tend to become part of an undelicious freefall sandwich. Here’s why: On a typical skydive, a pair of freefliers will clock a 45-second freefall and open at around 3,000 AGL. Let’s say that pair is followed by a belly group with a 10-second climb-out. This is going to sound like a math word problem, but bear with me: If one of those freefliers has a canopy with a 30MPH forward speed (which will move forward at around 45 feet per second, assuming little-to-no wind), opens 30 seconds before the belly group and turns right back toward the DZ, the variables are stacking up for a collision. Those 30 seconds of flight will drive the freeflier forward by about 1,300 horizontal feet--a measly 400 feet from the middle of the belly folks, which a solid six-second track can cover. If you add wind to the equation and the RW group gets blown even further into the path of the freefly pair, the likelihood of a meetup gets even uglier. When freefly groups get out after belly groups, the picture gets a lot healthier. The fast fallers get their horizontal separation, predicated on their shorter climb-out and faster descent rate. Wind becomes a positive safety factor instead of a negative one; slower fallers simply blow farther away. 5. With longer flights comes greater responsibility.Tracking groups, high pulls and wingsuits get to snuggle with the pilot (and/or the tandem pairs) in the way back of the plane. Why? First off, they’re mobile: if they’re doing it right, they’ll use all that horizontal power to get the hell away from jump run--and get back from a longer spot. If they’re not doing it right, however, they’re fully within their capability to truck through everybody’s personal piece of sky on the way down. The moral of the story: longer freefall (or, in the high-pull case, general airtime) requires greater awareness and responsibility on the part of the nylon pilot. 6. Don’t be the heat-seeking meat missile.That’s the bottom line, really. Everybody in the sky is counting on you. (Me, for instance.)
 -
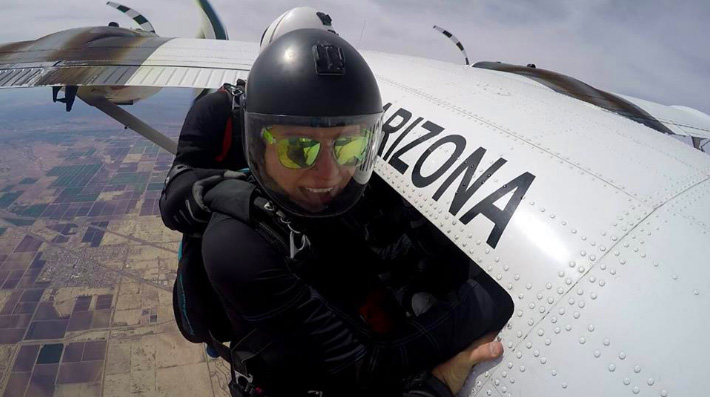 Photo by Jeff AgardJust moved across the country? Heading out to boogie in a strange new land? Impromptu road trip? If you’re not used to jumping at new-to-you DZs, reorienting yourself to a new conveyor-belt-to-the-sky is a bit daunting. But never fear, brave adventurer: if you walk in knowing what you need to do, you’ll be golden. Here’s a checklist to help make the process a little easier on you. Before you arrive:1. Do a preliminary scan for unpleasant surprises. Find out as early as possible if the dropzone (or the specific event you’re planning to jump) has special requirements that could keep you on the ground. 2. Budget. Get pricing on jump tickets, DZ accommodation and registration fees. This is a good time to check the jump-ticket refund policy and find out if there are extra charges for credit cards. 3. Ask about facilities. If you’re going to be squaring up to swampy summertime port-o-lets, miles-off RV hookups, co-ed showers (rawr) or anything else outside your comfort zone, you’ll want to know as early as possible so you can make a battle plan. 4. Make sure you’ve packed all your documentation. At the very least, you’ll need an in-date reserve repack card, your parachuting organization ID and your logbook. In some cases, you’ll also need your AAD travel documents and proof of medical insurance, too. Travel insurance is never a bad idea, either. When you arrive:1.Get the lay of the land. You’ll be spending a lot of time in the hangar and in the waiting areas, so get oriented. Pick a prime spot for your gear (hopefully, near an electrical outlet). Find the bathrooms and the fridge. Identify the load monitors, if there are any. Find out if there’s a separate window for manifest, or if the main office does it all. 2. Rock up to the office. Fill out the waiver, get a gear-and-paperwork check and buy your tickets. 3. Get briefed. You’ll likely be pounced on when you land in the office, but just in case: Pin somebody down to give you a complete briefing of the dropzone’s map and rules. Do not get on the plane without a briefing. Get clear on the manifest procedure. It seems like every DZ on the planet does this differently, and it can really get in the way if you’re not on board. Are you going to have to pay in advance, pay as you go, or pay at the end of the day? How does the ticket system work? Learn the exit order and separation rules. Many drop zones have very specific procedures in place, while others assume you should know where you belong. Watch how the local jumpers organize themselves, and ask lots of questions if you don’t get clear instruction. Check out the satellite map. You can expect a dropzone representative to use an overhead map of the dropzone and its surrounds to brief you. The rep will describe how to use recognizable landmarks to spot the dropzone from the air and review landing area obstacles, power lines, bodies of water, nasty neighbors, turbulence, the “beer line” and uneven terrain. Use this time to memorize your outs. Find out if there’s a special hard deck for this DZ. If there is one, it might be (way) higher than your personal hard deck. Check out the wind indicators. Find them on the overhead map, then peek at them in person while you take yourself on a tour of the main (and alternate, if applicable) landing areas. If there are tetrahedrons, ask if they’re trustable or if they’re “sticky.” Know the landing pattern. Landing patterns are not the same across dropzones, ranging from first-one-down-sets-it to a regular Busby Berkeley choreography of established patterns that never, ever change. Until you’ve internalized the unique rhythm, it’s best to give the main landing area a wide berth for your first handful of jumps at a new DZ. Make sure you know the rules and areas for swooping and hook turns, whether or not you plan to do them. (Don’t be the big canopy that tugboats lamely across the zoomy canopies’ path.) Figure out the loading procedure. Find out how the calls are announced and where you need to be to hear them. If there are shuttles to the plane, you’ll need to know what the call is to be on the shuttle. If there’s a retrieval from the landing area, make sure you know where it is (and hoof it over there right after touchdown).4. Get on a load! Make an organizer friend (or be your own organizer friend) and keep an open mind about what jumps you want to do. 5. Buy the good beer to share at greenlight. It’s basically, like, a housewarming that you throw for yourself. You’ll feel at home before you know it.
 -
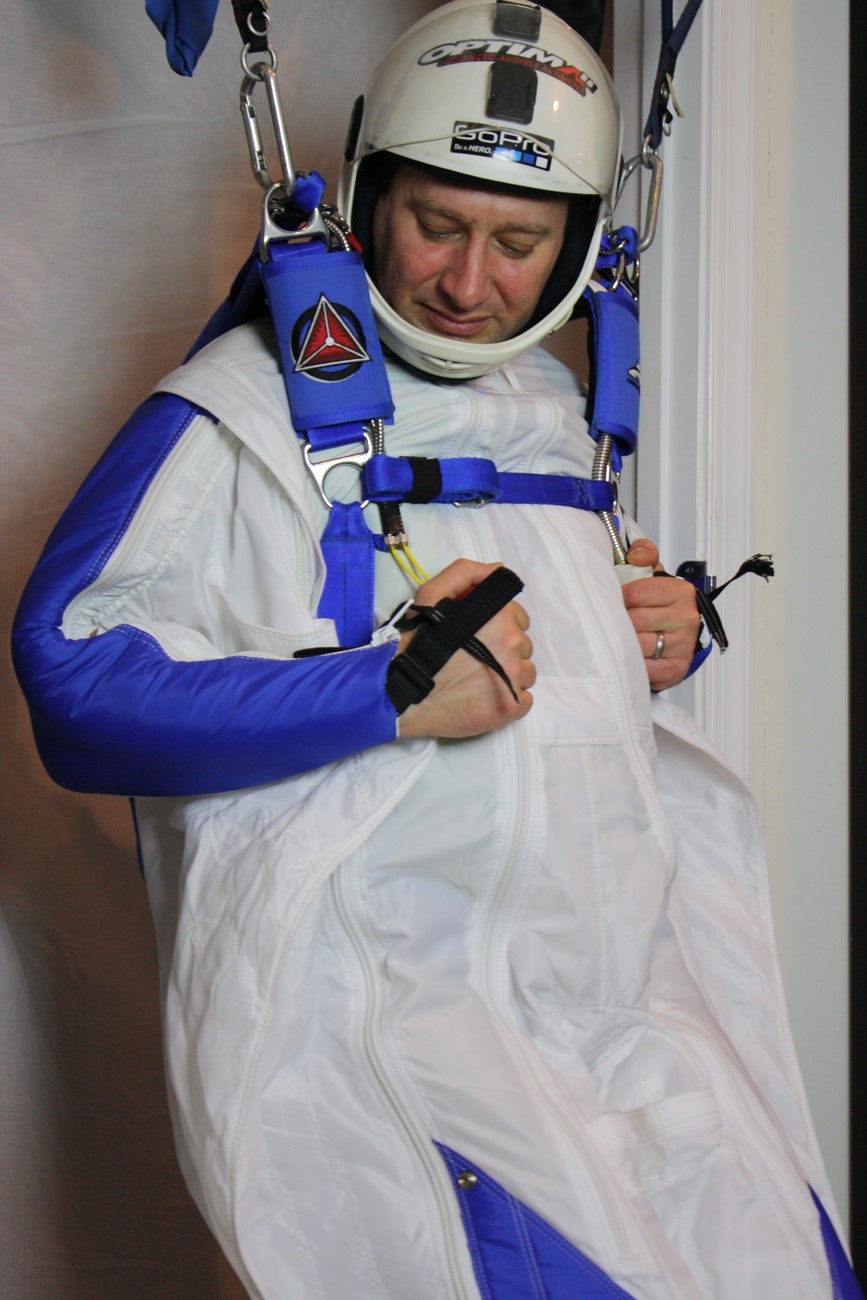 A reserve ride is an exciting adventure no matter how many jumps you have under your belt. Preparatory training is obviously the best way to ensure that you walk away unscathed, but it is my experience that the simulations we create are not as realistic as they could be. In many cases, many of us will argue, they are not as good as they need to be. The purpose of this article is to suggest possible improvements to the state of the art in emergency procedure training. If we envision beyond what we have done in the past, improvement is assured, and the safe conclusion of parachute malfunctions will increase in frequency. If we can simulate cutaway jumps more realistically, skydivers will be calmer in emergency situations, and more skillful. Elaborate simulation, in my experience, will also result in greater awareness and recall, more efficient actions, and less emotional trauma once the event is over. The first issue to be addressed by our sport as a whole is our simulation equipment. Although a vest with handles may be very helpful for establishing the general flow of handle-pulling, it is a far cry from what the event will actually feel like. Many jumpers have reported, upon landing from their first cutaway, that things did not feel or look remotely the way they expected. Handles were not where the jumper expected them to be, pull forces were not what they anticipated, nor was the feeling of the experience similar to the training process that was supposed to prepare them for this event. It is my experience, however, that when we take thoughtful steps to improve our training methods and equipment, the gap between expectation and reality can be closed significantly. The most important piece of equipment in any simulation is the mind. Creating a clear visualization of the scenario is essential, no matter how silly it may look to bystanders. The job of the Instructor in these situations is to provide insightful clarification, ideally based on their own experience. Set the emotional stage for the student in every possible way, describing the details as clearly as possible, leaving nothing out. Allow yourself to get wrapped up in the excitement that is inevitable in such experiences. This will not only make the simulation feel more real, it will help illuminate the natural mental reaction of the student to intense stress. If over-reaction or under-reaction is apparent, further training is necessary. If the student failed to perform, the instructor simply has more work to do. It continues to be my strong opinion that a suspended harness is absolutely essential for the best possible training. Given the vast amount of money we now spend on aircraft and student gear, skimping on this key element of teaching equipment is shortsighted, and most often a product of laziness and compromise. If building a hanging harness cost thousands of dollars, the financial argument might hold more merit, but this is most decidedly not the case. There are many possible methods that cost very little, and can be created in just an hour or two. I know, I build a new hanging harness at almost every dropzone I travel to in the process of running my canopy skills and safety courses. I do this because I want to offer my course participants the best possible training, and because an alarming percentage of skydiving schools have done away with this vital piece of training equipment. This needs to change if we are to improve the safety of our sport. Let's start with the actual harness. When I find suspended harnesses in use, most often the actual rig is an uncomfortable, dilapidated old rig from the early 1980's, hung from the ceiling by attachment points that are way too close together to simulate a realistic experience. In the best cases, there is a three-ring setup that allows the jumper to cut away and drop a few inches. This is a great training aid, but what if the rig was a more modern adjustable harness that could accurately reflect the fit and handle placement of the rig they will actually be jumping? For that matter, what if we hung them in the rig they were actually going to jump? What if the suspension apparatus was long enough to practice kicking out of line-twists? What if the toggles simulated the resistance of an actual parachute using bungees or weights? What if you pulled on straps attached to the bottom of the harness each time they flared, to simulate the pitch change? What if, as crazy as it sounds, you went to the local hardware store and picked up a high-powered carpet blower, a.k.a. “snail fan”, and angled it up at the harness to reflect the feeling of the relative wind? This is the kind of outside-the-box thinking that creates better simulations, and better training. Further, this is how we prepare our students for an actual malfunction and reduce the risk of pilot error. For experienced jumpers, I highly recommend hanging up in your own rig. This will clarify handle placement under load, allow you to explore strap tightness possibilities, and give you the opportunity to experience actual pull forces when your repack cycle is up. If you do not have stainless steel hardware on your rings, please use fabric connection points rather than the carabiner attachment displayed in these photos. Another key element of malfunction simulation is to follow through with the complete jump, rather than stopping after the handles are pulled. In reality, the adequate performance of emergency procedures is just the first in a long list of steps that lead to a safe landing. For instance, what if the cutaway harness had Velcro reserve toggles that needed to be first peeled upward and then pulled downward? Many people, myself included, have tried simply pulling the reserve toggles downward to find that they would not release. Missing details like this can lead to a student feeling more angst than is necessary, and can result in further stress-induced mistakes with major consequences. Additionally, proper exploration of the reserve canopy is important for a good flight pattern, accuracy and landing flare following a malfunction. How much slack is in the brake lines? Where is the stall point? What is the flare response on this brand new canopy? A good cutaway followed by a broken ankle on landing is still a bad day. Simulate the whole jump, and there will be fewer surprises. The final issue I want to cover on the topic of better emergency procedures training is the inclusion of deliberate adrenaline management efforts following the deployment of the reserve canopy. Carrying the emotional momentum of a malfunction all the way to the ground definitely increases the chances of a lousy landing. High levels of stress takes time to sluff-off, but a skilled operator also knows how and when to slow down. Once you have pulled all the handles you need to pull, taking three long, slow, deep breaths while gazing at the horizon with a smile of relief on your face can change your mood, and your fate. Get your composure back, and your optimism will follow. From there, skill is just a short step away. This process can and should be included in every emergency procedure simulation to create a habit that is likely to be carried out in the sky. Following such quiescent procedures allows the mind to more easily let go of the recent past and focus on the present moment and the near future: 1) Check altitude and location 2) Find a safe landing area 3) Explore the reserve 4) Fly a good pattern 5) Flare beautifully 6) Walk away with a smile on your face 7) Thank your rigger A malfunction does not need to be viewed as an emergency, especially if you are truly prepared; it is just a change of plans. A complete simulation can be the difference between a horrifying emergency and a well-executed contingency plan. If we handle it well, a main parachute malfunction can actually be fun. I have found few experiences more rewarding than a complicated situation that I figured out on the fly, and despite my fear, I kept my head and did the right thing. In short, a parachute malfunction is an opportunity to prove to yourself and the world that you can handle yourself in a crisis, and with realistic training, your success can be an inevitable conclusion. About the Author: Brian Germain is a parachute designer, author, teacher, radio personality, keynote speaker with over 15,000 jumps, and has been an active skydiver for 30 years. He is the creator of the famed instructional video "No Sweat: Parachute Packing Made Easy", as well as the critically acclaimed book The Parachute and its Pilot. You can get more of Brian’s teaching at Adventure Wisdom, Big Air Sportz, Transcending Fear, and on his vast YouTube Channel
 -
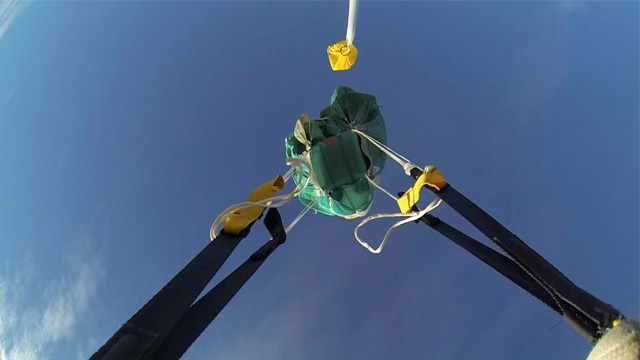 Image by Joe NesbittLast week, we talked about the mighty kerfuffle that is the pilot-chute-in-tow malfunction. So...who wants to have one? Nobody! Right. So now that we’ve established that, we can get down to the business of avoiding the hell out of those. There are four big steps you can take to lessen your risk of a PCiT, and there’s a good chance you’re currently messing up at least one of them. 1.Cock it up (so it doesn’t cock your jump up).Your collapsible pilot chute is a demanding partner. Her deal is this: no foreplay, no canopy. Most of the time, you’re good about it. You guys have a really established routine at this point, right? From the time you’ve got your nylon laid out on the floor to the time you wrap your legs around it to finish it off, you follow a very predictable routine. Somewhere in there, you give that collapsible pilot chute a tug and get her indicator window nice and blue. Everybody’s happy. But what happens when you get distracted? If you end up ignoring your PC for a surprise debrief or a dance break or an awkward conversation with the meaty contents of the best-fitting freefly suit you’ve seen all week, make no mistake: she’s going to get her revenge. Failure to cock the collapsible pilot chute, after all, is the leading statistical cause of PCiTs. The solution here is simple: focus. Give your pack job the attention it deserves, in the same order every time. (It’s never a bad idea to include that little indicator window on a quick gear check, either.) 2. Do what you’re told.I know. You’re the boss of you, and I’m not your real mom, and manufacturers are basically like corporate drones, and the USPA is a bunch of guys throwing canes and slippers at kids who merrily chase balls onto their collective lawn. You do what you want. That said: maybe you should do what you’re told every once in awhile. This is revolutionary stuff, I know. But the manufacturers’ instructions for bridle routing and main-flap-closing aren’t just there to give you something else to toss giddily out of the box when your new container arrives. As any pro packer will tell you, those yawn-inducing closing procedures differ dramatically between brands. If you’re using the wrong one for your particular equipment, you’re setting yourself up for a container lock. 3. Watch the news.Along those lines: be on the lookout for updates. Remember a few years back, when all those photos came out of closing pins stabbing neatly through the middle of their bridles? It kinda looked like a fabric samurai drama, but it was pretty serious -- several jumpers, jumping different equipment, experienced pilot-chutes-in-tow in this same manner. In response, manufacturers posted updates to their manuals, changing the closing procedures for their containers to lessen the risk. The moral of the story is this: Maybe you’re still doin’ it the old way and have managed to be lucky so far. (Emphasis on: so far.) You can also investigate pull-out -- as opposed to throw-out -- pilot chute systems, if you like to be on the oddball end of technology. 4. Embrace the transient nature of our linear existence.Nothing is forever, dear reader. All seasons pass. All kittens turn into old cats. Your pilot chute and bridle will eventually wear out. Thus is the way of the world. We know you love your pilot chute and bridle. They love you back. They yank that nylon out of the bag for you over and over and over without complaint. They get dragged across the grass and the filthy packing mat and the Arizona desert for you. They get stepped on and sat on and waved around willy-nilly when you need to get someone’s attention on the other side of the hangar. But they can’t do it forever. Collapsible pilot chutes lose effectiveness when their little kill lines shrink. If that line shortens to the point that the PC can’t inflate fully, you will probably end up with a dead pilot chute flapping around above you in freefall while you count to yourself in your helmet. Insufficient drag to pull the closing pin = PCiT. Like many existential tragedies, this doesn’t happen overnight. Have you noticed little hesitations after you throw? Are they getting longer? Have you noticed the aging process creeping up on your little bitty sub-parachute in the form of obvious wear? Cuddle up on the couch with her, read The Velveteen Rabbit together, cry a little bit and give your old, loyal PC a Viking funeral. She deserves it.
 -
 Curt Vogelsang captures some hot canopy-on-canopy action. Y’know when you don't feel like getting out of bed in the morning? Your main parachute is likely a lot brighter-eyed and bushier-tailed than you are, but every once in a good long while it just doesn't feel like getting out and doing its job. Y’know? Relatable. Kidding aside: When you throw your hand-deployed pilot chute but the container stays closed -- trapping the main deployment bag inside, helpless to deliver you a parachute -- you’ve gotchaself a pilot-chute-in-tow. In other words: you’ve got nothing out, which makes you the clenchy, concerned (and hopefully very temporary) owner of a high-speed mal. You’d better get on that, buddy. Stat. But how? Deploy the reserve immediately or cut away first and then deploy the reserve? One Handle or Two Handles: The Cagematch If you’re not sure which you’d choose,* you’re certainly not the first. This particular point has been the subject of roaring contention since the invention of the BOC, my friends. (Guaranteed: the comments section below will corroborate my statement. I can sense people sharpening their claymores and dunking their arrows in poison even now.) There’s a school that says -- well, duh -- get your damn reserve out, like right now what are you waiting for. There’s another school that calls that school a bunch of mouth-breathing pasteeaters. The latter group insists that you'd better go through the procedures you know lest you mess it up when it counts. They usually follow up by spitting on a photograph of the first group’s mother and wondering aloud why the first group is even allowed to skydive. Then they start punching each other. Images by Joe Nesbitt The USPA Skydiver’s Information Manual doesn’t make a move to break up the fight. It stands clear of the flying arms and legs and says, “Y’know -- they both kinda have a point.” Section 5-1 of the manual says this, verbatim: “Procedure 1: Pull the reserve immediately. A pilot-chute-in-tow malfunction is associated with a high descent rate and requires immediate action. The chance of a main-reserve entanglement is slim, and valuable time and altitude could be lost by initiating a cutaway prior to deploying the reserve. Be prepared to cut away. “Procedure 2: Cut away, then immediately deploy the reserve. Because there is a chance the main could deploy during or as a result of reserve activation, a cutaway might be the best response in some situations.” Let’s look a little closer at the options, then, shall we? Option One: Not Even Gonna Bother With That Cutaway Handle. Pro: Immediately yanking out that reserve saves a step. When AGL counts (and golly, doesn’t it?), saving a step can save a life. Many skydivers are quick to point out specific incidents in which jumpers with PCiTs have gone in with sealed magical backpacks, having failed to pull both handles (or pull any handle at all) while the clock was ticking. Gulp. Con: It takes the pressure off (in a potentially bad way). As the reserve leaves the container, there’s a chance that it can take the sealing pressure off the flaps that are keeping the main container closed. The main can then leap to freedom and deploy at the same time as the reserve. At this point, you might wind up with an entanglement, a side-by-side, biplane or downplane to figure out.** Option Two: Get Off The Field, Main Parachute. Reserve, You’re In! Pro: It’s the same stuff you’ve been taught to do for every other reserve-requisite malfunction. ...If you initiate the reserve deployment clearly, confidently, and as early as possible, of course. After all: making a one-off exception for a single kind of malfunction can be tricky. A jumper might well spend a little too much time thinking it over (‘Am I going for my reserve handle first right now? ‘Cause that’s weird. Is that okay?’) when they should just be yanking the stuffing out of their emergency handles. Going through the real-life motions of the little dance you do before you get on every load makes more sense to your body, for sure. Con: You’re adding more complexity to the situation than you may realize. Especially if you don’t have secure riser covers, the (jealous?) cut-away main risers might sneak out of the container and grab for the reserve as it deploys. Another thing: the main is very likely to wiggle free, detach from the harness as soon as it catches air and do its best to entangle with your Option B. The latter kerfuffle is made much more likely when you add a single-sided reserve static line to the mix, turning the already-dismaying situation into something of a tug-of-war. Neither of these choices sounds like the cherry on top of a lovely afternoon; I know. At some point, however, you may be forced to make one. If you do, you’d better have a plan in mind. Not in the mood to make that choice? Me neither. Luckily, there are some steps you can take to better your chances of never seeing a PCiT -- and in next week’s article, I’ll tell you what they are. --------- *If you have a Racer (or any container with a cross-connected RSL), you do not have a choice. You must pull the reserve without cutting away. Do not pass ‘go,’ do not collect $200. In that particular configuration, the main will choke off the reserve if the cutaway has been pulled. If this unnerves you, get thee to a rigger to discuss it. **Head over the PIA.com to check out a handy study they did in 1997 regarding the management of two-out situations. It’s called the “Dual Square Report.”
 -
 Sylvia Tozbikian wiggles her way back to the DZ after an off landing in a graveyard“Off” ain’t such a bad thing. As skypeople, we love “off.” Offbeat. Offhand. Offside. And, y’know -- we’re all a little off, really. Off landings should fit right into our oddball little world. Unfortunately, lots of skydivers tend to be ill prepared for an unscheduled landing out in the real world. Are you one of ‘em? Here’s how to get ready for a surprise skydiving adventure. 1. Be a nerd about it. Sure, the airborne life throws you curveballs sometimes -- but there are variables here that you can control, y’know. Work ‘em. If you only ever land that thing in a schoolbook configuration in the exact same landing area, you’re not going to enjoy the steep learning curve of an off landing. Hang out with a canopy coach for a weekend to workshop your braked flight (and, y’know, braked landings) in a structured, feedback-rich environment. The more thoroughly you train your body and brain to execute these maneuvers, the less you’ll panic when you look down and realize you’re hanging over an endless sea of potential ouch. Also: always jump with a charged method of communication. 2. Speak up. Very likely, your off landing is going to be your fault, and it’s probably because you didn’t pay attention (to winds aloft, to the jump run, to your opening altitude, to where you were pointing your pretty new wingsuit…). If it’s the pilot’s fault, you should know it by the time you’re standing at the door and lookin’ down. If the spot is off, don’t leave the plane. Ask for a go-round. 3. Look out for yourself. If you’re at the caboose end of a group and you can’t spot from the door, make a habit of quickly spotting as soon as you run out. If you notice that your compatriots failed to notice that they were getting out of the plane somewhere in the next state, evaluate your options. If it’s safe, then you should peace out earlier and pull higher, crossing fingers that the extra altitude will get you home. That said, don’t be a dick. If the particular skydive you’re doing is safer for everyone if all members conform to the freefall and breakoff plan, then congratulations: you’re landing out. 4. Curb your optimism. At this point in your journey into offland, you might be under one of two available parachutes. Your first responsibility after ensuring that whatever’s out is controllable is to realistically determine where you’re headed. If you feel like you just-might-maybe make it to the main LZ, make sure you’re not just-might-maybeing your way into a power station or highway or forest or whatever might be in the intervening territory. If you’re not sure -- or if the middle ground is an alligator farm -- then you should bin that Pollyanna attitude and get real. Put your entire brain on the task of on finding a safe alternative that takes into consideration your current position and the wind direction. 5. Mind invisible canopy-eaters. Once you’ve picked a spot and are toodling down to make your acquaintance with it, you should start getting as picky as possible. You’ll obviously be headed for what appears to be an open space, but wait -- are there invisible monsters lurking? Trees, buildings and other solid objects can throw serious turbulence if they’re upwind (and livestock can wander into the picture very quickly). Keep that in mind as you’re planning. 6. Play the field. As much as possible, be a commitmentphobe. Make sure you don’t have blinders on to other landing areas that might save your ass in the event of surprise fences, power lines, turbulence monsters, stampeding herds and other obstacles you didn’t notice from on high. 7. Embrace it. If you’ve always been on, you can be assured that off is coming. Get real and get ready, and you’ll be much better...off. (Snicker, snicker.)
 -
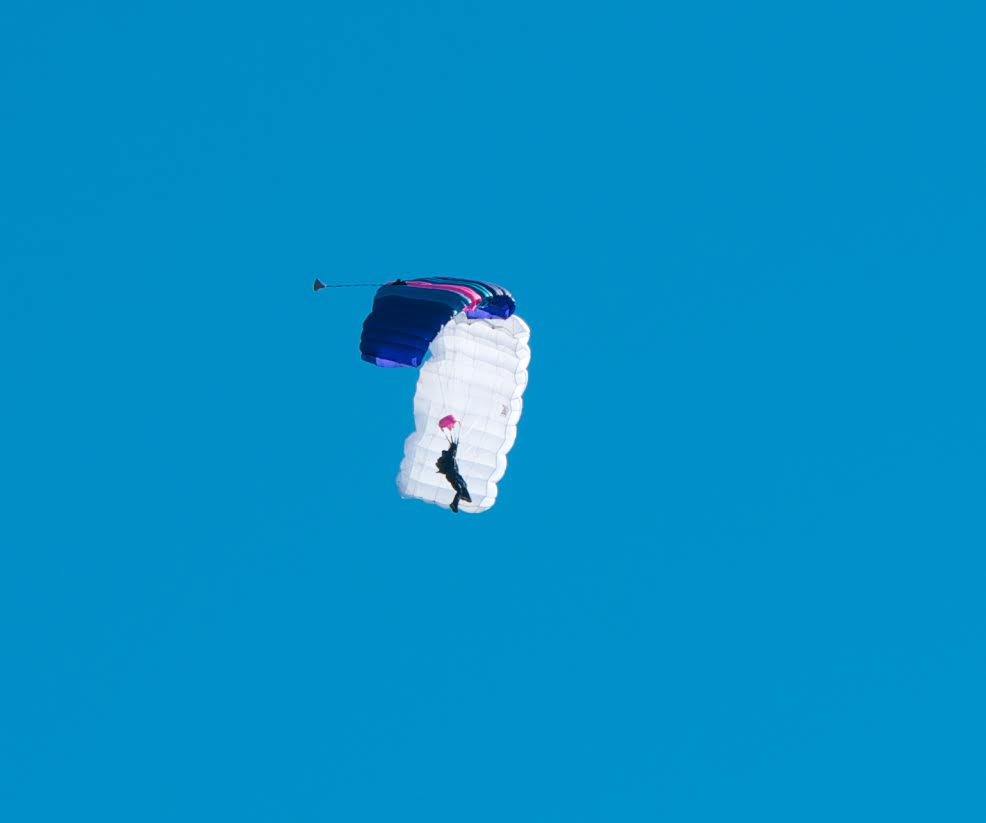
 How to Avoid Spinning Malfunctions Image by Oliver NöthenAh, to be swung madly around the ballroom of the sky. If you like that sort of thing, of course. Most of us, y’know, don’t. Even though they’re eminently preventable, spinners remain a very statistically significant cause of cutaways. There’s good news, however: A little attention will go a long way towards making sure you aren’t dancing downward under a misbehaving main. Here’s how to get your body, brain and gear set up right. 1. Are you bungling the basics? If spinning mals come up more than occasionally for you, consider whether you need to send yourself back to packing (or body-position) school. Might be the case. 2. Are you just being loopy? Back when side ponytails were sexy and just about everything smelled like Teen Spirit, the skydiving industry used Velcro to secure toggles to risers. When manufacturers made the switch to the velcro-free designs we see now, they forgot about something vitally important: the long, floppy bights in the steering line that were now suddenly exposed to the rodeo ride of the deployment process. Those mile-long bights took the opportunity to lasso anything they could. A particular favorite: hands. One misplaced toggle grab, and a skydiver could easily find him/herself in a compromising bondage situation with their control lines. The bights happily welcomed guide rings into the act. It was a ready-made recipe for a super-solid spinner, and it was ugly. Soon, every single manufacturer’s rig designs had integrated line stowing features (“keepers”). There’s a reason the changes were made: as a jumper, you need that line tucked safely away until you’re good and ready to release the brakes. That said: Many of those old risers are still around, unmodified. Even more bafflingly, some skydivers don’t bother stowing the lines during the packing process (presumably, to save 20 seconds or so). If that’s you, you know what to do. And if you have Velcro on your risers, for the love of god check it for airworthiness. 3. Are your cat’s eyes conspiring against you? Toggles love the cat’s eyes of brake lines. They dive at the chance to snuggle and lock in a spinny embrace. It’s no wonder that’s the case: after all, their relationship is really hot. The heat that’s generated by the slider’s travel over the lines has a shrinking effect on the system, creating a kind of Chinese fingertrap for your toggle seating. With one toggle in and one toggle out, you’re going to be going for a ride. A rigger can quickly suss out if your cat’s eyes are in good shape: big enough for the toggle to pull out smoothly, but not so capacious that the toggle’s fat bits can pass through. If they need replacing, do it. 4. Do you know when to let go? Spinning malfunctions are sneaky bastards. For all their preventability, they have killed people. Make no mistake: Once you’re looking at one, you need to take it seriously. The most important thing you need to remember is this: a spinning malfunction is not a line twist. When you’re under a docile, level main that’s flying cheerfully along as you swear at it, you’re looking at a line twist. When you’re not directly below a canopy that’s flying level -- when it’s flinging you outwards as it heads for the ground -- you are on the business end of a spinner. The first is an inconvenience. The latter is a mal, and you’d better get on it. As wing loading increases, so does the violence of the spin, and the likelihood that you’re going to kick out of it quickly dissolves. So: Don’t fight it. Just get rid of it. Take some quality time with your reserve. You’ll be glad you did.
 -
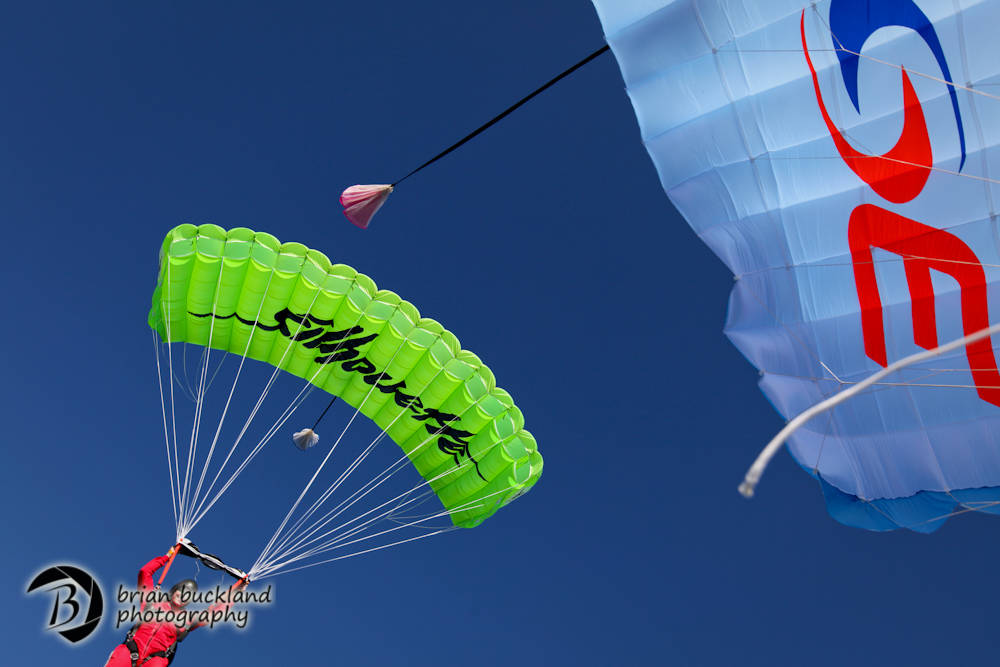 Image by Brian Buckland It is common knowledge that wing-loading has profound effects on the way parachutes perform. Furthermore, it appears that even if the wing-loading is exactly the same between two otherwise identical parachutes, different size canopies fly quite differently. In other words, if you fly a 210 square foot parachute of a given design with lots of additional weight to achieve a loading of say, one pound per square foot, a 150 at the exact same wing-loading will usually have a steeper glide ratio, faster turns, and demonstrate a longer recovery arc following a high airspeed maneuver. This means that, regardless of the wing-loading, all small canopies are high performance, and should be treated accordingly. There are many explanations for this non-linear relationship, and in this article I will discuss some of the most significant governing variables. Test flight data shows us that small wings, regardless of wing-loading, will be more radical than their larger counterparts, all other design aspects being equal, however the degree to which they are different depends of the model of the canopy. Nevertheless, the trend is consistent and predictable. The most common explanation for these differences is that it is due to differences in line length. Smaller canopies do have shorter lines on the whole. Although it is true that some aspects of a parachute’s performance increases as line length reduces, this only applies to mobility about the roll, pitch and yaw axis. The effects on recovery arc tend to have the opposite response to line length. In other words, a parachute with longer lines tends to exhibit a longer recovery arc. To explain these counter-intuitive effects, we must look elsewhere for an explanation. The other aspect, previously unconsidered, is the relationship of the canopy's internal volume to its surface area. Essentially, the volume displaced by the airfoil can be thought of as a key aspect of the overall DRAG. Of course the shape of the wing itself is vitally relevant to the drag coefficient, but for the purposes of this discussion, let’s focus on the effects of drag from the perspective of simple air displacement, like a footprint in the sky. The fatter the airfoil, the more drag it will exhibit. This means that a “fat” parachute will sit at a higher angle of attack in full flight, based on the balance of power between the airfoil's drag (D1) and that of the suspended load, the jumper (D2). Further, the drag value of a “fat” airfoil will increase markedly with airspeed, and therefore large objects will suffer more drag than “skinny” airfoils at high speed. The wing, therefore, will “want” to return to the overhead position more aggressively on fatter airfoils, as a general rule. Let's take those aerodynamic principles to the realm of parachute sizing. When a parachute design is scaled, for the most part, the entire wing is scaled simultaneously. This is the same geometric progression as a matchbox car: same three dimensional proportions, but a different size. When we want to make a parachute larger, we simply multiply each dimension by a “scale factor”, a single number that will result in the size change we desire. When we apply this mathematical model to parachute designs, we create an unwanted effect: disproportionate scale factors relating to area and volume. Simply put, the number we use to scale the parachute is based on the "square footage" of the wing, and this is of course, a square function (X²). The volume on the other hand, is governed by a cube function, (X³). This means that when we increase the height of the rib at the same rate as the span and the chord, we inadvertently make the wing too fat as we scale upwards, and too thin when we scale down. This is one of the reasons why a 120 flies very differently than a 170, even at the exact same wing-loading and body drag component. The wings only appear to be the same, but they are most decidedly not the same from a volumetric perspective. So, one might say, why don't we make the height of the airfoil on smaller wings greater, and that of larger wings smaller, proportionately? This is sometimes done and it works to a certain degree. However, if we were to search for a formula that would allow us to scale the volume at the same rate as the area, we would have to keep the rib height the same on all sizes of a design. I worked this out with a brilliant Tasmanian mathematician on flight back from Sydney many years ago. A 120 with the same rib as a 190? That doesn't quite pass the gut check, does it? Only the middle sizes would fly right, and beyond a few degrees of freedom, the system would collapse into chaos, because the fat little wings would have too much drag to be efficient and the big wings would have too little lift to land well, and would be prone to collapse in turbulence due to their flimsy nature by virtue of their low volume. A simple answer does not appear to exist, at least not yet. The heart of the problem is the fact that our industry has grown accustomed to the use of "pounds per square foot" as our way of quantifying parachute size. This leads to the erroneous belief that a given "wing-loading" will result in similar performance for all parachutes regardless of size. This is most certainly not the case, and is dangerously misleading for light weight jumpers striving for that magical one pound per square foot wing-loading. A 120 is inappropriate for someone with less than 100 jumps no matter how much they weigh. So, what do we do? Firstly, we honor the differences in parachute sizes, and downsize very carefully. We make our steps downward based on actual ability and frequency of jumping, and we look for any excuse we can to upsize. In addition to remaining conservative with regards to canopy size, we must go to greater lengths to understand the nature of performance and size. If it is true that performance trends do not appear linear with regards to parachute size, then perhaps the solution is a curved ruler. To that end, I have offered a complex sizing chart to the world that reflects the non-linear nature of parachute sizing and performance for the purpose of downsizing guidance. This easy-to-operate chart has been adopted by many national organizations and local dropzones as the official guidelines for parachute size relative to experience. Born from a brilliant but arguably conservative Swedish chart created by my good friend and colleague, Ola Jameson, who was the Head of Safety (Riksinstructor) for the SFF at the time. My somewhat less conservative version of the “sizing chart” offers suggestions for parachute size relative to weight, rather than simple wing-loading alone as the defining factor. This allows the recommended parachute size for a heavy person to be a higher wing-loading than that which is suggested for a lighter person. It is available HERE. The sizing chart does not suggest when the jumper should downsize, but rather limits the degree to which they should decrease their parachute size based on the complex aerodynamic principles effected by wing geometry. The "chart trap" is always a risk with such things, when jumpers automatically step down in size because the chart suggests that a change is reasonable. Decisions based on parachute size and design should always be made based on the actual ability of the jumper, and the other governing factors described in the 22 pages of modifying text that follow the chart. Another consideration I will now put forth to the skydiving community is a fundamental change to the way we define parachute size. Based on the discussion above, a two-dimensional analysis is insufficient to describe what a parachute will do in the sky, and "pounds per square foot" is a very limited 2-D relationship. I suggest that a better model for parachute size definition is Pounds (or kilos) per Cubic foot (or cubic meter). The metric numbers would be far easier to work, if we can get the Yanks and Brits to let go of the Imperial system; but we have to pick our battles, don't we. By using lbs/ft³, we will effectively remove the 2-D bias from the "ruler" as it were, and make the relevant differences more numerically obvious. It may sound like a radical idea at first, but so was the ram air canopy when that showed up, but look how well that worked out. Just because a change is difficult does not make it less necessary. In the interest of moving this new paradigm forward, and in the spirit of the immortal words of Mahatma Gandhi, I will be the change I wish to see in the world. Here are the volumes of my parachutes. It is my hope that other manufacturers will follow suit, in the interest of transparency of our parachutes’ designs, for the good of the skydiving public. The topic of parachute performance prediction is vast, and must continue to be discussed in scientific terms. We must do this because, as one of the few (mostly) self-governing branches of aviation, we are the only true experts in our field. We are the ones who must think outside the old box of established paradigms, and change when change is necessary. We will continue to improve our sport in every way, simply because we love our sport so much that we want to know more, and grow more. The universal passion for knowledge exhibited throughout the skydiving community leads us to a very high level of mutual respect for our fellow jumpers. This precious commodity of solidarity is rare in this world, and we must allow that connection to lead us to always reach for safer procedures built on our ever-increasing understanding of that which saves our lives. Improvement in matters relating to safety is just love of life in motion, and love must be adaptable and smart if it is to last in a complex world. Again and again, skydivers prove to me that they are highly intelligent adventurers committed to safety, and very much worthy of my respect. We will adapt, and we will thrive. About the Author: Brian Germain is a parachute designer, author, teacher, radio personality, keynote speaker with over 15,000 jumps, and has been an active skydiver for 30 years. He is the creator of the famed instructional video "No Sweat: Parachute Packing Made Easy", as well as the critically acclaimed book The Parachute and its Pilot. You can get more of Brian’s teaching at Adventure Wisdom, Big Air Sportz, Transcending Fear, and on his vast YouTube Channel
 -
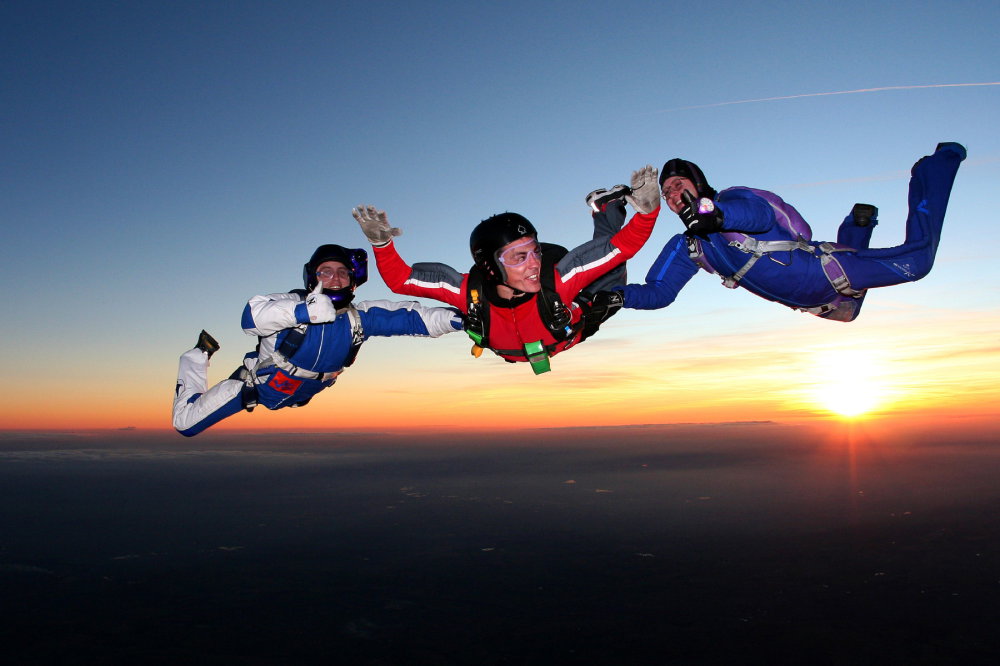 And What You Can Do To Fix It Image by Gary WainwrightI’m not a teacher. I’m forehead-slappingly, eyes-avertingly, hide-your-facingly terrible at it, actually. Luckily, I’m lucky enough to count as friends some of the best airsports teachers in the world. (Whew.) This article is a collection of short answers from several of these. They’re top-level coaches/instructors/examiners, and their experience spans in several disciplines. They’re also incredibly wise, beautiful souls. I went to them with this question, so important for all of us students on the edge of the world: If you could cure all your students of one thing they do that gets in their own way, what would it be? Here’s what they had to say. Listen up. “Rushing. I see a lot of students that are determined to pack too many things into one jump. Then they end up flailing; when they don't nail the first part, they're confused as to whether to go back and work on the first part or move on to the next part anyway. They lose a lot of time, and they get very frustrated. Pick one thing. Do it perfectly. Stop. Then move on to the next thing.” - Joel Strickland: Freefly & Tunnel Coach; Double British National Champion, Freefly & Freestyle “If I could cure all my students of one thing, it would be to erase the idea that everything about them is static and unchangeable. Once a student believes in their own self-efficacy -- believes in the idea that all that they are is changeable in a positive direction -- believes that everything from their physical reactions to their fears can be modified and updated -- anything is possible for them to learn. - Matt Blank: Wingsuit Skydiving Coach, Lightning Flight Wingsuit & Freefly School “I’d get them to stop watching YouTube. That creates pre-conceived notions of what they should be doing. Either that, or I’d encourage them not to freefly from jump 26 to jump 199 -- when they do, their belly skills suck dust when it comes to their FFC.” - Douglas Spotted Eagle, Wingsuit Skydiving Instructor “Often, they don’t respect the progression and embrace their inexperience. You must do both. It makes sense to one day aspire to wingsuit BASE jump from a cliff, but it can be difficult to focus your efforts where they are the most effective if you’re fast-forwarding years into your career. Your instructor, who you possibly selected because he or she wingsuit BASE jumps, wants you to focus more on finding the range of your beginner or intermediate wingsuit -- and recovering from instability in it -- before talking about how the wingsuit BASE start works. I find that many students seem to want faster returns for their efforts, and they seem to get frustrated with their own learning process. I can appreciate the way that we latch onto that dream of human flight, but i want to pass on an outlook where each individual skill is a whole and complete activity by itself that takes time and effort to master before being combined with other skills. So when you combine a set of skills (for example: rigging, canopy control, site selection, weather, bodyflight, wingsuiting and experience in the subterminal base environment), then you can make smart decisions. When you lack experience or skills in a certain area, you begin to lose the full picture.” - David Covel: Wingsuit Coach, BASE FJC Instructor, AFF Instructor, TI “I would cure them of self-doubt. It takes courage and confidence to challenge yourself to change your behavior and improve your skill in any area of your life. It's amplified when applied to an extreme sport. A lack of belief in your own potential can manifest itself in many ways: fear, nervousness, indifference even laziness. Understanding that you have the control and ability to consciously change your own actions is a very empowering fact that can unlock all levels of improvement. You have to commit to change.” -Maxine Tate: Canopy Piloting Instructor, Flight-1; US & UK National Champion; Coach Examiner; AFFI/Evaluator “I would cure this one thing that gets in students’ way: hubris. Assume you know nothing about the sport you are learning. No one assumes that they know everything about the sport they are learning, but the worst students just aren't really listening when the instructor is talking. In general, girls are better at listening than the boys. I think with the boys, especially with really good skydivers, there is a certain amount of ego that prevents accepting that there are things in BASE that they know nothing about. Think about this: almost EVERY BASE course that my partner Marta [Empinotti] and I teach, we learn something. This is because we know we don't know everything, so we keep our eyes and ears open, hoping to learn something new that we can analyze, assimilate and share with others in our beloved sport.” - Jimmy Pouchert: Co-Founder & Chief Instructor, APEX BASE; Freefly Coach “Over-amping. The ability to breathe even (especially) when scared, and to get into a focused zone before a jump, makes the biggest difference between a skydive that feels rushed and out of control and one in which a lot of learning and growth takes place. Even very experienced skydivers often feel nervous before their first wingsuit jump or when trying something new. The key is to trust that your ground preparation will serve you in the air, and to focus on one thing at a time starting with deep breaths, releasing tension, and visualizing the perfect exit.” - Taya Weiss, Owner/Head Instructor at Lightning Flight "We all have a tendency to look at the negative first, so I would remind all my students to start by pointing out three positive aspects about their previous skydive and then focus on one or two -- maximum, two -- areas of improvement. Positive reinforcement, combined with constructive criticism, goes a long way towards improving performance and attitude." - Lawrence de Laubadere: Freefly Coordinator, Lightning Flight Wingsuit & Freefly School “If I could cure all my students of one thing, it'd be expectation. As I tell them all, “If it's not fun, it's not worth it!” Learning to fly is not unlike so many other things in life: sex, making friends, etc. The harder you try, the harder it is. When I try to teach someone something in the tunnel, they often feel (natural) disappointment if they can't do it how they see others doing it. But it's not my goal to get you doing perfect layouts from the start. I'm looking for the components from my students: staying relaxed, looking where they should be, keeping the legs straight, etc. All I need them to do is smile, have fun, and keep making those baby steps. No expectations, no disappointment. In the end, I think attitude is one of the trickiest skills in progression.” -Dave Rhea: Instructor, Bodyflight Stockholm
 -
How To Land Where No One Has Landed Before (The Star Trek Trick)
nettenette posted an article in Safety
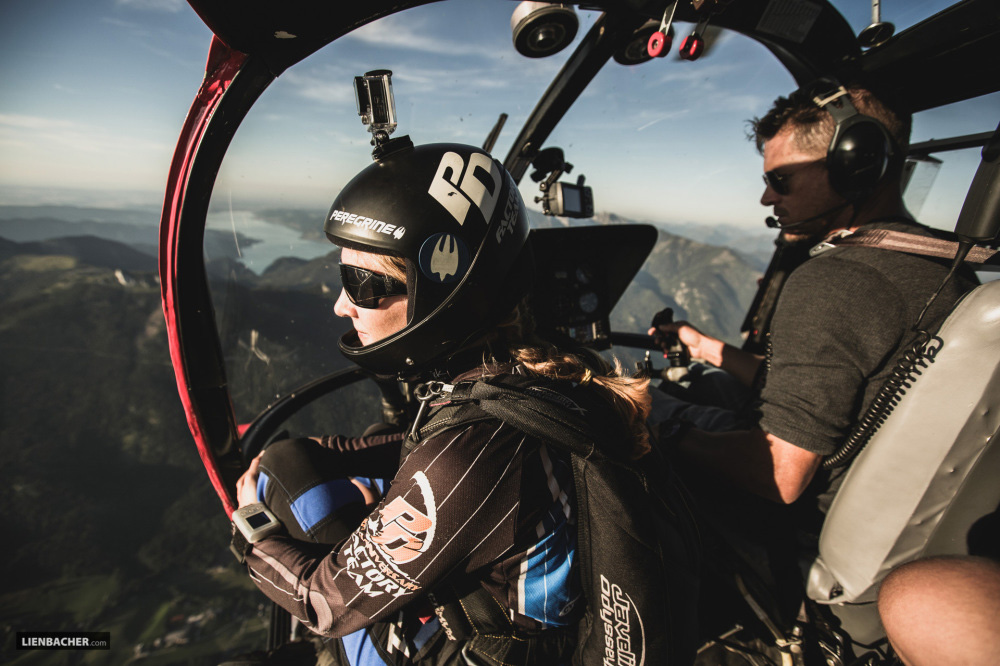 ...Or Where Everyone Else Is Landing, But That’s Beside the Point Image by Wolfgang LienbacherYou’ve seen Star Trek, you big nerd -- so you know the answer to this question: When everybody’s staring out the front of a spaceship as it slams into warp speed, what are they looking at? Don’t make that face. This absolutely applies to skydiving. The answer, of course, is that they’re staring dramatically out into a starfield. Within that starfield, the outside stars are streaked into blurs and the center stars are distinct, clear and individual. At any given moment, the spaceship is headed towards the clear stars in the center of the frame. Gene Roddenberry and his glitter-stirring co-wizards didn’t come up with that out of nowhere. they used a classic model, called the Radial Optic Flow Pattern (or ROFP), to base their screensaver-worthy visuals upon. Originally defined by scientist James J. Gibson, Radial Optic Flow has greatly driven the development of an “ecological” approach to visual perception. This approach investigates human vision in the context of the natural environment (as opposed to a laboratory). It may sound obscure, but that same model is the one you, as a skydiver, should consciously use if you’d rather land in the peas than the trees. Here’s how. Velocity Fields and FOEsAs a human in motion, your field of view – your very own spaceship windshield – is called your “velocity field.” Within that velocity field, when you’re traveling along a straight path (with no eye, head or body rotation), your heading is nailed quite precisely by the unmoving focus of expansion (FOE) in the center of your vision. How precisely? Well, a 2008 Oxford University study found that humans can use the FOE in optic flow to estimate their heading within one degree of the visual angle, and that’s good – because the FOE is exactly where you’re going. As opposed to a paraglider – which can go up just as handily as down, in the right conditions* – a skydiving canopy has one essential mode: forward/down. A ROFP for forward movement describes expansion – like the stars in the front windshield of the spaceship as it rushes towards the FOE described by the still stars in the middle. (As our skydiving canopies can’t really go backwards, we won’t worry about the “reverse thrusters” mode.) Image by Wolfgang Lienbacher Where’s My FOE?If you’re flying your skydiving canopy straight, your FOE is easy to pick off: it’s the place in your vision that isn’t dropping, rising, or side-sliding. As you approach the landing area, the FOE remains central while the rest of the field expands proportionally more quickly. If you’re throwing a bunch of canopy inputs into the mix, however, it’s much more difficult to determine FOE. That’s because you’re introducing a “rotational component of lamellar flow,” which forces the retinal flow pattern not to be radial anymore, thereby making it difficult to recover the original heading. How to “Energize” Your Accuracy:When you set up your landing, choose objects on the ground and notice whether they’re moving up or down in your velocity field. Notice the still spot that indicates your FOE. Notice how accurate you can make your landings by fixing your FOE on your intended spot landing. As you learn to determine your FOE close-up, start to work on spotting your FOE from higher and higher altitudes. By doing this, you’ll train yourself to know instantly if the spot is off and you’ll need to choose an alternate landing area. Keep your FOE on the target, not an obstacle. When I was racing motorcycles, I used to refer to this trick as my “eye magnets.” That sounds just as silly as spending four hours in a makeup chair getting a rubber Klingon face glued on, but it’s not: your gaze truly is functionally magnetic. You'll head inexorably towards the one tree in the landing area you’re terrified of hitting (and thus staring at). Conversely, you'll kinda-magically turn away from that tree without any other conscious inputs if you “unstick” your gaze and attach it firmly to open turf. Improperly applied eye magnets are referred to less-cutely as “target fixation.” Many skydivers refer to this phenomenon as “the accuracy trick,” which seems unfair – there are a lot of helpful tools for accuracy, of which this is only one. That said, consistently landing where you want to is a great way for a skydiver to live long and prosper. (Shh. You know you giggled.) ** For this reason, “the accuracy trick” is a little trickier to use for paraglider pilots, because visual cues have a tendency to bounce around as the wing is affected by thermic “bubbles” near ground level.
 -
 Image by Andrey VeselovStalling For Success: What You Don’t Know About Stalling Your Canopy Could Smack You. Hard. This, suffice it to say, could end badly. There was a balloon jump. (Whee!) The winds picked up at around 3,000’ and shoved your jolly crew rather far off-DZ. (Um…) You jumped anyway. (Whee!) You over-rotated your super-magnificent aerial and pulled a titch lower than you wanted to. (Um…) Your landing options are now -- well -- limited. And a little heavy on the obstacles. And kinda tiny. And now you’re on final. (Uh-oh.) Do you know where your stall point is? Probably not. Right about now, I bet you wish you did. In this regard, skydiving is unusual. After all, stall training is a foundational part of the training process in other air sports (paragliding, specifically), and there’s no question it’s vital. Considering how important it is to know the exact point at which your equipment stops flying, it’s surprising how few skydivers – even advanced ones – have seriously investigated the stall point of their canopies. Perhaps this is because the transition between the very-slow-flight and no-flight modes produces a stomach full of butterflies. It could also have something to do with the fact that skydiving canopy rides are much shorter than paragliding flights -- and, because the skydiving canopy is trimmed to fly down instead of up, comparatively easy to fast-forward. No matter what the root cause, the fact remains: knowing your stall point is an essential component of safe and skilled canopy flight. And there’s probably a lot that you probably don’t know -- yet. Here’s the skinny. 1. You aren’t really in control up there.Sorry, buddy. Without understanding your system’s stall point, you are not in full control of your wing. Most notably, you’re at a significant disadvantage during the landing process, as the execution of a flare is the approach to a stall in very close proximity to the ground. 2. It’s not about slow flight. It’s about no-flight.The lion’s share of ram-air canopy pilots believe that the definition of a stall is directly related to slow airspeed – that the “stall point” is when the canopy is flying too slowly to produce lift. Sound familiar? Yep. Unfortunately, while it often ends up being the case in practice, this isn’t actually true. The true “stall point” is defined as the moment when the parachute is no longer producing lift, no matter what the airspeed when you enter the maneuver. Bear with me here, because this has bearing on your jumping career. When a ram-air airfoil reaches an excessive “angle of attack,”* a stall results. As relative wind moves over an airfoil, it “curls” over and downward to create lift. However, when the pilot adjusts the airfoil to a higher angle with respect to the relative wind – often, but not always, by pulling hard on the brakes – he or she is effectively building a nylon wall against that relative wind, making it harder for the relative wind to follow its usual path and create lift. Finally, it reaches a point where it can’t. At any point that the angle of attack reaches that point, no matter what the airspeed, the pilot has a stall on his or her hands. When you understand the stall as a function of AoA, you can easily see how a ram-air airfoil can stall at high speed as well as low speed. This leads to an important fact: a higher-loaded wing will stall at a higher airspeed than its more lightly loaded counterpart. This is just another of the galaxy of reasons why it’s important to downsize your canopy thoughtfully and knowledgeably. 3. You can choose your own adventure.Initiating a stall for the first time is not unscary. Don’t just stab the brakes and cross your fingers, though: manage the process. The rodeo quality of the stall depends on the type and sharpness of the inputs you use to get into it, and on your technique for stall recovery. Stalls entered using slow inputs tend to initiate a stall from slow speed and slight sink, making the stall more docile than those entered using quick, brutal inputs. The more aggressive and uneven you are in your entry, the more likely you are to introduce a bank angle at the entrance of the stall. This will stall the lower wing first, which can often result in a spin (and, maybe, line twists) during recovery. Another bit of advice: Don’t just reach for your brakes. Jumpers tend to initially experiment with stalls by monkeying around with their toggles – mostly, because they’re more familiar with those controls. That’s not really the best idea. Though rear-riser stalls “kick in” more suddenly than stalls initiated with the brakes (as they profoundly and quickly change the shape of the canopy using the C and D lines), recovering from them is smoother and easier.** ...and, of course, pull high. The “lab” is up at a nice, cushy altitude. Make sure to stop your experiments with a lot of margin between you and the dirt. 4. You don’t have to go it alone.Look at your canopy’s manual to familiarize yourself with the stall dynamics you can expect from it. If there’s no information regarding stall behavior in the manual, contact the manufacturer and ask about it. They’re happy to help. So are canopy coaches. Ask, ask, ask. Then you might not have to ask the farmer to disentangle you from the fence, collect your scattered dignity and help you hobble to the road. That’s worth it, no? Here’s a great little video by AXIS Flight School that demonstrates a rear-riser stall. In this video, you can closely inspect the canopy’s reaction to the stall input. *The angle of attack, or AoA, is the angle between the cord line – visualized as a straight line between the leading edge and the trailing edge – and the relative wind that the airfoil is moving through.
 -
 Image by Max HaimThere's been a ton of social media hype this week about the new Jetman Dubai video released by XDubai. The video, available in 4k quality, has already amassed over 2 million views on youtube within 48 hours of release. But what is the story behind Jetman and will this venture see an evolution to methods of human flight? Back in the mid-2000s, Yves Rossy of Switzerland set history by becoming the first person to fly with the use of a jet-propelled wing. A step that closed some of the gap between wingsuit flying and aircraft piloting. Before venturing into jet-propelled human flight, Rossy was both an air force and commercial pilot, serving in the Swiss Air Force before flying for both Swissair and Swiss International Airlines. Rossy first began skydiving, then looking to wingsuiting and skysurfing in order to maximize his flight time, but neither of these were able to satisfy what it is he was after. Rossy didn't want to be freefalling, but rather flying, with as little restrictions and as much freedom and agility as possible, while still ensuring the longest possible flight time. This is what then prompted him to begin his development on the original jet propelled wing. After developing an inflated wing design in order to achieve more flight time, Rossy then began to design the first jet propelled wing, which was flown in 2004. This first propulsion based wing was only a dual jet propultion system, which allowed him to maintain flight level. In 2006 he changed the design to use 4 jets instead of the original 2. This change allowed Rossy to go from merely being able to maintain flight level, to being able to ascend while in flight too. Since 2006, Yves Rossy, the Jetman has flown in several high profile flights and accomplished impressive achievements. Rossy is now primarily flying in Dubai, with Skydive Dubai seemingly being the sole sponsor of the venture at this point in time. Teaming up with Skydive Dubai has meant that Rossy has been able to get some crazy video footage of his latest flights, with Skydive Dubai being notorious for their video production quality. The Next ChapterIn early May, Jetman Dubai began hinting at the announcement of a new development in the Jetman Dubai project and after a few social media teasers, a video was released on the 11th May which announced that Yves would no longer be flying solo. Instead, he would be joined in the air by Vince Reffet, a well known skydiver and BASE jumper. Vince was born into a family of skydivers and did his first jump at just 14 years old. Now just in his 30s, Vince already boasts an impressive tally of over 13 000 jumps. The French protege is specifically recognized for his freeflying skills, and is best known for his position on the Soul Flyers team. The training of Vince by Yves Rossy has opened up far more opportunities for the Jetman Dubai project, with the most noteable being that of formation in flight. According to the Jetman Dubai website, Yves began training Vince as early as in 2009. The visuals of these two individuals flying together are so outstanding that it has many calling fake on the videos. However the truth is that what you see is the result of some extremely skilled pilots, working together to create something majestic. The Jetman WingThe Jetman Dubai wings weigh in at a total of 55kg with a wing span of 2 meters, and contain 4 Jetcat P200 engines. Speeds on descent can reach 300km/h, while ascent speeds clock in at around 180km/h. The flight will typically last for between 6 and 13 minutes. Flight begins with an exit, most commonly by helicopter, and when the flight time is over, a parachute is deployed for landing. A question on a lot of people's minds seem to be whether or not this type of jet propulsion system could work its way into the public. Though it seems that those keen to do some jet flying of their own should not hold their breath, apart from a large budget, it's difficult to see any situation in the near future whereby the safety aspect associated with these wings will allow for public use. In the mean time however, we can sit back, watch and enjoy. Who knows what is next for the now Jetman Dubai duo, but we can't wait to see it...
 -
 Image by Lukasz SzymanskiThe challenge for any business is to exceed the expectations of its customers, especially when expectations are already high. The businesses that can pull this off will gain loyalty and earn valuable word of mouth marketing from their satisfied customers. Exceeding expectations is a challenge for the skydiving industry. Everyone who books a skydive already has very high expectations… after all, this is a major event in many people’s lives. Having traveled and visited drop zones all over the US, one of the biggest issues I see is a narrow sightedness when it comes to the guest experience. Too often, drop zones are focused on doing just one thing well: the skydive. Though this is definitely what we should be focused on (it’s what people are there for), we’ve lost sight of the complete experience; if the operation isn’t running efficiently, high expectations will turn to disappointment in short order. The common culprit in a poor customer experience is wait times. No one likes to wait. Yet here we are, charging a premium price, taking reservations and then expecting people to happily wait for several hours before they jump. Informing customers about wait times over the phone and in e-mail confirmations (usually 3 - 5 hours) doesn't make this practice any more acceptable or palatable to our customers who are conditioned to expect instant gratification. In a world where we can order something on Amazon.com and have it show up at our doorsteps the next day (or in some markets, the same day), we shouldn’t expect our customers to adapt to our antiquated practices. Rather, we should be challenging ourselves to find ways to better adapt to modern customer expectations. If we fail to do this, we will undoubtedly face the fallout of negative reviews online. How To Exceed ExpectationsTo exceed expectations, a business must recognize its weaknesses through the eyes of the customer. The best way to do this is to ask them. However, if you want honest feedback, don’t survey your customers immediately after their skydive; they’ve just had one of the most amazing experiences of their lives, of course their immediate feedback will be positive. When I managed a DZ, I was always under the impression that we were doing a great job because when I surveyed customers following their skydive they always raved about their experience. Only when I started to survey our guests 24 hours after their jumps did I become aware of organizational problems that needed to be addressed. These ranged from employee language on the plane, (not good when your business is located in the Bible Belt) to major frustrations with wait times, to dissatisfaction with media quality. If you want to have a finger on the pulse of your organization, survey your guests after they’ve had time to come down from their initial adrenaline high. If they’re dissatisfied, they’ll typically tell you! Understand The Touch PointsThere are usually 20 interactive points of contact that a customer will have with a drop zone. If a DZ wants to gain a competitive advantage in a busy marketplace and see digital word of mouth marketing spread, they should be focused on improving these customer touch points. The goal should be to reach a five star level of service at every touch point. This is not an easy task, but it’s what has separated brands like Disney, The Four Seasons, REI and Zappos from all of their competition. This way of thinking should not be precluded from skydiving - especially considering the time and expense that goes into running a DZ. If we’re investing so much time and money into our operation, why not be the best we can be? Below is a list of 20 customer touch points every DZ should be aware of. I challenge all of my clients to rate themselves on a scale of 1 to 5 with 1 being poor and 5 being excellent. The caveat is that the score for each touch point must be graded on the organization’s weakest link within the category. For example, if four out of five instructors give great service and one is average, then the score must be graded on the weakest instructor. Now you see the challenge! The Touch Points Website Social Media E-mail exchanges Phone Interactions Road Signage Parking Lot (the condition of it) Greeting at manifest Condition of the bathrooms Quality of DZ Food (snack bar or vending machines) Quality of training Wait Times to Make Skydive Presentation of the Jumpsuits Presentation of the Instructor Presentation of the Videographer The Aircraft The Ride to Altitude The Skydive Time it Takes To Receive Media Quality of the Media Quality of Materials (certificate of achievement) The Closing (defined as a thought out ending highlighting accomplishment)In today’s digital world, word of mouth can make or break a business. If you want to leverage this powerful tool to your benefit, then you have to start consistently exceeding customer expectations. Take a step back and view your business through the eyes of the customer. Focus on the entire experience, not just one element within it. Remember, the actual skydive is only one component of the overall customer experience. Strive to make every component as incredible as the skydive itself, and you’ll turn customers into raving fans.
 -
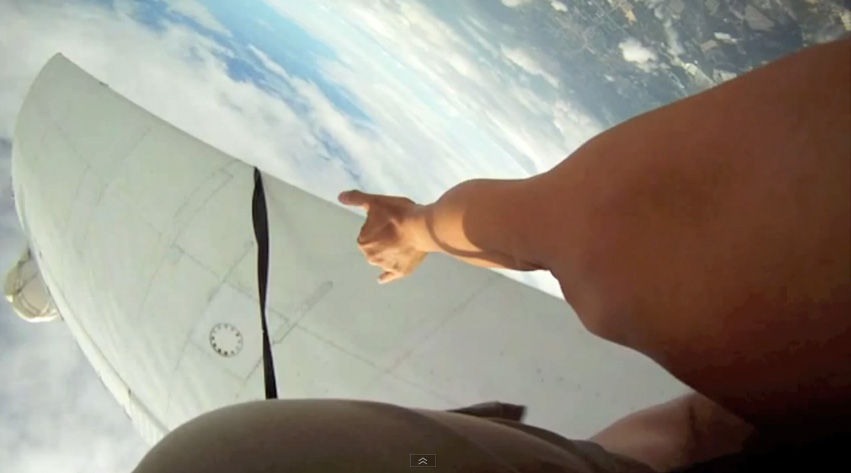 Despite having occurred late last year, a recently uploaded Youtube video showing an extremely close encounter between a tandem instructor, passenger and the jumpship they just exited from, has gone viral. The 4 minute long video (including editing) was shot in October 2014 and shows a tandem instructor, from what has been determined as a Thailand based skydiving operation at an estimated 13 000 feet (a typical exit altitude for tandem jumps). Twelve seconds after the TI and passenger exit the plane, the plane comes into view of the camera and can be seen diving quickly in their direction. The camera speed is then slowed down and shows the plane moving closer, with one frame showing the bridle and drogue of the TI wrapped around the wing of the plane. It appears as though the drogue bridle was cut when it wrapped over the wing and can be seen waving behind the TI in some of the frames. He then deploys the reserve shortly afterwards. The passenger appears for the most part, unaware of exactly how close the pair came to death during the incident, with the video later cutting to text on screen suggesting that the TI had just explained what had happened, while they were under canopy. There has been quite a bit of conversation around just how this happened, whether it was purely pilot negligence - or whether perhaps a close fly-by is something that is pre-arranged with the TI and pilot, in order to give the passengers a more thrilling experience. While there is no clear evidence to lead one to make such a damning assumption, several individuals have noted the TI's apparent eagerness to get the passenger to look in the direction of the descending aircraft, even before it has entered the frame of the video. Others are calling the TI a hero for the professional way in which he handled the incident, staying calm and getting both himself and the tandem passenger safely on the ground. Regardless of the details behind the incident, it's clear that those involved are lucky to still be alive. A discussion about the event is currently taking place in the forums in an incidents thread.
 -
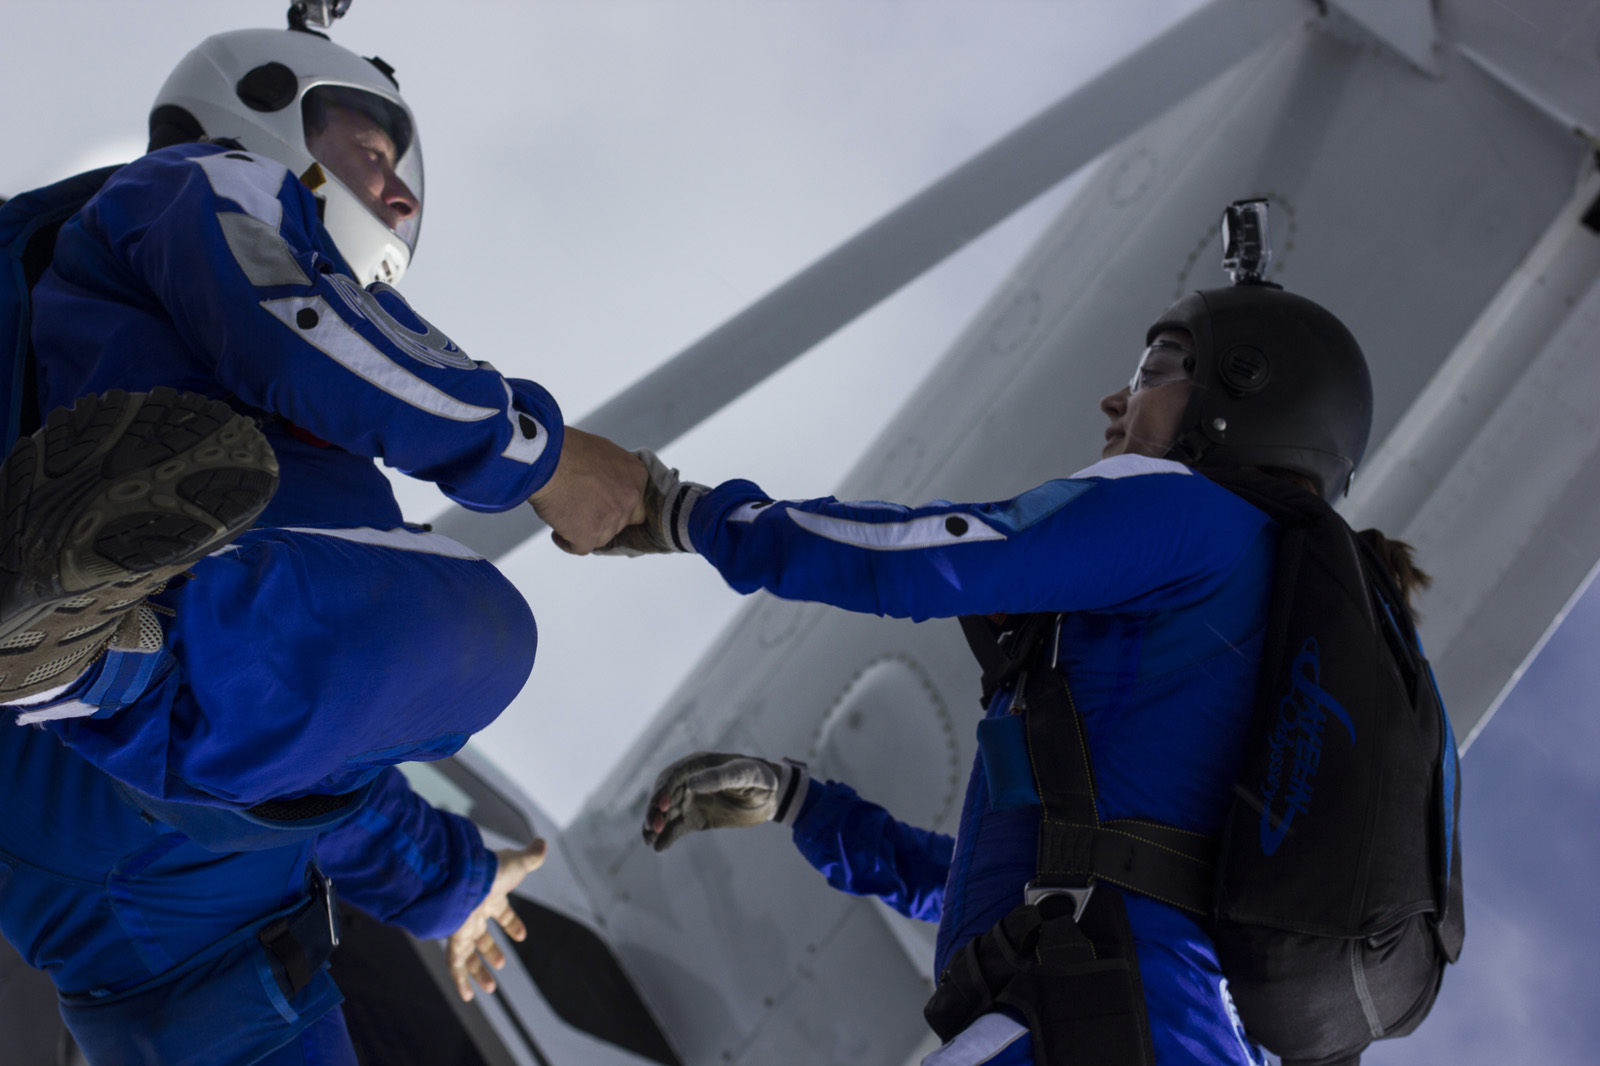 Brian Germain and wife Laura Kraus launch an exit over Voss, Norway. Photo by Ron HolanThere are many different views on exit order, although only some of them are based in science. The following exit order plan is based on the principle of "prop blast penetration": the degree to which a jumper remains under the aircraft based on the drag produced by their body position. When a jumper assumed a low drag body position, head down for instance, they follow a longer arc through the sky on their way to vertical descent. The fastest falling skydivers are freefliers, which means that they remain under the aircraft longest. If freefliers exit the aircraft first, their trajectory will take them toward, and often beyond the trajectory of flat flyers exiting after them. This fact has been proven time and again in the numerous close calls that have led to the creation of this exit order model. Therefore, the best way to create maximum separation between jumpers at deployment time is to have the FS "flat" jumpers exit before the freefliers, regardless of deployment altitude. Beyond this, we must also consider formation size when planning exit order. Since the last groups out of the airplane are more likely to land off the dropzone, large groups tend to exit before small groups based on the "needs of the many outweigh the needs of the few" principle of human civilization. I concur that this is a good plan, but for another set of reasons. Large groups tend to open lower than small groups due to task fixation and the need for adequate tracking time to create safe separation. This means participants of large formations should open closer to the dropzone. Further, smaller groups have the option of breaking off early, tracking perpendicular to the jumprun and pulling high to compensate for long spots, while the complexity of building a large formation makes it difficult to take such steps toward safety due to the peer pressure associated with the situation. Photo by Ron Holan The Exit SequenceSo this brings us to the preliminary plan of sending the flat flyers out first, in groups largest to smallest, then the freefliers. However, since inexperienced freefliers most often remain under the aircraft for a shorter period of time than vertically oriented freefliers performing perfect zero angle of attack exits, the order should be lowest experience to highest. This also allows the more experienced freefliers to observe the exits of the novices, giving them the opportunity to give helpful advice, and to provide extra time in the door if necessary. If the previous skydiver or group is still under the airplane, do not jump. When in doubt, wait longer. Following the flats and then the vertical skydivers, we have the students and tandems. The order can be varied here, although there are some reasons to support sending the tandems out last. First, landing a tandem off the DZ is safer than landing a student into an unknown location. Second, students can sometimes get open lower than planned, which not only increases their risks of landing off, but puts the instructors at risk of landing off even more as they open lower than their students. Tandems on the other hand have the option of pulling whenever they see fit, which allows the camera flyer to get open high as well. The last groups to consider are those involved in horizontal skydives, such as tracking, "atmonauti" or steep tracking, and wingsuit pilots. The truth is, experienced horizontal skydivers can safety get out of the way of other jumpers quite easily, and can exit in any part of the order. However, in the case of two or more horizontal skydiving groups, plans must be created and followed with vigilance. For instance, one tracking group can exit first and track out and up the right side of the jumprun, while another group can exit last and offset toward the left side of the jumprun. Three horizontal groups on the same aircraft are best handled by adding a second pass, although there is a great deal of room for creative answers when wingsuit pilots are involved. Photo by Ron Holan Timing the ExitsThe amount of time between groups must vary based on the groundspeed of the aircraft. On a windy day, with an into-the-wind jump-run, the aircraft may move quite slowly across the ground, reducing separation between jumpers. This requires significant time between exits, perhaps as much as 15 seconds or more on a windy day or a slow airplane. The separation between groups can be increased quite easily on windy days by crabbing the aircraft with respect to the upper level winds, a practice that has become increasingly common at large dropzones. For a scientific explanation of exit separation, please read John Kallend’s PowerPoint, found here. Many jumpers believe that once the freefall is over, there is no way to prevent a collision. However, given the glide ratio of modern parachutes, we have the ability to close the gap quickly after opening by pointing our canopies in the wrong direction. Given the fact that the vast majority of skydivers will be opening reasonably close to the jumprun, immediately flying up or down the line of flight is pretty much always a poor choice. Therefore, once you have cleared your airspace and pulled, your job is to look for traffic in your immediate vicinity and then fly your parachute perpendicular to the jumprun heading. I like to call this “Canopy Tracking”. Once you verify that the others are open and note their location, you can begin to navigate toward the play area and then to the pattern entry point. This all requires a great deal of awareness and adaptability, as even the best plan can change quickly in a complex environment. The bottom line is this: keep talking. Every load is a brand new set of circumstances, and requires a good deal of thought and planning. Make sure everyone arrives at the loading area no later than the ten minute call to allow for healthy preparation time. Most accidents and close calls could have been easily avoided by skydivers talking to skydivers, and skydivers talking to pilots. Take your time in the door, keep your eyes open and take care of each other. It is a big sky up there, and when we work together, safety is the likely conclusion. Brian Germain is a skydiving safety advocate, and has written numerous books and articles on the topic. He has a regular spot on Skydive Radio called Safety First, and has made over 150 safety related videos, all available through AdventureWisdom.com
 -
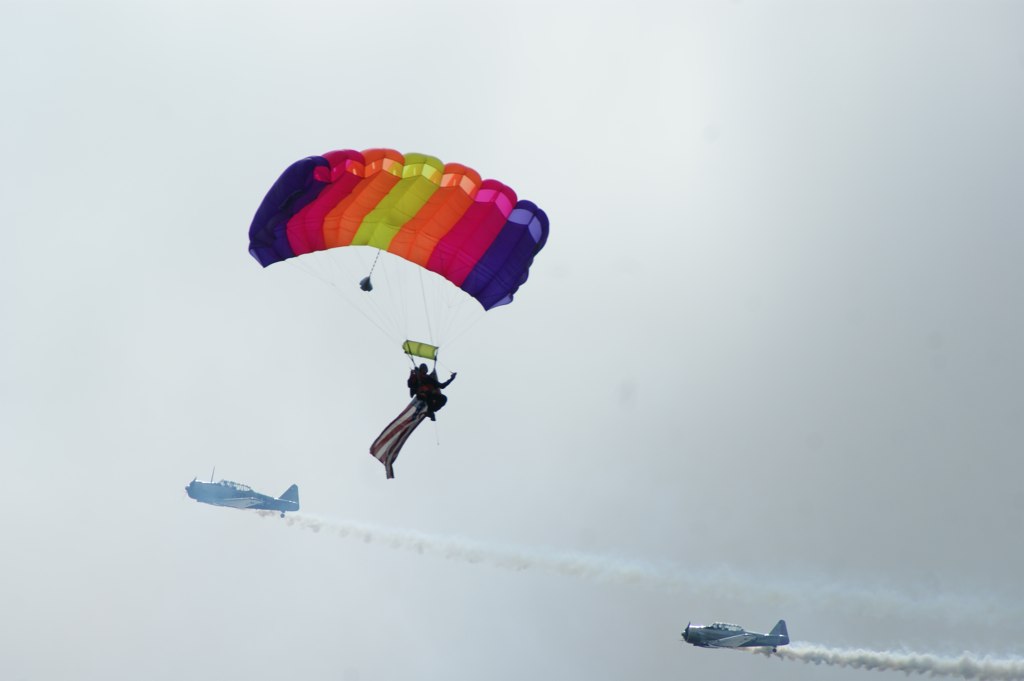 At 66 years of age and with a one year old hip replacement, it decided that it was time to upsize my main canopy. I currently jump an Aerodyne Triathlon 210, so I purchased a Performance Designs Spectre 230. I had heard good things about the Spectre, although I had not yet jumped a demo Spectre. Of course, I did not need any advice on how to use this canopy. I have almost 2300 jumps, a USPA Pro Exhibition rating, and have owned dozens of canopies. I thought I could land anything, especially my nice new big 230 square foot canopy. Little did I know that a "slightly elliptical" canopy would be so drastically different when making turns and in recovery than the more traditional Triathlons I have always jumped. So, my first mistake was that I never read the flight characteristics information in the sales literature, in particular, about the dive characteristics of this canopy. Many of the reviews said that the Spectre is described as “ground hungry”, and needs a deeper and faster flare to land well. My jumps on my new canopy: Jump #1: I tested my turns and my old style two-stage flares. Oh well. Not much of a stall. Maybe I just have to "learn" this new canopy. I used a straight-in approach on grass, but hit rather hard in very fast, sliding landing. Good thing the grass was damp. Jump #2: I decided to land into the pea gravel pit. A 10 mph crosswind at 45 degrees caused me to make a small correction on landing, then the wind side started to dive, a I pushed my flare, nothing, I hit hard, drove my right shoulder into the pea gravel pit, plowed a deep furrow through it, and went into a belly slide as I exited the peas. But this still counts for accuracy, right? Jump #3: After breakoff from a 15-way formation, and after too long of a track, I opened, and saw that I was rather far from the landing area. I decided to land in a small green field. I fortunately noticed the chain-link fence on all four sides of the field. Now I needed to burn off some altitude to get into this spot. I used one carving S-turn at quarter brakes, and then a last second turn to come straight in. However my canopy started to dive into the ground so fast that I never had a chance to get the “fast deep flare” that this canopy requires. I hit so hard that I caused six breaks in my leg and a partial shoulder dislocation. Rotor cuff surgery is now in my future too. It seems that in an stressful situation, I reverted to my old landing and flaring habits from my other canopies. So here are my comments and recommendation when jumping a new canopy (even when upsizing.) If most of your experience is on some of the more docile rectangular canopies, be careful if you change to even a slightly elliptical canopy, even if it is bigger. It will surprise you how differently it responds in turns, dives, and recovery. Bigger is not always enough to be better. (Sorry guys.) Read all of the reviews written about the canopy, and all about the flight characteristics. Talk to others who have owned one. Ask your Safety and Training Advisor and Rigger about the canopy and how it fits your style and experience. Open high and test everything you can up high. Practice steep as well as shallow turns. Test your flare and note the toggle pressure and location needed to find your stall point and "sweet spot". (Your brake settings may be different than on other canopies you have jumped.) Observe the dive speed and recovery traits at all brake locations, plan a straight in landing until you get experience, and that means more than one jump. Even if you have 2300 jumps like I do, read all of the articles you can find on canopy skills. At the very least, you will wind up with a checklist of things to look for to prepare for your first landings. In summary: I was careless but lucky. I have gone through many "could have - should have" thoughts, and offer my personal experience and observations as food for thought, and hope it may help others when changing canopy style or size.
 -
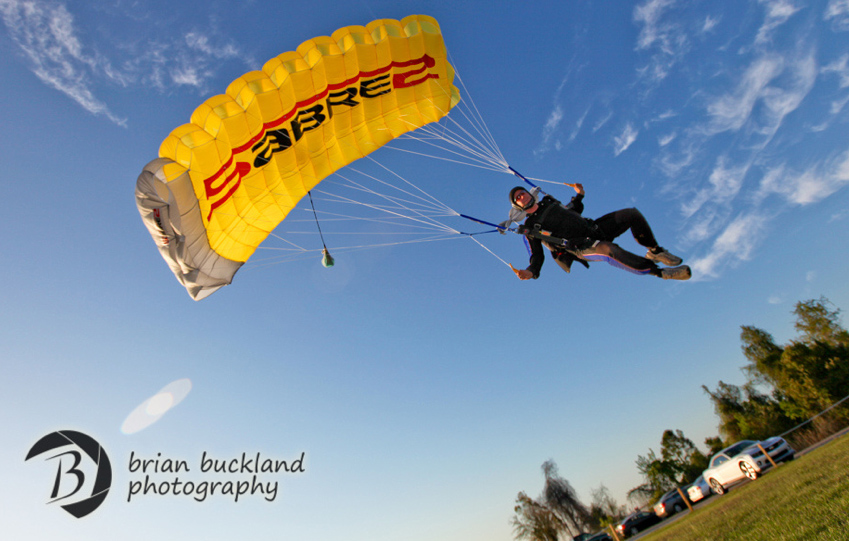 At the end of the day, skydiving is a dangerous sport. I’ve lost many friends and even family members– under properly functioning parachutes. We can’t regulate stupid behavior, but we can at least spread good information so more people can make wise decision. So why would someone consider upsizing? 10. Cannot land consistently standing up. If you’re having troubles standing up consistently or even in the same area in all weather conditions, then you need to upsize and take a canopy course to understand the concepts basic flight characteristics. 9. Not current. You can be uncurrent after a winter vacation without skydiving, coming off an injury or just life getting in the way. According to USPA, you are uncurrent if: A-license holders who have not jumped within 60 days B-license holders who have not made a freefall skydive within the preceding 90 days C- and D-license holders who have not made a freefall skydive within the preceding six months DZ policy: Every DZ has their own policy for uncurrent skydivers. Be sure to check in with them before coming out to the DZ to see what you may have to do. Also check the USPA Skydiver’s Information Manual for more info. 8. Jumping at a Higher Elevation. At higher elevations the canopy is going to perform faster and act more responsive because of the air being less dense. So landings will feel faster and turns will feel more aggressive. If you’re traveling to places like Colorado or Utah, you may want to pack a larger canopy. 7. Gained Weight/Wearing Weight. Well, what can I say? Sometimes during the winter, it’s easy to pack on some pounds and that invariably negotiates your wingloading. Also, if you haven’t jumped all winter and you’ve accumulated a new wingloading, you may want to consider getting current on a bigger canopy. Next, if you’re a small girl, or decide to get on a 4-way team, you may be wearing weights. This added weight will definitely make your canopy fly differently than expected. So before making a decision on what canopy to buy or whether or not to downsize, consider the use of weights to make the best wingloading decision for your experience. 6. Reserve Size. Generally, your main and reserve should be about the same size. If you were quick to downsize or couldn’t find the right sized container, but have a larger reserve, with little experience under a bigger canopy, may be a good reason to upsize your main. (Having the same sized canopies also reduces other problems should 2 canopies out occur.) 5. Types of Jumps. Doing big ways? Wingsuiting? Demos? Some jumps may warrant a bigger parachute. When I do world record jumps, I usually opt for my bigger canopy so I’m not fighting my way through traffic and have a larger range of floating. Wingsuiting can cause line twists or other malfunctions and jumping a more docile canopy can help you negotiate them better. On demos, having a lower wingloading will give you more range to negotiate smaller landing areas or areas surrounded by obstacles – as long as you understand the flight dyamics of your wing. 4. Age/Health/Agility. Take an inventory of your overall health. How are your knees? Wrists? Ankles? Eyesight? Depth perception? Reaction Time? These may be considerations to upsize. 3. Attitude/Experience. Someone’s overall experience and attitude about the safety of themselves and others is a vital component in skydiving safety. Disregard for your own experience and/or safety is an obvious sign to upsize. 2. Because You Downsized and You Shouldn’t Have. Having inconsistent landings? Not standing up your landings? Stabbing out your flare? Landing by touching down on your knees first then popping up to your feet thinking it was an awesome swoop? Spiraling in traffic cause it’s freakin’ fun on a small canopy when not necessary? Scared of line twists? Having a hard time kicking out of line twists? Not paying attention to others in the sky? Land downwind for fun? Don’t follow a landing pattern? What the hell is a landing pattern? Don’t understand the flight characteristics of your wing? Pretty much don’t follow the rules? 1. Finally, if you cannot answer yes to all of these questions, you need to upsize: Can you land your main crosswind? Are you comfortable landing crosswind? Can you land your main downwind? Are you comfortable landing downwind? If you had to land out and the only option was a tight area surrounded by obstacles, do you know you could land your canopy accurately? Do you feel that you completely understand the flight characteristics of your wing? Do you understand what happens to the flare, landing pattern, stall characteristics and overall flight characteristics when you downsize? Have you used your rear risers & do you know why and when you’d need to use them? Have you used your front risers & do you know why and when you’d need to use them? Have you performed braked turns? Braked turns for landing? Can you land within 10 meters of a target center at least 5 times in a row? Did you take a canopy course beyond the B-license requirements? When I first started skydiving, I was young and pretty much invincible. I was on the fast track to get on a small canopy and go fast! And it’s all fun, until you get hurt or you watch someone die. I’d seen a lot of crazy things (especially people “getting away” with bad decisions) in my 20-year career, but in 2003, I witnessed my father’s fatal canopy collision. Then without your permission, things change. It’s amazing how death will completely transform your perspective on safety, especially when the sport is your livelihood. We spend more time under canopy than we do in freefall, so this is a moment to check in and evaluate how much canopy education have you gotten? My dad used to tell me, “take stock into your destiny.” So, take that Flight 1 course you’ve always wanted to, finish your B-license canopy training, ask questions, and just know, there ain’t no shame to upsize that thang! How at risk are you? Below is a canopy risk calculator that was created by the USPA, which can give you an idea of just how big of a safety risk you're at with your current canopy and experience level Calculate My Canopy Risk Useful Resources Barry Williams on Canopy Safety (Skydive Elsinore 2013 Safety Day) [Video] Barry Williams on Canopy & DZ Safety (Skydive Elsinore 2012 Safety Day) [Video] Performance Design's "Survival Skills for Canopy Control" Contributors: Melissa Lowe, Barry Williams and Jason Moledzki
 -
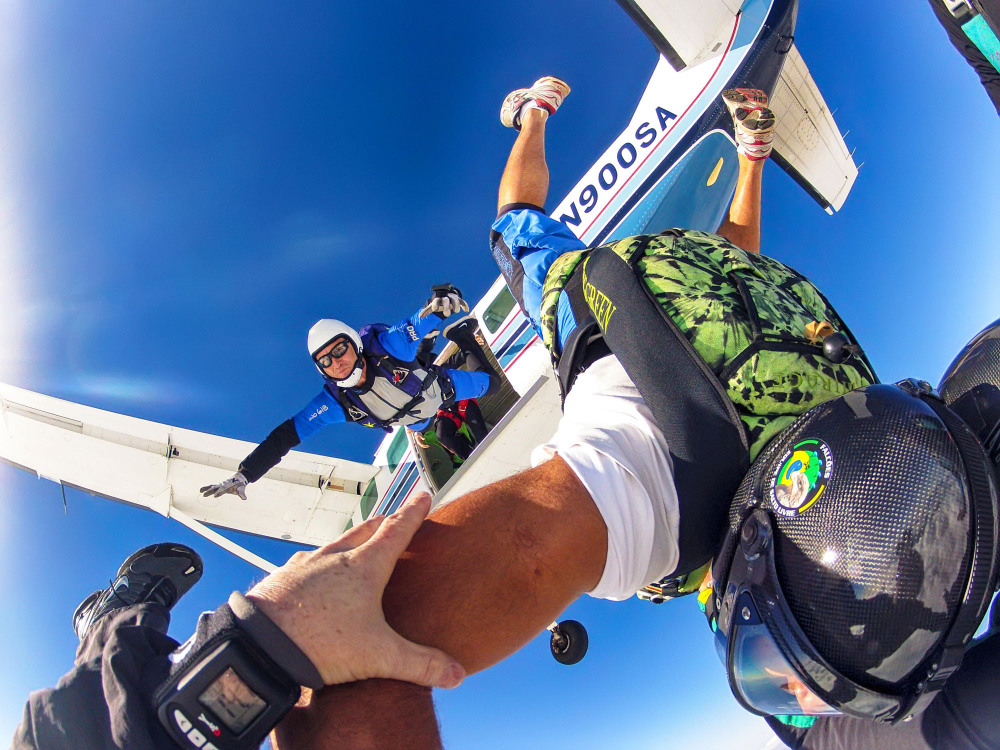 On Saturday October 26, 2013 there was a near canopy collision by experienced jumpers. There were several factors which may have contributed to this event. I feel that a lack of understanding of exit separation was a major contributor. The winds of the day were posted: 24 knots at 12,000 feet, 22 knots at 9,000 feet and so on. I was on the first load, first out with a three way formation. I turned to the group behind me and asked for 10 seconds of separation. The response was “Why? That’s a lot of time.” Both of these jumpers have around 500 jumps. One has been jumping for over 10 years, the other for 9 years. One of these jumpers was part of the group that was involved in the near collision later that day. The incident: a near miss at opening time between two skydivers we will call jumper 1 and jumper 2. Jumper 1 left the plane first as part of an 8 way relative work group. Jumper 2, as part of a less experienced 2 way relative work group, left next with 5-6 seconds of separation. The second group left the plane flipping and having fun then got stable and continued a normal relative work dive. Jumper 1 was oriented to track up the line of flight decreasing his separation from the 2nd group. Jumper 1 further decreased his separation from the 2nd group by continuing to fly his canopy up the line of flight for 12 seconds. At which time he noticed one of the jumpers from the two way open pretty close. He then started looking for the other jumper from the two way group (jumper 2) and started a right rear riser turn. At this point, jumper 2 under a still deploying main fell past and within 20 feet of Jumper 1. Here is a link to the video of the opening sequence. This video was taken with a gopro camera and the jumpers in it are closer than they appear. Conclusions: 1. The initial flipping on exit of the second group may have had the two way in an orientation to slide down the line of flight and therefore contributed to the second group moving towards the first group. If so this would have been only momentary and not a large contribution. 2. Jumper 1 decreased separation by tracking up the line of flight. Although a contributing factor to the lack of separation, this was an appropriate action as on groups of 2 or larger all jumpers should track away from the radial center of the formation regardless of whether that puts them tracking up or down the line of flight as this will give them the greatest amount of separation from the members of their own group which would pose the greatest danger of collision at opening time. Jumpers tracking up the line of flight away from larger groups should always be aware of their direction and not “over track”. 3. Jumper 1 was flying a small fast canopy, continuing to fly up the jump run, holding into the wind with his brakes still set. This decreased separation with the following group. Every skydiver should know where jump run is planned to be before boarding the aircraft. All jumpers should upon opening orient themselves as quickly as possible to fly perpendicular to jump run at least long enough to ensure the groups before and after them have opened. 4. There is no question that mistakes were made on both sides, but there should also be no question that there would have been greater separation with 8 seconds at the door as called for in the chart below. In this case an extra 2 seconds separation would have equated to between 224-252 more feet of separation. We are also reminded of another incident we had a while back. Jumper 1 on a hop-n-pop leaves opens and flies up the line of flight. Jumper 2 leaves with about 5 seconds of separation and tracks down the line of flight. Jumper 2 tracks through Jumper 1’s canopy ripping it in half. Luckily neither one was injured. Another example is the video posted Iloveskydyving.org. This video clearly shows the following group giving 8 seconds of separation. Judging from their flying style it is obvious they are very skilled and not likely sliding through the air unintentionally. However, they still end up opening dangerously close to the group before them. We don’t know about what mistakes the group ahead may have made if any, but consider the problem may have been enough wind to dictate more time for adequate separation. Close Skydive Canopy CollisionAs Jumpers, we must have a basic understanding of the effects the ground speed of the aircraft has on the amount of time that we need to allow for the same amount of separation. I have heard swoopers say that the only good wind is no wind. They are saying this because in a no wind situation all things remain constant and consistent. Likewise at altitude if the aircrafts speed relative to the ground was always the same we would always give the same amount of time for the same amount of separation. What is adequate separation? In distance, the number I was taught is 1000 feet from center of formation to the center of the next formation for small groups. This number increases up to 2000 feet or more for groups of 8 or larger. Consider two 4 way groups lined up perfectly with jump run which will result in a jumper from each group tracking directly at one another. This allows each jumper to track 250 feet with 500 feet still left between them. The Skydivers Information Manual goes farther and recommends 1500 feet of separation for small groups and solos. What is adequate separation? In time, that will depend on the speed of the aircraft and the wind the aircraft is encountering. In other words, it will depend on the ground speed of the aircraft on jump run. See the chart put together by Phil Litke. These numbers should be considered minimums for 1000 feet of separation to be doubled for following groups of 8 or larger. Here are some examples of experienced jumpers and Tandem instructors giving between 13 and 31 seconds exit separation when the winds were very high. Also consider that these instructors are, for the most part, giving such separation on solos and 2 ways. As stated earlier, larger groups should be allowed more distance and therefore more time. We are all concerned about hosing the guys in the back of the plane by taking too long. I am not advocating that we give more time unnecessarily. If the speed of the aircraft dictates a certain amount of separation between groups this should include your set up, climb out, and count. I am not suggesting anyone taking longer than the conditions call for as this would create different problems such as people landing off, unnecessary go arounds, and wasted fuel. Most of us have had experienced people in the back of the plane yelling for people to hurry up and get out. This is because they feel you are taking too long to exit and will end up with them getting too far from the airport to make it back. If the winds are strong enough to necessitate a certain amount of separation then likewise the plane is moving slower relative to the ground, Freefall drift will be greater, and the acceptable opening spot may be farther from the landing zone. Every skydiver should know the acceptable exit and opening points for the conditions of the day. Many people land out without trying to make it back because it looks father than they are used to seeing. Without looking at the winds and calculating the opening spot before you go up you have very little chance of knowing for certain whether you will make it back, especially as the winds get higher and the spots get longer. One thing that you cannot control when you leave the aircraft is what the group behind you will do. We all should look after each other. By knowing how much separation to give you are looking out for yourself and the group ahead of you. Don’t be afraid to confirm with the group behind you that they will also wait an appropriate amount of time before exiting. Recommendation to reduce the likelihood of these type incidents: 1. Phil Litke’s exit separation chart should be posted near the jumper closest to the pilot for easy reference on jump run. 2. Upon turning onto jump run after the cut, the pilot will inform the close jumper of the aircrafts ground speed. This close jumper will look at the chart and determine how many seconds are needed. The number of seconds separation to give will be passed down to all jumpers on the load. 3. If this turns out to be too great a burden for the pilot we should install a GPS unit near the door so that the jumpers can determine ground speed themselves and make all jumpers on the load aware of how many seconds separation to give. We all have to get on board for this to work. Our landing direction at our dropzone is mandatory. This has been the best proactive step towards promoting a safe landing area and smooth landing pattern I have seen since I have been with my dropzone. The chaos of 22 jumpers landing in every direction in light and variable winds seems to be behind us. Each of us knows no one landing against the assigned pattern will escape a talk with a staff member. Exit separation is as important a safety issue and should be treated with the same respect. It needs to be a matter of policy for consistency. There is not an original idea on this subject here. This is the best knowledge which my mentors passed on to me. Here are a couple of related articles which go into greater depth about these concepts and solutions to these problems. I hope it is clear we must go about things in a more thoughtful and consistent way to avoid similar incidents in the future. http://www.dropzone.com/safety/Exit/Exit_Separation_Revisited_628.html http://indra.net/~bdaniels/ftw/sg_skr_dealing_1_uppers.html
 -
Most of us agree that canopy control is the most important, and most difficult aspect of skydiving instruction. Within this broad objective is the ability to fly a safe and consistent landing pattern. This is crucial for everyone, from the highest level of experience down to the beginner. The clear necessity for improvement in this area has been demonstrated time and again with the unacceptable frequency of canopy collisions and low turn accidents that have plagued our sport for far too long. General aviation has implemented many new technologies to assist pilots in navigation. These tools have enhanced aviation safety, and such devices are not considered crutches, but a necessary part of safe flying. Similar advances are now commercially available for skydivers as well, but many do not include these instruments in their safety toolkit; least of all for primary instruction methodologies. It is time for this to change. Altitude awareness is not something that ends once the canopy opens. Knowing precisely how high we are throughout the approach and landing is vital for consistency, and many of the traditional analogue devices are unable to provide truly trustworthy data. The digital altimeters that are now widely available are accurate within ten feet or so, but they have one tragic flaw: the pilot must look away from the ground, and away from the traffic, in order to access the information. Having water available does not guarantee that the thirsty will drink, and as altitude diminishes and stress level increases, visual altimeters are used less and less. As many high performance pilots have come to realize, audible altimeters are an incredibly powerful aid for heads-up access to the information that saves their lives. The time has come to utilize these tools for students and intermediate skydivers as well. A pattern is a simply a series of invisible points in space, what some have come to refer to as "altitude-location check-points". With three or four ALC's, a canopy pilot can follow a preplanned path through space to a predictable landing point. When these ALC's are programmed into an audible device such as the Optima, with its impressive tolerance of + or - only ten feet, the distracting glances at a visual altimeter become mostly unnecessary. More importantly, I have found that my canopy piloting students who use such audible cues are more aware of their surroundings, and are far less likely to run into other canopies on the way to the target. Even more importantly, by having their eyes focused "outside the cockpit" so to speak, the canopy pilot learns exactly what the ground looks like at the various altitudes. Therefore, I have discovered, if there is an instrument failure in the future, they have "calibrated their eyeballs", and are aware when they are too low to execute a hard, descending turn. Many instructors have grown accustomed to preaching the party line that relying on instruments for canopy flight is inadvisable. Although there is some merit to training our eyes to recognize key altitudes, simply trusting our inborn instincts is not an effective way to accomplish this goal. When a “flat-line” beep goes off in your helmet that marks 300 feet AGL, and you happen to be looking at the ground at the time, you immediately become a better canopy pilot. Furthermore, when you are focused on your surroundings, rather than a dial on your wrist, you are more likely to make the necessary course corrections that lead to the target. The primary reason for missing the target is, and always will be, failure to maneuver when a course correction is necessary. When you always know how high you are, and are observing your location in relation the target, you are far more likely to make the change that puts you in the peas. The safety concerns regarding the use of audible devices for flying a pattern can be addressed with a few simple rules. The first rule is, if you don’t get the first beep, assume that the instrument has run out of battery life, or is improperly programmed. When the initial pattern beep comes, verify that this is in fact the altitude that you expected it to be by looking at your visual altimeter. If it is not, or you hear nothing at all, use your visual altimeter for the remainder of the jump, and sort it out on the ground. Above all else, your eyes are your default, and you can veto what the audible is telling you, or not telling you. If it doesn’t look right, put your parachute over your head and prepare to flare for landing. There have been many technological leaps that have changed the sport forever, and audible information for canopy flight is proving to be one of the most profound. By knowing exactly how high we are at all times, we can act appropriately. We can relax more as we fly our approach, and enjoy the simplicity and joy of landing our parachutes without worry. Above all else, the reduction of the stress within each canopy pilot, both student and expert, has proven itself to allow for the full expression of skill that training has made possible. When we embrace such advances, we can more easily expand into the pilots we were meant to become. BSG Brian Germain is a parachute designer and test pilot, and runs canopy flight skills and safety courses all over the world. Brian has made over 14,000 jumps in his 25 years in the sport. He is also the host of the “Safety First” segment on SkydiveRadio.com, and the creator of many educational You Tube videos. Brian is the author of the widely popular canopy flight text The Parachute and its Pilot, as well as Transcending Fear, Greenlight Your Life, and Vertical Journey. His upcoming book entitled “Vibe Matters, emotion is everything” will be coming out later this year, along with the long awaited educational packing video “No Sweat”. His websites are www.BIGAIRSportZ.com and www.Transcendingfear.com and his YouTube channel is: www.youtube.com/bsgermain
-
Funneled exits are bound to happen once in a while on recreational RW loads, but they do not have to be the norm. With the leadership of a good load organizer and thorough dirt dives, jumpers with relatively little experience can soon be pulling off stable exits. In recreational RW, the most common type of exit is a Star (or “round” as it often called). In a Star exit, it is easier to control the exit chunk and maintain levels because all jumpers are looking into the center. The number of jumpers in the Star exit depends on factors such as jumper experience and the complexity of the skydive. For recreational loads with mixed experience levels, a 2, 3 or 4-way Star is probably large enough. Any bigger and the chance of a funnel increases. This article focuses on Star exits from left side-door aircraft such as Otters, Cessna Caravans and PAC750s because they are commonly used for formations larger than a 4-way. Also, because many recreational skydivers don’t do a lot of 4-way, terms such as Middle Floater and Rear Floater are used instead of 4-way terminology such as Outside Center and Tail. Deciding Who Will Be In The BaseThe simple solution is to put only experienced jumpers in the base, but that often doesn’t leave enough experienced jumpers further back in the lineup. An alternate solution is to put experienced jumpers outside the plane and lesser-experienced jumpers inside. This mix of experience levels can work quite well if everybody leaves on ‘GO’ and presents to the relative wind. Then, if the exit is less than perfect, the experienced jumpers are in a better position to control the exit chunk. For example, if one of the inside jumpers starts to flip over, it is sometimes possible for one of the outside jumpers to push against his back pack and help him settle back down into his slot. The Importance Of Dirt Diving The ExitThe exit is just as important as remembering the points of the skydive. If the base is not there, no points will be turned anyway. So during the dirt dive, jumpers should pack it up and take grips exactly the way they expect to do it on jump run. This can prevent a lot of fumbling around for grips when they are lining up for real. If a mockup of the aircraft door is available, jumpers should use it. If not, they can make marks on the ground to represent the door. Typically, the organizer is positioned in the middle of the door and facing in so that he can see when everybody is in position before giving the count. Since full face helmets make it very difficult to hear the count, many organizers move their head or leg in time with the count. Some organizers swing their left leg out-in-out to indicate the Ready-Set-Go. (The second swing out represents the ‘Go’). Launching A 2-Way StarThis exit uses a Middle Floater and 1 jumper inside the plane. As mentioned earlier, the most experienced jumper should be outside the plane because he is in a better position to control the inside jumper as the 2-way leaves the plane. Getting Into position1. With both hands holding onto the bar (or the top inside of the door if there is no bar), the Middle Floater rotates his body to the left so that his back pack goes out the middle of the door (so he doesn’t snag anything). His head follows until he is standing outside the plane with his right foot on the edge of the door and his left knee presented to the prop blast. His hands should be approximately shoulder-width apart. 2. As soon as the Middle Floater turns around in the door, the Inside Jumper reaches between the Middle Floater’s arms then right and left for his arm grippers. This leaves both the Middle Floater’s arms free to fly and control the exit. 3. As he takes grips, the Inside Jumper steps forward with his left foot, placing it on the edge of the door and crouching down (not on his knees) while keeping his chest cheated toward the prop blast and his back straight up and down. His right foot should naturally be a foot or two back inside the plane (helps ensure his body is cheated toward the prop blast). The Launch When the Inside Jumper is ready, he looks up at the Middle Floater. The Middle Floater gives the count and launches out, leading with his left knee and presenting his chest and hips to the prop blast. With his free hands he can help control the Inside Jumper if he starts to twist or turn off heading. He can also double grip the Inside Jumper for added stability. The Inside Jumper DOES NOT push but goes with the exit, keeping his head up and rotating his chest and hips toward the prop blast as he helps fly the 2-way on the relative wind. Both jumpers are responsible for keeping the 2-way on heading relative to the aircraft’s line of flight so that other jumpers on the skydive can go directly to their slots for a faster build. The 2-way is also responsible for maintaining a good fall rate. Launching A 3-Way StarThis exit uses 2 floaters (a Rear and a Middle) and 1 jumper inside the plane. Again, the most experienced jumpers should be outside the plane. Getting Into Psition1. The Rear Floater climbs out first (see the photo of the Middle Floater climbing out for the 2-way). 2. On the heels of the Rear Floater, the Middle Floater climbs out the same way, except he rotates his body to the right and stands pretty much in the middle of the door. 3. As the Middle Floater climbs out, the Rear Floater grips the Middle Floater’s right arm gripper with his left hand. 4. Both floaters are now standing outside the door and should be turned slightly toward the front of the aircraft with the inside of their left knees presented to the prop blast. 5. The Inside Jumper gets in position the same way as described for the 2-way Star except he takes a left-hand grip on the Rear Floater’s right arm gripper and a right-hand grip on the Middle Floater’s left arm gripper. (Again, he steps toward the door with his left foot and places it near the edge of the door to ensure he is cheated toward the prop blast.) Launch When the Inside Jumper is ready, he looks up at the Middle Floater. The Middle Floater gives the count and launches out, leading with his left knee and presenting his chest and hips to the prop blast. The Rear Floater should anticipate the count and leave a split second early, hardly noticeable but just enough to place him on the lower end of the 3-way and looking up at it. (In 4-way, the Rear Floater, called the ‘Tail’, is always on the lower end of the formation to help anchor it on the relative wind.) The Inside Jumper DOES NOT push. He simply steps off, keeping his head up and rotating his chest and hips toward the prop blast as he helps fly the 3-way on the relative wind. All jumpers are responsible for keeping the 3-way on heading relative to the aircraft’s line of flight so that other jumpers on the skydive can go directly to their slots for a faster build. The 3-way is also responsible for maintaining a good fall rate. Launching A 4-Way StarThis exit uses 2 floaters (a Rear and a Middle) and 2 jumpers inside the plane. As with the 2 and 3-way Star exits, the most experienced jumpers should be outside the plane. Getting Into Position1. The Rear and Middle floaters climb out the same way as described for the 3-way Star exit. (Note: The Rear Floater should stand a few inches forward of the rear door jamb so that the Inside Rear jumper does not hit his arm on exit.) 2. While the two floaters are climbing out, the 2 inside jumpers (let’s call them Inside Rear and Inside Front to indicate their relative positions in the door) should step forward with their left foot and place it on the edge of the door, keeping their back pack backs straight up and down and their chests cheated toward the prop blast. They should crouch but not be on their knees. Their right foot should naturally be a foot or two back inside the plane. 3. The Inside Rear jumper takes a left-hand grip on the Rear Floater’s right arm gripper and a right-hand grip on the Inside Front jumper’s left arm gripper. 4. The Inside Front jumper takes a right-hand grip on the Middle Floater’s left arm gripper and can either leave his left hand free or reach back and double grip the Inside Rear jumper’s right arm. The Launch When the inside jumpers are ready, they look up at the Middle Floater. The Middle Floater gives the count and launches out, leading with his left knee and presenting his chest and hips to the prop blast. The Rear Floater should anticipate the count and leave a split second early (the same way as described for the 3-way exit). The inside jumpers DO NOT push. They basically step off and go with the Middle Floater, keeping their heads up and rotating their chests and hips toward the prop blast. The Inside Front jumper should also think about launching toward the front of the plane, and the Rear Inside jumper should think about helping to place the Inside Front jumper up and forward. No grip switching is necessary. If the 4-way is the base for a big-way, jumpers can take double grips for added stability. All jumpers are responsible for keeping the 4-way on heading relative to the aircraft’s line of flight so that other jumpers on the skydive can go directly to their slots for a faster build. The 4-way is also responsible for maintaining a good fall rate. Safety Tips Before boarding the plane and before jump run, jumpers should give each other pin checks. During the lineup and the exit, jumpers should always protect their handles. Before planning to launch larger exit chunks, jumpers should know how many jumpers are allowed in the door and at the back of the aircraft (so that the aircraft’s stall point is not jeopardized). If they don’t know, they should ask the pilot!As with other types of exits, methods for launching a Star can vary from one organizer to the next, from one 4-way team to the next, or even from one DZ to the next. The methods described in this article are ones that have worked successfully for this author on both 4-way and recreational loads. But no matter what method is used, success is much more likely if jumpers present as much as possible to the relative wind when lining up in the door and continue this through the launch. Finally, bigger is not always better. Most skydivers would rather swoop on a solid 2-way than chase a funneled 6 or 8-way base. A solid base allows everybody on the load to turn more points and get the most bang for their buck.
-
Landing your canopy in a specific place is a skill that we all must master. If you cannot land where you want to, eventually you will land someplace you don’t want to. Honing this skill is something that we all must pursue, and how we approach this will determine whether or not we survive the learning process. We must first learn how to land on a runway before striving to land on a specific point. When pilots try to skip this step, they often run into significant stumbling blocks, some of them requiring surgery. Once you are proficient at hitting the centerline of a runway with consistency, then you can move on to more specific targets such as entry gates and landing points. One of the most important aspects of any approach is the “entry angle”. Although we can often repair a flawed approach, there are limits to our course corrections. The parachute can only do so much. If you set up too close to the target or entry gate of the swoop course, you may be in for a painful lesson. Too tight is a very dangerous place to be. Even if you are flying a conservative approach, making gentle turns to final, this can still bite you. When a pilot strives to land on a target that is mostly underneath them, they are on what I call “the path of crazy shit”. You can almost hear the banjo music starting like in a chase scene in an old western. There is no graceful way to land on a target that is directly below you. The parachute wants to glide, and turning or diving to get there will always put your life at risk. If you are a swooper, the consequences of being too close to your entry gate are dire. You may have the potential to extend the dive of your canopy to make the entry gate, but all you will do is make a divot between the flags that mark the location of your final act of egoistic stupidity. Let it go, and live to swoop another day. If we are too far away from our entry gate, real or imaginary, our solutions are simple, and generally quite safe. “Shallowing” of the approach can easily be accomplished by letting off the dive early and/or holding a bit of brakes or rear risers. We do not often read incident reports about canopy pilots who died a horrible death as a result of holding two inches of rears to stretch their glide back to the target. Set up deep, and tighten up over several jumps. The hard part comes when you have set yourself up, started your dive, and are not sure if you can make the gate or not. You are tight and steep, and you think that if you make it you are going to be a hero. Hero or zero that is; only time will tell. If you hold your swoop in your hand like a butterfly, hoping it will not fly off, you will live far longer than if you squeeze it tightly and try to force a square peg into a round hole. Either it is there or it is not. You need to train yourself to know when you are too tight by knowing what it looks like when it is just right. Visualize the perfect entry, not too shallow, not too tight, with the target or entry gate out in front of you. Walk through the sequence, setting up tiny gates on the ground, and practice making aborts by lifting your eyes from the entry gate and landing long. If you are looking down at it, just let her fly, land safely, and go up and do it again. There is always the next jump. They key to a good abort procedure is training. Without physical rehearsal for physical activities, our cognitive understanding is useless. We have to practice arresting the dive over and over, and find new ways of putting our parachutes into level flight quickly. The first concept is: “Pitch Before Roll”. This means that the turn itself is less important than the pitch attitude of the canopy. When you are striving to pull up from a diving turn, increase the canopy’s pitch angle before striving to recover the roll. Bank angle does not kill people, descent rate does that. If you nose your parachute up, you will increase the angle of attack of the wing, which will give you the added lift that will reduce the decent rate. This will afford you the time to reduce your roll angle prior to touchdown. You literally create time. The second concept that supports healthy recovery technique is: “Sharp Inputs Create Sharp Results”. Slowly applying the brakes, regardless of the depth of the input, will never create the high rate of pitch change that shorter, sharp inputs can. This is the same reason why slow flares, when started at a very high altitude, will not cause an adequate change of direction of flight so as to create a level-off for a soft landing. Practice giving sharp stabs on the brakes while in a turn, and see what it does for you. If your weight increases dramatically, you know you are creating a change of direction, since inertia is resisting your change of motion. Another relevant concept with regards to saving yourself from a low turn is: “Give Up Some Heading”. If you strive to arrest your dive and stop the yaw too quickly, you are likely to wobble on the roll axis. This is because the increased lift on the low wing is bringing that wing up, beginning an oscillation about the roll axis. This can easily be prevented by allowing the turn to continue a bit following the increase in the angle of attack. Look into the turn, and let the wing follow through with its natural over-steer tendency, perhaps as much as 90 degrees when recovering from a fast turn. This overshoot can be as little as 20 degrees in a slower, carving turn. When you strike the toggles, do it with a short, strong burst-and-hold of 12-18 inches, but do it in an asymmetric manner that continues the current momentum of the turn. This will allow you to smoothly and slowly exit the turn and enter your final landing procedures gracefully. The last idea that seems to make a difference in how quickly you are able to pull up from a low turn is where you are looking: “Look Where You Want To Go”. If you are like most people, you will stare at your impending impact point on the ground, right until landing. By focusing your attention on what you don’t want, you inevitably make it happen. Somehow we are drawn toward whatever is in the center of our focus, so it is a far better plan to look toward where you intend to go, rather than where you are currently going. If you have turned too low, your current destination point is somewhere below you, while your intended flight path is in the general direction of the horizon. Lift your eyes, and make your parachute fly toward where you want to go. Focus is more than the object of attention, it is the shape of things to come. Aborting is a part of life. Humans are not perfect, and sometimes we are incapable of fixing our errors. Targets and entry gates are fun to shoot for, but not at the expense of our bodies. Aim to fly a clean approach every time, and let your gut tell you what to do. If it feels bad, it usually is. Do not let your desire to make the swoop course or the peas keep you from seeing what is right in front of you. Ego distorts our vision, as does passionate desire. The only way to see clearly is to remain calm, breathing slowly and completely throughout the approach, and maintain a positive mood as you set yourself up. If you start to feel scared, it is your cue to breathe more and try less. The perfect approach always feels easy. It flows like water. It is the result of good planning combined with good execution, made possible by positive emotion. Joy is thrust, fear is drag, ego is weight, and knowledge is lift. Maximize lift and thrust, and you will go far. Go Big Live Long BSG Brian Germain is the author or several popular skydiving books including: The Parachute and its Pilot, Transcending Fear, Vertical Journey and Greenlight Your Life. He also has a spot on Skydive Radio called “Safety First with Brian Germain. Brian runs canopy flight courses throughout the world, and does motivational keynote speaking on the topic of transcending fear. His website is: www.BrianGermain.com
-
 This is a lot of info I have learned over the years about interviewing potential tandem customers and AFF students who are either elderly, or have some disability or medical condition. I always try to relate the physical aspects of the skydive to that person and what might the consequences be. In particular, the airplane ride, the opening shock and the landing. All of these events have specific physiological effects on people and each person have different risks and will react differently to these effects. 1. What is your height and weight? Obvious question. Do not exceed the weight limits of the gear. For tandems, weigh yourself with gear and everything on to know what your exit weight is going to be. Most tandem manufacturers have a 500lb (227kg) limit for their gear, so easy math will help you know what YOUR personal maximum tandem student weight is. Do not exceed the TSO for the AFF students rig. If you do and they get hurt, then that is simply defined as ‘gross negligence’ on your part and the waiver will mean virtually nothing in the case of a lawsuit. 2. Do you have any metal in your body? Most people will know a great deal about accidents or surgeries that they have had and can tell you in great detail about it. A spinal fusion with plates/screws or a rod in a femur does not mean that someone cannot jump – but it might raise other questions about the stability of those joints and the consequences of a hard opening or a bad landing. But a rod in the lower spine could break several vertebrae if a hard landing occurs with the student landing on their butt, causing serious and/or more permanent injuries. 3. Do you have any artificial joints? The question needs to be asked of everyone. A hip replacement is a dangerous thing for a 70 year-old or 80 year-old candidate. Opening shock alone could dislocate the joint. Knees as well. What is the range of that knee? Can you raise your legs for landing? 4. Do you have any plumbing (catheters, colostomy bags, etc)? (Yes that’s right – I said COLOSTOMY BAG) While this may be awkward for you to talk about, it probably is not awkward for the student or person that might have one. If someone has one of these or similar devices installed, then it is probably as ‘normal’ to them as walking or breathing. But on a skydive, a catheter or bag can come loose or detach, and at the very least, would be a nasty mess to deal with. A lot of catheters are attached to a bag strapped to their leg. Many can be removed, relocated, drained or emptied prior to a jump. 5. Do you have any other medical apparatus (Pacemaker, insulin pump, etc)? Again, they could have internal or external devices on their body. A pacemaker is often not a big deal. A external defibrillator might be a problem if it became detached during the skydive. Same for an insulin pump or a catheter used to feed medications into their body? Where is it? Will the harness rub against it? Can it be removed, relocated? What are the consequences of something happening to it? 6. Are you taking a medication or something that can be administered by me in an emergency? Something like an asthma inhaler or a diabetic medication. If there is a chance of an asthma attack, then the tandem instructor can take the inhaler with them and administer it if needed. 7. Do you have issues with heart or breathing? Someone with a weak or other heart condition, or congenital breathing problems may not even be able to breath properly at 10,000’ in an airplane. Combine that with the stress of a skydive, and you may end up with a medical emergency. Have they flown recently? What precautions do they take if any? And no, I do not recommend bringing their oxygen system on board the plane. Can they deal with an accelerated heart rate for an extended period of time? We all know that heart rates can rise to some 140+ just prior to and during the exit out of the airplane. Not everyone is able to handle that if they have some condition related to heart or blood pressure. 8. What if my doctor says it’s OK for me to jump? While that may be good information to know, most doctors know little or nothing about skydiving. If you get the chance, talk to their doctor directly and explain the physical things that happen during a skydive. The airplane ride (hot, sweaty, cramped space and altitude issues). The adrenaline rush during exit and freefall (heart rate), the opening shock of the parachute, (several G’s of force and the potential for a very hard opening), the parachute ride (vertigo, motion sickness, tight and uncomfortable harness, reduced circulation) and the landing especially (forward motion instead of vertical, and how we can slide in (or not) and what is expected of the student during that phase and what can happen if it does not go well) 9. What will an injury do to your quality of life? I have learned that this is probably one of the most important questions you can ask. An 80 year old with Osteoporosis may be able to skydive, but if they break an ankle, they may never walk again. Bones may not heal and they could spend the rest of their life in a wheelchair or worse. It is much the same for disabled folks. I always try to get a feel for what would happen to their life if they break something, because it CAN and it DOES happen. 10. Do you have any sort of medical condition that can kill you in a 10-15 minute window? I ask this question as a catch-all. Basically there is a possible 10-15 minute window in the case of a tandem jump, (a high or early activation on a parachute resulting in a long ride down). During that time, the instructor cannot perform CPR, a tracheotomy, or rescue breathing. So if the student has any medical condition that would need to be attended to by emergency means, the tandem instructor is pretty much helpless to intervene during the skydive. If the student has any such condition, then perhaps a skydive is not a good idea. When in doubt, consult a doctor who IS a skydiver. There are plenty of them out there and most can advise you on the effects of a disease, surgery or medication on the process of skydiving. Just because the customer is standing in front of you right now and wants to jump right now, is not a reason to take them up. Offer to do some homework on their condition(s) and arrange for a future date to see if they can jump. I have taken up dozens of elderly, disabled, and paraplegic/quadriplegic students in my life. I have also REFUSED to take up dozens of them. Not everyone is capable of making a skydive. Not everyone should be making a skydive. David TK Hayes USPA D-18764 CSPA D-486 AFF, Tandem, IAD, S&TA;, Coach, PRO
 -
When I started skydiving round parachutes were the only parachutes available. The landing under a round canopy had a high straight down component. Although Para Commanders had a noticeable forward speed under no wind conditions, landing in winds over 10 mph were again straight down. Due to straight down landings most injuries were to the ankles because one tended to sit down on the ankles during a less than perfect timing of the landing techniques required by round parachutes. Use of the Parachute Landing Fall (PLF) greatly reduced the extent and severity of landing injuries. Virtually all successful skydivers were experts at PLFs because not every landing was executed perfectly, no matter how many jumps one had, and sooner or later one had to land a round reserve. In the classroom it required a block of at least two hours to teach landing the parachute because so much of the time was devoted to teaching an actual PLF. The complete PLF technique is not a natural, readily apparent procedure. During the actual jump about half of the students would perform a PLF and the other half wouldn’t no matter how much time and practice was spent on PLFs. The injury rate was quite high. About 1 in 20 first jump students would suffer some type of ankle injury. With the advent of square parachutes, and particularly with the advent of placing students under square parachutes, the landing injuries changed. Each experienced person reading this article will realize that the injuries from landings that we see today are not limited to ankles. This is because the parachute is moving the jumper across the ground in almost all circumstances. However, there are cases were a person would be descending straight down even today. A high or rapid or deep flare by a student would be one example. In this case the PLF position for landing would definitely influence the ability of the student to walk away from their mistake. In my opinion there are instances when use of a PLF for a botched landing is NOT beneficial to the jumper. A downwind landing is such an instance. The PLF introduces a roll and a square parachute introduces a large amount of speed. For the sake of this example, assume the wind is blowing at ten mph. The jumper has made a mistake and is landing downwind. He/she has the presence of mind to have the toggles at his/her ribs (half flight) for an air speed of ten mph and a ground speed of 20 mph. Please bear with me for the easy math. 20 mph = 20 mph X 5280 ft/hr = 105,600 ft/hr 105,600 ft/hr = 105,600 ft/hr divided by 60 minutes/hour = 1,760 ft/min 1,760 ft/min = 1,760 ft/min divided by 60 sec/min = 29.33 ft/second At 20 mph ground speed a person is moving 29.33 ft per second across the ground. At half flight the downward speed (3 to 5 mph) would be somewhere between 4.4 ft/sec and 7.33 ft/sec. I believe that in this example the best outcome for the jumper would be to try to absorb as much of the initial downward velocity as possible with their legs (knees bent and pressed tightly together) and then NOT ATTEMPT A PLF. The danger inherent to a high speed roll/tumble is a direct result of the laws of physics. An example using a cylinder will illustrate the principle. I am 52 inches around the shoulders so let’s talk about a perfectly round cylinder, 52 inches in circumference, moving in the air just above the ground and oriented perpendicular to the line of flight. At touchdown the cylinder is going to pick up a rotational (angular) velocity based upon the speed across the ground (linear velocity) divided by the circumference of the cylinder. Excluding friction, which will slow the cylinder by scraping, the cylinder will initially roll across the ground at 29.33 ft/sec divided by 52” (circumference) per rotation. 52 inches divided by 12 inches per foot = 4.33 feet (circumference) 29.33 ft/sec divided by 4.33 ft / rotation = 6.77 ROTATIONS PER SECOND!!! If this seems quite a lot, it is. However, this is why occupants of a rolling vehicle are thrown so far from the vehicle in a rollover car accident (buckle up?). In the rollover case the rotational speed (angular velocity) of the vehicle rolling is translated to the linear velocity of the thrown body. The thrown objects, including unbuckled occupants, are thrown hundreds of feet. Returning to the skydiver, I am not a perfect cylinder. I am more of an imperfect ellipse (oval) seen from above. This is not to my benefit in a rolling landing as the ground (not perfectly smooth) will have a tendency to turn me into a round object by attempting to break off my protrusions (shoulders, arms, knees, etc.) This is complicated by the fact that the PLF was developed using round parachutes which did not have flare capability. As such the arms in a round canopy PLF were above the head, elbows bent and cushioning the head from the sides. This positioning essentially extends the arms along the long axis of the cylinder. With a square parachute our hands are down at our sides (hopefully) controlling the flare. During the rotation of a PLF, and particularly a rotation of 6.77 rpm, the hands and arms are thus exposed to quite a bit of trauma due to impact with the ground, more than once, as the roll proceeds. What one hopes for is the best case scenario where the jumper is rolling from shoulder to shoulder across the ground. The worst case scenario would be tumbling head to toe across the ground. Unless one is a trained gymnast this would expose the head and neck to several impacts with the ground. A real life roll/tumble would probably fall somewhere between these two extremes. At a rotational speed of 6.77 rpm a PLF would risk head and neck injury. At a rotational speed of 6.77 rpm, even a perfect PLF has great risk to shoulders, arms, hips and legs. There is a solution to this downwind landing possibility. It is easy to train and easily understood by newcomers and experienced skydivers alike. The simplest way to prepare for as many landing scenarios as possible is to assume the PLF position, fly the parachute and slide on one hip in the event of a forward motion, high speed landing. I teach our students to envision holding a dollar bill between their knees and squeezing a quarter between their glutes (“feet and knees, dollar and a quarter”). Actually doing so puts one into the PLF position. When the person discovers a downwind mistake has been made, he/she should assume this PLF position. At touch down the jumper should try to absorb as much as possible of the downward impact with their feet but lean back in the harness. Under no circumstances should the person allow themselves to be thrown head first. The jumper wants to stay on their feet as long as possible, tending to sitting down. As the person sits down he/she wants to transition (during the squat) onto a hip. One does not want to impact directly onto the butt. The spine will tolerate torsion (bending) but very little compression. Sitting down directly onto the butt could cause spinal problems on its own (disks and vertebrae). Absorbing the actual butt touchdown with the hip will allow the spine to flex. Hitting a rock with the tailbone while sliding across the ground could be quite painful as a likely result is a cracked tailbone. Hitting a rock with the hip while sliding across the ground might possibly bruise the hip, an easier recovery than any spinal injury. The jumper should perform a baseball slide into second base ensuring that they remain sliding feet first. The person will get dirty. Done properly, one may see damage to the leg strap cover on the hip, but a dirty/torn jumpsuit and/or a dirty/scraped hip cover will be all that one sees. During a proper landing (into the wind) and under reasonable conditions, if a person is in a PLF position (feet and knees, dollar and a quarter) accompanied by a flare anywhere near half–flight, the parachute will lay the student down in the first half of a PLF. This is all that is necessary with a properly sized square canopy. The “lay down” is a result of the fact that most students are not true into the wind at touchdown and thus the square parachute almost always imparts some degree of forward AND sideward motion to the student. The occurrence of downwind landings is relatively rare. However, bear in mind that most of these are done by a jumper off student status (off radio assistance). This person has received very little if any formal instruction since the first solo landing class. So the technique must be simple to learn, retain and execute months after the initial training. Since I began teaching this concept, decades ago, I have not had a single jumper injury related to downwind landings when my advice was put into practice. My motivation for writing this article comes from the words that I hear when traveling to other drop zones and the words that I read in articles such as “Incident Reports”, “…you should have done a PLF”. This is not always the case, particularly with today’s parachutes. A PLF is no longer a panacea for all conditions. I also want to point out that, in my opinion, the instructor showing a first jump student a PLF accomplishes nothing at all. Having each student perform a PLF on the ground is no better. For a person to learn a PLF requires repetitions by the student, MANY repetitions, from an elevated platform. A person or publication telling anyone that he/she should have done a PLF, which the person has never actually learned, is not accomplishing what the student needed and the knowledge that the publication is trying to disseminate.
-
Although there are many ways to improve one’s accuracy in parachuting, I have found no better way than flying a consistent pattern. By connecting a series of invisible points in the sky, “Altitude-Location-Checkpoints” as I call them, we can create a consistent flight path that makes us more predictable in the air, as well as significantly increasing our chances of landing on target. The typical pattern, made up of three distinct turn points, I will now argue is not quite enough to get to the target with the consistency we are looking for. The standard flight pattern for a ram air parachute involves a downwind leg, a cross wind leg, and an into-the wind leg, also know as the final approach. This pattern is defined by three distinct turn points, “A” (Base to Final), “B” (Downwind to Base), and “C” (pattern entry point). It is true that if we are prepared to modify our approach in light of new information along the way, we can hit the target. But wouldn’t it be nice to get there without needing to modify our flight path, to just sail along and turn when the altitude is right? That is exactly what the inclusion of a fourth turn point does. The trouble with the standard pattern is that there is a good deal of guesswork when it comes to the length of the Base leg. Depending on the glide ratio of the parachute, the location of the turn to Base leg will vary widely. The better the relative glide ratio, the farther the turn to Base needs to be from the target. Our ability to adapt to this changing environment is spotty at best, and often requires substantial correction along the way. This creates traffic conflicts, as well as varying airspeed and decent rate, making life far more difficult for us, and for the canopies behind us. In most cases, the length of the Base Leg needs to be longer than we think. This becomes an even more important issue for swoopers setting themselves up for a high speed approach. If the length of the Base Leg is incorrect, the pilot is forced to either float in the brakes or “S-Turn” prior to the initiation of the dive. This has consequences to the approach, even if they manage to reach the Initiation Point at the correct altitude. If they are flying significantly faster than usual when they arrive at the initiation point, they may lose much less altitude in the turn due to the increased front riser pressure upon initiation. If they are flying significantly slower than usual, they may lose a much greater amount of altitude in the turn, and find themselves hooking into the ground. It is my experience that, aside from the altitude of the Initiation, the selection of the “B” point is the most important aspect of a high speed approach. If we simply add another checkpoint prior to the entry into the Downwind Leg, we can take the guessing out of the process. Assuming that the turn points are equidistant in altitude (300, 600 and 900 feet), we can simply add another unit above the original pattern entry to create a fourth, or “D” point, precisely on the wind-line, upwind of the target. What this does is, it creates a Pre-Base Leg, which shows us exactly how long the Base Leg needs to be. In other words, if the altitude between the points is 300 feet, the “D” point is at 1200 feet. The beauty of the data that this “D” point brings us is, we discover the exact length of the base leg without choosing the precise location of the “B” point prior to exit. This means that we can fly this pattern at a new drop zone, or when we are landing off, and learn where the altitude-location-checkpoints are for that specific landing area. It doesn’t help us with the “depth” of the pattern points, but it puts us in the ballpark, assuming that we have a rough idea of our canopy’s glide ratio. When the winds pick up, this method still works perfectly well. The crab angle on the Pre-Base Leg is equivalent to the angle of crab on the Base Leg. Note that the horizontal distance of the offset from the target on the downwind leg on a windy day is exactly the same as it would be on a no wind day (A to B = Anw to Bnw). This is only true if we do not compensate for the side-slip of our ground track due to the crosswind legs. However, even when we do choose to compensate for diagonal crabbing on the base leg and create a “Holding Crab”, if we create the same crab angle on the Pre-Base Leg, we end up on the perfect final approach despite the complex situation. This is easily accomplished by simply making our goal to fly a box pattern on the ground, flying our Pre-Base and Base Legs perpendicular to the wind-line. Also note that the length of the base leg is longer on the No Wind condition than it is on a windy day on which we perform a Holding Crab on the crosswind legs. This is due to the reduced groundspeed when in a Holding Crab, and the diminished glide ratio that comes as a result of it. If you aren’t pointed where you are going, you will not move there quite as quickly. This method assumes something that many canopy pilots do not have: a trustworthy altimeter. A standard dial-type, analog altimeter is not sufficient to give us the kind of accuracy we are looking for. Even the digital dial-type is not usually graded in such a way that we can distinguish units of one hundred feet or less. These are freefall altimeters. For the precise data required by today’s canopy pilots, we need digital altimeters with digital read-outs. Even better, many of us have found, is the heads-up advantage of an audible altimeter designed for canopy flight such as the Optima and Neptune. If you have an audible alert telling you where you are, it is far easier to keep your eyes looking outside the cockpit and on the action that may require your instantaneous reactions. All that being said, your eyes have ultimate veto power. If things do not look right, your instruments must be ignored. Too many skydivers have hit the ground due to complete faith in their instruments that let them down due to mechanical problems, battery issues or some unconsidered technical malfunction. Assuming that you use this accuracy technique the way it was intended, and you notice what is happening as it is happening, you can take a huge step forward in consistently hitting your target runway. It will take a while to dial-in your approach so that you actually hit the target, but the target is always a secondary goal to hitting the centerline of the runway and turning to final at a reasonable altitude. If you plan your pattern well, using four distinct points along the way, you can change what you are capable of handling as a canopy pilot. Not only will you feel better about yourself, you will increase the likelihood that you will live a long, healthy life. That, of course, is the mark of a great skydiver. In addition to being a highly experienced skydiver with over 14,000 jumps, Brian Germain is the author of several books including The Parachute and Its Pilot, Transcending Fear, Vertical Journey, and Green Light. He is currently designing canopies for Aerodyne Research, and offers canopy flight courses worldwide. For more about Brian’s Books, Seminars and Parachutes, visit his websites: www.BigAirSportz.com and www.TranscendingFear.com