Search the Community
Showing results for tags 'news'.
Found 523 results
-
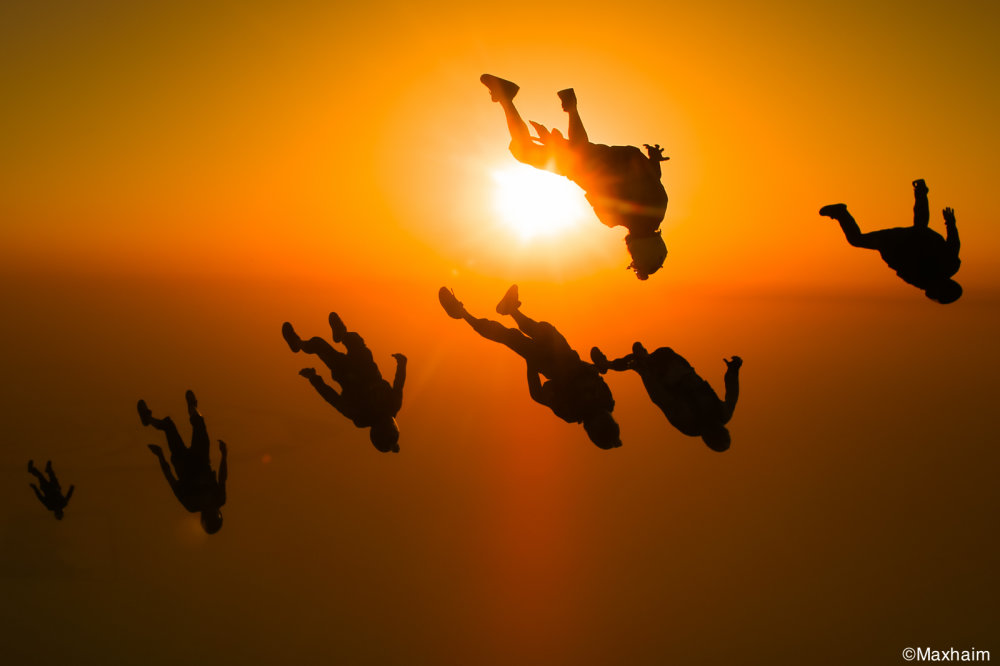
Image by Max HaimThe Midwest Skydivers Reunion, a group of competitive teams from Michigan, Ohio, Indiana, Illinois, and Wisconsin that were actively competing in the '70s and '80s will be held Labor Day Weekend, August 29 - September 1, at Midwest Freefall Skydiving in Ray, Michigan. All net proceeds from the event will be donated to the National Skydiving Museum to support its efforts to build a museum. The event is a unique opportunity for Midwest skydivers of the '70s RW scene (and beyond) to reconnect with teammates, club members, DZOs, pilots, riggers and anyone who shared in that magical time. The reunion was created as an opportunity for old friends to gather for a one-time event to remember those no longer with us, and celebrate and reconnect with those still here. The cost for the weekend is July 16 - August 15. After August 15, registration will be limited to on-site for $65. The cost of jump tickets will be $20 on Friday, August 29th and $26 through the long weekend. There will also be a dinner banquet on Saturday evening ($20 per person) and Sunday BBQ ($15 per person.) Spouses, significant others, family and friends are welcome to attend. The leadership team of the Midwest Skydivers Reunion consists of Kim Barden, Texas Tom Weber, Lloyd Tosser III and Sandy Reid. Details, a schedule of events, and participation inquiry information is available through a link on the National Skydiving Museum website www.skydivingmuseum.org or http://www.midwestfreefall.com/about/events/midwest-skydivers-reunion/. The fundraiser will benefit the National Skydiving Museum's capital program that will raise the necessary funds to build the museum. When completed, the National Skydiving Museum will recognize and promote the sport of skydiving through public education and awareness; recognize the contribution to skydiving by its participants, suppliers and supporters; capture forever the history of the sport through is events, equipment and personalities; and enhance aviation safety as it pertains to skydiving. It is expected the museum will draw visitors from throughout the world to experience the thrill of skydiving through its history of people, equipment, and events. The National Skydiving Museum is a 501(c)(3) not-for-profit corporation governed by a Board of Trustees. Record your history in Ray, MichiganThe National Skydiving Museum wants your stories of the early days of our sport and industry. Video interviews are posted in the eMuseum and will be on display forever. Time is of the essence. We are losing early skydivers at an alarming rate. Help the eMuseum to capture your stories now. Michael Kearns will be continuing his video interviews during the Midwest event. To sign up for a time slot, contact him at [email protected], +1-678-796-8337 or see him at the event. The location will be announced. See the eMuseum at http://skydivingmuseum.org/emuseum/ See examples of completed interviews on Youtube. --Dan Poynter, D-454. Museum Trustee & Curator.
-
Melissa (Nelson) Lowe and Barry Williams are collecting skydiving stories of the past to create a book called, “Around the Bonfire – skydiving stories from the 1950s-1980s.” We know we’ve lost many influential skydivers of the past, so we were inspired to preserve the stories that are still around. All net proceeds from the event will be donated to the National Skydiving Museum to support its efforts to build a museum. Submissions can be about anything skydiving related from the 1950s – 1980s! For example: after hour shenanigans, boogies, your first nationals, aircraft, military or sport jump stories, meeting the man/woman of your dreams on the DZ, visiting a new DZ, your first jump, new training techniques that changed...Submitted stories must include: Your Name (Nickname optional) D-License # (or USPA Membership #) SOS #, Muff Brothers or Freak Brothers # (or anything fraternity from that era) Era/Time Frame of Story Location THE STORY: any length and can submit multiple stories (there will only be grammatical editing) Copy of jump in logbook (optional) Photos with photo credit and permission from photographer (photo submissions are optional, but highly encouraged) Contact information (is required, but will not be published) Please submit your stories or inquiries to [email protected]. Digital copies of logbook entries and photos are preferred, however you can submit hard copies to: Skydive Stories c/o Barry Williams 32959 Perret Blvd. Lake Elsinore, CA 92530 NOTE: Hard copy submissions will not be returned. Submissions duly note that you give Melissa Lowe and Barry Williams permission to use your stories and/or photos to be used for print and publication at their discretion. Deadline for entries is December 31st, 2015, but do not delay, submit your stories today! The fundraiser will benefit the National Skydiving Museum to raise the necessary funds to build the museum. When completed, the National Skydiving Museum will recognize and promote the sport of skydiving through public education and awareness; recognize the contribution to skydiving by its participants, suppliers and supporters; capture forever the history of the sport through is events, equipment and personalities; and enhance aviation safety as it pertains to skydiving. It is expected the museum will draw visitors from throughout the world to experience the thrill of skydiving through its history of people, equipment and events. The National Skydiving Museum is a 501(c)(3) not-for-profit corporation governed by a Board of Trustees. For more information about the National Skydiving Museum, Hall of Fame, visit www.skydivingmuseum.org or contact museum administrator, Nancy Kemble, at 540-604-9745 (direct line) or [email protected]
-
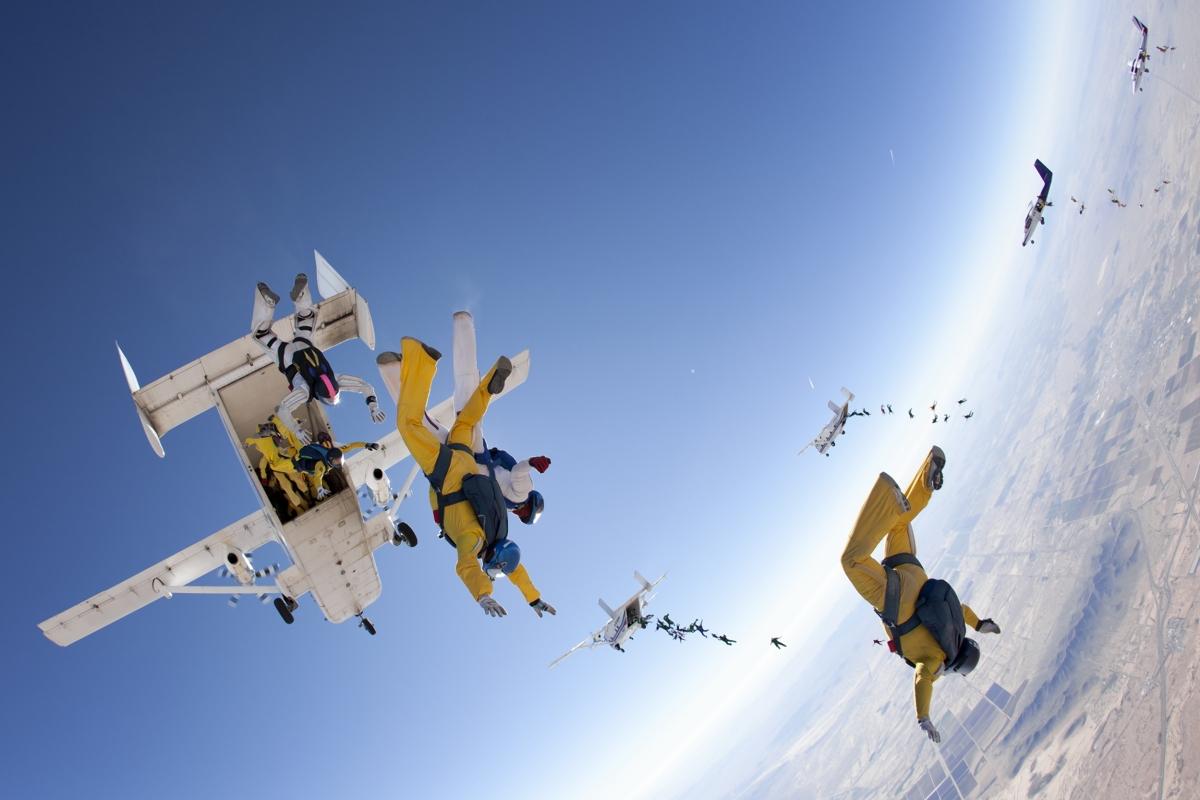
Funneled exits are bound to happen once in a while on recreational RW loads, but they do not have to be the norm. With the leadership of a good load organizer and thorough dirt dives, jumpers with relatively little experience can soon be pulling off stable exits. In recreational RW, the most common type of exit is a Star (or “round” as it often called). In a Star exit, it is easier to control the exit chunk and maintain levels because all jumpers are looking into the center. The number of jumpers in the Star exit depends on factors such as jumper experience and the complexity of the skydive. For recreational loads with mixed experience levels, a 2, 3 or 4-way Star is probably large enough. Any bigger and the chance of a funnel increases. This article focuses on Star exits from left side-door aircraft such as Otters, Cessna Caravans and PAC750s because they are commonly used for formations larger than a 4-way. Also, because many recreational skydivers don’t do a lot of 4-way, terms such as Middle Floater and Rear Floater are used instead of 4-way terminology such as Outside Center and Tail. Deciding Who Will Be In The BaseThe simple solution is to put only experienced jumpers in the base, but that often doesn’t leave enough experienced jumpers further back in the lineup. An alternate solution is to put experienced jumpers outside the plane and lesser-experienced jumpers inside. This mix of experience levels can work quite well if everybody leaves on ‘GO’ and presents to the relative wind. Then, if the exit is less than perfect, the experienced jumpers are in a better position to control the exit chunk. For example, if one of the inside jumpers starts to flip over, it is sometimes possible for one of the outside jumpers to push against his back pack and help him settle back down into his slot. The Importance Of Dirt Diving The ExitThe exit is just as important as remembering the points of the skydive. If the base is not there, no points will be turned anyway. So during the dirt dive, jumpers should pack it up and take grips exactly the way they expect to do it on jump run. This can prevent a lot of fumbling around for grips when they are lining up for real. If a mockup of the aircraft door is available, jumpers should use it. If not, they can make marks on the ground to represent the door. Typically, the organizer is positioned in the middle of the door and facing in so that he can see when everybody is in position before giving the count. Since full face helmets make it very difficult to hear the count, many organizers move their head or leg in time with the count. Some organizers swing their left leg out-in-out to indicate the Ready-Set-Go. (The second swing out represents the ‘Go’). Launching A 2-Way StarThis exit uses a Middle Floater and 1 jumper inside the plane. As mentioned earlier, the most experienced jumper should be outside the plane because he is in a better position to control the inside jumper as the 2-way leaves the plane. Getting Into position1. With both hands holding onto the bar (or the top inside of the door if there is no bar), the Middle Floater rotates his body to the left so that his back pack goes out the middle of the door (so he doesn’t snag anything). His head follows until he is standing outside the plane with his right foot on the edge of the door and his left knee presented to the prop blast. His hands should be approximately shoulder-width apart. 2. As soon as the Middle Floater turns around in the door, the Inside Jumper reaches between the Middle Floater’s arms then right and left for his arm grippers. This leaves both the Middle Floater’s arms free to fly and control the exit. 3. As he takes grips, the Inside Jumper steps forward with his left foot, placing it on the edge of the door and crouching down (not on his knees) while keeping his chest cheated toward the prop blast and his back straight up and down. His right foot should naturally be a foot or two back inside the plane (helps ensure his body is cheated toward the prop blast). The Launch When the Inside Jumper is ready, he looks up at the Middle Floater. The Middle Floater gives the count and launches out, leading with his left knee and presenting his chest and hips to the prop blast. With his free hands he can help control the Inside Jumper if he starts to twist or turn off heading. He can also double grip the Inside Jumper for added stability. The Inside Jumper DOES NOT push but goes with the exit, keeping his head up and rotating his chest and hips toward the prop blast as he helps fly the 2-way on the relative wind. Both jumpers are responsible for keeping the 2-way on heading relative to the aircraft’s line of flight so that other jumpers on the skydive can go directly to their slots for a faster build. The 2-way is also responsible for maintaining a good fall rate. Launching A 3-Way StarThis exit uses 2 floaters (a Rear and a Middle) and 1 jumper inside the plane. Again, the most experienced jumpers should be outside the plane. Getting Into Psition1. The Rear Floater climbs out first (see the photo of the Middle Floater climbing out for the 2-way). 2. On the heels of the Rear Floater, the Middle Floater climbs out the same way, except he rotates his body to the right and stands pretty much in the middle of the door. 3. As the Middle Floater climbs out, the Rear Floater grips the Middle Floater’s right arm gripper with his left hand. 4. Both floaters are now standing outside the door and should be turned slightly toward the front of the aircraft with the inside of their left knees presented to the prop blast. 5. The Inside Jumper gets in position the same way as described for the 2-way Star except he takes a left-hand grip on the Rear Floater’s right arm gripper and a right-hand grip on the Middle Floater’s left arm gripper. (Again, he steps toward the door with his left foot and places it near the edge of the door to ensure he is cheated toward the prop blast.) Launch When the Inside Jumper is ready, he looks up at the Middle Floater. The Middle Floater gives the count and launches out, leading with his left knee and presenting his chest and hips to the prop blast. The Rear Floater should anticipate the count and leave a split second early, hardly noticeable but just enough to place him on the lower end of the 3-way and looking up at it. (In 4-way, the Rear Floater, called the ‘Tail’, is always on the lower end of the formation to help anchor it on the relative wind.) The Inside Jumper DOES NOT push. He simply steps off, keeping his head up and rotating his chest and hips toward the prop blast as he helps fly the 3-way on the relative wind. All jumpers are responsible for keeping the 3-way on heading relative to the aircraft’s line of flight so that other jumpers on the skydive can go directly to their slots for a faster build. The 3-way is also responsible for maintaining a good fall rate. Launching A 4-Way StarThis exit uses 2 floaters (a Rear and a Middle) and 2 jumpers inside the plane. As with the 2 and 3-way Star exits, the most experienced jumpers should be outside the plane. Getting Into Position1. The Rear and Middle floaters climb out the same way as described for the 3-way Star exit. (Note: The Rear Floater should stand a few inches forward of the rear door jamb so that the Inside Rear jumper does not hit his arm on exit.) 2. While the two floaters are climbing out, the 2 inside jumpers (let’s call them Inside Rear and Inside Front to indicate their relative positions in the door) should step forward with their left foot and place it on the edge of the door, keeping their back pack backs straight up and down and their chests cheated toward the prop blast. They should crouch but not be on their knees. Their right foot should naturally be a foot or two back inside the plane. 3. The Inside Rear jumper takes a left-hand grip on the Rear Floater’s right arm gripper and a right-hand grip on the Inside Front jumper’s left arm gripper. 4. The Inside Front jumper takes a right-hand grip on the Middle Floater’s left arm gripper and can either leave his left hand free or reach back and double grip the Inside Rear jumper’s right arm. The Launch When the inside jumpers are ready, they look up at the Middle Floater. The Middle Floater gives the count and launches out, leading with his left knee and presenting his chest and hips to the prop blast. The Rear Floater should anticipate the count and leave a split second early (the same way as described for the 3-way exit). The inside jumpers DO NOT push. They basically step off and go with the Middle Floater, keeping their heads up and rotating their chests and hips toward the prop blast. The Inside Front jumper should also think about launching toward the front of the plane, and the Rear Inside jumper should think about helping to place the Inside Front jumper up and forward. No grip switching is necessary. If the 4-way is the base for a big-way, jumpers can take double grips for added stability. All jumpers are responsible for keeping the 4-way on heading relative to the aircraft’s line of flight so that other jumpers on the skydive can go directly to their slots for a faster build. The 4-way is also responsible for maintaining a good fall rate. Safety Tips Before boarding the plane and before jump run, jumpers should give each other pin checks. During the lineup and the exit, jumpers should always protect their handles. Before planning to launch larger exit chunks, jumpers should know how many jumpers are allowed in the door and at the back of the aircraft (so that the aircraft’s stall point is not jeopardized). If they don’t know, they should ask the pilot!As with other types of exits, methods for launching a Star can vary from one organizer to the next, from one 4-way team to the next, or even from one DZ to the next. The methods described in this article are ones that have worked successfully for this author on both 4-way and recreational loads. But no matter what method is used, success is much more likely if jumpers present as much as possible to the relative wind when lining up in the door and continue this through the launch. Finally, bigger is not always better. Most skydivers would rather swoop on a solid 2-way than chase a funneled 6 or 8-way base. A solid base allows everybody on the load to turn more points and get the most bang for their buck.
-
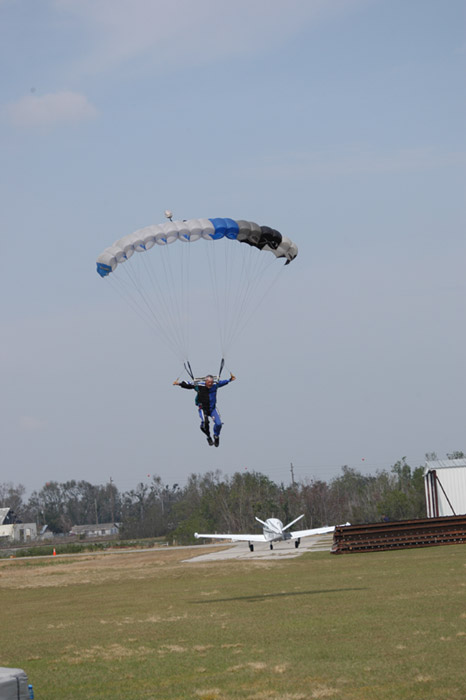
So you whipped through your student program, graduated AFF, moving towards or already got your A license, eyeing a rig to buy and well on your way to your first 100 jumps. Canopy or parachuting skills are an integral part of every training program, but are also the most important skills these days. There are five quality canopy skills every student should know: awareness of your rig and canopy, awareness of your self and others in the pattern, awareness of target and setup, good depth perception, and a proper two stage flare. A Few Parachuting Tips That Are Very Important 1. Awareness Of Your Rig And CanopyDeveloping awareness of your rig comes with time. Unfortunately, when you're a student, time is not a comfort you always have. You need to be comfortable and confident with your rig on every jump. If it is a new rig you're jumping, wear it around the house, while your cooking dinner, sitting on the couch or doing chores so that you can get used to it. If you rent rigs, get suited up extra early like on the twenty minute call, so you can go through all your emergency procedures. This comfort and confidence is paramount when you are up in the air. If you are not confident in your parachuting equipment, you will have "gear fear" and this can affect your judgment. If you have a new rig and there are things you don't like about the rig, change them. You would be surprized the little things a rigger can do to make a rig fit better. I recommend buying a custom rig when you have reached a size you will be on for a while 190-170 sq feet on average. Even with a new rig, small alterations can be made. The easiest fixes that I see students can do is a bungee cord to connect your leg straps, padded reserve handle, shortening the closing loop, and modifying the laterals to make the rig fit tighter. All these modifications are freefly specific but a tighter rig is a safer rig. Know your canopy when parachuting. Know each stage of deployment and the equipment on your canopy which is responsible for each stage. Learn how to pack! Packing your parachute is an intimate way to get to know your equipment. If you can pack your rig well, you will more likely have a greater understanding of your equipment and confidence with it. Packing comes with experience. Pack at home over and over again, watch people pack, and ask lots of questions. If a packing course is offered, take it. I know when I was starting out, I wasn't that interested in my canopy. It was a docile vehicle to get me from 3,000 feet to the ground, which I had to pack every time to go up. I definitely feel different about my canopy now. When you are under canopy and not in the pattern above 1000 feet, play with your canopy, practice your landings over and over again. Experiment with front risers, rear risers and toggles. Two intricate tips with your equipment can improve the performance of your canopy immensely. The first is simple, stow your slider and bring it down behind your head. Keep weary of where you are located relative to the drop zone, and other jumpers. Don't mess with the slider as you might end up in another county. Stowing your slider helps reduce drag and can increase your glide. It also gets rid of that annoying flapping noise. The second tip is for a student who can land on his target consistently. After your slider is stowed elongate your chest strap all the way out, without undoing it. Practice on the ground. You want your chest strap to be as wide as possible for three reasons: the canopy is designed to fly like this as it increases the glide of your canopy, second it gives you another control surface to fly, that being your hips, and lastly it allows you to lean forward in your harness which gives you more control. All three of these points can be seen on a good canopy pilot and a moderate student can start practicing these skills early on in his career, even though it will play a bigger part later. When your chest strap is elongated your hips are now hooked directly to your canopy instead of your shoulders through the harness. It will be hard to turn the canopy with your hips at first especially with large canopies, but it can be done. Simply scissor your legs and throw the leading leg over the trailing leg and lean in to it. Then try it the other way. This will become more important when you get to sizes like 150 sq feet and below. A word of caution, don't spend too much time elongating your chest strap under the canopy while you are parachuting, you definitely will end up in a different county. Opening shock makes it more difficult to elongate the chest strap then on the ground. The buckles cinch up with opening shock to make sure you don't fall out. Do not undo your chest strap! If you elongate the chest strap properly you will not fall out of the harness. The canopy will feel slightly wilier but nothing dangerous. Stow your slider and elongate your chest strap before you unstow the brakes. This will make it infinitely easier. If you unstowed your brakes already, let the alterations go and remember to do these things on the next jump. You must have a certified instructor watch over you when you practice on the ground and in the air. Make sure these alterations are done before 1000-1500 ft. Be careful, use common sense. 2. Awareness Of Your Self And Others While ParachutingI have briefly touched on this subject already, but since canopy collisions and landing off are a reality, awareness of yourself and others is a Quality Skill unto it self. Always know where you are relative to the drop zone. Are you up wind or downwind? Can't tell, figure it out! Watch the wind on the trees, or a nearby lake. Watch other skydivers, are they landing in the same direction your facing, or the opposite. I tell my students to watch the drop zone in the plane and where you are relative to it and the wind. This serves multiple purposes: you gain an awareness of where the pilot is in his jump run and his tendencies, you have a better understanding of the area you are jumping and potential outs and hazards, and on jump run you will be able to anticipate where you will be if you look out the window while other people are getting out. Look out for other people under canopy, especially during and right after opening. Check your canopy then look for others immediately. Look up and down the jump run for the people who got out before you and right after you. Get a visual then go through your checklists of things to do. If you are playing with your canopy up high always look before you turn or yank on a control surface. Find the pattern; be mindful of people out side the pattern. Do not spiral in the pattern. The best way to have clear space around you is to go last and deploy high. One easy thing that you can do especially when you are traveling to a different drop zone is find how they operate their pattern. You would be surprised how many experienced jumpers do not ask about or forget the pattern. I think this is the biggest problem at destination DZs where people are visiting. Follow the rules laid out; the rules are there for you as skydiver's safety and the safety of others. 3. Awareness Of Your Target And SetupYou should be aware of where your landing target is in freefall. I have left countless jumps early because the spot was off, people took to long in the door and spread the spot to thin, or the wind was stronger when we exited then when we took off. The point is, develop an awareness of where your target is in freefall by doing solos. Don't be afraid to deploy a little early if you see you are entirely too long to get back. After you are open and you have made sure the canopy is safe, you have made your control checks and alterations, size up the distance and altitude you have from your target. Execute the pattern your instructor and you have gone over. Try to stay up wind of your target before you start to execute your pattern. Go over in your head, how you are going to execute, see the legs of your pattern, check for others, and then go! Hitting your target is not done in the last 150 feet, that is how people get hurt. Hitting your target comes from proper briefing of the landing area before the jump, your spot, and how you set up for your pattern at 1000 feet. Good target acquisition comes from practice but also preparation. 4. Good Depth PerceptionDepth perception is a key element of being a good canopy pilot. It is a learned skill but can be greatly improved through various techniques. If you wear glasses please tell your instructor. Do not be ashamed of your sight. Your sight will put you at a great disadvantage if you do not use your glasses or contacts while parachuting. With proper use of glasses and contacts you can enjoy the sport with no problems. If your goggles don't fit your glasses buy ones that do. If you do not like glasses and your contacts dry up, change your goggles to a snugger fit, or possibly look into laser surgery. I know many people in the sport who swear by laser surgery. The bottom line is that when you skydive, use what you use to drive your car. Skydiving is as critical as getting behind the wheel with your eye sight. If your sight isn't a problem or you use one of the corrective measures above, you can dramatically increase your depth perception of the drop zone and the ground. Look at the drop zone while you are in the plane and gage it with your altimeter so you get an idea of how high you are. Get a highly visible altimeter and don't forget it on the ground! When you get within the last 150 feet do a quick check for people around you, then lock in on your target. When you get 50 feet from your target, shift your eye sight from looking down to looking in front of you. Open your vision so you still include the ground but try to look forward. Begin your two stage flare at about 10-15 feet depending on the winds. Keep your vision open and wide; do not fixate on the target. Consult your instructor. 5. A Proper Two Stage FlareI know some drop zones do not condone a two stage flare. Do not buck the trend on this one. If your drop zone doesn't allow it, come to me I will teach you. Ask your instructor about the two stage flare. I know from my experience some students have a tough enough time doing a symmetrical flare at the proper altitude. So maybe the two stage flare is not right for you, right now. I do believe it is an important part of being a good canopy pilot, and mixed with all the alterations mentioned above can give you your first swoops coming straight in with no riser input. In fact I have seen students who collapse and stow their slider, elongate their chest strap, and use a proper two stage flare swoop 50-60 feet with no wind. The two stage flare is quite simple.10-15 feet above the ground quarter flare your canopy. This action planes out your canopy and translates your vertical motion forward. Make sure that the flare is quartered not a half flare. There is a dramatic difference. A quarter flare will plane the canopy out and accelerate you forward; a half flare will distort your canopy and make you sink. When you are five feet above the ground, full flare to come to a complete stop. I see many people just leave the canopy in a quarter or half flare. This action makes you hit the ground moving forward and a little hard, you might have to run it out. Make sure you have a consistent symmetrical flare on target before you practice a two stage flare. The two stage flare is difficult without video to show you what you are doing. So, get coaching with video, people just telling you what to do will not get it done. You must have feedback and video is the best for this. Also if your instructor uses radio this is a plus, but not essential. I have commented on many things in this article. Do not try to do them all at once. Concentrate on one thing per jump. Focus on one thing for 20 jumps if you get flustered easily, till you get it right and it becomes habit. If you incorporate all these things with the over site of a quality coach, you can swoop coming straight in with no riser input on target safely negotiating others and the physical hazards around you. Be very careful under canopy while you are parachuting. Nothing replaces common sense, good judgment and asking lots of questions. You too can be an excellent canopy pilot with these five quality skills. Steven Blincoe has 4,000 jumps and 300 Skyventure hours in the wind tunnel. He is the founder of the New School Flight University in Orlando, Florida. He also has 10 years of experience in the sport coaching, competing, and filming. Steven Blincoe can be reached by phone 530-412-2078 USA, or by email [email protected]. You can also go to www.blincoe.org.
- 1
-
- canopy control
- safety
-
See more
Tagged with:
-
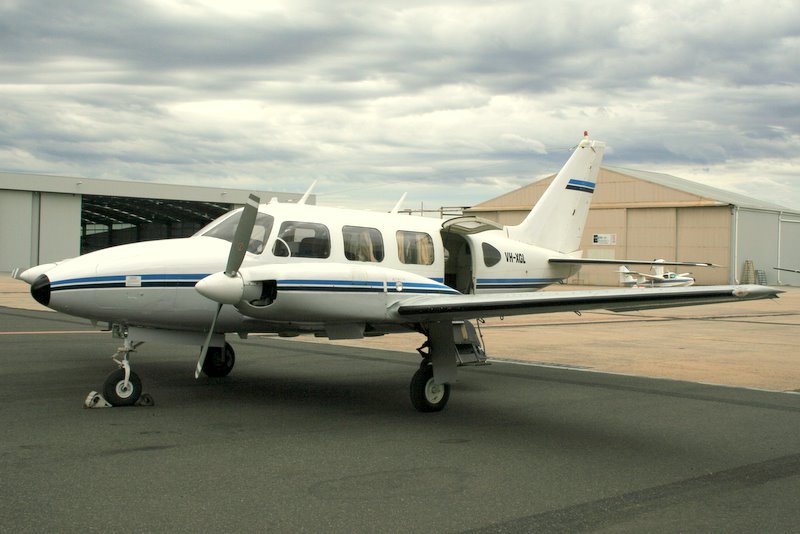
A plane crash near Topolów, Poland this weekend killed eleven people and left one seriously injured. Shortly after departure from Skydive Rudniki, given the statements of witnesses on the ground- it would appear that the plane began experiencing problems, with reports of strange noises coming from the engines. The twin engine Piper Navajo aircraft was carrying 11 skydivers and the pilot when it crashed. There were conflicting reports with regards to the final moments before the crash, with some saying the plane caught fire on impact, while other witnesses were quoted saying that the plane caught fire moments before impact, when it was seen flying close to the houses. Another quote from a witness suggested that some of the skydivers may have tried to exit the aircraft prior to impact. At the time of publication, there was no official cause of the accident. Though some news reports indicated that the plane was over capacity.
-
Tuskegee, AL – On a vehicle patrol in the Korengal Valley, Afghanistan, on December 27th, 2007, SPC Jesse Murphree was ambushed in an IED attack. He was part of the 173rd Airborne Brigade Combat Team stationed out of Vicenza, Italy; made famous by the movies “Restrepo” and “Korengal” by Sebastian Junger. The IED attack resulted in 60 surgeries and counting, 6 ‘deaths’ on the operating table, and the amputation of both legs above the knee; among other injuries. Jesse has had a long and ongoing recovery. Every day is progress in his recovery. Now, what better way to help an American Hero feel free, and serve as hope to others who still want to live their life to the fullest? For Jesse, it is SKYDIVING! As a paratrooper who has made several static line jumps with the army, Jesse wants to return to the sky and in a big way. Showing nothing can hold him back and hoping to inspire others to achieve their goals. The plan is simple: Operation Enduring Warrior – Skydive is teaming up with AXIS Flight School and Skydive Arizona to get him the proper special training that he needs. The problem is paying for the costs of his traveling and gear. Jesse needs specialized gear. He also lives in Tampa, Fl. To help with the costs associated with getting Jesse to become a licensed skydiver, there will be a fundraising event at Skydive Tuskegee in Tuskegee, AL on July 12th and 13th. Everyone from the most experienced skydiver to a first time tandem jumper to someone wanting to keep their feet on the ground is welcome to the event. The activities will include Angle and Free Flying with Andrew Pye, Swoop ‘N Chug, Accuracy, Tattoo Raffle, Gear Raffles, Games, Door Prizes, Motorcycle Stunts, Saturday Night Dinner with a Smoked Whole Hog and Bonfire, and much more. Like and share our Facebook Page for more information. Our Facebook page is located at: www.facebook.com/JumpingWithJesse To donate to Jumping With Jesse go to: fundly.com/jumping-with-jesse For any more information or sponsorship opportunity, please contact: Tyler Nelson, Jumping With Jesse Creator Cell: (762) 241-8544 [email protected]
-
When I started skydiving round parachutes were the only parachutes available. The landing under a round canopy had a high straight down component. Although Para Commanders had a noticeable forward speed under no wind conditions, landing in winds over 10 mph were again straight down. Due to straight down landings most injuries were to the ankles because one tended to sit down on the ankles during a less than perfect timing of the landing techniques required by round parachutes. Use of the Parachute Landing Fall (PLF) greatly reduced the extent and severity of landing injuries. Virtually all successful skydivers were experts at PLFs because not every landing was executed perfectly, no matter how many jumps one had, and sooner or later one had to land a round reserve. In the classroom it required a block of at least two hours to teach landing the parachute because so much of the time was devoted to teaching an actual PLF. The complete PLF technique is not a natural, readily apparent procedure. During the actual jump about half of the students would perform a PLF and the other half wouldn’t no matter how much time and practice was spent on PLFs. The injury rate was quite high. About 1 in 20 first jump students would suffer some type of ankle injury. With the advent of square parachutes, and particularly with the advent of placing students under square parachutes, the landing injuries changed. Each experienced person reading this article will realize that the injuries from landings that we see today are not limited to ankles. This is because the parachute is moving the jumper across the ground in almost all circumstances. However, there are cases were a person would be descending straight down even today. A high or rapid or deep flare by a student would be one example. In this case the PLF position for landing would definitely influence the ability of the student to walk away from their mistake. In my opinion there are instances when use of a PLF for a botched landing is NOT beneficial to the jumper. A downwind landing is such an instance. The PLF introduces a roll and a square parachute introduces a large amount of speed. For the sake of this example, assume the wind is blowing at ten mph. The jumper has made a mistake and is landing downwind. He/she has the presence of mind to have the toggles at his/her ribs (half flight) for an air speed of ten mph and a ground speed of 20 mph. Please bear with me for the easy math. 20 mph = 20 mph X 5280 ft/hr = 105,600 ft/hr 105,600 ft/hr = 105,600 ft/hr divided by 60 minutes/hour = 1,760 ft/min 1,760 ft/min = 1,760 ft/min divided by 60 sec/min = 29.33 ft/second At 20 mph ground speed a person is moving 29.33 ft per second across the ground. At half flight the downward speed (3 to 5 mph) would be somewhere between 4.4 ft/sec and 7.33 ft/sec. I believe that in this example the best outcome for the jumper would be to try to absorb as much of the initial downward velocity as possible with their legs (knees bent and pressed tightly together) and then NOT ATTEMPT A PLF. The danger inherent to a high speed roll/tumble is a direct result of the laws of physics. An example using a cylinder will illustrate the principle. I am 52 inches around the shoulders so let’s talk about a perfectly round cylinder, 52 inches in circumference, moving in the air just above the ground and oriented perpendicular to the line of flight. At touchdown the cylinder is going to pick up a rotational (angular) velocity based upon the speed across the ground (linear velocity) divided by the circumference of the cylinder. Excluding friction, which will slow the cylinder by scraping, the cylinder will initially roll across the ground at 29.33 ft/sec divided by 52” (circumference) per rotation. 52 inches divided by 12 inches per foot = 4.33 feet (circumference) 29.33 ft/sec divided by 4.33 ft / rotation = 6.77 ROTATIONS PER SECOND!!! If this seems quite a lot, it is. However, this is why occupants of a rolling vehicle are thrown so far from the vehicle in a rollover car accident (buckle up?). In the rollover case the rotational speed (angular velocity) of the vehicle rolling is translated to the linear velocity of the thrown body. The thrown objects, including unbuckled occupants, are thrown hundreds of feet. Returning to the skydiver, I am not a perfect cylinder. I am more of an imperfect ellipse (oval) seen from above. This is not to my benefit in a rolling landing as the ground (not perfectly smooth) will have a tendency to turn me into a round object by attempting to break off my protrusions (shoulders, arms, knees, etc.) This is complicated by the fact that the PLF was developed using round parachutes which did not have flare capability. As such the arms in a round canopy PLF were above the head, elbows bent and cushioning the head from the sides. This positioning essentially extends the arms along the long axis of the cylinder. With a square parachute our hands are down at our sides (hopefully) controlling the flare. During the rotation of a PLF, and particularly a rotation of 6.77 rpm, the hands and arms are thus exposed to quite a bit of trauma due to impact with the ground, more than once, as the roll proceeds. What one hopes for is the best case scenario where the jumper is rolling from shoulder to shoulder across the ground. The worst case scenario would be tumbling head to toe across the ground. Unless one is a trained gymnast this would expose the head and neck to several impacts with the ground. A real life roll/tumble would probably fall somewhere between these two extremes. At a rotational speed of 6.77 rpm a PLF would risk head and neck injury. At a rotational speed of 6.77 rpm, even a perfect PLF has great risk to shoulders, arms, hips and legs. There is a solution to this downwind landing possibility. It is easy to train and easily understood by newcomers and experienced skydivers alike. The simplest way to prepare for as many landing scenarios as possible is to assume the PLF position, fly the parachute and slide on one hip in the event of a forward motion, high speed landing. I teach our students to envision holding a dollar bill between their knees and squeezing a quarter between their glutes (“feet and knees, dollar and a quarter”). Actually doing so puts one into the PLF position. When the person discovers a downwind mistake has been made, he/she should assume this PLF position. At touch down the jumper should try to absorb as much as possible of the downward impact with their feet but lean back in the harness. Under no circumstances should the person allow themselves to be thrown head first. The jumper wants to stay on their feet as long as possible, tending to sitting down. As the person sits down he/she wants to transition (during the squat) onto a hip. One does not want to impact directly onto the butt. The spine will tolerate torsion (bending) but very little compression. Sitting down directly onto the butt could cause spinal problems on its own (disks and vertebrae). Absorbing the actual butt touchdown with the hip will allow the spine to flex. Hitting a rock with the tailbone while sliding across the ground could be quite painful as a likely result is a cracked tailbone. Hitting a rock with the hip while sliding across the ground might possibly bruise the hip, an easier recovery than any spinal injury. The jumper should perform a baseball slide into second base ensuring that they remain sliding feet first. The person will get dirty. Done properly, one may see damage to the leg strap cover on the hip, but a dirty/torn jumpsuit and/or a dirty/scraped hip cover will be all that one sees. During a proper landing (into the wind) and under reasonable conditions, if a person is in a PLF position (feet and knees, dollar and a quarter) accompanied by a flare anywhere near half–flight, the parachute will lay the student down in the first half of a PLF. This is all that is necessary with a properly sized square canopy. The “lay down” is a result of the fact that most students are not true into the wind at touchdown and thus the square parachute almost always imparts some degree of forward AND sideward motion to the student. The occurrence of downwind landings is relatively rare. However, bear in mind that most of these are done by a jumper off student status (off radio assistance). This person has received very little if any formal instruction since the first solo landing class. So the technique must be simple to learn, retain and execute months after the initial training. Since I began teaching this concept, decades ago, I have not had a single jumper injury related to downwind landings when my advice was put into practice. My motivation for writing this article comes from the words that I hear when traveling to other drop zones and the words that I read in articles such as “Incident Reports”, “…you should have done a PLF”. This is not always the case, particularly with today’s parachutes. A PLF is no longer a panacea for all conditions. I also want to point out that, in my opinion, the instructor showing a first jump student a PLF accomplishes nothing at all. Having each student perform a PLF on the ground is no better. For a person to learn a PLF requires repetitions by the student, MANY repetitions, from an elevated platform. A person or publication telling anyone that he/she should have done a PLF, which the person has never actually learned, is not accomplishing what the student needed and the knowledge that the publication is trying to disseminate.
- 1 comment
- 2
-
- canopy control
- safety
-
See more
Tagged with:
-
The culture of skydiving attracts an eclectic group of people and for me, some of those people stand out by character, resume and history. I recently met a couple that fascinated me because of their longevity and passion for the sport. They are Gerry and Debbie Harper and they are the DZO’s of Canada’s, Skydive Vancouver. Gerry and Debbie are still very active skydivers and involved in running their drop zone. Their enthusiasm after all of these years of skydiving was inspiring as many people get burned out, stop jumping because of relationships or just lose their zest for the sport and the people. And not only do they have the enthusiasm, they have grand goals of keeping their drop zone open in Canada even though there are many challenges to face. So I sat down and asked them some questions: First Jump Gerry: Christchurch, New Zealand on May 20th, 1967 Debbie: Lynden, Washington on June 17th, 1974 Total Jumps Gerry: 16,000+ Debbie: 5,600+ What inspired you to make your first skydive? Gerry: Doesn’t every kid want to skydive?! Debbie: It was something that had always intrigued me while I was growing up. In my travels I met a fellow who just started and was so excited, he told me where I could go. What keeps you motivated to stay in skydiving? Gerry: It’s simple. I still love it! One of our instructor’s once said, ‘As long as we keep jumping, we’ll stay young.’ Debbie: I think this is such an exciting time in our sport. I look at what the freefliers are doing and I am in awe! It’s challenging and inspiring. AND, I get to play in the sky with my husband and son everyday. How did you two meet? Debbie: I met Gerald [Gerry] when I went to make my first jump and he was my instructor. The rest is the age-old story! We lived together for several years then married in 1983. What has been your proudest moment in skydiving? Gerry: Representing my country (Canada and New Zealand) at World Meets! We won the Canadian Nationals in 1971 for Style and Accuracy, and I represented New Zealand in 1970, 1972 and 1974. Debbie: My proudest moment is when my dad came out to the DZ for the first time to watch me skydive. He came out only after I had a couple hundred jumps. By then, he knew he wasn’t going to talk me out of it. I was so proud when he watched me! (I landed in the ditch!) He offered to buy me a new jumpsuit. I guess he didn’t like the one I had, or thought it might improve my accuracy! Biggest accomplishment in the sport? Gerry: Winning Gold in the Canadian Nationals! Debbie: Getting the 30 way Color Concepts (organized by Roger Ponce) over downtown Vancouver in 1995. Who was your skydiving mentor? Gerald was mentored by Jimmy Lowe. We both thought very highly of Jim and considered him a friend. When did you open the DZ? We took over Abbotsford in 1977 in western Canada and is called, Skydive Vancouver. What inspired you to take on the challenge of opening a skydiving center? Abbotsford has been a drop zone since the 1950’s. Gerald and his friend, Rod Bishop, Canadian Team Member, were training students in the late 1970’s and grew into taking it over. What’s a cool fact about Skydive Vancouver? The first US/Canadian Nationals were held here in 1961 or 1962. In the past, skydivers always leased property to use for jumping, when this property came up for sale, the jumpers organized to buy the land before a blueberry farmer did. What is your season? And what do you do in the off-season? We consider our season to be March through October, although we often jump in February and December. Having slow time in the winter allows us to work the airplanes and getting gear ready for the next season. In the off-season, we like to take some time off- like going to the Puerto Escondido Boogie over New Years. Nothing hard core, just fun. You had stated that skydiving is fun, but what about being a DZO? It has its moments. We may write a book....if we ever had time! What was it like when your son, Jess first started jumping? Gerry: I never questioned it. He has always been capable. Debbie: Jess was determined to skydive from an early age. We ignored his requests because he was so young. However, he started asking questions to other Instructors. When they told us what was happening we knew we couldn't ignore him much longer. He did a Tandem at 8, Static Line at 16, then AFF. I knew it was inevitable that he would be a skydiver, but I never wanted him to run a DZ and I pushed him to get an education. He got a diploma in Mechanical Engineering, but he has been working at the DZ since he finished school. There was probably never any way of stopping him. Now he is my boss! Advice to new jumpers? Gerry: Don't be afraid to ask questions. Debbie: Slow is fast. Advice to not-so-new jumpers? Gerry: Complacency kills. Stay vigilant. Debbie: Remember why you got into this sport: because it is fun! Future goals? Gerry: We have seen a lot of DZs close for various reasons. We have to operate commercially in Canada, which has overburdened many small operators financially and created a paperwork load that many find overwhelming. Some have lost location due to building etc. We want to keep skydiving alive, available, safe and fun in the Lower Mainland. Debbie: To make more fun jumps and learn from the kids. Anything else you'd like to add? Gerry: I am happy to be jumping my Stiletto 120 and square reserve and not my 28' C9 and my unmodified 24' twill reserve! Debbie: I feel so very fortunate to have met and so many wonderful people in this sport. People I meet when I travel to other DZs and skydivers that come to our DZ; people that have become lifelong friends and people I met just yesterday. Customers who make 1 jump and skydivers I have learned from, some more experienced and some less experienced than me. Everyone adds a piece to the puzzle.
-
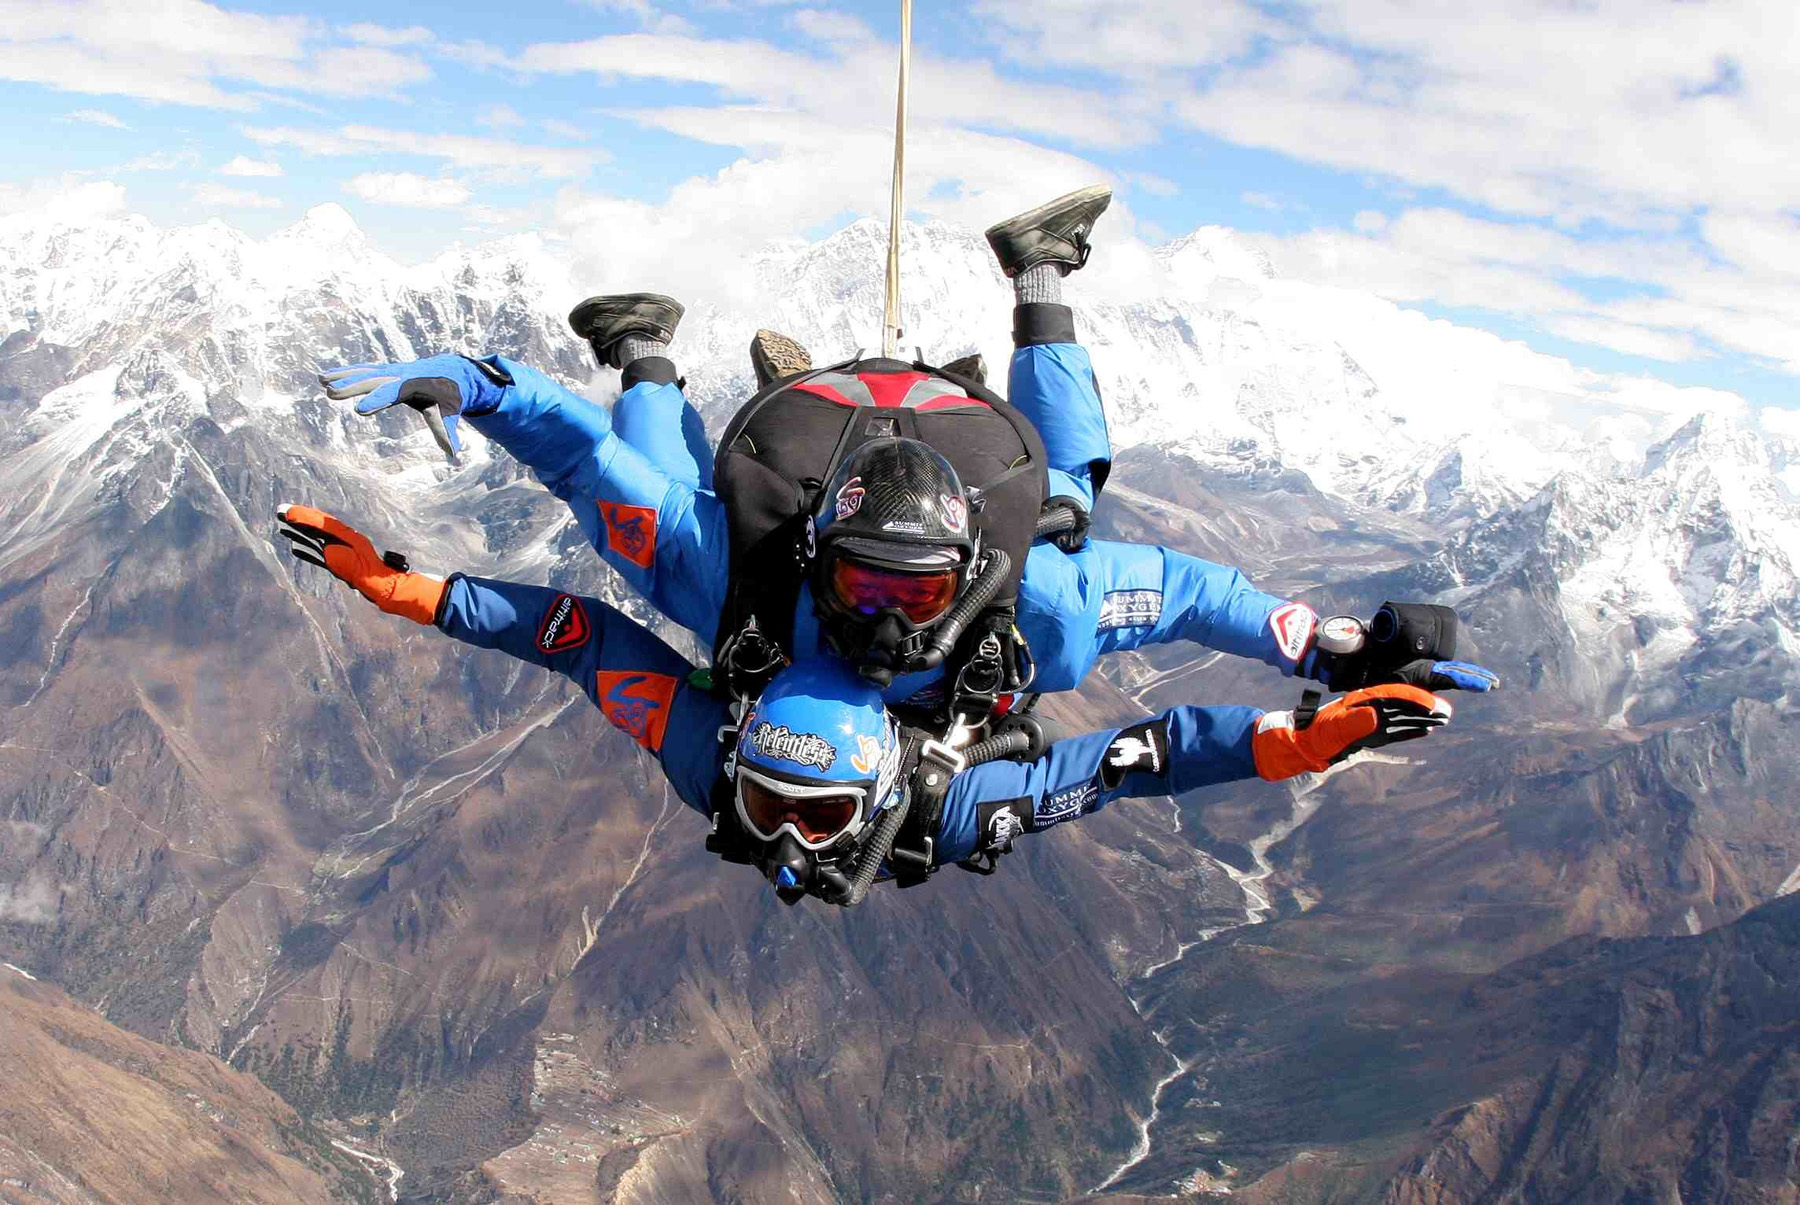
A Himalayan Adventure That Continues To Reinvent Itself In late October 2014, Everest Skydive is set to enter into it’s seventh year of operation and make it’s eight expedition into the Nepali Himalaya bringing skydiving back to one of the earth’s most remote locations. In between the traditional scenery of climbers, trekkers, sherpas and porters, skydivers and their parachutes will once again be seen flying through the skies of the Khumbu region and Sagarmatha National Park. Arriving at this point, entering a seventh year after the first skydives were made in 2008, has been a path as challenging as any of the paths that lead to Everest Base Camp. Each year, as logistical challenges emerge and operational needs change, the expedition faces a year long challenge to bring skydiving back to Nepal. “Eleven months of hard work for one month in the Himalaya working even harder” has been the mantra of the team and expedition, composed of an international mix of skydivers and mountaineers. Over the years Everest Skydive has seen many changes. Whether it was aircraft support shifting from the Pilatus PC-6 to the AStar B3, or helping promote charities like Global Angels, to opening up new remote dropzones, the Everest Skydive expedition has constantly evolved to meet the needs of the local Nepali tourism industry and to bring high altitude skydiving and canopy flight to higher and higher dropzones. Seven years ago, the idea of safely landing sport and tandem parachutes at 12,350ft MSL was considered by many to be an impossible task. Yet, as each expedition successfully ventured further and further into the Himalaya, landing parachutes closer and closer to Everest Base Camp, this team of international skydivers proved beyond a shadow of a doubt that with today’s modern parachute designs providing cutting edge technology and performance envelopes, that high altitude parachute landings were not just the realm of stuntmen and world record seekers. As each year came and went, stand up landings at dropzones at 15,000ft MSL in Ama Dablam Base Camp, or 16,900ft MSL into the Gorak Shep lake bed, or even 17,192ft MSL onto the Kala Pattar Plateau proved that modern canopy flight and landing was sustainable at these altitudes. As each expedition would come to a close however, the team would search the Nepali landscape for new and exotic locations to bring skydiving into. After establishing those four dropzones in the Eastern Himalaya, the team’s founder Suman Pandey suggested the team head west to Pokhara, a lakeside Nepali tourist location beneath the Anna Purna Range of the western Himalaya. With a DZ elevation of 3,300ft MSL, Pokhara Skydive allowed for the Everest Skydive Himalaya experience without the added cost and complexity of the bail out oxygen systems that the higher eastern Nepali Himalaya region required. Pokhara Skydive then evolved into Everest Skydive’s first “consumer friendly” (not incredibly expensive) skydiving expedition for local tourism based sport and tandem skydiving. Not to be content with just bringing skydiving to the western Himalaya however, the team “borrowed” an AStar in 2013 and went scouting for another remote high altitude location. They found it in a village called Manang, located in a valley with an elevation of 11,500ft MSL, and with the help of the local government, were able to create a sustainable high altitude dropzone in Manang, Nepal as well. With all the exhausting effort put into creating successful skydiving expeditions into the Himalaya each year, the staff was known to periodically take a week off together after Everest Skydive and trek on foot up to Everest Base Camp to connect with the local friends and families that they had become a part of over the years. This expedition to Everest Base Camp received so many questions from friends and family back home over the years however, that the team began to open up the trek and invite others to join in on this life changing experience of making it all the way up to Everest Base Camp. What started out as a handful of friends, turned into a group of twenty people hitting the trails in two stages in 2013 and the 2014 expedition looks to bring between 20 and 30 skydivers and friends of skydivers on a trek to Everest Base Camp with skydiving in the western (and way more affordable) Himalaya region of Pokhara after the trip to Everest Base Camp. One of the strengths of the Everest Skydive expedition and it’s Everest Base Camp and Pokhara Skydive evolution is in the company that the team works with. Fishtail Helicopters has been providing Everest Skydive and their guests with the world’s most reliable high altitude helicopter support. And in a region like the Himalaya, the word “reliable” can be the difference between skydiving all day in a remote location or sitting on a hillside wrestling a parachute container away from a local yak…….Helicopter support for jump operations, helicopter support for medical evacs if needed and most appreciated it would seem……helicopter support to depart the Himalaya after reaching Everest Base Camp. Most everyone that reaches Everest Base Camp feels a little tinge of anxiety as they start to head back down the mountain, as they suddenly realize, with their goal behind them, that they still have a 3 day walk back out of the park to catch a Twin Otter back to Kathmandu. Not Everest Skydive and it’s group however……since the team works directly with the AStar owners, they coordinate flights out from the Himalaya the day after reaching Everest Base Camp. Facing a 3 day walk, instead the team flies out on an 8 minute terrain flying AStar flight back to Lukla Airfield, back to the world. The word “epic” can be a cliché at times, not here though, not on this flight. It has to be experienced to understand it, but for those that already have, they know. That’s the story more or less, seven years of hard work by a small group of highly motivated international teammates that continue to bring the “top of the world” within reach of the skydiving universe. It’s an expedition that continues to grow and evolve like the remote ecosystem around it. And at the end of the day, whether it’s skydiving beside Mount Everest or sharing a lemon tea with a sherpa family and friends, the Everets Skydive expedition continues to make the world a little smaller by bringing people together from different cultures and countries and giving them all the same thing to believe in, that people are capable of accomplishing anything as a team. For more information on Everest Skydive, you can contact Tom Noonan via e-mail.
-
Fluid Wings is a new and innovative company based in DeLand, Florida - which is aiming to close the gap between the parachuting, speed flying and paragliding. The company was born through a love of human flight, and focus on an engineering-based approach. Fluid Wings draws from the expertise of Scott Roberts, a skydiver with over 15 years experience, who has been competing for more than a decade; Kevin Hintze, an active pilot, paraglider, speedflying instructor and test pilot; as well as Shane Shaffer, chief test pilot and production lead. From the first of June this year, Fluid Wings will begin production on their newest main - The Prime. The Prime will be a 9-cell hybrid main, available initially in sizes from 150-190 square foot in a combination of ZP and low porosity nylon. The canopy is aiming to provide pilots with a fun and predictable flight, with focus also being placed on how easy it is to pack. The Prime will look to cater to jumpers of all experience, being easy enough to handle for newer jumpers, while still being responsive enough to be fun for the more advanced skydivers. Stock colors are Royal Blue top skin and stabilizers, with a white bottom skin and ribs. Please note that bottom and rib colors are limited to white due to color section of low bulk fabric. The canopy ships with Vectran lines and soft-link connectors, with a low-bulk option packing up to a size smaller is also available. “The Prime is responsive and playful, while still easy to manage. It has a good glide for those long spots, with a nice strong flare for tip-toe landings,” said Scott Roberts of Fluid Wings. “We like her a lot and think jumpers will too!” The Prime will retail for $2090 with all options. You can contact Fluid Wings at [email protected] for more information, purchases or demo requests.
-
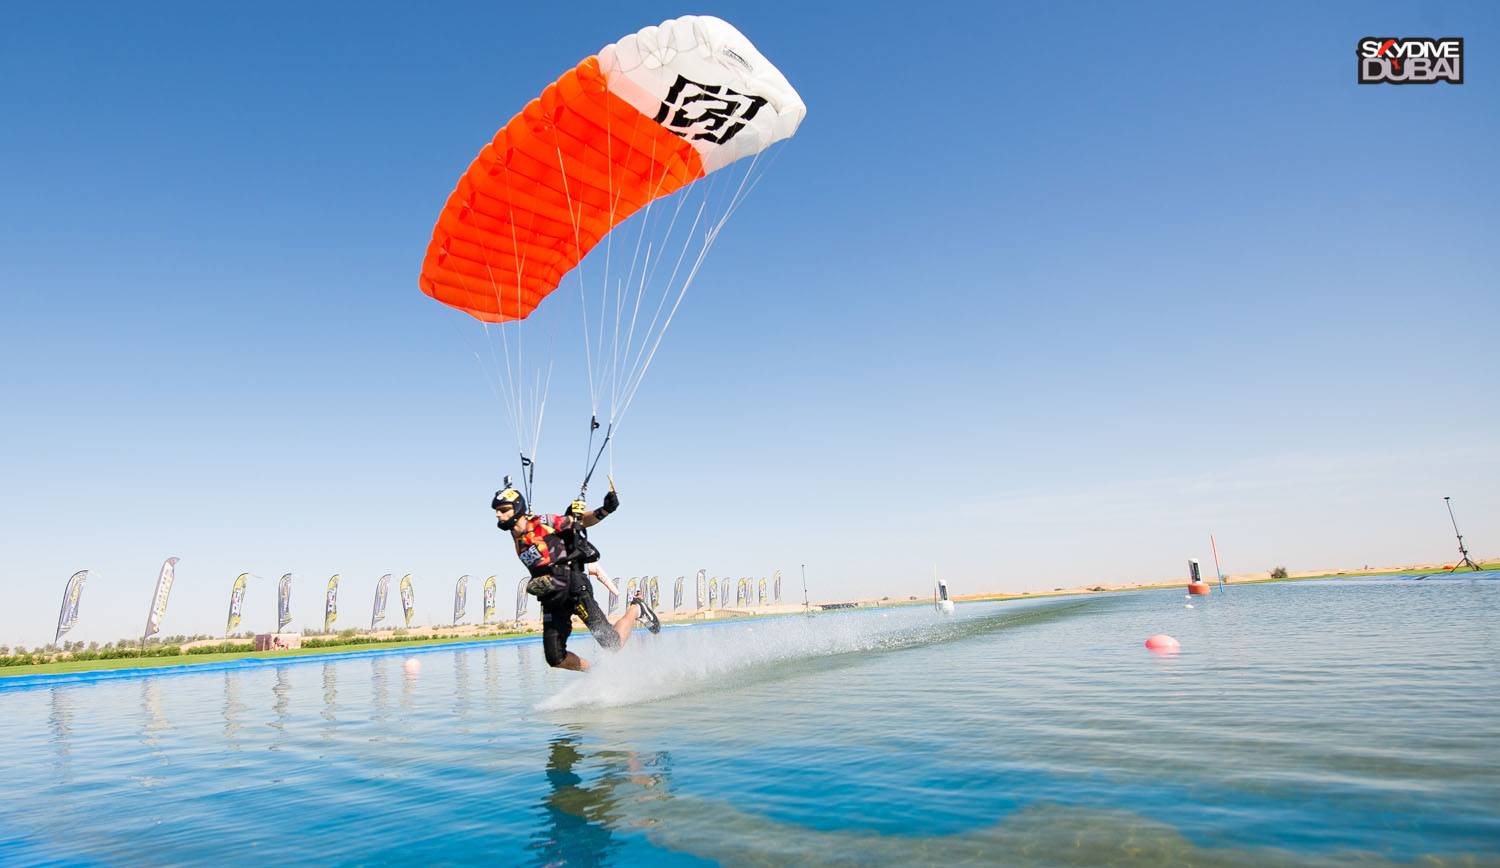
The Dubai International Swoop League (DISL) organised by Skydive Dubai and The Emirates Aerosports Federation (EAF), ended with a bang in April 2014. DISL is a platform that provides skydivers with a controlled and safe learning environment to better understand how to handle parachutes. In skydiving the most dangerous part of the sport is learning how to pilot and land parachutes safely, with the advancements in technology skydivers need to ensure they stay abreast of all the new criteria. The 5th and final meet of the year brought together a total of 38 participants from UAE, USA, UK, Qatar, New Zealand, Ireland, Australia, Russia, Yemen, Romania and South America, all competing for the top spot. DISL consists of three categories that skydivers can compete in; PRO, Intermediate and Beginner. Skydive Dubai gave away $2500 for first place, $2000 for second place, and $1500 for third place in each category, the highest cash prizes available for this type of competition around the world. “Skydive Dubai has the best training facilities in the world for all disciplines in skydiving. We want to create fun learning experiences for anyone living or traveling to Dubai for skydiving.” Said Patrick Kaye, Athlete and Canopy Piloting Team Leader, Skydive Dubai. With the ongoing support of Sheikh Hamdan Bin Mohammed Bin Rashid Al Maktoum, His Excellency Nasser Al Nayadi and Raul Bocanegra, DZM of the Desert Campus, DISL continues to be an expanding stage of knowledge and skill. This year’s meets were judged by the FAI Emirates Aero sports federation. Results: PRO: 1st Place: Pablo Hernandez 2nd Place: Billy Sharman 3rd Place: Patrick Kaye INTERMEDIATE: 1st Place: Darius Turcinskas 2nd Place: Laszlo Csizmadia 3rd Place: Ashton Wood BEGINNER: 1st Place: Jarret Martin 2nd Place: Oliver Noel 3rd Place: Henrik Koskela Billy Sharman, second place winning in the pro category stated, “The DISL is a superb competition, the entire Skydive Dubai family should be very proud to have such a fun and very well organized event as part of their event schedule.” Skydive Dubai Desert Campus cordially invites all Skydivers from around the world to participate in the 2015 season which will begin in December 2014. Once again, 5 competitions will run throughout the season, one per month, until April 2015. Anyone with a B license can participate and each competition will have 3 levels of experience in order to cater to all levels of canopy piloting. For more information, please follow the Skydive Dubai Desert Campus Facebook page or contact any member of the Skydive Dubai Swoop Team or staff member at the Skydive Dubai Desert Campus.
-
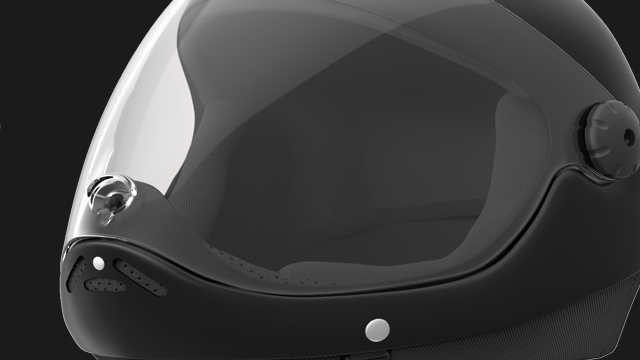
Parasport Italy recently released the latest addition to their gear products with the announcement of the Z1 SL-14 helmet. The Z1 SL-14 is the first of the company's products to use the much anticipated Skylight visor. One of the new features with the Skylight visor is the ability to rotate the flip-up visor to a point whereby it will go unseen, ensuring that it does not disturb your peripheral vision under canopy. The visor is made of injection molded polycarbonate and is both anti-scratch and anti-fog treated. Parasport Italy also put focus on the ease of use, and the Skylight visor has been made to operate easily with one hand, even while wearing gloves. The positive response to the previous Z1 helmet regarding the visor locking system has meant that while enhanced upon, the same concept is used for the Z1 SL-14. A wider face opening allows for enhanced peripheral vision, a clear field of view whereby the helmet does not distract, and makes for easier sight of the handles, as well as a better awareness of the environment. There have been numerous improvements made to the shell of the Z1, ensuring a stronger, more durable helmet, while at the same time focusing on comfort. The manufacturing process involved injection molding with high impact ABS, like that used in the building of motorcycle helmets. The method by which this injection molding takes place, ensures that the products are consistent and well built. The helmet also comes with an adjustable airtight collar which is made from soft anallergic polyester. A removable variable density liner ensures that the Z1 gives a comfortable fit, while also allowing one to easily set the size just by changing the liner. The collar system has been redesigned for a more comfortable fit than previous models, with more padding around the back of the neck. Similar enhancements have been made on the liner which has been redesigned to ensure even better comfort. There has also been an improvement with the airflow management, which the liner's new design helps aid in. A lot of focus was placed on consumer and industry feedback with the production of the Z1 SL-14. Such feedback is what brought the design of the Z1 away from the rear placed ratchet collar system that was found on the previous model. The new latching system makes it possible to close the collar around your neck and secure the helmet with the chinstrap buckle in a single movement. The chinstrap is adjustable to adapt the collar to the different shapes and sizes. Adjustment is needed just once (as shown on the drawing), after that securing the Z1 SL-14 is easy as pulling the chinstrap and closing the clip: no further adjustment needed. The helmet is designed to be light and aerodynamic, while still ensuring that it is of the highest quality and strength. Technical Specifications Integrated polycarbonate flip-up visor Unique practical and affordable visor mechanism Anti-fog, anti-scratch, sturdy replaceable visor Airtight collar, combined with safety chinstrap Interchangeable liner (can be washed in the washing machine!) Pouches on both ears to accommodate audibles Size is set by the liner. Available sizes are S, M, L, XL and XXL Available with IAS option to install the Skytronic GFX, the NeoXs or compatible audibles Available separately the beautiful protecting helmet bag
-
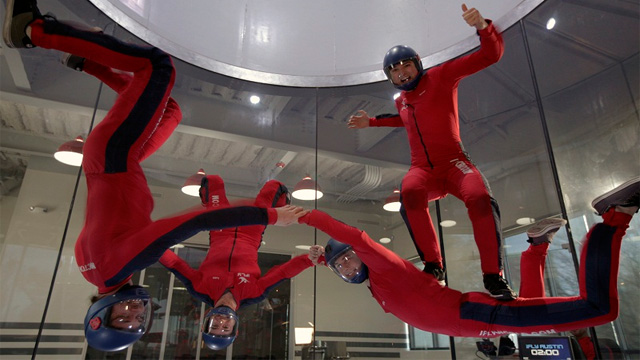
Image by iFly AustinWe would like to introduce the latest addition to Dropzone.com, our wind tunnel listings! We’ve been working hard at gathering information on all the active indoor skydiving venues from around the world, resulting in a list of 26 wind tunnels, spanning 12 countries, making it the most comprehensive and up to date list of vertical wind tunnels online.We have modelled the indoor skydiving section on that of our dropzone database, allowing you to review your experience, in turn helping others in choosing the best places to indoor skydive, and focusing on allowing you to quickly and easily find venues using GPS plotting. Users will be able to find detailed information about each dropzone in the listing, including time block pricing, training pricing, technical information and contact details. Indoor skydiving has become an essential part of competitive freefly training and continues to provide a platform for the evolution of body flight. With the continued growth of the sport, and the establishment of new tunnels, the future of indoor flying is looking extremely bright. We welcome and encourage users who have flown at any of the wind tunnels to submit a review of their experience. Should you know of a wind tunnel that is not listed in the database, you are able to submit a listing yourself, or contact us via e-mail and we will add the listing for you. Our database will continue to be built on and maintained by both dropzone.com and the respective owners and staff of the tunnels. If you are a staff member of one of the tunnels listed in our database, you can claim the listing. View Wind Tunnel Listings
-
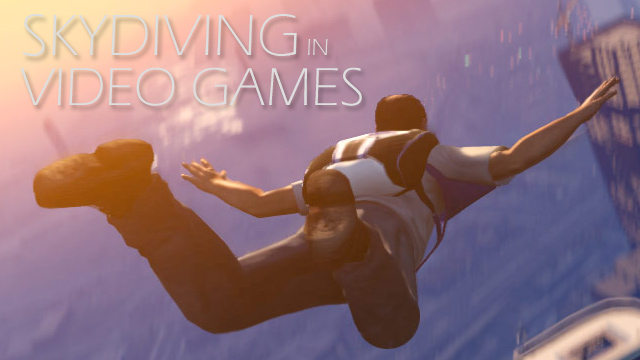
With the recent release of Grand Theft Auto V, we've decided to take a look at some of the video games out there that offer players the ability to skydive in their gameplay. While dedicated skydiving games are few and far between and mostly awful, there are some big budget games out there that provide in game base jumping or skydiving. The introduction of these activities usually take place during missions when playing the single player campaign or story modes. Other games tend to introduce the activity only when playing multiplayer. Grand Theft Auto (Series) The GTA series is perhaps one of the most controversial video games series made to date. The game has seen protests, attempts to ban sales and mothers up in arms over the content. In a game where you run the streets killing, hijacking and beating anyone who you come across, it's easy to see why. For those who are less inclined to rob stores and toss dollars at pixelated strippers, the game also offers some great aviation related missions. Parachuting was introduced into the game with the release of GTA: San Andreas in 2004 but was then not present in the retail copy of GTA IV. Later the GTA IV expansion, "The Ballad of Gay Tony" reintroduced the parachute and fans were once again finding buildings to base jump off of. In the latest release of the game, GTA V once again offers players the ability to skydive and base jump. The parachuting gameplay is introduced in the story line when one of your characters is required to undergo aviation training (airplane, helicopter and skydiving) in order to complete one of the missions. You begin by having to land on a moving target, so essentially your first handling of the canopy is an accuracy jump. You will also then be able to make jumps with your parachute outside of that mission training, whether you're hijacking an aircraft to jump out of, or finding a building to make a base jump from. When it comes to the skydiving gameplay, you're able to track during freefall and once you open your canopy (rather hard usually too), you're then able to navigate with regular turns or sharp turns - and flare for your landings. The canopy design is somewhat disappointing with what someone on our social media page aptly called an "Air-Unlock" canopy, with both front and back of the cells being open. There is a slight delay on the canopy opening, as to be expected for realsm, but it still opens quick enough for you to get some fair low jumps in. Finding locations that are high enough to base jump off of is a challenge sometimes, but rewarding when you find that perfect exit point and maybe do some proxy tracking. While this game extends so much further than just skydiving, the gameplay of the skydiving make it one of our top recommendations. As stated before, this game is definitely not for the sensitive type. Videos of Skydiving and Base Jumping in GTA Saints Row (Series) Another game aimed at the maturer audience, Saints Row offers gamers the chance to do some couch base jumping. Skydiving and base jumping have been available in the series since Saints Row 2, but only in Saints Row The Third did the gameplay of parachuting become really fun. The 2013 release of Saints Row IV also saw the act of base jumping and skydiving being kept. The base jumping in Saints Row The Third is somewhat similar to that of GTA San Andreas, where the canopy is quick to open. In fact it becomes a little bit annoying just how quick they open, you are able to base jump off 50 foot objects with ease. The skydiving experience otherwise is quite standard, you're able to track your player before pulling and then control your canopy once it's open. Unlike GTA, where your jumps are either mission related or purely because you want to throw yourself out of a plane, or off a building or cliff side - Saints Row The Third allows you to set a target once you have jumped, and steering your canopy so that you land as close to that mark as possible will earn you reputation in the game. Saints Row IV, which was only recently released also allows for naked base jumping. If you're looking to perform dirty low jumps, buying Saints Row The Third is definitely a good option. The game is now quite old and you can pick it for quite a reasonable price. Videos of Skydiving and Base Jumping in Saints Row Battlefield 3 If you're looking for some skydiving game action without the senseless street violence or sexual content, then Battlefield 3 may be better option. While the Battlefield 3 campaign mode was entirely too short and didn't include skydiving in it, the multiplayer mode which is still played by thousands of people offers the ability to also both skydive or base jump. Unlike the previously mentioned games where you are in an open world environment and can joy ride to your exit points, Battlefield 3 is an intense military combat environment where you are taken on fire and in turn having to protect yourself when you are mobile. There are a good number of exit points in the game should you choose to base jump, depending on the map you're playing. Unlike Saints Row and GTA, Battlefield 3 is set in first person view. Personally I always find first person views much more appealing, as I find that they tend to be more immersive. There are a few large cliffs in Battlefield 3 that allow for impressive freefall times. If you have a few friends that also play the game, it is easy to arrange with them for some 3 or 4 way base jumps - or go extreme like the video below with a 64-way! With Battlefield 4 coming out in a couple months, there is still a lot up in the air about just what gameplay will be included in the new release. At this stage we will have to wait and see what they do with regards to the skydiving and basejumping in the game. Videos of Skydiving and Base Jumping in Battlefield 3 Base Jumping Base Jumping is a game developed by a small company called D3, though judging from their websites the name is in the process of being changed. The difference between this game the games listed above, is that this game is a dedicated BASE game, where all the focus is on the sport and not on the strippers or on shooting the enemy. Here you will be presented with exit points and a challenge for that exit point. It's been a while since I played this game, but I remember it being a little confusing to navigate at first with regards to the menus. However the gameplay is good fun and if one is looking solely for a dedicated base jumping game. It's definitely worth giving Base Jumping a try. The "Pro Edition" is still receiving regular updates and fixes, so the game may well be better than when I had last given it a go. You can view the development update information and more information about the game itself at the development page. It also appears the company may be working on a skydiving game similar to Base Jumping. Videos of Base Jumping Go! Sports - Skydiving The Go! Sports game series has been somewhat of a disappointment with difficult to use controls and usually extremely repetitive gameplay. Go! Sports Skydiving tends to slot in with the other Go! Sports titles, but does offer a few redeeming qualities that distance it from games in the series like Go! Ski. The game offers two general modes, there is formation skydiving where you control your model into the position to fill a formation and then there is the landing mode, which is pretty much accuracy landing. In the formation mode, while the concept doesn't seem too bad - there are several issues that cause controlling your player to be extremely frustrating at times when using the required SIXAXIS controls. The game is not unplayable by any means and can still offer the gamer some fun, but apart from the tough controls - this is the kind of game that can get old fast. The only thing that will keep a user playing is the fact that there is an online ranking system. But given the good price, it is definitely worth considering giving a go, there isn't much to lose. Videos of Skydiving in Go! Sports - Skydiving Which of the games listed above is your favourite for your bedroom skydiving experience? And if you know of any other skydiving or base jumping related games, let us know in the comments below. We'd love to give them a try.
-
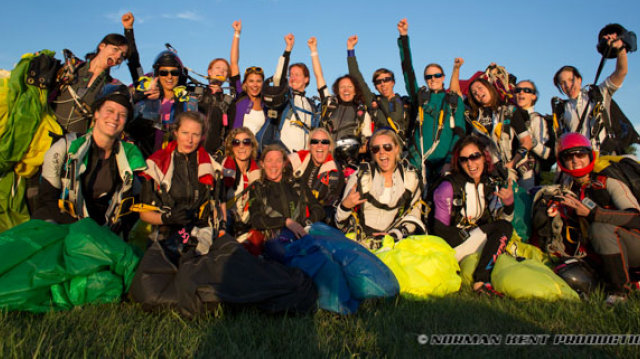
In celebration of women’s history month we decided to take a look at the role of women in the history of skydiving. Although only about 20 percent of all skydivers are female, women have been there right from the start, conquering the skies alongside their male counterparts. As soon as man figured out how to fly, he also had to find a way to save himself if something goes wrong with his flying device; which is why the first parachute jumps were all done from balloons. Some women made a living from parachuting in the early days, doing it not only for the thrill, but also to entertain the crowds. First Female Parachutists Jeanne-Genevieve Garnerin, wife of Andre Garnarin, inventor of the frameless parachute and avid balloonist, was the first woman to descend under a parachute. She did this on 12 October 1799, from a 900 meter altitude. Jeanne continued to tour with her husband in France and all over Europe, completing many balloon ascents and parachute descents. The bug also bit her niece, Elisa Garnerin, who started flying balloons at only 15 years of age and completed 39 professional parachute descents between 1815 and 1836. Kathe Paulus was another woman who had a great impact on skydiving as we know it today. In collaboration with her husband, Lattermann, she developed a parachute prototype to make their balloon flights safer. This was one of the first inventions of a collapsible parachute – the parachute was folded and packed into a bag. Unfortunately Latterman died trying out their invention when his parachute failed after jumping from a balloon, but Paulus made it to the ground safely. She improved the invention and made good money from sales during WW1, although she lost her fortune later because of inflation. By August 1914, Kathe Paulus had made about 70 exhibition descents in her safety device. Kathe Paulus on a balloon flight Jumping from a Plane Georgina Ann Thompson, known as Tiny Thompson, became the first woman to parachute from a plane on 21 June, 1913 over Los Angeles. Georgina was destined for a life of poverty, working 14 hour days in a cotton mill before skydiving changed everything for her. She got married at age 12, became a mother at 13 and lost her husband soon thereafter. Georgina was 15 when she first saw Charles Broadwick’s famous parachute show and felt so inspired she insisted on joining his troupe. She soon earned the nickname “Tiny Broadwick” or “Doll Girl” because of her small size and was a great hit at the carnivals. Dressing up in ruffled bloomers, pink bows and ribbons in her hair, Tiny drew large crowds everywhere she went with her daredevil manoeuvres. She was soon approached by famed pilot, Glen Martin, who wanted her for his airplane shows. Charles Broadwick developed a silk parachute for Tiny, which was packed into a knapsack attached to a jacket using harness straps. A string was woven through the canvas covering of the parachute and attached to the plane’s fuselage. As soon as she jumped, the cover would tear away and the parachute would fill with air. For her first airplane jump, Tiny sat on a trap seat, outside the cockpit and behind the wing. The parachute was on a shelf above her. Glen Martin ascended to an altitude of 2000 feet, where Tiny pulled a lever, allowing the seat to drop out from underneath her. The parachute opened up and she floated down gently, landing in Griffith Park. Tiny later also became the first female parachutist to land in water. In 1914, during a demonstration jump from a military plane that went horribly wrong, Tiny became the first person to do a planned free-fall. During this jump, the line of her parachute became tangled in the plane’s tail assembly. The wind was whipping her around and it was impossible to get back into the plane. Tiny however kept her cool and decided to cut all, but a short piece of the line and plummet toward the earth. Pulling this line by hand, she freed the parachute to open up, demonstrating the principle of the rip cord. By surviving this accident, Tiny showed that it wasn’t necessary for a parachute to be attached to a plane in order to open it. It was possible for a pilot to safely jump from a damaged plane. Georgia Thompson (Tiny Broadwick) Through WW1, Tiny worked as an advisor for the U.S. Army Air Corps. During her life, she made over a 1000 jumps from planes and survived several mishaps. She once ended up on top of a train; got tangled up in a windmill as well as high-tension wires. Despite suffering numerous injuries during her career, she lived a long and full life, dying at age 85. Women in Skydiving Today 63-Way Head Down Women's World Record Ever since the first female pioneers made their first jumps, women have been setting new records in skydiving. We decided to compile a list of some of the most impressive female skydiving achievements to date: A new world record for the largest female head-down freefly formation was set in 2013 in Arizona, where 63 women linked arms for a minute and a half to hold the formation. The women ranged in age between 20 and 52 years old and reached speeds of over 165 mph as they were falling upside down, head first toward the Arizona desert. Participants came from the U.S., Canada, Mexico, England, France and Russia. The world record for the largest all-female skydiving formation is held by 181 women from 31 countries and was set in Perris, California. With this feat, the women managed to raise over $900,000 for the fight against breast cancer. This record will be challenged in October 2014 when an attempt is made to exceed 200 jumpers. U.S. skydiver, Cheryl Stearns, holds the record for the most parachute descents by a woman, with a total of 15,560 in August 2003. To date, her total amount of skydives has exceeded 18,000. She is also the Guinness World Record holder for the most jumps in 24 hours by a female skydiver, with 352 jumps in 1995. The oldest person to have done a skydive jump is Hildegarde Ferrea, who was 99 years old when she did a tandem jump in 1996, at Dillingham Field in Oahu, Hawaii. 181-Way Women's World Record Conclusion Skydiving is a sport where female skydivers may be in the minority, but looking back in history we see that women have played a very important role through the years, directly and indirectly to help develop the sport to what it is today. We expect that this is also how it will be in the future and look forward to seeing more achievements and inventions from the fairer sex.
-
Dubai, UAE, 2nd April 2014 – Extreme Canopy Flight (XCF) is Skydive Dubai’s vision of making skydiving history by setting new limits for human flight by breaking the Guinness World Record for the smallest parachute jump. With the support of Emirates Aero Sports Federation and Skydive Dubai, Project XCF’s training and record attempts are going to take place at Skydive Dubai the Palm Dropzone in Dubai on Saturday 5th April from 3 – 7pm. The record breaking attempt is going to be performed by extreme athlete Ernesto Gainza, a test pilot for NZ Aerosports and Icarus canopies and professional stunt man with more than seven thousand skydives. The project will be documented from inception to successful completion. XCF jumps are all performed under highly experimental conditions and using specially designed prototype equipment. Currently expert skydivers use parachutes that range in size from 80-200 square feet and over the last decade the development of high-performance canopy sizes have averaged between 70-90 square feet. Ernesto aims to land a parachute of 35 square feet, less than half the size of the smallest parachutes currently being jumped. With the significant reduction in size the opening, flight and landing characteristics change dramatically resulting in a spinning malfunction which could cause an almost instantaneous loss of consciousness, as such Ernesto needs to have the right mental and physical preparation to be able to react decisively to any situation. Across the global skydiving community, a very small percentage of competitive canopy pilots have the skill to fly these canopies successfully. Ernesto Gainza stated, “Project XCF is the product of a man’s dream to fly and land the world’s smallest parachute. Regardless of the size of the challenge, a dream will always be a dream if there is no determination to make it reality.” The current unofficial record for the smallest parachute landed is held by Luigi Cani who jumped a 37 square foot canopy on January 1st 2008. Luigi was the inspiration for this project. Skydive Dubai provides a platform to fulfill dreams. In addition to granting Ernesto’s dream of breaking the world record of XCF jumps, Skydive Dubai will also be granting the wishes of three kids with incurable diseases through their collaboration with The Make-A-Wish Foundation® United Arab Emirates, an international non-profit organization with 38 active offices dedicated to fulfilling the wishes of children with life-threatening medical conditions. The event on Saturday 5th April is open to all who wish to come and see history being made. The day will be filled with a lot of entertainments for all ages. About Skydive Dubai SKYDIVE DUBAI, the world’s premier skydiving location, is located in the heart of Dubai city. It is operating in two locations The Palm Drop Zone, which has as area size of 260,000 and runway size of 60m x 700m, and Desert Campus Drop Zone. Skydive Dubai offers tandem jumps, training for athletes and courses for beginners and experienced skydivers. Both drop zones observe the highest standards in safety under the regulations of The International Air Sport Federation (FAI). All skydivers are fully accredited by the United States Parachuting Association (USPA) and The Emirates Aviation Association (EAA).
-
Flight-1 is the world leader in canopy education and progression. From novice pilot through the upper echelons of competitive canopy piloting, Flight-1 has a course that fits every skydiver’s skill set and learning objectives. Flight-1’s courses are set apart from many other canopy courses by the fact that they have been developed by members of the PD Factory Team, which has some of the world’s best canopy pilots and the most experienced canopy coaches involved. If you have any doubts about the skills possessed by the PD Factory Team, taking a look at the video of the “Threading the Needle” stunt they performed last October will show that you’re in the best hands. For years Flight-1 has offered a curriculum for group coaching in canopy handling skills. Their curriculum provides a clear progression for skydivers of all experience levels to continually learn and improve from basic to expert canopy handling skills. Flight-1 courses have been extremely popular over the years and shown great success. Flight-1 have just added 5 new course modules (103 / 201A / 202A / 301 / 302) Airmanship (103): This course follows on from their course 101 “Flying The Modern Wing and course 102 “The Canopy Performance Range”. In “Airmanship” Flight-1 will focus on bringing the skills skydivers have developed into what would be considered a general skydiving environment. The course will revolve around the fundamentals of the skydiving environment, managing the variety of skydivers on a jump to understanding the dropzone environment. It also includes discussions on canopy choice, equipment malfunctions, and avoiding and successfully dealing with canopy collisions. Modules 201A and 202A, “Flying Relative” and “Team Flying” respectively; are designed for individuals that are looking to hone their canopy skills and further develop comfort in flying around other parachutes. Flying Relative (201A): This is the first step in the Flight-1 Air to Air Program. After a safety briefing, the student is introduced to flying relative to another canopy piloted by the coach. Here the pilot learns the true reference of how canopy controls affect the system relative to each other in a one on one environment with an experienced coach guiding them through the jumps. Team Flying (202A): This course leads the student into dynamic team flying and landings. It builds on relative flying, teaching the student advanced dynamic formation flying, turns and landings. The "ultimate wind tunnel" for canopies. The final two courses currently being offered are Precision Performance (301) and Competition Canopy Piloting (302). Precision Performance (301): This course is targeted towards experienced pilots who want to develop their turns and high performance landings. It introduces a logical progression toward increasing power, bringing accuracy into the landing, and preparing to navigate courses and gates. Competition Canopy Piloting (302): This, the course covers the fundamentals of competing that all skydivers need when new to the competition environment. It helps the pilot focus on what is important and how to manage personal skills and tactics to ensure best performance. Flight-1 courses will now be open to more skydivers, as they have decided that while still firmly believing that the best approach is to go through the curriculum in order, the real importance is ensuring that education opportunities be maximized. So long as a skydiver has met the requirements listed below, they will be able to attend the course. Flight-101: Cleared to self-supervise Flight-102: Attended 101 Flight-103: Requirement - B license Recommendation - Attended & completed Flight-1 101 & 102 Flight-201: Requirement - Min of 200 jumps Recommendation - Attended & completed Flight-1 101 & 102 Flight-202: Requirement - Min of 500 jumps Recommendation - Attended & completed Flight-1 201 Flight-201A: Requirement - Attended & completed Flight-1 101 & 102 Flight-202A: Requirement - Attended & completed 201A Flight- 301: Requirement - Min of 500 jumps OR CP Competitor in the last year Recommendation - Attended & completed Flight-1 201 & 202 Flight-302: Requirement - Min of 500 jumps OR CP Competitor in the last year Recommendation - Attended & completed Flight-1 201 & 202
-
With the Hawk, the S-Fly team were looking to design a suit that maximizes manoeuvrability and agility in the skydiving and BASE environments. By maximising the pilot’s abilities to perform rolls, flips and precision carving from both back and belly with smooth transitions, the Hawk allows the pilot to creatively express their flying style. While extremely maneuverable, the Hawk still provides the lift and power while flying on your back or belly, to allow dynamic acrobatics without dropping out or sacrificing excess altitude. The result is a really fun, very fast and powerful freestyle acrobatic wingsuit designed for intermediate to expert level pilots. The DesignThe high performance and maneuverability of the Hawk was achieved by building upon the already successful Verso platform. S-Fly increased the surface area of the arms, extended the leg wing, adjusted the profile and sweep of the arm wing to maximise speed. Additionally, in classic S-Fly style, there are no grippers allowing free wrist and hand movement. The inflation and pressurization of the Hawk is where the guys at S-Fly feel the suit really stands apart in the modern wingsuit market. The suit remains inflated while transitioning through all maneuvers and positions, but with a smooth unhindered feel. This smooth and consistent inflation of the Hawk is powered by the specific design and placement of the inlets and the four independently fed elements of the wing. The AirfoilThe Hawk’s arm and leg wings are fully pressurized in flight. The two arm wings are fed by wide mesh valves located along its leading edge. The leg wing is fed by three pronounced and reinforced inlets located on the front and three on the back. This system ensures optimum distribution and pressurization while minimizing drag in all positions. The “body” is comprised of a single cell that runs from the chest, down the circumference of the legs and to the ankles. The “body" is an evolution of the original mono-wing design from S-Fly. Through the extensive testing phase, it was found that this design allows unique and total freedom to move the pelvis, giving the pilot unencumbered and precise lateral movement without compromising performance. Through the mesh valves located on the arms, and two inlets placed high on the back, the “body” is effectively inflated while flying on the back and belly. The Hawk is constructed with Parapack light which is much lighter, has the same aerodynamic properties and is equally durable to normal parapack. The suit is surprisingly light and strong the fabric feels and how much faster it feels in comparison to other fabrics used during the prototype phase. Options *Quick Zip Cut arm wing release system Textured BASE soles Chest zipper port for camera access Fast leg zipper opening strap
-
Squirrel Wingsuits have just released the latest addition to their inventory. The SUMO is a tracking suit, the first to be manufactured by the company. The suit is aimed towards both BASE jumpers and skydivers, and catered towards all levels of experience, from beginners through to advanced trackers. It was the decision of Squirrel to opt for a 2-piece tracking suit system as opposed to a single piece suit, aiming to bring the comfort and ease of use found in 2-piece systems while providing the performance of a 1-piece suit. The driving concept behind the SUMO was for a tracking suit that balances both volume and stability, while making internal pressure and quick inflation vital points in its design. The SUMO has an included “No-Wobble System” which secures the pants to the knee area. This feature, which can be toggled to be active or inactive, helps prevent movement while tracking, giving you better performance and is recommended for proximity BASE jumps, multiways and flights that demand only the best performance. It is attached to the area using Velcro, which can then be easily left unfastened, should one not wish to fly with the No-Wobble system. The suit is tapered slightly from waist to ankle, to increase the ease of handling. It is also quick to inflate after exit and is said to provide excellent forward speed with simple and intuitive control. Squirrel have built the SUMO tracking suit with the same high standards that have made their wingsuits such a success. It is highly advised that BASE jumpers first practice jumping with the SUMO from by skydiving it until they have become comfortable with the way it flies. SUMO Tracking Suit Features Force FeedThe majority of power in a tracking suit comes from the pants, and the SUMO benefits from an array of mylar-fed inlets which rapidly inflate and maintain pressure inside the suit. Quick StartsThe SUMO's oversized arm inlets provide immediate control after exit. Upper arm inlets allow early inflow after exit, and the shoulder inlets maintain pressure in flight, through all angles of attack. No-WobbleInside the pants at the knee, Squirrel have added a Velcro enclosure which anchors the pants to your leg, reducing pant-leg wobble and increasing control and performance. This is one of the most crucial features of the SUMO, giving the pants a more precise and solid feel when maneuvering in high speed tracks. Air-TightA high collar, cinched wrist, and extra-long torso help in reducing leakage and maintaining jacket pressure. Plenty-PocketsThere are four zipped chest pockets which provide plenty of space for phones / emergency electronics / gear storage, and the jacket is lined with airmesh and lycra/fleece for comfort and structure. ReinforcedThe knees of the SUMO are heavily reinforced with Cordura, with 5mm of closed cell foam padding for protection and structure. Toe-TensionThere are three toe-tension settings available , which use a lightweight and simple buckle/strap adjustment to maximize fit performance. ZipsHighly durable and custom colored 10C YKK zips run up both legs.
-
EUGENE SKYDIVERS REGAINS RIGHT TO LAND AT CRESWELL AIRPORT Agreement helps pave the way for skydiving to return to Creswell CRESWELL, Ore—Urban Moore, owner of Eugene Skydivers, announced this morning that his business has regained the right to land parachutes at the Creswell Airport. “The settlement with the city cleared all hurdles and now it’s official. We can land at the airport,” stated Mr. Moore through some early morning text messages to employees and friends. Last August a settlement was reached between Eugene Skydivers and the City of Creswell in an attempt to end an eight-year legal battle. Although the agreement accelerated a resolution, Mr. Moore credits the United States Parachute Association (USPA) and the Airport Defense Fund (ADF) for providing much needed support during his legal challenge to the eviction of skydivers from the airport.“I couldn’t have gotten this far without the help of USPA or the ADF. I’m looking forward to going back to work. This is a great day for skydiving,” continues Mr. Moore. The settlement has established safety guidelines and written procedures that both sides agreed to. The policies in place will ensure safe operations for all parties involved. Weather permitting skydiving is expected to resume at the Creswell airport as early as Thursday, Feb. 13. About Eugene Skydivers Urban Moore opened Eugene Skydivers in February 1992 at the Creswell Airport. During the last twenty-years, Eugene Skydivers has performed exhibition skydives for businesses, charities, and political campaigns. In 1998, an Oregon State skydiving record was hosted at the parachute landing area of the Creswell Airport. To date, Eugene Skydivers has successfully performed an estimated 70,000 skydives. The hours of operation are Thursday thru Sunday and by appointment.
-
POV cameras are popping out of the ether these days, and a small company in Korea, previously specializing in dashboard cameras, has entered the POV fray with their small box Blackvue camera. The Blackvue closely resembles the frame of the GoPro, and that’ll be the first comparison most folks will make when looking at this camera. Size and weight-wise, the BlackVue is identical to the GoPro, JVC Adixxion, Swan, and the majority of other POV cameras, and the profile isn’t terribly different from its main competitor. Why would one look at the Blackvue SC500 (or any other competitive camera)? Price, form factor, simplicity/ease of use/setup all fall into a consideration. The Blackvue is ridiculously simple with few buttons, no menus to scroll through, and the simple modes assure perfect recordings every time. The camera features Wifi output for monitoring, an included/detachable LCD display, and is capable of shooting 60p footage for smooth slow motion. The housing is a rubberized, non-water/weatherproof housing that mounts on a stickypad/thumbscrew system (compatible with GoPro mounting accessories). The camera is essentially choice-free, in that it offers three shooting modes. 30p (standard/default 1920x1080/30p) Still Photo (also capable of timelapse) High Speed (1280 x720/120p) IMAGE QUALITYLet’s start with the most important aspect of image quality. Image quality from this camera is about what I expected it to be. It’s not “drop your jaw this is incredible” good, and it’s not really poor, either. It’s better than some of its competitors, lesser than others so I’d refer to it as “average.” The camera features a Sony Exmor imager, similar to the imager used in the Sony AS-15 cameras, and I’m a bit surprised that Pittasoft didn’t take greater advantage of the features this sensor offers. They’ve tuned the sensor to be quite dynamic, as this screengrab demonstrates. The lens is a fixed 170 degree lens, similar to most of the competitor POV cameras. The glass is exposed, as there is no cover/protection for the lens in the housing. The lens does come with a small rubber cover that is easily lost and falls off if the camera is tipped over. It is possible to sit the camera farther back in the housing, if the LCD display is removed, thus providing some lens protection via the housing. The BUTTONSThere are only three buttons on the camera (unless one counts the LCD power button on the LCD pack). One button powers the camera and selects the mode (Video/Still/High-Speed). One button for Wifi on/off, and the record start/stop button. The removeable LCD pack also has its own power button. Buttons are large, so operating the camera while wearing gloves won’t be any kind of an issue. The built in speaker provides audio for playback, and also provides status indicators when buttons are depressed. However, this speaker/audio indicator is hard to hear in a noisy airplane. INDICATORSAll indicators are found on the front of the camera. This is where the first weakness in the camera is found. The indicator lights are small, and difficult to read in daylight. The record light is also dim and although the streamlined look of the record indicator is sexy, it’s also difficult to see in a well-lit aircraft cabin. In the 120p test footage, you can see the camera operator squinting and covering the camera to shade it from the sun, as it was challenging to see whether the camera was recording or not. BlackVue would do well to take a page from their competitors playbook and put a larger indicator light in their next version. The HOUSING:The housing is unique; a rubber “O” ring design surrounds the entire camera. The intent is to dampen vibration and provide protection against scuffs and scrapes common in the action sport environment. The housing is capable of holding only the camera, or the camera/LCD combination. The housing offers a pair of holed mounting tabs, identical to the GoPro camera mount system, and in fact, the two are compatible. This is a huge benefit to camera owners, as they have access to the full complement of GoPro mounting accessories. Smart move on the part of Pittisoft to jump on this before any of their competition has realized that when it comes to camera mounts, standardization is a good thing. This system is not waterproof, nor even weather resistant. While I’d have no problem using it around mist, clouds, etc, I’d also be very uncomfortable in any environment where water might cover any significant portion of the camera. Pittasoft does have a waterproof housing in the works at an undisclosed price. Best viewed in 720p CONNECTING POINTSThe camera provides a mini HDMI port for instant viewing on a monitor. This is critical for debriefs, as when one is working between loads, it is time-consuming to remove a microSD card and read from a computer or other playback system. The camera also offers a USB port, suitable for charging or playback over a computer. Both ports are covered by a removable plastic plug. Like other small format cameras using this “feature,” I find it annoying, as it’s a small plastic part easily fumbled while wearing any kind of glove, and may easily be lost. BATTERY LIFEThere is no easy way to say it; battery life is unimpressive. Out of six jumps, the battery failed on three of them, even though I disabled the LCD screen. The unit had been charged prior to each jump, and turned on to check on the ground prior to boarding the aircraft. It’s possible my unit wasn’t entirely up to speed, yet even after charging overnight, the unit couldn’t manage two jumps in a row with the LCD preview enabled. There is no indicator for battery level if the LCD display is disabled, yet the LCD preview eats most of the battery. Wifi is also a battery-killer, but fortunately, the WiFi indicator is very obvious, and unless cell/wifi preview is absolutely necessary, users would be wise to leave it off (this issue is similar with all the POV cameras, but the Blackvue seems to be a bit more wifi power-hungry than some of the others). In speaking with the folks at Pittisoft, they indicated that they’re now shipping a firmware offering better battery life. SUMMARYAll in all, this is a very simple camera, easier to operate than most of the POV offerings out there due to its limited functionality. Some people are looking for easy-to-use and this camera absolutely offers “easy.” Picture quality is on par with cameras costing more, and offers a better image than some of its same-price counterparts. It’s super-fast to set up and as there are no menus to cycle through, there is virtually no chance of not knowing which mode the camera is in. Its light weight makes it perfect for many other applications; I particularly appreciated how well it flies on a UAV drone. The price is competitive, the camera is very easy to operate, and the build is robust. I for one, am looking forward to seeing how Pittasoft’s new camera does in the rapidly broadening POV market. Price: 300.00 USD Available online and at some retailers now. About The AuthorDOUGLAS SPOTTED EAGLE is an audio and video pro. He is a Grammy recipient with DuPont, Peabody, and Telly awards lining his studio; he is also a participant/producer in multiple Emmy winning productions. Douglas is the Managing Producer for Sundance Media Group, Inc. and VASST, authoring several books and DVDs and serving as a trainer and consultant for videographers, software manufacturers and broadcasters. He is the author or co-author of several digital media titles including Digital Video Basics (VASST), The FullHD (VASST), and Vegas Editing Workshop (Focal Press) among many others. - See more at: http://www.dropzone.com/about/Contributors_895.html#sthash.oSWvVDbz.dpuf
-
Action cameras are popping up all over the place, from all sorts of companies. Garmin shocked a few with their release of the Garmin Virb in the third quarter of last year. Now it's the Japanese manufacturer Shimano that has joined the party. Unlike some of the other action camera competitors, Shimano is a long standing company founded in 1921, but is typically known for their cycling, snowboarding and fishing equipment. Shimano will be releasing their first POV action camera in May this year, which will look to compete with brands like GoPro, Contour and Sony. The new 'CM-1000' as it's called, certainly has some interesting features that could allow it to challenge the competitors. Unlike most other POV cameras the CM-1000 is waterproofed to 30 feet without the requirement of any additional housing. The weight is also very impressive, weighing in at just 86 grams; more than half that of the GoPro Hero 3 Black Edition when waterproof housing is attached. The most impressive feature for us is the aperture of the camera lens which sits at F2.0, as opposed to most competitors' F2.8. This full-stop increase in light will allow for better low-light performance from the camera, a topic that is often focused on and often falls short in some manufacturers. The sensor is also very impressive, boasting a 16 megapixel backlit CMOS sensor, likely able to produce high quality still images as well as full HD video. The CM-1000 will come with multiple lens modes, a standard 135 degree view as well as an ultra wide angle 180 degree view. Another pretty cool feature is the auto image rotation, which will automatically rotate the picture to the correct orientation, regardless of how you hold the camera. Bells and whistles come in the form of ANT+ capabilities, allowing users to connect the device to training devices and heart-rate monitor. Especially useful for those who like to keep track of their data. While one would imagine that coming from a company who is renowned for their cycling gear, that their camera would be focused towards cyclists. The CM-1000 seems to target all POV users, with the company's focus put on things like waterproofing. In summary, the CM-1000 looks impressive on paper, it has what appears to be a high quality sensor, a large aperture and is light weight. It is however important to remember that these are only a fraction of variables that will affect the overall video and image quality. And it will be interesting to see how the camera handles transition in lighting, as that's always an important factor with POV cameras. Though if it performs as one would expect from a company with a history of quality products and a large development budget, this camera is definitely worth keeping an eye on. Shimano's CM-1000 will come with a lens cover and two mounts (one adhesive and the other helmet mount) and USB cable. The CM-1000 will set you back $299 on release.
-
I have spent much of my life studying parachute stability. It has become an obsession of sorts, spurred by a fairly sizable stint in a wheel chair- funny how that works. I have designed and built many, many canopies with the goal of creating collapse-proof canopy. I have failed. It is impossible. This is the case because, despite the best efforts of the designer to increase internal pressurization and dynamic stability, the canopy can still be flown badly and become unstable. This will always be so. The job then, falls on the educators, and on the pilots themselves to learn and rehearse the essential survival skills that increase the chances that the correct action will be taken in the spur of the moment. I stated in my original article on turbulence, entitled “Collapses and Turbulence”, that the key is to maintain lots and lots of airspeed and line tension. I still hold that this is generally the truth. However, upon re-examining the situation, I have realized that my perspective on the situation is based on my frame of reference. I fly sub-100 square foot cross-braced speed machine that falls out of the sky like a homesick bowling ball. I do not really represent the whole. The average-size parachute is 150-170 square feet in the civilian world, and much larger for students and military jumpers. In further exploring the issue from the perspective of lighter wing loading and larger parachutes, I have discovered that this is not necessarily best way to fly a larger canopy in chaotic air. Here is why this is so: If the parachute has a great deal of drag, i.e. a light wing-loading, thick airfoil or is a large parachute in general, the rules change. Such canopies are less capable of maintaining high speeds unless flown very aggressively. Due to the high drag variable at the canopy end of the drag equation (“Rag Drag”, as I call it) the excess airspeed makes the canopy itself want to retreat behind the jumper far enough to reduce the airspeed far below the unadulterated full flight speed. This momentarily increases the likelihood of a collapse. The parachute levels off in mid air, slows down, and for a brief moment, becomes vulnerable to collapse. Therefore, when flying a canopy with a short, powerful recover arc, aiming to increase the speed beyond full flight becomes a double-edged sword. If the timing is wrong, such as when leveling out high (prematurely), the situation can become very dangerous. The truth is, leveling off well above the ground is dangerous for any wing-loading, and can happen with any parachute due to an incomplete plan or an imperfect execution. Parachutes flown below one G, at speeds less than full flight speed tend to be more susceptible to collapse. So, if the pilot is quick with their "Surge-Prevention Input", (what paraglider pilots call "flying actively", the risk of collapse is significantly reduced as the negative pitch oscillations will be minimized, thereby diminishing the likelihood that the wing will reach a low enough angle of attack to actually achieve negative lift and dive toward the jumper (i.e. collapse and scare the daylights out of you). Given the fact that the only preventative or corrective response to a collapse is to stab the brakes as quickly as possible, the sooner the pilot responds to the forward surge, the less the input necessary to avoid or correct a collapse. Therefore, a canopy with a great deal of slack in the brake lines will require more motion on the part of the pilot to create any appreciable effect. This means that a canopy that is in full glide, with the toggles all the way up in the keepers and three inches of excess brake line trailing behind will take longer to see an increase in the angle of attack due to the control input than one with no slack in the brakes at all. So then the question is posed: “Do we shorten the brake lines on larger canopies to help the pilot prevent collapses?” The answer to this is no, we cannot. This will result in serious bucking during front riser input. It will also mean that following a few hundred jumps, the canopy will be in significant brakes when they think they are in full flight, due to their “lazy arms” pulling the tail down when they should be flying arms up. This will result in lower average airspeeds that will reduce the parachute’s flare power, as well as it’s penetration into the wind. This will also result in more oscillation and distortion in turbulence. The answer comes to us from our sisters and brothers in the paragliding world. They teach their students to hold a touch of tension on the brakes when flying through turbulence. The goal here is not to put on the brakes and deform the tail, but to simply take up the slack on the brake lines, in preparation for a 12-24 inch strike on the toggles to prevent a collapse. Some teach their students to hold about 5 lbs of pressure on the brakes, while others teach that we should hold no more than two inches below the “Feel Point”. Either way, taking the slack out of the brakes is like standing ready in the door, even when you can't see the count. So, on larger canopies, it appears that a light touch on the brakes may help prevent collapses. However, it is not because the canopy is more stable in this configuration, but simply that the pilot is more prepared to prevent the wing from surging forward in the pitch window. Once the wing has passed through that parcel of turbulent air, however, the job remains to regain the full flight airspeed, while maintaining positive G's. Letting the wing surge back into full flight too quickly can send the wing out of the frying pan and into the fire. Get it back to speed gently, but get back there as quickly as possible. These are opposing goals, so the actions of the pilot once again become pivotal, calling upon trained skills and acute attention to sensation. Ultimately, the best way to handle turbulence is to deny it battle. Despite what your ego is telling you, you already have enough jumps. I know you want more, but sometimes the best way to go is to sit on the ground and watch the inexperienced jumpers get experienced. Live to fly another day. Brian Germain Big Air Sportz www.bigairsportz.com
- 4
-
- canopy control
- safety
-
See more
Tagged with:
-
The Norwegian Defence Force recently replaced all their parachute systems and in turn sold their surplus gear to a company (Alfa Nordic AS) which is now looking to sell the large collection of Performance Designs and Parachutes de France items. There were originally 120 main canopies and 120 reserves for sale, with the current inventory selling quickly. The canopies are said to be in good condition with the majority having around 100 jumps on them with only a few with more than 200 jumps, and many of the reserves are still in their original plastic bag. The DOM for the mains and reserves are between September and October 2001. Any damaged canopies that were found in the original batch have been removed from the sales pool and as of yet there have been no returns on any of the sold items. The canopies have reportedly been and are currently being stored in boxes on pallets, covered with thick transparent plastic in a dry and warm storage area in Norway. Alfa Nordic’s main building is located in Hokksund, Norway with the rigger being located in Voss. The items originally listed as for sale include: Performance Designs: Navigator 220 Navigator 240 Navigator 260 Navigator 280For 4000NOK (about $635) Parachutes de France: Electra TechnoFor 1000NOK (about $159) The current item availability can be viewed via Google Doc Should you wish to make a purchase or enquiry you can contact Ron Holan at [email protected]
-
Cookie Composites was founded in 2003 by Jason Cook and Jeremy Hunt, in Australia, with the focus of manufacturing high quality skydiving head gear and accessories in small series. In 2006 the company decided to invest in their industrial design department. Since then new methods of product development and manufacturing were introduced, improving the products and allowing the brand to grow. Today Cookie's products can be found all over the globe. Ricardo Sa Freire is one of the creative minds behind the very successful Cookie FUEL helmet. The talented industrial designer has been working with the guys at Cookie for almost a decade, having designed gear items that can be found in thousands of skydivers' inventory. We caught up with Ricardo to find out exactly what went on in the design and development process of the Cookie FUEL helmet. Dropzone.com: When you were approached by Cookie to do this design, what was the high-level brief? In a nutshell, what did they want in terms of design, cost and market positioning? Ricardo: I've had the opportunity of working with Cookie for the past eight years and together we have developed several products from helmets to accessories. All projects start the same way, we observe things. The market, the users, materials, new trends etc. Once we understand these factors we can begin to design something. In the case of the Fuel we knew it was time for us to design a new open face helmet that could provide all the great features it now does. We then set our minds to design the best open face helmet possible. It should be safe in the air, easy to customize and comfortable without forgetting about the aesthetics. Dropzone.com: Talk us through the basic phases or steps that goes into designing a new helmet, from the initiation of the project to when the first products roll off the line. Ricardo: Whenever you design an object, that will be directly used by a person, there are some steps you need to take. Considering that all your pre-project development is done (research and strategic decisions) you then start the conceptual phase. This is where the ideas and findings you previously came up with are explored. After filtering these ideas it's time to test them through models and prototypes. Once everything is up to our standards we move to pre-production, where we make a final assessment and give the final touches. During the whole process we have constant discussions over the concepts, looks, and solutions. We only move forward once the three of us are satisfied. Dropzone.com: When you set out to design the FUEL, did you start from the proverbial "blank canvas" or did you build on concepts that you've looked at before? Ricardo: The concept behind the Fuel was something that came up after a lot of talk between Jason Cook, Jeremy Hunt and myself. Way before we started designing it we knew all the features and options the helmet would have. When it came to the helmet's shape and looks we were very open about it, all we knew, was that, it had to tie up with the rest of our range specially the G3. We wanted people to put these helmets side by side and see they were related. Dropzone.com: Working with Jason and Jeremy on the project, were there specific areas (build quality, comfort etc) where each individual focused,or was everyone involved with all aspects of the design? Ricardo: All three of us have very different skill- sets and expertise, this allows us to cover a lot of ground during the development. Jason and Jeremy have the business/production engineering side of things really locked in. They know if we will be able to produce what we are developing in a realistic way and will also come up with elegant and intricate solutions like the G3's visor mechanism, the Fuel's cutaway chin-strap and may others. They are also skydivers, something I am not. I have been an industrial designer for more than a decade (designing mostly sports equipment) and I am very comfortable designing new products for the skydiving community. But even after learning so much about it by researching and talking to athletes I still trust their judgment when we are exploring options during development. Dropzone.com: Is there any added pressure when designing a safety device, where a prototype may fail a strength test and require a change in design? Ricardo: Cookie products are not safety devices however we understand the environment in which they will be used. We know how we want something to perform and shoot for that. Most of the times we get a better result than we were expecting but when we don't, we learn from it and come up with a better solution. The Fuel's cutaway chin-strap is a good example. After the concept was turned into a prototype and tested we realized that it held more weight than we expected and took less force to activate. So after testing it many times we realized that that was not ideal and decided to make some adjustments to have it performing exactly how we wanted. Dropzone.com: Where did you look for inspiration when designing the Cookie FUEL? And do you find that you are more influenced by natural or industrial elements? Ricardo: The Fuel's main design influence is its functionality. Of course we wanted a helmet that looked good but the final shape came from the idea of optimizing the features and comfort. So I wouldn't be able to choose only one of the two options. It is a tool with no unnecessary features like a turtle shell but it was though through down to it's minimal details like a high-tech component. Dropzone.com: What are the various trade-offs that you have to keep in mind during the design process? Are there any specific ones you'd call out that was particularly difficult for this design? Ricardo: Trade-offs are part of the design process and sometimes they can turn into improvements. During the development of the Fuel we came across moments were we had to choose between two directions but we normally do it after testing both so it never feels like you are missing something. But this also has a lot to do with the fact that we knew what we wanted to achieve from the beginning. Dropzone.com: Did you arrive at a bunch of concepts from which you guys chose the final candidate or did you pretty much work on a single design and evolve it to where you ended up? Ricardo: We have been working together for so long that we really understand each other and Cookie, as a brand, became what it is today because of this. The earlier projects had a lot of concepts and designs to choose from and that was necessary back then. But nowadays we have really matured in terms of design. We know how a Cookie product looks or should look, so now we focus on making it the best possible. And we will keep doing it. Dropzone.com: What, in your opinion makes the FUEL stand out from other freefly helmet designs available on the market? Ricardo: The Fuel delivers a lot in a low profile package. It's light, comfortable and allows you to customize it in a very fast and simple way. It is a helmet that will evolve according to your needs. You can choose to mount L&B; or Alti-2 altimeters, side mount Sony or Contour cameras and top mount GoPro cameras by choosing between the classic snap or the snag-free Roller-Mount all this combined with a cutaway chinstrap. The only thing missing was a chin-cup. But I am happy to say that we have just finished the development of a completely new chin-cup and cutaway system that will be presented in the next week or so. We are currently building stock before starting to take orders so keep an eye in our Facebook page for more info. Do you own a Cookie FUEL? Let us know what you think of the helmet.


