Search the Community
Showing results for tags 'gear'.
Found 157 results
-
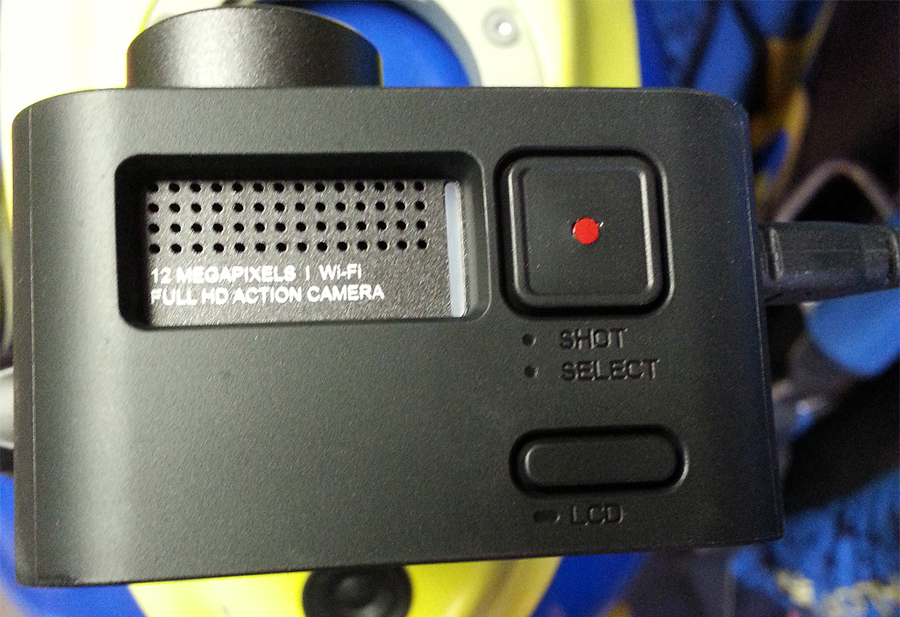 POV cameras are popping out of the ether these days, and a small company in Korea, previously specializing in dashboard cameras, has entered the POV fray with their small box Blackvue camera. The Blackvue closely resembles the frame of the GoPro, and that’ll be the first comparison most folks will make when looking at this camera. Size and weight-wise, the BlackVue is identical to the GoPro, JVC Adixxion, Swan, and the majority of other POV cameras, and the profile isn’t terribly different from its main competitor. Why would one look at the Blackvue SC500 (or any other competitive camera)? Price, form factor, simplicity/ease of use/setup all fall into a consideration. The Blackvue is ridiculously simple with few buttons, no menus to scroll through, and the simple modes assure perfect recordings every time. The camera features Wifi output for monitoring, an included/detachable LCD display, and is capable of shooting 60p footage for smooth slow motion. The housing is a rubberized, non-water/weatherproof housing that mounts on a stickypad/thumbscrew system (compatible with GoPro mounting accessories). The camera is essentially choice-free, in that it offers three shooting modes. 30p (standard/default 1920x1080/30p) Still Photo (also capable of timelapse) High Speed (1280 x720/120p) IMAGE QUALITYLet’s start with the most important aspect of image quality. Image quality from this camera is about what I expected it to be. It’s not “drop your jaw this is incredible” good, and it’s not really poor, either. It’s better than some of its competitors, lesser than others so I’d refer to it as “average.” The camera features a Sony Exmor imager, similar to the imager used in the Sony AS-15 cameras, and I’m a bit surprised that Pittasoft didn’t take greater advantage of the features this sensor offers. They’ve tuned the sensor to be quite dynamic, as this screengrab demonstrates. The lens is a fixed 170 degree lens, similar to most of the competitor POV cameras. The glass is exposed, as there is no cover/protection for the lens in the housing. The lens does come with a small rubber cover that is easily lost and falls off if the camera is tipped over. It is possible to sit the camera farther back in the housing, if the LCD display is removed, thus providing some lens protection via the housing. The BUTTONSThere are only three buttons on the camera (unless one counts the LCD power button on the LCD pack). One button powers the camera and selects the mode (Video/Still/High-Speed). One button for Wifi on/off, and the record start/stop button. The removeable LCD pack also has its own power button. Buttons are large, so operating the camera while wearing gloves won’t be any kind of an issue. The built in speaker provides audio for playback, and also provides status indicators when buttons are depressed. However, this speaker/audio indicator is hard to hear in a noisy airplane. INDICATORSAll indicators are found on the front of the camera. This is where the first weakness in the camera is found. The indicator lights are small, and difficult to read in daylight. The record light is also dim and although the streamlined look of the record indicator is sexy, it’s also difficult to see in a well-lit aircraft cabin. In the 120p test footage, you can see the camera operator squinting and covering the camera to shade it from the sun, as it was challenging to see whether the camera was recording or not. BlackVue would do well to take a page from their competitors playbook and put a larger indicator light in their next version. The HOUSING:The housing is unique; a rubber “O” ring design surrounds the entire camera. The intent is to dampen vibration and provide protection against scuffs and scrapes common in the action sport environment. The housing is capable of holding only the camera, or the camera/LCD combination. The housing offers a pair of holed mounting tabs, identical to the GoPro camera mount system, and in fact, the two are compatible. This is a huge benefit to camera owners, as they have access to the full complement of GoPro mounting accessories. Smart move on the part of Pittisoft to jump on this before any of their competition has realized that when it comes to camera mounts, standardization is a good thing. This system is not waterproof, nor even weather resistant. While I’d have no problem using it around mist, clouds, etc, I’d also be very uncomfortable in any environment where water might cover any significant portion of the camera. Pittasoft does have a waterproof housing in the works at an undisclosed price. Best viewed in 720p CONNECTING POINTSThe camera provides a mini HDMI port for instant viewing on a monitor. This is critical for debriefs, as when one is working between loads, it is time-consuming to remove a microSD card and read from a computer or other playback system. The camera also offers a USB port, suitable for charging or playback over a computer. Both ports are covered by a removable plastic plug. Like other small format cameras using this “feature,” I find it annoying, as it’s a small plastic part easily fumbled while wearing any kind of glove, and may easily be lost. BATTERY LIFEThere is no easy way to say it; battery life is unimpressive. Out of six jumps, the battery failed on three of them, even though I disabled the LCD screen. The unit had been charged prior to each jump, and turned on to check on the ground prior to boarding the aircraft. It’s possible my unit wasn’t entirely up to speed, yet even after charging overnight, the unit couldn’t manage two jumps in a row with the LCD preview enabled. There is no indicator for battery level if the LCD display is disabled, yet the LCD preview eats most of the battery. Wifi is also a battery-killer, but fortunately, the WiFi indicator is very obvious, and unless cell/wifi preview is absolutely necessary, users would be wise to leave it off (this issue is similar with all the POV cameras, but the Blackvue seems to be a bit more wifi power-hungry than some of the others). In speaking with the folks at Pittisoft, they indicated that they’re now shipping a firmware offering better battery life. SUMMARYAll in all, this is a very simple camera, easier to operate than most of the POV offerings out there due to its limited functionality. Some people are looking for easy-to-use and this camera absolutely offers “easy.” Picture quality is on par with cameras costing more, and offers a better image than some of its same-price counterparts. It’s super-fast to set up and as there are no menus to cycle through, there is virtually no chance of not knowing which mode the camera is in. Its light weight makes it perfect for many other applications; I particularly appreciated how well it flies on a UAV drone. The price is competitive, the camera is very easy to operate, and the build is robust. I for one, am looking forward to seeing how Pittasoft’s new camera does in the rapidly broadening POV market. Price: 300.00 USD Available online and at some retailers now. About The AuthorDOUGLAS SPOTTED EAGLE is an audio and video pro. He is a Grammy recipient with DuPont, Peabody, and Telly awards lining his studio; he is also a participant/producer in multiple Emmy winning productions. Douglas is the Managing Producer for Sundance Media Group, Inc. and VASST, authoring several books and DVDs and serving as a trainer and consultant for videographers, software manufacturers and broadcasters. He is the author or co-author of several digital media titles including Digital Video Basics (VASST), The FullHD (VASST), and Vegas Editing Workshop (Focal Press) among many others. - See more at: http://www.dropzone.com/about/Contributors_895.html#sthash.oSWvVDbz.dpuf
 -
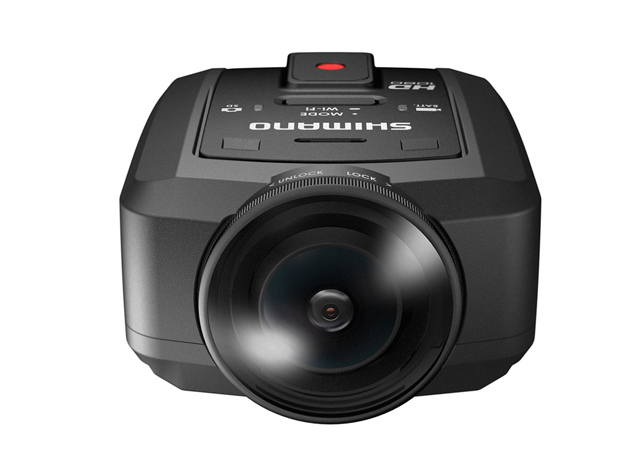 Action cameras are popping up all over the place, from all sorts of companies. Garmin shocked a few with their release of the Garmin Virb in the third quarter of last year. Now it's the Japanese manufacturer Shimano that has joined the party. Unlike some of the other action camera competitors, Shimano is a long standing company founded in 1921, but is typically known for their cycling, snowboarding and fishing equipment. Shimano will be releasing their first POV action camera in May this year, which will look to compete with brands like GoPro, Contour and Sony. The new 'CM-1000' as it's called, certainly has some interesting features that could allow it to challenge the competitors. Unlike most other POV cameras the CM-1000 is waterproofed to 30 feet without the requirement of any additional housing. The weight is also very impressive, weighing in at just 86 grams; more than half that of the GoPro Hero 3 Black Edition when waterproof housing is attached. The most impressive feature for us is the aperture of the camera lens which sits at F2.0, as opposed to most competitors' F2.8. This full-stop increase in light will allow for better low-light performance from the camera, a topic that is often focused on and often falls short in some manufacturers. The sensor is also very impressive, boasting a 16 megapixel backlit CMOS sensor, likely able to produce high quality still images as well as full HD video. The CM-1000 will come with multiple lens modes, a standard 135 degree view as well as an ultra wide angle 180 degree view. Another pretty cool feature is the auto image rotation, which will automatically rotate the picture to the correct orientation, regardless of how you hold the camera. Bells and whistles come in the form of ANT+ capabilities, allowing users to connect the device to training devices and heart-rate monitor. Especially useful for those who like to keep track of their data. While one would imagine that coming from a company who is renowned for their cycling gear, that their camera would be focused towards cyclists. The CM-1000 seems to target all POV users, with the company's focus put on things like waterproofing. In summary, the CM-1000 looks impressive on paper, it has what appears to be a high quality sensor, a large aperture and is light weight. It is however important to remember that these are only a fraction of variables that will affect the overall video and image quality. And it will be interesting to see how the camera handles transition in lighting, as that's always an important factor with POV cameras. Though if it performs as one would expect from a company with a history of quality products and a large development budget, this camera is definitely worth keeping an eye on. Shimano's CM-1000 will come with a lens cover and two mounts (one adhesive and the other helmet mount) and USB cable. The CM-1000 will set you back $299 on release.
 -
 The Norwegian Defence Force recently replaced all their parachute systems and in turn sold their surplus gear to a company (Alfa Nordic AS) which is now looking to sell the large collection of Performance Designs and Parachutes de France items. There were originally 120 main canopies and 120 reserves for sale, with the current inventory selling quickly. The canopies are said to be in good condition with the majority having around 100 jumps on them with only a few with more than 200 jumps, and many of the reserves are still in their original plastic bag. The DOM for the mains and reserves are between September and October 2001. Any damaged canopies that were found in the original batch have been removed from the sales pool and as of yet there have been no returns on any of the sold items. The canopies have reportedly been and are currently being stored in boxes on pallets, covered with thick transparent plastic in a dry and warm storage area in Norway. Alfa Nordic’s main building is located in Hokksund, Norway with the rigger being located in Voss. The items originally listed as for sale include: Performance Designs: Navigator 220 Navigator 240 Navigator 260 Navigator 280For 4000NOK (about $635) Parachutes de France: Electra TechnoFor 1000NOK (about $159) The current item availability can be viewed via Google Doc Should you wish to make a purchase or enquiry you can contact Ron Holan at [email protected]
 -
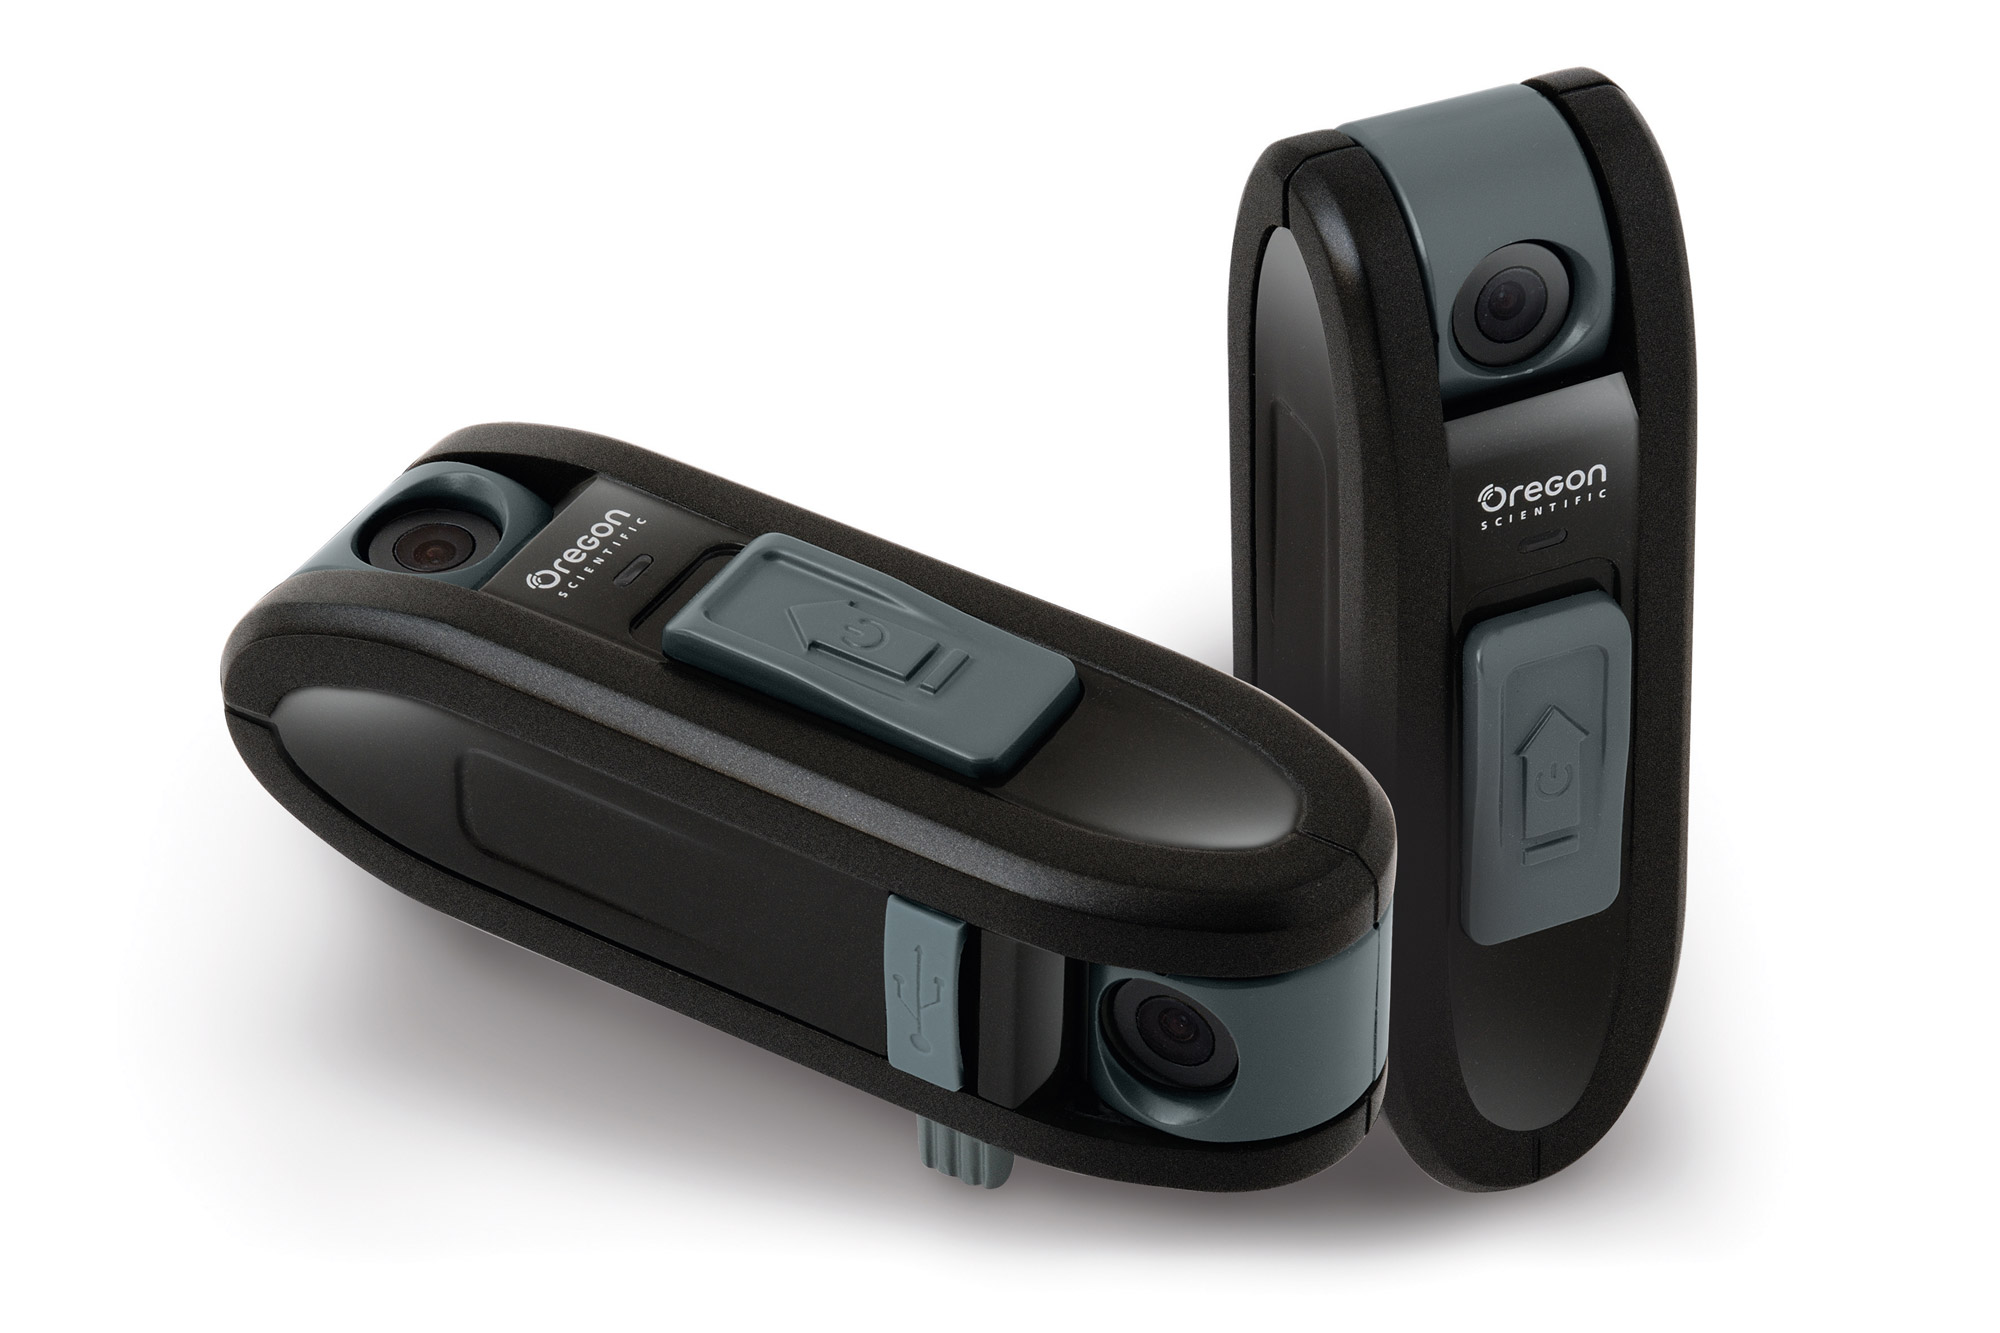 Eyes In The Back Of My Head..... Remember when Mom told you she had "eyes in the back of her head?" With the Oregon Scientific Chameleon, she really could have em’! Ever wanted to see what’s happening behind the camera? Without the hassle of two cameras, syncing in post, and splitting screens/picture in picture? With the new Oregon Scientific ATC Chameleon, syncrhonized video with two channels/angles in a single stream is quick and easy. The camera allows users to see what’s coming up and what’s gone by with just one button. This camera is unique in that it features dual lenses, shooting two views to a single stream that may be displayed either side by side or over/under. This allows not only for POV, but reactions to the POV. The large button allows even the most thick mitten or glove to turn on/off the camera. Powering up the camera also starts record mode. Note: See our comprehensive side-by-side shootout of the top POV Action Cameras here OverviewAt 4.5 x 1.5 x 2.25 inches, this slightly larger than average POV camera is a single-button on/record camera. The only user-selectable option on the camera is a switch that allows users to determine whether they’ll shoot over/under or side by side video. All in all, it’s incredibly simple. The lenses are both 170 degree field of view lenses. In other words, they’re ruber-wide. Given that capturing action and POV reaction is the goal, they need to be wide, as they’re generally quite close to the subject on one end or the other. The lenses are pretty good on this low cost camera. Each lens can rotate 180 degrees; one rotates vertically, the other horizontally. The camera is not intended for shooting 3D content, as the two lenses cannot overlap or point at the same subject. MountingThe camera mount profile is somewhat higher than some of the other POV cameras; the dual V-clip mount may easily be removed for flush mounting. This will cover the microphone, but audio is rarely a priority in POV cameras. If for example, mounted directly to a helmet, mudflap, chest strap, or goggle strap, the mount is superflous, and the flush mount ability is likely preferable. Oregon Scientific offers several different mounting options such as ball mounts, flat mounts, adhesive mounts for surf, helmets, etc. Recording MediaThe ATC Chameleon stores files on a MicroSD, up to 32GB/Class 6 card. One minor observation; the recessed card slot housing makes it challenging for fat fingers to extract a card. The housing also offers a switch for camera status, a Micro USB port, and a switch for horizontal/vertical views. Like most of its small-imager competitors, the Chameleon displays rolling shutter bending at very high shutter speeds. Keeping the camera reasonably horizontal in high light significantly reduces this phenomenon (in all POV cameras). CodecLike all other POV cameras, the Chameleon also uses the h.264/mp4 codec. It offers a slighly lower bitrate than other cameras; it’s 8Mpbs compared to other cameras at nearly double the bitrate. Like most POV cameras, this low bitrate/high compression is challenged in low light, but in high light and contrasted scenes it works quite well. Audio is a single channel AAC stream, and is similar in quality to most other POV cameras. OutputThe Chameleon offers two output resolutions; 1920 x 720, or 1280 by 1440 (yes, that figure is correct, taller than wide). Vertical mode applies 1280 x 720 to each channel, while horizontal mode is VGA per channel. Vertical mode provides for the best imagery in most instances. Vertical mode also allows very easy splits for full-screen views in any NLE system. This is the mode I recommend for most purposes. Overall ViewThis camera is brilliant in design. Fast, easy to use, and offers a perspective that no other camera currently offers. Sure, one could purchase two separate POV cameras, have two separate streams, sync them in post, and have a similar result. However, it will cost twice as much and take twice as long, not to mention other variables. In this aspect, the Chameleon shines. The low bitrate coupled with small imagers makes it a challenge in low light. Additionally, the codec will not open in every NLE or media player. For example, while the files will open in VLC, the Windows Media Player or Quicktime Basic will not open these files on a PC. Corel Videostudio will not open these files, while Adobe Premiere CS or Sony Vegas Pro/Movie Studio does properly decode these files. This shot was taken post-sunset. The camera adds quite a bit of gain, shifting color and softening detail in very low light. This is similar to most POV cameras in its class. In this screengrab, the resolution/size shows 1280 x 1400 in over/under mode. The split view denies either view the best quality image possible; this is inevitable and I cannot ding the camera for the way it chooses where to split the image. Again, the unique and creative nature of the split view makes up for this, however. The creative views possible with this camera are unlimited. It is quite durable, can be dunked underwater (it is not waterproof for sustained periods of time, OS does offer a water housing), and is capable of drops from high areas. I dropped mine from approx 12’ and it was fine, even after landing on tarmac and impacting on the edge of the lens. In this image, the compression causes contrast to bleed into highlights and shadows, softening the details in the image, However, as a B Roll and unique view, this won’t be an issue in most scenarios. Post ProductionAs mentioned, not all NLE’s will properly decode this camera, but most should. Transcoding will be required for users of Final Cut Studio, while FCPX users will not need to transcode files from this camera. The width of the lens is the same FOV as most popular POV cameras, so it will cut nicely into other POV cam content. Another option with 155-180 FOV content is that a negative spherize and crop filter may be applied to flatten out a too-wide image. Expect to do some color correction. Bear in mind that two channels are now being corrected, so if lighting or color are dramatically different on one channel, the other will likely be adversely affected. It’s quite easy to split channels in any NLE for individual color correction. The standard AVC color correction process (Shift gamma, reduce yellow, pop sat) will help this camera really shine. A tiny bit of edge sharpening will benefit low contrast images (again, similar to other AVC-based camera files). SummaryThis camera has some terrific value for the budget-minded action-sport enthusiast. It also offers unique camera angles and an ease of use that is rare in the POV world. The angles alone make it a useful tool in any videographer’s tool box for walkthrus, capturing challenging angles, seeing around corners, capturing body positions while showing the environment, or just plain fun (I put one on a dog collar to capture the dogs ears and the wagging tail). The picture quality isn’t bad, the one-button record makes it ridiculously easy, and the price is definitely right. I’m happy to have a couple in my POV kit; they’ve come in handy already. If budget, a unique view, or simply another tool in the box are considerations, this is a terrific option. Price:$199.00 retail, available online or in sporting goods stores here. For More Informationhttp://us.oregonscientific.com/cat-Outdoor-sub-Action-Cams-prod-ATC-Chameleon.html For training on AVC or POV Cameras: www.vasst.com About The AuthorDOUGLAS SPOTTED EAGLE is an audio and video pro. He is a Grammy recipient with DuPont, Peabody, and Telly awards lining his studio; he is also a participant/producer in multiple Emmy winning productions. Douglas is the Managing Producer for Sundance Media Group, Inc. and VASST, authoring several books and DVDs and serving as a trainer and consultant for videographers, software manufacturers and broadcasters. He is the author or co-author of several digital media titles including Digital Video Basics (VASST), The FullHD (VASST), and Vegas Editing Workshop (Focal Press) among many others. Douglas is an accomplished aerial photographer who thrives in the adrenaline-filled world of fast-action videography. He is active as a multimedia producer, trainer, and presenter, utilizing the latest technology as part of his workflow.
 -
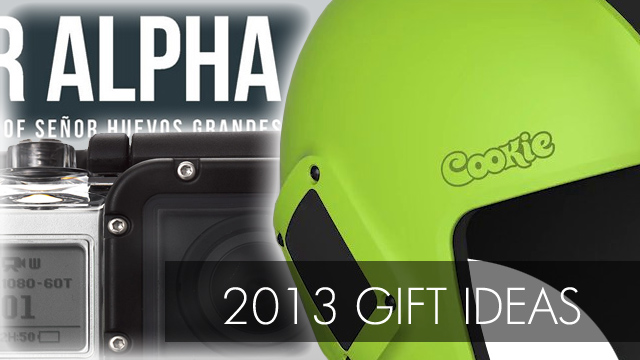 With under two weeks until Christmas of 2013, I hope you've already done your Christmas shopping. But in case you haven't, we've put together a list of potential gifts, ranging from high end gear (perhaps for those looking to leave themselves, or their loved one something skydiving related under the tree), to smaller stocking stuffers that could be a good gift for friends and fellow jumpers. Cookie Fuel HelmetThis open face helmet can be ordered as the helmet only for use as a basic, comfortable open-face helmet. Or it can be transformed into a full-on camera helmet with a top-mount, side-mount, cutaway chinstrap and outside access audible mount. Just as Cookie Composites revolutionized the full-face camera helmet with the G3, the Fuel looks to do the same for the open-face and POV camera helmet markets. The Cookie Fuel shell is made of a High Impact ABS / Polycarbonate Blend. It comes standard with pressed foam chin strap (non-cutaway) and blank side and top plates. The blank side plates will hold any audible altimeter, but the audible won’t be visible from the outside of the helmet unless the optional audible mount side plate is ordered. For more information and pricing visit: From Skydive Store From Chuting Star GoPro Hero 3 BlackCapture and share your life’s most meaningful experiences with the HERO3+ Black Edition. 20% smaller and lighter than its best-selling predecessor, it delivers improved image quality and powerful new features geared for versatility and convenience. SuperView™ is a new video mode that captures the world’s most immersive wide angle perspective, while Auto Low Light mode intelligently adjusts frame rate for stunning low‐light performance. Combined with 30% longer battery life, faster built-in Wi-Fi and a sharper lens, the HERO3+ Black Edition is the most advanced GoPro yet. For more information and pricing visit: From Skydive Store From Chuting Star GoPro LCD Touch BacpacRelive Reality Instantly with the GoPro LCD Touch BacPac. The LCD Touch BacPac is a removable LCD touch screen for GoPro cameras*. As a removable accessory, the LCD BacPac keeps your camera as small and light as possible, yet provides the convenience of an LCD screen when attached. Seamlessly attaches to the back of GoPro cameras LCD touch screen allows for easy visual control of camera (frame your perfect shot) and settings Preview + playback photos and videos including instant slow motion playback Integrated speaker with volume control 3.5 mm headphone jackFor more information and pricing visit: From Skydive Store From Chuting Star Gear BagsLooking to stash all your gear into a single bag, making carrying a breeze. These gear bags have plenty of room, for your rig, jumpsuit, camera and your accessories. For more information and pricing visit: From Skydive Store From Chuting Star Pro TrackThe ProTrack audible altimeter/electronic logbook is the standard for audible altimeters. The ProTrack continuously stores detailed information about the last 200 jumps and accumulates the total number of jumps and freefall time up to 10,000 jumps. The ProTrack has 3 selectable freefall warning altitudes. The Most Popular Skydiving Computer Loaded with advanced features, PROTRACK™ gives skydivers a full plate of information about their skydives INSTANTLY on the large LCD viewscreen. Whether you fly on your head, turn points like a banshee, dock first on a big-way, surf the clouds or are just learning to skydive, PROTRACK™ is the perfect audible altimeter solution for you. L&B; has also added special data collection parameters and preset dive types for both WINGSUIT FLIGHT and B.A.S.E. JUMPING making the PROTRACK™ even more versatile for every type of jump and every kind of jumper. PROTRACK™ can be easily set for 1, 2 or 3 loud and distinct freefall warning altitudes and will provide you with the ability to log up to 9,999 jumps! See your exit altitude, freefall time, average freefall speeds, maximum speed reached and deployment altitude of your skydive as soon as you land. No other audible altimeter available gives you the versatility, accuracy and reliability like PROTRACK™! PROTRACK™ is the most advanced, user friendly, and accessible audible altimeter electronic logbook/freefall computer available to skydivers. PROTRACK™is everything you would ever want in an audible altimeter. New technology advances in speed calculation have been developed by L&B; so that skydivers can now record and compare their freefall speeds accurately. For more information and pricing visit: From Skydive Store From Chuting Star Stocking Stuffers Flexvision GogglesFlexvision Goggles: the goggles with a friction lock adjustment and without an outer rim to fall off! Flexvision are made from a soft, flexible, long-lasting plastic that is scratch resistant. Each pair is individually sanded on the inside for a smooth finish, and offer a wide field of vision. A thick bungee strap pulled through a small hole in the plastic allows the user to adjust the tension without need to make a knot, just pull to the desired tension and release. The friction Lock is a unique feature, especially for students and tandems where there is a need to change settings often. The Flexvision Goggles come flat, but then conform and mold to your face as you put them on and tighten up the bungee. Keep an extra set in your jumpsuit! These are one of the longest-lasting goggles manufactured specifically for skydiving and give you an unobstructed field of vision. For more information and pricing visit: From Skydive Store From Chuting Star Neumann Winter Skydiving GlovesThese gloves are the standard for winter hand protection for skydivers from the company that knows gloves: Neumann. These gloves have a thermal-lined back for extra warmth in the winter. Neumann Tackified Skydiving Gloves are: Designed To Fit Like A Second Layer Of Skin Meets NFL/NCAA Specifications Ensure Finger And Hand Sensitivity Tackified Leather Palms Machine Wash and Air DryFor more information and pricing visit: From Skydive Store From Chuting Star Skydiving Santa Christmas CardsWhat better Christmas card to send to friends from the dropzone than a skydiving Santa Christmas card. From Chuting Star Sugar Alpha"Skydiving and drug smuggling pioneer Roger Nelson lives life out of the box. Fueled by a love for adrenaline and adventure, Roger goes after everything he wants with gusto. But now Roger is ready to retire from smuggling. With a parachute center to run and a family to raise, Roger knows it is time to stop the cat-and-mouse games he has been playing with the authorities for years. He and his longtime partner, Hanoi, plan one final run to Belize, where they intend to fill their Douglas DC-3 with enough cannabis to set them up for life. But then Hanoi dies in a plane crash in an attempt to make some "legitimate bucks" flying fish in Alaska while they wait for the growing season to end. Left without a partner or plane, Roger remains determined to return to his family for good. To do so, he decides to stay true to himself and follow through with his retirement run. Roger must rely on a colorful cast of characters and the most unlikely airplane for a gig ever-Sugar Alpha, the legendary DC-3 with the secret fuel tanks and not-so-secret paint job-to help him complete the most daring run in the history of smuggling." The book has received excellent reviews and would make a great gift to anyone who enjoys a good book. Log Book CoverAn inexpensive and useful gift for your friends who jump. For more information and pricing visit: From Skydive Store From Chuting Star Beer MugFor more information and pricing visit: From Skydive Store The Skydiving HandbookParachuting, The Skydiver's Handbook by Dan Poynter and Mike Turoff is the one and only how-to, where-to, basic-to-advanced skydiving manual. This up-to-date book covers all training methods in great detail: static line, accelerated freefall, Instructor assisted deployment and Tandem. It traces the history of the parachute up to modern skydiving, year by year. The chapter on emergency situations is absolutely fascinating. Full of statistics, it reveals the best solution to every possible emergency situation. The book goes on to coach you in your freefall progression, from the basics through advanced relative work and free style, and in flying your canopy, from the basics to advanced canopy relative work. The equipment chapter is lengthy because this is where Dan Poynter has always been strongest. He tells you all about your gear, what to look for, what repairs you can make and when to take it to a rigger. Another chapter covers special jumps: at night, into the water, BASE, para-ski, high altitude, Smoke jumping, with cameras and much more. The Appendix directs you to the action by listing clubs, drop zones, equipment companies, books, magazines and videos. Never before has so much skydiving information been available in one place-and it can be yours. The Skydiver's Handbook. Completely revised, ninth edition, softcover, 5.5 x 8.5, 408 pages, 260 illustrations, four-color cover. Over 82,000 in print. For more information and pricing visit: From Skydive Store From Chuting Star
 -
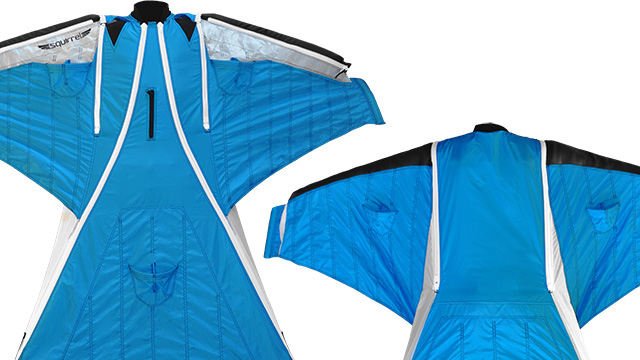 Earlier this year we brought you the article Inside Squirrel Wingsuits, where we talked with Squirrel founder Matt Gerdes about the then new wingsuit manufacturing company. We discussed what set Squirrel apart from other wingsuits and where the company was aiming to go to from there. You can now find Squirrel wingsuits on a number of extremely skilled and well known flyers, and Squirrel is seemingly establishing itself as a trustworthy and reliable wingsuit company. The latest addition to the Squirrel inventory is the Swift. The Swift is a suit that is marketed as a beginner suit for both BASE jumpers and skydivers. While it is said to be easy to fly, it is stressed that the Swift is by no means limited to beginner flying and still a competent suit for intermediate and even experienced wingsuit pilots. When developing the Swift, Squirrel wanted to bring to the table a wingsuit that would be forgiving to fly, while at the same time providing the performance needed in a BASE environment and when flocking. There is also a focus on agility and the suit is said to be great for acro, backflying and other quick maneuverability. The DesignInlets The Swift's inlets are catered to efficiency, with the surface area being larger than on some other beginner wingsuits. Both arm and leg wing pressure is able to be adjusted using the internal zips, doing so will ensure that you are able to manage your ride to be softer, if you are a newer pilot. Leading Edge Leading edge construction is a pivotal and complicated matter in wingsuit design. While rigid structures on the arm would allow for enhanced performance, it would pose a safety risk, but at the same time an overly flexible design would cause a loss of performance. One of the key elements to developing a good wingsuit is to find the perfect balance between a rigid, high performance design and the safety that comes with the more flexible design. Squirrel suits say that they've found the right ingredients to allow the high performance, along with safety; thanks to their three-layer leading edge design. While the exterior layer is finished in Glideskin, a flexible, durable and smooth material, the middle layer is made from a static, non-flexible air-mesh material which is sized wider than the Glideskin. This stronger, more fixed middle layer ensures that the profile does not become deformed. Finally on the interior is a Lycra finish which provides a smooth surface. Only the first few centimeters of the wrist will allow for full flex, as to allow for easy BOC and brake toggle access. Planform Squirrel have gone with a stance and sweep that is extremely similar to their more advanced wingsuits. This will allow those who begin flying on the Swift to easy adapt and progress to some of the more advanced Squirrel suits. Should you begin jumping with a Swift and then later move on to the Colugo, you'll find the transition easier due to a familiarity. Likewise if you had to move from the Colugo to the Aura. Profile The Swift has taken its profile from the advanced Squirrel suit, the Aura; with adaptions made to the Swift's lower surface area and shorter chord. Squirrel say that the thickness of the Swift is similar to that of the Colugo, and was chosen because of the focus on stable trim flight. Features There is a focus that all performance enhancing features in a wingsuit should be standard. The aim from the company is to bring you excellent performance and features included in the price of the suit. All Squirrel suits include: Foam padded foot cavities, internal pressure-zips, nut-sack storage compartment, chest pocket / belly-cam access, mylar reinforced leading edge and rubber BASE soles. Access "Keep it Simple and Safe" has been the mantra for Squirrel and with easy BOC and brake toggle access being a focus in reliable deployments, the suit has been designed to allow for just that. Cutaways are totally unnecessary, says Squirrel, pointing out the extremely easy BOC access and ease of access for the brake toggles, in any situation. The Swift has been designed to bring the flyer the excellent performance while never compromising on safety. Features Force Feed - A 3D reinforced inlet with maximum intake to drag ratio. Developed as a primary safety feature. Innie-Outie (BASE Mode / Skydive Mode) - This feature allows you to easily change between BASE or skydiving mode. In BASE mode the harness will be located on the inside of the chest compartment, for reduced drag and optimum glide; this is enhanced by the zips being completely closed. In skydiving mode the handles are completely exposed at the chest, allowing for easy access and an increase in safety. RAD (Rapid Arm Deployment) - A simple arced cut at the wrist allows for increased ease in the reaching of the pilot chute and toggles. A small, yet highly effective feature. Get Stiffie - A Mylar-reinforced bottom surface on the leading edge ensures that the profile structure is maintained, as well as providing efficient feeding to the inlets. Get Stretchy - In BASE mode, the flexibility of the panels near the shoulder relieve stress on the suit during openings. Bar-tacks in areas also help prevent seam failure. Light Ribs - Porcher Sport Skytex ensures that the suit is light and durable, while at the same time being more stable than mesh. This helps in reducing weight and pack volume. Glideskin - This flexible and durable material is used on all Squirrel suits and is used on the leading edge, where it is able to provide a stable profile while at the same time allowing for flexibility at the wrist area. Airtight Construction - All Squirrel suits are tested thoroughly for airtight symmetry in order to ensure the highest build quality possible. Super Sexy Zippers - While safety and performance are at the top of the list, the Swift is also a good looking suit. The suit uses custom ordered YKK #10 Coil zips. You will have the ability to choose between five colors of zips when ordering your suit.
 -
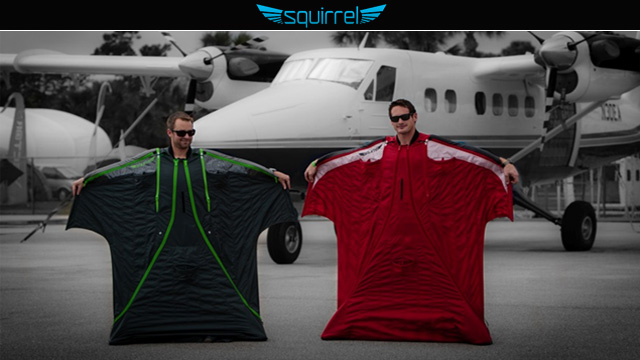 There are constant advancements in the development of human flight and over the past decade in particular we’ve seen some pretty ground breaking achievements, thanks both to the pilots who push the envelopes and the gear manufacturers that are constantly coming up with new products, and researching the way forward with regards to these items. We had a chat with Matt from Squirrel Wingsuits, one of the new wingsuit manufacturer on the block. On your facebook group you mention that this venture is one of a collaborative nature and that there are some 'elite wingsuiters' involved in the project. Are you able to provide names of those who are involved? Squirrel was originally founded by Matt Gerdes, Luc Armant, and Dave Barlia. After a year of intensive work, Dave was not able to reconcile the inherent workload with his family life and returned to fun jumping. Currently the day-to-day operation is Matt Gerdes and Mike Steen, with testing and development the responsibility of us plus a list of team pilots that will be released on the website soon. You mention on the Squirrel website that "If you want something done right, you have to do it yourself". That philosophy seems to be the primary reasoning behind the development of Squirrel. It is clear that you guys felt as though something was not being done correctly by other modern wingsuit manufacturers; is there something in specific that you felt was lacking in the current market and that there was a dire need for that had to be developed? In 2009 there weren’t a lot of people jumping “big” wingsuits in the BASE environment. Jade Tatom was the only person I had met who had ever BASE jumped a Tony suit. At that time (summer 2009) I felt that I had outgrown the suit I was flying and I was looking for something new but I didn’t want a Vampire because everyone else had a Vampire. I decided to get a “big” suit and immediately realized that it was awesome in the BASE environment. For 2009 and most of 2010, lots of people sneered at me and the other guys who were jumping these new big suits… there was an incredible amount of poop-talking that went on here at the Dropzone forum, in hindsight it’s really sad but it’s funny seeing so many of the people who were adamantly against big suits flying them now. I have to give Andy West and Dean Potter credit for being smarter than I was and basically enjoying their suits in private. I was a loud proponent of big suits and convinced as many people as I could (which turned out to be a lot) that wingsuit BASE was more fun with bigger wings… and by the end of 2011, a lot of people had figured out that more surface area is potentially advantageous in many ways. Anyone familiar with the evolution of wingsuit design in the past 3 years knows the rest of the story. I have liked every suit I’ve owned, for the most part. Tony makes great wingsuits and his and Jeff’s designs have (in my opinion) revolutionized the sport. But in 2011 I almost died twice and decided that I either had to quit jumping, or figure out a solution to the issue. In the end, Squirrel was the solution. If I die BASE jumping, now at least it will be in my own suit ;-) What is different about Squirrel wingsuits that sets them apart from the competition? Why would one be making a better choice by going for Squirrel as opposed to one of the other guys? If you look at the suit and fly it and can see and feel the difference, then you will know if the suit is for you or not for you. Deciding which suit to fly is (and should be) a very personal choice. I’ve tried my best to describe some of the details that are unique to our suits on our website, but I would never claim that our suit is better than another. It’s something that each jumper needs to experience and decide for themselves. The company is quite new, as are the products that have been released. How has reception been thus far? The feedback has been even better than we hoped. Our main concern is delivery times at this point. How many products do you currently have for sale, and how many are in development, with any possible release periods for upcoming products? The Colugo will be on general sale in late February. The Aura, a slightly larger suit, will follow. The Swift, our entry-level suit, will come this summer. How much time or effort has been spent into the research, specifically aerodynamic research for these suits. Are they going to be offering anything special with the way they fly? Anything you can tell us about the procedure that has lead up to the production. We are very lucky to have Luc Armant on board. He and Fred Pieri were instrumental in establishing the planform and profiles. Luc and Fred work for Ozone Paragliders, which for the past few years has been widely recognized as the world leader in high performance paraglider designs (currently about 80% of the top competition pilots are flying Ozone, which is insane in a sport with almost 50 brands). Luc and Fred are both complete and total geniuses, and their understanding of flexible airfoils is unparalleled. They have had some wild and awesome ideas, but there are major restrictions for wingsuits because we need them to be comfortable and safe (in my opinion safety and comfort come before performance) before we need them to be fast and efficient. Some of our early prototypes had massively stiff arms with reinforced tri-laminate surfaces and mostly-rigid profiles. The performance was amazing but you couldn’t even sit comfortably in the airplane. We remedied some of that with complex arm-release systems using magnets and Lycra and other things, but in the end it was all just too much going on when you’re standing on the exit point. Simplicity is so incredibly important in our sport. The first phase of development really made clear that comfort and confidence are the main priorities. A natural flying position, very clean and easy access to the BOC and brakes, and fast start-arc* in the BASE environment are our first priorities. When you start pushing speed and glide performance too much, inevitably there are sacrifices. We’re very happy with the performance but for me the most important thing is having the maximum amount of confidence that I’m going to get a fast, balanced, and predictable start, and then be able to reach my BOC clean and clear on every jump. I think that this is what pilots will appreciate on every jump. It’s human nature to be obsessed with performance, and I am not against that obsession, but I think that choosing suits based on their theoretical glide and losing sight of things like a fast start-arc and a really clean pull is a mistake. Nothing else matters when you can’t get your PC. In the past year we’ve seen more and more jumpers ordering the biggest suit possible – and while I agree that big is fun, I also think that we have to stay focused on ease of use and agility, especially for BASE jumping. And a lot of jumpers are not getting this point. The phenomena is like the opposite of skydive canopies, where jumpers feel cooler when they are flying something smaller; it seems like a lot of BASE jumpers want to be wearing the biggest suit they can, even though they would be able to fly much better lines in a more moderate design. *We define the “start-arc” as the vertical distance consumed at the point at which the jumper crosses an imaginary line extended at a 45 degree angle from the cliff edge. Your primary focus at the moment seems to be on attracting BASE jumpers, do you ever plan on expanding focus to skydivers as well? Every BASE jumper is a skydiver, too. Or at least they should be. In my opinion, skydiving is the single most important thing that you can do to improve your wingsuit BASE jumping. One of the most important features on our suits is the Innie-Outie zip system, which allows you to zip your BASE harness inside the suit and profit from the increased wing area and reduced drag which results, or you can zip your skydive harness onto the outside of the suit which allows you to access your handles safely and easily with no funny-business. Our focus will always be on wingsuit BASE jumping, that’s just who we are, but we all love to skydive and all of our suits are designed to be skydived safely and easily. Are there any professionals, whose names one may know busy flying Squirrel suits at the moment, and if so, who are they? Stay tuned for the list.
 -
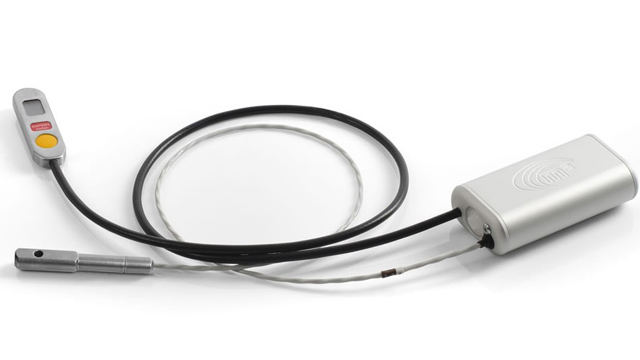 A product service bulletin has been released for the MarS A.S m2 AAD. This after several reports of the device displaying the errors "Error No. 0" and "Error No. 1". These errors were not eliminated by turning the device off and then on again. The error has been traced to an issue with the device sensor. There is a mandatory compliance request for owners with affected devices to send said devices in for an inspection and subsequent replacement or repair. Costs involved in the procedure will be covered by the manufacturer. More information on this service bulletin and the affected serial numbers can be found at MarS A.S M2 AAD Service Bulletin pdf.
 -
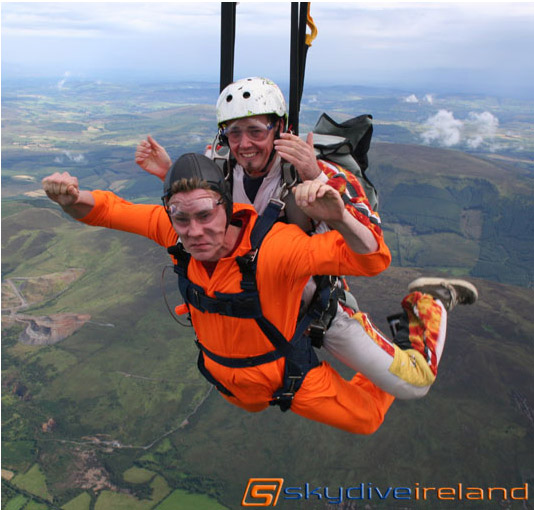 Imagine as a Dropzone Operator waking up at 7:30am on a sunny summer morning to discover that the dropzone has been broken into by thieves in the middle of the night and that all your student equipment is gone! On the morning of June 1st, 2007 Skydive Ireland received a serious blow when all of our student equipment was stolen in the middle of the night by thieves leaving us grounded and unable to take our customers skydiving. All of our Solo Student rigs and all of our Tandem equipment was gone just like that without trace leaving us completely disabled with very little options. I mean let's face it, in our industry the option of taking a trip to the local adventure store to replace your stolen parachute equipment just simply does not exist. Irish winters are really long and here we are having just arrived at the peak season of summer with the sun shining and an empty gear room with no manufacturers nearby and no friendly dropzone to offer assistance in our time of need, it is well and truly at that point you say to yourself…. We're F**ked! This is the type of scenario you wouldn't wish on your worst enemy and this disaster threatened the DZ's very existence since we were a new DZ and only a few months old at the time. We tried to remain composed and think of a clear plan of action to recover from this situation with our first instinct to go on the search for our brand new equipment that was lifted in the wee twilight hours of a summer's morning. The police were dispatched but the real truth of the matter was that the equipment was gone and our worst fear was that this was a specifically targeted job since no other valuable equipment was stolen. Whoever did it knew what they were coming for. There were mixed feeling as we found it difficult to believe another Skydiver could possibly be behind this hit. We figured if it was regular thieves that they would have found more value in expensive wide screen televisions and other similar types of equipment that would sell very easily on the street. With only two skydiving centers in Ireland who were these people planning on selling stolen student parachute equipment to? Having come to terms with the mornings events and dealing with the sinking feeling in the pit of my stomach I knew that we had to figure a solution fast and turned to the Skydiving Industry for support. What I suppose was the standard thing to do I did and that was to call the manufactures of the brand new equipment and surely they would be willing to use their resources to rescue us. The Tandem rigs we had were Paratec Next Tandem since we are based in Europe I figured it best to deal more locally for my Tandem gear. So calls were made to Paratec and the situation explained and the consequences of what would happen to us were easily understood. In naive hope I never thought that there would be an issue of support but I was greatly disappointed beyond words to be told by Paratec that there is no equipment they could dispatch to us to assist their customer and fellow skydivers recover this emergency and that they cannot part with their one and only Tandem Demo rig. I wasn't impressed. A cold chill rand down my back with the shocking realization that we were now isolated from other Tandem Equipment Manufacturers who were now all based several thousand miles away and now in the month of June the parachute manufacturing industry was in peak demand with typical 12-14 week delivery schedules. I hurried to dropzone.com in desperate search of some used Tandem Equipment in the classifieds but there was nothing there that was suitable or easily accessible. The other dilemma of course was that all of my Tandem Instructors were rated under the Vector Tandem program so we didn't exactly have the option of just going with any Tandem rig that was available. I'm sure you can start to appreciate the nightmare situation we were now facing and running out of options. It was time to revert back to the manufacturers and try to plead for their understanding to help them understand how serious this situation had escalated. I mean seriously, does it get much worse than this? I made the best move as a dropzone owner that I have done to date. I picked up the phone and called Strong Enterprises based in Orlando Florida. I was greeted by a very friendly Sales Manager named John Makoski who immediately begin to work a plan to dispatch replacement equipment without delay to get us back in the air. I mean this guy dropped everything he was doing and put Skydive Ireland on his highest priority and he just couldn't believe that something like this happened to us. It was due to his concerned response to our situation and seeing lighting speed response to getting this situation under control that I was finally able to regroup and feel the weight of a thousand elephants lift right off my shoulders. Here was a manufacturer who I had never bought a single piece of equipment from or never benefitted their business in any way begin to treat my small company like I was their biggest client. Within a few hours John had gotten approval from Mr. Ted Strong who everybody knows is the owner of Strong Enterprises and was authorized to immediately dispatch 6 Dual Hawk Tandem Systems from their large inventory of stock and make the arrangements to get them to Ireland without delay. I couldn't believe it! This was incredible and I just couldn't express how grateful I was to be picked up in the hand of this Parachute Manufacturing Giant and begin to feel that everything was going to be alright. Then suddenly I had an anti climax when I realized that none of my Tandem Instructors were certified to use the Dual Hawk Tandem. With this piercing feeling in my brain another whole began to bore deep when I thought to myself that perhaps this company might take advantage of me and demand a higher than normal sale price since I didn't have any other choice and finally I began to wonder how am I going to afford 6 new Tandem Systems in light of our break in and something I haven't mentioned yet was that our stolen equipment was not even insured. This is not good. So now I am wondering how this is going to pan out and that I still have to get 6 Tandem Rigs each weighing about 65 lbs to Ireland as fast as possible and at a price I could afford and then find someone who could just fire up a Dual Hawk Instructors Course to get us rated to use the equipment. This is when Mr. Tom Noonan, Strong's Tandem Course Director was introduced to me and in a friendly and supportive voice over the phone said that he had taken the initiative and booked flights direct to Ireland and will personally deliver the equipment and spend the time here to qualify all of my Instructors on the Dual Hawk Tandem and that they will provide the new equipment to me at a hugely discounted price and that they will allow a few months for me to be able to pay for the vast majority of it all! If any of you reading this has ever experienced an immense rush of extreme and unquantifiable feeling of gratitude, relief followed by a dash of excitement and an overflow of amazement at this level of concern and support it was actually quite hard to digest and realize that these guys were willing to do all of this for me. What an incredible level of customer focused service. This is mind blowing stuff and every Dropzone Operator should be seriously paying attention to this. I can honestly say that this is something I have never heard of another manufacturer do in this type of situation in my 13 years of Skydiving. Lets be honest and say that this was a huge risk for Strong in that what if I went bust because of this situation and was not in a position to repay them for their equipment and I had it in Ireland. But they weren't one bit concerned about this and only cared about getting my little DZ back up and running and the deal Tom made with me was that I would have to buy him a few pints of the black stuff in an authentic Irish pub. That was an easy deal to agree I can tell ya! It wasn't long before I was at Shannon Airport shaking hands with the man who flew through the night across the broad Atlantic loaded with Parachute Equipment for delivery and to provide immediate expert training and certification on the Dual Hawks to get us back in the action. This was now all starting to feel very surreal. With his surname being Noonan and being from Boston it was evident Tom was from Irish descent and had always looked forward to visiting his ancestors home. As we sat in a typical Irish Country style pub with symbols of the old Irish culture and harder times of the past it was about 7:30am it was time to start cashing in on our deal. So I ordered a few pints of the black stuff and Tom, Darren and myself toasted to a new chapter and to recovering Skydive Ireland and feasted on a full Irish Breakfast till we were as fat as cows. Now beginning to show signs of a long night spent travelling and with a fully loaded belly and a nice few pints of Guinness we headed back to my house so Tom could refresh and get some sleep. Darren and I unloaded the car and all our new gear was in black gear bags and it felt really good holding Dual Hawk Tandem Parachute Systems in my arms and feeling like everything is getting back on track. I don't think I will ever be able to explain the feeling accurately enough so I won't even try or I'll end up just babbling. So with Tom now out for the count I was anxious to try on our brand new Dual Hawks so we pulled out two of them and immediately begin to start dissecting the rig to discover it's features and to see how it feels. As a certified parachute rigger for more the n10 years I immediately begin to admire the workmanship of this parachute system and to examine its components which at first glance had me realize this was not just another Tandem System. With features such as the dual loop main canopy closure to prevent a nasty horse-shoe and the anti-line dump line stows. Even the fine detail of the position of the RSL to deal with a possible riser breakage to avoid a premature reserve deployment. I really liked the feature of the Master 400 sqft Reserve canopy which is comforting to know this canopy is thoroughly designed to meet the most demanding Tandem nightmare. One of the really exciting things about it was that they were all equipped with the brand new development from Strong which is the superb all ZP material SET 366 Main Tandem Canopy configured with Single Brake setup. I was not getting really buzzed about flying this new toy. It was obvious that this rig was built for Tandem Skydiving from the ground up and was rugged to last the test if time. We now had a serious set of kit that made our stolen Tandem Systems look like plain old modified sports rigs. I couldn't get over the size of the Drogue and what I immediately liked was the simplicity of the main and reserve deployment sequences. On our other Tandem Systems there seemed to be a confusing amount of handles which offered a great risk of causing the Instructor confusion in a high stress situation. I had always thought the more handles the better because of more options but then thought that simple is better given the statistics that ALL Tandem Fatalities were due to Instructor error. I was now keen to complete the Strong Tandem Instructor Candidate Course which for us would be the cross over from another Tandem Rating so it meant less jumps to become certified on the Dual Hawk then if we were starting out as new Instructors. Later that day when Tom arose from the dead we made a plan to get going the next day with the Course Material and waste no time in getting it completed. Throughout the course I found Tom Noonan to be an excellent Examiner to work with and what was most apparent was that not a single ounce of ego was present in his natural ability to make a person feel comfortable and help us understand the functions of the Dual Hawk and was patient with all of our questions and comparisons and scenarios with the what we had been used to jumping and now getting excited about jumping the Dual Hawk. I was anxious to feel what freefall will be like with the position of the Drogue attachment at the base of the Reserve Tray unlike the Vector 2 style system which gives a really nice position in freefall and makes for an excellent Student freefall position for the Video and Photos. I can honestly say from going as passenger that the Student Harness is the most comfortable out of all the harnesses which makes for some very happy customers. Tom did an excellent job at completing the course qualifying myself and my Instructors. He worked very hard and was very committed to his very high standard of safety and awareness and we all learned a lot of valuable skills and information from him. He is a true professional and loves what he does and I was glad that with his proud Irish heritage he was able to visit Ireland and Skydive at my DZ with beautiful views of lakes and mountains Tom became attached to the place and has since returned again to Ireland to spend time with us doing further training to qualify a Strong Tandem Examiner to make us more self sufficient. Tom has become a great friend and I will always be grateful for what Strong Enterprises did for my dropzone. Without them we were well and truly hammered. I could spend a few paragraphs telling you what I thought about the other manufacturers lack of support in our time of need but it would just simple take aware from the value of this story but what I will advise from our experience is that when choosing your equipment especially when you're living depends on it is imperative you choose a manufacturer who can back you up when the shit hits the fan. I have only good things to say about the Dual Hawk and with almost a year of full time jumping the Dual Hawk and sweet soft opening of the new SET 366 and zero cutaways I can only say you will look long and hard for a Tandem System of this caliber. Once you see past the fluff of the other Tandem systems with other manufacturers competing to be the most inventive it stands to this day that the Dual Hawk is the most proven Tandem system in the world and was designed by a great man who was the true pioneer of Tandem Skydiving, Mr. Ted Strong. Thank you all the Team at Strong Enterprises in Orlando Florida. You saved our bacon and have been a huge source of support and inspiration to my dropzone and you are to be applauded for your concern and the dropzone rescue operation you handles so professionally and I hope one day I can repay you. I am glad to report that some of our stolen parachute equipment surfaced in Eastern Europe in the country of Lituania which we were able to retrieve. The gear had been in use at a Skydiving Center and when I discovered this I made contact with the Dropzone to inform them they were using stolen Parachute Equipment. Investigations are pending to source that carried out this terrible crime and to ensure they do not do it to another dropzone again. Blue Skies, David Byrnes DZO - Skydive Ireland www.skydiveireland.ie
 -
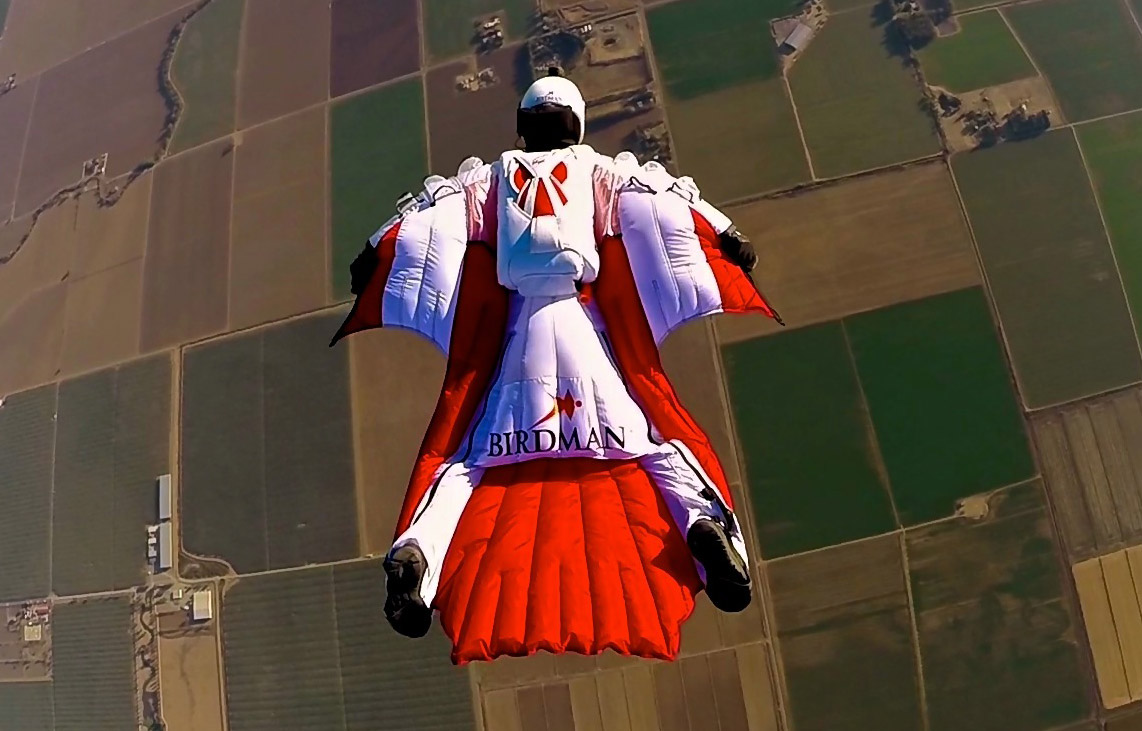 Just days after we brought you an article on the Ninja wingsuit by Birdman, they have come out with a press release for the anticipated Katana wingsuit. We mentioned the Katana in last weeks article, touching on whether or not the Katana was in fact a renaming of what was originally advertised as the Samurai, while in development. The Katana is Birdman's third wingsuit in their 2013 line, following the Blade III and Ninja. The Katana wingsuit has been developed by Jari Kuosma and Shin Ito and focuses on speed and distance, where as the Blade III was a flocking suit and the Ninja was an acrobatics suit. The Katana wingsuit sports large wings and quatro-wing design with a drag reduction system which enhances the flow of air on the top of the wing, allowing for quicker speeds and longer distance in flight. The design still allows for quick and flat turns without having to maximize the surface area. Birdman wanted to develop a wingsuit that while being large, was extremely quick and at the same time capable of easy maneuverability. Technical Specifications: Aerodynamically shaped, transparent reinforced sail material with BIRDMAN DRS. Emergency cut-away for arms. 10 mm YKK zippers. Reinforced 3D air-intakes with air-locks. Hook knife pocket outside. Two inner pockets. Reinforced 2 mm thick leather bootie. High collar. 210D double coated extra sturdy nylon. Semi- rigid long- and short ribs made from BoPET material. Fully breathable inner lining for comfort. Thick protective knee & bootie area. Leading edge: Aerodynamically shaped, transparent reinforced sail material. Thick, moisture absorbing back pad made from Spandex. Large size erected air-inlets with airlocks. Back deflector and leg wing DRS. Semi-rigid and shaped leading edge. 10 mm wide YKK zipper.Sales for the Birdman Katana start in November 2013. Birdman is a company with a long history in skydiving and was one of the first companies to produce wingsuits to skydivers, over a decade ago. The company is has undergone some changes after taking a hiatus and now pushing their new line of products in 2013.
 -
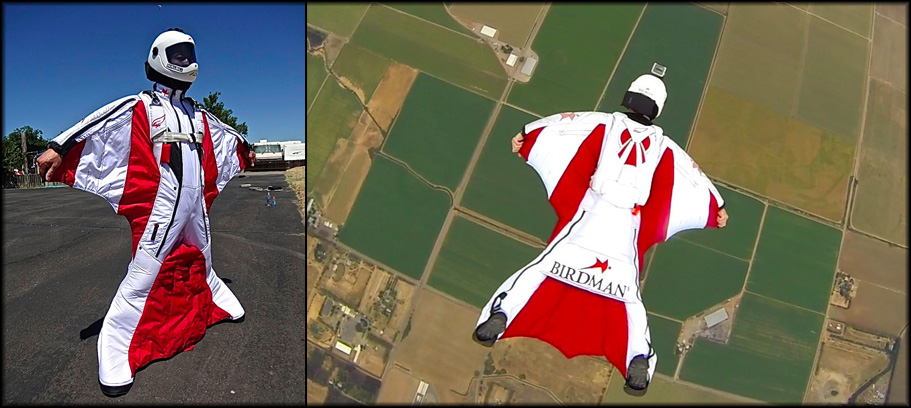 Seven months ago, Birdman re-entered the world of gear manufacturing with a new website, new products and what was almost a completely new team. Birdman took a hiatus in 2010, when the company went through a change in ownership structure. Earlier this year their website was back up, boasting a new look and advertising some new products, which included the branching out into watches designed specifically for BASE jumpers and skydivers. They immediately released the names of three new wingsuits that would be in development: The blade III, the Ninja and the Samurai. For more details on the resurrection of Birdman, check out The Return of Birman which was published in March. When the site went live they had only given information on the Blade III, while both the Samurai and the Ninja were said to be 'coming soon'. The Ninja has now been made available for purchase, along with information about the suit. The Ninja is selling at Birdman's online store for 149, 800 Yen, or $1527 US (at time of publishing). This is about $200 less than the Blade III. The suit seems to be aimed towards the intermediate to advanced flyer and is sold as a suit of high agility. Birdman's online store provides the following details for the Ninja: "NINJA is a brand new wingsuit concept from BIRDMAN®. It’s been designed to be the master of aerobatics, which means it has sharp and accurate turns, agility, easy recovery from all flying positions and ability to accelerate faster than any other suit in it’s class. Just like a true NINJA. This power is created from it’s drag decreasing quatro-wing design while the agility comes from it's aggressive profile and superior air-inlet / air lock design.. All this sums up to the best performing & funaerobatics wingsuit you have ever flown.. and, it’s BIRDMAN® *Recommend to try after completing FFC. The NINJA comes all included; Quattro-wing drag reduction, 9 large air-inlets with air-locks, semi-rigid ribs, mini-ribs, two large pockets, inner lining, high collar, easy access leg zippers, extra soft kneepads, extra sturdy booties & 10 mm YKK zipper and over the shoulder zip for easy dressing. It will be offered in 4 color scenes. FRONT Leading edge: Aerodynamically shaped, transparent reinforced sail material Emergency cut-away arms 10 mm YKK zippers Five (5) reinforced air-intakes with air-locks Hook knife pocket outside Two inner pockets Reinforced 2 mm thick leather bootie High collar with NINJA and BM logo 210D double coated extra sturdy nylon Semi-rigid long ribs made from BoPET Semi-rigid short ribs made from BoPET Full, fully breathable inner lining inside Thick protective & reinforced knee & bootie area Mini-ribsBACK Thick moisture absorbing spandex backpad Large air-inlets with airlocks Back deflector with air-pass Reinforced and soft shoulder blade Semi-rigid shaped leading edge Extra long 10 mm YKK zipper with QR pull tab Snaps for booties and leg wing"Also of interest on Birdman's websites is that there is another product on the webstore called the Katana which is said to be coming soon, though there is no mention of the Samurai. It's unclear at this point as to whether the Samurai and the Katana are two separate wingsuits we can be expecting the company to release, or whether there was perhaps a renaming at some point that hasn't yet synced up completely. Have you tried any of the new Birdman products? Comment below and let us know what you thought.
 -
 In the earliest days of skydiving, photographers were excited about the advent of the “lipstick camera” for its small form factor and ease of use. The camera(s) could be mounted on a wing, helmet, or other foundation, cabled to a recorder, and used for new angles in aerial production. They were also horribly expensive. In modern times, we’ve seen the camera shrink in size, and dramatically improve in image quality. In many cases, this size-shrink inspires kludgy form factors, and this is where the Replay XD camera shines. With a nod to the stylings of the unobtrusive lipstick camera, the Replay XD is very slim in size (same diameter as a quarter), and easy to use. All electronics are packed into this small cylinder, where several features are found that no other camera offers. Replay XD shoots in one of three user-determined resolutions; 1080, 960, or 720. Framerates of p30 or p60 are user-selectable. The camera is powered up via a button mounted at the front. Users know it’s recording by the red indicator light and the haptic (vibration) feedback that occurs when the camera is put into record mode. The camera may be set up as a one-button record, or other modes may be defined by the user. MicroSD cards are used for storage, and the camera supports up to a 32GB card, allowing for ridiculously long record times (up to 10 hours, and Replay offers a battery pack to support long recording times). These small cylinder cameras may be mounted at any angle, any pitch, on any surface with great ease. The Replay XD is much smaller in overall profile than any of the other cameras, which is why it’s long been a choice in the motorsports and aircraft industry. Mounting the Replay XD is no different than mounting any of the other popular POV cameras; peel n’ stick the 3M tape, and put it where you want it to go. The camera can be rotated in its mount until it has been clicked in place. Once clicked, it’s locked and cannot be rotated. The Replay XD uses a 135 degree FOV (Field Of View) so it’s a bit more narrow than some of the other popular brands. However, this also provides for a more natural view, something many sports enthusiasts prefer, as the narrower FOV does not have a distorted image. I like that Replay XD offers lens replacement kits for 5.00; this means I’m not spending a lot of cash for scratched lenses, and lenses can be replaced in the field. Replay takes lenses fairly seriously; they’re the only POV manufacturer that offers lens adapters so that external lenses or more importantly, filters, might be added to the camera setup. This is a tremendous advantage for pro’s wanting the best image possible. With a mini HDMI connector on the back of the camera, it is the only live output to be found on any POV camera offering. This means that not only can the camera be connected to a broadcast device for live streaming (without the degradation of using low bitrate video via wi-fi), but that the camera may be connected to the battery-operated ReView monitor for checking camera placement, angle, level, exposure on a production-grade monitor. Lastly, the live HDMI output also allows users to plug straight into any television monitor while setting the camera on a helmet and checking the aimpoint. Another pro feature, is the ability to access the core functions of the camera and modify camera settings for specific purposes. Opening the .txt file at the root of the camera, allows users to modify bitrate (very important), white balance, exposure/compensation, saturation, contrast, audio gain, and more. The menu selections also allow the camera to be set to a one-button record, or one-button power up, second button-record mode. The file settings may be saved off, making it ridiculously easy for a camera monkey to set up multiple cameras. Replay XD is also the only POV camera that offers timecode in the stream, providing significant benefit for multicam operations or legal use. The camera is capable of shooting interval stills, at full resolution from a 5Mp sensor. Files may be custom-named in the .text file, or simply auto-named by the camera. The camera records mp4/AVC files and wraps them in a .mov package, readable by any NLE software or media player on any platform. A micro usb connector is used to charge the camera, and to transfer data from the camera to a storage device. Memory cards may also be removed for external read/transfer. The Replay XD isn’t waterproof, but I was able to dunk it to around 10’ of ocean, and in any sink or tub. It’s not designed for underwater use (they have a housing good to 100meters), but the camera is quite capable of going through rain, incidental water, and other “wet” situations with ease. The all-billet aluminum camera is ridiculously tough, as seen in this YouTube video where I drove a Dodge Challenger back and forth over a running camera, and even popped the clutch, spinning the camera out from under the car. Image quality is what I’d expect out of a POV camera. It’s subjective to say it’s better or worse than other POV competitors. The image sits quite nicely alongside media from high end cameras, and in fact, this camera is used for many broadcast television shows, including live feeds from NHRA and other race competitions. It’s been used in major-motion picture production, and sits nicely in the mix with other high-end POV cameras. The things that set the Replay XD aside are its form factor, the durability, and the features usually found only on broadcast equipment. The factory package comes ready to roll; battery is partially charged, memory card included, 2 mount systems, pads, charger, 12V charger, carry bag, USB cable, storage bag for camera, Cordura system storage bag./Things I really like about this camera: External audio/pro audio capability Live external monitor (to any monitor, but the ReView is very cool) Lens/filter adapters One button operation Super low profile/inobtrusive in a wide shot. Aluminum billet mounts Body durability/toughness Image quality with user-defined tweaks Timecode for multicam use Field-changeable lens covers The awesomely wide variety of mounts ranging from lightweight plastic for general use, to billet aluminum for more permanent or high-risk mount locations.What I don’t like: USB port. This is a Micro USB port, and the cables are nearly impossible to find in a crunch. If you’ve got the cable with you, great! But if you don’t, and your battery dies, you’ll wish you had a RePower charge kit with you. Rubber buttons. At first glance, these are great. But, it is possible to skin them off if they’re struck with great force at the inappropriate angle. Rubber water seal O-rings. These keep the camera watertight, but they also can fall off if the back is frequently removed. In a tight spot, it’s difficult to get to the release tabs on the low-boy mount. I did find that using a flat screwdriver or popsicle stick got me in there, yet one would think there is an easier way.The camera kit sells for 299.00 with all accessories, and is available from most skydiving supply stores.
 -
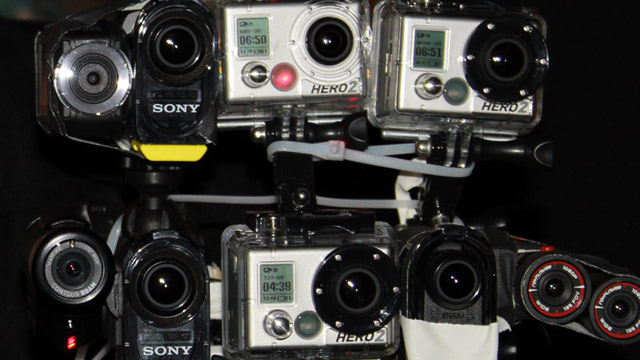 We have a newer and more comprehensive action camera shootout available. We set out with 6 of the most popular models of action cameras in an all-out camera review. Our desire was to uncover the answer to the question "What is the best POV camera on the market?", and at the same time determine the strengths and weaknesses of the cameras being reviewed. The overall performance results were a little surprising to us... Could the GoPro be dethroned? It’s the “Me” generation, and modern action cameras provide transparent windows into the very lifestyles of these individuals. “Check out what I’m doing” seems to be the prevalent theme. Quite a few electronics manufacturers have recognized the vast market for small HD cams. As a result, action cameras have undergone a tremendous shift from the low-resolution bullet cameras of 5 years ago. Today, we have POV cameras that shoot 24p, 4k resolutions, p120 frame rates for overcrank/super slow motion, and a whole lot more. Setting out to find the best action cam, I assembled a collection of mounting points onto my Bonehead Flattop Pro camera helmet. This skydiving helmet is perfect for testing cams in the most demanding situations. On this helmet I have mounted: Sony HDR AS15 (3 ea) GoPro Hero 2 (3 ea) Replay XD (3 ea) JVC Adixxion (1 ea) Drift Innovations HD (1 ea) Contour Roam2 (1 ea) It’s a total of 12 cameras on top, plus one wrist-mounted for documentation. When possible, each of the action cameras are tested in one of three modes: 1920x1080p30 (Full HD/30 progressive frames per second) 1280x720p60 (HD/60 progressive frames per second) 1280x720p120 (HD/ 120 progressive frames per second) In this comparison, the following criteria shall be observed: Overall quality in identical lighting conditions Quality in low light Audio quality Features/flexibility Ease of use/setup/ out-of-box experience Slow motion/over-crank quality Third party support Codec/post production And off we go… Overall Quality This is the most subjective conversation of the lot. Rather than shooting charts, I chose to shoot actual subjects/scenes. Subjectively speaking, the Sony HDR AS15 is the best of the group in the most common 1920x1080p30 modes. Colors are natural, whites are white, blacks are black, and the gamut is smooth. There is no banding from the codec, and the dynamic range is broad. Watch this video full screen for best comparison. The GoPro Hero2 produces a warmer overall image and it appears warm, but balanced when viewed alone. Standing next to the AS15, however, the Hero2 image reveals itself to be softer and less contrasted, with colors that selectively pop and/or are over saturated due to the more limited dynamic range. In the below image, note that clouds appear as ‘industrial haze’ vs being white. However, some people do prefer a more warm color to neutral/proper white balance. White balance is as much an aesthetic preference as it is a standard. My eye (and post workflow) prefers neutral colors. * Low Light Next, low light tests are performed. The purpose of this test is to see how well each camera performs in low light conditions. Typically, small format cameras are very challenged in low-light scenes, due to the small image sensors filled with high pixel values. Many sports activities take place early morning/late afternoon, or inside cramped quarters. Low light scenes are where the Exmor processor (used in the Sony HDR AS15) outshines all others. Although the images have a blue cast, color tone is closer to the ‘eye-view’ of the scene. The 1280x720p60 modes in the GoPro Hero 2 and the Sony HDR AS15 proved to yield the best overall images for clarity, smooth motion, and exposure, but they display quite different in presentation. Among these cameras, it’s interesting to see the differing methods used for handling the range of white to black: blooming whites to light the scene or reducing whites to balance the color. Although the Drift HD has less noise than other images, it also is the least useful image overall in how little information is contained in the frames. The Sony AS15 shows more noise than the GoPro Hero2 in p120 modes, yet also has more of a useful image. The gain can be brought up in post on the Hero2 (I did look at this), and the noise becomes about equal. However, the AS15 also offers better clarity, sharper edges, and smoother contrasts. Audio Quality Sound reproduction is an important part of the video experience. Audio was tested both with and without waterproof housings on relevant cameras. This is a no-brainer. Waterproof box or not, the Sony HDR AS15 wins the audio test quite handily. With a stereo mic and 16bit audio, the AS15 trumps all the competitors in every way. Adding the waterproof box to the Hero2 or Contour Roam renders them nearly useless. Drift, JVC, Contour+ and RePlayXD all are water resistant to shallow depths, and do not need housings. Therefore audio quality outside an external housing was superior to the Hero2 in all examples. As you can tell from the helmet setup pictures, we tested one GoPro and one Sony inside their housings, but without their respective front lens assemblies. This was not only to match up lenses, but to also give each action camera the best audio opportunity possible. Audio is a somewhat important part of action sports, and isn’t forgotten by most of the manufacturers. Sony, GoPro, Drift,Replay, Contour+ all allow for external microphones to be connected. It is important to note that the Sony HDR AS15 offers no audio in p60 or p120 modes. Features/Flexibility This is incredibly subjective, as one person’s pleasure is another person?s pain. In my view, this is where everything outside of image quality becomes part of the purchase decision. I reviewed what I like/don’t like/found missing in each of the cameras. This section has no specific rhyme nor reason; it’s merely my personal impressions of the camcorders themselves, without looking at the packaging or image quality. It was easy to compare image quality, as all of the cameras use the .mp4 codec, packaged in a variety of containers such as .mov and .mp4. Bitrates are similar on all of the cameras, so the real variations come in the imagers, lenses, and usability. Lenses are varied from 115 degrees to 180 degrees on these cameras. Some have selectable Field of View, and where possible, I selected as close to 120 degrees FOV as possible to best service the similarities in the test. Only Sony and JVC offer stabilizers, so the stabilizers were disabled for most of these tests. In the ATV stabilizer tests, Sony HDR AS15 performed significantly better than the JVC Adixxion. RePlay XD I LOVE the simplicity of this camera. One button powers up the camera, it vibrates and provides LED feedback for record, pause, and battery level information. It is water resistant, and can be stashed almost anywhere due to its tubular aircraft aluminum form. RePlay offers several mounting options, including swivel/ball head mounts made from aluminum billet. Quite simply put, it’s a tough camera. RePlay offers a mounting ring that allows for wide angle lenses to be attached to the camera. Since the lens is only 61 degrees in width, it is substantially tighter than any of its competitors, and a wide angle adapter will be necessary in some situations. The lens rotates, allowing for side or flat-mount surfaces. This camera is a staple in the NASCAR circuit, and it’s easy to see why. It also offers HDMI output for live previewing or uncompressed output to a Ninja or similar device. The HDMI output can feed an wireless HDMI system for broadcasting over a remote area. Additionally, RePlay offers a waterproof cable connection for underwater HDMI use, perfect for placing the camera under water while monitoring or recording above water. For advanced users, the RePlay XD has certain settings that may be modified in a Notepad application (one that is .txt only). This allows users to customize the camera. Out of the box, this camera is ready to roll including a MicroSD card. Battery life is approximately 2 hours in 1080 mode. RePlay also provides users with a very nice Cordura case for storage. The camera cannot free-stand due to the round body; a beanbag with weight is the only way this camera can sit on its own. Fortunately, the RePlay comes with several plastic stick-on mounts. This camera uses a proprietary mount system, but in reality any conduit mount/tiedown works nicely. Click Here to See Pricing, Ratings, and Reviews on Amazon.com JVC Adixxion I was excited to check out this camera because JVC brings great things to the table. They mark the second professional camera company joining the HD POV fray, which makes it clear that POV is a strong bet in broadcast B-roll cameras. The form factor is nice, and I love the standard ¼ camera thread provided on two sides for side or top mounting on a helmet, roll bar, fuselage, or whatever. The camera is easy to operate, using two buttons for control. Menus are easy to navigate, and users may configure vertical or horizontal positions. JVC also has wifi available on the camera, and can stream live to UStream directly from the camera without a PC. Also there are Android and iPhone apps available for external camera control/linking. JVC uses WiVideo to configure the camera. I could not get the app to function with the camera on my laptop, tablet nor two cell phones. The camera locked up and required battery removal on multiple attempts to configure the wireless setup (ver 0483). It does upload directly to UStream without any difficulty. Otherwise, users will need to install an SD card (purchased separately) and the device is ready to roll. My test unit was charged to approximately 10% of life. A beautiful feature on this camera is the electronic stabilization mode. It smoothes out images very nicely (yes, this works for skydiving, as it is EIS). The image quality does suffer with the stabilizer engaged. Battery life is approx 110 mins in 1080 mode. I found the camera buttons clunky, and the mounts that come with the camera had several of us scratching our heads, wondering “WTH were they thinking?”. Perhaps because of the standard thread mount, JVC felt that creative mounting solutions should come from the user? The camera comes with a plastic ball swivel stick-on mount that cannot be trusted in any sort of medium impact activity. The Addixxion will easily snap out of the ball swivel. It also comes with a rubber mount to go on an elastic goggle headband such as ski goggles, similar to the “jockstrap” mount that is available for the GoPro. Click Here to See Pricing, Ratings, and Reviews on Amazon.com Contour Contour really stepped their game up with the + model, offering Bluetooth control of the camera and preview over a cell phone or tablet (low framerate). Similar to the RePlay, Contour thoughtfully provides a MicroSD card in the box (why doesn’t everyone do this?) The camera features a GPS receiver that embeds the GPS signal in the video stream. Some users may find great benefit in this feature. It’s fun to open the GPS data in GoogleEarth, playback the waypoints while watching earth, and re-live the experience. GoogleEarth may be screencapped for additional (and interesting) B-Roll footage. Recording can be enabled simply by sliding the locking record switch forward. The camera automatically goes into record mode, so there’s no clumsy fumbling with small buttons that one sometimes cannot see due to mounting systems. The Contour+ does have some external controls for features such as white balance (accessed via cell or tablet device over BlueTooth. Video may be streamed over HDMI, as with most of the other cameras. Out of the box, this action camera is ready to roll including a MicroSD card BlueTooth preview and control is a nice addition, although it was very choppy and slow on my Samsung Galaxy SIII phone and Galaxy Tab2. Battery life is approximately 90 minutes of continuous record in 1080 mode. The form factor is very well thought-out for most applications; however, the proprietary mount system is a personal dislike. The camera cannot freestand due to the rounded bottom. A mount, housing, or similar device is required to use this system. Mounting the camera on a tripod requires additional adapters not easily found due to limited distribution. Contour is the only camera that comes with a tether in case the camera is knocked free from its mount. While this may be desirable in some sports, in skydiving, BASE jumping, or paragliding, it is not a wanted feature. Click Here to See Pricing, Ratings, and Reviews on Amazon.com Drift HD This camera wasn’t originally on my list of cameras to test, as it has always seemed like a toy camera company to me (I had one of their original SD cameras and found it wanting). However, pressure from several friends around the world caused me to re-think my position. The RF remote control is cool. It lets the user configure the camera(s) for remote start/stop, and it can sync multiple cameras. With a rotatable lens, the camera may be placed at any angle. One can monitor over a streaming HDMI output, or use a built-in preview screen that may be powered down to save on battery life (this is a big plus in this camera). The packaging is pretty nice too , acting as a case for the gear. Only RePlay and Drift offer a package to store the camera when not in use; I like this feature. The rotatable lens isn’t without flaws. In vertical mode the angular distortion all but renders this camera useless, due to the already-challenged quality of image. With a battery life of only 45 minutes in 1080 mode, this is not a camera for lengthy shooting. Drift does offer an extended life battery… you’ll want it if this is the camera you choose to purchase. The Drift comes with a pair of stick-on mounts, a strap mount, and the remote control. The remote is necessary in gloved environments: the big buttons are easy to hit, while the camera’s tiny buttons are easy to miss even when not wearing gloves. The Drift HD can free-stand without any assistance, and the standard ¼ camera thread on the camera body makes it easy to mount on a tripod. Click Here to See Pricing, Ratings, and Reviews on Amazon.com Sony HDR AS15 The HDR AS15 is one of the newest camera choices, and it’s Sony’s first foray into this market. The switchable FOV from 120 to 170 is terrific. I’m a bigger fan of the narrower views as they don’t distort the image, and provide a closer to ‘natural’ image. The glass lens is a Zeiss, and it does not disappoint. Coupled with the Exmor sensor/imager, it is a beautiful combination. A one-button camera-on/record enable feature makes this identical to the Contour+ for speed to record. Out of the box, this camera is ready to roll, minus a needed MicroSD card (purchased separately). The AS15 offers wireless control and camera setup. Connecting to my Galaxy SIII, Tab2 10.5, and iPhone 4s was simple and painless. Each camera has a control code printed on a sticker. I don’t care for this; Sony should provide more than one sticker, or better yet, print the code inside each camera. If the code is lost, it’s not easy reconnecting without linking via USB to discover the password. Using wireless for constant monitoring cuts the battery life by around 25%. The wireless is challenged in a way, as only one unit may be controlled at a time. Had Sony used a different network scheme, multiple cameras could have been controlled from a cell or tablet device. Hopefully they’ll look into this with future updates. Operating the camera is easy: the two menu buttons are simple and the menu flow is logical. The electronic stabilization system is standard Sony sweet smoothness, and no one can really compare with what Sony has given users of stabilization modes. Sony uses the CyberShot batteries, both standard and extended life. The camera comes with two battery trays. This is a benefit, as batteries may be found at any Walmart, Best Buy, or other big-box store. Sony’s mounting system is the most robust of all the various camcorders; a standard ¼ camera thread in the bottom of the waterproof housing is easy to mount. Compared with the non-precision plastic mounts offered by GoPro, JVC, Drift, and RePlay, the massive ABS plastic mounts provided by Sony are rock solid and will not chatter in even the most extreme vibrating environments. Outside the box, the camera doesn’t mount well to anything without some sort of other mount assist. The camera cannot free-stand because of its rounded bottom. Additionally, the external mic connector and HDMI connector are in the bottom of the camera. Sony has a box with LCD monitor available for the camera, making it more bulky, but also utilizes this accessory port on the bottom of the camcorder. With the LCD/box option, the AS15 may be easily mounted on a tripod or other mounting system. Click Here to See Pricing, Ratings, and Reviews on Amazon.com GoPro Hero2 This is the camera that changed up the world of action sport photography, and which has been the longest running action sports camera in the market, now in its third version. GoPro comes out of the box with a squarish form-factor, sharing the ‘box’ format with the Drift and JVC cameras as opposed to the longer, more slim stylings of the RePlay XD, Contour, and Sony camcorders. The 170 degree lens may be switched to a 127 FOV (used for most of these tests) via menu settings. The menus are the most challenging aspect of using this camera; alternating between the power/function button and the shutter/select button can become confusing, even for the most seasoned user. I have around 20 of these cameras, and still sometimes have to go all the way through the menu cycle to reach the desired setting. Out of the box this camera is almost ready to roll, coming with a partially charged battery, 2 mounts, and a waterproof box (SD Card not included). GoPro offers a WiFi backpack system for 99.00, but I could not get it to work with my cell phone. The remote start/stop switch worked properly. The remote system may be paired with multiple GoPro’s for simultaneous start/stop. GoPro uses a proprietary mounting system, but this is of little consequence. One can go to Walmart or other big-box store and purchase additional and widely varied mounts. GoPro offers far more mounting options than any of the competition. At first glance, this is very nice of them; however, they need to offer a wide variety of mounts simply because they are proprietary. To mount a GoPro on a tripod, for example, will cost another 10.00 just for the adapter to mate its proprietary mount with a standard ¼ camera receiver. Click Here to See Pricing, Ratings, and Reviews on Amazon.com Overcrank/Slow-Motion Modes Overcrank/Slow motion not only allows for better viewing of very fast action, it also adds drama and lends a sense of timelessness to fast and exciting scenes. All of the cameras in this shootout offer a p60 mode in 1280x720 mode. Only the Sony HDR AS15 and the GoPro Hero 2 offer p120 modes. Sony records p120 in a true 1280x720 mode. GoPro Hero2 records a resolution of 848x480 when in p120 mode. One frustration with GoPro: they pack the frames, so the NLE doesn’t see the native stream. Sony flags (and plays back over HDMI) the proper slow motion/overcranked content. There is a benefit to the non-standard method GoPro uses, as it allows for real-time playback “on the set,” although editors will have to manage the timeshift in post. In this video, both p60 and p120 modes can be compared in well-lit conditions. In this video, both p60 and p120 modes can be compared in very dark conditions. In this p120 scene, the image goes from brightly backlit to exposure-compensated. I appreciate that the camera does not bloom nor pop when the exposure shifts. “Rugged-ness” Ok, this wasn’t part of the original plan, but it’s well worth mentioning. Riding on ATV’s with these little cameras made it obvious that people are going to break them if they put the camera into harm’s way. RePLAY XD easily walks away with this; you can stand on them, drive a car over them, drop them from great heights (I dropped one from several hundred feet), and they’ll come right back asking for more. The JVC is well-built too; JVC claims they can be dropped from 6’ and survive, but frankly speaking, any of these cameras can survive a 6’ drop, so that’s somewhat of a chuckle for a marketing bullet point. In their external cases, the GoPro and Sony are both very tough. The lens is the weakest point on any of these cameras, which again is a nod to RePlay, as they have a replaceable cover over the lens while keeping a virtually indestructible low profile. Out of the box, the Sony is perhaps the most fragile, with the GoPro and Drift HD being in the same categories. Third Party Support This category easily belongs to GoPro. They’ve been in the market longer than anyone, and until the announcement of the GoPro Hero3, the form factor hasn’t changed, allowing third party vendors to build custom-molded helmets, aluminum billet mounts, custom-colored housings, and even camera controls. That being said, Sony, RePlay, and Contour all offer additional mounts, housings, LCD displays, cabling systems, remotes, and other accessories. Additionally, Sony, JVC, and Drift all offer standard threads which eliminates the need for a large portion of the third-party tools built for GoPro cameras. Codec/Post Production All of the action cameras in the shootout are using the h.264 codec (AVC) packaged in one of two containers. Apple users of Mountain Lion OS are able to directly stream video from all the cameras on their machines. Windows users who run Windows XP or newer will have no difficulty playing back footage from these cameras. The Galaxy Tab2 has no problems playing back the files directly from the cameras or cards in a card reader with no transfer of data. For editing, all Windows applications will natively edit the files without difficulty. Users of Adobe Premiere CS5.5 or newer can edit native files on their Mac, but users of FCPX and FCP Studio7 will need to log/import the files and convert them to AIC or ProRes. This is one place where the shootout yielded a surprise; I’d expected Sony to use the superior AVCHD codec vs using AVC. The HDR AS15 is mainstreamed by using the AVC codec, which puts Sony squarely in the middle of a group where they could’ve had a significant advantage over the competition. To sum up this segment: none of the cameras have an advantage over the others in post, with the exception of the GoPro H2 with the ProTune upgrade installed (the 35mbps rate may have some transcode advantages in post, depending on the subject). SUMMARY With all features, shapes, sizes, and mounts aside, it boils down to two main challenges for the best action camera: image quality and ease of use. In all image-related aspects of this shootout, the Sony HDR AS15 easily offers a superior image quality over all competitors. For low-light, brightly lit, and overcrank modes both bright and dark, all members of my team and I selected the Sony AS15 footage. In blind tests with others, they selected the AS15 as best of all images. In 1080p30 mode, my preferences (in order) Sony HDR AS 15 GoPro Hero2 RePlay XD In 720p60 mode, my preferences (in order) Sony HDR AS15 GoPro Hero2 (this is GoPro’s best mode, IMO) RePlay XD In 720p120 mode, my preferences (in order) Sony HDR AS15 GoPro Hero 2 In low-light environments, my preferences (in order) Sony HDR AS15 GoPro Hero2(p60mode) Contour+ (p60 mode) For color accuracy, my preferences (in order) Sony HDR AS 15 GoPro Hero2 RePlay XD (It was a difficult choice between the RePlay XD and the JVC Adixxion when the subject was well-lit/sunlighted subjects, with the JVC lens protector removed. The RePlay’s sharper edges gave it the advantage). GoPro, Replay, Sony, and JVC offer white balance settings either through menus or through .txt-based edits of the camera’s operation set up. All of these tweaks were avoided; every camera was “out of the box” for best/most fair comparison. Images from the JVC and the Drift HD are simply too soft for any sort of professional use. Removing the JVC lens protector (not recommended) somewhat improves the image. Overall, most every one of the cameras offers features, form, or function that other cameras do not have; particularly when looking at factors outside of image quality. For me, the final image quality matters most of all, and it’s the aspect we tested most thoroughly in this shootout. Keep your focus tight, dse Joel Hindman, Darren Burke, Andreea Olea, Tom van Dyck, Karl Gulledge, John Hamilton, Chris Warnock, Lob Lobjoit, Sydney Owen-Williams, Skydive Elsinore contributed to this article. About The Author DOUGLAS SPOTTED EAGLE is an audio and video pro. He is a Grammy recipient with DuPont, Peabody, and Telly awards lining his studio; he is also a participant/producer in multiple Emmy winning productions. Douglas is the Managing Producer for Sundance Media Group, Inc. and VASST, authoring several books and DVDs and serving as a trainer and consultant for videographers, software manufacturers and broadcasters. He is the author or co-author of several digital media titles including Digital Video Basics (VASST), The FullHD (VASST), and Vegas Editing Workshop (Focal Press) among many others. Douglas is an accomplished aerial photographer who thrives in the adrenaline-filled world of fast-action videography. He is active as a multimedia producer, trainer, and presenter, utilizing the latest technology as part of his workflow. Editors Note: We are aware that the above review lacks the competition of the GoPro HD Hero 3, which was released shortly after we completed the review. We are as interested as you are to see how the HD Hero 3 compares to the other action cams reviewed in this article, in particular the Sony AS15 and we aim to bring you the answer to that question in the near future.
 -
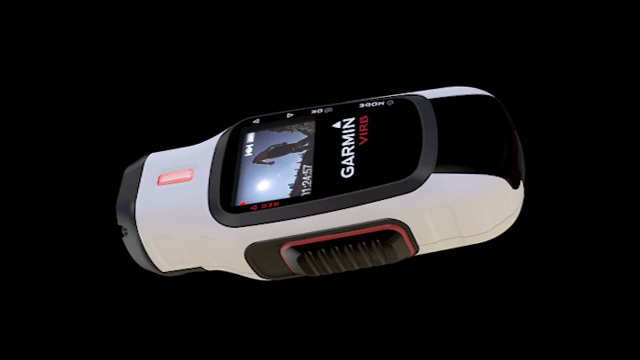 Get ready for the Garmin VIRB, the latest new action camera to be revealed. While Garmin are well known for their GPS navigation devices, the company also boasts a variety of other technology devices, many of which revolve around maritime activity. In recent years Garmin has released several marine radio communication devices, as well as dabbling in the production of camera technology. However, Garmin has decided to take a step in a new direction - joining companies such as GoPro, Sony, Contour and JVC in the production of POV action cameras. It's a brave step by Garmin, but if they manage to effectively integrate the device with their other products, there may well be room for them in the GoPro dominated market. Garmin VIRB DesignUpon first sight the device is quite good looking with an appealing display screen on the top of the camera, and a large power button on the side of the device. For those who helmet mount their action cams, this small change from what other cameras typically offer can really make things easier, allowing you to feel whether or not the device has been turned on or off. The build of the device looks almost like a hybrid between the Contour and the Drift HD action cams. The main concern when looking at the VIRB design, is the convex lens, which seems to extend a fair degree out from the camera. While the Sony AS15 has a similar design, there is no getting around the fact that the exposure of the lens would in turn pose a risk of damage, especially in sports where you'd expect the camera to take a knock. Garmin do show an image of the VIRB with lens covering housing attached, but it remains unclear whether this extra housing is the underwater housing, which is an extra option. The device will be made available in either black or white. Technical DetailsThe VIRB is as expected, a high definition recording device that will allow video recording in 1080p quality, with a 16 megapixel CMOS processor and allow for up to three hours of filming from a full charge. Data is recorded onto a MicroSD card, with a recommendation of Class 10 - as to be expected with HD recording. The device will also sport a 2000mAh rechargeable Lithium-ion battery. Out of the box the VIRB is waterproof for 30 minutes to a depth of 1 meter, while the purchase of a scuba diving housing device will extend that depth to 50 meters. The display screen is 1.4" large and while remaining on, uses very little battery life. The "WideVü" lens is comprised of 9-element glass and offers the user three modes of recording: Wide, Medium and Narrow. Built in lens distortion correction and stabilization enhances video quality. True 1080p HD Recording 16 Megapixel CMOS Processor 1.4" Chroma Display 2000mAh Lithium-ion Battery ANT+ Wireless Connectivity VIRB Desktop Software Waterproofing Wi-fi Connectivity (Elite) Device PairingIt is clear that from the start Garmin would have to provide a form of functionality that separates them from other action camera manufacturers on the market, and this is where device paring comes into play. Using ANT+, the VIRB will be able to connect with other Garmin devices such as watches, remotes and cycling computers. While Garmin hasn't revealed exactly what one can achieve with the pairing of their devices with the VIRB, it certainly opens up a new avenue that most of the other action cameras lack. Options and PricingThere will be two VIRB options available, the basic VIRB device which will retail for $299.99 and then the VIRB Elite which will set you back $399.99. The differences between the two devices lie mainly in the functionality available. The VIRB Elite will offer wifi connectivity, allowing you to connect the device to your iPhone or Android smartphone. In my opinion the main selling point for the Elite is the ability to track your elevation, speed and other variables. This data will then be able to be overlayed on your video. While certainly limited to a small group of people, when in "Ski Mode" the device will also be able to detect whether or not one is on a chairlift and in turn pause recording for that period. With the VIRB scheduled for a September release, there isn't enough video footage to really make a claim as to the camera's quality. Though it's expected that the camera will rank up along with the other action cams out there, and it's certainly worth keeping an eye on. In the mean time, for a preview of the device's recording quality, you can view the official advertising video for the Garmin VIRB below.
 -
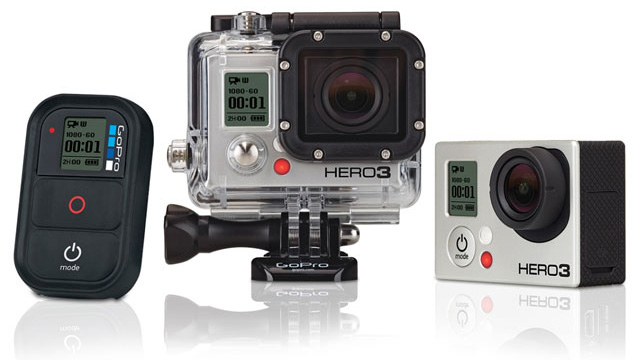 After a hyped release and what looked on paper to be an outstanding action camera, the GoPro Hero 3 has come under all kinds of scrutiny since its release late last year. While there appears to be a large number of users who are happy with their purchase, there is also a fair sized pool of users who are not happy with their product. A page on the Gethypoxic website dedicated to listing each of the GoPro Hero 3's issues, as well as potential workarounds has seen comments from a vast amount of users who feel as though their purchase of the Hero 3 was a mistake, many of whom recommend that those with GoPro Hero 2s avoid the upgrade to the Hero 3, citing that the GoPro Hero 2 offers a more stable and in turn, better user experience. One user who claims to have more than 20 years of software experience, suggests that the Hero 3 was rushed out too quickly in order to meet seasonal demands. He goes on to cite the need for an 'out of the box' update requirement. The IssuesOne of the more noted problems with the GoPro Hero 3, is the lack of continuous exposure adjustment when using the 'Photo Every Second' mode, which takes a still photo every second. The Hero 3 Black will set the exposure when it is turned on and fail to then adjust to allow for still images to be properly exposed, should one move from a dark to a light environment. Instead the exposure is locked to the automatic exposure setting based on the lighting when the camera is first turned on. Of course this means that skydivers, who will be exiting into much lighter conditions, will almost always end up with washed out images. This renders the 'Photo Every Second' mode virtually useless to skydivers. One would have to start the camera once one had already exited, a less than desirable action to have to do. The GoPro Hero 3 has also been known to turn off at unexpected times, often during connection to a television display or when using the USB cable to download. The cause for these shutdowns are not known, but there is the assumption that it may be related to an overheating problem. There have been many accounts of cameras freezing or locking up during filming. Several other small and more isolated issues also exist with the GoPro Hero 3 range. A number of other issues were present at the time of the camera's release, though updates released by GoPro since then have managed to fix many of them. Is it all a bit late though? With the current action camera market seemingly exploding, steps such as releasing a camera before sufficient testing can prove dangerous. One thing that has to go to GoPro is that they are generally quite quick to release updates to fix certain issues. We are however surprised that the exposure issue, which proves to render an entire feature useless for a certain market - has not yet been fixed. Good NewsThe good news for GoPro fans or those with the Hero 3 that are still encountering the exposure lock issue, is that GoPro have responded to the bug, which as it turns out - isn't a bug at all. A forum user posted the following response from GoPro regarding this issue: "Sorry about the problems with exposure locking in the two shortest time lapse intervals. Would you believe that was intended as a feature and it's not a bug? My understanding is that some folks in the skydiving community asked for it, but since then we've heard lots of complaints from other skydivers, so we've asked the engineering folks to make it an option you can turn on or off. For now be aware that in the two shortest time lapse modes, 0.5 and 1.0 seconds, the exposure will latch on to the values encountered at the first frame. For time lapse intervals of 2.0 seconds and longer each frame will be imaged using auto exposure. Remember that if auto-exposure results in flickering you can improve and smooth out the assembled video by invoking the De-flicker filter from the Advanced Settings menu of our free Cineform Studio software. Keep an eye on the forums and check in to the firmware update page every few weeks for when the update hits. Thank you so much for your feedback." GOPRO HERO 3 Black Firmware revision 02.37While the above quote seemed to suggest that there would be a fix for the exposure lock in the latest firmware upgrade, it seems that the new GoPro Hero 3 Black upgrade did not contain a fix to the problem. Rumours are now that the adjustment of the exposure lock issue will happen with the next update. The fact that GoPro are aware of this issue and seemingly aiming to solve it, it is a fair assumption that it won't be long before they release a new upgrade that will take care of this. As for now though, there's a lot of frustrated skydivers who were hoping that this new update would solve some of their problems. While GoPro do not have the changelog available on their site yet for the new firmware update, the following changelog has been published elsewhere. HERO3: Black Edition Current firmware version: HD3.03.02.37 Wi-Fi version: 3.4.2.9 Release date: 04/03/2012 Feature Enhancements: FW version # is now visible on upon startup. Narrow FOV 1080p30/1080p60 (Protune) Narrow FOV 720p60 (Protune) Medium FOV 720p60 (Protune) Default start-up mode is now 960p48 At this point it seems to be a wait and see scenario with regards to the fixing of many of the Hero 3's bugs, but we have no doubts that GoPro are working hard to solve these issues and that sooner rather than later, we'll see these issues being addressed in coming updates. Do you own a GoPro Hero 3? Comment below and share your experience with using this camera.
 -
 With all the recent issues that have been brought up by the Argus AAD ban by multiple container manufacturers, I wanted to make sure that everyone knows that while most modern AAD’s have a similar design, based on that of the CYPRES1 which was introduced in the early 90’s, they all have very unique differences, and these differences can cause major issues if you are unaware of them. Also, this is a good time to remind people about best practices to use if you have an AAD in your rig. Because of safety concerns right now it looks like most container manufacturers have at least temporarily prohibited the ARGUS in their containers, so this article predominantly relates to the CYPRES and the VIGIL. If the ARGUS is approved again for most containers, updated information will then be made available. Although not widely seen, there are also the FXC Astra (electronic with cutter), and the FXC-12000, an older bulky mechanical pin-pulling device. Introduced at the recent PIA Symposium, the MARS M2 from the Czech Republic and being imported by Alti-2, is another newcomer to the AAD market, which may be available sometime this year once the container manufacturers approve it for use. All the modern electronic AAD’s currently on the market in their “Expert mode” work by activating a cutter that severs the reserve closing loop when the user is falling at or greater than a given speed (typically around 78 MPH or faster) and at or lower than a given altitude (typically around 750 feet). This cut closing loop should then allow the reserve to begin its opening sequence. This is all the AAD will do (cut the loop). If the reserve has been correctly packed, the cutting of the loop should initiate the reserve opening sequence, and hopefully a reserve canopy will open between 200-500 feet AGL (barring a pilot chute hesitation, etc). KNOW YOUR EQUIPMENTAs always, consult the user manual for your specific make/model, and discuss any of your AAD questions with a qualified rigger. We are lucky to have SSK Industries, Inc., the US service center for CYPRES units located in Lebanon, Ohio, so please feel free to contact SSK for any CYPRES questions also. The first major difference between AAD’s is “active” mode. This is the altitude above the ground that the AAD would allow itself to activate if the conditions were met for an activation. The CYPRES\CYPRES2 arms at 1500 feet AGL. The VIGIL\VIGIL2 will move to active mode at 150 feet AGL. Both of these have different rationale behind their decisions. While a CYPRES will not active if the airplane only gets to 900 feet and you have to do an emergency exit, a VIGIL moves into active mode at a lower altitude and this has caused issues when the door of the airplane accidentally opened which caused a pressure difference that triggered activation. Counterpoint to this for the VIGIL is if you exit at 1200 feet and hit your head on the tail the unit is already in active mode and is able to potentially fire to start the reserve activation sequence. (Note that CYPRES is armed if you climb to arming altitude, then descend lower prior to exit.) The CYPRES also disarms when it goes below ~ 130 ft. AGL. The VIGIL will also disarm at ~130 feet on the way down A second major difference is in the shutdown timing. A CYPRES until has a hard shutdown at 14 hours after the startup sequence. This means even if you are on the airplane climbing to altitude or in freefall when that time is reached the unit will shut down. In this method of shutdown timing you must do a manual shutdown and restart of the unit if you are approaching the 14 hours since startup to ensure that the unit will remain active for any skydives that you are intending on doing. The VIGIL checks to see if it is at its “Ground Zero” altitude and if you are 150 feet or higher or lower than that altitude via pressure readings then the unit will remain on until you reach “Ground Zero” altitude again. This can cause an issue if you take your rig home and you live more than 150 feet above or below the field elevation at the airport since the VIGIL might remain on for days or weeks. Specifically this can cause issues if you are frequently traveling and leave the DZ at the end of the day and travel to a different DZ the next day since the unit might still be on and is using the altitude of the other airport as its “Zero” point. This could cause the unit to fire much higher or lower than expected. As a reference point Middletown Hook Field, the home of Start Skydiving is at 650’ MSL, Columbus (CMH) is at 815’ MSL, Indianapolis (IND) is 797’ MSL and Covington (CVG) is 896’ MSL. All of these areas may be at a large enough altitude difference that you may need to manually turn your VIGIL off when you leave the dropzone to keep it turned on until it is returned to Start Skydiving. Leaving the VIGIL on for extended time periods can lead to the battery going dead prior to the expected life of the unit or the unit failing to realize the difference in “Zero” altitude if you travel to another dropzone. A third difference is the way that the altitude reference offset data is stored in the units.. If you are doing an offsite demo jump, or jump at a DZ with an airfield with an elevation different from the landing area, there exists an option that, if you know you are going to be landing at a location that is hundreds of feet higher or lower then where you are taking off from, allows you to adjust the AAD so it knows about that difference, so it still will activate at ~750 feet above the ground at the intended landing location. Because of the CYPRES automatic weather correction feature, it will re-zero itself on the way back to the take-off location, so it is necessary to switch it off and reset the DZ altitude reference prior to each jump at the remote airfield. At the end of the self-test procedure, CYPRES-2 displays the previously set altitude offset so that it can be easily selected again. The CYPRES(1) unit does not have a memory of a programmed offset and will forget the difference each time the CYPRES is turned off. CYPRES automatically tracks weather changes throughout the day, and if the airfield and landing site are nearby and at the same elevation there is no need to reset it every time you need to re-zero your altimeter. If you travel by car back to the DZ, or walk back from a different elevation after landing with your CYPRES, it is recommended to reset it (switch off/on). As the VIGIL does not automatically track weather changes in the same way, it will retain the offset information in its memory until you go back into the menu and change it back to zero even if the unit is shut down or it reaches its 14 hour point and shuts off. The upside is if you are frequently jumping at a location that involves needing to input an offset the offset is saved for you. The downside to this is if you program in an offset and forget to reset it you could have the unit activating incorrectly since it thinks it still needs the offset. The VIGIL also recommends resetting the unit if you travel with it in a car or walk back from a different elevation. Yet another difference is the “Function” of the AAD. CYPRES units come in four versions that are easy to tell the difference of at a glance. CYPRES Expert units have a Red button, Speed units have a Red button that has SPEED printed on it. Student units have a Yellow button and a Tandem unit has a Blue button. Each of these models has unique activation parameters so refer to the user manual for specific information. A CYPRES-2 unit can be reprogrammed by SSK or the factory to change its functionality and it’s done at no charge. The VIGIL is a multifunction device that allows for the user to change it from “Expert” to “Student” or even “Tandem” in the startup sequence.) You do need to make sure the unit is in the right mode to get the correct activation parameters loaded. You can tell the mode the VIGIL is in by looking at the display once the unit is turned on and it will tell the currently active mode. Tandem Instructors especially need to ensure if the rig they are about to jump has a VIGIL installed that it is in the right mode since having the unit activate at the EXPERT or STUDENT parameters may not ensure the canopies will open in time to save your life. There are additional differences so please read your User Manual to really understand all the details of your AAD. While we try to use the “Set it and Forget it!” attitude towards AADs, they are somewhat complicated devices that you need to understand the details of, so that you can properly use the unit if it is installed in your container. Modern AAD’s since they were introduced with the CYPRES1 in 1991 have saved hundreds of lives. They have also caused issues and even fatalities when inducing two canopy out situations at times where jumpers have opened their main canopies very low or other complications. AAD’s have a very high success rate when needed but they are not 100% flawless either. Just by having an AAD installed does not mean that you are now perfectly safe. Many jumpers inform their friends and families that “I have this little device that will pull for me if I don’t” as a way of reassuring them around the dangers of skydiving. While it is true that having an AAD does increase your safety factor it is not to be relied on and the true risk involved in skydiving does need to be considered. Reminder of Best Practices for use of your AAD no matter which brand you use: 1) Only turn your AAD on at the takeoff site, do not turn it on at home then drive to the DZ since it will think your home is “Zero Altitude” and may fire higher or lower than expected because of this. 2) If a “multimode” device, ensure the unit is in the correct “Mode” for the skydive you are about to do. 3) Notice any errors during the start up or during operations during the day and alert your rigger before completing another jump on the unit. 4) Be aware of the shutdown timing on the AAD and if needed turn it off before you leave at the end of the day. Also be prepared to reset the unit if you will be doing more than 14 hours of jumping (Night jumps especially are of note on this) 5) Only configure offset information into the unit if you are truly jumping at an altitude different than you are taking off from. Also be sure you know whether the unit retains the offset information or not. CYPRES2 User Manual: http://www.cypres-usa.com/userguide/CYPRES_2_users_guide_english.pdf or http://www.cypres.cc/index.php?option=com_remository&Itemid;=89&func;=download&id;=182&chk;=5ca53a980b98700d976eb51f9e1fc9c3&no;_html=1〈=enVIGIL User Manual: http://www.vigil.aero/files/images/ENGELS___DP_JUN_2010.pdf VIGIL SB on this topic: http://www.vigil.aero/files/images/Information_Bulletin___Airborne_Status_.pdfWith all the recent issues that have been brought up by the Argus AAD ban by multiple container manufacturers, I wanted to make sure that everyone knows that while most modern AAD’s have a similar design, based on that of the CYPRES1 which was introduced in the early 90’s, they all have very unique differences, and these differences can cause major issues if you are unaware of them. Also, this is a good time to remind people about best practices to use if you have an AAD in your rig. Because of safety concerns right now it looks like most container manufacturers have at least temporarily prohibited the ARGUS in their containers, so this article predominantly relates to the CYPRES and the VIGIL. If the ARGUS is approved again for most containers, updated information will then be made available. Although not widely seen, there are also the FXC Astra (electronic with cutter), and the FXC-12000, an older bulky mechanical pin-pulling device. Introduced at the recent PIA Symposium, the MARS M2 from the Czech Republic and being imported by Alti-2, is another newcomer to the AAD market, which may be available sometime this year once the container manufacturers approve it for use. All the modern electronic AAD’s currently on the market in their “Expert mode” work by activating a cutter that severs the reserve closing loop when the user is falling at or greater than a given speed (typically around 78 MPH or faster) and at or lower than a given altitude (typically around 750 feet). This cut closing loop should then allow the reserve to begin its opening sequence. This is all the AAD will do (cut the loop). If the reserve has been correctly packed, the cutting of the loop should initiate the reserve opening sequence, and hopefully a reserve canopy will open between 200-500 feet AGL (barring a pilot chute hesitation, etc). KNOW YOUR EQUIPMENTAs always, consult the user manual for your specific make/model, and discuss any of your AAD questions with a qualified rigger. We are lucky to have SSK Industries, Inc., the US service center for CYPRES units located in Lebanon, Ohio, so please feel free to contact SSK for any CYPRES questions also. The first major difference between AAD’s is “active” mode. This is the altitude above the ground that the AAD would allow itself to activate if the conditions were met for an activation. The CYPRES\CYPRES2 arms at 1500 feet AGL. The VIGIL\VIGIL2 will move to active mode at 150 feet AGL. Both of these have different rationale behind their decisions. While a CYPRES will not active if the airplane only gets to 900 feet and you have to do an emergency exit, a VIGIL moves into active mode at a lower altitude and this has caused issues when the door of the airplane accidentally opened which caused a pressure difference that triggered activation. Counterpoint to this for the VIGIL is if you exit at 1200 feet and hit your head on the tail the unit is already in active mode and is able to potentially fire to start the reserve activation sequence. (Note that CYPRES is armed if you climb to arming altitude, then descend lower prior to exit.) The CYPRES also disarms when it goes below ~ 130 ft. AGL. The VIGIL will also disarm at ~130 feet on the way down A second major difference is in the shutdown timing. A CYPRES until has a hard shutdown at 14 hours after the startup sequence. This means even if you are on the airplane climbing to altitude or in freefall when that time is reached the unit will shut down. In this method of shutdown timing you must do a manual shutdown and restart of the unit if you are approaching the 14 hours since startup to ensure that the unit will remain active for any skydives that you are intending on doing. The VIGIL checks to see if it is at its “Ground Zero” altitude and if you are 150 feet or higher or lower than that altitude via pressure readings then the unit will remain on until you reach “Ground Zero” altitude again. This can cause an issue if you take your rig home and you live more than 150 feet above or below the field elevation at the airport since the VIGIL might remain on for days or weeks. Specifically this can cause issues if you are frequently traveling and leave the DZ at the end of the day and travel to a different DZ the next day since the unit might still be on and is using the altitude of the other airport as its “Zero” point. This could cause the unit to fire much higher or lower than expected. As a reference point Middletown Hook Field, the home of Start Skydiving is at 650’ MSL, Columbus (CMH) is at 815’ MSL, Indianapolis (IND) is 797’ MSL and Covington (CVG) is 896’ MSL. All of these areas may be at a large enough altitude difference that you may need to manually turn your VIGIL off when you leave the dropzone to keep it turned on until it is returned to Start Skydiving. Leaving the VIGIL on for extended time periods can lead to the battery going dead prior to the expected life of the unit or the unit failing to realize the difference in “Zero” altitude if you travel to another dropzone. A third difference is the way that the altitude reference offset data is stored in the units.. If you are doing an offsite demo jump, or jump at a DZ with an airfield with an elevation different from the landing area, there exists an option that, if you know you are going to be landing at a location that is hundreds of feet higher or lower then where you are taking off from, allows you to adjust the AAD so it knows about that difference, so it still will activate at ~750 feet above the ground at the intended landing location. Because of the CYPRES automatic weather correction feature, it will re-zero itself on the way back to the take-off location, so it is necessary to switch it off and reset the DZ altitude reference prior to each jump at the remote airfield. At the end of the self-test procedure, CYPRES-2 displays the previously set altitude offset so that it can be easily selected again. The CYPRES(1) unit does not have a memory of a programmed offset and will forget the difference each time the CYPRES is turned off. CYPRES automatically tracks weather changes throughout the day, and if the airfield and landing site are nearby and at the same elevation there is no need to reset it every time you need to re-zero your altimeter. If you travel by car back to the DZ, or walk back from a different elevation after landing with your CYPRES, it is recommended to reset it (switch off/on). As the VIGIL does not automatically track weather changes in the same way, it will retain the offset information in its memory until you go back into the menu and change it back to zero even if the unit is shut down or it reaches its 14 hour point and shuts off. The upside is if you are frequently jumping at a location that involves needing to input an offset the offset is saved for you. The downside to this is if you program in an offset and forget to reset it you could have the unit activating incorrectly since it thinks it still needs the offset. The VIGIL also recommends resetting the unit if you travel with it in a car or walk back from a different elevation. Yet another difference is the “Function” of the AAD. CYPRES units come in four versions that are easy to tell the difference of at a glance. CYPRES Expert units have a Red button, Speed units have a Red button that has SPEED printed on it. Student units have a Yellow button and a Tandem unit has a Blue button. Each of these models has unique activation parameters so refer to the user manual for specific information. A CYPRES-2 unit can be reprogrammed by SSK or the factory to change its functionality and it’s done at no charge. The VIGIL is a multifunction device that allows for the user to change it from “Expert” to “Student” or even “Tandem” in the startup sequence.) You do need to make sure the unit is in the right mode to get the correct activation parameters loaded. You can tell the mode the VIGIL is in by looking at the display once the unit is turned on and it will tell the currently active mode. Tandem Instructors especially need to ensure if the rig they are about to jump has a VIGIL installed that it is in the right mode since having the unit activate at the EXPERT or STUDENT parameters may not ensure the canopies will open in time to save your life. There are additional differences so please read your User Manual to really understand all the details of your AAD. While we try to use the “Set it and Forget it!” attitude towards AADs, they are somewhat complicated devices that you need to understand the details of, so that you can properly use the unit if it is installed in your container. Modern AAD’s since they were introduced with the CYPRES1 in 1991 have saved hundreds of lives. They have also caused issues and even fatalities when inducing two canopy out situations at times where jumpers have opened their main canopies very low or other complications. AAD’s have a very high success rate when needed but they are not 100% flawless either. Just by having an AAD installed does not mean that you are now perfectly safe. Many jumpers inform their friends and families that “I have this little device that will pull for me if I don’t” as a way of reassuring them around the dangers of skydiving. While it is true that having an AAD does increase your safety factor it is not to be relied on and the true risk involved in skydiving does need to be considered. Reminder of Best Practices for use of your AAD no matter which brand you use: 1) Only turn your AAD on at the takeoff site, do not turn it on at home then drive to the DZ since it will think your home is “Zero Altitude” and may fire higher or lower than expected because of this. 2) If a “multimode” device, ensure the unit is in the correct “Mode” for the skydive you are about to do. 3) Notice any errors during the start up or during operations during the day and alert your rigger before completing another jump on the unit. 4) Be aware of the shutdown timing on the AAD and if needed turn it off before you leave at the end of the day. Also be prepared to reset the unit if you will be doing more than 14 hours of jumping (Night jumps especially are of note on this) 5) Only configure offset information into the unit if you are truly jumping at an altitude different than you are taking off from. Also be sure you know whether the unit retains the offset information or not. CYPRES2 User Manual: http://www.cypres-usa.com/userguide/CYPRES_2_users_guide_english.pdf or http://www.cypres.cc/index.php?option=com_remository&Itemid;=89&func;=download&id;=182&chk;=5ca53a980b98700d976eb51f9e1fc9c3&no;_html=1〈=enVIGIL User Manual: http://www.vigil.aero/files/images/ENGELS___DP_JUN_2010.pdf VIGIL SB on this topic: http://www.vigil.aero/files/images/Information_Bulletin___Airborne_Status_.pdf
 -
 The Birdman is flying again! This past week, BIRDMAN® International ltd jumped back to life with the addition of some new content, along with a new website design. The company, which halted sales on gear in 2010 due to a change in ownership structure - now has blood pumping through its veins again. The press release that was posted to the website highlights a number of details regarding the company; it's structure, ambitions and new direction are all addressed. This news has caught the attention of wingsuiters everywhere, many eagerly anticipating the new products that are set to emerge from the restructured Birdman company. Birdman's ReturnThe question on many lips surrounds what exactly went on during the past 30 months with regards to Birdman as a company. What structual changes were made, and where Birdman are headed from here. These are all questions that have addressed in the BIRDMAN® International ltd press release that they have posted on their site. One question that only time will be able to answer, is whether or not Birdman have what it takes to return to the market with the dominance they once held. Firstly, Risk Control Corp. will be the manufacturer and seller of BIRDMAN® International ltd suits under license worldwide from Japan. Risk Control Corp is run by Shin Ito, who is now seen as the strategic partner to BIRDMAN® International ltd. Shin Ito is a world renowned and record holding skydiver and specifically wingsuit flyer. Jari Kuosma, from BIRDMAN® International ltd states that Shin Ito has been the driving force behind the new birdman line as co-creator. Jari goes on further to say that while in the past BIRDMAN® International ltd had trouble in regards to the sewing of the suits, he now feels more comfortable in the manufacturing process - having professionals to work with, ensuring the best possible quality for the new Birdman suits. There is clearly a new focus on the Birdman products, and that focus seems to be quality. The company seems to have shifted away from the more economic suits and instead are focusing on supreme quality as opposed to an economic wingsuit option. The claims are that no corners were cut with the new line and that the aim was to create cutting edge suits that provide top quality. The paragraph closes with the wording "However, I dare to claim that the value of the new suits will be higher than the price tag. You'll see." The website indicates that the new line will come out with 3 new wingsuits. The Birdman Blade III has already been put live on the site, with detailed information publicly available, while the other two suits, the Samurai and the Ninja - are both yet 'to be announced soon' The Blade IIIA new wingsuit has also been made available by BIRDMAN® International ltd. The Blade III is said to be targeted towards experienced skydivers and will be the first product to be released having been created with the help of Shin Ito. An extract from the Birdman website says the following about the suit: "BLADE III is very powerful all-around wingsuit made for experienced wingsuit pilots who want to enjoy their flight from exit to landing. It is balanced perfectly giving pilot 100% control of pitch and speed. It’s drag-reducing quattro–wing platform has large, carved and specially shaped wings for best lift, agility and speed. This gentleman’s race craft comes all included; four wings, semi-rigid ribs & mini-ribs, pockets, inner lining, extra sturdy booties & 10 mm YKK zipper and over the shoulder zip for easy dossing. It will be offered in 5 color scenes." Birdman WatchesIt seems that wingsuits aren't the only products that BIRDMAN® International ltd are returning to the industry with. The company has also released information on a line of skydiving watches that they will be selling. The watches are supposedly designed with skydivers in mind and consists of a carbon fibre face, a case of aerospace grade 316-L stainless steel and 'virtually scratch-proof' sapphire crystal. The watches are said to be water resistant to 100 meters and the straps made from parachute nylon, so that you can be sure that they aren't going to snap under pull. The History of BirdmanBirdman started out making wingsuits in 1999, at a time when the wingsuit manufacturer market was extremely small - in fact, Birdman is generally recognized as one of the first wingsuit manufacturing companies. They released the BirdMan s.u.i.t in '99, as their first commercial wingsuit. The year after that they released both the BirdMan GTi and the Classic. In 2001 they continued the new lines with the BM SkyFlyer and the Classic II being released. A year later they expanded into tracking pants, releasing the Birdman Tracking Pantz. In 2003 the SkyFlyer and S.3 were released, followed up in 2004 by the Phi. 2005 saw the release of the quite popular Firebird and Firebird-R wingsuits. Between 2006 and 2009, Birdman released several more suits including both the Blade and the Blade II in 2007 and 2009 respectively.
 -
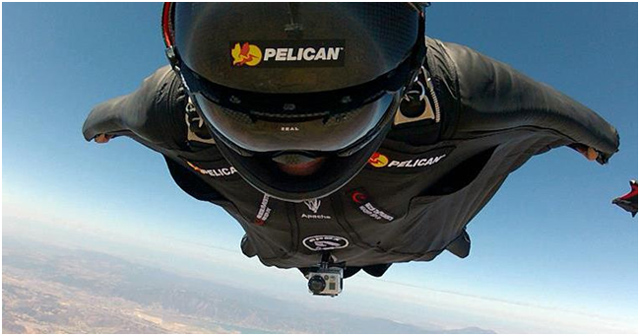 8 February 2013 - Editors Note: After this article was published, TonySuit released a Service Bulletin regarding the Rebel and Apache Wingsuit that addresses the concerns raised below. If you use the Apache or Rebel for skydiving, TonySuits offers a free modification that will relocate your harness and emergency handles to the outside of the suit. See the image below. Download the full Service Bulletin. Wingsuiting is a new discipline that is ever-changing in terms of equipment, general DZ knowledge, and practices within the discipline. This can lead to a great deal of confusion about what is what, and how the equipment operates. One such example is the Apache series wingsuit, manufactured by Tonysuits Inc. This series of wingsuit is advertised as "for BASE jumping"and as the "biggest wingsuit in the world", the manufacturer "observed that placing the parachute harness inside the suit improved performance by reducing drag." This wingsuit places all components of the main lift web (MLW) inside the wingsuit, making the chest strap invisible, and leaving handles inaccessible unless modifications are made to the suit, parachute system/rig, or both. The manufacturer’s website also indicates: NOTE: This suit is for BASE jumping only. Having the harness inside the suit excludes it from being used for skydiving. Expert wingsuit skydivers could choose to modify the Apache to mount the emergency handles on to the suit itself under the guidance of a qualified rigger but TonySuits does NOT recommend any modifications! The process of jumping this system in the skydiving environment requires one of three actions; Rig Hidden In The WingsuitThe first option is to do nothing and jump the suit as it is with the rig entirely hidden within the wingsuit system as seen in this image below. Handles are entirely covered, and inaccessible without first unzipping the wingsuit. This is a legal means of jumping the wingsuit/rig system. Whether it is an ideal or safe method is determined by a pilot or S&TA.; The above method is not addressed in the FARs nor PIA Technical Documents. Various DPRE’s (Designated Parachute Rigger/Examiners) commented "No one at the PIA or FAA level ever anticipated we’d have jumpers covering handles with a jumpsuit; we now need to address this topic." Emergency procedures in this system: Unzip wingsuit. Crossdraw handles (Left hand to cutaway release, right hand to reserve ripcord). The "fully covered handles" method may be the only method not addressed in a FAR or PIA Technical Document, yet this method fails to take into account situations such as: Aircraft emergency requiring instant access to a reserve handle Missing hackey/handle, requiring a straight-to-reserve deployment Pilot Chute in Tow Hard pull Canopy collision requiring a cutaway High ground winds, where a cutaway is necessary Adding "Chicken Handles"Another method has been to put "chicken handles" on the wingsuit, essentially Rapide links attached to the cutaway release and reserve ripcord system. This changes the angle of cable travel (inducing a double 90 degree bend in the relevant cable) significantly increasing pull force. TSO (Technical Standards Order, administered by the FAA) requires that pull force be not greater than 22lbs of pull. In testing, the cutaway release required approx 45lbs of pull force, and the reserve system would not release with 60lbs of pull force applied (this was the limit of the scale used for the pull test. The "Chicken Handle" system was discussed with several rig manufacturers, Technical Chairs, former Technical Chairs, Rigging Chairs, and former Rigging Chairs of PIA. All agree this system is a violation of manufacturer TSO as expressed in FAR 65.111, and PIA TS 135 4.3.3 Table 2. In order to legally use this deployment system, the system must be tested and certified according to FAA TSO specification as set forth by the PIA. The definition of testing for certification requires: "4.3.3 HUMAN FACTORS AND ACTUATION FORCE TESTS: An anthropometrically diverse group of individuals (consisting of a representative group of no less than 3 males and 3 females) from the intended user group shall be employed for all human factors tests in 4.3.3. All individuals shall be able to operate the subject device without any undue difficulty. Table 2 lists the required test conditions and number of tests for each particular component. Additional information for the component tests is listed below. TESTS: Under normal design operating conditions, all devices tested under this paragraph shall result in a positive and quick operation of the device within the following load range applied to the handle: (a) a load applied at the handle of not less than 5 lbf (22.2 N), applied in the direction giving the lowest pull force, (b) a load applied at the handle of not more than 22 lbf (97.9 N), applied in the direction of normal design operation, (c) for chest type parachute assemblies, the maximum pull force shall be 15 lbf (66.7 N), (d) the primary actuation device shall be tested in accordance with Table 2, (e) the emergency/reserve drogue release (if used) shall be tested in accordance with Table 2." Table 2 includes standing, hanging in harness etc. The above system was never tested prior to being put into the marketplace. The challenges with this system were discovered in the field, as seen in the video link below. Pull tests were performed at various angles and configurations, with a Master Rigger in attendance. As of March 2012, the manufacturer has recommended that skydivers immediately discontinue use of this system. Moving Handles from the Rig to the WingsuitA third modification requires moving handles from the parachute rig system and relocating them to the wingsuit body via the use of Velcro. The rig is then connected to the wingsuit via ties/cords that are tied above and below the cheststrap/handles of the rig. Due to pull forces and the random/chaotic nature of a deployment, this system has suffered multiple two-out scenarios across the country. Multiple dropzones have banned this wingsuit system from being jumped from their aircraft. Tony Uragallo of TonySuits has responded to concerns, saying: "I am changing the Apache system to be similar to the Squirrel suit system." Squirrel suits have found a novel way of dealing with these risks by adding zippers that allows the rig to worn inside the suit (for BASE jumping) as well as outside the suit, with handles fully exposed. (for skydiving) The vast majority of skydivers often don't give much thought to TSO's or FARs, and most have likely have never heard of PIA TS 135. These are the "rules of the road" for parachute gear in the skydiving world. These rules regulations and laws are there to protect skydivers from unsafe practices equipment, to provide standards of performance, and the safe operation of a dropzone and to prevent problems within the skydiving and non-skydiving community through standardized rules, laws and industry practices. The FARs put aircraft pilots directly in the crosshairs when a problem occurs; this is why skydivers must demonstrate repacks when visiting a dropzone, for example. Should any incident occur, it falls on the pilot-in-command. Yet most aircraft pilots are unaware of what is or isn’t legal, as the dropzone assumes responsibility for equipment being legal and reserves in-date. In this instance, a wingsuit designed specifically for BASE being used in the skydiving environment and requiring modifications to a rig or the rig operation is a violation of TSO and by extension, the FARs. This creates a legal headache for dropzone operators, S&TA;’s, rig manufacturers, and other skydivers on the lookout for standard equipment. Wingsuits designed for BASE jumping are exciting, fun, and provide an added edge of adrenaline. Some skydivers may take the approach of "So what? It's an individual choice." Any reasonable jumper, base or skydiver, will conclude that skydiving is a different environment than BASE (which has no rules). In the skydiving environment, the manufacturers assure the FAA and the DZO that gear meets safety standards via the TSO certification. DZO's in turn, assure the pilot that equipment being used in the skydiving environment is legal, in-date, and approved. As skydivers, we assure each other's safety by using equipment that is legal, safe, and approved for the activity. If you are considering jumping any product that may involve relocating handles or other modifications, first contact the manufacturer of the harness to verify the legality of doing so - and check with your DZO or S&TA; for any local policy.
 -
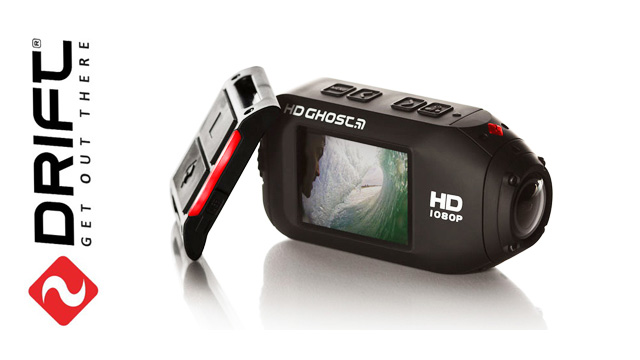 Just a mere few weeks after GoPro released the new HD Hero 3, another popular POV camera manufacturer has too released a new product. Drift, which has had quite successful sales with their previous model have announced the release of the "Drift HD Ghost", a new and more powerful product when compared to their award winning and commercially popular model, simply named the "Drift HD". It is clear from the start that Drift were putting their focus on the features with the HD Ghost, being quick to highlight their new two-way LED remote control. The selling point for Drift, when it comes to the Ghost HD, is the concept that while many other POV cameras come with accessories included, that these other products will often require a number of aftermarket accessories to achieve the results desired by the consumer. Drift say that the HD Ghost will include 'everything sports enthusiasts need to capture professional quality video immediately". The above mentioned LED remote controller is one that is designed to allow the user to understand what current settings his HD Ghost is set to. Where most remote controls work one way, sending information to the camera, but not receiving it, this two way remote controller system is something that is new to the POV camera market, the question as to whether this will be a feature that will be adopted by other manufacturers in future or whether it will be seen primarily as a gimmick is yet to be seen, but if the system works in practice as it does in theory - it will certainly allow for a much easier and comfortable mode switching experience when one is using the remote to control the camera functionality. There is a 'Drift Flashback (TM)' function on the HD Ghost which will record video in a loop, and only save the file when the user 'tags' it. This can come in useful in situations where you're looking for 'that' shot and are expecting a number of failed attempts before catching it. I'm sure many of all are all too familiar with running out of recording space just when you need it, a curse that seems to extend to still photography too. The Ghost HD comes with a 2-inch LCD screen which allows for video playback and editing. The LCD is also covered in Gorilla Glass(R) which prevents scratching and keeps the camera rugged. A 7 element lens design is said to help increase the vibrancy and clarity of the HD Ghost as opposed to previous models, and brings better image quality to the 1080p, 960p, 720p and WVGA recording modes. The camera is also able to shoot stills while recording video footage. Stills are able to be captured in three different formats: 5, 8 or 11 megapixels. Or 2 megapixels when taking a still shot while recording. Also of interest is the ability for the Ghost to switch between 170°, 127° and 90° field of view. The device comes with wi-fi connectivity and soon Drift are said to be releasing an iOS and Android mobile app which will allow Ghost HD owners to control their camera's recording, settings and playback directly from their mobile devices. This is seem as a way of making it even easier for users to record footage and share it with social networks. In essence, one could record a video, transfer to their smart phone and then upload directly to social networks within mere minutes of the recording. The Drift Ghost HD is made with 3 meter water proofing when used without a case, this means that general water sports with the exception of things like scuba diving, don't have to invest in an extra housing case, though there is the option for deep water protection by purchasing one of Drift's special underwater housings, which are water proof until 60 meters. Drift claims to boast the longest lasting battery for any POV camera currently on the market, with 3 hours of recording time, using a 1700 mAh lithium-ion battery. The current retail price on the Drift HD Ghost puts it in the same market as the GoPro HD Hero 3, meaning that Drift see the HD Ghost as a serious contender in the action camera market. And from early reviews it seems that the Ghost is able to capture some quality footage, whether that footage is as good as the Sony AS15 or the GoPro HD Hero 3 is yet to be seen. But we do think that the Drift HD Ghost is a big step up from their previous Drift HD, which didn't perform too well compared to some of the competition in our action camera comparative review.
 -
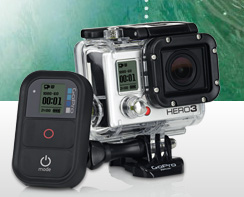 GoPro have just unveiled the specifications for their new generation of mounted sports cameras. The GoPro Hero 3 will likely grab an even tighter hold of the already dominated market, where GoPro have found themselves leading over the past few years. Other companies have tried to revitalize their products in order to keep up with the ever popular GoPros, but ultimately have not yet managed to capture the power, functionality and quality that GoPro manage to pack into their cameras. The HD Hero 3 looks to focus on creating a smaller and lighter camera, while at the same time increasing the features and enhancing both video and photo quality. It's difficult not to be impressed by the Hero 3 by looking at what it provides, at least on paper. The Hero 3 range is said to be at least 30 percent smaller than the HD Hero 2, and 25 percent lighter. They have also included built in wifi, which while of limited use to some, is a huge positive advancement for many others. The processor of the camera is claimed to be twice as fast as it's predecessor, this makes the camera able to handle higher quality video at higher frame rates. The higher end of the Hero 3 range allows for 4k resolution video at 15 FPS, while supporting 60fps at 1080p, 100fps at 960p and 120fps at 720p. This is a vast improvement from the Hero 2 which recorded at a maximum of 48fps at 960p and 30fps at 1080p. This information would support the claim that the Hero 3 can in fact double the performance of it's predecessor, the HD Hero 2. The design of the GoPro Hero 3 is similar to that of the Hero 2, though slightly slimmer. It's good to see GoPro sticking to a design that has proven to be successful, while only making minor cosmetic changes, most of which are due to design enhancements, one of which is a new, flatter lens. There are currently 3 models in the range, the entry level model which is referred to as the 'White Edition', the intermediate model which is called the 'Silver Edition', and then the top of the market model which has all the bells and whistles - the 'Black Edition'. Another impressive feature is the ability to control up to 50 cameras from a distance of up to 600ft using a remote. This remote is included in the Black Edition, while can be purchased separately for the other Hero 3 models for around $80. Due to the fact that the Hero 3 has only been announced hours ago, there aren't really any performance tests out yet and will likely come in at a later stage, though the claims are that the Hero 3 (Black Edition) is twice as sharp, twice as powerful as before when under low light conditions and all models also have received a reduction in the wide angel distortion. The photographic specifications on the GoPro HD Hero 3 are slightly enhanced from the Hero 2, in specific models. The entry level model, as with the Hero 2, comes with a 5 megapixel sensor, while the intermediate model has been bumped up from an 8 megapixel to an 11 megapixel sensor, while finally - the top of the line model has been bumped up from an 11 megapixel sensor to 12 megapixels. All three models have the ability for burst shots, with the White Edition offering a maximum of 3 shots per second, the Silver Edition providing up to 10 shots per second with its burst mode feature, while the Black Edition takes the cake with an amazing 30 shots per second burst firing option. GoPro HD Hero 3 - Specifications GoPro HD Hero 3 (White Edition) Specs Included Built in Wifi 1080p/30fps, 960p/30fps, 720p/60fps 5MP photos Up to 3 shots per second burst mode Improved Housing $199 MSRP HERO3: White Edition Camera 197’/ 60m Waterproof Housing* Rechargeable Li-ion Battery QR Buckle 1 Curved Adhesive Mount 1 Flat Adhesive Mount Assorted Mounts and Hardware USB Charging Cable GoPro HD Hero 3 (Silver Edition) Specs Included Built in Wifi 1080p/30fps, 960p/48fps, 720p/60fps 11MP photos Up to 10 shots per second burst mode Protune & White Balance Improved Housing $299 MSRP HERO3: Silver Edition Camera 197’/ 60m Waterproof Housing* Rechargeable Li-ion Battery QR Buckle J-Hook Buckle 3-Way Pivot 1 Curved Adhesive Mount 1 Flat Adhesive Mount Assorted Mounts and Hardware USB Charging Cable GoPro HD Hero 3 (Black Edition) Specs Included Built in Wifi 4k/15fps, 2.7k/30fps, 1440p/48fps, 1080p/60fps, 960p/100fps, 720p/120fps Remote Control 12MP photos Up to 30 shots per second burst mode Protune, Continuous Photo, White Balance and Picture in Video Improved Housing $399 MSRP GoPro App Compatible Pro Low-Light Performance HERO3: Black Edition Camera 197’/ 60m Waterproof Housing* Wi-Fi Remote + Key Ring Remote Charging Cable Rechargeable Li-ion Battery QR Buckle J-Hook Buckle 3-Way Pivot 1 Curved Adhesive Mount 1 Flat Adhesive Mount Assorted Mounts and Hardware USB Charging Cable The waterproof housing for the Hero 3 has been developed to be smaller and fit close to the new flatter lens. Lens distortion under water is often a factor in wide angle underwater photography or filming, and it may have been one of the driving forces behind the decision to adopt a flatter lens in their design. The storage and ports have changed slightly since the previous releases and now contains a mini-USB for syncing and charging, while having micro HDMI for video output. The Hero 3 will use a micro SD card, as opposed to the regular SD cards used in previous versions. The big question for many GoPro owners is going to be whether it is worth them upgrading their current setup for the new Hero 3. For the most part the White and Silver editions are along the same lines as the Hero 2, the Silver Edition just having a few new tweaks and enhancements, which may be enough for some to consider the upgrade. But from what we've seen on paper, the Hero 3 Black Edition looks to be a different beast and we have high expectations for the results of any tests that are going to be performed with this camera in the near future.
 -
 This week Contour launched their new Contour+2. Like its predecessors the Contour+2 is a light-weight versatile full HD action camera. Contour took a look at their previous models and combined the best features from the ContourROAM and the Contour+ into the new easy to use Countour+2. By sticking the existing form factor they made sure the camera is still small and light, two of the most important requirements for any mounted action cam. The Contour+2 weighs only 0.2oz more than its immediate predecessor. What's in the box? Contour+2 Camera Micro SD Card (4GB)* Profile Mount Rotating Flat Surface Mount Rechargeable Battery USB 2.0 Cable Mini HDMI Cable Mic Cable Waterproof Case Specs: Full HD – 1920 x 1080 @ 30/25fps Tall HD – 1280 x 960 @ 30/25fps Action HD – 1280 x 720 @ 60/50 or 30/25fps Slow Motion – 854 x 480 @ 120/100, 60/50, or 30/25fps Photo Mode: Every 1, 3, 5, 10, 15, 20, 30, 45, or 60 seconds 5MP Sensor Codec – H.264/AAC / File Type – MP4 AAC Audio Compression 32GB microSD Compatible Battery Life: 2-2.5 hrs While most of the improvements are to the video itself, there are some external changes that, on the face of it makes real sense and will probably make this an even more desirable little camera to have. Contour brought back the built-in tripod (1/4" - 20) mount, something that got lost between the ContourROAM and the original Contour+ that just didn't make sense. There’s also an Instant-on record switch and no more power button. Slide the slider forward and you’re ready to jump. There's a slide lock to prevent you from having a dreaded premature recording stop. The Contour+2 records full HD (1080p) at 30FPS video and SD (480p) video at 120FPS. However, it now also embeds “rich data” like speed, elevation and distance via a built-in GPS receiver as part of the recording. All of this can be edited and fused via their Storyteller app (PC/Mac). So, much easier to track and share your most excellent wingsuit jump. Other cool features include: a 270° rotating lens which allows you to mount this camera in almost any position you can imagine and the built-in leveling laser will help you get frame and get the picture right regardless. An external mic port, a 4GB microSD card and a mini HDMI cable for live streaming all included. Also part of the package is a 60-meter waterproof case and then of course the one we like, improved Bluetooth connectivity, turning your iOS or Android smartphone into and external remote viewfinder. Another great thing, at $399.99, you get all of this at about 100 dollars cheaper than the old Contour+! We hope to have a full review of the Contour+2 in the very near future for you. In the meantime, find out more about this camera on the Contour Website.
 -
According to Karel Goorts, Managing Director for Aviacom SA, production of the Argus automatic activation device (AAD) for the sport parachuting market has been discontinued. The current group of service centers will continue to provide service for units currently in use. A limited number of cutters and spare parts will be available. Many container manufacturers rescinded the approval of the Argus to be installed in their containers earlier this year, following questions about the effectiveness of the cutter. Argus owners should check with their container manufacturer to determine whether the Argus may be installed. Source: USPA Aviacom released the following press release on the situation: Dear Argus Customer, We thank you for the support and the confidence that you granted us over the years. The Argus has saved no less than 31 lives since 2006. The recent bans from major manufacturers forced us to discontinue further production for the sport market, due to the impossibility to use our AAD in most rigs. We have been lobbying in St.-Louis at the PIA meeting with all involved parties to get the Argus back in the air – to no avail. The manufacturers demand a brand new cutter design. This will take between 18-24 months and cost over 100,000.00 USD. We don’t get any guarantee that this solution will be accepted by those who issued the ban, so it is not a viable option. Our Service centers will be able to continue the 4 year check-ups and the remaining ‘old’ cutters still will be exchanged for free. A limited stock of spare parts will be available. The remaining stock of Argus SIS will be sold through our dealer network. We are sincerely sorry for this unfortunate situation. Kind regards, Karel Goorts Managing Director Aviacom SA P.S.: The Argus is allowed for use in the following rigs: Mirage, Wings, Dolphin, Racer, Infinity, Next and Basik. Source: Aviacom
-
 Phoenix-fly announces a new Coaching program to replace the Phoenix-fly Instructor Program. Rising up from out of the ashes is the Phoenix and the latest re-start at Phoenix-fly is the dismantling of their “Instructor” program and the birth of a new Coaching program, making room for a gradual move towards a more official training standard. “With the recent rise in wingsuit-related incidents and the tremendous growth in the wingsuit discipline, we felt it was time to re-examine our roster of manufacturer-endorsed instructors and determine a path for instruction that not only provides the best methodologies for training, but also provides an accessible, consistent system that Phoenix-fly can firmly stand behind,” says Jarno Cordia, Global Marketing Manager for Phoenix-Fly. Phoenix-Fly’s history is well known; president and founder Robi Pecnik was one of the first and easily the most innovative wingsuit designer in the early days of wingsuiting. Paired up with Jari Kuosima, they formed Birdman. Pecnik kept the company on the leading edge of suit design while Kuosima sold suits. Together they built a powerhouse product line, and over time they instituted a training program to help skydivers get their wings into the air. The program was primarily authored by Chuck Blue and Henny Wiggers.This was known as the “Birdman Instructor” program. In 2004, Pecnik grew dissatisfied with the direction Birdman was taking, and so left to form Phoenix-fly. Many Birdman Instructors (BMI) automatically received Phoenix-fly instructor ratings when the competitive company was formed, and the Phoenix-fly program moved forward and grew from that base of early instructors. It was later discovered that some of the BMI’s had received their ratings via email. In short, some of the new PFI’s had never received formal training of any kind. “We’ve found over the course of years that instructors were going uncurrent or teaching First Flight Courses to skydivers that didn’t meet the industry-recognized recommendation of 200 skydives in the last 18 months,” said Jarno, “We needed to address this, and with the spate of recent fatalities, we wanted to address it before someone was killed or injured during one of our training jumps. A high percentage of the recent fatalities fall well below the 200 jump minimum required by Phoenix-Fly and now by the new USPA BSR.” With this in mind, the old PFI or “Phoenix-fly Instructor” program has been dismantled and the replacement program being steadily brought online. “We made four Phoenix-Fly Coaches (PFC’S) this past June, with others lined up to obtain their rating in the fall months,” says Douglas Spotted Eagle (DSE) Director of US training. “With the new additions to the SIM that myself and a team of wingsuiters authored, the recent changes in the program Robi and Jarno wanted to make, and the USPA adding a Basic Safety Requirement related to wingsuiting demonstrated that now is the right time to change up the program.” Holders of the Phoenix-fly Instructor’s patch now hold a souvenir of the time they taught beginning wingsuiters. The Phoenix-Fly Instructional rating does not automatically translate to the newly founded Coach rating, and requires some re-training to merge into the new methodology of the PFC program, as well as a USPA Coach rating (USA-only). “The new program parallels the USPA Coaching program and in fact we now require, rather than recommend, that Phoenix-fly Coaches in the USA hold a current USPA Coach instructional rating,” says DSE (who also holds a USPA Coach Examiner rating). According to Cordia, “We’re looking at requiring something similar for our non-USA Coaches. We’re already in the process of training up a Coach/Examiner for South America and he’s a USPA AFFI, TI, and just finishing his Senior Rigging rating. These are the kinds of people we want teaching and evaluating potential coaches.” The newly developed program fundamentals came from the coaching techniques initially developed by Skydive University, discussions with other wingsuit coaches, and weaknesses observed over hundreds of student jumps. Kinesthetics, isometrics, visual imagery, and student repetition are all part of the revamped PF First Flight program. First Flight Courses take slightly more time and provide improved and up-to-date information regarding navigation, deployments, and emergency procedures. Scotty Burns of Z-flock points out, “We’ve been teaching wingsuiting based on methods developed in the early days of wingsuits but the suits of today are much bigger, faster, and potentially more dangerous than they were ten years ago. This new program arms students with the knowledge they’ll need as they undergo the wingsuit journey. I’m really excited about it. I’ve taught dozens of wingsuit students over the years and know what to expect in an average First Flight. Since I’ve started training with this new program, my students somehow have been flying better. This thing works!” “Having watched numerous wingsuit first flight courses, I can say with confidence that the PF coach program takes instruction to a completely new level, using various well thought-out techniques that deliver the best training I could think of,” commented recent PFC graduate Andreea Olea. “It's amazing how well it works with all kinds of students, from the most distracted to the most clumsy to the most cocky ones. Quality wingsuit training at its best - major kudos to Phoenix-Fly for setting such an excellent standard!” Phoenix-fly coach candidates that have obtained their USPA Coach rating should plan on attending a Phoenix-Fly Coach training session at Skydive Elsinore, Skydive Utah, Skydive City/Zephyr Hills, or at Raeford Parachuting School with Douglas Spotted Eagle, Scotty Burns, or Chuck Blue. There is one half day of classwork, some of which will recall training received during the USPA Coach rating process. The second half day is a jump day, in which students must receive two satisfactory scores in three possible jumps. The jumps are scored using criteria very similar to the USPA Coach evaluation form. Candidates are also required to pass a written test before receiving their Phoenix-Fly Coach patches. “Phoenix-fly Coaches must teach a minimum of six First Flight Courses per year and 15 coach jumps in order to remain current,” says DSE. Phoenix-fly Coaches receive special discounts on PF wingsuits, access to the PF training fleet for special events, and other unique discounts and opportunities via PFpartners. “Truly, we’ve changed up our program so it meets a standard consistent with the USPA methodology of training and coaching, and so that the new program is consistent with the new wingsuiting additions to the USPA SIM. We’re looking to insert additional Coach/Examiners so that there are more geographical points in the USA where potential Phoenix-fly Coach candidates can more readily receive training and pass the course,” says Cordia. “We believe we’ve built a new training program worthy of even the most challenging students.” “From the USPA perspective, we’re thrilled to see Phoenix-fly step up their training to prepare skydivers for bigger suits, low-tail aircraft, and overall safety. The fact that the program is consistent with existing USPA standards and training programs is a bonus for all, ‘ says Jay Stokes, President of the USPA. Former Phoenix-Fly instructors wanting to update their Phoenix-Fly rating, or anyone qualified to challenge the PFC course may contact one of the PF Coach Examiners to arrange for a training class. Phoenix-fly Coach Courses are currently available at: ~Skydive Elsinore (Douglas Spotted Eagle) ~Skydive Utah (Douglas Spotted Eagle) ~Raeford Parachuting Center (Chuck Blue) ~Skydive City/Z-Hills (Scotty Burns) -The Parachute Center, Lodi, CA (Ed Pawlowski) Contact Jarno Cordia for other countries/regions Dropzones are encouraged to check Phoenix-fly.com for information regarding the active status of Phoenix-Fly Coaches.
 -
You have probably seen the previous article on the bonehead composites gear update. Well that was the first of what was almost a complete gear section update. It became evident that much of what is listed in the gear database wasn't entirely fresh and that there were some discontinued items which were still listed and some new gear out there which also hadn't found it's way into the database. Action has been taken in correcting this issue and making sure the gear section is as up to date as possible. I have both sent out e-mails to all involved manufacturers as well as manually gone through the list and updated what I could. The result is over 100 new gear items added to the database including a new category, "Cameras and Camera Equipment". Granted much of what is new on the site isn't new in production, but this now gives you a chance to review gear that was previously not listed. New gear items can be found under the following categories: Altimeters, Audibles and AADS - Alti-2 Inc - Free Fall Accessories - Larsen & Brusgaard - Parasport Italia Cameras and Video Cameras - GoPro - Sony - VholdR - Conceptus - Hypoxic - Ultimate Switch - Sky Tools - Skydance Headwear Harness and Container Systems - Altico - Basik Air Concept - Jump Shack - Para Avis - Para-Phernalia - Rigging Innovations Inc - Sunrise Manufacturing International - Thomas Sports Equipment Helmets, Head Gear and Goggles - 2K Composites - Bonehead Composites - Cookie Composites - Gath Head Gear - Headfirst Headwear - Parasport Italia - RAWA - Sky Systems - TonFly Jumpsuits and Clothing - Bird-Man Suits - Body Sport USA - Firefly Jumpsuits - GoCrazy - Kurupee - Matter Clothing - Phoenix-Fly - Sonic Flywear - Tonfly Main and Reserve Parachutes - Atair - Basik Air Concept - Flight Concepts - Icarus Canopies - ParaAvis - Parachute Systems - Performance Designs A complete list of the new gear items can be found - On the New Listing page. Though even with these updates I am sure there are still manufacturers which have slipped through and aren't listed in the database. And I will be trying my best to fill in these holes and hopefully create a comprehensive up to date gear section. Your assistance would be greatly appreciated too! Anyone who notices a manufacturer or gear item missing in the database can post information in the following thread - Gear Section - and I will add them. If you are also aware of products which have been discontinued, but aren't listed as such you can also alert me to this and I will go ahead and correct the issue.
-
We're happy to announce that we've updated the Bonehead Composite gear page with plenty of new items. We've been somewhat out of date regarding some of the new helmets put out by Bonehead Composite, so there is lots to check out- some of which you may already be aware of or own. Though this gives you the chance to head over to some of the new items and rate them, should you already have experience with them. Here's some of the new items we have added: The ZEUS Helmet"Take a walk on the wildside... Zeus is a new way to look at video helmets. The ZEUS from BoneHead Composites Is designed to be a versatile camera helmet with its flat side and a space provided for a Cam EYE II. One of the first things you'll notice about the ZEUS is the Retro-Roman styling. ZEUS provides more frontal facial coverage and a brim to keep the sun out of your eyes without being aerodynamically obtrusive. The ZEUS comes standard with BH's ingenious Thermal-Fit liner, our new buckle chin-strap closure and the great finish quality that you have come to expect from BoneHead. This helmet does not require a chin-cup and there is not a cutaway system currently available" The FLAT-TOP NARROW Camera Helmet"The other choice of professional camera fliers from around the world… The FLAT-TOP NARROW from Bonehead composites is the trimmed version of our almost famous FLAT-TOP PRO. The FLAT-TOP NARROW is a great all-around camera helmet for any discipline in skydiving. RW, freefly, tandem video or competition freestyle can be captured with your FLAT-TOP NARROW. This camera helmet is a rear-entry system to give the user better camera stability without sacrificing comfort. This NARROW version of the FLAT-TOP PRO has been made to allow the camera flyer less surface mounting availability and air drag but keeps the stability of the rear-entry configuration. The FLAT-TOP NARROW has plenty of space inside to run wiring, camera buttons, etc. to keep as much of the snagable surfaces to a minimum. You have the choice of where you would like a ring sight post placed. The FLAT-TOP NARROW comes standard with BH's ingenious Thermal-Fit liner, still camera adjustable platform, NEW cutaway system, and "Riser Slap" release button protector." Hells Halo Camera Helmet"Hell's Halo is Boneheads latest and greatest camera helmet. There are 3 mounting surfaces for all your camera mounting needs. What makes this helmet stand out is an internal "halo" band that is adjustable using the ratchet clip on the back for last minute size adjustment. The helmet comes in two shell sizes along with our thermo-fit foam and an adjustable chin strap. If you still feel you need a chin cup, that accessory is also available. You can choose from our regular chin cup or our new concealed chin cup which hides the ladder straps!" The MAMBA Helmet"Welcome to BoneHead's latest addition to Full-Face Flip-Up Helmets. The MAMBA from Bonehead Composites is a great choice for RW jumpers with its full face security and the ability to flip open the lens quickly and easily without sacrificing keeping closed in freefall. The new lens closing mechanism requires the jumper to squeeze the lens together to allow the closing pin to be released from it's locking position at the forehead area in order not to make a push-in button on the chin susceptible to knock and unwanted lens openings during the most intense skydives. The MAMBA features dual internal audible pockets on the inside of the helmet, great peripheral vision, a heavy neoprene neck liner to help with fogging lenses and noise, a FASTEX chin strap closure with padded strap, front Chin-Dam wind deflector to keep unwanted wind flow out of the inside of the helmet and a shape that allows full head movement and the ability to see and locate emergency handles. The MAMBA comes standard with BH's ingenious Thermal-Fit liner, chin-strap closure and also comes with the lens coated with anti-fog direct from the factory." The ALL-SPORT Helmet"Refined Sleek Shape For All Types of Skydiving. The ALL-SPORT helmet from Bonehead Composites is now available from your favorite retailer! Customers all over the world wanted a helmet that was simple, sleek and of course had the quality and design that has made BoneHead Composites famous in the skydiving world.. and we delivered! The ALL-SPORT features a very simple shell design that is flatter on the left and the right so that camera mounts can be added easier. We took all the best attributes of the Guner and Mindwarp and combined them to make the ALL-SPORT. Internal audible pockets have been integrated into the helmet so that there is no need to build out the sides of the shell to accommodate audibles and still keep the interior comfortable. The ALL-SPORT comes standard with BH's ingenious Thermal-Fit liner, neoprene padded leather FASTEX chin-strap closure. " These are just 5 of the new 10 helmet and helmet items added today. Head over to the Bonehead Composite gear page to see the rest.


