Search the Community
Showing results for tags 'canopy control'.
Found 29 results
-
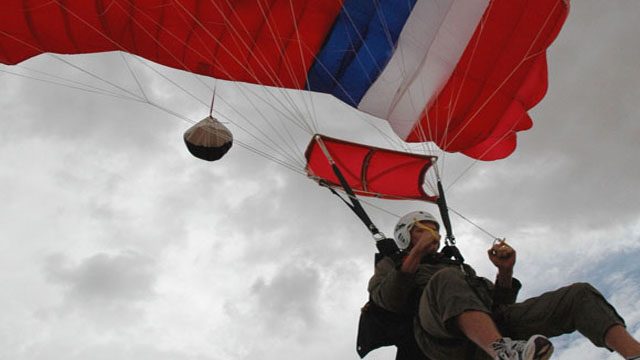
The Advanced Canopy Control Course is designed for the average skydiver. It will give the skydiver confidence and ability to fly in close proximity to other canopies safely, while providing the skills necessary to avoid problems caused by others. It does not however, address proper tracking and deployment awareness, or landing skills. The purpose of the course is to improve safety by teaching proper canopy maneuvering techniques and to develop a sincere and lasting respect for Canopy Relative Work, through Advanced Canopy Control. The course includes one hour of ground training each day before jumping and is divided into three parts. Each part consists of five jumps for a total of fifteen jumps. There is a multiple choice, true/false test at the end of the course. The course will expose the skydiver to the fundamentals of Canopy Relative Work through Advanced Canopy Control. Areas of emphasis will include proper equipment, dirt diving, aircraft, weather, spotting techniques, exiting, piloting, approaching a canopy formation, catching, proper docking procedures, docking techniques, transitioning, break-off and emergency procedures. At the completion of the course, the skydiver will have learned the basic abilities that are required to avoid potentially fatal collisions with others in congested conditions. The jumper will be better prepared to handle a tight landing situation, dock safely onto various canopy formations, and deal with situations that can rapidly develop when other jumpers do not fly safely. Ground Training - One Hour Each Day Emergency Procedures Wraps Entanglements Communication Docking Formation Funnels Avoiding Problems Instructors Note:If the student has recently graduated AFF, please help with packing, spotting and landing; encouraging on heading awareness, groundspeed/winds and controlled ground approaches without a windsock --should be 100% before & during a skydive... For example, packing: explain the difference between rolling the nose and splitting it. Tail pockets vs. bags. Large toggles that can be kept in the hands when risering, staying on proper heading spotting: judging the aircraft heading whether crabbing, going downwind or upwind. This requires having a sense of speed over the ground. For instance, normal jump run airspeed is about 90 knots. If theres no wind at altitude for the first five jumps, then you will get a feel for 90 knots of ground speed looking down from the door. Then if on later jump runs, if you are traveling half as fast across the ground you could surmise that there is a 45 knot head wind, etc. Encourage this type of analysis along with wind direction; i.e. crabbing characteristics as viewed from the door and even odd occurrences where it would seem that due to a very fast ground speed you might be going downwind unbeknownst to the pilot! Ground approaches: the old method of feet together at 1000' check groundspeed with toes, turn 90-degrees, recheck, turn 90, etc. taking the slowest groundspeed heading as the direction for landing, and treat landings with the utmost respect for 100% awareness! A windsock should be considered a luxury. Think of anything that could cause you an 'accident' sometime and how you would avoid getting hurt. Emergency ProceduresThe first step towards successfully surviving an emergency situation is to have a plan, prior to the onset of the emergency. It must be a well-considered plan, based on experience gleaned from the wisdom of experts and analysis of fatal errors committed by others. Do not limit yourself to a single course of action, however. This is your life under canopy or in freefall. Be spiritual in some way to accept any risk, but always perform at 100% and encourage the student to do likewise. You'll always be happy with the performance and you'll be in control should there be any major challenges. For example: You are wrapped! The canopy is wrapped around your head and the lines are wrapped around your neck. You cant communicate with the jumper below you. Your face is turning purple and consciousness is fading. Your plan was for the guy who wrapped you to relieve the situation by cutting away, since he cant hear you yelling instructions to him. He is supposed to cut away, but he cannot. Unknown to you, he has become wrapped severely and is having his own problems. Therefore, you whip out your trusty Jack the Ripper and lay waste to his canopy, thereby saving your own life.If you are truly confident in your decisions, I believe you will survive and your student as well IF they follow the doctrine of always doing their very, very best. A primary plan is necessary, but dont limit yourself to a single emergency procedure and kid yourself that it is going to work every time, all the time. The second step is to practice it. You should practice your emergency procedures so that they become second nature to you. The middle of an emergency is not the time to become confused or indecisive. You should review your emergency procedures prior to each skydive. You should also quickly review your emergency procedures whenever you become involved in a rapidly deteriorating situation. This will replace potentially paralyzing fear with a positive plan, and the plan will be the first thing that comes to mind. Once your mind goes into survival-mode via 'procedure' --you'll gain additional insight as to how to deal with the problem. Each problem is unique. It's luck in my opinion that you get out of it. You do EVERYTHING you can thoughtfully and distinctly think of one-after-another solutions and go for it intelligently without panic and resolve the issue in time & with altitude. Once you're clear and under a reserve --I suppose if you were really hard-core you could go look for some more action but I would stay clear of anyone and get to the ground safely. The third step is to do it! Sounds easy, but you need to realize you will die if you don't. Definitely --clear it while checking altitude. Speak out loud your actions so they can be heard. Get under the problem with strength & body-English. use the hook-knives, lines off of you --check altitude and yell it out. Clear the air and chop it. Make your OWN decisions. Types of Emergencies:CRW emergencies are divided into two categories, Wraps and Entanglements. A Wrap occurs when a canopy becomes wrapped around a jumpers body. An Entanglement occurs when two or more canopies become entangled with each other. Either way, you are fucked. One way you may still have a good canopy above you --the other, both are twisted together doing their absolute own thing and there's nothing you can do but get away from it by chopping (so long as you are BELOW the bullshit). WrapsA wrap can be compared in severity to a low speed free fall malfunction. With sufficient altitude, you will have time to consider the problem and solve it. The canopy of the jumper above you, who is wrapped, should remain inflated. This gives you substantially more time to deal with your malfunction than you would have during a high speed freefall emergency. But it is very serious. Take care of it while you have the LUXURY of TIME. Do not land a modern square canopy with two people suspended under it. You will have incredible forward speed because of the increased wing loading on the still-inflated canopy. Landing impact will be severe, particularly to the bottom jumper. BUT --if you are in a Bi-Plane at 1500 feet, can't see your pilot-chutes, --plan on landing it --the pilot chutes 'may' be entangled --ain't worth the risk. The rule for wraps: The bottom jumper cuts away first. The top canopy usually remains open, so there is no reason to release it. Also, if the person who is wrapped cuts away, (the top jumper), he will go into freefall with the bottom jumpers canopy wrapped around him. That will only make the situation much worse --definitely for him, perhaps for you too. Usually, you can extricate yourself from a canopy that has wrapped you by sliding it down your body. If not, then the bottom jumper will have to cut away. That will release the tension and make it easier for you to extricate yourself and get free of the fabric. If he can't hear you then he might just cut-away. Then gather-up the canopy to throw it away 'whole' --DON'T throw it away if you think there may be a stray line or two wrapped-around your neck or leg, etc. Keep it gathered-up, stuff it between your legs and land with it. EntanglementsAn entanglement usually results from one person passing through the lines of another persons canopy. This causes the two canopies to become entangled, with the jumpers dangling beneath the partially inflated or completely collapsed canopies. This situation almost always requires both persons to cut away. This can result in both jumpers being subjected to sudden and extremely violent G forces. Usually, one person is suspended higher than the other, but not always. The general rule for entanglements is for the top person to release first. If the bottom person releases his lines first, the risers may recoil upward and wrap the other person. When the top person releases first, he may impact the bottom person on the way by, but he wont have much momentum. The top person is usually the one who passed through the lines of the bottom person, and, many times, his canopy will pull itself out of the mess after it is released. Sometimes the entanglement begins to spin, and one person will be hanging downward while the other one is orbiting the entanglement. This spin may accelerate rapidly. In this situation the orbiter should cut away first. This will fling the orbiter clear of the entanglement and does not alter the other persons orientation to the entanglement. If the jumper who is hanging downward releases first, it can cause the orbiter to change orientation to the mess and could make the situation worse. CommunicationWhen jumpers become involved in a wrap or an entanglement, the first thing to do is to communicate. You need to communicate the altitude, the problem and the plan. When someone has a canopy wrapped around them they may not be able to read their altimeter. In all the excitement they may have forgotten what the altitude was the last time they checked. You certainly dont want them to panic and cutaway. It is very reassuring to hear the altitude called out every 500 feet when you are totally engulfed in nylon. It can also be encouraging to hear that your canopy is OK. --do it. If you cannot get any response from the person wrapped up in your canopy, then you should go ahead and cut away. They probably have nylon across their face or around their neck and cant respond orally. They may not even be able to breath at all. You need to release the tension by releasing your risers, (cutting away) and leaving them with a ten pound mess of canopy --or a re-inflating canopy that jerks their head/leg off from time to time. Point is --better to leave them sooner than later if they are NOT communicating. If you are the person who is wrapped in a canopy, you should communicate that you are working on the situation, if you can. This information should be conveyed at regular intervals. Be cautious of your terminology. Dont say to the other person, "Dont cutaway!", or anything else that could be misunderstood! Once the decision to cutaway has been made, dont panic. Do it right! Keep your shit together. It only takes seconds to do right. Follow the numbers straight-thru and you survive according to the statistics --I think. First, get your hands on both handles and insure that you are clear of any lines. You should peel your cutaway handle off the Velcro, but leave the reserve handle in its pocket. If you have a hard pull on the cutaway handle, you can momentarily release your grip on the reserve handle and use both hands to cutaway. Keep your eyes on the reserve handle, so you can regain your grip quickly. Be prepared to do a freefall delay, if you have sufficient altitude. Look down where you will fall and figure you need around 400 feet or more of clear air beneath you. If there is going to be more than one person cutting away, the first one out needs to freefall for five to ten seconds, altitude permitting! This will provide sufficient vertical separation for the next person who cuts away to safely deploy a reserve. The most important thing that can be done to maintain a margin of safety is to remember your altitude! Most problems begin during docking or break-off. USPA states that the minimum altitude for docking is 2500 feet. How low would you want to be in a wrap? The next question is, how low would you want to be in freefall? USPA states that the minimum safe altitude to initiate a cutaway is 1800 feet. These limits have been determined by years of experience and several fatalities. Respect them. It is also conventional wisdom that a cutaway initiated below 500 feet has almost no chance of being successful. At that altitude you may save yourself by deploying your reserve into the malfunction. It is better to increase aerodynamic drag than it is to accelerate toward the ground in freefall. DockingWhat causes wraps and entanglements? Usually, bad docking techniques. The three factors most often involved are speed, (closure rate), angle, and distance from center. If you have too much speed, your body continues to travel forward after you have docked. The point where the target jumper grabs your canopy remains stationary, but the rest of the canopy continues to move in your direction of travel.. The canopy may then lose pressurization and wrap the person you docked on. Because objects tend to swing in an arc, it is common for the canopy to dissipate its momentum by wrapping securely around the jumper that you docked on. There are good and bad angles to dock from. Docking from straight behind, a zero degree angle of approach, is the safest angle. Docking head-on is obviously the worst angle. A head-on dock can result in injury. Docking with your canopy heading 90-degrees to the target jumpers heading will still give you too much speed. The most efficient angle is 45-degrees to the side of straight behind. Docking unintentionally with an end cell is more likely to generate a wrap than docking with a center cell. These three factors combine to make a dock safe or unsafe. Formation FunnelsAnother cause of wraps and entanglements is when the formation "funnels." This can be the result of the unanticipated collapse of a mismatched or misflown canopy. It can also occur if a canopy in the formation stalls. In a plane formation, the nose of the canopy below you is pushing on your brake lines. Your canopy can stall if you apply as little as half brakes. If someone docks and wraps the corner of a formation, it can cause part of the formation to funnel. It can also funnel at breakoff because the trim of the formation changes as canopies leave it and the stress distributed throughout the formation changes. Another problem is carelessness. Some people dont look where they are going. You should always look before you turn. Dont fixate on the formation. (Many people have gotten wrapped on a freefall jump by not looking where they were going, after opening. If you are looking at your toggles right after your canopy opens, you may experience a sudden and violent encounter with someone else who is doing the same thing). Avoiding ProblemsWhat can we do to prevent or ease wraps and entanglements? The foremost preventative measure is thorough planning. Perform a thorough dirt dive. That is the time to share techniques that will work for the type of formations and transitions that you are planning to accomplish. CRW is very three-dimensional and, therefore, quite complex. Participants can easily miscalculate a maneuver, if they are trying something new. Dont just dirt dive the formation. Share what you know. If someone is approaching too hot, you can spread out your arms. and prevent the canopy from wrapping you. Even if it does wrap, you can extract yourself easier because you wont be cocooned so tightly. Nylon will stick to itself like a Chinese finger trap when it is wound tightly around you. If you can give it some slack it will come loose. You can grab the area of nylon with the most tension, then lift it, if only an inch, then as you let it down it will loosen and start sliding down your body. If you are in a formation and someone below you gets wrapped, hold on to them until they can sort things out. Do not drop them unless they expressly request it. This gives them more time and less to worry about, as it will keep their canopy on heading. If you are planed on the jumper above you and they have become entangled in your lines, you can apply light front-riser pressure. This re-tensions your nose and tends to keep your canopy from spinning. They may then be able to slide up your lines, which will allow their canopy to stay inflated. This front risering must be done initially, as the problem occurs. Once the two canopies become entangled, one or both of you will have to cut away. If an end cell wraps around your foot, it can be difficult or impossible to release. You cant lift the jumpers weight up with one leg. Attempting to do so can injure you. As a canopy starts to wrap around your foot, you should stick the other foot in there, also. This will enable you to lift the jumper who is fouled on you and will allow you to get your hands on the canopy to relieve the tension on your legs and feet. This can help prevent injury. Example wrap: The canopy hits you with its left end-cell. The end cell stays (you gripped-it or snagged it) and the canopy flies around in front of you counter-clockwise (left turn) and continues around and stops back on its original heading when it first made contact with you. Reach over with your right hand andgrab your left front riser, Reach with your left hand in front of your right arm and grab a hold of your right front riser. Stiffen your body and pull your hands together and and out to your sides --this will turn you to the left 180 degrees --repeat the same move again and get the correct grip for a solid point. (Don't forget to present the point) it shows you know what you are doing. If the canopy is collapsing and re-inflating, you dont want to fight it. Have the bottom person cut away. The snatching action of the rapidly inflating-deflating canopy can really damage your ankles. The best strategy to prevent or reduce the effects of wraps and entanglement is to wear proper equipment. All participants should wear thin, leather gloves, shoes, socks and long pants or a jumpsuit. Wrist mounted altimeters are not recommended. Your RSL should be disconnected. AADs are fine. If you are too low and going too fast, you want your reserve coming out, regardless of the circumstances. You need a CRW parachute to do safe and sane CRW. The time to learn CRW is not after completing a freefall opening at 2000 feet on your little micro-lined skyrocket. Learn it from an expert, using the proper equipment, and at the proper altitude. Part One Jumps Basic Techniques 1.Introduction:The student exits 1st and is promptly docked on top by Instructor A. Instructor B docks on the student from below, on Instructor Bs center cell. The student will catch Instructor Bs center cell and take foot grips in his center lines. On command from Instructor B, the student drops the grip. Instructor B will re-dock on the student, approaching from the right side. Emphasis should be placed upon the students technique in properly and smoothly catching Instructor Bs center lines and getting quick foot grips, then returning to toggles in hands. Instructor B is then released by the student, and docks the student from the left. After the third dock by Instructor B, the student then releases his grip on Instructor B and then retreats when Instructor A releases him. The two instructors shall then form a biplane and the student will set up low, on center, and float up for a center dock. (always get the student from the top on their first CRW jump, you never know how they will react and you need to be in control. Keep the docks from Instructor B smooth and accurate, encouraging the student to catch the centerlines without a lot of moving around, etc. Setup with Instructor B quickly for the student. They usually will approach from straight behind, and may even use front risers, however, the plan for the classic bottom-up approach instills confidence, wave them in or tell them to 360 and set up for them if they abort. Make sure they understand if you move to not follow; they wait for you to stop moving and then they continue their approach.). 2.Base Setup Repetitions:Instructor A exits. Student follows 5 seconds later. Student positions canopy next to Instructor A. Instructor B positions himself behind and below. Student leaves Instructor A and positions himself next to Instructor B. The instructors continue to provide various approach angles for the student to practice. (use the rear risers to float up behind the student, telling them to do the same, 360 fast, they do the same. 90 out, 180 back, then on heading, they do the same, creep out front, have them tuck up knees to get to the scrimmage-line be creative!) 3.Sashay Wing Rotations - No Grip:Student exits first. Instructor A docks right wing. Student turns out to the left and back, then down and over to dock left wing on Instructor A. Instructor B then docks left wing on student. Instructor A leaves and student turns out to the right and back, then down and over to dock as right wing on Instructor B. Instructor A waits for student to dock. Instructor A then descends to make contact as right wing on student. (use the word "Point" between formations, get them to react quickly, encouraging direct approaches. Try to get a flow going, have fun!) 4.Sashay Center Rotations with grip:Student exits first. Instructor A docks the student on top; Instructor B docks student on bottom. Rotation begins with emphasis placed on keeping the formation on heading. This should be the students first successful dock. (each time you dock them, tell them to check heading. Make sure they get their toggles in hands quickly after they catch, emphasize the importance of piloting the formation holding steady while someone else is rotating, correcting the heading if necessary after the catch.) 5.Tri-Plane piloting exercise:360,180, and 90-degree turns. Emphasis is placed on recognizing formation appearance, taking proper grips, and observing the leading edge characteristics of other canopies and how to handle them. Also, awareness of the DZ should be emphasized. Instructors should fly slow, leaving student leaning forward on top. (toggles in hand & 4th finger grips on centerlines for stability, arching and proper foot grips. Proper turns, smooth but deliberate.) Part Two Jumps Top Docking, Rotation and Sequential 6.Top Dock, Plane - Repetition:Student spots the jump run, taking mental note of actual ground speed to compare with future spotting during course. He exits 3 seconds after Instructor A to set up for a top dock. Instructor B follows student. Emphasis is on keeping the students focus on instructors canopy leading edge. The instructors leading edge should be kept level with the students body while the student approaches. The student will be given every opportunity to complete his top dock. After the dock, the formation heading is changed intentionally. The student then descends the instructors lines to form a bi-plane. Instructor B sets up behind, low and to the side on heading and the student leaves the top to go back and get him. (help them with vertical separation, but make them work everything else. Tell them not to look at their canopy but keep their eyes on yours. When they climb down the lines, have them do it symmetrically bare handed, then leaving from an arched, straight-legged posture with toggles in hand.) 7.Warping and End Cell Tag:Adding equally opposing forces on the airfoil, with a front riser and an opposite toggle while maintaining heading and stability, the student uses strength and finesse simultaneously. Emphasis is on using deep front riser and deep opposite brake without inducing heading changes. Tagging begins as the instructor flies end cell to end cell and bumps lightly on one side. The instructor then backs-up a little and flies over to the students other side and flies forward a little and bumps again on the end cell. After the instructor bumps each side once, the student unwarps his canopy while maintaining heading, then performs this same tagging on his instructors end cells (Instructor goes into a warp after his 2nd tag). Student gains experience of passing through burble and is encouraged to be aggressive towards bumping end cells. Instructor B stays close throughout dive to increase students awareness. (this is going to be new to them. Explain it as though they were under a round in this warped configuration, where the unwarped canopy has the advantage. The burble can be explained as the area where a bridled pilot chute points teach them where it is so they can avoid it, or use it. Bumping end-cells shows the canopies can take it --repeat the dive to be more aggressive if required., Make sure you just bump fabric-to-fabric (no line groups closing --loss of control). Also, warping can be a great way of top docking from above. --encourage thinking along these lines --ie top-docking, warps, flying 'down the chimney' with a close pair, your own reason for excelling. Get them turned-onto doing their best) 8.Stack-Plane-Side by Side Repetition:A lot of line work with flying & catching fast empasized--not sloppy but more aggressive than last dive... Student is positioned on the bottom at the beginning of the exercise. Emphasis is on smooth, clean docks, creating smooth planes and smooth side by sides with clean break-offs and quick comebacks. Student must show communication skills during all side by sides, i.e., simple conversation. (simple conversation, jokes, good vibe stuff, no yelling, have fun, eye-to-eye. Watch out for risers snapping back into the face during the breaks. Keep aware of handles during grips. Get the toggles back in the hands quickly after breakoffs for a quick turn back into the stack approach. Hit the breaks a little harder for a quick smooth plane then back-off the nose away from the lines and settle it in tight.) 9.End to End, top or bottom:The best sequential drill I can think of for single-flying. 8 seconds between points is a good pace... With the student at the leading edge of Instructor A end cell, the student taps the outside edge of Instructor A canopy with his foot. Then he flies towards the opposite end cell without passing it, and taps it with his other foot. Then the student returns to the opposite end cell without going past. Instructor B is relative and preventing him from going past Instructor A end cell (Instructor B is 1/2 span distance from Instructor A, level with student, on heading). Then student Sashays out across, back & down into a wing position on the bottom of Instructor A and flies from end cell to end cell on the instructors body. The instructor will then sashay into a wing position on the bottom and the dive repeats. Emphasis is placed upon flying relative to the instructor, while using deeper than normal brakes throughout most of the flying. (this is slow, controlled flying. Stay close to them, almost crowding. Its a difficult dive worthy of a thorough dirt dive. This is a good time to introduce the idea of catching with the feet only.) Towards the end of the dive, with the student on top, the student uses a foot-grip-only walking method to get to the other side of the canopy, while maintaining his heading, and he practices until breakoff. (stay light to make it easier on them.) 10.Wedge Rotation - No Grip:Fast dumps, risers, warps --whatever it takes. No grips / No worries. Juyst make the slot as fast you can without waiting for a grip and go to the next point. Call the points to get the dive going faster. Student starts as left wing, then rotates to the pilot position, then rotates as right wing, then pilot again, then rotates as left wing, etc. Emphasis is on proximity flying with contact, where required (You can place your canopy on his hip . but he keeps his legs together and away from any grip, when he rotates as wing on you, you let him touch your body at the hip more or less, but do not take a grip - just fly relative). From the pilot position, the student learns to rotate diagonally across the top skin of the adjacent canopy and down, taking the wing position (as in dive 4 with coaching by Instructor B). In the wing positions, the student is encouraged to make contact with his canopy end cell on the instructors waist area, while staying to his side of the centerline of the pilot. (make sure they can get across your top skin when they leave. Awareness of missing the bridle as they skim the skin is important!) Part Three Jumps: Relax Gain Smoothness and Fly with Finesse Pieces, Wing docking 11.Three Stack Rotation:Clipping the tail, sashaying out & in. Toggle hard & back with front riser & breaks --just teach the method you're best at to 'show' the student. Or: Emphasis is placed on over-the-top rotations, staying on center and docking with minimal momentum. (teach whichever method youre most comfortable with, but teach how to stop the canopy, i.e. dinking the risers after the toggles.) 12.Wedge Rotation with Grips:Emphasis is placed on promptly acquiring grips, preferably with feet only, and maintaining the proper position relative to the other canopy. Hence the hand grip, if used, must be quickly obtained, so that the student can quickly return his hands to his toggles, enabling him to stay relative and on heading. The student is reminded that a legal grip can be with a hand or foot, so long as the shoulder is directly above the grip. (might be a good time to show them some part 53 stuff and get them turned-on to competitive flying. You can also explain the use of outside riser trim, inside toggle or warping when flying in a wing slot.) 13.Tri-Plane Rotations:This exercise involves building a tri-plane. Student is pilot, Instructor A second, Instructor B third. Student leans forward in his harness and applies brakes to float up, creating a two stack with a third canopy planed (called a "One-Two") formation. He then releases his foot grips and rotates up, back and over the top of the biplane, and uses risers to get his canopy level with the shoulders of Instructor B. He then docks on Instructor B, and applies brakes to plane cleanly. Emphasis is placed on a smooth and timely transition from plane to stack, and risering to shoulder level as described. (keep them forward as they slide up to avoid the head or reserve snagging the bottom skin. Make certain you can observe when they release the risers to give them a real-time critique of stopping at shoulder level.) 14.Two-Stack Rotation:Initially, the student will serve as the pilot of a three-stack. Instructor A is second. Instructor B docks third. After the initial formation is completed, Instructor A drops Instructor B. The student keeps his grip and flies his two-stack up, over, down and behind to dock on Instructor B. After the student docks his stack on Instructor B, Instructor B will then release grips and rotate to the bottom of the formation to create another three-stack, with the student on top as stack pilot. The student then repeats the two-stack rotation again. Emphasis is placed upon smoothness, acquiring proper grips, and good, clean riser work. (teach them to step on to their own feet to hold the grip on the lines, then risering down will not cause them to slide down the lines ) 15.Student organizes!Dive ends with a Downplane, and an accuracy landing in the peas. (go along with anything they want. Make them responsible for dirt-dive, pilot communications, spotting, calling points, breakoff everything. Stick to the 2500-foot breakoff rule. If they win at the accuracy buy their jump! Explain that 15 CRW jumps should give them respect for the dangers not to go out by themselves and do CRW with just anyone, but that they should now be able to fly safer and be more aware of others, etc.) AccViaCrw Test Multiple choice (check all that apply), true/false, etc. VISUALIZE EACH SITUATION1. What are the three steps towards successfully surviving an emergency? Altitude awareness, anticipating the problem, wearing the proper equipment. Have a plan, practice it, then do it! Proper flying techniques, trimming the canopy, adjusting float Mental preparedness, a will to survive, fast thinking. 2. How many categories of CRW emergencies are there? 1 More than 5 3-5 2 3. What are the categories of CRW emergencies? Stalls, spirals, unintentional end cell docking Wraps & entanglements Equipment failure, incompatible canopies, line lengths Formation funneling, poor beakoff/transitioning techniques 4. Which type of emergency can be compared to a low speed freefall malfunction? Biplane with pilot chutes entangled Mismatched canopy stall inside formation Wraps Top person passes through the lines of the bottom canopy 5. Rules for wraps Bottom jumper cuts away Top person cuts away first Top person cuts away Bottom jumper cuts away first 6. Rules for entanglements Bottom person cuts away Top person cuts away first Bottom person cuts away first Top person cuts away 7. Who is usually the one that passes through the lines of the other person during an entanglement? The person who docked last The person on the bottom The wing position The top person 8. If you and another jumper are orbiting an entanglement and he is beneath you, you should Tell him to cut away Be the first to cutaway Check altitude, then tell him to cut away Be the last to cut away 9. What is the 1st thing to do if you become involved in a wrap or entanglement? Immediately try to get out of the situation Communicate Get out your hook knife Check your own canopy first 10. If you cannot get any response from the person wrapped up in your canopy you should Maintain a stable heading Apply light rear riser pressure Tell him to cut away Cut away 11. The most important thing that can be done to maintain a margin of safety is to: Remember your altitude Wear the proper equipment Look before you turn Always know where the landing area is 12. When are the two most likely times problems may occur? During Breakoff Using mismatched canopies During docking While in a asymmetrical formation 13. What usually causes wraps or entanglements? Poor communication Improper equipment Mismatched canopies Bad docking techniques 14. What is the safest angle to dock from? 90 degree angle of approach from either side From directly below From above, on center Zero degree angle of approach from straight behind 15. What is the most efficient angle to dock from? From above, on center 45 degrees to the side of straight behind Zero degree angle of approach from straight behind 90 degree angle 16. True or False Docking unintentionally with an end cell is more likely to generate a wrap than docking with a center cell True False 17. If someone is approaching you too hot you could Pull your knees up and hope he misses Spread out your arms to prevent the canopy from wrapping you. Yell at him to abort the dock Try to deal with it after he docks 18. If you are in formation and someone below you gets wrapped... Hold on to them until they can get things sorted out. Yell out "Drop the bottom man" Call for "break it down" Turn the formation into the direction of the landing area 19. If you are planed on the jumper above you and he begins to get entangled in your lines you can... Pull some breaks to lighten the load on him Turn away slightly from the entanglement Tell him to drop you Immediately apply light front riser to retention your nose and help keep your canopy from spinning, 20. As a canopy starts to wrap around your foot you should... Apply deep front riser to sink and get your foot out Immediately reach down and grip the canopy Stick your other foot in there too! Look first, then turn away from the wrap 21. If you have just one foot wrapped 360 degrees Call out for more breaks from the man below Apply deep front riser to sink and get your foot out It should slide off of you on its own Turn away from the wrap and backwards from your canopy 22. If a canopy is collapsing and reinflating... Apply breaks to stable out the airfoil dont fight it have the bottom person cut away Use alternating front and rear risers Get a good grip with gloved hands and wait it out 23. What is the recommended breakoff altitude for CRW? 2500 feet 1500 feet Depends on the experience level Depends on the formation type 24. Under what circumstances is being on top NOT the safest? With a mismatched canopy is approaching the formation When the person on top has little or no experience. When both sides of the formation funnel simultaneously During turbulent wind conditions 25. When is it preferable to spot going downwind? In High winds In lower winds In no wind In average winds WHY?The DZs always visible, heading not as critical. 26. When is it preferable to spot short, going upwind? During high wind conditions When There are freefallers on the plane When there are low winds During multiple jump runs by the same plane WHY?The DZs always visible, heading not as critical. 27. When piloting a canopy formation you should always know where the landing area is True False 28. As your walking towards the plane you notice there are five or six groups of freefallers on the same load. You want to get out short and work towards the DZ since there is no wind. You should Ask the pilot to insure all groups exit on one pass Change your spot to another side of the windline Change plans and get out last avoiding a potential go-around by the freefallers. Get out first and work towards the DZ 29. You are in a biplane at 1500'. You notice the pilot chutes are entangled. You should... Immediately breakoff Try climbing back up to a stack position Retrim the nose of the bottom canopy Plan on landing the biplane 30. You have a canopy docked on your left leg. Another canopy attempts to dock on your right leg however the dock is sloppy and it begins to come around. You should... Drop the good canopy Turn away from the sloppy dock Call for a "break it down" Try to keep the good canopy and salvage the dock 31. How might you achieve greater float without drastically sacrificing forward speed? 1 inch of rear toggles Pick up your knees and apply light front risers Warp the canopy Rear risers 32. If youre approaching a target from beneath and lose sight of the target, you should Frontriser to the side until you can see the target and then setup for another approach. Rear riser back up to dock Use toggles to float Turn with a toggle and go setup for another approach 33. A formation can funnel at breakoff because Canopies may leave the formation in an asymmetrical fashion. Some formations have a tendency to funnel by themselves The trim of the canopies changes as they leave it and the stress distributed throughout the formation changes. Very high winds aloft 34. A planed formation can funnel because - In a plane formation the nose of the canopy below you is pushing on your break lines and you may stall in as little as half brakes. There are too many people in formation No cross connectors are being used People that are docked are not looking where they are going 35. You open your canopy. Everything is wrong. Weather, lots of traffic, (canopies in the air) bad spot. You should Achieve vertical separation Find a landing area. Look for hazards Look for alternate areas e Determine wind direction for landing 36. Your canopy opens, another jumper opens his right in front of you, facing you. You should Execute a rear riser turn away from him Dive down into clean air below you Perform a hard toggle turn to avoid him Call out to him to get his attention 37. When approaching a formation after exit when should you execute your turn to setup your approach When you are directly along side After you pass the side of the formation Before getting to the side of the formation Below and behind the formation Your ground test is over. Please anticipate being tested in the air on future skydives! Be safe AND prepared. And always do your very, very best! AccViaCrw Answers1. What are the three steps towards successfully surviving an emergency? b Have a plan, practice it, then do it! 2. How many categories of CRW emergencies are there? d 2 3. What are the categories of CRW emergencies? b Wraps & entanglements 4. Which type of emergency can be compared to a low speed freefall malfunction c Wraps 5. Rules for wraps d Bottom jumper cuts away first 6. Rules for entanglements b Top person cuts away first 7. Who is usually the one that passes through the lines of the other person during an entanglement d The top person 8. If you and another jumper are orbiting an entanglement and he is beneath you, you should b Be the first to cutaway 9. What is the 1st thing to do if you become involved in a wrap or entanglement? b Communicate 10. If you cannot get any response from the person wrapped up in your canopy you should d Cut away 11. The most important thing that can be done to maintain a margin of safety is to: a Remember your altitude 12. When are the two most likely times problems may occur? a During Breakoff c During docking13. What usually causes wraps or entanglements d Bad docking techniques 14. What is the safest angle to dock from d Zero degree angle of approach from straight behind 15. What is the most efficient angle to dock from b 45 degrees to the side of straight behind 16. Docking unintentionally with an end cell is more likely to generate a wrap than docking with a center cell True 17. If someone is approaching you too hot you could b Spread out your arms to prevent the canopy from wrapping you. 18. If you are in formation and someone below you gets wrapped... a Hold on to them until they can get things sorted out. 19. If you are planed on the jumper above you and he begins to get entangled in your lines you can... d Immediately apply light front riser to retention your nose and help keep your canopy from spinning. 20. As a canopy starts to wrap around your foot you should... c Stick your other foot in there too! 21. If you have just one foot wrapped 360 degrees d Turn away from the wrap and backwards from your canopy 22. If a canopy is collapsing and reinflating... b dont fight it have the bottom person cut away 23. What is the recommended breakoff altitude for CRW a 2500' 24. Under what circumstances is being on top NOT the safest? b When the person on top has little or no experience. 25. When is it preferable to spot going downwind? a In High winds 26. When is it preferable to spot short, going upwind? c When there are low winds 27. When piloting a canopy formation you should always know where the landing area is a True 28. As your walking towards the plane you notice there are five or six groups of freefallers on the same load. You want to get out short and work towards the DZ since there is no wind. You should c Change plans and get out last avoiding a potential go-around by the freefallers. 29. You are in a biplane at 1500'. You notice the pilot chutes are entangled. (Or, you cant see the pilot chutes ) You should... d Plan on landing the biplane 30. You have a canopy docked on your left leg. Another canopy attempts to dock on your right leg however the dock is sloppy and it begins to come around. You should... a Drop the good canopy 31. How might you achieve greater float without drastically sacrificing forward speed? d Rear risers 32. If youre approaching a target from beneath and lose sight of the target, you should a Frontriser to the side until you can see the target and then setup for another approach. 33. A formation can funnel at breakoff because c The trim of the canopies changes as they leave it and the stress distributed throughout the formation changes. 34. A planed formation can funnel because a In a plane formation the nose of the canopy below you is pushing on your break lines 35. You open your canopy. Everything is wrong. Weather, lots of traffic, (canopies in the air) bad spot. You should a. Achieve vertical separation b Find a landing area. c Look for hazards d Look for alternate areas e Determine wind direction for landing36. Your canopy opens, another jumper opens his right in front of you, facing you. You should a Execute a rear riser turn away from him 37. When approaching a formation after exit when should you execute your turn to setup your approach c Before getting to the side of the formation Always do your very, very best! THINK: Energy, Altitude, Position and you'll be there --it's 150 seconds of pure adrenaline & finesse!
-
Landing AccidentsAvoid landing accidents by doing all you can to eliminate landing off the DZ.As soon as you're open, evaluate the spot. When faced with a bad spot, quickly find out how far you can go by using the accuracy trick. You can greatly extend your parachute's capability to get you back to the DZ by learning how to use the entire control range to your advantage. The accuracy trick will help you learn how to quickly choose the best toggle or riser position for any bad spot. Why deal with unfamiliar hazards off the DZ? Avoid them through better canopy control. A. The Accuracy Trick DefinedFind the point on the ground that doesn't move. 1. Choose a point on the ground in front of you. If it seems to move towards you (the angle gets steeper in your field of vision), then you will fly past that point. If the point seems to move up or away (the angle to the point gets flatter in your field of vision), then you won't make it that far, unless something changes. If you keep looking between these two points, you will find one point on the ground that does not appear to move in your field of vision at all. (The visual angle doesn't change.) I call that point the "special point" that doesn't move. The visual angle to all other points on the ground seem to move outward from this point as you travel towards it. 2. If the winds never changed, and you never moved your toggles, you would end up crashing into the ground right on that special point! If the winds do change, you can tell right away because the special point that wasn't moving will start to move as soon as the winds change. That means there is a new point that doesn't move. A new special point replaces the old one. That special point will also start to move if you change your toggle position. B. Using The Old Accuracy Trick1. When you have a tail wind and the spot is quite long: Find the toggle position that would take you to a point furthest past the DZ. Then you will arrive at the DZ with the most altitude (and most options) remaining. A simple rule such as, "on a long spot with a tailwind, fly half brakes," may be better than nothing, but it is far from ideal. To avoid the off-airport landing, you may need better performance than a simple guideline can give. With a strong tail wind, it is likely that going to deeper brakes will help even more, but how much brakes? Use the accuracy trick to choose what control position works the best in the particular tailwind you have at the time: Find the special point, then add some brakes. See how you have a new special point as you change the toggles? If the visual angle to the new point is flatter, you are doing better. The visual angle to the old point will get steeper and steeper. Now add some more brakes. If your field of vision changes again just as described, then you're doing even better. Each time you change the toggles, (or each time the wind changes), you will have a new special point. Add more brakes. You're flying really slowly now. If the visual angle to the new point is steeper, then you're not doing as well. If this is the case, the visual angle to the old point will get flatter and flatter. So reduce the brakes back to the optimum.2. If you have a tailwind coming slightly from one side, and you have a long spot, quickly choose the right crab angle to fly a straight path to the DZ. You've turned towards the DZ and have chosen the best brake position that would take you to a point furthest past the DZ by using the accuracy trick described above. You can draw an imaginary straight line between you and the special point, through the intended landing point. If you start drifting off this line, immediately make a crab angle that will keep you on this line. See how the visual angle to the special point changes as you create the crab angle? Adjust the brakes to put that special point in the best position again. If you were really deep in the brakes, you will probably need less brakes after you create a crab angle. Do not "home" back to the DZ by pointing straight at it while drifting sideways. Since the crosswind will blow you slightly off the wind line, you will likely readjust your heading again and again to point back towards the DZ, without ever counteracting the crosswind at all. This means you will be flying a long arc back to the DZ. The quickest way back is a straight line, so crab rather than home!3. What about a headwind on a long spot? If you have a headwind, the special point that doesn't move will be quite close to you. If you need to fly past this point to get to a safe landing area, you will probably need to use front risers. (Make sure your canopy is quite stable on front risers before using this technique) How much front risers? Use the accuracy trick to find out! Try a little front riser and the special point will move. (The angle will start changing). Try a little more and it will move again. Try a little more. Did the point move the wrong direction? That's too much front riser. See how this method works to determine the best control position in any bad spot situation? How about a headwind coming from slightly from one side? 4. Don't forget to leave yourself plenty of safety margin. Use the accuracy trick in this way to get back to a safe place, but be careful to avoid fixating on this technique so much that we forget to use our safe options while they still exist. Make sure you leave yourself plenty of altitude and maneuvering room to plan a safe approach and landing. II. Learn To Fly Defensively A. Defensive Flying Has Two Basic Parts1. Developing such high skill that you get to the ground safely in spite of the stupid things people are doing all around you. 2. Developing such good judgement that you make your decisions in a way that helps create safer situations for yourself and others. B. Stage The Approaches To Avoid Heavy TrafficMany of the worst accidents are collisions that occur at landing time, often because there are just too many canopies going too many directions to be safe! Staging the traffic can help reduce this risk. 1.To create more seperation from other traffic. After opening decide quickly whether it is best to float or dive, assuming the spot is good enough to allow for some maneuvering. The goal is to prevent a high frequency of landings occurring in a short period of time. Less traffic density means less chance of an accident. This is similar to the idea that eliminating tailgating reduces the chance of accidents on the highway. To stage the approaches to the landing area, you must look way ahead and predict how the traffic will arrive at the landing area. Then, adjust your fight path so that you have as little traffic as possible when you are landing. The more people on the load using this technique the better! Noticing heavy traffic when you're already on final approach is too late! Planning is the name of the game.2. How do you stage the approaches? First, look all around you after opening. See where everyone is. Ask yourself two questions: Are you near the top of the bunch or near the bottom? Is your canopy loaded more heavily or more lightly than the others? Then: If you're more towards the bottom, and have an average wing loading for the group: You should land as soon as possible. You're trying to stretch out the time period that all the landings will occur by getting the landing process started sooner. If you don't do this, you may start crowding up the traffic behind you, just like a car driver would if he drove slowly in the fast lane.If you're more towards the bottom, but have a big floaty canopy: The faster traffic will probably catch up and pass you. Where would you prefer this to happen? If you dive down and try to set up on final approach early, you will probably be passed during your final approach. In this case, assuming the spot is good, it might be better to float in the brakes right from the start. This will force the faster traffic to pass you while you are still quite high. Being passed up high is safer than being passed on final approach.If you're more towards the top: You should try to float in the brakes. You're trying to stretch out the time period that all the landings will occur, by landing later. This is easy if you are on a larger floaty canopy.What if you're more towards the the top, but you have a high wing loading? If you're loaded heavily, you can still probably float in brakes quite well. Try to stay up with the big floaty canopies, until you find the biggest gap in the traffic that is below you. Then you fly down and fill that biggest gap. That gap is usually just in front of the big floaty canopies. C. Learn The Habits Of OthersAnticipating the actions of others will help keep you out of trouble.Here are some examples: 1. The indecisive slow poke. This is someone with a big canopy that likes to do sashays while in the final approach area. If you're flying a much faster canopy, don't follow him on his downwind leg. You may get stuck behind him, needing to pass him on late final. The problem is, you may not be able to predict where he will be when you pass! Better to pass him earlier on, or turn your base leg early, landing more up-wind than him. Perhaps you can land somewhere else. Just don't cut him off, because he might get overloaded by the whole thing and make a mistake, causing an accident. 2. The last-second hook turner. This guy loves to do low toggle-turns, way lower than you're willing to risk. If you're following him back from a bad spot, don't wait for him to turn into the wind before you do! You'll probably be turning lower than you want to be! If he is following close behind you and below you, he might be obstructing your turn into the wind. Remove yourself from this situation while there is still plenty of altitude. 3. Have you ever known someone who likes landing downwind for fun? In today's jumping environment, you have to be ready for anything, so keep lots of options open. D. Diffuse The Hot Landing AreaThis you do by taking the initiative to land somewhere else. Walking is healthy! It's better than being carried back on a stretcher. By choosing to land somewhere else, rather than joining into the already crowded traffic on final to the "cool" landing area, you'll make it safer for yourself, as well as making the "cool" landing area a little less crowded for the others. E. Check The Spot Early During The SkydiveMany marginal spots are made worse by aimlessly wandering around for a few seconds while figuring out where you are. If you can do so quickly, check the spot during climb out if you're a floater waiting for others to climb out. Check it if you have an idle second or two during freefall. Checking the spot early and frequently will give you advance warning of a bad spot. You will know, right away, which direction to fly the canopy. You might even decide to leave a touch early, to start getting safe separation sooner, and therefore permit a little higher opening too. F. Improve Your TrackingYou'll get safe separation sooner, if you improve your tracking. Then you can deploy your canopy higher and avoid problems with bad spots. This will help you avoid the off-airport landing. You can also get more separation, which will reduce chances of a collision during opening. 1. How much separation is necessary? The higher the wing loading on the load, the more separation is required. Most people are way too comfortable with way too little separation! You should be able to have an off-heading opening facing directly towards another jumper and still have enough separation to allow for a rear riser turn to avoid a collision. Blaming off-heading openings for canopy collisions is a major cop-out. 2. To Improve your tracking, first improve your attitude: be dissatisfied! You must be dissatisfied with your present tracking, or you will have no real incentive to improve. Satisfaction with your tracking is a trap and an ego protection device. This ego protection device helps you make your bad excuses for poor tracking more believable. One bad excuse is, "That jerk tracked right over my head when I was ready to pull." Really? Or did you track too steeply and not see where you were going? Be dissatisfied and you'll get constant improvement. 3. With your attitude changed, now experiment with technique. Many people have not really experimented with body positions for tracking, so you often see poor tracking. I suggest that you occasionally devote an entire skydive just to tracking. You'll have plenty of time to experiment. Make sure you track away from the line of flight, to avoid conflicts with other jumpers. 4. Avoid these common errors: Arching. This is OK for a beginner, but it causes a steep track. De-arching makes the track flatter. Try bending a little at the waist. Knees and ankles bent. This slows the track, making it mushy and steep. Straight knees and pointed toes are better, and they should push down onto the relative wind. Arms up, streamlined with relative wind. This causes a steeper track also. The arms should be pressing down onto relative wind to make the track flatter. Legs and arms too close together. This does not help the speed much, and usually causes difficulty avoiding a rolling motion side to side. A slightly spread position, with feet almost shoulder width, and hands 6" 12" from torso is better because it aids in stability and makes it easier to deflect more relative wind.5. When you leave a formation and track up and away, rather than down and away, you're starting to get the hang of it! On most jumps the fall rate is fast while doing RW, and the body is arched. Since the track should be de-arched and flat, a good track may actually have a lower descent rate than the formation! III. ConclusionsI have not covered reducing the risks of normal landings and swoop landings because that will be addressed in a different seminar. As you can see, I believe that most of the canopy survival skills are a combination of improving skills and developing better judgment. Because of my emphasis on improvements, there can be no end to this process, and no real conclusion. I do not wish to fall into the too common trap of thinking that I've completed my learning process and I'm safe from harm. I've seen that this is a deadly trap. That is why I would like to encourage you all to share your ideas on the subject with me. I hope I have presented to you some thought provoking ideas and concepts that you can use to help you reduce the risk of accidents at your DZ.
-
 I. Working on Conservative Approach TechniquesA well planned approach makes good landings easier to accomplish, while most bad landings come after a poor approach. It follows then, that working on improving a variety of approach techniques is the first step. A. Control your canopy with smooth toggle movements. Fly your downwind, base, and final approach smoothly, keeping control inputs to an absolute minimum. This makes it easier for others to predict what you are doing. The canopy will fly more efficiently, and it also helps to make the canopy more stable in turbulence. B. Once you're pleased with your landings, experiment with making approaches at various speeds. Getting a good landing with less float after the flare will help you land in small areas. Doing this requires a slower approach. But if you are too slow, you will land hard! It takes considerable skill to land softly after a slower approach, so practicing this in an open area is important. C. Learn how slowly you can approach and still get a reasonable landing. Again, landing well after a slow approach requires practice and considerable work on flaring technique. How slow you can make a safe approach depends on your wing-loading, the design of the parachute, and how good your technique is. It takes a lot of practice to get good landings after a slow approach, but the result is more options for different landings, and greater safety. D. Even if you are conservative, learn how to make a straight-in approach using a small amount of front risers. Make sure your canopy is very stable in this flight mode first. Just 1 to 3 inches of riser will produce quite a change in the approach speed and landing. By becoming familiar with the slightly higher speeds of this approach, you will be better prepared should the unexpected happen and you find yourself screaming along after making an evasive maneuver to avoid traffic near the ground. E. If you are an aggressive canopy pilot and like SWOOP landings, it is very important to practice straight-in approaches at various speeds. You may have to make a slow approach one day, and you need to stay good at it. You may not even realize how slow you can approach and still be safe. Its better to practice in good conditions so that you are prepared for the worst. Most new canopies can be flown straight in, even at very high wing-loadings, with proper technique. If you can't do it, you probably need to work on technique. II. Working on High-Speed ApproachesA. Learn when to say no to a high-speed approach. There are times when high-speed approaches are unsafe, due to heavy traffic in the air or on the ground, when you are angry or tired, when you are disappointed with your performance, or when the weather conditions are marginal. Make sure you err on the cautious side! You can make that swoop landing on a later jump when conditions improve only if you survive this jump! B. Verify that the technique you wish to use works well with the canopy you are using. Some canopies have unusual flight characteristics that can take hundreds of jumps to fully explore. Do this exploration up high away from other traffic. Some canopies can become unstable using certain techniques. C. Stay with straight-in approaches, working on flaring technique for many jumps to obtain the longest swoop possible before attempting any turning approaches. Many people do not work on improving their technique long enough before trying aggressive turning approaches. Many tend to react too late to changing circumstances, and then over control afterwards. The result is reduced canopy efficiency, which reduces the distance of the resulting swoop. It also indicates that the jumper is over his limit of safety. D. If you are doing turning approaches, try to develop several different techniques for controlling the rate of altitude Ioss compared to the rate of turn. 1. Over a period of many jumps, find out how much you can vary the altitude loss in a turn by using different control inputs. 2. In these experiments you will find that some techniques will produce extremely high altitude loss with only a moderate rate of turn (Example: Steep front riser spiral). 3. In these experiments you will also find that some techniques will produce low altitude loss, even with a fairly high rate of turn (Example: Carving toggle turn). E. When setting up for your turning approach, try to set up for a turn that will allow for a great altitude loss with very little turn rate being required. 1. If you're sure you've set up your approach high enough, start the high altitude loss turning technique. As you make the turn, evaluate the altitude loss. Always be ready to change the turn into one that produces less altitude loss. Starting real high and knowing many turning techniques allows you to have plenty of outs. Try to start all your turning approaches with enough altitude to make the high altitude loss turn safe. Choose the turning method you feel is appropriate. If you notice during the turn that you do not have sufficient safety margin, change the turn technique to one that allows for less altitude loss. Now you have your margin for safety back again. 2. If you are sure you are too low to try the high altitude loss turn, and even a medium altitude loss turn does not look like a good possibility, consider landing slightly crosswind, if traffic permits. Avoid the low turn! If it looks like you need to start with a low altitude loss turn method, you are in a dangerous situation! If you turn anyway, and you do survive, slap yourself for being so stupid! Vow to never get caught in that situation again! Don't judge your approach technique as good just because you walked away from the landing! F. Avoid becoming trapped into the habit of using only one turning technique that requires an exact starting altitude for success. Favoring one turning technique, especially a low altitude method such as a sharp snapping toggle turn followed by burying both toggles, is very risky. Because the canopy tends to pull out of the dive almost the same way each time, you require an exact starting altitude and perfect judgement each time. Nobody can be that perfect! One day your judgement will be a little bit off, and you will crash. Or you may have some turbulent air, which will affect your approach, and you will crash. Do not fall into the too common trap of thinking that you've completed the learning process! No one has! G. Learn the concept of the "corner" and stay out of it. The corner represents the change from a vertical diving approach to a horizontal swoop. Make that corner as round as possible. (A large radius pullout started higher is safer than a sharp pullout started lower). 1. If the canopy's natural tendency to pull out gets you to level flight without pulling any toggles at all, then you were not very far into the corner. This is the safer method. 2. If you need to pull the toggles down to get out of the vertical part of the approach before you can start your flare, then you were too vertical too close to the ground! This is better than hitting the ground, but its very dangerous and should be taken as a severe warning. The biggest problem with this is that the average experienced jumper does not see this as being as dangerous as it really is. Slap yourself for being so stupid, and promise not to get caught like that again. Instead, do everything higher, and start the pullout earlier. Again, the idea is to prevent having to be perfect just to survive. 3. As you can see, the measure of safety on your swoop is how little toggle it takes to get to level flight. If you are pulling toggles down hard and late, you need to start the turn much higher, so that you will need less toggle to pull out of the dive. You may also need to learn how to perceive, far sooner, that you are getting too far into the corner. This way you can apply a little toggle up higher, rather than a lot of toggle at the last instant. In other words, you need to work more on better planning of the approach. Probably a less steep approach would help! H. Avoid these hook turn traps. 1. The courtesy trap. You can only pay so much attention to being courteous to others while under canopy. Do not pay so much attention to others that you forget to leave yourself plenty of safe options too. 2 The dropping winds trap. This is one example of failing to adjust for the changing conditions as the day progresses. People who have been flying the same downwind approach to the landing area all day tend to get very used to the sight picture that they have. As the wind drops, this sight picture will change, as the wind will no longer be helping you get back to the landing area so quickly. But you may continue to try and fly the old sight picture. If you are getting caught by this, you will feel you are sinking faster than you expected while on downwind, so you try and float in the brakes a bit more than previously. In an attempt to keep the same landing spot as earlier, you may find yourself trying to float downwind a little farther as well. All this adjusting eats up airspeed and altitude, both of which are needed to turn into the wind. If you are also tired from a day of jumping, you might find yourself ignoring these signs, turning too low to survive. 3. The "I'm really Gonna swoop this time" trap. This is a situation where the jumper is so enthusiastic about his swoop landings, that they forget about everything else! They see their desired approach as the only possibility and will attempt that approach regardless of whether there are problems with traffic, spectators, winds, or turbulence. They forget that other options exist, and are very likely to have an accident. 4. The race horse trap. Jumper making mistake number three (above) has fallen into the race horse trap. Race horses sometimes wear blinders on their eyes to restrict their vision. Sometimes jumpers pay so much attention to their own approach that they don't see anything else, just like the race horse. Collisions near the ground are often caused by this, so its very dangerous. III. Working on Improving LandingsA. Altitude control is the key to no-wind landings. It is not so important to be at an exact specific altitude when starting the flare, but it is very important how high you are when you finish the flare. You should finish the flare so that you have no rate of descent (or at least your minimum rate of descent) when your feet are at ground level. B. For the best landings, transfer the weight from harness to ground gently and gradually. If you are at zero rate of descent with feet at ground level, you can gently press your feet on the ground while you continue to sit in the harness. With the first step, you can remove a little weight from the harness, by stepping only lightly on the ground, and more heavily on the next steps, until all your weight is transferred from the harness to the ground. To do this you must have the zero rate of descent at ground level, not higher. You must also maintain adequate flying speed during this time. No parachute or any other wing is capable of supporting you at no foward airspeed! C. Be careful to avoid using your hands and arms for balancing or protecting yourself during the flare and landing. As you will see in the video, the canopy will respond to every toggle movement (or shifting in the harness), even when you are well into the transition to the ground. D. Watch the landings of other people and get video of your landings. Look for these common errors. 1. Lifting one toggle at touchdown. This is the balance trap. If you feel like you are falling to one side, you may try to stick an arm out for balance, which turns the canopy. You may think it was a side gust. 2. Extending a hand out to protect yourself. This is the protection trap. By extending your hand out to the ground to protect yourself, you unknowingly steer the canopy that direction. 3. Stabbing the ground with your feet. This is done usually in anticipation of a hard landing. It hurts the legs and feet, and is usually accompanied by lifting both toggles backwards and upwards, which compounds the situation by causing the canopy to dive harder at the ground. 4. Fighting the wind. This is letting one toggle come up and pushing the other one down prematurely, in anticipation of difficulties in getting the canopy on the ground in high winds. This can produce some really ugly accidents. Make sure you're really on the ground first, then get the canopy on the ground. 5. Tunnel vision. Though we try our best to avoid it, all of us tend to concentrate more on our flight path as we get closer to landing time. Sometimes swoopers or accuracy jumpers start having this problem much higher up. This is very dangerous! Try to keep looking around and seeing people! 6. Flaring too slowly, too high, or too far, etc... Experiment more while up high. Watch other peoples landings and watch videos of your own landings. Usually this is a perception problem. IV. ConclusionA. Acknowledge your current limitations. B. Constantly play "what if" situations when you're flying. C. If in doubt choose the conservative option. D. Create safe situations for yourself and others. E. VOW TO BECOME A STUDENT OF CANOPY CONTROL AGAIN. F. Have fun!
 -
Before discussing static and dynamic stalls we should first review some terms involving stability. Static stability refers to how something behaves in a steady state. A parachutist suspended under a normally functioning canopy would usually be said to have positive static stability. That is to say that when not changing the position of the toggles or risers, things like airspeed and heading will not change very much from one moment to the next. Dynamic stability refers to what happens after something has been disturbed from its static state. Once a parachutist changes the position of the toggles or risers, dynamic stability comes into play as the body swings under the canopy. A static stall refers to what airplane pilots would call a slow deceleration, approach to landing or simply a normal stall. Basically, at an altitude from which it will be safe to recover from the stall, slowly increase the angle of attack and let airspeed bleed off. Keep increasing the angle of attack, gently, until the stall happens. Under a parachute, this is fairly simple. Slowly pull the toggles down and wait. Do not pull down the toggle so quickly that you swing forward from your normal position under canopy. Hold the toggles all the way down and wait. You should notice the sound of the airspeed decreasing, perhaps a slight rocking in the saddle and then perhaps a noticeable increase in descent rate. This is a basic stall. For all intents and purposes it is the most genteel stall your canopy will demonstrate. Recover from the stall by decreasing the angle of attack -- let the toggles up and resume flight. The dynamic stall is different because of the suspended weight swinging under the canopy. Again at an altitude from which it will be safe to recover, begin the maneuver from full flight -- toggles all the way up. This time instead of slowly pulling the toggles down, pull them down as quickly and as far as you can and hold them there. A few different things are happening this time around. Because your airspeed initially hasn't changed all that much, but you've increased the angle of attack dramatically, the wing is now creating a lot more lift. A function of creating lift however is also the creation of drag. Your canopy as a result will not only go up but also slow down. Your body on the other hand is following Newton's first law of motion and will continue at its current speed and direction. Unfortunately this also asymmetrically loads the front and rear risers, which continues to further increase the wing's angle of attack. It's a vicious little circle there for a moment or two as increasing the angle of attack slows the canopy more and more. As your body swings farther and farther forward, rapidly, the wing exceeds the critical angle of attack and it stalls. Your body may have been thrown quite a bit forward of the leading edge of the wing and even slightly upwards of your normal place under the canopy. As a result, your body may feel a much more definite falling or even backward motion than it did during the static stall. Stalls can happen at any airspeed and at any attitude. All that is required is for the wing to exceed the critical angle of attack. Up to this point in this discussion, we've been looking at stalls in a fairly normal manner. If you didn't know better you may have thought that the stall had something to do with the speed of the wing or its attitude in relationship with the horizon. That's normal. Many people make this mistake. After all, we've demonstrated the stalls from a slow deceleration and with a fairly normal relationship to the horizon, earth and sky. That's about where most discussions on the subject begin and end. So, some people might make the mistake of thinking that a stall can only happen if you're flying too slow or if the leading edge of the wing is pointed toward the sky. Unfortunately, this is just dead wrong. To make matters worse, some maneuvers that you may perform, turns for example, create G force. Basically, your body wants to continue in a straight line but is getting pulled in another direction by lift. As the bank angle increases, so does the G force. In an airplane, maintaining altitude during a turn, the G force increases at a rate equal to one divided by the cosine of the bank angle. So, at a bank angle of 60 degrees the G force will be 2. You might not get exactly 2 Gs under a parachute turning with a 60 degree bank though since generally you're not maintaining the altitude and the equation becomes quite a bit more complicated taking into account your descent rate, but in most cases it will definitely be greater than 1. So what does this have to do with stalls? As the G force increases so does the amount of lift required to offset it. With the same angle of attack, the airspeed at which the stall occurs will be increased by the square root of the G force. Airplane pilots would call this an accelerated stall. Let's say you're pulling a sustained 2 Gs pulling out of a steep swoop, your canopy will have an accelerated stall at 1.414 times its static stall speed. The really insidious part of this is when a person is snapping the toggles down to pull out of a too steep and too low swoop, the dynamic stall comes into play. The body continues in a straight line, increasing the angle of attack and aggravating the stall with really bad results. It's my opinion that this could be the primary factor in some botched hook turn landings. Paul Quade is a Certified Flight Instructor and the camera flyer for the Open Class 4-way team, Perris Lightwave.
