nettenette
-
Content
27 -
Joined
-
Last visited
-
Feedback
0%
Everything posted by nettenette
-
 All Images by Scotty Burns Scotty Burns Breaks Down Your Pre-FJC Checklist Scotty Burns is a skydiver with fixed-wing pilot blood in his veins. He started skydiving on his 18th birthday, because his first commercial aviation gig--towing banners--included an obligatory parachute. He decided that he wanted to learn how it worked, just in case he had to use it. The rest, of course, is history. While today Scotty owns and operates the Flyteskool wingsuit academy in DeLand, Florida, his airborne specialties go far beyond inflatable nylon. For almost two decades, he’s held Commercial Multi-Engine Instrument Airplane (and helicopter) ratings, with a couple thousand hours of PIC (pilot-in-command) time. It’s his Wingsuit Instructor Examiner role that most folks in skydiving recognize Scott in most readily, however, as he’s spent the last ten years training over a thousand baby-bird wingsuit students at dropzones all over the world (and as the Wingsuit I/E for Skydive University). Scotty’s pilot-first-skydiver-also training techniques have helped to make wingsuit flying safer for everyone over the years--and, in the process, he has seen the good, the bad and the ugly when it comes to wingsuit wannabes. If you’re interested in the good and interested in avoiding the bad and the ugly, listen up. Scotty has a few things to say to you before you show up for that wingsuit FJC. Here it is--in his own words... Slow Your Roll A lot of the issues that we’re starting to see over and over these days point right back to the same root cause: rushing. People are really wanting to start flying wingsuits as quickly as possible, almost in spite of the rest of the sport. To save money, they’ll get in and do 150 hop-and-pops. They just jump their ass off for the numbers and don’t focus on building actual skills in freefall or under canopy. Their canopy skills are especially crappy, because hardly any of these guys have done any canopy coaching. They just want to get to jump number 200 and they assume they’ll figure it out. Round out your skills. One of the first things that I would recommend people do that want to get into wingsuiting is to laser focus on building a well-rounded set of skills, and to do so early. On your way to that first hundred jumps, learn all the other disciplines that you can. Go out and do a bunch of RW jumps. Learn how to turn points and do different exits, and get comfortable doing that. Learn how to do some head-down. Get into some angle flying and tracking jumps, because it is really going to help you learn how to control the air as you get further into your skydiving career. Flying a wingsuit is not an unrelated accessory to this progression. It requires all the work that comes before. That said: As you learn to fly a wingsuit, you are becoming a lot more of a pilot or an airman than you are a skydiver. There are a lot of differences between jumping with a wingsuit and jumping without a wingsuit. There are a lot of skills and experience that you need to have that you really don’t learn in any other form of skydiving. That is not an oversight on the part of your teachers; these skills are simply not necessary in other disciplines. Learn to fly your canopy, then your wingsuit. Your wingsuit is not how you land. Your canopy is. And in our discipline, it is much more common to have to land out, in a place you don’t want to--like someone’s backyard, or a parking lot--under a reserve, not so uncommonly. Statistically speaking, you are much more likely to get injured close to the ground in that wingsuit. Your ability to put yourself down safely in a place you wouldn’t normally want to go because you didn’t have any other choice is an extremely important skill. Get canopy coaching, and plan on the worst possible case scenario. Ease off the YouTube. Don’t spend your time watching every wingsuit video on Vimeo. It is cool and all, but it becomes a liability at a point. For instance: I had a student come out just the other day who has been working in the industry for a couple of years and has been waiting to start flying wingsuits. At my ground school, he was talking over me half the time and telling me what he had learned through all of these BASE videos that he had seen. He was acting unteachable. He is a really nice guy, but if he wasn’t in the industry, I would have had to tell him to go home. Take it easy. Then take it easier. Because one of the most important things about flying a wingsuit is your ability to relax, there is a huge difference between what most people see in videos before they learn how to fly and what they should actually be doing when they first put on that suit. There is a huge difference between what people do that are BASE jumping with a wingsuit--the decisions they’re making, and the gear they are flying--versus what somebody at 200 jumps is going to do. And it’s also important to remember that a lot of the guys in those videos are no longer with us. Some of the most talented human beings you would ever know or ever dream up. So what does that tell you? That means that it doesn’t take much to screw up, so you’d better take the long, thorough road. On that first jump, remember: You’re not trying to go out and break any records. You’re trying to make sure that you can get out safely and fly a pattern and pull with stability. You should aim to fly at 60 or 70%. You wouldn’t jump into a brand new race car and mash the pedal to the floor to get it out of the dealership. he amount of drag that you produce in that wingsuit versus the drag you produce on a normal jumpsuit is 6 or 8 times as much--easily--so it only takes about an eighth of the amount of input to get the same kind of response. The more you can relax, the better off you will be. Planning for Plan B is not optional. Planning for that worst possible case scenario has always got to be in the back of your head because it is going to happen. It might not happen today or tomorrow, but it is going to happen and it is probably going to happen at the worst possible time. Making sure that you have got that out is very important. Modern wingsuits are tiny little F16s without engines. It is really easy to find yourself miles away from where you were supposed to be. I have had to land in more people’s backyards than I care to admit to. Most of the time it wasn’t that I personally made a mistake; it was because shit just happens in this sport, and you have to be ready. You can make great decisions and still shit can go down. Then you end up having to rely on emergency skills that you had better hope are there. Keep it simple. Most people that are getting into it just want it so bad and they try too hard. If you can just relax and smile, listen to your coach and do as you were taught (and not what you learned from videos), you can keep yourself doing this for the next 15 or 20 years--versus being broken, giving up on it, or worse. It is incredible to see how far the wingsuiting discipline has come. It’s really sad that so many of our friends aren’t still around to see the changes. That’s why it is even more important for people to seek out the best information--and the best instruction--they can.
 -
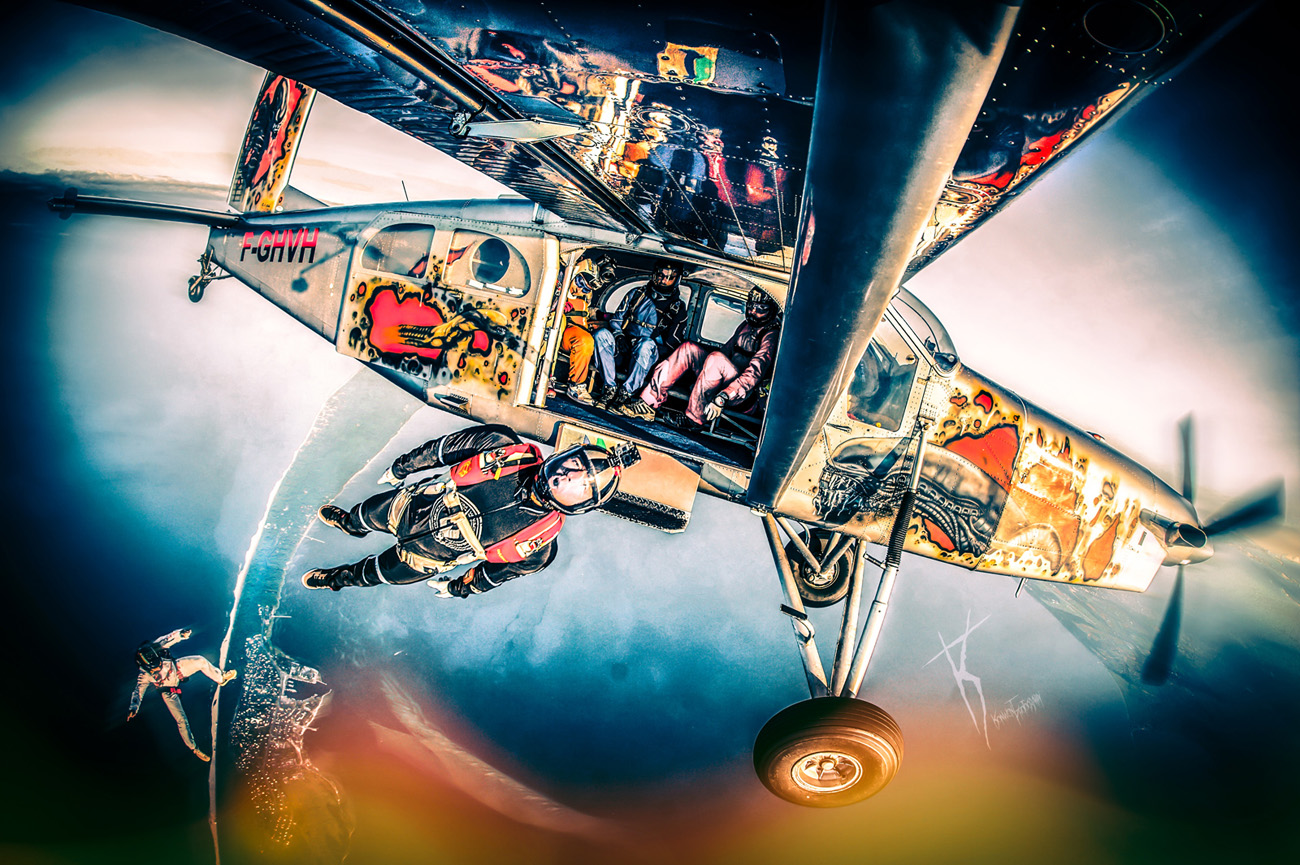
How To Get That Wind Tunnel Job - Vince Arnone Talks You In
nettenette posted an article in Disciplines
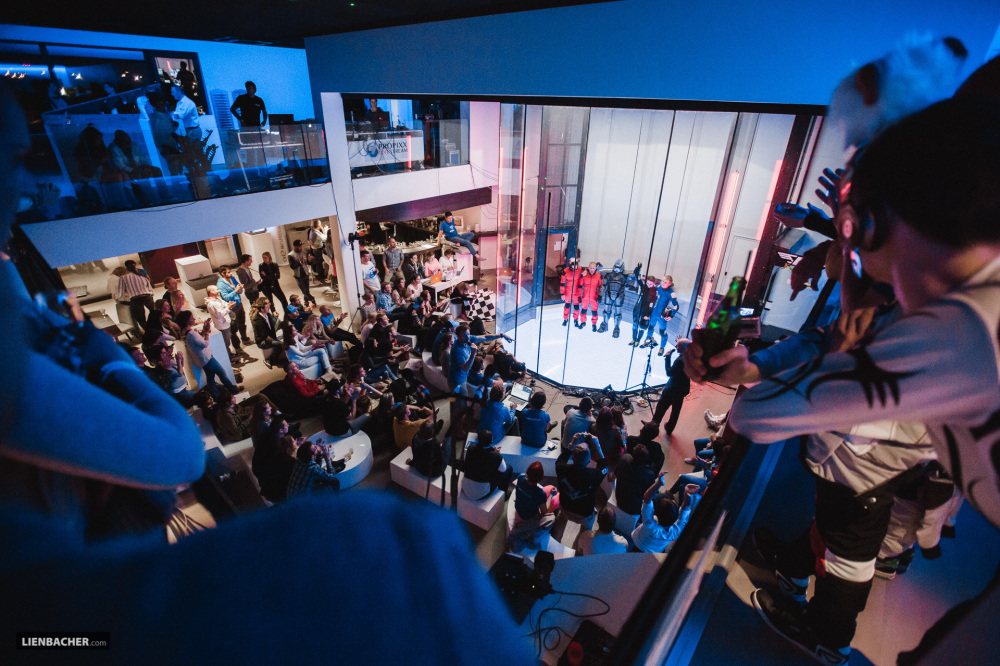 Image by Wolfgang Lienbacher When it comes to the windytube, Vince Arnone has a few solid miles under his belt. He’s worked in the wind tunnel industry since 2010 (and in the skydiving world for a few more years before even that). He runs Indoor Skydiving Source, a community-based resource for indoor skydiving and bodyflight. During his many years as a tunnel instructor--working with first-time flyers and skydivers alike--he has constantly been approached by wanna-be tunnel rats. If you’re one of them, he has some advice to share with you. I asked him some questions about it, and here’s what he had to say. Q: What’s the first step? Are there prerequisites? Vince: Just apply! At the end of the day, great timing and a solid application really is the key to working in the wind tunnel. Beyond that, there are a few important factors to consider before filling out that app. The physical requirements of the job should be the first thing you consider before seriously looking at getting a job as a wind tunnel instructor. Being a tunnel instructor, and especially working with first-time flyers, is a physically demanding job. Sometimes you work with children, but sometimes a 250lb man walks through the door. They are both your responsibility, and bothcan kick your ass! Both the IBA and Tunnel Instructor rating programs administer a physical fitness test that you must pass in order to be an instructor. The test normally includes pull-ups, sit-ups and running. You don't need to be superhuman, but being generally in shape is a good starter. Q: Do you need a lot of previous tunnel experience? Is it, like, only shredders need apply? Vince: No. The training will be part of the job, and it’s an investment. It goes like this. In order to work in a wind tunnel with first-time flyers, you need a tunnel instructor rating. Earning this rating requires a 3-4 week course which teaches you how to safely introduce and monitor a flyer's first flight. Most wind tunnels include this as part of your initial hiring period. You might have to sign a contract or have some money withheld from your paychecks to pay for the training, but rarely do you have to pay out-of-pocket for it. Training programs like this are designed to take anyone off the street with no previous experience and set them up with the key skills they need for the job. Q: Do you have any insider tips that might give an application the edge? Vince: If you remember one thing from this article, remember this: a staff at a wind tunnel is a close-knit team, and the team has to work well together. Because of this fact, knowing and having a standing relationship with other instructors or managers can make the difference when applying. A hiring manager is always looking for a good fit to the team, not just a skilled individual. This means they are looking for someone who will mesh well with the other instructors on the staff and work hard. This is the most important thing to remember when applying. If you don't know anyone, but you know the job is for you, don't worry! I don't mean that you have to be long-time buddies with someone at the tunnel in order to get a job. Hang around. Get to know the staff at the tunnel you want to work in. Show interest. Small acts like this will go a long way, and you just might learn about the tunnel and bodyflight in the process. Q: What should a potential tunnel employee do to prepare for the interview? Vince: Treat it like a “real interview.” Don’t be too casual about it. All the standard job application best practices apply. The opportunity to work in the wind tunnel is a unique -- and possibly life-changing -- one. Approach it with a good attitude and tons of passion, and see where it might take you. Good luck! Q: What are the major differences between tunnels for flyers with an eye on growth? Vince: Back when I first started--I guess I’m sounding old now--there were just so few tunnel jobs out there. The number of tunnels from 1982 to the year 2011 was around 40. From 2012 to 2015, that number jumped to around 80. Today, looking at the database, there are 113. So rather than jumping at ANY possibility--as someone who sees the tunnel job as an opportunity to grow their personal skills and maybe even start coaching--it really matters which tunnel you land at. The days where everyone would flock to a single tunnel because it was the only tunnel, only high speed tunnel, or only 14 ft tunnel, are long gone. There are more coming, too; since 2013, the number of tunnels opening each year has also exploded. This also means the number of instructor positions has grown. Just by the numbers, setting out to get an instructor job is more likely to end successfully. This also means that the experienced flying community has spread out. Consider working at a tunnel that mainly serves first-time clientele. There will be lower experienced flyer traffic, and the other instructors might not be flying- and coaching-focused. That’s a much different environment than a tunnel that sees experienced flyers as a larger percentage of their business. Working with experienced flyers and other coaches will play a big role in your personal progression. Surrounding yourself with people who have similar goals will immerse you in the culture. Consider the location and culture of the tunnel you land at. A location that will support your flying goals will help you reach them much quicker--and this is about you going all-in for personal development, isn’t it?
 -
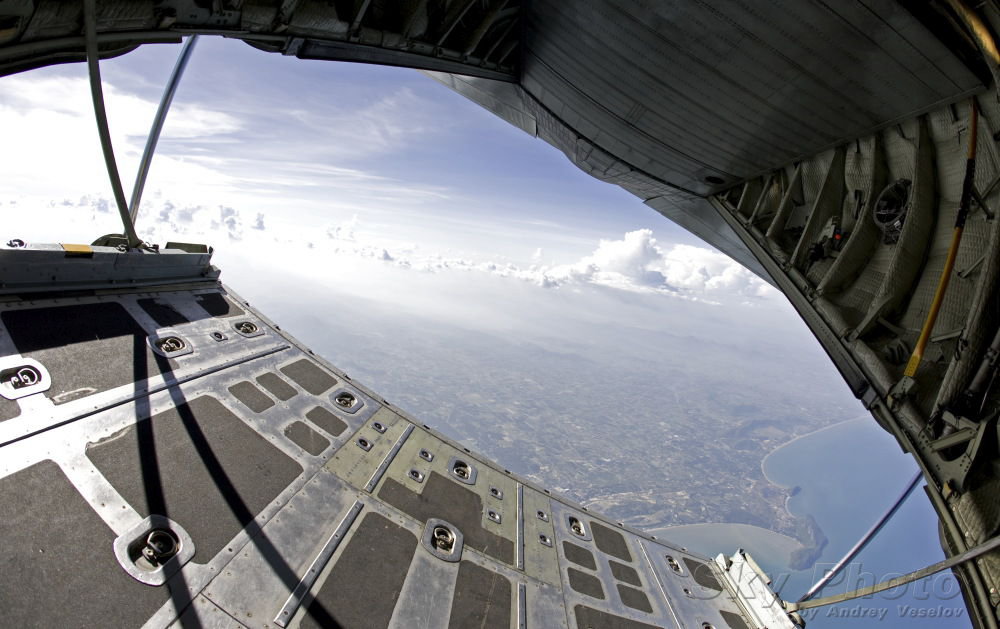
 The History of a Silly Name Image by Andrey Veselov It’s hard to imagine that, not too long ago, a skydiving get-together was a rare thing indeed. Today, as you’ve no doubt noticed, there are hundreds of ‘em. In fact, almost every drop zone, no matter how small, has at least one official yearly boogie to celebrate its local jumpers. Namibia! Fiji! A tiny little beach town in Kenya*! A big field in Montana! Where two or three are gathered in its name, behold: you’ve got a boogie on your hands. Some of these events are immense, filling the skies with dozens of wildly various aircraft, hundreds of skydivers and a whirling (terrifying?) smorgasbord of disciplines. Others are comparably tiny. Despite their differences, most boogies are a reliably good time. It stands to reason that a group of skydivers would find any excuse to come together in a frenzied combination of daytime skydiving and nighttime frivolity–but when did the first one take place, and how did it come by such a goofy name? Read on. The Birth of a BoogieThe modern skydiving boogie may owe its existence to a film: specifically, the first major skydiving film released to the public, called Gypsy Moths. Shortly after the film’s much-lauded debut, one of the skydivers featured in the film – a prominent skydiving athlete named Garth “Tag” Taggart – was asked to put together a “just-for-fun” skydiving event in his hometown of Richmond, Indiana. Until then, skydivers only really, officially gathered for USPA-officiated competitions at regional and national meets. In September of 1972, Garth arranged that seminal event, which is recorded in Pat Work's fascinating record of early skydiving (entitled "United We Fall"). Where Did the Term “Boogie” Come From?The term “boogie” derived from a comic motif developed by fringe cartoonist R. Crumb.** The motif features a “boogie man” striding confidently across an abstract landscape with the phrase “Keep On Truckin’” emblazoned above. The word “boogie” doesn’t appear anywhere within the motif, but the story goes that Garth Taggart was inspired by the image. He was also probably influenced by use of the word in New Zealand skydiving circles, as well as by its use as a then-trendy name for an, ahem, wild party. In any case, Taggart picked that moniker to describe the Richmond RW Festival on its event t-shirts, and the term stuck. Firmly. These get-togethers have sometimes been referred to as “jumpmeets”--in the olden days, when the organizers didn’t want to saddle the event with the term’s then-obvious, hard-partying implications--but “boogie” is how we’ve really come to know the phenomenon. Hilariously enough, those historic shirts didn’t actually use the word “boogie.” Due to an unfortunate misspelling on the hastily-printed giveaways, they described the event as a “boggie.” Snicker snicker. The First Boogie Kicks OffHowever confused the naming, that original event brought together more than a hundred skydivers from all over the US to practice the then-relatively-new RW discipline. The Richmond City Boys’ Club hosted the event, making significant revenue by charging non-skydivers an admission fee. That first boogie (or “boggie,” if we’re being historically accurate) saw some formations that were, for the time, pretty damn groundbreaking. In "United We Fall," Pat Work notes that the athletes “made several big stars out of a Twin Beech and a DC-3.” Work goes on to remember that “[a]ll the self-styled, super-hero RW types made three tries at a 30-man, and succeeded in FUBAR-ing all three in front of the lens of Carl Boenish.” The botched jump didn’t cripple the event, however. “Everyone else just giggled and went up and made 18-mans […] with no problems[.]” That night, the skydivers and some lucky spectators enjoyed a raucous bonfire, dancing and screenings of some of the most seminal skydiving videos on record. The Boogie EvolvesIn the years immediately following that first boogie, the quickly growing sport of skydiving started to earn a bad-boy reputation amongst the general public (who didn’t much care about it previously, when the sport was tiny and firmly on the fringes). For several years, the city of Richmond out-and-out banned skydiving for fear of its freakshow excesses.*** By the time the 1970s were drawing to a close, however, that original boogie had become very official. It turned into the USPA Nationals--whaddaya know. Boogies TodayThe phenomenon of the boogie holds to the much same spirit as Garth “Tag” Taggart’s founding principle: fun. These days, however, they’re also used as a venue for major skydiving competitions, world records, vendor demonstrations, charity efforts and loci for training. Across the board, these events retain one important historical value: the nominal “boogie” itself. We come for the party, right? *Which I just finished attending. **If you aren’t aware of R Crumb, treat yourself to a Google image search. You’re welcome. ***Apparently, it was proving too logistically difficult to lock up their daughters--and sons, for that matter.
 -
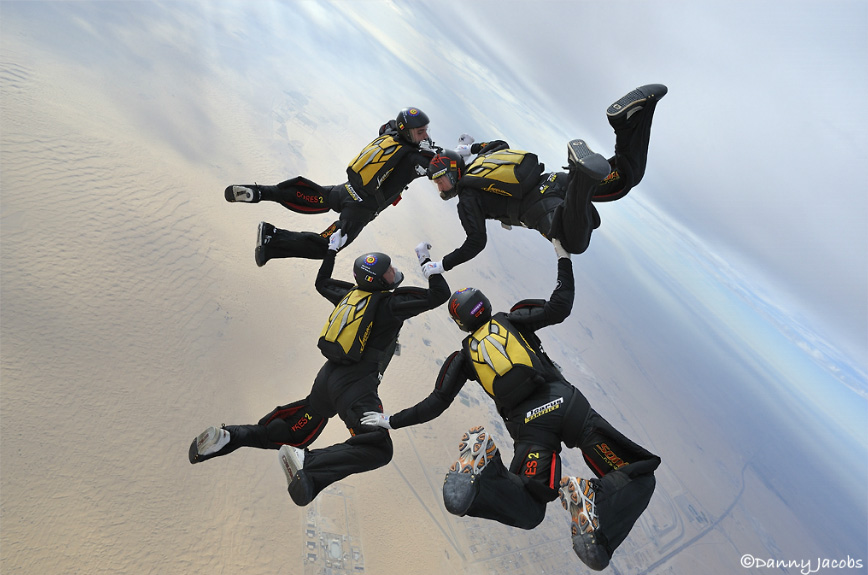 How does the winningest 4-way team in the world get--and stay--that way? Image by Danny Jacobs If you say “by training hard,” you’re certainly right. Hayabusa, the aforementioned golden boys of 4-way FS, unsurprisingly train their way around the calendar in both the tunnel and the sky. As of publication, they recently topped of the podium in the FAI world championships for both, as you’ve undoubtedly noticed. The top of the podium is, after all, pretty much home for these guys. Their hard training schedule, however, is certainly not the only ingredient in the sweet-smelling success that’s always wafting out of the Hayabusa tent. If you’ve got a couple of hardworking skydiving buddies who fly well with you, you might be thinking about going for your own set of medals. Not into FS? No worries. It doesn’t matter if you point your belly button at the ground or the horizon: you can still borrow a page from Hayabusa’s playbook. Here’s what Hayabusa Point Dennis Praet has to say about how his uniquely consistent team keeps their streak going so strong. 1. Work on the relationships.“At the beginning, I really underestimated the importance of team dynamics,” Praet says. “They are super important. You can be an awesome flyer. You can do the fastest 360s. Whatever. But if you don’t have a good relationship with your teammates--if you are not very good friends--then competition is a very tough world.” “Don’t underestimate how important it is to have a good relationship with your teammates,” he continues, “And don’t misunderstand that to mean that you always have to accepting someone else’s bad habits or crap. It’s true that it is about coming to terms with some bad characteristics, but it’s more about appreciating the good ones. Like siblings, in a way.” 2. Fix what you need to and get on with it.“We had a very harsh year in 2014 with Hayabusa,” he explains. “It was the year that nobody liked, and it just takes all the passion away. We saw the rough year for what it was, changed the things that needed to change and found that passion back.” 3. Cross-train outside skydiving.“Everybody on the team does their own thing as far as fitness is concerned,” Dennis says. “It’s not a secret that I don’t like running; I would rather go to the gym or do some of my active hobbies, but pretty intensively. I absolutely love wakeboarding and kite surfing, and sometimes I’ll spend the whole day in the water, going hard.” “When I train, I focus on the fact that four way is a 35-second sprint--so going for endurance is only helpful in training. You can kind of pick your own sport to optimize your capacity for sprinting. As long as you are fit enough to go through a whole training camp--12 jumps a day, without losing your head--you are in good shape.” 4. Get your head right.“When we are going into a hard competing day,” Praet says, “We try to put all our personal issues on the side. If there is any small thing that might put you off your mental game, consciously put that out of your head. Then just trust the training that you have done; the plan that you followed throughout the year. That way, you know--even if you lose, it is just that the other team was better. It is not something that you have done or didn’t do. That knowledge is comforting.” Hayabusa winning 2013 Dubai International Skydive Championship
 -
 The Stuff You Need To Remember, Even If You Never Actually Do The Math Image by Andrey Veselov Have you ever gotten off at the wrong bus stop? Probably. But did you turn around and blame the bus driver for your mistake? Probably not. As a skydiver, however, there’s a good chance you’ve done exactly that--by exiting the plane at an inappropriate time, then accusing the pilot of “giving you a bad spot.” If you leap blindly out the door at the flash of a green light, it’s not the pilot who’s making the mistake--it’s, y’know. You. 1. Green doesn’t necessarily mean go.The green light doesn’t necessarily mean that the pilot thinks you should leave the plane. This may be a surprise, but spotting is actually not the pilot’s responsibility at all. The green light’s technical meaning is that he or she has completed all of the responsibilities of a jump pilot: that the necessary adjustments have been made to speed and trim to allow for safe exit, and that air traffic control has been informed that skydivers are preparing to leave the aircraft. It is the jumpers’ responsibility to verify a safe exit point that’ll get you back. If you’re being pushed out the door and the spot ain’t right, don’t go. Simple as that. 2. Don’t rely entirely on technology.The presence of a GPS system on nearly every skydiving aircraft has changed the game, of course. In many ways, it has allowed the spotting process to slip quietly out of most jumpers’ minds and wiggle its way into the cockpit, which isn’t fair to the pilot (who has plenty going on up there already, to say the least). Spotting used to be a purely manual process; doublechecking the spot still must be. 3. Know your jump run.Most pilots fly their jump runs into the wind, on a heading determined by GPS. From there, it used to be that you needed to do some math in order to properly calculate your spot--estimating your drift in freefall and under canopy using an algorithm. To do so, you needed to know the winds aloft, as well as the forecasted wind speeds and directions. It’s no wonder most skydivers couldn’t be bothered. These days, we have the internets on our side. Apps and (when they’re working) online calculators make it much easier to get it right--but the best practice is to check with the dropzone. If there’s no posted information available, check in with manifest and ask for their input. 4. Get your load in order.After you’ve run the numbers, boss-level spotting requires good communication with the rest of the skydivers on your load. These days, loads are packed with different disciplines, all with different glides and fall rates. Slow-falling, long-gliding groups of wingsuits and fast-falling, short-gliding groups of head-down freeflyers share planes with high-altitude hop-and-pop canopy relative work jumpers, shredders of angles and hybrid formations of every stripe. The general rules is that, since the upper winds push freefalling jumpers across the sky, jumpers who will be exposed to them the longest will be pushed farther away from the landing area. That said: Different dropzones follow different procedures for exit order. Learn them before you start milling around in front of the door. If you have questions or issues, ask the S&TA; about the underlying logic. 5. Get your priorities straight.Look straight down from the door, checking for any air traffic and making a mental note of your direction of flight and of your exit point. It helps to physically point to the landing area to make a general assessment that you’re within a landable distance of it. If you’re not, don’t leave the plane. It’s not worth it. Even if you never actually sit down and calculate a spot, you’ll be a much safer skydiver for that five seconds’ worth of mindfulness -- and you’ll make the skies safer for everyone else you share them with.
 -
 Exits at the Baltic Boogie 2015 Image by Konwent Photography There are a number of ways to kneecap a boogie, and they often have something to do with your gear bag: a forgotten helmet that lands you in a beat-up student ProTec all week; a forgotten suit that leaves you slippery and gripless; the dreaded out-of-date repack card. When you’re gathering up everything you need for a week of rapid-fire skyjumpin’ in a far-off location, it’s easy to forget a (key) detail here and there. Maybe this--my personal packing checklist--might help.* The Basics Rig(s) Helmet(s) Suit(s) (wingsuit/tracking suit/belly suit/tunnel suit/freefly suit/sit suit/dinosaur onesie/all of the above) Dytter Altimeter Gloves Your preferred skydiving kicks Your credit card (and a healthy sense of realism about how thoroughly it’s about to be abused)Paperwork In-date parachute association license In-date reserve repack card AAD air travel card (like the one, from Cypres, or this one, from Vigil) so you aren’t caught off guard at any check-in you may pass through during your skydiving careerRig Protection Packing mat/drag mat: preferably, with a sun cover, riser holders and at least one pocket (If your mat doesn't have a sun cover, bring an old towel to cover your gear during any short moments you need to leave it in the sun.) Bonus points if you sew your own. Extra bonus points if you sew me one. A sturdy, high-quality suit hanger with molded shoulders (to hang up your suit(s) well away from the dirty hangar floor)Tools Several pull-up cords (or your trusty power tool) Leatherman, Swiss Army knife or other sturdy multi-tool Line routing card Hemostat or tweezers (for those moments when your fingers are just too big for the job)Replacement Materials Extra closing loops Rubber bands, both large and small (or Tube Stoes, if that’s your jam) Any special batteries you might need for your doodadsLogging and Note-Taking Materials Logbook. (If you don't keep a digital version, keep the paper book in a Ziploc bag because--let’s be real--you always spill either coffee or beer on that thing.) Ballpoint pen Pencil/eraser Sharpie Notepad (for sharing information with other skydivers, such as phone numbers and scrawled threats) Labeling tape (to mark everything with your identifying information)Camera Stuff * Note: Obviously, serious, like, aerial cinematographers have a much more nuanced kit than this. This is a starting point. Label everything. Camera. Or, y’know, cameras...but try not to cover the entire surface area of your body with ‘em. Waterproof case Non-waterproof case (for dry situations where you prefer better sound over better equipment security) Mounts Mount wrench Sync/charge cable Microfiber lens cleaning cloth and solution Extra SD cards, labeled clearly with identifying numbers (those little SD card wallets are nice)Comfort Buff(s) Non-perishable "emergency" snacks A water bottle (or rollable Platypus bottle) with flavor packets, teabags or whatever else entices you into actually sucking on the thing at regular intervals UV-protective sunglasses Sunscreen Kneepads Clean sweat rag Ponytail holders Rehydration packets (because that beer truck may well sneak up on your blind side)Additional Tips Label everything. Lots of skydivers on the DZ will have exactly the same items that you do in their packing kit for skydiving, from closing tools to helmets. If unlabeled items go missing from your kit, it’s likely not an issue of dishonesty -- just mistaken identity. Labeling often solves the problem before it arises. Keep it clean and organized. Keep like with like in separate bags within the larger gear bag, and keep everything protected from dust, dampness, dirt and sun. Make it easy to find every individual item, and you’ll save hours of time in the long run. Get an idea for what your access to the facilities is going to look like at the boogie. We’re talking cooking; laundry; showers. If you’ll need to carry in coins for showers and laundry--or if you’ll have to pre-buy something like laundry soap before you drive out into the hinterlands, or something along those lines--you’ll be glad you knew about it and planned accordingly. Ask around about the experience you can expect at the boogie you’re planning to attend. Skydivers who have been there before will be glad to run down the highlights and challenges for you. Even better: you might end up convincing them to join you for a reprise. *If you have additions to this list, by all means PM me!
 -
 Image by Ralph Turner Remember when getting a camera onto your helmet required power tools, soldering irons, hot knives and makeshift camera mounts? Um--probably not. It wasn’t so long ago, really, that you had to have access to a workshop to get a camera on your head. Back then they were, like, really big, too. And it was obvious that cameras were problems waiting to happen. Those behemoths could--and regularly did--snap the stuffin’ out of the jumpers’ necks, making jumpers literally painfully aware that the camera posed additional safety considerations. With the advent of the GoPro, jumping with a camera started to seem, well, obvious. Just peel off the little sticker on the mount, slap it somewhere on your helmet, clip in the little plastic doohickey and away you go. Set it and forget it! You won’t even know it’s there! ...until it decides to get all uppity and grab a handful of your lines at an inopportune moment, that is. Here are the key questions you oughta be asking yourself before you end up in a spiderweb of your own making. 1. Should I even be jumping this thing?The USPA actually recommends that you be the proud bearer of a C license before you jump a camera, and that you’ve jumped everything else on your person at least 50 times before. If that causes you to make a big, exasperated noise, consider this: your overall bodyflight and canopy skills need to be beyond reproach before you add the risks and distractions of a camera. 2. What am I actually going to do if it all goes pear-shaped?You’ll need to make a decision about what the exact steps you’ll take if part of your system ends up snagged on your camera. Go through the individual components: bridle, pilot chute, lines, etc. Talk to your S&TA; about these details to check your intuition. Perhaps, if your helmet allows, you’ll fit it with a cutaway system so your helmet doesn’t impede your life-saving efforts. That said: Talk to someone who has actually had to use a quick-release chinstrap setup under duress. Yes, it’s great that they exist. No, they are not failsafe. If you don’t install a cutaway system, you’re going to have to be able to get that helmet off your head yourself. This is, suffice it to say, not the easiest thing to do while spinning and plummeting and stuff. If you’re convinced your flimsy-seeming little mount will pop right off when it counts, think again. It seems that, at least when you don’t want them to come off, those GoPro mounts are tougher than they look. (A lot tougher.) 3. What’s it worth to me to buy a safer mount?The free mounts that come with your camera have that one thing going for ‘em: They are, y’know, free. You don’t have to buy anything else. They are gratis. No more exchange of funds involved. Free, however, sometimes isn’t the way to go. As ubiquitous as they have become, the venerable GoPro was not invented for skydiving. Check out the array of sky-specific aftermarket mounts that aim to eliminate that looming snag hazard. Ask the camera flyers you admire what mounts they prefer (and why). 4. Can I anti-snag myself in the absence of after-market parts?If you just don’t see yourself buying an alternative mount, you shouldn’t just throw up your hands and leave it to the fates. You should still make the effort to reduce your snag hazards. The SIM has some advice for industrious DIYers: All edges and potential snag areas should be covered, taped or otherwise protected. Necessary snag points on helmet-mounted cameras should at least face away from the deploying parachute. A pyramid shape of the entire camera mounting system may deflect lines better than an egg shape. Deflectors can help protect areas that can’t be otherwise modified to reduce problems. All gaps between the helmet and equipment, including mounting plates, should be taped or filled (hot glue, etc.). Protrusions, such as camera sights, should be engineered to present the least potential for snags. Ground testing should include dragging a suspension line over the camera assembly to reveal snag points.That last one is key, so I’ve gone ahead and put that sucker in bold. 5. What’s my decision altitude?There is very little in this life that’s more distracting than getting a dangly brake line looped around your helmet camera and whipping into a brutal spin. The wha huh OH CRAP OH NO moment turns into GET IT OFF GET IT OFF GET IT OFF and, before you know it, your dytter is giving you the business. So: it’s a smart idea to bump your deployment altitude up a little big to give you more time to extricate yourself. More variables require more buffer and, make no mistake, that light little fluff of a sports camera is an additional variable to be reckoned with. 6. Is this thing going to put me on the facepalm-inducing-incidents list?...Because that, at the end of the day, is a more important question than “is it on?”
 -
You're making me short of breath, @riggerrob! :D xox
-
 Let me ask you this: When was the last time that you saw the pilot running down a safety checklist on the jump plane? Photographer: BatCam If you’re paying attention, you certainly have--or at least seen the clipboard stuffed somewhere in the cockpit, lookin’ official. Metal-tube pilots have an actual checklist to run down to confirm the safety of the gear that heaves us all up into the sky. That’s a great idea -- it’s a reasonably complicated system, and a checklist ensures that nothing’s being forgotten. Now: when have you ever seen a nylon pilot with a clipboard and a pen, spinning briskly around in front of a mirror and checking things off? Yeah--never. Even though a wingsuit has lots of little safety details that need to be confirmed before every flight, our before-takeoff checklist exists only in our heads--and it’s significantly more complicated than a standard skydiving gear check. Let’s make that checklist a little easier to remember, hey? A gear check should be a mantra. Here’s the abbreviated checklist to add to your “standard” skydiving gear check: The Four-Three Wingsuit Check 3 Checks 3 Straps 3 Handles 3 Zeroes Here’s what it means. Three ChecksThis will be familiar to any skydiver, since it’s been a recommendation since the dawn of the sport: you should perform a pre-flight gear check three times. Perform one in the hangar, one before hoppin’ on the plane and one before you exit. Also: Never underestimate the value of another pair of eyeballs during this process. Three StrapsTwo leg straps and one chest strap are the only things that keep us skydivers from being skyfallers. All wingsuits cover up two-thirds of those vital bits of webbing; some wingsuits (in BASE mode) obscure the chest strap as well*. As you might imagine, fatalities--and many close calls--have resulted. Check them with your eyeballs before you’re zipped in. Some suits fit snugly enough that the straps seem tightened when they’re not (gulp!), and once those straps are out of sight, they can easily slip out of mind. After you’re zipped in, you can check your legs by lifting your shoulders and feeling for the pull of the leg straps. Three HandlesMake sure you know exactly where all three of your handles are, and that they’ll be available to you while you’re flying. Your cutaway and reserve handles must be readily accessible and visible to you in flight -- so make sure your suit is fitted and attached in a way that puts those handles on proud display. Switching from BOC to leg pouch? Switching from leg pouch to BOC? Best be damn sure you know which one you’re wearing. Three ZerosZero Holes When you’re fully zipped in, every zipper on the suit should be zipped and every cable should be properly routed. If a zipper is down, you’re in for a rodeo. Your wingsuit closure zippers aren’t the casual affair at the front of your pants, either, my friends. Check: Are the female and male ends mated properly so that each tooth of the zipper alternates? This is checked at the fitting end of the zipper. If that’s not done properly, you risk losing that wing in flight (or potentially shifting the zipper during deployment, which can cause jamming and possible damage). Eminent wingsuit athlete and coach Matt Blank has additional advice. “I have my students zip their arms all the way closed,” he explains, “Then touch their handles and then open both arm zippers. This insures that the clothing they have on under their suit does not inhibit the student from reaching his or her handles--or is a risk for being caught in zippers if they need to rapidly unzip after deployment.” Look at your pressure zippers, too. Are the pressure relief zippers in the appropriate place for the flight, and symmetrical from arm to arm? For beginner flight, we quite often unzip the pressure zippers, which naturally comes at a cost to performance. As we advance in the sport, we may zip them partially closed or closed all the way. In either case, check for symmetry. If one arm is zipped differently than the opposite, the suit will have an asymmetric inflation--causing an unbalanced flight. Image submitted by bruno.ferrazza Zero Dangles Check for dangly anything: cables, webbing, half-stowed pilot chutes, camera bits, etc. As a rule, dangly bits are bad. Oh. and another thing: Never disconnect your RSL for wingsuit jumps. Take it from Richard Webb, one of the discipline’s most experienced and respected athletes (as well as the founder of the science-forward, no-nonsense human flight information source Top Gun BASE). “I've been saved by an RSL when my reserve pillow got sucked into my wingsuit on a spinning malfunction,” Webb explains. “It literally saved my life. I didn't have an AAD at the time. Now, I will never wingsuit without an RSL. Ever. I strongly endorse RSL use for all wingsuit ops. The data is conclusive. Even on spinning malfunctions on tiny cross-braced canopies, RSLs and Skyhooks work remarkably well at getting you under an inflated reserve safely with minimal line twists.” Zero on Your Altitude Indicators Make sure your AAD is on (and reads zero), as well as your other altitude indicators -- and that you can see your visual alti while you’re in flight mode. If you wingsuit with an AAD, you need to know this: most AADs will not fire at even modest wingsuit speeds. That said, they have saved wingsuit pilots who got little-bunny-foo-food on the way down, so don’t let that dissuade you from turning yours on. The Rest of the RecipeA good gear check requires that you know your gear. As a wingsuit pilot, it falls on you to become intimately familiar with the design, operation and function of the suit you’re whizzing around in. If you’re checking your flocking buddy and you’re not familiar with his/her particular equipment, ask. (If your buddy doesn’t seem to know what the hell he/she is wearing, take that as a warning.) Allow your intuition some room to breathe, here. Check for a comfortable range of motion, that the configuration makes sense to you and that you feel good in the suit. You can rest assured that if you don’t feel good in the suit, you’re not going to have a good time. *Sound confusing? Yeah. Well. It is. Wingsuit design varies widely by brand and model--sometimes, with some manufacturers, even within the model. Wingsuits are often built to be configured differently, depending on the jump specs, the container design, pilot preference and--I dunno--current mood. You are likely going to have questions. Ask them of your mentors and the manufacturer of your suit.
 -
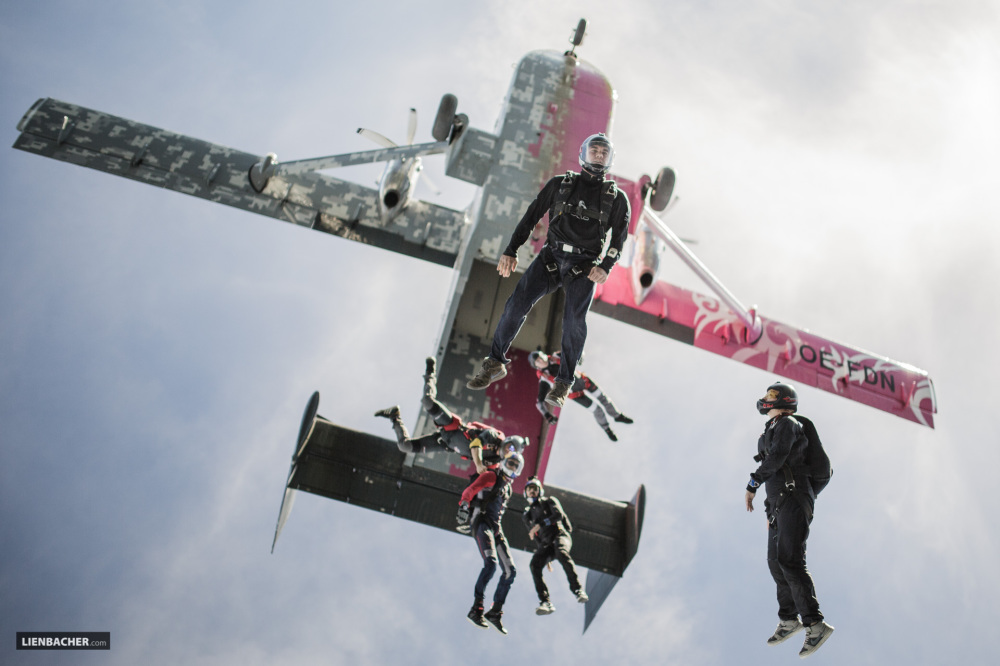 How To Jump Smart When You've Got Asthma Photographer: Wolfgang Lienbacher Ah, the sky: the beautiful bubble of air that surrounds us all in a breezy embrace.But what if your lungs have a troubled relationship with that air? If you’re an asthmatic and getting into skydiving, you’re facing a substantial--but surmountable--challenge. You’ll be happy to hear that you’re not the first to square up to the sky with flimsy airbags. Many asthmatics are successful sport skydivers. In fact, some studies show that exposure to high altitudes can even improve the lung function of people with asthma. (Ha! Take that, haters.) That said, you need to check off a few boxes on your way to the plane. Here’s a quick tipsheet. Get your doc’s signoff.If you want to be a serious sport skydiver, your asthma must be stable and under excellent control. Don’t take your own word for it, either--speak to your doctor about it. Your doctor will need to confirm that your peak flows (or spirometry) should be close to the normal range. This can be quite discretionary stuff, so get a second opinion if necessary. Unfortunately, severe, persistent asthma and skydiving are not a good mix. Know where your meds are.It’s rule number one for you in your landlubber life, and it remains rule number one in the sky: you must know where your meds are at all times. Keep that rescue inhaler readily available--not buried in a bag, floating in with the rest of your gear--and make sure other people know where it is. Making sure it’s in the pocket of jumpsuit is definitely not the worst idea--and keeping a permanent backup in your dropzone kit is a very, very good one. Go easy on yourself.Skydiving is exercise, and it’s exercise in a cold-air environment. The high altitudes we reach on sport skydives can compromise weaker lungs, reducing the oxygen in an asthmatic jumper’s blood to the point of unsafety. These conditions are challenging even for people who fall within the healthy, normal range--so an asthmatic can expect to exert proportionally more effort on each jump. Listen to your body. Don’t push it. Declare your meds.The dropzone needs to know if you’re on medication, so be clear and specific about what your treatments include. Also note that if competitive skydiving is on your horizon, you’ll need to make sure the governing organization is aware of all the prescription medications you’re taking. Anti-doping rules are in place for all competitors, and some asthma medications are on the list. You wouldn’t want to see your team’s faces at a DQ you could have seen coming. Don’t be shy. While you’re talking to your new dropzone about your asthma and declaring your meds, talk to them about the supplemental oxygen on the plane. If you’re on a long hold at altitude, don't be shy about asking for it. Be okay out of the pollen bubble.Is pollen a problem? Be aware that most dropzones around the world are located in agricultural areas. You may actually be physically landing in a cultivated crop field chock-full of pollen. If that sounds like your idea of a very bad time, you may need to get creative about where and when you jump. Make sure your bones aren’t compromised.As asthmatics are probably aware, a regular dose of oral steroids can be very bad for the structural integrity of your skeleton. If that describes you, make sure you’re thoroughly medically assessed for osteoporosis and that your bone density sits within the normal range. Learning to fly a sport skydiving parachute doesn’t automatically mean you’re doomed to crash landings, but they’re far more likely in the early days of your jumping career--and potentially much more injurious for a medicated asthmatic than for others. Brand new? Address your anxiety as early as possible.Anxiety is a very normal part of the early skydiving experience. This is true for everyone. Asthmatics--especially folks for whom emotional spikes can trigger an asthma attack--must deal with this in a much more thoughtful, procedural ways than others. The good news is that you can expect the intensity of anxiety to lessen over the course of your skydiving career; the bad news is that, in the beginning, it’s quite a hurdle to get over. Here’s a hot tip: there are plenty of ways to prepare your body for the experience. The wind tunnel is a great hack. If you take some time to acclimate your body to the feeling of freefall in this controlled environment, you’ll have proportionally less anxiety once you get into the sky. Take a tandem skydive to be introduced to the procedure, the plane, the facility and the sky. Give yourself the time to approach your sport skydiving career sideways, not overwhelmingly all-at-once, and your lungs will be that much happier in the sky. After all, it’s the sky we fill our lungs with; it’s time yours were properly introduced.
 -
@Pat007 -- if you're in a tree, you're usually in a spiderweb mess and pretty hopelessly tangled. xx
-
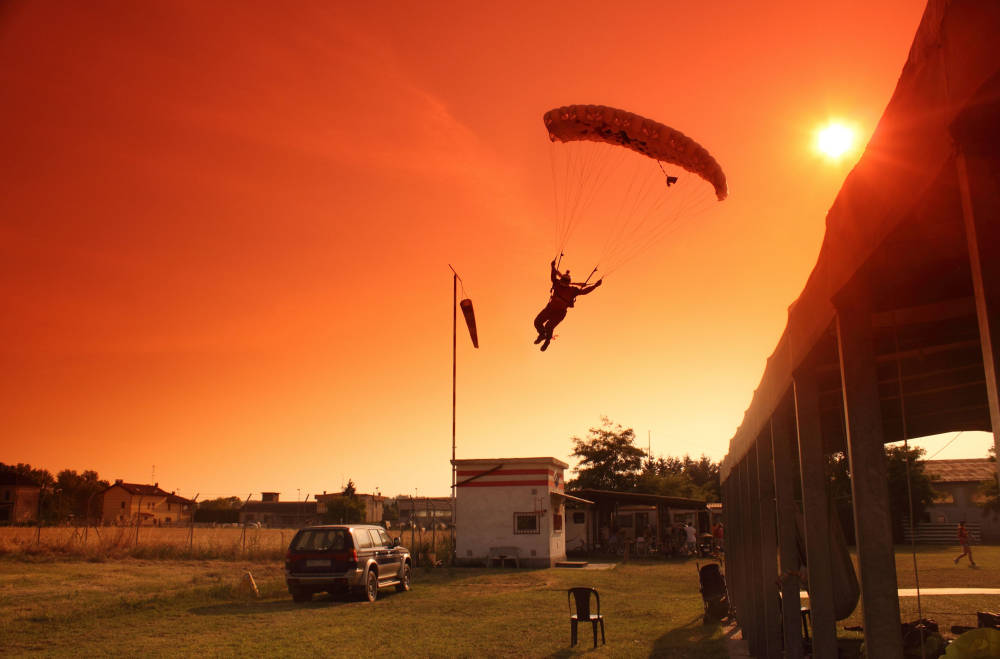 Damage Control for Unwilling Christmas Ornaments Image by Corrado MarianiChristmas ornaments are lovely, aren’t they? Glossy, colorful baubles, swinging gaily from the bushy branches of a fragrant fir, make our little hearts sing along with the season they decorate. They are not, however, excellent role models for air sports athletes. If you ever end up gracing some branches with your majesty, the United States Parachute Association would first like you to take your enforced treetop time to think very carefully about how you got there. According to the SIM, “properly preparing for the canopy flight by observing the winds,” “planning an appropriate landing pattern” and “choosing the correct exit and opening points” will generally keep you out of the foliage. In short: you messed up, kid. ...But let’s move on. If you discover that you’re on an imminent collision course with a tree, you need to know your 8-step damage control plan. Here’s what to do. 1. Make sure you’re flying into the wind.Do not downwind a tree landing. You may not have a sock to steer by, but – hey, lucky you! – you have at least one tree for reference. Watch the movement of its branches to determine the wind direction. 2. Fly in half-brakes.Your aim is to slow down your canopy as much as possible for the impact. Fly your final approach in half brakes, taking care not to stall your canopy in the process. 3. Go for the middle.Your aim is to impact at the central trunk of the tree. If you miss the middle of the tree, you run the risk of clipping the tree with a line or a cell, collapsing your canopy and dumping you on the ground in a yowling pile. 4. Keep your $#!* together.As you do in a properly executed parachute landing fall (“PLF”), hug your body towards the midline, as though you were inside a mummy-style sleeping bag. Keep your legs springy at the knee, but hug them snugly towards the midline. Continue to fly your canopy until you contact the tree. Just before impact, draw your forearms together so that your elbows sit at the stomach and your hands over the face. This position protects your belly, ribs and chest from being lanced by branches. 5. Keep your hands to yourself.Resist the urge to grab limbs to stop your fall, as this will only leave vast areas of your body unprotected from veritable armies of sharp branches that are about to mobilize for the attack. 6. Assume a hard landing.More often than not, a parachutist who lands in a tree does not stay in the tree. Usually, the jumper falls right through, snapping branches and leaving shredded bits of canopy all the way down. Keep that PLF position as best you can, in order to make the landing as soft as possible when the tree finally sees fit to deposit you at its feet. 7. Get comfortable.Have you actually managed to stay in the tree? Oh, great. Stay there. A great many injuries occur not during a jumper’s actual tree landing, but from the jumper’s failed attempt to detach themselves from their mangled equipment and climb down. In general, if you’re more than a meter or so over the ground and you have any hope of rescue, wait for that rescue to arrive. If you’re phoneless, radioless, jumping-buddyless, out of public earshot and generally hooped for help, you’d better hope you have a hook knife handy. You'll use the hook knife to -- gulp -- disentangle yourself from the spiderweb of lines you're likely encased in. This is necessary to prevent you from accidentally throttling yourself, and from sustaining a serious rope-burn injury if a branch cracks and sends those knifelike lines through your tender outer layers. You'll probably cry a little bit with every line you cut. Ain't no shame in it. 8. Be grateful.Even if you shred your pricey gear, rejoice if you walk away from a tree landing uninjured. Gear can be replaced -- and you lucked out, you lucky duck. See the bright side.
 -
@NickyCal -- Thanks!
-
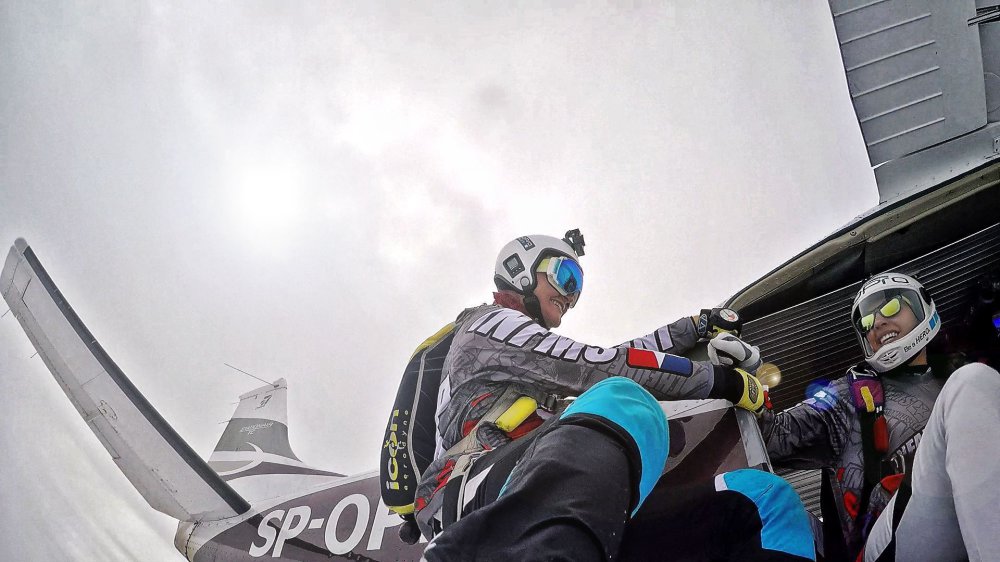 You Gotta Do It Right, Every Time Lead image by skydivegirlplIn the Frankenstein world of skydiving aircraft--where the original innards have been ripped out and kinda-sorta replaced here and there with lighter components--we’ve had to rethink this whole “seatbelts” thing with an eye to minimalism and ease of use. (For contrast, check out the amount of webbing with which aerobatic pilots festoon themselves.) In almost every case, skydiving has had to invent new procedures to maximize the utility of restraints while lacking the backing support of a seat. Hear this, dear readers: These “new procedures” vary in effectiveness. Very few skydivers are properly educated. The details matter. Belts for BenchwarmersAre you sitting in a comfy, capacious aircraft with side benches? Lucky you! You can enjoy the proven-safest restraint configurations available to modern skydiving. Hooray! The reason that lap belts should only be used by side-facing skydivers is that they are maximally effective when there is a solid support surface behind the occupant: a seat back, an aircraft sidewall or a bulkhead. (A particularly burly swooper doesn’t count.) Already bored and sure you know how this lap belt thing goes? Hold up. Did you know that you should be routing your lap belt between your main lift web and body when you’re sitting on a side bench?** “Whoa,” you say. “This means that the restraint belt does not simply go over the top of my glorious lap, as I am used to.” You, dear reader, are correct in that observation. Routing the male end of the lap belt between your belly and main lift web as it’s on its way to the latch on the other side is the way to go. It’s proven to make you less likely to slide out of it in the slippery, bucket-seatless context of a jump plane. Restraints For Floor FolksIf you’re on the floor, this is your huckleberry: A single Hooker belt, wrapped around a single hip, close to the ring. These aren’t as good as the big-plane lap belts, because single-side belts have a disconcerting tendency to impose massive, twisting, sideways loads on a jumper's spine. There’s also a huge flail arc for the head, which can result in significantly reduced thinking for the rest of the jumper’s natural life. That said: if it comes down to it, at least your meat stays put, inside the plane, and you don't end up suffocating your buddies at the front of the cabin. “What fresh hell,” you are probably wondering, “Is a Hooker belt?” Calm down--you’ve totally seen one. A Hooker belt is what we call single-point skydiver restraints. They’re ‘Hooker belts’ because they were invented by Jack Hooker. (If you recall, we mentioned him earlier in this series; he’s the fellow who developed restraints in response to the multiple-fatality crash in Hinckley, Illinois that claimed many of his friends.) To see how it’s done, take a little journey with me back to nineteen-ninety-something, when the FAA last took photos for its Sport Parachuting Advisory Circular. Play some Ace of Base and put your hair up in a side ponytail so the photos aren’t so jarring, then take a look. 1. Sit close to the attachment point, facing the back of the plane. 2. Pass the male end of the restraint under the upper part of the leg strap closest to the attachment point. 3. Pass it under the main lift web*. 4. Latch it close to the hip ring. 5. Aim to sit so you have a 45-degree angle between the point the restraint attaches to you and where it attaches to the floor. 6. Tighten until there is little slack. The more slack you have, the further you will travel before impacting something in the cabin in a no-bueno manner. A short leash also minimizes twisting and flail arc. Once you’ve got those methods down, it’s not over. There are a few more points to keep in mind, besides: Restraints don’t work if you can slide out. Ask the jumper who was ejected out the left door during a forced landing in Oklahoma. She was sitting with her back to the pilot and the belt only over her lap. Routing it through the harness would have kept her inside the plane, which is an excellent place to be when the plane is bouncing and crunching all over the ground. Beware the leg-strap-only method. In a tiny plane? Tempted to just tug a belt through your leg strap and fuhgettaboutit? Think twice. Crash tests have proven that single point, single tether restraints are not very effective. The direction you’re facing is actually important. Research has shown that, in order for the restraints to work properly, parachutists must face the tail (“aft”). Never ever ever share a restraint with another skydiver. Everyone on the aircraft needs to be secured individually. Yes, this is just as true for tandems. Tandem students should never be restrained by just clipping to the tandem instructor. If the tandem instructor is incapacitated during a crash, the student cannot unhook. This has killed at least one tandem student in Australia (by drowning). Don’t double up. You must have a single point of detachment to begin egress*** in an emergency. Panicky flailing, fear, fire and smoky visual impairment can all play into the ability to get out. Two attachment latches is one too many to work out in that kind of environment, as has been proven over and over again. Curb your camera. In the event of an impact, make no mistake--your flimsy little G3 is a projectile weapon, as is every loose bit and/or bob that’s rattling around your person. The length of a Twin Otter is plenty of space for them to reach ramming speed. Don’t let them get the opportunity. Leave your chest strap the hell out of this. Chest buckles are only rated for 500 pounds, while most other harness buckles are rated for five times that. If it does hold, it’ll flail you around like a demented cowboy misusing a lasso. Been in a cra...uh, forced landing? Get your gear checked out. Even though it’s a key part of how we protect ourselves from aircraft oopsies, a parachute harness was developed for deceleration from freefall, not partnering up with a restraint belt. Most manufacturers have not tested their harness configurations to see how they weather the jangling, multi-directional abuse of a forced landing. If you’ve been in a plane that’s gone down unexpectedly, send your rig to a rigger to check its airworthiness. The “tight cabin” theory simply ain’t true. Tightly packed loads do no better than their emptier counterparts during forced landings. The only thing that will protect you is a restraint system, not being shoved in like a sardine. You’re not buckling up for yourself. If you take one thing away from all this talk of restraints, remember this: When you do up that belt, it’s not for you. It’s for everybody you might crush if that plane smashes in. It’s for everybody you might fall on from the apex of your surprised-face zero-g levitation to the cabin roof. It’s for the pilot, who needs to be able to count on a certain balance of weight when shit is actively hitting the fan. And it’s for your friends--so they don’t have to stand around a bonfire in tears, wondering how to prevent it all from happening again. * The main lift web is the vertical part of the front of the harness--the webbing that your cutaway and reserve handles live in.
 -
With all respect, @Fanello1775 -- these articles are written for the purposes of learning, and they're written with love for people who have just started jumping as well as very experienced jumpers. It's my aim to create an atmosphere where very new folks can feel on board, invited and accepted, not told to $%&# off because they don't know enough.
-
Thanks, @PaulDoolittle! I had no idea how much I wasn't taught. And this subject is, like, *important*! xx
-
You've been an enormous help, @riggerrob! So many thanks for your contributions, support and wisdom! :) x
-
I'd just like to say that @diverdriver is my f'in hero, and that every skydiver should pop over to diverdriver.com and have a look. You're gonna be like WHOA I DID NOT KNOW THAT, and you're going to be glad you do now.
-
 You Probably Aren’t Aware of All These Oopsies Screengrab of the 12th May 2016 Lodi incidentSeatbelts help. You probably get the picture by now. But do you know just how many lives they’ve saved in the past couple of years alone? Oh, man. Loads. At time of publication, USPA dropzones use seatbelts. Even the legendarily non-USPA maverick dropzone at Lodi had seat-belt use essentially imposed on it--which resulted in all souls walking away from that dropzone’s 2016 Cessna Caravan forced landing in a vineyard. The pilot suffered a bloody nose. (He was not wearing a shoulder belt--nor his emergency bailout rig. Tsk tsk.) They were shaken, but okay--and they haven’t been the only ones. Over the last couple of years, forced landings all over the world have seen most of the jumpers survive, in great part because of that friendly webbing. On December 4, 2014, A Cessna 205 out of Sussex, New Jersey suffered a total loss of engine power during its initial climb. The in-cabin video shows the forced landing going smoothly until the nose wheel dug into a muddy field and flipping the plane onto its back. All five seatbelted souls on board survived with minor injuries. Also in December of 2014, a Cessna 182 in Beromunster, Switzerland lost power shortly after take-off. The aircraft broke its nosewheel in a field, but all five occupants--seatbelts fastened--made it out with bumps and bruises. On May 10 of 2015, an Antonov out of Azov, Russia experienced high engine temperatures that forced an immediate landing. While the crash was severe enough that a post-landing fire destroyed the fuselage, all 13 (seat-belted) occupants got out in time, and survived with minor injuries. On June 29 of 2015, a Cessna 182D out of Oak Harbour, Washington lost engine power. It struck a tree during the forced landing, which was short of the runway. The impact split the fuselage in two at the instrument panel. Unsurprisingly, the pilot was seriously injured (but survived). One passenger was injured after being ejected from the open fuselage. On July 12 of 2015, a Cessna took off from Barnegat County, New Jersey. The crankshaft failed shortly after take-off, forcing a landing right on the highway. The traffic camera shows the plane landing on the right lanes and rolling onto the grass median towards the end. The pilot and all four passengers survived with hardly a scratch on them, thanks to their seatbelts. On July 7 of 2015, a Cessna Caravan lost engine power shortly after taking off from the desert dropzone in Dubai. The forced landing into the sand dunes started a fire that consumed the airframe, but everyone--including the pilot--was able to unfasten their seatbelts and get out before it burned up. In August of 2015, a Turbo Finist carrying a pilot and ten skydivers crashed shortly after taking off from Casale Monferrato, Italy. The impact of the landing bent the wings, broke the main undercarriage legs and smashed the engine compartment. Everybody wore seatbelts. Everybody walked away. In October 2015, a Yak-12 carrying three skydivers force-landed in Poland, hard enough to break the main undercarriage. The video starts with a glance at their fastened seat-belts and ends with them running away from the wreckage. Later that October, one of Dubai’s Twin Otters crashed on landing. Only a pilot was onboard. He survived, despite major damage to the airframe, thanks to his handy webbing. On April 28, 2016, an antique biplane lost power and force-landed near Osage in the American midwest. The pilot plus two skydivers put the airplane at gross weight, and both skydivers stood on the lower wing, grasping the front cockpit edge. This created more drag than usual for what was originally a two-seater trainer with only 220 horsepower. The plane never climbed very high and force-landing in a field, hard enough to break both main undercarriage legs. The "safety straps," as sketchy and unofficial as they must have been, kept those skydivers onboard during what must have been one hell of a clenchy forced landing. (For comparison: a couple of years earlier, another skydiver was incapacitated by carbon monoxide--because he had been holding on right behind the exhaust--and fell from the lower wing of a PT-17 biplane at an altitude too low to open a parachute. If that jumper had had a safety strap, they’d be alive today. Thanks to rockstar Sebastian Alvarez’s video, most of us are familiar with the May 12, 2016 crash of a Cessna 208 Caravan at Lodi. Engine failure shortly after takeoff forced a landing. During the roll-out, the plane struck a truck and rolled into a ditch, inverting at low speed. When the airplane ground to a halt, the entire load was hanging from the ceiling. All 17 skydivers exited uninjured. The last frame of the video shows the pilot washing blood off his nose--which shoulder belts would have prevented. On July 3, 2016, a Cessna 206 out of Gilchrist, Texas had to land when an engine broke a connector rod shortly after take-off. The pilot landed upright on Crystal Beach. There were zero injuries. On August 3, 2016, a Cessna TU206 lost power 1,000 feet after its takeoff from Skiatook, Oklahoma (which, coincidentally, sees more than its share of aviation mishaps) and had to come down in a grassy field. The impact buckled the airframe in a major way, but everyone was belted. All seven occupants survived with minor injuries. Quite recently to this publication--In September of 2016, in fact--a plane out of DC Skydiving had to land right after takeoff. All 11 skydivers and the pilot wore seatbelts, and all walked away uninjured. The plane didn’t fare so well.The thing about seatbelts, of course, is that they don’t work if you don’t use them--or if you use them wrong. In the next installment, we’ll talk about how to use a seatbelt on a skydiving plane, ‘cause there are some sketchy little myths floating around.
 -
Not a detraction at all, @andym148. Great pilots deserve our utmost love and respect.
-
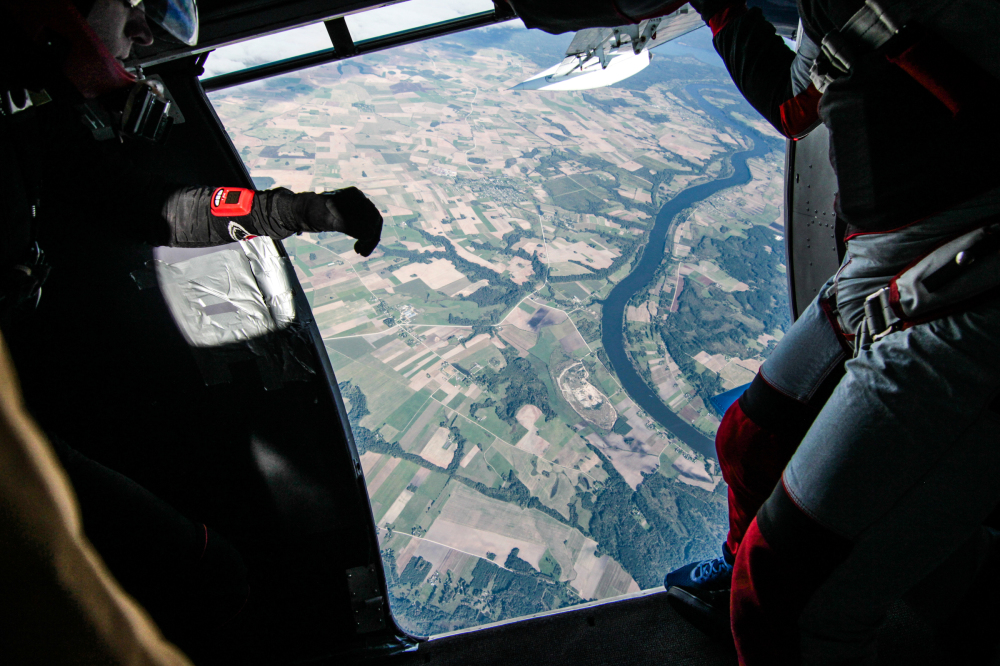 A Seatbelt’s Job Goes Beyond The Crash Think your seatbelt only helps you when the metal hits the dirt? Nope. The magic of seatbelts goes far beyond the prevention of injuries and fatalities during actual impacts. Seatbelts also help the plane fly better and move more safely during maneuvers, sometimes preventing that impact from even occurring. The first way seatbelts do this is by helping to moderate the weight and balance of the aircraft. Limiting the numbers of jumpers on board to the number of seatbelts limits the risk of overloading the plane, which we all know is a bad scene (slower acceleration, sloth-like climb, stall danger due to higher stall speed, and the like). It also keeps the wiggly weight of the passengers pinned in place, helping the pilot maintain control. Take an example. One day, a Cessna 205 aircraft ran out of fuel just after takeoff from Celina, Ohio. (Everyone on board--the pilot and five parachutists--perished in the incident, so witness reports and NTSB investigation reports are all we have to explain what happened.) DiverDriver.com explains that, of the witnesses that reported hearing the airplane during climbout, each “described smooth engine noise, brief ‘sputtering,’ and then a total loss of engine power. The airplane descended straight ahead at the same pitch attitude, then the nose dropped, a parachutist exited, and the airplane entered a spiraling descent.” That first jumper left from the student position--as the door was under the wing and not in the rear like the Cessna U206. His exit abruptly shifted the weight aft, rendering the aircraft uncontrollable. Two more jumpers attempted to exit. The all three jumpers who exited the aircraft were unable to deploy parachutes. Everyone left in the aircraft perished in the violent resulting crash. Another sacred duty of the seat belt: to help the pilot maintain precious, tenuous drabs of control during violent maneuvers in the lower end of the altitude spectrum. Belts hold skydivers in place during the top-gun shit that pilots have to pull sometimes in order to avoid mid-air-collisions, stopping meat from rattling around the cabin and coming down unbalanced. Note: As skydivers. we’re at pretty serious risk for these, because this kind of incident is statistically most likely to happen in the crowded, lackadaisically-controlled airspace around the small airports we tend to frequent. When two planes go head-to-head, pilots are taught to pull power and dive to the right--which slams un-belted jumpers right up into the ceiling. The landing is a mystery, but if too many of them land too far aft, the airplane will be unbalanced, stall and spin. Whee. Ugh. “Sure,” you say, “But that shit hardly ever happens.” Au contraire. In the next installment, we’ll take a look at the long list of recent incidents you haven’t even heard about--and meditate on the totally-coulda-been-you aspect of the thing.
 -
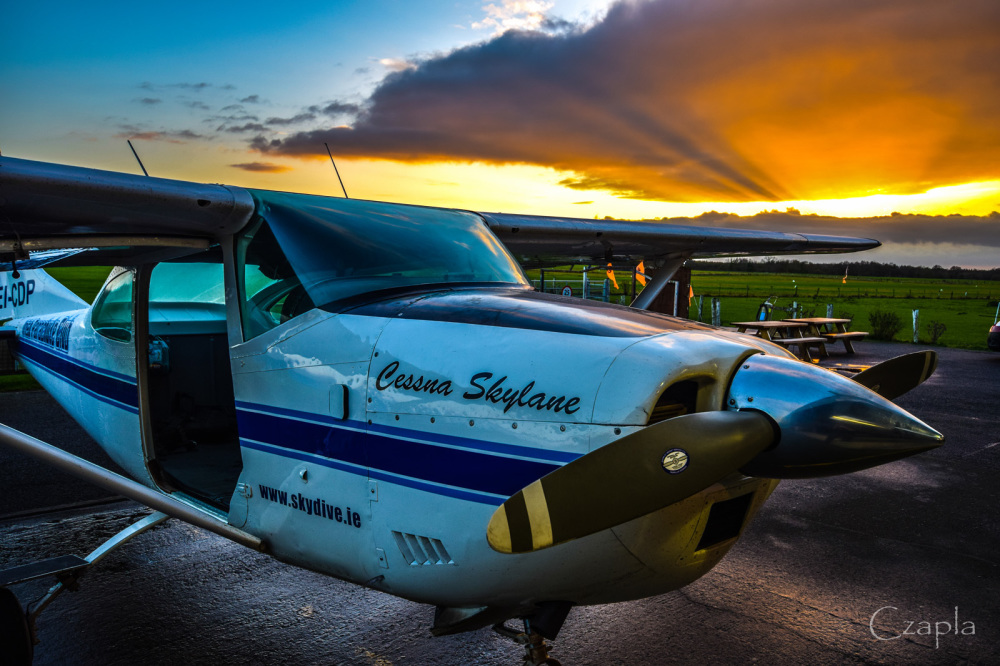 The History Lesson You Never Got Image by Lukasz SzymanskiIf you look at the National Transportation Safety Board (NTSB) reports, DiverDriver.com, our own Dropzone.com and the world’s newspaper reports, you’ll notice something interesting: the last couple of years were bad for forced landings, but good for survivors. Since December 2014, the total has been 18 forced landings, involving more than 100 occupants--but only one fatal crash (the May 2016 tragedy in Hawaii, the circumstances of which were too violent for safety restraints to have helped). Every incident is, of course, multifactorial, but there’s a simple reason that more skydivers haven’t been grievously injured or killed in these crashes: correctly installed, correctly used seatbelts. In an incident that involves a loss of power after takeoff and forces a landing, it’s seatbelts that save the jumpers’ (and pilots’) hides. It hasn’t always been this way. Seatbelts for skydivers used to be just as casual as seatbelts for motorists used to be, in the good-old-bad-old days. In the late 1970s, very few jump planes had seat belts. Single-Cessna DZs flew third-hand airplanes that were gutted to reduce weight, while large "destination" DZs flew World War 2 surplus DC-3s and Beech 18s. These war-surplus airplanes had been through so many different owners, and gutted so many times, that the original seat belts were an ancient memory. A few rare jumpers counted themselves lucky if they had a frayed cargo strap to hold onto. A Change in PolicyThen a series of bloody accidents in the early 1990s forced the FAA to enforce its preexisting FARs requiring seatbelts for everyone in the sky. These FARS require all skydivers to be seated and belted in for taxi, take-off and landing (as and when that eventuates). It’s easy to forget why this maybe-sometimes-silly-seeming rule was set down, but there’s lots of scar tissue to back it up. Our POPS mamas and papas learned the hard way, so we don’t have to. The first tragedy in this particular series struck at Perris in April of 1992. Contaminated fuel caused a Twin Otter--containing two pilots and twenty jumpers--to lose power at 200 feet over the runway. The engine failed, and the pilot feathered the wrong prop, causing a total loss of thrust. When it came back down, the aircraft over-ran the runway into a drainage ditch. The airplane slammed to an abrupt halt. The fuselage collapsed all the way back to the bulkhead at the rear of the cockpit, killing both pilots instantly and sliding the unbelted skydivers to the front of the cabin, crushing or asphyxiating each other in the process. Six skydivers were taken to the hospital with serious injuries. Sixteen died. (For a detailed account, read survivor Dan Brodsky-Chenfeld's book, "Above all Else." Make sure you have Kleenex available when you do.) The second pivotal crash occurred Labour Day 1992, in Hinckley, Illinois. That day, a Beech 18, full of holiday tandems, lost an engine shortly after take-off. They never climbed high enough to bail out. The pilot prepared to force-land in a farmer's field, but got too slow when he reduced power on the good engine. The Beech stalled, flipped and dumped the unbelted jumpers on their heads. Everyone on board was killed. At one of the many, many Hinckley ash dives, Jack Hooker brought a keg of beer and told the gathered mourners that he had been working on a solution. He had installed prototype seatbelts in the Cessna 182 that hauled jumpers during slow days at Hinckley. He sewed custom seatbelts for aerobatic, glider and warbird pilots. It’s a good thing he was on it. Over the winter of 1992/1993, the Federal Aviation Adminisration laid down the law for the USPA: either make seatbelts fashionable, or suffer industry-crushing regulatory consequences. From there, the USPA did a commendable job of popularizing seatbelts among skydivers. During the first AFFI course of January 1993, candidates were told to belt themselves in before taxi or they’d fail the evaluation dive. At the time, it was revolutionary, but the policy was vindicated a few months later--in the spring of 1993--when another Twin Beech crashed near Xenia, Ohio and everyone onboard survived. Soon, seatbelts became the new norm almost everywhere. No Guarantees“Almost everywhere,” unfortunately, hasn’t been able to save everybody. In July of 2006, a Twin Otter crashed in Missouri. There were some seatbelts involved, but they were incorrectly installed and incorrectly used. Unrestrained skydivers slammed into belted skydivers at high speeds. All but two skydivers were killed; the two survivors were critically injured. One of those survivors, an American Airlines pilot, was paralyzed in the accident, therefore losing his career. He took his own life. On August 3, 2008, a Lodi, California-based King Air had a forced landing near Pitt Meadows, Canada. Because the plane had been fitted with just enough seatbelts to satisfy the FAA, but versions that were too short to wrap around the jumpers’ waists. As a result, only the pilot wore a lap-belt--and he was the least injured, because he had a proper seat and seatback. In the hard landing, all seven skydivers slammed forward in the cabin. Nobody died, but everyone on the load suffered grievously, and the jumper on the bottom of the pile ended up with a life-changing list of brain injuries. These days, seatbelts are de rigueur on non-sketchball dropzones around the world--and that’s a relief, because their importance goes well beyond their stopping power in the event of an actual-factual crash. In the next installment, we’ll talk about how seatbelts affect everything from general flight efficiency to wild evasive swerving.
 -
 At Work With Kenyon Salo and Team Thunderstorm Kenyon Salo stays pretty busy. When I talk to him, he’s been -- well -- kinda slammed. “I’ve been doing a lot of skydiving, a little bit of BASE jumping, lots of wingsuiting, building the brand of The Bucket List Life, a dynamic lifestyle design community, doing a lot of keynotes, running a bunch of seminars and trainings...” He pauses for a moment. “And I’m leaving for Cozumel in half an hour to go scuba diving for a week. I should probably pack.” Kenyon’s also a professional exhibition skydiver. He’s an athlete on not one, but two skydiving demonstration teams. He’s on the Mile-Hi Demonstration Team (the home team for his dropzone, Mile-Hi Skydiving), which does high-profile demo jumps all over the state. He’s also on the official Denver Broncos parachute team: “Team Thunderstorm.” Thunderstorm is unique in the world: no other team in the NFL has their own team of professional parachutists. The team jumps into every single home game. That would be impressive in and of itself, of course -- but there’s more. The Broncos stadium is as unique as the team that jumps into it. It’s one of the steepest, tightest sports stadiums in the United States. Oh -- and the entire stadium is criss-crossed with metal cables during the high profile games (which is more often than not, since the Denver Broncos are Super Bowl Champions). “As far as exhibition jumping is concerned, the Bronco’s stadium -- or “Sports Authority Field,” as it’s known officially -- is the diamond. There is a not a harder stadium that’s being jumped right now,” Kenyon explains. “A lot of the older stadiums are really splayed out, where the Bronco’s stadium is really upright. And then there are the cables, of course. This is the most technical demo jump in skydiving.” To do what Kenyon and his team do on game day, you have to have quite a resume: you have to be a competition-level swooper, you have to be able to speak eloquently to the media, and you have to land a tiny parachute in wicked conditions. Perfectly. Every. Single. Time. That is, to say the least, a difficult job position to fill. Understandably, Team Thunderstorm is small. It has six members, no more, no less: Jimmy Tranter, Stuart Schoenfeld, Justin Thornton, Kenyon Salo and Allison Reay. The number never changes. If one of the jumpers is unavailable on the day of the jump, that jumper is not subbed out. “The six of us know each other’s flying with great precision,” Kenyon explains, “And we can predict each other, every time. That safety is worth its weight in gold.” The Air Force used to get into that stadium with 250- or 260-square-foot canopies, navigating the stadium’s unusual topography by sinking their big canopies perilously in and executing a low turn before setting them down. It worked. But then the stadium installed more cables and the pre-game show wanted a higher-speed exhibition. Team Thunderstorm had to envision a better way -- and they did. “We decided to jump 97-to-120-square-foot Spectres,” Kenyon says. “The reason we jump those is because we have to dive the parachute across the crowd while still keeping a mandated 50-foot distance above them. We do hook turns into the stadium, down the stands, carving right. We pop a toggle at something like 150 feet, then carve across the field, then land.” “Basically, it’s like parallel parking a Ferrari at 60 miles an hour,” he laughs. “And 99% of the time, we stop between the 20 yard line and the end zone.” The first time Kenyon made the jump he describes as a moment of “terrifying confidence.” He knew he could do it -- after all, he’d made dozens of successful jumps into the empty stadium before he got the green light to join the team on game day. “Prior to being accepted as a team member,” Kenyon says, “I’d take advantage of any practice day I could get. I did a lot of practice when there were no actual games on the field. But I was also practicing at the dropzone. I would fly that canopy as much as I could -- work hard on the turn -- and work with Jimmy Tranter, a phenomenal canopy coach for brand new jumpers as well as for Team Thunderstorm, who gave the final okay to DZO and Team Thunderstorm Organizer Frank Casaras, for me to join the team on game days. Jimmy has got 25,000 jumps. When he speaks, everybody listens.” That constant practice is vital for a jump like this. Even without the dizzyingly steep sides and cable obstacles at the Broncos stadium, stadium jumps are so legendary that they have their own classification in the taxonomy of exhibition jumping. (The classifications are, in order of difficulty: Level 1, Level 2, Level 3 -- and “Stadium.”) This is true because of the super-challenging conditions a stadium creates. The rim of a stadium creates puckering turbulence as the wind hits it from the outside, spilling rough air down into the bowl. These conditions are not for the faint-of-heart. “When we come over that rim,” Kenyon says, “We have to be prepared for anything and everything. You can easily have 12 mile-an-hour wind at the rim and no wind on the field, so that means within 300 feet of difference in altitude you have got a huge difference in wind speed. And it’s often in different directions.” “Our small canopies help with that,” he continues, “Because, as we dive through the stadium, speed equals lift -- and the fluid dynamics also make the canopy rigid for smooth flying and landings. In the Bronco’s stadium, time runs in milliseconds. From the point you come over the rim -- and by that time, you are going very quickly down the field -- you are flying through and underneath a netting of metal cables. “There’s a single place you can enter,” Kenyon explains. “As soon as you do, you’re moving across the field very quickly, and you’re avoiding those cables. All the cables for the field goal cameras sit at 150 feet. The skycam cables come from the top corners and extend down diagonally; there’s around 350 feet of cable there, stretching down to a point the ground from two directions.” He gives a sideways grin. “It’s very challenging, yet every team member is absolutely prepared mentally and professionally for this demonstration.” Challenging, yes. Injurious -- not so far. At time of publication, Team Thunderstorm boasted a 100% safety record. Every team jumper has landed on the field on every single jump, with no close calls. “We have strict parameters that we must follow that are set forth by the USPA (United States Parachute Association) for how demos of this level and caliber must be handled,” Kenyon continues, “Sometimes we have to call it because the cloud ceiling is too low or the winds are beyond our limits. It’s those moments that make this team professional because we always err on the side of caution to make sure safety is paramount.” “Something Jimmy Trantor taught us, which I hold in the highest regard, is that we must constantly update our mental map on these jumps,” Kenyon articulates. “It’s a running inner monologue that focuses your awareness. ‘I made the turn; ‘the winds have changed;’ ‘I’m going down the crowd now;’ ‘I’m getting a little crosswind over here;’ ‘I’m a little bit over the sideline, I’m bringing it back over the center;’ ‘the field is a little wet;’ update, update, update. We spend the entire jump updating our mental patterns and adjusting. Immediately.” It’s a zen exercise to keep a high-quality inner monologue going in a stadium situation -- sometimes at night, with pyro; sometimes in wild conditions; always, with the throbbing energy of a massive, excited crowd. “There’s nothing like jumping out of the plane at 5,000 feet and already hearing the crowd beneath you,” Kenyon exudes. “The crowd sees us exit and just erupts. They are screaming and yelling, and you’re suddenly filled with the knowledge that you’re doing it for them -- the fans that have supported you for seven seasons running; for the camaraderie of the team around you; for the guys playing great football.” And for the love of skydiving, of course.
 -
How To Avoid Line Burn (Because Raw Canopies Work Better)
nettenette commented on nettenette's article in Gear
Thanks, @riggerrob! :D Yeesh...puckery stuff. -
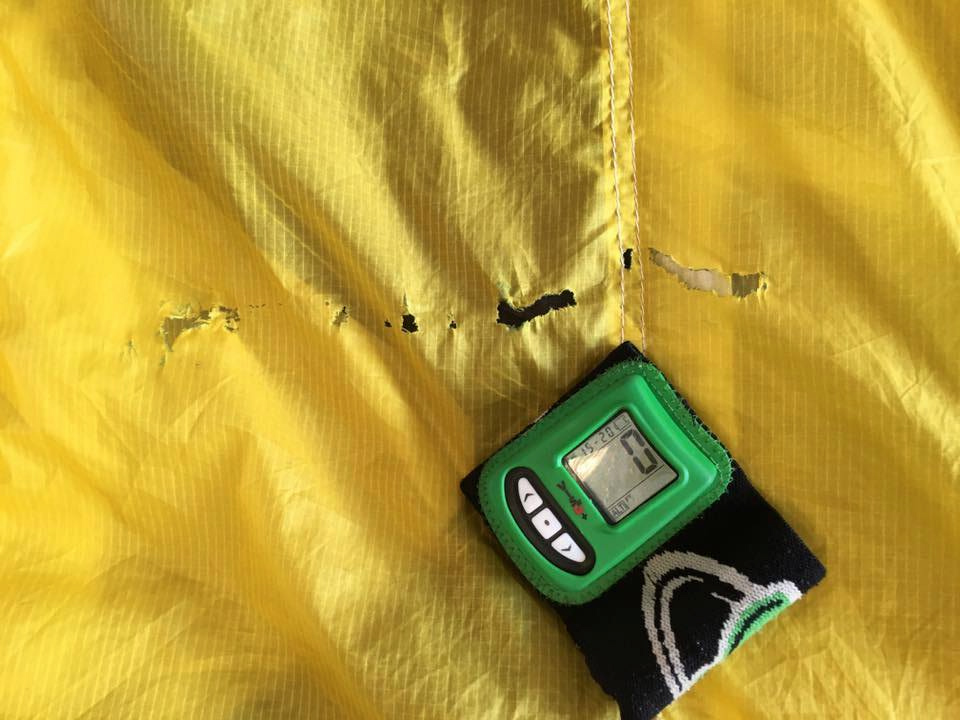 Image by Keith CreedyC’mon...just how much damage can one little line really do? Actually--lots. When a suspension line gets out-of-place and slides across neighboring nylon, another line, or another skydiver (in a collision scenario), the damage can be catastrophic. The lines connecting your mortal coil to your nylon conveyance are, after all, thin strands of extremely strong material – and, in deployment and flight, they move very, very fast. Line burn is, as you have no doubt extrapolated by now, caused by the generation of heat by friction. The amount of heat a fast-moving line generates is enough to literally melt the canopy – and, under certain circumstances, the line itself. Here are the questions you’ve gotta answer in order to avoid cooking your precious canopy. 1. How melt-resistant are your lines?Both F-111 and ZP nylon melt at 417 degrees Fahrenheit. That’s a lower melting point than almost all the common suspension line materials (Dacron®, Vectran® and HMA), which melt when exposed to heat levels of 482-932 degrees. There is, however, one exception: Spectra®. Spectra®, that tender little princess, melts at just 297 degrees. Even if they literally melt a hole in the canopy, all lines but Spectra® will likely survive the incident unscathed. If you have Spectra® lines, however, check them carefully if you discover line burn on your canopy – they are likely sufficiently damaged to require replacement. 2. Is that crease really a crease?Most modern sport canopies used to be made of F-111 nylon. These days, for lots of reasons--from performance to fading mitigation--they’re generally constructed of ZP (zero-porosity) fabric. The behavior of these two materials under stress varies widely. When an F-111 canopy suffers line burn, the damage tends to be localized – often, sufficiently contained to be landable. ZP fabric is not so forgiving: high-speed line burns tend to cause major structural disintegrity. In addition to that, burn damage to ZP fabric can be difficult to identify, often appearing as a simple crease in the fabric – though testing to that crease finds it to have been massively reduced in tensile strength. (For this reason, Performance Designs doesn’t use zero-P fabric in their reserve canopies.) 3. Are you packing for a smacking?According to the United States Parachute Association, incorrect packing is the most common source of line burn. The other cause, of course, is canopy collision – but that is a subject for another article entirely. To reduce your risk: Don’t throw your canopy in the bag. Take a moment to mindfully arrange the lines towards the center of the pack job, making sure that rogue lines aren’t nestled deep in the fabric where they could cause burn. Mind your slider. Keep the slider flush against the slider stops and tucked between the line groups. Not only will this help to mitigate opening shock, it will help to manage the lines as the canopy deploys and keep them from unnecessary intimacy from the neighboring fabric. Clear your stabilizers. The stabilizers (the “ears” of fabric that come down slightly on each lateral side of the canopy) have a tendency to tuck themselves in towards the lines when you’re pro-packing. Make sure they’re clear. 4. Have you already been burned? Look for melting and discoloration. Line-burn damage looks very different than puncture damage (or any other clean cut or rip). Check your lines. If you notice burn damage on your canopy, it means that the nylon most certainly came into contact with your lines. To check lines for burn damage, use your hands more than your eyes. While seared lines often show signs of melting at the burn point, the easiest way to determine damage is by feel: an undamaged line will feel smooth if you pinch it and slide your fingers down, while burned (or otherwise damaged) lines will feel bumpy and rough. Get help. If you notice evidence of line burn – or what you suspect to be line burn – on your canopy or lines, take the damage to your rigger for inspection as soon as possible. Don’t freak out! In many cases, the damage can be repaired simply and economically, with replacement suspension lines and patching. Don’t be a dick. If you notice any damage on a rental (or student) rig, don’t hesitate to point it out to your coach or the rental office, whether or not you believe the damage happened “on your watch.” You’d want the same treatment--and you don’t want to be burning your fellow skydivers. Right?