

nettenette
-
Content
27 -
Joined
-
Last visited
-
Feedback
0%
Everything posted by nettenette
-
Parachutes to Paragliders: How Skydivers Can Keep It Up Without Crashing Out
nettenette commented on nettenette's article in General
I got started at the Point of the Mountain, @codyjcarroll, just south of Salt Lake City. :) x -
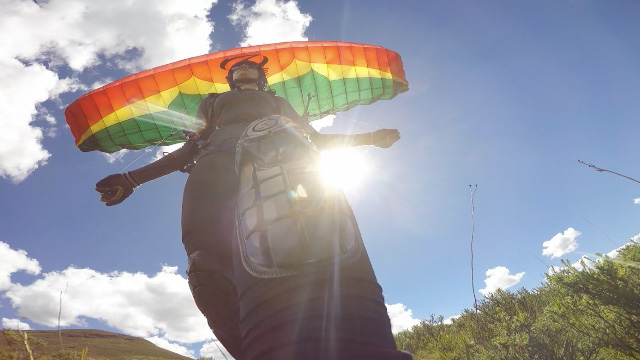 The author launches her Ozone Firefly into the Lesotho skyParagliding (and its zippier cousin, speedflying) owes much to skydiving. From the early footage of a group of 1970s skydivers ground launching their parachutes off of small hills to the early ram-air skydiving canopies used for quick descents by French mountaineers, the sports have had innumerable points of crossover. The sports only truly split in the later 1980s, when engineers started to redesign the ram-air canopy to stay in the sky like its triangular free-flying cousin, the hang glider. The modern paraglider (and speedwing, for that matter) is, indeed, similar in some points of design to a steerable skydiving canopy. That surface similarity leads a lot of athletes to throw themselves bodily into the mission of crossing over--often, by buying a secondhand wing and hauling it up a hill for some trial-and-error training. I can’t even start to tell you what a bad idea that is. To the untrained eye, a wing may look similar to a skydiving canopy. The differences, however, are plentiful. They are important. Ignore them at your peril, dear reader. Any skydiver looking to kick off a career under a paraglider or a speedwing must be crystal-clear on one concept: the two airfoils have very different flight characteristics, which require completely different pilot technique in order to fly well and safely. Here’s how. 1. Know this: This nylon, she is a stranger to you.First, let’s get one thing out of the way: paragliders and speedwings are not parachutes. They are foot-launched airfoils, only packed into a bag for storage and transport, then laid carefully out on the ground at the launch and coaxed into the airflow by a strapped-in pilot. Among other things, neither paragliders nor speedwings have drogues, sliders or containers. The wing attaches to the system with carabiners. They have thinner, more complicated risers. They have many, many more cells than their parachute cousins. Make no mistake: these are different beasts almost everywhere you look, once you’re really looking. Most importantly: Unlike a parachute, a paraglider never has to deploy. Therefore, designers are able to focus on building much higher-performance flight characteristics into the wing than a skydiving canopy can deliver. 2. Check your ego.Do not make the mistake of thinking that, since you’re a skydiver, you’ll be able to pick up a paraglider and teach yourself to fly. You can not, meat muppet. It is vital to seek out proper instruction. As a student paraglider pilot, you won’t throw yourself into the air right away. Instead, you can expect to spend plenty of time on the ground, ground handling (“kiting”) and launching a beginner wing in various conditions. You’ll also be learning how to manage an airfoil that is very large (and very opinionated) compared to the wee little scrap of nylon that saves your life when you jump from a plane. Example: This author knows one very famous, legendarily talented BASE jumper and world-champion skydiver who has suffered exactly one bad injury in his airsports career. The mechanism of injury was a self-taught paragliding kiting session gone terribly awry. Guaranteed, this was a guy who had way more of a right to insist that he was going to be fine than you do. Ow. As a student learning under a licensed PG/speedflying instructor, you’ll learn the procedures for managing these dynamic changes in flight characteristics. Often, the appropriate response is entirely different to the actions you’d take as a skydiver. You are going to need these hot tips as you progress. 3. Shake your bad habits.If you ask a PG/speedflying instructor what it’s like to teach the sport to an experienced skydiver, they’ll tell you that such students tend to have a few bad habits: Immediately running for take-off instead of kiting the wing (which is one of the best ways to gauge the conditions and “warm up” for the flight) Over-reliance on the brakes as opposed to weight-shift, leading to dangerously “toggle-happy” behavior Poor handling of collapses and stalls, which results in painful forehead-slapping injuries on the part of the instructor Little patience for the important work of learning aerodynamics and meteorology Reduced caution regarding flying conditions and personal limitationsIf you see yourself exhibiting these traits, chickity-check yourself posthaste. Don’t be a “typical skydiver” on the hill and give the “real” pilots more reason to refer to themselves as “real” pilots. 4. Become an amateur meteorologist.If you’re an experienced skydiver, you’re undoubtedly used to knowing exactly two things about the weather: if it’s too windy to jump, or if it’s too cloudy to jump. Once you take up paragliding and speedflying, get ready to add, like, hundreds of layers of complexity. Launching, landing and flying a paraglider or a speedwing isn’t the end of the game. The heart of paragliding is lots of time spent in a very active sky, so students of the sport must learn a lot about both macro- and micro-meteorology. You must learn about the effect of terrain – literally, from mountains to molehills – on wind patterns, about the different types of clouds, about atmospheric stability, about daily weather cycles and about thousands of other subtleties of the sky you play in. 5. Get used to “parawaiting.”On the launch, there will be no announcement from manifest telling you to get your gear on. You and you alone will make the call as to whether or not it’s safe and appropriate to fly. Especially if you branch out into the solo-launch-intensive hike-and-fly side of the sport, your individual skill, judgement and discipline will rule the day. In many cases, your judgement will tell you to sit down and wait – sometimes, hours – for conditions to improve. In other cases, you’ll have to bin flying for the day. Hike-and-fly pilots may have a long, grumpy hike back to the car. Parawaiting is part of the sport. Accept it. Sure, it’s not skydiving – but that’s why you want to branch out, no? Done intelligently, cross-disciplinary training will only make you a better, stronger, smarter extreme athlete. Rise to the challenge.
 -
 No-Punches-Pulled Advice From A Long-Time Suit Dealer Image by Joel StricklandYou might think twice--or three times, or never--about dropping many hundreds of dollars on a dapper tuxedo. A skydiving suit, however? Shut up and take my money, dear manufacturer. Just make sure it’s in my colors and that the sponsor logos are right. When you’re slinging that kind of cash around, the last thing you want is for the object of your ardent longing to show up too loose, too tight, too short, or too long--and, due to a bafflingly high instance of improper measuring on the part of the buyer, that happens all the time. Take it from Joel Strickland, double British gold medalist (in both freestyle and freefly) and dealer for the venerable Vertical Suits. He’s been wrapping innocent skydivers in measuring tape for some years now, and he has excellent advice for the un- (or under-) initiated. 1. Relax.“Measuring is not as difficult as people think it is,” Strickland soothes, “So, if you follow a few simple rules, it is pretty straightforward.” In other words: don’t get too nervous about this. 2. Get someone to help. “While it’s technically possible to measure yourself,” Strickland explains, “It is not recommended. There will be some touching. Try not to make it weird.” 3. Make it a dress rehearsal.Strickland advises everyone who comes to him for a fitting to wear what he/she would normally wear under a suit: base layers, thermals, underpants, jeans, whatever’s usually under there. You’ll want that suit to fit comfortably over your usual undergirdings, not strain over a pair of baggy, beloved chinos you didn’t wear to the fitting. 4. Follow the video. “It is difficult to get it wrong if you use the talking pictures,” Strickland says. “We live in the future. Few people are ever more than ten feet from a device that will let you do this. No excuses.” He’s referring specifically to the Vertical Suits fitting video, of course, but similar helping hands are available from other suit manufacturers. 5. Measure twice, cut once. “Always measure twice,” Strickland insists. “Maybe switch hands or stand on the other side and do it the other way around. Perhaps switch the limb being measured. See that the numbers match up.” 6. Don’t tweak. “Suit design has grown into a very precise process using science and maths and brains,” Strickland says. “The manufacturers ask for a lot of measurements for a reason, and the best results come from sticking to the plan. If you mess with them, it can throw out the form of the suit and compromise its awesomeness.” 7. Let the company know about your special needs.If you do require a specific area to be looser--for example, if you wear a brace--reach out to the manufacturer for advice instead of altering your measurements to suit what you think the suit requires. They’ve almost certainly seen your issue before and can give you the best advice. 8. Don’t fudge the numbers.Your measurements now are what counts. “If you want your suit to fit,” Strickland sighs, “Do not adjust anything based the diet you just started or the gym membership you just bought.” 9. Be gentle. “When wielding the tape measure,” he continues, “You should be aiming for tickle, not strangle.” 10. Come as you are. When being measured, stand naturally. “Don’t puff out your chest or suck in your stomach or clench your buttocks or whatever,” Strickland explains. Your suit will feel better, fly better and look better if it fits you as you really are, right now. 11. Look to the experts, if you really want to nail it.The best way to get all of this stuff done is to seek out one of your chosen suit’s stable of official dealers. “In and around all the places where skydiving is popular,” Strickland advises, “There are people who work closely with the company as boots on the ground to help.” These dealers have the benefit of many years of combined experience, as well as a direct line to the manufacturer for questions. They’ve generally tried and tested many different jumpsuits through the years, and can offer horse’s-mouth feedback on any issues or questions you might have. Sniff around at boogies or events--not just under the loudly-logo’d tents, but in the crowds, as well. “They will go on and on,” Strickland assures. “You will wish they would shut up about it after a while.”
 -
@BigL, what's the fun in that? :D Ha! You're so right; I was totally assuming that folks would be observing a repack when they do this dance, 'cause of the need for a rigger, so I didn't even say nothin' 'bout that. Good catch and well-played. ;)
-
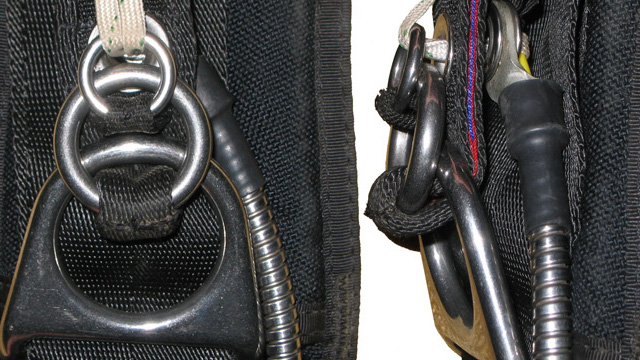 Three-ring systems look pretty tough. They’re made of thick, heavy metal, after all – what could possibly go wrong? Bad news: lots. The rings are husky little guys, that’s true. However, they depend on the webbing behind them–and the cutaway cables that fasten them in the ready position–in order for them to work. It behooves you to know when and how to maintain the system. How Sloppily Maintained 3-Ring Systems Can Cause a Bad DayNylon webbing, the material used to make skydiving (and BASE, for that matter) risers, stiffens over time to conform to the position in which it’s usually stored. Sometimes, they “set” so firmly in that position that the risers can’t flex the backing nylon–and can’t detach from the harness when the jumper engages the cutaway system, especially during a low-drag malfunction (such as a streamer). This, of course, is a very bad thing. The B-SidesYou’ve probably gotten used to looking at the little snowmen of your three-rings during your preflight gear checks. Great! How often do you look behind them? The loop that connects the cutaway cable to the three-ring system can get dangerously abraded over time. You should peek at it every time you pack. The Deep TracksTo keep your three-rings in proper working order, the three-rings need to be manually disassembled, the cables checked and the webbing treated to a little massage. For skydivers, this is the stuff of riggers. According to Federal Aviation Regulation Part 65-111, skydivers “must be under the supervision of a rigger when performing any maintenance on a parachute system.” Don’t let your rigger have all the fun, though. Having a hand in the process has the significant benefit of familiarizing you with the operation of the system and increasing your confidence that it’ll be there when you need it. The best advice is to go through these steps every three months, whether or not you’ve been jumping the rig. Check your user’s manual for specific instructions. You can always find this on the manufacturer’s website. Pull the cutaway handle. Set the cutaway and connected cables on a clean surface. (Do not pull the reserve handle – unless you need a repack, of course.) Inspect the Velcro on the cutaway handle and the seating on the harness. You may need to use a stuff brush to “fluff” the Velcro and clean off any adherence-preventing dirt, especially if you jump at a dusty drop zone. Check the ends of each cutaway cable to be sure they haven’t developed any kinks or rough edges. Run a microfiber cloth over each cable. While you do, check for smoothness. Disassemble the risers. Carefully check each riser for signs of wear. Look especially carefully at the white loop that “locks” the cutaway cable to the three-ring system. (You should be checking this loop each time you pack the rig, but this process gives you a better, closer look.) Twist and flex the webbing of each riser near the ring system. You can safely be vigorous. You’ll likely feel the problem-causing stiffness as you do this. Reassemble the system. Refer to your user’s manual to ensure you’ve done it correctly. Before your next jump, have an experienced jumper or a rigger confirm that the system is correctly reassembled. Enjoy a little more gear confidence, dear reader. You’ve earned it.
 -
 Meet the Forces of Nature That Turn Your Loads Originally published 2014. Postscript follows. Dan McNulty - Skydive the WasatchWhen I call, it’s 7:00 p.m. for me. It’s 6:30 a.m. in Afghanistan, where Dan McNulty is talking to me (presumably, with a big mug of coffee in-hand). Dan’s about to become the proud owner of a brand-new drop zone in Nephi, Utah – a quiet little one-horse town about an hour south of Salt Lake City along highway 15. The airfield is sized just-right for the easy-going, mom-and-pop affair Dan envisons: four tidy hangers, a well-maintained runway and acres of green grass for soft landings. Mt. Nebo, the highest point in the entire Wasatch and the snow capped centerpiece of the southern range, rises to a majestic 11,928 feet just alongside. Dan closes on his hangar next week. He’s stoked. He’s never actually seen the airfield, but that doesn’t bother him a bit. He’s already named it, even: Skydive the Wasatch, naturally. The season starts the second week in April. He gets home from Afghanistan March 26th. In just weeks, then, he’ll be adding a three-letter acronym to his name that only a few hundred other humans can claim: “DZO” – Drop zone Owner. Skydive the Wasatch didn’t happen overnight. Dan’s been working on this for almost two years – almost entirely remotely, patching it all together with emails and phone calls. Seeing little growth on the horizon of his current job as a security contractor in Afghanistan and being very familiar with the skydiving industry, he decided that opening a drop zone was, in his words, a “natural progression.” After an abortive attempt to set up shop on an airfield in the Heber Valley, which ended up effectively denying skydiving access with a combination of prohibitive policies and price-outs, Dan discovered the pretty little airfield in the placidly agrarian town of Nephi. “It turns out that Nephi is perfect,” Dan says. “It has everything we need. It’s close to Salt Lake City and Provo. And the city is really excited for skydiving to come to town, which is really rare and really important.” When the papers were signed, Skydive the Wasatch was effectively born (though it won’t be open for business until springtime). Dan McNaultyTo run a skydiving operation, you need a plane. Working from Afghanistan, Dan sourced an aircraft from Skydive New Mexico, a DZ with – uniquely – the same altitude as Nephi, 5,000 feet ASL. He knows, then, that this particular souped-up Cessna 182 can do the same trick for him as it did for them: climb 11,500 feet in a crisp 20 minutes. The pilot is a Moab expat with a few hundred hours flying skydivers at Skydive Canyon lands, another high-altitude drop zone. “We’re starting streamlined,” Dan says. “The basics. We’ll build as we grow. And we do intend to grow.” John Hamilton - Skydive ElsinoreJohn Hamilton, the owner and General Manager of Skydive Elsinore, knows all about growth. Though Skydive Elsinore has been an operating drop zone since 1959, the landscape of the sport has changed almost unrecognizable since he bought Skydive Elsinore with business partner Karl Gulledge. Since then, “Elsi” has burgeoned from its previous status as a small-but-historic airfield to one of the largest, highest-grossing drop zones in the world. To date, Skydive Elsinore hasn’t just hucked hundreds of thousands of skydivers over the rolling landscape aside the soaring Ortega mountain range. It has been a key partner to the advancement of parachuting technology and aerospace at large, hosting scientific studies for JPL, Pioneer Aerospace, Airborne Systems, Vertigo Inc., JSAF, Cirrus Aircraft Recovery Systems and a great many of the world’s elite air force parachuting groups. “When I first became a DZO, big surprises were a daily occurrence,” John remembers. “I guess in the beginning I can look back and say that ignorance was a form of bliss.” He laughs. “I don’t know if I ever would have taken on the challenges that awaited me if I really knew what I was getting into.” Part of John’s blissful ignorance was that he was about to become an unwilling expert in the formation of companies, legal issues, governmental regulations, employment challenges, marketing, accounting, customer service, budgeting, banking regulations, web development, social marketing, online community-building, search engine optimization and a long list of other non-skydiving-related subjects. He also had a crash course in effective communication, which he hails as the most valuable weapon in his DZO arsenal. “At the beginning, I felt like I was eating an elephant, one small nibble at a time,” he says, his smile wry. John’s relationship with skydiving has evolved from a “pure passion for the sport” to a round-the-clock focus on the business. He admits to sometimes losing sight of that original passion – he was a BASE jumper and a competitive 4-way skydiver, after all – in the thick tangle of ownership responsibilities. As he relates them, he peeks out toward the sky, a grin suddenly playing at the corners of his mouth. “You have to keep the balance. When I get lost in all this, the plane is right outside my office. I can always make a sunset load. It does the trick.” John HamiltonWhile skydiving remained relatively predictable in its equipment and disciplines for many years at the beginning of John’s tenure, the pace has picked up significantly. “In today’s skydiving industry, challenges arrive almost overnight,” he asserts, “And they change just as fast.” Modern DZOs must constantly adapt to the logistical, safety and economic challenges posed by the sport’s ever-changing pantheon of disciplines. “With the advent of horizontal flight – wingsuiting, tracking, angle flying, etcetera – we have had the challenge of integrating a whole list of new safety policies, while at the same time working with the governmental agencies who govern our sport.” “The feedback from our jumpers varies widely,” he continues, “and much of it makes me think that the vast proportion of jumpers don’t understand the hard work we must do in order for them to enjoy these new methods and technologies. It’s about so much more than the sum of its parts, and jumper cooperation is key, but I am ultimately responsible for the safety conducted on the drop zone.” John refuses to create an atmosphere that influences younger jumpers to push their own abilities too far. He’s known for his tireless encouragement of Elsinore’s instructional staff – and experienced jumpers, too – to lead by example, even as the community undergoes exponential growth. “I understand the thrill for newer skydivers to want to push the limits of disciplines in the sport. Trust me, I do. But it’s important for those jumpers to understand that keeping a safe culture lets us all continue to skydive.” Elsinore’s track record, for the number of jumps made here, is stellar. However, it’s a numbers game – and it doesn’t always work. “The biggest headaches of my job are, almost without exception, those that stem around the many legal risks and challenges associated with running a skydiving center – the intersection of personal responsibility and DZ responsibility, for the most part.” John pauses. “For example: a student will turn themselves into the ground, then will doggedly challenge the waiver and try to find blame in everyone else, without taking any responsibility for their own actions.” “It’s challenging, yeah. It can be a Herculean undertaking.” He pauses. “However – I get to see people’s faces after they land from that first tandem skydive. I get to know that I was part of that life-changing event for every one of them. It brings a huge smile to my face, every time. I get to help the next generation of skydivers grow as athletes and as people. It is absolutely worth it.” In passing, I tell John about Dan McNulty and his new drop zone in Nephi. John leans in. “Here’s what I’ve learned from my experience: Find a good lawyer. Then find a good accountant,” he says. “Also: It may seem unnecessary – counterproductive, even – but do things by the book in all cases. You may think you’re saving money, or even making money, by doing one or two things in the proverbial grey area. You’re not. Trust me.” He continues. “Learn to accept the rule of thirds: one-third of the people you deal with will like you, another third will tolerate you – and the last third won’t like you one bit. That doesn’t matter.” He takes a level breath. “When you’re dealing with a difficult situation, forget about public opinion and ask yourself the following before you communicate a response: am I doing this because it’s the right thing to do, or because I want to prove myself right? The answer is almost always obvious.” Lelo Mraz & Claudia Blank - Skydive TaftIt’s unsurprising that John inspired others to follow a similar path: specifically, two good-looking Brazilian kids with megawatt smiles. Lelo Mraz and Claudia Blank have been beloved members of the Southern California skydiving world for a couple of decades. Recently, they joined business partner Michael Choi to become the proud new owners of their own facility: Skydive Taft. Lelo and Claudia arrived in Redondo Beach in the early 2000s from different small towns in their shared native country, and promptly fell in love. Lelo had started jumping seriously in Brazil back in 1995; he’d logged hundreds of hours in the Perris sky and tunnel by the time the two showed up to Elsinore as a pair. Claudia, on the other hand, hadn’t made so much as a tandem. Suddenly, in 2008, she decided offhand to do a jump. Naturally, Lelo ran outside video. By 2009, Claudia was an inveterate skydiver and, like Lelo, had a full-time job at the Skydive Elsinore DZ. The pair loved their jobs. They loved the Elsi community. They loved the skydiving. But they’re also clever, enthusiastic folks who love a challenge, and Lelo knew they couldn’t stay there forever. “I came up with the drop zone idea a couple of years ago,” Lelo remembers. “I’ve always known that I wanted my own business, and I know skydiving really well, so I was kicking around business plans, trying to come up with numbers that would be workable.” “I first looked into wind tunnels, but the investment is around ten million dollars. When I started to investigate drop zones, the money part started to make sense.” He started talking to mentors: not just John Hammond, Karl and Laurent “Lob” Lobjoit from Elsinore, but Rich Greene from Oceanside, as well as other pros who had walked the mine-strewn path before him. Lelo Mraz & Claudia BlankIt took time, of course. “I spent a lot of time looking into airfields around California – we love California, and definitely didn’t want to leave. Nothing seemed to work, though. Then one day I was joking with my partner, Michael Choi, that maybe we should go check out Taft – even though it’s in the middle of nowhere – and that day, I saw an ad that it was for sale. It seemed like it was meant to be.” From there, things moved quickly. There were signatures on the paperwork by last October, and the new crew took over the DZ on November first. The Taft airfield is surprisingly big for its slightly out-of-the-way location. It has several hangars, a paved runway, two parking lots, a huge landing area and plenty of room for an active community of jumpers to settle in. So far, the pair is strategically running a small plane and slowly, thoughtfully rolling out a master plan for the DZ to be a regional center for training, rigging, courses and ratings. It’s no easy task for young entrepreneurs – especially, for longtime members of the skydiving community – to take over a dropzone that’s been operating for as many years as Skydive Taft. Over the facility’s 24-year history, it had accrued a small-but-very-loyal following of fun jumpers who hadn’t seen much in the way of change before Lelo and Claudia appeared smilingly in the office. Ever. “Most people like us, and we try hard to be fair, but we had to implement some policies that we felt to be extremely important from a safety standpoint,” Claudia explains. “A lot of the people who have been at Taft for so many years feel like it's their drop zone – like they own it. We don’t want to lose them, but some people get angry if we even move a couch.” She continues, “We decided to make changes little by little, taking a more careful approach than we thought we’d have to take.” Claudia gives a wry smile. “So far, so good. But it isn’t easy.” Leaving the tight community at Elsinore, too, was a struggle – and remains so, as the move is still fresh. “I can honestly say that I had no complaints at all about our ‘old life’ in Elsinore,” Claudia muses. “It was so hard to completely walk away from what was already a dream job. I made money on the weekends and jumped for fun on the weekdays at one of the most beautiful DZs in the world. I loved it, and I loved my coworkers.” “I was in denial until we finally had the paperwork,” she continues, “I knew that as soon as I made it official and quit, there was no turning back, even though they made sure to tell us that the door would always be open. This process – it changes something inside of you.” The Elsinore team threw Lelo and Claudia a huge, very-well-attended farewell party, popping up with little surprises all day long, paying for as many jumps as the couple wanted to do and dedicating one of the drop zone’s signature paving tiles to them as a memento of their long service. There were tears. It’s hard to spend time in nostalgia, however, when you have so much on your plate. For example, the first big boogie for the new drop zone is just around the corner: the Cal City Reunion, on March 22nd. Taft is sporting a bigger plane for the event and getting ready to welcome its biggest-ever crowds. “For now, we're really new. We have a lot to learn. We have been going with the flow, but being very strategic with funding. We're not going into debt; we're working with savings. It was a leap of faith, but now – even though it’s winter – business is picking up, and money is coming in, so we feel OK.” Meanwhile, in Afghanistan, Dan McNulty is working on the final details of the Skydive the Wasatch process. The tandem rigs are already bought and inspected, Today’s checklist includes arranging for delivery of the plane and closing on the hangar. “This has been a very creative process, so far,” Dan notes. “When I set out to do this, I was sure about one thing – that I'd never work for anyone else, ever again. It means that I am 100 percent responsible, for better or for worse. But it means that everything I do means something. John Hammond seconds the sentiment. “Just when I think I’ve seen it all,” he laughs, “I am quickly reminded that I haven’t. Each and every day I run this dropzone brings new people, new challenges and new surprises.” There is, clearly, an art to DZOing. ----------- Postscript: In the seasons since this article’s first publication, both Skydive the Wasatch and Taft have, predictably, thrived. Claudia and Lelo are hosting the full-on Liquid Sky Free fall Fest in August. Dan McNulty has even picked up another drop zone: Piedmont Skydiving, in North Carolina. Go jump with these guys and give ‘em a high-five!
 -
 Image by Lukasz SzymanskiPaul Iglin has been brokering used skydiving gear for more than a decade. He’s seen it all. He has definitely seen your kind before, and wants you to know a few things about the buying process, so you don’t make the same mistakes he’s seen over – and over – and over. I asked him what people need to know about buying used skydiving gear when they begin the process, and he had plenty of sage advice to share. Here’s what he has to say about it. 1. Curb your enthusiasm.“Your job as a buyer is to get the right gear at the right time and at the right point in your skydiving career. It’s not as easy as it sounds. Every once in a while I have had people contact me who have not actually started skydiving yet. It is very rare, but it happens. They are clueless – and they are dangerous to themselves from a financial standpoint, because they have no idea what they’re buying. I tell them to go to somebody else; I won’t sell them gear. Before you start shopping for gear, you need to know what you are shopping for. So, if you don’t: Stop right there. Good shape, good brand, good used gear at the right price: Make no mistake; that’s hard to find. In skydiving gear, the supply-and-demand curve is really messed up. There’s very little supply and very high demand. It’s also seasonal. Come March and April, everybody rushes to find gear, and then demand stays strong all the way through end of the season around September. Try to shop outside that time frame if you can.” 2. Don’t trust your friends.“Man, people get their advice from some terrible sources. A lot of the time, they’ll just go to their friends. But when you’re a new jumper, most likely your friends are also newer jumpers who basically don’t know jack****. Their understanding is very, very narrow; they have blinders on. Like: they bought themselves a brand-new Infinity rig with a brand-new Optimum with a brand-new Sabre 2, and it works for them, so that’s what they tell their friends to get. Now, it doesn’t necessarily mean that the gear they’re recommending is the worst. It just means that these people don’t have a statistically relevant sample, so their opinion doesn’t really count for anything. And they always tell whoever’s asking that ‘this is the best,’ as opposed to making the correct statement: ‘This is the one I have, and it works well for me.’” 3. Do your homework.“All of this ties into the fact that people often just don’t do proper research. How do you do proper research? Well, whenever people ask me this question, I tell them this: Look at the gear as tier A, B and C as far as manufacturers, quality and pricing. I’m going to go ahead and throw some manufacturers’ names out there. You have your tier-A manufacturers: your Vectors; your Javelins; your Mirages; your Infinities. All those guys have been around for a long time. There are no questions about quality. They are very reputable. All the options are available. Then you have your tier-Bs: Icons, Wings, Perigees, whatever Dolphin became and a whole lot of other brands that are either obscure or very localized to another continent or a particular country. Avoid the latter if you’re a new jumper, because you don’t know what the **** you’re doing. You may have somebody try to sell you another brand that’s technically TSO’d, but you’re really going to suffer when you try to resell. You’ll have a hard time finding replacement parts if you are outside of the country of manufacture – and you’re going to get killed on shipping, and support is going to be pretty crappy. Be aware. Your can ask any rigger what the tier-C manufacturer is. They’ll tell you.” 4. Make peace with your pants size.“One of the biggest mistakes I see people make is being a over-optimistic about their weight. It happens a lot, because it’s usually people who are just slightly overweight that make the biggest mistakes. For example: a 5’10”, 180-pound person says, ‘I am going to be exiting at 210 pounds, so I should get a 210, But I’m going to work out and lose weight, so I’m going to go with a 190.’ I immediately tell them not to shop for the future. You shop for right now. If you need a 210 based on your current body weight, for chrissakes get a 210. Because in my experience -- and this is 15 years of skydiving speaking -- it is very unlikely that you will actually get to that goal weight. Sorry. It is possible, sure, but nobody has ever gotten hurt because their canopy was bigger rather than smaller. Don’t be stupid about it.” 5. Then add to that number. More than you think.“The other problem that I see a lot of people early on in their careers -- and a lot of times even as they become experienced skydivers with a couple of hundred jumps -- is that people don’t account for exit weight. People add a couple of pounds and call it a day, and that’s completely wrong. You step out of the shower, and that’s your body weight. Then you put on your clothes. You put on your boots. You put on your rig. You put on your helmet and whatever suit you wear and your cameras and whatever else you’re jumping with. Then you step on the scale, and that’s your exit weight. You know all that already. Even knowing that, a lot of people don’t bother with the scale and egregiously underestimate what their rig weighs. A lot of people estimate 15 pounds for gear. Seriously?! What the **** are you talking about? You are going to put on 10 pounds just of clothing and boots alone. Then a canopy weighs about eight pounds. Your container weighs 8-12 pounds, depending on the amount of hardware. Your reserve? About six pounds. Your AAD, even, weighs six ounces. Your jumpsuit is going to add another couple of pounds. None of that stuff is magically weightless. Add 30 pounds for your gear. Maybe more. Don’t underestimate! You’re only hurting yourself.” 6. Consult the chart.“The loading chart that I share with my customers – Brian Germain’s chart -- is the easiest one that I think is out there. I’m not necessarily saying it is the best one; I just think it’s the easiest to grasp. What he says is this: If you have 100 jumps or less, you should load one-to-one or less. For every 100 jumps, increase your wing loading by .1. That means that if you have 300 jumps, there is no reason you shouldn’t be jumping the 1.3 wing loading. Of course, you have caveats. People who jump at high-altitude dropzones and people who jump in very windy areas will need to choose different gear than people who jump at sea level, and so on and so forth. If you live in Colorado, you should probably jump a bigger canopy, because the air is thinner. If you jump where it’s really, really windy, you may get away with a slightly smaller canopy because you really do need the speed. Also, keep your head.“If you get a 170, you weigh 210 pounds and you’re 50 jumps into the sport, you are not doing anybody any favors. You may survive. You may not. But I certainly won’t be the person selling you a 170-square-foot canopy.” In general, please: Don’t go into it blind. Ask very experienced people for advice. And if you come to me as a buyer, expect me to tell it like it is. Because I will.”
 -
6 Ways to Be Less Dumb When You Buy Used Skydiving Gear
nettenette commented on nettenette's article in Gear
Ain't my list, Peek. It's Paul's. 😂 Thanks for your note! -
Turbulence Is Trying To Hide From You - Here’s Where to Look
nettenette commented on nettenette's article in General
@RStanley0312 -- You are so right. xx http://thud.us/images/rc/DSAIR.jpg XO -
Turbulence Is Trying To Hide From You - Here’s Where to Look
nettenette posted an article in General
 Image by Brian BucklandRemember hide-and-go-seek? Well: you’re probably better at it than turbulence. So why are so many skydivers still caught off-guard? The answer is probably--predictably--complacency. After all, skydivers aren’t as vigilant about rough air as, say, paragliding pilots. That said: the devil’s invisible rodeo remains a serious hazard for every single person in the air, whether or not their ram-air is meant to get them down instead of up. Most of the time, you’re gonna be lucky. You’ll meet turbulence under a skydiving canopy high enough above the ground that you’ll just rumble around for a little bit before cruising into smoother air. Sometimes, though, your luck will run out. When those bumps happen in close proximity to the ground, turbulence tells a very different (and sometimes quite painful) story. Don’t despair--you can use your grownup-level hide-and-go-seek skills to stay in one piece. Let’s start with the key takeaway: Like the dumbest kid on the playground, turbulence near the ground tends to stick to a few predictable hiding places. They’re gonna hide downwind of solid objects. This includes trees, buildings and anything else that’s tall, sticking out of the ground and wider than a flagpole. They’re gonna hide above differential ground features. You can expect different surfaces--such as the lawn of the landing area and the asphalt next to the hangar--to reflect heat differently. You will feel that difference as, y’know, bumps. Also notable: when the sun heats two dissimilar surfaces to different temperatures, dust devils have the conditions they need to form. These “baby tornadoes” are standbys of desert dropzones, and they can form from uneven heating even when the winds are otherwise calm. They’re gonna hide behind spinning props. Remember shielding your pretty little face from the prop blast as you hopped on the plane? Well, that wind doesn’t go away just because you’re now landing. Keep your parachute (and everything else you care about) well away from the spinning propellers of airplanes chugging away on the ground. In fact, keep as clear of any propellor as you can, whether it’s spinning or not, always. They’re gonna hide behind other parachutes. Parachutes chum up the air (especially behind them) just as much as any other airfoil would. Don’t be surprised when you’re thrown around when you tuck into an ill-advised CReW move--or chase somebody too closely in your landing pattern.Not so bad? Okay. Stop smiling so smugly, though: there are a few factors that make the situation way, way worse. If you bumble into the bumps thrown by these suckers, you’re going to have a bad time. Stronger wind. If the wind is pretty much zero on the ground, you can generally get away with landing closer to a turbulence-throwing obstacle than you would if the wind were hauling (or even moderate). If you see movement in the wind indicators, do yourself a favor and keep clear. Bigger obstacles. The wind will pretty deftly wrap around a narrow tree. A hangar, however, is another story. Tall walls, outbuildings, silos -- they’ll all be bubbling, toiling and troubling on the lee side when the wind is pushing. According to the USPA: “You can expect to feel the effects of turbulence at a distance as far as 10 to 20 times the height of the obstacle that the wind is blowing across.” Do the math: wind blowing across 50-foot-tall trees can cause turbulence 500 to 1,000 feet downwind. Yikes.One of the first diagrams you’re forced to stare at when you get your initial paragliding license (and every skydiver should, by the way) is one that describes rotor. Since paragliders are basically riding the wind that’s coming off of very, very big obstacles, those rotor diagrams are a good macro view of the turbulence that pours into any wind shadow. As an object gets bigger, those diagrams pretty handily describe the way wind tucks around and churns into the empty space on the other side of it. Are you ready to play? Thought so. Now count down from 13,500 and find turbulence before it finds you.
 -
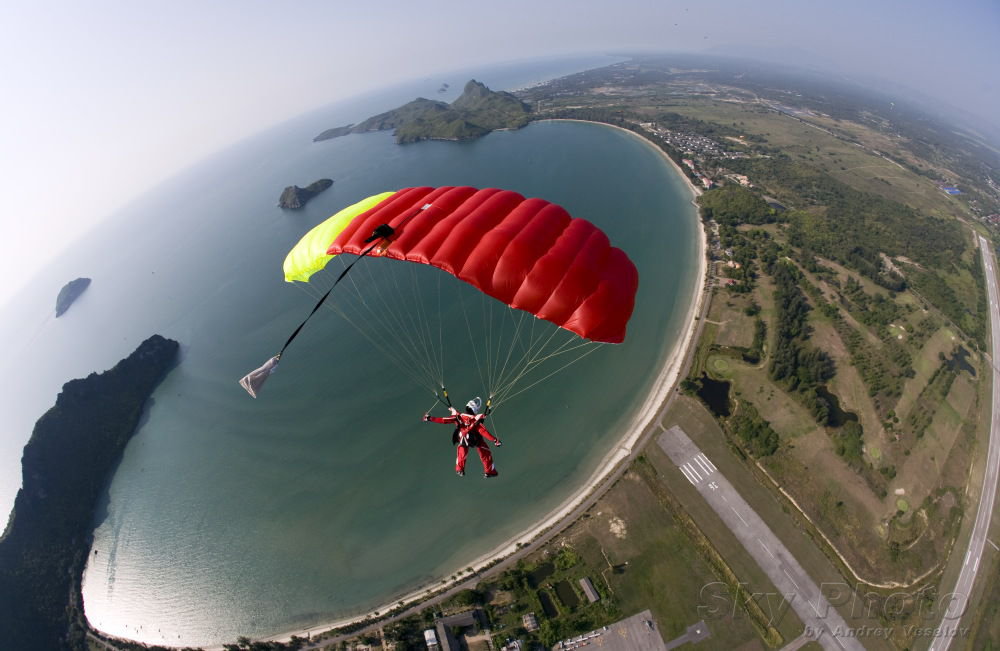 Image by Andrey VeselovNobody’s going to argue that landing directly into the wind is the best way to go, but we’re not always that lucky. Got a long, narrow path between obstacles? Unless you’re super-duper lucky and the wind direction seems to have been designed entirely for your landing pleasure, you’ve got yourself a crosswind landing, my friend. If you jump at a busy DZ with a super-strict canopy pattern, you’ve undoubtedly honed your crosswind skills. Great--but that’s not the only place that crosswind landings rear their skinny heads. For instance: you’ll find them lurking at an overpopulated boogie, where the landing area is a human forest with a clear patch at the very edge…or a forehead-slapper of an off landing, where your only choice is a road...or pretty much every beach landing, ever. The importance of your landing direction should override the wind direction in a number of circumstances. Here’s how to make it work. 1. Stop bellyaching and get used to it, already.Ask any airplane pilot: landing with the wind at an angle to the runway is, like, totally normal. Ask any beach-dropzone bum or coastal-soaring pilot, and they’ll definitely elaborate on the benefits of landing smoothly with the wind pushing in hard from the side. Let go of the worry. Your ram-air wing is perfectly capable of flying with the nose pointed at an angle to the runway. That maneuver even has a name: “crabbing.” (The difference between the direction the nose is pointing and the pilot’s path--“ground track”--is called the “crab angle,” which always kinda makes me think of melted butter and tongs.) 2. Get lined up.If you’ve got a long, narrow path in front of you, guess what? You’ve got yourself a landing strip. Start humming ‘The Danger Zone’ into your helmet and get ready, Goose. Your biggest task when you line up a landing is to snag yourself as much of a headwind as possible while keeping away from the obstacles you’re certainly avoiding. Anything up to a 90-degree crosswind will work. (Your task: to avoid any kind of tailwind, if at all possible.) If you have a choice, use the longest runway you can find to increase your margin for error. 3. Get creative.As you come in on that final, you’re going to be doing something of a dance with whatever wind is pushing at you from the side. You can be assured that this wind is going to be pushing you toward something you do not want to fly into. It may be pushing you unevenly. And it may be pushing you pretty damn hard. Your approach, therefore, is necessarily going to be a little less cut-and-dry than your typical downwind/base/final box. You’ll most certainly notice that your downwind leg is not actually, like, downwind and you’re not getting the distance you’re used to. What’s usually your base leg is likely to be the actual downwind, so stay vigilant and don’t let it shove you into an obstacle. 4. Hold your focus.As you tuck into your final approach, glue your eyes on the middle of the far end of the runway. Nail them there. Staple them there. Weld them there. Do not start looking at the obstacles to either side, or you are very likely to get suddenly intimate with them. 5. Let it do its thing.From there, you have one single job: to keep the wing/canopy level while you fly in a straight line. Not so bad, right? Calmly make the necessary inputs without overcorrecting. Let the nose point in whatever direction it needs to point. Warning: this bit of the flight might seem pretty wiggly. Don’t let that motion distract you from maintaining your heading. Any inputs required to keep that straight-line heading will simply increase your crab angle and point your nose into the wind, slowing you down. 6. Come to a full and complete stop.To flare in a crosswind, make a slight adjustment to your normal procedure: use moderate emphasis on the upwind brake to get into a wind-facing position. (Please note that “moderate emphasis” does not mean “full-on, panicked toggle punch.”) 7. High-five somebody.If it’s a beach landing and you managed to drop your canopy in the saltwater, go ahead and high-five the side of your own face--but no matter what, slap that palm to something. You deserve it.
 -
Awesome notes, @jimjumper-- Thanks for speaking up! xx
-
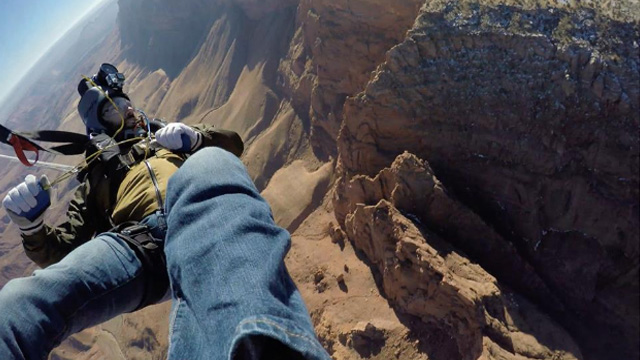 Dave Rhea gives his Skyhook a workout over northern Arizona Photo Credit: Dave Rhea You’re as ready as you’ll ever be. Right? You know what a malfunctioning main looks like. You know the sequence*. You’ve done your homework (like we reviewed last time). Before you pull that handle, though, make sure you know the rest of the story: how to make that reserve ride as un-traumatic an experience as possible. 1. Do not overthink itIf you believe that your main is unlandable, you are going to have a reserve ride. Lots of skydivers have landed under reserves, realizing later that the problem was solvable. Lots of skydivers have also gone in while striving to sort out malfunctions that did not get solved. Pick your poison. 2. Do not worry about stabilityThis is the very least of your problems, as you are on the world’s most intractable timer. Worry ONLY about altitude. 3. Pull the cutaway handle until no lower than 1,000 feetIf your pull is sufficiently low (shame on you for that, by the way--gotta say it) and you have an unlandable main, you’ll be testing your reserve’s opening characteristics in the most potentially lethal way. Take note: the USPA not-so-recently raised the minimum deployment altitude even for eminently experienced D-licensed jumpers. Initiating a reserve ride below 1,000 feet isn’t always deadly, but it has an unnerving tendency to be. Don’t take the chance. 4. Hold on to your handles...or, y’know, do your best. If you manage it, you’ll save a bit of money, and you’ll save face when you land. 5. Make sure it’s outArch and look over your shoulder for the reserve pilot chute. Reserves deploy fast, so this head position may rattle your neck – but if the pilot chute is somehow caught in your burble, this should either shake it loose or make it clear to you that you need to do some burble intervention, stat. 6. Keep an eye on your free-floating mainHowever: do not try to chase it and grab it in the air. (People have died doing that, bigshot.) Don’t “chase the bag” if it means you’ll land in a dangerous LZ. Use landmarks to get a bead on where the gear is headed, then take a deep breath, leave it to the fates, and prioritize your mortal coil. 7. Remember: Your Cutaway, Your BusinessWhen you land a reserve, you’re going to be the talk of the DZ (for about five minutes, usually). During that five minutes – longer, if the loads are turning slowly – you’ll probably be approached by a gamut of big talkers and would-be mentors, questioning your malfunction and eager to discuss your decision to cut away. My advice: speak to your trusted mentors and co-jumpers about it in private, and tell the rest to go suck an egg. When you suddenly need to get proactive about saving your life in the sky, make no mistake: you are absolutely alone. In the entire world, there exists only you and two handles. Your cutaway is your business. You were there. They were not. Review your own footage to determine the nature of the malfunction and review alternative methods of correction, if applicable. 8. Buy a bottle of posh booze for the rigger who packed the reserve you rode, and keep the reserve pin for posterity. It’s tradition. * Arch, look down at your handles, grasp the handles, pull cutaway, pull reserve.
 -
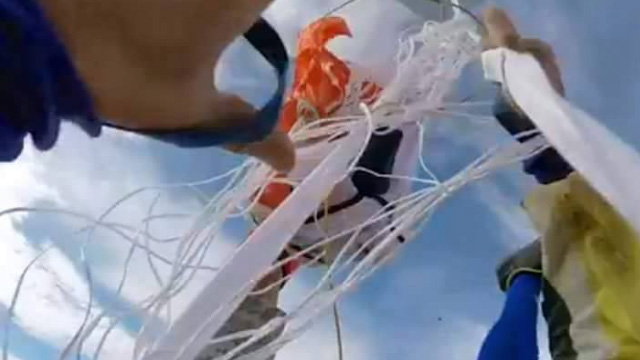 Michael Huff has a hard time saying goodbye. Photo credit: Michael HuffAre you ready to be alone in the sky with a malfunctioning parachute and two little handles? Though there are skydivers with thousands of jumps who have never experienced the fun of a cutaway, don’t be fooled: it’s not a question of “if,” it’s a question of “when.” Don’t feel ready? You’re not alone – but there are a number of proven ways to boost your confidence (and, therefore, safety). 1. Stay CurrentI know. It’s not your fault. Your home DZ is seasonal – or it’s far away – or it’s a tandem factory that keeps sullen fun jumpers on the ground. Whether it is or isn’t your motivation that’s the problem, the fact remains: long lapses between jumps are dangerous. They dull skills, heighten apprehensions, create a sense of unfamiliarity with aircraft and degrade the muscle memory you have carefully built around your gear, which is of vital importance in the event of a reserve ride. It’s vital to your career as a skydiver – especially, at the beginning – to make the effort to jump every couple of weeks. Make the effort and get up there. 2. PrepareThe USPA Skydiver Information Manual puts it rather dryly: “Regular, periodic review, analysis, and practice of emergency procedures prepares you to act correctly in response to problems that arise while skydiving.” Rephrased in a slightly more compelling manner: practicing might save your life, especially if you’re a newer skydiver who isn’t quite as accustomed to the stresses of freefall as an old-timer. Here’s a two-item to-do list to tip you in the right direction: Deploy your reserve for every repack. Have you ever deployed the reserve for your current skydiving rig? If not, the result may surprise you. You’ll learn the direction of pull for your gear, as well as the force you’ll need to exert. If your rigger watches the process, he/she can watch the deployment and identify potential problems. Even if you have deployed your own reserve, a repack is an unwasteable drill opportunity. Practice emergency procedures in your DZ’s training harness. (You may feel like a dork, especially if you’ve already been skydiving for a little while. Go on a quiet weekday and do it anyway.) 3. Do The Little DanceBefore each and every jump, the USPA advises skydivers to “review the procedures to avoid emergency situations and the procedures to respond to emergencies if they occur.” This doesn’t have to mean poring over your SIM like you’re cramming for a test. It does, however, require a little bit of work before every jump--just to make sure that your muscle memory is fresh and your brain is prepared for puckersome eventualities. Touch your handles in sequence before you enter the plane. It is not beneath you. Being blasé about basic safety doesn’t make you more awesome. If you ever happen to share a plane with an energy-drink teammate or a world-class coach, watch ‘em closely and you’ll see what I mean. Check that your reserve handle is seated, while you’re at it. A loose reserve handle can deliver a reserve ride without the fun of a malfunctioning main – and you don’t want that, do you?Right! So: now you’ve done what you can to be ready for a potential reserve ride on any given skydive. Next time, we’ll talk about what to do when your main decides to give you the pop quiz.
 -
 7 Expert Tips For New Skydivers to Get the Most Out of Load Organizers Remi Aguila organizing a festive Christmas-boogie jump at Skydive Arizona Photo by Alex Swindle The portrait wall next to manifest is confusing for a brand-new skydiver. Who are all those people, anyway, with the smiling faces and the discipline names printed in all-caps underneath them? What’s an “Organizer,” really? If you don’t know the etiquette, it can be a little daunting to get on those loads without fear of a forehead-slapping faux pas. New skydivers, make no mistake: you are invited. Remi Aguila has been organizing belly jumps at one of the biggest, busiest dropzones in the US – Skydive Arizona – since around 2008. Since then, he has organized thousands of skydives for jumpers of all levels, nationalities, aptitudes and proclivities. You can be certain he’s seen your kind before. Here’s what he says you need to know to have a successful experience in the organized sky. 1. Don’t be shy.“Newbies have this tendency to find me in the bar after the day is over and say that they wanted to get on a jump but that they didn’t want to intrude; didn’t want to ‘ruin the skydive.’ That’s missing the point entirely, guys. If there are organizers on your drop zone, go talk to them. Maybe the jumps they’ve currently got going aren’t a great match for your skill level, but a good organizer will find a way to get you in. Most organizers will be happy to split groups into smaller factions that fit more of the jumpers’ goals. They’ll be happy to design a jump for people with less experience – but you have to ask.” 2. Know who you’re talking to.“An organizer is not the same thing as a coach. An organizer’s job is really to get people jumping, and to make sure that people who want to jump with other people can find somebody to jump with. Organizers exist because, even though there’s a lot of casual organizing that goes on between jumpers, most people like – to a certain degree – to be told what to do. An official organizer can facilitate that without being too authoritarian, but still the presence of an organizer on a jump puts a nice bit of structure into the mix. A dropzone representative usually hires the organizers at any given DZ. Basically, that hiring manager looks for people that hold a coach rating, that demonstrate skill in their chosen discipline, that have a friendly attitude and that show a solid record of experience in smaller formations. (Most organizers end up doing between two- and eight-way jumps.) Don’t get tripped up by the specter of compensation, either. I have never been on a drop zone where somebody who was called an organizer was expected to be paid by the jumpers. There may be some out there; I don’t know. However, I have been jumping for 25 years, and I have never come across a dropzone where somebody who was called a load organizer was expected to be paid directly by the jumpers. At boogies, you generally pay an extra fee to cover the load organizers in general, but you won’t be paying for slots or paying organizers as you would a coach.” 3. Communicate clearly.“You need to start the conversation; the organizer probably won’t approach you first. When you do, introduce yourself confidently. Tell the organizer your skill level and your experience. Tell them what you want to learn. I don’t personally know a single organizer that’s going to turn a newbie away out-of-hand. They may, however, tell them that – at the moment, at least – there are too many people on a given jump, or that the jump sits outside of their current abilities, and it wouldn’t be appropriate for them. That said: if you’ve made it clear that you’re new and you’re looking for a jump you can join, then you’ll be on their radar.” 4. Get the timing right.“Where I jump – at Skydive Arizona, in Eloy – showing up on a weekday is your best bet if you’re fresh off student status. It’s a lot less busy, and organizers will more often have the time to do one-on-ones or two-on-ones with new jumpers. You may even get lucky and score some free one-on-one, non-structured coaching from them, whether that’s belly or freefly. Personally, I think that’s a great way to get some foundational experience. For instance: If it is a very quiet day and somebody approaches me, I’ll certainly ask what their experience level is, but it’s not going to be a deciding factor as to whether or not I’ll jump with them. If we’re doing one-, two- or three-ways, it doesn’t really matter what the experience level of the person is. They’re going to get on the jump, and they can expect much more feedback than they’d receive on a busier day.” 5. Be honest.“As an organizer, it’s important for me to get a realistic idea of a jumper’s skill level and general awareness level. When you tell me how many jumps you have, I need you be honest about it. If you have 20 jumps, say you have 20 jumps. There’s no point in misrepresenting yourself. If you have 20 jumps and 3 hours in the tunnel, be clear about that. Jump numbers are no longer the absolute measure they used to be, with the introduction of tunnels. However, somebody with 20 skydives is going to have a different skill and awareness level than someone with 200.” 6. Be open.“If you’re a brand-new skydiver, there’s a good chance that you don’t know what you want to do on the jump. A good organizer will have a few basic jumps that are two-ways and three-ways that are ready-made for people that don’t have a lot of experience. These tend to be kind of coachish and workshop basic skills. That’s what really you should be doing at this point. For these jumps, we tend to focus on basic turns, slides and levels. The aim is to keep it fun, but also to add factors that build on the basic freefall skills: like procedures for exiting the plane and for separation. Some people expect a full-on coach experience, and other people just expect a smile and a high-five. I advise shooting for the middle of that scale.” 7. Ask for feedback.“Immediately after the jump, approach your organizer for a quick debrief. This is key to your development as a skydiver. Make it specific: ‘What do you think I should improve? What do you think went well? What do you think didn’t go well?’ This debrief may not involve video; it may just involve some basic feedback on how the exit went, what aspects you can work to improve and general notes on the jump flow. On busier days and on bigger jumps, it’s going to be a little more challenging for your organizer, because he or she might have 20 people that want notes. When that’s the case, it’s incredibly hard to give individual feedback because of the number of people we’re looking out for. Always ask. The worst an organizer could say (and I would be very surprised if they did) is that they’re sorry; that they have to run to another load. In that rare case, just brush it off and try again next time. We’re here to facilitate your experience, after all – and to help you have the most fun you can have in the sky.”
 -
The Other Certification Every Skydiver Needs: A WFR Card
nettenette commented on nettenette's article in Safety
Well done, @TitaniumLegs! :D xx -
The Other Certification Every Skydiver Needs: A WFR Card
nettenette commented on nettenette's article in Safety
Absolutely true, @danornan! Any first aid education is helpful, for sure and for certain. I am of the personal opinion that the balance of skill return to investment of time and trouble is just about perfect in the WFR context, but even an afternoon at the Red Cross is better than nothing. Thanks for your input! :) -
 Image by Juan MayerIt happens so fast. You’re coming down from a great jump. You land, laughing, and whip around for the imminent high-five with a huge smile on your face. That smile drops right along with the friend framed in your view. Something happened in those last few feet of flight--you don’t know what, but that triumphant swoop turned into a spectacular case-in, and your friend’s screaming, and you’re running towards him at top speed, and his leg is at a crazy angle, and there’s blood. Lots of blood. What the hell do you do now? Wouldn’t you like to have a plan? Even if you have no intention of becoming a medical pro--or even a uniformed first responder--you can get a short education that might make you the deciding beneficial factor in someone’s very worst day...maybe even yours. This curriculum is comprehensive and practical, integrating the essential principles and skills required to assess and manage medical problems you might come across, especially but not specifically in isolated and extreme environments. It doesn’t have a name that implies its usefulness for skydiving, sure--”Wilderness First Responder” sounds like a course built just for Search-and-Rescue burlies--but hear me out. You need this. Here’s why. 1. Help is not always immediately at hand.Wilderness First Response certifications are meant to be used in earnest when the caregiver and receiver are essentially stranded in remote circumstances. While skydiving drop zones aren’t generally beyond the furthest reaches of civilization, they’re never in the center of it, either. Response times are not, as a rule, immediate. Any medical education is of enormous benefit, of course, but--for a regular-strength skydiver--the ROI of a WFR is pretty damn dead-on. The WFR course is about intelligent, informed self-reliance in the absence of immediate help. In the wilderness setting that the course was designed around, the priority is to figure out whether you can semi-self rescue, to assess what additional resources you need, and to methodically stabilize yourself and/or others until the cavalry rolls up. In the dropzone setting, this training is just as useful. 2. Whether or not you’re trained, you will always be the first responder to your own injuries. Make those early minutes count.If you end up injured during an emergency landing that’s outside the drop zone--and you don’t have a charged, functioning method of communication--then you’ll be waiting for help to find you. If you happen to be conscious in that interim (hooray lucky you), WFR training will give you a method for understanding your injury, stabilizing it and tracking its progress for later reporting. Without training, you’ll likely just lie there, terrified, in blinding pain--or make your injuries worse with incorrect responses. 3. You should be off the list of dead-weight liabilities and on the list of assets.Skydiving is a sport that demands proactive personal responsibility in the context of a mutually supportive, risk-educated community. We all understand this. That said: While a WFR certification does not confer the knowledge of a full EMT, it makes the bearer a much stronger member of the greater support team. A baseline education in first response moves you from a gasping member of the horrified crowd to a literate, assisting partner in incident management, though your role in the moment will, in all statistical likelihood, be quite procedurally basic. 4. You should dial up your powers of observation.We’re not just talking about cardiac arrest and gaping wounds, here. WFR training will help you recognize subtle symptoms in a way that could help you change the outcome. Dehydration? Hypoxia? Heat illness? These are real-life dropzone problems, and your awareness could make a big difference in someone’s day. 5. You’ll get important certifications.Successful completion of a WFR course will generally earn you a two-year Adult & Child CPR certification as well as the obvious Wilderness First Responder certification. This may or may not be an important piece of paper for you in a technical sense, but current CPR certification makes you a secret superhero in a world where lives are often saved by trained, responsive passers-by. 5. It’s a really good time. Seriously.Wilderness First Response courses are generally administered in, predictably, wilderness settings. I did mine with the National Outdoor Leadership School (NOLS) with the full majesty of the Yosemite Valley as the backdrop. My partner did his in the Grand Canyon country of Flagstaff, Arizona. WFR courses are offered in highly visitable settings all over the States--indeed, the world--and y’know what? There are few better-invested ways to spend a week in nature than learning life-saving, life-changing skills in a close-knit group of fellow adventurers. Y’know, like the close-knit group of fellow adventurers with whom you share your sky--and who are counting on you to be the best team member you can possibly be. Live up to it.
 -
You got this, hon. The training at Perris is good, the student parachutes are enormous and you already know a bit about the process from your tandems. Don't bother with bungee jumping to shake out your nerves--head to the wind tunnel. It'll help you more; I promise. http://extremesports.about.com/od/skydiving/a/The-5-Things-Every-Skydiver-Must-Know-but-No-One-Will-Tell-You.htm XOXOX 'Nette
-
 Image by Joel StricklandDoes exit order seem like some kind of obscure semi-religious ritual? Do you go through the motions without really understanding the moving parts? If so, yikes--but you’re certainly not alone. Luckily, understanding the logic behind the order is a pretty straightforward affair, and the entire sky will be better off if you wrap your head around it. Ready? Okay. Commit this to memory. 1. In the name of science, get the $#&$ out.It may seem like hollow tradition to hustle out the door on exit, but it’s not. As a matter of fact, there are serious calculations behind the art of exiting the plane efficiently. On a calm day, an aircraft on jump run covers around 175 feet per second of flight (that equates to a mile every 30 seconds or so). Translated into stopwatch terms, that means that--on that same calm day--no more than 60 seconds can pass from the moment the first jumpers leave the airplane to the moment the last jumper exits. For practical purposes, taking into consideration how much ground the average square canopy can cover, every jumper in the plane has to be out during a two-mile jump run. If they don’t, some are bound to land out (or a chilly second pass is going to be served up to the sulky remainder). 2. Don’t mess up the pilot’s math.If your group is about to be the first big handful of meatballs out of the plane but you suddenly split up into smaller groups, you’re messing with the pilot’s chi. After all, the jump pilot has more to calculate when he/she turns on that little green light than you might realize. He/she has to calculate about how much time each group will take to exit, and make sure the green light goes on at the correct distance from the DZ to accommodate the aforementioned 60-second countdown. As a rule, the group that will have the slowest climb-out should leave first. Big group? Light goes on farther out from the DZ to allow for a slower climb-out. Little group? The light goes on closer to the DZ. How can you help? Jump the plan you give manifest, and the pilot can give everybody a good spot. 3. Jealously guard your real estate.If you’re a Big Sky Theory kinda jumper who assumes vertical separation is going to save you from a meat-traffic collision, you are not working from scientific facts. Horizontal separation is the only separation that really counts up there, so make sure your group has a chunky slot of sky all to yourselves. Never place big bets (like: your continued existence) on your fellow skydivers pulling at the altitude they swear by. A tiny brainfart (or a big malfunction) will eat up that vertical separation before you can say “what happened to pulling at 3,500, toolbox?!.” 4. Horizon-pointing belly buttons go behind downward-pointing belly buttons.When freefly folks get out first, they tend to become part of an undelicious freefall sandwich. Here’s why: On a typical skydive, a pair of freefliers will clock a 45-second freefall and open at around 3,000 AGL. Let’s say that pair is followed by a belly group with a 10-second climb-out. This is going to sound like a math word problem, but bear with me: If one of those freefliers has a canopy with a 30MPH forward speed (which will move forward at around 45 feet per second, assuming little-to-no wind), opens 30 seconds before the belly group and turns right back toward the DZ, the variables are stacking up for a collision. Those 30 seconds of flight will drive the freeflier forward by about 1,300 horizontal feet--a measly 400 feet from the middle of the belly folks, which a solid six-second track can cover. If you add wind to the equation and the RW group gets blown even further into the path of the freefly pair, the likelihood of a meetup gets even uglier. When freefly groups get out after belly groups, the picture gets a lot healthier. The fast fallers get their horizontal separation, predicated on their shorter climb-out and faster descent rate. Wind becomes a positive safety factor instead of a negative one; slower fallers simply blow farther away. 5. With longer flights comes greater responsibility.Tracking groups, high pulls and wingsuits get to snuggle with the pilot (and/or the tandem pairs) in the way back of the plane. Why? First off, they’re mobile: if they’re doing it right, they’ll use all that horizontal power to get the hell away from jump run--and get back from a longer spot. If they’re not doing it right, however, they’re fully within their capability to truck through everybody’s personal piece of sky on the way down. The moral of the story: longer freefall (or, in the high-pull case, general airtime) requires greater awareness and responsibility on the part of the nylon pilot. 6. Don’t be the heat-seeking meat missile.That’s the bottom line, really. Everybody in the sky is counting on you. (Me, for instance.)
 -
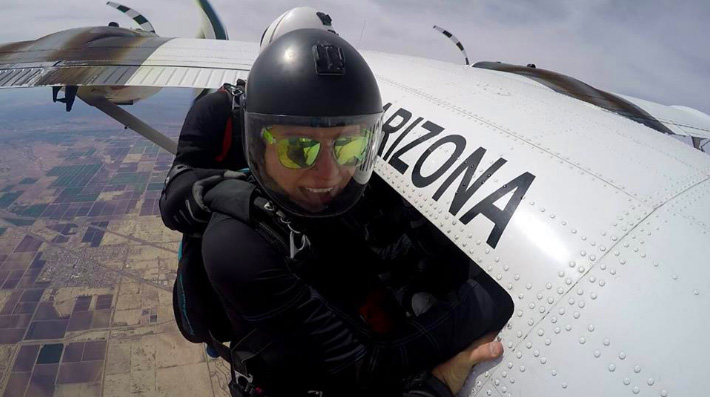 Photo by Jeff AgardJust moved across the country? Heading out to boogie in a strange new land? Impromptu road trip? If you’re not used to jumping at new-to-you DZs, reorienting yourself to a new conveyor-belt-to-the-sky is a bit daunting. But never fear, brave adventurer: if you walk in knowing what you need to do, you’ll be golden. Here’s a checklist to help make the process a little easier on you. Before you arrive:1. Do a preliminary scan for unpleasant surprises. Find out as early as possible if the dropzone (or the specific event you’re planning to jump) has special requirements that could keep you on the ground. 2. Budget. Get pricing on jump tickets, DZ accommodation and registration fees. This is a good time to check the jump-ticket refund policy and find out if there are extra charges for credit cards. 3. Ask about facilities. If you’re going to be squaring up to swampy summertime port-o-lets, miles-off RV hookups, co-ed showers (rawr) or anything else outside your comfort zone, you’ll want to know as early as possible so you can make a battle plan. 4. Make sure you’ve packed all your documentation. At the very least, you’ll need an in-date reserve repack card, your parachuting organization ID and your logbook. In some cases, you’ll also need your AAD travel documents and proof of medical insurance, too. Travel insurance is never a bad idea, either. When you arrive:1.Get the lay of the land. You’ll be spending a lot of time in the hangar and in the waiting areas, so get oriented. Pick a prime spot for your gear (hopefully, near an electrical outlet). Find the bathrooms and the fridge. Identify the load monitors, if there are any. Find out if there’s a separate window for manifest, or if the main office does it all. 2. Rock up to the office. Fill out the waiver, get a gear-and-paperwork check and buy your tickets. 3. Get briefed. You’ll likely be pounced on when you land in the office, but just in case: Pin somebody down to give you a complete briefing of the dropzone’s map and rules. Do not get on the plane without a briefing. Get clear on the manifest procedure. It seems like every DZ on the planet does this differently, and it can really get in the way if you’re not on board. Are you going to have to pay in advance, pay as you go, or pay at the end of the day? How does the ticket system work? Learn the exit order and separation rules. Many drop zones have very specific procedures in place, while others assume you should know where you belong. Watch how the local jumpers organize themselves, and ask lots of questions if you don’t get clear instruction. Check out the satellite map. You can expect a dropzone representative to use an overhead map of the dropzone and its surrounds to brief you. The rep will describe how to use recognizable landmarks to spot the dropzone from the air and review landing area obstacles, power lines, bodies of water, nasty neighbors, turbulence, the “beer line” and uneven terrain. Use this time to memorize your outs. Find out if there’s a special hard deck for this DZ. If there is one, it might be (way) higher than your personal hard deck. Check out the wind indicators. Find them on the overhead map, then peek at them in person while you take yourself on a tour of the main (and alternate, if applicable) landing areas. If there are tetrahedrons, ask if they’re trustable or if they’re “sticky.” Know the landing pattern. Landing patterns are not the same across dropzones, ranging from first-one-down-sets-it to a regular Busby Berkeley choreography of established patterns that never, ever change. Until you’ve internalized the unique rhythm, it’s best to give the main landing area a wide berth for your first handful of jumps at a new DZ. Make sure you know the rules and areas for swooping and hook turns, whether or not you plan to do them. (Don’t be the big canopy that tugboats lamely across the zoomy canopies’ path.) Figure out the loading procedure. Find out how the calls are announced and where you need to be to hear them. If there are shuttles to the plane, you’ll need to know what the call is to be on the shuttle. If there’s a retrieval from the landing area, make sure you know where it is (and hoof it over there right after touchdown).4. Get on a load! Make an organizer friend (or be your own organizer friend) and keep an open mind about what jumps you want to do. 5. Buy the good beer to share at greenlight. It’s basically, like, a housewarming that you throw for yourself. You’ll feel at home before you know it.
 -
 Image by Joel StricklandWhat’s the second-scariest thing in the world? Probably, it’s the open door of a plane at altitude as seen through the eyes of an AFF-1 student. Remember that moment? Most of us do. What’s the first-scariest thing in the world? Arguably: the open door of a plane at altitude, seen through the eyes of a skydiver doing a recurrency jump after a long hiatus. Coming back to skydiving after a long time on the ground is an inarguably intense experience -- possibly even a bit more so than the first time your feet left the plane. First of all, you know a lot more about what can go wrong. You’re likely to feel a lot more pressure to perform “like an old pro,” which never helps matters. And -- if you took that time off to heal an injury that grounded you -- you’re getting back on the horse, cowboy/girl, and that ain’t no easy thing. How do you approach recurrency with the best chance of a successful reintroduction to the wild blue yonder? The same way you do everything else in airsports: mindfully, methodically and with a lot of sensitivity to your unique position in the sport and emotional biome. 1. Know the actual rules.The United States Parachute Association gives these guidelines for recurrency in the Skydiver's Information Manual. (Non-American skydivers may have different exact guidelines to follow.) A License “USPA A-license holders who have not made a freefall skydive within 60 days should make at least one jump under the supervision of a currently rated USPA instructional rating holder until demonstrating altitude awareness, freefall control on all axes, tracking, and canopy skills sufficient for safely jumping in groups.” B License “USPA B-license holders who have not made a freefall skydive within the preceding 90 days should make at least one jump under the supervision of a USPA instructional rating holder until demonstrating the ability to safely exercise the privileges of that license. C and D License “USPA C- and D-license holders who have not made a freefall skydive within the preceding six months should make at least one jump under the supervision of a USPA instructional rating holder until demonstrating the ability to safely exercise the privileges of that license.” 2. Lay the emotional groundwork to support your success.You’re not the first recurrency-seeker to freak out. Recurrency jumps are often hard -- especially if you're a newer skydiver. Many a lapsed skydiver has turned the car around on the way to the drop zone rather than get back in the sky. You’re going to need to use your tools. Call a friend -- even a non-skydiver -- to meet you at the DZ and keep you accountable. Watch videos of your past jumps to remind yourself that you'll be fine (and you'll be ecstatic when you land). Listen to music that gets you stoked. Read journal entries from the time that you were actively skydiving and having an awesome time up there. If you were out because of an injury or a medical issue, make sure to chat to your doctor about your intention to reenter the sport. If you need to, get a second opinion -- but hear them out. 3. Make sure your gear is up to the challenge, too.Has your gear been stored for more than a season? You’ll need to take a close look at it before you call it back into action. Parachutes don’t like to sit on the bench, y’know. After a longer period of time -- especially if the rig wasn’t stored unpacked in a climate-controlled environment with the stow bands removed -- the materials themselves may start to break down. If your rig has brass grommets on the main d-bag, the metal may have reacted with the rubber of the stow bands (making them hard, brittle, and incapable of doing their snappy little jobs). The ZP coating might have “glued” the cells together to the point where the canopy needs to be manually fluffed out. If your magical backpack has been in storage for any extended period of time, it’s smart (and confidence-inspiring) to have a rigger put it through its paces. Get a thorough inspection of all the nylon, the harness and the container, as well as the reserve repack that’s surely due. When it comes back, you’ll know that it’s airworthy (or you can get your hands on something that is). 4. Recognize your “aliefs” (and how to handle them).Coined by philosopher Tamar Gendler, an “alief” is another form of belief, but it’s not the same thing. We hold beliefs in response to what things are. An alief is a response to how things seem. Knowing and feeling that difference on a recurrency jump can bring you a lot of relief. Here’s how it works. As a skydiver, you have probably put in plenty of hours packing, gear checking, loading into a plane, exiting a plane, freefalling, flying your canopy and landing. With enough repetition, your brain has stored all these behaviors and recognizes them. On a conscious level, you believe yourself to be perfectly capable of performing the actions of a skydive. However, when you come back after a long hiatus, alief rears its ugly head. When you believe you can make a skydive but your body has become unaccustomed to the physical sensations of skydiving, you have an alief. The mental state of alief is a primal form of fear that underlies a moment you know you are safe in your head but your body's not on the same page (i.e. standing on a pane of rock-solid, clear glass, hundreds of feet over a canyon floor). Alief is a funny thing: it’s what makes people refuse to drink soup from a factory-fresh bedpan, eat fudge that looks like poop, or pull the trigger of an empty gun with the barrel against their head. It might also keep you from getting on the plane because damnit it just feels wrong. If you understand what you’re experiencing, though -- it might not. Let me be the first to high-five you back into the fold, friend.
 -
 Image by Joe NesbittLast week, we talked about the mighty kerfuffle that is the pilot-chute-in-tow malfunction. So...who wants to have one? Nobody! Right. So now that we’ve established that, we can get down to the business of avoiding the hell out of those. There are four big steps you can take to lessen your risk of a PCiT, and there’s a good chance you’re currently messing up at least one of them. 1.Cock it up (so it doesn’t cock your jump up).Your collapsible pilot chute is a demanding partner. Her deal is this: no foreplay, no canopy. Most of the time, you’re good about it. You guys have a really established routine at this point, right? From the time you’ve got your nylon laid out on the floor to the time you wrap your legs around it to finish it off, you follow a very predictable routine. Somewhere in there, you give that collapsible pilot chute a tug and get her indicator window nice and blue. Everybody’s happy. But what happens when you get distracted? If you end up ignoring your PC for a surprise debrief or a dance break or an awkward conversation with the meaty contents of the best-fitting freefly suit you’ve seen all week, make no mistake: she’s going to get her revenge. Failure to cock the collapsible pilot chute, after all, is the leading statistical cause of PCiTs. The solution here is simple: focus. Give your pack job the attention it deserves, in the same order every time. (It’s never a bad idea to include that little indicator window on a quick gear check, either.) 2. Do what you’re told.I know. You’re the boss of you, and I’m not your real mom, and manufacturers are basically like corporate drones, and the USPA is a bunch of guys throwing canes and slippers at kids who merrily chase balls onto their collective lawn. You do what you want. That said: maybe you should do what you’re told every once in awhile. This is revolutionary stuff, I know. But the manufacturers’ instructions for bridle routing and main-flap-closing aren’t just there to give you something else to toss giddily out of the box when your new container arrives. As any pro packer will tell you, those yawn-inducing closing procedures differ dramatically between brands. If you’re using the wrong one for your particular equipment, you’re setting yourself up for a container lock. 3. Watch the news.Along those lines: be on the lookout for updates. Remember a few years back, when all those photos came out of closing pins stabbing neatly through the middle of their bridles? It kinda looked like a fabric samurai drama, but it was pretty serious -- several jumpers, jumping different equipment, experienced pilot-chutes-in-tow in this same manner. In response, manufacturers posted updates to their manuals, changing the closing procedures for their containers to lessen the risk. The moral of the story is this: Maybe you’re still doin’ it the old way and have managed to be lucky so far. (Emphasis on: so far.) You can also investigate pull-out -- as opposed to throw-out -- pilot chute systems, if you like to be on the oddball end of technology. 4. Embrace the transient nature of our linear existence.Nothing is forever, dear reader. All seasons pass. All kittens turn into old cats. Your pilot chute and bridle will eventually wear out. Thus is the way of the world. We know you love your pilot chute and bridle. They love you back. They yank that nylon out of the bag for you over and over and over without complaint. They get dragged across the grass and the filthy packing mat and the Arizona desert for you. They get stepped on and sat on and waved around willy-nilly when you need to get someone’s attention on the other side of the hangar. But they can’t do it forever. Collapsible pilot chutes lose effectiveness when their little kill lines shrink. If that line shortens to the point that the PC can’t inflate fully, you will probably end up with a dead pilot chute flapping around above you in freefall while you count to yourself in your helmet. Insufficient drag to pull the closing pin = PCiT. Like many existential tragedies, this doesn’t happen overnight. Have you noticed little hesitations after you throw? Are they getting longer? Have you noticed the aging process creeping up on your little bitty sub-parachute in the form of obvious wear? Cuddle up on the couch with her, read The Velveteen Rabbit together, cry a little bit and give your old, loyal PC a Viking funeral. She deserves it.
 -
 Curt Vogelsang captures some hot canopy-on-canopy action. Y’know when you don't feel like getting out of bed in the morning? Your main parachute is likely a lot brighter-eyed and bushier-tailed than you are, but every once in a good long while it just doesn't feel like getting out and doing its job. Y’know? Relatable. Kidding aside: When you throw your hand-deployed pilot chute but the container stays closed -- trapping the main deployment bag inside, helpless to deliver you a parachute -- you’ve gotchaself a pilot-chute-in-tow. In other words: you’ve got nothing out, which makes you the clenchy, concerned (and hopefully very temporary) owner of a high-speed mal. You’d better get on that, buddy. Stat. But how? Deploy the reserve immediately or cut away first and then deploy the reserve? One Handle or Two Handles: The Cagematch If you’re not sure which you’d choose,* you’re certainly not the first. This particular point has been the subject of roaring contention since the invention of the BOC, my friends. (Guaranteed: the comments section below will corroborate my statement. I can sense people sharpening their claymores and dunking their arrows in poison even now.) There’s a school that says -- well, duh -- get your damn reserve out, like right now what are you waiting for. There’s another school that calls that school a bunch of mouth-breathing pasteeaters. The latter group insists that you'd better go through the procedures you know lest you mess it up when it counts. They usually follow up by spitting on a photograph of the first group’s mother and wondering aloud why the first group is even allowed to skydive. Then they start punching each other. Images by Joe Nesbitt The USPA Skydiver’s Information Manual doesn’t make a move to break up the fight. It stands clear of the flying arms and legs and says, “Y’know -- they both kinda have a point.” Section 5-1 of the manual says this, verbatim: “Procedure 1: Pull the reserve immediately. A pilot-chute-in-tow malfunction is associated with a high descent rate and requires immediate action. The chance of a main-reserve entanglement is slim, and valuable time and altitude could be lost by initiating a cutaway prior to deploying the reserve. Be prepared to cut away. “Procedure 2: Cut away, then immediately deploy the reserve. Because there is a chance the main could deploy during or as a result of reserve activation, a cutaway might be the best response in some situations.” Let’s look a little closer at the options, then, shall we? Option One: Not Even Gonna Bother With That Cutaway Handle. Pro: Immediately yanking out that reserve saves a step. When AGL counts (and golly, doesn’t it?), saving a step can save a life. Many skydivers are quick to point out specific incidents in which jumpers with PCiTs have gone in with sealed magical backpacks, having failed to pull both handles (or pull any handle at all) while the clock was ticking. Gulp. Con: It takes the pressure off (in a potentially bad way). As the reserve leaves the container, there’s a chance that it can take the sealing pressure off the flaps that are keeping the main container closed. The main can then leap to freedom and deploy at the same time as the reserve. At this point, you might wind up with an entanglement, a side-by-side, biplane or downplane to figure out.** Option Two: Get Off The Field, Main Parachute. Reserve, You’re In! Pro: It’s the same stuff you’ve been taught to do for every other reserve-requisite malfunction. ...If you initiate the reserve deployment clearly, confidently, and as early as possible, of course. After all: making a one-off exception for a single kind of malfunction can be tricky. A jumper might well spend a little too much time thinking it over (‘Am I going for my reserve handle first right now? ‘Cause that’s weird. Is that okay?’) when they should just be yanking the stuffing out of their emergency handles. Going through the real-life motions of the little dance you do before you get on every load makes more sense to your body, for sure. Con: You’re adding more complexity to the situation than you may realize. Especially if you don’t have secure riser covers, the (jealous?) cut-away main risers might sneak out of the container and grab for the reserve as it deploys. Another thing: the main is very likely to wiggle free, detach from the harness as soon as it catches air and do its best to entangle with your Option B. The latter kerfuffle is made much more likely when you add a single-sided reserve static line to the mix, turning the already-dismaying situation into something of a tug-of-war. Neither of these choices sounds like the cherry on top of a lovely afternoon; I know. At some point, however, you may be forced to make one. If you do, you’d better have a plan in mind. Not in the mood to make that choice? Me neither. Luckily, there are some steps you can take to better your chances of never seeing a PCiT -- and in next week’s article, I’ll tell you what they are. --------- *If you have a Racer (or any container with a cross-connected RSL), you do not have a choice. You must pull the reserve without cutting away. Do not pass ‘go,’ do not collect $200. In that particular configuration, the main will choke off the reserve if the cutaway has been pulled. If this unnerves you, get thee to a rigger to discuss it. **Head over the PIA.com to check out a handy study they did in 1997 regarding the management of two-out situations. It’s called the “Dual Square Report.”
 -
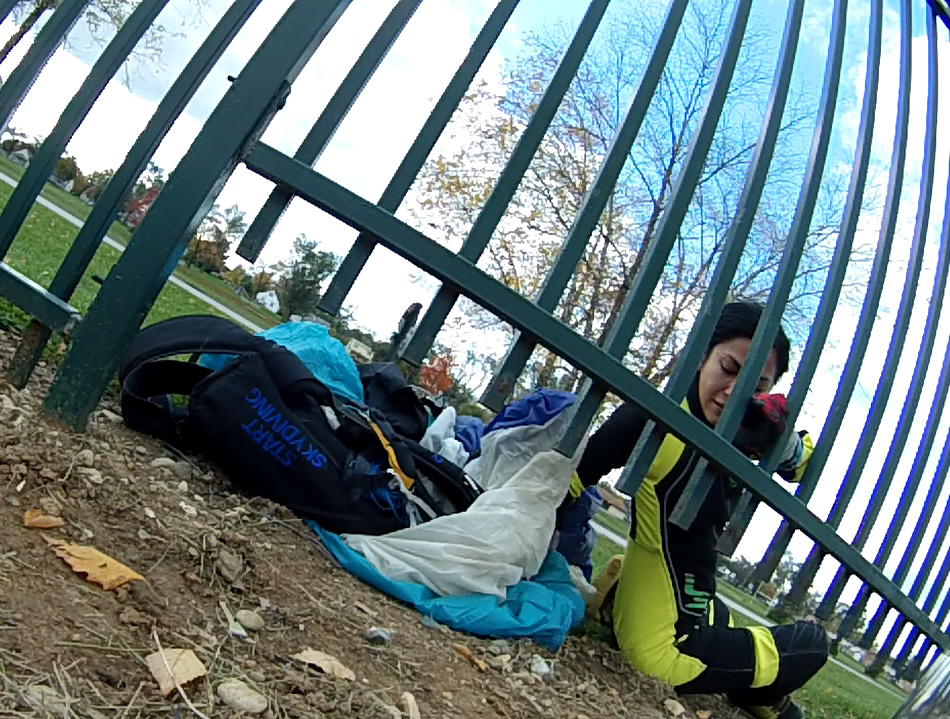 Sylvia Tozbikian wiggles her way back to the DZ after an off landing in a graveyard“Off” ain’t such a bad thing. As skypeople, we love “off.” Offbeat. Offhand. Offside. And, y’know -- we’re all a little off, really. Off landings should fit right into our oddball little world. Unfortunately, lots of skydivers tend to be ill prepared for an unscheduled landing out in the real world. Are you one of ‘em? Here’s how to get ready for a surprise skydiving adventure. 1. Be a nerd about it. Sure, the airborne life throws you curveballs sometimes -- but there are variables here that you can control, y’know. Work ‘em. If you only ever land that thing in a schoolbook configuration in the exact same landing area, you’re not going to enjoy the steep learning curve of an off landing. Hang out with a canopy coach for a weekend to workshop your braked flight (and, y’know, braked landings) in a structured, feedback-rich environment. The more thoroughly you train your body and brain to execute these maneuvers, the less you’ll panic when you look down and realize you’re hanging over an endless sea of potential ouch. Also: always jump with a charged method of communication. 2. Speak up. Very likely, your off landing is going to be your fault, and it’s probably because you didn’t pay attention (to winds aloft, to the jump run, to your opening altitude, to where you were pointing your pretty new wingsuit…). If it’s the pilot’s fault, you should know it by the time you’re standing at the door and lookin’ down. If the spot is off, don’t leave the plane. Ask for a go-round. 3. Look out for yourself. If you’re at the caboose end of a group and you can’t spot from the door, make a habit of quickly spotting as soon as you run out. If you notice that your compatriots failed to notice that they were getting out of the plane somewhere in the next state, evaluate your options. If it’s safe, then you should peace out earlier and pull higher, crossing fingers that the extra altitude will get you home. That said, don’t be a dick. If the particular skydive you’re doing is safer for everyone if all members conform to the freefall and breakoff plan, then congratulations: you’re landing out. 4. Curb your optimism. At this point in your journey into offland, you might be under one of two available parachutes. Your first responsibility after ensuring that whatever’s out is controllable is to realistically determine where you’re headed. If you feel like you just-might-maybe make it to the main LZ, make sure you’re not just-might-maybeing your way into a power station or highway or forest or whatever might be in the intervening territory. If you’re not sure -- or if the middle ground is an alligator farm -- then you should bin that Pollyanna attitude and get real. Put your entire brain on the task of on finding a safe alternative that takes into consideration your current position and the wind direction. 5. Mind invisible canopy-eaters. Once you’ve picked a spot and are toodling down to make your acquaintance with it, you should start getting as picky as possible. You’ll obviously be headed for what appears to be an open space, but wait -- are there invisible monsters lurking? Trees, buildings and other solid objects can throw serious turbulence if they’re upwind (and livestock can wander into the picture very quickly). Keep that in mind as you’re planning. 6. Play the field. As much as possible, be a commitmentphobe. Make sure you don’t have blinders on to other landing areas that might save your ass in the event of surprise fences, power lines, turbulence monsters, stampeding herds and other obstacles you didn’t notice from on high. 7. Embrace it. If you’ve always been on, you can be assured that off is coming. Get real and get ready, and you’ll be much better...off. (Snicker, snicker.)