Leaderboard


Popular Content
Showing content with the highest reputation since 01/20/2016 in Articles
-
4 points
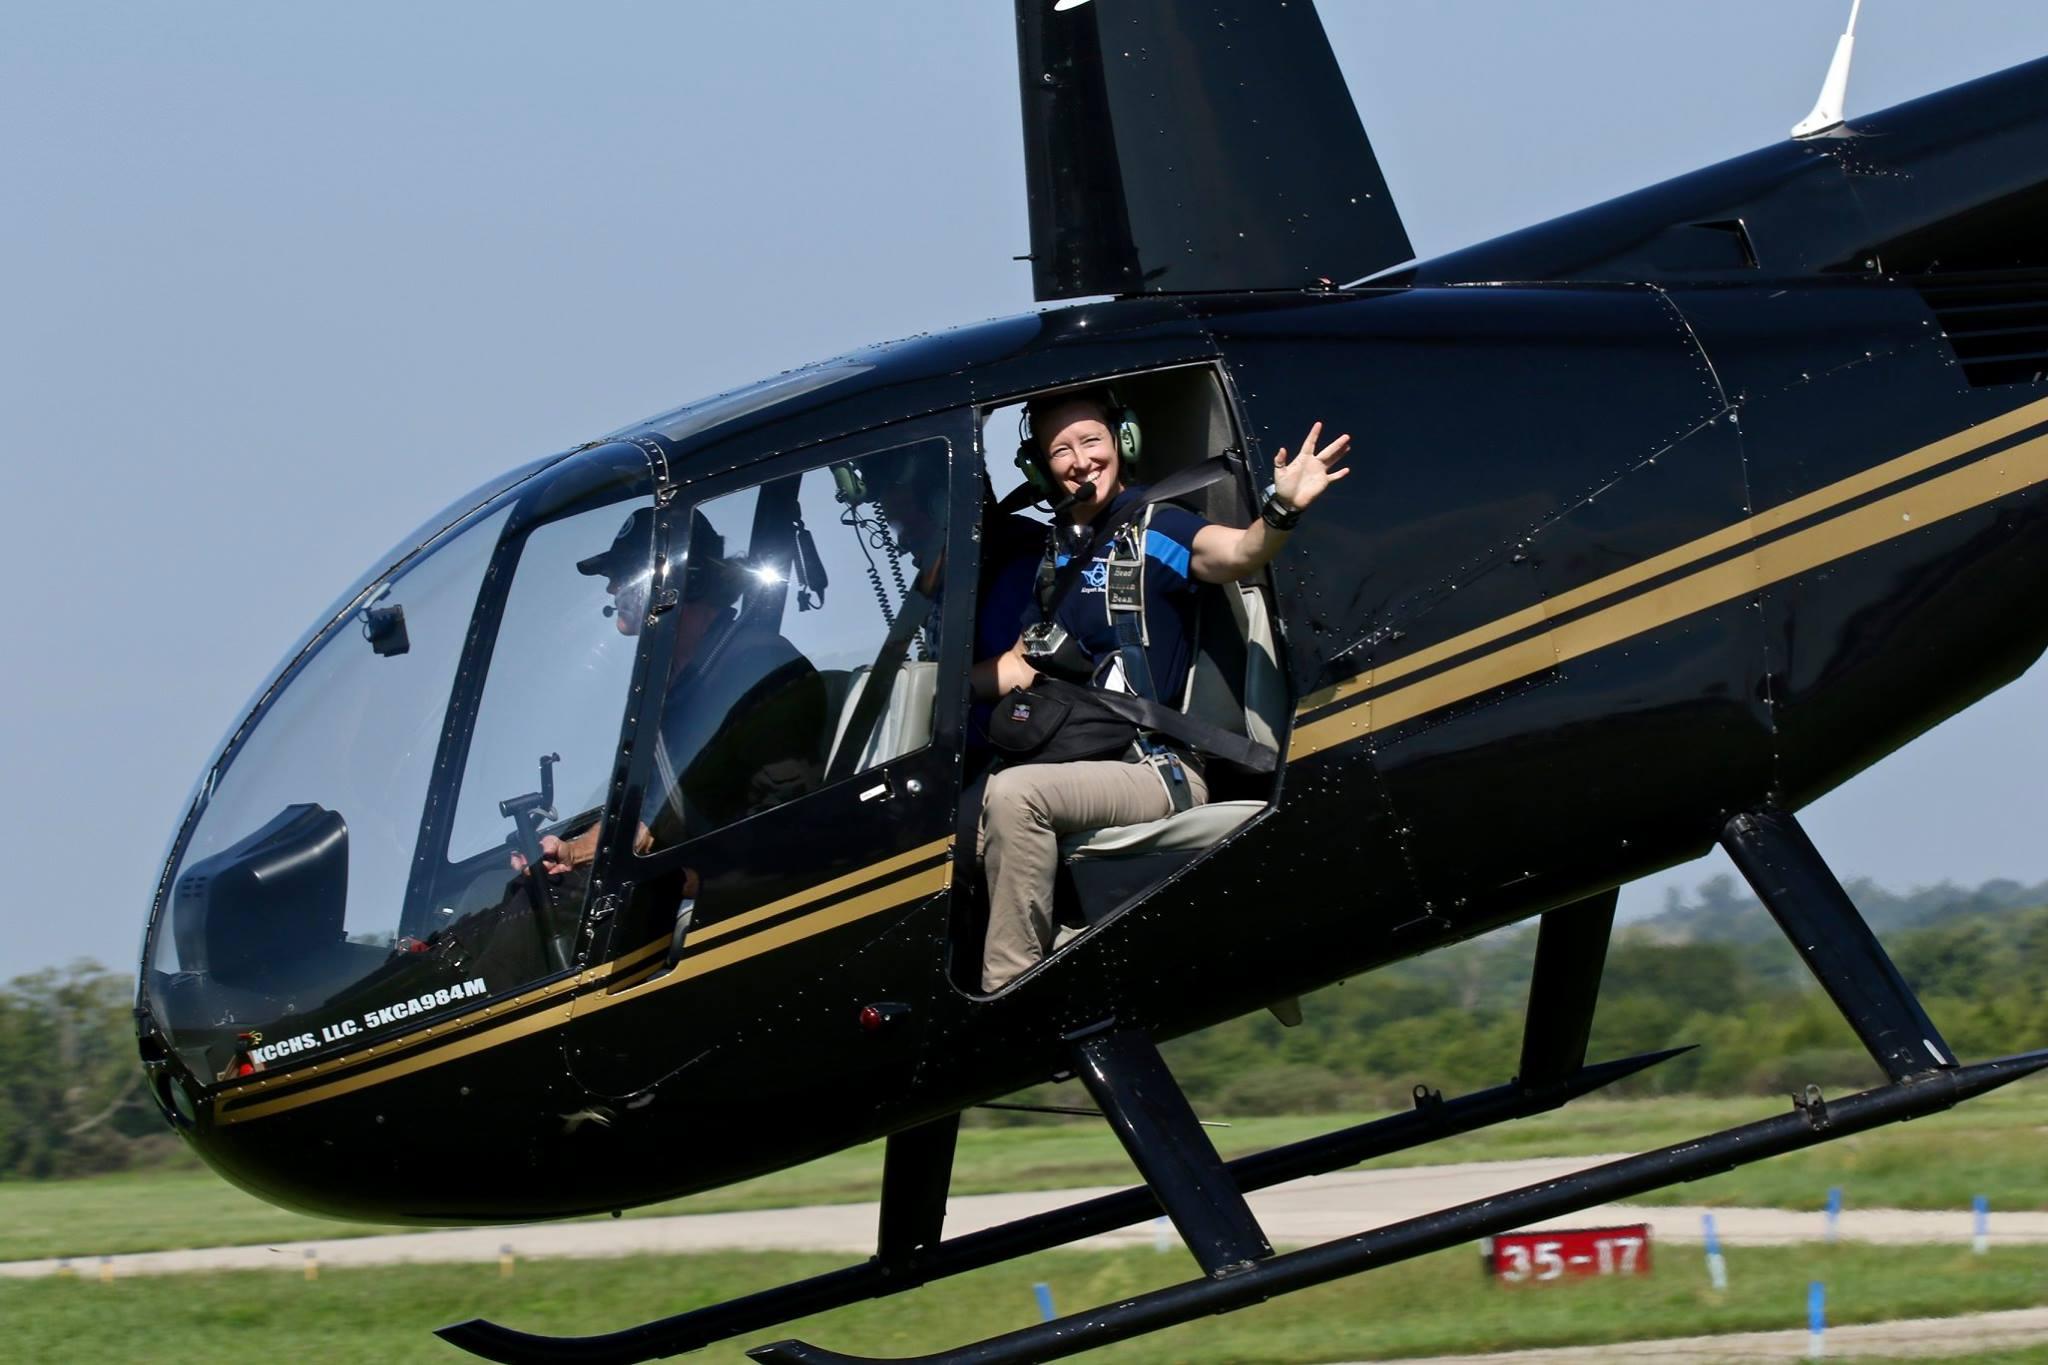 It’s Not What You Do (Or the Size of Your Dropzone): It’s How You Do It Jen Sharp -- since 2017, the Director of IT for the USPA -- is a woman of note for a long list of reasons. Jen’s a font of wisdom, a truly badass skydiving instructor and a businesswoman of uncommon strength and clarity (proof: she spent 21 years owning a successful small drop zone in Kansas). When she speaks, one should do themselves the favor of listening. If you don’t already know her story: Jen has been jumping since she was 18 years old. She opened Skydive Kansas directly after her college graduation, when she had a full-time teaching job and only 300 jumps. (Even then, she’d already been working as a static line jumpmaster, instructor, packer, rigger and radio-wrangler. Supergirl, basically.) Since then, she has traveled extensively as a jumper, an instructor and a public speaker. It was 1995 when Jen opened her dropzone: the days of saving up your vacation days for the World Freefall Convention; of spending Friday night to Sunday dinnertime on the dropzone; of single-plane 182 dropzones all over the place and, like, eight places you could go to fulfill a turbine craving. The close knit of those intimate little club-format dropzones has, of course, steadily unwound since then in most places. Adding skydiving to the schedule has become much more of a surgical strike: you get to the DZ at 10am and manifest immediately so you can make it to Crossfit by 4. You sift through regional skydiving events on Facebook, few of which require more than a handful of minutes’ worth of planning. You drive hours for a turbine. Jen takes on her alter ego, “Stu,” as a student (get it?!) on an AFF eval jump. It would be easy to mourn the loss of the small dropzone as an entity -- there are precious few of them left, proportionally to their previous numbers -- but Jen refuses to. For her, the “small dropzone feel” is the culture we should all be striving for, even if there happen to be seven Skyvans in the hangar archipelago. “The best vibes are at the places that keep the actual perspective, not just the party line, that we are all just people and all just want to have fun,” she begins. “The ones that embody safety in the active choices to care for each other. The places that assume the best in people. Luckily, that’s really simple to do.” Simple? Yes. Easy? Not necessarily, but according to Jen, that’s what we are really going for here: an inviting culture. Example after example proves that business success will follow that beacon significantly more reliably than it will follow volume. “What that culture is not,” Jen clarifies, “is the culture of the burned-out tandem instructor, hauling meat; a culture where an instructor never connects with their student; where they don’t even call them students, but passengers. If you call them a passenger, they are one-and-done. They know their place with you. But if you call them a student -- and you truly think of them that way -- the whole dynamic is going to be different.” How do you change the dynamic? By changing the way you see the person in the harness. “The public we meet is awesome,” she continues. “And we forget that! We totally forget this as instructors -- especially, tandem instructors. We forget that the person we’re taking is amazing. Why? Because they are not on the couch. A normal person is just sitting there on the couch on the weekend or maybe vacuuming or making snacks, drinking beer and watching TV. But this person is okay with being uncomfortable; with putting their life in your hands. They are excited about it, and they are trusting you. That already makes them a really cool person.” Doing an interview at PIA 2015. “If you want to see the average person, go to Walmart,” she laughs. “That’s the ‘average person.’ The person walking on a dropzone for the first time is not the average person. They are already living on a level that we should resonate with, especially since they’re new and they need our guidance.” For Jen, in fact, the “passenger” moniker is no less than a dishonor. “Homogenizing everyone who walks in the door into a ‘passenger’ has a couple of outcomes,” Jen explains. “It burns tandem instructors out. It burns the public out against skydiving when we make the assumption that they don’t know anything. Where did we even get that idea in the first place? Sure, they don’t know anything about skydiving, but they probably know a lot about something else.” “When I would take tandem students, I didn’t know who they were, necessarily,” she muses. “I would always ask ‘why are you here today,’ but they weren’t always going to tell their life story. I would find out later that we had just taken a brain surgeon, or the senator from some western county in Kansas. You never know who that person is. They’re just walking around in their sweats because you told them to dress comfortably. So -- if you’re starting to feel the burnout, try allowing yourself to be curious about them. And, if you’re a dropzone owner, strive to instill that curiosity in your instructor staff.” Who knows: That curiosity, manifesting as totally authentic friendliness, could end up defining a regional dropzone’s niche. “If drop zones realize how many kinds of niches there are to occupy,” Jen says, “I don’t think we’d ever talk in terms of ‘small,’ ‘medium’ and ‘large’ dropzone. You can occupy a really strong, functional cultural niche without being the biggest DZ around, or having the most airplanes, or doing the most tandems. As a dropzone, your niche really comes from whatever it is that you want to bring to the table -- and your resources and your passions -- and you succeed when you fulfill that to the max. I think a lot of places are figuring that out, and that’s contributing to the fact that we now have more of a variety of dropzones than we ever have before.” Y’know that bit about a cultural "niche"? Jen insists that it’s not just about feels. It’s about returns, too. A strong niche can turn into a marketing advantage. “Not every dropzone should compete on price,” Jen notes. “It's conceivable for a smaller DZ to actually make more profit by doing less jumps. Profit is not the same as gross.” “It’s as straightforward as reaching the fullest manifestation of what you’re capable of doing,” she adds, smiling, “and, of course, always trying to get better.”
 -
2 points
 Have you ever realised that you feel something is not right in the system and something must be done about it? The question is how many times you did something to improve things…..? Avoidable Fatalities The purpose of Education in Skydiving and Rigging is to facilitate learning. Nothing else! All things learned are important and often vital to the skydiver- our sequence emergency procedures, wrong decisions under pressure and improperly done maintenance and repairs can end in disaster and they have. If there is any other interests involved in the education system- the process is ineffective. Also there is a difference between education in skydiving and public schools. If students in public education are to experience the result from what they learned in school or college years after graduation, skydiving students will need what they learned literally the same or the next day. A study was carried out by Hart, Christian L. and Griffith, James D. (2003) "Human Error: The Principal Cause of Skydiving Fatalities". Here are a couple of points: “Of the 308 fatalities that were reported between 1993-2001, 264 (86%) were categorized as Human Error, indicating that human error was deemed to be the principal causal factor in the mishaps. The remaining 44 (14%) fatalities were categorized as Other Factors, indicating that human error did not play a principal role in those mishaps. Therefore, human error appears to be the principal causal factors in the great majority of skydiving fatalities. Within skydiving training and education programs, specific attention should be given to human error, and training should be deliberately aimed at reducing human error mishaps. In the design of parachuting equipment, attention should be given to designing systems that increase skydiver situation awareness and increase the probability of correctly carrying out deployment and emergency procedure while under stress and time pressure.” I find it unacceptable that in the 21st Century with the level of science and experience in the sport we have 86 percent fatalities that have resulted from avoidable mistakes. In skydiving, critical situations require making correct decisions and executing proper action. This causes increases in pressure and cognitive load, beyond the state of flow that impairs our ability. When the cognitive load increases, our limited cognitive capacity is exceeded and we become overloaded. Our brains cannot process the large volumes of information being generated by the situation and we can fail to make accurate decisions. Example is tandem bag lock malfunction- requires very fast thinking, change of standard emergency procedures, reaction and execution when RSL is connected. However, if RSL is not connected- things are way easier- action is as usual- cutaway and reserve deployment. This is just an example where correct training can significantly reduce the pressure or lead to positive outcome. Knowing that there is direct connection between the previous training taken and how the skydiver would react under pressure is vital. Namely our gut feeling is what determines our reactions under pressure and lack of time. It all happens simultaneously before we put everything in words. So someone that has never used RSL as a backup system would go first for the reserve handle after cutaway and will almost never check for main risers clearance. In the late 80’s and 90’s of the last century, there were significant discoveries in phycology that explain a lot how and why humans make certain decisions under pressure. Unfortunately skydive training still has not caught up with psychology. Mirror neurons is one of these discoveries. For example, neurons in our brain fire symmetrically to match our instructor’s emotions. So, if the instructor is very positive, enthusiastic and smiling, about 20-30% of the neurons in the same area in the student’s brain, responsible for these emotions fire as well. The result is that students assume that if the instructor is that positively charged- everything must be in order. It is the same when the instructor looks negative, unhelpful, concerned- the student is experiencing a grade of freeze, flight response and the performance goes down. This is just a generalisation but it explains why students love enthusiastic instructors, regardless how competent they are. However, students also can identify incompetence hidden in positive attitude. There is also an explanation for that recently discovered. In this article, I will try to scratch the surface on training. Combining psychology and training in skydiving is going to be part of a different publication. In skydiving we have two types of Education- Safety education and skills improvement training. They overlap and mix all the time but they stay different things. Example is the training during the new skills courses- initial AFF, Tandem and AFF Instructor certifications. They all have two parts- the Safety part, which teaches the student/candidate/ how to survive the skydive with the new equipment and procedures and the Skills improvement part- how to do it well. This is very important since decision making is heavily influenced by the level of competence and skills in these separate areas. Both, the student and the teacher/instructor/ should know where they stand in that- at what stage of the training and learning process they are. Even more, the training for a particular skill must match the psychological reasons influencing how the student will react in this situation. It’s important to know why people make fatal mistakes and how to avoid them- you never know when a simple flight back to the landing area can turn into a situation that requires emergency procedures. Approaching Education Differently Looks like education in skydiving suffers from a bit of amnesia! It is based on the industrialised system of education. This system came out during the industrial revolution and it was designed to serve the needs of the manufacturing process- to produce a workforce that follows algorithms. Basically, it’s a system that tells you how to do things, without much explaining. The student is instructed not thought. This all works well when in the manufacturing! And we have all seen the big emergency procedures charts that look like wiring diagrams like they are designed for a computer processors to follow. However, people are not machines but organic creatures and in addition they have to make their own decisions under pressure. Industrialised system is based on standardisation and conformity! It is true that these principles are a must in skydiving and they define the skills necessary for surviving the skydive with- must know, must do and must not do. But there must be a clear line where they begin and finish because any irrelevant and wrong information or negative emotions significantly affect the decision making process. The fact that a student does not understand what causes our bodies to turn in freefall creates negative emotions and can cause them to fail the stage. Conformity and standardisation also contradict the principles on which skydiving and life for that matter have flourished over the years- diversity and creativity. Every single person is different. Not a single person’s life is the same as anybody else’s. There’s no two persons on this planet that are the same. So why skydiving training is standardised to that extent? One of the results is that year after year there’s a great amount of people that give up skydiving after they get their A licence. And the reason is that they don’t want to spend a long time and a lot of money doing relative work with B rels. Most of the students started skydiving because they wanted to do something else- usually freeflying or swooping. There is a great amount of students that never complete the AFF course as well. If a private company was losing such an enormous amount of their clients every year, they would say- “Maybe it’s not the customers, maybe it’s something we do”. If equipment and training courses were put under the compatibility lid some time ago, they would never advance more than the static line course and round military parachute stage! People are also curious and creative. They want to learn. Everyone knows that students and instructors start their career with a great amount of curiosity and want to learn and keep this going forever. Curiosity is the engine of achievement. One of the effects of the current culture, has been to de-professionalise instructors. There is no system in the world that is better than it’s instructors. Instructors are the lifeblood of the success of drop zones, but teaching is a creative profession. Teaching, properly conceived, is not a delivery system. Instructors should not be there just to pass on received information. Great instructors do that, but what great teachers also do is mentor, stimulate, provoke, and engage. Another big problem with the industrial based system is that it never covers everything that we need to know because it is based on what has happened so far. Especially in recent years, it presents you with a list or diagrams with possible situations. What happens if you get into situations that are not on the list?! Then you need creativity! A good example is the tandem fatality resulted from a turn initiated at about 200ft and the control line and toggle got hooked on the disconnected side passenger connector. The tandem pair entered into a continuous diving turn. The tandem instructor ran through the given emergency procedures diagram but there was nothing for this particular situation. The most he could think of was- cutaway and deploy reserve. Unfortunately it was too low. However, there were at least two solutions in this case that were not on the diagram- cut the break line and try landing with risers or counter the turn with the other toggle and land on deep brakes. Compliance in this situation didn’t equal safety but provided a false sense of safety. Situations like this require some creativity or divergent thinking. And we use divergent thinking all the time in skydiving- when we exit and fly different tandem clients, when different aircraft changes the inflight procedures, when tailoring the stage for a particular AFF Student, when packing reserves or repairing equipment etc. “Divergent thinking is a thought process or method used to generate creative ideas by exploring many possible solutions. It typically occurs in a spontaneous, free-flowing, "non-linear" manner, such that many ideas are generated in an emergent cognitive fashion. Many possible solutions are explored in a short amount of time, and unexpected connections are drawn.” There is another system of education, which is based on reasoning, where cause and effect are the significant element. This is the system to which we owe the development in skydiving and skydiving equipment- people trying different things and improving the ones that work. With this system, understanding how and why things happen is the driving force. That’s how basic military parachutes were improved for sport parachuting to get to the current state of the art canopies and harness containers. This is how we all got where we are now. With this system, the student’s safety and progression are the important thing, not the standard of “pass or fail” and the learning process can be tailored so the students can learn effectively. In this system both- student and instructor are aware of the level of competence /unconscious incompetent, conscious incompetent, conscious competent, unconscious competent/ the student is in. Right now there are thousands of consciously incompetent skydivers and instructors about their own equipment but they are expected to deal with extraordinary situations with competence. They simply do not know how their reserve system or components exactly work and what potential problems they can cause them. As a result, these licenced skydivers are not ready to deal with a number of issues. If you knew that if the Cypres fires in head position and the reserve might hesitate, how materials and body position affect the reserve openings, what the reserve pilot chute is, etc. you would consider your actions. The level of competence/competence- confidence loop/ directly affects the performance and decision making in every situation- challenging or threatening. The more competent you are with equipment and situations, the more pressure is reduced and it is easier to make decisions. All this is not that new and there is wonderful work done by instructors and dropzones. However, it is happening not because of the current standardisation and command and control culture but despite it. Yes, sometimes habit is stronger than reason, but reason always prevails eventually. Maybe it’s time the available knowledge in the 21-st century about learning, training, psychology and the connection between them to be implemented accordingly. While doing that, some accidents could be prevented. After all, skydivers are organic creatures and parachutes are just mechanical systems operated by skydivers. Nothing magical happens up there! The magic we feel is only in our heads! --------------------------------------- K.B Jumps - 25 000+ AFF, Tandem Instructor, Freefall Photographer Rigger- FAA all types, APF Rigger Examiner Master of teaching, Biology and Chemistry
 -
2 points
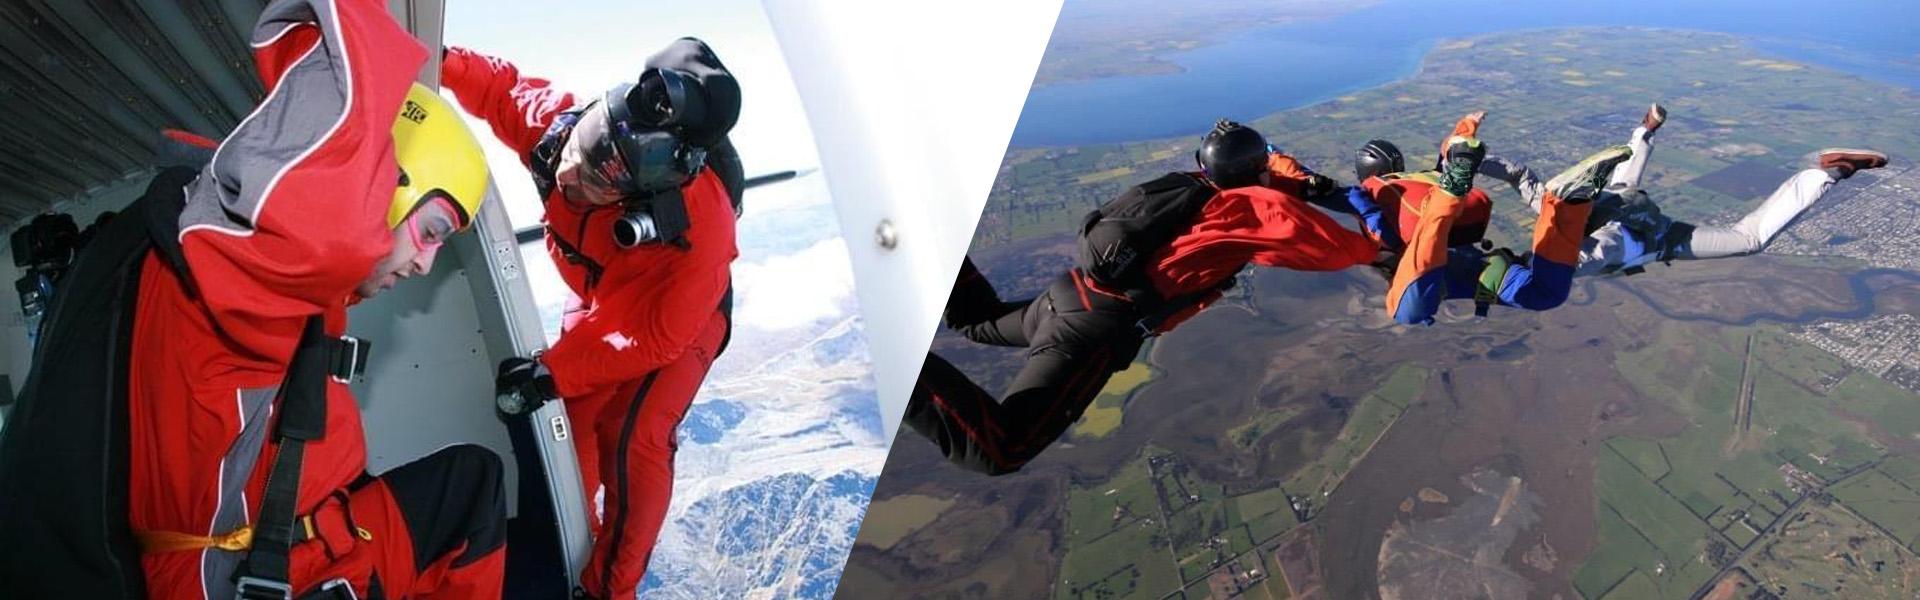
 When first learning to skydive, at least in the US, you attend a first jump course (FJC) that usually lasts between four and five hours on the ground, then you go up in a plane and jump. There are several methods of instruction including Accelerated Free Fall (AFF), Instructor Assisted Deployment (IAD), Static Line (SL), or a combination of the three called the Integrated Student Program (ISP). While all of these methods of instructions are different, they all have one thing in common: gravity. You have to land your parachute. This is where the PLF comes into play. It is also where numerous accidents happen, sometimes due to sliding in, rather than doing a PLF. This is understandable, since tandem pairs land this way for safety reasons. Besides standing up the landings (the preferred method), this is the landings students see most often. When skydiving first began, all of the equipment was military surplus. This included round canopies, so naturally the PLF was brought along as the safest way to land. Over time, and thanks to the innovation of early pioneers of the sport, the equipment evolved into the square (and now elliptical) canopy, which brought its own problems, like needing a slider to control the opening, and also alleviated the issue with hard landings, mostly. Now, rather than falling more or less wherever the wind blew you, you could steer and fly the canopy much the same as a glider, since the canopy is now a pressurized wing. When you want to land, you fly a landing pattern and pull both steering toggles down and flare, much the same as an airplane would by using flaps. This allows you to bleed off forward speed and land softly standing up (theoretically). Like all things skydiving, when it works, it works really well, but when it doesn't work, it can kill you. I was a skydiver before going airborne, so when it came time to learn how to PLF, I thought I had an advantage since I had been taught how. Boy was I wrong. They had a platform you climbed on and rode a zip line to gain forward speed and then you let go to learn how to PLF in a simulated landing. I could not keep my feet together, so the Blackhat (instructor) tied my boots together. I had to hop around all day, but I have not had a problem keeping my feet together since. In airborne school, they take two weeks to train you how to jump out of planes compared to five hours in skydiving. Most of that time is preparing you to land. As there is no way to steer the round canopy other than slipping on landing (pulling the risers to go sideways a little) or facing into the wind, and no way to flare or slow down the speed, the PLF is needed to prevent injury. I have seen a jumper fall about 50 feet and do a PLF and walk away with a few bruises. While I understand that time is limited and it is hard to prepare a student for all possibilities, I feel that more time should be spent on PLFs during the FJC, at least an hour, and that students should do at least five correct PLFs before every jump. This is standard procedure before doing an airborne jump, and includes all jumpers being led through the entire jump by a jumpmaster, including their emergency procedures. If we put every student through this before every day of jumping, it would help prevent injuries. The reason students choose to slide in rather than PLF is observation. Since this is the way a tandem pair lands in order to prevent injury, it is assumed to be safe. It is, when properly taught. It is easier to injure yourself sliding in or trying to run out a landing than doing a PLF. I know of at least two serious injuries sustained sliding in that a proper PLF would have prevented. One case ended with a cage around the lower vertebrae. I made a jump at an unfamiliar DZ on rental gear and the winds were a little high, about 15 mph, so I ended up landing long. When I turned on final, there were some power lines in front of me and I was headed straight for them. I turned around and did a downwind landing, and a PLF into the hard-as-a-rock, newly plowed field, ending up with some scratches when I landed. I was going about 20 mph forward speed. Had I slid in or tried to run it out, I would most likely have broken something. Another time I jumped at an unfamiliar DZ, I chose to PLF instead of running it out, and while walking back stepped in a gopher hole. Had I hit that while running out the landing, I would have broken my ankle. A proper PLF has five points of contact: the balls of the feet, calf, thigh, buttock, and pull-up muscle (deltoid). When you prepare to hit the ground, keep your feet and knees together, slightly bent, in preparation to absorb the impact. When you fall, hit all the points of contact in order, while rolling on the ground. A proper PLF will allow you to absorb all of the energy and dissipate it by rolling, rather than staying stiff and breaking bones or tearing ligaments and tendons. I kick my feet together when approaching my landing to ensure my feet are together and knees bent, ready to hit the ground and roll. That way, if I don't bleed off enough speed to land standing up, I am already prepared to roll and do it without thinking. If I am going slowly enough, I have a nice stand up landing. Although the goal is standing it up, it is best to be prepared for a PLF, especially if you are fond of your ankles and spine. Blue skies. Article written by @sfzombie13
 -
2 points
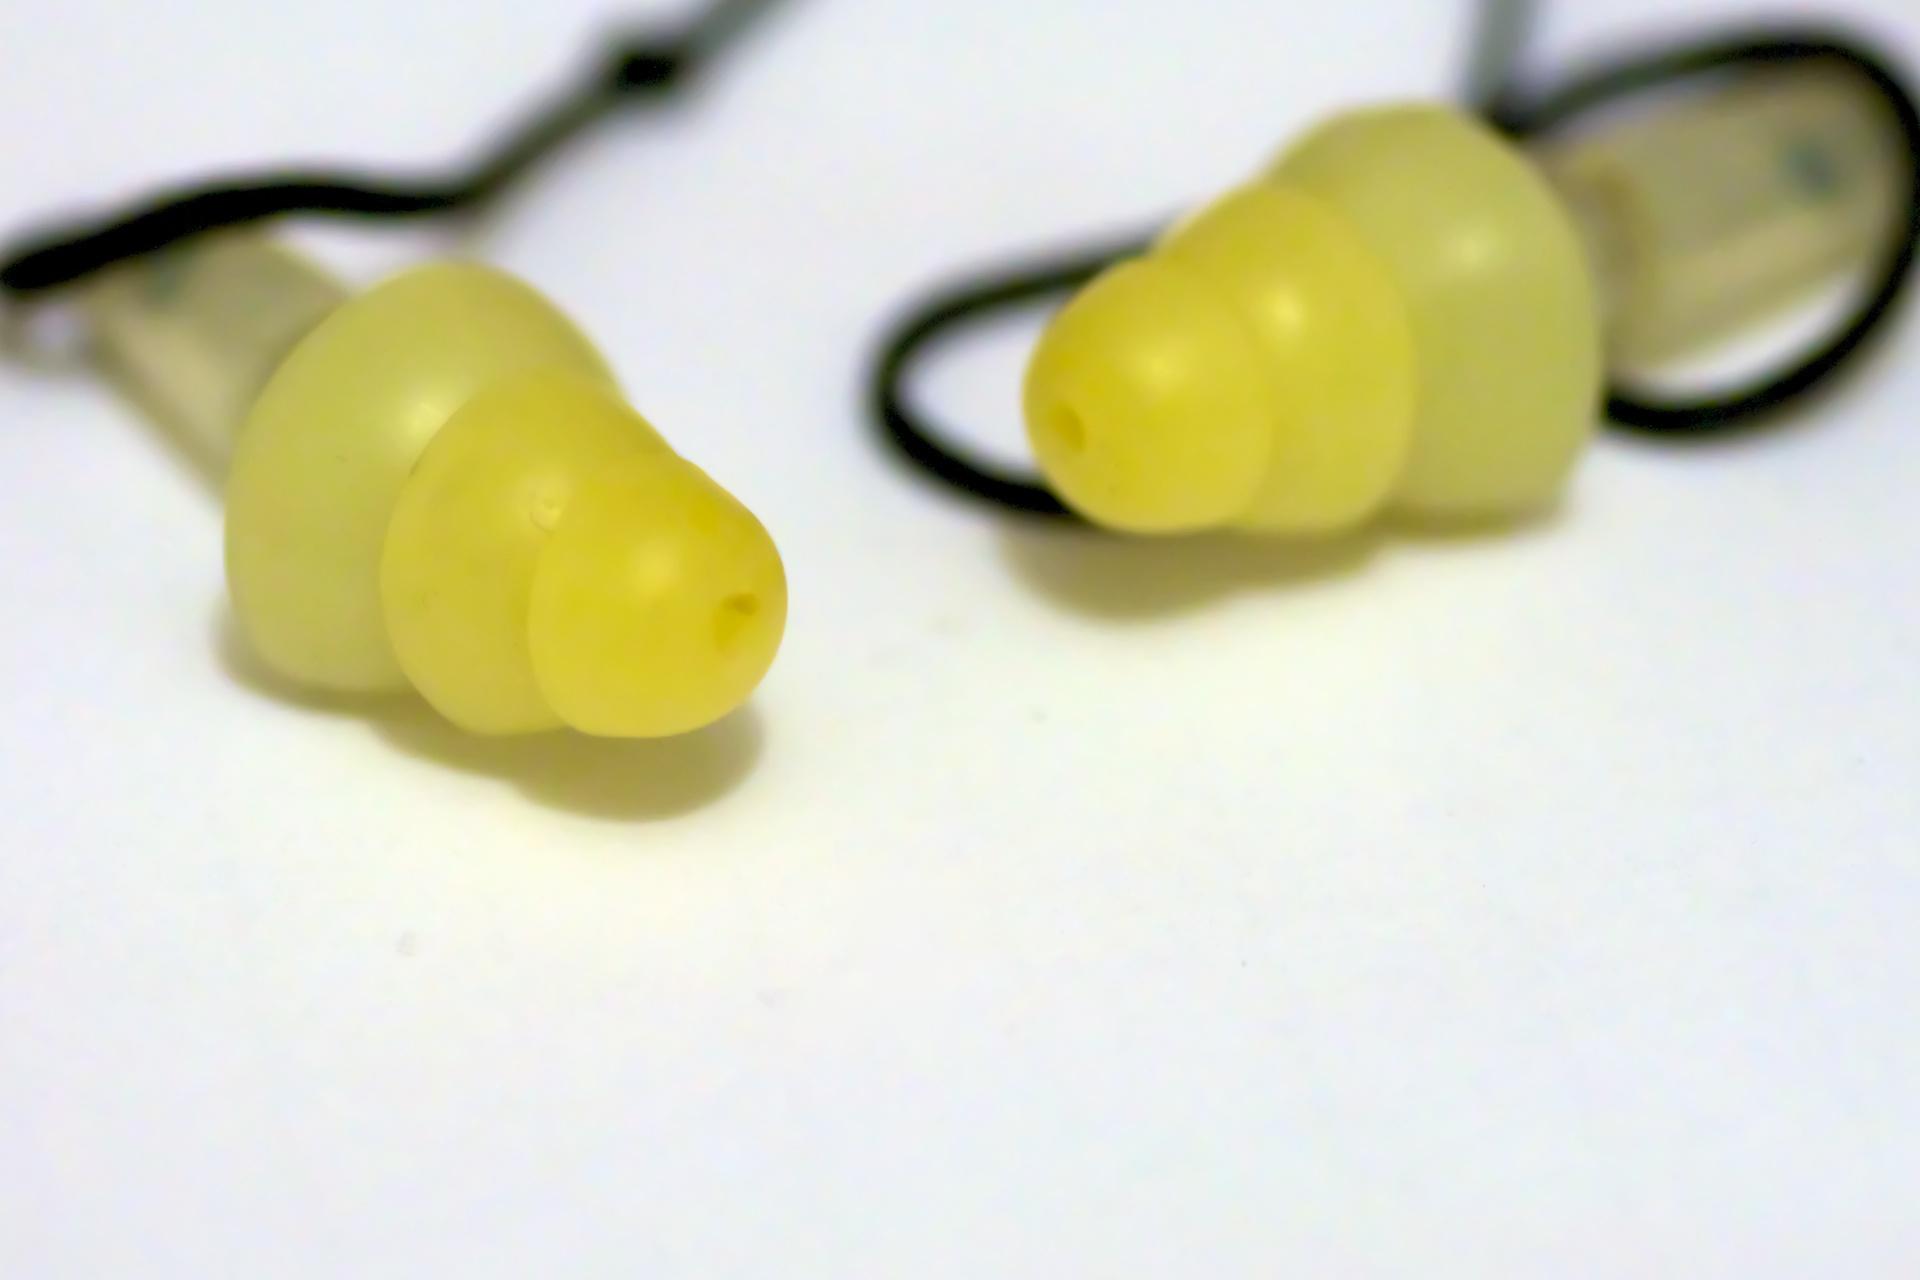 Not wearing earplugs on every skydive? Hear me out (while you still can): It’s pretty damn important to add a pair to your every-jump kit, and your excuses probably don’t hold up to expert scrutiny. What expert? A lofty one. Last week, I got to talk to Dr. Anna Hicks* at length about the thorny matter of skydiving with a cold (watch the February issue of Parachutist for that one). At one point, our conversation took a slight diversion towards hearing damage. The content of that more than deserves its own moment in the sun: Our delicate soundholes, and the damage we don’t have to do them. So: Why aren’t you wearing earplugs on every jump? 1. Because it’s not that big a deal. If you like listening to things other than phantom roaring, then sorry. It kinda is. Each of us is born with 15,000 sound-sensing cells per ear. (I like to think of ‘em as magical hearing hair, because that’s kinda what they look like.) Hearing loss occurs when they die. It’s not just noise exposure that kills them; certain medications and other environmental factors and do it, too, but those are freak deaths by comparison. Once they’re gone, they’re gone. Birds, fish, and amphibians have the ability to grow back magical hearing hair. Mammals, like your average skydiver, lack the ability to regenerate these cells. All we can do is stick in a hearing aid and hope for the best. You don’t have to take my word for it. Talk to anybody who suffers from tinnitus and ask them if they’d have taken precautions to prevent it. 2. Because I don’t jump that much. Dr. Hicks begs to differ. “I see so many skydivers that have damaged their hearing,” she notes. “Even if you’re just doing 100 jumps a year, every time you jump, the engine is noisy, and the freefall is noisy, too. Over your skydiving career, that adds up to a lot of noise exposure.” “I still find some people that can’t be bothered with ear plugs even in the wind tunnel,” she adds, “but our hearing is too important not to take ten seconds to put them in every time. You don’t want to end up not able to hear your friend at the pub because you knackered your hearing from too much noise exposure.”** 3. Wearing earplugs in freefall is dangerous. If it’s not just laziness that’s keeping you from protecting your hearing, it might be a misplaced sense of safety. Dr. Hicks wears hers from ground to ground, and she recommends that you do too, even if it’s just on the way up to altitude. “I am a big advocate with any patient I see,” she says, “especially those whose job is skydiving, to wear ear plugs at least on the way up and ideally on the way down as well. Earplugs do not prevent situational awareness, stop you from being able to talk to your students, or to hear shouts under canopy. You can hear what you need to hear, usually you can actually hear your audible altimeter better because the background freefall crackle is reduced, and vitally, [wearing earplugs] reduces the longer-term damage we can experience from our sport.” Some people discover that they find a problem equalizing if they have earplugs in on the way down. Dr. Hicks’ advice: If equalizing is a problem for you, try using the vented plugs (which you can buy from a pharmacy for a few dollars) to better equalize during descent. 4. I can’t afford the nice ones and the foam ones cause ear infections. According to Dr. Hicks, that is not a thing. As long as the plugs are rated, they’ll provide the protection you need. “You can wear posh ear plugs or the cheap foam ones like you get in the tunnel,” she says. “Either-or.” According to a study of sixty long-range patrol-aircraft crew members, the idea that disposable foam earplugs cause ear infections is a total myth. The crew members were randomly divided into three groups: one wearing fancy custom-molded earplugs, the second using foam earplugs that they washed after each use, and the third group using foam earplugs washed only once per week. The study lasted eight weeks and included examinations by a medical officer as well as skin scrapings for bacterial culture and fungal examinations. The results indicated no fungal infections or clinically significant bacterial infections, and no differences in positive bacterial culture between the groups. Moral of the story: roll ‘em up and stick ‘em in. They’re going to prevent a heck of a lot more damage than they could possibly cause, and 50-year-old you (who doesn’t have to have the TV on FULL BLAST ALL THE TIME) will thank you. *Dr. Hicks is a certified badass. An active-duty Aviation Medicine specialist in the British Regular Army, she has logged more than 4,000 jumps over 15 years in the sport, many of which as the Outside Center for the multi-medaled British 4-way team NFTO. Dr. Hicks is also a British Parachute Association Accelerated Freefall Instructor and formation skydiving coach, as well as a Skydiving Instructor at Britain’s legendary Skydive Netheravon. Oh: and she was Tom Cruise’s personal aviation doc during the filming of the latest Mission: Impossible reboot. ‘Nuff said. **Confused? Ask a British person for a translation.
 -
2 points
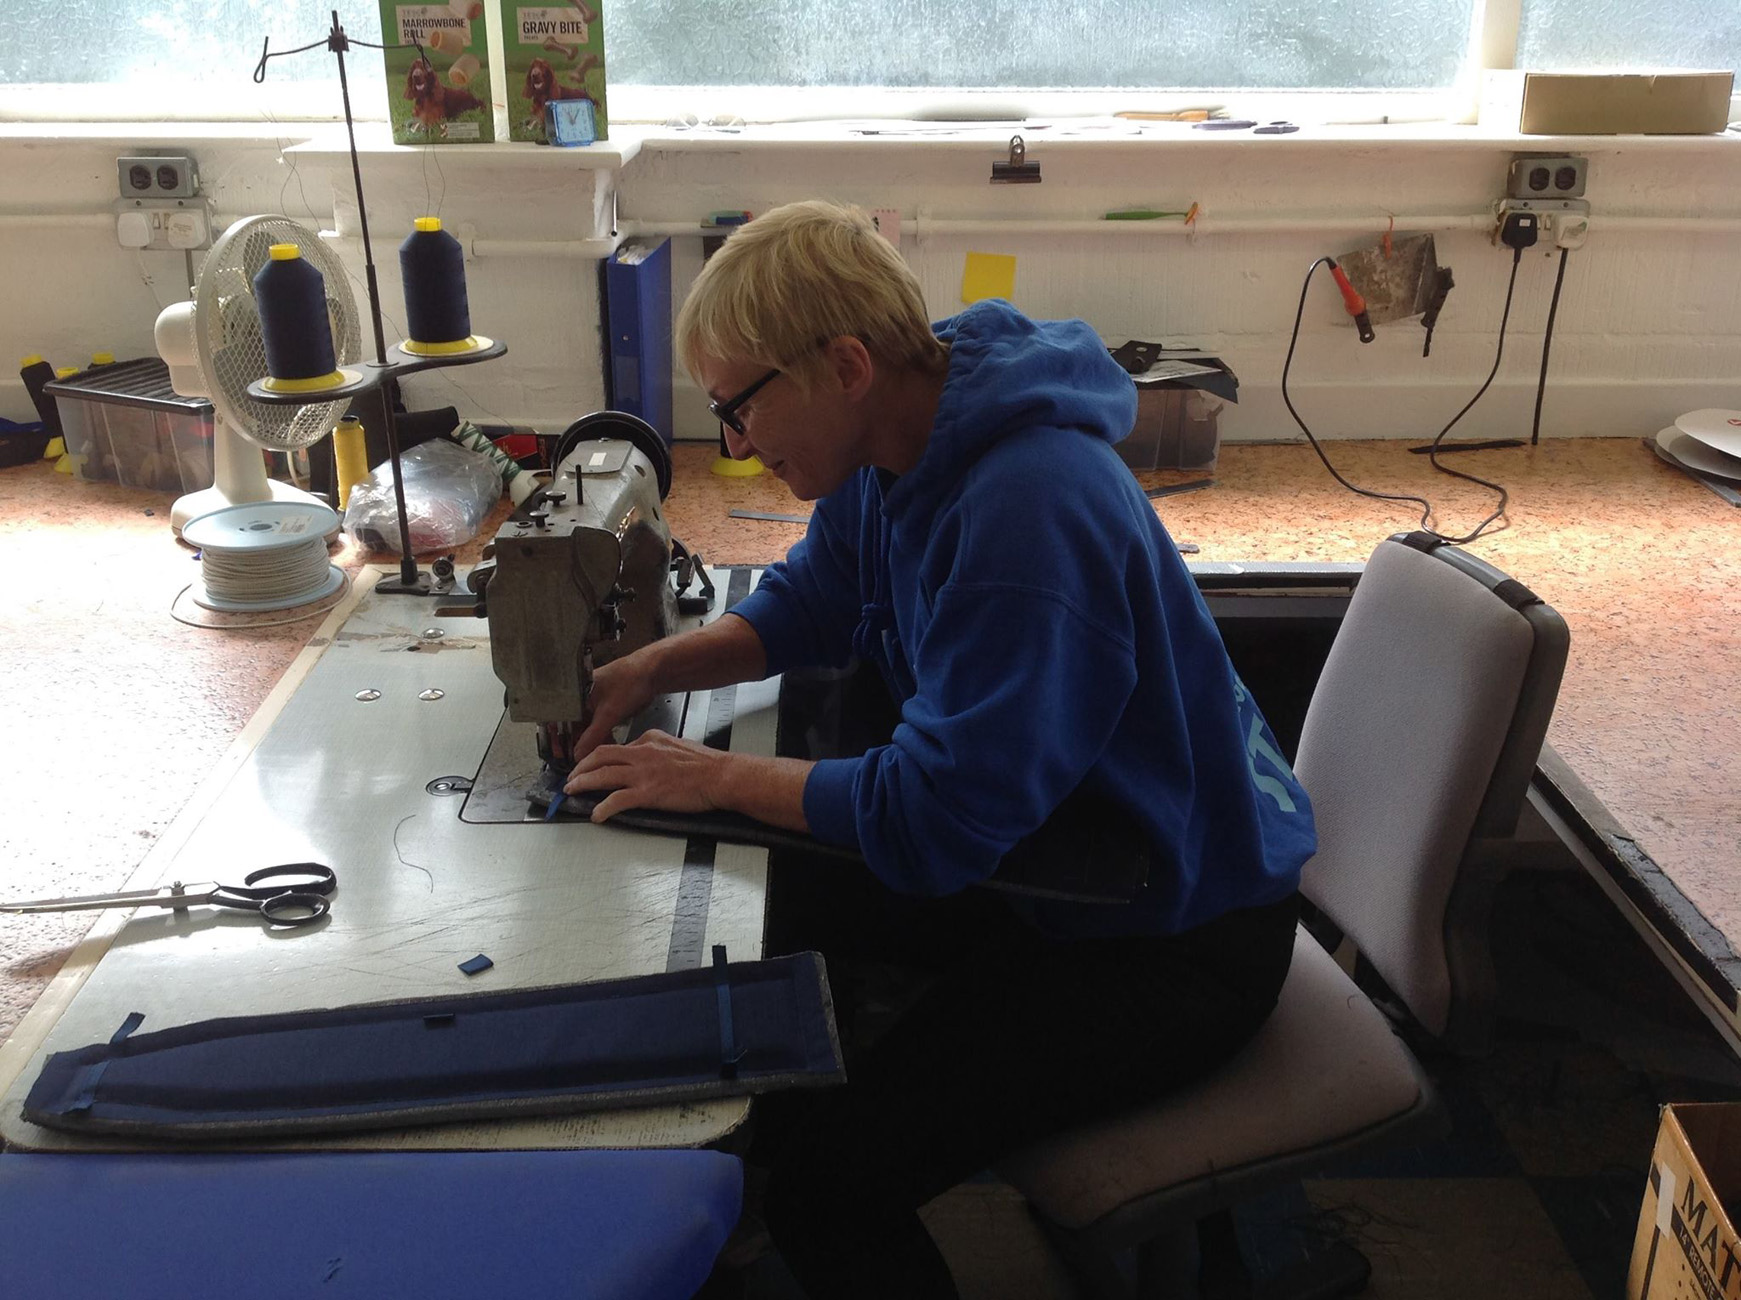 Do your suspension lines have a noticeable five-o'clock shadow? Maybe it’s time for your gear to spend the weekend with your friendly neighborhood rigger. If you’re unsure, you’re not alone--plenty of skydivers hem and haw about this particularly important aspect of canopy maintenance. Looking for a little more convincing? Here’s a brief education on line maintenance by Karen Saunders, one of the few (and one of only two women) to hold the lofty Advanced Rigger ticket from the British Parachute Association. Karen has seen enough fuzzy line sets to give any sane canopy pilot the night sweats, and she wants to make sure it’s not you that gets to live the nightmare of a mid-swoop snap. 1. Go with your gut. “Trust your instincts. If you think that maybe your lines are looking a bit shabby, they probably are. Most people will look at their line set and say, That looks a bit shit, but I’ll do something about it tomorrow. Tomorrow turns into a week, and then a month. Before you know it, you’ll have a line snap or an off-heading opening. Fix it before you create yourself some problems.” 2. Know what you’ve got. “The most important thing is to know what type of line is on your parachute. Most people don’t--and if they don’t, then they won’t know how many jumps they can expect to get out of that line set before it needs to be replaced. And they also won’t know whether to expect to have line shrinkage or whether it is going to go the other way and simply snap when it reaches the end of its life cycle. Vectron and HMA will do just that if you don’t take care of them: Snap. They won’t give you a warning aside from the fact that they will start to fray as they age. The other thing to think about is where your line set actually comes from. Most people will buy their line sets from manufacturers, but there are riggers out there that will make cheaper line sets themselves. I can spot a manufactured line set from anything else in a flash, but most people couldn’t--and maybe that’s the line set have got on your canopy that you bought from somebody in good faith. It is always best before you buy anything to get it checked out.” 3. Get some visual reference. “Once you know what line type is on your parachute, look at Performance Designs’ line wear charts for your lines to get an idea of what wear actually looks like. It may surprise you. Using that reference as an example, you can see how deterioration looks over a given period of time and what percentage of strength you lose. You can test your new knowledge immediately by looking at the bottom part of your brake lines and the stabilizers. Those lines are always going to take the brunt of the wear. Generally, having the bottom part of your brake lines replaced at the first sign of wear is going to save you a whole world of problems.” 4. Watch for the warnings (if you have a line type that broadcasts them). “If your lines are made of Spectra or Dacron and you need a reline, you can expect to get some bad openings: an off-heading or big surges after opening. That’s generally because the slider is moving up and down your lines, heating them up and shrinking them. If your parachute opens and it is not on-heading, then it is generally an indication that it is going out of trim. You need to get somebody to look at that. When you do, they might look at it and tell you that the lines are okay; maybe it’s just your body position causing the problem. If they look at your lines and go holy shit, man, you need to replace straight away, then you have your answer. Either way, you’ll have peace of mind.” 5. Don’t get tunnel vision. “Don’t just look at your lines. Your lines are suspended by some binding tape which needs checking as well. Especially after a hard opening, be sure to look at the tape where each line is attached to your canopy, as well as the fabric around it. Kill lines are another thing. Everybody forgets that a kill line wears out in the same way as a suspension line, except a lot more quickly. If your kill line is made out of Spectra and has shortened, then you’re going to start having problems with your openings. The dead giveaway is finding that your pilot chute is turned virtually inside out every time you land. A kill line wears throughout the bridle. The weakest point doesn’t have to be at the bottom or top--it can snap right in the middle--so make sure you pull it through from both ends when you check it. Pull it as far as you can from one end and then pull it as far as you can from the other end to have a good look. Finally: If you’re getting a new line set, please, please, please replace your slinks as well. Don’t put a new line set on it and put an old set of slinks on it. That defeats the object of this exercise. They are not infallible. They do fail, and the last thing you want is for a slink to fail at 200 feet, because you’re not going to survive that.” 6. Remember: The integrity of your lineset isn’t a good place to save a few bucks. “The costs to reline aren’t as bad as you might think. I can tell you roughly what I charge, but I can’t speak for other riggers. That said, I will always look at something for free, and if someone asks me for it, I will always give my advice for free, and that’s also the way most of the riggers I know like to work. I charge 15 pounds, which equates to about 20 U.S. dollars, to replace both lower brake lines. If the lowers go from the cascade all the way to the toggle, I charge 40 pounds--which is something like $60. If you compare that amount of money to losing a brake line when you’re flaring--or when you are at 100 feet--you see the value. You have to weigh the cost of your own safety. If you don’t happen to have a rigger on your dropzone, then go to an experienced jumper. See them and say, Hey, I’m a bit worried about this. What do you think I should do? If they look at it and start laughing, you have your answer.”
 -
2 points
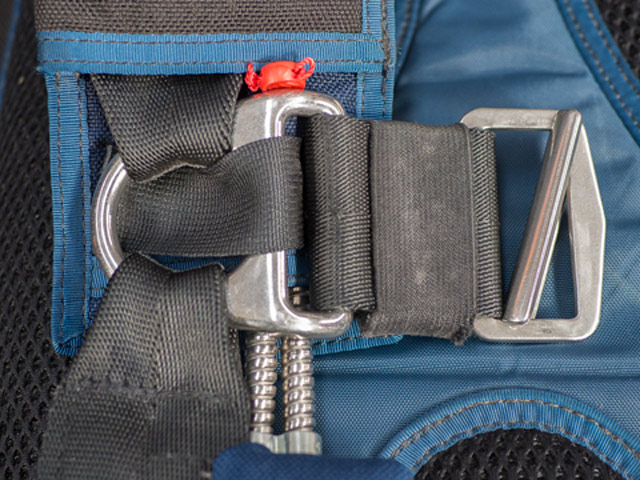 Harnesses: Fitting to your body and effects to consider... During part 1 (take a look here) we described the different parts of a skydiving harness and the materials used on it. On the second part we are a bit more practical. Here we will go through most (all?) harness options and designs, independently of the manufacturer. We will see what they are and which purpose they have, so you can decide if they are for you or not. Most manufacturers are open to offer non standard options if the buyer asks about it. However, there is a significant number of options that are specific for a subgroup of manufacturers, and therefore you can't freely mix and match every single option explained here. To keep things ordered we will go from top to bottom of the harness. Let's go! Risers Going from top to bottom, the first thing you find are the main risers. As simple as they seem to be, they have a significant number of options. Webbing The first thing to decide is which type of webbing you want on your risers. In this time and age there is little debate: If you are not an outlier you'll want type 17 risers. There are multiple reasons. The main technical reason is that it makes it easier to pull down the slider to stow it behind your head. Type 17 is also preferred to type 8 because of its lower bulk and cooler appearance (which is, of course, not a technical reason). It typically comes paired with minirings, which are also less bulky than traditional rings and "cool" looking. Regarding webbing, a second option is to have risers sewed in half, reducing its cross section and drag. This option is only available in type 17 risers and has a very specific audience: hardcore swoopers. They need to reduce drag as much as possible, to squeeze out all the performance in their canopies. If you are not a hardcore swooper you can ignore this option. Moreover, some manufacturers advise against these low profile risers if you are going to deploy at terminal speed. The last bit regarding webbing on risers is its length. 21" (53 cm) is the standard length of many manufacturers. As usual, check first with them to ensure that is true. You can also order them shorter (if you have short arms) or longer. It is normally recommended to have them as long as possible, but allowing to reach the slider. That's because with longer risers the canopy can "open up" a bit more, and you'll have more range in all your controls, particularly in toggles. That also means that you can stall your canopy easier, so the whole system has to be in balance. Diving loops Diving loops are nowadays kind of standard, and even rigs targeted at newly licensed skydivers have them. There are, however almost as many kinds as manufacturers. The simplest type is a loop of type 17 webbing sewed close to the top of the front risers. These loops are easy to manufacture, cheap, and play no role on hooking your main canopy. On the flip side, they lay flat against the risers, making them more difficult to grab and causing distractions, and are harder on the fingers. Another common type of loop uses tubular webbing. The advantage of this type of loop over the simple type 17 is two-fold: It is easier on the fingers, allowing to hold the front risers longer, and the loop tends to stay open, making it easier to grab. Sometimes these loops have extra material inside (stiffeners or bungee cords) to ensure they stay open when you need them. It is also possible that the tubular webbing is sewed in the inside part of a regular type 17 loop. In recent years the so called "louie" loops have become more popular. These loops have a double layer of webbing, and stay easily open. But their most distinctive feature is that they wrap the loop used to connect the canopy to the risers. That implies 2 things: First and foremost, they require more attention when connecting a canopy. The soft links (these loops do not accept hard links) have to go through the diving loops and the connecting loops. Routing the soft links just through the diving loops can have serious consequences. The stitching could break and the whole line group could be released. The advantage of these loops is that it allows the canopy pilot to pull from the highest point of the risers, giving more range and a more comfortable pull. Diving loop with tubular webbing on the inside for added comfort and to keep it open. Louie loop. Note how the soft link has to go through the link loop and the dive loop. The last thing to comment here is that CRW dogs typically have dive blocks instead of dive loops. Dive blocks are easier to grab and release, which makes them more useful than loops in that environment. Toggles Manufacturing techniques vary wildly between different rigs. So much, that we won't cover them in too much detail here. What is important is that the toggles stay secured until you grab them. To the best of my knowledge, that is true for every modern reputable manufacturer. Nevertheless, we can analyze the different components/options, even though each manufacturer uses its own technique and rarely offers changes to it. Brake line retainer: That's the part of the toggle that goes through the cat's eye in the brake lines. Normally it is a "hardened" piece made using multiple layers of webbing. Some manufacturers use a straight pin instead. While this seems like a good idea, it opens the door to misrigging, since the pin fits through the guide ring. That could result in the brake line pulling on the pin and its pocket, which could be easily damaged. Toggle retainers: The toggles need to be secured in place. This is achieved with either stiffer parts inserted in pockets in the risers (just like the brake line retainer), straight pins inserted in tighter pockets, or snaps. The number of stiff parts and pins varies between 2 and 3. The orientation also varies. That is why some cases require an upwards motion before pulling the toggles down to release them. Should snaps be used, it is important to remark that the snaps should perforate an extra piece of webbing sewed in the risers, not the webbing of the risers itself. Slack retainers: These are loops sewed on the back side of the back risers. They can be a simple piece of tape (which tend to let the slack a bit more loose), or a elastic (which secures the slack better, but makes the slack stowing more tedious). Toggle with stiffener on top and pin on bottom, tape slack retainers and closed top pocket. Other options are stiffeners on top on bottom, pin on top, extra stiffener pointing downwards on top, elastic retainers and open (at the top) top pocket. Additional guide rings Some riser manufactures have the option of placing an extra set of guide rings at the top of the risers. This way, during full flight, the brake lines go through this set of rings, but not through the normal guide rings. To stow the brakes the cat's eye has to go through the normal rings, the toggle has to lock the brake in place, and the excess can be normally stowed. The benefit of this option is to have a smoother transition to rears, and reduce the length that the brake line is traveling, since it doesn't have to go down to the guide ring and up again towards wherever the pilot has his/her hands. If you are into canopy piloting, or if you need to have very short brake lines, this might be an interesting option for you. 3 rings The last set of options in the risers is the 3 rings system. The first thing to decide here is if you are happy with today's standard: Minirings. The vast majority of sport rigs have them today, mostly for aesthetic reasons. They work just fine, and you rarely see rigs with large rings nowadays. But the pulley minirings form is slightly less effective than in large rings. That means that the force needed during cutaway might be higher. Modern risers have extra housings for the cutaway cable -sometimes with teflon inserts-, to avoid them from being pinched in twists, and make cutaways more difficult. The usage of these housings in modern risers offsets the extra force required to cutaway with minirings in most cases. Another thing to consider is that typically minirings come with type 17 risers, and large rings with type 8 risers, even though other combinations are possible. So the type of webbing you want on your risers might tip the balance for you, if you are undecided. Aerodyne, to keep the aesthetics of minirings but without compromising on pull forces, designed a modified 3-ring release system. The "miniforce" rings system is essentially the same as other minirings systems, but with an enlarged middle ring. That improves the pulley efficiency and reduces the load in the white loop. If you want to use these risers in a container not manufactured by Aerodyne, check first with your manufacturer about component compatibility. We will talk a bit more about this at the end of the section. Aerodyne's "miniforce" 3-rings system. Lastly, you can decide the hardware finish. There are 3 main options in the market: Cadmium plated steel: This is possibly the oldest type of hardware used in skydiving that is still sold today. It works well will all kinds of webbing, the plating offers corrosion protection and it is generally cheaper, despite the extra costs associated to dealing with cadmium's toxicity. However, the plating can flake off over years, and then corrosion might happen, depending on the environmental conditions and how you treat your gear. Moreover, it is not shiny, which goes against one of the (sadly) first principles of skydiving: You have to look cool. Cadmium plated steel 3-rings system after more than 1000 jumps. Stainless steel: This kind of hardware is the most commonly used today. It offers better corrosion protection than plated steel, since there is not plating that can flake off. It is and stays shiny. And it slips more. 3-rings release system can lose about 5% efficiency (more force transmitted to the small ring) because of the reduced friction. Arguably, in well manufactured miniring systems, it doesn't play a role. Stainless steel 3-rings system after 100 jumps. Black hardware: This is the latest addition in hardware finish. It is steel hardware with an oxide layer, that gives it its matte black color. It is relatively recent, so field experience is more limited than stainless steel and cadmium plated steel. Some people claim that after hundreds of jumps it doesn't have significant usage marks. However, at least in some cases, marks are pretty visible (see also the pictures of chest rings). Black 3-rings system after 100 jumps. The chosen finish will affect the 3-rings system, buckles, chest and hip rings, and RSL shackles. However, whatever you choose, it won't affect the grommets or housings of your rig. Maybe something to consider. Some people mix risers with different hardware materials and from different manufacturers. This works fine in most cases. However, you are stacking the odds against you if you are not careful. On one hand dimensions and placement of all the parts should match. RSL ring side, cutaway cable inserts and length of cable, large ring dimensions -that can be different even among minirings systems-, large ring placement -higher or lower in the MLW-. All these are things to consider. There have been already fatalities rooted in a poor mix of components (reverse risers on a Javelin container). On the other hand, NAS-804, the specification required by TSO-C23b, states "The use of dissimilar metals, especially brass, copper, or steel in intimate metal-to-metal contact with aluminum or aluminum alloy, shall be avoided, whenever possible.". So, in principle, unless you know better, you should avoid mixing types for extended periods of time, as you might cause premature degradation of your hardware. Also, "miniforce" risers work fine with Aerodyne rigs. But the enlarged middle ring might not release cleanly in other rigs. Check compatibility with the manufacturer of your rig before using that mix. Chest rings Exploring down our harness we get to the chest strap junction. Most manufacturers -but not all- add chest rings to articulate their harness, either by default, or as an option. A fully articulated harness (with chest and hip rings) is supposed to be more comfortable, as the webbing doesn't need to bend and fold as much as a non-articulated harness. However, the chest is an area where these deformations are not really pronounced. As much as your body moves and twists in freefall, your upper torso stays pretty rigid. Nevertheless, chest rings help to avoid awkward and uncomfortable webbing twisting when the harness has been made for a larger person than the wearer. In these cases, the tendency is to overtighten the chest strap to compensate and secure better the jumper. That brings both chest junction together more than they should, and without rings the webbing would be unnaturally bent at that point. Of course, in an ideal world, every skydiver would have a harness that fits them properly, so this would never happen. Besides the arguable increase in comfort, chest rings are an excellent investment if, for whatever reason, the harness needs to be resized or repaired in the lower MLW. With chest rings the area affected is reduced to the webbing between the chest and hip rings. Without chest rings, the amount of work (and price) for this would be significantly higher, since the MLW is sewed to more components that would need resewing or replacement. Like the 3-rings release system, the chest rings can have different finish. More unique to chest rings is their orientation, and its influence on fitting and chest strap width. The chest rings used in every modern harness/container system are always very similar to the large ring in the 3-rings release system. The only possible difference is the bend in the slot where the MLW is threaded, which might or might not be present. In the chest, manufacturers orient the ring in 2 different ways: With the threading slot towards the upper MLW, or towards the chest strap. There are a few subtle implications: Rings with a vertical orientation (threading slot towards upper MLW) accept more naturally type 17 chest straps. In roughly half the circumference of the ring, the manufacturer has to accomodate the lower MLW and the chest strap, so commonly type 17 is used for the chest strap. That doesn't mean that type 8 is not possible. It is, but being it more bulky, it is less convenient. Rings with a horizontal orientation (threading slot towards chest strap) accept more naturally type 8 chest straps. I have yet to see this configuration with type 17, but it is, in theory, possible. Looks would be compromised for no reason though, so it is unlikely you'll see it either. Another thing to consider with this configuration is the range of motion of the upper MLW. Here, it can slide to the sides easier (the ring stays in place and the upper MLW can slide on it) than in vertical configuration (where the whole ring has to move and overcome the friction with the chest strap and the lower MLW). What that means is that when flying steep head down angles, the harness can slip down (up?) your shoulders easier than in other cases. Black chest ring after 1000 jumps. Note the shiny side on the right. Chest ring with the threading slot towards the upper MLW and a type 17 chest strap. The last option to consider regarding chest rings is the use of padding under the rings. Not many manufacturers offer it, but it is nevertheless possible. Chest ring with the threading slot towards the type 8 chest strap. The additional tape keeps the padding secured under the ring. Chest strap As we mentioned already, there are two chest strap widths to choose from. Regarding strength, there is no real difference, since the weakest point is the friction adapter, which is rated at 500 lbs independently of the width. Type 17 is less bulky and has less drag, which some swoopers would care about. It is also true that these same swoopers, the ones that can notice the difference, would completely remove their chest strap after opening and stow it away (while using a belly band to secure themselves). So this is also a moot point. At the end, this is one of these options that are completely a matter a personal taste. Another option regarding chest straps is their length. Most manufacturers have a standard length, which is typically around 19" (48cm). Normally this can be extended at no cost. Long chest straps allow the jumper to open up their harness and therefore their canopy, for increased efficiency. With a long chest strap it is also possible to lean forward during landing for a more active canopy piloting position. Regardless the length of your chest strap, if you are going to loosen it as much as you can, you should pay attention to its termination. Type 8 chest straps have a folded end that acts as a stopper and prevents the chest strap from being accidentally unthreaded. Type 17 terminations are sometimes not that effective, depending on how it was done. Termination of a type 8 chest strap. The tip has 4 layers to make it stiffer and the tab prevents the strap from being accidentally removed. Terminations of type 17 chest straps. The top picture has an extra tape, that creates a tab. The bottom picture has a stiffener at the tip. Note how fuzzy they are, specially the one on top. That's the effect of rubber instead of the normal elastic bands. Lastly, some manufacturers offer wide webbing loops in the chest strap to stow it. That replaces the default elastic bands, that tend to stretch over time loosing effectiveness, and can also get lost. This option is more common on type 17 chest straps than on type 8. Whatever you choose (elastic band or webbing loop) avoid rubber bands anywhere in contact with webbing. Rubber bands are fairly abrasive. As a result they will weaken your webbing and make it look fuzzier. Handles The next decision point coming down the harness affects the cutaway and reserve handles. The most common combination is a pillow for the right side (cutaway), and a metal ring for the reserve ripcord. But there are variations. Pillow handles are popular among freeflyers, because they are less snag prone than other options. Many of them use pillows for both the cutaway and reserve handles. The obvious downside, is that they make grabbing and pulling them more complicated. A pillow requires your whole hand to grab it. On top of that, it has a similar texture to your jumpsuit fabric, so if you are not looking and you have a loose suit you can grab part of your jumpsuit by mistake. To make them easier to grab, some manufacturers make sure they have a harder core. Others make them extra fat. And others sew an extra layer of a less slippery material. You can also embroider pillows for extra "flashiness", which is not possible with other types of handles. Reserve pillow handle, with embroidery, a pocket between both pieces of webbing on the MLW, and a spectra ripcord. Metal rings have been around a longer time than pillow handles. They are easier to grab (you can simply hook your thumb through them) and have a very distinctive feeling, so you can't possibly grab your jumpsuit fabric by mistake. On the other hand they are easier to snag when your buddy is grabbing your harness or with a small camera during exit. To mitigate that, some manufacturers offer low profile D rings, that stick out less than traditional D rings. Reserve D ring with a pocket between both pieces of webbing, and a steel cable ripcord. The last option is having a webbing loop with a stiffener inside to retain its open shape. These handles are very common in tandem rigs. However, in sport rigs they are rarely used. They are compromise between pillow and D ring handles. The reserve ripcord has been made of a steel cable for a long time. It works well in most cases, and most manufacturers stick to it. Others give the option of using a spectra ripcord with a bungee inside. In some cases this is the default for new rigs. The claimed advantages are many. Since spectra is more slippery than steel cables, it reduces the pull force required. In case of a dislodged handle, the bungee will keep it close to the housing and minimize the area in which it will be bouncing around. It is also cheaper to manufacture and inspect in some cases (steel cables have a hidden swage inside the pillow to keep them connected to the handle). However, it is slightly easier to misrig (the reserve pin can be threaded through just some fibers of the ripcord, instead of through the loop) and can be damaged by a sharp edge in the housing easier than a steel cable. The next option here is the material of the cutaway cable. Almost every manufacturer offers "lolon" coated cables. These are the standard yellow cables that most people are familiar with. They are reliable if the user/rigger ensures proper length and maintenance. The maintenance requires regular cleaning and lubrication of the cables. This is often neglected, which can result in increased pull forces during a cutaway. An alternative material is teflon coated cables. These are orange or red, and are currently in use just by Parachute Labs and their Racer harness/container. The advantage is that they don't require periodic cleaning and lubrication. However, getting them right is more complicated, as teflon doesn't stick easily to the cable. That resulted in the past in the core of the cable detaching from the coating, leaving the sheath locking the 3-rings release system. Regardless of the material you chose, it would be smart to check regularly your cables for cracks or other issues to avoid similar situations, as in theory it could also happen with "lolon" cables. Finally, there are a few ways to construct the pockets for the handles. The most common ways are either sandwiched between the 2 pieces of webbing of the MLW, or with a specifically manufactured pocket made of fabric wrapping the MLW webbing. As long as the velcro is in good condition, both are equally secure. On rigs with chest and hip rings the pocket wrapping the MLW is more common, as there is extra stitching necessary to secure the MLW in place, right where the handles are. Another advantage of the fabric pocket is that velcro is placed further away from webbing, avoiding possible contact and damage. On some older rigs, the cutaway handle might be attached just with a simple velcro strip, without extra pockets or in between the MLW. This is easier to disengage accidentally. Reserve pillow handle, with pocket wrapping the MLW and a steel cable ripcord. Cutaway pillow handle, with a simple velcro strip on the back side of the MLW. Hip rings More important than chest rings, are hip rings. However, they are more difficult to evaluate for a variety of reasons. The most important one, is that each manufacturer puts together in that junction a different set of harness components. Let's see this in more detail: MLW, laterals and front and back leg straps: Some manufacturers might connect together in a single round ring 4 different components. This has a couple of disadvantages, and that's why it is not a common configuration. First and foremost: it connects the leg straps too far up. The angles then could be a bit more awkward and less comfortable, particularly if you are a tall person and want to sit on your harness during canopy flight. Secondly, with 4 connected components there is little room for a belly band. Round hip ring connecting 4 different components (lower MLW, laterals and front and back leg straps). MLW, laterals and a single leg strap junction point: This setup is far more common than the previous one. Having the front and back leg strap junction working independently from the ring, and therefore placing this junction further down in the harness, allows to have a more comfortable fit. The angles of the leg strap become more natural. Nevertheless, the consequence of this is that the leg strap becomes slightly more stiff. There is a non-articulated junction between front and back leg straps, and they move as a single component. Most manufacturers design the geometry of this junction in a way where the back leg strap connects to the ring, and the front leg strap connects to the back leg strap. Rigging Innovations does it the opposite way in their Curv. There these roles are reserved and the front leg strap is connected directly to the ring. As a result, when the leg strap moves forward, it pulls in a bit more on the hip ring, and consequentially on the whole container. Round hip ring connecting 4 different components (lower MLW, lateral, belly band and leg strap) MLW and front and back leg straps: This arrangement is also very common. The ring is placed further down than in the previous case, which allows to connect independently the front and back leg straps, while preserving comfortable angles. Laterals are connected to the MLW above the ring in this setup. That junctions is very stiff, and right above it is the handle pocket. The small area in between absorbs whatever angle change you induce by leaning forward, so it ends up bending sharply. Another effect of this arrangement is that having the rings below that junction makes belly bands sit further low than in harnesses with rings connecting laterals. But the positive side is that both parts of the leg strap can move independently. Some people like them to move "at once", and so opt for a setup that adds an extra piece of fabric that softly links front and back leg straps and slightly covers the ring. Hip ring connecting 3 different components (lower MLW and front and back leg straps linked with an extra piece of fabric). Note how further up is the lateral junction. Each arrangement is a tradeoff. Depending on your body type and chosen discipline, you might prefer one setup or another. Part 3 will focus on body types and will explain how theses tradeoffs might affect you. As with chest rings, repairs are easier on harnesses with hip rings than without them. Another thing in common with chest rings is that hip rings are also affected by your choice of hardware finish. An option related to hip rings is the belly band. This component can have 2 different functions. Most people that use them do it in their swoop setup. They undo completely their chest strap, and stow it away. To stay secured in the harness they use belly bands. The second group of people interested in belly bands are people whose harness has laterals that are too long. With a belly band they can pull their hip rings a bit forward, making their container stay closer to their lower back and move less in freefall. That is particularly important while freeflying. Of course moving the hip rings too much forward can distort the harness geometry and affect comfort. If you are in this situation chances are that you should get your harness resized. Hip ring connecting 4 different components (lower MLW, front and back leg strap, and belly band). Note how this setup places the belly band lower than in a setup with a ring connecting to the lateral. Laterals As we saw in part 1, the laterals are the part of the harness that connect the back of the harness with the lower MLW. They are critical for comfort during freefall and under canopy. Too long and you will have a huge gap between your back and your container. Too short and they'll make your harness feel too tight and uncomfortable. The default construction, with the laterals coming straight out of the edge of the backpad, works fine if your back is significantly wider than your container. But in many cases that's not true, the container and back are about the same width, and there is a measurable gap between the back side of the laterals and your back. Many manufacturers try to find a way to contour to the side curvature of your back (back to front, at the belly level). That makes the container more comfortable and it stays in position without moving around much. There are essentially 2 schools for that. The most common is to find "cut-in" laterals, where they are inserted in the backpad not at the edge, but somewhere more centrally. This style of laterals are in contact with the jumpers back, and typically they are padded for extra comfort. Another type is to have the webbing coming straight from the edge, get to the hip junction, and come back a bit more towards the center of the backpad, wrapped in padding. There are alternatives to the two main approaches. Infinity and Sife provide floating laterals as an option, where the lateral webbing goes through the webbing slot of the hip ring, which moves freely. Sife adds padded stabilizers to that configuration. Mirage has the laterals coming straight out of the edge of the container, but has two elastic bands coming from the center of the backpad, acting as a sort of elastic stabilizers. Lastly, as in some student rigs, SunPath added adjustable laterals to their Aurora wingsuit rig. Straight laterals coming out of the edge of the container. Padded stabilizers. The outermost component is simply an stiffener wrapped in fabric, without major structural purpose. Floating laterals. Note how the ring can move freely through the webbing of the lateral. Elastic stabilizers. Leg straps Leg straps are the remaining piece of the harness. And of course, there are multiple options here as well. In part 1, we already saw multiple adapters. Each manufacturer has its default set of adapters. Nevertheless, some of them, can install an alternative style if you ask them. These adapters are also affected by the chosen hardware finish. As it has been mentioned before, stainless steel is more slippery than cadmium plated steel. The teeth of the adapter could also be harder and sharper if they were the same design as plated adapters, which could damage the webbing and make the whole system work differently. That's why both types of hardware have slightly different designs. These effects are also part of the reason to have double layer straps, to make them thicker and slip less. Besides this, adapters are normally thread-thru. But it is also possible, even though not common, to order B-12 snaps. They allow to clip-in the leg straps, instead of having to put your legs through them. We have seen lots of options targeted for swoopers in the upper side of the harness. The bottom side also has options for this discipline. It is possible with some manufacturers to order wider leg straps, so sitting in your harness for long periods is a bit more comfortable. The tradeoff is that they are more uncomfortable during freefall and on the ground. Since swoopers tend to slide during their landings, the leg straps suffer a great deal of wear. That's why it is also possible to use leg strap covers, that can be easily replazable once they are worn out. That way, your harness stays intact. The last optional bit is the freefly bungee. It's functionality has been already discussed in part 1. There are basically 2 designs: Connecting the inner part with 2 webbing loops and a bungee; or connecting the outer part, with the bungee routed through a channel that hides the knots and distributes the tension. Freefly bungee connecting the inner part of the leg straps and knots exposed. Freefly bungee connecting the outer part of the leg straps and knots hidden in the channels. More harness options There are even more options than what we have covered so far. But they are difficult to classify going from top of the harness to bottom. For instance, embroideries. Laterals, leg straps, mud flaps (right below the 3-rings) are all areas were you can include any embroidery. Mind you, the embroidery is done in fabric, not in webbing. So for instance, to add an embroidery to your laterals, they have to have a piece of fabric covering the webbing. Other example are hook knifes. There are 2 common pockets for hook knifes: In the mud flap, or in the leg strap. Some manufacturers also add a hook knife pocket integrated in the fabric that makes their handles pocket. There are multiple models of hook knifes: Cheap plastic handle with a single blade, harder plastic with single or double blade, metal handle and single or double blade, or full metal knifes. Even though it is unlikely that you'll need it, it is recommended to avoid the very cheap knifes made of brittle plastic. Some manufacturers make contoured yokes, that adapt better to your shoulder area. It is also possible that they offer an "inverted yoke", where the container seams are inwards, looking a bit neater and slightly more comfortable on that area, since the sharper binding tape won't be rubbing against you. Every manufacturer also offers padding. Some include full padding (yoke, backpad, stabilizers and leg straps) as a single option. Others separate it in 2 or 3 areas, allowing you to choose with more granularity. Besides the standard padding, made normally out of some spacer foam, some manufacturers also offer "deluxe" padding in their backpad, made of a more comfortable material. Rigging innovations has gone an extra mile in the harness design of their Curv container, and offer 3 unique things. The first is what they call the bio yoke. There, they essentially separated the part of the yoke in contact with your shoulders, and the part of the yoke that connects with everything else inside the container (risers, reserve risers and housings). This way the part in contact with your body is more flexible and comfortable. The second is what they call the bio curve. This is a half container half harness feature. It simply contours the container so it follows the curvature of your back, avoiding gaps there. The third thing is a new leg strap geometry, which has been already discussed in the hip rings section. End of Part 2 This concludes part 2. As you can see, there are tens of options, which create hundreds of combinations. Each manufacturer has their defaults and their common options. If you are buying a new container and want an option not listed in their order form, ask them. You might be surprised. If you are buying an used container, hopefully this will help you to decide on which harness designs and options are important for you, to narrow down your search in the wild second hand market. Part 3 will be the last part of the series. There the focus will be on how different harness designs might fit different body types, and how the wrong dimensions in parts of the harness will affect your flying, comfort, and potentially even safety. So if you enjoyed part 1 and 2, keep an eye out for part 3!
 -
1 point
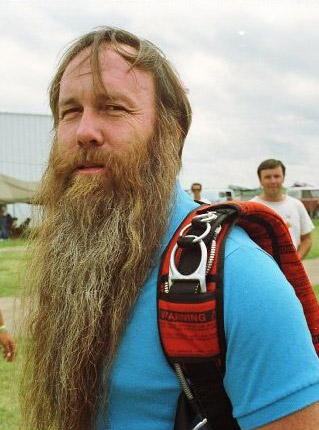 Image by Russell M. WebbIf I've learned one thing in my 35 years in the sport, it's that it is very difficult to get most skydivers interested in safety. Years ago, when it became obvious that my hand deploy pilot chute and 3-ring release made it possible to deploy a malfunction, and then breakaway from it, 500 feet faster than the existing internal pilot chutes and Capewell canopy releases allowed, a lot of jumpers simply started deploying their mains 500 feet lower. Utterly negating the increase in safety these systems offered. Even today, most jumpers think that because all gear has a TSO tag on it, one piece of gear is as safe as another. Unfortunately, that is not true, and most jumpers will choose "fashion" over safety every time. Here are just a few examples of what I mean, starting in the '60's, right up to the present day. The army found out that if you put 2 foot band of fine netting around the skirt of a round parachute, you eliminate the most common deployment malfunction, the partial inversion. The trick worked so well that airborne troop static line malfunctions went from 1 in 250 to 1 in 250,000. WOW! So, a company that made round sport reserves (there were no square reserves yet) came out with an "anti-inversion netted" reserve. NO ONE bought it. You know why, of course...It packed up 10% bigger. Jumpers past up a proven 1,000 times increase in safety for smaller pack volume. Believe it or not, there is a similar, thought not nearly as drastic, choice jumpers are making when they buy a square reserve today. Let me explain. The first square canopies came without sliders, so they had to be built tough. This meant, among other things, that there was tape running spanwise (from right to left) between the line attachment points. With the advent of the slider and softer opening canopies, some companies began leaving the spanwise reinforcing tapes out of their square reserves. Why? Because they cost less to build, and (you guessed it) they packed smaller. This proved to be a wise choice, (at least in the marketing department) because although jumpers very often choose their mains for performance and durability, the almost always always choose their reserves base only on price and pack volume. While reserves without spandwise tapes are fine in most situations, as we have seen recently, they tend to fall apart when skydivers push the envelope. (ie. big people on tiny canopies, going head down at high altitudes.) Safety doesn't seem to be any larger a consideration than it was when they passed up anti-inversion netted round reserves in the '60's. Standard size (large) 3-ring release systems have never given a solo jumper any problem. They ALWAYS release easily and NEVER break. However, mini 3-rings look neater, so that's all people will buy. No matter all the reports of hard or impossible breakaways or broken risers. Don't get me wrong, Properly made, and maintained, mini 3-ring release systems will handle anything even the newest ZP canopy with microlines can dish out. Unfortunately, because they are now being pushed right to their design limit, they must be made EXACTLY right. And a lot of manufacturers either can't or won't. On the other hand, a large 3-ring system has so much mechanical advantage, that even a poorly made system will still work just fine. But then fashion is much more important than safety, isn't it? Spectra (or micro-line) is strong and tiny, so it reduces both pack volume and drag , which means you get a smaller rig and a faster canopy. Unfortunately, It has a couple of "design characteristics" (this is manufacturer talk for "problems") It is very slippery (less friction to slow the slider), and stretches less than stainless steel. This is why it hurt people and broke so many mini risers when it was first introduced. Now, I must say that the canopy manufacturers did a wonderful job handling these "characteristics" by designing new canopies that opened much slower than their predecessors. However, the fact still remains, that if you do have a rare fast opening on a microlined canopy, Spectra (or Vectran) will transmit that force to you (and your rig) much, much faster, resulting in an opening shock up to 300% higher than if you have Dacron lines. (It's sort of like doing a bungee jump with a stainless steel cable. At the bottom of your fall, your body applies the same force to the steel cable as it would to a rubber bungee cord, but because steel doesn't stretch, your legs tears off.) So why would I have a fast opening? Well for one thing, you, or your packer might forget to "uncollapse" your collapsible slider. BAM! Or perhaps you're zipping along head down at 160 mph with a rig that wasn't designed for it, and you experience an accidental container opening. BAM again. The point is this: If you want to push the envelope, and get all the enjoyment this sport has to offer, and do it "safely", you need to make careful choices in the gear you jump. If you weigh 200 lbs. and do a lot of head down, perhaps you really shouldn't be using a reserve without spanwise reinforcement, mini 3-rings, or a canopy with micro lines. No matter how much you weigh, you should educate yourself about gear, and then only jump gear that is designed for how you jump. So many fatalities occur because of decisions jumpers make BEFORE even getting in the airplane. Don't join that group. Be smarter than that. Fashion, at least in skydiving, can get you killed. ~ Bill Booth
 -
1 point
 Luxfly, Tunnel Tech and the Mighty Braffs It seems like tunnels are popping up everywhere, doesn’t it? As a dyed-in-the-wool aficionado of all vertically-oriented wind, this can hardly have escaped your notice. Another thing that hasn’t escaped your notice, we’re willing to bet, is that none of these tunnels have popped up within a lunch-break drive of your fine abode. Wanna do something about that? Well: As it turns out, you can. And you can do it even if you’re not personally made of money. Want proof? Meet Steve Braff, a true tunnel-building dynamo. He and his wife/business partner, Magali share a deeper history in windytubes than pretty much anyone on the planet -- and now, they’re building Luxfly, the most exciting indoor skydiving wind tunnel project in Europe, using the brand-newest, top-of-the-line-est technology to do so (Tunnel Tech, to be specific -- but we’ll get to that later). Suffice it to say: The Braffs are a good example to follow. Currently, Steve and Magali -- collectively known as their vertical wind tunnel consulting business, Starfly -- are keeping busy not just with Luxfly, but with .other tunnels around the world. As a point of note, Starfly is utterly unique -- Steve and Magali are the only people in the world who do this kind of work, helping others to build tunnels. Outside of Starfly, there are two industry operators: the customers, who want to have and operate tunnels, and the tunnel manufacturers, who want to sell vertical wind tunnel technology. Until Starfly, there’s been no one in between to smooth the steep, bumpy road to a grand opening. Pretty in pink “Right now, we have five projects in process,” he says. “But it varies. Sometimes, we help people out with optimizing their existing tunnels; sometimes, we help them start projects, or assist them in different phases. We work with a group of investors to which we propose our projects. The specific investors depend on the location and the host country. People who want to build tunnels can work with us at every stage. We can do it from A to the end.” “Since I was a kid, my dream was always to fly like Superman,” Steve grins. “And that was the only thing I ever wanted to do.” Steve started skydiving at 21 years old. He’s celebrating his 23rd year in the sport this year, with around 8,000 skydives, a thousand BASE jumps -- and, very importantly, lots and lots of hours in the windytube. “I was always interested in the tunnel flying industry,” he explains. “It always amazed me, what people were doing in there.” For a very long time, Steve funded his freefall habit by working at the family company: importing Italian coffee into the Braffs’ native Belgium. One day, after 15 years of working side-by-side with his brother, mom, sister and dad, he decided it was time for a change. “I said: You know what, I think I'm going to quit,” he laughs, “And sell air. So I did.” “There’s enough money around the world to serve everyone who wants to invest,” he insists. “The issue is that there aren’t enough ideas, or the people with the willingness to push them. When somebody tells me they’ve been trying [to get a tunnel started] for two years and they can’t seem to get the money together, I just tell them they need to push harder. Never give up. It only depends on you. The money is there, and you’ll unlock it if you try.” Tunnel Tech airducts with Hubble-level surface precision and finishing Steve doesn’t want you to think that he’s under the impression that it’s easy to convince someone to invest in something as big as a tunnel. The price tag of a windytube is plenty high for a project that most humans have only seen, occasionally, on TV. “You need to transfer your passion to the investor,” he advises. “If you are capable of doing this, then you’re already doing great work on the investment. Even if you have a business plan and you can prove with paperwork that your wind tunnel is going to make a lot of money -- super nice presentations and Excel sheets and all the trimmings -- you still need to make your potential investors believe in it with their hearts. If they don't believe in it with their hearts, they will not invest.” “Think about it,” he continues. “You’re asking them to invest millions of Euros in a building with wind blowing at 200 kilometers per hour through the walls. It is crazy. We still run into this all the time when we go to new contractors. Why all of this for a flight chamber? Why all of that construction around it? They don't understand.” In 2006, after one false start at a Belgian dropzone, that decision took Steve and Magali to create a truly watershed moment in what the rest of the world knows as “indoor skydiving.” Inspired by the idea that training in the vertical wind tunnel could revolutionize skydiving -- at the time, a very new and unorthodox philosophy -- the pair decided to build the very first vertical wind tunnel facility in Belgium. It was called AirSpace and it was, in a word, visionary. “I am a big fan of Apple, and their thing was always to think different,” Steve explains. “And that resonates with us, because it’s really the way we live. We are always trying to improve and make stuff differently; not to be just another tunnel. Our tunnel was a huge success because of that, and because we wanted to do everything we could for the for the flyers.” Steve and Magali built “their” tunnel from scratch. To do so, they quit everything else in their lives to focus full-time on creating the facility -- including their home. “My wife and myself, we decided we were going to go full on,” he smiles. “We wanted to know everything -- every bolt, every detail -- about our tunnel, and about the industry. So we left our rented house and moved into the contractor container on the construction site. We lived in it for a year. It was a really nice experience, day by day following the progress of construction.” Steve and Magali Braff Though ‘home’ was technically a shipping container for the Braffs that year, the heart of the idea behind that tunnel -- and, now, LuxFly -- was, charmingly, to make it into as homey a place as possible. The Braffs integrated a cozy lounge bar; as much wood as possible, moving away from the stainless-and-plastic aesthetic that pervaded (and still pervades) the vertical wind tunnel oeuvre; a deep sense of comfort and place. “We were insistent that it had to be like a house,” Steve says. “I wanted people to come in and walk around in their bare feet. When I saw that for the first time, it felt like success to me.” The year it took to build AirSpace -- still fast for a tunnel project, which is normally it is two years from the point of financing, securing building permits and organizing all the construction to the grand opening -- taught Steve and Magali a boatload. “Sure, it was a lot of ups and downs -- a lot of them -- more downs than ups, okay -- but, at a certain point, you have to look at it a bit like the stock market,” he explains. “You need to be patient and you need to keep believing in it. That is your only source of strength. Not depending on anyone. It's yourself; your own belief.” The tunnel truly bloomed under the Braffs’ management. This is one couple, however, that doesn’t make a habit of resting on laurels, no matter how comfortable they might be. After a few years, they decided to sell it and move on. It felt like time to grapple with another project (this time, on the border with Luxembourg), and to start helping other would-be tunnel owners with their own projects. “We earned a lot of experience over the course of all those years,” Steve says. “We traveled a lot, both skydiving and tunnel flying. We have seen a lot of wind tunnels. We took all those ideas we discovered over the years and we put them into in Luxfly. It's going to be super, super, super special.” According to Steve, Luxfly is going to be “the 2020 version of tunnel flying.” The design aesthetic -- still a secret, as of publication -- promises to be groundbreaking. The pair decided to make another, perhaps even bigger change: a total technology rethink. While AirSpace used top-of-the-line-at-the-time German tech (ISG), the Braffs decided to build Luxfly with Tunnel Tech, a multinational vertical wind tunnel technology company that’s making huge strides forward in safety and efficiency. “I must say [Tunnel Tech] have blown us away with the quality of their product,” Steve explains. “First of all, I’ve known Slava, the CEO, for many years. When I heard he was making his own technology -- and that they were building a 15-foot with less power consumption than a 14-foot -- I got very curious. Then I started following their projects in Japan, in Moscow and in Korea, and I was totally convinced.” The LuxFly structure & the Tunnel Tech machine are ready for assembly “It was a risk, of course, because it’s a new company, and it always feels safer to go with a company that has built 15 tunnels versus somebody that has built three,” he continues. “But that’s our history. With Airspace, for example, I think we were the fourth ISG tunnel; perhaps the fifth. So being the fourth Tunnel Tech wind tunnel doesn’t feel so crazy. Tunnel Tech really are rethinking every part of the tunnel -- how we can do better, better and better -- contrasts a lot with where now a lot of manufacturers are now. When you have a certain design that's working and selling, the tendency is to just keep it until people demand something new. Tunnel Tech keeps well out in front of that.” With Luxfly’s gala grand opening set for the end of January, Steve and Magali are up to their eyeballs in preparations. They insist, however, that they are always available to help people out -- to make new tunnel dreams a reality. “We are passionate people,” he smiles. “We just want to share our love of flying.”
 -
1 point
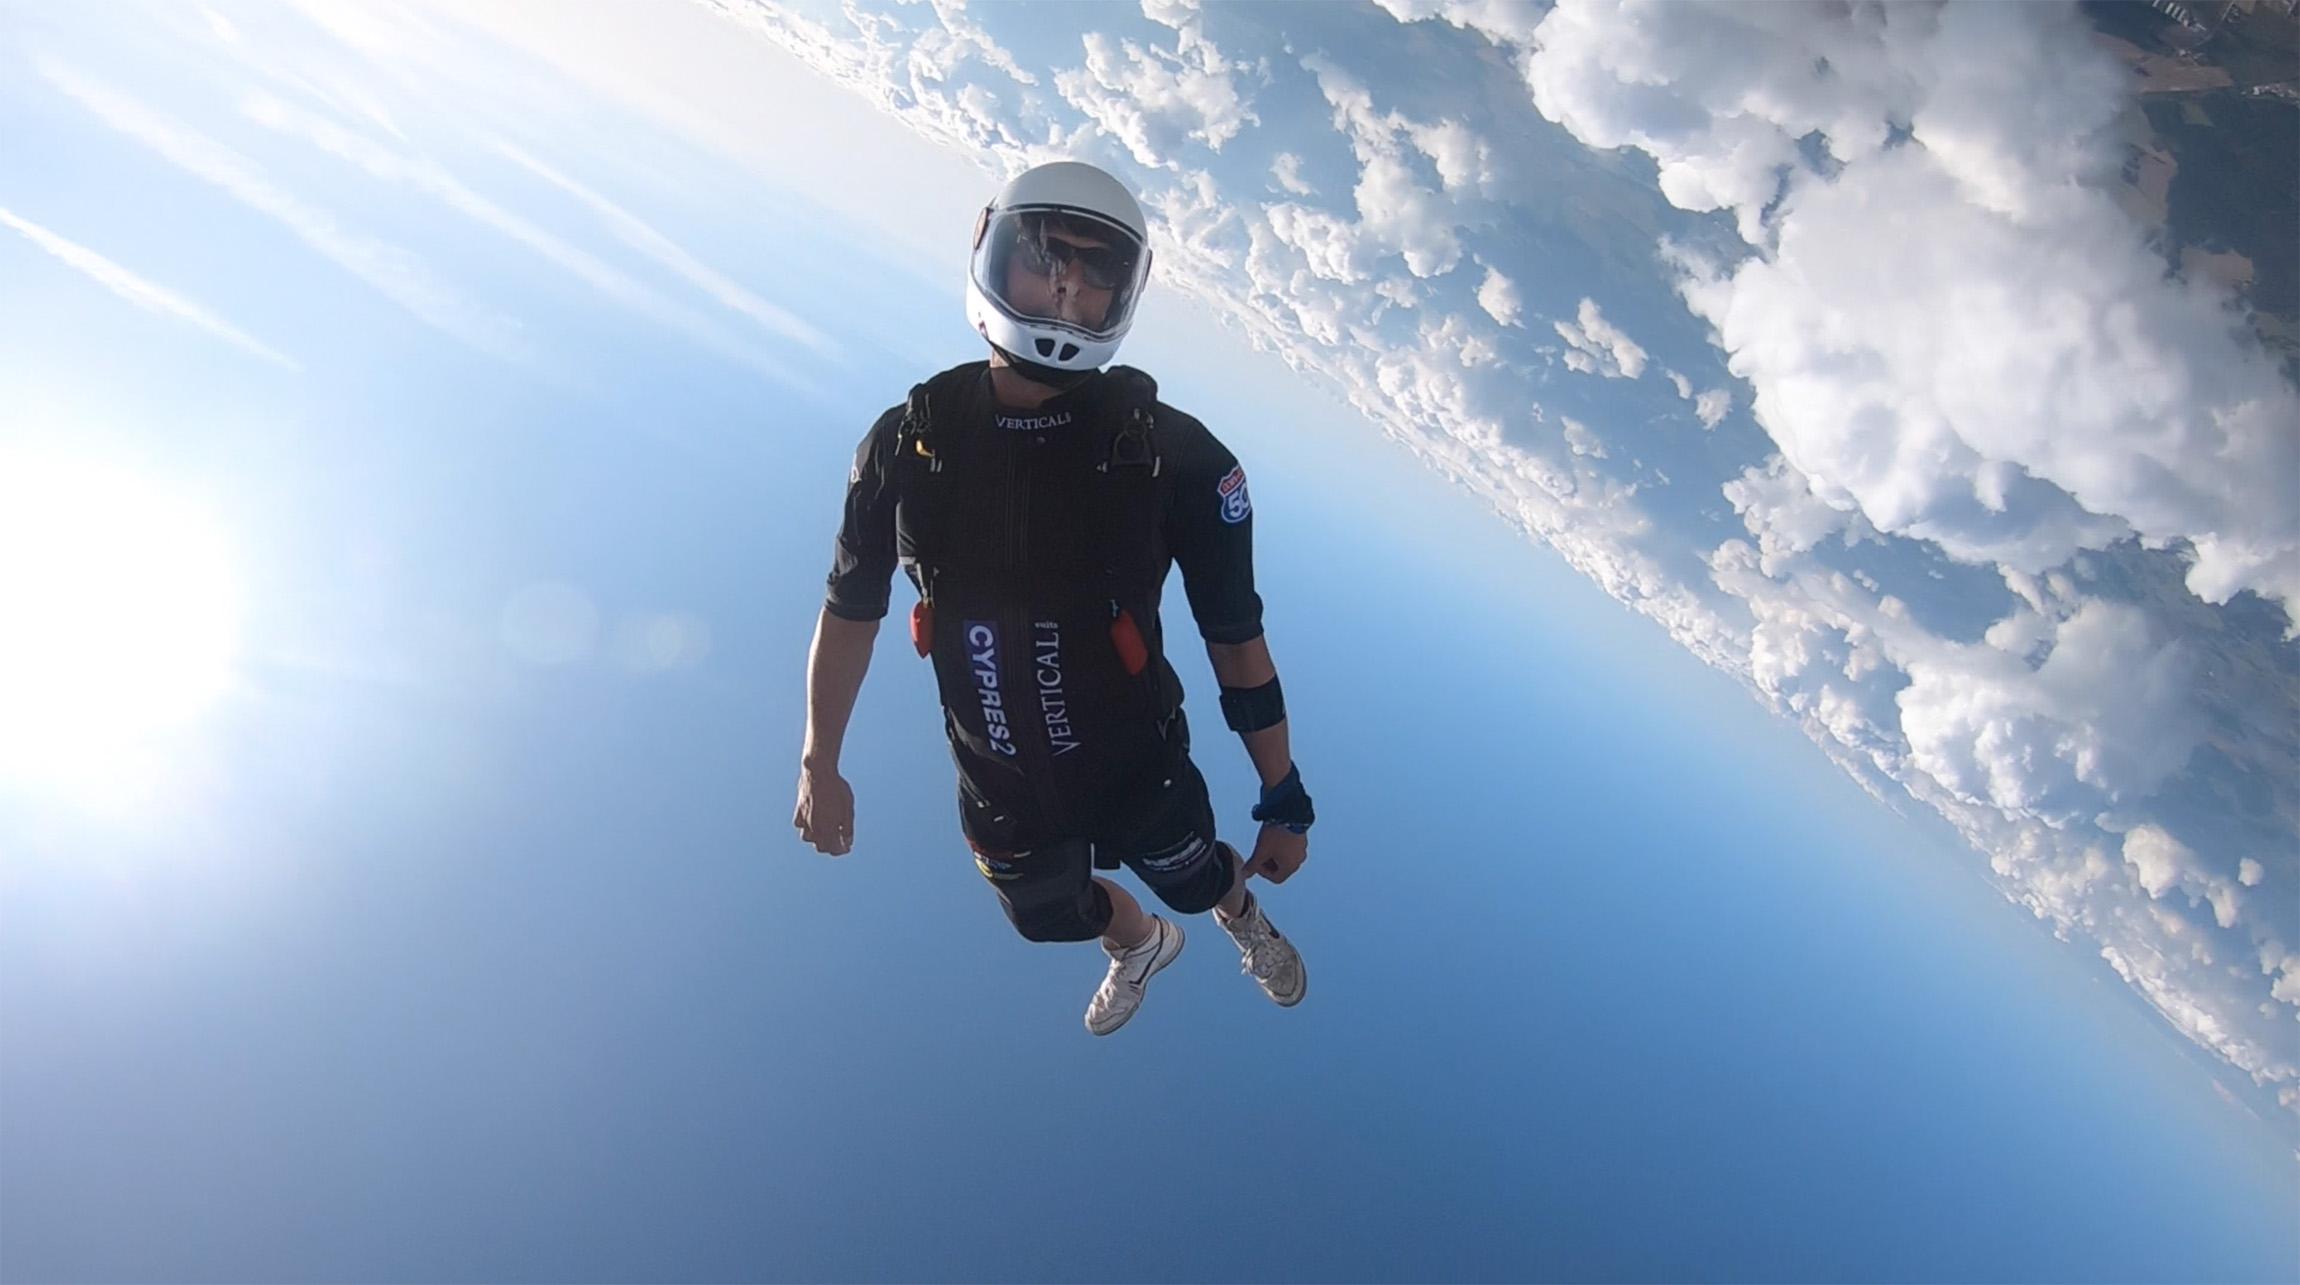 Review by Joel Strickland Cookie Composites are quick to admit that there was a fair element of luck involved in their success with the G3. At the time of release in the early teens, the tunnel industry was exploding - and the full face helmet was crossing over from the province of close-in disciplines where you need to be extra careful about catching a knee or an elbow in the face - to pretty much everyone. Flyers were after a greater level of comfort while training for extended periods of time indoors while retaining a level of communication akin to open helmets. People wanted to be able to see each other’s whole face - and with the G3 you could. Skydiving soon followed suit, because you could now wear your cool sunglasses underneath your lid and see all the big grins in the pictures and video. While lucky with the timing, Cookie had purposefully pulled off a crucial victory with their product - it occupied a particular sweet spot between form and function that appeals greatly to skydivers. The G3 was desirably fancy - but not too posh or too shiny to the point where it stood out as worthy of mockery. A few scratches and a couple of stickers later, and it had become (in the most positive of terms) part of the furniture of skydiving. While there were functional alternatives available, the G3 became iconic - as much so as the L+B device on your wrist or the Cypres unit in your rig. Over the last few seasons there has been a growing grumble in our sport about the level of protection offered by helmets specifically designed for flying. The biggest and most successful company is always going to be the softest target for conversations about the actual value a helmet with no impact protection material has for your brain in an accident, and the G3 has come under fire against new offerings from competing companies that have been through tests and carry a certification. The concerns over safety are certainly valid, yet these conversations would often neglect that for a very long time we were all basically completely fine with what was on offer, and from day one - if we had been genuinely more concerned about safety over comfort and style - everyone single one of us always had the option of wearing a $20 Protec just like we all did when learning to skydive in the first place. In the meantime, Cookie Composites have quietly and diligently created the G4 - extensively researching every single material and design element to give us what we have been asking for. Instead of rushing something out, Cookie worked alongside others in the industry to help develop a brand new rating with the specific requirements of both the skydiving and tunnel environments in mind. While purposefully retaining the same balance of form and function, up close it is clear that it is a complete redesign - applying many lessons learned from its predecessor. Here are the main differences that you likely care about the most: Recessed Visor: High speed flying combined with any looseness in the springs could create a distracting visor vibration on a G3. The new design has the visor recessed to fit flush all-round with the shell to eliminate this effect. It also looks great. Audible Pockets: While perfectly fine for a lot of people, many of us with funny shaped faces were squeezed by our audibles despite any amount of wiggling. Cookie have rebuilt the pockets - and now they fit into the shell with zero intrusion into the space where your head is supposed to be. Now I can jump with two sets of beeps, hearing them perfectly yet feeling nothing - unthinkable for me previously with even the largest G3. Metal Springs: With the old design, over time the rubber springs would stretch out and require replacing - a process that even the most generous can only describe as a pain in the ass. While Cookie took steps to remedy this with good post-purchase support, they were always going to be searching for a new system. The G4 visor mechanism has done away completely with the rubber and now uses a metal spring arrangement that should eliminate the maintenance routine. Rear Protection: While maintaining the same general look, the new shell goes down a little further at the back to offer some more coverage in a sensitive area. This does make the hole where you put your head a wee bit smaller, and changes slightly the familiar back-forward motion of putting on a G3, to something more akin to donning a motorcycle helmet. Impact Rated: Now there is deformable material inside. The big design battle Cookie faced was to create a helmet that would pass the crash tests while always remaining something sleek and light that skydivers would embrace as the right thing. The G4 is a little bit bigger and a little bit heavier than the G3 - but comparing them with one in each hand there is really not much in it. With the redesigned interior allowing a bit more space around the ears, it does feel like a bigger helmet when you first wear it - but that is coming from someone who has been wearing a G3 for work since the day it was released. The unsolved problem (for now) is that while the Cookie G4 as sold qualifies for this new rating specific to skydiving, the tests are very precise indeed. As soon as you make any modifications at all to the weight or shape you are no longer using the helmet that has been qualified - you are using something else. The truth is that the myriad what and where of how we mount cameras makes practical testing out of reach. Along with impacts, a part of the new rating are thorough snag tests - and adding even the smallest, sleekest camera mounts would fail them. The question we now face is that is it safe to assume that a helmet designed from the ground up with impact protection in mind going to provide a greater level of protection in a crash regardless of where you stick a camera on it? I know what I believe. The driving force behind Cookie Composites - Jason Cook and Jeremy Hunt - speak passionately about their company and their products. A quick hello turns into two hours of sharing their experiences creating the G4. The lessons from the previous design have been studied, revised and thoroughly applied - along the way investigating and investing in all manner of materials, theories and processes to make it the best it can possibly be. Cookie’s success this decade has given the company the knowledge and the practical means to deliver a new product that should occupy the same place in our sport that its predecessor has done for many years. Their visual presence and the level at which they support our sport can make Cookie Composites can seem like a big company, but at a basic level it is still a handful of skydivers tinkering around in a workshop, putting in a great deal of time and effort to make something that works the best for their friends and their community around the world. Long may it continue. Does the G4 live up to the hype? Yes. Yes it does.
 -
1 point
 The following video was posted on social media last week and shows a harrowing scene of a wingsuit jumper suffering a collision shortly after exit. The collision appears to knock the jumper unconscious, as he then begins to spin uncontrollably as he descends in freefall. The spin amplifies the lower he gets - until finally his AAD activates and saves his life by crucially firing while he is seemingly unconscious. You can follow or contribute to this conversation in the following forum post: A forum post from a Dropzone.com user has shed some light on the situation... "If I remember correctly group of 4. Leader fumbled exit a little. The 2&3rd guys start flying the planned direction right on exit. The 4th guy has the time and awareness to see the leader and starts diving to the leader. Guys 2&3 now correcting from intended flight path toward leader, intercepted by guy number 4. None of them are new guys. Super lucky that the guy who had the AAD fire walked away with no major injuries. The guy who hit this guy is a good friend of mine and is very heads up and a skilled 4-way flier with more WS jumps than FS. The example here is that if it can happen to guys like him it can happen to you." - Slimrn The topic of AADs can sometimes be a controversial one, many experienced jumpers believe they don't need them and some even view dropzones that have AAD requirements negatively. However, this event goes to show that sometimes the AAD can play a crucial role in saving your life, especially in the case of midair collisions which result in a loss of consciousness.
 -
1 point
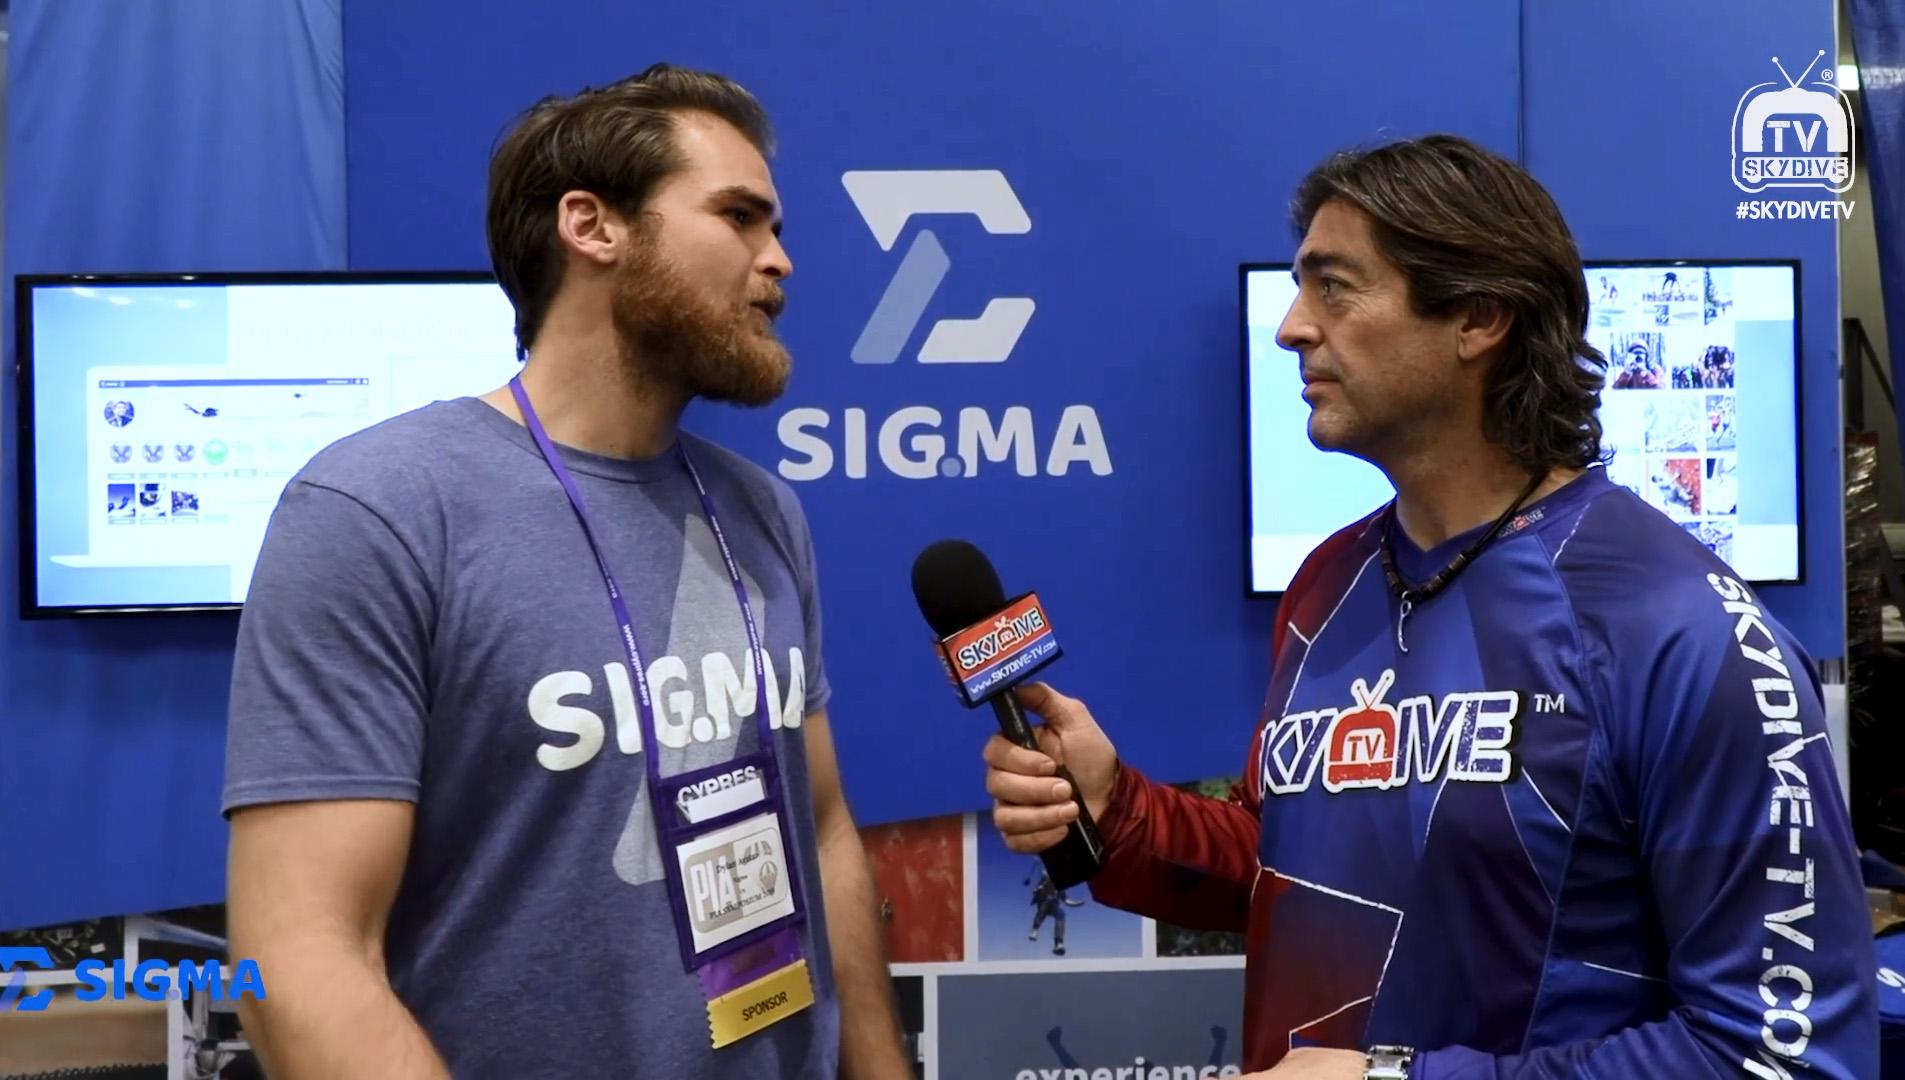 Written by Laura Jane Burgess There’s excited chatter on the mat, the rustle of nylon fabric being packed, the buzzing hustle and bustle of a busy day. Canopies zip overhead. Squinting, mesmerized, though you’ve seen it near a hundred times, you watch the initial glide across the grass, the slide of flat-soled swoopers, and the quick-legged staccato steps as each jumper comes to a stop. You’ve never seen a more perfect day to skydive. Waiver signed you file in line behind a queue of shuffling feet and exasperated sighs—a 15-person traffic jam. Daylight’s burning. Loads should be turning. What’s the holdup? It’s the fellow at the front. A jumper far from his home drop zone (558.9 miles, ± .1 mile to be exact). His innocent intent was to check in and manifest. Except, he doesn’t have so much as a shred of physical documentation to his name. No logbook to verify currency and no physical, tangible evidence of USPA credentials. What’s to be done? His lack of documentation dismissed or ignored? Certainly not. Exhaustive, time-consuming attempts made to secure a paper trail. Undoubtedly. If everyone’s lucky, the ordeal will take 10-20 minutes. However, if you consider that at a busy drop zone you’re likely to encounter the same issue any number of times on any given day. The wasted daylight adds up, cutting into profit margins and the amount of time jumpers spend in the air. Imagine for a moment that the futile task of trying to sleuth down credentials could be avoided, and the check-in process could be made significantly easier—for everyone involved. As luck would have it, this is precisely what the Sigma / Burble integration aims to do. In the late spring of 2019, when the integration launches, skydivers who frequent any one of the many drop zones utilizing Burble software can grant those drop zones access to view their Merits on Sigma. In case you’ve been ignoring those emails the USPA sent you or still feel a little in the dark, Merits aren’t patches to be stitched on a Cub Scout sash. Rather, Merits refer to things like USPA credentials, UPT ratings, corresponding coursework and even your most recently completed skydives. At the close of the day, drop zones taking advantage of the newly integrated systems can send out shareable Merits for completed jumps, whether it be to tandems, fun jumpers, or staff. For jumpers, the Merits can serve as a “digital signature” to verify their most recent skydive. Instead of relying on illegible, potentially forged, physical logbook entries, there will be a traceable, authenticated digital entry. Drop zones can also attach video clips and other media to the merit badges. This creates hefty possibilities for Merit use with student training programs. No matter where a student roams (or if their logbook follows suit), instructors at any Burble drop zone can see exactly who and what they are working with. For jumpers, the integration process requires no real technical finesse. In around three minutes, skydivers can link their Sigma account to their BurbleMe profile. Jumpers can then authorize the Burble drop zone(s) of their choice access to their Sigma Merits. Every time they check in at the preferred Burble drop zone(s), their Merit information auto-populates into their jumper profile. The result? A streamlined shortcut from check-in to freefall. The first time a jumper grants a Burble drop zone access to view their Sigma Merits, they can enable an auto-update feature. From thenceforth, whenever changes to Merits occur, it automatically uploads into the drop zone’s Burble DZM Account and the jumper’s BurbleMe profile. Practically applied, this looks like convenient, real-time access to see as credentials expire, are renewed, or are updated, without the need to request additional physical documentation. After the Sigma / Burble integration, drop zones can have instant access to verified information without having to waste time or manpower on multiple sources. After the integration takes effect, staff will no longer need to manually input jumper information or search the USPA database with the Group Member lookup tool. Fewer steps and less manual data transfer mean less opportunity for error. The instant access to verified, up-to-date information, makes it much easier for drop zones to verify the standing of visiting jumpers and instructors in a shorter amount of time. For DZO’s, in particular, this integration offers untold peace of mind: no more worrying about the legitimacy of jumpers on your aircraft, fears of forgery, concerns over invalid credentials, or issues with input errors. Come spring 2019, you might catch the audible sigh of relief coming from the staff buried underneath the mountain of (soon to be obsolete) paperwork, see the sheer joy of jumpers spending less time at check-in and more time on airplanes, and agree, with the Sigma / Burble integration, t here’s something for everyone to celebrate! Featured image credit: SkydiveTV Vimeo
 -
1 point
 Rosie Manning Breaks Down Accessibility Barriers in the Tunnel Raise your hand if someone you know has been seriously injured on a skydive. Everybody? Right. Now -- keep your hand raised if that inspired you to invent a whole new apparatus to get your friend back into flight mode. I’m willing to bet that very, very few hands have stayed raised. One of them is Rosie Manning’s. The first thing you should know about Rosie Manning is that her lissome form and noon-in-July demeanor might easily fool you. She’s sweet almost to a fault -- but then you start to realize that she has you direly outgunned in the brains department. This mechanical engineer can think in circles around most folks (and then take you to the tunnel and fly in circles around them -- but more on that later). If you ask her, she delicately shrugs it off as a survival instinct. “When you study engineering as a girl,” she notes, “You’re already in an uphill battle. There were 200 guys and 9 girls in my degree. From day one, I was going against the wind.” As it turns out, Rosie thrives against the wind. She and one of the other nine girls in the program (Emily Whatton, a dynamo in her own right) joined the university’s skydiving club. At first, it was a lark, but by year two, both girls were hooked. Time flew. For the fourth and final year, the program participants were tasked with an individual project which made up the bulk of the students’ final grade -- and Rosie knew exactly what hers was going to be. It was that year -- 2016 -- that UK skydiver Ben White injured himself during a swoop. He came out of it alive, but paraplegic. Rosie figured she could use her project to help. “I was heavily addicted to skydiving at this point,” Rosie remembers, “and I really wanted to do a project that was skydiving-related. I had an idea.” Rosie sent Ben a message: How interested would you be in letting me design something for you to help you fly in the wind tunnel again? Unsurprisingly, he was entirely up for it. Bonus: Ben himself had studied robotics at university, so the process was uniquely collaborative. So far, so good: But there was still a baffled academia who had to buy in. “The first time I pitched the idea of the project to my tutor,” Rosie laughs, “He said, ‘Okay, so you’re telling me you want to throw a paraplegic person out of an airplane?’ Um...no. Then I spoke to quite a few of my other teachers about it to get some advice. They all told me it wouldn’t be possible.” “I just didn’t listen,” she grins. “I went and did it anyway.” Rosie, with Ben’s collaboration, set about designing a brace that would support Ben’s lower body for the purpose of tunnel flying. First problem: the university only allowed for a total project budget of 100 pounds. To solve her problem, she asked for help. Rosie went to a long list of orthopedic and prosthetic companies. Finally, she had a lucky break: she got an email back from a company in the UK called TruLife, whose Head of R&D, Shane Nickson, was a keen skydiver. He offered funding and help with manufacturing. TruLife ended up custom molding the carbon-fiber-and-titanium brace to Rosie’s design. The second challenge: tunnel time. This wasn’t too tough, luckily, as the owner-at-the-time of the UK’s Bodyflight Bedford was a super-cool guy who was happy to donate tunnel time to the project. Score. The third big roadblock was, again, academia. And it was a whopper. “We struggled making the project fit the specifications the university wanted,” she explains, “because the university wants you to show your preparation; the calculations; the justifications for all the choices.” In order to meet the requirements, the team had to build an external sensor system that would measure the angle of the wearer’s legs in different orientations: belly flying; back flying; free flying. From that data, they worked out the forces that would act on the wearer’s legs in each position to determine the required strength of the brace. “That actually took up a lot of the project,” Rosie notes. “And Ben was a huge help with that because he was a robotics guy, so he knew loads about the programming that was required.” After they finished the project -- after Rosie had left university -- she, Ben and two other friends entered the World Challenge in the rookie category. “There were only four teams in the category,” she remembers, “but it ended up being this huge battle with another team for third place. We just beat them, and I think the fact that our team beat another team that was completely able-bodied was probably the best day of this whole thing. We went up to collect our medals -- Ben, in his chair -- and we got the biggest cheer.” Such a triumphant, happy moment, no? But it came at such a confusing time. “To be honest, when I finished my degree, I honestly had no idea what I wanted to do,” Rosie remembers. “I knew that I pretty much hated the first three years of my degree but absolutely loved the final year. If knew that, if I was going to do engineering, it needed to be something I wanted to do -- something sport related -- because that’s what I love doing.” “I knew that going into a scheme with a huge company wasn’t for me,” she continues. “It would have been a super easy thing to do. Pretty much everyone in my degree went and did that because it’s the next step in the system they’ve set up for you. I didn’t know what I wanted to do, exactly, but I know I don’t want to do that.” So: Rosie and her friend Emily Whatton took off. The pair went traveling for a year with their partners -- also skydivers -- and the tiny amount of money the foursome had managed to save up. While on the road, Emily and her partner were offered jobs as tunnel instructors at Sirius Sport Resort in Finland. Six months later, Rosie got the call and joined them. While there, Sirius backrolled Rosie’s build of another tunnel mobility brace and started welcoming even more adaptive athletes into the bodyflight community, a fact of which Rosie is understandably proud. “Currently, there are two separate frames --” she explains, “a smaller one and a larger one, with different-sized straps that can be fitted with either one. If you have someone tall and skinny, you can use the longer frame with the shorter straps, and vice versa. For kids, we use the small frame and the smaller straps.” “It was quite hard to build it without really knowing what sizes of people we were going to get,” she adds, “but I was pretty pleased because the system can accommodate anyone from a tiny 8-year-old up to a fairly massive guy.” Users report that the biggest challenge for the adaptive flyer is fitting the brace to the body, because it has to go underneath their legs while the flier is seated in their wheelchair. Once they’re assisted from the chair into the airflow, it’s pretty much a snap. “[The brace] is at a set angle,” Rosie says, “so fliers with shorter legs have more forward drive and fliers with longer legs have more backward drive for him. That’s easy to manage; we just make sure that, when we brief them, we emphasize that they need to be really relaxed in the arms because we’re going to need to adjust the arm and hand position to counteract any drive that produces. Every [adaptive athlete] we’ve flown with so far seems to take that on board really well, and they fly beautifully.” The photos of Rosie’s adaptive athletes really speak for themselves. “I mean, it is fantastic,” Rosie enthuses. “I think that flying and skydiving is the greatest sense of freedom you can experience in this life. For an adaptive athlete -- someone that, maybe for their whole life, has been confined to a wheelchair -- it is a feeling that is like no other. Sharing that is super rewarding. I want to do a lot more of it.” Rosie recently relocated to work at a wind tunnel in Canada, but she certainly hasn’t abandoned that dream. Currently, she plans on taking her design in two different directions: continual development on the first-timer model, as well as a model designed for the specific needs of adaptive sport flying. “We got [Ben White] belly flying and back flying in the current design,” she explains, “but I want it to be able to do more. Ultimately, we want a design that makes freeflying possible. I’m thinking in baby steps -- take it to some low-speed back carving and belly carving; work up from there. I want to give anyone who wants to get involved in this sport the opportunity to progress in it as well.”
 -
1 point
 Aeronautrixx Literally Has Your Back Life in the sky just keeps getting better for the 13% of us who fly under the influence of two X chromosomes. The latest development? Aeronautrixx -- a 501(c)(3) nonprofit, founded by skydiver//adventurist Karen Woolem. The org’s goal, as Karen puts it, is “providing education, guidance, sponsorship and resources to help women pursue their aeronautical dreams in a fun and safe manner.” Those are lofty goals, indeed, but Karen -- who is as well-organized as she is dynamic -- isn’t the type to shoot low. To understand where Aeronautrixx is coming from, of course, you first have to understand a little bit about its founder. Karen started jumping 28 years ago, led by the example of her skydiver father. She was 15, and they’d make the long trek down to Skydive Paso Robles from the Monterey Bay Area because Paso was the only driveable DZ that would let such a young pup jump. She made a few less than 100 jumps in that first phase and stopped jumping in 1993, when her rig was grounded. “The question was,” she remembers, “Do I buy new gear, or do I go to college?’ Objectively speaking, it wasn’t really a question. Karen was the first in her family to go to college, and she wanted to place her focus there. As it turns out, a full 15 years passed before she got back into the sport, though she made a few feints in that direction. Finally, in 2009, she got recurrent -- at Hollister, where her dad learned to skydive back in 1988 -- and she’s been jumping ever since. Mostly, Karen describes herself as an RW kinda chick. (Fun fact: When I talk to her, she has just returned from skydiving over the Egyptian pyramids.) Aeronautrixx, interestingly enough, was born of that other major step forward in female-focused skydiving: the Women’s Skydiving Leadership Network. Back in 2016 (when the WSLN was first officially formed), Karen was selected for the first WSLN leadership symposium. She spent a week at Raeford with the event, soaking up the skills, the vibes and the connections. As part of that program, Karen designed a logo for a WSLN t-shirt. The image was strong, feminine, colorful and balls-out bold. She loved it. While a different logo was selected for that original purpose, Karen couldn’t help but realize that she’d created the logo for an effort that was gathering steam in her own imagination. Specifically, she was pondering a personal challenge she’d faced as a female, coming back into the sport: Finding a used container that fit both her and the canopy size she was comfortable with. She’d found it damned near impossible. “Finding a used container that fit me was no problem,” she mueses, “but they were all made for sub-100s; for super-swoopers. When I first came back, was under a 170. I ended up having to rent for what seemed like forever. It was so expensive.” She realized that there was a solution -- and that she could catalyze it. “I knew there were plenty of people out there that have gear to donate,” she adds, “And I thought -- hey! -- if I set up a non-profit, it can be a win-win. People can donate gear that fits smaller people jumping larger canopies -- or any gear they have gathering dust in a closet. Then I can give those guys a tax write-off and get that gear out to women who need it. Now [the recipient is] paying $25 a jump instead of $50 and can take her time to either wait for a long delivery on custom gear or piece together a used setup that fits.” “It’s so expensive getting started in this sport,” Karen adds. “Aeronautrixx aims to make the potential financial burden less of a deterrent for women.” So far, it’s a home run. Aeronautrixx just got a complete setup donated and matched it with a woman who just graduated AFF. Boom. It’s not just containers, either. Karen has partnered up with a craftsman who completely refurbishes and repaints helmets with airplane-grade paint, and those helmets have been gracing the sky in larger numbers with each passing season. In addition to that, Karen is currently working on getting a few complete demo systems co-sponsored with manufacturers. Of course, it’s not just gear that makes a skydiver — so Aeronautrixx covers the skills bases, too. These days, Karen is a WSLN mobile mentor, dually based at Skydive Sebastian (near her current home) and Skydive California (near her west-coast roots). For the past three years, she’s been using Aeronautrixx as a platform to host female-focused skills camps and boogies on both coasts. In October, there’s the Unicorn Boogie at Skydive California; in April, there’s the Mermaid Boogie at Skydive Sebastian; this February (coming right up!) there’s going to be a gold-lamé-festooned disco party at Z-hills. The boogies’ shared core value? Bring women together -- from all over -- and encourage growth and fun in equal measure. The response so far has been phenomenal. “I try to get an all-female roster of organizers,” Karen adds, “to show the newer jumpers that it’s not only men that are leading the pack. And I always try to bring in non-local organizers to give the ladies the chance to jump with other females in the sport that they might not get a chance to jump with.” The formula is certainly working. At the first Mermaid Boogie, Karen was standing in a packed hangar. Stopping in the middle and looking around, she suddenly realized something amusing. “I looked around and it occurred to me, there were no men. We’re turning the Otter with all chicks.” They turned 22 loads that day. At the end of the day, Karen insists that Aeronautrixx is about inclusion. Men are welcomed at Aeronautrixx events -- even issued cheeky “man cards” -- and the sea of costume onesies now includes a fair number of male humans. That’s not at all surprising, considering the unequivocal language of the Aeronautrixx mission statement: “We believe that women can be just as, if not more, badass as our male counterparts.” Well-put and well-proven, no? ---- To donate to Aeronautrixx (or get involved with an event or two), visit the org’s website or Facebook page: https://aeronautrixx.com/ https://www.facebook.com/pg/aeronautrixx/
 -
1 point
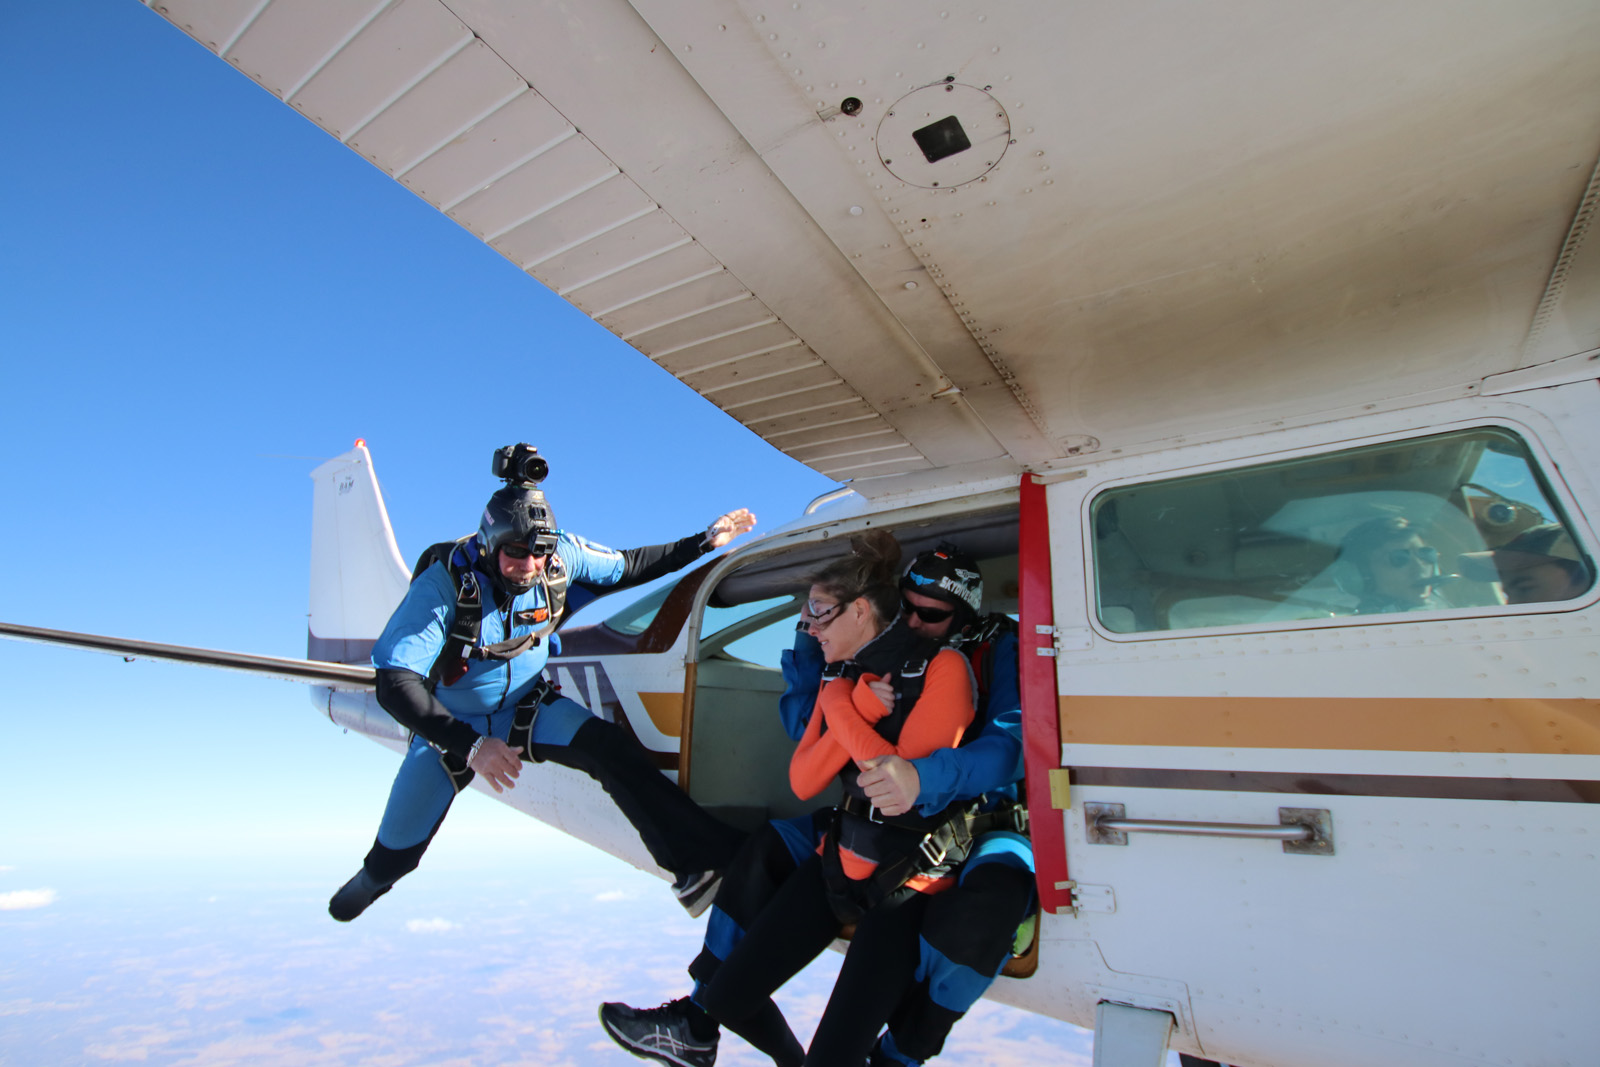 Get Ready: Here Comes the Turbine 206 When Joel Strickland and I jumped in all fifty states this summer for our Down For 50 project, we saw the insides of a lot of 182s. A lot. That’s no surprise, of course--the 182 is the undisputed workhorse of our sport. It could be argued that the valiant little 182 keeps our sport going. But what if there were a better way? As it turns out, there is. I found out about it when Joel and I made our Oklahoma stop. Understandably, we fully expected to see another 182 out there. Instead, when we wandered across the hangar of the (super tidy, spacious and impressive) Oklahoma Skydiving Center to see what was parked outside, we had to double-take. There was a 206 parked out there. A 206 with a very funny face. A turbine. For reals. Our first look at the toothy open grin of that jumpship was to start something of a minor obsession for me. First of all, it became apparent that its presence there had engendered the healthiest sport community of any smaller dropzone I’d ever visited. No wonder: that thing gets six jumpers to 14,000 feet in less than half the time it took the DZ’s old 182 to huff four folks up to 10k. The door is big. And this thing -- for lots of reasons -- puts turbine power within the reach of dropzones that never dreamed they’d be able to get there. I’ll let its champion, Andy Beck, cover all that. (Andy Beck is Co -DZO of the Oklahoma Skydiving Center, a small DZ between Tulsa and Oklahoma City, as well as the co-owner of BAM Aviation, which has been specializing in this conversion since Andy himself discovered its existence.) Pretty cool, right? I’ll leave the explanations to the expert. Below follows the conversation I had with Andy about this beautiful beast. If you’re not as enchanted with this plane as I am by the time we’re done here, I’ll be very surprised. Q: What’s your love story with this plane? Andy: My dropzone [the Oklahoma Skydiving Center] is somewhere between a small and a medium-sized DZ. For years, we were, like, man, we want a turbine airplane, just as instructors and fun jumpers. It’s easy to relate to that. I grew up on a single airplane drop zone. That’s where I started; that’s how I learned to skydive: A single airplane 182 drop zone. When you’re in a situation like that, you spend your whole life sitting around, watching people skydive, doing tandems and AFFs, just praying that there’s an airplane load that has empty slots. And that’s okay, because that’s all you know. But then you go somewhere and you suddenly realize there’s a different model that means you can skydive more than once or twice a day. you see how much more time you have for the fun part of the sport in a turbine, compared to what you can get out of the 182 that’s waiting for you back home. Since my wife Alyssa and I bought this dropzone four years ago, we wanted to bring that other model to our own DZ. The first thing we did -- immediately -- was to bring in a second 182, so we could have one for tandems and AFF and one for fun jumpers. I understand why people don’t want to mess with fun jumpers, but to me the reason that I think that you need the experienced-skydiver scene is because -- if you don’t -- then how do you convince anybody to do more than one jump? If all they ever watch is tandems, they’re one-and-done. They think that’s all there is. If they have to go somewhere else to jump after AFF, that’s not good either. People want to stay where they learned. They know the people. They want to travel and visit, but they love their home. That’s where they want to be. That’s their home base -- their friends -- the people they like to jump with. To teach people to jump and then tell them to go somewhere else just seemed dumb to me. So you have to grow to support your experienced skydiver community. Q: Why not just get an old King Air like everybody else? Andy: Long story. As a DZO, when you start looking at turbine airplanes, yeah, you think, maybe I can afford a King Air, but the only ones that anybody sells that any small-to-medium DZ can afford are about worn out, and worn out King Airs are a huge maintenance situation. Then, you think: I really love the Caravan. And that’s a cool plane. It is one of the starter-type turbine investments. But most of the Caravans worth having cost between $1.2 and $1.8 million dollars, and you’ve got 16 to 20 slots to fill. At a smaller DZ, you just can’t reliably fill it. That’s just not a very doable business model. And before, there really wasn’t anything that was, basically, half of a caravan. So I kept looking. The 206 has been around forever as a skydiving plane, but it really has a bad reputation because -- with the standard configuration -- it’s super slow. In the Oklahoma summer, you can hardly get to 10,000 in one, even if you’ve got the turbo version. For our purposes, it’s just not much of a plane. Then, one day, I heard about the new Pratt Whitney PT6 turbine 206 conversion from a fun jumper. It sounded like a myth, but I was intrigued, so I called the aircraft conversion inventor, Van Pray, who was partnering with Turbine Conversions on the Turbine 206 concept. Van has been around dropzones, skydiving, and airplanes all his life and turbine conversions has been modifying agricultural aircraft to turbines for decades. I asked Van to bring his plane down for a weekend so I could see if maybe this was going to be the answer to my problem. Turns out, it was better than I could have ever imagined. Anyway, Van and Emiko Pray brought their plane down, and we basically rented it like a boogie for two different weekends to try it out. I wanted to see how it cash flowed; how much fuel it used. There is no way anybody could tell you that information without seeing it for yourself. Since I paid all the bills, I could really see how economical it was. After that, I just knew that’s what I had to do. We had to build one. Q: What do the numbers look like? What does the turbine 206 specifically bring to the table here? Andy: Well, you can get a 182 for about $60,000 dollars. The Turbine 206 goes for around $600,000 depending on airframe, engine, etc... So of course it’s expensive when you look at it like that. But you have to remember that what you’re actually getting for that is half of a Caravan. Depending on your airframe -- engines and all that -- the fuel burn is half of a caravan or less too. Before I got the turbine 206, we had an average of three planes at OSC. We would always fly two, but on a lot of really busy days we would fly all three. In the summer, with a 520, or a PPonk, or a higher-horsepower 182 that actually can go to 10,000 feet in a reasonable time, you burn 7 to 8.5 gallons of fuel alone. Obviously, when they’re full, heavy and hot, it’s more like 8 to 8.5 gallons, but when you’re flying cool, light loads you could do a little over 7 gallons. That’s what my average was, at least. The turbine 206, on the other hand, will average ten gallons consistently to 14,000 feet AGL. The other big thing is that AV gas is getting a little bit harder to find in the first place, and the price of it is consistently higher than jet fuel pretty much anywhere you go, especially in more remote areas -- but if there’s a commercial airport anywhere around, no question, you can get jet fuel. So: When you look at expenses, the turbine 206 doesn’t burn very much more fuel per load, and the fuel it burns costs less. You also get the industry standard Pratt Whitney PT6 dependability and reliability. With the high-horsepower 182, I could count on two loads an hour: four people per load, to 10,000 feet. With the turbine 206, you get six people per load and you can do three loads per hour -- to 14,000 feet -- with one plane. Every hour throughout the day, you just keep getting farther ahead, because the plane doesn’t slow down with the heat. The density altitude doesn’t affect it the same way. It just goes and goes. On a good Saturday we do 30 loads in the 206 -- three loads an hour for 10-plus hours. We just fly and fly and fly. Q: The fun jumper community here seems to be seeing some real benefits. These guys have crazy healthy jump numbers for being based at a small dropzone. Andy: Yeah, we’re proud of that. The quality of every skydive is better, and that makes a difference to the bottom line, too. We wanted to offer the best possible experience to all of our jumpers! In the last two years, we’ve finished way more A licenses and created way more fun jumpers, because on each skydive they’re not getting 25 to 30 seconds of freefall, they’re getting from 50 to 60 seconds on every jump. It’s like trying to ride a bike. If your parents let you ride a bike for 10 to 20 seconds, take your bike away, then give you another 10 to 20 seconds on it the following weekend, it is going to take a long time to learn how to ride a bike. Skydiving is way harder to learn than riding a bike. If you give them more time on task and more jump availability, people are going to learn and be better and safer skydivers. They’re more current. They’re more excited. They make more jumps. It just gets better in every direction. Fun fact: We do 18,000-foot jumps occasionally, and we could even go higher than that if we wanted to. This plane climbs just as good at 18,000 feet as it does at 10,000 feet. It’s just a whole different beast. We have a lot of fun here. Q: So when did BAM Aviation start doing the conversions? Andy: That’s a funny story. When we built the first one, we had absolutely no intention of building more airplanes. That wasn’t why we did it in the first place. We did it for our dropzone. But, in the process of figuring out how to do it, we partnered up with Turbine Conversions and they made us an authorized installation center. They came and took a tour of our facilities, saw what we had and asked if we wanted to take on some more. This conversion is not crazy-hard, but it’s not just a straight, bolt-on modification and it takes real skill to do. It is a lot of sheet metal work. And I was lucky enough to have access to some real talent with Mike Palmer and Brian Wattenberger. I myself am learning, but the two guys that work with me really are master mechanics. They’re very unassuming, but when you get in the shop and watch their creativity, it’s incredible. They are true masters of the trade; true craftsmen. There would be no airplane business if it wasn’t for Mike and Brian. That’s a fact. I mean: I’m the skydiving business owner, and the guy that came up with the idea to convert the first plane, but without the mechanics, there would be no BAM Aviation (which stands for Brian, Andy, Mike). That’s for sure. At this point, it’s busy here. We have another one that we’re more than halfway through and several others in the works. We’re prepared to scale up, depending on need. I’m sure that the more people that know about it, the more people are going to be interested in it, because it the turbine 206 is a real option for that small/medium drop zone to be able to expand without going a million and a half dollars in debt. I do it because it’s good for my dropzone and it’s good for the sport.
 -
1 point
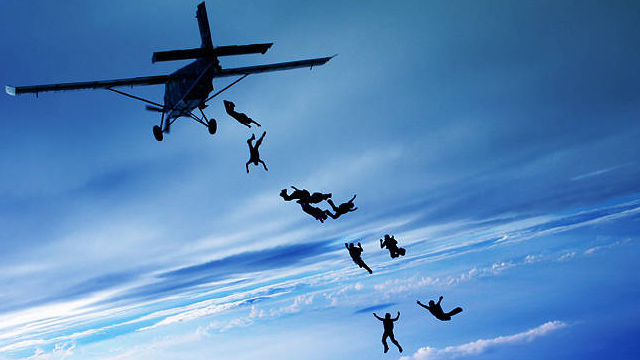 By Bryan Burke, S&TA; at Skydive Arizona Identifying the ProblemAll of the following events took place during our spring 2013 season here at Skydive Arizona. Some have been repeated several times. Since I started to look into this subject and inquire as to what other drop zones are seeing, several similar incidents have been brought to my attention. In addition, there are several reports of serious freefall collisions that have resulted from tracking, angle, and wingsuit dives around the world. Example One Angle flying dives, also known as atmonauti or tracing dives, are recording fall rates comparable to freeflyers. They not only fall faster than true trackers, they do not cover nearly the horizontal distance that true tracking dives do. (Inexperienced trackers, especially on their backs, often have essentially the same flight characteristics, much faster down than experienced trackers and not much horizontal travel.) In one case, a group of very experienced angle fliers insisted on exiting first, saying they were trackers. They fell at freefly speeds, about 170 miles per hour. The dive was planned to go roughly 90 degrees to the line of flight, but they didn’t go very far, covering less than half the distance a real tracking dive would. This type of dive tends to include a lot of highly experienced freeflyers experimenting with new stuff, so they were jumping very fast canopies and opening between 3,000 and 3,500. A conventional belly flying group followed them out. They had a long climb-out, about 15 seconds, broke off at 4,500 feet, tracked, and deployed between 3,000 and 2,500. All of them were experienced and competent trackers in the conventional sense of the word. There was nothing unusual about the conditions. Up on the jump run, the airplane was covering ground at 150 feet per second (about 90 knots) and the horizontal distance between Group 1 and Group 2 at exit would be about 2,250 feet. Because of the longer freefall time for the second group, about 500 feet of that was lost to freefall drift in the winds aloft. This leaves their hypothetical center points at opening about 1,750 horizontal feet apart, still adequate separation for two conventional belly flying groups opening within a few seconds of each other. However, because of their fast freefall speed, followed by the climb-out time for the second group, the angle fliers deployed their parachutes nearly thirty seconds before the second group, but also 500 to 1,000 feet higher. They immediately turned towards the landing area under canopy; otherwise they would not get back, at least not with enough altitude for a big swoop. During that thirty seconds, they only dropped about 700 - 1,000 feet or so vertically, but they covered between 1,500 and 1,800 horizontal feet in that time. This does not even take into account the ground covered by tracking at break-off from either group. Canopy winds were light. In thirty seconds, a modern fast canopy in normal straight flight will do 60 feet per second horizontally. That puts them 1,800 feet back towards the DZ and line of flight. Mentally, skydivers tend to think freefall separation is an exit problem, not a canopy problem. Once they have a good canopy, they are conditioned to think about canopy traffic and their landing – not about what might be in freefall overhead, because in the past this has not been a problem since we figured out that fast fallers should follow slow fallers out in the exit sequence. So, at about 2,500 feet the two groups effectively merged into a single large mix of deploying freefallers and people already under very fast parachutes. The only reason there were no collisions was blind luck. Mind you, every one of these jumpers was experienced, current, and well trained within the existing paradigm. Example Two A very experienced jumper with a cutting edge wingsuit was logging freefalls of over three minutes and opening at about 3,500. We had three aircraft flying. Our procedure is to leave a minimum of two minutes between drops for conventional freefall loads, three with wing suits or students, and four after a load with tandems. The wingsuit jumper exited. The plane behind started a three minute clock. Although the wingsuiter opened about half a mile away from the jump run, he then made a riser turn towards the landing area and left the brakes stowed as he fiddled with his suit. A minute later, he was just under 2,500 when canopies were opening around him. Example Three Taxiing out from the loading area, the pilot called me to ask which way trackers should go. This piqued my curiosity, trackers are supposed to know this when they manifest. I told him “east” and asked if he could tell where they were in the exit order. Meanwhile I checked with the manifest to see if anyone on that load had reported they were planning to track or asked for information about which way to go. None had. A bit later the pilot replied that they would be exiting first. I got out my binoculars to watch. The three-way tracking group exited and flew straight up the line of flight, opening between the next two groups in the exit order. Naturally I noted their canopies and rounded the three up in the landing area for a discussion. Initially they were confused about what the problem was, although they did acknowledge that there were other canopies in the sky closer than they had expected. The leader of the dive had seventy jumps. It was his first tracking dive, and he was leading it on his back. He had planned to turn off jump run and fly east and was completely unaware of his failure to do so. The other two had about 150 and 200 jumps, not enough to be aware that he had failed to turn. Even if they had been, there was no plan on how to signal course corrections to the leader, and they were not close enough to do so in any case, due to the lack of experience. Two of the three, including the one with 70 jumps, had GoPros on, which no doubt distracted them from the navigation problem as they tried to video each other. It was a de-briefing nightmare as I learned more and more about how much they did not know. It was their first time at a large, busy drop zone. They had never received any coaching or advice on tracking. They had no idea about USPA’s recommendations for jumping with a camera. This episode made me realized that the manifest in-briefing that had served us well for years, with minor modifications now and then, was no longer adequate. In the past we never felt the need to screen for camera use or horizontal flying, merely informing them that if they were planning to track or wingsuit they would need to get a daily update from the safety officer. Example Four A total of twelve wingsuit jumpers landed out, the nearest almost half a mile from our normal landing area, the farthest over a mile out. After I rounded up the entire group (not one of them local jumpers) I made it plain that this was unacceptable, not just from a safety point of view, but also because many of them landed on private property or public roads, not a good thing in terms of our relations with the community. Questioning them about their flight planning, I learned some very interesting things. First, it was two groups, not one. The less experienced group was planning to take an “inside track” while the second, more experienced group was planning to fly a wider course, both of the tracks parallel to the original jump run. (This is a fairly common practice at DZs with a lot of wingsuit activity.) To make this easier, the individual who had taken charge of planning asked the pilot to turn 90 left at the end of the regular skydiver jump run. In theory the two wing suit groups would then simply exit and turn 90 left, paralleling the normal jump run back to the DZ and gaining horizontal separation from the climb-out time on jump run. Unfortunately this plan did not take into account that the winds aloft were about 30 knots out of the west, and the standard jump run was south. Thus, a left turn gave the plane a ground speed of about 130 knots, and each group took quite a while to climb out. Once in flight, they were already well down wind of the planned flight area and would have more cross-wind push the entire flight. Clearly this plan was doomed from the start, and anyone who had the slightest idea what the winds aloft were doing would know this. Winds aloft are very easy to find on line these days, or someone could have simply asked the Safety Officer what his observations were. Not one of those twelve wingsuiters questioned the incredibly bad plan the group leader had come up with, which was based on completely wrong assumptions. Even if anyone had looked down, they were already committed and had no Plan B. Example Five I picked up a wingsuit jumper who landed over a mile off the dz. (Nearly 1.5 statute miles, in fact.) The only reason I even knew about him was a bystander saw his canopy in the distance and pointed him out. I never would have seen him, his opening point was well beyond our first exit group on the normal jump run! His story? With very little experience on his new high performance suit, he was jumping a new helmet and camera set-up for the first time. He reported that he had problems with the helmet throughout the flight (shifting and vibrating) and forgot to pay attention to where he was going, flying downwind and away from the DZ the entire time. Example Six Trackers landed out, on the approach to the runway. When I inquired about the flight plan they said that when they got to the airplane, there was another tracking dive. The two groups decided to exit first and second, each going 90 degrees to the jump run in opposite directions. This put the out-landing group exiting at the extreme early end of the jump run, tracking downwind, then faced with penetrating back into the canopy winds. They had no chance to make it to the normal landing area and their opening position put them in a canopy descent to a clear area directly on the extended centerline of the runway. These are real world examples at one drop zone over the course of a mere couple of months. Along with similar problems reported from other drop zones and the incidents of actual and near-miss collisions associated with horizontal dives, it seems clear that training in these fields is completely inadequate. Before Freeflying came along in the early 90s, the skydiving environment was very simple. Everyone fell almost straight down and parachutes flew about 25 miles per hour. In the 90s, we had to figure out how to deal with a new, much faster fall rate in some groups, and canopies almost doubled in horizontal speed. In the last decade, even more variations in skydiving have popped up. These didn’t really show up much on DZO’s radar because so few people were doing them, but now they are increasingly common. Approximate Speeds of Various Forms of Skydiving Activity* Activity Vertical Speed Range Horizontal Speed Range Freefall time (13,000) FS 120 – 130 mph 0 – 20 mph** 00:60 - 65 Freefly 150 – 180 0 – 20** 00:40 – 50 Tracking 120 – 140 30 – 60*** 00:55 – 65 Angle 140 – 160 20 – 40*** 00:45 – 50 Wingsuit 40 – 70 50 – 80*** 01:30 – 3:00 *Approximations derived from videos and recording altimeters. **Random drift due to things like backsliding, one side of the formation low, etc. ***Best guess, based on distance covered in freefall time. Thus, on a single load there might be freefall times from exit at 13,000’ to opening at 3,000’ as little as :40 seconds and as much as three minutes. Horizontal speeds will range from zero to 80, with distances of up to a mile on tracking dives and flights of several miles possible for expert wingsuit jumpers. Note that these speeds will vary considerably. For example, experimenting with tracking myself and observing tracking contests, I could get well over a mile in 60 seconds and many people can out-track me by a significant margin. However, actual tracking dives are usually not done in a max track position because it doesn’t lend itself to maneuvering with others. On a calm day, a tracking dive going 90 off the line of flight usually only covers about half a mile. Identifying the RisksCollisions within Groups Within groups, tracking, wingsuit, and angle dives are showing a disproportionately high rate of collision injuries. Even the best planned dives can still involve high closing speeds as the group forms and breaks up. And, as Bill von Novak has pointed out: On a tracking dive there is no focal point; no base you can dock on or, failing that, at least keep in sight for break-off. Everyone tracks in effectively a random direction at the end of the dive and hopes for clear air. In some cases they even barrel roll just to add some more randomness to their directions. To a newbie a tracking dive sounds lower pressure than a big-way; you don't have to dock, you just have to go in a similar direction as the leader. This tends to attract lower experienced jumpers, and those jumpers often shed the jumpsuit they are used to for a freefly suit or no suit at all - resulting in new and hard to predict fall rates/forward speeds. To that I have to add the potential for huge closing speeds, sometimes due to lack of skill but often due to poor organizing. Tracking dives in particular have a history of being “loose” or “pick-up” loads. Many times I have seen people “organizing” a tracking dive by making a general announcement to give a ticket to manifest if you want to come along. There is often very little screening for experience and ability. Then, it is common to group the more experienced people close to the leader, and that person is often in a floater position on exit. Anyone who can remember learning to do larger formations knows that novice divers tend to dive too long, even if they have been forewarned about the problem. (If you dive out two or three seconds after the base, that base is way ahead of you on the acceleration curve, so they appear to be getting further away – which they are. You dive more aggressively, something you don’t have much practice at. Then, when the base hits terminal velocity, they suddenly rush up at you because you are now going much, much faster than the base. You then go low, or collide.) Now add to that the significant horizontal movement, burbles that aren’t directly above the lower jumper, multiple vertical levels, and huge blind spots since you are looking ahead, not around. The potential for collisions is incredibly obvious once you think about it, but apparently few people doing tracking dives are thinking about it. Collisions Between Groups Although these are still rarely found in the accident record, I have seen many near misses, which suggests that it is only a matter of time. This is particularly disturbing to me because in a group-to-group collision, it means someone was exposed to an extreme hazard that they had no knowledge of, expectation of, or control over. Skydiving is risky enough with the known hazards. As drop zone operators and safety professionals it is morally wrong to expose our customers to a risk where their only real control would be to look at who else is on the load, and pull off it. Landing Out Out landings have two problems, one a risk to the jumper and the other, to the drop zone itself. The record shows that out landings have a high risk of landing injuries, especially from low turns to avoid obstacles or turn into the wind. This risk is exacerbated by the fact that the drop zone staff might not even know of an injury, and if they do, the response can be complicated. The second risk is aggravating the neighbors or airport authorities. Every drop zone has at least some neighbors or authorities who are opposed to skydiving. As long as these are a small minority a DZ can usually get by. Once skydivers start dropping into neighborhoods, landing on runways, and otherwise drawing unwelcome attention, the political balance can change. A classic example of this is the tracker landing on the roof of a two-story house 1.3 miles south of the DZ at Longmont, Colorado early in July of 2013. He not only broke his leg, he damaged the roof and required a complex rescue. At the time of the incident, he had 64 jumps in over a year in the sport. The wind was blowing from the north, but he tracked south, towards a heavily developed suburban area. In his own remarks, he accepts no responsibility for the incident, blaming it entirely on the winds rather than his extremely poor planning. Changing the Paradigm What do these activities all have in common, from the standpoint of skydiving culture? There is very little expectation, or even definition, of quality. Success is defined as mere participation and survival. Near collisions, actual collisions, landing out, and other problems do not seem to be perceived as failure. The video evidence alone is proof of this attitude. Just randomly browse YouTube for tracking, wingsuit, and angle dives and you’ll see some really bad, sometimes frightening, flying. Yet the comments are almost never critical. In order to turn this around, drop zones will have to set higher standards and change the definition of acceptable. This is not the first time we’ve been down this road. I started skydiving in 1978. Sequential FS was really starting to take off, but for the typical jump group there was no reason to plan a second point. As an old friend of mine said of those days, “I remember when a good 8-way was a 4-way!” It was learn by doing, and we had a lot of accidents from the hard docks, funnels, and collisions on the way to and from the funnels. But we learned a lot, and fifteen years later, when freefly came along, RW was at a pretty advanced, safe stage of technique. Those who were around in the early days of freeflying saw history repeat itself. Freeflyers didn’t want to dirt dive, debrief, or set goals. That was for RW jumpers, and anything to do with RW wasn’t cool. It was simply “Let’s jump together and do some tricks.” Eventually, they came to realize that just led to a lot of wasted jump tickets, AAD fires, and hard knocks in freefall. Now freeflying uses exactly the same philosophy as FS: train, set goals, set standards, and most of all, plan dives appropriate to the experience and ability of the participants. Now we see a new discipline emerging. On the one hand, angle flying is somewhat like freefly, where the recruits are already fairly experienced skydivers. Tracking is often more like early RW, where there was not a lot of skill among many of the participants, and not much meaningful leadership from the ones who had managed to survive. Wingsuiting seems to be in a class by itself, a population split between regular skydivers wanting to try something new, and BASE jumpers who feel that rules are a curse. One thing most of them seem to lack is good training about the surrounding environment. Training The general lack of training, supervision, and experience in this field is part of the problem. For example, although most wingsuiters take a first flight course of some type, I have visited web sites naming instructors with as few as 300 total jumps and only 100 wingsuit jumps! Based on the quality of some wingsuit jumpers, clearly some instructors have pretty low standards as well as low skills. All of the training materials I have seen make some mention of navigating and awareness of wind conditions, yet not one of the wingsuit jumpers I have spoken to after they land out has reported that their instruction included specific details on how to plan an effective flight path. After debriefing countless wingsuit incidents including malfunctions, traffic problems with other jumpers, out landings, and so on, I have come to conclude that a USPA Wingsuit Instructor Rating is a good idea. Training should included a detailed syllabus and written and practical tests, including flight planning, before they receive a wingsuit endorsement. At present it cannot be assumed that any wingsuit jumper has adequate training. Tracking attracts people with very little experience and has even less formal training than wingsuiting. It is perceived as something anyone off student status can do, since there is no need for enough skill to dock on a formation or turn points. In fact, some tracking dives are put together with the clear expectation that some participants won’t even be able to keep up. Since tracking itself is perceived as easy, I believe this translates into a mind-set that there is nothing to worry about. Hence we see very poorly organized dives with little or no screening for ability or experience, and often no meaningful flight planning. Angle flying also requires better screening for skill. Initially this activity was mainly undertaken by highly skilled freeflyers, but now that it has been popularized on media sites a lot of less experienced jumpers want to get involved. Like tracking, these dives require a flight plan that takes into account the rest of the load, and the high descent rate. In my opinion angle flying is more akin to freeflying than to tracking, and should exit in conventional freefly order with great attention to flying 90 degrees off the line of flight but not into the same airspace that slower falling trackers may also be heading for. Standards for Experience and Participation Unlike Freeflying and Formation Skydiving, horizontal flying cannot be learned in a wind tunnel. The only way to acquire skill is to actually do it. As everyone knows from learning Formation Skydiving or Freeflying, you don’t take people with 70 jumps up on large formations with mixed experience levels and minimal planning – at least not with a reasonable expectation of safety and success. We also know that you don’t develop skills very effectively if you have no expert coaching - or at least competent leadership. This should include goals set for the skydive before you are on the way to altitude, a useful dirt dive, and then a good post-dive debriefing, ideally with a video that is useful, not a sloppy, shaky GoPro video with constantly changing reference points. After giving it extensive consideration, I’m planning to screen new arrivals much more aggressively and have minimum standards they will have to adhere to. Just as most skydiving associations feel 200 jumps is a good minimum for wingsuits and cameras, fifty is a good number for a night jump, and so on, I feel that tracking dives should not be undertaken, except as one-on-ones with an experienced coach or instructor (or approved solos after consulting with an I or STA) until 100 jumps. At that point, the jumper can go on slightly larger tracking dives led by a coach, instructor, or approved organizer. For those with more jumps just taking up tracking, I feel that regardless of experience your first ten tracking dives should be with an approved Coach, Instructor, or organizer and these individuals should have an understanding with the dz about keeping the dives small and simple, just as we would with an expert FS jumper exploring freeflying. To lead a tracking or angle flying jump, I am thinking about a minimum of five hundred jumps, including at least 25 tracking jumps (and 25 angle flying jumps for that activity, not a total of 25 combined). The minimum skill set to lead will include awareness of collision risks and how to mitigate them, the importance of staying away from the jump run, how to make a flight plan that guarantees everyone will get back, how to plan with other groups on the load to ensure adequate separation, etc. Leaders must screen all participants for skill and have a well planned dive from exit to opening. Dives for which anyone can sign up by bringing a ticket to manifest are not allowed. Leading on the back is not allowed unless paired with another skilled tracking leader as a co-pilot flying face down. Information, Screening, and Guidelines Skydive Arizona’s plan to get better information out and establish our intentions and expectations with the horizontal community is simple. Once our procedures are established, or whenever we change them, the procedures will be posted on our web site, displayed near the loading area on a multi-sided “Safety Kiosk,” and available as flyers or hand-outs at manifest. As jumpers arrive they will be asked if they have any intention of participating in horizontal jumps. If so, they will receive the hand-out and a special briefing, in addition to the usual DZ briefing. Depending on their experience level they may be limited in what they can do, or directed to our coaching department. (Although the GoPro problem is only peripheral, we’ll be adopting a similar strategy there.) Drop Zone SOPs Besides improved training, screening for skill and experience, and better coaching and organizing, drop zones can also implement standard operating procedures to mitigate some risks. Exit Order The phenomenon discussed in Example 1, above, indicates that angle flyers should never go before belly flyers. If they do, we not only have the well known problem of differential freefall drift in winds (the faster fallers drift less, the slower ones, more) but we then combine that with fast canopies having 20 or 30 seconds of flight to eliminate any remaining horizontal separation. This has already happened here, at Elsinore, and on the east coast that I know of; doubtless it has happened elsewhere. Trackers can leave just about anywhere in the order, provided the flight plan works with the overall scheme of things. If they have a slow fall rate and a fast horizontal rate, leaving first works fine, providing the leader takes a course that does not put them too far away. In practice, the pilot is always trying to get the first group off the plane at the earliest possible point from which they have a reasonable chance of getting back. This creates the best opportunity to get the entire load out on one pass. If the trackers leave first and fly 90 off the jump run, they are now further out than that “earliest possible” point. Leaving first, they must do a minimum of 45 off the line of flight, or 90 for half the jump followed by 45 for the rest, or 60 the entire time - something that gains a little ground back towards the dz while at the same time getting well clear of the jump run. Clearly, any exit position still presents the possibility of a tracking group flying up or down the jump run. The only way to mitigate this risk is to limit tracking leadership to experienced, well trained skydivers. Flight Planning I will be asking everyone in the horizontal community to take much more responsibility in flight planning. As I see it, the proper planning procedure has several steps. Get a clear understanding of the overall DZ geography. If, for example, going to the right of the line of flight will put you over the ocean while going left will put you over a safe, open field, left might be the best choice if winds allow. Get current wind conditions, exit to surface. Find out if there are any other special concerns, such as a second plane dropping military or CF jumpers in an airspace box adjacent to the normal jump run. Plan an opening point from which everyone can safely get back to the DZ. From that point, reverse engineer the freefall portion taking into account never flying under or over the jump run and avoiding other horizontal groups on the plane. In the event that winds, geography, other DZ activity, or some other issue makes it unlikely that all points of the flight plan will be successful, cancel the dive until conditions are more favorable.On every dive we will hold the flight leader responsible for devising such a plan and executing it properly. Any safety infractions or out landings will result in grounding until they can prove they understand the situation better and have devised a strategy to prevent a repeat. Per Load Limits Depending on whether or not the DZ and jump run offer the option of flying to both sides of the line of flight, it is possible to get up to four horizontal groups out of a plane safely. If the airspace is limited to just one side of the jump run, three seems to be about the limit. I’m more concerned with keeping everyone safe than with pleasing everyone if significant risks are involved, so we will start limiting the number of horizontal jumps on any given load. On this subject of pleasing customers, the situation is analogous to the HP landing problem. If the risk is to the participant only, then a little extra risk might be considered acceptable. However, when other skydivers have no control over the risk, it is completely unfair to expose them to it. Just as HP landings don’t belong in the normal traffic pattern, horizontal flight that might endanger other groups on the load is not acceptable. Minimum and Maximum Opening Altitudes I am not a great believer in relying on vertical separation, since a stuck pilot chute, premature deployment, or spinning malfunction can erase it in seconds. However, there is no reason not to add it to the arsenal. Some drop zones are mandating a minimum 4,000 foot deployment altitude for wingsuits and a maximum 3,000 for trackers and angle flyers. I haven’t made a decision on this yet, but it makes sense in some situations. Enforcement After the alarming close calls in our last season, and looking back on the canopy discipline problem that plagued the sport for years (and still does, in places) Skydive AZ recognizes that modifying behavior requires both positive guidance and, when necessary, some penalties. We’ll be asking horizontal flyers who create safety problems to stand down from their activity until they can demonstrate a better understanding of our concerns.
 -
1 point
 There are lots of things you can learn about on the Dropzone that will aid you understanding of how all the elements involved in a skydiving operation fit together to make things work. Even just focusing on the assessment of the jumping conditions demonstrates several moving parts that all need to operate effectively to function as a whole. Remember, there are things that you must know, but also things that you can know that will make you better and safer. A helpful way to evolve your knowledge is try to see things from the perspective of others. What Other People Know:Chief Instructor: Whoever is employed to be in charge of the daily dropzone proceedings will not only be generally very well experienced but likely also highly practised under the conditions of that particular location. You can learn much from this person. When things are busy they will likely juggling many things in their head to keep everything running smoothly, but when quietness descends seek them out and pick their brains as they probably have many, many excellent stories to share - each with an important lesson behind it. The Pilot: To become a pilot you have to read books and do tests and stuff. A lot of this is about the weather. While you are trying to gauge the strength of the wind outside by listening intently from under a duvet - a good pilot will be up checking many sources of information to be able to perform their job properly. The information analysed by pilots is a very good place to head if you are keen to take your knowledge about flying conditions to the next level. The Jump Master: The person who is in charge of the load needs to be very aware of what is going on both on the ground and in the air. Being tasked as jump master is a serious job that happens relatively early in your skydiving career and while easy to perform with the correct level of awareness carries serious responsibility when there is some kind of incident. Are you confident enough in your decision to take the plane around or bring it back down after spotting a big mess at altitude and have the courage of your convictions when faced with an angry dropzone owner? Being all over the details will make you look like a goddam pro when anyone starts quizzing you. What were the winds doing at the bottom and the top? Which way was it going? What kind of clouds were they and at what altitude? The Other Skydivers: Does everyone on the plane know what they need to know? Are the people you are jumping with or those in the group next to you clueless idiots? Should you worry about them? Who is going to tell them the correct information? You do it - for your own benefit as much as theirs. Also worth considering is the perspective of the tandem masters and the camera pool - they keep the dropzone going and thus operate day-in and day-out under all conditions and circumstances. If the plane goes up then almost certainly some of them are on it and their collective knowledge is well worth mining for information about functioning at the fringes of what is possible or acceptable on your particular dropzone. Conclusion:Applying some time and effort to learn more about weather conditions will create a return on investment with your ability to judge further out if jumps are going to happen or not. Skydiving is an expensive hobby and happens quickly - so everything you can do to maximise your effectiveness on each jump helps, and understanding more about the weather will make you a better, safer skydiver. Learning about all of the conditions you will be faced with will not only facilitate making good calls when you are jumping, it will also help you to get more out of your jumps when they happen. Nobody is right all the time but the more educated you are the better your guesses will be - and as such you ability to decide wether to drag your ass out of bed before dawn and get down to the dropzone or do something else with your day. Also try remember that there is nothing to be gained from being angry at the sky - it does not give a shit. Also, it is probably healthy to do something else now and then - if your life is a constant battle with the weather you might well end up batshit crazy and living in a caravan on the airfield with mushrooms growing in your hair. On a dropzone you are surrounded with ways to learn, and the first time you apply some extra-curricular knowledge in a practical way is immensely satisfying. Every now and then you come across someone who seems to have magical powers when it comes to predicting what the sky is going to do - but they are most likely just a regular human that knows things.
 -
1 point
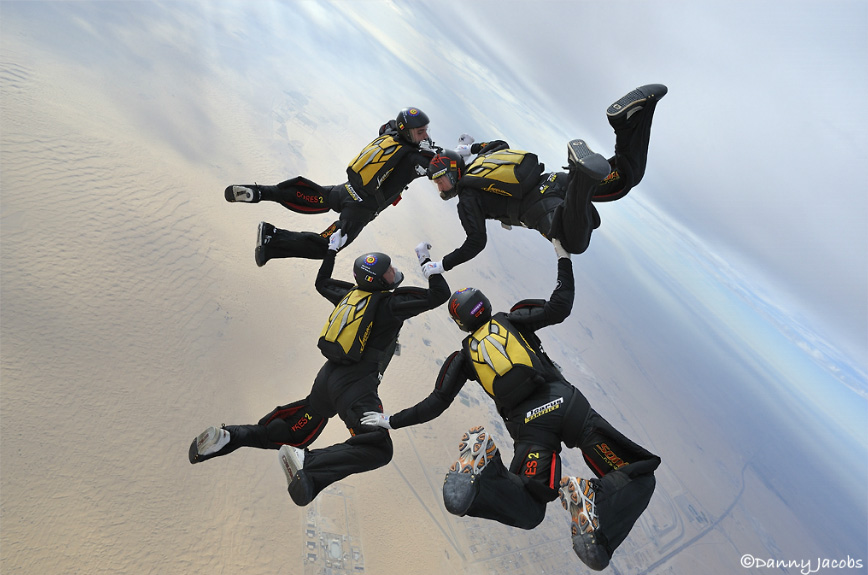 How does the winningest 4-way team in the world get--and stay--that way? Image by Danny Jacobs If you say “by training hard,” you’re certainly right. Hayabusa, the aforementioned golden boys of 4-way FS, unsurprisingly train their way around the calendar in both the tunnel and the sky. As of publication, they recently topped of the podium in the FAI world championships for both, as you’ve undoubtedly noticed. The top of the podium is, after all, pretty much home for these guys. Their hard training schedule, however, is certainly not the only ingredient in the sweet-smelling success that’s always wafting out of the Hayabusa tent. If you’ve got a couple of hardworking skydiving buddies who fly well with you, you might be thinking about going for your own set of medals. Not into FS? No worries. It doesn’t matter if you point your belly button at the ground or the horizon: you can still borrow a page from Hayabusa’s playbook. Here’s what Hayabusa Point Dennis Praet has to say about how his uniquely consistent team keeps their streak going so strong. 1. Work on the relationships.“At the beginning, I really underestimated the importance of team dynamics,” Praet says. “They are super important. You can be an awesome flyer. You can do the fastest 360s. Whatever. But if you don’t have a good relationship with your teammates--if you are not very good friends--then competition is a very tough world.” “Don’t underestimate how important it is to have a good relationship with your teammates,” he continues, “And don’t misunderstand that to mean that you always have to accepting someone else’s bad habits or crap. It’s true that it is about coming to terms with some bad characteristics, but it’s more about appreciating the good ones. Like siblings, in a way.” 2. Fix what you need to and get on with it.“We had a very harsh year in 2014 with Hayabusa,” he explains. “It was the year that nobody liked, and it just takes all the passion away. We saw the rough year for what it was, changed the things that needed to change and found that passion back.” 3. Cross-train outside skydiving.“Everybody on the team does their own thing as far as fitness is concerned,” Dennis says. “It’s not a secret that I don’t like running; I would rather go to the gym or do some of my active hobbies, but pretty intensively. I absolutely love wakeboarding and kite surfing, and sometimes I’ll spend the whole day in the water, going hard.” “When I train, I focus on the fact that four way is a 35-second sprint--so going for endurance is only helpful in training. You can kind of pick your own sport to optimize your capacity for sprinting. As long as you are fit enough to go through a whole training camp--12 jumps a day, without losing your head--you are in good shape.” 4. Get your head right.“When we are going into a hard competing day,” Praet says, “We try to put all our personal issues on the side. If there is any small thing that might put you off your mental game, consciously put that out of your head. Then just trust the training that you have done; the plan that you followed throughout the year. That way, you know--even if you lose, it is just that the other team was better. It is not something that you have done or didn’t do. That knowledge is comforting.” Hayabusa winning 2013 Dubai International Skydive Championship
 -
1 point
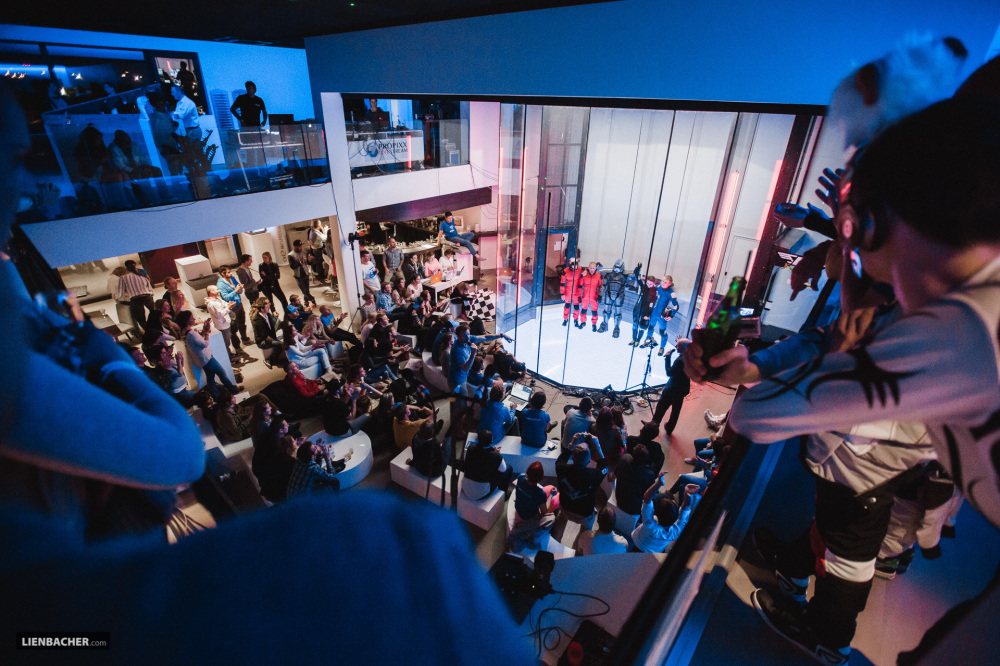 Image by Wolfgang Lienbacher When it comes to the windytube, Vince Arnone has a few solid miles under his belt. He’s worked in the wind tunnel industry since 2010 (and in the skydiving world for a few more years before even that). He runs Indoor Skydiving Source, a community-based resource for indoor skydiving and bodyflight. During his many years as a tunnel instructor--working with first-time flyers and skydivers alike--he has constantly been approached by wanna-be tunnel rats. If you’re one of them, he has some advice to share with you. I asked him some questions about it, and here’s what he had to say. Q: What’s the first step? Are there prerequisites? Vince: Just apply! At the end of the day, great timing and a solid application really is the key to working in the wind tunnel. Beyond that, there are a few important factors to consider before filling out that app. The physical requirements of the job should be the first thing you consider before seriously looking at getting a job as a wind tunnel instructor. Being a tunnel instructor, and especially working with first-time flyers, is a physically demanding job. Sometimes you work with children, but sometimes a 250lb man walks through the door. They are both your responsibility, and bothcan kick your ass! Both the IBA and Tunnel Instructor rating programs administer a physical fitness test that you must pass in order to be an instructor. The test normally includes pull-ups, sit-ups and running. You don't need to be superhuman, but being generally in shape is a good starter. Q: Do you need a lot of previous tunnel experience? Is it, like, only shredders need apply? Vince: No. The training will be part of the job, and it’s an investment. It goes like this. In order to work in a wind tunnel with first-time flyers, you need a tunnel instructor rating. Earning this rating requires a 3-4 week course which teaches you how to safely introduce and monitor a flyer's first flight. Most wind tunnels include this as part of your initial hiring period. You might have to sign a contract or have some money withheld from your paychecks to pay for the training, but rarely do you have to pay out-of-pocket for it. Training programs like this are designed to take anyone off the street with no previous experience and set them up with the key skills they need for the job. Q: Do you have any insider tips that might give an application the edge? Vince: If you remember one thing from this article, remember this: a staff at a wind tunnel is a close-knit team, and the team has to work well together. Because of this fact, knowing and having a standing relationship with other instructors or managers can make the difference when applying. A hiring manager is always looking for a good fit to the team, not just a skilled individual. This means they are looking for someone who will mesh well with the other instructors on the staff and work hard. This is the most important thing to remember when applying. If you don't know anyone, but you know the job is for you, don't worry! I don't mean that you have to be long-time buddies with someone at the tunnel in order to get a job. Hang around. Get to know the staff at the tunnel you want to work in. Show interest. Small acts like this will go a long way, and you just might learn about the tunnel and bodyflight in the process. Q: What should a potential tunnel employee do to prepare for the interview? Vince: Treat it like a “real interview.” Don’t be too casual about it. All the standard job application best practices apply. The opportunity to work in the wind tunnel is a unique -- and possibly life-changing -- one. Approach it with a good attitude and tons of passion, and see where it might take you. Good luck! Q: What are the major differences between tunnels for flyers with an eye on growth? Vince: Back when I first started--I guess I’m sounding old now--there were just so few tunnel jobs out there. The number of tunnels from 1982 to the year 2011 was around 40. From 2012 to 2015, that number jumped to around 80. Today, looking at the database, there are 113. So rather than jumping at ANY possibility--as someone who sees the tunnel job as an opportunity to grow their personal skills and maybe even start coaching--it really matters which tunnel you land at. The days where everyone would flock to a single tunnel because it was the only tunnel, only high speed tunnel, or only 14 ft tunnel, are long gone. There are more coming, too; since 2013, the number of tunnels opening each year has also exploded. This also means the number of instructor positions has grown. Just by the numbers, setting out to get an instructor job is more likely to end successfully. This also means that the experienced flying community has spread out. Consider working at a tunnel that mainly serves first-time clientele. There will be lower experienced flyer traffic, and the other instructors might not be flying- and coaching-focused. That’s a much different environment than a tunnel that sees experienced flyers as a larger percentage of their business. Working with experienced flyers and other coaches will play a big role in your personal progression. Surrounding yourself with people who have similar goals will immerse you in the culture. Consider the location and culture of the tunnel you land at. A location that will support your flying goals will help you reach them much quicker--and this is about you going all-in for personal development, isn’t it?
 -
1 point
 While I was an S+TA, I spent a considerable amount of time telling people they shouldn't be loading their canopies so heavily. 90% of the time it didn't work. Skydivers can have a bit of an ego, and when I told them they probably shouldn't downsize yet they heard "I think you're a crappy canopy pilot who can't handle a smaller wing." So they downsized and broke their legs, backs and pelvises with some regularity. A few years back I met up with Brett, one of the people I'd been lecturing to whle I was an S+TA. He told me that he wished he'd listened to me back then. He had broken his femur during a botched landing, been out of the sport for a while, and then came back and really learned to fly his canopy. He took a canopy control course and actually upsized to get more performance out of his canopy. He ended up coming in first in one of the events at the PST that year. That started me thinking. Maybe the approach I was taking was wrong. Since jumpers tend not to listen to other people who tell them they're not as good as they think they are, perhaps if you could give them better tools to evaluate themselves they could make better decisions about canopy choices. It's one thing to have some boring S+TA guy give you a lecture about not having any fun under canopy, quite another to try to perform a needed manuever under canopy - and fail. In that case there's no one telling you you can't fly the canopy, it's just blatantly obvious. So I came up with a list of canopy control skills everyone should have before downsizing. Some are survival skills - being able to flat turn would have saved half a dozen people this year alone. Some are canopy familiarization skills - being able to do a gentle front riser approach teaches you how to judge altitude and speed at low altitudes, and how to fly a parachute flying faster than its trim airspeed, a critical skill for swooping. It's important to do these BEFORE you downsize, because some manuevers are a little scary (turning at 50 feet? Yikes!) and you want to be on a larger canopy you're completely comfortable with before trying such a thing. The short version of the list is below. Before people downsize, they should be able to: flat turn 90 degrees at 50 feet flare turn at least 45 degrees land crosswind and in no wind land reliably within a 10 meter circle initiate a high performance landing with double front risers and front riser turn to landing land on slight uphills and downhills land with rear risers Details: 1. Flat turn 90 degrees at 50 feet.This is the most important of all the skills. The objective of this manuever is to change your direction 90 degrees losing as little altitude as possible, and come out of the manuever at normal flying speed. Coming out at normal flying speed means you can instantly flare and get a normal landing. If you can do this at 50 feet, and come out of the manuever with normal flying speed at 5 feet, you can flare and land normally. Every year people die because they decide they simply have to turn at 100 feet and know only one way to do it - pull down a toggle. The parachute dives and they hit the ground at 40mph. To prevent this, not only do you have to know how to flat turn, but you have to practice it enough that it becomes second nature. Then when you do need it, you won't have to think about it. To pull off this manuever, start by toggle turning the parachute gently. IMMEDIATELY follow that with some opposite toggle. The idea is that you want to flare just a little to counteract the canopy's desire to dive. Continue adding opposite toggle until you've stopped the turn. At this point let both toggles all the way up. If you feel the parachute accelerate after you let go of the toggles (i.e. it feels like you just flared) use less opposite toggle next time. If you feel like the parachute is diving, like you just did a toggle turn, use more opposite toggle next time. Basically you want to start the turn with one toggle, stop it with the other one, and use just enough toggle to keep the wing from diving but not so much that it does a flare. It should go without saying that this manuever should be practiced up high before you ever try it down low. If and when you do try it out low, start at lesser angles (i.e. try a 15 degree turn first) make sure the pattern is clear and make sure conditions are good (soft ground, good winds.) Work up gradually to a full 90 degree turn. I do think it's important to try at least a gentle flat turn very low; we are horrible judges of exact altitudes when we're at 1000 feet, and it's hard to tell if you've lost 50 feet or 200 in a turn. By trying it out down low, you'll get a better sense of what it can do for you, and you'll have the "sight picture" better set in case you have to use it for real one day. A variation on this is to go to half brakes and then let one brake up. This gives you a flat turn, but by flaring first you "use up" some of the canopy's energy so you can't turn as effectively. On the plus side the turn happens more slowly. If you are about to hit a tree and want to make a last minute turn, this variation might be the way to go, as it combines a turn and a flare, thus reducing your speed before impact. A version of this is currently taught in the ISP, so it might be a good way to make your first flat turns before transitioning to the less-braked variety. 2. Flare turn at least 45 degrees.This does two things - it gives you another tool in your arsenal to dodge last minute obstacles, and teaches you to fly your canopy all the way through to the landing. The #1 mistake jumpers with new HP canopies make is to "reach out to break their fall" while they're flaring; this of course turns the canopy in the direction they are reaching. Most people decide that this is due to a side gust just as they're landing. I remember one jumper at Brown who, amazingly enough, experienced a side gust seconds before he landed (and always from the right) 40-50 times in a row! Learning to flare turn will help eliminate this problem. To flare turn, start with a normal flare, then flare slightly more with one toggle. The canopy will turn. Bring the other toggle down to match it, and the canopy will straighten out. It's a dynamic process; rather than put the toggles at a certain position, you have to speed up one toggle for a second, then speed up the other to match it, before you level them and finish the flare. If you balloon upwards, then don't flare as quickly. If you drop to the ground, bring both toggles down more aggressively when they are 'split.' One thing that helps people is to think about where your canopy is rather than what it's doing. Use the toggles to put it off to one side for a moment, then use them to put it back over your head. This can be hard to practice with a large canopy. I can pull off a 45 degree turn on a Manta, but the flare is over so fast that it's hard to explain what I just did. It's much easier on a canopy loaded around 1:1, so you may want to wait on this one until you get to that loading. Note that if you combine a flare turn with a flat turn, you can pull off nearly a 180 degree turn at just above 50 feet. Also note that knowing how to do flat and flare turns doesn't mean you can always turn at 50 feet and get away with it - sometimes it's better to accept a downwind landing than make a turn at a dangerously low altitude. But if you do have to turn low (say, you're on course for the electrified fence around the pit bull farm) a flat/flare turn will let you either turn and land normally or turn and minimize the damage caused by landing in a turn. 3. Land crosswind and in no wind.These are straightforward. No wind landings are pretty easy; the only issue is that your perception of speed and altitude will be off. Since you seem to be moving faster over the ground when there's no wind (which you actually are) it can seem like a good idea to add just a little brake to 'slow you down' before you land. Resist that urge! Keep that speed in your canopy; you can turn the speed into a good flare only if you start the flare with decent (i.e. full flight) speed. Crosswind landings can be a little more tricky because of that strong tendency to want to "reach out to break your fall." Counter this by flaring with your hands in towards the center of your body. You may have to PLF on these landings, since you'll have some decent forward speed and have some sideways motion from the wind. If you want to get fancy, try a flare turn after you start your flare on the crosswind landing - you can easily pull off a standup landing if you get turned enough before you put your feet down. If these work well you may want to try a downwind landing. The benefit to doing that is it will prepare you to accept a downwind landing in the future; you won't be tempted to turn too low to avoid it. Choose an ideal day for this one, with a slippery landing area (wet grass is perfect) low winds and a clear landing area. Prepare to PLF, and think about "laying it down" on your thigh as you land to start sliding. You can slide across grass at 30mph without getting hurt, but planting your feet and cartwheeling at those speeds can be very dangerous. 4. Land reliably within a 10 meter circle.This is essentially the PRO requirement. This is critical because your accuracy skills are what will keep you from having to turn low. It's very comforting to know that you can land in any 50ish foot clearing if you find yourself having to land out; it's especially important as you get to smaller canopies that need longer and longer runways to land well. Your only option may be a section of road, and you may have to hit the beginning of the road dead-on to have enough room to slow down. The subject of canopy accuracy is too long to do justice to here, but the top 3 hints I've heard are: - If you're not sure if you're going to make it over a wire or tree, look at what it's doing with respect to the background. If more background is appearing from beneath the wire or tree, you're probably going to make it. - As you look at the ground, most points will seem to move away from a central point. Some will rise, some will fall, some will go out to the side. If you look long enough you'll find one point that's not moving - that's where you're going to land if the winds don't change all the way in (which is rare.) - Going into brakes usually makes you land short in high winds, but can extend your glide in no wind. Front risers almost always make you land shorter. 5. Initiate a high performance landing with double fronts, and a front riser turn to landing.I am pretty convinced that front riser high performance landings are a lot safer than toggle turn high performance landings, and double fronts are the safest of all. If you do it too low, or become worried about the landing - just drop the risers and you're back to normal flight. For double front riser landings, set up a normal landing, aiming for a point a little farther away than you normally do. At 100 feet or so, pull down both front risers. Your canopy will drop and accelerate. At some point above the ground (30-10 feet depending on your canopy) drop the front risers. Your canopy will begin to recover. Before it completes the recovery to normal flight, you should be at flare altitude. Start the flare normally. You may need to use less toggle than normal, since the canopy is now going faster than you're used to, and the same amount of toggle gives you more lift. You will also plane out farther, since you have more speed you have to bleed off before you come to a stop. For front riser turns to landing, first try front riser turns out above 1000 feet and get used to how your canopy recovers. Then start by coming in 10 degrees off the windline, and making a gentle front riser turn to line up with the wind at ~100 feet. The canopy will dive and accelerate, so be prepared to drop the front riser instantly and flare if you have to. Also be prepared to steer in the flare, since the canopy may not have stopped turning completely before the flare begins. Done correctly, you'll start the flare with more forward speed, giving you a longer planeout. Make sure your flares are smooth for this! A smooth flare generates more lift for a longer period of time than "stabbing" the brakes. However, don't start the flare at 30 feet - starting the flare that high will slow the canopy down, negating the effects of the front riser approach. If you do find yourself stabbing the brakes to prevent hitting the ground, move the altitude at which you start front risering up. Probably the most critical skill you will get from this exercise is the development of the "sight picture." Below 200 feet your altimeter is pretty useless, and you should be looking at traffic and the landing area anyway. Eventually you'll develop a sense of what "picture" you should see just before you start that riser turn. The picture will vary with wind, landing area etc. If you arrive at the point where you would normally start the front riser turn, and the picture's not right - abort it and land normally. Once you have the picture down, and are doing front riser turns that transition to gradual flares, then start increasing the angle. Once you get to 90 degrees you're going to be gaining a lot of speed, so be sure to adjust your sight picture up to compensate. As always, bail by dropping the risers if you feel like there's anything wrong. Once you drop the risers, level the wing with your toggles and prepare to flare. At worst you'll have to land crosswind - but that's a skill you should have by this point anyway. 6. Land on slight uphills and downhills.Often, land away from the DZ isn't perfectly flat; sometimes you can't tell this until you're at 20 feet. To prepare for this, find a place in your LZ that's not perfectly flat, scope it out, and plan on landing there. There's not too much magic concerning landing on a slope. You flare more aggressively to land going uphill, less aggressively to land going downhill. Obviously not all DZ's have slopes. If you don't have a good slope on your DZ somewhere, you may have to put this one off until you're at a DZ that does have one. Beaches are a good place to practice this, since they have pretty predictable slopes down to the water, and overrunning the landing just means you get wet. 7. Land with rear risers. Knowing how to land with rear risers can help you deal with a canopy problem like a broken or stuck brake line, and can help you make a better land/cutaway decision when you do have such a problem. Again, this is best practiced up high. See how far you can pull the rear risers before the canopy stalls. It will stall much earlier with rear risers; memorize where that happens so you don't do it near the ground. When you try it for real, choose an ideal day - steady moderate winds, soft ground, clear pattern. Be sure to try this for the first time on a largish canopy (one of the reasons you should do these things before downsizing.) Leave your hands in the toggles and wrap your whole hand around the rear riser. That way if things go awry you can drop the risers and flare normally. Start the flare at a normal flare altitude, and prepare to PLF. You may get the sort of lift you're used to, but you probably won't slow down as much before you're near that stall point. Make sure your feet are on the ground (sliding preferably) before you get there. On smaller canopies, you may want to start the flare with rear risers. Then, once the canopy is leveled out, drop the risers and finish the flare with the toggles (which are still around your hands.) That way you get your vertical speed to zero, which is the critical part of a safe slide-in landing, and can still stop the canopy without hitting the ground going too fast. (This is also a technique used by swoopers to extend their swoops BTW.) The above list is not meant to include all the skills you need to safely fly a canopy; it’s just a checklist for a cross-section of skills you should have before downsizing. Some of these will be easier on a larger canopy, and can be practiced right away. Landing downwind, for example, is easier on a larger canopy simply because it can slow you down more before stalling. Some skills are more difficult on a larger canopy. It can be difficult to get a planeout at all on a larger F-111 canopy, so practicing things like a flare turn may best wait until you approach a 1:1 loading on a ZP canopy. At that loading, the canopy begins to perform more along the lines of how we expect a HP canopy to fly. More importantly, skills like the flare turn become both possible and necessary to practice, so you can hone your skills while you are under a canopy that tolerates minor mistakes. As I mentioned in the beginning, these are skills you should learn before you downsize, although some (like the flare turn) can be difficult to practice at very light loadings. If you can't do some of them yet? Get some coaching; it makes a lot more sense to learn them on your larger canopy, before you start jumping a smaller canopy that scares you. Once you can do them all, then try the smaller canopy. And if someday someone cuts you off under the smaller canopy, you'll have the reactions you learned under the larger canopy. Even if you haven't completely adapted those manuevers to the smaller canopy yet, those reactions will more likely than not save your life.
 -
1 pointOne of the most dreaded conditions of all is the no wind scenario. This fear is so profound that many jumpers in fact avoid jumping in no wind conditions. Although landing with the benefit of a headwind is unarguably easier, there are specific methods that markedly improve the chances of standing up your landing. Here are a few tips that will help you to land softer and safer when the wind goes away: 1) Make sure you level off within touching distance from the ground. If you finish the flight with some space between you and the earth, you will have more than just forward speed to deal with at the end of the landing. All parachutes stall above zero airspeed, which means that as soon as the extreme slow flight capability of your parachute is attained, it will drop you into the ground with both forward and vertical movement. The best way to deal with this is to be sure that you have already arrived at standing height when the stall breaks. That way, the only remaining kinetic energy is forward movement, which can be diminished by taking a few controlled steps. 2) Make sure your brakes are short enough. Most manufacturers set the brake lines to allow for a certain amount of slack so that when the front risers are applied with the toggles in the hands, there is no tail input. This, coupled with shorter risers (most parachutes are set up for 21 inch risers), will prevent you from reaching your parachute's slowest flying speed. With the help of your rigger, shortening the brake lines is an easy task. Take out not more than one inch at a time and give it a few jumps before taking more out. 3) Keep the parachute over your head. Any tilt in the roll axis will result in a premature stall of the parachute, which will drop you into the ground while you still have ground speed. This is due to an effect known as "load factor". When a wing is in a bank, it requires a bit of increased angle of attack to keep it flying at the same height or descent rate. This results in an increased relative weight, which in turn increases the stall speed. Keep your eyes looking down the "runway" and you will be able to notice variance in your bank angle easier. Making smooth corrections to the bank angle all the way to the end of the landing will result in a softer touch-down and less forward velocity at the end of the ride. 4) Be sure that you are finishing the flare. Keep smoothly adding brakes until you run out of arms, or ground-speed, whichever comes first. In other words, if you are flying into a significant head-wind, flaring all the way down will make you go backwards, as the speed of your parachute will be less than the speed of the wind. Flaring straight down is the only way to accomplish a complete flare, as stylish outward sweeping of the arms out to the sides or to the back will only result in a stylishly ineffective flare. The brake lines can only work if they are pulled. 5) Assuming that a PLF is not necessary, put one foot under your spine, as the "main landing gear", and the other out in front as the "nose gear". That way you will not plant both feet at the same time and pivot onto your face. Slide your main gear along the ground as long as you can, and then when the friction finally grabs your foot, take that first step onto the front foot. 6) Loosen your chest strap and lean forward in the harness. This will allow you to get your weight over your "landing gear", rather than back on your heels. The parachute will increase its pitch angle as you progress through the landing, but your body doesn't have to tilt in accordance. Freeing your body from the pitch of the system will allow you to feel more comfortable finishing the flare, as you will not feel the urge to let up on the toggles as you put your feet down to get to a more balanced pitch angle. 7) Let the wing sink down below standing height during the second half of the swoop, and then use the canopy's lift to bring you back up to standing height. Referred to as the "Seagull Landing", this allows you to arrest any excess forward speed, as you will be in a climb at the last part of the landing. Be sure not to climb above standing height as you do this, as that will result in a drop at the end that will put you on your face. 8) Practice slow flight up high. The more comfortable you are with the low-end range of your canopy's performance envelope, the longer you will be willing too keep your toggles down at the end. Fear of the stall results in incomplete flares, as well as letting up the toggles at the end of the landing. Keep the canopy in brakes for at least 30 seconds (up high), and perform smooth turns right and left. This will help you fly your way out of any bank angle created by an asymmetrical level off during the flare. 9) Believe it is possible to land perfectly. It is. Only when a pilot thinks: "I am going to crash" is the crash inevitable. 10) Get video! There is no greater tool than actually seeing yourself land. The best way to get filmed, I have found, is to film other people. Landing in no wind can be great fun. Ultimately, this is how we counter the fear of landing our parachutes. If you lean forward into the experience, your positive body language results in more fluid, appropriate actions that actually improve your situation. When you are comfortable with landing in no winds, you begin to actually look forward to those zero-wind sunset loads. Scooting across the ground with maximum forward speed can be incredibly enjoyable when you know you have the skills to handle the situation. In the end, the only way to achieve this is to jump on a regular basis, and enjoying the learning process is how this is reinforced. Find something about every landing that you can smile about, even your crashes. Everything that is not the path shows us where the path is not. Happy Landings! Bryan Germain www.CanopyFlightInstructor.com Editors Note: Also see - Another Look at No-Wind Landings by Scott Miller
-
1 point
 There are many variables to consider when looking into a canopy collapse: What was the pilot doing? How fast was the canopy flying when it collapsed? Where was the pilot flying? What is the canopy design? What is the wing-loading? Was there any re-active solution employed?These are the principle considerations, but not the only ones. I will take each one separately. 1) The way in which a parachute is flown can increase or decrease the "G" loading on the lines. A rapid release of one or both brakes significantly increases the chances that the canopy will collapse. This allows the parachute to surge forward to a lower angle of attack, decreasing the lift of the parachute. This reduces the amount of energy exerted by the parachute away from the suspended load, allowing the "negative" portion of the lift to take over and allow the wing to fly towards the jumper. 2) Airspeed is what creates lift. Lift is what causes the wing to strive to fly up and away from the jumper. This is the formula for line tension and therefore stability. The slower you are flying, the more likely your parachute will collapse due to low internal pressure and low line tension. 3) Was the wing flying in clean air when the collapse occurred? This is an important part of the question. All parachutes can collapse in "bad" air. We must always fly considering the invisible dangers that the sky presents us. If you wouldn't fly a kite there, don't fly or land your parachute there. 4) Certain parachute designs do better in turbulence than others. I must avoid pointing fingers here, as this is a volatile industry that can be taken down by non-skydiving lawyers. Nevertheless, certain wings have an increased propensity to go "negative" when presented with adverse condition, while others bump around a bit and keep on flying. This is a complex issue, and the best way to decide which parachute to buy and fly is to listen to the actual statistics, and to your own experience when flying a particular design. I have not experienced any kind of collapse on the parachutes I fly, ever.* If you have on yours, you may want to reconsider what is over your head. *(This does not include nasty, ill-conceived prototypes that seemed like a good idea at the time. I am talking about production-model canopies here) 5) Parachutes perform differently at different wing loadings. The lighter the wing loading, the slower it will fly. This means that the internal pressurization of the wing will be less on larger canopies. In general, lightly loaded parachutes experience more small collapses than heavily loaded ones. Not only is there less internal pressure in the wing, but the dynamic forces area also less with decreased airspeed. This means that the average line tension tends to be less on a lightly loaded wing, and the wing tends to have a increased propensity to surge forward in the window when flying at low air speeds. This is why very small, highly loaded parachutes tend to experience fewer distortions, especially when flown at high speed. Flying at high speed increases the drag of the canopy itself, relative to the jumper, so the relative wind holds the parachute back in the window and at a higher angle of attack. This is why I make carving, high "G", high speed turns to final approach heading, especially in turbulence. The speed actually reduced the chances of a collapse by increasing the forces that keep the parachute at the end of the lines. I am literally increasing my wing loading by flying fast and at high "G's", and the increases velocity reduces the amount of time that I fly in bad air. I am not saying that you should downsize just to increase your stability. I am saying that until your skills and knowledge are ready to fly smaller, faster parachutes, you should stay out of the sky until the winds come down. I still haven't been hurt by a jump I didn't do. 6) This is all about "Pitch Control". If you are flying a good design with lots of airspeed and significant line tension, and in a reasonable location that has no obvious precursors for collapse, you can only deal with a collapse in a re-active manner, as you have addressed all of the relevant variables up to this point. If your wing tries to aggressively surge forward in the window, you must notice it and quickly stab the brakes to bring it to the back of the window. A collapse always begins by a surge to a low angle of attack, but there is very little time to deal with the problem before I folds under. Here are the signs: The first sign is a change in Pitch. The wing moves forward in the window. This is the limited flying space over your head. Too far forward and it collapses. Too far back and it stalls. The "G" loading drops dramatically and almost instantly. In other words, your apparent weight in the harness drops because the wing is producing less lift. This is the time to jerk on your brakes: quickly, sharply, but not more than about 50% of the total control stroke. This action is to pull the wing back in the window, not to stall the parachute. By putting the wing further back in the window, we are increasing the angle of attack. This increases the lift, and forces the wing to fly away from the suspended load and thereby increase the line tension. This can prevent a collapse entirely, or cause the wing to recover to stable flight before things get really out of control. If the wing is allowed to collapse, it may recover quickly on its own. This is why the more modern airfoils have the fat point (Center of Lift) so far forward. It causes the wing to pitch nose-up when it begins to fly again, bringing it back to the end of the lines. Nevertheless, parachutes can still collapse fully, which often involves significant loss of altitude and possibly a loss of heading. If your wing goes into a spin because of a collapse, your job is to stop the turn first, as you increase the angle of attack. If it is spinning, there is less chance of recovery until the flight path is coordinated and the heading stable. Conclusions: Don't fly an unstable parachute. If it is prone to collapse, ground the parachute. Do not sell it to an unsuspecting jumper at another drop zone. These people are your brothers and sisters. Don't fly in crappy air. Land in wide open spaces, in light winds, and never directly behind another canopy. Practice stabbing your brakes in response to forward surges on the pitch axis. This must become a "learned instinct" that requires no thought at all. Like pulling emergency handles, pulling the wing to the back of the window when the lines get slack is essential for safe skydiving. Keep flying the parachute. If your parachute does something funny near the ground, don't give up. If you keep your eyes on YOUR ORIGINAL HEADING, you will unconsciously do things that will aid your stability and keep you from getting hurt. Looking toward what you don't want is how you make it occur. I hope this little article helps you understand the phenomenon of collapses a bit better. I know as well as anyone how painful a collapse can be. I do not want to go back to that wheelchair, and I don't want anyone else to have to experience that either. You morons are my family, and if information can help protect you, I will give it until my lungs are out of air. Blue Skies, Sky People. Bri Article Discussion BIGAIR SPORTZ
 -
1 point
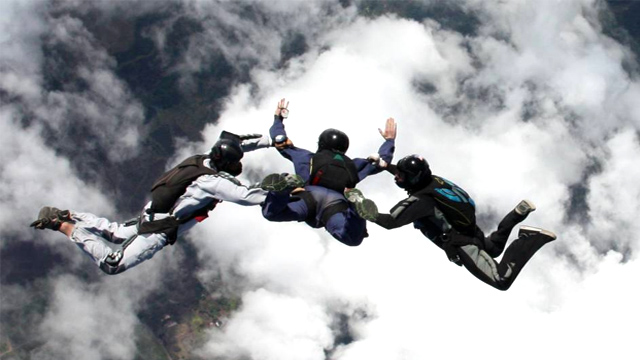 This article by Alain Bard is meant as a general guide. We highly recommend contacting your local rigger and instructor before using any of the information provided in this article. In the years I’ve been a rigger, I’ve often seen the results of skydivers’ gear buying experiences. Most experiences go well, but some do not, and result in the buyer having to re-sell an inappropriate piece of gear they bought. In this article, I am going to try to lay down some advice on how to go about choosing gear. I’m going to try to not go into brand specifics, but rather which components you should get and in what order, buying new or used, and sizing. New vs. Used? Let’s tackle this one first. Should you buy new or used? Traditional advice is that if this is your first set of gear: you should buy used. You’ll probably only use your first set of gear for the first 100 jumps or so. If you buy used skydiving gear, you can save some money (over new) while jumping your first set of gear, and take your time figuring out what you really want before you commit to buying new equipment. Let’s break it down though. So to put together a rig, you have to get 4 components: a harness/container, a reserve parachute, an Automatic Activation Device (AAD) and a main parachute. Whether to buy each of these pieces new or used depends on the piece. AAD Let’s start with the easy one: the AAD. Used or new does not matter, as you’re paying a fixed cost per year for these units. This fixed cost per year varies between $80-160 per year depending on which unit you choose. If budget is an issue, and you can find one used, grab it. Used AADs are rare as they expire faster than the skydiving gear they are in. If your budget allows, you can buy new. AADs are super easy to re-sell if you ever need to. Reserve Parachute Next up: the reserve parachute. For newbies, I always recommend buying a used reserve parachute, as you can save a significant amount of money here, and the benefit of a new reserve isn’t really justified over the cost of a new one. Reserve parachutes don’t get used very often, and even after 10 years, are usually in next to perfect condition. A 10-year old reserve of the same design is the same as a brand new one, it’s just cheaper to buy. Ensure the reserve has less than 5 or so “rides” and is no older than 15-18 years old. Also, ensure it has no holes, patches or repairs, or if it does, make sure the cost is much less, and consider sending it back to the factory to have it checked out first. Main Parachute For the main parachute, my advice is the opposite to a reserve. I recommend buying a main with as few jumps as possible (under 200 if possible). Buying a new main parachute is preferable, if budget allows. You will use this parachute to save your life 99.9% of the time. Its condition matters. Age isn’t really that much of a concern as much as the number of jumps. I like to make sure a main parachute still has its original lines, because you can tell the number of jumps by the condition of the lines. Trying to estimate the number of jumps on a canopy after a reline is sometimes difficult if the parachute fabric has been kept clean, dry and out of the sun. Another consideration is where the jumps were made. A parachute that was jumped in the summer in Canada or the US Northeast on green grass for only 6 months of each year will be in much better condition than one jumped all year round in desert-like or beach locations. Sand really eats away at the fabric coating and gets into the seams. If budget is really an issue, then a modern-design (last 10-15 years) used main parachute with more jumps is OK too, but make sure to have your rigger take a look and don’t pay too much for it, as it’s not going to be worth as much. Again, ensure it has no holes, patches or repairs, or if it does, make sure pay much less, and consider sending it back to the factory to have it checked out first. Harness/Container Last is the harness/container, for 80% of newbies, a used harness/container is probably the right way to go. Newbies tend not to land on their feet 100% of the time, and if you get a used harness/container a little dirty or scuffed up, it won’t matter as much. The problem is getting the right size for both the canopies *and* for your body (ie. harness size). Sizing for canopies is easy enough, but then sometimes it’s difficult to find the perfect sized harness. Having a harness that is a little too big or too small isn’t the end of the world, but it’s not as comfortable as a made-to-measure harness. If the harness is more than a little too big or too small, then resizing a harness is always an option, but it may cost more to have a harness resized than the harness/container is worth. For 20% of newbies, their body type makes it almost impossible to find a used harness/container. I’m talking about the 6’ guy who weighs 120lbs, or the 4’8” girl who weighs 95lbs, or on the other end of the spectrum, what you’ll find advertised as “big-boy rigs” for really large and/or heavy people. For these people that fall outside the average body types, while resizing a harness is sometimes an option, getting a new harness/container is sometimes a better option. Some manufacturers make basic rigs with no bells or whistles that end up costing less than a used, fully featured harness/container. I’m talking about rigs like the Shadow Racer and the Rigging Innovations Genera. These are great rigs at an even better price. Also, if you are a serving military member, some manufacturers offer incentives (up to 30% off) on new gear. This is a great deal, and a no-brainer. If you are eligible for such discounts, get new stuff! Before I move on, I want to mention that when you buy used, you will have to keep an open mind when it comes to colors. It’s the price you pay to save some money. So now WHAT should I buy, but more importantly – in what order? So you’ve been jumping a certain size main for a while and think you’re ready to downsize and get a different set of gear. Great! Let’s go through it. One of the biggest gear-buying mistakes is choosing (or buying) a harness/container first, and then trying to fit the canopies into a container that was not sized for those canopies, so…. Here’s the order in which you should think about it: Select the Reserve canopy first. Select an appropriately sized reserve. Your reserve should be big enough to not seriously hurt or kill you in the event of an unconscious reserve landing (no flare). This means that your reserve should be sized according to your wing loading on that reserve. For most people, that means I recommend getting a reserve at least one size bigger than the main you intend to jump. So if you think you want to jump a 150-size main parachute, get a 160 or 170-size reserve, and if you're a big guy that jumps a tiny cross-braced canopy, you'll maybe still want a 170-sized reserve (4-8 times larger than your main). You’ll thank me when you actually need to use the reserve. Then, pick a main, any main. Well, not really, but decide on the size of main you want to jump. You can pick the type of main later, but decide on size now. Now you can think about a harness/container! Then and only then start doing the research on what brand of harness/container you want based on the features you think are important to you. Look at harness/container manufacturers’ published volume charts to see which size container you would need to fit the reserve. You want to pick a size of container that fits the reserve and is described as “soft” or “normal” fit (if those descriptors are available). Stay away from a “tight” reserve fit at all costs. You’ll quickly notice that not all the manufacturers offer combinations that will fit a reserve that’s larger than a main. That’s really a shame. You should really ask those manufacturers why they don’t offer this. An expensive solution to this problem is a low-bulk reserve, which is marketed a being able to pack one size smaller than a regular reserve. So, if you want a container combination that fits a regular 150-sized main, and only fits a 150-size reserve, a low-bulk 160 reserve may be an option. Careful though, it doesn’t scale down. For instance, a low-bulk 126 reserve may not fit in a 113-sized container, or it may fit but be so tight that it interferes with the normal deployment of the reserve. This is bad, and should be avoided. So you’ve picked a reserve, and you know what size of harness/container you need, only then should you start looking at the classifieds to see if you can find something that has the right size harness attached to it. If you find something that you think fits, or described by the seller as fitting someone your size, ask the seller for the serial number of the harness/container. Then contact the manufacturer of the rig (even if it was made 10 or 20 years ago), and ask them what size the harness was made to fit. Most manufacturers keep data on all the rigs they have ever built, and will be happy to disclose this information to you, and discuss whether it would fit you based on your measurements. There is no need for guessing games. You can know before you even buy whether or not the harness/container will fit you. The only exception to this rule is if the harness has previously been re-sized, which is uncommon. Main Parachute 7-cell, 9-cell, F111, ZP, Hybrid, low bulk, square, semi-elliptical, elliptical, air locked, cross-braced, etc., etc… There are many mains on the market today. There is no right or wrong answer here. It depends on what you want to do. I’ll have to save this topic for another article. Refer to my comments above on age and condition. Don’t forget the AAD! The last part is to get an AAD. As long as the AAD in question is within its service life, has been maintained at the proper interval (if required), operates normally, and is approved for the harness/container you want to put it in, then you’re good to go. So there you have it. It’s not always obvious at first, so I hope this guide will help some of you out. Alain Bard has been an active skydiver since 2003. Alain holds the following CPSA ratings: D CoP, Skydiving Coach Level 2, Jumpmaster (JM), Ground Control Instructor (GCI), Skydive School Instructor (SSI), Skydive School Examiner (SSE), Exhibition Jump Rating (EJR), Parachute Rigger (RA). He is also a Tandem Instructor. Alain is a certified Hot Air Balloon Pilot (Transport Canada) Alain is a certified Paramotor Pilot (Transport Canada) Alain is a certified Paraglider Pilot (HPAC) You can find out more about Alain at his website: http://bard.ca
 -
1 point
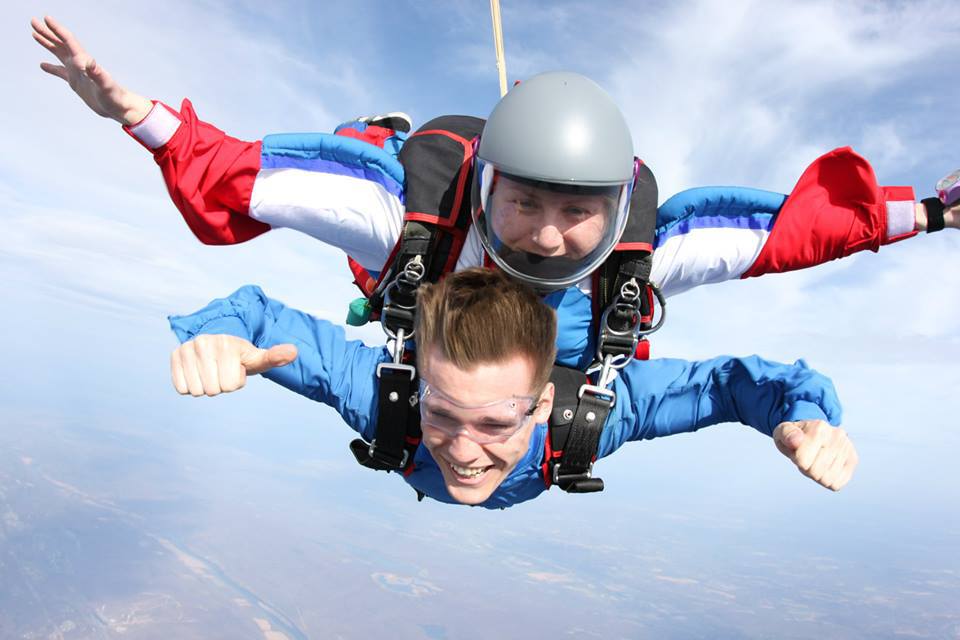 Image by Vincent ReederDo you remember what it was like to go on a first date? Imagine inviting someone out that you felt was completely out of your league...beautiful, intelligent, witty - the whole package. I feel nervous just thinking about it. Naturally you'd want to leave a great impression. You hope that at the end of the night your date would say that it was the best date she'd ever been on. To reach this outcome, attention to detail is necessary. I'd wash my car, research restaurants to ensure the atmosphere was romantic, the food outstanding and the service excellent. Now visualize picking your date up. Think about how you feel physically: sweaty, nervous and a marathon-pumping heart rate. After you've practiced saying "Hello, you look beautiful tonight," (several times) you get out of the car, walk confidently up the driveway without revealing your internal emotions. Once she greets you at the door, your awareness levels are in hyperdrive - you notice everything in milliseconds - the way she looks from head to toe, how she smells… your subconscious notices what's behind her as she stands in the doorway. Is her place messy or neat? You take everything in. The emotions felt on a first date are how our students feel when arriving at the drop zone for the first time - out of their comfort zones, excited and nervous. Our students notice EVERYTHING from the moment they drive in to the parking lot until they've landed from their jump. As drop zone operators, we must remember that we are hosting the ultimate date - the opportunity to give someone a lifetime memory. Every detail on our date should be carefully examined - each customer point of interaction be brought to a five star standard. Our goal is to have our guests say that their experience was one of the best days of their lives. Bob Marley once sang, "You can't please all the people all the time…" No matter how hard we strive to exceed customer expectations, we will never be perfect. Smartphones have empowered consumers to become critics that effect how other consumers decide where to spend their money - with your business or with your competitor. When negative comments are posted about your business, how you react (or not react) can greatly effect the outcome. In this week's newsletter, we examine tips for handling negative feedback. 6 Strategies For Handling Negative ReviewsTip 1: Don't Knee Jerk The natural response when reading criticism is to immediately become defensive and type out a quick response. DON'T DO THAT. Sit with the criticism for a while and let the initial shock that you've been publicly called out, settle. The walls aren't caving in and some of the criticism may have merit. Try to be objective and own your part in the criticism. The biggest mistake is not making necessary changes to ensure a similar review doesn't pop up in the future. Tip 2 - Join The Conversation After you've calmed down, it's better to join the conversation than ignore it. Negativity breeds negativity and joining the conversation is better than allowing one person's views to rumble into an avalanche of criticism that becomes unmanageable and viral. It's best to be non-confrontational, non-defensive and act as a caring human being. Be calm in your response and say sorry if you need to. Introducing yourself and showing that you're a real person puts a face to a business as opposed to a corporate entity with a PR spin. Pick and choose your battles as well. If someone is a tyrant and is abusive... the general audience will be able to discern that. Tip 3 - You Don't Have to be Right Realize that you don't have to be right. People who spend a lot of time online are used to companies trying to spin everything into a positive. If you're wrong, it's okay to say you're wrong. No one is perfect and it can be refreshing to see some honesty. Acknowledge and see if it's possible to find resolution by contacting the individual directly. If you can convert a critic into a fan of your business, the word of mouth spread is far greater. Criticism and how a customer's complaints are handled can be very valuable in spreading goodwill about your company. Tip 4 - Don't Get Caught Off Guard If you haven't done this yet, stop reading this newsletter and do it now. (I'll wait here while you get this done). Go to Google Alerts and plug in your company name. If anyone mentions your company online, you'll at least be in the know. It's never a good thing to have an online war raging about your company and have no awareness that it's even occurring. Tip 5 - Never Go Into A Diatribe (This is Queens English for "Don't show your ass.") Let's suppose the criticism you've received is misguided and wrong. The most common mistake is how people respond by: a). working themselves into a lather and taking a hard stance defending themselves and b). write a long-winded response that only fuels the comment thread (we see it on a daily basis within the forums of dropzone.com). When responding, keep calm and carry on (even if you want to rip someone's head off) and keep it relatively succinct. Rehashing each detail of the customer encounter WILL fuel more commentary from those watching the thread unfold. Keep in mind, you're not responding publicly to an audience of a few - it could be a few hundred. No matter how right you maybe, acting indignantly will only turn many people off. Tip 6 - Don't Hide- Be Transparent Many companies delete negative reviews - particularly off of social media feeds. Deleting people's posts can cause rancor for those watching things unfold and they WILL CALL YOU OUT on it. The best course of action is to respond. Of course, there are some people out there ('trolls') who are looking for trouble and are looking to pick a fight.. when things get abusive, it's time to pull them off. The Realities Anonymity empowers people to say things they normally wouldn't in the presence of others. Showing you're human, interested in helping to solve a problem and publicly apologizing will usually diffuse most situations.
 -
1 point
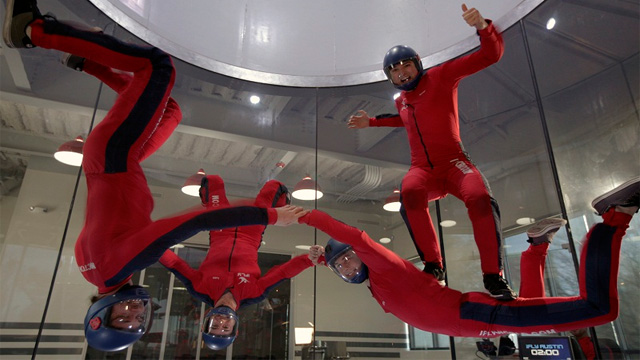 Image by iFly AustinWe would like to introduce the latest addition to Dropzone.com, our wind tunnel listings! We’ve been working hard at gathering information on all the active indoor skydiving venues from around the world, resulting in a list of 26 wind tunnels, spanning 12 countries, making it the most comprehensive and up to date list of vertical wind tunnels online.We have modelled the indoor skydiving section on that of our dropzone database, allowing you to review your experience, in turn helping others in choosing the best places to indoor skydive, and focusing on allowing you to quickly and easily find venues using GPS plotting. Users will be able to find detailed information about each dropzone in the listing, including time block pricing, training pricing, technical information and contact details. Indoor skydiving has become an essential part of competitive freefly training and continues to provide a platform for the evolution of body flight. With the continued growth of the sport, and the establishment of new tunnels, the future of indoor flying is looking extremely bright. We welcome and encourage users who have flown at any of the wind tunnels to submit a review of their experience. Should you know of a wind tunnel that is not listed in the database, you are able to submit a listing yourself, or contact us via e-mail and we will add the listing for you. Our database will continue to be built on and maintained by both dropzone.com and the respective owners and staff of the tunnels. If you are a staff member of one of the tunnels listed in our database, you can claim the listing. View Wind Tunnel Listings
 -
1 point
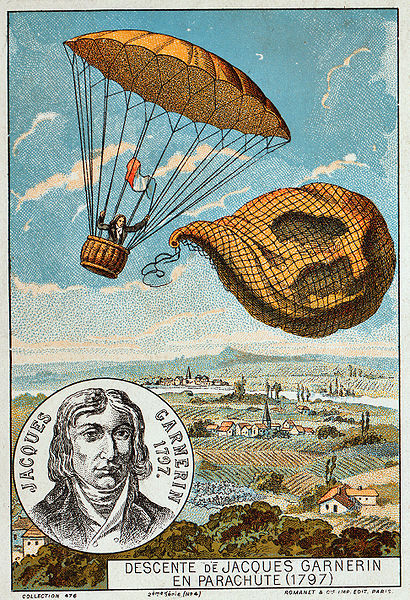 Today recognizes the 216th anniversary of the first parachute jump, made back in 1797 by French aeronaut André-Jacques Garnerin. Garnerin, who was born on the 31 January 1769 was a student of the legendary ballooning pioneer, Jacques Charles. Charles himself, a decade before Garnerin's record was set, set a record of his own when along with Robert brothers, he became the first to used a hydrogen-filled balloon for manned flight. Garnerin, no doubt heavily inspired by his professor, began to forge his own path in the aeronautics world, becoming the Official Aeronaut of France. France was undoubtedly the hot spot for aeronautic discovery and innovation in the 18th century, and in 1783 it was the Frenchman, Sébastien Lenormand who invented what is considered the first modern parachute. The original design that was used by Garnerin for the first parachute jump was naturally a far cry from what we are familiar with today. The parachute itself was made from silk and was approximately 23 feet in diameters. The device was constructed using rope to connect the basket to the edges of the material. Prior to ascent the parachute resembled a closed umbrella and consisted of a pole which ran down the middle, with rope that ran through the pipe. This was used to attach the parachute to the balloon that he would be ascending with. The occasion of the first parachute jump itself took place in Parc Monceau, Paris on the 22 October 1797. Garnerin made ascent to a height of around 3,000 feet, before cutting the rope that connected the parachute to the balloon, and in turn allowed him to begin his descent. The descent was anything but smooth and Garnerin had to deal with the basket swaying violently during the flight, as well as having what could be described as a bit of a rough landing, with the basket scraping along the ground. In the end though, Garnerin had successfully completed the first parachute jump and paved the way for modern parachuting. Despite the fact that Garnerin was the first to perform a manned descent with a parachute, it is worth noting that 12 years prior to this, Jean Pierre Blanchard had used a parachute with a basket attached to perform parachuting demonstrations using a dog as a passenger. While given the advances made in France each year in the latter part of the 18th century, it was inevitable that a manned parachute jump would occur. It was Garnerin who made it happen first and can in turn be seen as the first modern parachuter in the world. Google honored this anniversary by adding a parachuting game to the Google doodles. Be sure to go check it out!
 -
1 pointLos Angeles - Dan Brodsky-Chenfeld remembers nothing about the airplane crash that nearly killed him, or the five weeks he lay in a coma afterward. What he does remember is that one of his best friends died on the skydiving plane that crashed 10 years ago last Monday. "It infuriates me," he says of the crash. "I'm still very good friends with his mother, with his sister. I see them and talk to them and it just kills me, that I had anything to do with it." In one of the worst accidents in skydiving history, the twin-engine de Havilland plunged to the ground during takeoff at Perris Valley Airport, killing the pilot and 15 skydivers. Brodsky-Chenfeld, 40, was among six survivors. He was coaching American and Dutch skydivers and had recruited some to come out to Southern California for training. Among the dead was his friend James Layne, whom he had taught to skydive in Ohio. Federal officials determined that contaminated fuel caused the right engine of the DHC-6-200 Twin Otter to lose power after takeoff. The pilot then made a mistake. The overloaded plane's right wing dipped and struck the ground. Witnesses said the craft bounced upright and then nose-dived, shearing off its nose and wings. Troy Widgery, 35, of Denver, recalls the aircraft was 300 feet in the air when it rolled over and he saw the ground out of the door. The crash knocked him out for several seconds. When he awoke, he found himself on top of bodies, fearful that the aircraft would catch fire. "I thought, well we lived through that and now it's gonna burn. Gotta get out of here. Everyone was either dead, dying or couldn't move." Widgery spent several days in the hospital with a broken hip, collarbone and other injuries. "I was jumping two months later. Once I could walk again, I was skydiving," he said. The skydiving school about 60 miles southeast of Los Angeles survived and has flourished, now handling about 10,000 student jumps a year. Pictures of the dead hang on the school walls, and there is a memorial park near the drop zone. On Monday, friends will gather there for skydiving and a barbecue. "It's an opportunity to be among people who truly understand our pain," said Melanie Conatser, co-owner of Perris Valley Skydiving. Brodsky-Chenfeld, of Chandler, Ariz., suffered a head injury, a broken neck, a collapsed lung and other internal injuries in the crash. He is "covered with scars" and still takes medication for back pain and other problems caused by his injuries. Yet he, too, was back to skydiving only months after the crash, following two major surgeries and with a brace around his neck. He has made 9,000 jumps since the crash, and started a championship skydiving team, Arizona Airspeed. "It's hard to ever consider a life that doesn't include that," he said. "It's really important that every day of your life you're doing something that really challenges you, something that you love to do." ~ Associated Press


.thumb.jpg.4bb795e2eaf21b8b300039a5e1ec7f92.jpg)