Calvin19 0 #1 May 7, 2007 OK, so this is not exactly freefall photography. at all actualy, but i know there are some super-smart photographers in this colum somewhere. my goal-to get relatively sharp wide-angle NON-STAR TRAIL picture map of the Northern Hemisphere sky. My Problem-I need to set my lense at 2.8 or 4 F-stop, at 17mm, but the focus needs to be exctly infinity. I remember having the same problem with my 35mm, but i guess i lucked out once. the Depth of Field is just so freaking narrow. maybe its hopeless? but i dont buy that. any thoughts? I have tried AF to the blue sky in day with lense set, then not touched the lense at all until i take pics, but thats hard and does not work very well. Quote Share this post Link to post Share on other sites
quade 3 #2 May 7, 2007 Interesting. You doing this on film or digital? I assume, from the photo, that you have this mounted on a azimuth mount with a clock drive of some sort to track the rotation of the earth. I think, if it was me, I'd be tempted to focus on Venus. You can probably see that clearly enough through the lens to ensure it's sharp and it you're using digital, you might be able to hook it up to a computer to check it before you lock it down. 2.8 or (god forbid) 4 isn't very fast. Are you going with that lens because of the auto-focus or do you just not have anything faster?quade - The World's Most Boring Skydiver Quote Share this post Link to post Share on other sites
Calvin19 0 #3 May 7, 2007 yeah, i built a homemade star drive for 60 bucks. i saw a thing online when i was 17 for a "barn door star drive" and i made one with a hand crank. last month i thought, why couldnt i make one that turned itself? so i did some math (i HATE math), used new tangents/sine whatever stuff, spent 3 days and 60$ at radio shack, and came up with the ERS. it works, about the same as the original hand crank, but this one i could put my name on. I did the originals with film, now i am doing it with A 400D (XTI) and a 17-85 canon lense. the lense is sweet, but it WILL go to 1.7, but i have yet to figure out how to manualy set it at that. the exposures i am dealing with are between 5 and 15 min. I am afraid that the digital sensor will not capture the magic of the dee space like the film did (though i did saturate the last pic a bit however) hmmm... venus. well, here is the best shot i have yet with digital. the moon was out, so its noisy. (2nd attatchment) oh, and i set the ISO at 100, the AF is off. of course. the camera is stupid and im even stupider. I by no means am a photography expert, but i do do a lot of astronomy. I cant make a goor star drive on my own with my budget. but a total-sky 'map' picture will be a cool project for me. good idea on the computer, I could do a few test shots, to check the focus, and adjust. then lock it down and dont touch it for the remainder of the nite. i will do that. good idea. thank you. anyone else with a less, um, slow way of doing it? I guess it takes the whole nite to do one half the sky, so i need to be patient. but im only patient when im doing something. not when im waiting. Quote Share this post Link to post Share on other sites
Calvin19 0 #4 May 7, 2007 Is what i am seeing just noise possibly? i had some advice that i should do this in film. anyone selling a cheap 35mm? sigh... i like digital though. but i LOVED film. damnit. Quote Share this post Link to post Share on other sites
LouDiamond 1 #5 May 7, 2007 Are you using the mirror lock up when you are doing this? The vibration from the mirror moving can cause some blurring. Take a look at this article to see if it helps you out with this. another one"It's just skydiving..additional drama is not required" Some people dream about flying, I live my dream SKYMONKEY PUBLISHING Quote Share this post Link to post Share on other sites
shropshire 0 #6 May 7, 2007 I have an old Pentax ME Super that I no longer use... your if you want it. (.)Y(.) Chivalry is not dead; it only sleeps for want of work to do. - Jerome K Jerome Quote Share this post Link to post Share on other sites
mnealtx 0 #7 May 7, 2007 QuoteI did the originals with film, now i am doing it with A 400D (XTI) and a 17-85 canon lense. the lense is sweet, but it WILL go to 1.7, but i have yet to figure out how to manualy set it at that. the exposures i am dealing with are between 5 and 15 min. That lens is f/4 to f/5.6 ... not sure where you're getting the 1.7 from... I can tell you that recommendations for moon shots are off the "sunny 16" rule... (in this case, shutter speed of 1/ASA at f/11).. not sure what you'd need to do good star shots... You may want to try posting the question on some photography boards... good luck!Mike I love you, Shannon and Jim. POPS 9708 , SCR 14706 Quote Share this post Link to post Share on other sites
quade 3 #8 May 7, 2007 Quote yeah, i built a homemade star drive for 60 bucks. i saw a thing online when i was 17 for a "barn door star drive" and i made one with a hand crank. last month i thought, why couldnt i make one that turned itself? That's quite the set up! Screw the infinity focus thing . . . just aligning the tripod and mount seems like THAT is the biggest issue. If you're off by just a fraction of a degree, your stars are gonna come out all streaky, especially with longer and longer exposures. I'd love to give something like this a shot, but where I live is far too polluted. Heck I can't even go out to Perris anymore and really look at the stars.quade - The World's Most Boring Skydiver Quote Share this post Link to post Share on other sites
LouDiamond 1 #9 May 7, 2007 Check this site out for more helpful tips. The camera settings link should help dial you in as should the rest of the links on the page."It's just skydiving..additional drama is not required" Some people dream about flying, I live my dream SKYMONKEY PUBLISHING Quote Share this post Link to post Share on other sites
Calvin19 0 #10 May 8, 2007 Quote . just aligning the tripod and mount seems like THAT is the biggest issue. If you're off by just a fraction of a degree, your stars are gonna come out all stre. haha, yeah, thus my first problem. but now i totaly have the drive dialed. well, at least that i can get an OK shot at 85mm FL. but i guess after all this input, the focus is not the problem. its the digital noise. so, film it is. of course, the nice/almost vital thing with digi is a can check the exposure right after the shot is done. oh well, i have a summer to work with. for the summer sky at least. then i need to do the same thing for the winter sky. then the whole northern hemisphere. i cant wait. and about the 1.7? Im pretty sure i saw the 2.8 at one time. but maybe not the 1.7. hmmm.... i need to know more about my equipment. thakns guys! and thanks for the sites!!! Quote Share this post Link to post Share on other sites
Zee 0 #11 May 8, 2007 Give Noise Ninja a try. Does wonders for removing noise from digital pics.... Action©Sports Quote Share this post Link to post Share on other sites
Calvin19 0 #12 May 8, 2007 PS- i made the Star drive "ERS" laser-sighted. its really cool sounding. but its basicaly just me useing a 150mw astronomy laser resting against the Axis hinge. the nerd in me pokes out a lot here. Quote Share this post Link to post Share on other sites
Calvin19 0 #13 May 8, 2007 your right, specs say 4-5.6. huh. i must be going insane. i stand corrected. Quote Share this post Link to post Share on other sites
mnealtx 0 #14 May 8, 2007 Quoteyour right, specs say 4-5.6. huh. i must be going insane. i stand corrected. No worries - A random thought on noise... if you're going to be doing a long exposure anyway... I'd go for the lowest ISO I could get away with....Mike I love you, Shannon and Jim. POPS 9708 , SCR 14706 Quote Share this post Link to post Share on other sites
newshooter12 0 #15 May 8, 2007 you should be good with that lens anyway... the sweet spot for most lenses should be between f8-11. and the DOF will be greater than when you're at a lower f-stop. are you shooting in RAW mode? that'd give you some more latitude after you've shot it and for post processing than a JPEG. nice work and engineering any way you cut it though. keep up the good work. Matt Quote Share this post Link to post Share on other sites
DSE 3 #16 May 8, 2007 The sweet spot will vary greatly depending on the sensor size, FWIW. Matt's right, of course, RAW is by far a better option, with low ISO. I hit up a guy named Victor Milt (Former DGA pres) and he said if you really wanted to go deep into this, provide sensor size, lens availability, and he'll grab calcs and go to work. He's very old school. There is also a professor named Peter Gloeggler who has written many white papers on lenses, chromatic abberations and color timing based on imager/sensors combined with various focal lengths. Google his name, and you should find a few. He went to work for Sony for a short period of time, but retired early and now consults to Zeiss. PM me for his contact info if you're interested. Quote Share this post Link to post Share on other sites
Calvin19 0 #17 May 8, 2007 of course im shooting in RAWI will experiment with f8, it means that the timing of the drive and sighting has to be perfect though. thanks! CH Quote Share this post Link to post Share on other sites
LouDiamond 1 #18 May 8, 2007 Here is just a snipit from the quick start link I provided above. The more specific /detailed links on the page break it down even further. QuoteTo get started, you will have to figure out how to get your camera to use as long a shutter speed as possible, at as wide an aperture as possible, and at as high an ISO as possible. Unfortunately, you may have to read the manual to learn how to do this. Sorry. Your other option is to just dig around in the camera's menus looking for these settings, but some times they can be hard to find and not labeled very clearly. Set the camera on manual exposure if it has that setting. Then set the lens to its widest opening, usually f/2.8. Set the ISO to the highest it will go, usually 400 for simple point and shoot cameras. If the camera doesn't have a manual exposure setting, set it to night mode. Focus The next thing you will have to worry about is the focus. Once again, dig through the camera manual, or menus, and see if you can figure out how to turn off the autofocus, and manually focus the camera on infinity (the farthest away that the camera will focus). For more sophisticated digital cameras like DSLRs, you can pre-focus the camera in the daytime on something very far away, and then turn the auto-focus off. If you have a DSLR with a lens that you can manually focus, focus it on infinity and tape it down. Beware, many of these lenses actually will go past infinity, so you can't just trust the markings on the lens. Experiment with this in the daytime. If you have a point and shoot camera, it may have a setting for shooting at infinity and may have some type of icon of mountains to indicate this. Try shooting something very far away to be sure the setting works. White Balance Light-polluted red sky with auto white balance. Many cameras also allow the white balance to be selected by the user. Once again, this setting will be buried in a menu somewhere. Most will be set to auto white balance by default. This usually doesn't give great results for nighttime photography, especially if you are shooting anywhere that has light pollution. This will usually make the sky a brown/red color. Try setting the white balance to Tungsten for long exposures of the night sky. This can give a more pleasing sky background. Take the Picture Set camera lens to widest aperture (f/2.8 is better than f/4 or f/5.6). Set the shutter to bulb or the longest shutter speed that you can. Set the ISO to the highest number that you can. Set the White Balance to Tungsten. Focus on infinity and lock the focus there. Use the self-timer or a remote release to open the shutter. Try different long exposures. Just put the camera on a tripod and aim it at a nice constellation and take the longest exposure at the widest aperture that you can, at the highest ISO that you can. Heck, you don't really even need a tripod. Just use a beanbag and place it on a solid object, like the hood of your car. Use the camera's self timer to open the shutter, and try not to move the camera during the exposure. Take a series of exposures, and double the exposure for each. Start at 1 second, then try 2 seconds, 4 seconds, 8 seconds, 15 seconds and 30 seconds. Now you can examine the results on the back of the camera. "It's just skydiving..additional drama is not required" Some people dream about flying, I live my dream SKYMONKEY PUBLISHING Quote Share this post Link to post Share on other sites
bofh 0 #19 May 8, 2007 Quote but i guess after all this input, the focus is not the problem. its the digital noise. The 350D has a long exposure mode setting to minimize the noise. I believe the 400D also has that setting. When set, it will continue to measure after the shutter has closed for a while (I believe it is as long as the exposure time). Quote Share this post Link to post Share on other sites
Calvin19 0 #20 May 9, 2007 QuoteQuote but i guess after all this input, the focus is not the problem. its the digital noise. The 350D has a long exposure mode setting to minimize the noise. I believe the 400D also has that setting. When set, it will continue to measure after the shutter has closed for a while (I believe it is as long as the exposure time). Yes, it does. and im useing it. I gathered as for settings i should use (instead of f4, etc) -long exposure noise ruduction -ISO 800 -Bulb (of course) shutter speed -Focal stop 8>14 -17mm, or widest on lense F-L EDIT- also, -RAW as well as JPG format, (the camera can save for simultaiously) -10,300,000pixels -Manual mode. sounds good. i will probaly need about 15min + exposures, but oh well. fun nights ahead! Quote Share this post Link to post Share on other sites
mnealtx 0 #21 May 9, 2007 You want to run mirror lock up, as well... good luck!!Mike I love you, Shannon and Jim. POPS 9708 , SCR 14706 Quote Share this post Link to post Share on other sites
dorbie 0 #22 May 12, 2007 Consider image stacking, especially for specific targets, but it should work with wider fields too, provided you are reasonably consistent across images. Major changes in aspherical projection would have to be corrected for example. (you wouldn't want to select a different target unless your lens was completely aspherical). This particular tool includes wavelet processing and reconstruction to deconvolve multiple images, but at its simplest stacking helps tremendously with noise. It also helps you cherry pick and align your best images for sharpness. Something free like this should be painless: http://www.astronomie.be/registax/ http://www.threebuttes.com/RegistaxTutorial.htm Search for astronomy image stacking for alternatives and tutorials. If you want the best results then the more images with longer lenses will produce the highest resolution final product, but you need to stitch them correctly. Each image you produce is a section of a sphere, this is always the case for a stationary viewer in photography, but in the case of astronomy it's particularly obvious because you're talking about the celestial sphere. To create a high quality sky panorama stitching many images onto a spherical base image would allow you to generate the highest quality final database. For this to work well you need re-projection but it really depends how much time you want to devote to what could be a very non trivial project. For this purpose a good aspherical lens rather than a wide angle one may be a better option especially considering the typical implications for sharpness across the sensor when wide open. I see you getting a production path going for your sky survey as follows 1) generate a photographic sequence for each region of the sky. 2) stack image sequences to reduce noise and experiment with wavelet processing 3) Aspheric correction of each image. 4) stitching to chosen celestial projection. 3 should be consistent and you can figure it out for your lens and stick with that. It can also be done between stage 1 and 2. Stage 4 is non trivial but packages exist to support this kind of mapping, it essentially is a quicktime VR style projection (if that helps you understand this) but there are many projections possible just as there are many types of projection you might see used to represent a map of the Earth. Something like this (chosen because it displays a great example of what you need): http://www.pixtra.com/ Or the free equivalents, Google panorama stitching tools. If you really want to capture the celestial sphere this is the way to go. Finally.... If you want to give yourself a grand project then I suppose you could do this year round until all the visible sky from your site is captured. That would be kinda extreme though, then of course there's the missing portion of the Southern sky you could pursue from other sites, really extreme... unless you found an antipodean or equivalent co-conspirator. P.S. if all this is too much, then at least the stacking software should help Quote Share this post Link to post Share on other sites
Calvin19 0 #23 May 12, 2007 Dorbie, Yeah, I thought of that. So i practiced manipulating the view fields (picture deformaties) of pictures on photoshop. i actualy used a bunch of stills i took with the same camera while flying a paraglider, just basicaly trying to do a "two dimensional" panorama, so i took 4 shots accross, and stacked 3 high, my "Photostich" program really sucks t doing that, so i have to do it in photoshop elements for mac. Photostitch does not even recognise star patters, so that definatly wont work. Im not great at photoshop, but im good enough to match image saturation/exposure etc and image edge splicing. Im not really going for high res, The goal is to be able to print a wall mural, and a 140mp final image will be fine for that. Im not doing research or anything, just want the pretty star picture. The lense i am useing (Canon 17-85 EF-S) will work fine i think, it will not be perfectly sized in all places (kinda like a flat map of earth, it just does not work out) but oh well. oh, and finaly, of course im doing the project year-round, the goal is to have the entire northern sky hemisphere! doesnt even have to be year round, only 6 months or so. i just need to be up at 03:00 some nights. one problem is the images will vary of course in atmospheric um, color? with humidity, temp, etc. i know it matters in astro photography, but it might not even be an issue here. thanks!!! CH Quote Share this post Link to post Share on other sites
dorbie 0 #24 May 13, 2007 Some stitching software gets the geometry of the problem wrong. I've written software to do this (actually for large projection displays) and unless you project aspherically corrected images onto a sphere (in the case of your problem) it can't be made to work for large sequences / wide angles. I think the software I linked to should be able to handle it, but approach it from first principals. Before you feed it your images you should try to correct for the lens. Take a reference image of a regular grid and correct that to be ortho-rectangular (completely aspherical), this is quite simple, you can then reuse that correction because it is always the same for that lens at that angle (if it's a zoom). Using the true field of view for your corrected image it can be projected onto a sphere and aligned with other images that go through a similar process, ultimately building a completed image. Yep 'seeing' and other factors will affect the success of the final image. You should try to do a color match, mainly setting the black level right first and then figuring out if additional tweaks are required. Enough variation will present a tough challenge but you can always try to match conditions & settings. OK, year round for the full hemisphere you're going to have to stitch. If you have problems with the stitching software available let me know. Again I'll stress that aspherical is more important than wide (IMHO). I should be able to help you get something useful working. You should also think about your desired output, you cannot simply print such an image without a chosen projection, it is analogous to publishing a map of the Earth. You need an output projection. Quote Share this post Link to post Share on other sites
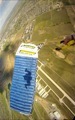
Calvin19 0 #25 June 17, 2007 well, i think i found the best settings. 8f, 8min, 800 ISO 17mm FL noise reduction on, as well as post-shot photoshop scratch removal LCD ON for timing. the one with the green beam is 4f, 30sec. just to show the way i sight the ERS. -SPACE- Quote Share this post Link to post Share on other sites