ZP Canopy Landing Tips and Techniques
Irrespective of how long you've been jumping, piloting today's high-speed canopies is not for the faint of heart. With thousands of landings on old zero performance canopies such as round 1.1s, PCs, Piglets, and Strato Stars, many of our founders are frankly fearful of fast canopies. Moreover, as canopy development continues in the present direction toward ever faster, smaller models, skydivers new and old need to be continuously educated on landing technique.
As one who recently returned to skydiving after a lengthy layoff (13 years) I knew I needed to get better acquainted with today's high-speed wings. They were obviously different from what I had been used to. Faster ... make that "swoopier" ... and although they looked to me to be more fun, there were too many people getting hurt under them. Wanting to avoid that, I set out to discover what I needed to know that I didn't about piloting these new canopies.
To provide some perspective, before learning these tips I'd rather have had to shoot down-wind accuracy on a round than land a small Z-Po 9-cell on a hot still day. Surprised? Remember that a landing in 110 F temperatures, say at Perris' 1,450 MSL, is like landing at 5-6,000 feet. One of the first persons I got turned onto was John LeBlanc, design engineer for Performance Designs. He explained that my old-fashioned notions about the handling characteristics of ram air wings have little relationship to designs now on the market. New high performance Z-pos are lighter and more durable, but they also demand much more attention to landing. Because what you don't know can hurt you, John tried to explain why I couldn't land a zero porosity canopy the same way as my old ram air.
Here is my understanding of how to land today's canopies. While some of these ideas, tips, and techniques are from John LeBlanc please remember that they are all filtered by an old time skydiver: all mistakes are my own. This is advice from a canopy expert interpreted by a relic:
Stepping up to the ground?
On a nice sunny day, John and I watched some landings at the DZ. He used his hands and feet to show me how, having picked my landing area, it should be done. 'You simply level out,' he told me. 'Convert your forward and down approach into forward speed. Eliminate any down for now, but stay inches off the ground.'
Inches? with a high forward speed? That seems scary; why not feet?
Says John: "The idea that neophytes should be several feet off the ground is okay for flying super big student gear, but it's not what the goal is, and is definitely not okay on the smaller stuff! Several feet up feels worse and worse as you go smaller, whether you're a neophyte or a self-acclaimed expert. As a result , we (Performance Designs) consider it unwise to go smaller (in canopy size) until you can consistently level out with feet at ground level under your existing canopy. Going smaller won't make it any easier, but rather it becomes more difficult!"
John compares good landing technique to getting off an escalator. "The down escalator is like the ideal descending approach, level off and landing." Escalators do offer a good canopy landing analogy. Both modes of transport demand coordinated, mindful movements at journey's end. Try visualizing a landing approach as John describes how your landing will resemble stepping off a descending escalator: "Now, think of an escalator. When it levels out, your feet are just below ground level by an inch or two. You can gently transfer your weight from the step (the harness) to the ground because you are at that level. The forward speed is no problem, because you're at ground level. You're stepping up onto the ground, rather than down to it."
"If the escalator dumped you off even as little as a foot high, the first few steps would be tough! This is because your forward speed is still there, as it will be on any no-wind landing. (If you level out too high) you crunch down with a (higher) rate of descent. This is why leveling off several feet up for neophytes is not a good idea. They have to come down sooner or later, and when they do, it will be with a (greater) rate of descent at the time of contact. With a little canopy, that will be a bad landing because it will hurt!" I mull this over.
There you are, storming across the turn, just above the ground. While you still have forward speed, your feet just brush the weed tops. As your speed decreases, you provide a tad more flare so as to maintain your feel of the grass. Then, just step up. Step up? Wait a minute, I protest. Easy enough for you to say that stepping out of my harness should be as simple as getting off an escalator, but if it's so easy why do so many people crash and burn? Obviously this analogy only applies to a smooth, known landing surface. Life and landing, I remind John, are both dangerous.
Yes, he agrees, "You are wise in emphasizing that brushing the feet applies to a known, smooth landing surface." and adds: but notes that "the altitude of your body should be the same, even if you're lifting your feet to stay clear of a poor surface until touch down time."
More importantly, John continues, "As wing loadings go over 1.1 lbs per sq. ft., this technique is a required for acceptable no-wind landings."
In my words, if you have a 150 square foot canopy and weigh 170 pounds, and your suspended weight per square foot of canopy exceeds a ratio of 1:1, then you gotta swoop the ground to avoid eating it. Then, a good landing will allow you to cautiously stand up out of your harness, starting from where the parachute is holding you up to where your feet are supporting you. The major tactile feedback is that your weight is transferred from your leg straps to your shoe soles.
Low wind landings and high speed dirt
What about the special challenges of no-wind landing conditions? "You will still stand up out of your harness," says John, "but you'll do so at a fast walk to a run, depending on canopy and wing loading. " The more wing load, the faster you'll have to run.
We watch several more landings in which many of the canopy pilots flare too high or too early. One thing hasn't changed about landing, I tell John. Landing softly requires precise timing. How do you time your flare?
He explains that if you flare too high, you'll land from higher up with an increased rate of descent, "if its done too soon, it results in a big gain in altitude, which means that you are too high (to land softly) again! " When you flare too high and then crash in on a little canopy, you'll likely get in a few front loops. Of course, if you flare too low or not at all, no matter what size canopy you're under you'll eat much dirt and still do several front loops.
People will laugh. Late flares are not considered good form; they tend to dirty your jumpsuit and gear. It's a good idea to avoid them, so you'll eat less dirt less often. As John adds that a good way to learn how, "is to figure it out on a bigger, more docile canopy. (less dirt eaten.)"
A backyard swing model
Remember the fun you had as a kid swinging in a backyard swing? You could go real high or not. You could even try to jump out at the top of the arc or lower. Or, if you had a littler kid in your lap, you'd just let the swing slow down to nearly stop and then just step out of the seat onto your feet. You do it so smoothly that there is no fear and no pain. It is satisfying. The little kid is happy but not scared. "The swing can be moving slow or fast, but if you get off at the right time, it's easy in either case." [to step out of the seat and onto your feet. No sweat, no fear. Like on a slow-moving swing, it's easier to time your touchdown under a bigger canopy], "The slow swing (big canopy) is easier to time, and the steps are slow. "
A fast moving backyard swing is something like a landing small fast canopy notes John, "The fast swing, (like a small canopy), is harder to time and the steps are quicker. But (even fast steps) don't hurt if you step (up) onto the ground at the bottom, when the rate of descent is exactly zero." Just imagine you are stepping out of that swing seat and onto your feet. If done smoothly it's fun, even satisfying. You've just had a good landing and you know it. But "Now try goofing on the timing ... get off on the upswing; things get real rough if you're moving fast! That is just like finishing your flare too high."
The transition from sitting in the harness to standing on the ground is subtle enough for another analogy. Thinking for a moment, he used a child's walking chair: and said something like 'I'm talking about those contraptions they put toddlers into. It's a seat with four wheels, and the kid's feet just barely touch the ground. They can paddle around and get into all sorts of trouble. Or they can quit paddling and just stand up. The difference is so smooth that they hardly notice whether it is their feet or the seat holding them up. That's what a good landing is like.' Yes, John said, "The walking chair analogy. Nice."
Putting this to practice, I find the idea of a two-stage flare is helpful for transitioning to the horizontal. First, flare with only about 6-12 inches of toggle. This converts the ground-rush into a swoop just above the ground. At the end of the swoop, when the canopy won't stay up any longer, depress (bury) the toggles for the second part of the flare.
After thinking about it, John added these remarks: "OK, I like the idea of a two-stage flare except for the part about burying the toggles at the end. This will make many canopies stall, and others might just quickly mush onto the ground. If your feet are at ground level, then this doesn't make much difference. You step up onto the ground just the same. But, if you haven't realized that you're a little higher than the ideal, you'll get a rude awakening when you bury the toggles. [Burying the toggles then] you drop down onto the ground with a thud."
He also strongly endorses flare-practice, before finial approach, while still high up, "I like... practicing the flare a lot. I do it on EVERY jump. its fun!" Practicing upstairs helps because you can hear and feel what your canopy is doing without the distraction of high speed dirt coming at you.
Keep "hands-on" canopy control
Canopy control inputs should be smooth and fluid, not abrupt and mechanical. Whatever landing you do make, says John, "you must still keep your hands controlling the canopy, even if you have the urge to swing your hands as you step (or run). If you are unknowingly moving the toggles, the canopy will do some unwanted maneuvers! People also use their hands for balance cause some pretty wild gyrations, too!"
However, "If you continue to fly the parachute properly when you are taking your first steps, [then] the parachute will continue to help support you during those initial steps. Again, this technique is not critical on a big canopy, but becomes more and more important as the wing loading increases."
So, remember, parachute canopies only do what you tell them to do. They are so responsive that heretofore unnoticed hand movements will give you yaw and cause you to veer off. In other words, they're responsive enough for perfect landings every time. Or they can turn a twitch into a turn. Keep your hands in sight so you always know what they're doing.
Smaller is not always smarter
While today's new smaller Z-Po parachute canopies are faster, most do appear to have wider safety margins than did the squares of yesterday. However, I'm convinced that going to a smaller canopy shouldn't be an automatic goal. For some of us, consistently painless landings require lower wing loadings via bigger canopies.
As PD's John LeBlanc puts it: "Square foot for square foot, today's canopies are generally more forgiving than those squares from years ago. But as you downsize from one size modern ram air to a smaller canopy of the same type, you give up some of that forgiveness.
"So, make sure you've really got things well under control before you even consider going smaller. On the larger canopy, little technique problems will not affect the softness of the landing noticeably, but the same poor technique will cause problems on the next size smaller canopy."
Pat Works, SCS-1
Legal Disclaimer: Serous injury or death can result from applying written techniques to a high speed sport. Although the quotes are from John LeBlanc, Neither he nor Performance Designs endorse, condone, apporve, or reccomend anything herein. Parachutes are dangerous: you could kill yourself using 'em.
Copyright 1994 by Pat Works
RWu Parachuting Publications
1656 Beechwood Ave. Fullerton CA. 92635
(714) 990-0369
FAX 529-4769
Your First Reserve Ride - Laying The Foundation
Michael Huff has a hard time saying goodbye.
Photo credit: Michael HuffAre you ready to be alone in the sky with a malfunctioning parachute and two little handles?
Though there are skydivers with thousands of jumps who have never experienced the fun of a cutaway, don’t be fooled: it’s not a question of “if,” it’s a question of “when.” Don’t feel ready? You’re not alone – but there are a number of proven ways to boost your confidence (and, therefore, safety).
1. Stay Current
I know. It’s not your fault. Your home DZ is seasonal – or it’s far away – or it’s a tandem factory that keeps sullen fun jumpers on the ground.
Whether it is or isn’t your motivation that’s the problem, the fact remains: long lapses between jumps are dangerous. They dull skills, heighten apprehensions, create a sense of unfamiliarity with aircraft and degrade the muscle memory you have carefully built around your gear, which is of vital importance in the event of a reserve ride.
It’s vital to your career as a skydiver – especially, at the beginning – to make the effort to jump every couple of weeks. Make the effort and get up there.
2. Prepare
The USPA Skydiver Information Manual puts it rather dryly: “Regular, periodic review, analysis, and practice of emergency procedures prepares you to act correctly in response to problems that arise while skydiving.”
Rephrased in a slightly more compelling manner: practicing might save your life, especially if you’re a newer skydiver who isn’t quite as accustomed to the stresses of freefall as an old-timer. Here’s a two-item to-do list to tip you in the right direction:
Deploy your reserve for every repack. Have you ever deployed the reserve for your current skydiving rig? If not, the result may surprise you. You’ll learn the direction of pull for your gear, as well as the force you’ll need to exert. If your rigger watches the process, he/she can watch the deployment and identify potential problems. Even if you have deployed your own reserve, a repack is an unwasteable drill opportunity.
Practice emergency procedures in your DZ’s training harness. (You may feel like a dork, especially if you’ve already been skydiving for a little while. Go on a quiet weekday and do it anyway.)
3. Do The Little Dance
Before each and every jump, the USPA advises skydivers to “review the procedures to avoid emergency situations and the procedures to respond to emergencies if they occur.”
This doesn’t have to mean poring over your SIM like you’re cramming for a test. It does, however, require a little bit of work before every jump--just to make sure that your muscle memory is fresh and your brain is prepared for puckersome eventualities.
Touch your handles in sequence before you enter the plane. It is not beneath you. Being blasé about basic safety doesn’t make you more awesome. If you ever happen to share a plane with an energy-drink teammate or a world-class coach, watch ‘em closely and you’ll see what I mean.
Check that your reserve handle is seated, while you’re at it. A loose reserve handle can deliver a reserve ride without the fun of a malfunctioning main – and you don’t want that, do you? Right! So: now you’ve done what you can to be ready for a potential reserve ride on any given skydive. Next time, we’ll talk about what to do when your main decides to give you the pop quiz.
By nettenette, in Safety,

Your First Reserve Ride - Go Time
Dave Rhea gives his Skyhook a workout over northern Arizona
Photo Credit: Dave Rhea
You’re as ready as you’ll ever be. Right?
You know what a malfunctioning main looks like. You know the sequence*. You’ve done your homework (like we reviewed last time). Before you pull that handle, though, make sure you know the rest of the story: how to make that reserve ride as un-traumatic an experience as possible.
1. Do not overthink it
If you believe that your main is unlandable, you are going to have a reserve ride. Lots of skydivers have landed under reserves, realizing later that the problem was solvable.
Lots of skydivers have also gone in while striving to sort out malfunctions that did not get solved.
Pick your poison.
2. Do not worry about stability
This is the very least of your problems, as you are on the world’s most intractable timer. Worry ONLY about altitude.
3. Pull the cutaway handle until no lower than 1,000 feet
If your pull is sufficiently low (shame on you for that, by the way--gotta say it) and you have an unlandable main, you’ll be testing your reserve’s opening characteristics in the most potentially lethal way. Take note: the USPA not-so-recently raised the minimum deployment altitude even for eminently experienced D-licensed jumpers. Initiating a reserve ride below 1,000 feet isn’t always deadly, but it has an unnerving tendency to be. Don’t take the chance.
4. Hold on to your handles
...or, y’know, do your best. If you manage it, you’ll save a bit of money, and you’ll save face when you land.
5. Make sure it’s out
Arch and look over your shoulder for the reserve pilot chute. Reserves deploy fast, so this head position may rattle your neck – but if the pilot chute is somehow caught in your burble, this should either shake it loose or make it clear to you that you need to do some burble intervention, stat.
6. Keep an eye on your free-floating main
However: do not try to chase it and grab it in the air. (People have died doing that, bigshot.) Don’t “chase the bag” if it means you’ll land in a dangerous LZ. Use landmarks to get a bead on where the gear is headed, then take a deep breath, leave it to the fates, and prioritize your mortal coil.
7. Remember: Your Cutaway, Your Business
When you land a reserve, you’re going to be the talk of the DZ (for about five minutes, usually). During that five minutes – longer, if the loads are turning slowly – you’ll probably be approached by a gamut of big talkers and would-be mentors, questioning your malfunction and eager to discuss your decision to cut away.
My advice: speak to your trusted mentors and co-jumpers about it in private, and tell the rest to go suck an egg. When you suddenly need to get proactive about saving your life in the sky, make no mistake: you are absolutely alone. In the entire world, there exists only you and two handles. Your cutaway is your business. You were there. They were not.
Review your own footage to determine the nature of the malfunction and review alternative methods of correction, if applicable.
8. Buy a bottle of posh booze for the rigger who packed the reserve you rode, and keep the reserve pin for posterity.
It’s tradition.
* Arch, look down at your handles, grasp the handles, pull cutaway, pull reserve.
By nettenette, in Safety,
Wingsuit Skydiver Saved by AAD After Collision (Video)
The following video was posted on social media last week and shows a harrowing scene of a wingsuit jumper suffering a collision shortly after exit. The collision appears to knock the jumper unconscious, as he then begins to spin uncontrollably as he descends in freefall. The spin amplifies the lower he gets - until finally his AAD activates and saves his life by crucially firing while he is seemingly unconscious.
You can follow or contribute to this conversation in the following forum post:
A forum post from a Dropzone.com user has shed some light on the situation...
"If I remember correctly group of 4. Leader fumbled exit a little. The 2&3rd guys start flying the planned direction right on exit. The 4th guy has the time and awareness to see the leader and starts diving to the leader. Guys 2&3 now correcting from intended flight path toward leader, intercepted by guy number 4. None of them are new guys. Super lucky that the guy who had the AAD fire walked away with no major injuries. The guy who hit this guy is a good friend of mine and is very heads up and a skilled 4-way flier with more WS jumps than FS. The example here is that if it can happen to guys like him it can happen to you." - Slimrn
The topic of AADs can sometimes be a controversial one, many experienced jumpers believe they don't need them and some even view dropzones that have AAD requirements negatively. However, this event goes to show that sometimes the AAD can play a crucial role in saving your life, especially in the case of midair collisions which result in a loss of consciousness.
By Administrator, in Safety,
Wings Level
Wings Level
I've been thinking for some time about a final bit of advice,
some catchy canopy control phrase, to say to students when they
are about to go up. This morning it finally came to me:
Wings Level
When you're close to the ground keep your wings level
This covers a lot of ground. Most of the injuries I can think
of violated this principle.
You can survive a lot of horizontal embarrassment by pulling
your breakables in and doing a PLF. The vertical stuff is what
hurts, and that mostly comes when your canopy is not level.
There are three common situations: turbulence, SLAMMs and flaring.
Turbulence
One feeling of turbulence is the canopy suddenly rocking/tilting
right or left. If it tilts to the right our untrained reaction
is to raise our left hand to catch our balance, and lower our
right hand to catch ourselves. This causes a hard right turn
and slams us into the ground.
Under canopy we must retrain ourselves to think "Wings Level!"
and counter the tilt with our toggles.
Tilt to the right:
Think "Wings Level!"
Left toggle down / Right toggle up
Canopy overhead
Back to neutral or continue flaring or ... If we're flaring when this tilt to the right happens another
part of our reaction is to raise our left leg up and reach for
the ground with our right leg. This is an injury prone position
to hit the ground in.
Our ground based habits are strong, and it takes some effort and
practice to use only canopy control, our hands and toggles, while
we're still in the air.
Active control is the idea, you fly the canopy, don't let it fly you.
SLAMMs - Stupid Last Minute Moves
SLAMs - Stupid Low Altitude Maneuvers
I got this term from Rick Horn. It refers to last minute panic turns.
These last minute turns happen when people
Get too low before facing into the wind (Get-home-itis)
Try to avoid last minute obstacles
Chase the windsock Large scale canopy strategy - thinking ahead - is the approach to
focus on here.
The idea is to get up wind of target, and then fly a landing pattern.
It starts before you even put your gear on.
Get a flight planner (an aerial photo of the drop zone).
Go outside and look at the ground winds.
Draw both left and right hand landing patterns for these winds.
Pick one or the other based on obstacles and other factors.
If the winds are still the same when you jump, this is the one
you will try to use.
The actual jump often happens differently than the plan.
The point here is to learn a process, a way of thinking,
an approach, that keeps you out of the awkward situations
and last minute moves in the first place.
Now draw the jump run (what have previous loads been doing?).
Mark where the first and last groups got out (watch the actual
jump or ask people who have just landed where they got out).
If the uppers are strong mark both exit and opening point.
Now put yourself in the shoes of someone who has just opened.
I'm here, the windsock is still the same, so my two possible landing
patterns are there, what do I do between now and later to get from here
to the onramp, the beginning, of the landing pattern I want to use?
Should I run? Should I hold? Should I crab?
If I keep facing the way I'm facing now, where will I land?
There's an obstacle, a lake, some trees, a power line between
here and there. Can I fly over it? Should I fly over it?
What if the wind changes and I land on it? Is that a disaster,
or just inconvenient?
If I can't make it back, where's a clear spot that I can land in?
Which way is the wind blowing and therefore what landing pattern
should I fly?
Can I make it back but the wind has changed, the windsock is moving?
What's my new landing pattern and how do I get from here to the onramp?
Is the windsock going in circles? Are the jumpers ahead of me landing
in all directions? Should I move my landing pattern over a bit and
land outside the swarm of clueless sunday drivers?
Am I too long but the wind is at my back so I can pull a few inches
on the toggles and come down slower and ride the wind back?
Am I down wind and don't want to blow away so I should face the wind
and pull a few inches on the front risers and get down quicker?
Have I by some miracle of forethought made it to the onramp of my
chosen landing pattern? How do I handle it now?
As a student they told me the 1,000 - 600 - 300 ft technique, but
most experienced jumpers guage the pattern by angles and rates.
On a light wind day I fly the down wind part at a certain distance
from the target so the target is at the correct angle down from
me. I fly down wind until the target is maybe 45 degrees behind
me and turn cross wind. Once again the target is at the correct
angle down from me. At the magic moment I turn on final.
If I'm too low in the pattern I can cut across corners and shorten
my flight path. If I'm too high I can go into brakes, come down
slower but steeper, and bleed off unwanted altitude.
If I've misjudged the whole thing, I remember that it's better to
land out and walk back than land in and get carried away on a stretcher,
so I do my turns onto cross wind and final at a nice safe altitude,
and congratulate myself on what good judgement I have.
It is hard to stress enough the value of persistently trying to
fly your canopy on a predetermined course (get up wind of target,
and then fly a landing pattern) rather than zooming aimlessly
around and then landing.
The value is that trying to make your canopy go where you plan to
go in all the different conditions teaches you how to make your
canopy go where you *want* it to go in all the different conditions.
Canopy control is not simple and it's not easy. There are zillions
of variables and circumstances, and on any given jump you don't
even know what they all are.
If you put genuine effort into this for 200 - 300 jumps you will
start to sort out the patterns and learn what you can and can't do.
Knowing what you can and can't do is especially helpful in staying
out of the SLAMMs when you're landing out.
Sometimes, even when you're thinking ahead, you have to make a turn
close to the ground. There is a way to do it and still keep your
wings level and that is braked (flat) turns.
The idea is to first go into the right amount of brakes, half brakes,
deep brakes, and then use one toggle slightly up or the other slightly
down, or both, to turn.
This gives you a change of heading with only a slight bank.
If you were really at 50 or 75 ft when you did this, you just have
to land that way (PLF).
Practice braked turns up high until they feel really comfortable so
that when you need one close to the ground it will be easy to do.
Letting up from deep brakes near the ground is tricky because you drop
quite a ways before your canopy resumes its normal glide path.
At some point it's worth spending maybe 10 or 20 jumps edging gradually
into this to find out what you can do. It's different with each canopy.
Turn onto final in part brakes. At say 150 ft let up slowly and see
what happens. Push gradually (that's *gradually*) into deeper brakes,
lower altitudes, faster let ups. After while you will get a sense
of what you can do.
If you keep pushing you will eventually scare yourself and then you
will know where the boundary is.
Flaring
Another place where you can get wings unlevel is flaring
flare too high and then let up
flare too high and stall
flare unevenly There is an old accuracy technique called double clutching,
where you let the toggles up 6 or 8 inches (not a foot!),
let the canopy fly for a moment, then toggles back down maybe
4 or 6 inches.
If you flare too high and just hold it, you will land hard
but probably get away with it by doing a PLF.
If you flare too high and then let up, you will land much
harder and may not get away with it. Even big, slow student
canopies can slam you in if you do it wrong enough.
If you've been practicing double clutching up high where it
doesn't hurt, you can impress your friends and coaches with
your great canopy control.
If you flare unevenly, one hand lower than the other, you get
the canopy tilting one way or the other as in turbulence.
Tilt to the right:
Think "Wings Level!"
Left toggle down / Right toggle up
Canopy overhead
Back to neutral or continue flaring or ... Some people look at their hands or bring their hands together
at the bottom of the flare in order to flare evenly.
Those can be good short term techniques, but in the long run it
is better to focus on what the canopy is doing.
If the canopy tilts or banks I want to counter with one toggle
down and the other up regardless of whether it was turbulence
or an uneven flare that caused it.
The flare works in two stages. The top quarter or top third
stops your downward speed and levels you out (for a short while).
The bottom part slows your forward speed.
This means that in high winds, where you're barely penetrating
and your horizontal speed (relative to the ground) is already
stopped, you just do the top part of the flare, and you do it
much closer to the ground.
If you do a full flare in high winds you get picked up and thrown
backwards pretty hard. This will impress your friends and coaches
but not the way you want.
The hard part of flaring in no winds is guessing when to start.
You start the top part higher. This levels you out, changes your
visual picture, and gives you immediate feedback on how good your
guess was.
If your guess was good, then do the bottom part and land.
If you started too high, then pause for a moment, and then do the
bottom part.
Part of the trick is where you look.
If you look at the horizon then you can't see the ground well enough
in your peripheral vision and you can't tell when.
If you look straight down under your feet all you see is ground
rushing by and you can't tell when that way either.
Up higher I'm looking more out ahead.
As I'm starting the flare I look ahead of where my feet are going
to touch down just like you do on an uneven mountain trail.
As my feet are just about to touch down I look more downward just
like you do at a rough spot on that mountain trail. What I'm looking
for is any rock or uneven spot where I might twist an ankle.
If your flare motions are too slow you don't get the effect, but
if you yank the toggles down you just distort the canopy and airflow
and that doesn't work either.
If you back off a little from the yank to a definite, strong
motion, it works pretty well.
The final bit of flaring technique is to practice PLFs until
they are comfortable and natural, because in spite of all this
great technique there is nothing like a PLF to save your body
and your pride when you misjudge it.
A point of terminology is that panic turns are not hook turns.
Hook turns, canopy swooping, turf surfing, pond swooping are a form
of canopy flying that you can learn about later if you want.
If you are interested, then go to some of the larger drop zones
in Florida or California or some place and learn from the people
who are already good at it.
Like any envelope pushing around high speed dirt, it's pretty easy
to kill yourself if you fuck up, so it's smarter to build on the
experience of others.
Meanwhile, in your day to day jumping, keep your wings level when
you're close to the ground.
Sometimes, in spite of our best efforts, our best training, our
best intentions, we have a brain fart and do something stupid.
Here's one that ranks right up there with the best of them.
One year at Quincy it was hot, it was humid, it was late in the
week, I was tired, I didn't want to land out and wait for the
pickup, and I had to cross the loading area to get back.
The loading area is a pretty wide section of concrete filled with
Otters and Casas picking up jumpers, getting fuel, spinning props,
planes taxiing in and out, tents full of waiting jumpers.
I had seen it in freefall, I had been eyeing the situation from
the time I opened.
Can I do it? I'm not sure. It's gonna be close.
I'll just face that way and decide when I get closer.
Can I do it? I'm not sure. Just barely. Maybe. No, I should
turn around and land over here. I'm going for it.
Concrete. Staying aloft by sheer terror. The slightest gust
and ... Shit.
Props. I could land on the tail. Massive social humiliation
and broken bones but I'd miss the props. Shit.
The tent. I'm going to land on the tent. Shit.
I'm over. I land.
I gather up my chute and walk back thinking that was the stupidest
thing I've ever done.
To this day I can still hardly believe that I did that.
It's not just students who show bad judgement under canopy.
Bryan Burke has said that minds are like parachutes, sometimes
they just don't work.
That means that we must develop the best set of habits and background
experience that we can, so that when our minds don't work we might still
accidentally do the right thing.
Keep your wings level when you're close to the ground.
Skr
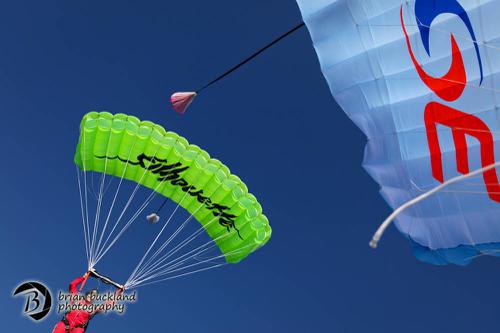
Wing-loading and Parachute Performance
Image by Brian Buckland
It is common knowledge that wing-loading has profound effects on the way parachutes perform. Furthermore, it appears that even if the wing-loading is exactly the same between two otherwise identical parachutes, different size canopies fly quite differently. In other words, if you fly a 210 square foot parachute of a given design with lots of additional weight to achieve a loading of say, one pound per square foot, a 150 at the exact same wing-loading will usually have a steeper glide ratio, faster turns, and demonstrate a longer recovery arc following a high airspeed maneuver. This means that, regardless of the wing-loading, all small canopies are high performance, and should be treated accordingly. There are many explanations for this non-linear relationship, and in this article I will discuss some of the most significant governing variables.
Test flight data shows us that small wings, regardless of wing-loading, will be more radical than their larger counterparts, all other design aspects being equal, however the degree to which they are different depends of the model of the canopy. Nevertheless, the trend is consistent and predictable. The most common explanation for these differences is that it is due to differences in line length. Smaller canopies do have shorter lines on the whole. Although it is true that some aspects of a parachute’s performance increases as line length reduces, this only applies to mobility about the roll, pitch and yaw axis. The effects on recovery arc tend to have the opposite response to line length. In other words, a parachute with longer lines tends to exhibit a longer recovery arc. To explain these counter-intuitive effects, we must look elsewhere for an explanation.
The other aspect, previously unconsidered, is the relationship of the canopy's internal volume to its surface area. Essentially, the volume displaced by the airfoil can be thought of as a key aspect of the overall DRAG. Of course the shape of the wing itself is vitally relevant to the drag coefficient, but for the purposes of this discussion, let’s focus on the effects of drag from the perspective of simple air displacement, like a footprint in the sky. The fatter the airfoil, the more drag it will exhibit. This means that a “fat” parachute will sit at a higher angle of attack in full flight, based on the balance of power between the airfoil's drag (D1) and that of the suspended load, the jumper (D2). Further, the drag value of a “fat” airfoil will increase markedly with airspeed, and therefore large objects will suffer more drag than “skinny” airfoils at high speed. The wing, therefore, will “want” to return to the overhead position more aggressively on fatter airfoils, as a general rule.
Let's take those aerodynamic principles to the realm of parachute sizing. When a parachute design is scaled, for the most part, the entire wing is scaled simultaneously. This is the same geometric progression as a matchbox car: same three dimensional proportions, but a different size. When we want to make a parachute larger, we simply multiply each dimension by a “scale factor”, a single number that will result in the size change we desire.
When we apply this mathematical model to parachute designs, we create an unwanted effect: disproportionate scale factors relating to area and volume. Simply put, the number we use to scale the parachute is based on the "square footage" of the wing, and this is of course, a square function (X²). The volume on the other hand, is governed by a cube function, (X³). This means that when we increase the height of the rib at the same rate as the span and the chord, we inadvertently make the wing too fat as we scale upwards, and too thin when we scale down. This is one of the reasons why a 120 flies very differently than a 170, even at the exact same wing-loading and body drag component. The wings only appear to be the same, but they are most decidedly not the same from a volumetric perspective.
So, one might say, why don't we make the height of the airfoil on smaller wings greater, and that of larger wings smaller, proportionately? This is sometimes done and it works to a certain degree. However, if we were to search for a formula that would allow us to scale the volume at the same rate as the area, we would have to keep the rib height the same on all sizes of a design. I worked this out with a brilliant Tasmanian mathematician on flight back from Sydney many years ago. A 120 with the same rib as a 190? That doesn't quite pass the gut check, does it? Only the middle sizes would fly right, and beyond a few degrees of freedom, the system would collapse into chaos, because the fat little wings would have too much drag to be efficient and the big wings would have too little lift to land well, and would be prone to collapse in turbulence due to their flimsy nature by virtue of their low volume. A simple answer does not appear to exist, at least not yet.
The heart of the problem is the fact that our industry has grown accustomed to the use of "pounds per square foot" as our way of quantifying parachute size. This leads to the erroneous belief that a given "wing-loading" will result in similar performance for all parachutes regardless of size. This is most certainly not the case, and is dangerously misleading for light weight jumpers striving for that magical one pound per square foot wing-loading. A 120 is inappropriate for someone with less than 100 jumps no matter how much they weigh. So, what do we do? Firstly, we honor the differences in parachute sizes, and downsize very carefully. We make our steps downward based on actual ability and frequency of jumping, and we look for any excuse we can to upsize. In addition to remaining conservative with regards to canopy size, we must go to greater lengths to understand the nature of performance and size.
If it is true that performance trends do not appear linear with regards to parachute size, then perhaps the solution is a curved ruler. To that end, I have offered a complex sizing chart to the world that reflects the non-linear nature of parachute sizing and performance for the purpose of downsizing guidance. This easy-to-operate chart has been adopted by many national organizations and local dropzones as the official guidelines for parachute size relative to experience. Born from a brilliant but arguably conservative Swedish chart created by my good friend and colleague, Ola Jameson, who was the Head of Safety (Riksinstructor) for the SFF at the time. My somewhat less conservative version of the “sizing chart” offers suggestions for parachute size relative to weight, rather than simple wing-loading alone as the defining factor. This allows the recommended parachute size for a heavy person to be a higher wing-loading than that which is suggested for a lighter person. It is available HERE.
The sizing chart does not suggest when the jumper should downsize, but rather limits the degree to which they should decrease their parachute size based on the complex aerodynamic principles effected by wing geometry. The "chart trap" is always a risk with such things, when jumpers automatically step down in size because the chart suggests that a change is reasonable. Decisions based on parachute size and design should always be made based on the actual ability of the jumper, and the other governing factors described in the 22 pages of modifying text that follow the chart.
Another consideration I will now put forth to the skydiving community is a fundamental change to the way we define parachute size. Based on the discussion above, a two-dimensional analysis is insufficient to describe what a parachute will do in the sky, and "pounds per square foot" is a very limited 2-D relationship. I suggest that a better model for parachute size definition is Pounds (or kilos) per Cubic foot (or cubic meter). The metric numbers would be far easier to work, if we can get the Yanks and Brits to let go of the Imperial system; but we have to pick our battles, don't we. By using lbs/ft³, we will effectively remove the 2-D bias from the "ruler" as it were, and make the relevant differences more numerically obvious. It may sound like a radical idea at first, but so was the ram air canopy when that showed up, but look how well that worked out. Just because a change is difficult does not make it less necessary.
In the interest of moving this new paradigm forward, and in the spirit of the immortal words of Mahatma Gandhi, I will be the change I wish to see in the world. Here are the volumes of my parachutes. It is my hope that other manufacturers will follow suit, in the interest of transparency of our parachutes’ designs, for the good of the skydiving public.
The topic of parachute performance prediction is vast, and must continue to be discussed in scientific terms. We must do this because, as one of the few (mostly) self-governing branches of aviation, we are the only true experts in our field. We are the ones who must think outside the old box of established paradigms, and change when change is necessary. We will continue to improve our sport in every way, simply because we love our sport so much that we want to know more, and grow more. The universal passion for knowledge exhibited throughout the skydiving community leads us to a very high level of mutual respect for our fellow jumpers. This precious commodity of solidarity is rare in this world, and we must allow that connection to lead us to always reach for safer procedures built on our ever-increasing understanding of that which saves our lives. Improvement in matters relating to safety is just love of life in motion, and love must be adaptable and smart if it is to last in a complex world. Again and again, skydivers prove to me that they are highly intelligent adventurers committed to safety, and very much worthy of my respect. We will adapt, and we will thrive.
About the Author: Brian Germain is a parachute designer, author, teacher, radio personality, keynote speaker with over 15,000 jumps, and has been an active skydiver for 30 years. He is the creator of the famed instructional video "No Sweat: Parachute Packing Made Easy", as well as the critically acclaimed book The Parachute and its Pilot. You can get more of Brian’s teaching at Adventure Wisdom, Big Air Sportz, Transcending Fear, and on his vast YouTube Channel
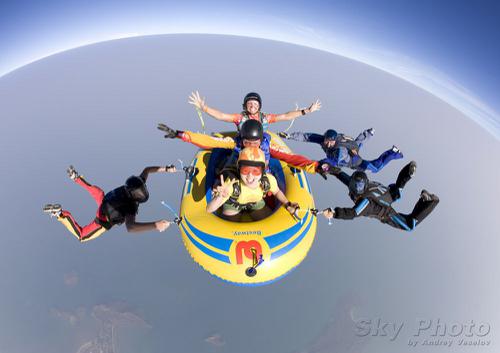
Why We Boogie
The History of a Silly Name
Image by Andrey Veselov
It’s hard to imagine that, not too long ago, a skydiving get-together was a rare thing indeed.
Today, as you’ve no doubt noticed, there are hundreds of ‘em. In fact, almost every drop zone, no matter how small, has at least one official yearly boogie to celebrate its local jumpers. Namibia! Fiji! A tiny little beach town in Kenya*! A big field in Montana! Where two or three are gathered in its name, behold: you’ve got a boogie on your hands.
Some of these events are immense, filling the skies with dozens of wildly various aircraft, hundreds of skydivers and a whirling (terrifying?) smorgasbord of disciplines. Others are comparably tiny. Despite their differences, most boogies are a reliably good time.
It stands to reason that a group of skydivers would find any excuse to come together in a frenzied combination of daytime skydiving and nighttime frivolity–but when did the first one take place, and how did it come by such a goofy name?
Read on.
The Birth of a Boogie
The modern skydiving boogie may owe its existence to a film: specifically, the first major skydiving film released to the public, called Gypsy Moths.
Shortly after the film’s much-lauded debut, one of the skydivers featured in the film – a prominent skydiving athlete named Garth “Tag” Taggart – was asked to put together a “just-for-fun” skydiving event in his hometown of Richmond, Indiana. Until then, skydivers only really, officially gathered for USPA-officiated competitions at regional and national meets. In September of 1972, Garth arranged that seminal event, which is recorded in Pat Work's fascinating record of early skydiving (entitled "United We Fall").
Where Did the Term “Boogie” Come From?
The term “boogie” derived from a comic motif developed by fringe cartoonist R. Crumb.** The motif features a “boogie man” striding confidently across an abstract landscape with the phrase “Keep On Truckin’” emblazoned above. The word “boogie” doesn’t appear anywhere within the motif, but the story goes that Garth Taggart was inspired by the image. He was also probably influenced by use of the word in New Zealand skydiving circles, as well as by its use as a then-trendy name for an, ahem, wild party. In any case, Taggart picked that moniker to describe the Richmond RW Festival on its event t-shirts, and the term stuck. Firmly.
These get-togethers have sometimes been referred to as “jumpmeets”--in the olden days, when the organizers didn’t want to saddle the event with the term’s then-obvious, hard-partying implications--but “boogie” is how we’ve really come to know the phenomenon.
Hilariously enough, those historic shirts didn’t actually use the word “boogie.” Due to an unfortunate misspelling on the hastily-printed giveaways, they described the event as a “boggie.” Snicker snicker.
The First Boogie Kicks Off
However confused the naming, that original event brought together more than a hundred skydivers from all over the US to practice the then-relatively-new RW discipline. The Richmond City Boys’ Club hosted the event, making significant revenue by charging non-skydivers an admission fee.
That first boogie (or “boggie,” if we’re being historically accurate) saw some formations that were, for the time, pretty damn groundbreaking. In "United We Fall," Pat Work notes that the athletes “made several big stars out of a Twin Beech and a DC-3.” Work goes on to remember that “[a]ll the self-styled, super-hero RW types made three tries at a 30-man, and succeeded in FUBAR-ing all three in front of the lens of Carl Boenish.” The botched jump didn’t cripple the event, however. “Everyone else just giggled and went up and made 18-mans […] with no problems[.]” That night, the skydivers and some lucky spectators enjoyed a raucous bonfire, dancing and screenings of some of the most seminal skydiving videos on record.
The Boogie Evolves
In the years immediately following that first boogie, the quickly growing sport of skydiving started to earn a bad-boy reputation amongst the general public (who didn’t much care about it previously, when the sport was tiny and firmly on the fringes). For several years, the city of Richmond out-and-out banned skydiving for fear of its freakshow excesses.***
By the time the 1970s were drawing to a close, however, that original boogie had become very official. It turned into the USPA Nationals--whaddaya know.
Boogies Today
The phenomenon of the boogie holds to the much same spirit as Garth “Tag” Taggart’s founding principle: fun. These days, however, they’re also used as a venue for major skydiving competitions, world records, vendor demonstrations, charity efforts and loci for training.
Across the board, these events retain one important historical value: the nominal “boogie” itself.
We come for the party, right?
*Which I just finished attending.
**If you aren’t aware of R Crumb, treat yourself to a Google image search. You’re welcome.
***Apparently, it was proving too logistically difficult to lock up their daughters--and sons, for that matter.
By nettenette, in Safety,
When Should You Upsize Your Canopy?
At the end of the day, skydiving is a dangerous sport. I’ve lost many friends and even family members– under properly functioning parachutes. We can’t regulate stupid behavior, but we can at least spread good information so more people can make wise decision.
So why would someone consider upsizing?
10. Cannot land consistently standing up. If you’re having troubles standing up consistently or even in the same area in all weather conditions, then you need to upsize and take a canopy course to understand the concepts basic flight characteristics.
9. Not current. You can be uncurrent after a winter vacation without skydiving, coming off an injury or just life getting in the way. According to USPA, you are uncurrent if:
A-license holders who have not jumped within 60 days
B-license holders who have not made a freefall skydive within the preceding 90 days C- and D-license holders who have not made a freefall skydive within the preceding six months
DZ policy: Every DZ has their own policy for uncurrent skydivers. Be sure to check in with them before coming out to the DZ to see what you may have to do. Also check the USPA Skydiver’s Information Manual for more info.
8. Jumping at a Higher Elevation. At higher elevations the canopy is going to perform faster and act more responsive because of the air being less dense. So landings will feel faster and turns will feel more aggressive. If you’re traveling to places like Colorado or Utah, you may want to pack a larger canopy.
7. Gained Weight/Wearing Weight. Well, what can I say? Sometimes during the winter, it’s easy to pack on some pounds and that invariably negotiates your wingloading. Also, if you haven’t jumped all winter and you’ve accumulated a new wingloading, you may want to consider getting current on a bigger canopy.
Next, if you’re a small girl, or decide to get on a 4-way team, you may be wearing weights. This added weight will definitely make your canopy fly differently than expected. So before making a decision on what canopy to buy or whether or not to downsize, consider the use of weights to make the best wingloading decision for your experience.
6. Reserve Size. Generally, your main and reserve should be about the same size. If you were quick to downsize or couldn’t find the right sized container, but have a larger reserve, with little experience under a bigger canopy, may be a good reason to upsize your main. (Having the same sized canopies also reduces other problems should 2 canopies out occur.)
5. Types of Jumps. Doing big ways? Wingsuiting? Demos? Some jumps may warrant a bigger parachute. When I do world record jumps, I usually opt for my bigger canopy so I’m not fighting my way through traffic and have a larger range of floating. Wingsuiting can cause line twists or other malfunctions and jumping a more docile canopy can help you negotiate them better. On demos, having a lower wingloading will give you more range to negotiate smaller landing areas or areas surrounded by obstacles – as long as you understand the flight dyamics of your wing.
4. Age/Health/Agility. Take an inventory of your overall health. How are your knees? Wrists? Ankles? Eyesight? Depth perception? Reaction Time? These may be considerations to upsize.
3. Attitude/Experience. Someone’s overall experience and attitude about the safety of themselves and others is a vital component in skydiving safety. Disregard for your own experience and/or safety is an obvious sign to upsize.
2. Because You Downsized and You Shouldn’t Have. Having inconsistent landings? Not standing up your landings? Stabbing out your flare? Landing by touching down on your knees first then popping up to your feet thinking it was an awesome swoop? Spiraling in traffic cause it’s freakin’ fun on a small canopy when not necessary? Scared of line twists? Having a hard time kicking out of line twists? Not paying attention to others in the sky? Land downwind for fun? Don’t follow a landing pattern? What the hell is a landing pattern? Don’t understand the flight characteristics of your wing? Pretty much don’t follow the rules?
1. Finally, if you cannot answer yes to all of these questions, you need to upsize:
Can you land your main crosswind?
Are you comfortable landing crosswind?
Can you land your main downwind?
Are you comfortable landing downwind?
If you had to land out and the only option was a tight area surrounded by obstacles, do you know you could land your canopy accurately?
Do you feel that you completely understand the flight characteristics of your wing?
Do you understand what happens to the flare, landing pattern, stall characteristics and overall flight characteristics when you downsize?
Have you used your rear risers & do you know why and when you’d need to use them?
Have you used your front risers & do you know why and when you’d need to use them?
Have you performed braked turns? Braked turns for landing?
Can you land within 10 meters of a target center at least 5 times in a row?
Did you take a canopy course beyond the B-license requirements?
When I first started skydiving, I was young and pretty much invincible. I was on the fast track to get on a small canopy and go fast! And it’s all fun, until you get hurt or you watch someone die. I’d seen a lot of crazy things (especially people “getting away” with bad decisions) in my 20-year career, but in 2003, I witnessed my father’s fatal canopy collision. Then without your permission, things change.
It’s amazing how death will completely transform your perspective on safety, especially when the sport is your livelihood.
We spend more time under canopy than we do in freefall, so this is a moment to check in and evaluate how much canopy education have you gotten? My dad used to tell me, “take stock into your destiny.” So, take that Flight 1 course you’ve always wanted to, finish your B-license canopy training, ask questions, and just know, there ain’t no shame to upsize that thang!
How at risk are you?
Below is a canopy risk calculator that was created by the USPA, which can give you an idea of just how big of a safety risk you're at with your current canopy and experience level
Calculate My Canopy Risk
Useful Resources
Barry Williams on Canopy Safety (Skydive Elsinore 2013 Safety Day) [Video]
Barry Williams on Canopy & DZ Safety (Skydive Elsinore 2012 Safety Day) [Video]
Performance Design's "Survival Skills for Canopy Control"
Contributors: Melissa Lowe, Barry Williams and Jason Moledzki

What You’re Doing Wrong As A Skydiving Student
And What You Can Do To Fix It
Image by Gary WainwrightI’m not a teacher.
I’m forehead-slappingly, eyes-avertingly, hide-your-facingly terrible at it, actually.
Luckily, I’m lucky enough to count as friends some of the best airsports teachers in the world. (Whew.)
This article is a collection of short answers from several of these. They’re top-level coaches/instructors/examiners, and their experience spans in several disciplines. They’re also incredibly wise, beautiful souls. I went to them with this question, so important for all of us students on the edge of the world:
If you could cure all your students of one thing they do that gets in their own way, what would it be?
Here’s what they had to say.
Listen up.
“Rushing. I see a lot of students that are determined to pack too many things into one jump. Then they end up flailing; when they don't nail the first part, they're confused as to whether to go back and work on the first part or move on to the next part anyway. They lose a lot of time, and they get very frustrated. Pick one thing. Do it perfectly. Stop. Then move on to the next thing.”
- Joel Strickland: Freefly & Tunnel Coach; Double British National Champion, Freefly & Freestyle
“If I could cure all my students of one thing, it would be to erase the idea that everything about them is static and unchangeable. Once a student believes in their own self-efficacy -- believes in the idea that all that they are is changeable in a positive direction -- believes that everything from their physical reactions to their fears can be modified and updated -- anything is possible for them to learn.
- Matt Blank: Wingsuit Skydiving Coach, Lightning Flight Wingsuit & Freefly School
“I’d get them to stop watching YouTube. That creates pre-conceived notions of what they should be doing. Either that, or I’d encourage them not to freefly from jump 26 to jump 199 -- when they do, their belly skills suck dust when it comes to their FFC.”
- Douglas Spotted Eagle, Wingsuit Skydiving Instructor
“Often, they don’t respect the progression and embrace their inexperience. You must do both.
It makes sense to one day aspire to wingsuit BASE jump from a cliff, but it can be difficult to focus your efforts where they are the most effective if you’re fast-forwarding years into your career. Your instructor, who you possibly selected because he or she wingsuit BASE jumps, wants you to focus more on finding the range of your beginner or intermediate wingsuit -- and recovering from instability in it -- before talking about how the wingsuit BASE start works. I find that many students seem to want faster returns for their efforts, and they seem to get frustrated with their own learning process.
I can appreciate the way that we latch onto that dream of human flight, but i want to pass on an outlook where each individual skill is a whole and complete activity by itself that takes time and effort to master before being combined with other skills. So when you combine a set of skills (for example: rigging, canopy control, site selection, weather, bodyflight, wingsuiting and experience in the subterminal base environment), then you can make smart decisions. When you lack experience or skills in a certain area, you begin to lose the full picture.”
- David Covel: Wingsuit Coach, BASE FJC Instructor, AFF Instructor, TI
“I would cure them of self-doubt. It takes courage and confidence to challenge yourself to change your behavior and improve your skill in any area of your life. It's amplified when applied to an extreme sport.
A lack of belief in your own potential can manifest itself in many ways: fear, nervousness, indifference even laziness. Understanding that you have the control and ability to consciously change your own actions is a very empowering fact that can unlock all levels of improvement. You have to commit to change.”
-Maxine Tate: Canopy Piloting Instructor, Flight-1; US & UK National Champion; Coach Examiner; AFFI/Evaluator
“I would cure this one thing that gets in students’ way: hubris. Assume you know nothing about the sport you are learning. No one assumes that they know everything about the sport they are learning, but the worst students just aren't really listening when the instructor is talking.
In general, girls are better at listening than the boys. I think with the boys, especially with really good skydivers, there is a certain amount of ego that prevents accepting that there are things in BASE that they know nothing about. Think about this: almost EVERY BASE course that my partner Marta [Empinotti] and I teach, we learn something. This is because we know we don't know everything, so we keep our eyes and ears open, hoping to learn something new that we can analyze, assimilate and share with others in our beloved sport.”
- Jimmy Pouchert: Co-Founder & Chief Instructor, APEX BASE; Freefly Coach
“Over-amping. The ability to breathe even (especially) when scared, and to get into a focused zone before a jump, makes the biggest difference between a skydive that feels rushed and out of control and one in which a lot of learning and growth takes place. Even very experienced skydivers often feel nervous before their first wingsuit jump or when trying something new. The key is to trust that your ground preparation will serve you in the air, and to focus on one thing at a time starting with deep breaths, releasing tension, and visualizing the perfect exit.”
- Taya Weiss, Owner/Head Instructor at Lightning Flight
"We all have a tendency to look at the negative first, so I would remind all my students to start by pointing out three positive aspects about their previous skydive and then focus on one or two -- maximum, two -- areas of improvement. Positive reinforcement, combined with constructive criticism, goes a long way towards improving performance and attitude."
- Lawrence de Laubadere: Freefly Coordinator, Lightning Flight Wingsuit & Freefly School
“If I could cure all my students of one thing, it'd be expectation. As I tell them all, “If it's not fun, it's not worth it!” Learning to fly is not unlike so many other things in life: sex, making friends, etc. The harder you try, the harder it is.
When I try to teach someone something in the tunnel, they often feel (natural) disappointment if they can't do it how they see others doing it. But it's not my goal to get you doing perfect layouts from the start. I'm looking for the components from my students: staying relaxed, looking where they should be, keeping the legs straight, etc. All I need them to do is smile, have fun, and keep making those baby steps. No expectations, no disappointment. In the end, I think attitude is one of the trickiest skills in progression.”
-Dave Rhea: Instructor, Bodyflight Stockholm
By nettenette, in Safety,
What To Do When the Wind Picks Up
As a student skydiver you are guided by your instructors, drop zone management and USPA's Basic Safety Requirements (BSR's) as to the maximum winds allowable for you to safely jump. However, after you graduate from student status and become a USPA "A" license holder, there is no requirement or recommendation concerning wind speeds. And after you purchase your own gear, drop zone management will no longer need to worry about the gear that you are renting from them. From that point on, the decision to jump or to stay on the ground will be a decision that you will be making for yourself.
The following article describes some of the things to consider when you find that someone has turned the big fan on "high".
Before the Jump:
You will find that the maximum winds to jump in is a very individual decision and depends on the jumper's experience, attitude, main canopy size and type, and reserve canopy type. Do not base your decision on what you see more experienced jumpers do because their situation is different, and do not allow yourself to be talked into jumping in winds that are not appropriate for your level of experience and your gear.
It does however help to watch more experienced jumpers land when you are deciding whether or not to jump yourself. Watching someone that is your weight and has similar gear will give you a good idea of what to expect on your landing, assuming the wind does not increase any further.
In addition to getting the wind speed in miles per hour from a wind meter or other source, you can go to the landing area and observe the winds for a while, noting in particular the gustiness present in that area. With experience you will be able to judge the wind that you can jump in by how the wind feels.
Sometimes a lull in the wind may fool you into thinking that the winds have subsided enough to safely jump, but you should observe the winds for at least 5 minutes before coming to that conclusion because another period of increased wind and gusts may follow a lull.
If you in fact decide to make a jump when the winds are strong, protect yourself in the event that some unexpected problem arises by wearing adequate head protection and foot protection.
After Opening:
After your canopy opens and you have begun to fly back to the landing area is the time when you may first begin to realize that the wind has picked up or is much stronger than you were prepared for. As soon as you realize that this has happened, get turned into the wind and check your speed across the ground. If you are backing up there is a good chance that the wind is also very high on the ground. If you have a reserve static line system (RSL) on your rig you may want to disconnect now in the event that you have to release your main canopy.
Pulling down on your front risers will increase your forward speed and may help you make it back or at least keep you from backing up as far, but using your front risers also increases your rate of descent, so you will have to use your best judgement as to whether this is really helping you or not.
If you do not think that you will make it back to the normal landing area, this is the time to make sure that wherever you do land will be a large clear area. It is especially important not to land behind anything like a tree line or a building. The stronger the winds are, the more turbulence is generated downwind of large obstacles like these. It may be necessary to turn and fly far downwind to get to a suitable area.
Approach to landing:
As you get closer to the ground there will probably be slightly less wind, but it will be more turbulent, especially if the terrain is anything but completely flat. Your canopy will be more stable if you hold partial brakes. Your arms can act like "shock absorbents" by relaxing some of the tension on the brakes when the gusts come along.
Holding some brakes will cause your canopy to fly slower and may even cause you to back up, but this may be better than risking having your canopy collapse. At this point you will be comforted by knowing that you have planned ahead well enough to have chosen to land in a large field with a lot of room behind you in which to back up.
Landing:
It is usually recommended that you not front riser or turn sharply near the ground when there is turbulence present. This has been known to cause canopies to collapse.
Smaller canopies are much more sensitive to small steering changes and to gusts so concentrate on keeping the canopy directly into the wind.
You may not need to flare as much as when there is less wind but you must still flare. The main thing to avoid is flaring fully just as a gust occurs. A gust could create enough extra lift to make you go up suddenly and then let you down hard when the gust subsides. Use your judgement and your feel of the canopy to determine just how much to flare and prepare for a parachute landing fall (PLF).
After landing:
The best advice that can be given here is what we have heard many times as students: Pull down on one toggle, and keep pulling it in until you have canopy in your hand, then run around to the downwind side of you canopy.
Even if you have a good landing it is still possible for your canopy to stay inflated and to pull you over and onto the ground. You can usually prevent this by quickly turning around and running downwind with the canopy while it is deflating. If you begin to fall down after landing do not reach out with your hands to break your fall because of the possibility of injuring your arms. Concentrate instead on getting your canopy deflated and do a PLF if necessary, or let the seat of your jumpsuit take the action.
If it has become extremely windy or gusty when you land and you are certain that you will not be able to land without being dragged you have one last resort, and that is to pull your cutaway handle to release your main canopy. This of course assumes that you have disconnected the reserve static line (RSL) system and that you are not jumping a single operation system (SOS) that pulls the reserve handle at the same time you cutaway.
Do not let your fear of re-connecting your canopy prevent you from releasing it if you really need to. It is not a big deal to release your canopy and it is not very hard to properly re-connect it to your rig. You or your rigger probably do it every reserve repack anyway to test the release system. Quite often a canopy that is released in this manner will land with the risers laying out across the canopy and can be easily straightened out. You may even be able to re-connect it right where you land. Just be sure to have the release system inspected by a rigger and do a good line check before packing.
If you decide to release your main canopy, the best time to do it is when you find yourself off balance and know you are going to fall down. If you do this promptly you will simply fall down and not be dragged. You may not even get very dirty! However, if you wait until you are being dragged across the ground by your canopy you may be dragged into a position where you cannot reach your cutaway handle.
Once you are being dragged, you are in very bad situation and must do whatever is necessary to get the canopy under control. At this point you will be glad to know that you planned ahead well enough to not be upwind of a paved surface or a barbed wire fence.
After everything is finally under control be sure to gather up your canopy tightly to prevent the wind from re-inflating it. Remember, the jump is not over until you are back in the packing area with your gear off.
In Your Spare Time:
Read your canopy owner's manual! It has a wealth of information in it and contains information on your canopy's flight characteristics. Some manufacturers even have advice on flying your canopy under adverse conditions.