0

General

    How to Approach Your Recurrency Skydive

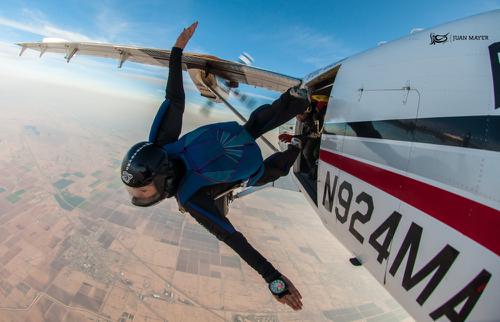
    Image by Joel StricklandWhat’s the second-scariest thing in the world? Probably, it’s the open door of a plane at altitude as seen through the eyes of an AFF-1 student. Remember that moment? Most of us do.
    What’s the first-scariest thing in the world? Arguably: the open door of a plane at altitude, seen through the eyes of a skydiver doing a recurrency jump after a long hiatus.
    Coming back to skydiving after a long time on the ground is an inarguably intense experience -- possibly even a bit more so than the first time your feet left the plane. First of all, you know a lot more about what can go wrong. You’re likely to feel a lot more pressure to perform “like an old pro,” which never helps matters. And -- if you took that time off to heal an injury that grounded you -- you’re getting back on the horse, cowboy/girl, and that ain’t no easy thing.
    How do you approach recurrency with the best chance of a successful reintroduction to the wild blue yonder? The same way you do everything else in airsports: mindfully, methodically and with a lot of sensitivity to your unique position in the sport and emotional biome.
    1. Know the actual rules.
    The United States Parachute Association gives these guidelines for recurrency in the Skydiver's Information Manual. (Non-American skydivers may have different exact guidelines to follow.)
    A License
    “USPA A-license holders who have not made a freefall skydive within 60 days should make at least one jump under the supervision of a currently rated USPA instructional rating holder until demonstrating altitude awareness, freefall control on all axes, tracking, and canopy skills sufficient for safely jumping in groups.”
    B License
    “USPA B-license holders who have not made a freefall skydive within the preceding 90 days should make at least one jump under the supervision of a USPA instructional rating holder until demonstrating the ability to safely exercise the privileges of that license.
    C and D License
    “USPA C- and D-license holders who have not made a freefall skydive within the preceding six months should make at least one jump under the supervision of a USPA instructional rating holder until demonstrating the ability to safely exercise the privileges of that license.”
    2. Lay the emotional groundwork to support your success.
    You’re not the first recurrency-seeker to freak out. Recurrency jumps are often hard -- especially if you're a newer skydiver. Many a lapsed skydiver has turned the car around on the way to the drop zone rather than get back in the sky.
    You’re going to need to use your tools. Call a friend -- even a non-skydiver -- to meet you at the DZ and keep you accountable. Watch videos of your past jumps to remind yourself that you'll be fine (and you'll be ecstatic when you land). Listen to music that gets you stoked. Read journal entries from the time that you were actively skydiving and having an awesome time up there.
    If you were out because of an injury or a medical issue, make sure to chat to your doctor about your intention to reenter the sport. If you need to, get a second opinion -- but hear them out.
    3. Make sure your gear is up to the challenge, too.
    Has your gear been stored for more than a season? You’ll need to take a close look at it before you call it back into action. Parachutes don’t like to sit on the bench, y’know.
    After a longer period of time -- especially if the rig wasn’t stored unpacked in a climate-controlled environment with the stow bands removed -- the materials themselves may start to break down. If your rig has brass grommets on the main d-bag, the metal may have reacted with the rubber of the stow bands (making them hard, brittle, and incapable of doing their snappy little jobs). The ZP coating might have “glued” the cells together to the point where the canopy needs to be manually fluffed out.
    If your magical backpack has been in storage for any extended period of time, it’s smart (and confidence-inspiring) to have a rigger put it through its paces. Get a thorough inspection of all the nylon, the harness and the container, as well as the reserve repack that’s surely due. When it comes back, you’ll know that it’s airworthy (or you can get your hands on something that is).
    4. Recognize your “aliefs” (and how to handle them).
    Coined by philosopher Tamar Gendler, an “alief” is another form of belief, but it’s not the same thing. We hold beliefs in response to what things are. An alief is a response to how things seem. Knowing and feeling that difference on a recurrency jump can bring you a lot of relief. Here’s how it works.
    As a skydiver, you have probably put in plenty of hours packing, gear checking, loading into a plane, exiting a plane, freefalling, flying your canopy and landing. With enough repetition, your brain has stored all these behaviors and recognizes them. On a conscious level, you believe yourself to be perfectly capable of performing the actions of a skydive. However, when you come back after a long hiatus, alief rears its ugly head.
    When you believe you can make a skydive but your body has become unaccustomed to the physical sensations of skydiving, you have an alief. The mental state of alief is a primal form of fear that underlies a moment you know you are safe in your head but your body's not on the same page (i.e. standing on a pane of rock-solid, clear glass, hundreds of feet over a canyon floor).
    Alief is a funny thing: it’s what makes people refuse to drink soup from a factory-fresh bedpan, eat fudge that looks like poop, or pull the trigger of an empty gun with the barrel against their head. It might also keep you from getting on the plane because damnit it just feels wrong.
    If you understand what you’re experiencing, though -- it might not. Let me be the first to high-five you back into the fold, friend.

    By nettenette, in General,

    Employee Development: The Often Ignored, Yet Very Important Aspect of Training

    Image by DeltaBravoAs spring draws near it is time once again to start thinking about the summer jumping season. Most drop zones will start to organize their safety day activities, gear will be inspected, and repacks scheduled. However, what many of us forget to do is spending some time developing our coaches and instructors after all, professional skills can be forgotten during the winter months just as easily as safety rules and regulations.
    For many drop zones, instructional development stops after the candidate’s progression card is signed off and the certification is issued. What we fail to realize is that instructional skills are perishable and everyone can benefit from annual employee development training. What I would like to discuss here are some methods the average drop zone can use to develop their instructors. Understandably not all of these are possible at every drop zone, and individual drop zones may have to modify these methods to fit into their procedures, but these are simple and can be done with little imposition on the drop zone. Before I talk about training techniques I would like to discuss certification and training records.
    I am not about to suggest that drop zones start massive files on their people, but the drop zone owner is an employer and even though most of the employees are classified as independent contractors, the DZO/DZM should have a basic training folder for each instructor. Some things that might be useful to include would be copy of class 3 medical certificates for tandem instructors, copies of CPR/First Aid certification cards, awards, and even the latest logbook entry once a year (I’ll discuss the last two more later on). Although none of these items fall into the privacy act, the DZO/DZM should still keep the files locked up and they should only contain the document copies, never the originals. This will prevent the information from being passed around or discussed publicly. Now that we have the staff, and their records are in order, how are we going to mold them?
    To renew an instructor certification, the individual must attend an instructor’s seminar. The majority of the time that seminar is the annual safety day, but instructors need something more. I have heard many DZOs/DZMs make the comment that the requirements to become a certified instructor should be made more stringent. I even heard one person advocate that a coach should have a minimum of 500 jumps. Although that sounds great in theory, logistically it is almost impossible. Instead of just forgetting about instructors and coaches after they have become certified, get them all together once a year. Pick one of them to give the ground portion of the First Jump Course while all the other instructors are the students. This will allow for all of the instructors to provide constructive feedback to each other and it will give the instructors a chance to relearn something they may have forgotten. One thing that is frustrating for a new student is when one instructor says, “Remember? In class you were taught to….” When in fact that was something the other instructor forgot to teach in class. By holding annual employee development training not only will the instructors benefit, but so will the students.
    Free Fall Drills
    Another technique is to practice free fall drills. It happens to all of us. We, as humans, can get sloppy with our techniques overtime. Two instructors or coaches jumping together would be in a position to debrief each other. This can be done as a fun jump, but as long as it is not a free fly jump or a “zoo” dive. After all, we are not free flying with first jump students and they are jumping exact dive plans. I do want to stress at this point that instructors must help each other out. If it is in the plan for one person to act like a first jump student, then act like one, but let’s be honest, how many first jump students actually put their helmet on backwards and start playing with the aircraft controls as soon as they get in the plane? Although I’m sure it does happen on occasion, not to the extent that I see people acting it out when teaching new instructors. Discuss with each other what you have seen over the past year, but don’t make the training so unrealistic that it is ineffective.
    Have an instructor day at the wind tunnel. Since wind tunnels are beginning to spring up in more places take advantage of it. Video the time in the tunnel and spend some time doing dirt drills working on areas that need improvement.
    Emergency Training
    Many DZs will invite the local rescue squad out on safety day and there are others that don’t like to do this because they do not want to scare the new jumpers. I can understand both sides of this, but it doesn’t take away from the fact that this is a dangerous sport. It is a good idea for all instructors to have basic first responder training specific to the types of injuries that could be experienced at the DZ. Subjects such as C-Spine immobilization, when to move an injured person and when not to should be taught to all instructors. What about the injured person’s helmet? Should it be left on or taken off? How do you safely remove an injured person from the swoop pond? When the call is placed into 911, what information is the most helpful? Does the staff know the address to give the 911 operator (that is a good thing to type up and put by the phone, by the way). This brings us back to the training folder.
    One of the things that would be a good idea to keep in the folder would be copies of awards and maybe even a copy of a recent logbook entry. If there is ever an accident or fatality at the DZ, the DZO/DZM will have to deal with the media. By having key information handy, the DZO/DZM will be able to make a quick and informative statement to the press if needed. For example, if someone were to get hurt during a tandem jump, the DZO could say, “This is a very unfortunate accident and we are looking into the cause right now. The instructor is highly experienced and has over 10,000 jumps, 9,000 of them being tandem, and just two months ago was awarded the USPA badge for 50 hours of free fall.” Many people don’t like talking to the press, and that is the subject for another article, but the fact remains; by just saying no comment you leave the uneducated alone to make up their own answers based on hearsay, rumors, and their own fears.
    As you can see, there are various ways for a drop zone to develop their instructors. Although not every way is possible, nor has every possible way been covered, we must remember that drop zones are businesses, instructors are employees, and once in a while, employees need refresher training too.
    Corey Miller C-38834
    Corey has a Master’s Degree in Aeronautical Science, specializing in Human Factors and Education.
    He has over 30 years of experience in both aerospace and military aviation.

    He is currently the Quality and Safety Manager for the ATM Program in Kabul Afghanistan but he calls the Oklahoma Skydiving Center his home.

    By coreyangel, in General,

    Hearing Safety For Skydivers: It’s A Thing

    What Skydivers Don’t Know About The Holes in the Sides of Their Heads

    Image by Lukasz SzymanskiThere are plenty of things in this life that you don’t want to hear. I know.
    Your girlfriend telling you she’s leaving you for her co-worker who buys roses instead of jump tickets. The wind tunnel peanut gallery tittering at your epic layout biff. The dude at the bonfire yammering on about his siiiiiick proxy flight in his brand-new sponsored Air Mattress 4.
    But what if you never got to hear anything at all anymore? And what if it was your fault?
    If you want to keep the good sounds coming in to your skyward-tilting brain, you’d better take some responsibility. There are probably some things you don’t know about the holes alongside your head, after all.
    1. Hearing loss is forever.
    Once you’ve damaged the lining of your inner ears, there’s nothing that can be done to bring it back. There’s no medication to bring your old ears back -- nor is there a surgery that sets things straight.
    Hearing loss that’s attributable to skydiving happens because of damage to the cilia of the inner ear. (Cilia are the tiny, hair-like cells that vibrate with the pressure of sound waves and tell the brain about it.) Too much exposure to those waves wears them right out. Once they can’t wiggle anymore, it’s over. They don’t bounce back.
    2. You might go crazy, too.
    Alongside general hearing loss, you might get a bonus symptom: tinnitus. If the cilia are bent or broken due to excessive sound exposure, they can dribble out random electrical impulses to your brain, causing you to hear sound where none exists. Basically, this results in a constant ring/roar/buzz/hiss/squeal that lives inside your head 24/7. If that sounds like hell, you’re absolutely right.
    3. It’s louder up there than you think.
    Decibel levels are not linear; they’re logarithmic. Linear measures are measured with addition and subtraction (for example: four miles is twice as long as two miles). Logarithmic measures ratchet up by factors of ten. This means that every increase of 10 on the decibel scale represents a 10-fold increase in the intensity of the sound it measures. Noise that clocks in at 20dB is 10 times louder than a sound of 10dB. 30dB? 100 times louder...so look differently at decibel measures than you do at the numbers in your bank account.
    The noise we’re subjected to on the ride up hovers over 90dB -- which government standards decree is only healthy for around seven and a half minutes. We’re in the tin can for 20-30. You do the math.
    4. Monotony is worse than variety.
    I used to produce music videos for a living (which is less fun than you’d think, but that’s another, boozy story). The production team was always required to provide the crew and talent with earplugs; if the production assistant forgot them, it was crucifixion time. That’s because OSHA, the US Occupational Safety and Health Administration, enforces requirements limiting workers’ exposure to a time-weighted average noise level of anything over 85 dB.
    As skydivers, we don’t have to listen to that same damn godawful excuse for a song over and over (thank god), but we’re actually exposed to something that’s actually worse for our health than boy bands: level monotony. A long exposure to a same-pitch drone -- such as engine noise -- is more damaging than sounds that change in pitch, like loud music. The droning sound wears away at the cilia with the same sound waves, like waves crashing on the same part of a beach over and over in the same way.
    5. You can plug your holes.
    Many skydivers wear earplugs from gear-up to landing. Some take them out for freefall; others take them out for the canopy ride. Figure out what works for you and allows you to reliably receive information from your audible. It takes some discipline (or self-tricksiness) to remember, but it will help you in the long run. Try keeping a pair taped to your altimeter to help you remember to put them in.
    Helmets with padding over the ears are less effective than earplugs, but they can still help.
    6. You don’t need expensive earplugs to skydive.
    The drugstore cheapies will do. When you place them, make sure they’re snug -- but that you can still feel them move around when you slide your jaw around (so you can equalize pressure, if necessary).
    7. You can still pretend you can’t hear.
    When Siiiiick Wingsuit Proxy Guy looks at you, ever hopeful for adulation, you can still give him back a confused “huh?” and wander off.
    Better yet: take your earplugs to the bonfire.

    By nettenette, in General,

    Is Your Rig Freefly-Friendly or Preemie-Prone

    How to Set Yourself Up For Success

    Image by Joel StricklandIt’s time. You’re ready.
    You’re going to point your belly button away from the ground when you fall out of a plane. YES.
    You’re gonna point it at the horizon. You’re going to point it at other people. You’re going to sit around and look at it while you slide backward. You’re going to take your belly button on an amazing adventure.
    But wait: is your container ready to join you on this journey?
    The discipline you’re about to enter -- freeflying -- makes more demands of your skydiving rig than belly flying does. Now that you’re going to start moving around at a full range of angles in the relative wind, you need freefly-friendly equipment.
    But what is a freefly-friendly skydiving rig?
    The simple answer is that it’s a skydiving container, with all of its flapping bits under control, that fits close to your body. To get a little more specific, we’ll look at a few examples of non-freefly-friendly rigs -- and we’ll see how to get them fixed.
    The “Reclining Chair”
    What’s the difference between making a great skydive and hanging out in a poolside sun lounger?
    Uh...everything.
    If your leg straps are slippy, your sitfly might end up looking like a lounge-fly -- and the resultant harness ride-up might put your chest strap into your throat. SO importantly, this look is also humorously unflattering in photos and videos.
    This might be the easiest issue to fix -- it could be a simple issue of improper strap adjustment. Before you send your kit in for surgery, see your S&TA;, rigger or instructor to check your current gear-up method and adjust accordingly. If it’s truly an issue of fit, your rigger can amend your harness, leg pads and leg straps accordingly -- and add one of those fetching little butt-bungees to keep your leg straps managed.
    The “Incredible Floating Container”
    If the laterals on your rig are too long or the leg straps are too loose, you’re going to have one of these -- a container that floats away from your freefallin’ body while air rushes in to separate the two of you.
    The fixes for the Incredible Floating Container are similar to the Reclining Chair -- first, check with an expert to make sure you’re kitting up correctly; then, if the problem persists, send it to the loft.
    The “Flippy Floppy Flapper”
    Guess what? Your pin flaps -- and riser-cover flaps -- love to flap. They just love it. They’ll use any excuse to get out there and do their name proud.
    To keep the flaps under wraps, you’ll need to look closely at the condition of each component. Make sure the stiffeners aren’t broken, warped or loose. Check for weak Velcro and/or magnetic closures. If you find something, don’t despair: Your rigger can revitalize wiggly tuck tabs, replace ragged-out Velcro, install (or replace) magnets and/or repack your reserve to adjust where its bulk places pressure on the system.
    The “Premature Popper”
    If your BOC doesn’t hug your pilot chute snugly enough, the multi-orientational pressures of freeflying make it much more likely that said pilot chute is going to make an early escape. Even if you’ve gone ahead and bought yourself one of those fancy low-profile freefly puds, that’s not going to save you if your BOC is loose, holey or inelastic. Note: if you’ve recently downsized in addition to switching up your discipline, be extra careful -- the BOC system relies on a snug, correctly-fitting main in the tray.
    Another pop-preventer: maintaining a frayless closing loop of the proper length.
    The “Put Me In, Coach”
    The Put Me In, Coach is another variation on the Premature Popper. It’s an even less-fun one: an instantaneous reserve ride without the screamy good time of a malfunctioning main. It happens when the Velcro on your handles is weak, or when you bumble into a limb or foot that grabs your D-ring.
    Make sure that the Velcro on your handles is strong and mated completely on both sides. It should take a moderate tug to separate the handle from its cozy home. Also: it’s not necessary to replace your D-ring with a pillow when you transition to freefly, but there’s a reason it’s so commonly done: that capital D is a big, shiny, shoe-sized liability.
    The “Velveteen Rabbit”
    If your rigger tells you that your rig is impossible to freeflyify, you may be the soon-to-be-ex owner of a Velveteen Rabbit rig. Don’t be too sad: it has probably been very loved for very many years, and it’s ready for retirement. Give it a viking funeral if you want, but don’t insist on flying it -- let it go. Making the hard choice to get rid of it might just save you -- and your wandering belly button -- a lot of unnecessary misery.

    By nettenette, in General,

    Propeller Safety For Skydivers Who Want To Live

    How Not To Become Dog Food Like That Indiana Jones Guy
    Image by Lukasz SzymanskiRemember that scene in Raiders of the Lost Ark? Indiana Jones is on an active airfield. He’s duking it out with a bald, mustachioed, wall-of-meat Nazi, and he’s kinda losing. Finally, he manages to distract the dude with his puny, tickly little punches until a propeller can chop his shiny evilness into dog food.
    And we cheer, and we laugh. Because ha! That guy was so stupid, he didn’t even see that propeller. Hilarious.
    Well, my friends -- we could all easily be that bald, mustachioed, wall-of-meat Nazi if we’re not careful.
    We’re around propellers all the time, after all. We’re accustomed to hearing and feeling them -- so much so that they’re almost invisible. Statistically, we’re in their immediate presence enough for the risk to be proportionately higher than it is for someone who’s rarely on an active airfield. So: here’s your game plan.
    Always sneak up on fixed-wing aircraft from behind.
    Props are located in on the fronts of fixed-wing aircraft -- either on the nose or on the fronts of the wings themselves -- so always approach a fixed-wing aircraft from well behind the wing. Teach yourself to do this every time, whether or not the plane is running. This will lessen the chance of you bumbling into the “fool processor” with a boogie beer in-hand.
    Always stare helicopters in the face. (Kinda.)
    Helicopters don’t like to be snuck-up-on. Think about it like you’re establishing dominance -- always approach helicopters from the side-front, where the pilot can see you. (The real reason for this is the danger posed by the rear rotor, but -- if you think about it -- helicopters kinda have faces you can stare down.) The rule of thumb is to stay in front of the boarding door, never behind it, and not directly in front of the helicopter where it tips during takeoff.
    Never chat with the pilot from outside the plane.
    Have manifest radio them with information, or -- if you must -- do the annoying half-gesture, half-shout thing inside the cabin. They probably don’t want to talk to you, anyway.
    Never touch a propeller unless you’re filling out a timecard to do it.
    Touching a propeller is like sticking your hand into a beehive. You may or may not get stung, but it’s an inarguably dumb idea. Even if the plane is tucked in for the night, it’s not okay to saunter up to a propeller and stroke, push, spin, crank, pull, lean, poke, lick or fistbump it. They’re heavy, sharp and kinda unpredictable, especially if you’ve been drinking (which you probably have been). Just leave it alone.
    Don’t take the shortcut.
    Is the shortest distance from the LZ to the hangar a straight shot through the loading zone (or any other aircraft operating area)? Do the right thing and walk around it. If you start cutting through the no-walk zone to save a couple of minutes, your fellow jumpers, students and spectators will likely follow suit. Restricted areas aren’t restricted unless it’s hot and you’re tired and you double-manifested, and you -- or someone who waddles along after you -- might pay a high price for the choice.
    Don’t wave your hands in the air like you just don’t care on a heli huck.
    ...until you’re either hanging from the helicopter strut, safely landed, or mugging for a freefall photo you’ll be embarrassed about later. There are spinning scimitars up there while you’re exiting, dude.
    Do your part to muddy up the gene pool.
    Especially on crowded weekend days, boogies, demo events and any other place that more than two mouthbreathers are gathered in the name of skydiving, you are going to witness stupidity. If you see one of the horde wandering cow-faced towards the propellers -- almost always, led by a GoPro or smartphone -- please grab them, divert them and ask them nicely not to procreate as you lead them gently behind the signs they’ve so blithely ignored.
    Maybe remind them of the bald, mustachioed, wall-of-meat Nazi guy who became dog food. (Everybody remembers that part.)

    By nettenette, in General,

    Highway To The Dangerzone

    Image by Lukasz SzymanskiHeadin' into twilight

    Spreadin' out her wings tonight

    She got you jumpin' off the deck

    And shovin' into overdrive...
    When I was learning to wingsuit, I sang it in my helmet. Every time.
    True story.
    Anyway.
    We can all agree that -- in addition to fun, of course -- skydiving is about pushing personal limits and building personal skillsets. We might also agree that skydiving is not necessarily about putting yourself directly in the path of actual mortal danger. There are inherent risks (and, if we’re being honest, we kinda love them), but we don’t love the idea of spending a couple of seasons healing up from a broken pelvis. Right? Right.
    There are multiple danger zones in skydiving, and it’s actually something of an autobahn -- in that there are no posted speed limits to reach them. To put it another way: most of them exist as much for brand-new skydivers as well as battle-worn multiple national champions. As a skydiver, it’s important to take these just as seriously, no matter how much of a n00b or dropzone hero you might be.
    Danger Zone 1: Meat-Based Collisions
    If you’re not flying on proper level with a group, you’re officially in Danger Zone 1. Flying on level keeps you out of the broken-bone zone if a member of the group suddenly corks or prematurely deploys. It keeps you out of pesky burbles, and it helps you keep meaningful awareness of where everybody else is flying around you. Invest in the coaching that will help you get (and stay) on level in formations of any kind.
    Also important: don’t just fly on level. Fly on-heading. Off-heading collisions hurt more than same-heading collisions. And never risk a 180-degree collision, even if you’re totally sure there’s nobody on your six -- it’s just not worth it.
    Danger Zone 2: Nylon-Based Collisions
    Once you’re dangling from your fabric, you have another danger zone to contend with: potentially crowded skies. According to the USPA, the most likely moments you’ll veer into oopsie territory here are:
    a) right after deployment and

    b) after entering the pattern.
    Instead of putting yourself in a place where you’re nimbly avoiding (or tragically not-avoiding) other jumpers at close quarters, be smart about it. Break off from other jumpers with room to spare. Create horizontal and vertical distance from everybody else in the sky (including the guy who’s almost certainly lurking behind you). Finally, keep your head on a swivel -- especially during that troublesome base-to-final bit, where everybody will be trying their best to kill you.
    Danger Zone 3: The Basement
    The basement is the biggest, baddest danger zone there is. It is, after all, where the ground lives. The ground is a monster that’s just waiting for you to stop paying attention because it wants to eat you.
    You’re going to enter this danger zone every time -- there’s no avoiding it. When you do enter it, you’re going to want to be under a canopy you’re controlling, over a landable bit of dirt, with a plan that accommodates as few obstacles as possible. This means that you must get that first canopy out at an altitude at which a second canopy is an option. It means that you must make sure that your equipment is maintained to prevent preemie brake releases. It means that you must either avoid or manage the hell out of low turns. And it means you’re going to need to know how to land that thing in water.
    The ground is waiting for you to make a mistake -- and it’s hungry.
    So, if you happen to be on the highway to the danger zone, try taking the next exit. Most people will indeed say hello to you, even if you never get it on the red line overload.
    I promise.

    By nettenette, in General,

    Top 10 Marketing Musts

    Image by Andrey VeselovDo you wish to increase profitability and grow your DZ? If so, read each of these 10 points closely.
    As a DZO, you are no doubt constantly bombarded by marketing companies trying to get you to spend your precious money. These marketing efforts generally result in little to no ROI. Focus on the objectives below, do them well and you will see growth.
    1. CUSTOMER EXPERIENCE
    No matter where your DZ shows up in a Google search, if the customer experience is not great, then no amount of marketing will matter. With platforms like Yelp, TripAdvisor and Google Reviews, the power of word of mouth has never been stronger. Delivering a great experience is not the same as executing a safe skydive. Identifying each individual customer point of interaction and making it a five star experience is the total package. Master this and watch your business grow. If you spend no money on marketing, get this right because many of your competitors are not.
    Tip: Survey your customers 24 hours* after their experience. The questions should revolve around each individual customer touch point. This is eye-opening as it will reveal the weak points of your business.
    * Do not survey immediately after the experience. Everyone is on a high and will give feedback that is skewed.
    2. SEO
    If you’re not on page one of a Google Search, then you’re invisible. The majority of your guests will search for your business via Google and few of them will be leaving the first results page. Educate yourself on what you need to do to ensure that you show up on page one, preferably near the top, in organic (unpaid) Google search. Be sure to find out the most commonly used search terms for skydiving in your region to identify what search words to focus on. This is hugely important to get right.
    Tip: Do not be fooled by SEO companies that promise to bring your page to number one. If an SEO company reaches out to you with this kind of guarantee, it should be a red flag.
    Tip: When seeing where you show up on a Google Search, don’t search for the exact name of your business. Search using terms like ‘skydiving’ ‘in’ (enter nearest big city).
    3. WEBSITE
    Your number one marketing tool will be your website. Don’t do a barter trade for jumps with someone that knows web design unless they are a) great at design and b) understand how to optimize the back end of the website for search. There are many functional websites in the skydiving industry that are not strategically optimized for search engine performance on the back end. Having a great looking website means absolutely nothing if the back end of the site is not correctly optimized for search. Many web design companies will simply create a site for you and then leave you to employ an SEO company to fill in the gaps. Utilize a design company that will create both a great design and optimize it for search.
    4. WOMM
    Word of Mouth Marketing (WOMM) is the most powerful form of marketing because we all trust recommendations from our friends and family along with review sites. IF you’ve identified all customer touch points and are receiving great scores in your customer surveys, then it’s time to implement a WOMM campaign. A WOMM campaign transforms customers into the marketing team for your business and best of all it’s free. Use lagniappe, leverage social media and implement a strategy that makes it very easy for your customers to write a review for your business.
    Tip: When implementing a WOMM strategy, it’s important you’re focused on the overall customer experience. If not, it’s highly possible you’ll receive negative reviews.
    5. E-MAIL MARKETING
    E-mail marketing is FAR FROM DEAD. However, effective email marketing requires much more than just sending an e-mail out every once in a while – there is a technique to creating a great e-mail marketing campaign. The growth of DropZone Marketing is due, in large part, to our e-mail newsletter campaign. Providing free marketing information (quality content) that is graphically pleasing and suited for mobile devices is a great marketing tool for any business as it keeps you in front of your customers and should help drive traffic to your website which helps with SEO.
    6. SOCIAL MEDIA
    Everyone knows that social media is a powerful medium, but few in the skydiving industry are leveraging it correctly. First, don’t try to be on all social channels. Select up to three channels and do well on each of the three. My recommendation is to focus on Google+, Facebook and Instagram for the skydiving industry. Focus on engagement rather than number of followers. If you’re not increasing your engagement with your followers, than your efforts may be a waste. Be consistent, be authentic, and really make an effort to engage with your audience.
    Tip 1: Google+ is relevant for SEO. Google will index its own networks when executing a search, so it’s worthy being there.
    Tip 2: Learn Tips for Mastering Facebook to better utilize this platform.
    Tip 3: Understand Instagram.
    7. GOOGLE ADWORDS
    One of the most powerful advertising tools is Google Adwords and is something I would recommend for every DZ. Do not waste money on billboards, TV or print advertising, you will not get a return on this investment. AdWords can be implemented by anyone, but if not managed correctly can become a waste of money. Presently, I’m seeing many DZ’s ads showing in markets hundreds and even thousands of miles away from a DZ’s region. AdWords should be monitored closely and keyword research should be done in order to create the correct marketing campaigns.
    8. CONTENT MARKETING
    Why does anyone create content on their websites? The answer is to drive traffic into their site, which increases the chance of a conversion (a booking for a skydive). Furthermore, increased site traffic can help your SEO efforts by increasing click rates into your site and hopefully, if your content is valuable, expanding your external link profile. Content marketing is a strategy that must be implemented by every business offering a product or service.
    Tip: Learn about River Pools and Spas and how they implemented content marketing to save their business during financial crisis.
    9. FACEBOOK ADVERTISING
    Being on Facebook is one thing, but if you want to see real results, you have to pay to play. Facebook is the gold standard of all the social media platforms that offer advertising because of focused targeting. Facebook ads can allow a DZ to focus pay per click ads (only pay if the ad is clicked) targeted towards a specific age demographic with specific interests. This is very powerful. Combine great Facebook content with an ad campaign and you will see your Facebook marketing campaign go to a higher level.
    10. EVENT PRESENCE
    Participate in highly attended, local events. Paying for a 10ft x 10ft booth is worth it. You won’t sell tandem skydives onsite, but it provides a great opportunity to capture e-mails to add to your valuable e-mail database for your e-mail marketing campaign. I encourage my clients to have a plan to expand their e-mail database continuously. Giving away a tandem skydive in order to collect hundreds of e-mail addresses is very valuable because it creates an opportunity to directly message people who are interested in your service. Go to lots of events!
    Tip: Look professional with your booths and have your pop-up tent branded. Spend the money to have a presentation that you would see at a trade show. If the approach is done half-ass by pulling things together, it’s not helping your brand. Do it right or don’t do it at all.

    By admin, in General,

    Advice For Your First Hop and Pop

    It’s sitting there, waiting for you in Category F of your USPA skydiver training: the hop ‘n’ pop.
    Eek.
    It’s no wonder that you’re biting your nails. (We’ve all been there.) It’ll be your first time deploying in soft, subterminal air. It’ll be your first time really trusting your stability out the door. And it’s probably going to be your first time opening that daunting clear plastic thingy. And you’ll be doing all this under the ungoggled gazes of everyone else in the plane -- who, you probably imagine, will have nothing better to do than inspect your technique.
    The USPA officially calls it the “clear-and-pull requirement,” in case you’ve been fruitlessly searching for “hop and pop” in the SIM. Your mission, should you choose to accept it (and, y’know, get that solo license) will be to exit from 5,500’ AGL, get stable and deploy within five seconds.
    Five seconds?!
    Don’t worry so much. Five seconds is much longer than you think it is. Ask any BASE jumper (or television commercial editor, or rodeo competitor): five seconds is kinda forever. Remember, too: you’re not reinventing the wheel. Your hop ‘n’ pop exit is no different from any other solo exit you’ve ever done, except that you’ll need to be stable and deploying within that aforementioned time constraint. If your licensed instructor didn’t think you ready and reliable, he/she wouldn’t be lining you up for it. So own it. And breathe.
    1. Start on the ground. Check out the winds aloft before you start the march to the plane, and review the spot with your instructor while you can both hear each other clearly.
    2. Don’t worry too much about the door. Other jumpers are paying less attention to you than you think they are. (Anyway, your instructor is going to be right there to help.)
    3. Don’t lose sight of the goal. From your window seat, you’ll be in a prime position to keep an eye on the landing area. Watch it as you climb, picking out the landmarks you usually use to find your way home. Once you have a lock on it, don’t let your nerves jiggle it out of your consciousness.
    4. Don’t forget your magical backpack. Get a pin check before that door opens. Check your handles and pilot chute, too.
    5. Take a moment to hang out. While the door is open and you’re waiting for that green light, put your goggles on and lean your head out a bit to check out the situation. You’re looking for the airport, of course; since you’ve been keeping an eye on the dropzone from your lofty perch, you’ll know just where to look. You’re also looking for positioning relative to the spot you discussed earlier with your instructor (winds aloft, remember?), and for other air traffic crowding “your” sky.
    6. Get ready for different feels. Your instructor will prep you on the ground for the correct hop-n-pop exit to leave this particular plane. When that green light comes on, take a deep, cleansing breath and do your relaxed best to nail it. The air will feel different -- “softer” -- than it usually does, which might catch you off-guard. You can expect to turn a little as you exit. Point your hips levelly at the ground and deploy that nylon within those five weirdly-long seconds.
    7. Bollocked it up? Pull anyway. If you don’t get this 5,500’ AGL exit right, you’re going to end up doing it all over again before you move on to its lower-altitude counterpart. It’s not the end of the world: unless, of course, you ride your oops too far down. Don’t launch right into kicking yourself if you fail -- that’s just going to make you more unstable. Accept your lot and pull by 3,500 feet AGL whether you’re stable or not.
    8. Expect your parachute to check out the scenery. Your canopy, when deployed subterminally, will open into the relative wind and “seek.” It may not open directly above you, as it usually does. Don’t get spooked and tense up.
    9. Give yourself a high five. Cross your fingers against the unlikely event of a low aircraft emergency that would test your newfound skills in the fun-free way. And buy the beer.

    By nettenette, in General,

    How Density Affects Your Destiny

    When Tiptoe Landings Disappear Into Thin Air
    When you come screaming in and tumble halfway down the landing area at a new dropzone, it’s unlikely that you would chalk your misery up to “pressure altitude corrected for nonstandard temperature and humidity.”
    Maybe, however, you should – and if you know a little more about how it works, maybe you won’t find yourself in that grass-stained position. It’s called density altitude, and the struggle is real.
    1. Remember the ball pit.
    You remember playing in the ball pit in the indoor playground, right? You’d take a running leap into the middle of the pit, diving into a big, forgiving pile of colorful plastic that cushioned your fall. If you took a running leap into a ball pit with just a few scattered balls rolling around at the bottom, you’d expect a different result.
    The sky is kinda like that.
    When we talk about air density, we’re referring to the number of air molecules in a given volume of space. High-density air has more molecules -- more balls. Low-density air has fewer.
    2. Respect the ball pit.
    Just like an empty ball pit doesn’t slow you down on your way to the floor, low-density air doesn’t slow down the wing as much as high-density air does. This changes the canopy’s flying dynamics, making the system fly faster – sometimes, much faster – than normal.
    As you might imagine from the term “density altitude,” altitude has a lot to do with the density of air. It’s inversely proportionate, so higher altitudes have lower density altitude – fewer air molecules in a given volume – than lower altitudes. This makes sea-level landings more docile than those at, say, Mile-Hi Skydiving in Denver or Skydive the Wasatch in Utah.
    3. Factor in the other variables.
    Altitude density is not simply another name for air density. It’s affected by a few more factors. Altitude density combines the effects of temperature, humidity and weather systems with altitude to measure the altitude at which your airfoil behaves as though it’s flying. If you travel for boogies, you may have experienced this in your skydiving career: with a few temperature and pressure changes, your canopy might behave as though it’s flying at Mile-Hi when you’re jumping in Moab.
    If you’re a little confused by that, you’re not alone.
    The key to understanding is to know that density altitude tells you where your canopy “thinks” it’s flying under standard temperature and pressure conditions, that highly evasive moment of total equilibrium. The “standard” comes from the fact that temperature and pressure decrease predictably as altitude increases. As such, a “standard” temperature and pressure can be assigned to any given spot on the altitude scale, dropping proportionally with altitude from the standard 15 degrees Celsius at sea level.
    Take a weather system through that same point, however, and you’ll need to start making some adjustments. a high-pressure area pushes more air density into the equation, and a low-pressure system does the opposite. Heat it up, and the molecules spread apart, lessening the pressure/density; cool it down, and the molecules snuggle in together, increasing the pressure/density.
    Humidity is a little more complicated, but super-interesting. When the weather is humid, we tend to describe the air as “heavy.” That description is utterly (and somewhat surprisingly) unscientific, as water vapor weighs almost half as much as dry air. When it’s humid, heavy dry-air molecules such as oxygen and nitrogen are replaced by much lighter water molecules, greatly decreasing the density of the air.
    4. Review the Cliff Notes.
    It’s easy to misunderstand (or misremember) the terminology. High density altitude means fast landings. Low density altitude means slower landings.
    Altitude and temperature are the factors that will deliver the most noticeable changes to the way your canopy flies. Humidity will affect your experience less. (Remember that – in this order – low, cold and dry equals slow, that high, hot and wet equals fast.)
    Consider upsizing to a more docile rental canopy if you’re making a big jump in density altitude (for example, from a coastal DZ to a high-mountain DZ).
    Higher density altitude? Your canopy will eat up more altitude in a turn and stall at a faster forward speed. Be ready.
    When you’re setting up a landing in a place with a significantly higher density altitude than you’re used to, give yourself plenty of room to land (and a bit of privacy for a PLF, if you care about such things). You won’t be able to just plop it down as you’re accustomed to, so focus on flying your canopy all the way through the flare and your almost-certainly-necessary run-out.

    By nettenette, in General,

    Not All Training is for Students: Recognizing and Preventing Groupthink in the Skydiving Community

    Image by Brian BucklandWhen we discuss training in the skydiving community we usually refer to training students or teaching experienced skydivers new techniques. However, we seldom discuss how to train our staff so they are safer and more effective. By grooming your staff you can make your drop zone more enjoyable for your customers and in turn, make your business more profitable. Today, I would like to discuss a psychological situation that can affect the staff as well as other skydivers. That situation is known as Groupthink.
    What is groupthink?
    Simply put, it is a condition that occurs when a closely cohesive group has a tendency to make bad decisions because the group pressure becomes so great, everyone starts to ignore moral judgments and sound decision making. Groups that are more susceptible to this phenomenon are tightly cohesive, have a similar background, and have a lack of clear rules for decision making. As for me, I cannot think of a more cohesive group of individuals with, similar backgrounds, than a group of skydiving professionals. Please don’t get me wrong, it is not a bad thing that we are a cohesive group of people. We just need to be able to recognize when our staff, or group, is beginning to fall into a groupthink mentality.
    So, what are the symptoms of groupthink?
    In 1972 a social psychologist named Irving Janis identified eight symptoms of groupthink. As you read through these I ask that you think to yourself about a time where you actually witnessed one or more of these at a drop zone.
    1. The feeling of invulnerability – Creates excessive optimism that encourages taking extreme risks.
    2. Collective rationalizations – Members ignore warnings and do not reconsider their assumptions.
    3. Beliefs in inherent morality – Members believe in the rightness of their cause and therefore ignore the ethical or moral consequences of their decisions.
    4. Stereotyped views of “outsiders”– Negative views of “enemy” make effective responses to conflict seem unnecessary.
    5. Direct pressure on dissenters – Members are under pressure not to express arguments against any of the group’s views.
    6. Self-censorship – Doubts and deviations from the perceived group consensus are not expressed.
    7. Illusion of unanimity – The majority’s view, and judgments, are believed to be unanimous.
    8. Self-appointed ‘mindguards’ – Members protect the group and the leader from information that is problematic or contradictory to the group’s cohesiveness, view, and/or decisions.
    I’m sure most people can relate to a few of these symptoms and to make it perfectly clear, just because you see one or two of these does not necessarily mean that a groupthink situation is going on… but then again it could. Since we know the symptoms, what can we do to prevent a groupthink situation, or to try to remedy the effects of a situation already happening?
    Let’s start by defining what we call a group. A group can be something small and organized like a team. It can be a little bit larger such as the staff of a DZ. Or it can be a group of people with a common cause such as free flyers or belly flyers. Now, let’s address the problem. One way to help prevent group think from setting in is to designate a member of the group as a devil’s advocate. This person will be the one to think outside the box and to ask the questions “what if” and “why”. The devil’s advocate should also suggest alternate plans or ways of doing things. It is important that the devil’s advocate does not just go through the motions, but makes meaningful suggestions and the group discusses them. This will keep everyone’s head focused on moral and safe decisions and not just out of habit dismiss all suggestions.
    Another preventive measure is for the leader to set aside an amount of time to survey warning signs. To define the leader, it can be a team coach, the DZO/DZM, but at a minimum it should be the S&TA.; This doesn’t have to be a big formal inspection, just a time to walk around the DZ so you can hear and see what people are doing and planning. In this case, someone will probably hear signs of groupthink before they see actions. Listen to what people are planning. Listen to what they are encouraging others to do. At the same time take note on how their words and actions are affecting others, especially the less experienced skydivers.
    Finally, for members of the group; you should all routinely talk to someone from outside the group that is trusted and has a valued opinion. These talks should be one-on-one and preferably not with the same person. This will give you a fresh point of view and help you to make the best decision, not necessarily the one that goes along with the group.
    By keeping an eye on each other not just by doing gear checks, but by letting people know when you start to observe behavior that could lead to unsafe practices, you can help make our sport safer. Let’s face it. Being a skydiver means taking calculated risks. We need to work together to keep the odds in our favor.

    By coreyangel, in General,

0