0

General

    The Skydiving Handbook - Chapter 2 (Exits)

    Imagine holding your arm out of a car window as you drive down the highway. The wind you feel is caused by your speed through the air rather than by weather. Skydivers call this apparent wind the relative wind, and it is the single most important element of the freefall environment. In fact, it is the only thing you have to work with in freefall, and from the moment of exit until your parachute opens you must think of yourself as a body pilot instead of a regular person, just as when you go swimming you have to leave your land habits behind. Your adventure in the relative wind begins at the moment of exit.
    There is nothing particularly complicated about exits and the techniques you use on your first freefall will be the same as those used by skydivers with thousands of jumps. Your exit makes or breaks the skydive, so we spend a lot of time practicing this part of the jump. A weak exit consumes valuable freefall time and puts you in a mental position of having to catch up, adding unwanted stress to your skydive. With a good exit you can get on with your learning and enjoyment at once, finishing the freefall tasks with plenty of time to spare. The two essentials of an exit are presentation and timing. Presentation refers to how you relate to the relative wind. Timing refers to your relationship with the other skydivers. Let's take a detailed look at these aspects of the exit.
    The body position we use to maintain a comfortable, neutral position on the wind (the equivalent of floating on water) is an arch. We'll learn more about body position soon, but for now you need to think simply about arching into the relative wind. This means that your hips are pushed forward into the wind, your arms and legs are spread out evenly and pulled back, and your chin is up, creating a smooth curve from head to toe. If you imagine lying face down in a shallow bowl with your arms and legs spread out evenly, you are thinking of an arch. In this position you will naturally face into the wind.
    To achieve a good exit, all you have to do is present your arch to the relative wind. Remember, we're on an airplane flying nearly one hundred miles per hour, so the relative wind is from the direction of flight. (When you see photos of skydivers they are usually presenting their arch towards the ground, but that's because they have fallen long enough to be going straight down so the relative wind comes straight up from the ground.) Once you are poised outside of the airplane, start your arch before you let go. Then it is a simple matter to open your hands, pivot into the wind, and you're flying! As you will soon learn, a relaxed arch is much more smooth, stable, and comfortable than a tense one so try not to think of yourself as falling off of an airplane. You're not; you're flying free. A mental image that might help would be learning to swim. You would be more relaxed and alert if you lowered yourself slowly down a ladder into warm water and let yourself float comfortably before letting go than if you jumped off a cliff into cold, dark surf. Think of the air as a friendly environment, slip into it smoothly as you climb out of the airplane, arch, take a deep breath, open your hands, and float off on the wind!
    You will note that I didn't say "push off." Until your parachute opens, your last contact with the world of solid objects is the airplane. If you push off, you will have some momentum that will tend to make you go over on your back, just as if you stood with your back to a pool and pushed off of something solid. Just arch and face the wind.
    As you leave the aircraft, the relative wind (arrow) is parallel to the ground. In a good arch with your head up, you should see only the airplane and sky rather than the ground during the first second or two of freefall.
    Losing forward speed and accelerating downward, the relative wind gradually shifts from parallel to the ground to perpendicular. This transition takes several seconds. You will not be facing the ground until about eight seconds after the exit.
    At no time do you look directly down at the ground. Even after the transition is over and you are falling straight down, in a good arch your head is up and your eyes are on the horizon.
    The aircraft's speed is about 100 miles an hour. When you leave, you lose some of that horizontal speed and actually slow down for the first few seconds. Then gravity takes over and you gradually accelerate to 110 miles per hour. That's why there is no sensation of sudden acceleration - you only gain ten miles per hour in ten seconds!
    Relax, arch, and face the wind is all you really need to do to achieve a stable exit. But remember that you are jumping with other people. For everyone to have a good exit, you also need group timing. Just as a band starts playing to a count, we'll start skydiving to a count. That count, used all over the country, is "ready, set, go!" It should be done with a smooth, even cadence. Because it's noisy outside an airplane, the count should be loud. Finally (think of a conductor with his baton giving a visual count to the orchestra) you, the conductor, need to give the other jumpers a visible count. We have you bring up your left knee on "set" and turn into the wind on go.
    Combining these two elements of presentation and timing will almost always result in a smooth exit. Leave out either one, and the exit may funnel, the term skydivers use to describe an unstable formation. Leave both out and a funnel is almost a certainty. But if that happens, don't panic. An arch will fix the problem.
    Incidentally, it doesn't affect your stability to dive out of the airplane. As long as you are presenting an arch to the relative wind, you will be stable. Unfortunately it takes most people a while to get used to the idea that the relative wind starts right outside the door. If you walk through an airplane door like you would a house door, you'll present your side or back to the wind and lose stability. In the water, walking doesn't work; you have to swim. Air is the same way - you have to fly through the door, not walk through.


    Test Yourself
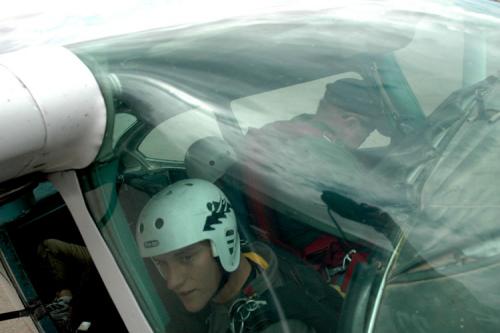
    1. Skydivers on the outside of an aircraft as they prepare to exit are called floaters. The ones inside the airplane who will dive through the door are called divers. Floaters are further divided into front, rear, and center, depending on their position in the door. On an ASP level one jump, the student is the center floater, the reserve side JM is front floater, and the main side JM is rear. Why is the front floater more likely to have a problem than the rear floater if he cannot hear or see the exit count given by the center floater?
    2. Novices diving out of an airplane frequently do a half roll and then recover stability facing the aircraft. What could cause this common problem?
    Proceed to Chapter 3 (Flying Your Body)

    By admin, in General,

    Jumping Away from the Normal Dropzone

    Note: This article refers to skydiving and regulations in the United States. Refer to your country's civil aviation regulations for how to do this safely and legally in your country.
    Disclaimer: The interpretations of the regulations referenced in this article are that of the authors.
    Abbreviations and acronyms:
    FAA: Federal Aviation Administration

    CFR: Code of Federal Regulations (new designation)

    FAR: Federal Aviation Regulations (old designation, still often used.)

    FSDO: Flight Standards District Office
    Important web pages and documents:

    FAA web site: www.faa.gov

    FAR 105, Parachute Operations. Can be found in Section 9 of the USPA
    Skydiver's Information Manual (SIM)

    Advisory Circular AC-105-2C, Sport Parachute Jumping. Can be found in Section 9 of the USPA Skydiver's Information Manual (SIM)

    FAA Aeronautical Information Manual (AIM)
    Why we need this information
    It seems like every skydiver eventually wants to skydive into an area or event that is not at a regular dropzone or skydiving center at an airport. And no wonder, because it is fun, exciting, and a challenge, plus the scenery is sometimes much better. Imagine jumping at your family reunion into a huge field out on your uncle's farm in the country, and bringing along some of your skydiving buddies. You can't get much better than that.
    But it does take a bit of preparation to do jumps like this safely and legally.
    Unfortunately, nearly every time a skydiver asks about how to go about jumping somewhere other than their normal dropzone, they will get a number of answers that are incorrect or incomplete.
    Why the confusion? Well, one reason is because the regulations associated with parachute jumping, FAR 105, changed in 2001. Many of us who have been skydiving a long time tend to remember the wording of FAR 105 before this change.
    Jumping into the various type of airspace
    For a detailed explanation of the airspace in the U.S, you can refer to official FAA airspace documents. There are also many tutorials on airspace, as pilots must learn about airspace classifications when learning to fly.
    Related Section: FAR 105.25, Parachute operations in designated airspace
    (a) No person may conduct a parachute operation, and no pilot in command of an aircraft may allow a parachute operation to be conducted from that aircraft—
    (1) Over or within a restricted area or prohibited area unless the controlling agency of the area concerned has authorized that parachute operation;
    (2) Within or into a Class A, B, C, D airspace area without, or in violation of the requirements of, an air traffic control authorization issued under this section;
    (3) Except as provided in paragraph (c) and (d) of this section, within or into Class E or G airspace area unless the air traffic control facility having jurisdiction over the airspace at the first intended exit altitude is notified of the parachute operation no earlier than 24 hours before or no later than 1 hour before the parachute operation begins.
    Paragraph 1 refers to two special types of airspace. It is unlikely that you will ever want or need to jump into that airspace unless you are with the military or with an exhibition skydiving team. It includes airspace around government and military buildings and installations.
    Paragraph 2 refers to airspace into which you must get authorization to jump. It includes controlled airspace up to, and above altitudes of Flight Level 180 (18,000 feet MSL) and above, airports with operating control towers and/or radar approach control. It is possible that you might want to jump into such areas and airports.
    Paragraph 3 refers to airspace that is the most likely type of airspace that you will encounter in rural areas or away from larger cities. "Giving notification of the parachute jump to Air Traffic Control" is the key information in this paragraph.
    Advance "notification" to Air Traffic Control is not required when jumping at a location in Class A, B, C, or D Airspace because an advance “authorization” is required from the respective controlling agency.
    The requirements for communication with Air Traffic Control during the jump are specified in FAR 105.13, Radio equipment and use requirements.

    NOTAMs
    A Notice to Airmen (NOTAM) is defined as "time-critical aeronautical information, which is of either a temporary nature or not sufficiently known in advance to permit publication on aeronautical charts or in other operational publications."
    NOTAMs are filed (by phone or online) with an FAA "Flight Service Station". A Flight Service Station is an FAA briefing facility that provides information and services to pilots, for example, providing information related to flight planning. If a parachute jump is planned at a location where jumping is not normally done, filing a NOTAM for this activity will increase the safety of flight in the vicinity, because pilots that look up the NOTAMS during their flight planning will know about the planned jumping.
    NOTAMS for parachute jumping are not normally required, but are a good idea, especially if you will be making a number of jumps on a particular day. Filing a NOTAM (with a Flight Service Station) is not sufficient for "giving notification" as described in FAR 105.25 paragraph 3. Notification needs to be made with the Air Traffic Control facility of jurisdiction, in most cases an Approach Control Facility or an Air Traffic Control Center. Although the phone numbers for these facilities can be found in various locations they can usually be obtained by contacting the Flight Service Station (FSS) at 800-WX-BRIEF (800-992-7433).
    Here is where the confusion lies
    The following is from the 1997 version of FAR 105. Sec. 105.23, Jumps in or into other airspace
    (a) No person may make a parachute jump, and no pilot in command of an aircraft may allow a parachute jump to be made from that aircraft, in or into airspace unless the nearest FAA air traffic control facility or FAA flight service station was notified of that jump at least 1 hour before the jump is to be made, but not more than 24 hours before the jumping is to be completed, and the notice contained the information prescribed in Sec. 105.25(a).
    Notice that "notification" is required, but that back then this notification could have been given to the nearest Air Traffic Control facility or to a Flight Service Station. Most of the time the notification was given to Flight Service, because pilots were used to contacting Flight Service while planning flights, and because contacting flight service by phone required only remembering a single nationwide phone number. Contacting the "nearest" air traffic control facility or the facility with "jurisdiction" required more research.
    It is likely that back then, when notification was given to Flight Service about a parachute jump, that Flight Service personnel simply referred to the "notification" as a NOTAM, thereby perpetuating the misconception that a NOTAM was being filed, or even that it was required.

    Jumping at another airport (where skydiving is not normally done)
    Related regulation: FAR 105.23, Parachute operations over or onto airports
    (b) For airports without an operating control tower, prior approval has been obtained from the management of the airport to conduct parachute operations over or on that airport.
    There are additional requirements for jumping at an airport with a control tower, but paragraph (b) is the important part for when you want to make a jump at a small airport. You must have the approval of airport management. The FAA changed it from “manager” to “management” at some point in the past, presumably, to require permission from the Airport Board, City Authority, etc, to preclude a single “Manager” from giving permission where a larger body actually has control. Certainly, most private airports would only have a “manager” but proceed with caution when receiving approval from an “airport manager” at a public airport. For a number of reasons it would be much better to have written approval from the actual airport management.
    Advance "notification" to Air Traffic Control is not required when jumping at an airport in Class A, B, C, or D Airspace because an advance “authorization” is required from the respective controlling agency.
    The requirements for communication with Air Traffic Control during the jump are specified in FAR 105.13, Radio equipment and use requirements.
    Demo (Exhibition) Jumps
    Related regulation: FAR 105.21, Parachute operations over or into a congested area or an open-air assembly of persons
    (a) No person may conduct a parachute operation, and no pilot in command of an aircraft may allow a parachute operation to be conducted from that aircraft, over or into a congested area of a city, town, or settlement, or an open-air assembly of persons unless a certificate of authorization for that parachute operation has been issued under this section.
    What constitutes a "congested area" or an "open-air assembly"? Well, now we are getting into the interpretation of the regulations. Parts of Advisory Circular AC-105 were written specifically to cover these questions, but there is still a bit of interpretation to do, and the FAA may interpret a particular landing area differently that you might.
    If you are jumping into an event like an air show, much of this documentation may already have been taken care of by the organizers, who may have simply added "skydivers" to the show's performers, but you would of course need to check with the organizers to be sure.
    The FAA will usually require that a "Certificate of Waiver or Authorization" (COA) be obtained for most exhibition jumps of this type, which will require that a FAA Form 7711-2, "Application for Certificate of Waiver or Authorization", be submitted. This application may need to be submitted in advance of the planned parachute jump(s), because the FAA has ten days in which to respond to the request.
    The Certification of Waiver or Authorization that you receive in response to your request will specify the conditions and limitations of the jump. These conditions may include the requirements that you give notification to Air Traffic Control of the jump and/or file a NOTAM. Either or both may be specified. Note: the completed, original COA is usually required to be on board the aircraft at the time of jump operations.
    The requirements for communication with Air Traffic Control during the jump will exist as usual, plus, Air Traffic Control radio frequencies and other procedures may be specified in detail in the COA.
    Note: This section of this article is not intended as a tutorial on organizing exhibition jumps, but is included mainly to compare the regulations associated with exhibition jumps with those of jumping into other areas. The best source of information about exhibition jumps would be a jumper that has organized exhibition jumps in your particular FAA region and has worked with that region's FSDO. The USPA Skydivers Information Manual (SIM) also contains a section "Exhibition Jumping and Rating".
    Jumping at the family reunion
    So the bottom line question becomes, “How do I legally jump into my family reunion on my uncle's farm out in the country?”
    First of all, make sure that everyone jumping into the area is qualified and skilled enough to safely do so.
    If you are a USPA member, please realize that you must still follow the BSR’s whether you are jumping at a USPA Group Member DZ, a non-Group Member DZ, or into your uncle’s farm. The BSR’s apply to each individual member regardless of where they make the jump, for example, the landing area requirements.
    Make sure it is really “out in the country” (Class E or G airspace.) A pilot will help you determine that if you do not know how to read aviation maps. If it is close to a town you will need to determine whether it is really an “uncongested “ area, and this includes both the landing area on the farm, and the place you will be exiting. This means not over a subdivision and not over a school. The FAA will always err on the conservative side when determining if an area is congested, so you will want to be conservative too. Advisory Circular AC-105 includes guidance on this.
    It is suggested that you not contact your local FSDO. Simply providing the required "notification" should be sufficient, assuming that the airspace is Class E or G.
    Provide notification as required by FAR 105.25. This notification will usually be to a “Center” or Approach Control facility. As the facility may not be one that routinely receives such notification, it may be helpful to have a copy of FAR 105.25 in hand so that you can read it to the individual if they are not familiar with it. Always be polite but remember that you are giving a notification, not asking for permission.
    Make sure the pilot knows to communicate as required by FAR 105.13.
    Look for other air traffic as usual while spotting.
    Jump and have fun!

    By admin, in General,

    How To Be A Good Passenger in a Jump Plane

    How to be a Good Passenger in a Jump Plane
    Note: Original text from an article written for April 1992 Parachutist. Since 1992 our fleet of jump airplanes has changed signifigantly. There are few planes like DC3's in use now which often have "loaders", and many pilots are now spotting airplanes with the help of the navigation equipment that is now more advanced. Please make adjustments for the changing technology. G.P. 2003
    This article is written in two parts covering some of the most typical jump plane situations you will experience. The first part will be of interest to new jumpers who are learning to spot and to jumpmaster themselves and who are jumping from small airplanes. The second part is for intermediate jumpers from a small drop zone who may soon consider visiting another drop zone or going to a skydiving event that has larger airplanes. It will also be good review for experienced jumpers who do not jump large airplanes very often and forget how to be a good passenger.
    Small Airplanes:
    Loading-
     
    Loading a small airplane will become different as you gain more experience in skydiving. You will be doing different exits than you did as a student and will need to be arranged differently in the airplane. First of all, take the advice of more experienced jumpers as to the most efficient place to be for your skydive. If you are in an airplane with students, follow the seating arrangement that the instructor specifies. Be careful as you get near the airplane if the engine is still running. The door of small airplanes is always near the prop and the airplane owner will not appreciate you bending the prop by backing into it. :) The least noisy time during your flight is during loading and is the best time to tell the pilot how high you are going and in what direction you want the jump run. The pilot needs to tell Air Traffic Control how high the plane is going and hopes you won't change your mind too many times on the way up. Tell the pilot if you will being doing Canopy Relative Work or will be opening high for some reason. Pilots don't want to do surprise CRW with canopies they don't know are up that high. The position of the seat belts in the airplane will usually dictate exactly where you will be sitting. If this position is uncomfortable just remember that the Federal Aviation Regulations state only that you must wear them only while the aircraft is in motion on the ground and during takeoff and landing. Make sure that everyone doesn't sit too far to the rear and make the plane out of balance. The pilot would not have much fun flying it in this condition. Ask the pilot for advice on loading if you do not know.
    Jump Run-
    When you know it is almost time to jump you will usually be getting to your knees and making final adjustments to your gear. In getting up, try not to pull yourself up by the pilot's rig or pull any important items off the plane in doing so. Check for any part of your gear that may have been moved while getting up in a crowded airplane, especially your hand deploy pilot chute. There should be no need to say very much to a pilot at this point if they were sufficiently briefed on the ground, but be alert and understanding about anything the pilot may say to you. Your jump may be delayed while waiting for another jump plane or from instructions from Air Traffic Control, and those instructions will be hard to hear if you are yelling about why you aren't on jump run yet.
    Spotting-
    You will always need to wait for a signal from the pilot before opening the door. If the airspeed is too high the door will receive excessive stress and might even come off. The airplane's owner would be very unhappy with you as well as the home owner whose roof the door lands on. Giving corrections to the pilot on direction of flight can be verbal by saying "5 RIGHT" or "5 LEFT", or by simply pointing in the direction to turn. Most pilots will correct about 5 degrees in the direction you indicate and then level out and wait for further corrections. If you point, make sure your hand is up where the pilot can see it. Try to keep the corrections to a minimum because the pilot probably lined you up on jump run pretty close anyway. If you correct back and forth too many times even the pilot will get lost. :) Most pilots will cut back on the power when you get out, but it is a good idea to call for a "CUT" anyway before exiting.
    Exiting-
    Try to exit the airplane and get into your position as quickly as possible so the pilot doesn't have to struggle to keep the airplane right side up. However, be careful not to bump things on the way out like your pilot chute. It is also not wise to lean on the pilot too much just to get that perfect exit position. If you push too hard on the pilot or lean on the yoke of the airplane you will have a very interesting sideways exit.
    Large Airplanes:
     
    Loading-
     
    Loading a large plane at a new drop zone or at a large skydiving event will likely be an exciting event for you. There may be several large groups on the plane and you may get the feeling of being herded into the airplane. This is just a sense of urgency on the part of the crew, after all, these larger airplanes are more expensive to operate and must be kept busy in order to make money. Try to do your share by paying attention and helping move things along.

    Although the props on larger planes are further from the door than on smaller planes there may be more of them and they may be on the sides on the plane where you are not used to avoiding them, so be careful. Many of the largest airplanes will have a crewmember called a "Loader" that is in charge of loading the airplane and determining the exit order of all the groups getting into the plane. The loader is a buffer between the jumpers and the pilot and has to keep the jumpers in line so the pilot can concentrate on more important things like flying. Pay attention to the loader because they will be able to load you as quickly and efficiently as possible. When seating yourself in the airplane you can note how the people ahead of you are seated and follow suit. Seating is usually very cozy in these airplanes even though it looks roomy when you first get in, so sit close. Somes planes have loading lines painted or taped across a rearward section of the airplane and all of the jumpers must be forward of this line. If you see that not everyone is going to fit in this area, you might as well scoot back and tighten it up before you get too comfortable because the loader is going to be mean and make you crowd together anyway. Seat belts will be available and you might have to look carefully to determine which one you should be using.
    After everyone is seated and you are taxiing out to the runway, take a look around the airplane. There may be a sign somewhere describing the plane's emergency procedures in case of engine failure. You will want to be familiar with these procedures and really follow them if the real thing happens rather than just getting up and running around all excited. Some planes might also have posted a diagram of the drop zone and the jump run for the day. This is important information for the person spotting and helpful to anyone jumping at an unfamiliar airport.
    Jump Run-
    When it is time to jump you will be getting up to make final adjustments to your gear. Check for any part of your gear that may have been moved while getting up in a crowded airplane. There may be room in a large airplane to have someone give you a pin check. Even if it is possible to completely stand up in the airplane, don't feel like you must do this until time for your group to line up and exit. This will help reduce crowding in the plane. All adjustments to your gear can be made while kneeling anyway. Try to continue to keep forward of the loading line by not spreading out too much. The airplane may climb better like this and you might just get some extra altitude. Try keeping the noise to a minimum in case you get instructions from the loader or spotter.
    Spotting-
    On the larger planes the loader may also do the spotting for the whole load. This is another reason you should pay attention to and be nice to the loader, so you will make it back to the airport. Another possibility is that the pilot may be spotting from up front by using instruments and giving the exit command directly or by relaying the command to the loader. If the load is being spotted by looking out the door, the corrections must be relayed to the pilot who possibly cannot see the spotter. Some airplanes have pushbutton switches on a panel that turn on lights that the pilot can see, or the loader may have a headset to talk to the pilot. If you are spotting you will need to learn how these work ahead of time. If the plane does not use one of these methods, the corrections must be relayed to the pilot by someone sitting near the pilot that can see the spotter. For this to work there must be a clear line of sight up to the cockpit. Do your part by keeping the isle clear.
    Exiting-
    Wait until the loader or spotter indicates that it is time for your group to line up and then do it quickly. If you are not in the first group, continue to stay forward until it is time for you to line up. Give the group ahead of you 5 to 10 seconds before your group exits, depending on the winds aloft, but don't be slower than that. The group behind you is using the same spot as you and larger airplanes are flying faster on jump run than smaller ones. You will know when you are taking too long to exit because the group behind you will begin objecting to your excessive delay. Everyone wants to make it back to the airport.
    Summary:
    This article has outlined the most common procedures that you will be following when jumping out of most airplanes. Hopefully it has given you some basics on how to be a good passenger on any aircraft whether it be an airplane, a helicopter, or a hot air balloon. If you ever have any questions about the procedures for a particular aircraft, just ask the pilot. They will be glad to help.

    By peek, in General,

    Thermals 101: A Paraglider’s Perspective

    I am much more experienced in paragliding than skydiving and in paragliding we really respect the thermals as they are what we need to fly – but at the same time can cause all sorts of havoc close to the ground.
    Thermals are bubbles of rising air. They might extend all the way from the ground to a cloud or they might be just a bubble. I have been told to study a 1970 hippie lava light, as the rising lava in the light is nothing more than a thermal.
    If a thermal bubble leaves the ground and rushes up in a column of air, there is a void that must be filled - with the same amount of air going down or sideways outside the thermal as is going up in the thermal. Again, think of the lava light – as the lava rises, the oil fills the void where the lava was. In other words, if you land near a thermal that is bursting, you can be in the middle of a gust of wind that is going down or sideways filling the area under the thermal. I have been in a thermal that went up at 1,400 feet per minute – which is faster than a lot of jump planes. Somewhere there must have been air going down 1,400 feet per minute to fill the void.
    If you see a wind indicator (wind sock) quickly change directions, you might have just witnessed a thermal near by. On a quiet day in a field of tall grass you can hear them leave too, just a quick rustle of the grass is all you hear.
    A lot of times thermals are the most aggressive close to the ground as they are narrow and get wider as they go up. They can be explosive off of a super heated asphalt driveway or black roof. There are some “surface tension” forces that keep the thermals close to the ground until they break off. If the wind changes a bit, it might be all it takes to make a thermal release.
    In paragliding, you know you are about to enter a thermal when you start to feel turbulence or even go down a bit. You actually judge your angle of attack into the thermal by looking at how the wing turns as you enter it. If your wing flies straight but surges back evenly, you entered it straight on. If your wing turns, part of your wing hit the thermal first causing the turn. If your wing surges forward, you probably just left the thermal.
    It is very easy on a large paragliding wing for half of your wing to be in a thermal and the other half not – causing all sorts of fun things – like asymmetric collapses. You could “hear” them in your wing all the time, they sounded like fabric getting loose then springing tight. Big asymmetrics could collapse more than half a canopy.
    On very active thermal days, only the advanced would dare to fly paragliding canopies/wings because you could experience all sort of "asymmetric collapses” or other dynamic unexpected events.
    Paragliders are rated by DHV ratings, 1 thru 4 where 1 is the safest to fly, which rate their handling in stalls and collapses. My DHV 1 GIN Bolero glider turns 90-180 degrees in an asymmetric collapse and must spontaneously recover to get the DHV 1 rating. Gliders rated higher might need pilot intervention to recover from a collapse. Turning = loss of altitude = hit the ground hard any way you look at it. Have you ever studied what might happen to your canopy under an asymmetric? How do you fix it?
    To avoid thermals close to the ground, I avoided ground treatments that absorb heat, like rock (pea gravel) or cement. In paragliding – we liked the green soccer fields, but I don’t think DZ have those.
    Thermals are caused by heated air on the ground being abnormally hotter than the air above. They “break” off of any pointed object, as small as a shrub. We were taught – turn the ground upside down after a rainstorm and anywhere water would drip off is where thermals rise. It is a mistake to think thermals only happen on hot days, because temperature difference, not just warm air, causes thermals. If the atmosphere is cold and the tarmac is hot – expect a greater thermal than normal even if the outside air temperature is freezing.
    There are all sorts of mathematical equations used to predict thermals and the strength of thermals, some available on the 1-800-WXBRIEF FAA Flight Service Center pre-flight briefing system, such as the “wave soaring forecast” and the “K index”. The K index measures stability in the atmosphere. You can also speak to a pre-flight briefer who can help interpret the data – but since I don’t speak pilot, I was always intimidated to talk to the humans and only played the recorded messages.
    If you are interested, you can study the “lapse rate” which is the phenomenon that as air gets thinner higher you go up in the atmosphere, the air pressure goes down and so does temperature. Physics says pressure and temperature are related due to fact higher pressure causes molecules to be closer to each other. Pure science says that the “dry adiabatic lapse rate” is 5.5 degrees per 1000 feet. This means, if you jump out of a plane 12K above the ground, expect it to be 66 degrees colder at 12K than at the DZ because the air is under less pressure.
    But our flying areas do not exist in scientific test tubes – there is instability in the atmosphere. If the actual temperature, lets say 2K up, is more than 11 degrees colder than the ground temperature – you are bound to experience even more aggressive thermals than normal as the atmosphere tries to find balance.
    Oh, thermals cause clouds – the reason why paragliders fly “cloud streets” of thermals across country. It is possible to experience “cloud suck” also, where the thermals are so strong you get trapped in a cloud and must use advanced techniques to lose altitude.
    Note – I am not an expert at this. Someone with more experience is invited to correct me. But my point is: aggressive thermals can cause turbulence close to the ground, which can very easily cause landings to be rough.

    By tdog, in General,

    Line of Flight Explained

    The topic of “Line of Flight” seems to be a mysterious, yet cool term that is often misused and/or misunderstood. As a freefly load organizer and instructor, I’ve realized the lack of knowledge about this subject so I figured we can take a moment and break it down:
    Jump Run – the direction of flight and configuration of the plane while jumpers are exiting
    Line of Flight – The 3-dimensional profile of Jump Run
    The Line of Flight is essentially the same “line” as Jump Run, however in skydiving, the Line of Flight is discussed in terms of three-dimensional space.
    Next, where Jump Run begins (or the point where the first group exits) is known as “Down the Line of Flight” and where Jump Run ends (towards the last group exiting), is called, “Up the Line of Flight.”
    According to these illustrations, note the compass rose and which direction the plane is flying. You can determine that the plane is flying from the South, towards the North. This establishes Jump Run and Line of Flight.
    So, what makes this “Line of Flight” important? To avoid collisions!!
    Potential Collision Hazards
    Freefall Drifting (outside the given exit separation and given column of air)
    Break-Off & Opening
    Canopy Opening and the First 10-15 seconds On every jump, in any axis, we all experience freefall and canopy drift. (Reference http://www.melissaairheart.com/winds-aloft/) Therefore, pre-planning the spot, Jump Run, Exit Order (reference http://www.melissaairheart.com/exit-order-of-business/), and Exit Separation (reference http://www.melissaairheart.com/exit-separation-time-really-matters/) turn out to be important elements of safety for Line of Flight.
    Taking into consideration the day’s Jump Run, the Exit Order for the load and Exit Separation for the day’s conditions, each group (assuming they are a traditional RW, Freefly, student or Tandem group) is given a “Column of Air” for freefall. If a group is moving towards the boundaries of their given column, there now exists a potential for a collision.
    How does one get towards the boundaries of the column if they exited in the right Exit Order and given the appropriate Exit Separation?
    Example 1: New Freeflier

    Freefly speeds are increased from 120mph to roughly 150mph. Typically, new sit flyers have a tendency to lean forward which causes a dramatic backslide, which can cover a great distance. If that jumper is facing Up or Down the Line of Flight, they are increasing their chances of converging with another group.
    A solution is to have newer freefliers identify themselves in the loading area, and let others know they’ll be taking the Line of Flight into consideration. Then make sure to face perpendicular to the Line of Flight during freefall.
    Example 2: Break-Off

    To avoid collision on break off, it is suggested to track perpendicular to the Line of Flight.
    Let’s say there is one 4-way RW group (no video), and three 2-way freefly groups exiting from a caravan – given Exit Separation 6 seconds, Jump Run South to North, and each group exited appropriately. To assure avoiding running into groups, the 2-way freefliers are able to track perpendicular to the Line of Flight, allowing more separation between themselves and the other groups.
    However, in a 4-way or larger, inevitably, part of the group may track Up and Down the Line of Flight. There are 3-options to this variable:
    1: The 2-jumpers tracking Up or Down the Line of Flight may reduce their tracking speed so as not exit their Column boundaries, yet still gaining an appropriate distance; and the 2-jumpers tracking off the Line of Flight do a max track to assist in maximizing group separation
    2: The 4-way could adjust their break-off and off-set their trajectory by at least 45° so as to break-off, off the Line of Flight
    3: The group exiting after a group of 4 (or more), leave a little extra time before exiting to account for enlarging the Column of airspace for the previous group’s need space for break off
    [Larger groups will absolutely need more time between groups to account for a larger distance covered on their break-off.]
    Note: Angled, tracking and wingsuit groups are exceptions to the “Column of Air” example as they fly in a broader airspace and need special consideration for their flight paths. This requires communication and awareness from the entire load, including the pilot.
    Why is Line of Flight important for canopy?
    Example 1: Canopy’s Flight Path

    The canopy’s forward movement after opening still increases the distance towards the boundaries of the prior or previous group’s Column of Air.
    Therefore, after ensuring a functioning canopy, it’s important to fly OFF the Line of Flight for approximately 10-15 seconds after opening. In theory, you should be able to look Up the Line of Flight and see the group after you breaking off or just opening; and look Down the Line of Flight and identify the group Down the Line of Flight under canopy and slightly below (depending on opening altitudes).
    Example 2: Landing Area and Opening Point

    This will vary depending on Jump Run’s direction, surface winds, freefall drift, etc. However, if the landing Target Area is under Group 3 shown in the next Illustration, then Group 1 and 2 will have to fly Up the Line of Flight. If you find yourself in Group 1 or 2’s situation, fly off the Line of Flight and identify the groups that exited after you before you fly to the the Holding Area and Landing Pattern.
    Try this at home:

    1. Figure out Line of Flight (or Jump Run) for the day’s conditions and identify landmarks for specific directions

    2. Make sure you note if your group is drifting up or down the Line of Flight; then assure you track accordingly

    3. After deployment and opening checks, fly your canopy off the Line of Flight (if safe to do so) for 10-15 seconds.

    4. Identify a safe flight path to Holding Area and Landing Pattern
    Another great resource is USPA’s Power Point presentation on “Canopy Collisions” found here http://www.uspa.org/USPAMembers/Downloads/tabid/84/Default.aspx (scroll towards bottom, under “Miscellaneous” topics.
    There are always exceptions to the norm and many variables. Therefore, maintain awareness and use your best judgement in each situation.
    Note: If this does not make sense, please consult an instructor at your Drop Zone for further explanation. This is not meant to be a sole training tool for skydiving or parachute flying. Full instructional methods will be provided at your skydiving school.
    Drawings are not to scale

    By MissMelissa, in General,

    The GoPro Hero

    Last
    week GoPro sent me one of their new Hero cameras to test in a variety of
    environments. I’m somewhat of a snob when it comes to cheap camcorders,
    and the people at GoPro knew this from the start. In fairness, this is the least
    expensive camera/camcorder I've ever reviewed, and not expecting to be impressed.The
    camera arrived in a complete configuration; batteries, 2GB SD memory card,
    and the standard box that the GoPro comes with. Opening the GoPro package
    requires a degree in disassembly if the box is to be kept in more than one
    piece. It took three people nearly 10 minutes to figure out how to open
    it. If the box is any indication of how tough this camera is…it’s gonna be a great
    little camera.


    The GoPro Hero Wide


    Physical Characteristics:
    The
    camera includes several mounting options, including a rubber headband that
    resembles a jockstrap. It’s not much to look at, but it’s also not going
    to be the common use (I hope) for most users. The camera mount on the
    “jockstrap” can easily be removed and connected to more substantial
    webbing.
    The water housing is impressive. Very impressive for the price, in fact. I’ve
    paid more for a cheap housing than for this entire camera, and this
    housing is more nicely built than a housing I once paid $350.00 for. This
    is a good thing, because the mount for the camera is integrated into the
    waterproof/protective housing of the camera. The system is not designed to
    be used without the camera in its waterproof housing.


    The
    camera itself feels “plastic,” even though it is made of light aluminum
    and plastic. The plastic lens is fairly exposed; all the more reason to
    keep it in its waterproof case and keep the case in a soft bag when not
    being used, in order to protect the lens from damage/scratching.


    This shot was one of 92
    still images captured in a single skydive.


    With
    a plastic pressure-release mount, there is some fear that a hard strike
    will cause the unit to be torn from whatever mounting device it may be
    attached to; this is a positive feature rather than negative factor, as
    safety is the primary concern of all active sport enthusiasts.

    The
    plastic mounts are plentiful; GoPro provided three stick-on mounts with
    extra double-sided adhesive material. In addition, GoPro provides a pair
    of extra mount clips,  and  a mounting arm that allows for a 90degree
    rotation of the camera when mounted to vertical objects such as the mast
    of a kiteboard, paraglider, or similar. It’s much like an Israeli-arm used
    for higher end cameras, excepting that it’s exceptionally lightweight, and
    plastic.


    The camera comes with
    several mounting devices/replacement parts.


    Technical Characteristics:

    The
    camera has a very small sensor size, I believe it is 256 x 192 with
    doubling, but I was unable to receive confirmation of this from the
    relations department at GoPro. The sensor is a CMOS imager, which is
    somewhat obvious by the lack of dynamic range (see image with large black
    spot in center of sun).

    Sporting an output  frame size of 512 x 384, broadcast, output to DVD, or
    other full-frame display will be difficult to do with any degree of image
    integrity. For web or fun review on a computer in small viewer, it's
    perfectly appropriate and will give a lot of enjoyment to the sports
    enthusiast that isn't chasing professional results.


    GoPro encodes to an MJPEG codec in AVI container (will be .mov on Apple)
    and will require an MJPEG decoder in order to read/edit. Most NLE software
    includes an MJPEG decoder, and they are available from several providers
    around the web. The encoder compresses the video data to 4800 Kpbs, which
    is approximately the same compression ratio found on many hllywood DVDs.
    However, bear in mind that Hollywood DVDs are framesized at 720 x 480, and
    are sourced from film or HD cameras. I mention this, as some of the
    marketing commentary on the GoPro Hero compares technical data with that
    of a DVD. They’re not remotely the same. Additionally, DVDs are encoded
    with a PAR (Pixel Aspect Ratio) of .909 or 1.333. This means that pixels
    are elongated in either a horizontal or vertical configuration. The GoPro
    records a PAR of 1.0 (this means the pixels are square, and are not
    stretched, which is a benefit). The display is a Standard Aspect Ratio,
    otherwise known as 4:3. This is the “old” format of screen display, and is
    no longer available in television displays.  GoPro might consider
    providing widescreen in an anamorphic format in their next camcorder
    models, as widescreen displays are now the world standard.

    30Fps Progressive frames means the image will be smooth for playback, and
    clear on computer monitors.

    Audio is recorded in Mono @8Khz/64Kbps stream. The audio is useless for
    anything other than reference. It should be pointed out once more, that
    this camera is aimed at the sport enthusiast that wants to capture
    exciting moments for the web, not for broadcast or professional use.


    Still images may be captured at the rate of one still every two seconds
    for up to 65 minutes (over an hour) on a 2GB SD card. Larger cards may be
    used. The stills are 5MegaPixels, and for some, this is going to be a
    “wow” factor. However, there is a difference between stills captured
    through a low-cost plastic lens and a reasonable quality glass lens as
    found on most 3-5MP hand cameras. In other words, the megapixel count is
    only a small part of the actual picture quality. (More megapixels don’t
    assure better pictures in any event.)

    SD
    flash card is the format in which this camcorder stores data. SDHC cards
    do not improve the performance, speed, nor quality of the camcorder.

    The
    camcorder package also includes a proprietary cable connection that
    outputs to USB and video composite signal.


    Note the hot-spot in the
    middle of the sun. I was able to consistently reproduce this artifact
    with any bright light source in a high latitude shot. Even a 100 watt
    lamp could create this anomoly in a reasonably lit room. I believe
    this is a problem with the sensor; it cannot manage high latitude.


    Operational Characteristics:

    The
    camera is easy to operate. The multiple-press menu button that provides an
    icon-driven LCD panel doesn’t provide immediate feedback, and requires a
    review of the owners manual to decode the iconography of the display. In
    my first operation, I captured video from a skydive, but accidentally
    deleted the files as a result of not being clear on what the different
    icons were indicating.

    Additionally, it wasn’t immediately clear on how to turn off the
    camcorder, and when left on without operation, the camcorder eats
    batteries fairly quickly. With regard to batteries, only Lithium batteries
    should be used with the GoPro Hero. They’re a little more expensive, but
    this device eats alkaline batteries like they are candy. Rechargeable
    batteries may not be used.


    The GoPro Hero Wide uses SD
    memory cards. The black strip on the back is a rubber isolator to keep
    the camera tight in the waterproof housing.


    There are only two buttons on this camera, it’s not like it’s a challenge
    to operate once the owners manual has received a glance or two. One button
    for shutter control/record functions, and one button for menu control. The
    beauty of this camera is found entirely in its small size, price, and ease
    of use.

    Summary:

    This camcorder
    isn't going to light the professional's eyes up like a professional POV
    camera will, but it won't burn the amateur's wallet like a professional
    POV camera costs, either. I've tried all the various POV "sport cams"
    currently on the market, and for sub $200.00, this is clearly the winner.
    There simply is no camera in its class that can compete. GoPro should be
    proud of themselves for designing a camera with this quality in this price
    range. At $189.00 it certainly isn't a toy, but it is a very fair cost of
    the fun this camcorder can record for the sport enthusiast. Mounted to
    handlebars, helmets, struts, pedals, forks, kayaks,  paddles,
    fenders, wrists, feet, belly, or other body part, the GoPro Hero is a hit
    in my book.


    -douglas spotted eagle

    By DSE, in General,

    Marketing Essentials for the Skydiving Industry

    Marketing execs love to throw around industry jargon to make themselves sound like marketing experts. Terms like ROI, target demographic, disposable income, call to action and spiral binders with graphs and charts showing positive gains look and sound legit. Don’t believe the hype.
    All this ‘marketing-speak’ sounds good, but the majority of marketing execs who work for broadcast, TV and print don’t understand the skydiving industry and mistakenly apply successful campaigns used for other industries to our own.
    Before buying in to a marketing plan, understand three major reasons why mass media ads don’t give a return:
    1. A Tough Call to Action. Strong marketing plans offer a call to action
    prompting an individual to respond to an ad. Few ads challenge people to do something that may result in one‘s death. Though death is an unlikely result, it weighs heavily for Joe Public to actually commit to calling a DZ and making a booking.
    2. Recruitment. Think about it, how many people come to a DZ alone? It happens, but it’s the exception to the rule. Students usually recruit a friend to share in the fear, anticipation and excitement of the experience. Not only does one need to spend time considering whether they should jump, but then need to recruit a friend, which takes time.
    3. Disposable Income. How many of us have an extra few hundred dollars lying around? Many mass media ads for activities are more affordable than your average price for a tandem skydive.
    Combine the obstacles of having to consider making a jump, recruiting a friend and saving money and you’ll find that a lengthy amount of time has gone by before the phone begins to ring. Some will argue that advertising creates brand awareness and this is true, but there will only be a small percentage who see and hear an ad that follow through all of the steps to make it to your DZ. Bottom line: a poor return on investment. Most DZO’s have been happy to break even on their mass media campaigns after they’ve launched.
    The Affordable and Effective Approach
    The most effective kind of marketing harnesses the exhilaration of your current customers. Firstly, give these guests a reason to come back to make a second jump. No longer does this need to be a ‘once in a lifetime experience.’ These guests will recruit their full-retail paying friends to experience life’s greatest adventure. Secondly, equip your guests with a means to advertise your DZ utilizing social media by sharing videos, photos and check-ins.
    Top Five Marketing Basics Every DZ Should be Implementing
    Online Reservations. If you’re a DZO who says that you don’t want to miss
    on the personal interaction with guests while making a booking, then this is the first marketing change to be made. If someone desires to spend money with your company at two o’clock in the morning, let them! Don’t force your potential customers to spend money with you on your terms.
    Social Media. The biggest corporations in the world are actively engaging with people through social media. If you are putting a couple posts out here and there then you’re missing a huge opportunity that the business world has come to embrace. Creating a social media plan is necessary, should be organized and well structured. This is a legitimate and inexpensive way to market the business.
    Video E-mails. Embrace your customer’s enthusiasm by using a service to e-mail guests their videos. Be sure the DZ’s branding, phone number and website is included because these videos will be shared everywhere. This is an example of getting your customers to market for you.
    Database Collection. Updating your DZ database is a critical piece to the marketing pie. Collecting e-mail addresses will allow for broadcasting your marketing message to a clientele that knows how great you are. A professionally designed newsletter offering specials during the holidays will reap rewards to the bottom line.
    Surveys. How do you know your strengths and weaknesses? Allow your customers to tell you by seeking their feedback. This should never be done at the DZ ten minutes after your guests have jumped. An online survey should be sent 24 hours after a jump allowing for anonymity and comfort to provide honest insight about the experience. In order to have a finger on the pulse of the operation and understand the weakest areas of the customer experience, surveys are invaluable.
    Finally, the best marketing is word of mouth. Examine every interaction your guests experience with the operation from the website, cleanliness of bathrooms, presentation of the instructor, cleanliness of jumpsuits etc. and be sure to amaze your customers. Having a plane with instructors who can safely execute skydives is not enough. The details that surround the experience is just as important as the skydive to ensure your customers aren’t just happy, but thrilled with the experience.

    By admin, in General,

    Risk Homeostasis and Skydiving

    Wikipedia describes the phenomenon as follows:
    'Risk homeostasis is a psychological theory developed by Gerald J.S. Wilde, a professor emeritus of psychology at Queen's University, Kingston, Ontario, Canada...the theory of risk homeostasis states that an individual has an inbuilt target level of acceptable risk which does not change. This level varies between individuals. When the level of acceptable risk in one part of the individual's life changes; there will be a corresponding rise/drop in acceptable risk elsewhere. The same, argues Wilde, is true of larger human systems (e.g. a population of drivers).'
    Through the comparison of relevant Sky Diving statistics, recent studies in the field of risk homeostasis show that the introduction of a safety feature does not necessarily improve the generalredistribution
    This phenomenon, due to a type of 'risk redistribution', was researched by Sky-Diving academics who spotted strange fatality rate fluctuations migrating back and fourth between open canopy fatalities, 'no pull' and 'low pull' cases and others, depending on the adoption of certain safety feature at that time.
    The study employed the Cypres (Cybernetic Parachute Release System) Automatic Activation Device (AAD) as an example, which is specifically designed to deploy the reserve parachute at the required altitude, in the event of timing neglect by the jumper.
    Risk homeostasis shows that varying individual trends toward risk adjustment become displaced by the introduction of a safety feature. The concept results an inadvertent psychological neglect of natural automated adjustments to these barriers. This leads to a generalised lowered level of risk, instead of unique to the area in which the safety feature is applicable.
    The risk then becomes distributed across parameters and is referred to as 'accident migration'.
    When this in turn was applied in relation to levels of perceived risk, it was noted that; 'Skydivers adjust their behaviors to maintain arousal at optimal levels'- a behavioral modification linked to inadvertent risk displacement. Levels of risk vary from one person to another and are adjusted in accordance so as to maintain a level of comfort most acceptable to the individual. On the other end of the spectrum, however, more risk can be introduced if the threshold is too low in comparison to what the individual is used to.
    In other words, the tendency to take less precaution in presence of a safety measure does not necessarily result in a balanced distribution of risk and as a direct result, risk is inadvertently lowered in other areas. Where there may have been a decrease in 'low pull' or 'no pull' fatalities due to this mechanism, the open canopy fatalities increased, and the introduction of open canopy safety features appeared to coincide with an increase in landing fatalities.
    A correlation can be seen concerning traffic accidents, where most of the evidence for risk homeostasis originates. Studies have shown that 'pedestrians are twice as likely to be killed in a painted crosswalk as in an unmarked one' and that driver side airbags in actual fact contributed to driver behaviors that increased accidents and fatalities.
    Needless to say, the field of skydiving is a popular target for academic study on the topic of researching risk whether perceived or real. Sensation seeking provides the blueprint for studying risk-taking in social, legal, physical and financial for the sake of such experience. It has been found that personality types within this sphere can be genetically characterized by an elongated version of the DRD4 gene which regulates the production of dopamine and effects pleasure and emotion.
    It should therefore come as no surprise that when comparing skydivers to non-skydivers it was found that the former have lower levels of death anxiety, which in turn lends itself to higher levels of target risk. It was also found that Skydivers accept significantly higher levels of risk and that 'More experienced skydivers monitor the risk perceptions of the beginning skydivers in their subcultures.'
    Further research will be conducted into how to enforce precautionary measures within the parameters of these findings. To read the original case study visit www.vicnapier.com
    Original Authors:
    Napier, Vic
    Pima Community College
    Findley, Carolyn Sara (Casey)
    Auburn University Montgomery
    Self, Donald Raymond
    Auburn University Montgomery

    By labyrinth, in General,

    Staying Current During Winter

    The winter months are a great opportunity to catch up on all the things we weren’t doing throughout the summer, such as working on our homes, engaging in winter sports, and mending relationships with our non-skydiving friends. It is also a time that can lead to a dulling of our skydiving abilities, and our memory of correct procedures. As a result, the period following a substantial break can be a very dangerous time for skydivers, and a great many injuries come as a direct result of a lack of currency. If we are creative, however, we can keep our skydiving minds warm even when it is cold outside.
    If you own a rig, for instance, it is quite easy to set up a hanging harness in your house. We have been using a secure chin-up bar for many years, and it works great. All you need is an extra pair of risers, a set of soft links, two climbing carabiners and a doorway. A retired pair of 18 inch risers work best for most doorways, to keep you high enough above the ground to create a good simulation. First, attach the tops of the spare set of risers together with the soft links. Next, loop the risers over the chin-up bar, and attach a carabiner to the large ring on the bottom of the risers. Then all you need to do is clip the carabiners through the three ring attachment hardware on your rig and you are ready to train. Keep in mind that if you are unsure about the security of your chin-up bar or door frame structure, be sure to wear a helmet and have a cushion underneath you just in case things go badly.

    Some of you are thinking, I don’t need to practice pulling my handles all winter, I am a licensed skydiver. I know what I’m doing. Although we all know this is not the truth, everyone needs to practice their emergency procedures, the point of hanging yourself up goes far deeper than just practicing pulling your handles. There are a great many things you can rehearse and learn while suspended in your own rig. I am not talking about the tired old harness at the dropzone that does not remotely resemble the one you jump. I am embarrassed for our sport when I do not even find one of these old beaters hanging at a training facility. That needs to change. No, I am talking about your own personal rig: your handles, your harness, your home.
    There are several things you will love about this initially embarrassing practice. One huge benefit is to practice transitioning from your deployment harness configuration to the flying and landing configuration. For most of us, this involves loosening the chest strap, and experimenting with different methods of moving the leg straps slightly forward to make yourself more comfortable.
    By sitting in the harness for long periods of time, your body can change and become stronger in the ways that allow you to be more comfortable under canopy. You can also explore harness turn inputs by swinging side to side by loading one legstrap at a time, which may illuminate a need to relocate the elastic butt strap between your legstraps. This “freefly bungee” is great for preventing a legstrap from sliding forward in freefall, but if located too high or too short, can prevent harness turn capability while under canopy. A “fastex” pinch-release can allow you to remove this strap entirely, and hanging harness training can prepare you for the new muscle memory of your procedural change.
    Hanging harness training will also allow you to practice flaring and leaning forward for landing. You can even tie webbing straps to the legstrap articulation hardware and have a friend pull your legs forward when you flare to simulate the pitch change, allowing you to rehearse leaning forward as the canopy pitches back to a higher angle of attack. This will help you to remain in balance for the touchdown, and by rehearsing this process in your downtime, you may even emerge from the ice and snow with more skill than the previous summer. Further, you can maintain your upper body strength in the canopy-specific muscles by lifting yourself up by the front risers dive loops, and by pulling on elastic bungee cords or “thera-bands” attached to the chin-up bar. These are easily acquired from most physical therapists, drug stores or apothecaries.
    By using carabiners to attach yourself to the suspension system, you will be able to avoid the need to remove your main parachute for the simulation. It will feel slightly different with your main parachute still in the pack tray, but it will be close enough to make the practice a valid training method for staying fresh through the chilly months. It is also helpful to remove your main from time to time, and attach the suspended risers to your rig’s three ring system to practice cutting away. A mattress, helmet and spotter is a really good idea for this practice. This will help you to get a clearer picture of what it actually feels like to chop your main, and may even result in your awakening to the fact that your method of pulling the handles needs work, or that your cutaway system requires lubrication. Be sure not to actually pull your reserve ripcord unless you have a rigger handy. When you do bring it in for your spring repack, definitely give that reserve ripcord a go in a full simulation. All good training requires accurate, complete rehearsal of what you will need to do in the sky.
    For wingsuit flyers, a hanging harness can be a fantastic training tool for staying current with the post-deployment sequence. Gear up fully and practice riding through the deployment with your knees together and your hands on the three rings. Then rehearse unzipping your arms, unstowing the toggles, loosening the chest strap and then unzipping and dressing your legs. For increased realism, try aiming a carpet blower up at you at the approximate glide angle of the canopy to simulate the relative wind. This will add the pressurization of the wings, making the process surprisingly like the real thing.
    If you wear your helmet as you do all of this, the simulation will be quite realistic and highly beneficial. Such rehearsal will be very helpful for keeping the habits that save your life fresh in your mind. Be sure to practice malfunction procedures with your wingsuit on as well. The only thing you need to worry about is the doorbell, and the awkward explanation to the mailman.
    Freefall skills are harder to keep fresh, unless you have a wind tunnel nearby. There are ways, however, to keep sharp without spending a lot of money. An FS “creeper” is a fantastic tool for practicing your belly flying, and creeper parties are a fun way to get jumpers together in the colder months. You can even have creeper competitions to stay on your game. It may feel a bit silly at times, but it is far better than trying to remember the dive pools all over again when the snow melts. I also find that an indoor swimming pool is a great asset in the winter, allowing you to work in three dimensions and play with new possibilities, especially if you have fun-loving skydiver friends. Nose plugs are really helpful for upside down swimming.
    I also enjoy pulling out my gear in the winter and taking the time to slowly and methodically look over all the details I may not have had the time to check during the fast-paced summer months. Even if you are not a certified rigger, this is your gear and you need to be comfortable with every aspect of the equipment that saves your life. Pull out your main and climb inside your cells; inspecting the crossports, the seams, and the reinforcing tapes. Look for broken stitches, pulls, and damage to the fabric that may have occurred during the jumping season.
    Inspect the bottom of your lines, your connector links and risers. Be sure to run your finger inside the slider grommets to check for rough spots that will damage your lines. You can also check your line trim by cutting the main away and tying the risers to something secure like a door hinge. By pulling tension on each line group in bilateral symmetry and comparing back to the center cell, you will learn volumes about the condition of your parachute. If you have spectra lines, you will be amazed how much your outboard lines and brakes will shrink over time through friction against the slider grommets, and from lack of loading. For a detailed education on main parachute inspection and an eye-opening retrimming technique, check out this video.
    Another powerful way to keep your head in the skydiving game is through watching videos. There is a great deal of eye candy on the internet, although not all of it falls under the category of training, or even positive visualization. Be careful what you watch, visualization is a powerful form of training, and some of what you watch can pave the way to higher levels of fear. Furthermore, watching lots of poor technique can dull your image of the “right” way to fly.
    Fortunately, there are some fantastic instructional videos available, which can actually expand your skydiving knowledge as the snow falls. The Australian Parachute Federation, for instance, created a fantastic malfunction video series called Cutaway. Additionally, here is a link to an in-depth Parachute Flight Safety Video Series, a canopy course ground school for all levels that will far exceed your expectations.
    To further the goal of expanding your skydiving skill through knowledge, there are also several incredible podcasts on the internet that can bring a wealth of knowledge to your computer, phone or tablet. Skydive Radio, Jump Twenty Six and Radio Skydive UK all provide a wealth of information that can enhance your abilities and literally extend your life. Interviews with leaders in the sport will expand your knowledge of the essential history of skydiving, safety practices, and secrets to get the most out of your airtime. Best of all, you can enjoy this learning in the comfort of your own earplugs.
    When we remember that most of what it means to be a skydiver actually happens on the ground, it becomes more than obvious that we do not need to turn off our skydiving brains once the chill hits the air. Although it is true that a flight to someplace warm is the best way to stay current in the winter, it is not the only way to continue being a skydiver. With a bit of open-minded creativity and ingenuity, we can continue our training all year long, and even emerge in the springtime with a deeper understanding than we had before. Freezing our thoughts about something we love this much not only increases our risks, it also costs us a piece of ourselves. Pull out your gear and keep the feeling alive, you will be glad you did.
    -BSG
    Brian Germain is a parachute designer, author, radio personality, keynote speaker, and has been an active skydiver for 30 years. You can get more of Brian’s teaching at Adventure Wisdom, Big Air Sportz, Transcending Fear, and on his vast YouTube Channel

    By admin, in General,

    The Business Behind Skydiving

    Short of going to the moon, skydiving is the greatest adventure life has to offer. Everyday lives are changed & comfort zones blown wide open! Skydiving is therapy and a respite from the grind of life. Having a bad day? Make a jump and see if it's as bad when you land.
    An Activity or an Experience?
    So, what are DZ's offering? Many DZs sell the experience while others sell an activity. We have all seen these things: Instructors who look as if they just got out of bed, ripped or dirty jumpsuits, staff arriving late, foul language within earshot of students, sexual innuendo or inappropriate jokes about death, the list goes on. We've witnessed it, yet we're not surprised by it. The expression "It's skydiving" is the blanket phrase that's thrown over this behavior. Let it be made clear, It's NOT skydiving, it's a mentality.
    The mentality derives from the origins of our sport when DZ's were built on an individual's passion to continue to jump post military service versus the creation of a DZ with a viable business plan. The introduction of tandem skydiving created a sustainable business model which has allowed for major skydiving centers like Chicagoland Skydiving Center, Skydive Spaceland, Skydive Carolina and Skydive Elsinore to thrive. The reality is the sport is still extremely young relative to other sports and we are still finding our way into the mainstream. To get there we must break the mentality that excuses poor service.

    Skydiving has evolved from barnstorming DZ's to multi-million dollar facilities

    Breaking the Chain
    The majority of DZ decision makers hire by plugging in an individual's experience level into the position while forgetting a more important consideration: a passionate personality. If greater significance was placed on one's personality first and years in the sport second, there will be a major shift in the business of skydiving. Having an instructional staff that is passionate about pleasing the customer will benefit the DZ with additional business- GUARANTEED. I'm not suggesting safety be compromised by hiring less experienced instructors. I'm suggesting that DZO's be more selective in the people they hire by weighing personality as heavily as experience.
    Customers want to have a relationship with a person not with an organization. Personal touch is what takes a company from good to great. Happy customers will create a word of mouth marketing campaign more valuable than any mass media expenditure from a DZ. Great customer service is a DZ's greatest marketing plan.
    All of us are consumers. If we spend more than US$300 for a service (tandem plus video and stills) what would the expectation be for the kind of service we should receive? Add the variable of a high risk activity and we'd like to feel that we are being well taken care of. Negative attitudes cannot coincide with the business side of the sport. Our sport is too good, too fun, too pure, too life changing to be anything other than the greatest experience in the world with the greatest people.

    By admin, in General,

0