0

General

    The Skydiving Handbook - Chapter 4 (The Skydiving Universe)

    We've already discussed your body's relation to the relative wind. Now let's look at your relationship to space and time. When you leave an airplane at our customary exit altitude of 12,500 feet above the ground, your accelerate from zero miles per hour vertical speed to approximately one hundred and ten miles an hour in about ten seconds. It doesn't seem too dramatic because the aircraft speed was already about 100 miles an hour, so you reall only gain ten miles per hour. At that point you reach terminal velocity, the speed at which the air pressure against your body balances the pull of gravity. Ignoring minor changes in body position, you will stay at that speed until something stops you - hopefully the deployment of your parachute! At terminal velocity you pass through one thousand feet every six seconds. If your parachute opens at 4,500 feet, that gives you about 52 seconds of freefall. (Ten seconds for the first thousand, six for each of the next thousand.) If your parachute did not open, you would now have a life expectancy of 27 seconds. Opening altitudes are based on allowing skydivers time to be sure that they do land under an open parachute. More experienced jumpers commonly open at about 2,500 feet because of their greater familiarity with equipment and emergency procedures. This gives them about 65 seconds of freefall from a 12,500-foot exit.
    The main thing about altitude is that if you run out of it while in freefall, you die. However, since your fall rate is constant, your consumption of altitude is constant. This means that if you have plenty of altitude, relax, because only time can take it away from you. Time and altitude are directly related.
    Loss of altitude awareness is a major contributor to skydiving fatalities. Always bear in mind that no distraction is worth dying for. Until your body's freefall clock has been programmed so that you know how long you've been in freefall, your only reference is your altimeter. Every time you do anything - intentionally or not - check your altitude. That way, you won't lose altitude awareness if a distraction such as a difficult maneuver or loose goggles comes along. Keep in mind that since you are consuming altitude (time) at a constant rate, you can't stop what you are doing, think it over, go back, and try again. In freefall, there are no time outs! That's why we try to do all of our freefall tasks carefully and deliberately, getting them right the first time. If you rush, you will actually lose time because the extra mistakes that result will slow you down. And when you consider the cost of freefall time, you'll appreciate the value of thorough ground preparation!
    Besides our time reference (altitude), we also make use of space references. There are two types of space references, orientation to the ground and orientation to other skydivers. We'll call the ground reference heading. Heading is an imaginary line drawn from a point on the horizon directly in front of you through your center. You use this reference for tasks such as turns, backloops, or simply hovering in place. Eventually you will substitute the line of flight for a personal heading. The line of flight is the heading the aircraft was on when you left it. The advantage of using line of flight is that now all the skydivers on the airplane have the same heading reference, instead of each picking their own. This makes it much easier to coordinate group activities.
    Your reference to the other skydivers is called the center point. The center point is that spot closest to all of the skydivers. When you are alone, it is in the middle of your body. With others, imagine a ball falling straight down around which everyone flies. In other words, four skydivers holding hands in a circle would have the center point in the middle of the ring. If they all backed up ten feet, it would still be in the same place because thjey are all still equally close to that point. In many ways, the center point of a formation is like the center of your box man discussed in the previous section. If one corner of a formation is low relative to the center point, the formation will turn in that direction. If two corners are low, it will slide in the direction of the low side.
    By now you can see that while skydiving, you have to be aware of several different things: altitude, your own body position, your position relative to the ground, and your position relative to others. Initially this will seem like a lot to be aware of, so on your first few jumps you will concentrate almost entirely on altitude and your body position while your jumpmasters take care of the rest. When you are release to fly free, you will add your own heading, and eventually you will be able to monitor these, the formation center point, and the line of flight as easily as you monitor your speed, direction, location, and other traffic as you drive to the drop zone!


    Test yourself:
    1. "Temporal distortion" refers to the fact that in an emergency situation (losing control of your car, for example), the rush of chemicals to your brain can cause events to seemingly go into slow motion. Why would temporal distortion be extremely dangerous to a skydiver?
    2. Why is ability to hold a heading considered essential to flying with other skydivers?
    Proceed to Chapter 5 (After the Freefall)

    By admin, in General,

    The Skydiving Handbook - Chapter 6 (Canopy Performance)

    Your square parachute is the result of two decades of design refinement. Like a glider, it can fly straight and level or turn, slow down, spin, and even stall. As the pilot, where you land and how you land is totally up to you. Practice, combined with a clear understanding of how your parachute works, will allow you to land softly, exactly where you want to, every time.
    When your parachute is inflated, the pressurized air filling the tailored cells causes it to take on a wing shape. A parachute has a fixed angle of incidence, built into it by the length of the lines. The "A" lines in front are shorter than the "D" lines in back, causing the wing to point slightly down. It essentially flies forward and down on the slope of the angle built into it. This angle causes it to fly about three feet forward for every one foot down, giving it a 3 to 1 glide ratio. In other words, on a calm day a parachute opened at 4,000 feet could fly a straight line distance of 12,000 feet before landing! The speed at which it flies is about 20 miles per hour forward and 6 to 8 miles per hour down when the canopy is in full glide with the control handles, called steering toggles all the way up. The toggles are also referred to as brakes, since pulling both down slows you down.
    Pulling down on the right toggle pulls down the back right corner of the canopy, slowing it down and creating a turn to the right. At the same time, the slow side looses lift and the canopy points downward in the direction of the turn, increasing the vertical descent rate. One of the most important handling characteristics of parachutes is that their descent rate always increases in a turn! This phenomenon is by far the greatest cause of parachuting injuries. With this in mind, you must take care to always plan your landing so that you will not be forced to do any major turns below 100 feet. How slow or fast you turn is in direct proportion to how far you pull down the toggle, as is the change in your descent rate - fast in a sharp turn, slower in a mild turn.
    If you pull down on both toggles simultaneously, the canopy's forward speed decreases. The slowest you can go is about five miles per hour forward. Generally you should fly your canopy as fast as possible - toggles all the way up. This is because the more air the wing has passing over it, the better it flies. In fact, in sustained deep brakes so little air passes over the wing that the descent rate increases significantly. You can even cause the canopy to stall, which means it gives up flying altogether. Normally student canopies have the control lines calibrated to make a stall condition difficult or impossible to get into. Whenever you jump an unfamiliar canopy, you should always do a series of turns and practice flaring (pulling both toggles down simultaneously) above 1,500 feet in order to acquaint yourself with its handling characteristics.
    Why 1,500 feet? Your CYPRES automatic activation device that deploys your reserve in an emergency is calibrated to fire at about 1,000 feet. It may mistake radical maneuvers under a good canopy for a malfunction and could deploy your reserve if you are aggressively turning or stalling the canopy below 1,500 feet! This is not only dangerous, but expensive. Recharging the CYPRES and repacking the reserve costs $170. If the CYPRES fired because of your mistake, you are the one who pays!
    Besides the canopy's handling characteristics, the parachute pilot must consider the surrounding conditions. Two variables are present to some degree on every jump; the spot and the winds. Let's take a look at spotting and how it affects you.
    Imagine the simplest jump possible. Let's say you are going to exit the airplane at 3,000 feet and your parachute, instead of gliding, descends straight down. There is no wind. In such conditions if you opened directly over the target, you would land on it. If we add a ten mile per hour wind, the spotter would have to determine how far the unsteerable parachute would drift and plan for the jumper to open that much further up wind of the target. Now let's say he has three parachutists leaving at ten second intervals. He must plan the initial exit so that all three will land as close as possible to the target: the first would be short of the target, the second right on, and the third would be long.
    In our case, the spotter is looking down from 12,500 feet, has to guess about the wind, and has only a rough idea of how long each group will take to exit. Fortunately square parachutes are maneuverable enough to compensate for the variables. As a novice you will usually leave late in the exit order which means that for you the spot will usually be long. This can be useful, because it means all you have to do is locate the landing area and fly towards it. As you do you can think about the wind line (remember chapter one) and check for other wind indicators such as wind socks, the shadows of clouds moving over the ground, smoke or dust, and the direction other parachutes are landing. You need to do this, because the wind is the second variable you need to think about.
    On a calm day, your ground speed will be the same as your canopy's forward speed - about 20 miles per hour. But when there is any wind, it will affect your ground speed. If the wind is blowing five miles an hour, you are now in a river of moving air. You don't feel like your speed changes, because your air speed is the same. But your ground speed is not. Facing into the wind, or holding, your ground speed is reduced by five miles per hour. When you turn and fly with the wind, called running, you add the wind speed to your canopy speed, resulting in a ground speed of 25 miles per hour.


    Test yourself:
    1. When you are crabbing (flying at 90 degrees to the wind) in a 10 mile per hour wind, what will your path over the ground look like?
    2. The slowest your parachute can go is about five miles per hour in full brakes. Flying into a ten mile per hour wind, what would your ground speed be?
    Proceed to Chapter 7 (Landings)

    By admin, in General,

    Climb Out, Freak Out, Chill Out

    A beginners guide to filming competitive 4-way
    This article is for jumpers that already have some experience flying camera and are trying to expand on their knowledge of how to film formation-teams in a competition setting. I will focus mainly on 4-way, because I believe it to be the most difficult FS discipline to film (aside from VFS), due to the many different exits and faster key speeds. However, once you have a firm grasp of shooting 4-way, the same principles can be applied to 8-way and larger formations.
    During a competition, whether it be a local meet or the nationals, it is vital that you give yourself all the advantages you can to do the job right. It is advisable that you jump with two cameras with differing wide-angle lenses. Film the team with the tighter view in mind, so if a grip goes out of frame, you can always revert back to the other camera with the wider view. The difference between first and second place can come down to only one point. So our goal is to have an “NJ free” (Non Judgeable) competition for all 10 rounds. If at any time during a jump a grip goes out of frame, the videographer can cost the team a point or more. Jumping with two cameras is not necessary for training, however you want to do a few training jumps before a meet with the exact set up that you are planning on using. This may expose any flaws or issues with your equipment.
    Training should be more difficult for you than competition. Push yourself to fly close to the formation. Train with your back up wide-angle lens, this will force you to be closer and more aggressive in getting the shots you need. This will make every competition feel much easier. Do not be afraid to try new things. Sometimes we have to leave our comfort zones to learn something that may benefit us in the long run.
    Climb OutIn most cases the camera flyer is in charge of the spot. Not having to worry about this little detail allows the team to focus on their jump. As you climb out on the camera step, think of flying your body as soon as you expose yourself to the airflow. Even though you are on the airplane, miss-presenting yourself to the wind can make your job a lot more difficult.
    You can practice climbing around on the airplane while it is parked. Get a feel for where everything is. Continue to practice until you can climb out of the plane in a smooth and controlled manner. Speed will come with time. Do not forget to practice climbing back into the plane. Sometimes you will find yourself climbing out right as the red light turns back on. If possible, one of your teammates can block some of the wind and help you get back inside. Remember to become familiar with different aircrafts when you travel to another drop-zone to train or compete.
    Freak OutNever trust an exit count! It is easy to get impatient on the camera step, waiting for the team to get ready. Teams can sometimes take a while in the door to get ready, especially if they are trying something new. Do not interpret a “wiggle” as a count. Be patient and watch for other signs like a helmet releasing a head jam.
    Every team’s exit count is different. Before every jump, most teams will take the time to dirt dive and practice their exit from a mock-up. You can learn a lot about the team by just simply watching them on the ground, so take as many opportunities as you can to learn the exit count and timing.
    Leading or Peeling?The exits covered here are from an otter, a left-handed door.
    Keep in mind that your relative position to the team is much closer on the aircraft than what it will be in freefall. You will need to create this gap quickly during the exit by falling slow. This is where camera wings and strong legs can be very helpful.
    Teams and coaches prefer the leading exit over the peel exit, because it gives them a great view of their timing, presentation, and heading. This method is much more conducive for the video debrief.
    For this exit I have my left foot on the camera step and my right hand on the handle. (When you have your right foot on the step, you expose more of your body to the exiting team.) After the team has given the count and is in the process of leaving the airplane, I find it helpful to try and run my right hand across the fuselage. I try to feel the rivets of the plane as I kick off the step. This helps ensure that I am in the correct position relative to the formation. As for your timing on this exit, you will know you have left too early when you can see the bottom of the airplane, and you will have left too late if you make contact with the team. For all exits, this is where your timing becomes crucial.
    Peeling is usually considered the safer choice of the two exits, because you leave right after the team. This way, you will not leave too early because of a misinterpreted count and you do not have to worry about the teams burble.
    For this exit, I have my right foot on the step with my right hand on the handle. I swing my body back so that my left foot is touching the fuselage. Now all I have to do is wait for them to come out the door. Leave with the last person and follow the team down the hill. Remember to present your hips correctly into the relative wind and keep the team in those cross hairs.
    Chill OutAfter the exit, all you have to do is keep the team’s grips in frame for the next 35 seconds. Remember that the different formations rarely stay in one place. As the team transitions from one formation to the next, you may have to adjust your own relative position to the team to keep them all in frame. Improving your individual flight skills will allow you to make these necessary corrections quickly and without thought.
    Although the “hard part” is over, you still have to be in the right position to get a judgeable video. Being close enough is the first part, but probably more importantly is being “steep” enough. Your angle in relationship to the formation is crucial. The steeper you can get, the better. It is very difficult to see all the grips when you are shallow. This is especially true on exit. If at any point, other than the exit, you can see sky, you are not steep enough. You should also only be able to see the top/back of the team’s helmets (no faces). The distance from the team will vary on the size lens you are using.
    An additional detail to pay attention to is the background. As the videographer, you can make the judge’s job easier by turning to a heading with a solid background, such as a forest, lake, desert floor, etc. Multicolored backgrounds, such as buildings can make the image very distracting and the formations harder to judge.
    Doh!Making contact with the formation can occur either on exit or in free fall. We want to avoid this scenario at all costs; however, accidents can and do happen. If you find yourself falling towards a formation, get as big and flat as you can! The last thing you should do is ball-up. Your natural reaction is to protect yourself, but by doing this you will only make things worse. Not only have you sacrificed all your lift and will now impact the team with greater speed, you have also given up on the chance that your airflow may be returned to you as the formation continues to move to the next point.
    I think that it is a good idea for camera flyers to understand what the team is exiting and how the formation will fly. I believe that a deeper understanding is necessary than just to know whether a formation is long or round. Being able to anticipate a formation’s movements, direction, and timing will greatly improve your video quality. Be pro active! Ask your team what formations they are going to perform. It will take some time, but being able to “speak” a little 4-way will not hurt.
    You can educate yourself on these formations by reviewing the IPC dive pool online. Memorize how each formation flies as it comes out the door; more importantly, think about how they might block your airflow. As the team debriefs their jumps, you should do the same. Take a look at your own timing, framing, and distance. Strive to make each video jump better than your last.
    Competition vs. TrainingWhen it comes to competition camera flying, there is a big difference between a “Gun for Hire” and a Teammate. In order to make this transition, you need to change your approach and mind-state from just being there for the ride, to being part of the action. As a teammate, you are taking on much more responsibility than a “gun for hire”, such as: archiving and cataloging all media footage, taking pictures, submitting photos to magazines and sponsors (if applicable), checking in with manifest for calls, spotting, chasing down cutaways, etc. Your team needs to be able to depend on you to do all of these things. Creating a great training environment becomes key. The more the team can focus on their training, the better.
    Helping a team to perform at their best can also aid you in achieving your best. Being able to perform at your peak during a high-stress competition can be very satisfying and rewarding. A positive attitude and an eagerness to learn is the start of becoming a good competitor. Hard work and embracing the training process is what will turn you into a great competitor.

    By admin, in General,

    Camera Considerations 101

    Flying with a camera can be a lot of fun, and is a reasonably easy goal for new skydivers to achieve.
    The USPA SIM Section 6.8E recommends that a skydiver have 200 skydives before putting on a camera. The first question often asked is “Why 200 jumps?” I believe the answer to that question is that in times past, the D license (which at one time required only 200 jumps) meant that a skydiver had experienced enough of the basics of skydiving that he/she could begin exploring additional responsibilities during a skydive. By no means is anyone with only 200 jumps generally prepared to be a good nor safe camera flyer, but everyone needs a benchmark from which to begin. This article isn’t about debating the merits of jump numbers; I’d recommend potential camera flyers stick with the SIM and the findings of the USPA.
    Before beginning, you’ll need to make a couple of gear decisions straight off, and this article is to help you prepare for those decisions.
    HEADGEARChoosing a helmet is the first and potentially most important decision in flying a camera. There are a lot of good helmets out there; each manufacturer has their own ideas about why their helmets may be better than another helmet. What your first decision will be isn’t as much about a brand, but rather a type.

    P>There are two types of helmets; those that are primarily side mount, and those that are primarily top mount. Most side mount helmets do offer at least a small top area to which a second camera or other fixture may be mounted. Most of the top-mount helmets are designed to place everything on the top of the helmet. Each type of helmet has its own advantages and disadvantages.
    Freeflyers and inside RW/FS skydivers tend to prefer side mount camera helmets not only because of the profile of the helmet, but due to the way the air moves around the helmet. Those that are shooting four/eight-way FS might prefer a top mount not only due to the greater stability of a flat-top profile, but that the larger top area allows for two cameras to be mounted (one acts as a backup in case a camera fails in competition). Commercial photographers tend to prefer flat top systems so that they can mount larger cameras, or have enough space to mount a DSLR and video camera from the same perspective point.
    One point to consider aside from the primary flying format; top mount helmets with properly centered weight are less injurious to the neck over repetitive openings.
    VIDEO CAMERAVideo camera models change pretty quickly, so it’s pointless to recommend models vs features.
    While recommending a brand is tempting to avoid, Sony camcorders have a strong position in the skydiving market for several reasons.

    -External control. This is very important, as you’ll want to know whether the camera is on, recording, battery failing, or nearly out of media. There are a couple brands of control devices that provide this information.
    -Electronic Image Stabilization (EIS). This is fairly important for freeflying, and much less of an issue for tandem shooters. Avoid Optical Image Stabilization in most cases. The floating lenses of an OIS system makes it difficult to shoot a stable image under any but the most optimal shooting situations (very difficult to achieve).
    Small is in; cameras don’t need to be large to produce large results. Keep weight on your head to a minimum and your neck will thank you over hundreds or thousands of openings.
    If your intent is to wear a camera merely to document skydives with friends, low-cost camcorders such as the GoPro Hero and similar small cameras are wonderful. If your eventual goal is to work towards shooting tandems or teams, you’ll want to consider a higher quality camera. A current favorite is the Sony CX series of camcorders.
    LENSESMost camcorders do not offer lens widths sufficient for most inside or tandem-oriented skydiving. Wide angle lens adapters are commonly found on camcorders used for skydiving. For most skydiving use, a .5 or double field of view lens is sufficient. If you’re flying inside video for FS or Freeflying, a .3 or more than double wide field of view is generally desired. Anything more wide than a .3 is typically going to be relegated to handcam or specialized use.
    Depending on the size of the camera’s lens thread, a step-up or step-down ring might be necessary. Step-down rings almost always assure a vignetted shot (black circle around your video frame), whereas step-up rings rarely cause a vignette. Step-up and step-down rings are very inexpensive. Some are plastic, others are aluminum. Some professionals prefer plastic rings so that if a riser strike or line catches on a lens and tears it off, the plastic ring will give way before damaging the camera. While this is likely true, plastic rings also deteriorate in strength when exposed to sunlight. If you use a plastic step ring, be sure to periodically inspect it to be sure it’s not become brittle or cracked due to sun exposure.
    RINGSIGHTSAlthough it’s tempting to want to outfit a helmet with everything right from the start, it’s a good idea to add parts one step at a time. A ringsight is a good tool for some disciplines; it helps the videographer know where the camera lens is looking, and some types of ringsights help with framing and distance.
    Ringsights aren’t necessary for inside shooting of FS or Freeflying. No matter what, a ringsight is a snag hazard regardless of how much care is taken to prevent it from being so. The risk can be lessened, but not entirely removed. The ringsite should be one of the last accessories added to a camera helmet.
    In lieu of a ringsight, consider a “paper asshole” or a punch hole reinforcement sticker, mounted on your goggles. This can serve the same purpose and yet completely remove the snag hazard of a ringsight. A circle or dot can be drawn on goggles as well.
    To sight in a dot on a goggle; face a plain wall on which, you’ve taped a target. A paper plate works well for this exercise. Stand back from the wall at a distance of about ten feet. Put on the camera helmet, turn on the camera, and have a friend hold your head/helmet so the paper plate is dead center in the camera’s display. Keep your eye looking forward; don’t be tempted to roll the eyeball up/down/sideways. Keep it straightforward. It might take a moment to get comfortable holding your eye straightforward while a friend guides your head/helmet to the centerpoint/target.
    Once you’ve relaxed, focused on the target, and the target is in the center of the camera, mark your goggles (one side only, usually the right side) with a DRY ERASE marker. Remove the helmet, remove the goggles/glasses, and then put them back on and check to see that a reasonably accurate target acquisition occurs. Otherwise, repeat the aiming/targeting process.
    It’s worth mentioning once again however, a ringsite should be one of the last accessories added to a camera helmet when you’re a newcomer to camera flying. A ringsight adds an unnecessary snag hazard.
    STILL CAMERAAgain, it’s very tempting to buy a camera helmet with everything in one shot, and as mentioned previously, is a poor decision for newcomers to camera flying. Learning to fly with a video camera will help develop the skills necessary for flying a still camera.
    DSLR cameras are popular, as they record stills to a memory card, making for fast previewing of photos taken during a skydive, and for tandems, DSLR’s are necessary for fast delivery of photos to tandem students. Though Canon and Nikon are both popular brands of cameras for skydiving, most any kind of camera can be modified to accept a bite, tongue, blow, or hand switch for taking skydiving photographs.
    MOUNTING DEVICESThe device used for mounting a still or video camera to the camera helmet is critical, particularly for video cameras. If the mounting device isn’t rock-solid, the camera will shake or shudder in freefall, resulting in an unstable image. Sometimes this shudder/shake will be blamed on the video camera when the blame lies squarely on the camera mount. Check whatever mounting device you’re considering to be sure it will not move either at the time of purchase, or after it’s been in use for a period of time. Personally, I’m a big fan of the Cookie Composites Padlock systems and the Really Right Stuff mounting systems. Neither are inexpensive, but if you want solid video and clean stills, a solid mounting system is critical.
    CONTROLLING SYSTEMSCamcorders and still cameras need hands-free operation. Video cameras can be manually started/stopped in the aircraft, but for convenience and comfort, most camera flyers use a control system of some sort. Sony tapeless systems offer essentially one controller choice; the HyPeye products from GetHypoxic. All of the camera control systems also offer an indicator that indicates the status of the camcorder such as Power On/Off, Standby, and Record modes. In lieu of these indicator devices, you can always wear a small mirror on the wrist next to the altimeter, and view the Record light on the camcorder. I’d recommend a plastic mirror vs a glass mirror in case your wrist strikes the side of the aircraft.
    Still cameras/DSLRs require some sort of trigger device to cause the camera to snap a shot. Conceptus manufactures tongue and bite switches for Canon cameras. Custom Nikon switches are available from The Ranch Pro Shop and other resellers. Some Pentax cameras use the Canon connection (2.5mm plug).
    It’s difficult to recommend a bite switch, hand switch, tongue switch, or blow switch; everyone has a preference. I personally prefer a tongue switch, but many friends like bite switches. Some like hand switches. You can also “roll your own” from inexpensive parts available at Radio Shack.
    JUMP SUIT/CLOTHINGSome camera flyers opt for jumping with or without a camera suit, or a suit with “wings.” Although it’s a personal preference, camera wings provide the camera flyer a more stable flying platform (when used correctly) provide the for a great deal of range and control that isn’t quite so easy to achieve when wearing a standard jumpsuit or freefly suit. If you’re looking at flying with tandems, wings are often an important part of the jump. If you’re shooting freefly work, you probably won’t want to wear wings.
    There is a lot to learn about flying a camera. Getting good at RW is perhaps the best thing you can do to prep for flying a camera with tandems and four/eight way teams. Understanding burbles, trapdoors, safe zones, and having good belly skills that include side sliding, the ability to orbit, and a very broad fallrate are all important aspects of camera flying.
    This article does not discuss the challenges of camera flying and make no mistake; there are many dangers. One such danger, is that the camera flyer is always focused on the action in front, and never able to turn to see what’s happening behind him/her. Another danger is that in order to “get the shot” some camera flyers lose altitude awareness and may find themselves well below appropriate deployment altitudes.
    Spend time talking to the camera flyers on your dropzone, reading the forums, and pay attention to some of the videos you’ll find on Skydivingmovies.com, YouTube, and Vimeo. All have examples of good and bad camera flying. You can learn a lot just from watching the techniques of others.

    By DSE, in General,

    Big BANG/Small Bucks

    AVCHD has exploded on the consumer and pro-sumer
    scene
    like a new star at the Oscars, and the CX100 is the newest “actor”
    in the AVCHD lineup from Sony.
    Packed into a small body measuring 2” W x 2.25” H x
    4” L (including factory battery) and 2” W x 2.25”H x 5” L with the more
    practical NP90 battery, this small “brick” weighs in between 11 and 14
    ounces, depending on the battery chosen. Short description; this
    camcorder is a mini-brick.


    The CX100 is a very
    small package. The lens is a 30mm thread, if you’ll be adding wide
    or telephoto lenses.


    The CX100 records a 1920 x 1080i image
    on a Memory
    Stick Pro Duo card, with record times up to 340 minutes on the included
    8GB stick, but it’s more practical to record to the highest quality
    video in most situations, reducing recording time to approximately 40
    minutes on an 8GB card, or 115 minutes on a 16GB card.  There are other
    modes, and these are useful for recording surveillance, low motion, or
    even simple scenes, but for best quality, most users will likely find
    the 16Mbps FH mode to be the preference.
    Most exciting is that this camcorder brings the
    award-winning Exmor™ imager to the consumer world. Exmor is the heart of
    the professional EX-series camcorders, which have become standards in
    the broadcast world. What this means to consumers is a more clean image,
    less noise in low-light, and a smoother image overall. It’s a single .20
    CMOS imager, but don’t be fooled by single and small. Technology has
    brought CMOS to a new level of quality that previous generations of  CCD-dependent
    camcorders. CMOS has shown itself to be the new future of virtually all
    imaging devices from the very low cost cell cams to high end
    professional production cameras. Exmor is currently the king of small
    imagers.
    Small is the key with this camcorder.
    Tiny and light
    weight, this camcorder fits snugly into the palm. It’s very ergonomic,
    being curved on the right side and square on the left side.


    This camcorder has a
    manual open/close for the lens cover. The LCD panel will notify
    users if the Record button is engaged while the lens cover is
    closed.


    The lens housing is very simple; it’s a 30mm
    threaded lens with a manual lens cover. It’s a Zeiss lens, identical to
    lenses found on previous HDR series camcorders. Optical width (35mm
    equivalent) is 42mm wide zoomed in to 497mm, so the camcorder isn’t
    quite wide enough for action sports or close-in work, but is plenty wide
    for the average user. While the camcorder does offer digital zoom, like
    most digital zooms, it’s not terribly useful due to the small sensor
    sizes. It’ll work well in a pinch, on a tripod/non-moving, or in a
    situation where the image acquisition is more important than image
    quality. Exposure is controlled via menu touchscreen, as is shutter
    speed, although the camera does not offer full manual control. There are
    nine exposure modes plus an Auto mode, giving users ten options for
    exposure control.
    Two microphone ports are found beneath the lens
    housing.
    The 2.5” LCD panel flips open and rotates; there is
    no clasp or latch holding it in place. The panel may be closed with the
    screen facing out, as with all previous models in this series. This is a
    big preview screen and it looks terrific.
    The controls are very simple.
    There is no normal
    on/off switch on the camcorder; opening and closing the LCD panel turns
    on/off the power to the camcorder. Power can be turned off with the LCD
    Panel open by pressing the on/off switch found beneath the LCD panel.


    The buttons, levers,
    and ports are few on the CX100; most of the options are found in
    the menu options.


    Also found beneath the LCD panel is a one-touch
    Disc Burn button to burn card contents straight to a DVD via the USB
    connector. Next to this is found a Play button for playback modes. Even
    when the camcorder is in Camera mode, pressing the Play button will put
    the camcorder in to Playback mode. Beneath the Disc Burn button is a
    Display button. Pressing this button once turns off most of the
    displayed information, thus allowing more of the preview screen to be
    seen. Pressing again turns off all display items, leaving the preview
    screen blank. Pressing/holding the button turns the preview off
    completely, thus allowing this camcorder to be used in a dark room
    without the LCD providing a source of light. In this mode, there is no
    recording indicator at all. The LCD screen is the only indication of
    recording; the camcorder does not have a Tally light. Next to the
    Display button is an “Easy button” that allows the camcorder to set all
    parameters of operation. Manual focus, exposure, and other modes are
    disabled when the Easy mode is engaged. Finally, there is a Reset button
    to reset all parameters of the camcorder back to factory setting.
    With the LCD Panel closed, the camcorder has three
    buttons; Record start/stop, Photo, and Zoom lever. With Record Mode
    enabled, the CX100 is able to take continual still photographs at a
    resolution up to 4Mp. However, there is a time lag between shots; expect
    about one still every 3 seconds, hardly fast enough for many sport
    photography modes.


    The Photo button and
    the Zoom lever are found on the top of the camcorder. The Photo
    button is a bit inconvenient if the camcorder is being held in a
    standard palm configuration. It fits under the index finger, but
    it’s hard to press the button without moving the camera during
    video recording.


    The stripped-down nature of this camcorder belies
    its intelligence. The camcorder is extremely smart, able to sense up to
    eight faces on the screen and calculate exposure based on these faces.
    Additionally, if the still modes are being used, the camcorder can sense
    smiles, and shoot automatically when it sees a smile. Now if it only had
    an “ugly” sensor that would prevent it from taking ugly photos, or a
    ‘composition’ setting that could prevent badly composed photos from
    being taken. Maybe in the next generation.
    Spot focus, spot metering, slow-shutter are all
    available on this camcorder, along with the previously mentioned nine
    exposure modes. Menus are relatively simple in this camcorder, but there
    are some menus the average user will want to pay attention to.


    There is no LANC on
    this (or any other file-based camcorder system. Remote control is
    achieved through the AV/R port. Pictured here is a HypEye D Pro
    control/indicator system.


    In the “General” menu mode (preview screen/menu
    button, page two under the Toolbox), there are five menu options. In
    this menu, Auto Shutoff, Calibration, and Power On By LCD are the
    important options. First, disable Auto Shutoff unless you’re okay with
    the camera powering down after five minutes of disuse. In the
    action-sports world, this is a non-starter, so disable this mode. Next,
    calibrate the screen for your personal finger touches. Different size
    fingers will touch the menu differently. Next, disable the Power On By
    LCD option if a remote is part of the planned operation of the
    camcorder. For example, when using the HypEye D Pro remote/camera
    indicator, the LCD panel must be opened first, then the HypEye may be
    enabled and will control the camcorder. If the Power On By LCD option is
    disabled, the HypEye D Pro will be able to turn on/off the camcorder,
    start/stop recording, and control functions of the camcorder while the
    camcorder is in a box or cage. It becomes a hands-free operation when
    the Power On By LCD option is disabled.


    If a remote on/off
    system is part of the operation of the CX100, be sure to go into
    this menu and disable the Power On by LCD option.


    In this same Toolbox menu, you’ll want to scroll to
    Page One of the menu options, and select the Face Function Set menu.
    Disable Face Detection, and disable Smile Shutter features. This will
    significantly speed the auto-focus functions of the camcorder. This same
    menu is where you’ll set the movie or photo modes of the camcorder.

    In the next menu, you’ll want to set the camcorder
    to record to external media, unless you’ll plan on downloading
    everything from the internal memory to an external hard drive. There is
    a huge benefit to this process; if you’ve filled or forgotten a memory
    stick, now you’ve got a way to record. Imagine being on a cliff wall or
    aircraft and realize you have no memory stick, or the stick is full.
    Simply switch to “Internal Memory” mode and you’ve just gained nearly 60
    minutes of high-quality recording in FH mode!
     
    Be certain to enable X.V. Color in the menu for the
    most rich and natural colors during playback to any X.V. enabled
    HD display. X.V. is standard in Sony displays, but XVYcc is an up and
    coming standard in home video/theatre. The color information is embedded
    in the video stream, and having it will not harm the image of non-XV (HDMI
    1.3) systems, but will be immediately apparent in XV displays.


    Disabling Automatic
    Off will be important to action sport photographers.


    If you need to share media, no worries. You can
    easily dub media from a mem stick to the internal Flash memory, or dub
    from the internal Flash memory out to a media stick. If Firewire has
    been your primary means of sharing video files, MSPD is now your
    transport medium for sharing video. From skateboarders to skydivers,
    this feature will be much loved, much appreciated, and much late in
    file-based recording systems.


    "The Sony CX100 with incredible HD quality in such a small form
    factor complemented by electrical stabilization and solid state
    media; is the best camera on the market for daily capturing
    skydiving and other action sports."


    Mark Kirschenbaum – Get Hypoxic/Skydiving Videographer


    Another ‘feature’ of this camcorder is the image
    stabilization system. For the past two years, almost all Sony models
    have been Optically Stabilized, or OIS. This is terrific for those that
    stand around with camcorders in their hands, but for those that are
    mounting camcorders to skateboards, helmets, aircraft struts,
    motorcycles, or anything else that has heavy, inconsistent vibration,
    OIS is a bane, not a benefit. Soft, juddery images are sometimes the
    result of OIS systems. The CX100 offers EIS, or Electronic Image
    Stabilization. Granted, for those that stand around with camcorders in
    their hands, EIS may not be quite as preferable, but for everyone else,
    EIS is golden. Action sports photographers have been begging for EIS to
    return to small-format camcorders. Sony has finally obliged.


    The bottom of the
    CX100 offers a metal-threaded/encased tripod mount with a
    removable bezel.


    All in all, the Sony CX100 is a dream camera for
    the low-budget videographer, the action sport photographer, or the
    independent production looking for a crash cam. At a retail of 599.00,
    its street price is somewhat lower, and available everywhere. In Black,
    Red, and Silver, there are even multiple color choices for the
    color-coordinated videographer/photographer. There is little to want
    for, given the size, weight, and cost of the CX100.


    The CX100 is very small, and will
    fit on any helmet camera mount system. Consider using gaffers tape
    to hold the battery if the mounting system does not support the
    battery bottom.

    Cookie Composites
    has announced they'll offer a box for the CX100 around the same
    time the camcorder ships.

    (pictured helmet is a Cookie Composites ROK)


    Weaknesses are found in the potential “oops” factor
    of leaving a lens cover on while using a remote, and in the opportunity
    to miss menu options in a hurry. Lack of audio input means extra care
    should be taken to capture decent sound; if a housing is used, be sure
    to leave an opening for audio. These are small pitfalls for the large
    scope of what this mini-monster brings to the table.
    Congratulations to Sony’s design team; in my
    estimation, this is the best small-format camcorder for the buck. Ever.
    ~dse

    By Deleted, in General,

    The GoPro Hero

    Last
    week GoPro sent me one of their new Hero cameras to test in a variety of
    environments. I’m somewhat of a snob when it comes to cheap camcorders,
    and the people at GoPro knew this from the start. In fairness, this is the least
    expensive camera/camcorder I've ever reviewed, and not expecting to be impressed.The
    camera arrived in a complete configuration; batteries, 2GB SD memory card,
    and the standard box that the GoPro comes with. Opening the GoPro package
    requires a degree in disassembly if the box is to be kept in more than one
    piece. It took three people nearly 10 minutes to figure out how to open
    it. If the box is any indication of how tough this camera is…it’s gonna be a great
    little camera.


    The GoPro Hero Wide


    Physical Characteristics:
    The
    camera includes several mounting options, including a rubber headband that
    resembles a jockstrap. It’s not much to look at, but it’s also not going
    to be the common use (I hope) for most users. The camera mount on the
    “jockstrap” can easily be removed and connected to more substantial
    webbing.
    The water housing is impressive. Very impressive for the price, in fact. I’ve
    paid more for a cheap housing than for this entire camera, and this
    housing is more nicely built than a housing I once paid $350.00 for. This
    is a good thing, because the mount for the camera is integrated into the
    waterproof/protective housing of the camera. The system is not designed to
    be used without the camera in its waterproof housing.


    The
    camera itself feels “plastic,” even though it is made of light aluminum
    and plastic. The plastic lens is fairly exposed; all the more reason to
    keep it in its waterproof case and keep the case in a soft bag when not
    being used, in order to protect the lens from damage/scratching.


    This shot was one of 92
    still images captured in a single skydive.


    With
    a plastic pressure-release mount, there is some fear that a hard strike
    will cause the unit to be torn from whatever mounting device it may be
    attached to; this is a positive feature rather than negative factor, as
    safety is the primary concern of all active sport enthusiasts.

    The
    plastic mounts are plentiful; GoPro provided three stick-on mounts with
    extra double-sided adhesive material. In addition, GoPro provides a pair
    of extra mount clips,  and  a mounting arm that allows for a 90degree
    rotation of the camera when mounted to vertical objects such as the mast
    of a kiteboard, paraglider, or similar. It’s much like an Israeli-arm used
    for higher end cameras, excepting that it’s exceptionally lightweight, and
    plastic.


    The camera comes with
    several mounting devices/replacement parts.


    Technical Characteristics:

    The
    camera has a very small sensor size, I believe it is 256 x 192 with
    doubling, but I was unable to receive confirmation of this from the
    relations department at GoPro. The sensor is a CMOS imager, which is
    somewhat obvious by the lack of dynamic range (see image with large black
    spot in center of sun).

    Sporting an output  frame size of 512 x 384, broadcast, output to DVD, or
    other full-frame display will be difficult to do with any degree of image
    integrity. For web or fun review on a computer in small viewer, it's
    perfectly appropriate and will give a lot of enjoyment to the sports
    enthusiast that isn't chasing professional results.


    GoPro encodes to an MJPEG codec in AVI container (will be .mov on Apple)
    and will require an MJPEG decoder in order to read/edit. Most NLE software
    includes an MJPEG decoder, and they are available from several providers
    around the web. The encoder compresses the video data to 4800 Kpbs, which
    is approximately the same compression ratio found on many hllywood DVDs.
    However, bear in mind that Hollywood DVDs are framesized at 720 x 480, and
    are sourced from film or HD cameras. I mention this, as some of the
    marketing commentary on the GoPro Hero compares technical data with that
    of a DVD. They’re not remotely the same. Additionally, DVDs are encoded
    with a PAR (Pixel Aspect Ratio) of .909 or 1.333. This means that pixels
    are elongated in either a horizontal or vertical configuration. The GoPro
    records a PAR of 1.0 (this means the pixels are square, and are not
    stretched, which is a benefit). The display is a Standard Aspect Ratio,
    otherwise known as 4:3. This is the “old” format of screen display, and is
    no longer available in television displays.  GoPro might consider
    providing widescreen in an anamorphic format in their next camcorder
    models, as widescreen displays are now the world standard.

    30Fps Progressive frames means the image will be smooth for playback, and
    clear on computer monitors.

    Audio is recorded in Mono @8Khz/64Kbps stream. The audio is useless for
    anything other than reference. It should be pointed out once more, that
    this camera is aimed at the sport enthusiast that wants to capture
    exciting moments for the web, not for broadcast or professional use.


    Still images may be captured at the rate of one still every two seconds
    for up to 65 minutes (over an hour) on a 2GB SD card. Larger cards may be
    used. The stills are 5MegaPixels, and for some, this is going to be a
    “wow” factor. However, there is a difference between stills captured
    through a low-cost plastic lens and a reasonable quality glass lens as
    found on most 3-5MP hand cameras. In other words, the megapixel count is
    only a small part of the actual picture quality. (More megapixels don’t
    assure better pictures in any event.)

    SD
    flash card is the format in which this camcorder stores data. SDHC cards
    do not improve the performance, speed, nor quality of the camcorder.

    The
    camcorder package also includes a proprietary cable connection that
    outputs to USB and video composite signal.


    Note the hot-spot in the
    middle of the sun. I was able to consistently reproduce this artifact
    with any bright light source in a high latitude shot. Even a 100 watt
    lamp could create this anomoly in a reasonably lit room. I believe
    this is a problem with the sensor; it cannot manage high latitude.


    Operational Characteristics:

    The
    camera is easy to operate. The multiple-press menu button that provides an
    icon-driven LCD panel doesn’t provide immediate feedback, and requires a
    review of the owners manual to decode the iconography of the display. In
    my first operation, I captured video from a skydive, but accidentally
    deleted the files as a result of not being clear on what the different
    icons were indicating.

    Additionally, it wasn’t immediately clear on how to turn off the
    camcorder, and when left on without operation, the camcorder eats
    batteries fairly quickly. With regard to batteries, only Lithium batteries
    should be used with the GoPro Hero. They’re a little more expensive, but
    this device eats alkaline batteries like they are candy. Rechargeable
    batteries may not be used.


    The GoPro Hero Wide uses SD
    memory cards. The black strip on the back is a rubber isolator to keep
    the camera tight in the waterproof housing.


    There are only two buttons on this camera, it’s not like it’s a challenge
    to operate once the owners manual has received a glance or two. One button
    for shutter control/record functions, and one button for menu control. The
    beauty of this camera is found entirely in its small size, price, and ease
    of use.

    Summary:

    This camcorder
    isn't going to light the professional's eyes up like a professional POV
    camera will, but it won't burn the amateur's wallet like a professional
    POV camera costs, either. I've tried all the various POV "sport cams"
    currently on the market, and for sub $200.00, this is clearly the winner.
    There simply is no camera in its class that can compete. GoPro should be
    proud of themselves for designing a camera with this quality in this price
    range. At $189.00 it certainly isn't a toy, but it is a very fair cost of
    the fun this camcorder can record for the sport enthusiast. Mounted to
    handlebars, helmets, struts, pedals, forks, kayaks,  paddles,
    fenders, wrists, feet, belly, or other body part, the GoPro Hero is a hit
    in my book.


    -douglas spotted eagle

    By DSE, in General,

    GetHypoxic HYPEYE D Pro

    Get Hypoxic HYPEYE D PRO Remote Camcorder Indication and Control System
    Settle back with a cup of good coffee as this is going to be lengthy; the product does a lot more than meets the eye!
    I received my HYPEYE D PRO controller and expansion in the mail today; I was overjoyed. I knew it would be a good product, as I already owned two HYPEYE MINI camera indicators.
    Just in case you ve been in the air too long, don't fly a camera, or simply haven't paid attention to technology, the camera control protocol known as LANC or (Local Area Network Control) is not a part of the crop of new camcorders being issued by Sony (or Canon). LANC is a tape-based protocol, and none of the new camcorders are tape-based, but rather are Hard Disk Drive (HDD), DVD, or Flash memory-based in design.
    Tape is very much on its way out, and will not exist as a common format in the foreseeable future. Absent a LANC controller, camera flyers struggle to start/stop the camcorder, not to mention the lack of an indicator usually mounted on a ring sight to indicate the status of the camcorder. True, a small mirror might be mounted on an altimeter to view camera status, and of course, camera flyers can cut large holes in their camera boxes for access to on/off switches and record switches, so it s not as if all is lost with the disappearance of LANC. But it is terribly inconvenient for most of us.
    Sporting a rubberized/weather proofed recessed button, this unit is solidly built. Early camera switches were fairly unreliable and affected by riser slap, high humidity, water, or the camera helmet being laid upon the ground and accidentally triggering the camera button. None of the above has any impact on the operation of the Get Hypoxic HYPEYE D PRO (damn, that s a long name) camera controller, due to the way it s built.
    Designed to be mounted either inside or outside the helmet, the switch housing offers a threaded hole in the back of the unit allowing for an included nylon screw to mount it to the outside of a helmet or other mounting surface. Even though this may expose the switch to a riser slap, the nylon screw should break/release in an entanglement.
    The switch housing is identical in size to the pre-formed port found in many camera helmets, allowing for a .65 to be drilled, allowing for a flush switch on the outside of the helmet with the bulk of the switch housing inside the helmet. Double stick tape or gaffers tape (not included) can be used to secure the switch to the helmet or mounting chassis. That s not all, nor is it the only way to be mounted - more on that later.
    I used the Expansion kit to set up my own switch access that is smaller than that of the HypEye, but it is not weather resistant like the HypEye switch. The switch housing has two rubber inserts for accessories available for the HYPEYE D PRO. The first is a female 3.5mm jack that allows for a debrief cable to be plugged into the helmet/switch directly, thus eliminating the need to remove the camera from a camera box/housing, or from a mounting plate in order to view the video. The debrief cable will likely be essential for any team camera flyer or AFF instructor wanting to debrief a jump. Not only is removing the camera from the helmet a pain, but also wears hard on the camera and box, this allows additional wear on the camera and helmet to be avoided. Techno-geeks will probably install a female 3.5mm jack in their helmet so the debrief cable doesn't need to be plugged into the HYPEYE D PRO switch housing too. I've already seen one team using the debrief port on an LCD monitor in the aircraft as they climbed to altitude for another jump, again saving the hassle, time, and potential error involved with removing the camera from the housing or helmet. If your last camcorder came with a four-contact 3.5mm cable (has yellow, red, and white connectors on the end) you won't need to purchase the HYPEYE D PRO DEBRIEF CABLE.
    The other rubber plug is an access port for the HYPEYE D PRO EXPANSION CABLE KIT. This is the kit that got me really excited about the unit because it adds so many features to the HYPEYE D PRO. In my opinion, this is what makes the HYPEYE so spectacular. The Expansion Cable Kit is optional at a cost of $29.00 USD.
    So what does the Expansion kit add?
    A plug that connects to an L&B; Optima audible altimeter. This allows a separate set of LED s on the HYPEYE indicator to flash when the Optima is triggered. The indicator will flash slow flashes at the first altitude set in the Optima, faster flashes as the second altitude is reached, and very fast flashes when the final altitude is reached by the Optima. This feature isn't only for the camera-flyer; deaf skydivers will find this feature very useful. Unlike the L&B indicator which is fragile and stiff, the HYPEYE indicator is on a flexible cable and can be mounted any number of ways to suit the users desire and need.
    Bite Switch input. Yup, the Expansion Kit allows owners to plug their existing 2.5mm bite switch cable into the system, triggering stills from a video camera. Some cameras can only shoot 3 stills during a jump, but camcorders like the Sony CX7 or HC5 may be turned into a still-only camera, allowing for reasonable quality stills to be taken with these small HD camcorders.
    External Switch/Remote Switch connection. This allows the rubberized nipple switch found in the HYPEYE housing to be bypassed and the system controlled by a third party switch. This is what I've done with my system. All electronics are mounted inside the recesses of my BoneHead Flat Top Pro helmet, and I've mounted my own softswitch on the side of the helmet. This is useful for custom buttons, but also would allow a pilot to trigger an exit camera or similar.
    Zoom Memorization. Ever gone on a jump only to find that the zoom button had been moved, and everything was blurry, deeply zoomed, or both? This feature tells the camera to be zoomed in at a user-defined point. This will hopefully reduce the number of absolutely ugly vignettes found in so many skydiving videos, allowing users to slightly zoom in past the point of the lens adapter rings.
    Remote on/off of camera functions. Imagine this; you re in the door of the aircraft ready to jump, and notice that you've forgotten to turn on the camcorder. The count begins as you yell WAIT! With the HYPEYE D PRO, pressing the switch will turn on the camera even if the on/off switch of the camera is in the off mode! (this is camera model dependent, and won't work with all cameras, but it s great with the CX and SR series cameras)
    A audio/microphone input rounds out this system very nicely. If the camera is in a typical housing, the internal microphone is buried, often under Neoprene or other material designed to securely hold the camcorder. An external microphone isn't only helpful, but essentially necessary for tandem interviews in this situation. Or you can just connect your ipod and burn to DVD for your 4way team with no post production work at all. Here is where users will find a weak point in the HYPEYE system; the installation instructions for the Expansion Kit recommend placing a dab of glue on top of the connector. After a quick call to Get Hypoxic I learned this was to prevent years of vibrations from inadvertently dislodging the cable. I needed to either use a hot glue gun or fingernail polish to create a bead on the cable once installed in the switch. It wasn t difficult, but I wondered why a swage or something similar wasn t molded to the otherwise well-designed cable. It would save users the headache of finding a glue gun or borrowing fingernail polish from someone. I used the hotglue, it was easier. See the GetHypoxic website for very detailed photos and instruction on how to achieve this.
    What's to love
    Weatherproof, recessed nipple button
    Audio/ Line-Level Microphone input
    Audible altimeter connection
    Super-bright LEDs
    Debrief port
    Zoom memory
    Bite Switch ready/input
    Remote control of all camera modes
    The camera connection side of the system is an AVRemote S cable system exclusive to Sony camcorders. What makes this unique is that these right angle cables will fit inside of most camera boxes where a straight connector absolutely will not. It s obvious that Get Hypoxic designed this connector and its slim profile, as the Get Hypoxic name is molded into the cable connector, as it is in the Expansion Kit fantail.
    The indicator side of this unit has several micro LED s in it. These indicate a number of different functions depending on the mode in which the camera is operating. Ready/Standby is indicated by a blue LED, Record indicated by a red LED, and warnings for batteries, sleep, error, or tape end indicated with a yellow LED. However, double-clicking the switch will put the camera automatically into different modes. Want to switch from video mode to stills only mode? No problem, just double-tap the HYPEYE switch. Wanna go from stills to playback? Same action.


    What's Not So Lovable:

    Big round cables are space-killers in tight helmets
    Zoom reset is slow
    Requires tools and additional adhesives for certain setups like the Expansion Kit
    Debrief port is part of switch, making it inconvenient for in-helmet setups
    Pricey WARNING: THESE LEDS ARE BRIGHT!

    Users may find them too bright if they're mounted close to the eye such as in a ring sight configuration. Using a Morse code-like tap sequence, the LED s may be dimmed in five different levels. (Out of the package settings are at the most dim preset) Military users will appreciate the exceptionally dim light in those covert training ops, and night jumpers will appreciate not being blinded by the camera flyer s indicators as well. These same LED s will also indicate altitudes triggered by the Optima, if the Expansion Kit is part of the setup. Be aware that the batteries in the Optima will affect the brightness of the altitude indicators. Camera status indicators are not affected by the Optima battery level.
    Speaking of military users, Get Hypoxic has said that they ll soon have an armored, aluminum billet version of the HYPEYE available at a higher cost. (comes stock set at a low brightness level, for your protection)
    There are some things I wish were different. The HYPEYE uses a very high quality silicone-covered rounded cable. A flat cable would have been more appropriate given the very tight confines of most helmets, yet it should be mentioned that flat ribbon cable is very expensive and not terribly durable. The molded fantail/distribution point of the Expansion Cable kit is also somewhat larger than I would have liked. In my Tonfly CC1, it took significant effort to keep the cables from impacting how the helmet fits, but it is possible. As my TonFly helmet does not have a ring sight (used for wingsuit camera) I appreciated the very stiff plastic in the indicator side of the HYPEYE D PRO. The user-programmable zoom depth is slower to get to zoom point than it should be, yet this is camera-dependent, so not really GetHypoxic's fault.
    Cable size aside, I feel this is one of the best-designed tools available to camera operators in any sport application where space and control are considerations whether they re using tape-based HDV camcorders, newer DV cams, or AVCHD camcorders. Congrats to Get Hypoxic for presenting a very well thought out, fully-featured product that skydivers can actually use, that seems to be very tough (I have only 22 jumps on my system). This tool is 110% real as far as I m concerned. It s hot, not hype.
    Get the Hypoxic HYPEYE D PRO Remote Camcorder Indication and Control System at Get Hypoxic or most skydiving gear outlets.
    HYPEYE D PRO-$99.00 MSRP
    PRO Expansion Kit-$29.00
    HYPEYE D PRO Debrief cable kit-$10.00
    The Hypoxic Hypeye D Pro is also available on Amazon: Hypoxic HYPEYE D Pro Remote Camcorder Indication and Control System.

    By DSE, in General,

    Can Yoga Improve Your Skydiving - You Might Be Surprised

    ByNadene Beyerbach
    Want to improve your skydiving skills, but don’t have thousands of dollars to blow in the wind tunnel? Try yoga! Yoga has been around for thousands of years. What is commonly considered yoga in Western society is actually Hatha Yoga, focusing mainly on physical yoga postures. However, yoga is not just a series of postures or poses. Yoga is meant to integrate the mind, body and spirit, and to achieve a state of enlightenment. For skydiving, this means developing your insight, awareness and focus, as well as balance, flexibility and stability.
    Not just an effective exercise for improving skydiving skills, yoga is also extremely convenient to practice at the dropzone. The simplicity of yoga means that you can do it virtually anywhere and need very little to get started. The most important thing you can do is wear comfortable, loose fitting clothing that you’re able to move easily in. A yoga mat is ideal, since it will allow you to grip with your feet and go deeper into the poses. However, poses can be done on grass, a towel or a blanket, if necessary. You can experiment with different yoga postures, breathing, meditation and relaxation exercises to see how they affect your skydiving. Try the following to get started:
    Complete Breath: A complete, “three part” breath consists of deep, continuous breathing through the nose. It is referred to as “three part” breath because you breathe first into the throat, expanding through the ribs, then deep into the belly. Slowly exhale, drawing the belly back in. Slow, deep breathing both energizes the body and calms the mind. Try using complete breathing when you’re concentrating on flying a body position that requires a lot of effort. For a relaxed and stable exit, you can also try exhaling completely as you leave the aircraft.
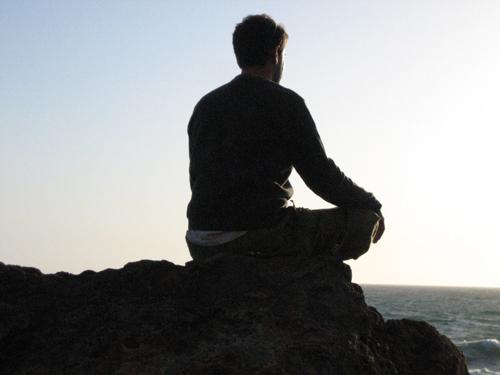
    Meditation/Relaxation: Simply close your eyes and focus on your breathing. Let your mind go blank. As thoughts enter your mind, just return your attention to your breath and let the thoughts float away. Meditation reduces stress and tension and improves concentration. Try meditating for a few moments on the ride to altitude before you begin any mental rehearsal. This will allow you to visualize your intention for the jump from a calm and centered place.
    Physical Postures: There are many different types of yoga postures to explore. Standing poses, seated poses, forward bends, back bends, twists, inversions (upside down poses), balance poses and relaxation poses are just some of the different types of postures. Let’s take a more in-depth look at sun salutations, twists, inversions and balance poses.
    Sun Salutations are an ideal warm-up for skydiving. Sun salutations are made up of a series of poses, flowing continuously from one move to the next. As you move through the poses be sure to hold each one for a few deep breathes. Begin by standing with your shoulders back and body properly aligned (Mountain Pose). Taking a deep breath, stretch your arms overhead, then fold forward at the hips and let your head hang toward the ground (Forward Fold). Step back with your left foot into a lunge. Follow with your right foot, pushing into your hands and feet to create an inverted V shape (Downward Dog). Lower your body toward the ground (Plank), then straighten your arms, looking up and lifting your chest toward the sky (Upward Dog). Now return to your starting position: Push back into Downward Dog, lunge on the right leg, fold forward, and finish by inhaling deeply in Mountain Pose. Try this sun salutation before gearing up for your next jump. You’ll instantly increase circulation, mobility, and flexibility.
    Twists offer back relief for skydivers who do a lot of bellyflying. If you spend a great deal of time arching, try a Half Spinal Twist to release tension in your back. Sitting down, bend your right leg to bring your foot toward you. Lift your left foot and place it on the outside of your right knee. Looking over your left shoulder, place your left arm behind you and your right arm around your knee. Breathe deeply and twist through your spine. Along with relieving tension, spinal twists will increase flexibility in your back and neck to help you further improve your RW skills.
    Inversions are poses performed upside down (with your feet above your head). They improve circulation and increase the flow of oxygen throughout the body. Inversions allow you to become comfortable in an upside down position and to work on balance with your center of gravity above your head. To try the Half Shoulder Stand, lie on your back and pull your knees to your chest. Support your back with your hands and straighten your legs above your body. Your weight should be on your shoulders, not your neck. Breathe deeply and remain strong through your core to help you balance. The Half Shoulder Stand is an excellent inversion to work on if you’re learning to fly head down.
    Balance Poses deserve special attention when it comes to skydiving. There is no better way to develop balance, strengthen stabilizer muscles, and increase mind-body awareness. Warrior 3 (also known as Airplane) is a good pose to begin working on your balance. Start by standing tall and lifting your arms to shoulder-height. Place your weight on one leg, lifting the opposite leg and leaning forward until you form a straight line. Hold for a few deep breathes, then repeat on the opposite side. Holding a balance pose will quickly make you aware of your alignment and body position. If you do any freeflying, adding balance work to your routine could give you the edge you’re looking for.
    Enjoy your adventures in yoga! Test out the suggestions in this article and continue to experiment with different postures to find what works best for you. Always work at your own pace and stop if you experience any pain or discomfort. Remember, it’s about the journey, not the destination, so don’t worry if you’re not an expert right away. To learn more, consider attending a yoga class or inviting an instructor to teach at your dropzone. With practice you’ll start to notice improvement in your skydiving skills through increased mind-body awareness, balance, focus and control. Keeping your body strong and flexible will also help to protect you from hard openings and not-so-perfect landings.
    Blue skies, or as we say in yoga, Namaste.
    Nadene Beyerbach is a skydiver and yoga instructor. She is certified by Body Training Systems as a Group Centergy instructor and is a member of the Canadian Yoga Association. Learn more about skydiving specific yoga at Flex Fly.

    By admin, in General,

    Risk Homeostasis and Skydiving

    Wikipedia describes the phenomenon as follows:
    'Risk homeostasis is a psychological theory developed by Gerald J.S. Wilde, a professor emeritus of psychology at Queen's University, Kingston, Ontario, Canada...the theory of risk homeostasis states that an individual has an inbuilt target level of acceptable risk which does not change. This level varies between individuals. When the level of acceptable risk in one part of the individual's life changes; there will be a corresponding rise/drop in acceptable risk elsewhere. The same, argues Wilde, is true of larger human systems (e.g. a population of drivers).'
    Through the comparison of relevant Sky Diving statistics, recent studies in the field of risk homeostasis show that the introduction of a safety feature does not necessarily improve the generalredistribution
    This phenomenon, due to a type of 'risk redistribution', was researched by Sky-Diving academics who spotted strange fatality rate fluctuations migrating back and fourth between open canopy fatalities, 'no pull' and 'low pull' cases and others, depending on the adoption of certain safety feature at that time.
    The study employed the Cypres (Cybernetic Parachute Release System) Automatic Activation Device (AAD) as an example, which is specifically designed to deploy the reserve parachute at the required altitude, in the event of timing neglect by the jumper.
    Risk homeostasis shows that varying individual trends toward risk adjustment become displaced by the introduction of a safety feature. The concept results an inadvertent psychological neglect of natural automated adjustments to these barriers. This leads to a generalised lowered level of risk, instead of unique to the area in which the safety feature is applicable.
    The risk then becomes distributed across parameters and is referred to as 'accident migration'.
    When this in turn was applied in relation to levels of perceived risk, it was noted that; 'Skydivers adjust their behaviors to maintain arousal at optimal levels'- a behavioral modification linked to inadvertent risk displacement. Levels of risk vary from one person to another and are adjusted in accordance so as to maintain a level of comfort most acceptable to the individual. On the other end of the spectrum, however, more risk can be introduced if the threshold is too low in comparison to what the individual is used to.
    In other words, the tendency to take less precaution in presence of a safety measure does not necessarily result in a balanced distribution of risk and as a direct result, risk is inadvertently lowered in other areas. Where there may have been a decrease in 'low pull' or 'no pull' fatalities due to this mechanism, the open canopy fatalities increased, and the introduction of open canopy safety features appeared to coincide with an increase in landing fatalities.
    A correlation can be seen concerning traffic accidents, where most of the evidence for risk homeostasis originates. Studies have shown that 'pedestrians are twice as likely to be killed in a painted crosswalk as in an unmarked one' and that driver side airbags in actual fact contributed to driver behaviors that increased accidents and fatalities.
    Needless to say, the field of skydiving is a popular target for academic study on the topic of researching risk whether perceived or real. Sensation seeking provides the blueprint for studying risk-taking in social, legal, physical and financial for the sake of such experience. It has been found that personality types within this sphere can be genetically characterized by an elongated version of the DRD4 gene which regulates the production of dopamine and effects pleasure and emotion.
    It should therefore come as no surprise that when comparing skydivers to non-skydivers it was found that the former have lower levels of death anxiety, which in turn lends itself to higher levels of target risk. It was also found that Skydivers accept significantly higher levels of risk and that 'More experienced skydivers monitor the risk perceptions of the beginning skydivers in their subcultures.'
    Further research will be conducted into how to enforce precautionary measures within the parameters of these findings. To read the original case study visit www.vicnapier.com
    Original Authors:
    Napier, Vic
    Pima Community College
    Findley, Carolyn Sara (Casey)
    Auburn University Montgomery
    Self, Donald Raymond
    Auburn University Montgomery

    By labyrinth, in General,

    Meditation Preparation

    Most skydivers exercise some form of mental preparation on the way to altitude. What most do not realize is how incredibly important this is. The mental state that we are in prior to exiting the airplane determines how we respond to any given situation, and this response is the most important contributing factor in how the situation ultimately evolves. In other words, mental preparation is every bit as important as a pin check.
    What is Meditation?
    It must first be clarified that the specific method of meditation is not important for the purposes of this discussion. There are many ways to attain a calm internal dynamic, and there are no wrong ways to meditate.
    The goal of meditation is simple. We are striving to calm the mind, and develop a state that is devoid of thinking so we may calm back down to our state of basic sanity and health. This can be achieved through sitting practice, or through deliberate focus of attention toward a simple task such as walking or yoga. All of these pursuits result in the same kind of brain activity, which happens to be the direct opposite of the fear state.
    In the emotional experience of fear, the brain becomes unbalanced. Certain parts of the cortex become deactivated, while others, most notably the older structures such as the Amygdala, become awakened. These ancient brain areas cause an unconscious escalation toward a preparatory "sympathetic" response, rather than the healing, balancing forces of our "parasympathetic" systems.
    Interestingly, the first part of the brain to show significant diminished functionality during a fear response is the pre-frontal cortex. This is the newest part of the brain, responsible for higher cognitive functioning and is the source of willed action. This means that when we are afraid, we are no longer in control of our actions. Our choices gradually become dominated by our old brain that only knows three things: Fight, Flight and Freeze.
    In walks the "parietal lobe" of the brain. Located on the crown of the head, this is the spatial orientation area. When the parietal lobe is working to help us orient ourselves in the world, we are not in a state of rest. When this part of the brain is under-stimulated or deprived of input, however, the quiescent (calming) systems of the mind and body take over to cool us down.
    When the visual information coming into the visual cortex is interpreted by the parietal lobe, there are aspects of our visual experience that have not changed in the recent past. These aspects of our reality become "base frame", which is to say that we stop paying attention to them. When this occurs to a majority of the visual data, the parietal lobe is said to be in a state of "Deafferentation". (Newberg, 2001)
    Deafferentation may be the cause of the altered states reported by mystics and spiritual seekers of all cultures. The common denominator across all the spiritual practices is the lack of changes in the data set coming into the visual cortex. This is accomplished simply by gazing in one particular direction for a long period of time.
    When the parietal lobe is deprived of neural input, our parasympathetic processes begin to transform our state of consciousness, as demonstrated in brain scans such as SPECT and functional MRI. The resulting brain activity is most notably different from our normal waking consciousness, called "beta" activity. In fact, experienced meditators exhibit extremely balanced activity throughout the brain, referred to as "gamma synchrony" (Davidson, 2004). Further studies have shown that the balance of activity in the parietal lobe is significantly different from that experienced in "normal" consciousness (Newberg, 2002).
    The interesting thing about the results of the many studies on meditation is the fact that repeated exposure to the meditative state seems to increase the effect. Buddhist monks with considerable meditation practice showed a much higher level of gamma synchrony than subjects with no previous experience (Davidson, 2005). It seems that practice really does make perfect.
    What does this mean for you and me? These studies show that we are actually able to alter our brain's activity, and prevent stress from diminishing our cortical activity to the capacity of a caveman. All we need to do is take the time to practice a new way of operating our minds. Although there are many different methods of meditation, there are common aspects across the techniques that seem to create the most powerful effect. Following are some of the common elements.
    Minimal change to the visual field, eyes open
    Focusing on the breathing, particularly the out-breath
    Balancing the posture to prevent physical discomfort
    Letting go of thoughts as they come
    Returning to the present moment When you exit an aircraft in flight, you are going into battle. You must prepare in every way that you can to defend yourself against planetary impact. The most important tool of all is your awareness. When your mental speed increases due to fear or anything else, you are a danger to yourself and everyone near you.
    How you find your way to the meditative state is your business. Your rituals are your personal avenue to the calm state, and it will look different for everyone. All that matters is that you take the time before each jump to cool out and let go of your thinking. That way, when some unconsidered possibility comes your way, you are relaxed and in balance, ready for anything.
    BSG


    Portions of this article are excerpts from Brian Germain's new book, Transcending Fear, 2nd edition. For more information regarding meditation as a tool for fear abatement and performance optimization, go to: www.TranscendingFEAR.com

    By admin, in General,

0