0

General

    The Skydiving Handbook - Chapter 6 (Canopy Performance)

    Your square parachute is the result of two decades of design refinement. Like a glider, it can fly straight and level or turn, slow down, spin, and even stall. As the pilot, where you land and how you land is totally up to you. Practice, combined with a clear understanding of how your parachute works, will allow you to land softly, exactly where you want to, every time.
    When your parachute is inflated, the pressurized air filling the tailored cells causes it to take on a wing shape. A parachute has a fixed angle of incidence, built into it by the length of the lines. The "A" lines in front are shorter than the "D" lines in back, causing the wing to point slightly down. It essentially flies forward and down on the slope of the angle built into it. This angle causes it to fly about three feet forward for every one foot down, giving it a 3 to 1 glide ratio. In other words, on a calm day a parachute opened at 4,000 feet could fly a straight line distance of 12,000 feet before landing! The speed at which it flies is about 20 miles per hour forward and 6 to 8 miles per hour down when the canopy is in full glide with the control handles, called steering toggles all the way up. The toggles are also referred to as brakes, since pulling both down slows you down.
    Pulling down on the right toggle pulls down the back right corner of the canopy, slowing it down and creating a turn to the right. At the same time, the slow side looses lift and the canopy points downward in the direction of the turn, increasing the vertical descent rate. One of the most important handling characteristics of parachutes is that their descent rate always increases in a turn! This phenomenon is by far the greatest cause of parachuting injuries. With this in mind, you must take care to always plan your landing so that you will not be forced to do any major turns below 100 feet. How slow or fast you turn is in direct proportion to how far you pull down the toggle, as is the change in your descent rate - fast in a sharp turn, slower in a mild turn.
    If you pull down on both toggles simultaneously, the canopy's forward speed decreases. The slowest you can go is about five miles per hour forward. Generally you should fly your canopy as fast as possible - toggles all the way up. This is because the more air the wing has passing over it, the better it flies. In fact, in sustained deep brakes so little air passes over the wing that the descent rate increases significantly. You can even cause the canopy to stall, which means it gives up flying altogether. Normally student canopies have the control lines calibrated to make a stall condition difficult or impossible to get into. Whenever you jump an unfamiliar canopy, you should always do a series of turns and practice flaring (pulling both toggles down simultaneously) above 1,500 feet in order to acquaint yourself with its handling characteristics.
    Why 1,500 feet? Your CYPRES automatic activation device that deploys your reserve in an emergency is calibrated to fire at about 1,000 feet. It may mistake radical maneuvers under a good canopy for a malfunction and could deploy your reserve if you are aggressively turning or stalling the canopy below 1,500 feet! This is not only dangerous, but expensive. Recharging the CYPRES and repacking the reserve costs $170. If the CYPRES fired because of your mistake, you are the one who pays!
    Besides the canopy's handling characteristics, the parachute pilot must consider the surrounding conditions. Two variables are present to some degree on every jump; the spot and the winds. Let's take a look at spotting and how it affects you.
    Imagine the simplest jump possible. Let's say you are going to exit the airplane at 3,000 feet and your parachute, instead of gliding, descends straight down. There is no wind. In such conditions if you opened directly over the target, you would land on it. If we add a ten mile per hour wind, the spotter would have to determine how far the unsteerable parachute would drift and plan for the jumper to open that much further up wind of the target. Now let's say he has three parachutists leaving at ten second intervals. He must plan the initial exit so that all three will land as close as possible to the target: the first would be short of the target, the second right on, and the third would be long.
    In our case, the spotter is looking down from 12,500 feet, has to guess about the wind, and has only a rough idea of how long each group will take to exit. Fortunately square parachutes are maneuverable enough to compensate for the variables. As a novice you will usually leave late in the exit order which means that for you the spot will usually be long. This can be useful, because it means all you have to do is locate the landing area and fly towards it. As you do you can think about the wind line (remember chapter one) and check for other wind indicators such as wind socks, the shadows of clouds moving over the ground, smoke or dust, and the direction other parachutes are landing. You need to do this, because the wind is the second variable you need to think about.
    On a calm day, your ground speed will be the same as your canopy's forward speed - about 20 miles per hour. But when there is any wind, it will affect your ground speed. If the wind is blowing five miles an hour, you are now in a river of moving air. You don't feel like your speed changes, because your air speed is the same. But your ground speed is not. Facing into the wind, or holding, your ground speed is reduced by five miles per hour. When you turn and fly with the wind, called running, you add the wind speed to your canopy speed, resulting in a ground speed of 25 miles per hour.


    Test yourself:
    1. When you are crabbing (flying at 90 degrees to the wind) in a 10 mile per hour wind, what will your path over the ground look like?
    2. The slowest your parachute can go is about five miles per hour in full brakes. Flying into a ten mile per hour wind, what would your ground speed be?
    Proceed to Chapter 7 (Landings)

    By admin, in General,

    Parachutes to Paragliders: How Skydivers Can Keep It Up Without Crashing Out

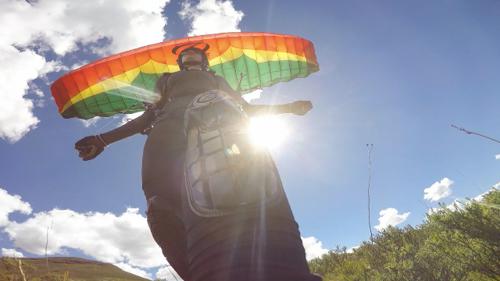
    The author launches her Ozone Firefly into the Lesotho skyParagliding (and its zippier cousin, speedflying) owes much to skydiving. From the early footage of a group of 1970s skydivers ground launching their parachutes off of small hills to the early ram-air skydiving canopies used for quick descents by French mountaineers, the sports have had innumerable points of crossover. The sports only truly split in the later 1980s, when engineers started to redesign the ram-air canopy to stay in the sky like its triangular free-flying cousin, the hang glider.
    The modern paraglider (and speedwing, for that matter) is, indeed, similar in some points of design to a steerable skydiving canopy. That surface similarity leads a lot of athletes to throw themselves bodily into the mission of crossing over--often, by buying a secondhand wing and hauling it up a hill for some trial-and-error training.
    I can’t even start to tell you what a bad idea that is.
    To the untrained eye, a wing may look similar to a skydiving canopy. The differences, however, are plentiful. They are important. Ignore them at your peril, dear reader.
    Any skydiver looking to kick off a career under a paraglider or a speedwing must be crystal-clear on one concept: the two airfoils have very different flight characteristics, which require completely different pilot technique in order to fly well and safely. Here’s how.
    1. Know this: This nylon, she is a stranger to you.
    First, let’s get one thing out of the way: paragliders and speedwings are not parachutes. They are foot-launched airfoils, only packed into a bag for storage and transport, then laid carefully out on the ground at the launch and coaxed into the airflow by a strapped-in pilot. Among other things, neither paragliders nor speedwings have drogues, sliders or containers.
    The wing attaches to the system with carabiners. They have thinner, more complicated risers. They have many, many more cells than their parachute cousins. Make no mistake: these are different beasts almost everywhere you look, once you’re really looking.
    Most importantly: Unlike a parachute, a paraglider never has to deploy. Therefore, designers are able to focus on building much higher-performance flight characteristics into the wing than a skydiving canopy can deliver.
    2. Check your ego.
    Do not make the mistake of thinking that, since you’re a skydiver, you’ll be able to pick up a paraglider and teach yourself to fly. You can not, meat muppet. It is vital to seek out proper instruction.
    As a student paraglider pilot, you won’t throw yourself into the air right away. Instead, you can expect to spend plenty of time on the ground, ground handling (“kiting”) and launching a beginner wing in various conditions.
    You’ll also be learning how to manage an airfoil that is very large (and very opinionated) compared to the wee little scrap of nylon that saves your life when you jump from a plane.
    Example: This author knows one very famous, legendarily talented BASE jumper and world-champion skydiver who has suffered exactly one bad injury in his airsports career. The mechanism of injury was a self-taught paragliding kiting session gone terribly awry. Guaranteed, this was a guy who had way more of a right to insist that he was going to be fine than you do. Ow.
    As a student learning under a licensed PG/speedflying instructor, you’ll learn the procedures for managing these dynamic changes in flight characteristics. Often, the appropriate response is entirely different to the actions you’d take as a skydiver. You are going to need these hot tips as you progress.
    3. Shake your bad habits.
    If you ask a PG/speedflying instructor what it’s like to teach the sport to an experienced skydiver, they’ll tell you that such students tend to have a few bad habits:
    Immediately running for take-off instead of kiting the wing (which is one of the best ways to gauge the conditions and “warm up” for the flight)
    Over-reliance on the brakes as opposed to weight-shift, leading to dangerously “toggle-happy” behavior
    Poor handling of collapses and stalls, which results in painful forehead-slapping injuries on the part of the instructor
    Little patience for the important work of learning aerodynamics and meteorology
    Reduced caution regarding flying conditions and personal limitations If you see yourself exhibiting these traits, chickity-check yourself posthaste. Don’t be a “typical skydiver” on the hill and give the “real” pilots more reason to refer to themselves as “real” pilots.
    4. Become an amateur meteorologist.
    If you’re an experienced skydiver, you’re undoubtedly used to knowing exactly two things about the weather: if it’s too windy to jump, or if it’s too cloudy to jump. Once you take up paragliding and speedflying, get ready to add, like, hundreds of layers of complexity.
    Launching, landing and flying a paraglider or a speedwing isn’t the end of the game. The heart of paragliding is lots of time spent in a very active sky, so students of the sport must learn a lot about both macro- and micro-meteorology. You must learn about the effect of terrain – literally, from mountains to molehills – on wind patterns, about the different types of clouds, about atmospheric stability, about daily weather cycles and about thousands of other subtleties of the sky you play in.
    5. Get used to “parawaiting.”
    On the launch, there will be no announcement from manifest telling you to get your gear on. You and you alone will make the call as to whether or not it’s safe and appropriate to fly. Especially if you branch out into the solo-launch-intensive hike-and-fly side of the sport, your individual skill, judgement and discipline will rule the day.
    In many cases, your judgement will tell you to sit down and wait – sometimes, hours – for conditions to improve. In other cases, you’ll have to bin flying for the day. Hike-and-fly pilots may have a long, grumpy hike back to the car. Parawaiting is part of the sport. Accept it.
    Sure, it’s not skydiving – but that’s why you want to branch out, no? Done intelligently, cross-disciplinary training will only make you a better, stronger, smarter extreme athlete. Rise to the challenge.

    By nettenette, in General,

    The Long Haul

    There are many areas of this sport in which we can invest ourselves, so many avenues in which to excel. By focusing heavily on a single discipline, we are able to achieve significant notoriety in a fairly short period of time. By utilizing the superior training techniques, personal coaching and wind tunnel rehearsal, modern skydivers are able to reach significant prowess in just a few months of participation in the sport. Although the speedy gratification of our desires is tempting and rewarding in the short term, there is a larger, more important goal. We must survive.
    I asked Lew Sandborn what he thought was the biggest problem in the sport today. With very little hesitation he stated that what concerns him the most is "new jumpers trying to make a name for themselves before their skills are ready for them to have that name". We want to get it all in one shot, and instantly achieve all of our goals. In a pursuit as complex as skydiving, it is impossible to get all the necessary information in a short period of time. We have to keep learning, and hope that our knowledge bucket fills up before our luck bucket runs out.
    It is difficult to see the big picture of our lives from where we are at any given moment. We forget that the medals we strive so hard to achieve will not mean much when we are older. They will just represent more stuff to box up when we retire to Florida. In the end, the things that matter most pertain to the choices that we wish we could take back. Twisting an ankle today might seem like a small issue, but in fifty years from now, it will be something that effects whether or not we can ever jump again.
    Picture yourself forty or fifty years from now. Are you still skydiving? Do you have pain in your joints from a bad landing? The quality of your life in the future is dependant on the choices you make today. If that wise old geezer that you will someday be could somehow communicate to you in the present-day, it might sound something like: "Stop trashing my body!"
    We are insecure when we are young. We are so uncertain of who we are that we feel a need to prove ourselves at every opportunity. We think that who we are is based on our most recent performance. We go to great lengths to show the world what we can do, and often pay a hefty price for our impulsiveness. Short-sighted goals neglect to take into account anything that does not achieve that goal. If looking cool and wearing the right gear is your highest priority, you may find yourself joining the dead skydivers club before too long.
    I hate sounding like an old fart. People assume that being safety oriented means that you have to be boring. Not true at all. We can have fun; we just need to keep the throttle below 100% thrust if we are to control where we are going. The long-term survivors in this sport all seem to have this perspective; whether or not they talk about it. We sit around in trailers at boogies, shaking our heads at the ridiculous behavior that repeats itself over and over. We watch people eat it in the same ways that they did last year, and twenty years before that. It’s like the message did not get out or something. The message is: "Pace yourself, this is a long journey".
    On every jump there is a way for your life to end. No matter how many jumps there are in your logbook, the Reaper is watching for the moment that you stop paying attention. He is looking for the one thing for which you are not prepared. This fact does not require your fear, it requires your attention. If you are to be there at the Skydivers Over Sixty Swoop Competition, you must let go of your grip on trying to prove yourself, and stay focused on the stuff that really matters.
    The real identity of a skydiver is not in how many medals they win or how stylishly they swoop. It is in how long they jump and how safely. There simply are no Skygods under the age of sixty. If you want to prove yourself, stay alive.
    BG
    Brian Germain is the author of The Parachute and its Pilot, a canopy flight educational text as well as Vertical Journey, an illustrated freefly instructional book. Brian is also the President of Big Air Sportz parachute manufacturing company, and teaches canopy flight courses all over the world. To learn more about Brian, or to order a book, go to: www.BrianGermain.com.

    By BrianSGermain, in General,

    Advice For Your First Hop and Pop

    It’s sitting there, waiting for you in Category F of your USPA skydiver training: the hop ‘n’ pop.
    Eek.
    It’s no wonder that you’re biting your nails. (We’ve all been there.) It’ll be your first time deploying in soft, subterminal air. It’ll be your first time really trusting your stability out the door. And it’s probably going to be your first time opening that daunting clear plastic thingy. And you’ll be doing all this under the ungoggled gazes of everyone else in the plane -- who, you probably imagine, will have nothing better to do than inspect your technique.
    The USPA officially calls it the “clear-and-pull requirement,” in case you’ve been fruitlessly searching for “hop and pop” in the SIM. Your mission, should you choose to accept it (and, y’know, get that solo license) will be to exit from 5,500’ AGL, get stable and deploy within five seconds.
    Five seconds?!
    Don’t worry so much. Five seconds is much longer than you think it is. Ask any BASE jumper (or television commercial editor, or rodeo competitor): five seconds is kinda forever. Remember, too: you’re not reinventing the wheel. Your hop ‘n’ pop exit is no different from any other solo exit you’ve ever done, except that you’ll need to be stable and deploying within that aforementioned time constraint. If your licensed instructor didn’t think you ready and reliable, he/she wouldn’t be lining you up for it. So own it. And breathe.
    1. Start on the ground. Check out the winds aloft before you start the march to the plane, and review the spot with your instructor while you can both hear each other clearly.
    2. Don’t worry too much about the door. Other jumpers are paying less attention to you than you think they are. (Anyway, your instructor is going to be right there to help.)
    3. Don’t lose sight of the goal. From your window seat, you’ll be in a prime position to keep an eye on the landing area. Watch it as you climb, picking out the landmarks you usually use to find your way home. Once you have a lock on it, don’t let your nerves jiggle it out of your consciousness.
    4. Don’t forget your magical backpack. Get a pin check before that door opens. Check your handles and pilot chute, too.
    5. Take a moment to hang out. While the door is open and you’re waiting for that green light, put your goggles on and lean your head out a bit to check out the situation. You’re looking for the airport, of course; since you’ve been keeping an eye on the dropzone from your lofty perch, you’ll know just where to look. You’re also looking for positioning relative to the spot you discussed earlier with your instructor (winds aloft, remember?), and for other air traffic crowding “your” sky.
    6. Get ready for different feels. Your instructor will prep you on the ground for the correct hop-n-pop exit to leave this particular plane. When that green light comes on, take a deep, cleansing breath and do your relaxed best to nail it. The air will feel different -- “softer” -- than it usually does, which might catch you off-guard. You can expect to turn a little as you exit. Point your hips levelly at the ground and deploy that nylon within those five weirdly-long seconds.
    7. Bollocked it up? Pull anyway. If you don’t get this 5,500’ AGL exit right, you’re going to end up doing it all over again before you move on to its lower-altitude counterpart. It’s not the end of the world: unless, of course, you ride your oops too far down. Don’t launch right into kicking yourself if you fail -- that’s just going to make you more unstable. Accept your lot and pull by 3,500 feet AGL whether you’re stable or not.
    8. Expect your parachute to check out the scenery. Your canopy, when deployed subterminally, will open into the relative wind and “seek.” It may not open directly above you, as it usually does. Don’t get spooked and tense up.
    9. Give yourself a high five. Cross your fingers against the unlikely event of a low aircraft emergency that would test your newfound skills in the fun-free way. And buy the beer.

    By nettenette, in General,

    Dangers of Being a Hero - Camera Safety Advice

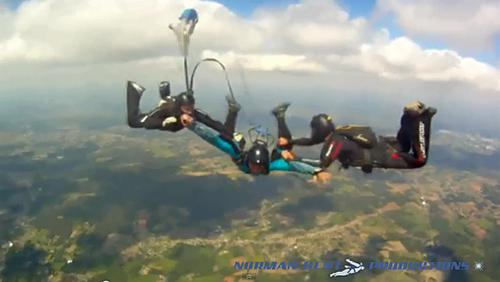
    Norman Kent is not only one of the leading skydive photographers, but he is also an advocate for safety relating to freefall photography and the use of mounted cameras within skydiving. Norman has been jumping with a camera since the mid-70s when at only 25 jumps, he strapped on a Kodak Instamatic.
    Over the past 40 since, Norman has established himself as a leader in the skydiving photography world and is a well respected member of the community.
    In the past, we've run several articles relating to the safety of camera usage. In 2013, Melissa Lowe published a piece titled "Hey Bro, Check Out My GoPro" which tackled the topic and included conversation with Norman Kent over the potential safety issues of the camera.
    Since that time, the popularity of action camera use in extreme sports has skyrocketed, with more and more individuals focus being shifted towards the media capture side of the jump. Norman Kent has released a new video on his Youtube channel titled "Dangers of Being a Hero", in which he addresses and revisits some of the topics relating to action cam safety.
    In the video Norman runs through several series of video which illustrate just how easy it is for snagging to occur on the camera, and continues to express how despite the fact that many people feel as though the risks are exaggerated, that the incidents are occurring, even if only rarely has it thus far resulted in death or injury.
    "It's not the equipment itself, it's the attitude of 'it's only a GoPro'"
    Norman Kent continues on in the video to look at alternate mounts that can be used to minimize snag potential and further ways in which one may be able to increase their safety when flying under a camera.

    By admin, in General,

    The Skydiving Handbook - Chapter 4 (The Skydiving Universe)

    We've already discussed your body's relation to the relative wind. Now let's look at your relationship to space and time. When you leave an airplane at our customary exit altitude of 12,500 feet above the ground, your accelerate from zero miles per hour vertical speed to approximately one hundred and ten miles an hour in about ten seconds. It doesn't seem too dramatic because the aircraft speed was already about 100 miles an hour, so you reall only gain ten miles per hour. At that point you reach terminal velocity, the speed at which the air pressure against your body balances the pull of gravity. Ignoring minor changes in body position, you will stay at that speed until something stops you - hopefully the deployment of your parachute! At terminal velocity you pass through one thousand feet every six seconds. If your parachute opens at 4,500 feet, that gives you about 52 seconds of freefall. (Ten seconds for the first thousand, six for each of the next thousand.) If your parachute did not open, you would now have a life expectancy of 27 seconds. Opening altitudes are based on allowing skydivers time to be sure that they do land under an open parachute. More experienced jumpers commonly open at about 2,500 feet because of their greater familiarity with equipment and emergency procedures. This gives them about 65 seconds of freefall from a 12,500-foot exit.
    The main thing about altitude is that if you run out of it while in freefall, you die. However, since your fall rate is constant, your consumption of altitude is constant. This means that if you have plenty of altitude, relax, because only time can take it away from you. Time and altitude are directly related.
    Loss of altitude awareness is a major contributor to skydiving fatalities. Always bear in mind that no distraction is worth dying for. Until your body's freefall clock has been programmed so that you know how long you've been in freefall, your only reference is your altimeter. Every time you do anything - intentionally or not - check your altitude. That way, you won't lose altitude awareness if a distraction such as a difficult maneuver or loose goggles comes along. Keep in mind that since you are consuming altitude (time) at a constant rate, you can't stop what you are doing, think it over, go back, and try again. In freefall, there are no time outs! That's why we try to do all of our freefall tasks carefully and deliberately, getting them right the first time. If you rush, you will actually lose time because the extra mistakes that result will slow you down. And when you consider the cost of freefall time, you'll appreciate the value of thorough ground preparation!
    Besides our time reference (altitude), we also make use of space references. There are two types of space references, orientation to the ground and orientation to other skydivers. We'll call the ground reference heading. Heading is an imaginary line drawn from a point on the horizon directly in front of you through your center. You use this reference for tasks such as turns, backloops, or simply hovering in place. Eventually you will substitute the line of flight for a personal heading. The line of flight is the heading the aircraft was on when you left it. The advantage of using line of flight is that now all the skydivers on the airplane have the same heading reference, instead of each picking their own. This makes it much easier to coordinate group activities.
    Your reference to the other skydivers is called the center point. The center point is that spot closest to all of the skydivers. When you are alone, it is in the middle of your body. With others, imagine a ball falling straight down around which everyone flies. In other words, four skydivers holding hands in a circle would have the center point in the middle of the ring. If they all backed up ten feet, it would still be in the same place because thjey are all still equally close to that point. In many ways, the center point of a formation is like the center of your box man discussed in the previous section. If one corner of a formation is low relative to the center point, the formation will turn in that direction. If two corners are low, it will slide in the direction of the low side.
    By now you can see that while skydiving, you have to be aware of several different things: altitude, your own body position, your position relative to the ground, and your position relative to others. Initially this will seem like a lot to be aware of, so on your first few jumps you will concentrate almost entirely on altitude and your body position while your jumpmasters take care of the rest. When you are release to fly free, you will add your own heading, and eventually you will be able to monitor these, the formation center point, and the line of flight as easily as you monitor your speed, direction, location, and other traffic as you drive to the drop zone!


    Test yourself:
    1. "Temporal distortion" refers to the fact that in an emergency situation (losing control of your car, for example), the rush of chemicals to your brain can cause events to seemingly go into slow motion. Why would temporal distortion be extremely dangerous to a skydiver?
    2. Why is ability to hold a heading considered essential to flying with other skydivers?
    Proceed to Chapter 5 (After the Freefall)

    By admin, in General,

    Jumping with Weights

    This article applies to FS belly flying, not Freefly or Canopy piloting.
    Safety first
    Wingload: Before considering jumping with weights please consider if you are comfortable with the higher wingload of your canopy. You will fly faster with the weights and if you are already pushing your limits then it may be unsafe or unnecessarily stressful. When choosing your canopies it may be a good idea to choose one size larger to allow for wearing weights.

    Water landings: You cannot swim with weights on! So please consider this if you are jumping near water. A weight belt is a clear advantage in case you have to dump the weights to allow you to swim. A tight jumpsuit and a weight vest are not good when landing in water, you cannot swim with the vest and it is nearly impossible to get off in the water.

    Health: Please consider if your body can handle the extra stress of jumping with the weights. If you have a bad back, a hard opening while wearing a heavy weight belt could be really bad for you!

    Comfort: Not exactly a safety aspect but weights can be really uncomfortable.

    Safety of others: Please make sure your weighs are firmly attached to your body. Losing or deliberately dropping weights can kill people on the ground, destroy houses and sink boats!
    Then why would anyone choose to jump with weights?
    Considering the safety and comfort issues why would anyone consider jumping with weights? Because it makes you a much better FS skydiver! Unless of course you naturally fall fast. When you see top performing skydivers, you will see that more than half of them wear weights. They do it because it is a clear performance advantage.
    Weights is a personal thing
    Just like your body shape and flying style are unique, so is your need for weights. The big or dense people don't need weights at all, and could do the rest of us a favor by choosing a jumpsuit that will slow them down. Smaller or skinny people often need weights, but the amount varies significantly.
    Definitions
    Just to make sure everyone is one the same page, two definitions;

    The Ideal fall rate is your fall rate when you are in freefall alone in a neutral comfortable body position without trying to go either fast or slow. (Mine is 187 km/h - 116 MPH)
    The Fall rate range is the range of speeds at which you are able to fall when trying to go faster or slower. (Mine is 160 - 220 km/h or 99 - 137 MPH).
    The purpose of weights
    The purpose of jumping with weights is to increase your Ideal fall rate and shift your Fall rate range upwards. In other words, to make it easier to fall faster and keep up with your team.
    The fall rate range of most skydivers is +- 30 km/h (+-20 MPH) from the ideal fall rate. The heaviest weights people are comfortable jumping with will give an increase in ideal fall rate of 20 km/h. The body is therefore much stronger at controlling the fall rate than by wearing weights.
    What a lot of people don't understand is that the weights will not actually make you fall faster! With the weights you will fall at the rate of the team, and without the weights you will fall at the rate of the team, you will just struggle more to do it! This of course assumes that you have a reasonable range, if you don't then you should work on improving it.

    Avoiding struggling to maintain a higher than ideal fall rate is the real propose of jumping with weights. What happens is that it requires attention to fall faster than the ideal fall rate, attention unnoticed taken away from flying your slot, turning points etc. Less attention on what you are supposed to do will make you perform at less than your potential.

    Wearing the right amount of weight, so you don't need attention on falling fast, will free your mind to be a better skydiver. With the right amount of weight you will notice that you are stronger, can move and turn faster, be more aware of what is going on around you, and you will make fewer mistakes and brainlocks.
    How to know if you need more weight
    If you need much more weight (5+ kg) then it is easy to feel because you are struggling a lot to fall fast, or you may not be able to keep up with your team. If you don't need that much then it is very likely you will not notice you are struggling. Things to look for indicating you (or others) need more weight;

    1. You pop up a little during challenging moves or if unexpected things happen

    2. You feel unable to move as fast as you normally can

    3. You feel slightly unstable

    4. You fly with your hands above your head

    Video of your jumps can be great for seeing these things since you may not notice during the jump.


    How much do I need?
    How much weight you need for a given jump is surprisingly complicated! Obviously, it depends on your ideal fall rate and the fall rate of the team you will be jumping with. For the first jump with a team it is a guess, and then you adjust the amount of weight to match your ideal fall rate to that of the team. It may take several jumps to get it right.

    As I wrote earlier the body is much stronger than the weights at controlling the fall rate, so don't be afraid of taking more weight, it takes a lot before it makes a real difference. Actually, I doubt anyone will be able to feel any difference if 1 kg (2 pounds) is added.


    How fast will it make me fall?
    Assuming everything remains the same, then adding 1 kg will increase your ideal fall rate by 1 km/h (1 pound gives 0.3 MPH). This is true for all but the most extreme body shapes.

    However, everything does not remain the same! The weight will change but so will the balance and the forces on the body. If your body is very flexible then a weight belt will pull your hip down and effectively make you arch more and thus make you fall even faster. There are several other smaller effects that also change the fall rate, so it is quite complicated and not possible to calculate exactly how much weight you need.
    A rough guide is;

    Inflexible body: 1 km/h per kg added (0.3 MPH per pound added)

    Very flexible body: up to 2 km/h per kg added (0.6 MPH per pound added)
    Please be conservative when adding weight and keep you increments at maximum 2 kg (4 pounds). Never make big changes in the amount of weight, the result may surprise you!


    Seeking advice
    When you are in doubt about how much weight you need (and you will be in doubt), seek advice from an experienced FS skydiver with a body shape, size and weight similar to you. Don't ask the big guys who have never jumped with weights, they may be highly experienced skydivers but they haven't got a clue about your needs. Often they will give useless advice like "You just need to arch more!" or my favorite "Take off your booties!”.
    Have fun, improve on every skydive and be safe!
    Jacques Jonsman is an engineer, serial entrepreneur and product & business innovator. He is an FS instructor and has been skydiving for 21 years.

    By admin, in General,

    Hearing Safety For Skydivers: It’s A Thing

    What Skydivers Don’t Know About The Holes in the Sides of Their Heads

    Image by Lukasz SzymanskiThere are plenty of things in this life that you don’t want to hear. I know.
    Your girlfriend telling you she’s leaving you for her co-worker who buys roses instead of jump tickets. The wind tunnel peanut gallery tittering at your epic layout biff. The dude at the bonfire yammering on about his siiiiiick proxy flight in his brand-new sponsored Air Mattress 4.
    But what if you never got to hear anything at all anymore? And what if it was your fault?
    If you want to keep the good sounds coming in to your skyward-tilting brain, you’d better take some responsibility. There are probably some things you don’t know about the holes alongside your head, after all.
    1. Hearing loss is forever.
    Once you’ve damaged the lining of your inner ears, there’s nothing that can be done to bring it back. There’s no medication to bring your old ears back -- nor is there a surgery that sets things straight.
    Hearing loss that’s attributable to skydiving happens because of damage to the cilia of the inner ear. (Cilia are the tiny, hair-like cells that vibrate with the pressure of sound waves and tell the brain about it.) Too much exposure to those waves wears them right out. Once they can’t wiggle anymore, it’s over. They don’t bounce back.
    2. You might go crazy, too.
    Alongside general hearing loss, you might get a bonus symptom: tinnitus. If the cilia are bent or broken due to excessive sound exposure, they can dribble out random electrical impulses to your brain, causing you to hear sound where none exists. Basically, this results in a constant ring/roar/buzz/hiss/squeal that lives inside your head 24/7. If that sounds like hell, you’re absolutely right.
    3. It’s louder up there than you think.
    Decibel levels are not linear; they’re logarithmic. Linear measures are measured with addition and subtraction (for example: four miles is twice as long as two miles). Logarithmic measures ratchet up by factors of ten. This means that every increase of 10 on the decibel scale represents a 10-fold increase in the intensity of the sound it measures. Noise that clocks in at 20dB is 10 times louder than a sound of 10dB. 30dB? 100 times louder...so look differently at decibel measures than you do at the numbers in your bank account.
    The noise we’re subjected to on the ride up hovers over 90dB -- which government standards decree is only healthy for around seven and a half minutes. We’re in the tin can for 20-30. You do the math.
    4. Monotony is worse than variety.
    I used to produce music videos for a living (which is less fun than you’d think, but that’s another, boozy story). The production team was always required to provide the crew and talent with earplugs; if the production assistant forgot them, it was crucifixion time. That’s because OSHA, the US Occupational Safety and Health Administration, enforces requirements limiting workers’ exposure to a time-weighted average noise level of anything over 85 dB.
    As skydivers, we don’t have to listen to that same damn godawful excuse for a song over and over (thank god), but we’re actually exposed to something that’s actually worse for our health than boy bands: level monotony. A long exposure to a same-pitch drone -- such as engine noise -- is more damaging than sounds that change in pitch, like loud music. The droning sound wears away at the cilia with the same sound waves, like waves crashing on the same part of a beach over and over in the same way.
    5. You can plug your holes.
    Many skydivers wear earplugs from gear-up to landing. Some take them out for freefall; others take them out for the canopy ride. Figure out what works for you and allows you to reliably receive information from your audible. It takes some discipline (or self-tricksiness) to remember, but it will help you in the long run. Try keeping a pair taped to your altimeter to help you remember to put them in.
    Helmets with padding over the ears are less effective than earplugs, but they can still help.
    6. You don’t need expensive earplugs to skydive.
    The drugstore cheapies will do. When you place them, make sure they’re snug -- but that you can still feel them move around when you slide your jaw around (so you can equalize pressure, if necessary).
    7. You can still pretend you can’t hear.
    When Siiiiick Wingsuit Proxy Guy looks at you, ever hopeful for adulation, you can still give him back a confused “huh?” and wander off.
    Better yet: take your earplugs to the bonfire.

    By nettenette, in General,

    You Know Nothing About Seatbelts - Part 1

    The History Lesson You Never Got
    Image by
    Lukasz SzymanskiIf you look at the National Transportation Safety Board (NTSB) reports, DiverDriver.com, our own Dropzone.com and the world’s newspaper reports, you’ll notice something interesting: the last couple of years were bad for forced landings, but good for survivors. Since December 2014, the total has been 18 forced landings, involving more than 100 occupants--but only one fatal crash (the May 2016 tragedy in Hawaii, the circumstances of which were too violent for safety restraints to have helped). Every incident is, of course, multifactorial, but there’s a simple reason that more skydivers haven’t been grievously injured or killed in these crashes: correctly installed, correctly used seatbelts. In an incident that involves a loss of power after takeoff and forces a landing, it’s seatbelts that save the jumpers’ (and pilots’) hides.
    It hasn’t always been this way. Seatbelts for skydivers used to be just as casual as seatbelts for motorists used to be, in the good-old-bad-old days. In the late 1970s, very few jump planes had seat belts. Single-Cessna DZs flew third-hand airplanes that were gutted to reduce weight, while large "destination" DZs flew World War 2 surplus DC-3s and Beech 18s. These war-surplus airplanes had been through so many different owners, and gutted so many times, that the original seat belts were an ancient memory. A few rare jumpers counted themselves lucky if they had a frayed cargo strap to hold onto.
    A Change in Policy
    Then a series of bloody accidents in the early 1990s forced the FAA to enforce its preexisting FARs requiring seatbelts for everyone in the sky. These FARS require all skydivers to be seated and belted in for taxi, take-off and landing (as and when that eventuates). It’s easy to forget why this maybe-sometimes-silly-seeming rule was set down, but there’s lots of scar tissue to back it up. Our POPS mamas and papas learned the hard way, so we don’t have to.
    The first tragedy in this particular series struck at Perris in April of 1992. Contaminated fuel caused a Twin Otter--containing two pilots and twenty jumpers--to lose power at 200 feet over the runway. The engine failed, and the pilot feathered the wrong prop, causing a total loss of thrust. When it came back down, the aircraft over-ran the runway into a drainage ditch. The airplane slammed to an abrupt halt. The fuselage collapsed all the way back to the bulkhead at the rear of the cockpit, killing both pilots instantly and sliding the unbelted skydivers to the front of the cabin, crushing or asphyxiating each other in the process. Six skydivers were taken to the hospital with serious injuries. Sixteen died. (For a detailed account, read survivor Dan Brodsky-Chenfeld's book, "Above all Else." Make sure you have Kleenex available when you do.)
    The second pivotal crash occurred Labour Day 1992, in Hinckley, Illinois. That day, a Beech 18, full of holiday tandems, lost an engine shortly after take-off. They never climbed high enough to bail out. The pilot prepared to force-land in a farmer's field, but got too slow when he reduced power on the good engine. The Beech stalled, flipped and dumped the unbelted jumpers on their heads. Everyone on board was killed.
    At one of the many, many Hinckley ash dives, Jack Hooker brought a keg of beer and told the gathered mourners that he had been working on a solution. He had installed prototype seatbelts in the Cessna 182 that hauled jumpers during slow days at Hinckley. He sewed custom seatbelts for aerobatic, glider and warbird pilots.
    It’s a good thing he was on it. Over the winter of 1992/1993, the Federal Aviation Adminisration laid down the law for the USPA: either make seatbelts fashionable, or suffer industry-crushing regulatory consequences. From there, the USPA did a commendable job of popularizing seatbelts among skydivers. During the first AFFI course of January 1993, candidates were told to belt themselves in before taxi or they’d fail the evaluation dive. At the time, it was revolutionary, but the policy was vindicated a few months later--in the spring of 1993--when another Twin Beech crashed near Xenia, Ohio and everyone onboard survived. Soon, seatbelts became the new norm almost everywhere.
    No Guarantees
    “Almost everywhere,” unfortunately, hasn’t been able to save everybody.
    In July of 2006, a Twin Otter crashed in Missouri. There were some seatbelts involved, but they were incorrectly installed and incorrectly used. Unrestrained skydivers slammed into belted skydivers at high speeds. All but two skydivers were killed; the two survivors were critically injured. One of those survivors, an American Airlines pilot, was paralyzed in the accident, therefore losing his career. He took his own life.
    On August 3, 2008, a Lodi, California-based King Air had a forced landing near Pitt Meadows, Canada. Because the plane had been fitted with just enough seatbelts to satisfy the FAA, but versions that were too short to wrap around the jumpers’ waists. As a result, only the pilot wore a lap-belt--and he was the least injured, because he had a proper seat and seatback. In the hard landing, all seven skydivers slammed forward in the cabin. Nobody died, but everyone on the load suffered grievously, and the jumper on the bottom of the pile ended up with a life-changing list of brain injuries.
    These days, seatbelts are de rigueur on non-sketchball dropzones around the world--and that’s a relief, because their importance goes well beyond their stopping power in the event of an actual-factual crash. In the next installment, we’ll talk about how seatbelts affect everything from general flight efficiency to wild evasive swerving.

    By nettenette, in General,

    Nailing “The Most Technical Demo Jump in Skydiving”

    At Work With Kenyon Salo and Team Thunderstorm
    Kenyon Salo stays pretty busy. When I talk to him, he’s been -- well -- kinda slammed.
    “I’ve been doing a lot of skydiving, a little bit of BASE jumping, lots of wingsuiting, building the brand of The Bucket List Life, a dynamic lifestyle design community, doing a lot of keynotes, running a bunch of seminars and trainings...” He pauses for a moment. “And I’m leaving for Cozumel in half an hour to go scuba diving for a week. I should probably pack.”
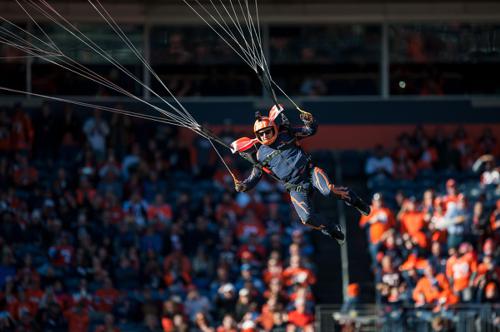
    Kenyon’s also a professional exhibition skydiver. He’s an athlete on not one, but two skydiving demonstration teams. He’s on the Mile-Hi Demonstration Team (the home team for his dropzone, Mile-Hi Skydiving), which does high-profile demo jumps all over the state. He’s also on the official Denver Broncos parachute team: “Team Thunderstorm.” Thunderstorm is unique in the world: no other team in the NFL has their own team of professional parachutists. The team jumps into every single home game.
    That would be impressive in and of itself, of course -- but there’s more. The Broncos stadium is as unique as the team that jumps into it. It’s one of the steepest, tightest sports stadiums in the United States. Oh -- and the entire stadium is criss-crossed with metal cables during the high profile games (which is more often than not, since the Denver Broncos are Super Bowl Champions).
    “As far as exhibition jumping is concerned, the Bronco’s stadium -- or “Sports Authority Field,” as it’s known officially -- is the diamond. There is a not a harder stadium that’s being jumped right now,” Kenyon explains. “A lot of the older stadiums are really splayed out, where the Bronco’s stadium is really upright. And then there are the cables, of course. This is the most technical demo jump in skydiving.”
    To do what Kenyon and his team do on game day, you have to have quite a resume: you have to be a competition-level swooper, you have to be able to speak eloquently to the media, and you have to land a tiny parachute in wicked conditions. Perfectly. Every. Single. Time. That is, to say the least, a difficult job position to fill. Understandably, Team Thunderstorm is small. It has six members, no more, no less: Jimmy Tranter, Stuart Schoenfeld, Justin Thornton, Kenyon Salo and Allison Reay. The number never changes. If one of the jumpers is unavailable on the day of the jump, that jumper is not subbed out.
    “The six of us know each other’s flying with great precision,” Kenyon explains, “And we can predict each other, every time. That safety is worth its weight in gold.”
    The Air Force used to get into that stadium with 250- or 260-square-foot canopies, navigating the stadium’s unusual topography by sinking their big canopies perilously in and executing a low turn before setting them down. It worked. But then the stadium installed more cables and the pre-game show wanted a higher-speed exhibition. Team Thunderstorm had to envision a better way -- and they did.
    “We decided to jump 97-to-120-square-foot Spectres,” Kenyon says. “The reason we jump those is because we have to dive the parachute across the crowd while still keeping a mandated 50-foot distance above them. We do hook turns into the stadium, down the stands, carving right. We pop a toggle at something like 150 feet, then carve across the field, then land.”
    “Basically, it’s like parallel parking a Ferrari at 60 miles an hour,” he laughs. “And 99% of the time, we stop between the 20 yard line and the end zone.”
    The first time Kenyon made the jump he describes as a moment of “terrifying confidence.” He knew he could do it -- after all, he’d made dozens of successful jumps into the empty stadium before he got the green light to join the team on game day.
    “Prior to being accepted as a team member,” Kenyon says, “I’d take advantage of any practice day I could get. I did a lot of practice when there were no actual games on the field. But I was also practicing at the dropzone. I would fly that canopy as much as I could -- work hard on the turn -- and work with Jimmy Tranter, a phenomenal canopy coach for brand new jumpers as well as for Team Thunderstorm, who gave the final okay to DZO and Team Thunderstorm Organizer Frank Casaras, for me to join the team on game days. Jimmy has got 25,000 jumps. When he speaks, everybody listens.”
    That constant practice is vital for a jump like this. Even without the dizzyingly steep sides and cable obstacles at the Broncos stadium, stadium jumps are so legendary that they have their own classification in the taxonomy of exhibition jumping. (The classifications are, in order of difficulty: Level 1, Level 2, Level 3 -- and “Stadium.”) This is true because of the super-challenging conditions a stadium creates. The rim of a stadium creates puckering turbulence as the wind hits it from the outside, spilling rough air down into the bowl. These conditions are not for the faint-of-heart.
    “When we come over that rim,” Kenyon says, “We have to be prepared for anything and everything. You can easily have 12 mile-an-hour wind at the rim and no wind on the field, so that means within 300 feet of difference in altitude you have got a huge difference in wind speed. And it’s often in different directions.”
    “Our small canopies help with that,” he continues, “Because, as we dive through the stadium, speed equals lift -- and the fluid dynamics also make the canopy rigid for smooth flying and landings.
    In the Bronco’s stadium, time runs in milliseconds. From the point you come over the rim -- and by that time, you are going very quickly down the field -- you are flying through and underneath a netting of metal cables.
    “There’s a single place you can enter,” Kenyon explains. “As soon as you do, you’re moving across the field very quickly, and you’re avoiding those cables. All the cables for the field goal cameras sit at 150 feet. The skycam cables come from the top corners and extend down diagonally; there’s around 350 feet of cable there, stretching down to a point the ground from two directions.” He gives a sideways grin. “It’s very challenging, yet every team member is absolutely prepared mentally and professionally for this demonstration.”
    Challenging, yes. Injurious -- not so far. At time of publication, Team Thunderstorm boasted a 100% safety record. Every team jumper has landed on the field on every single jump, with no close calls.
    “We have strict parameters that we must follow that are set forth by the USPA (United States Parachute Association) for how demos of this level and caliber must be handled,” Kenyon continues, “Sometimes we have to call it because the cloud ceiling is too low or the winds are beyond our limits. It’s those moments that make this team professional because we always err on the side of caution to make sure safety is paramount.”
    “Something Jimmy Trantor taught us, which I hold in the highest regard, is that we must constantly update our mental map on these jumps,” Kenyon articulates. “It’s a running inner monologue that focuses your awareness. ‘I made the turn; ‘the winds have changed;’ ‘I’m going down the crowd now;’ ‘I’m getting a little crosswind over here;’ ‘I’m a little bit over the sideline, I’m bringing it back over the center;’ ‘the field is a little wet;’ update, update, update. We spend the entire jump updating our mental patterns and adjusting. Immediately.”
    It’s a zen exercise to keep a high-quality inner monologue going in a stadium situation -- sometimes at night, with pyro; sometimes in wild conditions; always, with the throbbing energy of a massive, excited crowd.
    “There’s nothing like jumping out of the plane at 5,000 feet and already hearing the crowd beneath you,” Kenyon exudes. “The crowd sees us exit and just erupts. They are screaming and yelling, and you’re suddenly filled with the knowledge that you’re doing it for them -- the fans that have supported you for seven seasons running; for the camaraderie of the team around you; for the guys playing great football.”
    And for the love of skydiving, of course.

    By nettenette, in General,

0